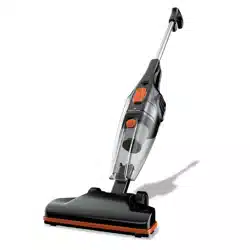
Electra Sweep Series
ALL MODELS ARE: All Steel Construction; Black Finish; .75 Peak HP Single Fan Motor; 4 Amps; 500
Watts; 50 CFM; Sealed Suction: 60”; 30 Ft. 2 Conductor Cord; Unit size / Unit weight: 16.5” x 5.5” x 4” / 5.5
lbs.
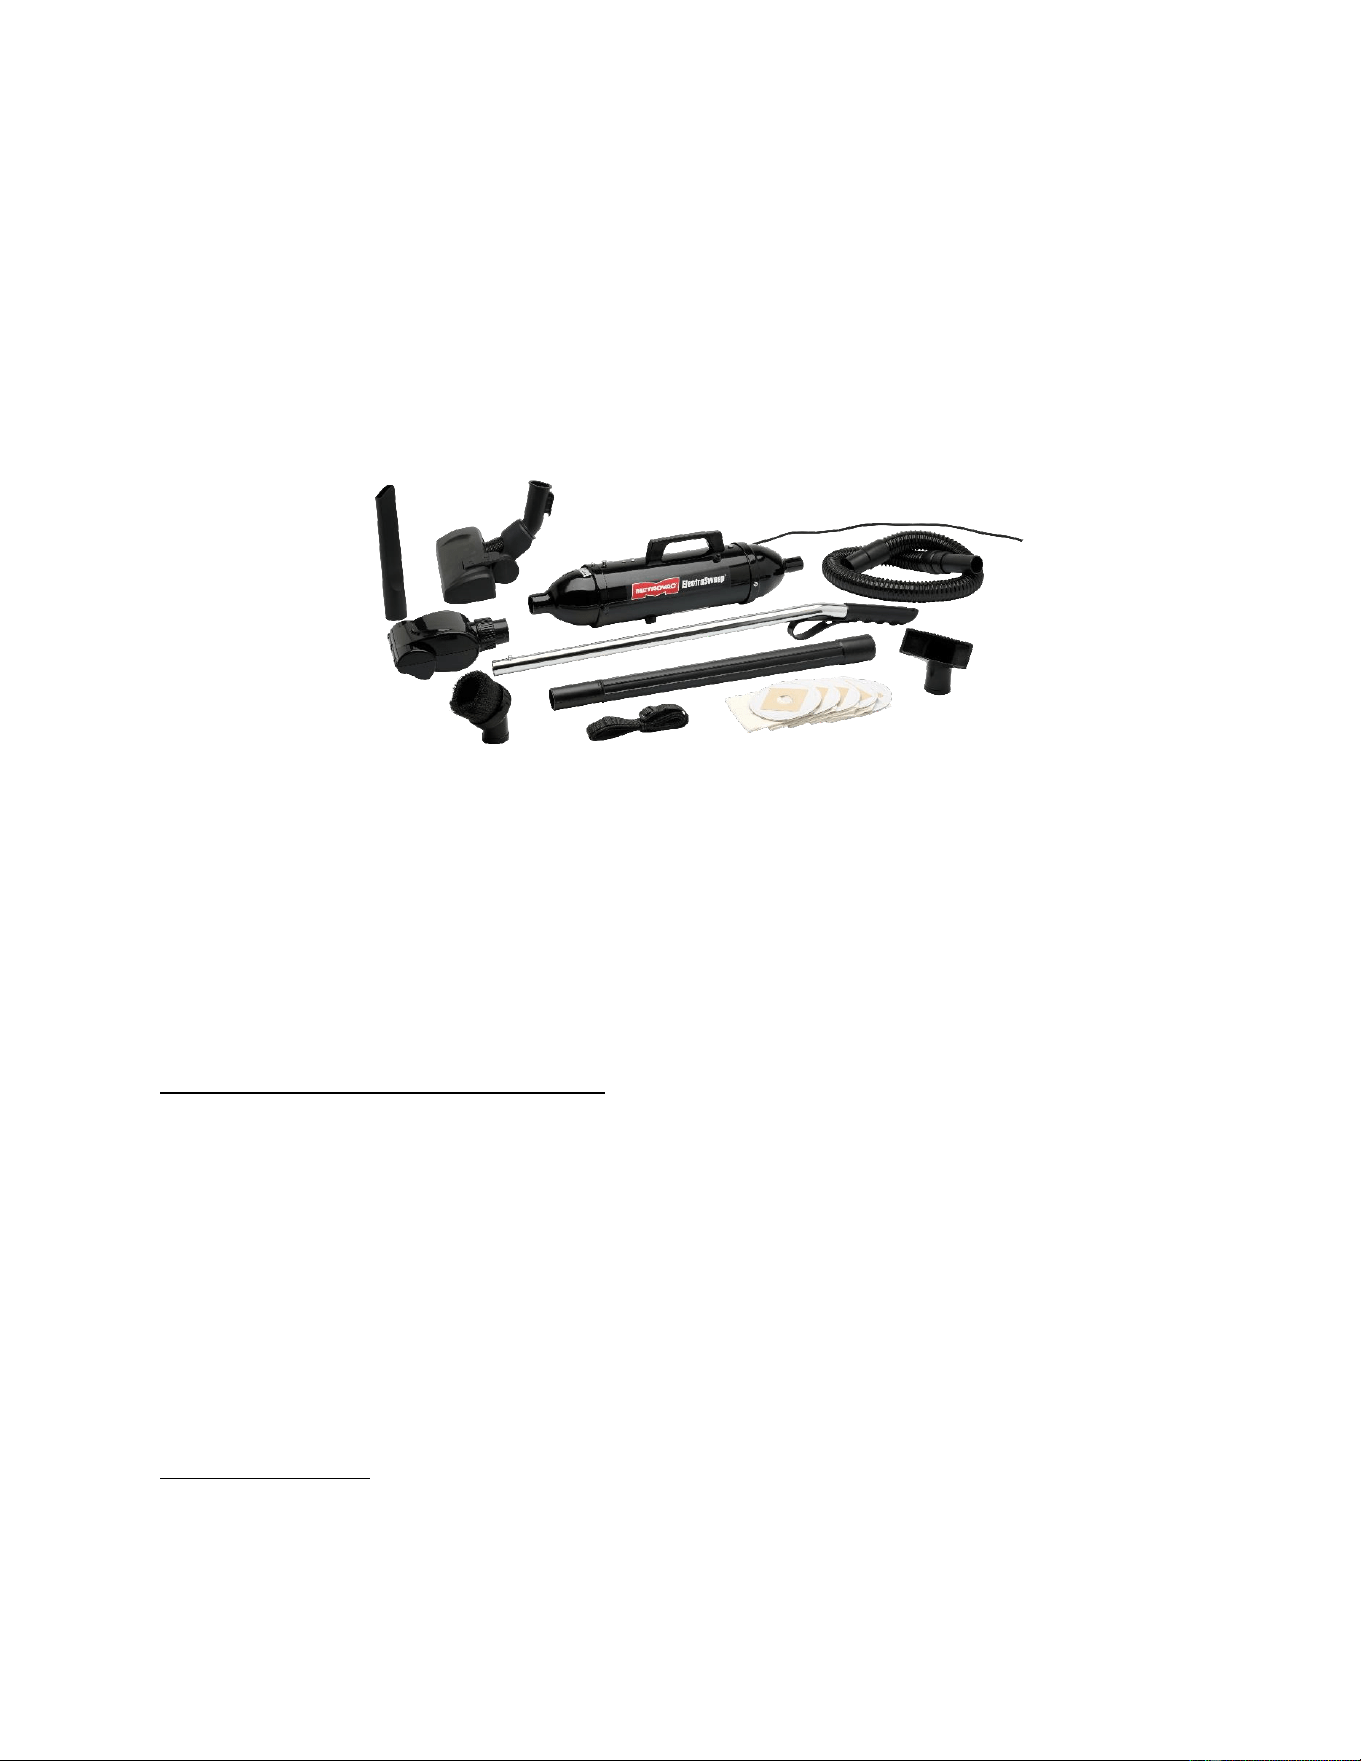
ACCESSORIES: Broom Handle; Upholstery Nozzle, Crevice Tool, Swivel Floor Brush; Dust Brush.
Different models and what they come with:
ES-105 (105-050841)
ES-105T (105-105435): 4 ½ Turbine Driven Revolving Brush.
ES-109T (105-105633): 3 Ft. Flexible Hose; Extension Wand; 4 ½ Turbine Driven Nozzle; Shoulder Strap.
(Model shown.)
INSTRUCTIONS (Instructions are general for all ES Models. Some of the below information may not
pertain to your specific model. Check list above for parts and accessories that go with your particular
machine):
TO USE AS A BROOM
• Assemble Handle to Power Unit by pressing the push button and inserting it into the exhaust rear
end cap. Align with the hole in the tube until it locks.
• Assemble the Carpet/Floor Tool to the front end by firmly twisting and locking into place.

• Using the Easy Glide Combo Carpet/Floor Tool:
o Bare Floors – Depress the pedal. The Brush should be “out” for bare floors.
o Carpet/Rug Areas – Depress the pedal. The Brush should be “in” for carpet.
• Plug the Electra Sweep into a 115 Volt AC Outlet.
• To turn the Broom on, press the On/Off Switch located on the top of the Power Unit next to the
handle.
• To turn the Broom off, press the On/Off Switch again.
• To replace the Disposable Paper Bag (Part MVC-571-PACK):
o Place the Power Unit, with or without the Broom Handle, attached with the exhaust end
facing down vertically on a level surface.
o Grasp the top of the Power Unit with your LEFT hand just below the locking Front and with
your thumb, press and hold down the Thumb Button.
o At the same time, grasp the locking Front with your RIGHT hand and twist it in a Counter
Clockwise motion and lift it up and off.
o Press new Replacement Bag with rubber diaphragm over the tube inside the locking Front.
o Align locking FRONT with pins on the Power Unit and with the button hole facing you.
o Press and hold down the Thumb Button while twisting the Front clockwise until the spring
button pops into place.
o Press buttons on hose coupling; insert into vacuum front end cap.
TO USE AS A HANDVAC
• Press button on the Handle and remove from the Power Unit.
ADDITIONAL PARTS FOR PURCHASE (the below items are available for purchase on our website
www.MetroVac.com; use the provided product # in the search):
• Electrasweep Replacement Bags 5 Pack – MVC–571–PACK
• Crevice Tool – MVC–188
• Upholstery Nozzle – MVC-185A
• Dusting Brush – MVC-206BBB
• Wands – MVC-194
• Shoulder Strap – MVC-204A
• 4 ½” Hand Held Turbine Driven Rotating Brush – MVC–200D
• Hose: 3’ Flexible Hose – MVC–178A
WARRANTY:
This machine carries a Three Year Limited* Warranty.
The Three-Year Warranty includes the unit and the motor.*
There is also a One Year Warranty* on Parts, Switches, and Cords.
This warranty covers any defects in materials or workmanship, including installation, with the exceptions
stated below:

• *MetroVac will repair or replace any defective or malfunctioning part* at no charge. If the machine
is not repairable, it will be replaced.
• *Mechanical alterations made to the machine will void the warranty.
• *Warranty does not cover carbon brushes, carbon brush wear, filters, or general maintenance.
• *The warranty does not cover physical damage made to the machine from tampering with or
attempting to take the appliance apart, improper electrical connections, or water damage.
*Customer is responsible for shipping charges to and from our facility.
***Even if the product is beyond the warranty period, we suggest you send the unit back to our
factory for expert repairs and maintenance at reasonable rates. Please click the following link to
access our Repairs and Maintenance form***
WARNING: To reduce the risk of fire, electric shock, or injury Do not leave appliance when plugged
in. Unplug from outlet when not in use and before servicing.
• Do not allow it to be used as a toy. Close attention is necessary when used by or near children.
• Use only as described in this manual. Use only manufacturer's recommended attachments.
• Do not use it with damaged cord or plug. If appliance is not working as it should, has been
dropped, damaged, left outdoors, or dropped into water, return it to a service center.
• Do not pull or carry by cord, use cord as a handle, close a door on cord, or pull cord around sharp
edges or corners. Do not run appliance over cord. Keep cord away from heated surfaces.
• Do not unplug by pulling on cord. To unplug, grasp the plug, not the cord.
• Do not handle plug or appliance with wet hands.
• Do not put any object into the openings. Do not use with any opening blocked; keep free of dust,
lint, hair, and anything that may reduce air flow.
• Keep hair, loose clothing, fingers, and all parts of body away from openings and moving parts.
• Do not pick up anything that is burning or smoking, such as cigarettes, matches or hot ashes.
• Do not use without dustbag and/or filters in place.
• Turn off controls before unplugging.
• Use extra care when cleaning on stairs.
• Do not use to pick up flammable or combustible liquids such as gasoline or use in areas where
they may be present.
• To avoid electric shock, do not use it on wet surfaces, do not expose to rain; store indoors.
• To reduce the risk of electric shock, this appliance has a polarized plug (one blade is wider than
the other). This plug will fit into an outlet only one way. If the plug does not fit fully in the outlet,
reverse the plug. If it still does not fit, contact a qualified electrician to install the proper outlet. Do
not change the plug in any way.
• For a grounded appliance: "Connect to a properly grounded outlet only. See Grounding
Instructions."
MetroVac / Metropolitan Vacuum Cleaner Co.
5 Raritan Road, Oakland, NJ 07436