Meet your new BISSELL® product!
Go to support.BISSELL.com for a walkthrough of your new
purchase, including videos, tips, support, and more. Want to get
started right away? This guide has all the information you need to
set up your new product. Let’s take a look...
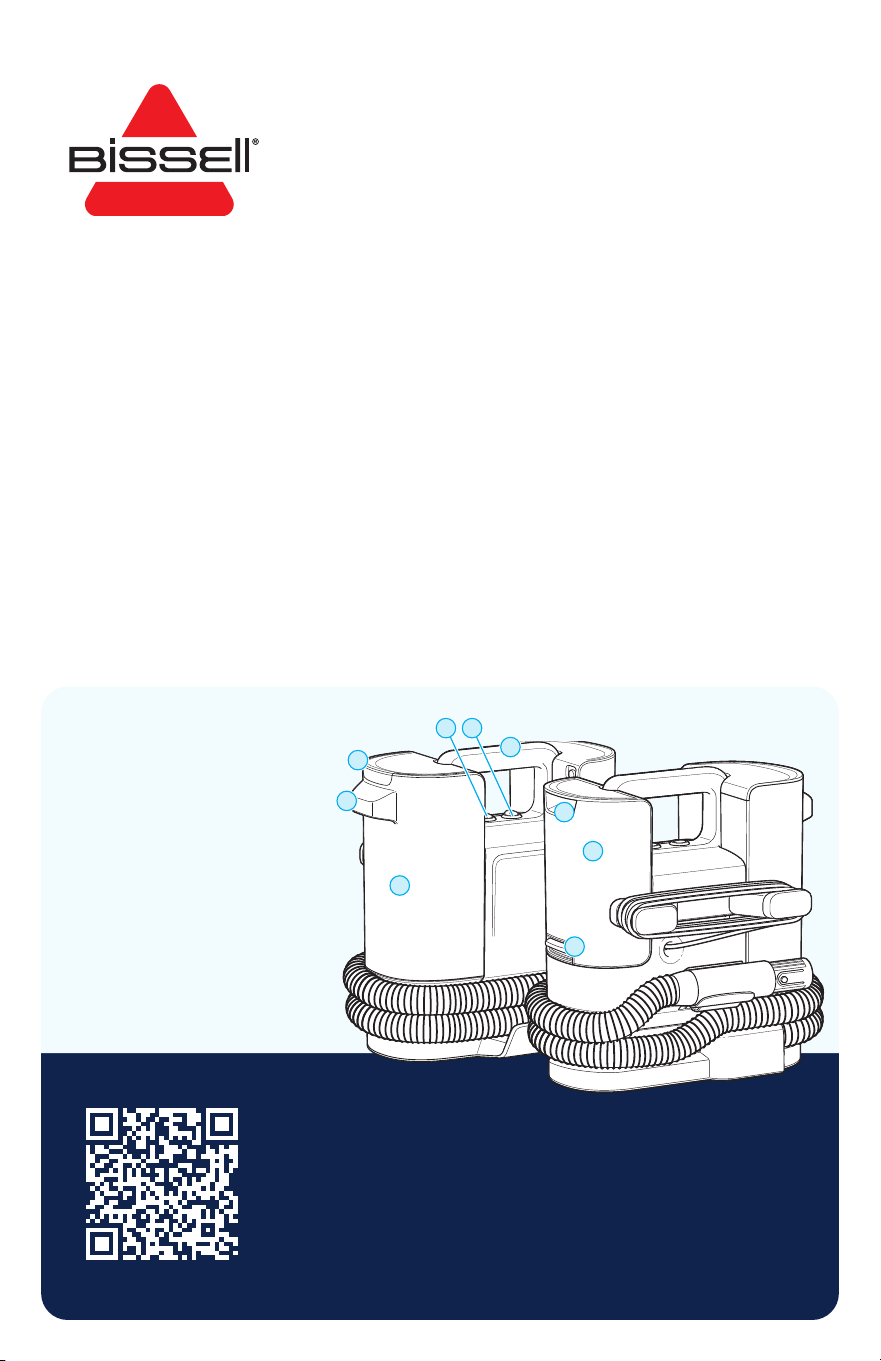
Product Overview
1. Power Switch
2. ProHeat Mode Switch
3. Dirty Water Tank Lid
4. Dirty Water Tank Handle
5. Dirty Water Tank
(Float Stack inside)
6. Carry Handle
7. SmartMix Handle
8. SmartMix Tank
9. Cleaning Mode Switch
Warranty ...........................................................................2
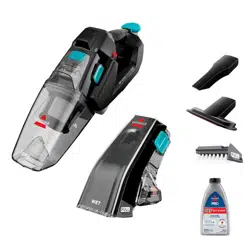
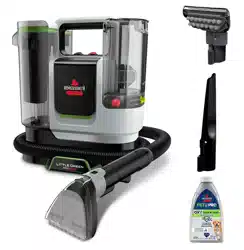
What’s in the Box? .....................................................3
Assembly ..........................................................................3
Filling the SmartMix Tank ......................................3
Getting Ready to Clean ......................................... 4
Using the Tools .............................................................5
Emptying the Dirty Water Tank ........................7
Cleaning and Storing Your Machine ..............7
4
5
3
6
1 2
8
7
9
Little Green
®
PROHEAT™ SMARTMIX
PORTABLE CARPET & UPHOLSTERY CLEANER
MODEL 3935
2 BISSELL.com
IMPORTANT SAFETY INSTRUCTIONS
WARNING
TO REDUCE THE RISK OF FIRE, ELECTRIC SHOCK OR INJURY:
• Do not leave appliance when it is plugged in. Unplug from outlet when not in
use and before servicing.
• Do not expose to rain. Store indoors.
• Always install float before any wet pick-up operation.
• Use only cleaning products intended for use with this appliance to prevent
internal component damage. See the Cleaning Formulas section of this guide.
• Do not allow to be used as a toy. Close attention is necessary when used by or
near children.
• Do not use for any purpose other than described in this user guide.
• Use only manufacturer’s recommended attachments.
• Do not use with damaged cord or plug. If appliance is not working as it should,
has been dropped, damaged, left outdoors, or dropped into water; do not
attempt to operate it and have it repaired at an authorized service center.
• Do not pull or carry by cord, use cord as a handle, close door on cord, or pull
cord around sharp edges or corners. Do not run appliance over cord. Keep cord
away from heated surfaces.
• Do not unplug by pulling on cord. To unplug, grasp the plug, not the cord.
• Do not handle plug or appliance with wet hands.
• Do not put any object into openings. Do not use with any opening blocked;
keep openings free of dust, lint, hair, and anything that may reduce air flow.
• Keep hair, loose clothing, fingers, and all parts of body away from openings
and moving parts of the appliance and its accessories.
• Turn OFF all controls before plugging or unplugging appliance.
• Use extra care when cleaning on stairs.
• Do not use to pick up flammable or combustible materials
(lighter fluid, gasoline, kerosene, etc.) or use in areas where they may be
present.
• Do not pick up anything that is burning or smoking, such as cigarettes,
matches or hot ashes.
• Unplug from outlet before filling, rinsing or cleaning.
• Do not turn over the cleaning nozzle, or touch the surface of the nozzle when
using the cleaner.
• Do not apply hot water directly to any person or animal.
• Do not turn your appliance ON until you are familiar with all instructions and
operating procedures.
• Keep appliance on a level surface.
• Liquid must not be directed towards equipment containing electrical
components.
• Do not use appliance in an enclosed space filled with vapors given off by oil-
based paint, paint thinner, some moth-proofing substances, flammable dust,
or other explosive or toxic vapors.
• Do not use to pick up toxic material (chorine bleach, ammonia, drain cleaner,
etc.)
• Do not pick up hard or sharp objects such as glass, nails, screws, coins, etc.
• Plastic film can be dangerous. To avoid danger of suffocation,
keep away from children.
• Connect to a properly grounded outlet only. See grounding instructions. Do not
modify the three-prong grounded plug.
• Plastic tanks are not dishwasher safe. Do not put tanks in dishwasher.
SAVE THESE INSTRUCTIONS
THIS MODEL IS FOR HOUSEHOLD USE ONLY. COMMERCIAL USE OF THIS UNIT VOIDS THE MANUFACTURER’S WARRANTY.
READ ALL INSTRUCTIONS BEFORE USING YOUR APPLIANCE.
When using an electrical appliance, basic precautions should be observed, including the following:
IMPORTANT INFORMATION
To reduce the risk of a leaking condition, do not store where freezing may occur.
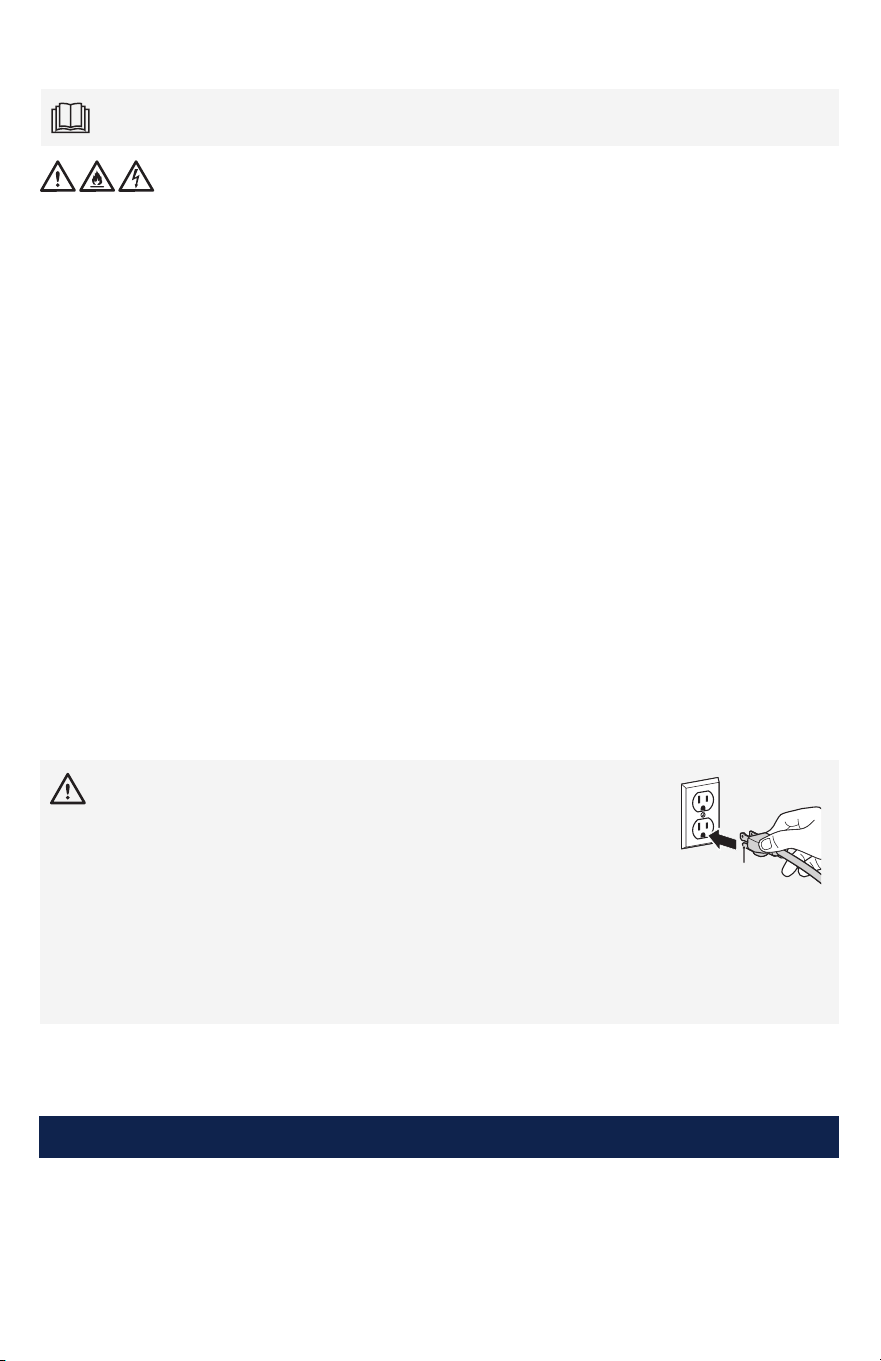
WARNING
Grounded
Outlets
Grounding
Pin
Improper connection of the equipment-grounding conductor
can result in a risk of electrical shock. Check with a qualified
electrician or service person if you aren’t sure if the outlet is
properly grounded. DO NOT MODIFY THE PLUG. If it will not fit the
outlet, have a proper outlet installed by a qualified electrician.
This appliance is designed for use on a nominal 120-volt circuit,
and has a grounding attachment plug that looks like the plug
in the illustration. Make certain that the appliance is connected
to an outlet having the same configuration as the plug. No plug
adapter should be used with this appliance.
GROUNDING INSTRUCTIONS
This appliance must be connected to
a grounded wiring system. If it should
malfunction or break down, grounding
provides a safe path of least resistance
for electrical current, reducing the risk of electrical shock. The cord
for this appliance has an equipment-grounding conductor and
a grounding plug. It must only be plugged into an outlet that is
properly installed and grounded in accordance with all local codes
and ordinances.
Warranty
Limited 2-year warranty, may vary by state. Visit support.BISSELL.com or call 1-800-237-7691 for
complete warranty information.
Terms and Conditions
Your purchase is subject to the BISSELL Terms and Conditions, which includes dispute resolution
through arbitration and class waiver. For complete terms or to opt out from arbitration or class
waiver, visit BISSELL.com/terms-of-use or call 1-800-237-7691.

BISSELL.com 3
Machine Self-Cleaning Tough
Stain Tool
Spraying Crevice Tool Trial Formula(s)
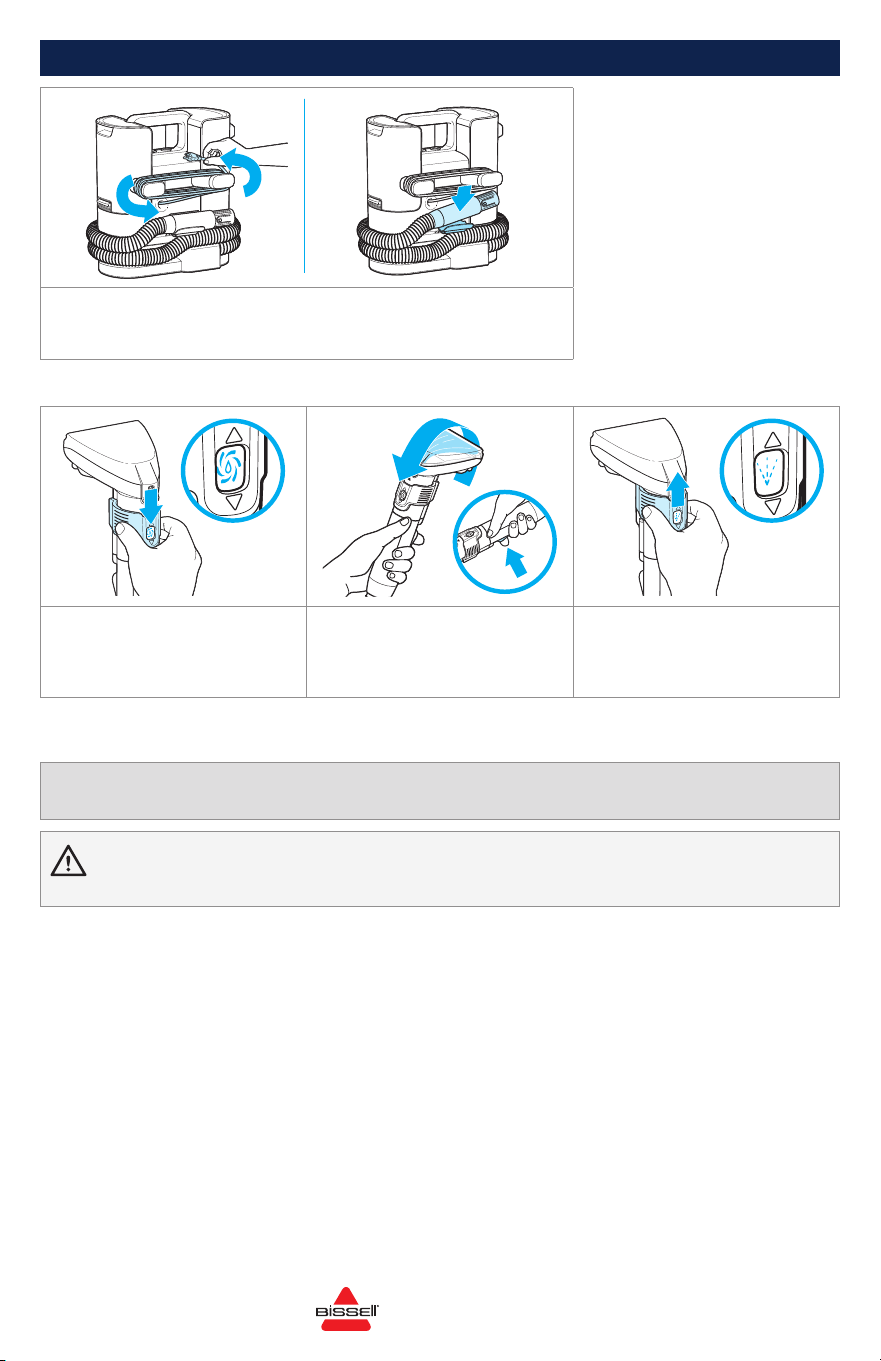
Assembly
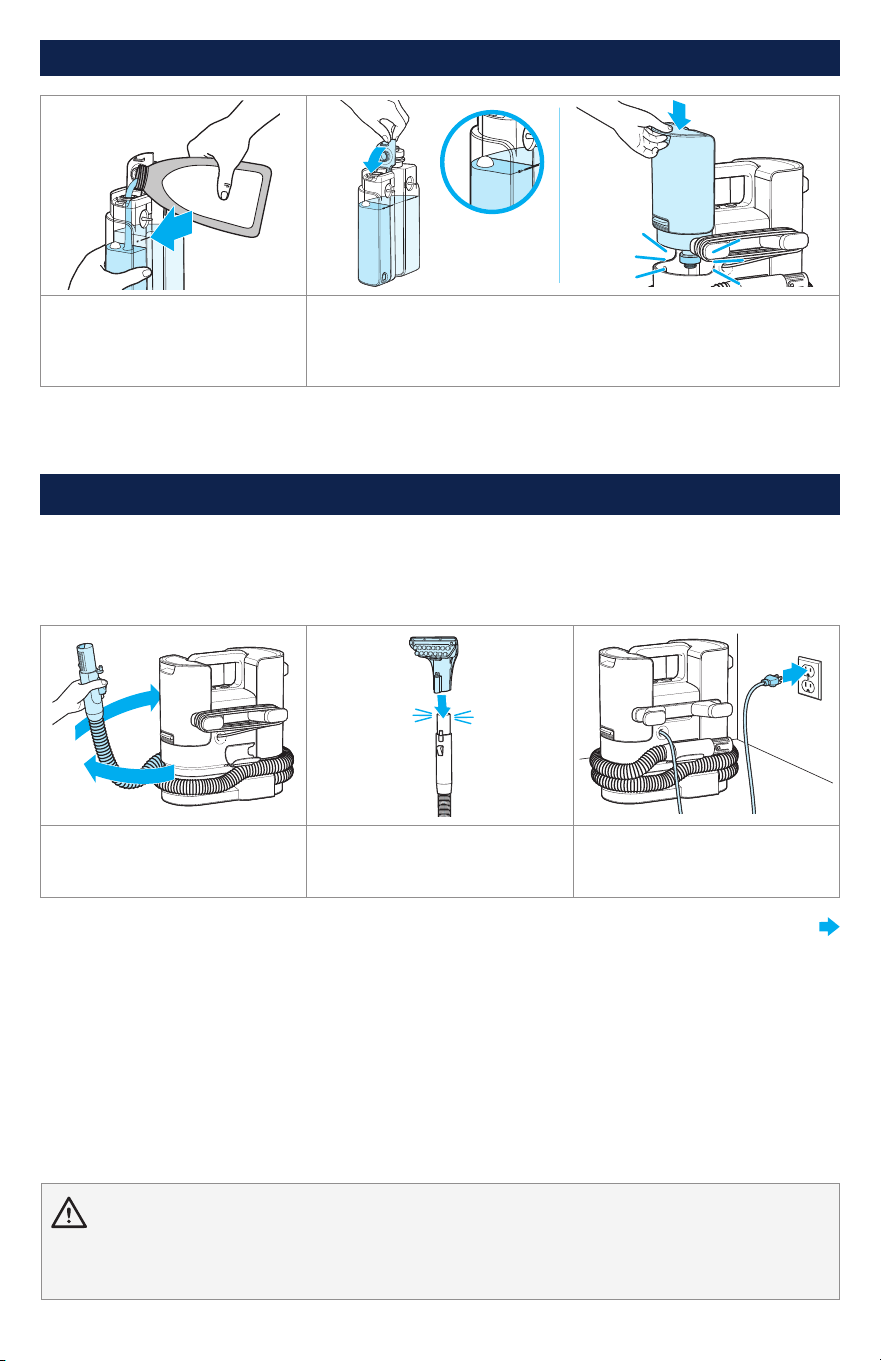
1. Wrap hose around bottom of machine. 2. Secure hose on hose clip.
What’s in the Box?
Filling the SmartMix Tank
This machine is compatible with BISSELL® formulas made for portable carpet cleaners. Always use
genuine BISSELL formulas in your machine. Use of other cleaning formulas may harm the machine.
1. Choose your formula.*
Scan the QR code with your
smartphone camera or visit
BISSELL.com for formulas.
2. Remove SmartMix tank.
Grip tank handle and lift up.
3. Unscrew cap on the water
side of the SmartMix tank.
4. Add water to the fill line. 5. Align cap with tank and
fully insert. Securely screw cap
onto tank.
6. Open the formula cover.
CONTINUED ON NEXT PAGE
4 BISSELL.com
WARNING
• To reduce the risk of fire and electric shock due to internal component damage, use only BISSELL cleaning formula intended for
use with this machine.
• Do not plug in your cleaner until you are familiar with all instructions and operating procedures.
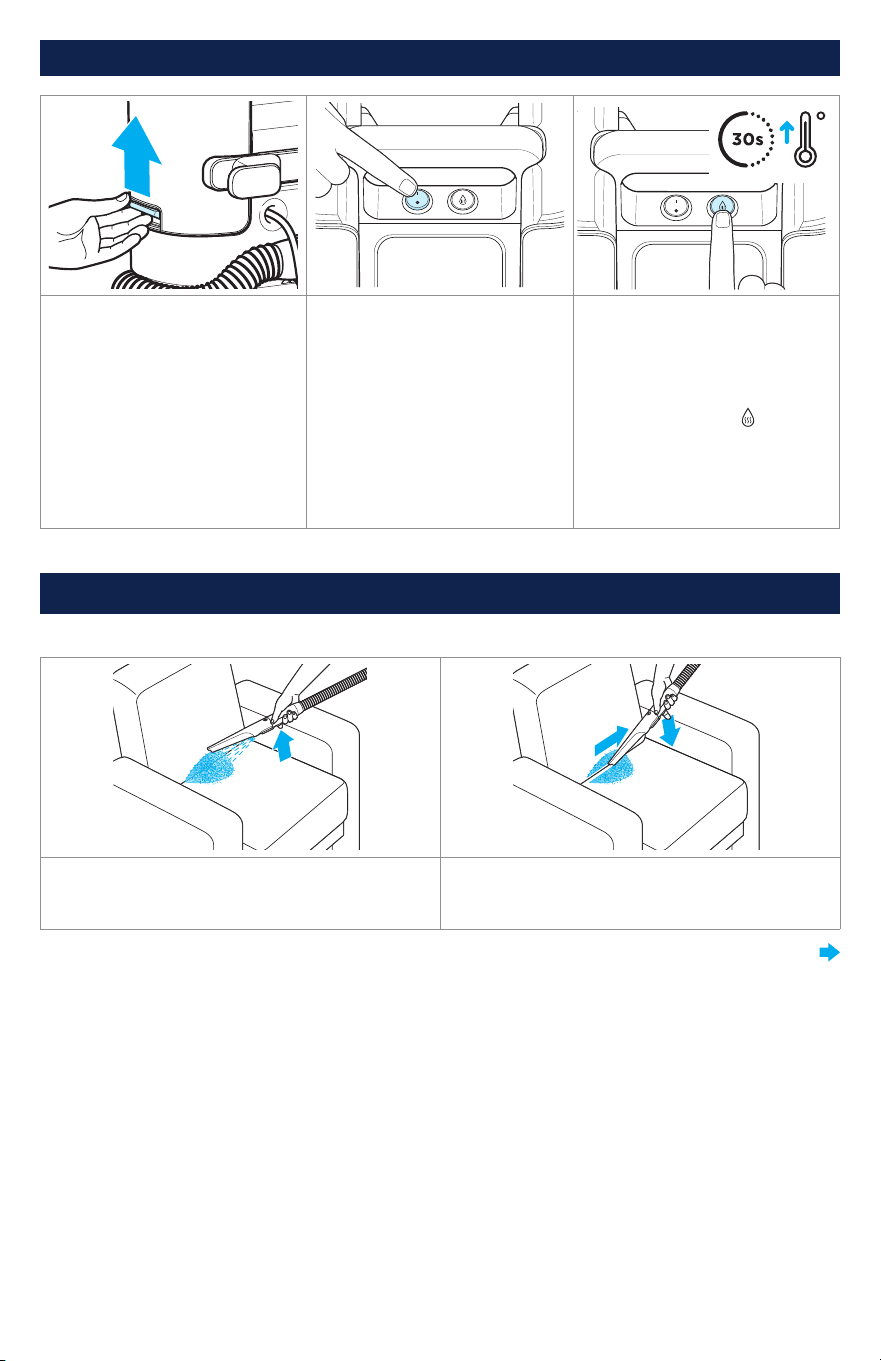
Getting Ready to Clean
• Vacuum to remove loose dirt from areas to be cleaned.
• Spray any BISSELL stain pretreat formula on soiled areas and allow to sit for a few minutes.
• Tip: For upholstery, work in small sections until area is clean.
1. Unwrap hose 2. Attach your desired tool to
end of hose grip until it clicks
into place.
3. Unwrap power cord and
plug into a grounded outlet.
CONTINUED ON NEXT PAGE
7. Slowly pour in formula. Add
cleaning formula to formula fill
line.
8. Close formula cover until it clicks. Align tank with machine
and press down until it clicks into place. Note: There is a formula
level indicator ball to help visually indicate how much formula
you have left.
*Compatible BISSELL formulas include: PET PRO Oxy Spot & Stain, Advanced PET Spot & Stain,
OXYGEN BOOST, Simply Spot & Stain Pet, Little Green Spot & Stain
Filling the Formula Tank (continued)
BISSELL.com 5
Getting Ready to Clean (continued)
4. Choose desired cleaning
method.
Deep Clean Mode:
Automatically mixes the
correct ratio of formula and
water to clean tough stains
Rinse Mode: Provides option
for a water only clean
5. To turn machine on, flip
power switch to the ON ( I )
position.
6. Optional: Use ProHeat
Technology to loosen and
remove tough stains, like oily
messes and set-in stains.
ProHeat Mode: Activate
heater with switch ( ). Wait
30 seconds for water to heat.
Once ProHeat light illuminates,
hold trigger over sink or bowl
to clear previous water use,
taking up to 10 seconds.
Using the Tools
Spraying Crevice Tool
1. While holding tool above the stained area,
press and hold the trigger to spray solution.
2. Release spray trigger and press tool firmly
against surface and pull toward you to remove
the stain. Repeat this step as needed.
CONTINUED ON NEXT PAGE
6 BISSELL.com
Using the Tools (continued)
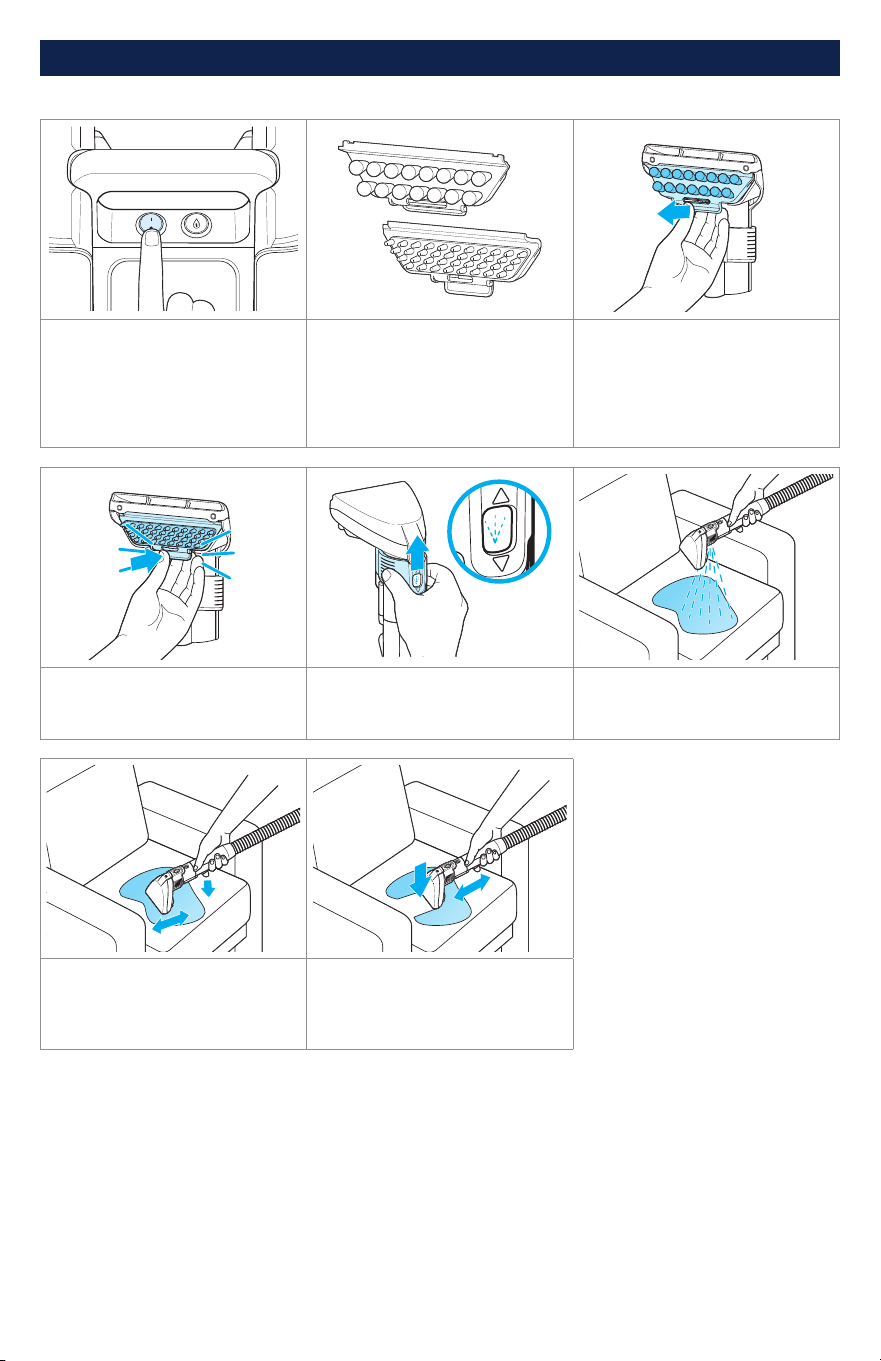
Self-Cleaning Tough Stain Tool
1. Turn machine OFF. 2. Choose your cleaning
method: Use the bristle block
for everyday soft surface
cleaning, or the rubberized
block to remove embedded
pet hair and debris.
3. Pull bottom latch to release
bristle block from tool.
4. Insert your preferred tool
block; it will click into place.
5. Slide tool lever up to ensure
tool is in SPRAY mode. Follow
steps 4-6 above to clean.
6. While holding tool above
desired area, press and hold
trigger to spray solution.
7. Release spray trigger
and gently scrub stain using
bristles.
8. With trigger released, press
tool firmly against surface and
pull towards you to remove
stain. Repeat as needed.
BISSELL.com 7
Emptying the Dirty Water Tank
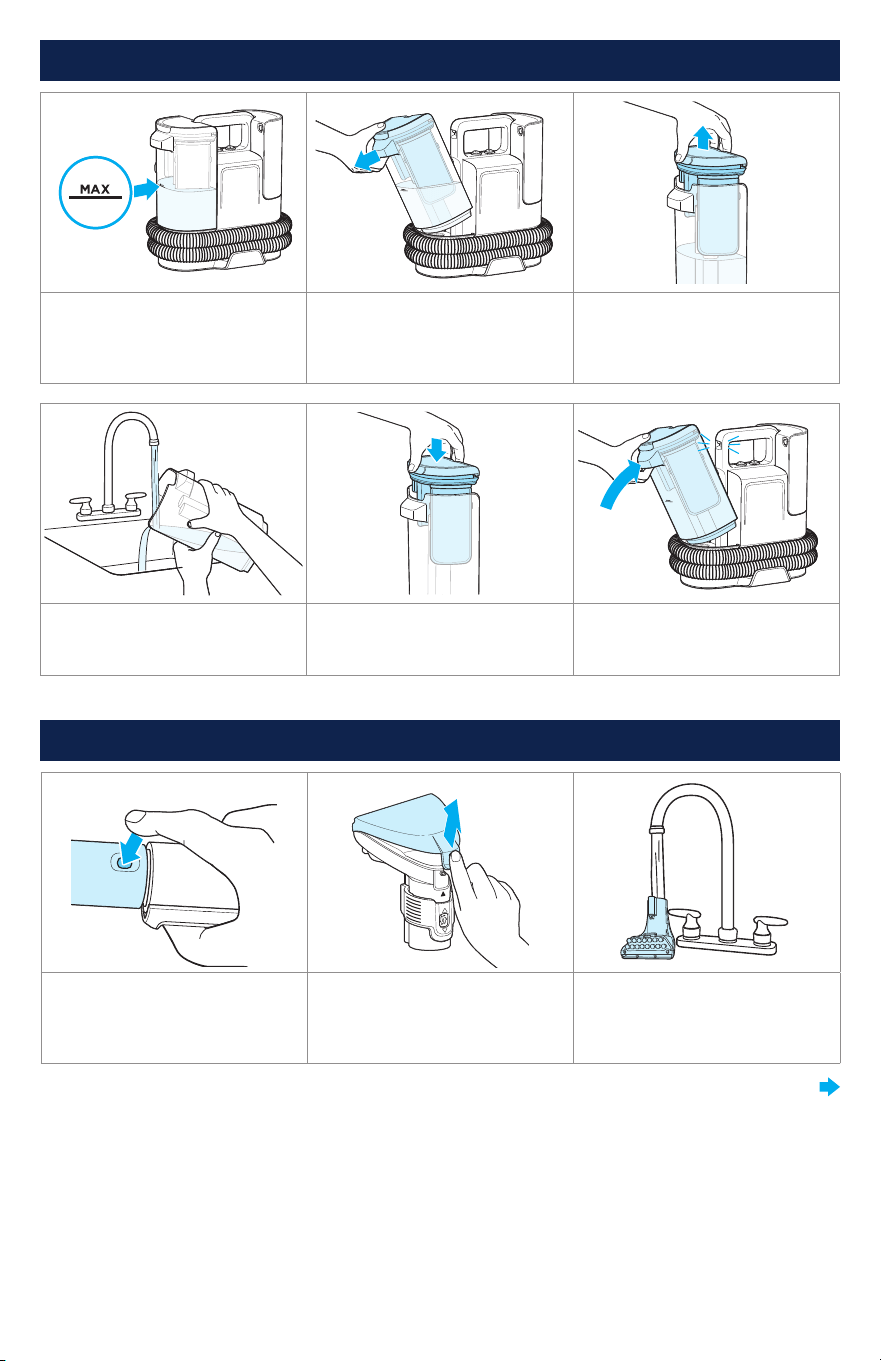
1. Empty dirty water tank
when “MAX” full line is
reached. Do not allow water
level to exceed MAX full line.
2. Tilt and pull away dirty
water tank to remove from
machine.
3. Pull up on dirty tank lid to
remove.
MAX
4. Pour out dirty water and
rinse tank.
5. Reinstall tank lid. 6. Tilt and rotate tank back
into place. Push firmly near top
of tank until it clicks into place.
Cleaning and Storing Your Machine
1. To disconnect tools, push
down on button above hose
grip and pull straight off. (Do
NOT twist tool to remove it.)
2. Select models with Self-
Cleaning Tough Stain Tool:
Remove tool lens and rinse.
3. Rinse tools under clean,
running water. Allow tools to
dry.
CONTINUED ON NEXT PAGE
8
WARNING To reduce the risk of fire and electric shock due to internal component damage, use only BISSELL
cleaning formula intended for use with this machine.
NOTICE: To reduce the risk of a leaking condition, do not store where freezing may occur. Damage to internal components may
result. Store machine in protected, dry area at room temperature (40°F - 104°F).
4. When finished using the product, wrap cord and hose for
storage. Store indoors in a dry location where product is not
likely to get damaged.
Cleaning Machine with Self-Cleaning Tough Stain Tool
1. Turn machine ON. Slide tool
lever down for cleanout mode.
2. Press the trigger to activate
the CLEANOUT function.
Solution mixture will come
through the tool and the hose.
3. To continue cleaning with
your machine, slide the tool’s
lever upward to return to spray
mode.
Note: Other maintenance or service not included in this manual should be performed by an authorized
service representative.
Cleaning and Storing Your Machine (continued)
©2024 BISSELL Inc. All rights reserved.
Part Number 1642016 09/24 v5