
Technical Support and E-Warranty Certificate www.vevor.com/support
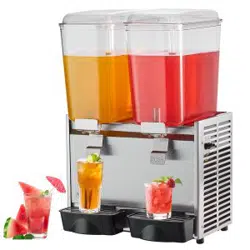
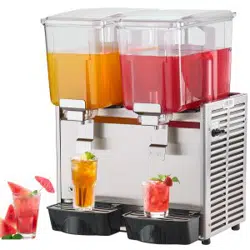
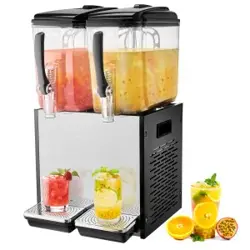
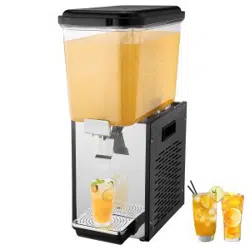
INSULATED BEVERAGE DISPENER
MODEL:WNS-1 / WNS-2 / WNS-3
We continue to be committed to provide you tools with competitive price.
"Save Half", "Half Price" or any other similar expressions used by us only represents an
estimate of savings you might benefit from buying certain tools with us compared to the major
top brands and does not necessarily mean to cover all categories of tools offered by us. You
are kindly reminded to verify carefully when you are placing an order with us if you are
actually saving half in comparison with the top major brands.
- 1 -
MODEL:WNS-1 / WNS-2 / WNS-3
Have product questions? Need technical support? Please feel free to
contact us:
Technical Support and E-Warranty Certificate
www.vevor.com/support
NEED HELP? CONTACT US!
This is the original instruction, please read all manual instructions
carefully before operating. VEVOR reserves a clear interpretation of our
user manual. The appearance of the product shall be subject to the
product you received. Please forgive us that we won't inform you again if
there are any technology or software updates on our product.
SAFETY INSTRUCTIONS
INSULATED BEVERAGE
DISPENER

- 2 -
Read and understand this entire manual before operating and
servicing this product. Failure to follow these warnings and
instructions can cause death, personal injury or damage to valuable
property.
Tip Over Hazard
• A child or adult can tip the insulated beverage dispener and be killed or
seriously injured.
• Serious injury may occur to children and adults if not secured before
installation.
• This product is not a toy. Children should not play with or around the
insulated beverage dispener at any time.
• Use as intended only. Do not stand on the product.
• Do not exceed the listed weight capacity.
SAVE THESE INSTRUCTIONS
PROPER USE OF YOUR INSULATED PRODUCT
1. Wash and rinse the unit prior to its use.
2. Preheating interior with hot water will improve heat retention.
3. Pre-chilling entire unit will improve cold retention.
4. Load container to its maximum capacity. Make sure the gasket is in
place. Replace lid and lock in position.

- 3 -
CARE AND CLEANING OF INSULATED CARRIER
1. Clean after every use. Destaining compounds approved for food or
beverage contact may be used. Ask your detergent supplier for proper
compound.
2. Make sure gasket is removed prior to running through a dishwasher.
Also, prevent latches from getting caught in the conveyor.
BEVERAGE DISPENSER FILLING INSTRUCTIONS
CAUTION: Liquid can overflow or squirt out of the vent cap when securing
lid if the unit is overfilled.
TO PREVENT OVERFLOW, DO NOT FILL HIGHER THAN 11/4” FROM
TOP.
CARE AND CLEANING OF THE FAUCET
To remove faucet assembly from unit:
1. Unscrew union nut to remove faucet from unit.
2. Unscrew bonnet from faucet body to expose rubber seat cup and stem
end. Pull down on seat cup to remove.
3. Push back union nut and remove metal “c” ring. Unscrew wing nut to
remove spout from unit completely. Set aside large rubber washer, small
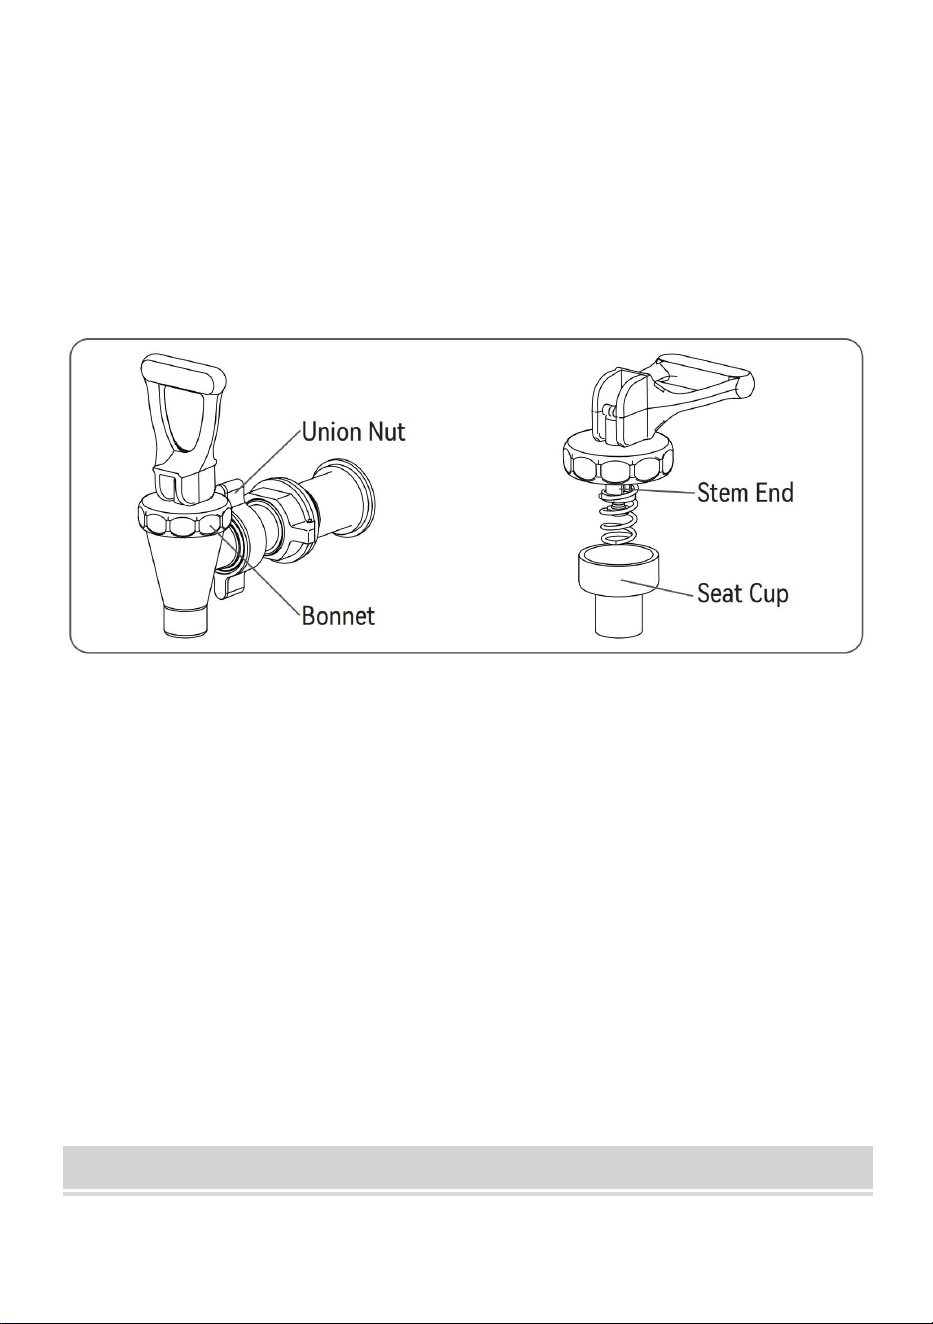
- 4 -
rubber washer and “c” ring.
4. Depress faucet lever in “locked open” position to clean top of bonnet
thoroughly.
5. Clean all parts of faucet with a solution of hot water and urn cleaner. Use
a faucet brush to clean the insides of the faucet and spout.
To return faucet assembly to unit:
1. Place small rubber washer on spout first. Then place spout inside unit.
2. Place large rubber washer on spout from outside the unit.
3. Screw wing nut on spout with circle base facing the unit. Fit union nut on
spout with inner screw side facing out. Replace metal “c” ring.
4. Replace rubber seat cut on spring and stem end of faucet. Apply
pressure to secure seat cup.
5. Screw bonnet onto faucet body.
6. Screw faucet onto spout and tighten union nut.
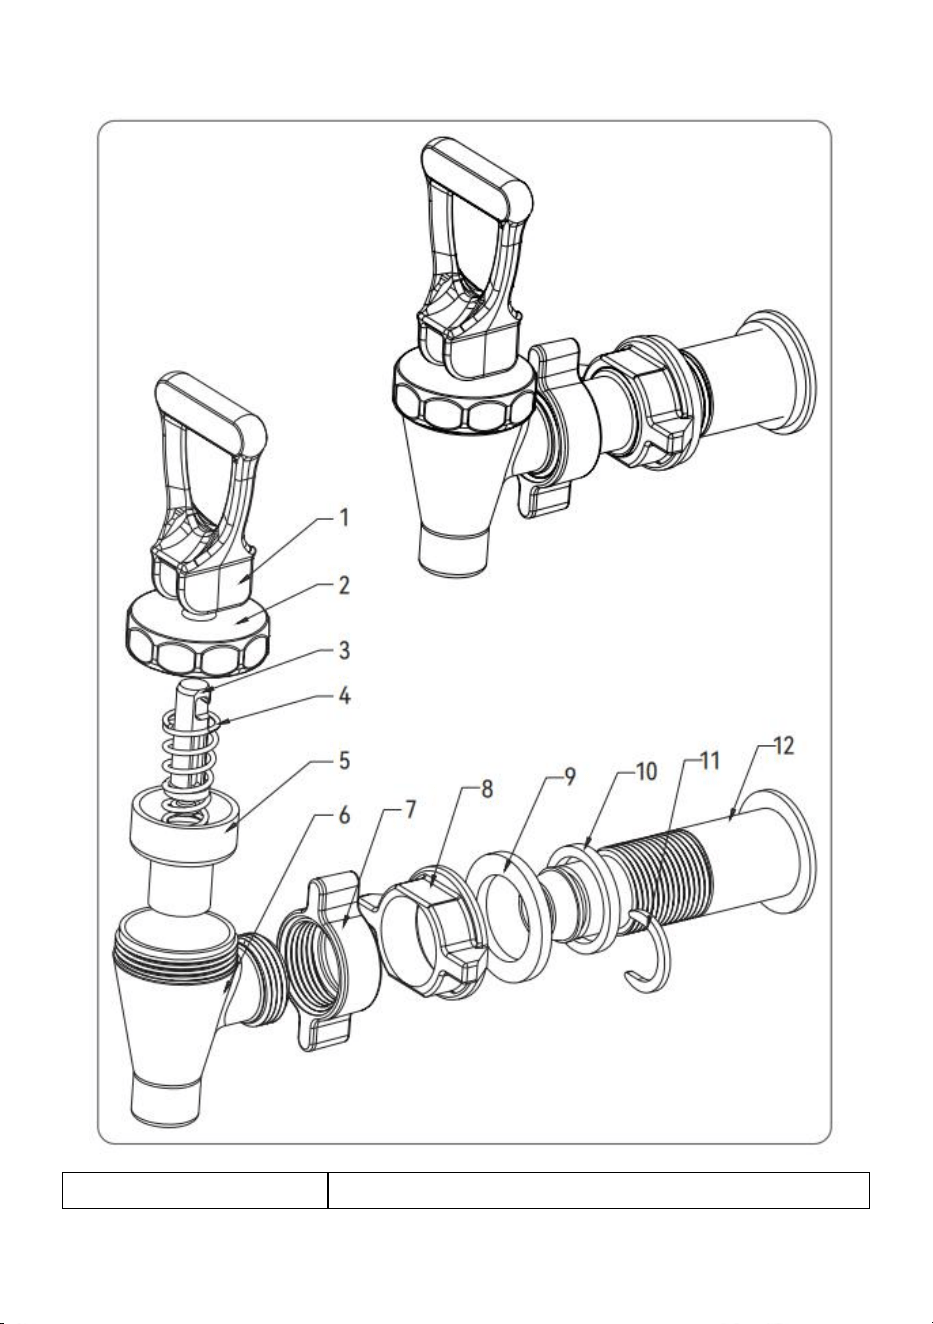
EXPLODED PARTS DIAGRAM
- 5 -
Beverage Dispenser Faucet
Number
Part Name
- 6 -
1
Faucet Lever
2
Bonnet
3
Stem End
4
Spring
5
Rubber Seat Cup
6
Faucet Body
7
Union Nut
8
Wing Nut
9
Large Rubber Washer
10
Small Rubber Washer
11
Metal C Ring
12
Spout
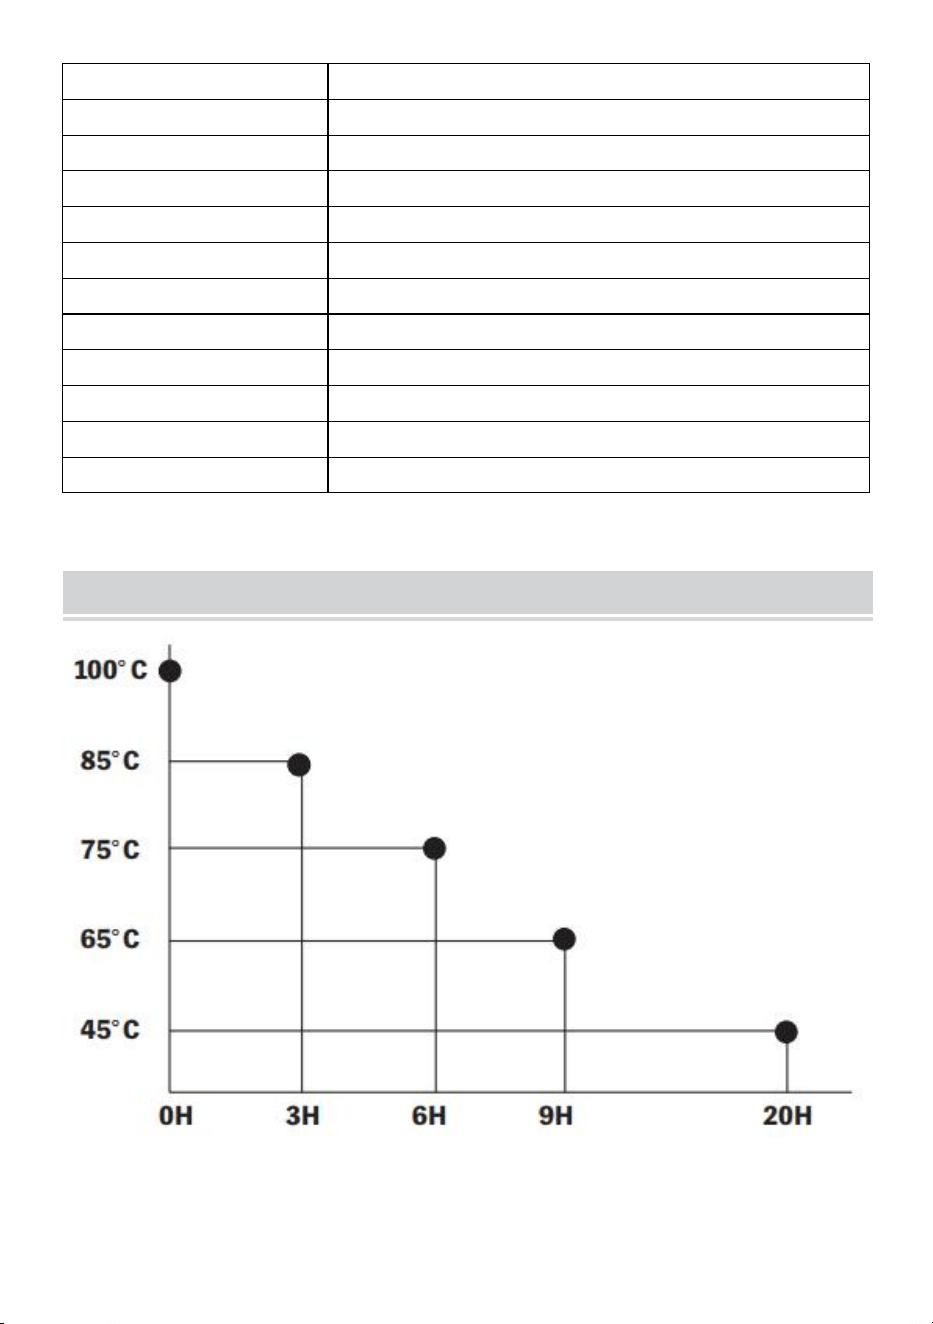
TEMPERATURE TEST
In Room Temperature 25°C
- 7 -
HOW TO CLEAN
1.Please wash the inside barrel in time after finish using and dry it.
2.Please do not put acid food or alkaline food for long time to avoid barrel
rusting.
HOW TO USE
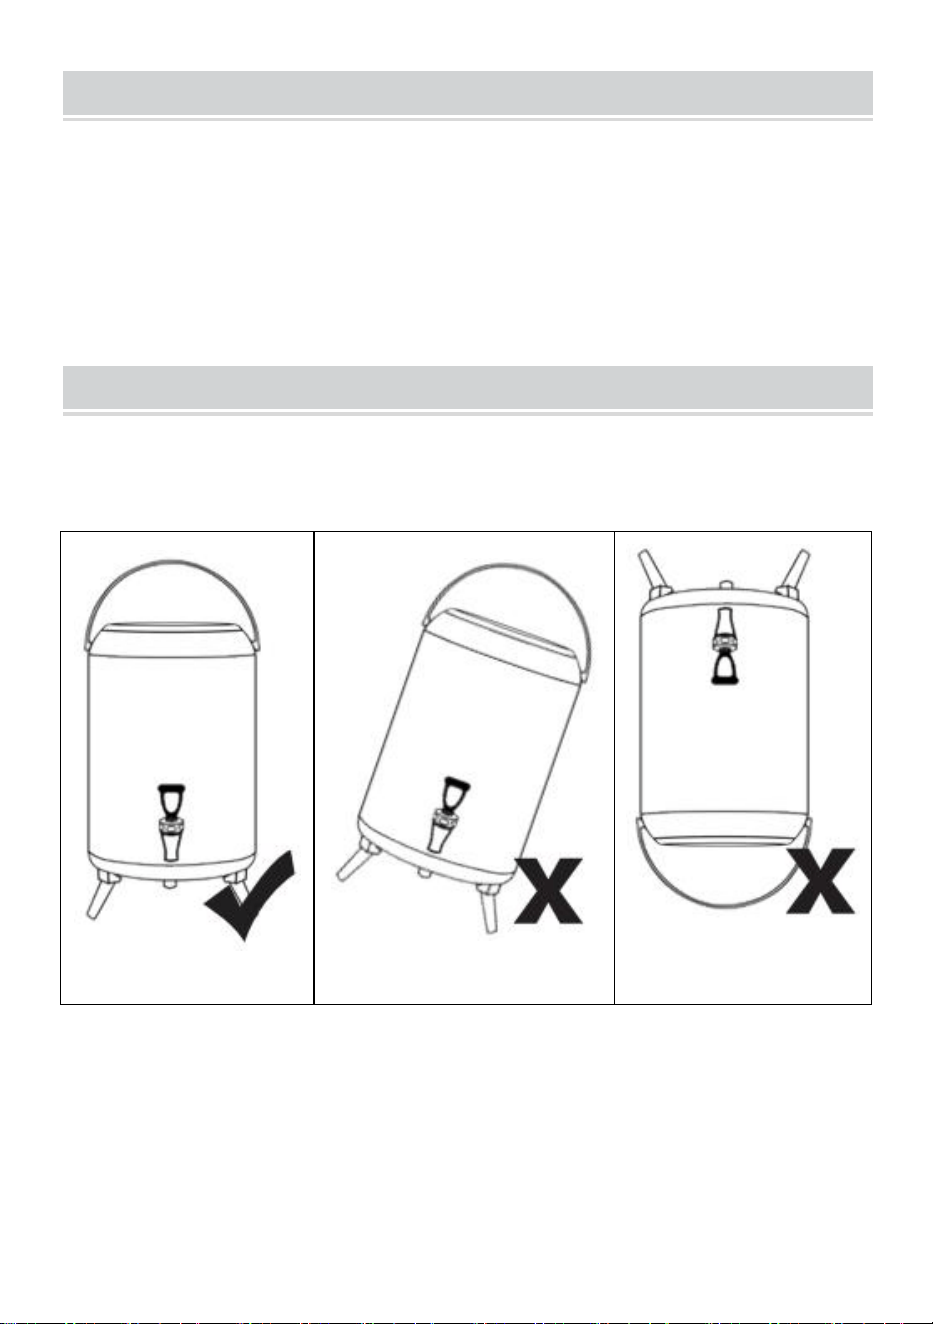
●
How to place
Do not fill excess the max water level
Correct placement
No slant
Do not turn over
● How to wash
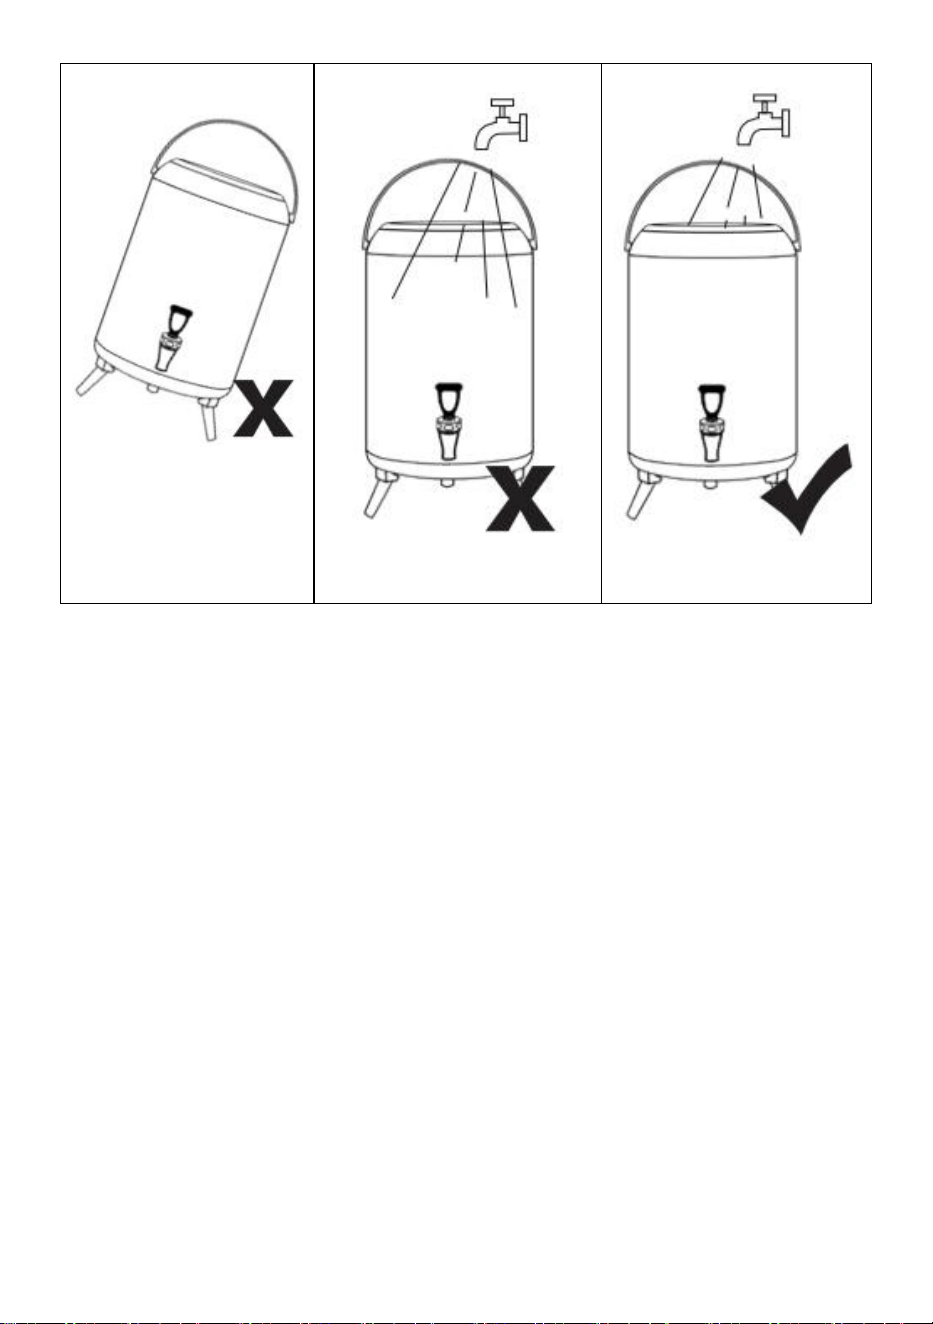
- 8 -
Do not soak in the
water
No direct flushing
Do wash the inner barrel
1.Please use soft cloth to clean the barrel outside.
2.Please wash the inside with water,then put some hot water (can
add some vinegar) inside to steep for 30minutes. Due to the
polishing technology, the inside may leave some polishing dusty,
so please do wash it before use.
3.Please do not put over the plastic circle position when you put
the water inside to avoid water overflow.
4.Please install plastic tea leaf filter when you use the dispenser.
5.Please wash the inside barrel in time after finish using and dry it.
6.Please do not put acid food or alkaline food for long time to
avoid barrel rusting.

- 9 -
Address:Baoshanqu Shuangchenglu 803long 11hao 1602A-1609shi Shanghai
Imported to USA: Sanven Technology Ltd., Suite 250, 9166 Anaheim Place,
Rancho Cucamonga, CA 91730
Made In China