DS160 &DS100&DS200
User Manual
1. Product Introduction
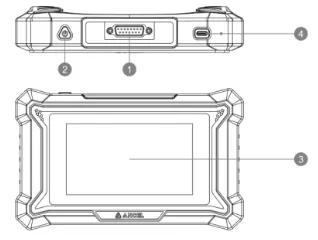
1. I/O Port: Connect the device to the vehicle's diagnostic port [OBD] using the diagnostic cable.
2. Power Button: Press and hold for 3 seconds to power on or display the shutdown prompt; press for 1 second to turn off the screen.
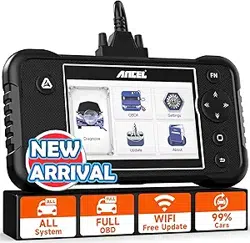
3. Screen: 5-inch touchscreen; after powering on, all diagnostic operations can be performed by pressing the screen menu.
4. USB Port: Type-C, used for charging and data transfer. Please use a power adapter with a 5V output for charging.
2. Product Parameter
CPU: Quad-core 1.3GHz
Memory: 2GB+32GB
Screen: 5 inches 854*480
Working Voltage: 5V
Working Current: ≤ 2.5A
Working Environment: 0°C ~ 50°C (32°F ~ 122°F)
Software Configuration:
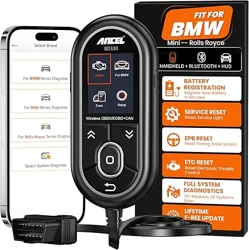
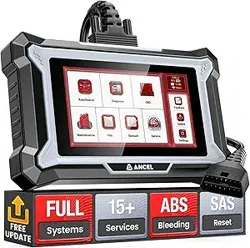
DS160: Full functionality for a single vehicle brand. Currently available for Ford, KIA, Benz, and Porsche.
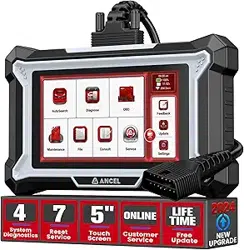
DS100: Supports 100+ vehicle models for diagnosing 4 ECUs (ECM, TCM, ABS, SRS). Only basic functions are available, including reading fault codes, clearing fault codes, reading ECU ID information, and reading data streams. It includes 7 maintenance functions, namely ABS Bleeding, Battery Matching, Brake Reset, Electric Throttle Relearn, Oil Maintenance Reset, Steering Angle Reset, and Gear Learn.
3. How To Use
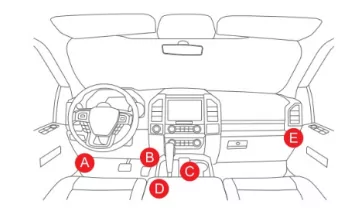
3.1 Connect the device to the vehicle's DLC (Data Link Connector) using the diagnostic cable
The location of the vehicle's DLC is usually located under the steering wheel, generally as shown in the figure below.
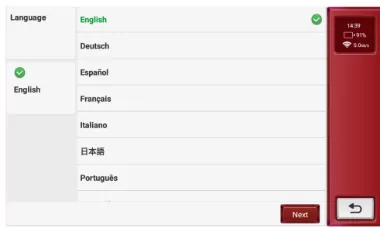
3.2 Language Setting
Once the DLC is connected, the device will automatically power on. For first-time use, the first step is to set the language. The default language of the device is English. If you want to change the language, please proceed to the next step and connect to Wi-Fi to download the latest diagnostic software for the selected language.
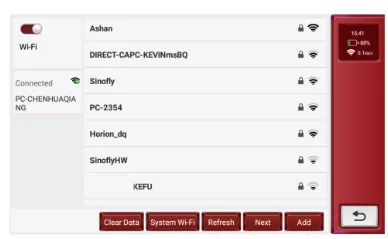
3.3 Select Wi-Fi
Wi-Fi connects the device to the internet, allowing for enhanced diagnostic services and access to the latest information. This device supports the 2.4GHz band. If you choose to skip the Wi-Fi connection, the default English version of the diagnostic software can still be used. However, it is recommended to connect to Wi-Fi during initial setup to easily download the latest version of the diagnostic software.
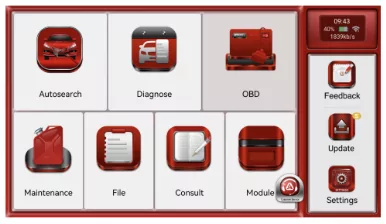
3.4 Enter the Main Interface
After reviewing and agreeing to the privacy policy, you will enter the main interface. Select the corresponding function on the interface to perform diagnostic tasks.
4. Function Introduction
4.1 AutoSearch Function
This function obtains the vehicle's VIN through the OBDII interface, analyzes the VIN, and automatically identifies the vehicle model to enhance diagnostic accuracy. It effectively prevents inaccurate diagnostic data caused by selecting the wrong vehicle model. To use this function, a Wi-Fi connection is required.
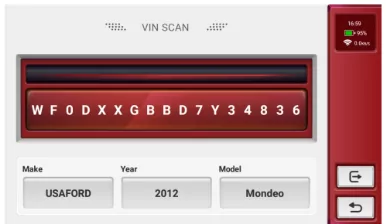
If the VIN code cannot be recognized, you can manually enter the VIN. You can also navigate to the "Diagnose" menu and select the corresponding option based on the vehicle's year and model.
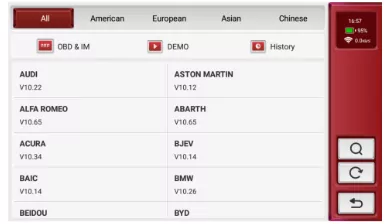
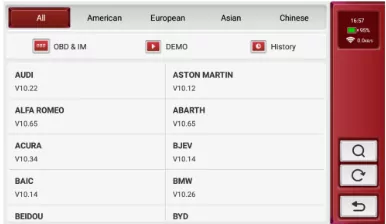
4.2 Diagnose Function
In this menu, directly select the corresponding vehicle brand, year, and model. You can then perform a full vehicle diagnostic scan to retrieve the fault codes from all ECUs. Alternatively, you can select a specific ECU system to read fault codes one by one, view data streams, or perform maintenance functions.
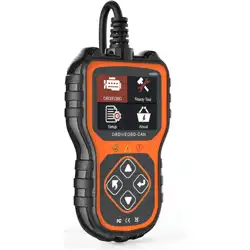
4.3 OBD Function
This function is for diagnosing the engine system, retrieving the status of various sensors and components related to the engine and emissions. This function is applicable to a wide range of vehicles. Since the implementation of the OBDII standard in 1996, any vehicle equipped with an OBDII system can perform this function.
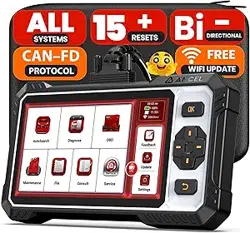
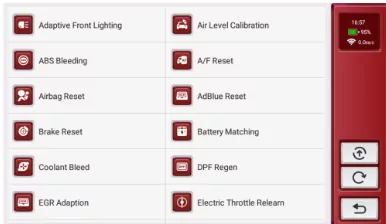
4.4 Maintenance
This function is currently available only on DS200. It consolidates all maintenance functions from various vehicle diagnostic software into a separate menu, making the diagnostic software more user friendly. In the DS160 series, you can find the corresponding maintenance functions within the specific ECU system, for example, the oil reset function can be found in the engine's special functions menu. The DS200 currently includes 15 maintenance functions, as listed in the menu:
4.5 File
This function manages all report files generated during the diagnostic process, making it easy to review, share and delete.

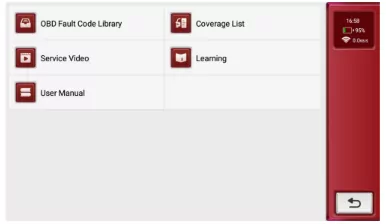
4.6 Consult
OBD Fault Code Library: Use the OBD fault codes generated during the diagnostic process to query detailed fault descriptions.
Coverage Lists: Quickly check the supported models and functions available on the current device.
Learning: Access video tutorials that provide guidelines for equipment usage, maintenance, and diagnostics.
Video: Watch instructional videos that demonstrate how to operate the device effectively.
User Manual: Helps technicians quickly understand how to use the device and improve diagnostic capabilities efficiently.
4.7 Feedback
This function allows you to provide feedback when encountering diagnostic errors with certain vehicle models.
These errors may result from undeveloped software features or incorrect diagnostic commands sent by the device.
Please follow the prompts to send the latest diagnostic logs and error descriptions via Wi-Fi, enabling our team to analyze the issue, make improvements, and update the vehicle diagnostic software.

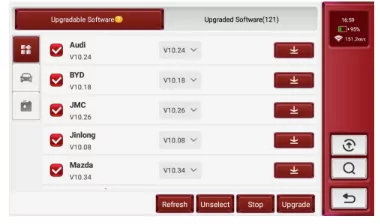
4.8 Update
This function is used to upgrade the diagnostic software. When new vehicle models are released or diagnostic features are optimized, we update the software to ensure the device can effectively detect and diagnose vehicles. A Wi-Fi connection is required during the upgrade.
Please note: Since the DS160 is a full-function diagnostic device for a single vehicle brand, its upgrade interface layout may vary slightly.
4.9 Settings
This function is primarily used to set various parameters and diagnostic conditions for the device. The main options are as follows:
- Feedback: Report any bugs in the diagnostic software app to us for analysis and improvement.
- Screenshots: Turn on this switch to enable screen capture.
- Screen Floating Window: Turn on this switch to record screen operation videos.
- Wi-Fi: Set up the connectable Wi-Fi network.
- Firmware Fix: Used to update the firmware.
- Language: Select the language for the tool.
- Time Zone: Choose the time zone of your current location; the system will then automatically configure the time according to your selection.
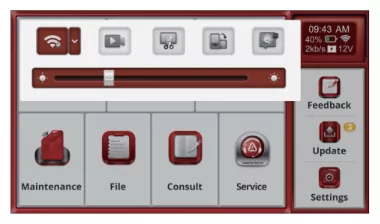
4.10 Shortcut
Swipe down from the top of the screen to open a floating window, providing quick access to settings like brightness adjustment and the screenshot feature.
5. FAQ
Here we list some frequently asked questions and answers related to this device.
5.1 Q: Why is there no response when the device is connected to a vehicle?
A: Ensure the connection to the vehicle's diagnostic port is proper, the ignition switch is on, and that the device supports the vehicle.
5.2 Q: Why does the system freeze while reading the data stream?
A: This could be due to a loose diagnostic connection. Please unplug the connector and reconnect it firmly.
5.3 Q: Why is there a communication error with the vehicle's ECU?
A: Please check the following:
- Ensure the diagnostic connector is properly connected.
- Confirm that the ignition switch is ON.
- If everything appears normal, please use the Feedback function to send us the vehicle's year, make, model, and VIN number.
5.4 Q: Why does the screen flicker when the engine starts?
A: This is normal and is caused by electromagnetic interference.
5.5 Q: How do I upgrade the system software?
A: 1. Start the device and ensure a stable Internet connection.
2. Go to "Settings" - > "App Update," click "OTA," and then select "Check Version" to access the system upgrade interface.
3. Follow the on-screen instructions to complete the upgrade. It may take a few minutes. After the upgrade is successfully completed, the tool will automatically restart and return to the main interface.
6. Warranty Declaration
This warranty applies only to users and distributors who purchase ANCEL products through authorized channels. For one year from the date of delivery, ANCEL warrants its electronic products against defects in materials or workmanship. Damage resulting from abuse, unauthorized modifications, misuse, or operation in a manner not specified in the instructions is not covered by this warranty. Compensation for any damage to the dashboard caused by this equipment is limited to repair or replacement. ANCEL is not liable for any indirect or incidental losses. The nature of the equipment damage will be assessed according to ANCEL's established inspection methods. No agents, employees, or representatives of ANCEL are authorized to make any confirmations, notices, or promises regarding ANCEL products.
OBDSPACE Tech Co., Ltd
Service Line: 0755-81751202
Customer Service Email: [email protected]
Official Website: www.anceltech.com
Product tutorials, videos, Q&A, and coverage lists are available on the ANCEL official website.