LIVESCOPE
™
PLUS LVS34 TRANSOM MOUNT KIT
INSTALLATION INSTRUCTIONS
Important Safety Information
WARNING
See the Important Safety and Product Information guide in the chartplotter or fishfinder product box for product
warnings and other important information.
CAUTION
Failure to install and maintain this equipment in accordance with these instructions could result in damage or
injury.
To avoid possible personal injury, always wear safety goggles, ear protection, and a dust mask when drilling,
cutting, or sanding.
NOTICE
When drilling or cutting, always check what is on the opposite side of the surface to avoid damaging the vessel.
This equipment should be installed by a qualified marine installer.
To obtain the best performance and to avoid damage to your boat, you must install the Garmin
®
device
according to these instructions.
Read all installation instructions before proceeding with the installation. If you experience difficulty during the
installation, contact Garmin Product Support.
Operating Considerations
CAUTION
The sonar information from this transducer is for situational awareness only and may not prevent grounding or
collisions in all circumstances. It is your obligation to remain aware of your surroundings and to ensure safe
operation of your vessel.
NOTICE
To avoid possible damage to the transducer, the bracket, and the transom of the boat, you should operate your
boat slowly in shallow water or in areas of unknown depth or underwater obstructions.
The transom mount bracket is not designed to break away upon impact, and striking an underwater object may
damage the transducer, the bracket, and the transom of the boat. Damage to the transducer, the bracket, or the
boat due to striking an underwater object is not covered under warranty.
When operating at speeds greater than 19 km/hr (12 mph), the performance of the transducer is limited, the
bottom return is diminished, and the depth information and alarm may not provide warnings for potential
shallow depth areas.
When operating at higher speeds, the transducer may have noticeable effects on the operation of the boat due
to the drag of the transducer in the water:
• The top speed of the boat may be lower than it is without the transducer installed.
• The steering of the boat may pull toward the side where the transducer is installed.
• The transom of the boat may lift on the side where the transducer is installed.
GUID-4411E271-8140-47D8-A7A0-96BA8158DE14 v1February 2022

Software Update
You must update the Garmin chartplotter software when you install this device. For instructions on updating the
software, see your chartplotter owner's manual at support.garmin.com.
Installation Support Videos
You can view videos online for assistance when installing this device.
You can access the videos by going to garmin.com/videos/lvs34 in your web browser or by scanning this QR
code with your smartphone.
Tools Needed
• Drill and drill bits
• 17 mm (
5
/
8
in.) wrench
• Torque wrench with a 17 mm (
5
/
8
in.) socket
• Masking tape
• #2 Phillips screwdriver
• Marine sealant
Mounting Considerations
• You must not mount the transducer in the path of the propeller.
• For vessels with outboard and sterndrive motors, you should mount the transducer on the side of the down
stroke of the propeller, typically starboard.
• You should mount the transducer in a location where it will not be jarred when launching, hauling, or storing.
• You should mount the transducer in a location where it is not behind strakes, struts, fittings, water intake or
discharge ports, thru-hull transducers, or anything that creates air bubbles or causes the water to become
turbulent. Turbulent water may interfere with the sonar beam.
• You should mount the transducer as close to the center line of the boat as possible.
• On twin-drive vessels, you should mount the transducer between the drives, if possible.
• If necessary, for extra cable length you can connect an optional extension cable, available at buy.garmin.com
or from your Garmin dealer.
2
Installing the Transom-Mount Bracket
NOTICE
If you are mounting the bracket on fiberglass with screws, it is recommended to use a countersink bit to drill a
clearance counterbore through only the top gel-coat layer. This will help to avoid cracking in the gel-coat layer
when the screws are tightened.
1 Place the included template in the selected mounting location on the transom.
2 Using a 4 mm (
5
/
32
in.) bit, drill pilot holes in the middle of the adjustable mounting holes on the template.
NOTE: You can wrap a piece of tape around the bit 19 mm (
7
/
10
in.) from the point to avoid drilling the pilot
holes too deep.
3 Remove the template from the mounting surface.
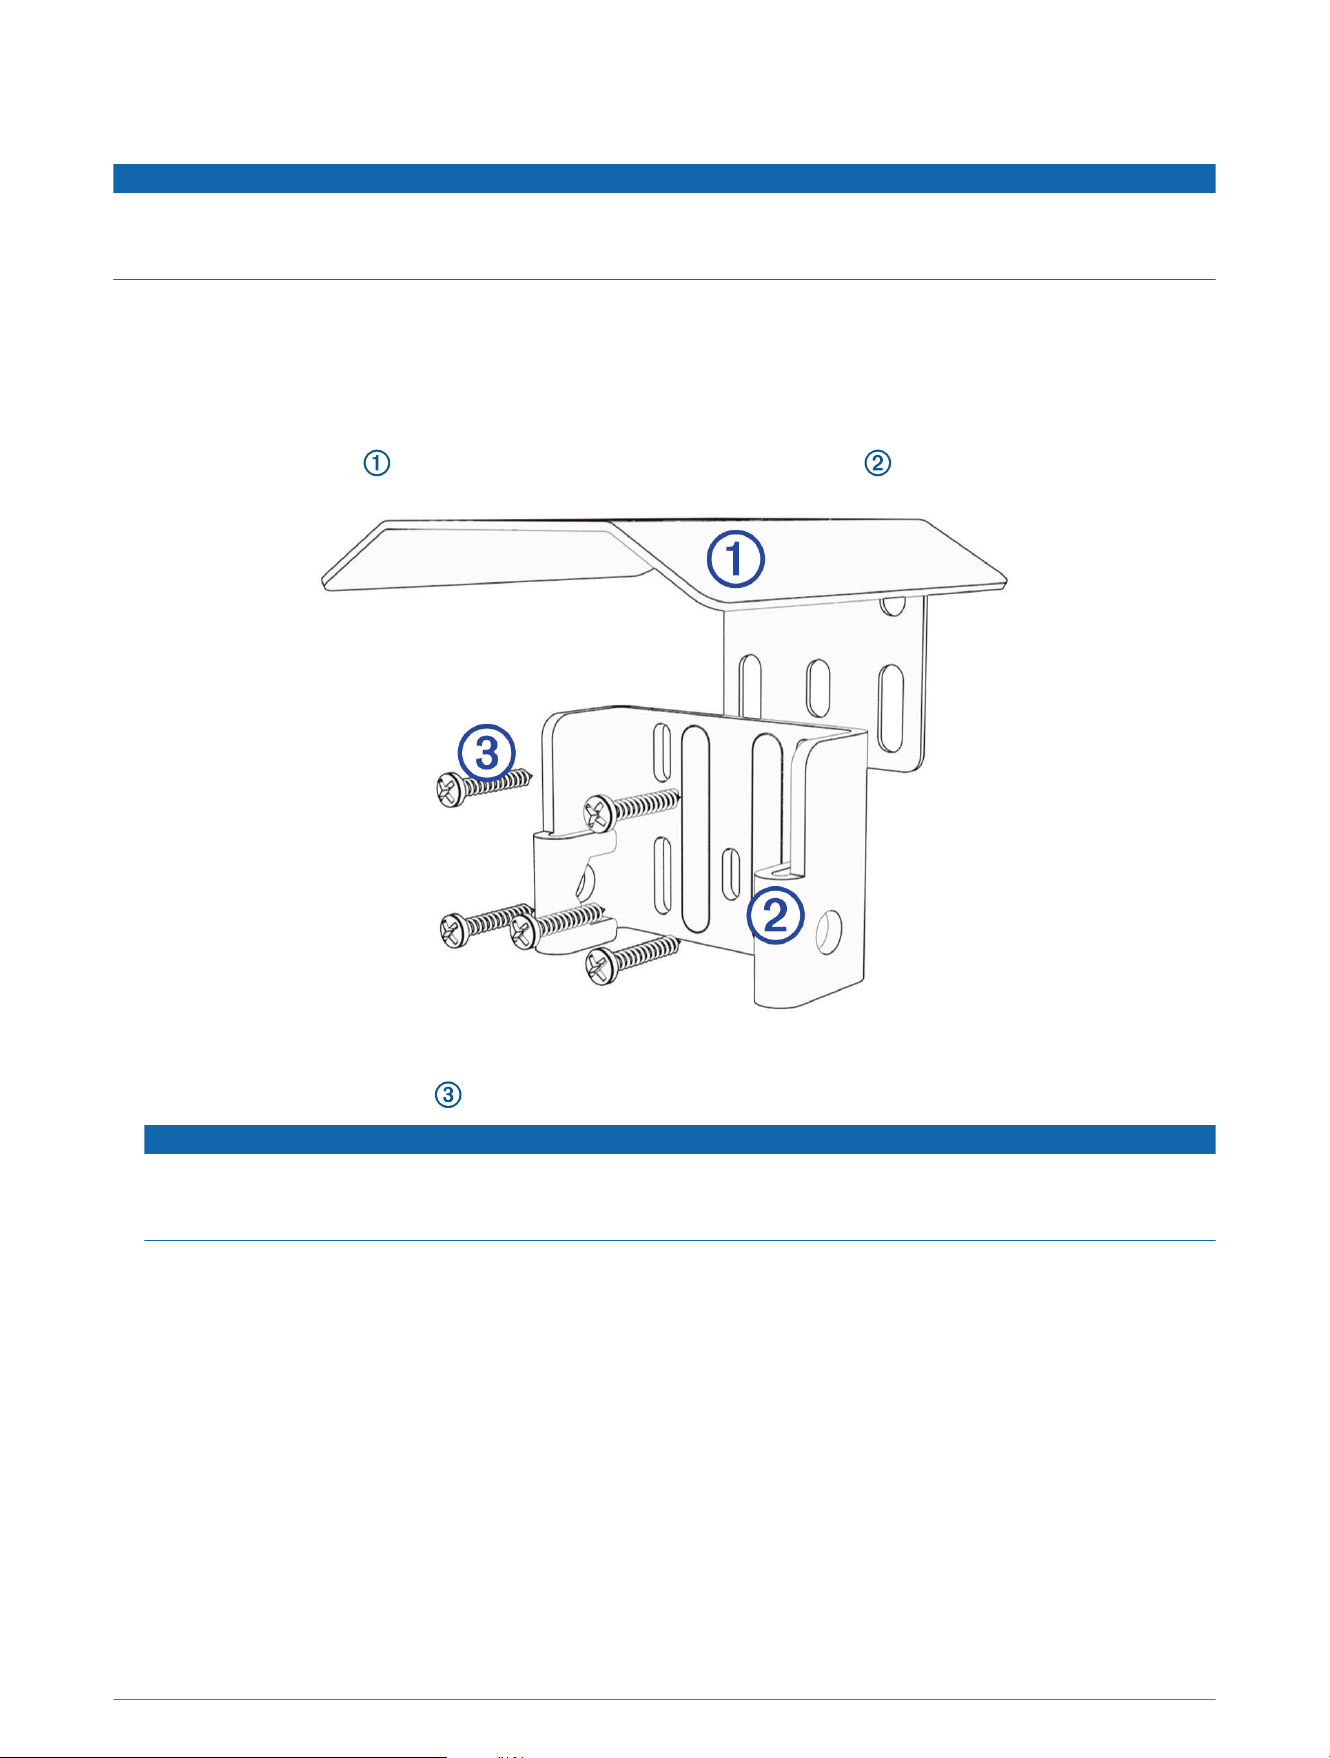
4 Place the spray guard against the back of the transom-mount bracket so the mounting holes align.
5 Apply marine sealant to the included 20 mm screws.
6 Using the five 20 mm screws , loosely attach the transducer mount and spray guard to the transom.
NOTICE
When installing this bracket, be sure to install screws all five mounting holes. This is especially important on
vessels that operate at high speeds. If screws are not installed in all of the mounting holes, the bracket may
bend or break when the vessel moves at high speeds, dislodging the transducer.
3
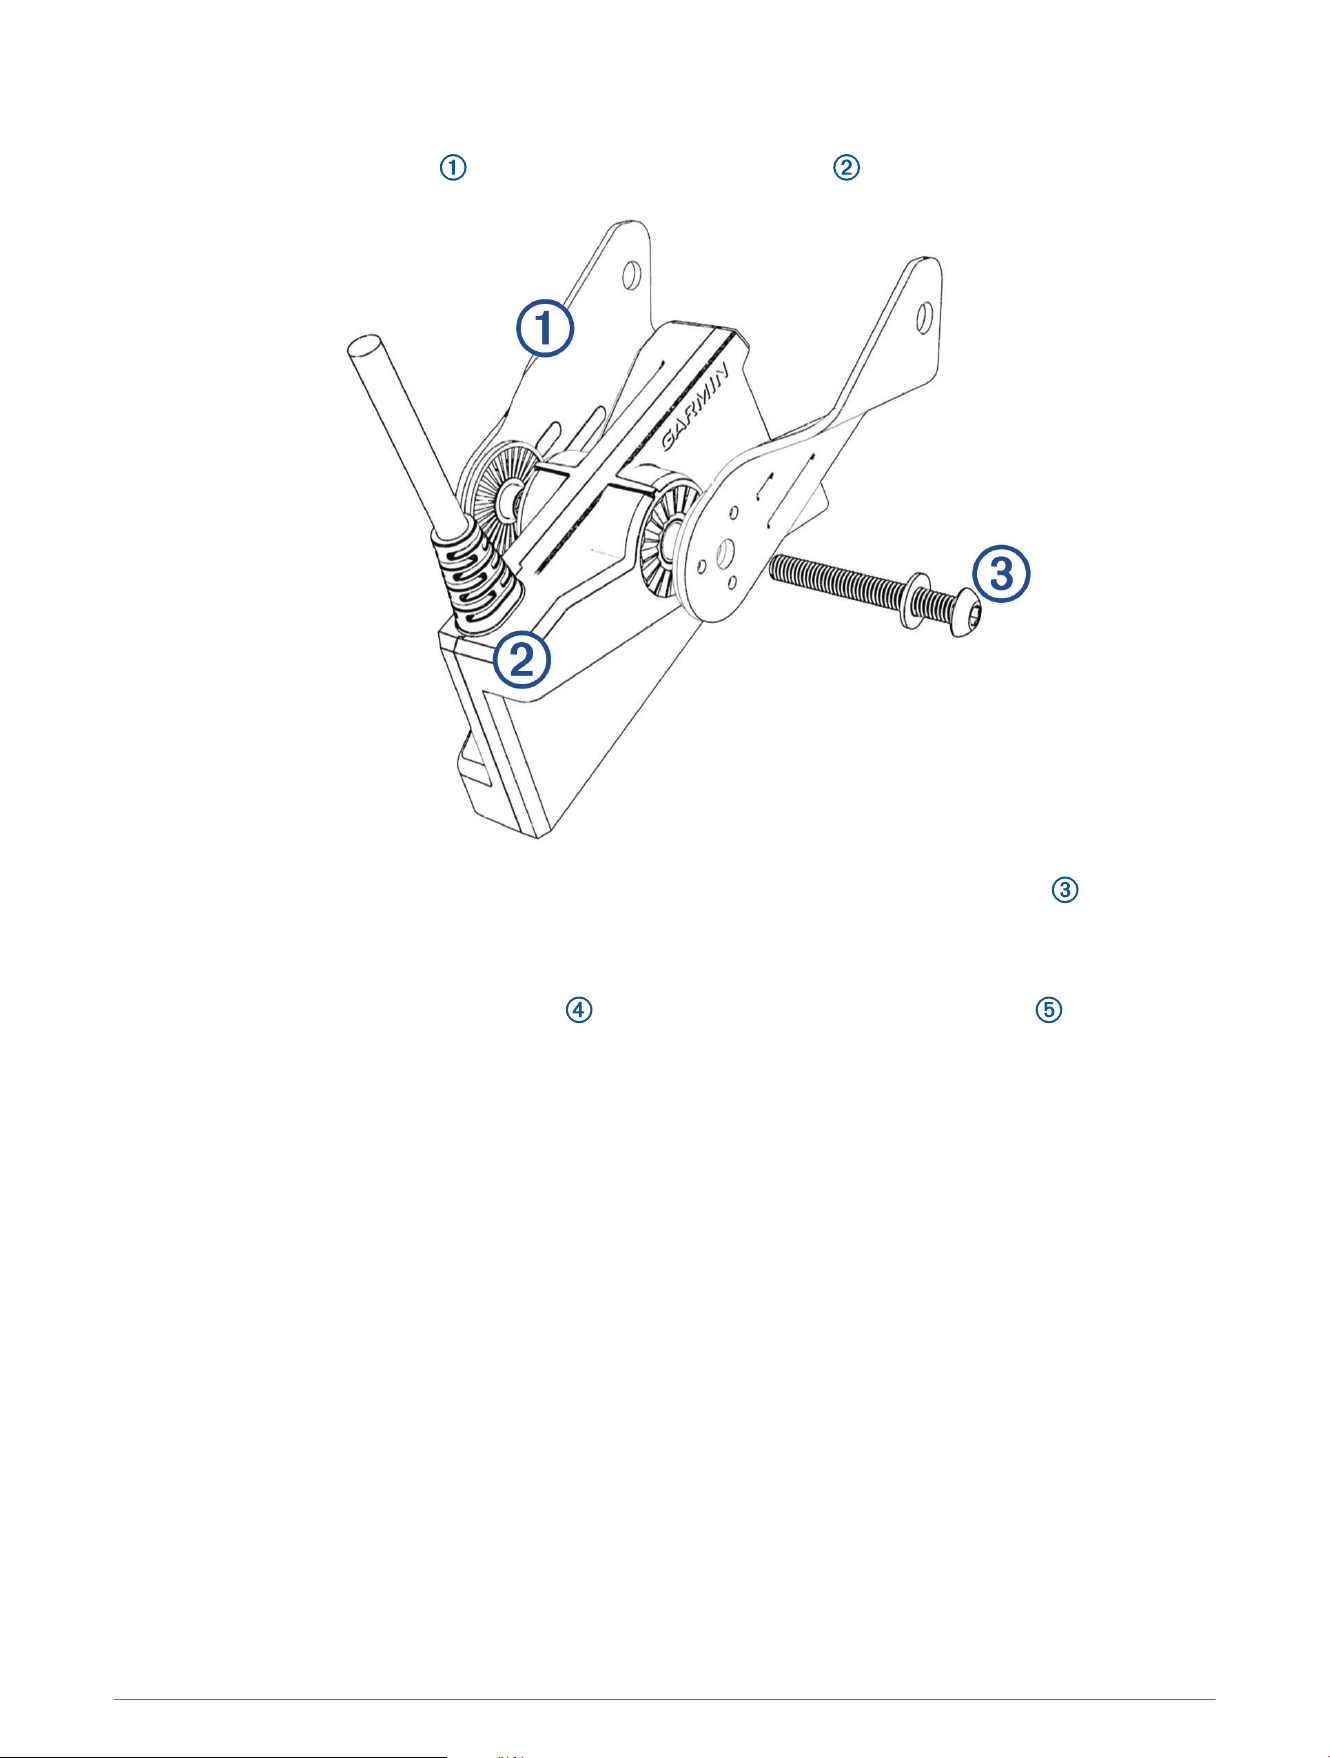
Assembling the Transom-Mount Hardware
1 Place the arms of the bracket against both sides of the transducer .
2 Loosely attach the arms of the bracket to the transducer using the included bolt and washer .
NOTE: You can secure the transducer to the bracket using the included knob instead of the bolt and washer,
but the bolt is recommended because the transom mount is not designed to change the viewing mode
during use.
3 Place the assembled transducer and arms against the bracket attached to the transom .
4
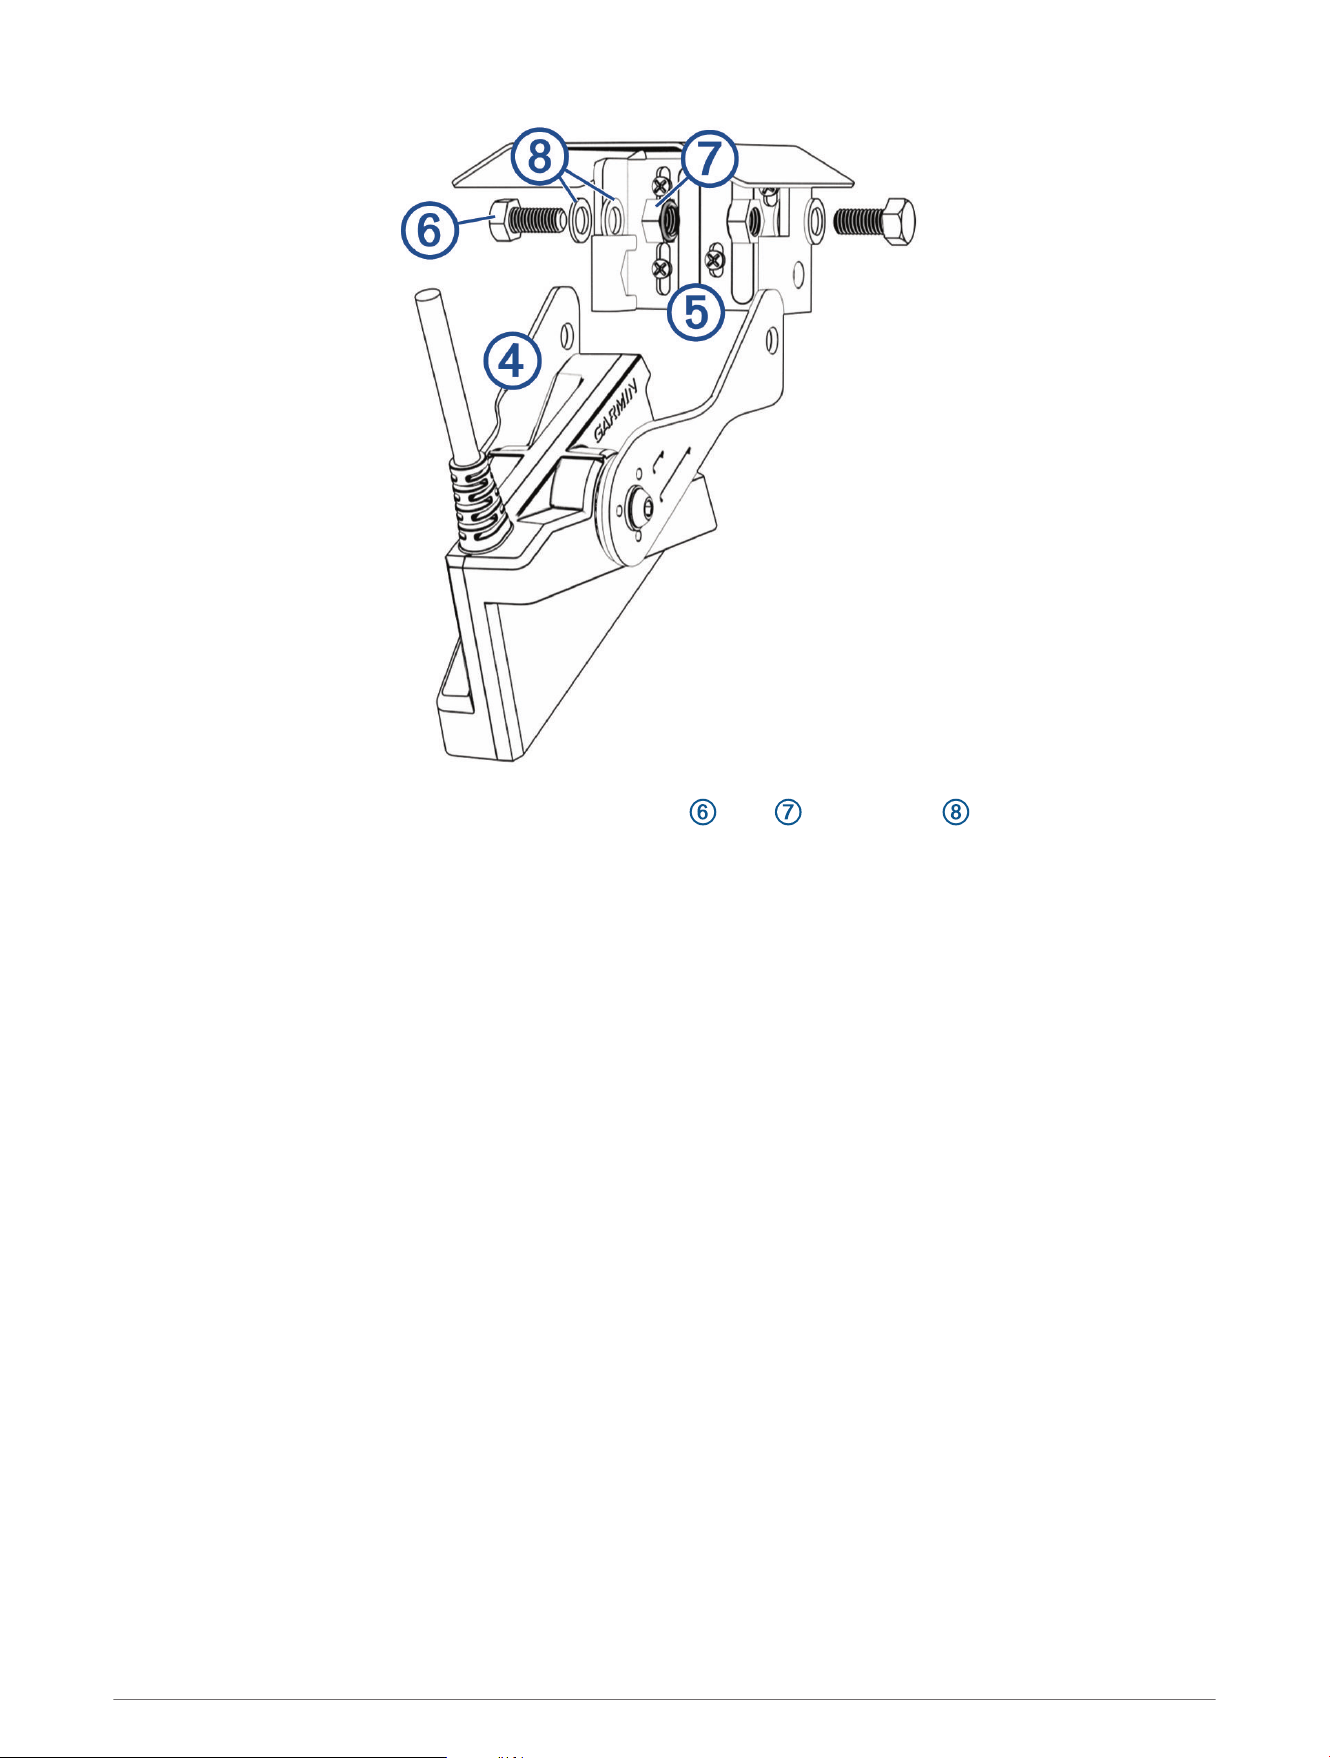
4 Attach the arms to the bracket using the included bolts , nuts , and washers .
5 Using a torque wrench with a 17 mm (
5
/
8
in.) socket, tighten the bolts to 20 N-m15 lb-ft. (15 lbf-ft.).
NOTE: The inside of the bracket base holds the nuts in place when tightening.
6 If you must route the cable through the transom, choose a pilot-hole location well above the waterline and
mark it.
7 If you marked a pilot hole in the previous step, use a 32 mm (1
1
/
4
in.) hole saw to drill a pass-through hole
completely through the transom.
8 Route the transducer cable to the sonar module:
• If you are routing the cable using a pass-through hole, push it through the hole you drilled in the previous
step.
• If you are not routing the cable using a pass-through hole, route the cable up and over the top of the
transom .
You should avoid routing the cable close to electrical wires or other sources of electrical interference.
5
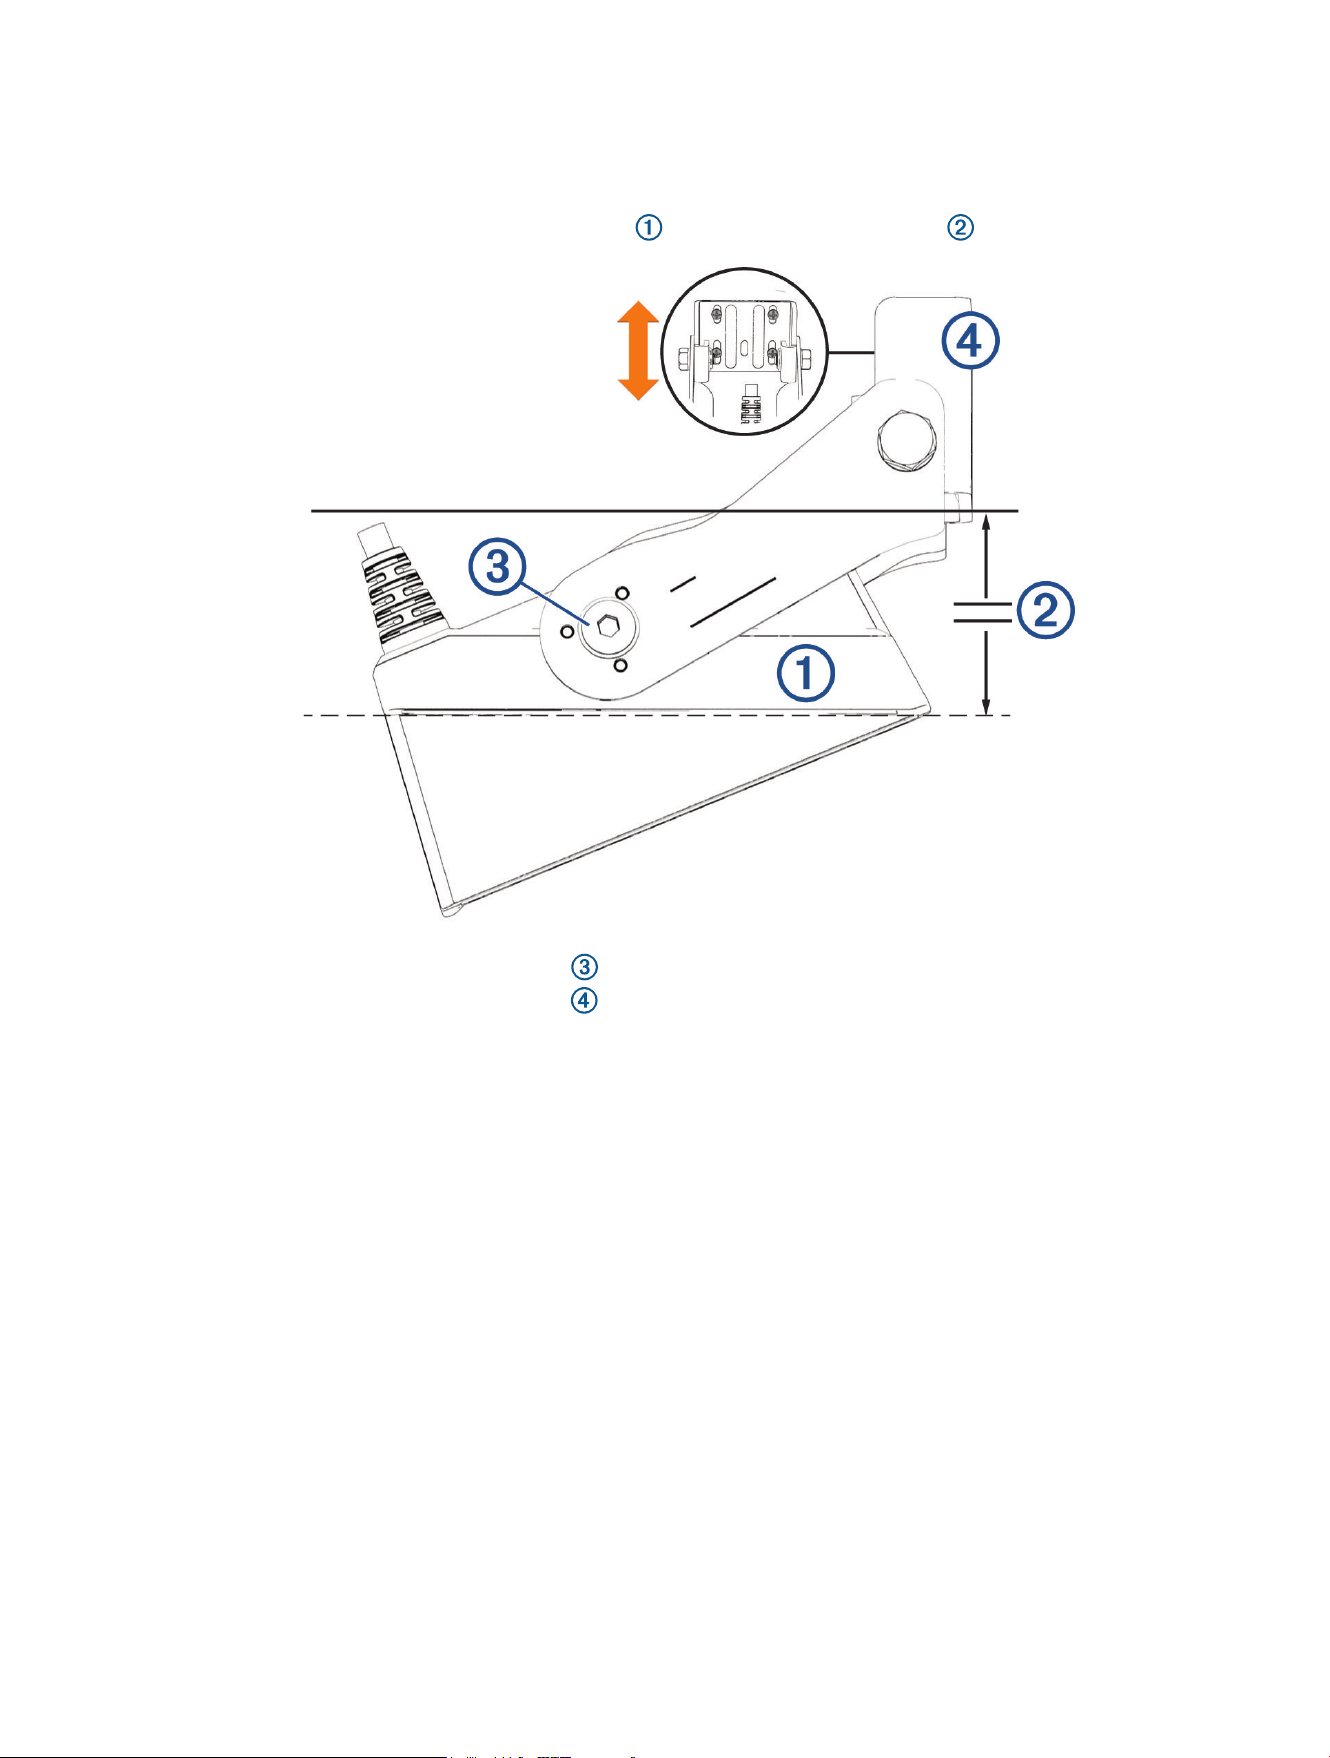
Adjusting and Securing the Transducer and Mount
After you connect the transducer to the mount and connect the mount to the transom, you must adjust the
angle and depth.
1 Adjust the angle of the transducer so the element is parallel with the waterline .
2 Using an M5 hex wrench, tighten the screw that secures the transducer to the mount.
3 Adjust the height of the transducer bracket on the transom so that the transducer is submerged when the
boat is in the water.
4 Using a #2 Philips screwdriver, tighten the five screws that secure the bracket to the transom.
5 Test the angle and depth of the transducer, and make any adjustments as needed.
© 2022 Garmin Ltd. or its subsidiaries
Garmin
®
and the Garmin logo are trademarks of Garmin Ltd. or its subsidiaries, registered in the USA and other countries. LiveScope
™
and GLS
™
are trademarks of
Garmin Ltd. or its subsidiaries. These trademarks may not be used without the express permission of Garmin.
© 2022 Garmin Ltd. or its subsidiaries
support.garmin.com