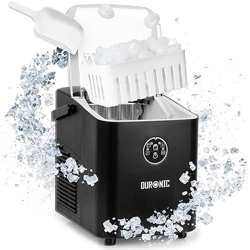

ICM120 - Ice Maker
PLEASE READ ALL THE INSTRUCTIONS BEFORE USE

2
3
English Manual
Manuel d’utilisation en français
Gebrauchsanleitung auf Deutsch
Manual de Instrucciones en Español
Manuale D’istruzioni In Italiano
Instrukcja obsługi. Polski
Gebruikershandleiding Nederlands
4
13
22
31
40
49
58
Contents
4
English Manual

5
Safety Instructions
• This appliance is for indoor/household use only. Do not use outdoors.
• The ICM120 Ice Maker is only for domestic use, it is not for commercial
use.
• This appliance is not intended for use by persons (including children) with
reduced physical, sensory or mental capabilities, or lack of experience and
knowledge, unless they have been given supervision or instruction
concerning use of the appliance by a person responsible for their safety.
• Do not operate this appliance if the power cable or plug is damaged. If
either is damaged, return the machine to Duronic for service or repair by
professional technician.
• Please ensure the mains power supply is 220-240V / 50Hz.
• Never try to replace the parts and repair the unit by yourself.
• To reduce the risk of electric shock, never operate this product near water,
with wet hands, spill liquid on the appliance or submerge it in water or any
other liquid.
• Do not use the ice maker machine near gas or other inflammable materials
(such as benzene, paint thinner, sprays, etc.)
• Do not place the appliance on or near a hot gas or on a heated oven.
• Keep the machine 15cm from other objects to ensure heat has space to
escape from the vents.
• Do not put any extension leads or portable power supplies near or behind
the appliance.
• Do not use any accessories which are not recommended by Duronic.
• Do not insert any foreign or electrical objects into the appliance.
• Do not store explosive substances such as aerosol cans with a flammable
propellant in or next to this appliance.
• The refrigerant and insulation blowing gas inside this machine is
flammable. When disposing of the appliance, do so only at an authorised
waste disposal centre. Do not expose the appliance to flames.
• Unplug the appliance after using it or before cleaning it.
• When cleaning the ice maker machine, do not use sharp utensils, steel
PLEASE READ THIS MANUAL CAREFULLY BEFORE USING AND RETAIN
IT FOR FUTURE REFERENCE

6
Safety Instructions (Continued)
Specications
wool, metal scouring pads or abrasive cleaners as they will scratch or
damage the appliance.
• Do not use distilled water in this machine. Mineral water is recommended.
•
When moving the appliance, do not tilt the machine more than 45
degrees and do not turn the machine upside down. This may damage the
compressor and the sealing system.
• It is normal for the compressor and condenser surface to reach
temperatures between 70°C and 90°C during operation and the
surrounding areas may be very hot.
• Due to the fast freezing process, ice cubes may appear “cloudy”. This is
normal, it is air trapped in the water during the freezing process and it will
not affect the quality or taste of the ice.
Features:
• The ICM120 makes bullet-shaped ice cubes
• Up to 9 pieces of ice can be made per eight minutes
• Daily ice output: 12kg / 26.5lbs per 24 hours
• Ice storage facility: 1.5L / 600g
• Refrigerant: R600a
• Noise level: ≦6 0dB(A) [ambient noise level ≦1 7dB(A)]
• Prompts when ice basket is full and when water level is insufficient.
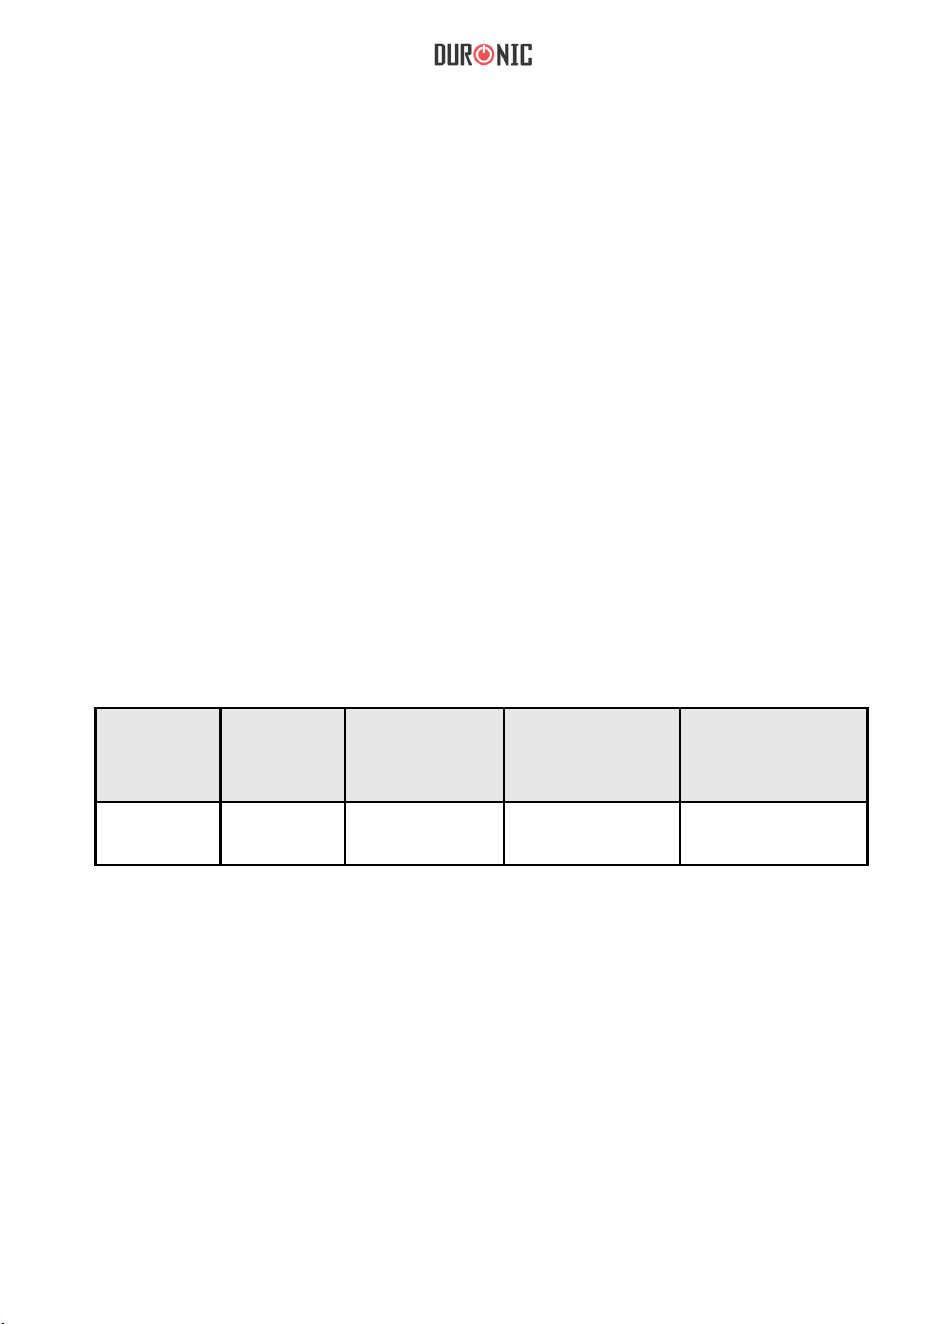
MODEL POWER
VOLTAGE
RATING
WATER TANK
CAPACITY
DIMENSIONS
ICM120
120W 220-240V /
50Hz
1.5L 22.4 x 30.8 x
28.3cm
7
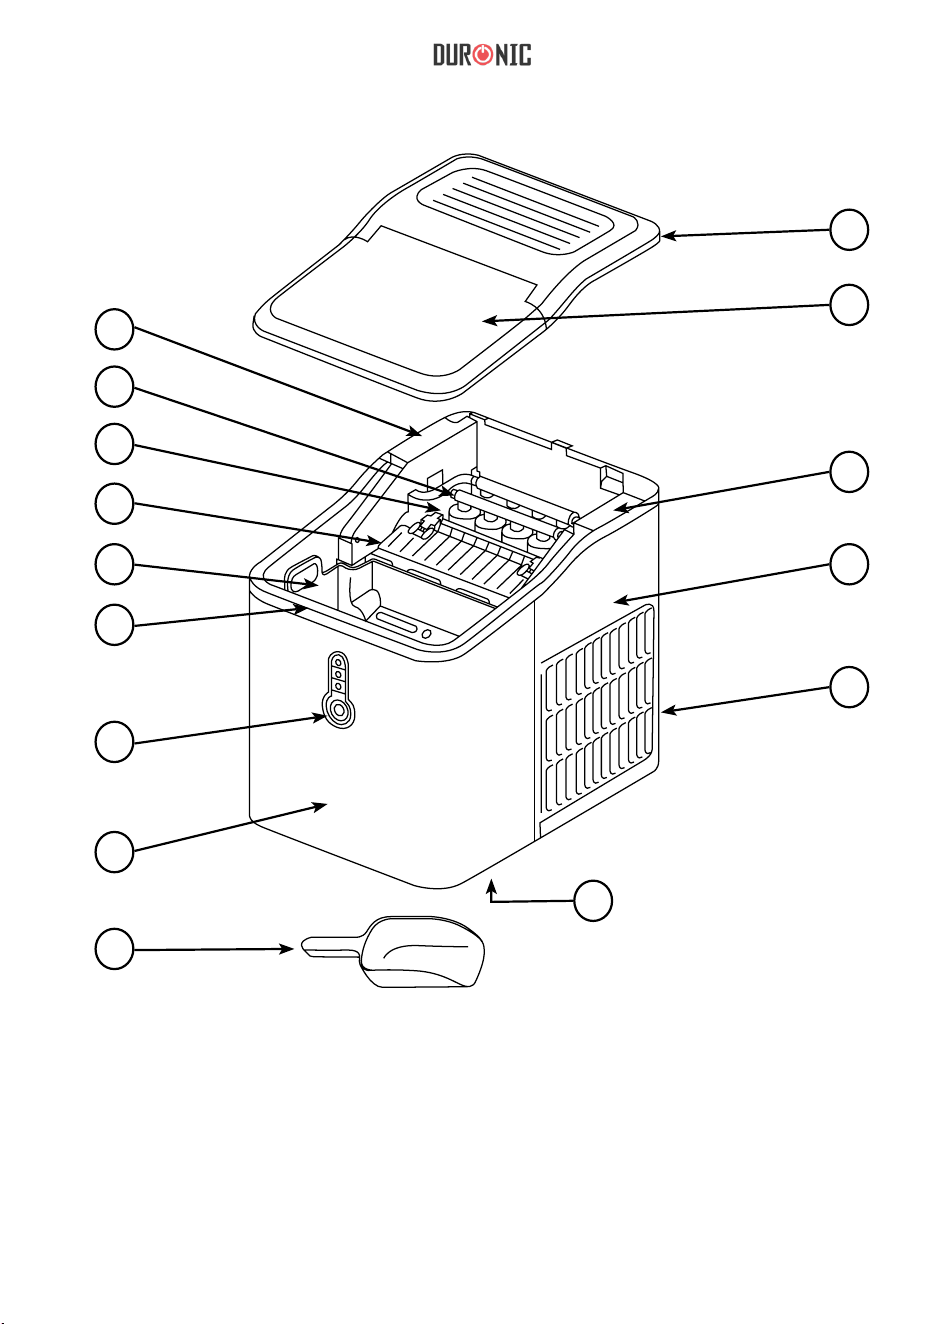
1. Micro switch
2. Evaporator
3. Water tray
4. Ice shovel
5. Ice basket
6. Water tank
1
2
3
4
5
6
7
11
12
13
14
15
8
9
10
7. Drainage plug
8. Control panel
9. Front housing
10. Ice scoop
11. Top cover
12. Transparent lid
Components
13. Motor
14. Back housing
15. Air vent

8
Before First Use
Before First Use
The Control Panel
• Before rst use, remove all the packing materials, check the machine
carefully and make sure that the machine, power cable and plug are
normal and do not have any damage.
• The machine should be positioned on a level surface. To ensure
sufcient ventilation, the distance of the back of ice maker to the wall and
surrounding objects should be at least 15cm. It should not be positioned
near an oven, radiator or any other heat source.
•
Before using the machine for the rst time, put the machine in place and leave
the transparent cover open for at least two hours.
• Distilled water should not be used. Mineral water is recommended.
ICE MAKING:
• When you plug in the ice maker machine the ICE MAKING light indicator
will ash.
• Press the power button to switch on the machine. The ICE MAKING
indicator light will stay on and the machine will start to make ice cubes.
• After the rst batch of ice cubes have nished being made, the de-icing
will activate, followed by the ice shovel which will move the ice into the ice
basket.
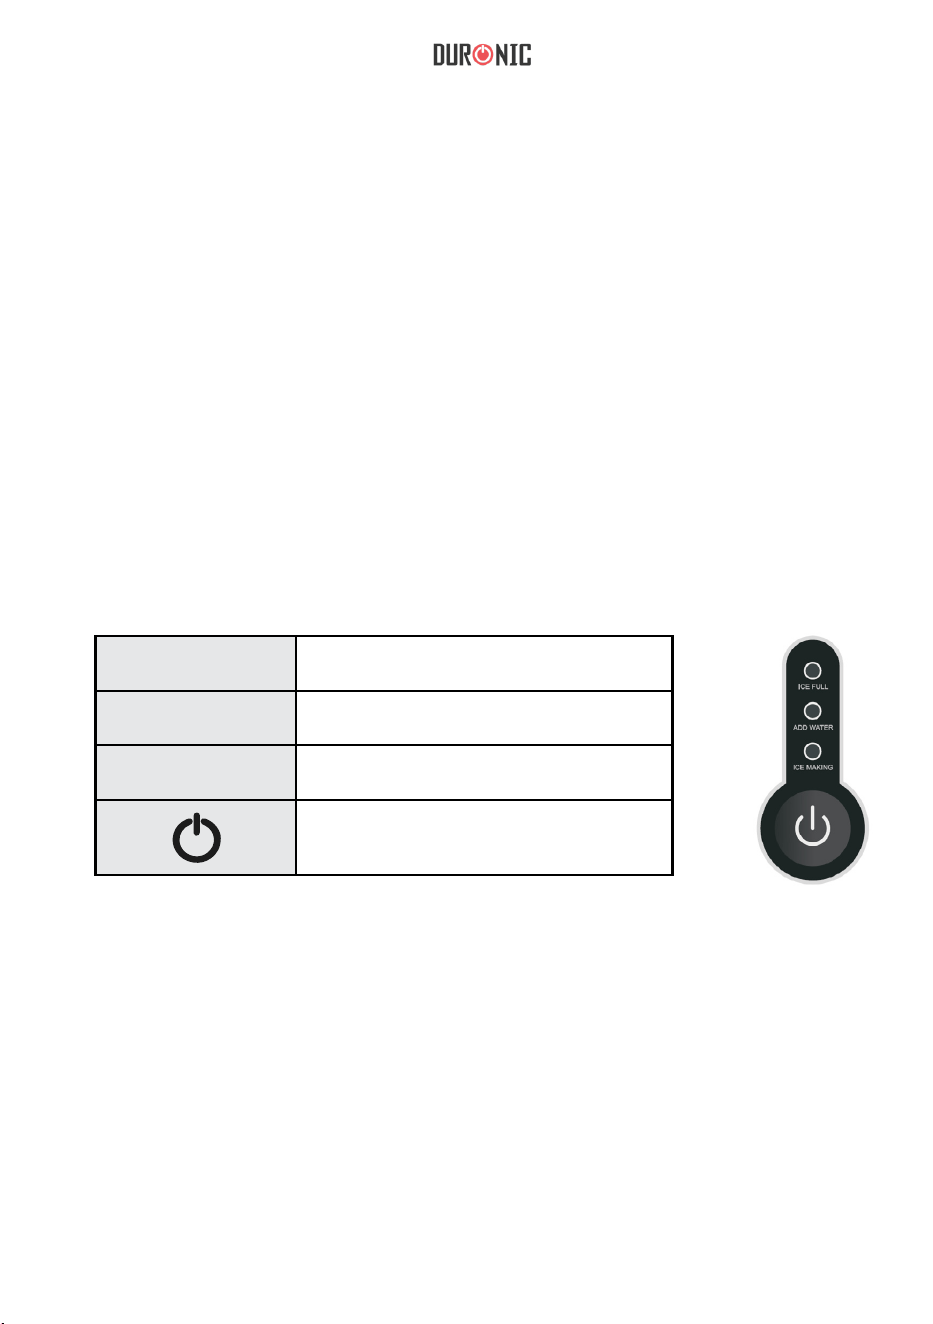
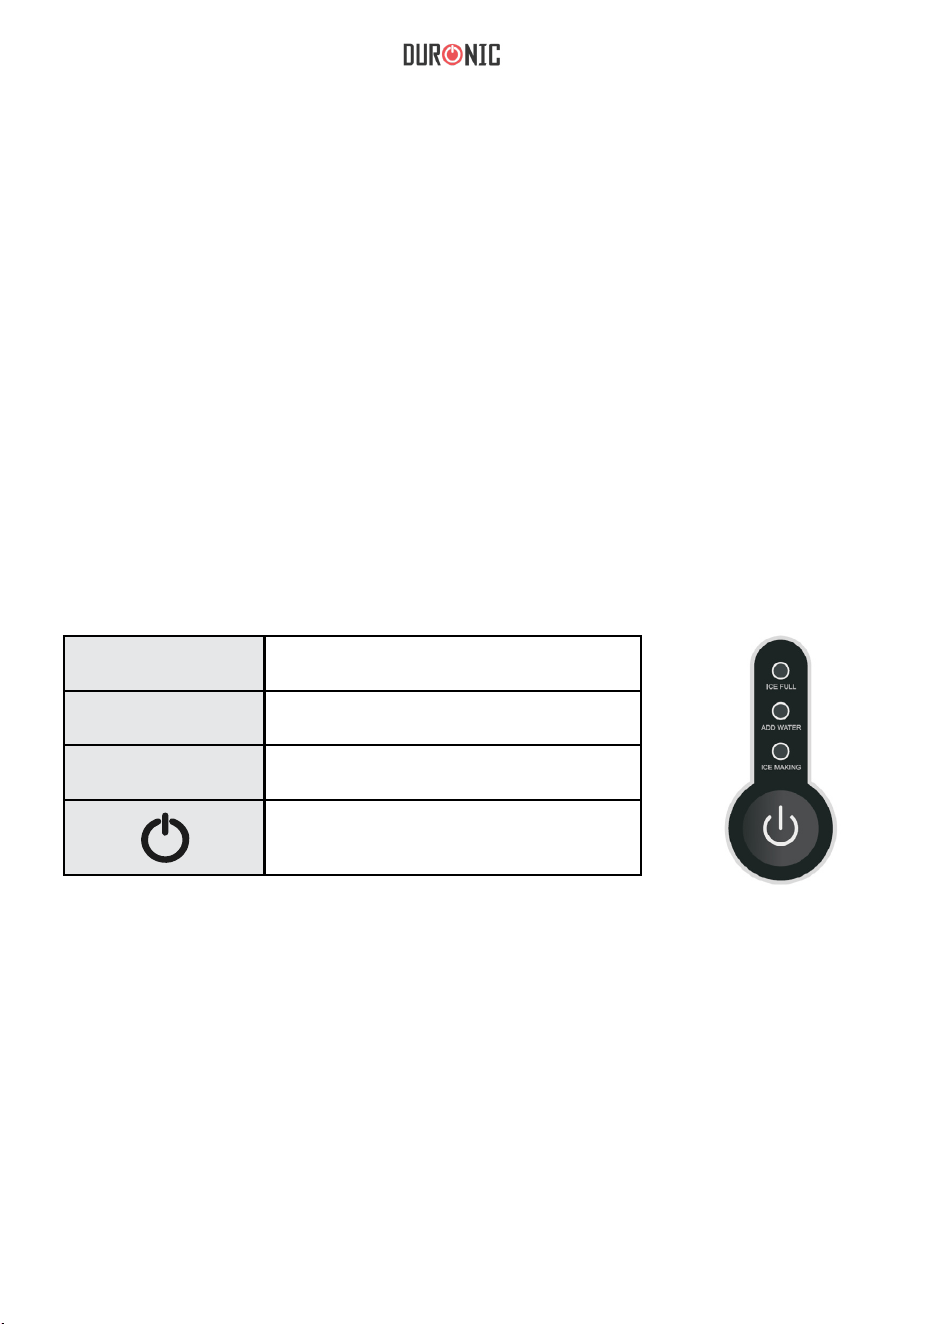
There are light 3 indicators and 1 button on the control panel:
ICE FULL Ice full alarm
ADD WATER Water shortage alarm
ICE MAKING Ice is being produced
Power button

9
How to Use
1. Open the transparent lid, take out the ice basket and add water to the
water tank. The water should not exceed the MAX mark.
Use either cold or room-temperature water to ll the tank. Do not ll the
tank with hot water.
If the water exceeds the MAX mark, you will need to drain a little water
away. You do this by opening the bottom drain plug and releasing some
water.
2. Put the ice basket back into the machine and close the lid.
3. Plug in the machine and switch it on at the plug.
4. Press the power button to start the machine.
5. The machine will start to make ice cubes.
6. The ICE MAKING indicator light will light up stay on while the machine
works making the ice cubes.
7. When the ice basket is full, the machine will automatically stop. Remove
the ice cubes using the ice scoop. The machine will then restart and
ADD WATER:
• When the ADD WATER light turns red, it means that there is not enough
water left in the tank. You will need to add more water and then press the
power button to restart the machine.
ICE FULL:
• When the ice cubes ll up the ice basket and it reaches the maximum
capacity, the ICE FULL light will ash, and the machine will automatically
stop. You will then need to empty the ice basket using the ice scoop.
• Once the sensor inside the machine can detect the ice basket is empty,
the machine will restart automatically and continue making ice cubes.
Do not ll up the tank directly from a tap. When relling the water
tank, use a bottle or jug to pour water into it.

10
continue making ice cubes.
8. When you have nished making ice cubes, turn off the machine by
pressing the power button again. Switch off the plug socket and unplug the
cable from the mains socket.
Cleaning and Maintenance
Clean the inside of the machine (ice basket, water tank, ice shovel) and the ice
scoop frequently.
How to clean your ice maker:
1. Switch off the machine and allow it to de-ice for a 2-3 hours. Do not use
any mechanical devices or any other means to accelerate the defrosting
process.
2. Before cleaning, unplug the machine and remove any ice cubes from the
ice basket.
3. Use a diluted solution of water and white vinegar to clean the inside and
the outside surface of the machine using a cloth. Do not use chemicals or
diluted agents such as acids, gasoline or oil on the machine.
4. After using the water/vinegar solution to wipe over the machine, rinse
the cloth in water and wipe over the same parts again to clean away the
solution.
5. Allow the machine to air and dry thoroughly. Keep ventilation openings in/
on the machine clear of obstruction.
To ensure the ice made is fresh, change the water in the reservoir at least
once a day. If you do not plan to use the machine for a long time, drain the
water out and clean the machine before storing it away.
Troubleshooting
Note: If the power is accidently disconnected while the machine is on during
an ice making cycle, small ice chips may form and lodge in the ice shovel. If
this occurs, check that the machine is switched off at the mains socket, then
gently push the shovel backwards towards the rear of the machine to remove
ice chips. Then restart the machine as normal.

11
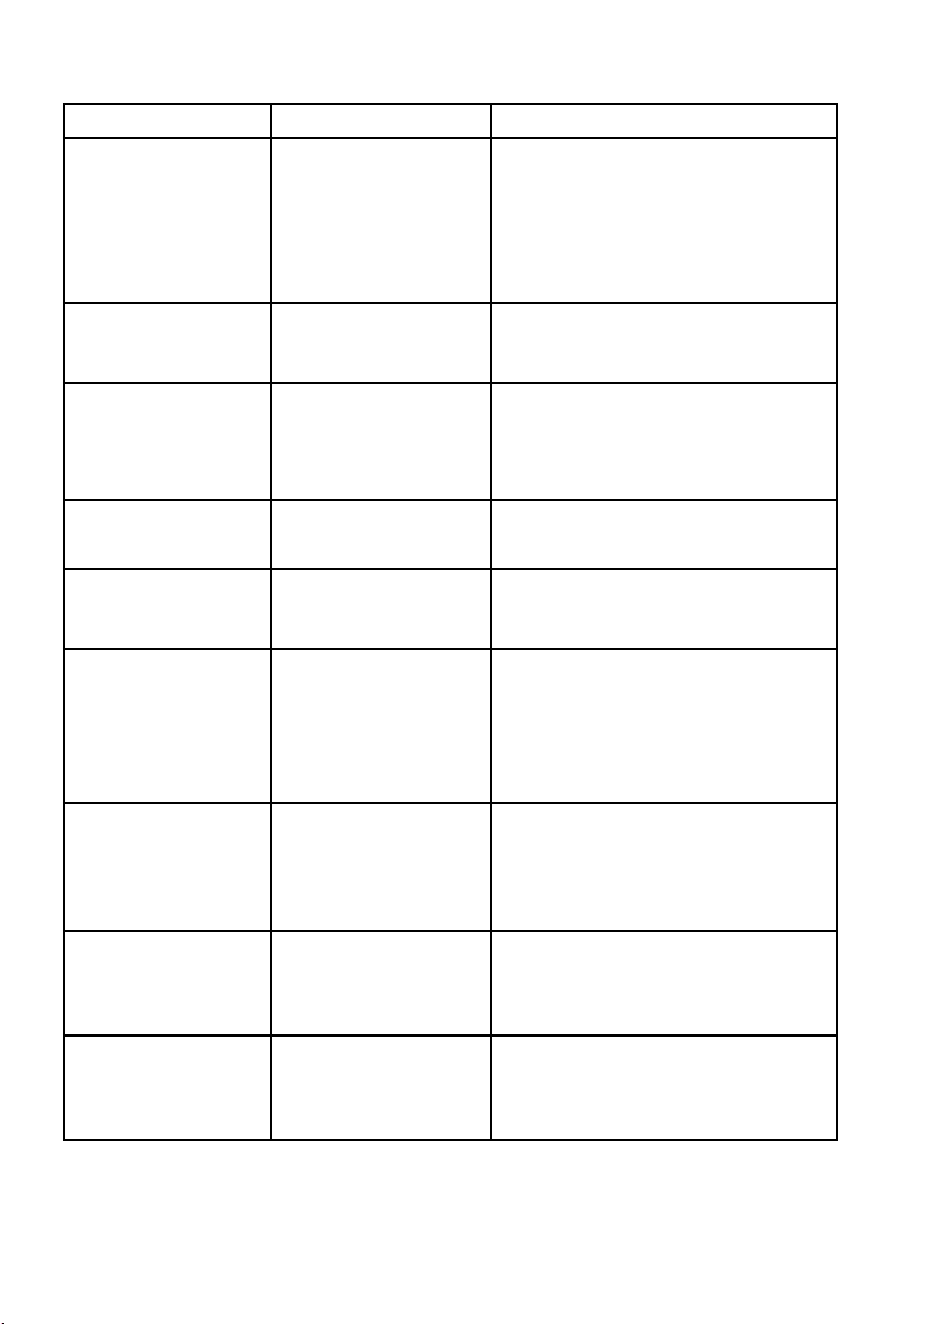
Problem Possible Cause Suggested Solutions
The ice shovel does
not move ice into the
ice basket.
The water tank is not
on a at even surface.
Check that the surface the machine
is on is at and even.
With the machine switched off at
the plug, gently push the ice shovel
using your nger, then press the
power button to restart it.
The compressor
works abnormally
with a buzzing noise
The voltage is lower
than recommended.
Stop the machine and do not restart
it until it’s plugged into the correct
voltage.
Water shortage
indicator light is on.
1. There is no water
2. The pump is full
of air
1. Add to some water until it reaches
MAX position.
2.Press POWER button to restart
the machine.
Indicator lights on
display are not on.
1) No power
2) Blown fuse
1) Turn the power on
2) Replace fuse
The ice made is too
large and with pieces
sticking together.
Ice of previous cycles
left in the water tray.
The ice making
process was correct,
but no ice has come
out.
1. The compressor
has no refrigerant
2. Compressor
damaged
3. Fan motor damaged
Call Duronic Customer Care Team
for advice.
All indicators twinkle
simultaneously.
Water tray is blocked
by ice cubes.
Unplug the power, take out the ice
which blocking the tray, then plug in
the power and press the POWER
button. The machine will restart after
around 3 minutes.
The machine has
been working, but
the water has been
warming up
Solenoid has broken
down
Call Duronic Customer Care Team
for advice
When the ice is full,
the machine does
not display the ICE
FULL icon
‘Ice Full’ sensor is
damaged
Call Duronic Customer Care Team
for advice
Switch off the machine by pressing
the power button and remove the
ice.
12
Warranty
1 Year Guarantee from Shine-Mart Ltd, Trademark owners of Duronic Products.
NOTE: THESE STATEMENTS DO NOT AFFECT YOUR STATUTORY RIGHTS AS A
CONSUMER
This product has been manufactured under the strictest or quality control procedures, and
using the highest quality of materials, to ensure excellent performance and reliability. It will
give very good and long lasting service, provided it is properly used and maintained. The
product is guaranteed for 1 years from the date of original purchase. If any defect arises due
to a faulty materials or poor workmanship, the faulty product must be returned to the original
place of purchase. Refund or replacement is at the discretion of that company.
Duronic Products are offered with a 1 year guarantee under the following conditions:
1. The product must be returned to the retailer with original proof of purchase.
2
. T
he product must be installed and used in accordance with the instruction
s
c
ontained in this operating manual.
3
. I
t must be used only for domestic purposes.
4. It does not cover wear and tear, malicious damage, misuse, neglect,
inexpert repairs or consumable parts.
5
. S
hine-Mart Ltd has no responsibilities for accidental or consequential loss or damage.
6
. S
hine-Mart Ltd are not liable to carry out any type of servicing work
,
u
nder the guarantee
7
. V
alid in the UK only
This product is tted with CE:1363 plug and fuse
Imported by Shine-Mart Ltd, RM3 8SB
Information on waste Disposal for Consumers of
Electrical & Electronic Equipment.
This mark on a product and/or accompanying documents indicates that when it
is to be disposed of, it must be treated as Waste
Electrical & Electronic Equipment, (WEEE).
Any WEEE marked products must not be mixed with general household waste,
but kept separate for the treatment, recovery and recycling of the materials used.
For proper treatment, recovery and recycling; please take all WEEE marked
waste to your Local Authority Civic waste site,
where it will be accepted free of charge.
If customers dispose of Waste Electrical & Electronic Equipment correctly, they
will be helping to save valuable resources and preventing any potential negative
effects upon human health and the environment, of any hazardous materials that
the waste may contain.
13
Manuel d’utilisation en français

14
de sécuritéInstructions
• Cet appareil est conçu pour un usage intérieur. N’utilisez pas à l’extérieur.
• La Machine à Glaçons
ICM120
est conçue pour un usage domestique et ne peut
être utilisé à des fins commerciales.
• Ce produit n’est pas conçu pour être utilisé par des personnes, y compris des
enfants, dont les capacités physiques, sensorielles ou mentales sont limitées ou
qui manquent de savoir et d’expérience, à moins qu’elles ne soient supervisées
ou qu’elles aient reçu les instructions nécessaires à l’utilisation de cet appareil
par la personne responsable de leur sécurité.
• N’utilisez pas l’appareil si le câble ou la prise sont endommagés et/ou ne
fonctionnent pas correctement. Si l’un des deux est abimé, contactez Duronic ou
faites réparer l’appareil par un professionnel.
• Assurez-vous que le voltage soit de 220V-240V/50Hz.
• N’essayez jamais de remplacer des éléments ou réparer l’appareil vous-même.
• Afin de réduire les risques d’électrocutions, n’utilisez jamais ce produit à
proximité d’eau et/ou avec des mains humides, ne renversez pas de liquide sur
l’appareil et ne le submergez pas sous l’eau ou tout autre liquide.
• N’utilisez pas l’appareil près du gaz ou tout autre combustible (comme du
benzène, du diluant pour peinture, du spray, etc.).
• Ne placez pas l’appareil sur ou à proximité d’une gazinière chaude ou d’un four
chaud.
• Gardez l’appareil à 15 cm de distance d’autres objets pour vous assurer que la
chaleur puisse s’échapper des trous d’aération.
• Ne placez pas de rallonge ou d’alimentation portable à proximité ou derrière
l’appareil.
• N’utilisez pas d’accessoires qui ne sont pas recommandés par Duronic.
• N’insérez pas de d’objets étrangers ou électriques dans l’appareil.
• Ne gardez pas de substances explosives comme des bombes aérosols avec
un propulseur inflammable dans ou à côté de cet appareil.
• Débranchez cet appareil après son utilisation et avant de le nettoyer.
VEUILLEZ LIRE ATTENTIVEMENT CE MANUEL AVANT D'UTILISER LE
PRODUIT ET GARDEZ-LE
POUR REFERENCE FUTURE.

15
techniquesSpécications
•
Instructions de sécurité (suite)
Le réfrigérant et l’isolation soufflant du gaz à l’intérieur de cet appareil sont
inflammables. Lorsque vous disposez de cet appareil, disposez-en dans une
déchetterie agréée. N’exposez pas cet appareil aux flammes.
• Lorsque vous nettoyez la Machine à Glaçons, n’utilisez pas d’ustensiles pointus ou
tranchants, de laine d’acier, d’éponges à récurer métalliques ou de nettoyants
abrasifs car cela peut rayer ou endommager l’appareil.
• N’utilisez pas d’eau distillée avec cette Machine à Glaçon. L’eau minérale est
recommandée.
• Lorsque vous déplacez l’appareil, ne l’inclinez pas à un angle plus grand que 45°
et ne le retournez pas. Cela pourrait endommager le compresseur et le système
d’étanchéité.
• Il est normal que la surface du compresseur et condenseur atteigne des
températures comprises entre 70°C et 90°C au cours de l’utilisation et les zones
autours peuvent être très chaudes.
• Dû au processus rapide de congélation, il est normal que les glaçons semblent être
« troublés ». Il s’agit d’air coincé dans l’eau au cours du processus de congélation et
cela n’affecte pas la qualité ou le goût des glaçons.
Caractéristiques :
• Le ICM120 réalise
des glaçons en forme de balle
• Jusqu’à 9 glaçons peuvent être réalisés en 8 minutes
• Production de glaçons quotidienne : 12 kg / 26,5 lbs en 24 heures
• Capacité de stockage de glaçons : 1,5 L / 600 g
• Réfrigérant : R600a
• Niveau de bruit : +- 60 dB (A) (niveau de bruit ambiant : +- 17 dB (A) )
• Signal lorsque le panier à glaçon est rempli et le niveau d’eau est insuffisant.
MODÈLE
CAPACITE DU
RESERVOIR
D'EAU
DIMENSIONS
ICM120
120W 220-240V /
50Hz
1,5L 22,4 x 30,8 x
28,3cm
PUISS-
ANCE
TENSION

16
1. Micro commutateur
2. Evaporateur
3. Bac à eau
4. Pelle à glaçons
5. Panier à glaçons
6. Réservoir d’eau
1
2
3
4
5
6
7
11
12
13
14
15
8
9
10
Bouchon de drainage
8. Panneau de contrôle
9. Boîtier avant
10. Cuillère à glaçons
11. Revêtement supérieur
12. Couvercle transparent
7.
Aperçu des éléments
13. Moteur
14. Boîtier arrière
15. Aération
17
•
Avant la première utilisation
Le panneau de contrôle
Comment fonctionne la Machine à Glaçons
Avant la première utilisation, retirez le produit de son emballage et vérifiez
prudemment que l’appareil, le câble d’alimentation et la prise ne soient pas
endommagés.
• L’appareil doit être positionné sur une surface plate. Pour assurer une
ventilation suffisante, la distance entre l’arrière de l’appareil et le mur ou un
autre objet doit être au moins 15 cm. Il ne doit pas être positionné à
proximité d’un four, radiateur ou toute autre source de chaleur.
• Avant d’utiliser l’appareil pour la première fois, laissez le couvercle
transparent ouvert pendant au moins deux heures.
• N’utilisez pas d’eau distillée. Nous recommandons de l’eau minérale.
• Lorsque
FAIRE DES GLACONS
vous branchez l’appareil, l’indicateur ICE MAKING s’allumera
brièvement.
• Appuyez sur la touche d’alimentation pour allumer la Machine à Glaçons.
L’indicateur ICE MAKING restera alors allumé et la Machine commencera à
produire des glaçons.
• Une fois la première fournée de glaçons réalisée, le processus de déglaçage
s’activera suite à quoi la pelle à glaçons déplacera les glaçons dans le panier.
Il y a trois indicateurs lumineux et une touche sur le panneau de contrôle :
ICE FULL
ADD WATER
ICE MAKING
Le panier à glaçons est rempli
Ajoutez de l’eau dans le réservoir
Des glaçons sont en train d’être
produits
Touche d'alimentation

18
1.
Comment utiliser la Machine à Glaçons
Ouvrez le couvercle transparent, retirez le panier à glaçons et ajoutez de l’eau
dans le réservoir. Ne dépassez pas la capacité maximale indiquée.
Utilisez de l’eau froide ou à température ambiante pour remplir le réservoir. Ne le
remplissez pas avec de l’eau chaude.
Si la quantité d’eau est supérieure à la capacité maximale du réservoir, il vous
faudra drainer un peu d’eau. Vous pouvez drainer l’eau en ouvrant le bouchon de
drainage par-dessus un évier ou un contenant et en laissant sortir de l’eau.
2. Placez à nouveau le panier à glaçons dans l’appareil.
3. Refermez le couvercle transparent.
4. Branchez la prise de l’appareil et appuyez sur la touche d‘alimentation pour
allumer la Machine.
5. La Machine commencera à produire des glaçons.
6. L’indicateur ICE MAKING restera allumé pendant que la Machine produit des
glaçons.
AJOUTER DE L’EAU
• Lorsque l’indicateur ADD WATER devient rouge, cela signifie qu’il n’y a plus
assez d’eau dans le réservoir. Vous devez alors ajouter de l’eau, sans dépasser
la capacité maximale indiquée par une ligne, et appuyez sur la touche
d’alimentation pour redémarrer la Machine à Glaçons.
•
LE PANIER EST REMPLI
Lorsque le panier à glaçons est rempli au maximum de sa capacité,
l’indicateur ICE FULL s’allumera et l’appareil s’éteindra automatiquement. Il
vous faudra alors vider le panier à l’aide de la cuillère à glaçons.
• Une fois que le capteur détectera que le panier est vide, l’appareil redémarra
automatiquement et continuera à faire des glaçons.
Ne remplissez pas le réservoir directement à partir d’un robinet.
Lorsque vous remplissez le réservoir, veuillez utiliser une bouteille
ou une cruche pour verser l’eau.

19
7. Une fois que le panier à glaçons sera rempli, la machine s’éteindra
automatiquement. Une fois que vous aurez vidé le panier à l’aide de la
cuillère, l’appareil recommencera à produire des glaçons automatiquement.
8. Une fois que vous avez fini de faire des glaçons, éteignez l’appareil en
appuyant à nouveau sur la touche d’alimentation et débranchez la prise.
Nettoyez fréquemment l’intérieur de l’appareil (panier à glaçons, réservoir
d’eau et pelle à glaçons) ainsi que la cuillère à glaçons.
Comment nettoyer votre Machine à glaçons :
1.
Nettoyage et maintenance
Eteignez l’appareil et laissez-le déglacer pendant 2 à 3 heures. N’utilisez
pas d’appareils mécaniques ou toute autre chose pour accélérer ce
processus.
2. Avant le nettoyage, débranchez la prise de l’appareil et retirez tous
glaçons qui se trouveraient dans le panier.
3. Diluez du vinaigre blanc dans de l’eau et utilisez cette solution pour
nettoyer l’intérieur et l’extérieur de la Machine à l’aide d’un tissu. N’utilisez
pas de produits chimiques ou d’agents dilués comme des acides, de
l’essence ou de l’huile sur l’appareil.
4. Après avoir utilisé la solution d’eau et de vinaigre, rincez abondamment
votre tissu, essoré-le et essuyez à nouveau l’intérieur et l’extérieur de la
Machine afin d’enlever la solution.
5. Laissez la Machine sécher à l’air. Ne bloquez pas les aérations de
l’appareil. Assurez-vous que celui-ci soit tout à fait sec avant de le ranger ou
de l’utiliser à nouveau.
Pour vous assurer d’avoir toujours des glaçons frais, changez l’eau du
réservoir au moins une fois par jour. Si vous n’avez pas l’intention d’utiliser
l’appareil pendant une longue période, drainer l’eau du réservoir et nettoyer la
Machine à glaçons avant de la ranger.
Notez : Si la source d’électricité est accidentellement déconnectée alors
que la machine réalise des glaçons, des petits morceaux de glace sont
susceptibles de se former et de se loger sur la pelle à glaçons. Si cela se
produit, débranchez l’appareil et poussez délicatement la pelle vers le fond
de l’appareil afin de retirer les morceaux de glace. Redémarrez ensuite
l’appareil de façon normale.
Dépannage
20
Problème
L’appareil n’est pas
placé sur une
surface plate et à
niveau.
Vérifiez que la surface sur laquelle
vous avez posé votre appareil est
plate et à niveau.
Alors que l’appareil est éteint,
poussez délicatement la pelle avec
vos doigts. Allumez ensuite
l’appareil.
L’indicateur
lumineux de pénurie
en eau est allumé.
1. Allumez le courant.
2. Remplacez le fusible.
Le bac à eau est
bloqué par des
glaçons.
Débranchez l’appareil, retirez les
glaçons qui bloquent le bac et
rallumez ensuite la Machine. Elle
redémarrera après environ 3
minutes.
Lorsque le panier à
glaçons est rempli,
l’indicateur ne
s’allume pas.
Raison possible
Solution suggérée
La pelle à glaçons
ne déplace pas les
glaçons dans le
panier.
Le compresseur
produit un
bourdonnement.
La tension est plus
basse que celle
recommandée.
Arrêtez la Machine et ne la
redémarrez que lorsqu’elle sera
branchée sur la tension adéquate.
1. Il n’y a plus d’eau
dans le réservoir.
2. La pompe est
remplie d’air.
1. Ajoutez de l’eau dans le réservoir.
2. Appuyez sur la touche
d’alimentation pour redémarrer
l’appareil.
Les indicateurs ne
s’allument pas.
1. Il n’y a pas de
courant.
2. Un fusible a grillé.
Les glaçons réalisés
sont trop grands et ils
sont collés entre eux.
Des glaçons des cycles
précédents sont restés
dans le bac à eau.
Eteignez l’appareil et retirez les
glaçons.
Le processus de
réalisation des
glaçons est correct
mais les glaçons ne
se sont pas formés.
1. Le compresseur n’a
pas de réfrigérant.
2. Le compresseur est
endommagé.
3. Le ventilateur est
endommagé.
Contactez le service clientèle de
Duronic pour des conseils.
Les indicateurs
clignotent tous
simultanément.
La Machine
fonctionne mais l’eau
s’est réchauffée.
Le solénoïde est
cassé.
Contactez le service clientèle de
Duronic pour des conseils.
Contactez le service clientèle de
Duronic pour des conseils.
L’indicateur « ICE
FULL » est
endommagé.
21
Garantie et service après-vente
1 an de garantie de la part de Shine-Mart Ltd, propriétaire de la marque Duronic.
NOTE : CES DÉCLARATIONS N’AFFECTENT EN RIEN VOTRE DROIT STATUTAIRE EN
TANT QUE CONSOMMATEUR
Ce produit a été produit en suivant les procédures de contrôle de qualité les plus strictes en
utilisant des matériaux de qualité pour assurer une excellente durabilité et performance.
Cette centrifugeuse vous offrira de longues années de service tant que vous utilisez
correctement cette machine et suivez les instructions de maintenance contenues dans ce
manuel. Ce produit est garanti pour 1 an à partir de la date originelle d’achat. Si ce produit
était endommagée en raison d’un problème électrique ou d’une fabrication imparfaite,
le produit défectueux peut être remplacé au vendeur à la discrétion de la marque sous
conditions:
1
. L
e produit doit être retourné avec la preuve originale d’achat.
2
. L
e produit doit être installé et utilisé en accord avec les instructions contenue
s
d
ans ce manuel d’utilisation.
3
. L
e produit doit être réservé à un usage privé.
4
. L
a garantie ne protège pas contre les dommages dus à l’usure normale
,
l
’utilisation malveillante, la mauvaise utilisation, la négligence, les réparation
s
c
onduites par des non-experts ainsi que les pièces consommables.
5
. S
hine-Mart Ltd ne porte pas de responsabilité pour tout dommage ou pert
e
a
ccidentel ou conséquent causé par ce produit.
6
. S
hine-Mart Ltd se dégage de toute responsabilité en matière de réparatio
n
d
urant la période de garantie.
7
. V
alide dans toute l’Union Européenne.
Ce produit est fourni avec une prise européenne
et un fusible de 3 ampères.
Importé par Shine-Mart Ltd, RM3 8SB.
Ce symbole apparaît sur le produit et/ou les documents accompagnant ce
produit pour indiquer que pour procéder à la destruction de ce produit, celui-ci
doit être traité comme un déchet électrique et électronique (WEEE).
Les produits marqués WEEE ne doivent être mélangés avec les déchets
ménagers et doivent être séparés pour traitement et recyclage des composants.
An de traiter et recycler ce produit, veuillez déposer tous les composants
marqués WEEE au site de recyclage le plus proche où ce produit sera repris
gratuitement. Si les clients jettent les déchets électriques et électroniques
WEEE correctement, ce geste aidera la préservation de ressources précieuses
et prévient les potentiels effets négatifs que ces composants ou tout autre
composant dangereux ont sur la santé humaine et l’environnement.
Garantie
suivez nous
www.duronic.com @Duronic_FranceDuronic France@duronic_france

22
Gebrauchsanleitung auf Deutsch

23
•
Sicherheitshinweise
•
•
•
•
•
•
•
Dieses Gerät ist nur für den Innen- / Haushaltsgebrauch bestimmt. Nicht im
Freien verwenden.
Die Eiswürfelmaschine I C
M120 ist nicht für den gewerblichen Gebrauch
gedacht.
Dieses Gerät ist nicht für die Verwendung durch Personen (einschließlich
Kinder) mit eingeschränkten körperlichen, sensorischen oder geistigen
Fähigkeiten oder mangelnder Erfahrung und Kenntnis vorgesehen, es sei
denn, sie wurden von einer für ihre Sicherheit verantwortlichen Person
beaufsichtigt oder in Bezug auf die Verwendung des Geräts angewiesen .
Nutzen Sie dieses Gerät nicht, wenn das Netzkabel oder der Stecker
beschädigt sind. Wenn einer der beiden beschädigt ist, senden Sie die
Maschine zur Wartung oder Reparatur durch einen professionellen
Techniker an Duronic zurück.
Stellen Sie sicher, dass die Netzstromversorgung 220-240 V / 50 Hz beträgt.
Versuchen Sie nicht, Teile auszutauschen und das Gerät selbst zu reparieren.
Um das Risiko eines Stromschlags zu verringern, nutzen Sie dieses Produkt
nicht in der Nähe von Wasser oder mit nassen Händen, keine Flüssigkeit auf
das Gerät verschütten oder in Wasser oder eine andere Flüssigkeit tauchen.
Verwenden Sie die Eiswürfelmaschine nicht in der Nähe von Gas oder
anderen brennbaren Materialien (wie Benzol, Farbverdünner, Sprays
usw.).
•
•
Stellen Sie das Gerät nicht auf oder in der Nähe von Wärmequellen oder
auf einen beheizten Ofen.
Halten Sie die Maschine 15 cm von anderen Gegenständen entfernt, um
sicherzustellen, dass die Wärme aus den Lüftungsschlitzen entweichen
kann.
•
Stellen Sie keine Verlängerungskabel oder tragbaren Netzteile in die
Nähe oder hinter das Gerät.
•
Verwenden Sie kein Zubehör, das nicht von Duronic empfohlen wird.
• Führen Sie keine Fremdkörper oder elektrischen Gegenstände in das Gerät
ein.
•
Lagern Sie keine explosiven Substanzen wie Aerosoldosen mit einem
brennbaren Treibmittel in oder neben diesem Gerät.
BITTE LESEN SIE DIESES
HANDBUCH SORGFÄLTIG DURCH, BEVOR SIE DAS
GERÄT VERWENDEN UND FÜR ZUKÜNFTIGES NACHSCHLAGEN
AUFBEWAHREN

24
•
Sicherheitshinweise
Spezifikationen
•
Das Kältemittel und die Isolierung, die das Gas in dieser Maschine
blasen, sind brennbar. Wenn Sie das Gerät entsorgen, tun Sie dies nur
in einem autorisierten Entsorgungszentrum. Setzen Sie das Gerät
keinen Flammen aus.
Trennen Sie das Gerät nach dem Gebrauch oder vor der Reinigung vom
Stromnetz.
•
Verwenden Sie zum Reinigen der Eismaschine keine scharfen Utensilien,
Stahlwolle, Scheuerschwämme oder Scheuermittel, da diese das Gerät
zerkratzen oder beschädigen können.
•
Verwenden Sie in dieser Maschine kein destilliertes Wasser. Mineralwasser
wird empfohlen.
•
Eigenschaften:
•
•
•
•
•
Der ICM120 stellt kugelförmige Eiswürfel her
In 8 Minuten können bis zu 9 Eiswürfel hergestellt werden
Tägliche Eisleistung: 12 kg pro 24 Stunden
Kapazität: 1,5 l / 600 g
Kältemittel: R600a
Geräuschpegel: ≦
60dB(A) [Umgebungsgeräuschpegel ≦17dB(A)]
•
Informiert, wenn der Eiskorb voll ist und der Wasserstand nicht ausreicht.
MODELL
ICM120
120W 220-240V /
50Hz
1,5 L 22.4 x 30.8 x
28.3cm
KAPAZITÄT
GRÖßE
SPANNUNGS
- WERT
LEISTUNG
• Kippen Sie die Maschine beim Bewegen des Geräts nicht mehr als 45 Grad
und drehen Sie sie nicht um. Dies kann den Kompressor und das
Dichtungssystem beschädigen.
• Es ist normal, dass der Kompressor- und Kondensatoroberfläche während
des Betriebs Temperaturen zwischen 70 ° C und 90 ° C erreicht und die
Umgebung sehr heiß sein kann.

25
1. Mikroschalter
2. Verdampfer
3.
4.
Wasserschale
Eisschaufel
5. Eiskorb
6.
1
2
3
4
5
6
7
11
12
13
14
15
8
9
10
7.
Wassertank
8.
Ablassschraube
9.
Bedienfeld
10.
Vorderes Gehäuse
11.
Eisschaufel
12.
Obere Abdeckung
Komponente
Transparenter Deckel
13. Motor
14. Hinteres
15.
Gehäuse
Entlüftung
26
•
Vor dem ersten Gebrauch
Systemsteuerung
Vor dem ersten Gebrauch
Entfernen Sie vor dem ersten Gebrauch alle Verpackungsmaterialien,
überprüfen Sie die Maschine sorgfältig und stellen Sie sicher, dass die
Maschine, das Netzkabel und der Stecker nicht beschädigt sind.
•
Die Maschine sollte auf einer ebenen Oberfläche positioniert werden. Um eine
ausreichende Belüftung zu gewährleisten, sollte der Abstand der Rückseite der
Eismaschine zur Wand und den umgebenden Gegenständen mindestens 15
cm betragen. Es sollte nicht in der Nähe eines Ofens, eines Heizkörpers oder
einer anderen Wärmequelle aufgestellt werden.
•
Stellen Sie die Maschine vor dem ersten Gebrauch auf und lassen Sie die
transparente Abdeckung mindestens zwei Stunden lang offen.
•
•
Verwenden Sie kein Destilliertes Wasser. Mineralwasser wird empfohlen.
EISHERSTELLUNG
•
Wenn Sie die Eismaschine anschließen, blinkt die Anzeige ICE
MAKING.
Drücken Sie den Einschalter, um die Maschine einzuschalten. Die ICE
MAKING-Anzeigelampe leuchtet weiter und die Maschine beginnt mit der
Herstellung von Eiswürfeln.
•
Nachdem die ersten Eiswürfel hergestellt wurden, wird die Enteisung
aktiviert, gefolgt von der Eisschaufel, die das Eis in den Eiskorb
befördert.
Auf dem Bedienfeld befinden sich 3 leuchte Anzeigen und 1 Taste:
ICE FULL
ADD WATER
ICE MAKING
Eis voll Alarm
Wassermangelalarm
Eis wird produziert
Ein/Aus Schalter

27
1.
Verwendung
Öffnen Sie den transparenten Deckel, nehmen Sie den Eiskorb
heraus und geben Sie Wasser in den Wassertank. Das Wasser
sollte die MAX-Marke nicht überschreiten.
Verwenden Sie entweder kaltes Wasser oder Wasser mit
Raumtemperatur, um den Tank zu füllen. Füllen Sie den Tank nicht
mit heißem Wasser.
Wenn das Wasser die MAX-Marke überschreitet, müssen Sie etwas
Wasser ablassen. Sie tun dies, indem Sie die untere Ablassschraube
öffnen und etwas Wasser ablassen.
2.
Setzen
3.
Sie den Eiskorb wieder in die Maschine ein und schließen Sie den
Deckel.
Starten Sie die Maschine.
4. Die Maschine beginnt mit der Herstellung von Eiswürfeln.
5. Die ICE MAKING-Anzeigelampe leuchtet auf, während die Maschine
die Eiswürfel herstellt.
6.
Wenn der Eiskorb voll ist, stoppt die Maschine automatisch. Entfernen Sie
die Eiswürfel mit der Eisschaufel. Die Maschine startet dann neu und stellt
weiterhin Eiswürfel her.
•
WASSER HINZUFÜGEN:
Wenn die Anzeige WASSER HINZUFÜGEN rot leuchtet, befindet sich
nicht mehr genügend Wasser im Tank. Sie müssen mehr Wasser
hinzufügen und dann den Netzschalter drücken, um die Maschine neu
zu starten.
•
EIS VOLL:
Wenn die Eiswürfel den Eiskorb füllen und die maximale Kapazität
erreichen, blinkt die Anzeige ICE FULL und die Maschine stoppt
automatisch. Sie müssen dann den Eiskorb mit der Eisschaufel leeren.
•
Sobald der Sensor in der Maschine erkennt, dass der Eiskorb leer ist,
startet die Maschine automatisch neu und stellt weiterhin Eiswürfel
her.
! Füllen Sie den Tank nicht direkt aus dem Wasserhahn.
Verwenden Sie zum Nachfüllen des Wassertanks eine Flasche
oder einen Krug, um Wasser hinein zu gießen.

28
7.
Wenn Sie mit der Herstellung der Eiswürfel fertig sind, schalten Sie die
Maschine aus, indem Sie den Netzschalter erneut drücken. Schalten Sie
die Steckdose aus und ziehen Sie das Kabel aus der Steckdose.
Reinigen Sie das Innere der Maschine (Eiskorb, Wassertank, Eisschaufel)
und die Eisschaufel regelmäßig.
So reinigen Sie Ihre Eismaschine:
1.
Reinigung und Wartung
2.
Schalten Sie die Maschine aus und lassen Sie sie 2-3 Stunden lang
enteisen. Verwenden Sie keine mechanischen Geräte oder andere
Mittel, um den Abtauvorgang zu beschleunigen.
Ziehen Sie vor dem Reinigen den Netzstecker aus der Steckdose und
entfernen Sie alle Eiswürfel aus dem Eiskorb.
3.
Verwenden Sie eine verdünnte Lösung aus Wasser und weißem Essig, um die
Innen- und Außenfläche der Maschine mit einem Tuch zu reinigen. Verwenden
Sie keine Chemikalien oder verdünnten Mittel wie Säuren, Benzin oder Öl für
die Maschine.
4.
5.
Nachdem Sie die Maschine mit der Wasser / Essig-Lösung
abgewischt haben, spülen Sie das Tuch mit Wasser ab und wischen
Sie dieselben Teile erneut ab, um die Lösung zu entfernen.
Lassen Sie die Maschine lüften und gründlich trocknen. Halten Sie die
Lüftungsöffnungen in / an der Maschine frei von Hindernissen.
Wechseln Sie mindestens einmal täglich das Wasser im Reservoir, um
sicherzustellen, dass das Eis frisch ist. Wenn Sie die Maschine längere
Zeit nicht benutzen möchten, lassen Sie das Wasser ab und reinigen Sie
die Maschine, bevor Sie sie aufbewahren.
Hinweis: Wenn die Stromversorgung versehentlich unterbrochen wird,
während die Maschine während eines Eisherstellungszyklus eingeschaltet
ist, können sich kleine Eisspäne bilden und in der Eisschaufel stecken
bleiben. Überprüfen Sie in diesem Fall, ob die Maschine an der Steckdose
ausgeschaltet ist, und schieben Sie die Schaufel vorsichtig nach hinten zur
Rückseite der Maschine, um Eisspäne zu entfernen. Starten Sie dann die
Maschine wie gewohnt neu.
Fehlerbehebung

29
Das Gerät befindet
sich nicht auf einer
ebenen Fläche.
Überprüfen Sie, ob die Oberfläche der
Maschine flach und eben ist.
Drücken Sie bei ausgeschalteter
Maschine am Stecker vorsichtig mit
dem Finger auf die Eisschaufel und
drücken Sie dann den Netzschalter,
um sie neu zu starten.
Wassermangelanzeige
Indicator lights on
display are not on.
1) No power
2) Blown fuse
1) Turn the power on
2) Replace fuse
The Ice made is too
large and with pieces
sticking together.
Ice of previous cycles
left in the water tray.
Take out the ice under the standby
state.
The ice making
process was correct,
but no ice has come
out.
1. The compressor
has no refrigerant
2. Compressor
damaged
3. Fan motor damaged
Call Duronic Customer Care Team
for advice.
Die Wasserschale ist
durch Eiswürfel
blockiert.
Ziehen Sie den Netzstecker, nehmen
Sie das Eis heraus, schließen Sie
das Gerät an und drücken Sie die
POWER-Taste. Die Maschine startet
nach ca. 3 Minuten.
Wenn das Eisfach
voll ist, wird das
ICE FULL-Symbol
nicht angezeigt
Problem Mögliche Ursache
Lösungsvorschläge
Die Eisschaufel
bewegt kein Eis in
den Eiskorb.
Der Kompressor
arbeitet abnormal mit
einem Geräusch
Die Spannung ist
niedriger als
empfohlen
Maschine stioppen und erneut
starten, wenn sie an die richtige
Spannung angeschlossen ist.
1. Kein Wasser
2. Die Pumpe ist
voller Luft
1. Etwas Wasser hinzufügen, bis
die maximale Position erreicht ist.
2.Drücken Sie die POWER-Taste,
um das Gerät neu zu starten
Alle Anzeigelampen
leuchten gleichzeitig
Die Maschine hat
funktioniert, aber
das Wasser hat
sich erwärmt
Magnet ist
ausgefallen
Kontaktieren Sie Duronic
Ice Full Sensor ist
beschädigt
Kontaktieren Sie Duronic
30
Shine-Mart Ltd, der Markeninhaber von Duronic Produkten, bietet 1 Jahr Gewährleistung.
HINWEIS: DIESE BEDINGUNGEN BEEINFLUSSEN IHRE GESETZLICHE RECHTE ALS
VERBRAUCHER NICHT
Dieses Produkt wurde unter strengen Qualitätskontrollen produziert und aus hochwertigen
Materialien hergestellt, um ausgezeichnete Leistung und Zuverlässigkeit zu gewährleisten.
Sofern das Produkt korrekt benutzt und gewartet wird, kann eine langlebige Lebensdauer
erwartet werden.
Das Produkt hat eine Gewährleistung von einem Jahr ab Kaufdatum. Beim Auftreten eines
Schadens, der von fehlerhalten Materialien oder Verarbeitung verursacht wurde, sollte das
defekte Produkt an den ursprünglichen Verkäufer zurückgegeben werden. Die Erstattung
oder Umtausch erfolgt nach Vorschriften des Unternehmens.
Duronic Produkte haben 1 Jahr Gewährleistung unter folgenden Bedingungen:
1. Das Produkt muss mit dem Kaufnachweis zurückgegeben werden.
2.
D
as Produkt muss unter den Anweisungen und Anleitungen installiert und benutz
t
w
orden sein.
3.
E
s muss ausschließlich für den Hausgebrauch genutzt worden sein.
4.
N
atürliche Abnutzung oder Verschleiß, böswillige Beschädigung, Missbrauch,
Vernachlässigung und unsachgemäße Reparaturen sind von der Gewährleistung
ausgeschlossen.
5.
S
hine-Mart Ltd übernimmt keine Verantwortung für zufällige oder Folgeschäden.
6. Shine-Mart Ltd ist nicht für Wartungsarbeiten zuständig. Diese fallen nicht unter die
Ge
währleistung.
7.
G
ültig in der EU
Dieses Produkt ist mit tted CE geprüfte Typ-F
Euro Stecker/BS Stecker ausgestattet
Von Shine-Mart Ltd, RM3 8SB importiert
Information über Abfalllagerung für Verbraucher von elektronischen Geräten.
Dieses Zeichen auf dem Produkt und/oder auf mitgelieferte Dokumenten
zeigt, dass, wenn eine Entsorgung erfolgt, das Gerät an einer Elektro- und
Elektronikgeräte-Abfall-Sammelstelle (WEEE) abgegeben werden muss.
Um eine weitere Behandlung und Weiterverarbeitung der Materialien zu
gewährleisten dürfen diese WEEE-markierten Produkte nicht mit dem Hausmüll
vermischt werden.
Für die korrekte Behandlung, Aufbereitung und Wiederverwendung geben Sie
alle WEEE-markierten Produkte zur kommunalen Abfallbeseitigungsanlage.
Dort können Sie diese kostenlos abgeben.
Wenn die Beseitigung von Elektro-und Elektronik-Altgeräten korrekt
durchgeführt wird, tragen Sie zur Gewinnung von wertvollen Ressourcen
bei, sowie einer möglichen Vermeidung von negativen Auswirkungen auf
Gesundheit und Umwelt.
Gewährleistung
Folgen Sie Uns
31
Manual De Instrucciones En Español

32
•
Instrucciones de seguridad
•
Utilice este aparato en un espacio interior/doméstico. No se recomienda su
uso en el exterior.
•
Este aparato no se ha creado con un fin comercial o industrial. Su uso es
doméstico.
•
No se recomienda la operación de este aparato por personas adultas o niños
con capacidades físicas, sensoriales o mentales reducidas a menos que se
encuentren bajo la supervisión de una persona responsable de su seguridad.
•
Nunca utilice el aparato si el cable o la unidad no funcionan correctamente.
Si el calefactor o el cable se ha estropeado, devuélvalo al servicio de Duronic
o póngase en contacto con un técnico profesional para repararlo.
•
Conecte la máquina sólo a una toma de corriente con la tensión y la frecuencia
indicadas en la etiqueta del aparato (220-240V / 50Hz).
•
No intente reemplazar alguna pieza o reparar el aparato usted mismo.
•
Para evitar el riesgo de descarga eléctrica, nunca utilice este producto cerca
del agua, con las manos mojadas, no derrame líquidos sobre el aparato ni lo
sumerja en agua o cualquier otro líquido.
No lo use en zonas donde haya gasolina, pintura o líquidos inflamables.
•
•
No coloque el aparato cerca de un horno precalentado ni zonas con gas.
Para evitar que la máquina para hacer hielos se sobrecaliente, deje un
espacio de 15 centímetros en las zonas de ventilación de esta.
•
No ponga ningún cable de extensión o fuente de alimentación portátil
cerca o detrás del aparato.
•
No utilice ningún accesorio que no se incluya con el aparato, ya que puede
dañarlo.
• No inserte objetos extraños o eléctricos en el aparato.
•
Nunca deposite substancias como aerosoles o productos con gases
inflamables cerca o dentro del aparato.
•
El gas refrigerante y aislante que circula dentro de esta máquina es inflamable.
Si deshecha el aparato, hágalo en el contenedor o lugar correspondiente. No
exponga el aparato al fuego.
• Tras su uso, cuando se vaya a limpiar o cambiar de sitio, desconecte siempre
el aparato de la toma de corriente.
Lea este manual con atención y consérvelo para futuras consultas
33
•
Instrucciones de seguridad
Especificaciones
•
Use agua mineral, no agua destilada.
Cuando mueva el aparato de sitio, no incline la máquina más de 45
grados y no ponga la máquina al revés. Esto puede dañar el compresor
y el sistema de cierre.
•
Es normal que la superficie del compresor y el condensador alcancen altas
temperaturas de hasta 70 y 90 grados centígrados mientras la máquina
esté en uso. También puede que la superficie cercana se caliente.
•
Debido al rápido proceso de congelación, puede aparecer humo al extraer
los hielos, lo cual es algo normal. Se trata de aire condensado debido al
cambio brusco de la temperatura. Este no afecta al sabor ni calidad de los
hielos.
•
Características:
•
Crea cubitos de hielo semi ovalados.
•
Se pueden hacer hasta 9 cubitos cada 8 minutos.
•
Capacidad de producción de hielo diaria: 12 kg cada 24 horas.
•
Capacidad de almacenamiento de hielo: 1.5L /600g
•
Tipo de refrigerante necesario: R600a.
Nivel de ruido: ≦60dB(A) [ruido ambiente ≦17dB(A)]
•
Avisa cuando la cubitera está llena y el depósito de agua se está
agotando.
CAPACIDAD
DEPÓSITO
DE AGUA
ICM120
120W 220-240V /
50Hz
1.5L 22.4 x 30.8 x
28.3cm
MODELO
POTENCIA
VOLTAJE DIMENSIONES
A la hora de limpiar la máquina, no utilice utensilios afilados, estropajos
de acero ni productos de limpieza abrasivos.
•

34
1. Micro
2.
interruptor
Condensador
3.
4.
Bandeja del agua
Recolector
5.
de hielos
Cubitera
6.
1
2
3
4
5
6
7
11
12
13
14
15
8
9
10
7.
Depósito de agua
8.
Entrada tubo drenaje
9.
Panel de control
10.
Parte frontal
11.
Pala recogedora de hielo
12.
Tapa superior
Partes
Tapa transparente
13. Motor
14. Parte
15.
trasera
Rejillas de ventilación

35
•
Antes del primer uso
Panel de control
Antes del primer uso
Retire el embalaje y, con cuidado, compruebe que la máquina, el cable
de alimentación y el enchufe están en perfectas condiciones.
•
Asegúrese de colocar el aparato en una superficie plana. Para permitir
que haya ventilación, deje 15 centímetros de separación entre la pared
o cualquier objeto cercano a las rejillas de ventilación de la máquina.
Nunca coloque el aparato cerca de un horno, radiador o cualquier
fuente de calor.
•
Previamente a su primer uso, monte el aparato y deje la tapa transparente
levantada durante 2 horas.
•
•
Se recomienda el uso de agua mineral. Nunca use agua destilada.
ICE MAKING – HACER HIELO
•
Al conectar la máquina, la luz Ice making parpadeará.
Presiona el botón de arranque. La luz Ice making se iluminará para
indicar que la máquina está en funcionamiento.
•
Después de que la primera tanda de hielos se haya hecho, el
condensador empezará a descongelarse y el recogedor empujará los
hielos haciendo que estos caigan en la cubitera.
En este panel encontrará 3 luces indicadoras y un botón de uso:
ICE FULL
ADD WATER
ICE MAKING
La cubitera está llena
Hay que añadir agua
Se está haciendo hielo
Botón de arranque

36
1.
Instrucciones de uso
Abra la tapa transparente, saque la cubitera y añada agua en el
depósito. Nunca sobrepase la línea máxima de agua.
Use agua a temperatura ambiente o fría, nunca agua caliente.
Si excede la capacidad máxima de agua, tendrá que vaciar el
depósito un poco. Para ello, abra el tapón del tubo de drenaje para
dejar que salga el agua que sobra.
2.
Vuelva
3.
a colocar la cubitera en la máquina y cierre la tapa.
Enchufe la máquina.
4. Pulse el botón de arranque.
5. La máquina empezará a hacer hielos.
6. La luz Ice making permanecerá encendida mientras la máquina esté
funcionando.
7.
Cuando la cubitera esté llena, la máquina se parará de forma automática.
Vacíe la cubitera con ayuda de la pala para que la máquina vuelva a
iniciarse.
•
ADD WATER – AÑADIR AGUA
Si la luz Add water se pone roja, es señal de que no hay agua suficiente en
el depósito. Tendrá que añadir más agua y reiniciar la máquina pulsando el
botón de arranque.
•
ICE FULL – CUBITERA LLENA
Si la cubitera llega a su capacidad máxima de hielos, la luz Ice full
parpadeará y la máquina dejará de funcionar automaticamente. Para
seguir haciendo hielos, tendrá que vaciar la cubitera con la pala.
•
Tendrá que esperar a que el sensor de la cubitera detecte que está
vacía para que la máquina empiece a funcionar de nuevo.
Nunca rellene el depósito directamente de un grifo. Ayúdese de
una jarra o botella.

37
8.
Una vez haya acabado, apague la máquina pulsando el botón de
arranque y desconectela de la corriente.
Se recomienda una limpieza frecuente de la cubitera, el depósito de agua y
el recogedor de hielos.
Cómo limpiar la máquina de forma adecuada:
1.
Limpieza y mantenimiento
2.
Apague la máquina y deje que se descongele durante 2-3 horas. No
use ningún aparato para ayudar a acelerar este proceso.
Antes de limpiar la máquina, desconectela y asegúrese de que la
cubitera está vacía.
3.
Con ayuda de un trapo, agua y vinagre limpie el interior y el exterior de
la máquina. Nunca use productos químicos abrasivos, ácidos, gasolina
o aceites.
4.
5.
Después de haber usado la disolución de agua y vinagre para limpiar,
enjuague el trapo y páselo de nuevo para limpiar del todo la máquina.
Deje que la máquina se seque por sí sola y asegúrese siempre de dejar
los conductos de ventilación abiertos.
Para asegurarse de que los hielos que se hacen son frecos, cambie el agua
del depósito con frecuencia. Si no planea usar la máquina durante un largo
periodo de tiempo, vacíe el depósito de agua y limpie la máquina antes de
guardarla.
Aviso: si se desconecta accidentalmente la fuente de alimentación mientras la
máquina está en funcionamiento, pueden formarse pequeños trozos de hielo
en el recolector. Si esto ocurre, desconecte la máquina y retire los trozos de
hielo con cuidado. Una vez hecho esto, podrá volver a usar la máquina.
Resolución de problemas
38
El depósito de agua
no se encuentra en
una superficie plana.
Compruebe que la máquina se
encuentra en una superficie plana
y lisa. Apague la máquina,
desconéctela y empuje el
recolector con ayuda de su dedo.
Vuelva a reiniciar la máquina.
La luz
indicadora de
poca agua está
encendida.
1. No
2. La
1. Añade
2. Pulsa el botón de arranque
para reiniciar la máquina.
M
Fusible
Encienciendala
2. Compresor
3. Ventilador
La bandeja de agua
está atascada con
hielos.
Desconecte el enchufe, retire el
cubito que está atascando el
sistema. Vuelva a enchufar la
máquina y espere 3 minutos a que
se reinicie.
No se ilumina la luz
de Ice full cuando
la cubitera está
llena.
Problema Posible causa
Solución
El recolector no
empuja los hielos a
la cubitera.
El compresor hace
ruido molesto
El voltaje es más
bajo de lo
recomendado.
Detenga la máquina y no la reinicie
hasta que pueda conectarlo a la
corriente adecuada.
hay agua.
bomba está
llena de aire.
agua hasta que llegue al
máximo.
Las luces indicadoras
no se encienden.
áquina no encendida
roto Cambie de fusible.
El hielo que se crea
es demasiado
grande y se pegan.
Hay restos de hielos
anteriores.
Retire los restos de hielos.
Todo está en orden
pero no se crea
hielo.
1. El compresor no
tiene refrigerante.
dañado.
del motor
roto.
Póngase en contacto con el
servicio de atención al cliente de
Duronic.
Todas las luces
indicadoras
parpadean
simultáneamente.
La máquina está
en funcionamiento,
pero el agua se
está calentando.
El solenoide se ha
roto.
Póngase en contacto con el
servicio de atención al cliente de
Duronic.
El sensor Ice full
está roto.
Póngase en contacto con el
servicio de atención al cliente de
Duronic.
39
Síguenos
NOTA: ESTAS DECLARACIONES NO AFECTAN SUS DERECHOS LEGALES COMO
CONSUMIDOR
Este producto ha sido fabricado bajo las más estrictas control de calidad y utilizando
materiales de
alta calidad para asegurar conabilidad y excelente funcionamiento. Le dará buen servicio y
una larga duración, siempre y cuando se utilice correctamente y sea bien mantenido.
El producto está garantizado por 1 año desde la fecha de compra original. Si surge
cualquier defecto debido a un error/defecto de fábrica o mano de obra, entonces el producto
debe ser devuelto al lugar original de compra. Reembolso o reemplazo es a discreción de la
compañía.
Productos Duronic se ofrecen con una garantía de 1 año bajo las siguientes condiciones:
1
. E
l producto debe ser devuelto al vendedor con comprobante de compra original.
2. El producto debe instalarse y usarlo según las instrucciones
contenidas en este manual.
3
. E
ste aparato es únicamente de uso doméstico.
4
. N
o cubre desgaste, daños maliciosos, uso indebido, negligencia
,
r
eparaciones inexpertas o partes consumibles.
5
. S
hine-Mart Ltd no será responsable por cualquier daño consecuente
,
ac
cidentes o pérdidas.
6
. S
hine-Mart Ltd no es responsable ah llevar a cabo cualquier tipo d
e
s
ervicio, bajo la garantía.
7
. V
alido solamente dentro de la (EU).
Este producto esta equipado con enchufe/fusible Europeo
Importado por Shine-Mart Ltd, RM3 8SB
Información sobre la eliminación de residuos para los consumidores
de equipos eléctricos y eléctricos:
Esta marca en un producto y/o documentos adjuntos indica que cuando se va a
desechar, se debe tratar como equipos residuos eléctricos y electrónicos (RAEE)
Cualquier producto marcado (RAEE) no debe ser mezclado con la basura
doméstica, sino separado para el tratamiento, recuperación y reciclaje
de los materiales utilizados.
Para el tratamiento adecuado, recuperación y reciclaje; por favor, tome todos los
productos (RAEE) y llévelo al sitio de residuos de su
Autoridad Local, donde será aceptado de forma gratuita.
Si los clientes desechan los residuos eléctricos y electrónicos correctamente,
ayudar a ahorrar valiosos recursos y prevenir los efectos negativos sobre la salud
humana y el medio ambiente, de materiales peligrosos que pueden
contener los residuos
Garantía
40
Manuale D’istruzioni In Italiano

41
•
Istruzioni di sicurezza
•
•
•
•
•
•
•
Questo apparecchio è solo per uso interno / domestico. Non utilizzare
all'aperto.
L'Ice Maker IC
M120 è solo per uso domestico, non è per uso commerciale.
Questo apparecchio non è destinato all'uso da parte di persone (compresi i
bambini) con capacità fisiche, sensoriali o mentali ridotte o con mancanza
di esperienza e conoscenza, a meno che non siano stati supervisionati o
istruiti sull'uso dell'apparecchio da una persona responsabile della loro
sicurezza.
Non utilizzare questo apparecchio se il cavo di alimentazione o la spina
sono danneggiati. Se uno dei due è danneggiato, restituire la macchina a
Duronic per l'assistenza o la riparazione da parte di un tecnico
professionista.
Assicurarsi che l'alimentazione di rete sia 220-240 V / 50 Hz.
Non tentare mai di sostituire parti e riparare l'unità.
Per ridurre il rischio di scosse elettriche, non utilizzare mai questo
prodotto vicino all'acqua, con le mani bagnate, non versare liquidi
sull'apparecchio o immergerlo in acqua o in qualsiasi altro liquido.
Non utilizzare la macchina per il ghiaccio in prossimità di gas o altri
materiali infiammabili (come benzene, diluenti per vernici, spray, ecc.)
•
•
Non posizionare l'apparecchio sopra o vicino a un gas caldo o un forno
caldo.
Tenere la macchina a 15 cm da altri oggetti per garantire che il calore
abbia spazio per fuoriuscire dalle prese d'aria.
•
Non collocare prolunghe o alimentatori portatili vicino o dietro
l'apparecchio.
•
Non utilizzare accessori non consigliati da Duronic.
• Non inserire oggetti estranei o elettrici nell'apparecchio.
•
Non conservare sostanze esplosive come bombolette aerosol con un
propellente infiammabile dentro o accanto a questo apparecchio.
•
Il liquido refrigerante e isolante che soffia all'interno di questa macchina è
infiammabile. Quando si smaltisce l'apparecchio, farlo solo presso un
centro di smaltimento rifiuti autorizzato. Non esporre l'apparecchio a
fiamme.
•
Scollegare l'apparecchio dopo averlo usato o prima di pulirlo.
SI PREGA DI LEGGERE ATTENTAMENTE QUESTO MANUALE PRIMA DI
UTILIZZARLO E CONSERVARLO PER RIFERIMENTO
FUTURO

42
•
Istruzioni di sicurezza
Specifiche
•
Quando si pulisce la macchina del produttore di ghiaccio, non utilizzare utensili
affilati, pagliette metalliche, pagliette metalliche o detergenti abrasivi poiché
potrebbero graffiare o danneggiare l'apparecchio.
Non utilizzare acqua distillata in questa macchina. Si consiglia acqua
minerale.
•
Quando si sposta l'apparecchio, non inclinare la macchina più di 45 gradi e
non capovolgere la macchina. Ciò potrebbe danneggiare il compressore e il
sistema di tenuta.
•
È normale che il compressore e la superficie del condensatore raggiungano
temperature comprese tra 70 ° C e 90 ° C durante il funzionamento e le aree
circostanti possono essere molto calde.
•
Caratteristiche:
•
•
•
•
L'ICM120 produce cubetti di ghiaccio a forma di ditale
È possibile preparare fino a 9 pezzi di ghiaccio in otto minuti
Produzione di ghiaccio giornaliera: 12 kg per 24 ore
Impianto di conservazione del ghiaccio: 1,5 L / 600 g
Refrigerante: R600a
• Livello di rumore: ≦60dB(A) [livello di rumore ambientale ≦17dB(A)]
•
Avvisa quando il cestello del ghiaccio è pieno e quando il livello dell'acqua è
insufficiente.
MODELLO DIMENSIONI
ICM120
120W 220-240V /
50Hz
1,5 L 22.4 x 30.8 x
28.3cm
POTENZA
CAPACITÀ
VOLTAGGIO
• A causa del processo di congelamento rapido, i cubetti di ghiaccio possono
apparire "torbidi". Questo è normale, è aria intrappolata nell'acqua durante il
processo di congelamento e non influirà sulla qualità o sul gusto del
ghiaccio.

43
1. Microinterruttore
2. Evaporatore
3.
4.
Vaschetta dell'acqua
Pala
5.
da ghiaccio
Serbatoio
6.
ghiaccio
1
2
3
4
5
6
7
11
12
13
14
15
8
9
10
7.
Serbatoio
dell'acqua
8.
Tappo di drenaggio
9.
Pannello di controllo
10.
Parte anteriore
11.
Paletta per il ghiaccio
12.
Copertura superiore
Componenti
Coperchio trasparente
13. Motore
14. Parte
15.
posteriore
Presa d'aria

44
•
Prima del primo utilizzo
Pannello di controllo
Primo utilizzo
Prima del utilizzo, rimuovere tutto il materiale di imballaggio, controllare
attentamente la macchina e assicurarsi che la macchina, il cavo di
alimentazione e la spina siano normali e non abbiano danni.
•
La macchina deve essere posizionata su una superficie piana. Per garantire
una ventilazione sufficiente, la distanza tra la parte posteriore del produttore
di ghiaccio e il muro e gli oggetti circostanti deve essere di almeno 15 cm.
Non deve essere posizionato vicino a un forno, un termosifone o qualsiasi
altra fonte di calore.
•
Prima di utilizzare la macchina per la prima volta, posizionare la macchina e
lasciare aperto il coperchio trasparente per almeno due ore.
•
•
Non utilizzare acqua distillata. Si consiglia acqua minerale.
PRODUZIONE DEL GHIACCIO:
•
Quando si collega la macchina alla presa di corrente, l'indicatore
luminoso ICE MAKING lampeggerà.
Premere il pulsante di accensione per accendere la macchina. La spia ICE
MAKING rimarrà accesa e la macchina inizierà a produrre cubetti di ghiaccio.
•
Al termine della produzione del primo lotto di cubetti di ghiaccio, si attiverà lo
sbrinamento, seguito dalla pala del ghiaccio che sposterà il ghiaccio nel
cestello del ghiaccio.
Ci sono 3 indicatori luminosi e 1 pulsante sul pannello di controllo:
ICE FULL
ADD WATER
ICE MAKING
Allarme serbatoio di ghiaccio pieno
Livello di acqua basso
Ghiaccio in produzione
Pulsante di accensione

45
1.
Utilizzo
Aprire il coperchio trasparente, estrarre il cestello del ghiaccio e aggiungere
acqua al serbatoio dell'acqua. L'acqua non deve superare il segno MAX.
Utilizzare acqua fredda o a temperatura ambiente per riempire il
serbatoio. Non riempire il serbatoio con acqua calda.
Se l'acqua supera il segno MAX, sarà necessario scaricare un po
'd'acqua. Puoi farlo aprendo il tappo di scarico inferiore e rilasciando
un po 'd'acqua.
3.
2. Rimettere il cestello del ghiaccio nella macchina e posizionare il coperchio.
Collegare la macchina alla presa.
4. Premere il pulsante di alimentazione per avviare la macchina.
5. La macchina inizierà a produrre cubetti di ghiaccio.
6. La spia ICE MAKING rimarrà accesa mentre la macchina lavora per
produrre i cubetti di ghiaccio.
7.
Quando il cestello del ghiaccio è pieno, la macchina si fermerà
automaticamente. Rimuovere i cubetti di ghiaccio utilizzando la paletta
del ghiaccio. La macchina si riavvierà e continuerà a produrre cubetti
di ghiaccio.
•
AGGIUNGERE ACQUA:
Quando la spia AGGIUNGI ACQUA diventa rossa, significa che non è
rimasta abbastanza acqua nel serbatoio. Sarà necessario aggiungere
altra acqua e quindi premere il pulsante di accensione per riavviare la
macchina.
•
GHIACCIO PIENO:
Quando i cubetti di ghiaccio riempiono il cestello del ghiaccio e raggiunge la
capacità massima, la spia ICE FULL lampeggia e la macchina si ferma
automaticamente. Sarà quindi necessario svuotare il cestello del ghiaccio
utilizzando la paletta del ghiaccio.
•
Quando il sensore all'interno della macchina rileva che il cestello del
ghiaccio è vuoto, la macchina si riavvierà automaticamente e
continuerà a produrre cubetti di ghiaccio.
! Non riempire il serbatoio direttamente da un rubinetto.
Quando si riempie il serbatoio dell'acqua, utilizzare una bottiglia
o una brocca per versarvi l'acqua.

46
8.
Una volta terminata la produzione dei cubetti di ghiaccio, spegnere la
macchina premendo nuovamente il pulsante di accensione. Spegnere la presa
e scollegare il cavo dalla presa di rete.
Pulire frequentemente l'interno della macchina (cestello del ghiaccio,
serbatoio dell'acqua, paletta del ghiaccio) e la paletta del ghiaccio.
Come pulire il tuo produttore di ghiaccio:
1.
Pulizia e manutenzione
2.
Spegnere la macchina e lasciarla scongelare per 2-3 ore. Non
utilizzare dispositivi meccanici o altri mezzi per accelerare il processo
di sbrinamento.
Prima di pulire, scollegare la macchina e rimuovere eventuali cubetti di
ghiaccio dal cestello del ghiaccio.
3.
Utilizzare una soluzione diluita di acqua e aceto bianco per pulire l'interno e la
superficie esterna della macchina utilizzando un panno. Non utilizzare prodotti
chimici o agenti diluiti come acidi, benzina o olio sulla macchina.
4.
5.
Dopo aver utilizzato la soluzione di acqua / aceto per pulire la
macchina, sciacquare il panno con acqua e strofinare nuovamente
sulle stesse parti per rimuovere la soluzione.
Lasciare che la macchina si asciughi completamente. Mantenere le
aperture di ventilazione all'interno / sulla macchina libere da ostruzioni.
Per garantire che il ghiaccio prodotto sia fresco, cambiare l'acqua nel
serbatoio almeno una volta al giorno. Se si prevede di non utilizzare la
macchina per un lungo periodo, scaricare l'acqua e pulire la macchina
prima di riporla.
Nota: se l'alimentazione viene scollegata accidentalmente mentre la macchina è
accesa durante un ciclo di produzione del ghiaccio, piccoli frammenti di ghiaccio
potrebbero formarsi e depositarsi nella pala del ghiaccio. In tal caso, verificare che
la macchina sia spenta dalla presa di corrente, quindi spingere delicatamente la
pala all'indietro verso la parte posteriore della macchina per rimuovere i trucioli di
ghiaccio. Quindi riavviare la macchina normalmente.
Risoluzione dei problemi

47
La macchina non si
trova su una
superficie piana e
uniforme.
Verificare che la macchina
sia posizionata su una sperficie
uniforme. Spegnere la macchina,
spingere delicatamente la pala del
ghiaccio usando il dito, quindi
premere il tasto
pulsante di accensione per riavviarlo.
La spia di livello di
acqua bassa
accesa.
1. Non
2. La
1. Aggiungere
2. Riavviare la macchina.
1) Non
2) Fusibile
1) Collegare alla presa di corrente
2) Cambiare
1. Il
2. Compressore
3. Motore
Il vassoio dell'acqua
è bloccato da cubetti
di ghiaccio.
Scollegare dalla presa di corrente
estrarre il ghiaccio che blocca il
vassoio e riavviare la macchina. La
macchina si riavvierà dopo circa 3
minuti.
Quando il serbatoio
è pieno von viene
segnalato
Problema Possibile causa
Soluzioni suggerite
La pala del ghiaccio
non sposta il
ghiaccio nel cestello
del ghiaccio.
Il compressore
funziona in modo
anomalo.
La tensione è
inferiore a quella
consigliata.
Arrestare la macchina e non
riavviarla finché non è collegata
alla tensione corretta.
c'è acqua
pompa è piena
d'aria
acqua nel serbatoio
fino a ragiungere MAX.
Gli indicatori luminosi
non sono accesi.
è collegato
danneggiato fusibile
Il ghiaccio prodotto è
troppo grande e con
pezzi attaccati insieme.
Il ghiaccio dei cicli
precedenti è rimasto
nella vaschetta
Estrarre il ghiaccio con la macchina
in standby.
Non esce ghiaccio liquido refrigerante
è esaurito
danneggiato
danneggiato
Contattare Duronic per ricevere
maggiori informazioni.
Tutti gli indicatori
lampeggiano
contemporaneamente.
La macchina ha
funzionato, ma
l'acqua si è
riscaldata
Liquido refrigerante
esaurito
Contattare Duronic per ricevere
maggiori informazioni.
Contattare Duronic per ricevere
maggiori informazioni.
Il sensore "Ice
Full" è
danneggiato
48
Questo prodotto è garantito per una durata determinata con il distributore a partire dalla data
di acquisto contro ogni difetto derivante da difetti di fabbricazione o dei materiali. Questa
garanzia non copre difetti o danni derivanti da installazione impropria, uso improprio o usura
anomala del prodotto.
L’apparecchio deve essere restituito nella sua confezione originale e accompagnato dalla
ricevuta e deve essere stato utilizzato in modo corretto. È importante rispettare le istruzioni
per l’uso e le precauzioni di sicurezza indicate di seguito. Inoltre, non possiamo garantire
l’apparecchio se è stato modicato o riparato dall’acquirente o da terzi.
1 anno di garanzia da Shine-Mart Ltd, proprietari del marchio commerciale Duronic.
NOTA: QUESTE DICHIARAZIONI NON INFLUISCONO SUI DIRITTI LEGALI DEL
CONSUMATORE
Questo prodotto è stato realizzato con le rigorose procedure del controllo qualità, e
utilizzando materiali di altissima qualità, per garantire afdabilità e prestazioni eccellenti.
Vi regalerà un servizio ottimo e a lungo termine, purchè venga opportunamente usata e
mantenuta. Il prodotto è garantito per 1 anno dalla data di acquisto. Se sorge qualche
difetto a causa di materiali difettosi o scarsa manodopera, il prodotto difettoso dovrà essere
restituito al luogo originale di acquisto. Il rimborso o la sostituzione sono a discrezione
dell’azienda. I prodotti Duronic offrono 1 anno di garanzia alle seguenti condizioni:
1. Il prodotto deve essere restituito al rivenditore con la prova d’acquisto originale
2. Il prodotto deve essere installato e usato seguendo le istruzioni contenute nel manuale.
3. Il prodotto va utilizzato solo per scopi domestici. Non è da utilizzarsi per uso commerciale.
4. La garanzia non copre usura, danni volontari, abuso, negligenza, riparazioni
inesperte o consumo dei materiali.
5. Shine-Mart Ltd non è responsabile per Danni accidentali o consequenziali.
6. Shine-Mart Ltd non è tenuta a eseguire qualsiasi tipo di riparazione, ai sensi
della garanzia.
7. Termini validi in tutta l’unione europea *Ci riserviamo il diritto di modicare le sopracitate
condizioni Per parti di ricambio si prega di consultare il sito www.duronic.com
Corretto smaltimento del prodotto.
Qusto prodotto è inclusivo di spina certicata CE
importata da Shine-Mart Ltd, RM3 8SB
Questo segno su un prodotto o su documenti indica che quando deve essere
smaltito, deve essere trattato come i riuti elettrici ed elettronici (WEEE)
Tutti I prodotti marcati WEEE non devono essere buttati nei riuti domenistici
generici, ma separati per il trattamento, il recupero
e il riciclaggio dei materiali utilizzati.
Per un corretto trattamento, recupero e riciclaggio; si prega di portare tutti I
prodotti marcati WEEE al Vostro centro smaltimenti riuti autorizzato, dove
saranno accettati gratuitamente.
Se i consumatori sono propensi allo smaltimento corretto di riuti elettrici ed
elettronici, aiuteranno a salvare risorse importanti e a prevenire i potenziali
effetti negativi sulla salute umana e sull’ambiente di tutti i materiali pericolosi
che i riuti possono contenere.
Garanzia
Seguici

49
Instrukcja obsługi. Polski

50
•
Bezpieczeństwo użytkowania
•
Urządzenie przeznaczone wyłącznie do użytku domowego. Nie stosuj
na świeżym powietrzu.
•
Urządzenie nie zostało zaprojektowane do użytku komercyjnego lub
przemysłowego, a jedynie do zastosowania w gospodarstwach
domowych.
•
Urządzenie nie jest przeznaczone do obsługi przez osoby (również dzieci)
o ograniczonych zdolnościach fizycznych, sensorycznych i psychicznych
oraz z niewystarczającą wiedzą i doświadczeniem, chyba że znajdują się
pod opieką lub zostały przeszkolone w zakresie użytkowania urządzenia
przez osobę odpowiedzialną za ich bezpieczeństwo.
Jeżeli
•
przewód zasilający lub urządzenie jest uszkodzone zwróć je do
firmy Duronic w celu naprawy przez wykwalifikowanego technika.
•
Przed podłączeniem urządzenia do gniazdka upewnij się, czy napięcie
domowej sieci elektrycznej jest zgodne z europejskim standardem
220-240V~ 50Hz.
•
Nigdy nie próbuj samodzielnie wymieniać części lub naprawiać urządzenia
•
Aby zapobiec ryzyku porażenia prądem nie obsługuj urządzenia, gdy
masz mokre ręce, gdy urządzenie zostało zachlapane lub zanurzone w
wodzie lub innych płynach.
Nie umieszczaj urządzenia blisko kuchenek i łatwopalnych materiałów (jak
benzyna, spreje, rozpuszczalnik).
•
•
Nie umieszczaj urządzenia blisko kuchenek, piekarników elektrycznych i
gazowych.
Zachowaj 15 cm odstępu od innych obiektów, aby mieć pewność, że
gorące powietrze swobodnie przepłynie przez otwory wentylacyjne.
•
Nie umieszczaj żadnych przedłużaczy ani zasilaczy w pobliżu lub za
urządzeniem.
•
Stosuj wyłącznie dodatki rekomendowane lub dostarczone przez producenta.
•
Nie wkładaj do urządzenia obiektów elektrycznych lub żadnych ciał obcych.
•
Nie należy przechowywać substancji wybuchowych, takich jak pojemniki
z aerozolem, bezpośrednio w urządzeniu lub w jego pobliżu.
Przed użyciem uważnie zapoznaj się z instrukcją obsługi i
zachowaj ją do wglądu.

51
Bezpieczeństwo użytkowania (C. d.)
•
Specyfikacja
Nie używaj wody destylowanej w tym urządzeniu. Zalecana jest woda
mineralna.
Podczas przenoszenia urządzenia nie przekręcaj urządzenia o więcej
niż 45 stopni i nie odwracaj urządzenia do góry nogami. Może to
spowodować uszkodzenie kompresora i systemu uszczelek.
•
Normalnym zjawiskiem jest, że kompresor oraz powierzchnia
kondensatora może znacznie się nagrzewać, osiągając temperaturę
pomiędzy 70°C a 90°C podczas pracy. Powoduje to, że otoczenie może
być bardzo gorące.
•
W celu zapewnienia szybkiego mrożenia, kostki lodu mogą wychodzić
"mgliste". Jest to normalne zjawisko - powietrze zostaje uwięzione w
wodzie podczas procesu mrożenia i nie wpłynie na jakość lub smak
lodu.
•
Charakterystyka
•
•
•
24 godz.
ICM120 wytwarza owalne kostki lodu.
Do 9 kostek lodu na 8 minut.
Dzienna wydajność: 12 kg / 26.5 lbs lodu na
Pojemność zbiorniku na lód: 1.5 L / 600 g
• Czynnik chłodniczy: R600a
• Poziom hałasu: ≦60dB(A) [poziom hałasu otoczenia ≦17dB(A)]
•
Monitorowanie: maksymalne zapełnienie zbiornika, zbyt niskiego
poziomu wody.
MODEL
POJEMNOŚĆ
ZBIORNIKA
NA WODĘ
ICM120
120W 220-240V /
50Hz
1.5 L 22.4 x 30.8 x
28.3 cm
MOC
NAPIĘCIE
WYMIARY
Czynnik chłodzący oraz gaz izolujący są łatwopalne. Utylizację
urządzenia należy wykonywać wyłącznie w autoryzowanym punkcie
utylizacji odpadów. Nie wystawiaj urządzenia na działanie ognia.
•
Odłącz urządzenie od zasilania, gdy go nie używasz lub przed
przystąpieniem do czyszczenia.
Do czyszczenia urządzenia nie używaj ostrych przedmiotów, druciarek,
szorstkich myjek lub ściernych środków czyszczących, ponieważ mogą
zarysować lub nawet uszkodzić urządzenie.
•
•
•
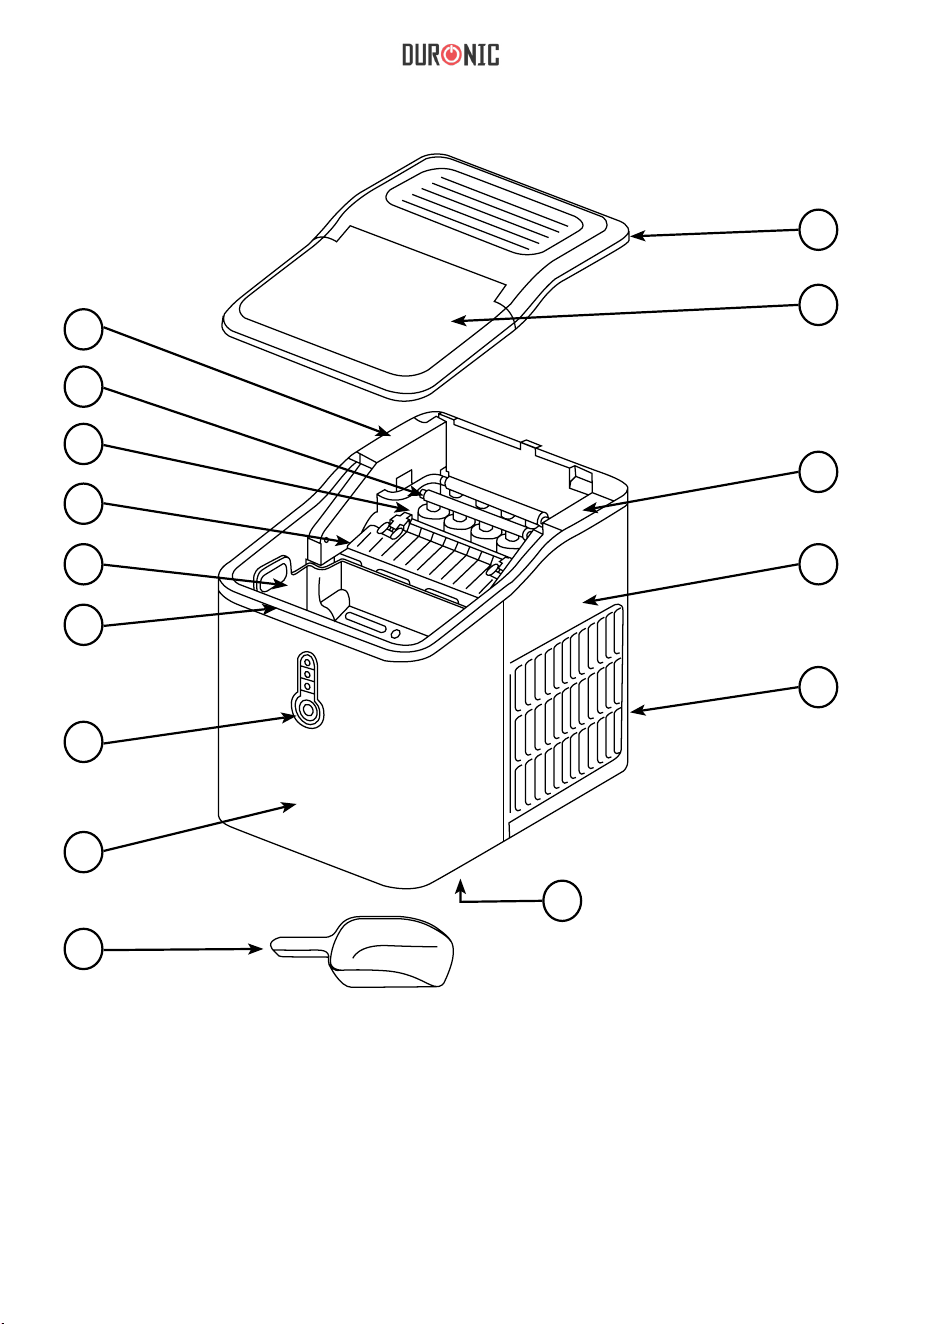
52
1. Mikro
2.
włącznik
Parownik
3.
4.
Pojemnik na wodę
Popychacz
5.
lodu
Pojemnik
6.
na lód
1
2
3
4
5
6
7
11
12
13
14
15
8
9
10
7.
Zbiornik na wodę
8.
Korek spustowy
9.
Panel sterowania
10.
Przednia obudowa
11.
Łopatka do lodu
12.
Górna pokrywka
Elementy
Transparentna klapa
13. Silnik
14. Tylna
15.
obudowa
Otwory wentylacyjne

53
•
Przed pierwszym użyciem
Panel sterowania
Przed pierwszym użyciem
Przed pierwszym użyciem usuń wszystkie elementy opakowania,
ostrożnie sprawdź urządzenie i upewnij się, że urządzenie,
przewód zasilający i wtyczka nie wykazują żadnych uszkodzeń.
•
Urządzenie należy umieścić na równej powierzchni. W celu
zapewnienia prawidłowej wentylacji dystans pomiędzy ścianą a tyłem
kostkarki i innych elementów otoczenia powinien wynosić przynajmniej
15 cm. Nie umieszczaj urządzenia blisko kuchenki, grzejnika lub innej
gorącej powierzchni.
•
Przed pierwszym użyciem umieść maszynę w wyznaczonej lokalizacji
i pozostaw transparentną klapę otwartą na przynajmniej 2 godziny.
•
•
Nie stosuj wody destylowanej. Rekomendujemy wodę mineralną.
PRODUKCJA LODU / ICE MAKING:
•
Po podłączeniu kostkarki do zasilania lampka kontrolna "ICE MAKING"
zacznie mrugać.
Przyciśnij przycisk włącznika, aby uruchomić urządzenie. Lampka "ICE
MAKING" zacznie świecić w sposób ciągły, a urządzenie rozpocznie
produkcję kostek lodu.
•
Gdy pierwsza porcja kostek będzie gotowa rozpocznie się proces
przesuwania kostek przez popychacz do lodu do pojemnika na lód.
Na panelu sterowania znajdują się 3 lampki kontrolne i przycisk włącznika:
ICE FULL
ADD WATER
ICE MAKING
Przepełniony zbiornik na lód
Dodaj wodę do zbiornika
Wytwarzanie kostek lodu
rozpoczęte
Włącznik

54
1.
Obsługa
Otwórz przezroczystą pokrywkę, wyjmij pojemnik na lód i dodaj wody
do zbiornika. Woda nie może przekraczać poziomu MAX.
Używaj wody o temperaturze pokojowej lub zimnej do uzupełnienia
zbiornika. Nie napełniaj zbiornika gorącą wodą.
Jeżeli poziom wody w zbiorniku przekroczy poziom MAX, usuń nadmiar
wody ze zbiornika. Możesz to zrobić otwierając korek spustowy
znajdujący się na spodzie urządzenia.
2.
Włóż
3.
pojemnik na lód i zamknij pokrywkę.
Podłącz urządzenie do gniazdka elektrycznego.
4. Przyciśnij włącznik, aby uruchomić urządzenie.
5. Urządzenie przystąpi do produkcji kostek lodu.
6. Lampka "ICE MAKING" pozostanie włączona podczas produkcji lodu.
7.
Kiedy pojemnik na lód będzie zapełniony urządzenie automatycznie
przestanie pracować. Usuń kostki lodu przy użyciu szufelki, a urządzenie
ponownie rozpocznie produkcję kostek lodu.
DODAWANIE WODY / ADD WATER:
•
Kiedy lampka "ADD WATER" świeci się na czerwono oznacza to, że w
pojemniku znajduje się za mało wody. Uzupełnij poziom wody i ponownie
przyciśnij włącznik, aby zrestartować urządzenie.
•
WYTWARZANIE LODU / ICE FULL:
Kiedy kostki lodu wypełnią pojemnik na lód do maksymalnego
poziomu, lampka kontrolna "ICE FULL" zacznie mrugać i maszyna
automatycznie zatrzyma się. Przy użyciu szufelki opróżnij pojemnik.
•
Gdy czujnik wykryje, że pojemnik jest pusty urządzenie zrestartuje się
automatycznie i uruchomi się ponownie.
Nie napełniaj zbiornika z wodą bezpośrednio z kranu.
Do uzupełnienia wody użyj butelki lub dzbanka.

55
8.
Kiedy zakończysz produkcję kostek lodu wyłącz urządzenie przy
użyciu wyłącznika i odłącz od zasilania.
Regularnie czyść wnętrze urządzenia (pojemnik na lód, zbiornik na wodę,
popychacz do lodu) i szufelkę.
Jak czyścić kostkarkę do lodu:
1.
Czyszczenie i Pielęgnacja
2.
Odłącz urządzenie od zasilania i odstaw do rozmrożenia na ok. 2-3
godziny. Nie stosuj dodatkowych urządzeń, aby przyspieszyć
rozmrażanie urządzenia.
Przed przystąpieniem do czyszczenia odłącz urządzenie z gniazdka
elektrycznego i usuń kostki lodu pozostałe w pojemniku.
3.
Użyj roztworu wody i octu, aby oczyścić wnętrze i zewnętrze urządzenia
przy użyciu ściereczki. Nie używaj chemikaliów lub rozcieńczalników jak
kwasy, benzyna lub oleje.
4.
5.
Po użyciu roztworu wody i octu przetrzyj urządzenie, zamocz
ściereczkę w wodzie i ponownie przetrzyj urządzenie, aby usunąć
roztwór.
Pozostaw urządzenie do dokładnego wywietrzenia i osuszenia. Nie
zasłaniaj otworów wentylacyjnych w maszynie.
Aby mieć pewność, że kostki lodu są świeże, wymieniaj wodę w zbiorniku
przynajmniej raz dziennie. Jeżeli nie planujesz używać urządzenia przez
dłuższy czas wylej wodę poprzez spust i dokładnie oczyść urządzenie
przed odstawieniem do przechowywania.
UWAGA: Jeżeli urzadzenie zostało odłączone od zasilania podczas
produkcji kostek, na popychaczu do lodu mogą znajdować się małe kawałki
lodu. W przypadku wystąpienia tego zjawiska odłącz urządznie od zasila a
następnie przesuń popychacz do tyłu - w głąb maszyny, aby usunać lód.
Natępnie zrestartuj urządznie.
Rozwiązywanie problemów
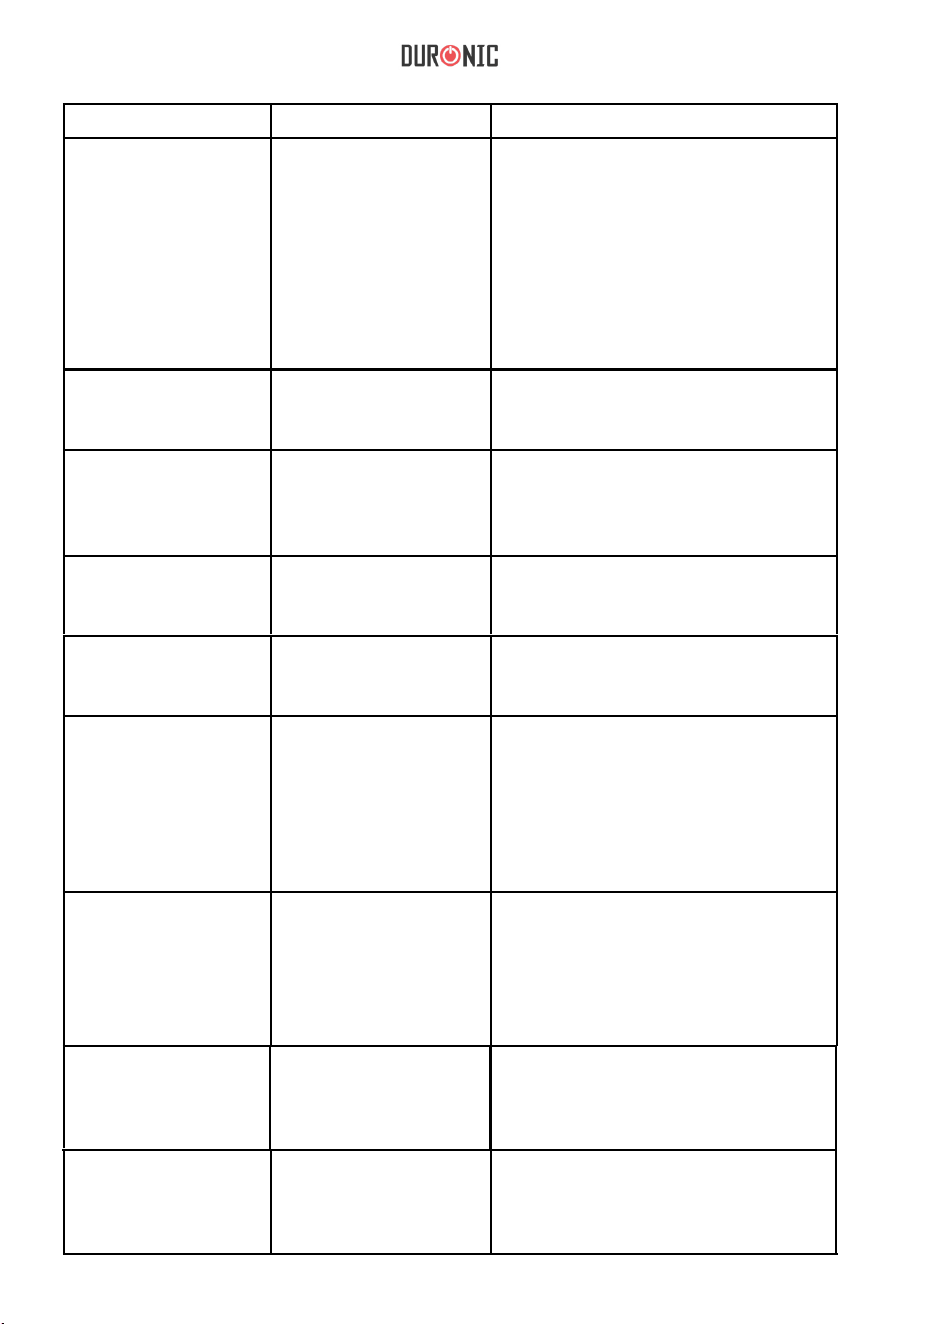
56
Problem
Pojemnik na wodę nie
znajduje się na
płaskiej, równej
powierzchni.
Sprawdź, czy powierzchnia
urządzenia jest na płaskiej równej
powierzchni.
Wyłącz urządzenie i odłącz od
gniazdka zasilającego. Delikatnie
przesuń dłonią popychacz do lodu,
a następnie podłącz urządzenie i
przyciśnij włącznik, aby je
zrestartować.
Świeci się lampka
"ADD WATER".
1) Włącz zasilanie
2) Wymień bezpiecznik
Pojenik na wodę jest
zablokowany przez
kostki lodu.
Odłącz urządzenie od zasila, wyjmij
kostki lodu blokujące pojemnik, a
następnie ponownie podłącz do
zasilania i przyciśnij włącznik.
Maszyna zrestartuje się po 3
minutach.
Pojemnik na lód
jest pełen, ale
lampka "ICE FULL"
nie świeci się.
Możliwa Przyczyna
Sugerowane Rozwiązanie
Popychacz do lodu
nie przesuwa go w
stronę pojemnika na
lód.
Kompresor nie działa
prawidłowo z i
brzęczy.
Napięcie jest niższe
niż zalecane.
Wyłącz urządzenie i podłącz do
prawidłowego napięcia. Następnie
zrestartuj.
1. Brakuje wody.
2. Pompka jest
wypełniona
powietrzem.
1. Dodaj wody do poziomu MAX.
2. Przyciśnij włącznik, aby
zrestartować urządzenie.
Lampki kontrolne
nie świecą się.
1) Brak prądu
2) Przepalony
bezpiecznik
Lód jest byt duży, a
kostki są sklejone.
W maszynie pozostały
kostki lodu z
poprzedniego cyklu.
Usuń pozostały lód w trybie
czuwania.
Proces
przygotowywania
lodu był prawidłowy,
ale nie pojawiły się
kostki.
1. W kompresorze
brakuje czynnika
chłodzącego.
2. Uszkodzony
kompresor.
3. Uszkodzony wiatrak
silnika.
Skontaktuj się z Działem Obsługi
Klienta Duronic.
Wszystkie lampki
migają
jednocześnie.
Skontaktuj się z Działem Obsługi
Klienta Duronic.
Skontaktuj się z Działem Obsługi
Klienta Duronic.
Cewka jest zepsuta
Urządzenie jest
uruchomione, ale
woda podgrzewa
się.
Czujnik zapełnienia
lodem jest
uszkodzony.
57
1 Rok Gwarancji rmy Shine-Mart LTD, marki handlowej Duronic Products.
UWAGA: ten dokument nie wpływa na twoje ustawowe prawo jako konsumenta.
Ten produkt został wykonany zgodnie z restrykcyjnymi normami kontroli i wykorzystuje
najwyższej jakości materiały dla uzyskania doskonałej wydajności i niezawodności.
Długotrwałość produktu zostaje osiągnięta przez właściwe użytkowanie i konserwację.
Gwarancja obejmuje 1 rok od daty zamówienia. Jeżeli jakikolwiek defekt powstanie ze
względu na wadliwość materiału lub niewłaściwe wykonanie to uszkodzony produkt musi
zostać dostarczony do miejsca, z którego został zamówiony. Zwrot pieniędzy lub wymiana
produktu jest w gestii rmy.
Duronic Products oferuje jeden rok gwarancji na podstawie poniższych warunków:
1. Produkt musi zostać zwrócony do sprzedawcy z oryginalnym dowodem zakupu.
2. Produkt był instalowany i użytkowany zgodnie z instrukcją obsługi.
3. Produkt użytkowany był wyłącznie w celach domowych.
4. Gwarancja nie obejmuje naturalnego zużycia się produktu, celowego uszkodzenia,
niewłaściwego użycia, zaniedbania, niewłaściwych napraw lub części eksploatacyjnych.
5. Shine-Mart Ltd. nie ponosi odpowiedzialności za przypadkowe albo celowe zgubienie
produktu lub jego uszkodzenie.
6. Firma Shine-Mart Ltd nie jest zobowiązana do przeprowadzania jakichkolwiek prac
serwisowych w ramach gwarancji.
7. Obowiązuje na obszarze Unii Europejskiej.
Ten produkt jest wyposażony we wbudowaną wtyczkę typu Euro-Plug / BS z
certykatem CE importowaną przez Shine-Mart Ltd, RM3 8SB
Informacja o odpadach i utylizacja dla użytkowników sprzętu elektrycznego i
elektronicznego.
Usuwanie wyeksploatowanych urządzeń elektrycznych i elektronicznych
(dotyczy krajów Unii Europejskiej i innych krajów europejskich z wydzielonymi
systemami zbierania odpadów). Ten symbol na produkcie lub jego opakowaniu
oznacza, że produkt nie powinien być zaliczany do odpadów domowych.
Należy go przekazać do odpowiedniego punktu, który zajmuje się zbieraniem i
recyklingiem urządzeń elektrycznych i elektronicznych. Prawidłowe usunięcie
produktu zapobiegnie potencjalnym negatywnym konsekwencjom dla
środowiska naturalnego i zdrowia ludzkiego, których przyczyną mogłoby być
niewłaściwe usuwanie produktu.
Recykling materiałów pomaga w zachowaniu surowców naturalnych.
Warunki Gwarancji
Śledź Nas
58
Gebruikershandleiding Nederlands

59
Safety Instructions
• This appliance is for indoor/household use only. Do not use outdoors.
• The ICM120 Ice Maker is only for domestic use, it is not for commercial
use.
• This appliance is not intended for use by persons (including children) with
reduced physical, sensory or mental capabilities, or lack of experience and
knowledge, unless they have been given supervision or instruction
concerning use of the appliance by a person responsible for their safety.
• Do not operate this appliance if the power cable or plug is damaged. If
either is damaged, return the machine to Duronic for service or repair by
professional technician.
• Please ensure the mains power supply is 220-240V / 50Hz.
• Never try to replace the parts and repair the unit by yourself.
• To reduce the risk of electric shock, never operate this product near water,
with wet hands, spill liquid on the appliance or submerge it in water or any
other liquid.
• Do not use the ice maker machine near gas or other inflammable materials
(such as benzene, paint thinner, sprays, etc.)
• Do not place the appliance on or near a hot gas or on a heated oven.
• Keep the machine 15cm from other objects to ensure heat has space to
escape from the vents.
• Do not put any extension leads or portable power supplies near or behind
the appliance.
• Do not use any accessories which are not recommended by Duronic.
• Do not insert any foreign or electrical objects into the appliance.
• Do not store explosive substances such as aerosol cans with a flammable
propellant in or next to this appliance.
• The refrigerant and insulation blowing gas inside this machine is
flammable. When disposing of the appliance, do so only at an authorised
waste disposal centre. Do not expose the appliance to flames.
• Unplug the appliance after using it or before cleaning it.
• When cleaning the ice maker machine, do not use sharp utensils, steel
PLEASE READ THIS MANUAL CAREFULLY BEFORE USING AND RETAIN
IT FOR FUTURE REFERENCE
60
Safety Instructions (Continued)
Specications
wool, metal scouring pads or abrasive cleaners as they will scratch or
damage the appliance.
• Do not use distilled water in this machine. Mineral water is recommended.
•
When moving the appliance, do not tilt the machine more than 45
degrees and do not turn the machine upside down. This may damage the
compressor and the sealing system.
• It is normal for the compressor and condenser surface to reach
temperatures between 70°C and 90°C during operation and the
surrounding areas may be very hot.
• Due to the fast freezing process, ice cubes may appear “cloudy”. This is
normal, it is air trapped in the water during the freezing process and it will
not affect the quality or taste of the ice.
Features:
• The ICM120 makes bullet-shaped ice cubes
• Up to 9 pieces of ice can be made per eight minutes
• Daily ice output: 12kg / 26.5lbs per 24 hours
• Ice storage facility: 1.5L / 600g
• Refrigerant: R600a
• Noise level: ≦
6 0dB(A) [ambient noise level ≦1 7dB(A)]
• Prompts when ice basket is full and when water level is insufficient.
MODEL POWER
VOLTAGE
RATING
WATER TANK
CAPACITY
DIMENSIONS
ICM120
120W 220-240V /
50Hz
1.5L 22.4 x 30.8 x
28.3cm

61
1. Micro switch
2. Evaporator
3. Water tray
4. Ice shovel
5. Ice basket
6. Water tank
1
2
3
4
5
6
7
11
12
13
14
15
8
9
10
7. Drainage plug
8. Control panel
9. Front housing
10. Ice scoop
11. Top cover
12. Transparent lid
Components
13. Motor
14. Back housing
15. Air vent

62
Before First Use
Before First Use
The Control Panel
• Before rst use, remove all the packing materials, check the machine
carefully and make sure that the machine, power cable and plug are
normal and do not have any damage.
• The machine should be positioned on a level surface. To ensure
sufcient ventilation, the distance of the back of ice maker to the wall and
surrounding objects should be at least 15cm. It should not be positioned
near an oven, radiator or any other heat source.
• Before using the machine for the rst time, place the machine and leave
the transparent cover open for at least two hours.
• Distilled water should not be used. Mineral water is recommended.
ICE MAKING:
• When you plug in the ice maker machine the ICE MAKING light indicator
will ash.
• Press the power button to switch on the machine. The ICE MAKING
indicator light will stay on and the machine will start to make ice cubes.
• After the rst batch of ice cubes have nished being made, the de-icing
will activate, followed by the ice shovel which will move the ice into the ice
basket.
There are light 3 indicators and 1 button on the control panel:
ICE FULL Ice full alarm
ADD WATER Water shortage alarm
ICE MAKING Ice is being produced
Power button

63
How to Use
1. Open the transparent lid, take out the ice basket and add water to the
water tank. The water should not exceed the MAX mark.
Use either cold or room-temperature water to ll the tank. Do not ll the
tank with hot water.
If the water exceeds the MAX mark, you will need to drain a little water
away. You do this by opening the bottom drain plug and releasing some
water.
2. Put the ice basket back into the machine and close the lid.
3. Plug in the machine and switch it on at the plug.
4. Press the power button to start the machine.
5. The machine will start to make ice cubes.
6. The ICE MAKING indicator light will light up stay on while the machine
works making the ice cubes.
7. When the ice basket is full, the machine will automatically stop. Remove
the ice cubes using the ice scoop. The machine will then restart and
ADD WATER:
• When the ADD WATER light turns red, it means that there is not enough
water left in the tank. You will need to add more water and then press the
power button to restart the machine.
ICE FULL:
• When the ice cubes ll up the ice basket and it reaches the maximum
capacity, the ICE FULL light will ash, and the machine will automatically
stop. You will then need to empty the ice basket using the ice scoop.
• Once the sensor inside the machine can detect the ice basket is empty,
the machine will restart automatically and continue making ice cubes.
Do not ll up the tank directly from a tap. When relling the water
tank, use a bottle or jug to pour water into it.

64
continue making ice cubes.
8. When you have nished making ice cubes, turn off the machine by
pressing the power button again. Switch off the plug socket and unplug the
cable from the mains socket.
Cleaning and Maintenance
Clean the inside of the machine (ice basket, water tank, ice shovel) and the ice
scoop frequently.
How to clean your ice maker:
1. Switch off the machine and allow it to de-ice for a 2-3 hours. Do not use
any mechanical devices or any other means to accelerate the defrosting
process.
2. Before cleaning, unplug the machine and remove any ice cubes from the
ice basket.
3. Use a diluted solution of water and white vinegar to clean the inside and
the outside surface of the machine using a cloth. Do not use chemicals or
diluted agents such as acids, gasoline or oil on the machine.
4. After using the water/vinegar solution to wipe over the machine, rinse
the cloth in water and wipe over the same parts again to clean away the
solution.
5. Allow the machine to air and dry thoroughly. Keep ventilation openings in/
on the machine clear of obstruction.
To ensure the ice made is fresh, change the water in the reservoir at least
once a day. If you do not plan to use the machine for a long time, drain the
water out and clean the machine before storing it away.
Troubleshooting
Note: If the power is accidently disconnected while the machine is on during
an ice making cycle, small ice chips may form and lodge in the ice shovel. If
this occurs, check that the machine is switched off at the mains socket, then
gently push the shovel backwards towards the rear of the machine to remove
ice chips. Then restart the machine as normal.
65
Problem Possible Cause Suggested Solutions
The ice shovel does
not move ice into the
ice basket.
The water tank is not
on a at even surface.
Check that the surface the machine
is on is at and even.
With the machine switched off at
the plug, gently push the ice shovel
using your nger, then press the
power button to restart it.
The compressor
works abnormally
with a buzzing noise
The voltage is lower
than recommended.
Stop the machine and do not restart
it until it’s plugged into the correct
voltage.
Water shortage
indicator light is on.
1. There is no water
2. The pump is full
of air
1. Add to some water until it reaches
MAX position.
2.Press POWER button to restart
the machine.
Indicator lights on
display are not on.
1) No power
2) Blown fuse
1) Turn the power on
2) Replace fuse
The Ice made is too
large and with pieces
sticking together.
Ice of previous cycles
left in the water tray.
Take out the ice under the standby
state.
The ice making
process was correct,
but no ice has come
out.
1. The compressor
has no refrigerant
2. Compressor
damaged
3. Fan motor damaged
Call Duronic Customer Care Team
for advice.
All indicators twinkle
simultaneously.
Water tray is blocked
by ice cubes.
Unplug the power, take out the ice
which blocking the tray, then plug in
the power and press the POWER
button. The machine will restart after
around 3 minutes.
The machine has
been working, but
the water has been
warming up
Solenoid has broken
down
Call Duronic Customer Care Team
for advice
When the ice is full,
the machine does
not display the ICE
FULL icon
‘Ice Full’ sensor is
damaged
Call Duronic Customer Care Team
for advice
66
Garantie
1 Jaar Garantie van Shine-Mart Ltd Handelsmerk eigenaars van Duronic Producten. LET
OP: DEZE STELLINGEN HEBBEN GEEN INVLOED OP UW WETTELIJKE RECHTEN ALS
CONSUMENT
Dit product is vervaardigd onder de strengste kwaliteitscontrole procedures, met materialen
van de hoogste kwaliteit, om uitstekende werking en betrouwbaarheid te verzekeren. Het
zal zeer goed en langdurig dienstdoen, naar gelang het correct gebruikt en onderhouden
wordt. Het product heeft 1 jaar garantie van de originele aankoopdatum. Als een defect zich
toont vanwege een materiaal- of constructiefout, dient het defecte apparaat bij de originele
aankoop locatie geretourneerd te worden. Terugbetaling of vervanging is ter discretie van
dat bedrijf.
Duronic Producten worden aangeboden met een 1-jarige garantie onder de volgende
omstandigheden:
1.
H
et product dient naar de verkoper geretourneerd te worden met aankoopbewijs.
2.
H
et product dient geïnstalleerd en gebruikt te worden naar de instructies in dez
e
gebruikshandleiding.
3.
H
et product is alleen geschikt voor huishoudelijk gebruik.
4.
D
e garantie dekt geen gebruiksschade, opzettelijke schade, verkeerd gebruik o
f
v
erwaarlozing.
5. Shine-Mart Ltd heeft geen verantwoordelijkheid voor accidentele schade of verlies.
6.
S
hine-Mart Ltd is niet aansprakelijk voor onderhoud onder de garantie.
7.
A
lleen geldig in Nederland
Dit product is uitgerust met een CE:1363 stekker en zekering.
Geïmporteerd door Shine-Mart Ltd, RM3 8SB
Informatie over afvalverwerking voor Afgedankte Elektrische en Elektronische Apparatuur
(AEEA).
Dit teken geeft aan dat een product en/of bijbehorende documentatie bij verwijdering, dient
te worden behandeld als Afgedankte Elektrische en Elektronische Apparatuur (AEEA).
Alle AEEA gemarkeerde producten dienen niet te worden gemengd met algemeen
huishoudelijk afval, maar moeten apart worden gehouden voor de behandeling, herwinning
en hergebruik van de gebruikte materialen.
Volg ons

67