For more recipes and cooking videos go to: www.yedihousewareappliances.com
Follow us on Instagram @yedihouseware
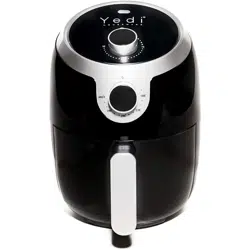
YEDI HOUSEWARE AIR FRYER
USER
MANUAL

This instruction manual can be found online in English at:
https://www.yedihousewareappliances.com/manuals
El manual de instrucciones en Español se puede encontrar en:
https://www.yedihousewareappliances.com/manuals
Le manuel d'instructions est disponible en Français sur:
https://www.yedihousewareappliances.com/manuals

IMPORTANT SAFEGUARDS
• When using electrical appliances, basic safety precautions should always be followed
including the following:
1. Read all instructions.
2. Do not touch hot surfaces.
3. To protect against electric shock do not immerse cord, plugs, or base in water or other liquid.
4. WARNING: This electrical appliance contains a heating function. Surfaces, also different than the functional
surfaces, can develop high temperatures. Since temperatures are differently perceived by different persons,
this equipment shall be used with CAUTION.
The equipment shall be touched only at intended handles and gripping surfaces, and use heat protection like
gloves or similar. Surfaces other than intended gripping surfaces shall be given sufficient time to the cool down
before getting touched.
5. Unplug from outlet when not in use and before cleaning. Allow to cool before putting on or
taking off parts.
manufacturer, its service agent or similarly qualified persons in order to avoid a hazard.
7. The use of accessory attachments not recommended by the appliance manufacturer may
cause injuries.
8. Do not use outdoors
9. Do not let cord hang over edge of table or counter, or touch hot surfaces.
10. Do not place on or near a hot gas or electric burner, or in a heated oven.
11. Extreme caution must be used when moving an appliance containing hot oil or other hot
liquids.
12. Do not use appliance for other than intended use.
13.The appliances are not intended to be operated by means of an external timer or separate
remote-control system.

SAVE THESE INSTRUCTIONS
• This appliance is for HOUSEHOLD USE ONLY.
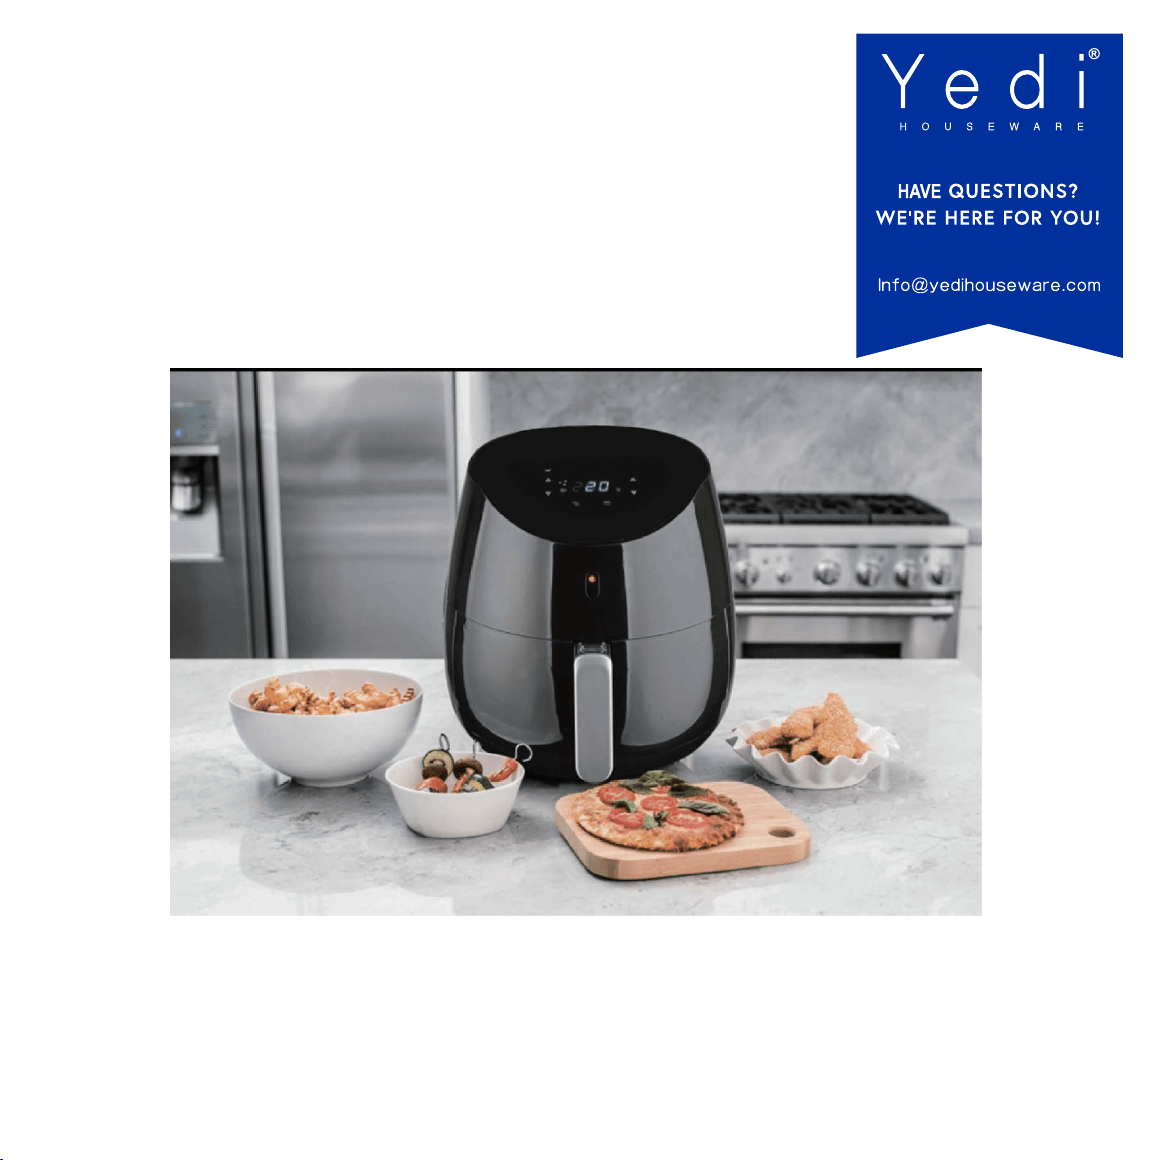
Introduction
The Y
edi Houseware Air Fryer provides an easy and healthy way of preparing your favorite ingredients. By
using hot rapid air circulation, it is able to make numerous dishes.
Important
Please read this manual carefully before you use the appliance and save it for future reference.
Danger
- Do not cover the air outlet when the appliance is working.
Warning
-This appliance is not intended for use by persons (including children) with reduced physical, sensory or mental
capabilities, or lack of experience and knowledge, unless they have been given supervision or instruction
concerning use of the appliance by a person responsible for their safety.
- Check if the voltage indicated on the appliance fits the local used voltage.
- Do not use the appliance if there is any damage on plug, or other parts.
- Do not go to any unauthorized person to replace or fix damages.
Contact [email protected].
- Keep the cord away from hot surfaces.
- Do not plug in the appliance or operate the control panel with wet hands.
- Do not place the appliance against a wall or against other appliances. Leave at least 6 inches
of free space on the back and sides and 6 inches free space above the appliance.
-Do not place anything on top of the appliance.
- Do not use the appliance for any other purpose than described in this manual.
- Do not let the appliance operate unattended.
- During hot air frying, hot steam is released through the air outlet openings. Keep your hands
and face at a safe distance from the steam and from the air outlet openings.

SAVE THESE INSTRUCTIONS
• This appliance is for HOUSEHOLD USE ONLY.
Warning
-Also be careful of hot steam and air when you remove the pan from the appliance.
-Any accessible surfaces may become hot during use.
- Immediately unplug the appliance if you see dark smoke coming out of the appliance. Wait for
the smoke emission to stop before you remove the basket from the appliance.
Specification &
Features:
-----Voltage:120V~ 60Hz
-----Wattage: 1500 Watts
-----Capacity of basket: 4.0 Quarts
-----Adjustable temperature:170℉—400℉
----- Timer (0-60 min)
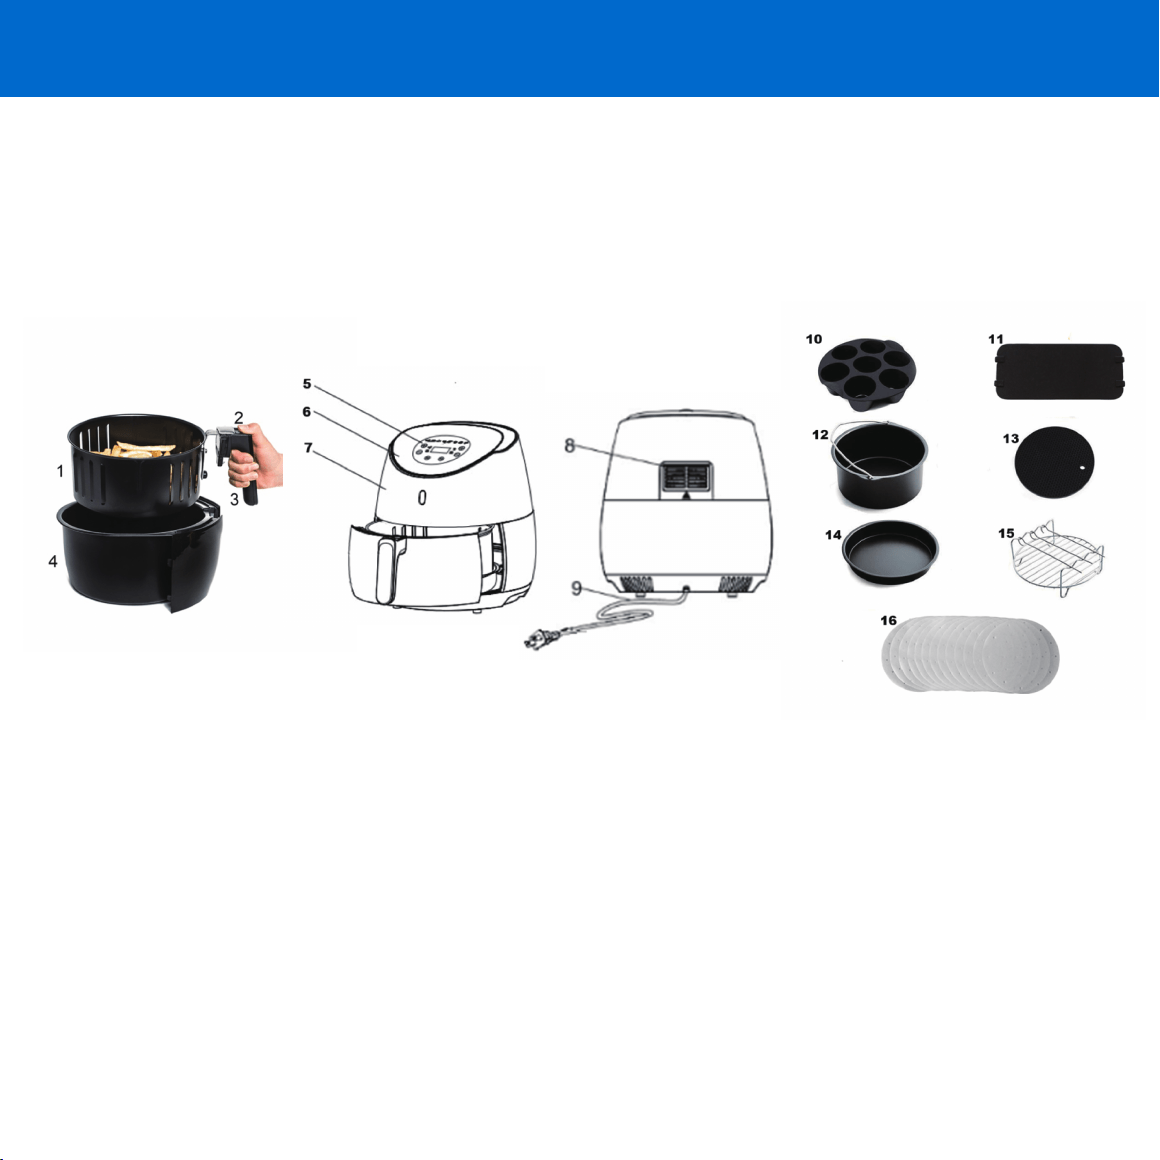
AIR FRYER COMPONENTS
1. Inner Fry Basket
2. Inner Fry Basket Release Button (Slide plastic cover forward – button is
underneath)
3. Handle
4. Outer Basket
5. Control Panel
6. Lid Ornament (use caution – can get hot)
7. Upper Housing
8. Air outlet openings
9. Power cord 9
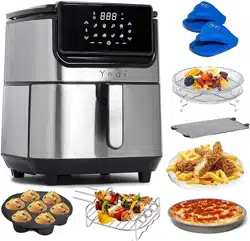
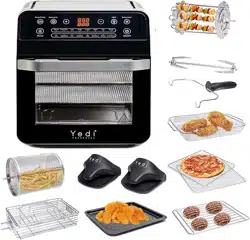
ACCESSORIES
10. Mini Cake Silicone Pan
Use: Cook cupcakes and other favorite desserts.
11. Basket Divider
Use: lets you cook 2 different foods at the same time without them coming into contact.
12. Cake barrel with nonstick coating
Use: Bake your favorite cake in the Cake Barrel
13. Rubber mat
Use: Protect your household surfaces with the rubber mat. Place the Air Fryer basket on top of the mat instead
of directly on counter surfaces.
14. Pizza pan with nonstick coating
Use: Cook delicious pizza in the Pizza Pan
15. Multi-purpose rack with stainless steel skewers
Use: Make skewers with the multi-purpose rack and also maximize your cooking space.
16. Perforated Parchment Steaming Papers
Use: keep the food clean and hygienic and make clean up easier.
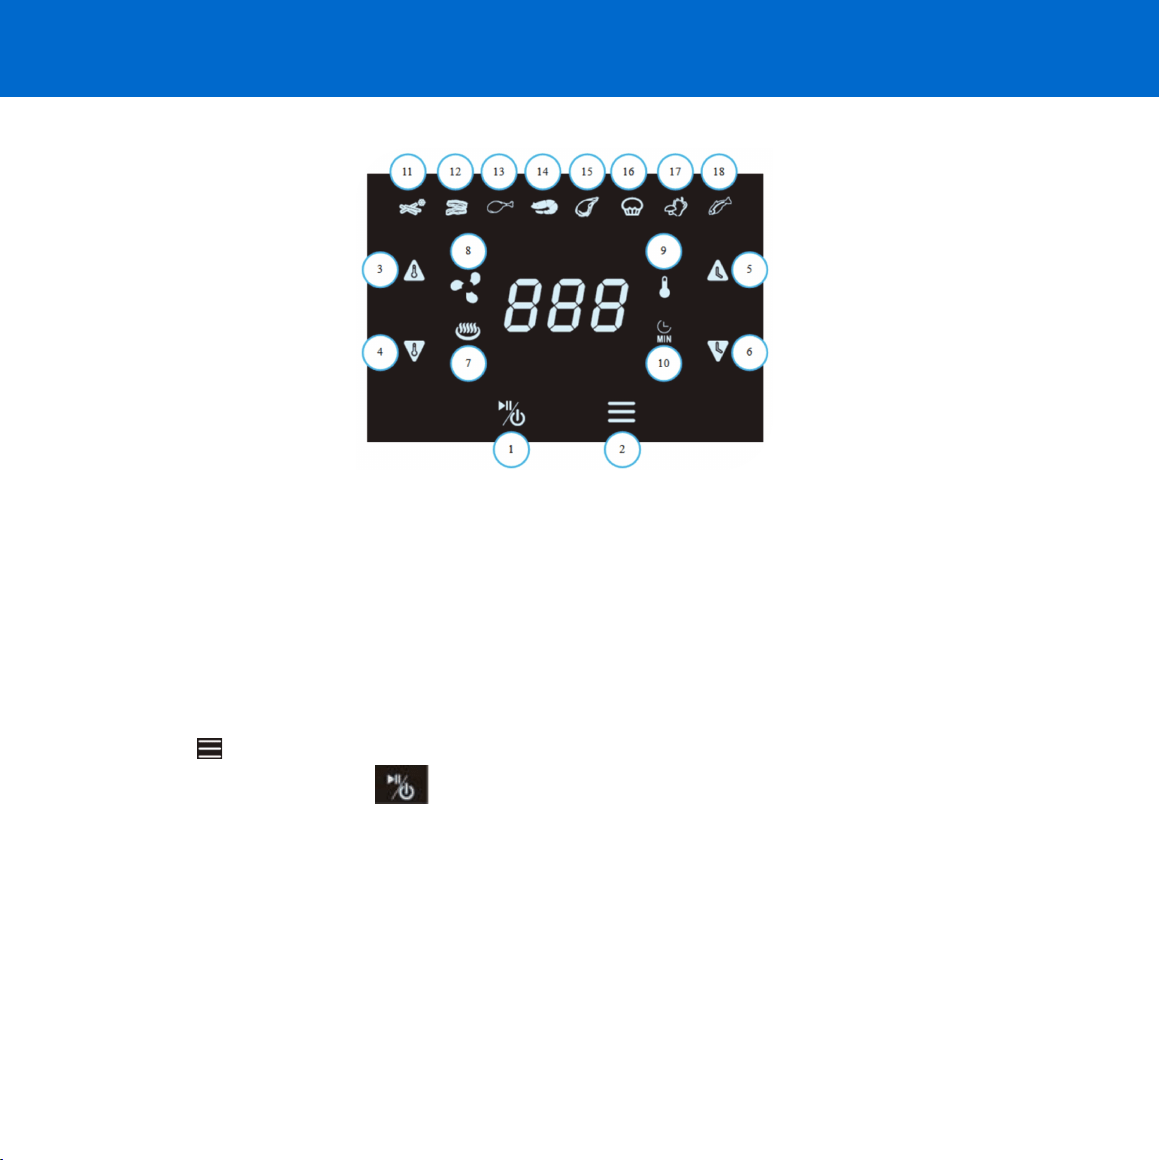
USING THE DIGITAL CONTROL PANEL
• Plug in and operate the control panel as follows:
Button 1 –Power Button
• Once the Outer Basket and Inner Fry Basket are properly placed in the main Unit housing, the Power Button
will be illuminated. Press the power button for 2 seconds and the display panel will turn on, and be set to its
default temperature of 400℉, with a cooking time of
15 minutes.
•
If you then tap the Power Button the Air Fryer will start the cooking process.
• If you press the power button for 2 seconds while the Air Fryer is cooking it will turn off.
Note: During cooking, you can quickly touch the button to control the pause and start of cooking.
Button 2 – Preset Button
• Selecting the “ ” Preset Button enables you to scroll through the 8 popular food choices.
• Once selecting a preset, tap the button to begin cooking.
Buttons 3&4 –Temperature Control Buttons
• The + and – symbols enable you to add or decrease cooking temperature 10℉ at a time.
• Keeping the button held down will rapidly change the temperature. Temperature Control range: 170℉-400℉.
Buttons 5&6 –Timer Control Buttons
• The + and – symbols enable you to add or decrease cooking time, one minute at a time.
• Keeping the button held down will rapidly change the time.
Indicator light“ 7 ”
• Heating indicator
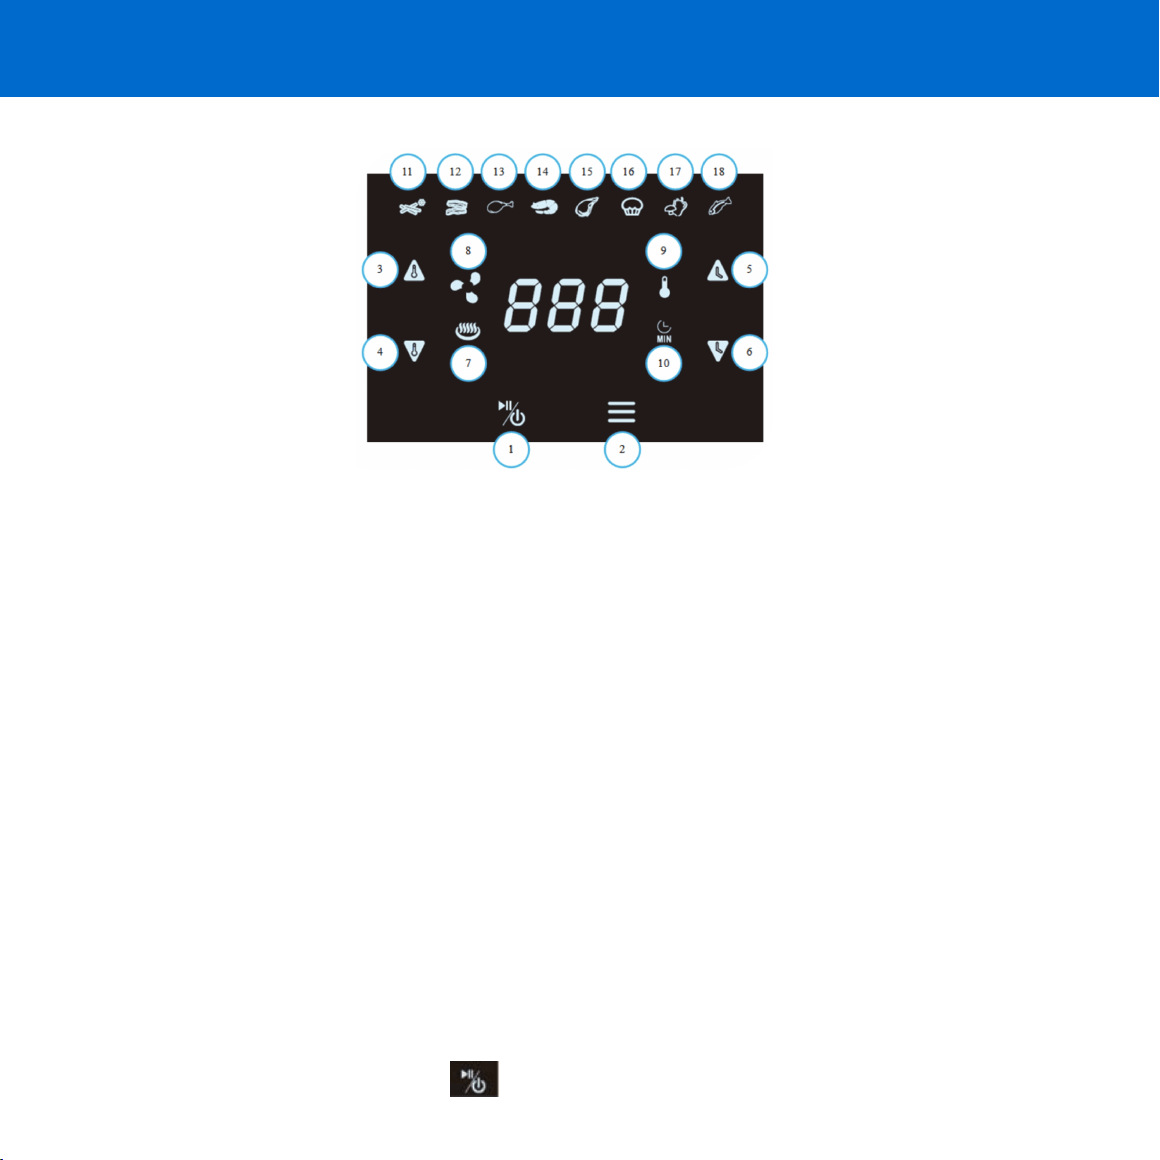
USING THE DIGITAL CONTROL PANEL
• Plug in and operate the control panel as follows:
Indicator light“ 8 ”
• Fan indicator
Indicator light“ 9 ”
• Temperature indicator
Indicator light“ 10 ”
• Timer indicator
Indicator lights “ 11-18” Popular Food Preset Indicators:
11. French Fries
12. Barbecue
13. Chicken
14. Shrimp
15. Beef
16. Cake
17. Vegetables
18. Fish
Note: Once you select a Preset, tap the button to begin cooking.
Preheating the Yedi Houseware Air Fryer
• You may preheat the Unit for more efficient cooking simply by selecting a cook time of 2 or 3 minutes and cook
at the default or choose a specific temperature. For preheating, you will need to insert the empty Inner Fry
Basket while assembled with the outer basket into the Unit housing.
Before using the Yedi Houseware Air Fryer for the first time
• Remove all packaging materials, stickers, and labels.
• Thoroughly wash the baskets
and accessories in warm soapy water and wipe down the inside with a wet cloth,
and then run at 400F for 5 minutes before first use. You may detect a slight smell and/or smoke. Don’t worry
this is normal. Then wash the baskets again, wipe down the inside again, and you are ready to use your Yedi!
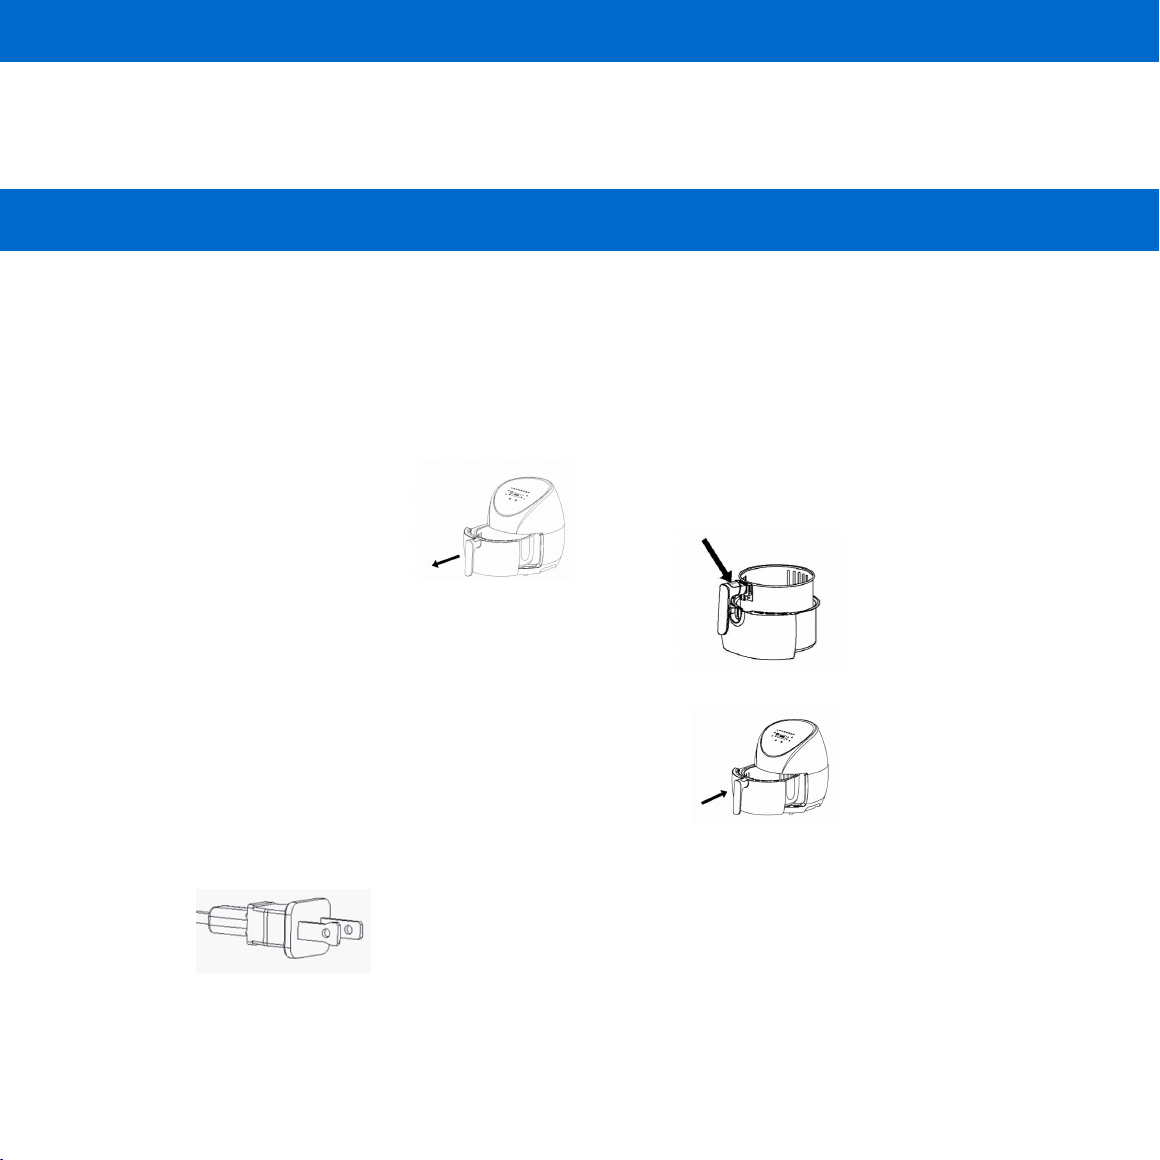
• Preparing for use, place the appliance on a stable, level, horizontal and heat resistant surface.
• Pull the handle to open the Air Fryer.
• Make sure the Inner Fry Basket is properly in the Outer Basket
• Slide the assembled Inner Fry Basket and Outer Basket into the cooking Unit until it “clicks” into place. Note:
The Unit will not work unless the Fry Basket is inserted properly.
• A short power supply cord Is provided to reduce the risk resulting from becoming entangled in or tripping over
a longer cord.
POLARIZED PLUG
• This appliance has a polarized plug, (one blade is wider than th
e other). As a safety feature to reduce the risk
of
electrical shock, this plug is intended to fit in a polarized outlet only one way. If the plug does not fit fully in
the
outlet, reverse the plug. If it still does not fit, contact a qualified electrician. Do not attempt to defeat this
safety
feature or modify the plug in any way
. If the plug fits loosely into the
AC outlet or if the AC outlet feels
warm do not use that outlet.

Time to Fry “Hot Air” Style
• Cooking: Only place food/ingredients in the Inner Fry Basket.
• Note: You may remove the Fry Basket at any time during the process to check the progress, shake food,
or turn over food (you do not need to stop, unplug or power off the device). Once the Fry Basket is reinserted
into the Yedi Houseware Air Fryer the cooking time will restart at the point in which it left off.
or
• You may also use the play/pause button during the cooking process to remove the baskets/shake food/get
a visual of food cooking progress. Just hit the pause button before removing the basket and then hit the play
button once reinserting it.
Shaking
• To insure even cooking, some foods require “shaking” during the cooking process. To do this, simply remove
the Outer Basket and Fry Basket from the Unit by gripping the handle and gently pulling it out. For heavier
foods, you might want to separate the Fry Basket from the Outer Basket before shaking. To do this, place the
assembled Outer Basket and Fry Basket on a heat resistant surface. While pressing the Basket Release Button
down, gently lift the Fry Basket up using the handle. (To locate the “Basket Release Button” push the plastic
piece on top of the handle up while griping the handle.) Shake ingredients, place the Inner Fry Basket in the
Outer Basket and return it to the Unit by gently sliding it back in to finish cooking. (Make sure to push the plastic
piece on top of the handle back so it covers the Basket Release Button before sliding the assembled Inner Fry
Basket and Outer Basket back into the unit.)
CAUTION: Never push Basket Release Button unless the Inner Fry Basket and Outer Basket are resting on
a level, heat-resistant surface.
Tip: Set the Timer to 1/2 the time needed for the recipe and the Timer bell will alert you when it’s time to “shake”.
Automatic switch-off
This appliance is equipped with a timer, when the timer has counted down to 0, the appliance produces a bell
sound and switches off automatically.

Frequently Asked Questions
1. Can I prepare foods other than fried dishes with my Yedi Air Fryer ?
• You can prepare a variety of dishes including steaks, chops, burgers and baked goods. See recipes that can
be found on the https://yedihousewareappliances.com website.
2. Is the Yedi Air Fryer good for making or reheating soups and sauces?
• Never cook or reheat liquids in the Yedi Air Fryer .
3. Is it possible to shut off the Unit at any time?
• Press the Power button for about 2 seconds or unplug it.
4. What do I do if the Unit shuts down while cooking?
• As a safety feature Yedi Air Fryer has an auto shut off device that prevents damage from overheating.
Remove the Outer Basket and set it on a heat resistant surface. Allow the Unit to cool down.
Remove the power cord from the outlet. Restart with the Power button.
5. Does the Unit need time to heat up?
• If you are cooking from a “cold start,” add 3 minutes to the cook time to compensate.
6. Can I check the food during the cooking process?
• You can remove the Outer Basket at any time while cooking is in progress. During this time, you can “shake”
the contents in the Fry Basket if needed to insure even cooking.
7. Is the Yedi Air Fryer dishwasher safe?
• Only the Inner Fry Basket and the Outer Basket are dishwasher safe. The Unit itself containing the heating oil
and electronics should never be submersed in liquid of any kind or cleaned with anything more than a hot moist
cloth or nonabrasive sponge with a small amount of mild detergent.
8.
What happens if the Unit still does not work after I have tried all
the troubleshooting suggestions?
• Never attempt a home repair. Contact Yedi Houseware.

Cleaning
Clean the appliance and accessories after every use.
Do not use metal kitchen utensils or abrasive cleaning materials to clean any parts or pieces, as this may
damage the non-stick coating.
1. Remove the mains plug from the wall socket and let the appliance cool down.
Note: Remove the Basket to let the Hot-air fryer cool down more quickly.
2. Wipe the outside of the appliance & accessories with a moist cloth or non-abrasive sponge.
Tip: If dirt is stuck to the Inner basket or the bottom of the Outer basket, fill the outer basket with hot water and
with some washing-up liquid/soap. Put the Inner Fry basket in the Outside Basket and let the baskets soak for
approximately 10 minutes.
3. Clean the inside of the appliance & accessories with hot water and non-abrasive sponge.
4. Clean the heating element with a cleaning brush to remove any food residues.
Storage
1. Unplug the appliance and let it cool down.
2. Make sure all parts are clean and dry.
Environment
Do not throw away the appliance with the normal household waste when it is exhausted, but hand it in at an
official collection point for recycling. By doing this, you help to preserve the environment.
Guarantee and service
If you need service or information or if you have a problem, please contact [email protected].

Troubleshooting
Problem Possible Cause Solution
The Hot-A
ir Fryer does
not work
The ingredients fried with
the air fryer are not done.
The ingredients are fried
unevenly in the air fryer.
Fried snacks are not crispy
when they come out of the
air fryer.
White smoke comes out of
the appliance.
Fresh fries are fried
unevenly in the air fryer.
Fresh fries are not crispy
when they come out of the
air fryer.
The appliance is not plugged in.
You have not set the timer.
The amount of ingredients in the
basket is too big.
The set temperature is too low.
The preparation time is too short.
Certain types of ingredients need
to be shaken halfway through the
preparation time.
You used a type of snacks meant
to be prepared in a traditional
deep fryer.
The basket is not placed in the
pan correctly.
You are preparing greasy
ingredients.
The pan still contains grease
residues from previous use.
You did not use the right potato
type.
You did not rinse the potato sticks
properly before you fried them.
The crispiness of the fries
depends on the amount of oil
and water in the fries.
Put the mains plug in polarized outlet.
Turn the timer knob to the required preparation time to switch on
the appliance.
Put smaller batches of ingredients in the basket. Smaller batches
are fried more evenly.
Change the temperature to the required temperature setting.
Change the time to the required preparation time.
Ingredients that lie on top of or across each other (e.g. fries)
need to be shaken halfway through the preparation time.
Use oven snacks or lightly brush some oil onto the snacks for a
crispier result.
Push the basket down into the pan until you hear a click.
When you fry greasy ingredients in the air fryer, a large amount of
oil will leak into the pan. The oil produces white smoke and the pan
may heat up more than usual. This does not affect the appliance or
the end result.
White smoke is caused by grease heating up in the pan . Make sure
you clean the pan properly after each use.
Use fresh potatoes and make sure they stay firm during frying.
Rinse the potato sticks properly to remove starch from the outside
of the sticks.
Make sure you dry the potato sticks properly before you add the oil.
Cut the potato sticks smaller for a crispier result.
Add slightly more oil for a crispier result.
For more recipes and cooking videos go to: www.yedihousewareappliances.com
Follow us on Instagram @yedihouseware