

2
Congratulations!
You
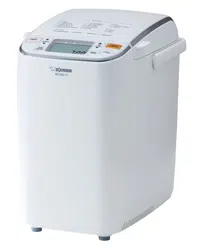
are now the owner of this wonderful Zojirushi Home Bakery Supreme®
Breadmaker. We are confident that
it
will give
you
top performance
and
optimum satisfaction for many years.
To
ensure this, please read
and
follow this instruction manual carefully.
It
is
also filled with great recipes
to get you started, from breads to cakes to even our Meatloaf Miracle.
Enjoy!
Table
of
Contents
INDEX
IMPORTANT
SAFEGUARDS
/
SPECIFICATIONS
3
PARTS
NAMES
/
HANDLING
INSTRUCTIONS
5
CONTROL
PANEL
/
HOW
TO
USE
THE
TIMER
6
ACCESSORIES
/
HOW
TO
MEASURE
THE
INGREDIENTS
?
CONVENIENT
FUNCTIONS
&
USEFUL
TIPS
8
BASIC
/
QUICK
COURSE
9-13
WHEAT
/
QUICK
WHEAT
COURSE
14·16
DOUGH
/
QUICK
DOUGH
COURSE
17·20
.........................
JAM
COURSE
21
CAKE
COURSE
22·23
SOUR
DOUGH
STARTER
COURSE
24·25
..............
.....
.............
.....
.............
.....
.........................
..............................
........................................................................
..
....
..
........
..
......
......
.. ..
....
......
....
..
..
....
.. ..
....
.....
........
.
HOME
MADE
COURSE
26·28
CLEANING
&
STORAGE
29
ABNORMAL
CONDITIONS
29
QUESTIONS
AND
ANSWERS
30
TROUBLESHOOTING
GUIDE
31
...........................................................
................................
..........
.
................
.....
.................
.
.............
..........................................................
.............................................................
........
......
....
................
..
....
....
......
..
....
..
........
..
....
..
........
..
....
..
....
.......................................
.......................................................
Recipes
BASIC/QUICK
VARIATIONS
BASIC
WHITE
BREAD
12
ITALIAN
HERB
BREAD
12
SUGAR
FREE
WHITE
BREAD
12
CHEESE
'N'
ONION
BREAD
12
SWEET
BREAD
12
CHOCOLATE
BREAD
12
RAISIN
BREAD
13
RUSSIAN
KULICH
13
APPLE
OAT
BREAD
13
FAT
FREE
APPLE
OAT
BREAD
13
BASIC
WHITE
BREAD
(1
.5
lbs
. /
681
g
SIZE)
13
RAISIN
BREAD
(1.5
lbs
. /
681
g
SIZE)
13
GLUTEN-FREE
BROWN
RICE
BREAD
13
GLUTEN-FREE
RAISIN
BREAD
13
WHEAT/QUICK
WHEAT
VARIATIONS
100%
WHOLE
WHEAT
BREAD
5
LIGHT
RYE
BREAD
15
WHOLE
WHEAT
NUT
BREAD
15
FAT
FREE
BASIC
WHEAT
BREAD
15
100%
WHOLE
WHEAT
APPLE
BREAD
15
100%
WHOLE
WHEAT
FRUIT
BREAD
15
HONEY
WHEAT
BREAD
16
ITALIAN
WHEAT
BREAD
16
100%
WHOLE
WHEAT
BREAD
(1
.5
lbs
.
/681
g
SIZE)
16
SEVEN-GRAIN
BREAD
16
PUMPERNICKEL
BREAD
16
100%
WHOLE
WHEAT
APPLE
BREAD
(1
.5
lbs
./
681
g
SIZE)
16
DOUGH/QUICK
DOUGH
VARIATIONS
CROISSANTS
18
TRADITIONAL
PIZZA
DOUGH
19
PIZZA
DOUGH
WITH
BEER
19
THIN-CRUST
PIZZA
19
THICK-CRUST
PIZZA
19
CRUSTY
ROLLS
19
SOFT
PRETZELS
19
BUTTER-RICH
ROLL
&
BREAD
DOUGH
20
CINNAMON-RAISIN
ROLLS
20
TRADITIONAL
LOAF
20
PAN
ROLLS
20
CINNAMON-RAISIN
SWIRL
LOAF
20
CLOVERLEAF
ROLLS
20
BREAD
STICKS
20
JAM
STRAWBERRY
JAM
21
BLUEBERRY
JAM
21
APPLE
JAM
21
CAKE
VARIATIONS
SHORTCUT
POUND
CAKE
23
CHOCOLATE
CAKE
23
DUTCH
APPLE
CAKE
23
SHORTCUT
CORN
BREAD
23
SPICED
ZUCCHINI
BREAD
23
CITRUS
FRUIT
BREAD
23
SOUR
DOUGH
STARTER
VARIATIONS
LIGHT
SOUR
DOUGH
BREAD
24
TRADITIONAL
SOUR
DOUGH
BREAD
25
HOME
MADE
VARIATIONS
CRUSTY
FRENCH
28
CRUSTY
FRENCH
(1
.5
lbs
. /
681
g
SIZE)
28
MEATLOAF
MIRACLE
28
....................................
..................
...................................................
.....
.......
...................................................................
...............................
.......
.......................
.......
.....
................
......
...............
......
.........
..................................................
........................................................................
........
..
....
.......
....
....
......
....
..
..........
..
.
.....
.. .. ..
.
......
...
....
...
.........
...
....
....
.
....
.
.... ..
.....
..
.
..
..........................................................................
..................................
.............
......
.................
.......
.....................
.........................................
.....
........
.
.........................................................................
.................................................................
.
.......
...
....
....
.
....
.
.... ....
.
....
.
......
...
....
...
......
.
..
.....
.....
..
....
.....
...
.
....
.....
....
..
.........
.
....
.....
....
.
....
.....
...
..
.......
..................................................................
............................................
................................................
...........................
...
..........
....
..................
..............................
.................
.....
................
.....
,
...............
.....
,
........
....
....
......
....
..
..........
..
....
.....
......................................
.........
.....
,
...............
......
................
.....
,
........
.......................................
..
.......
...........
.......
.................................
..........
...........
................................
.......
,
....................
........
............
....
..................
..........................
.
1
...................................................................
......................
.............
....................
..................
.....
.....
.......................
.
.................
..
.........................
........
..............
...........................................
.
.........................
. ,
....................................
..
........
....
..
........
..
....
......
..
.........
......
..
.......
.........
......
..
............
.....................................
................
....
...................................
..................................
...................
.......
.....................................
.........
...............
...........................................................
....
..
....
......
..........................
..................
......
..............................................................
......................................
..........................................................
...
.....................................................................
..
..
......
......
....
....
........
....
............................................
....
...........
....
.............
...............................................................
..............
.........
...........................

TIMPORTANTSAFEGUARDS
WHEN USING ELECTRICAL APPLIANCES, BASIC SAFETY PRECAUTIONS SHOULD ALWAYS BE
FOLLOWED, INCLUDING THE FOLLOWING:
1 Read all instructions carefully.
2 Do not touch hot surfaces. Use handles or knobs.
Do not close or clog the steam vent opening under any circumstances.
3 To protect against electrical shock, do not immerse cord, plug, or baking machine
in
water or other liquid.
4 Close supervision is necessary when the appliance is used by or near children.
5 Unplug the power cord when the appliance is not
in
use, or before cleaning.
Allow to cool before putting on or taking off any parts, and before cleaning the appliance.
6 Do not use or operate the appliance with a damaged cord or plug, or after the appliance malfunctions, or
has been damaged
in
any manner. Return the appliance to the nearest authorized service facility or dealer
for examination, repair, or adjustment.
7 The use of accessory attachments not recommended or sold by the appliance manufacturer may cause
injuries.
8 Do not use outdoors.
9 Do not let the power cord hang over the edge of a table or counter, or touch hot surfaces.
1 0 Do not place the appliance on or near heat sources such as gas or electric stoves, ovens, or burners.
11
Extreme caution must be given when moving the appliance containing hot contents or liquids.
12 Always attach plug to appliance first, then plug cord into the wall outlet. To disconnect, press RESET and
remove plug from wall outlet. Never pull on cord.
13 Do not use the appliance for other than intended or specified purposes.
14 Avoid moving parts.
15 Use only
an
electrical outlet rated at 15 amperes or more.
16 Use only 120-VOL
TAC
electrical current.
17 Do not scratch, damage, modify, forcefully bend, pull, twist, or fold the power cord.
18 Do not place the appliance on unstable surfaces or on surfaces that are vulnerable to heat.
SA
VE
THESE
INSTRUCTIONS
THIS APPLIANCE
IS
FOR HOUSEHOLD USE ONLY.
•@Mm,
A.
A short power cord is provided to reduce the risk resulting from becoming entangled
in
or tripping over a
long cord.
B.
Extension cords are available and may be used if care is exercised
in
their use.
C. When
an
extension cord is used:
(1
)the marked electrical rating of the extension cord should be at least as great as the electrical rating of the
appliance, and
(2)the longer cord should be arranged so that it will not drape over the countertop or tabletop where it can
be pulled on by children or tripped over unintentionally.
SPECIFICATIONS
This appliance has a polarized plug (one blade is wider
than the other). As a safety feature, this plug will fit
in
a
polarized outlet only one way. If the plug does not fit fully
in
the outlet, reverse the plug. If it still does not fit,
contact a qualified electrician.
Do
not attempt to defeat
this safety feature.
Power consumption: Heater: 600W
Power consumption: Motor: 1 00W
Power supply: 120V, 60Hz
Dimensions: 17"x10"x12"(43x25x30 cm)
Weight: 17 lbs.(7.8 kg)
3

4
,
TIMPORTANTES
MESURES
DE
SECURITE
POUR
UTILISER
DES
APPAREILS
ELECTRIQUES,
IL
FAUDRAIT
TOUJOURS
PRENDRE
LES
PRECAUTIONS
DE
BASE,
Y
COMPRIS
LES
SUIVANTES
:
1 Lisez toutes les instruction.
2 Ne touchez pas les surfaces qui peuvent etre chaudes.
Utilisez les poignees ou les boutons.
3 Pour se proteger de secousses electriques, n'immergez pas
le
cable, la fiche ou l'appareil a faire du pain dans
de l'eau on tout autre liquide.
4 Surveiliez blen les enfants s'ils utilisent
un
appareil ou s'ils se trouvent a proximite d'un appareil en marche.
5 Debranchez
le
cable d'alimentation secteur lorsque l'on n'utilise pas l'appareil, ou avant de
le
nettoyer.
Laissez l'appareil refroidir avant de le manipuler
ou
de retirer n'importe quelles pieces, et avant de
le
nettoyer.
6 Appareils portatifs. Ne faites pas fonctionner l'appareil
si
le
cordon ou la fiche sont endommages,
si
l'appareil ne
fonctionne pas correctement, s'il est tombe ou s'il a ete endommage. Confiez
au
service de reparation
recommande le plus proche tout examen, reparation ou reglage electrique ou mecanique de l'appareil.
7 L'utilisation d'equipements auxiliaires non recommandes ou vendus par
le
fabricant de l'appareil risque de
provoquer des blessures.
8 N'utilisez pas l'appareil
a l'exterieur.
9 Ne laissez pas le cordon pendre par-dessus le bord d'une table ou d'un comptoir et assurez-vous que
le
cordon
n'est pas en contact avec des surfaces chaudes.
1 0 Ne placez pas l'appareil pres d'un brOleur
a gaz allume ou d'un element electrique
ou
tension
ou
dans
un
four
allume.
11
Soyez tres prudent en deplacant
un
appareil qui contient
du
liquide chaud.
12 Commencez toujours par brancher le cable
a l'appareil et seulement ensuite ce cable a la prise murale. Pour
debrancher, appuyez sur la touche RESET et retirez la fiche de la prise murale. Ne tirez jamais sur le cable.
13 N'utilisez l'appareil que pour la fonction
a laquelle
ii
est destine.
14
Eviter de toucher les pieces mobiles.
15 Utiliser
un
courant de 15 amperes ou plus.
16 N'utiliser qu'un courant electrique
AC
de 120 volts.
17
Ne pas gratter, endommager, modifier ou courber, tirer, plier et tordre de force
le
cordon d'alimentation.
18 Ne pas placer l'appareil sur des surfaces instables ou des surfaces vulnerables
a la chaleur.
CONSERVEZ
CES
INSTRUCTIONS
CET
APPAREIL EST RESERVE A L'USAGE DOMESTIQUE.
•@mo
A.
Un
cable d'alimentation secteur court est fourni pour diminuer les risques provenant d'un emmelement ou d'un
trebuchement sur
un
cable plus long.
B.
Des cables de rallonge sont disponibles et peuvent etre utilises
si
l'on prend garde lors de leur utilisation.
C. Lorsqu'un cable de rallonge est utilise:
(1)
Ia
puissance electrique indiquee sur le cable de rallonge cevra etre au moins aussi elevee que celle de
l'appareil, et.
(2)
Ie
cable de rallonge devra etre dispose de telle sorte qu'il
ne
recouvre pas
le
dessus d'un comptoir ou d'une
table d'ou
ii
risquerait d'etre tire par
un
enfant
ou
sur lequel on pourrait trebucher involontairement.
Cet appareil a une fiche polarisee (une des lames est
plus large que l'autre). Par mesure
de
securite, cette
fiche ne s'adapte dans une prise polarisee que d'un seul
cote. Si la fiche
es
peut s'adapter completement dans la
prise
de
courant, l'inverser. Si elle ne peut encore s'y
adapter
, contacter un electrician qualifie. Ne
jamais
tenter de detruire ou de modifier ce dispositif
de
securite.
SPECIFICATIONS
Puissance: Circuit de chauffage:
600W
Consommation: Moteur: 1
00W
Tension:
120V
, 60Hz
Dimensions: 17"x10"x12"(43x25x30 cm)
Poids: 17 lbs.(7.8 kg)

TP
ARTS NAMES
Flange
Kneading Blade
Baking Pan
Rotating Shaft
Viewing Window
Steam Vent
Heating Element
Power Cord
Wing Nuts
(underneath the Baking Pan)
Lid
Control Panel
Twist Tie
Please
remove
the
twist
tie
holding
the
Power
Cord
before
use
.
Do
not
use
the
Power
Cord
bundled
up.
Doing
so
may
cause
the
Power
Cord
to
become
excessively
hot,
resulting
in
malfunction
.
Power Plug
THANDLING INSTRUCTIONS
How
to
remove
the
Baking
Pan
Grasp the Baking Pan's shorter
Flanges and pull toward you to
unlatch
it.
Then lift to remove.
Use oven mitts for removing a
hot Baking Pan.
How
to
attach
the
Kneading
Blade
O
CORRECT
x
INCORRECT
]l
eading ,
Blade",.
j
otati
ng
'
Shaft
Please
see
the
illustration
above
and
make
sure each Kneading
Blade
is
attached
correctly
on
the
Rotating Shaft.
The
Kneading
Blades
are
designed
to
fit
loosely,
and
may
rotate. This does
not
indicate a defective Kneading
Blade
or
Rotating
Shaft.
How
to
install
the
Baking
Pan
Hold the Baking Pan's shorter
Flanges and place it right in the
center
of
the oven cavity. Press
down until it clicks into place.
5

TCONTROL
PANEL
6
CRUST CONTROL button
DISPLAY
Use this button to choose the crust
Indicates the setting and the time
color from LIGHT, MEDIUM or
remaining until completion. The
DARK (for BASIC, QUICK, CAKE
BASIC
QUICK
WHEAT
DOUGH
display illustrated here shows all
and HOME MADE courses).
See
... ...
...
-
possible displays and is for
page
11
.
LIGHT
~
~Ta=F
KtEADRISE
1
ZIIAKE
reference only. This display will not
MEDIUM
~
~=
3='-15
appear during actual use.
TIMER button
DARK
Use this button to set the Timer.
L
JAM
CAKE
SOUR
DOUGH
HOME
STARTER
MADE
The Timer delays the completion
~
~~iL
LE
cv
eLEJ
HOME MADE COURSE
of the bread or dough course
in
10-minute increments, up to 13
"
HOMEMADE
j
Allows you to program up to 3 bread
hours. See bottom of this page.
TIMER
START/RESET
SELECT
COURSE
baking cycles to your specification.
At initial setting, no cycles are
~
,,....,..
<..
START/RESET button
-
I
_J'
T
Use this button to start a course or
the Timer. Hold the button to cancel
\..
C
programmed. See page 26.
OPERATION LIGHT
Turns on to indicate that the Home
Bakery is
in
operation.
a course, or when the course
completes. The course will not
be
cancelled unless the button is held
and the Home Bakery beeps.
SELECT COURSE button
Use this button to choose the dough preparation / baking course.
BASIC: For baking basic breads using active dry yeast.
BASIC WHEAT: For baking whole grain breads using active dry yeast.
BASIC DOUGH: For preparing dough using active dry yeast.
QUICK: For baking basic breads quicker using rapid rise yeast.
QUICK WHEAT: For baking whole grain breads quicker using rapid
rise yeast.
QUICK DOUGH: For preparing dough quicker using rapid rise yeast.
JAM: For making jam.
CAKE: For baking cakes.
SOUR DOUGH STARTER: For making
sour dough starter.
HOME MADE: Programs up to 3 bread
baking settings to your specification.
• The illustrations used
in
this Operating Instructions may vary from the actual product you have purchased.
COURSE
BASIC
BASIC
WHEAT
BASIC
DOUGH
QUICK
QUICK
WHEAT
QUICK
DOUGH
JAM
CAKE
SOURDOUGH
STARTER
HOMEMADE
STANDARD
TIME
3:45 3:40 1:50 2:18 2:08 0:45 1 :20 2:00 2:10
(PREHEAT
off)
(3:15) (3:00)
(1
:28) (2:13) (2:03) (0:36)
-
(2:05)
TIMER
• • • •
CRUST
CONTROL
• • • •
ADD
INGREDIENTS
BEEP
• • • • • • • •
-
-
-
*Selecting the PREHEAT OFF FUNCTION allows
you
to shorten the total cooking time (see
page
8)
.
■
HOW TO USE THE TIMER
To delay baking, set the Timer to reflect the time difference between the time you
would like the bread or dough course to complete and the present time. The Timer can
be set
in
10-minute increments for up to 13 hours.
1. Press the SELECT COURSE button to choose the course.
2.
Use the TIMER button to set your desired time. The time increases
in
10-minute
increments each time the button is pressed. Hold the button to advance quicker.
Once the Timer reaches 13:00 (13 hours), the Display returns to the minimum time.
3. Press the START/RESET button and make sure that the Operation Light turns
on
.
The Display will show the time remaining until completion
in
1-minute increments.
~~•~'-
------------._
• The Timer can only
be
used with BASIC, BASIC
WHEAT, BASIC DOUGH
and
HOME
MADE
courses.
•
Do
not use the Timer with
recipes that use milk, juice,
vegetables, eggs or other
ingredients that may spoil
easily.

T
ACCESSORIES
Measuring Cup:
The measuring cup provided is the same as a standard
8
oz.
(240
ml)
measuring cup. Filled to the brim, it
measures
1 cup.
It
may also
be
used to measure 1 cup
of flour; however, for measuring dry ingredients (such
as flour) less than 1 cup, please use a nested
measuring cup.
Measuring Spoon:
May
be
used to measure yeast, sugar, salt, dry milk and
spices. The large side measures
1 tablespoon; the small
si
de
measures 1 teaspoon. The halfway mark
on
each
measures one-half tablespoon and one-half teaspoon,
respectively.
200
150
-I====:::==
100
¾
½
50
¼
(L)
(1
Tbsp.)
(S)
(1
tsp.)
@~•LS•§
½
cur
½
½
½
THOW
TO
MEASURE
THE
INGREDIENTS
Dry Ingredients:
• Use a nested measuring cup. Spoon the ingredient into the
cup filling it to overflow.
Do
not press or pack the ingredient,
or scoop the ingredient out of a container with the nested
measuring cup. Doing
so
may pack too much ingredient
in
the cup or create air pockets inside the cup, causing
inaccurate measurements.
• Level off by sweeping off the excess with a knife.
To
measure
3/4 cup, fill and level off the 1 /2 and 1 /4 measuring cups.
Do
not try to measure 3/4 cup
in
a 1 cup measuring cup. Spices
and small amounts of dry ingredients are measured
in
the
provided measuring spoon.
Be
sure to level off.
Liquid:
• The liquid should
be
poured into the cup while the cup is
placed
on
a flat surface and measured at eye level.
Nested
Measuring
Cup
7

8
TCONVENIENT
FUNCTIONS
&
USEFUL
TIPS
■
HOW TO TURN THE PREHEAT FUNCTION OFF
The preheat function is designed to stabilize the
temperature of the ingredients prior to kneading.
Before
you
turn the preheat function off, please keep
in mind that your dough may not rise well if the
ingredients or the
room
temperature is too cold.
e
To
turn the preheat function off,
first select the course, then
press and hold the TIME and
CYCLE buttons together for at
least 3 seconds until PREHEAT
OFF appears
in
the Display.
• Once the START/RESET button is pressed to start
the course, PREHEAT OFF will disappear from the
Display, and the breadmaker will begin the course.
e
JAM,
CAKE and HOME MADE courses do not
include preheat, and therefore cannot
be
turned off.
• To turn the preheat function back
on,
press and
hold the TIME and CYCLE buttons together for at
least 3 seconds until PREHEAT OFF disappears
from the Display.
■ CHARACTERISTICS OF INGREDIENTS
· Dry yeast feeds
on
sugar and ferments
it,
thus
causing dough to rise. Dry yeast (simply dried
granules of yeast) is made of tiny plants that change
food (especially gluten and sugar) into bubbles of
carbon dioxide. As these bubbles expand, the bread
rises. The recipes developed for the Home Bakery
used "Fleischmann's active dry yeast" or
"Fleischmann's rapid rise yeast". Dry yeast should
be
kept
in
the freezer or refrigerator. Please
be
sure
that fresh yeast is used. Using old yeast is not
recommended and may adversely affect the
outcome of your bread.
·Bread flour is a type of wheat flour made from hard
wheat that includes all of the gluten from the grain.
Since bread flour has a higher gluten and protein
content than all purpose flour, it is well-suited for
use
in
yeast breads. Gluten gives structure and
height to the loaf, thus bread flour rises better than
other flours.
It
produces a higher loaf and bread that
has a coarser texture.
·Gluten is
an
elastic protein found mainly
in
wheat
flour (all flour contains some gluten). Gluten is
an
important element
in
all yeast breads, as it gives
bread its structure or framework. Flours with a high
gluten content make the best bread flours.
·Whole wheat flour, ground from the entire wheat
kernel, is heavier, and richer
in
nutrients.
·All purpose flour
is a blend of refined wheat flour
especially suitable for making cake, croissants and
pizza.
·Sugar
is important for the color and flavor of
breads, as well
as
to feed the yeast. Recipes that
call for sugar require granulated sugar.
Do
not
substitute with powdered sugar, brown sugar or
other sweeteners unless indicated.
·Salt
adds flavor and stabilizes the gluten in the
dough.
It
also controls the growth of yeast.
·Butter makes breads soft and glossy. Measure and
cut into small pieces. The recipes
in
this manual
were developed using unsalted butter. Salted butter
and margarine may
be
used, but
we
recommend
the use of unsalted butter.
·Dairy (milk, dry milk, etc.) adds texture
and
flavor,
and
helps
keep
breads softer.
You
may
substitute
milk or buttermilk for dry
milk,
but
the
loaf
may
come
out shorter
and
the
crust
may
be
darker than dry milk
breads.
The Timer cannot
be
used
if
milk or buttermilk
is
substituted for dry milk.
·Eggs add richness and velvety texture to bread
dough. Use large-size eggs
in
these recipes.
■
TIPS FOR SUCCESSFUL BAKING
1. Ingredients: Always use fresh ingredients.
2.
Measurements: Measure ingredients accurately.
Bread and yeast are very delicate and will not rise
and bake properly if the ingredients are measured
inaccurately. Follow the measuring guidelines
on
page 7.
3.
Liquids First: Always place liquid ingredients
in
the baking pan first to allow the Home Bakery to
knead properly.
4.
Room Temperature:
If
the room temperature is
over 77°F (25°C), we recommend using
refrigerated liquids. Flour should
be
fresh and at
room
temperature.
5.
Humidity: Humidity tends to make dough moister.
Try adding
an
extra tablespoon of flour to improve
the dough consistency. Repeat if necessary until
the dough forms a nice ball.
6.
High Altitude:
For
baking
in
high altitudes, decrease
the
amount
of
yeast by approximately 1/2 teaspoon,
and
decrease the sugar slightly.

eeasic
Course:
Use
Active
Dry
Yeast
~
?~~~~
rn(n_
+----+-_4_5_m_in_----r-----_---,--25_m_i_n~~~--r~~-4.s_-_55_m_in_--+------.-
_
~~
_m_i~=-=--:j
:,
Preheating Stir Second
Keep
warm
:,
down rising
b
about
~-
A- d-d-
1
8-e~
ep
---~
-~
---~
-~
---~--
C- o_m_p~l~t~
~~~~
- - - -
J
33-43
min
---------1
,..._------------
3:45
----------------<
■
The times of the Preheating and Third Rising cycles may vary depending
on the room temperature.
eauick
Course:
Use
Rapid
Rise
Yeast
.J
9

10
TBASIC /
QUICK
COURSE
BASIC STEPS
1 Remove the Baking Pan.
Open the Lid, grasp the Baking Pan's shorter
flanges and pull it toward you to unlatch
it.
Then remove by lifting it straight up.
2 Attach the Kneading Blades to the
Baking Pan.
Attach the Kneading Blade to the rotating
shaft and push down firmly.
-~mm-
Be
sure to attach the
Kneading Blade securely
•
Q
coRRECT
X
1NCORRECT
]ill
eading
17
Blade"
:
otating
I ,
Shaft
I '
3 Precisely measure ingredients and add them into the Baking Pan
in
the following order (see following pages for recipes):
(1)Water.
(2)
Add
flour.
(3)Add sugar, dry milk, salt and butter.
(4)Make a depression
in
the middle of the flour and place the yeast there. Make sure the yeast does
not touch any liquid.
•@Mts-
lf dry yeast contacts
water, results may not
be ideal.
4 Insert the Baking Pan into the
unit and close the lid.
Place the Baking Pan
in
the center of the
oven cavity and press down on it until it clicks
into place. Close the Lid.
5 Plug into outlet.
3:45 shows up
in
the Display.
BASIC
QUICK
WHEAT
DOUGH
....
~~
-
[
LIGHT
MEDIUM
◄
DARK
JAM
CAKE
SOUR
DOUGH
HOME
STARTER
MADE

r
6 Select the desired course.
(1
)Press the SELECT COURSE button to set the arrow
(•)
to "BASIC"
or"QUICK".
(2)Press the CRUST CONTROL button to set the arrow (
◄)
to either,
"LIGHT", "MEDIUM" or "DARK" to choose the crust you want.
(3)Press the START/RESET button.
·The Operation Light will turn on and the first cycle is shown (i.e.
PREHEAT).
·As
the process continues, the indication advances from PREHEAT,
KNEAD, RISE then to BAKE.
·When it's time to add ingredients such as raisins or nuts, the Home
Bakery will beep for 30 seconds, and ADD will flash
in
the Display.
Open the Lid and add the appropriate ingredients according to the
recipe.
•The Display will show the time remaining until completion
in
1-minute increments.
BASIC
QUICK
WHEAT
DOUGH
JAM
CAKE
SOUR
DDUGH
HOME
STARTER
MADE
TIMER
START/RESET
SELECT
COURSE
0
7 Remove the Baking Pan.
When baking completes, beeps will sound and
COMPLETE will be displayed. Press and hold the
START/RESET button until you hear a beep and then
open the Lid. Use oven mitts, grasp the Baking Pan's
shorter Flanges and pull the Baking Pan towards you to
unlatch it. Lift to remove.
BASIC
QUICK
WHEAT
DOUGH
I
- - If
the
START/RESET button is not pressed: - - - ,
1 • The Home Bakery will automatically
go
into
KEEP
WARM
to
keep
the
bread
warm
for
up
to
60
minutes.
1
:
However,
the
sides
of
the
bread
may concave, or
the
crust may become harder or darker during KEEP
WARM
.
The
bread
may also become soggy.
1
1
:
1
: •
Do
not place
the
hot Baking
Pan
on
surfaces that
are
vulnerable to heat
as
doing
so
may damage
the
surface.
eThe
Home
Bakery, the Baking
Pan
and
the air inside the Home Bakery will
be
very hot. Please
be
careful not to
burn
yourself
when
opening the
Lid
.
•
Do
not place a hot Baking
Pan
on
top of
the unit or any heat-sensitive material.
Damage
to
the unit or material may result.
:
1
1
, ______________________________ /
D
CAKE
SOOR
OOOOH
HOME
STARTER
MADE
BASIC
QUICK
WHEAT
DOUGH
...
r
,.
~'i~
JAM
CAKE
SOOR
OOOOH
HOME
STARTER
MADE
8 Remove the bread.
Turn the Baking Pan over and shake the loaf
out. If the Kneading Blade remains
in
the
bottom of your loaf, allow the loaf to cool then
use a plastic spoon or rubber spatula to
remove the Blade.
If the bread is difficult to remove, turn the Baking Pan on
its side and wiggle the Wing Nuts (the propellers at the
bottom) a few times. (Turning the Wing Nuts too much
may create a large hole at the bottom of the bread.)
r "
9 Be sure to unplug
after using.
Do not tug on the
Power Cord.
To use the Timer, please see "HOW TO USE THE TIMER" on page 6.
11

12
•
Recipes listed in this section were
prepared for the BASIC course. By
changing the amounts
of
some
ingredients, these recipes can also be
used for the QUICK course.
Ingredient amounts for the BASIC
course are indicated in red and those
for the QUICK course in blue. Select
the appropriate amounts depending on
the course you've chosen.
TIMER
Indicates that the Timer is
available. The Timer cannot be used
for QUICK course .
•
Please
use
a nested measuri
ng
cup that is 8 oz. (240
ml)
per cup.
BASIC WHITE BREAD
1-1/3
cups
320mL
Water
4-1/4
cups
544g
Bread Flour
4
Tbsp
.
46g
Sugar
2
Tbsp
.
89.
Dry Milk
2
tsp
.
11
.
29.
Sait
2-1/2
Tbsp
.
35g
Butter
2
tsp
.
5.6g
Active Dry Yeast
3
tsp
.
9g
Rapid Rise Yeast
ITALIAN HERB BREAD
1-1/3
cups
320mL
Water
4-1/4
cups
544g
Bread Flour
3 Tbsp.
35g
Sugar
2
tsp
.
11
.2g
Salt
2
Tbsp
.
26g
Olive Oil
1
tsp
.
0.8g
Basil
2 tsp.
5.6g
Active Dry Yeast
2-1/2
tsp
.
7.5g
Rapid Rise Yeast
SUGAR
FREE
WHITE
BREAD
1-1/3
cups
320mL
Water
4-1/4
cups
544g
Bread Flour
3
Tbsp
.
35g
Fructose
2
tsp
.
11
.
29.
Salt
2-1/2
Tbsp
.
35g
Butter
2
tsp
.
5.6g
Active Dry Yeast
2-1/2
tsp
.
7.5g
Rapid Rise Yeast
CHEESE
'N'
ONION
BREAD
1-1/4
cups
300mL
Water
4-
1/4
cups
544g
Bread Flour
2
Tbsp
.
23g
Sugar
2
tsp
.
11
.29
Salt
2-1/2
Tbsp
. 35g Butter
1-1/4
cups
140g
American Cheese,
Shredded
1/3
cup
40g
Red Onion, Minced
2
tsp
.
5.6g
Active Dry Yeast
SWEET BREAD
1-1/8
cups
270mL
Milk
1
50g Large Egg, Beaten
4-1/4
cups
544g
Bread Flour
4
Tbsp
.
46g
·······
·
sugar
2 tsp.
11
.2g
Salt
2-1/2
Tbsp
.
35g Butter
1 tsp.
2g Orange Peel
2
tsp
.
5.6g
Active Dry Yeast
CHOCOLATE BREAD
1-1/4
cups
300mL
Milk
1
50g
Large Egg, Beaten
4-1/4
cups
544g Bread Flour
2
Tbsp
.
23g
......
sugar
1-1/2
tsp
.
8.4g
Salt
2-1/2
Tbsp
.
35g
Butter
1
Tbsp
.
5g
Unsweetened
Cocoa
2/3
cup
107g Chocolate Chies
2
tsp
.
5.6g Active Dry Yeast

RAISIN BREAD
1-1/3 cups
320ml
Water
4-1/4 cups
544g
Bread Flour
4 Tbsp.
46g
Sugar
2 Tbsp.
8g
Dr:yMilk
1-1/2 tsp.
8.4g
Salt
2-1/2 Tbsp.
35g
Butter
1 tsp.
2g
Cinnamon
2 tsp.
5.6g
Active Dry Yeast
When beep sounds add:
1 cup
140g Raisins (separate
before
adding)
2-1/2 tsp.
7.
5g
Rapid Rise Yeast
RUSSIAN KULICH
1-1/8 cups
270ml
Milk
2
100Q
........
Large
Eggs
,
Beaten
1 tsp.
4g
Almond Extract
4-1/4 cups
544g
Bread Flour
2Tbsp
.
23g
.............
sugar
1-1/2 tsp.
8.4g
Salt
2-1/2 Tbsp.
35g
Butter
1/3 cup
40g
Slivered Almonds
2 tsp. 5.6g Active Dry Yeast
When beep sounds add:
1/2 cup
60g
Chopped
Dried
Fruit
2-1/2 tsp.
7.5g
Rapid Rise Yeast
APPLE OAT BREAD
1-2/3 cups
400ml
Apple Juice
4-1/4 cups 544g
Bread Flour
2 Tbsp. 23g Sugar
1-1/2 tsp. 8.4g
Salt
2-1/2 Tbsp.
35g
Butter
1 tsp. 2g
Cinnamon
1/2 cup
40g
Oats
2 tsp. 5.6g Active Dry Yeast
When beep sounds add:
1/2 cup 40g
Diced
Dried
Apple
FAT
FREE
APPLE
OAT
BREAD
1-2/3 cups
400ml
Apple Juice
4-1/4 cups
544g
Bread Flour
2 Tbsp.
23g
Sugar
1-1/2 tsp.
8.4g
Salt
1 tsp.
2g
Cinnamon
1/2 cup
40g
Oats
2 tsp.
5.
6g
Active Dry Yeast
When beep sounds add:
1/2 cup
40g
Diced
Dried
Apple
BASIC
WHITE
BREAD
(1.5
lbs.
/681
g
SIZE)
1 cup
240ml
Water
3-1/4 cups
416g
Bread Flour
3 Tbsp.
35g
Sugar
1-1/2Tbsp
.
69
Dry Milk
1-1/2 tsp.
8.4g
Salt
2Tbsp
.
28g
Butter
1-1/2 tsp.
4.2g
Active Dry Yeast
2 tsp.
69
Rapid Rise Yeast
RAISIN
BREAD
(1.5
lbs./681
g
SIZE)
1 cup
240ml
Water
3-1/4 cups
416g
Bread Flour
3 Tbsp.
35g
...........
..
..
sugar
1-1/2 Tbsp.
69
D~Milk
1 tsp.
s:6g
Salt
2 Tbsp.
28g
Butter
1/2 tsp.
1g Cinnamon
1-1/2 tsp.
4.2g
Active Dry Yeast
When beep sounds add:
3/4 cup 105g
Raisins (separate
before adding)
2 tsp.
69
Rapid
Rise
Yeast
■
Gluten-Free Bread
Gluten-free
breads
contain
no
gluten
(wheat
protein)
and
are
developed
for
those
with
celiac
disease
,
or
gluten
intolerance
.
Please
visit
www
.
zojirushi
.
com
or
call
Zojirushi
Customer
Service
at
1-800-733-6270
for
more
gluten-free
recipes.
GLUTEN-FREE
BROWN
RICE
BREAD
1-1/2 cups
360ml
Milk
3 150g Large Eggs, Beaten
1 Tbsp.
14ml
Apple Cider Vinegar
1/8 cup 27g
Vegetable Oil
.....
...
....
.....
2 Tbsp. 40g Honey
2 cups 296g Brown Rice Flour
2 cups
2809.
Potato Starch
A
1 Tbsp.
89
Xanthan Gum
1 tsp.
s:69
Salt
2-1/2 tsp. 7g Active Dry Yeast
• Mix and sift A
in
advance.
GLUTEN-FREE
RAISIN
BREAD
1-1/2 cups
360ml
Milk
3 150g Large Eggs, Beaten
1 Tbsp.
14ml
Apple Cider Vinegar
2 Tbsp. 26g
Vegetable Oil
.............
..
.
2 Tbsp.
40g Honey
2 cups
296g
Brown Rice Flour
2 cups
280 Potato Starch
A
1 Tbsp.
89
Xanthan Gum
1 tsp. 5;59
Salt
2-1/2 tsp.
7g
Active
Dr:y
Yeast
When beep sounds add:
1/2 cup 70g Raisins, Chopped
• Mix and sift A
in
advance.
13

r
r
\..
r
\..
14
WHEAT
COURSE
esasic
Wheat Course:
Use Active Dry Yeast
+-----+-----+--~----+--~----+----
- _
60min-----j
Keepwarm
!
~--~----+-
-
~---
-
~--~--~---------
J
b
about
Add
1
Beep
Compl~te Beep
48-53
min
------1
i---
----------
3:
40
----------
-----,
■
The times for the Kneading, Second risi
ng,
Th
i
rd
risi
ng
and Baking cycle
may vary depending on the room temperature.
eauick
Wheat Course:
Use Rapid Rise Yeast
t-='-~rn~n___ 25min 8min 35min 55min
___
6?rn~n_~
First rising
~~~n
Keep
warm
:
~--~----+-
-
~-----~---------
J
b
about
Add
1
Beep
Comp1
!
1e
Beep
25
min
------I
1---
--------
2:08
-------
-----1
1-5 Follow steps 1-5 for
BASIC/
QUICK COURSE on page 10.
6 Select the desired course.
(1)
Press the SELECT COURSE button to set the arrow
(.A.)
to BASIC WHEAT or QUICK WHEAT.
(2)
Press the START/RESET button.
BASIC
QUICK
WHEAT
DOUGH
L:,.
JAM
CAKE
SOURDOUGH
HOME
STARTER
MADE
•The Operati
on
Light will turn
on
and the first cycle
is
shown (i.e. PREHEAT).
•
As
the process continues, the indication advances from
PREHEAT, KNEAD, RISE then to BAKE.
·When it's time to add ingredients such as raisins or nuts,
the
Home Bakery will beep for 30 seconds, and ADD will
flash
in
the Display. Open the Lid and add the
appropriate ingredients accordi
ng
to the recipe.
•The Display wi
ll
show the time remaini
ng
unt
il
completi
on
in
1-minute increments.
TIMER
START/RESET
SELECT
COURSE
0
7-9 Follow steps 7-9
for
BASIC/
QUICK COURSE
on
page 11.
To use
the
Timer, please see "HOW TO USE THE TIMER"
on
page
6.

•
Recipes
li
sted in this section were
prepared for the BASIC WHEAT
course. By changing the amounts
of
some ingredients, these recipes can also
be used for the QUICK WHEAT
course. Ingredient amounts for the
BASIC WHEAT course are indicated
in
red and those for the QUICK
WHEAT course
in
blue. Select the
appropriate amounts depending on the
course you've chosen.
TIMER
Indicates that the Timer is
available. The Timer cannot be used
for QUICK WHEAT course .
Please use a nested measuring
cup
that is 8 oz. (240
ml)
per
cup
.
•
100%
WHOLE
WHEAT
BREAD
1-7/8 cues
450ml
Water
.....
5 cues
..
600g Whole Wheat Flour
3 Tbsp.
35g.
··
..
..
....
..
..
sugar
2Tbsp
.
89
D~Milk
2tsp.
11
.29 Salt
1-1/2tsp
.
8.4g
Salt
4 Tbsp.
32g
Vital Wheat Gluten
2Tbsp
.
28g
Butter
2tsp.
5.
6g
Active Dry Yeast
3tsp
.
9g
Rapid Rise Yeast
LIGHT RYE BREAD
1-1/2 cups
360ml
Water
4-1/4 cups
544g Bread Flour
2/3 cup 80g
Rye
Flour
2Tbsp
.
23g
Sugar
1-1/2 tsp. 8.4g Salt
2Tbsp
.
28g
Butter
1 Tbsp. 7g Caraway Seed
2tsp.
5.6g Active Dry Yeast
3tsp
.
9g
Rapid Rise Yeast
WHOLE
WHEAT
NUT
BREAD
1-7/8 cups
450ml
Water
5 cups
600g Whole Wheat Flour
3 Tbsp.
35g
.
.....
.
........
Sugar
2 Tbsp.
89
D~Milk
1-1/2 tsp.
8.4g Salt
2 Tbsp.
28g Butter
2/3 cup
73g Walnuts Chopped
5 Tbsp.
40g
Vital
Wheat Gluten
2 tsp.
5.
6g
Active Dry
Yeast
3tsp
.
9g Rapid
Rise
Yeast
FAT
FREE
BASIC
WHEAT
BREAD
1-2/3 cups
400ml
Water
3-1/2 cups 448g Bread Flour
1-1/2 cups
180g Whole Wheat Flour
2Tbsp
. 23g Sugar
1-1/2 tsp. 8.4g Salt
2tsp.
5.6g Active Dry Yeast
100%
WHOLE
WHEAT
APPLE
BREAD
2 cups
480ml
Water
5 cups
600g
Whole Wheat Flour
3 Tbse. 35g
Sugar
2Tbsp
.
8g
Dt:Y
Milk
1-1/2 tsp.
8.4g
Salt
2Tbsp
.
28g
Butter
1 tsp.
2g
Cinnamon
5 Tbsp.
40g
Vital Wheat Gluten
3tsp
.
8.4g
Active Drv Yeast
When beep sounds add:
1 cup
80g
Diced
Dried
Apple
100%
WHOLE
WHEAT
FRUIT
BREAD
2 cues
480ml
Water
5 cups
600g
Whole Wheat Flour
3 Tbse. 35g
Sugar
2 Tbsp.
8g
Dt:Y
Milk
1-1/2 tsp.
8.4g
Salt
2 Tbsp.
28g
Butter
1 tsp.
1.
6g
Alls12ice
5 Tbsp.
40g
Vital Wheat Gluten
3tsp
.
8.4g
Active Drv Yeast
When beep sounds add:
2/3 cup
80g
Chopped Dried Fruit
15

HONEY WHEAT BREAD
1-3/8 cups
330ml
Water
4-1/4 cups
544g Bread Flour
1/2 cup 89g
Cra
c
ked
Wheat
3 Tbsp. 60g Honey
1-1/2 tsp. 8.4g Salt
2 Tbsp. 28g Butter
2 tsp. 5.
6g
Active Dry Yeast
ITALIAN WHEAT BREAD
1-1/2 cups
360ml
Water
2-2/3 cups
341g Bread Flour
2 cups
240g
Whole
Wheat
Flour
2Tbsp
. 23g Sugar
1-1/2 tsp. 8.4g Salt
2Tbsp
. 26g Olive Oil
1 tsp.
0.89
Basil
2tsp
. 5.6g Active Dry Yeast
3tsp
. 9g Rapid Rise Yeast
100%
WHOLE
WHEAT
BREAD
11.s1bs.i681gS1ZE)
1-1/2 cues
360ml
Water
4 cues
480g
Whole Wheat Flour
2Tbse
.
23g .. .. sugar
1-1/2 Tbse.
69
D~Milk
1 tse.
5.6g
Salt
1-1/2 Tbse.
21g
Butter
3 Tbse.
24g
Vital Wheat Gluten
1-1/2tsp.
4.2g
Active Dry
Yeast
2-1/2 tsp.
7.5g
Rapid
Rise
Yeast
SEVEN-GRAIN
BREAD
1-1/2 cups
360ml
Water
4-1/4 cups 544g Bread Flour
2/3 cup
1099
Seven-Grain
Cereal
2 Tbsp.
23g
Sugar
2 Tbsp.
89
Dry Milk
1-1/2 tsp. 8.4g Salt
2 Tbsp. 28g Butter
2 tsp. 5.6g Active Dry Yeast
3 tsp. 9g Rapid Rise Yeast
PUMPERNICKEL
BREAD
1-2/3 cups
400ml
Water
2-1/3 cups 299g Bread Flour
1 cup 120g Whole Wheat Flour
1 cup 120g
Rye
Flour
3 Tbsp. 60g Molasses
1-1/2 tsp. 8.4g Salt
2Tbsp
. 26g Vegetable Oil
4 Tbsp.
32~
Cornmeal
2tsp
. 2g Instant Coffee
2Tbse
. 10g
Unsweetened
Cocoa
5 Tbsp. 40g Vital Wheat Gluten
2tsp
. 5.6g Active Dry Yeast
100%
WHOLE
WHEAT
APPLE
BREAD
(151bs
.
i681
gSIZ~
1-2/3 cups
400ml
Water
4 cues
480g
Whole Wheat Flour
2Tbsp
.
23g
Sugar
1-1/2 Tbse. 6g
D!Y
Milk
1 tse. 5.6g
Salt
1-1/2Tbse
. 21g
Butter
1/2 tse. 1g
Cinnamon
4 Tbse. 32g
Vital Wheat Gluten
2 tse. 5.6g
Active Drv Yeast
When beep sounds add:
3/4 cup 60g
Diced
Dried
Apple
16

r
eeasic
Dough Course:
eauick
Dough Course:
Use Active Dry Yeast Use Rapid Rise Yeast
r??
_!f!iri
--
+------+------+------------'
'
Stir
down
b
about
Add
1
seep
38
min
------1
>-------
----
1:
50
-------
-----,
b
about
Add
1
seep
25
min
-----I
t---
----
0:45
--------
-----,
1-5 Follow steps 1-5 for
BASIC/
QUICK COURSE on page 10.
6 Select the desired course.
(1) Press the SELECT COURSE button to set the arrow (
A)
to BASIC
DOUGH or QUICK DOUGH.
(2) Press the START/RESET button.
BASIC
QUICK
WHEAT
DOUGH
...
;o;
...
r
1:so
JAM
CAKE
SOUR
DOUGH
HOME
mRlER
MADE
• The Operation Light will turn on and the first cycle is shown (i.e.
PREHEAT).
• As the process continues, the indication advances from PREHEAT,
KNEAD, then to RISE.
• When it's
time to add ingredients such as raisins or nuts, the Home
Bakery will beep for 30 seconds, and ADD will flash
in
the Display. Open the Lid and add the
appropriate ingredients according to the recipe.
• The Display will show the time remaining unt
il
completion
in
1-minute increments.
A
TIMER
START/RESET
SELECT
COURSE
0
7
Remove the Baking Pan.
(1) When the course is done, beeps alert you
that the dough is ready and the Operation
Light will turn off.
(2)Press and hold the START/RESET button.
(3) Remove the Baking Pan. Open the Lid and pull the Baking Pan toward you by grasping the Baking
Pan's shorter Flanges. This will unlatch the Baking Pan so you can
li
ft it to remove.
JAM
CAKE
SOUR
DOUGH
HOME
mRTER
MADE
...
QUICK
WHEAT
oijjQj)
...
►
l·r-~
CAKE
SOUR
DOUGH
HOME
mRlER
MADE
8
Remove the dough.
Prepare a lightly floured board. Gather the dough at
the center of the Baking Pan. Remove the dough
carefully by raising it gently and place it on the board.
If the Kneading Blade remains
in
the bottom of your
dough, remove the Blade.
~
r
~
9
Be sure to unplug after using.
Do
not tug on the Power Cord.
r
~
1 0
Shape the dough and bake.
Shape the dough as you like and
let it rise. Then bake
in
an oven.
\...----------------------~
\.,_
_______________
~
To use the Timer, please see "HOW TO USE THE TIMER" on page
6.
17

18
TDOUGH
I
QUICK
DOUGH
VARIATIONS
Recipes listed
in
this section were prepared for the BASIC DOUGH course. By changing the amounts
of
some ingredients, these
recipes can also be used for the QUICK DOUGH course. Ingredient amounts for the BASIC DOUGH course are indicated in red and
those for the QUICK DOUGH course
in blue. Select the appropriate amounts depending on the course you've chosen.
TIMER
Indicates that the Timer is available. The Timer cannot be used for QUICK DOUGH course.
Please
use
a
nested
measuring
cup
that
is
8
oz
.
(240
ml)
per
cup
.
CROISSANTS
2/3
CU[>
160ml
Water
2
1009
Larg!=l
_.
!=.ggs,
Beaten
2-1/4
CU[>S
288g Bread Flour
1
CU[>
130g All
PUr[>OSe
Flour
3 Tbs[>.
35g
Sugar
3 Tbs[>. 12g
D~Milk
1
ts[>
. 5.6g Salt
3 Tbs[>. 42g Butter
1-1/2
tsp
. 4.2g Active Dry Yeast
2tsp
. 6g Rapid Rise Yeast
For kneading into
dough
:
1
cup
227g Butter, Softened
Egg Glaze:
1 50g Larg~ ~gg,
Beaten
4tsp
.
18ml
Water
■
METHOD
Follow basic steps 1-7 for making dough (see page
17).
1 Remove dough from the Baking
Pan
. Put into
greased bowl. Cover with plastic wrap. Place
in
refrigerator and allow to rest 30 minutes.
2
Roll
dough into
20
x 14-in. (50 x 35 cm) rectangle
on
a lightly floured surface. Using about 1/3 cup
of softened butter, butter 2/3 of dough while
leaving 1/3 of dough unbuttered.
3 Fold dough into thirds and repeat step 2 twice
more. Add flour to rolling surface as needed to
prevent sticking. Cover completely with plastic
wrap and place
in
refrigerator for 1 to 2 hours or
overnight.
4 Cut dough into 3 pieces and roll each piece to
1/4-in.
(5
mm) thick. Cut dough into triangles.
(Wide end should
be
about 3-1/2-
in.
(9
cm))
5
Roll
each triangle loosely starting from the wide
end, lay with
seam-side down.
Curve ends.
6 Place
on
greased baking pan. Allow to rise for
about 40 to 50
minutes or until
size doubles.
7 Brush lightly with egg glaze.
8 Bake at 375°F (190°C) for 10 to 15 minutes, or
until golden brown and flaky. Makes 24
croissants.
■

TRADITIONAL PIZZA DOUGH
1-1/4cups
300ml
Water
1-1/2 Tbsp. 20g Olive Oil
3-3/4 cups
4809
Bread Flour
1-1/2 Tbsp. 17g Sugar
1-1/2 tsp. 8.4g Salt
1-1/2 tsp. 4.2g
Active
Dry
Yeast
Vegetable Oil
2 tsp.
69
Rapid
Rise
Yeast
PIZZA DOUGH WITH BEER
1-1/3cups
320ml
Flat Beer
3-3/4 cups
4889
All
Purpose Flour
3 Tbsp. 35g Sugar
H/2tsp.
8.4g Salt
H/2Tbsp
. 21g Butter
H/2tsp.
4.2g
Active
Dry
Yeast
Vegetable Oil
2 tsp.
69
Rapid
Rise
Yeast
■
METHOD
■
Follow basic steps 1-7 for making dough (see page
17).
1 Remove dough from the Baking
Pan
.
2 Select shape variation of your choice.
THIN-CRUST PIZZA
1 Flour hands lightly. Shape dough into a ball.
Divide ball
in
quarters. Press each quarter of
dough into greased, 12-in. (30 cm) pizza pan,
forming 1-in. (2.5
cm)
edge.
2 Brush crust with oil. Cover and let stand 15
minutes.
3 Spoon tomato or pizza sauce over dough, top
with cheese and topping of your choice.
4 Bake 25 to 30 minutes at 400°F (200°C) or until
cheese gets bubbly and crust
is
golden brown.
Makes four 12-in. (30
cm)
pizzas.
THICK-CRUST PIZZA
1 Flour hands lightly. Shape dough into a ball.
Divide ball in half. Press each dough into
greased, 12-in. (30 cm) pizza pan, forming a high
edge.
2-4 Follow steps 2-4 for the Thin-Crust Pizza
recipe. Makes two 12-in. (30 cm) pizzas.
CRUSTY ROLLS
Prepare pizza dough with beer.
1 Put dough
on
lightly floured board, divide into
quarters, cut each quarter into 6 pieces.
2 Shape each piece into flattened oval-shaped ball.
3 Dip bottom of dough balls
in
cornmeal and place
on
greased baking sheet about 1-1/2-in.
(4
cm)
apart.
4 Slash tops of rolls with sharp knife or razor blade.
5 Cover dough lightly and allow to rise 30 minutes.
6 Brush rolls with one egg yolk beaten with 1 Tbsp.
water.
7 Bake rolls at 400°F (200°C), 15 to
20
minutes.
8 Let cool
on
rack. Makes 24 rolls.
SOFT PRETZELS
Prepare pizza dough with beer.
1 Put dough
on
lightly floured board, divide into 8
equal portions.
2 Cut each portion again into
6 equal portions. Roll
each piece of dough into pencil-thin line about
20-in. (50 cm) long.
3 To shape into
pretzel, pick up
ends of line
in
each hand and
curve into circle,
crossing end at
top.
4 Twist ends once
and lay down
over bottom of
circle.
5 Place about 1-in. (2.5 cm) apart
on
well-greased
baking sheets. Brush with beaten egg and
sprinkle lightly with coarse salt, poppy seeds or
sesame seeds.
6 Bake at 400°F (200°C), 10 to 20 minutes.
7 For crispy pretzels, place cooked pretzels
in
cool
oven on ungreased
baking sheet. Allow to
stand 3 hours or
overnight. This process
makes pretzels dry and
crunchy.
8 For soft, chewy pretzels, serve warm from the
oven. Serve with mustard. Makes 48 pretzels.
19

DOUGH
I
QUICK
DOUGH
VARIATIONS
BUTTER-RICH
ROLL
&
BREAD
DOUGH
7/8 cup
210ml
Milk
1
50g
Large Egg, Beaten
3-1/3 cups
427g
Bread Fiour
4 Tbsp.
46g
Sugar
1 tsp.
5.6g
Salt
1/4 cup
57g
Butter
1-1/2 tsp.
4.2g
Active
Dry
Yeast
Egg Glaze:
1
50g
Large
EgJI,
Beaten
4tsp
.
18ml
Water
2 tsp.
6g
Rapid Rise Yeast
■
METHOD
■
Follow basic steps 1-7 for making dough (see
page 17).
1 Remove dough from the Baking Pan.
2 Choose shaping method.
3
Egg
glaze: beat together egg and water. Brush
generously over shaped loaves or rolls prior to
baking.
CINNAMON-RAISIN ROLLS
Prepare Butter-Rich Roll & Bread Dough.
1 Put dougah
on
lightly floured board. Divide
dough
in
3 pieces.
2 Roll each 1/3 into a 8 x 9-in. (20 x 23 cm)
rectangle. Spread surface with 1/4 cup butter,
thinly sliced.
3 Sprinkle surface with 1 /4
cup brown sugar, 1 tsp.
cinnamon. Sprinkle 1 /3
cup raisins over dough.
4 Start with 8-in. (20 cm)
side and roll dough
jelly-roll style, pinch
seam to
seal.
With seam side down, cut
in
8
1-in
.
(2.5
cm)
pieces.
5 Place
on
greased baking sheet 2-in.
(5
cm)
apart.
Cover lightly with damp towel. Allow to rise
in
warm place until size doubles
--
about 40
minutes to 1 hour.
6 Bake at 375°F (190°C), 10 to 15 minutes. Makes
24 rolls.
TRADITIONAL LOAF
Prepare Butter-Rich Roll & Bread Dough.
1 Put dough
on
lightly floured board. Divide dough
in
3 pieces. Shape each piece into loaves.
2 Place
in
3 greased 5-1/2 x 3-in. (14 x 8 cm) loaf
pans.
3 Brush with egg glaze if desired.
4 Cover dough, allow to rise
in
warm place until
size doubles -- about 40 minutes to 1 hour.
5 Bake at 375°F (190°C), 25 to 35 minutes. Makes
3 loaves.
PAN ROLLS
Prepare Butter-Rich Roll & Bread Dough.
1 Put dough
on
lightly floured board. Divide dough
into equal quarters. Cut each quarter into 6
pieces. Shape each piece into a ball.
2 Place 1 ball
in
each of 24 greased muffin cups.
3 Brush with egg glaze if desired.
4 Cover dough, allow to rise
in
warm place until
size doubles
--
about 40 minutes to 1 hour.
5 Bake at 375°F (190°C), 10 to 20 minutes. Makes
24 rolls.
CINNAMON-RAISIN SWIRL LOAF
Prepare Butter-Rich Roll & Bread Dough.
1 Put dough
on
lightly floured board. Divide dough
in
3 pieces. Shape each piece into 8 x 5-in. (20 x
13 cm) rectangle. Melt 2 Tbsp. butter or
margarine. Brush over dough.
2 Sprinkle dough with mixture of 1 /4 cup sugar and
1 tsp. ground cinnamon. Sprinkle 1 /3 cup raisins
over dough.
3 Beginning with 5-in. (13 cm) side of dough, roll up
jelly roll-style. Seal ends by pinching edges of
dough together with fingertips.
4 Place dough
in
greased 5-1/2 x 3-in. (14 x 8 cm)
loaf pan or
on
large baking sheet.
5 Allow to rise
in
warm place until size doubles
--
about 40 minutes to 1 hour.
6 Bake at 375°F (190°C), 30 to 40 minutes or until
golden brown.
7 When loaf is cool, glaze with mixture of 2/3 cup
sifted powdered sugar and 1 Tbsp. milk. Makes 3
loaves.
CLOVERLEAF ROLLS
Prepare Butter-Rich Roll & Bread Dough.
1 Put dough
on
lightly floured board. Divide into
quarters. Divide each quarter into 6 pieces. Cut
each piece into 3 sections. Shape each into ball
with palms of hands. Place 3 balls together
in
each of 24 greased muffin cups.
2 Brush with egg glaze if desired.
3 Cover dough, allow to rise
in
warm place until
size doubles
--
about 40 minutes to 1 hour.
4Bake at 375°F (190°C), 10 to 20 minutes. Makes
24 rolls.
BREAD STICKS
Prepare Butter-Rich Roll & Bread Dough.
1 Put dough
on
lightly floured board. Divide into 24
equal pieces for 16-in. (40 cm) sticks. Roll each
piece of dough into thin 16-in. (40 cm) lines.
Arrange lines about 1
-i
n. (2.5 cm) apart on a
greased baking sheet. Allow to rise 30 minutes.
2 Brush wi
th
1 beaten egg white and 1 Tbsp. water.
Sprinkle with poppy seeds, sesame seeds or
coarse salt if desi
red
.
3 Bake at 400°F (200°C), 1 Oto 15 minutes.
20
-----------------------------___,,

-15min
Smin
20min-
Healing Heating
&
Stirring
Caal
l~
I
Complet
1:
20
1,2
Follow steps 1 and 2 for
BASIC/
QUICK COURSE on page 10.
3
Precisely measure ingredients and add them to the Baking Pan.
4,5
Follow steps
4
and
5
for
BASIC/
QUICK COURSE on page 10.
6 Select the JAM course.
(1) Press the SELECT COURSE button to set the arrow
(T)
to JAM.
(2) Press the
START/RESET
button.
• The Operation Light will turn on and cooking will start.
• The Display will show the time remaining until completion
in
1-minute increments.
7 Remove the Baking Pan.
(1) When the course is done, beeps alert you that the jam is
ready and the Operation Light will turn off.
(2) Press and hold the ST ART /RESET button.
(3) Remove the Baking Pan. Open the Lid and use oven
mitts to pull the Baking Pan toward you by grasping the
Baking Pan's shorter Flanges. This will unlatch the Baking
Pan
so
you can lift it to remove.
e
The Home Bakery, the Baki
ng
Pan
and the air inside the Home Bakery
will
be
very hot. Please
be
careful
not
to
burn yourself when opening
the
Lid
.
e
Do
not place a hot Baking
Pan
on
top of the unit or any heat-sensitive
material. Damage to the unit or
material may result.
8 Remove the jam.
Carefully remove the jam from the Baking
Pan using a rubber spatula. If the Kneading
Blade remains
in
your jam, use a plastic
spoon or rubber spatula to remove the Blade.
TIMER
START
/
RESET
SELECT
COIIIISE
0
1
•
,
~
9 Be sure to unplug
after using.
Do not tug on the
Power Cord.
I
Normally, the jam will thicken with refrigeration.
To make the jam thicker, add 1 package (up to 2 oz. (55 g)) of fruit pectin.
STRAWBERRY JAM
3 cups 300g Strawberry, Cut into
2 to 4 portions each
3/4 cup 149g
Sug
_
ar
1 Tbsp.
14ml
Lemon
Juice
Lightly mash strawberries before adding
to Baking
Pan
.
____
_
BLUEBERRY JAM
3 cups 360g Blueberry
_ 3_/4_c_u~p
__
1_
49
_
9.
~
__
S_
ug
_
ar
__
1 Tbsp. 14mL
Lemon
Juice
Ligtly mash blueberries before adding
to
Baking
Pan.
APPLE JAM
3 cups 330g Apple,
Peeled
and
C_h~op
_~
ped
_______
___
_
3/4 cup 149g
Sug
~
ar
___
_
1 Tbsp.
14ml
Lemon
Juice
Place cut apples
in
a microwaveable
container and cover with water. Cook
in
microwave
on
High for 5
to
10 minutes or
until tender. Drain and mash with a
potato masher.
Please use a measuring cup that is 8 oz. (240
ml)
per cup.
21

DRS
,
~
1,2
Follow steps 1 and 2 for
BASIC/
QUICK
COURSE
on
page 10.
3
Precisely measure ingredients and add them to
the Baking
Pan.
4,5
Follow steps 4 and 5 for
BASIC/
QUICK
COURSE
on
page 10.
BASIC
QUICK
WHEAT
DOUGH
CAKE
SOIi!
DOUGH
HOME
mRTER
MADE
TIMER
START/RESET
SELECT
COURSE
0
6
Select the CAKE course.
(1
)Press the SELECT COURSE button
to
set
the arrow
(T)
to CAKE.
(2)Press the CRUST CONTROL button to set
the
arrow(
◄)
to either "LIGHT", "MEDIUM"
or "DARK" to choose the crust you want.
(3)Press the START/RESET button.
• The Operation Light will turn
on
and the first
process is shown (i.e. KNEAD).
(4)11
minutes after pressing the START/RESET
button,
the Home Bakery will beep and ADD
will flash
in
the Display for
5
minutes. Open
the
Lid
and
entl dislod e any flour that is
left
on
the bakin
an
wall with a rubber
~
Add the appropriate
ingredients according to the recipe. Beware
of moving Kneading Blades when working
with the Baking
Pan
during operation.
•
As
the process continues, the indication
in
the Display advances from KNEAD, then
to
BAKE.
• The Display will show the time remaining
until completion
in
1-minute increments.
ecake
Course:
24min
Mixing
♦
. Add Beep
a
JAM
CAKE
som.wr
~~
BASIC
QUICK
WHEAT
DOUGH
r
:~
....
7
Remove the Baking Pan.
♦
Beep
(1) When baking is complete, beeps alert you
that the cake
is
ready and the Operation
Light will turn off.
(2) Press and hold the START/RESET button.
(3) Remove the Baking
Pan
. Open the
Lid
and
use oven mitts to pull the Baking Pan
toward you by grasping the Baking Pan's
shorter Flanges. This will unlatch the
Baking
Pan
so you can lift it to remove.
eThe
Home Bakery, the Baking
Pan
and the air
inside the Home Bakery will be very hot.
Please
be
careful not to burn yourself when
opening the Lid.
•
Do
not place a hot Baking
Pan
on top of the
unit or any heat-sensitive material. Damage to
the unit or material may result.
8
Remove the cake.
Turn the Baking
Pan
over and shake the cake
out. If the Kneading Blade remains
in
the
bottom of your cake, allow the cake to cool
then use a plastic spoon or rubber spatula to
remove the Blade. Please be careful when
removing the
cake from the
Baking
Pan
for
1
may crum
bl
e
or break.
!f!J/
r,-_
1
,-,}-'
·t
·
..
··
!.-/
.
;;
•<a:
.,
_t;,
\l
·.
')tf:\'.
·;,
'9 Be sure to unplug after using.
Do
not tug
on
the Power Cord.
22
··
Complete
'

Please use a nested measuring cup that is 8 oz. (240
ml)
per cup.
SHORTCUT
POUND
CAKE
S-"-'e'-=e~p=ac
=k=
ag=e
'---'-
la
=
b=e
-'
I
E=gg_
See
package
label
Water
or
Milk
1-1
/2 package
(2402
.)
680g
Pound
Cake
Mix
SHORTCUT
CORN
BREAD
S=-e
_e~p_
ac
_,.
k_
ag~e
_,
la
_,
b_e
,
I
E=gg
See
package
label
Water
or
Milk
1-1
/2 package
(22
.5 oz.)
638g
Cornbread
Mix
CHOCOLATE CAKE
_
---
----'
,__
__
_
1/2 cup 120mL Water
3 150g LargeEggs, Beaten
1/2 cup 108g Vegetable Oil
2 tsp. 8g Vanilla Extract
2 cups
260g All Purpose Flour
3 tsp.
11
g Baking Powder
1 cup 198g Sug~ar
____
_
7 Tbsp. 35g Unsweetened Cocoa
_
_
----'
___
_
When beep sounds add:
1/2 cup 80g Chocolate Chips
DUTCH APPLE CAKE
3 150g
Larg~
.~ggs, Beaten
1/2 cup 108g Vegetable Oil
1 tsp. 4g
Vanilla
Extract
···
2 cups 260g
All
Purpose Flour
3 tsp.
11
g Baking Powder
1 tsp.
5g
· Baking Soda
1 cup 198g Sug_
-a
_r
___
_
1/2 tsp. 2.
Bg
~·
..
_ S_a_lt
____
_
1/2 tsp. 0.
Bg
_-=
A
-,-
lls~p
_ic_e
___
_
2 tsp. 4g · Cinnamon
When beep sounds add:
1-1/2 cups 165g
Peeled
and
chopped
Apple
SPICED
ZUCCHINI
BREAD
3
150g
Large Eggs, Beaten
1/3 cup
72g
Vegetable Oil
2cups
260g
All
Purpose Flour
2 tsp.
7g
Baking Powder
............
1 tsp.
5g
Baking Soda
3/4 cup
149g
............
sugar
1/2 tsp.
2.8g
Salt
1/2 tsp.
0.
Bg
Allspice
1 tsp.
2g
Cinnamon
1 tsp. 2g Orange
Peel
When
beep sounds add:
1 cup
96g
Shredded Zucchini
3/4 cup
83g
Chopped Walnuts
CITRUS FRUIT BREAD
3/4 cup
180ml
Orange Juice
1-1/2 Tbsp.
21mL
Lemon Juice
2
100g
Large
Eggs,
Beaten
1/3 cup
72g
.
.
..
. ..Vegetable Oil
2 cups
260g
All
Purpose Flour
3 tsp.
11g
Baking Powder
1 tsp.
5g
Baking Soda
3/4 cup
149g
Sugar
1/2 tsp.
2.8g
Salt
1/2 Tbsp.
4g
Orange
Peel
1/2 Tbsp.
4g
Lemon
Peel
23

SOUR
DOUGH
STARTER
COURSE
esour
Dough Starter Course:
5 mi
n--i-------120
min
-------1
Rising
What is Sour dough starter?
Sour dough starter is a mixture
of
flour, water, sugar and
natural leaven.
This batter is one in which both yeast and bacteria grow in a
perfectly balanced condition. The yeast actually helps and
feed the lactobacilli organism. In other words, Sour dough is
a traditional form
of
the original "leaven" for bread.
Complete Beep
2
'
10
----------<
SOUR DOUGH STARTER
<Starter>
1-1/2 cups
360ml
Water
__
2_
cu
~p_s
___
2_5~
6g
~
__
B_r_ea_d_F_lo_u_r
2 tsp. 5.6g
Active
Dry Yeast
____
_
Please
use
a
nested
measuri
ng
cup
that
is
8
oz.
(240
ml)
per
cup.
24
1-5 Follow steps 1-5 for
BASIC/
QUICK COURSE on page 10.
6
Select the desired course.
(1)
Press the SELECT COURSE button to set the arrow ( -y ) to SOUR
DOUGH ST ARTER.
(2)
Press the START/RESET button.
• The Operation Light will turn on and the first cycle is shown (i.e.
PREHEAT).
• As the process continues, the indication advances from PREHEAT,
KNEAD, then to RISE.
• The Display will show the time remaini
ng
until completion
in
1-minute
increments.
7 Beeps tell you the starter is done.
(1)
When the course is done, beeps alert
you
that the starter
is
ready and the Operation
Light will turn off.
(2)Press and hold the START/RESET button.
LIGHT SOUR DOUGH BREAD
Add
the following ingredients to the Starter.
3 Tbsp.
42ml
Apple Cider Vinegar
2 Tbsp.
28ml
Lemon Juice
3 cups
384g Bread Flour
2 Tbsp. 23g
Sug
~a_r
______
_
H
/2
tsp. 8.
4g
Salt
2 tsp. 5.6g Active
Dry Yeast
1 Add additional ingredients and bake.
To make LIGHT SOUR DOUGH BREAD with your sour dough starter, remove the Baking
Pan
, add
the additional ingredients to the starter, and bake the bread using the BASIC course.
BASIC
QUICK
WHEAT
DOUGH
CAKE
SOOR
OOUGH
HOME
STARTER
MADE
BASIC
QUICK
WHEAT
DOUG
CAKE~=
TIMER
START/RESET
SELECT
COURSE
0
BASIC
QUICK
WHEAT
DOUGH
CAKE
SOOROOUGH
HOME
SW!llll
MADE

r
When
the Starter becomes active,
add
the following
ingredients
to
the Baking
Pan
.
3 cups 384g Bread Flour
2 Tbsp. 23g Sugar
1-1
/2 tsp. 8.
4!;!
~----,
S
-
_alt
,--=---c-c----
2 tsp. 5.
6g
Active
Dry
Yeast
1
Follow steps 1-7 for SOUR DOUGH STARTER on page 24 to prepare the
starter.
2
Remove the Baking Pan with the starter and keep at room temperature
for 7-10 days.
(1)
Cover the Baking Pan with plastic wrap and puncture several holes with a fork.
(2)
To ensure that the temperature is as steady as possible, wrap the Baking Pan with a towel.
•
In
colder areas, we recommend using the 24 hour RISE function
in
the HOME MADE course to
keep the Starter at the optimum temperature. Please
be
sure to cover the Baking Pan with
plastic wrap and puncture several holes before placing
in
the Home Bakery.
(3)
Stir the starter 2-3 times every day.
3
Prepare the Starter for baking.
When the Starter looks ready
in
about 7-10 days, feed the Starter 1 tsp. of sugar and 2 Tbsp. of
bread flour and mix lightly.
In
about an hour, you will see bubbles on the surface that indicate that
the Starter is active.
4
Add additional ingredients and bake.
Add the additional ingredients to the starter, and bake the bread using the BASIC course.
• Both sour dough starter and bread are very sensitive to the environment. Baking results may
vary depending on the season and location.
• Try to keep the area and the Baking Pan as clean as possible while the Starter is leavening.
• When leavening for more than
1
O days, feed the Starter with 1 tsp. of sugar and 2 Tbsp. of
bread flour once every 3-4 days.
• To bake another bread while the starter
is
leavening, transfer the Starter into a non-corrosive
bowl (we recommend glass, ceramic or stainless) and cover with a plastic wrap with holes.
25

!
-~~;~~
I
~;
~
I
Fl
~~~
1~
1
~
1
~1
Thim
~~
I
~
I
K~~~~
I I
Beep
Complete
Beep
I I
■
Other
courses have each cycle time preprogrammed and does not allow
any changes to be made to rising or baking times. The HOME MADE
course allows you to program each of the cycles to adapt better to your
favorite bread recipes.
r
r
1-5
26
Follow steps 1-5 for
BASIC/
QUICK COURSE on page 10.
6
Program the time for each cycle.
(1
)
Press
the
SELECT
COURSE
button
to
select
one
of
the
3
HOME
MADE
memories.
(2)
Press
the
CYCLE
button
to
display
the
PREHEAT
cycle
.
(3}
To
change
the
time
of
the
cycle,
press
the
TIME
button.
(The
time
display
flashes
.
To
reset
,
press
the
START/RESET
button
.)
The
time
will
advance
in
1-minute
increments.
Press
the
CYCLE
button
to
set
that
time.
·
The
factory
default
setting
for
HOME
MADE
is
ALL
OFF
.
(4)
Press
the
CYCLE
button
again
to
display
the
next
cycle.
Use
the
TIME
button
to
set
the
time
,
and
then
press
the
CYCLE
button
to
set
that
time
.
Continue
step
4
to
program
all
cycles.
(Refer
to
the
table
on
page
27
for
the
maximum
programmable
time
of
each
cycle
.)
•
The
length
for
KEEP
WARM
is
preset
to
60
minutes,
and
can
only
be
turned
on
or
off
.
(5)
After
all
the
cycle
times
are
set,
press
the
START/RESET
button
to
check
the
total
time
of
your
setting
.
Press
the
START/RESET
button
again
to
begin
operation.
Make
sure
that
the
Operation
Light
turns
on.
·
To
program
other
HOME
MADE
courses
,
use
the
SELECT
COURSE
button
to
select
MEMORY
2
or
3
and
repeat
the
process.
SELECT
COURSE
CYCLE
A
BASIC
QUICK
WHEAT
DOUGH
OFF
MEMO
RY1
JAM
CAKE
SOUR
DOUGH
HOME
STARTER
MADE
CYCLE
A
START/RESET
0
A
7-9 Follow steps 7-9 for
BASIC/
QUICK COURSE on page 11.

■
EXPLANATION
OF EACH CYCLE:
PREHEAT
OFF, 1-30
min
. Stabilizing the temperature of
ingredients.
RISE2
OFF, 1
min
.- 2 hrs.
Dou2h
rises after steam is
released (about 82.4°F
(28
C))
.
KNEAD
OFF, 1-30
min
. Bread dough making.
At
a cycle
time of less than 3 minutes, this process includes
only kneading. For cycle time of more than 5
minutes, beeps wi
ll
sound to indicate the time
to
add
ingredients.
RISE3
OFF, 1 min.- 2 hrs.
Dough
rises after formed into a
ball (about 100.4°F (38°C)).
BAKE
OFF, 1 -
70
min
. Baking (about 254 -
290
°F
(123
-
143
°C)). 3 shades, LIGHT,
MEDIUM
or
DARK.
RISE1
OFF, 1
min
.-
24
hrs.
Dough
rises (about 82.4°F
(28
°
C)).
KEEP
WARM
OFF or
60
min
.
The
baked br
ead
is kept
warm
(about 194°F
(90
°
C))
.
*Some
settings of the HOME MADE setting are different from the BASIC setting.
To cancel a cycle during that cycle ...
(1
)Press the TIME button to display the ongoing cycle and the
remaining time. (After 5 seconds have passed, the display
automatically returns to the original state.)
(2)While the remaining time is displayed, you can cancel the
current cycle and move on to the next cycle.
• Holding down the CYCLE button slightly longer while the time
display is flashing completes this process. After two seconds,
the display will show time remaining until the bread
is
ready,
resuming operation.
To erase all settings ...
BASIC
QUICK
WHEAT
~
The unit will remember the setting you had programmed for you next bake. If you cancelled a cycle during
that cycle, the unit will remember the shortened cycle for your next bake.
Follow these procedures to erase all settings:
1. Unplug the Power Cord from the outlet.
2.
Plug the Power Cord into the outlet while holding down the
CYCLE button. The HOME MADE memory is erased and
reset. Please keep
in
mind that by resetting the memory, all
settings will
be
erased.
■
Precautions
when using recipes not included
in
this book:
Please note that we are not responsible for any baking or jam
results using ingredients, or amounts which are not listed.
(This also applies to the HOME MADE course where you can
change the baking cycle time to your preference.)
~
CYCLE
~ -A
BASIC
QUICK
WHEAT
DOUG
OFF
MEMORY1
CAKE
SOUR
DOUGH
HOME
STARTER
MADE
•
Be
sure not to place an excessive load on the motor as this may cause unit damage, especially when:
* you decrease the amount of water.
* you increase the amount of flour.
* you add big or hard ingredients, etc.
To use the Timer, please see "HOW TO USE THE TIMER" on page
6.
27

THOME
MADE
VARIATIONS
Please
use
a nested measuring cup that is 8 oz. (240
ml)
per cup.
CRUSTY
FRENCH
1-1/2cups
360ml
Water
4-1/2 cups 576g Bread Flour
1-1/2 tsp.
8.4g Salt
1 Tbsp. 14g Butter
2 tsp. 5.
6g
Active Dry
Yeast
CRUSTY
FRENCH
(1.5
lbs.
/681
g
SIZE)
1 cup
240ml
Water
3-1/4 cups 416g Bread Flour
1 tsp. 5.6g Salt
1/2 Tbsp.
7g
Butter
1-1/2 tsp.
4.2g Active Dry Yeast
■
The
suggested time cycle for CRUSTY FRENCH is as follows:
PREHEAT KNEAD
RISE1
RISE2 RISE3 BAKE KEEP WARM
22
18
45 1
:25
OFF 1 :10 1 :00
■
The
top
of
the
CRUSTY
FRENCH
may
not
turn
out
as
smooth
as
other
breads
.
If
the
top
of
the
CRUSTY
FRENCH
falls
,
try
reducing
the
amount
of
water
by
1
Tbsp
.
If
the
bread
does
not
ri
se
high
enough
,
try
increasing
the
amount
of
yeast
,
or
use
Rapid
Rise
Yeast.
MEATLOAF
MIRACLE
1 Medium Onion, Chop~pe_d
__
_
2 lbs. (900g) Ground Sirloin
1 cup Mushrooms, Sliced
2 tsp. Salt
2 Tbsp. Fresh Parsley, Chopp~e_d
__
_
1 tsp. Garlic Powder
-~
1/
_4~
ts=P
~·
--~
Bla=c~k~
P~epp~e
~r ~
_____
_
1 cup Bread Crumbs
-
=-2
____
--=
La=-rg"'"'e'-'E=ggi,.
,
-=B=ea=t=en
-'------
<GLAZE>
1/2 cup Ketchup
or
Barbecue Sauce
.
..
.
..
..
..
... 1 Tbsp
.~-~
Brown Suga~r
_____
_
r
1 tsp. Prepared Mustard
1
Combine
ingredients and mix well.
In
a large bowl, combine
all
ingredients except for glaze and mix well.
Remove Kneading Blades from Baking
Pan
and press meat mixture into
the Baking
Pan
. Insert the Baking
Pan
into the unit and close the
lid
.
"'
r
2
Prepare Glaze.
In
a small bowl, combine
glaze ingredients and
set aside.
""--------------------------,~
""-----------~
3
Bake in
the
Home
Bakery.
(1) Select the HOME MADE
(1,
2 or 3) course.
(2) Press the CYCLE button, turning OFF all cycles (Preheat, Knead and Rise cycles).
(3) Select the Bake cycle. Press and hold the TIME button until the Display shows 1 :10. Then
press the CYCLE button twice to record this setting.
(4) Press the START/RESET button twice to begin the baking cycle.
(5) Verify that the Operation Light is turned on. Baking time is 1 hour and 10 minutes.
(6) 30 minutes prior to the end of baking time, open the Lid and pour the glaze
mixture on top of the meatloaf. Close the Lid and continue baking.
(7) Once baking is completed, allow the meatloaf to cool slightly, drain juices and
remove from the Baking Pan. Slice and serve.
■
The
suggested time cycle for MEATLOAF MIRACLE is as follows:
PREHEAT KNEAD
RISE1
RISE2 RISE3 BAKE KEEP WARM
OFF OFF OFF OFF OFF 1 :10 OFF
28

TCLEANING
& STORAGE
! CAUTION!
To avoid electrical shock, first unplug the Home Bakery and
allow it to cool before cleaning.
Dust and crumbs that collect inside the Home
Bakery may cause scorching or uneven baking,
so
be
sure to clean the unit and Baking
Pan
after each
use, following these steps.
Outer Body
and
Lid
------
Wipe off the Outer Body of the unit with a damp
cloth. Wipe the Lid as well. Clean the Viewing
Window with a moist paper towel, and wipe dry.
I,
- - - - - - i
CAUT
I
ON
! -------
'.
: Do not immerse the unit
in
water or
any other liquid.
1
, I
,
_____________________
,
Baking
Pan
and
Kneading Blade
Both the Baking Pan and Kneading Blade have
coated nonstick surfaces. Harsh cleaners (such
as
abrasives and metal scrubbers) or utensils (such
as
forks, knives and metal spatulas) must not
be
used
on
these parts
as
you may scratch them. Over time,
the nonstick surface may change color due to
moisture and steam. This is absolutely normal and
has no effect
on
unit performance or use.
-
Remove the Baking Pan from the oven cavity prior
to cleaning. Fill the empty Baki
ng
Pan
with lukewarm
water and liquid detergent. Allow it to sit for 30
minutes before emptying the Pan and removing the
Kneading Blade.
If
the Kneading Blade is difficult to
remove, hold the Kneading Blade
in
one hand and
use your other hand to grasp the Wing Nuts
underneath the
Pan
. Turn both hands in opposite
directions to free the Blade. Clean the inside of the
Baking
Pan
with a soft sponge.
You
may use a very
soft brush to dislodge baked-on crumbs around the
Shaft and in the center of the Kneading Blade. Make
sure
you
reattach the Kneading Blade to the Baking
Pan after cleaning. Never use a dish washer or
dryer, as it may result
in
deformation or discolorati
on
of the components, or unit malfunction.
I,
- - - - - - i
CAUT
I
ON
! -------
'.
• Do not immerse the Baking Pan
in
water or any other liquid.
Allow the unit to cool completely before stori
ng
it.
Keeping the
Lid
open helps. Clean it as described
above. Carefully dry all unit components and wi
pe
1
, I
,
_____________________
,
off any moisture inside the unit. To avoid damage to
the unit, do not place any heavy objects
on
top of
the
Lid
.
T
ABNORMAL
CONDITIONS
Status Condition Cause Status Condition Cause
"HOT"
i
appears.
The
Baking
Pan's
inside
temperature
is
over
104°F
(40
'
C)
.
This
ndication
will
appear
if
you
attempt
to
use
the
unit
continuously
.
➔
Open
the
Lid
and
allow
the
interior
to
cool.
The
motor
does
not
operate
during
the
KNEAD
cycle.
The
motor
protective
device
is
activated
due
to
an
excessive
load
on
the
motor
.
➔
The
unit
will
automatically
resume
operation
after
30
minutes
.
Discard
the
unfinished
bread
and
start
the
process
again
from
the
beginning
using
ingredients
that
put
less
load
on
the
motor
.
Buttons
do
not
operate.
The
Power
Plug
is
disconnected
from
the
outle
t.
➔
Plug
the
unit
into
the
outlet
securely
.
The
Operation
Light
turns
on
but
the
unit
does
not
operate
(kneading
does
not
st
art)
.
While
"
PREHEAT'
'
is
indicated,
the
temperature
of
ingredients
is
adjusted
,
so
kneading
does
not
start
.
➔
This
does
not
indicate
any
malfunction
.
Beeps.keep
sounding.
➔
If
in
the
KEEP
WARM
cycle
,
remove
the
baked
bread
immediately
and
press
the
START/RESET
button.
"3:45"
flashes
and
the
Operation
Light
turns
off
during
bakinwcook
i
ng
.
Power
supply
has
been
discontinued
for
more
than
30
minutes
due
to
power
failure
,
disconnection
of
Power
Plug
, a
defective
fuse
or
circuit
breaker
.
➔
Discard
the
unfinished
bread
and
start
the
process
again
from
the
beginning
using
new
ingredients
.
The
Home
Bakery
makes
noise
during
use
,
The
sound
heard
is
the
motor
during
the
kneading
process
.
➔
This
does
not
indicate
any
malfunction
.
The
Home
Bakery
rattles
during
operation
.
The
Baking
Pan
is
not
installed
securely
.
➔
Install
securely.
Smoke
comes
out
from
the
Steam
Vent
and
a
burn~
smell
is
general
•
Ingredients
or
baked
product
collect
on
the
Heating
Element
or
inside
the
unit.
➔
This
does
not
indicate
any
malfunction
.
Make
sure
to
clean
the
unit
after
use
.
Unplug
the
unit
and
allow
~
to
cool
before
cleaning
.
29

30
TQUESTIONS AND ANSWERS
Q1
Why
is
the
crust
of
the
Basic
Bread
harder?
A 1
The
Basic
Bread
course
is
programmed
to
provide
texture
.
For
a softer
crust,
store
your
bread
in
a
plastic
bag
after
it
has
cooled
down
to
body
temperature
.
Q2
Why
do
the
loaves
sometimes
vary
in
height
and
shape?
A2
Breads
are
very
sensitive
to
its
environment
such
as
room
temperature,
weather,
humidity,
altitude,
use
of
the
Timer
and
fluctuations
in
household
current.
The
bread
shape
can
also
be
affected
if
fresh
ingredients
are
not
used
or
measured
incorrectly
.
Please
see
''TIPS
FOR
SUCCESSFUL
BAKING"
on
page
8
for
further
information
.
Q3
How
do
the
loaves
vary
in
shape
depending
on
the
season?
A3
During
summer,
loaves
may
sometimes
rise
too
high
or
collapse,
causing
a
dent
in
the
middle
.
During
winter,
you
may
have
trouble
getting
the
bread
to
rise.
This
may
be
solved
by
keeping
the
water
temperature
at
about
68°F
(20°c).
Q4
Why
does
flour
occasionally
stick
to
the
side
of
the
bread?
A4
During
the
initial
mixing
period,
small
amounts
of
flour
may
sometimes
stick
to
the
sides
of
the
Baking
Pan
and
baked
onto
the
sides
of
the
loaf
.
If
this
happens,
scrape
off
that
portion
of
the
outer
crust
with
a
sharp
knife.
Q5
Why
does
flour
occasionally
stick
to
the
side
of
the
cake
baked
using
the
CAKE
course?
A5
You
may
not
have
added
the
ingredients
in
the
order
listed
.
When
the
add
beeps
sound
and
it's
time
to
add
additional
ingredients,
be
sure
to
remove
flour
that
remains
on
the
sides
of
the
Baking
Pan
using
a
rubber
spatula
.
Q6
Why
is
the
dough
sometimes
very
sticky
and
difficult
to
work
with?
A6
Dough
may
sometimes
be
sticky
(or
too
wet)
depending
on
the
room
and
water
temperatures.
Try
using
colder
water
when
making
the
dough
and
dust
the
kneading
surface
and
your
hands
with
flour
more
frequently
.
If
adding
flour
does
not
help,
try
reducing
the
amount
of
water
by
1~2
Tbsp.
Q7
Why
is
my
croissant
sometimes
not
as
flaky?
A7
Butter
may
not
fold
into
the
dough
well
to
form
the
flaky
texture
if
the
dough
is
not
refrigerated
well.
Place
the
dough
in
the
refrigerator
to
cool
prior
to
folding
in
the
butter.
QS
Why
does
the top
of
the
loaf
sometimes
look
torn?
AS
Sometimes
the
dough
rises
too
well,
and
the top
of
the
loaf
looks
torn
.
However,
the
loaf
will
have
a
very
soft
texture
.
Q9
Can
I
make
breads
using
eggs
in
the
Home
Bakery?
A9
Yes
.
Reduce
the
amount
of
water
and
replace
with
eggs
.
Put
the
eggs
in
the
Measuring
Cup
first;
then
add
water
to
measure
accurately.
Do
not
use
the
Timer
function
when
using
eggs
as
they
may
spoil.
Q1
O
Can
I
use
this
Home
Bakery
for
favorite
bread
recipes
found
in
other
cookbooks?
A 1 O
The
accompanying
recipes
were
specifically
created
for
this
Home
Bakery
;
results
may
vary
when
using
any
other
recipes
.
We
recommend
you
use
the
recipes
in
this
book
whenever
possible
.
Q11
Why
cannot
the
Timer
be
set
for
more
than
13
hours?
A
11
Ingredients
may
spoil
and
affect
the
quality
of
the
dough
if
left
out
for
an
extended
period
.
The
Timer
on
the
Home
Bakery
is
set
to
the
maximum
of
13
hours
for
the
best
taste
and
performance
.
Q12
Why
does
the
bread
sometimes
have
a
strange
odor?
A
12
Too
much
active
dry
yeast
or
un-fresh
ingredients
(espec
i
ally
flour
and
water)
may
cause
odors
.
Always
measure
ingredients
accurately
and
use
fresh
ingredients
for
best
results
.
Q13
May
I
use
home-ground
or
home-milled
flour?
A
13
Depending
on
how
coarsely
ground
the
home-milled
flour
is,
results
may
not
be
satisfactory
.
We
recommend
using
a
blend
of
home
-
ground
flour
and
regular
bread
flour
for
best
results
.
When
milling
flour
,
do
not
grind
the
flour
too
coarse
as
it
may
damage
the
Baking
Pan
.
Q14
Why
do
not
the
additional
ingredients
such
as
raisins
and
nuts
mix
into
the
dough
well?
A
14
Separate
ingredients
that
may
stick
together
(raisins
and
other
fruits)
before
adding
.
Also
add
ingredients
little
by
little
to
incorporate
into
the
dough
better.
Q15
Why
is
my
whole
wheat
bread
shorter
than
regular
white
bread?
A
15
Whole
wheat
flour
does
not
rise
as
well
as
bread
flour.
Especially
100%
whole
wheat
breads
turn
out
shorter
and
smaller
than
regular
white
bread
.

TTROUBLESHOOTING
GUIDE
This guide was created to help you through any difficulties you may encounter as you learn to use your Home Bakery.
Bread is very sensitive to its environment, so be patient, and consult this guide. Also please feel free to contact
ZOJIRUSHI Customer Service toll-free for additional help.
1. Consult the chart below.
First, adjust the yeast.
2. If adjusting the yeast does not solve the problem, next, make adjustments to liquids.
3. If the loaf is still not acceptable, make adjustments to dry ingredients.
4. Also see the chart below and check the condition
of
your ingredients and the unit.
ZOJIRUSHI
Customer
Service:
1-800-733-6270
Loaf rises then
falls.
M
Loaf rises too
high.
Q
Loaf
does
not
rise
high
enough
.
□
Loaf is short
and heavy.
High altitude
adjustments.
g
CD
Yeast
Decrease
1/4~1/2
tsp.
Decrease
1/4~1/2
tsp.
Increase
1/4~1/2
tsp.
Decrease
1/4~1/2
tsp.
® Liquids (Water
or
Milk)
Decrease
1~2Tbsp.
Decrease
1~2
Tbsp.
Increase
1~2Tbsp
.
Decrease
1~2Tbsp
.
® Flour
Increase
1~2Tbsp.
Decrease
1~2
Tbsp.
I
;
l
@ Salt
Increase
1/4 tsp.
Increase
1/4 tsp.
Decrease
1/4 tsp.
@ Sugar
or
Honey
Decrease
1/2 tsp.
Increase
1/2 tsp.
Decrease
1/2 tsp.
Liquid may be too hot.
• •
l
Flour may not be fresh.
• • •
Type
of
flour used may be
wrong.
• • •
Yeast may not have been
added.
•
~
Yeast may not be fresh.
• • •
Incorrect yeast may have
been used.
•
•
• •
I
I Unit may be unplugged
or
an
electrical failure may have
occurred.
• •
For
BASIC
Course
Only:
Problem
Cause/
Remedy
Loaf does not rise high enough.
Try using 2 tsp. of Rapid Rise Yeast instead of Active Dry Yeast, or raise the room
temperature. For QUICK course, trv raisi
no
the water temperature to 86°F (30°
C)
.
Loaf rises too high.
Try using cold water at 40°F (5°C), or lower the room temperature.
Top
of the loaf cracks.
Try
ra
isi
ng
the water temperature to 86°F (30°C), or increase the amount of water
by
1 Tbsp.
Bottom of the loaf is burnt.
Try
ra
isi
ng
the room temperature.
Loaf is too dark.
Try
increasing
the
amount of water,
raise
the
water temperature to
86
°F (30°C), or
raise
the
room
temperature.
Remove
the
bread
from
the
Bak
i
ng
Pan
i
mmed
iately after completi
on
.
Other
Difficulties:
Problem Cause
I Remedy
Crust is too light.
Increase the amount of sugar or honey by 1/2 tsp., and make sure the correct Course
was selected.
Loaf is undercooked.
Make sure the
un
it is not unplugged, and that
an
electrical failure did not occur. Also
make sure the correct Course was selected.
Loaf is too dark.
Decrease the amount of sugar or honey
by
1/2 tsp., and make
su
re the correct Course
was selected. Remove the bread from the Bakino
Pan
immediately after completion.
Ingredients are not mixed
properly
.
Make sure that the Baki
ng
Pan
is set properly in the
un
it, and that the Kneadi
ng
Blades
are installed correctly.
31