DIVINEEAGLE
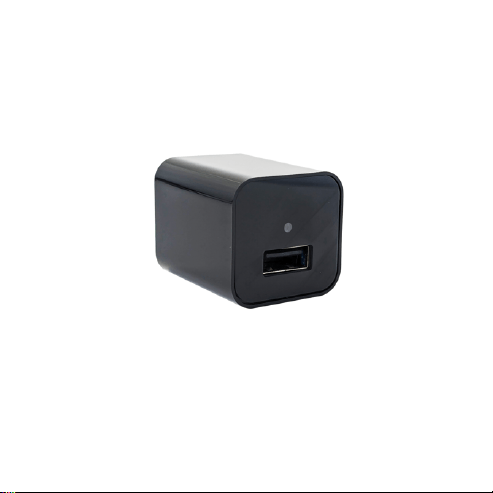
Pet Camera
Models: MEE007, MEE007s
User
guide
Customer support: +1 332 900 6312

2
Content
04 - Overview
05 - Quick setup and get started
11 - How to mount the camera
12 - Watch images on PC, Macbook
15 - Android, iPhone
18 - Reset the camera

3
Technical Specifications
Pet Camera MEE007, MEE007s
Recording Quality: HD
Recording Format: MJPEG (image
only) Power Source: AC 100-240 V
Mounting Type: Wall Socket Outlet
Memory Support: MicroSD card up to 512 GB (not
included)
No audio recording. Image Only.
The camera will be warm.
It’s normal because
the camera has tiny housing and a lot of techs
inside.
4
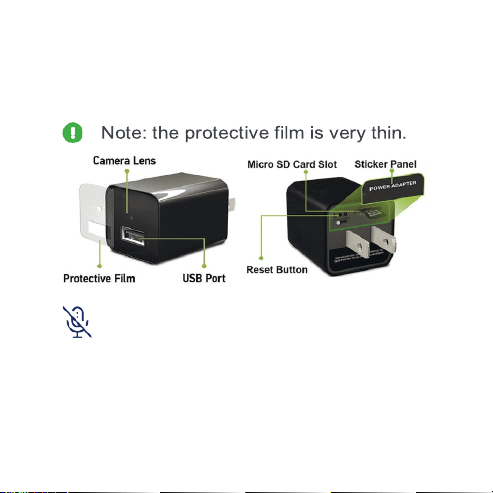
Overview
Remove a protective film before use.
This camera doesn’t have a microphone, it
doesn’t record sound or audio.
Only image recording.

5
Quick
Setup
1.
Insert your microSD card into the
camera. Insert until it clicks.
Make sure that you use a high-speed
card: Class 10 or UHS.
We recommend using: Sandisk, Sony
MicroSD UHS-I 16, 32, 64, 128, 256, 512GB.
The camera doesn’t support a MicroSD
card less than 16 GB.
DO NOT USE OLD CARDS or LOW SPEED
CARDS, THEY DON’T HAVE ENOUGH
WRITE SPEED

6
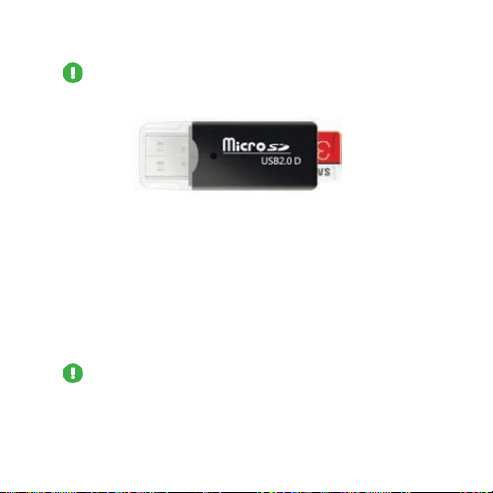
We recommend this microSD card,
up to 512Gb
If you are using your card, make sure
that you copy all the data. The camera
will format the microSD card.
2.
Plug your camera into a wall for 2
minutes. The сamera will format the
microSD card and create text file
Time.txt with default settings.
Note: The camera doesn’t have a bat-
tery inside. It needs to be connected to a
power source to work.
7
3.
Unplug the camera. Connect the
microSD card to your PC, Mас, iPhone,
Android using the provided card reader.
Use the OTG adapter for phones.
Note: To remove a card, press it into
the slot with your fingernail and it will pop
out.
8
Note: The microSD card goes only
halfway into the card reader.
4.
Open text file Time.txt. Revise the file
and save. 23:59 10:22:2022 Y
Meaning: HH:MM MONTH:DATE:YEAR
Time is shown in a 24 hour format.
To turn off the date stamp on the
image, change Y to N.
Note: The camera reads file Time.txt
and saves the time settings in the chip.

9
It doesn’t update the text file, files will have the
correct time and date from the chip, even
when the microSD card is taken out and
reinserted or the camera is unplugged and
plugged back in.
Note: The camera splits the files
(image only) into 5-minutes segments to
protect files from corruption during
unexpected power outages.
When the card is full, the camera will
overwrite the earliest files to retain the
most recently recorded file.

10
5.
Insert the microSD card back into the
camera and plug it into a wall. The
camera will start recording.
11
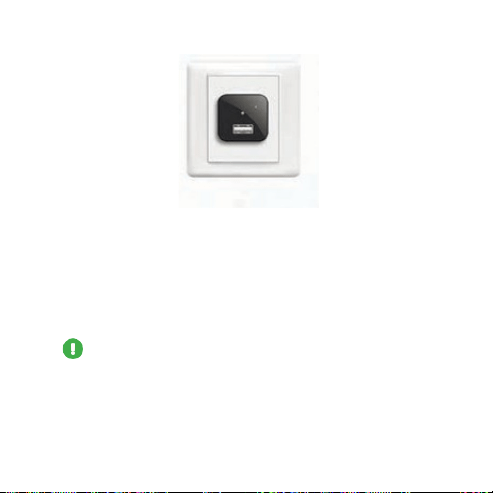
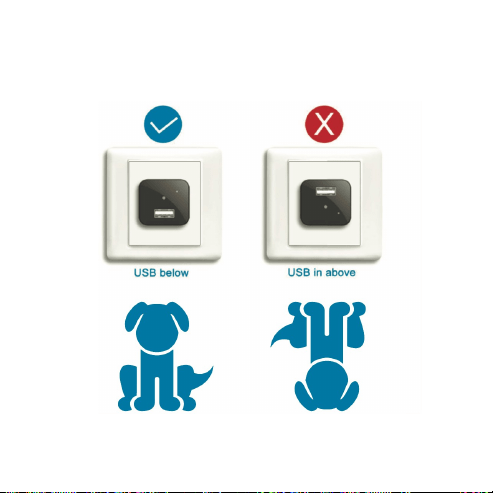
How to mount the camera

12
Watch files (image only) on PC
1.
Eject the microSD and put it into the
card reader.
Note: To remove a card, press it into
the slot with your fingernail and it will pop
out.
2.
Connect the card reader to your com-
puter.
3.
Find a flash disk, open the folder, and
open the file (image only).
Note: You can check your files by
connecting the camera using the ma-
le-male USB cable. However, the fastest
way is to use the card reader.

13
Watch files (image only) on
Macbook
1.
Eject the microSD and put it into the
card reader.
Note: To remove a card, press it into
the slot with your fingernail and it will pop
out.
2.
Connect the card reader to the provi-
ded USB Type-C OTG adapter.
3.
Connect it to your Macbook.
4.
Find a flash disk, open the folder, and
open the file (image only).

14
Note: You can check your files by
connecting the camera using the ma-
le-male USB cable. However, the fastest
way is to use the card reader.

15
Watch files (image only) on
Android phones
1.
Eject the microSD and put it into the
provided card reader.
Note: To remove a card, press it into
the slot with your fingernail and it will pop
out.
2.
Connect the card reader to the
provided USB Type-C OTG adapter.
3.
Connect it to your phone.
4.
Open a file manager (or any file ex-
plorer), find a flash drive, then open the
folder and open a file (image only).
16
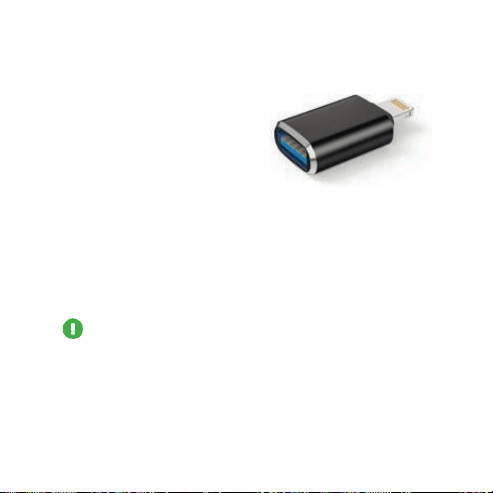
Watch files (image only) on iPhone
1.
Buy a Lightning to
USB OTG Adapter
for your iPhone if you
don’t have one and your iPhone has a
Lightning charging port.
2.
Eject the microSD and put it into the
provided card reader.
Note: To remove a card, press it into
the slot with your fingernail and it will pop
out.
3.
Connect the card reader to the OTG
Adapter for iPhone.

17
4.
Connect it to your phone.
Open the app “Files,” and tap Browse.
You will see “NONAME” or “UNTITLED” or
another name of the SD card. If the app
opens “iCloud Drive,” tap “< Browse” at
the top left. Tap on the SD card, click on
a folder and open your file.

18
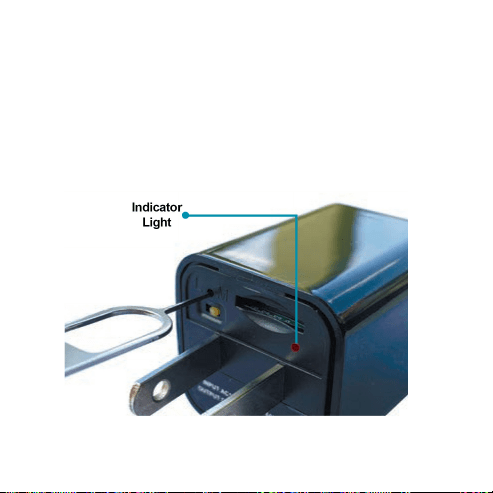
Reset the camera
1.
Unplug the camera from the wall,
and remove the microSD card from the
camera.
Note: To remove the card, press it into
the slot with your fingernail, and it will
pop out.
2.
Connect the camera using the provi-
ded male-male USB cable to any char-
ger/power

19
Note: The camera needs to be
connected during the reset!
3.
Wait for 3-4 minutes.
4.
Press and hold the reset button until
the lights go off. The reset button is
between the L and M letters on the back.
Use a paper clip or a reset pin from a
box.
20
5.
Disconnect the camera from the USB
cable and plug it into a wall.
6.
Wait for 3-5 minutes and set up it
again.

21
FAQ
Q: The camera doesn’t record.
A: Make sure that you installed a microSD
card 16GB or more into the camera.
Q: The camera doesn’t work, the indica-
tor is blinking.
A: Reset the camera (see page 18).
Q: The image is hazy or slightly blacked
out.
A: Make sure that you removed the pro-
tective film. Clean the front panel.

22
Q: I can’t find the file Time.txt.
A: Reset the camera (see page 18)
and set it up again.