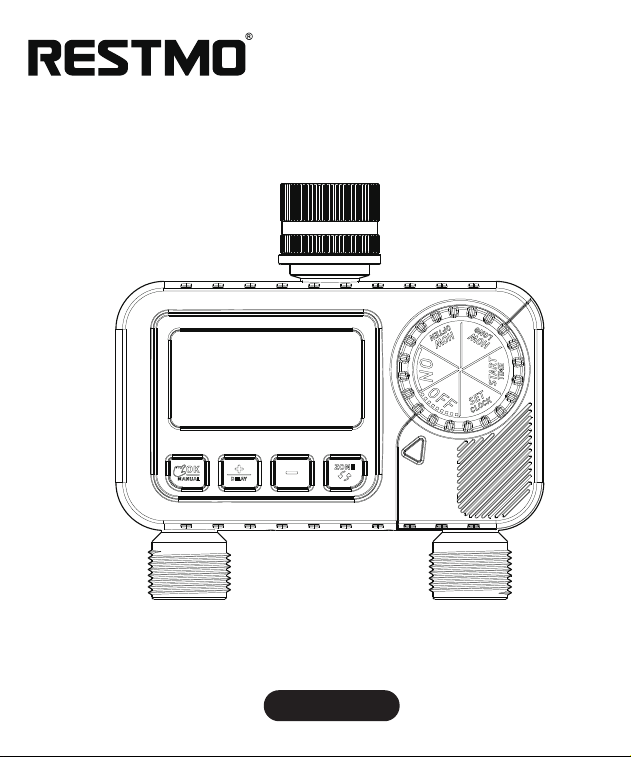
2-ZONE DIGITAL WATER TIMER
O-HT-3B
USER MANUAL

1
WARNINGS
WARRANTY
Restmo provide one-year worry-free warranty. For any warranty claims
within one year from the original order date, please email your order ID
to Restmo Support and we will respond within 24 hours.
Follow below steps to reset the valves of the water timer if you are
using it for the first time or it is not in use for a period of time.
Step 1: Install batteries and attach the timer on the faucet. Turn on the
faucet to max.
Step 2: Rotate the timer dial to “ON”.
Step 3: Long press (3s) the “MANUAL” button to access Manual
Watering Mode.
Step 4: Press the “ZONE” button to select both zone 1 and zone 2.
Step 5: Turn the timer on manually for more than 5s then turn it off.
2
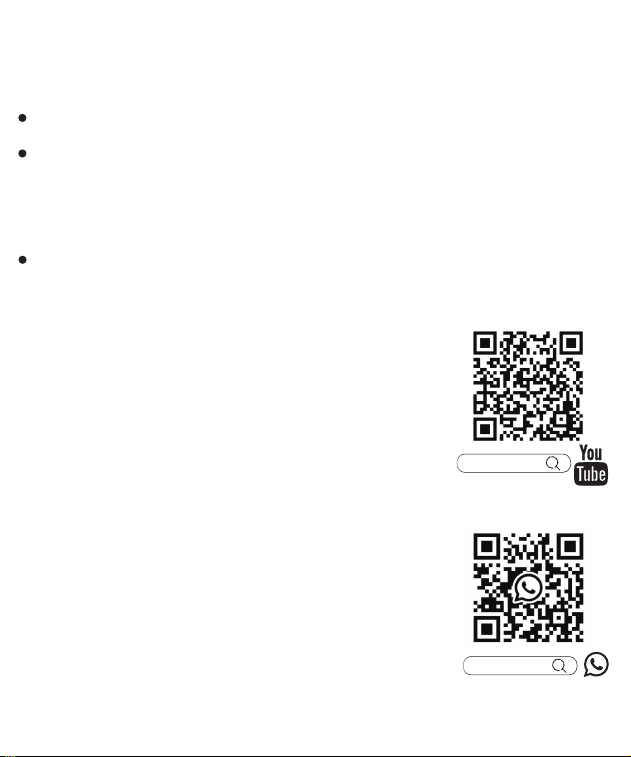
Scan YouTube QR code or search RESTMO
on YouTube to view set-up instructions video.
RESTMO
Scan WhatsApp QR code or send us WhatsApp
messages to get online supports.
929 329 4398
Step 6: Repeat the above steps 2-5 for more than 5 times until the
water flows through properly.
When expecting freezing temperatures, the water timer should be
removed from hose/faucet and stored indoors to avoid potential
freeze damage.
Filter can prevent dirts and extend product lifetime. Clean filter regularly
and replace if worn.
Only use with clear cold water.

3
OVERVIEW
LCD
SCREEN
WATER
INLET
DIAL
ZONE
BUTTON
+/DELAY
BUTTON
OK/MANUAL
BUTTON
ZONE 2
ZONE 1
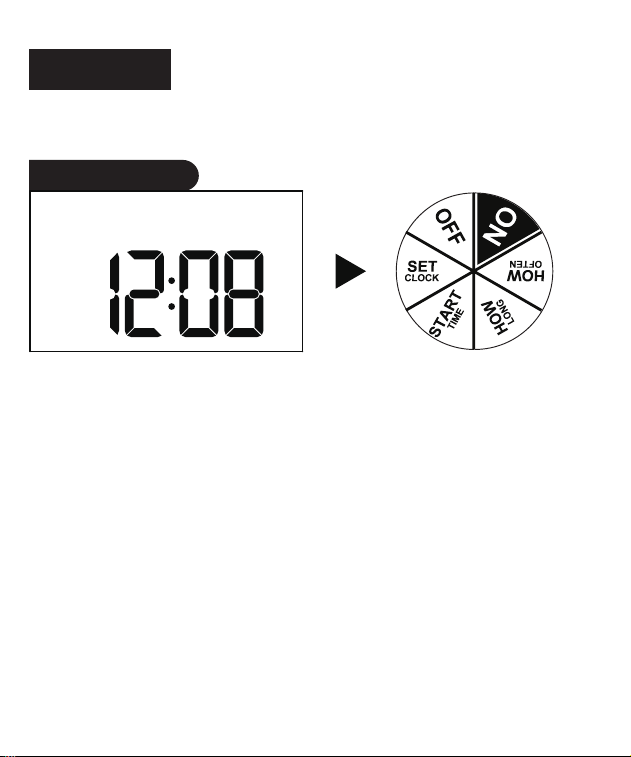
Dial Functions
ON
OFF
SET CLOCK
START TIME
HOW LONG
HOW OFTEN
Timer is on/off automatically
Timer is off
Set up current time
Set up what time to start watering
Set up watering duration
Set up watering frequency
- BUTTON
4
SPECIFICATIONS
Watering Frequency .................................................. 1-12hrs or 1-7days
Watering Duration ................................................... 1min to 3hrs 59mins
Independent Outlets .............................................................................. 2
Inlet Thread ................................................ 3/4” NH Female (pure brass)
Outlet Thread ..................................................................... 3/4” NH Male
Working Pressure ................................................ 8 - 120PSI (0.5 - 8Bar)
Maximum Flow Rate ..................................................... 10GPM (35LPM)
Working Temperature ............................................. 38 - 120˚F (3 - 50˚C)
Waterproof and Dustproof................................................................. IP54
Battery ....................................... 2*AAA Alkaline Batteries (not included)
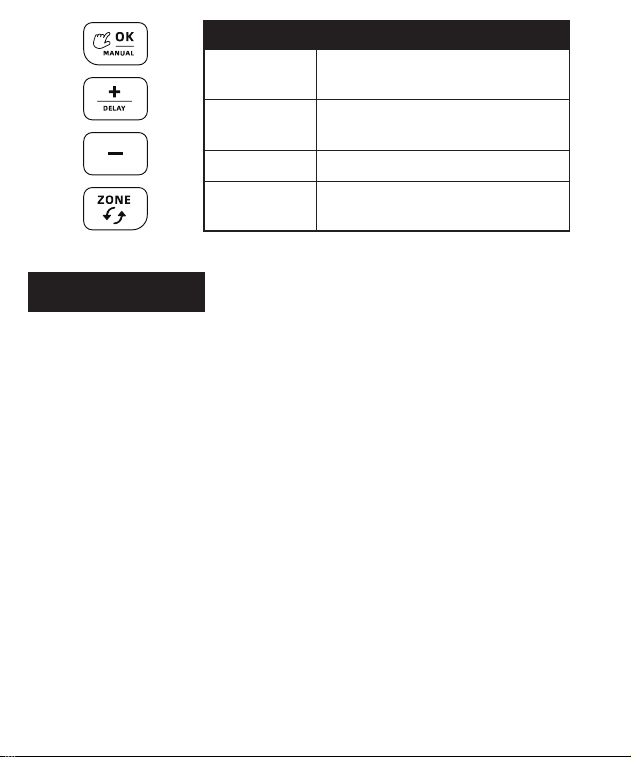
Button Functions
OK/MANUAL
BUTTON
Confirm setup or water manually
Set up time, system, rain delay
Set up time and system
Switch watering zones (1/2)
+/DEALY
BUTTON
- BUTTON
ZONE
BUTTON

5
Watering Frequency .................................................. 1-12hrs or 1-7days
Watering Duration ................................................... 1min to 3hrs 59mins
Independent Outlets .............................................................................. 2
Inlet Thread ................................................ 3/4” NH Female (pure brass)
Outlet Thread ..................................................................... 3/4” NH Male
Working Pressure ................................................ 8 - 120PSI (0.5 - 8Bar)
Maximum Flow Rate ..................................................... 10GPM (35LPM)
Working Temperature ............................................. 38 - 120˚F (3 - 50˚C)
Waterproof and Dustproof................................................................. IP54
Battery ....................................... 2*AAA Alkaline Batteries (not included)
INSTALLATION
BATTERY INSTALLATION
1. Pull out the battery case on the back of timer.
2. Insert two new AAA alkaline batteries and replace the case.
3. Ensure batteries are fully inserted by correct directions.
Note:
- DO NOT use wet hands to open battery case. Always keep your hands
dry when install batteries.
- Replace with new batteries if low battery indicator displays.
6
TIMER SETUP
1) Turn dial to SET CLOCK.
2) Press +/- buttons to choose 12H or 24H.
3) Press OK button and move to hour/minute setup.
4) Press +/- buttons to set the current hour and minute.
5) Turn dial to save changes.
STEP 1: SET CLOCK
7
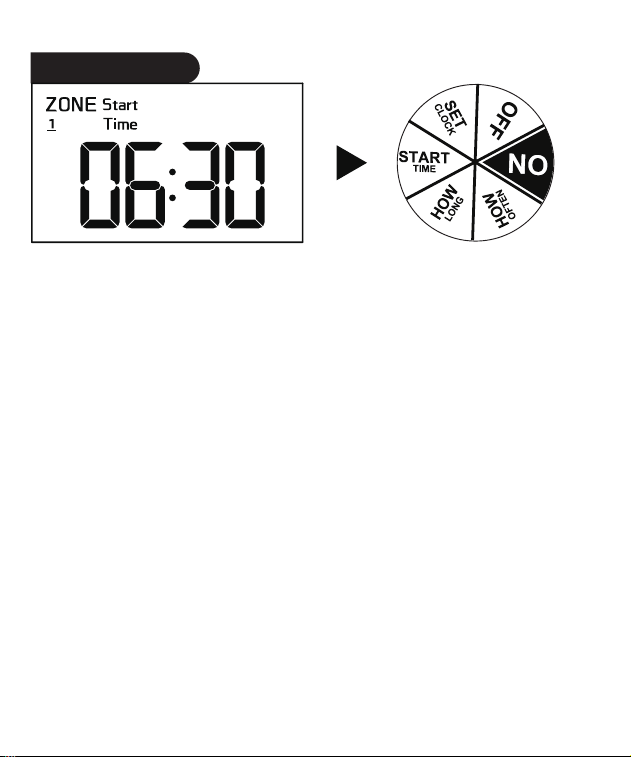
1) Turn dial to START TIME.
2) Press +/- buttons to set the start time.
3) Press OK button to switch hour and minute.
4) During START TIME, press ZONE button to switch zone 1/2.
5) Turn dial to save changes.
STEP 2: START TIME
8
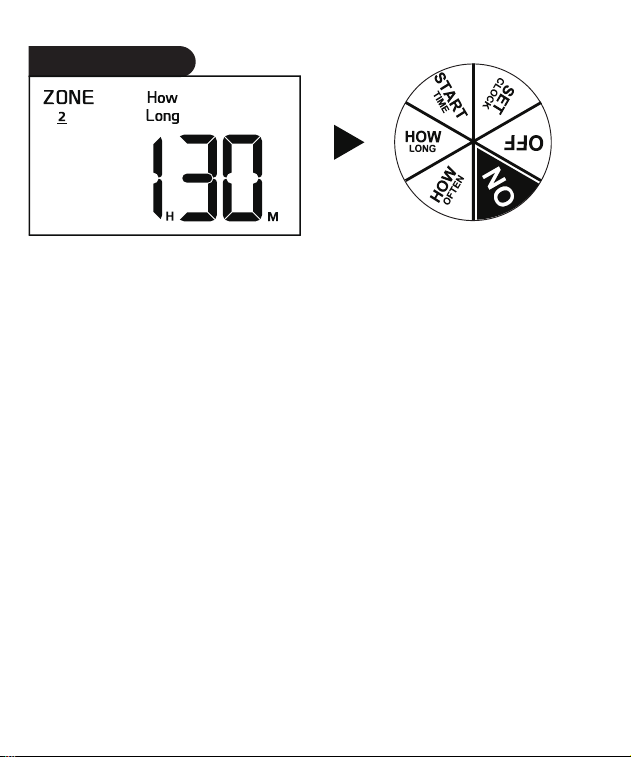
STEP 3: HOW LONG
1) Turn dial to HOW LONG.
2) Press +/- buttons to set the watering duration.
3) Press OK button to switch hour and minute.
4) The maximum watering duration can be set is 3 hours and 59
minutes. When set the time to 0 hour and 0 minute, it means the
program will not run.
5) During HOW LONG, press ZONE button to switch zone 1/2.
6) Turn dial to save changes.
9
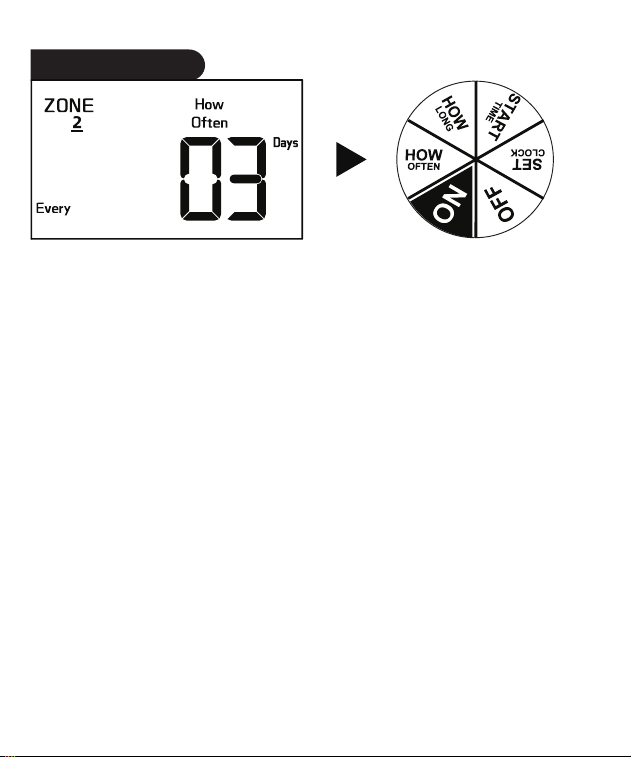
1) Turn dial to HOW OFTEN.
2) Press +/- buttons to set the watering frequency.
3) Press OK button to confirm.
4) During HOW OFTEN, press ZONE button to switch zone 1/2.
5) Turn dial to save changes.
STEP 4: HOW OFTEN

10
Note:
1- The options
which “HOW LONG” is greater than “HOW OFTEN” will be
automatically skipped.
2- When the HOW OFTEN is set to every 1 day, every 2 days, every 3 days,
or every 7 days, the watering program will run as below:
EVERY 1 DAY
EVERY WEEK
Sun
Mon Tue Wed Thu
Fri Sat
EVERY 2 DAY
WEEK ONE
WEEK TWO
Sun
Mon Tue Wed Thu
Fri Sat
WEEK ONE
WEEK TWO
EVERY 3 DAY
Sun
Mon Tue Wed Thu
Fri Sat
WEEK ONE
WEEK TWO
EVERY 7 DAY
Sun
Mon Tue Wed Thu
Fri Sat
11
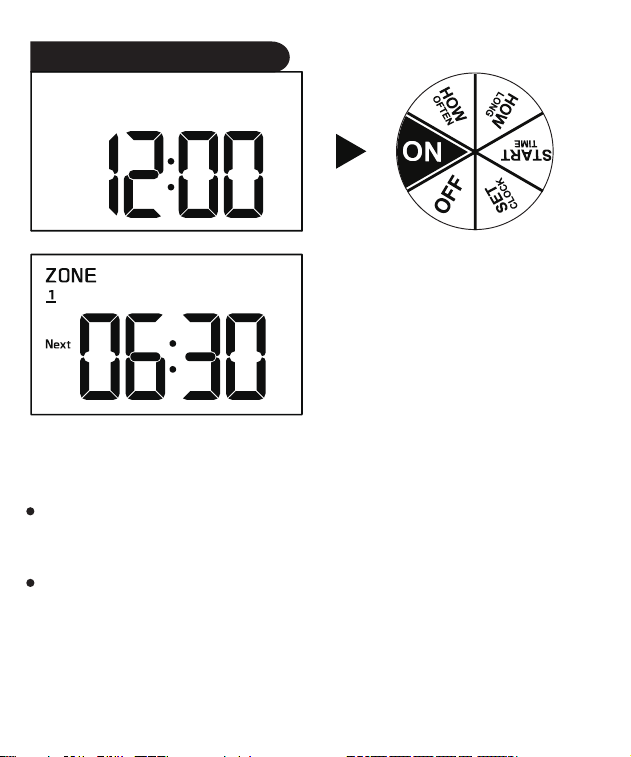
Turn dial to ON to start the program.
When watering is OFF, LCD screen flashes between the next
watering start time and the current time.
When watering is ON, LCD screen displays the remaining time of
the current program.
STEP 5: AUTOMATIC WATERING
12
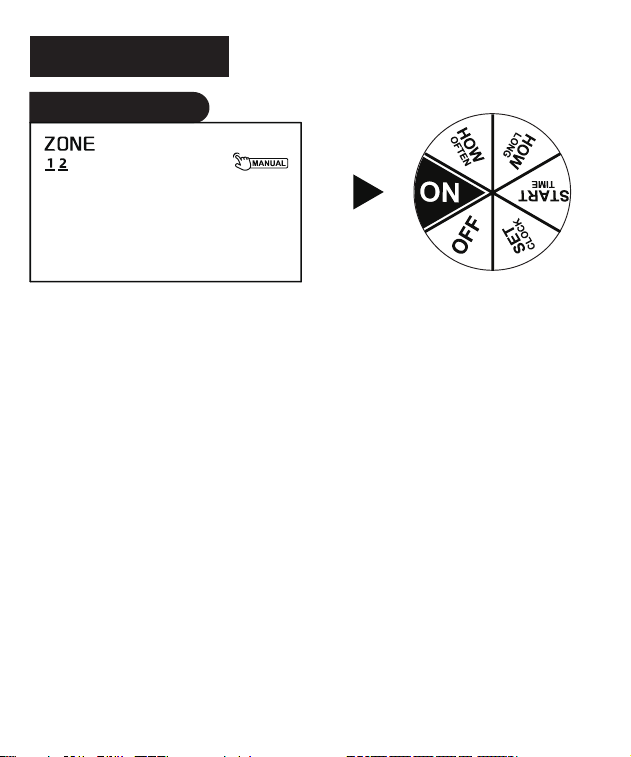
MANUAL WATERING
Manual Watering Mode
Manual watering allows you to water without interrupting preset
program. To access manual watering, follow below steps:
1) With the dial at ON and timer is not at RAIN DELAY mode. Long
press MANUAL button (3 secs).
2) Press zone button to select ZONE 1 or 2, or both.
3) Press +/– buttons to select watering duration from 1min to 7hrs
59mins. Press OK button to switch hour and minute. The setup
flashes 3 times and manual watering will automatically start.
4) Manual watering starts and LCD screen displays the remaining
time of manual watering program.
5) To cancel manual watering, turn dial to OFF and back to ON.
13
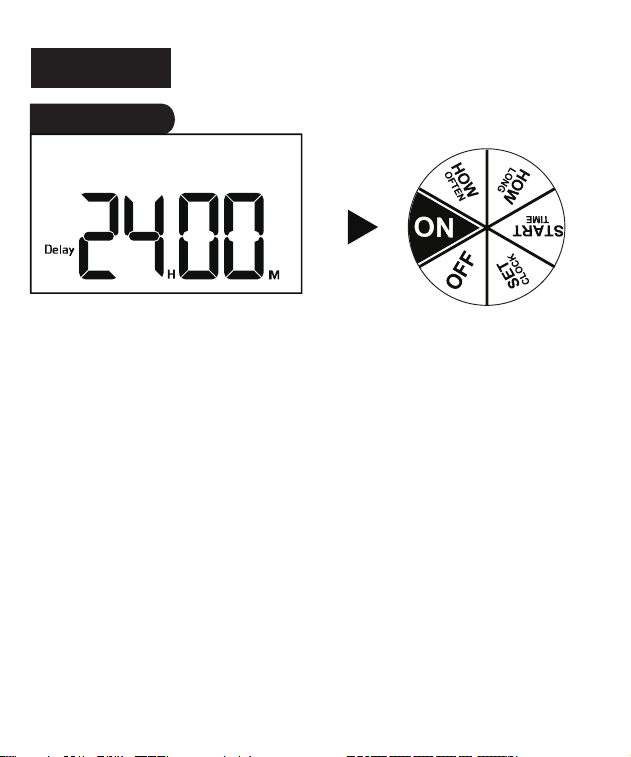
RAIN DELAY
Rain Delay Mode
Rain delay allows you to postpone programs for a period of time. To
access rain delay, follow below steps:
1) With the dial at ON, long press DELAY button (3 secs).
2) Press +/- buttons to select a delay of 0/24/48/72 hours. Press
OK button to confirm.
3) Rain delay starts and LCD screen displays the remaining
time before preset program resumes.
4) To cancel rain delay, long press DELAY button (3 secs)
with the dial at ON.
14
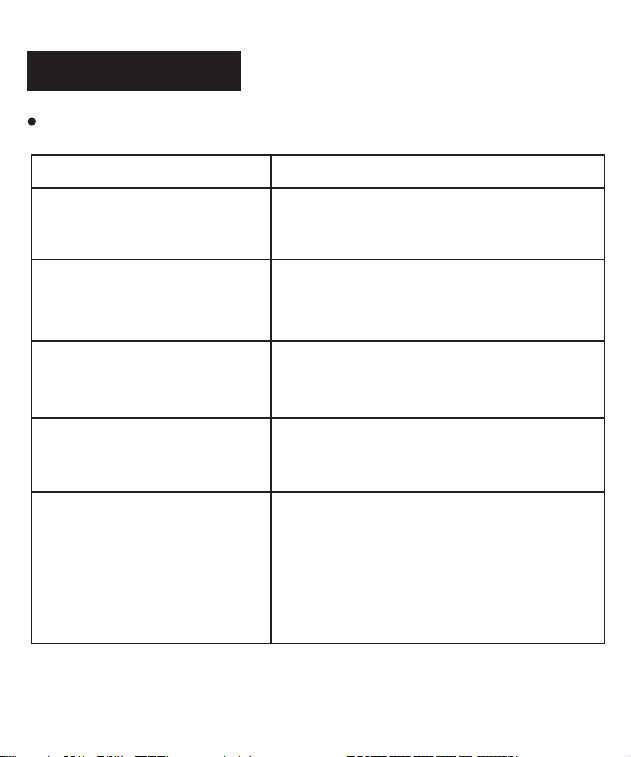
TROUBLE SHOOTING
Possible Factors
Solutions may help
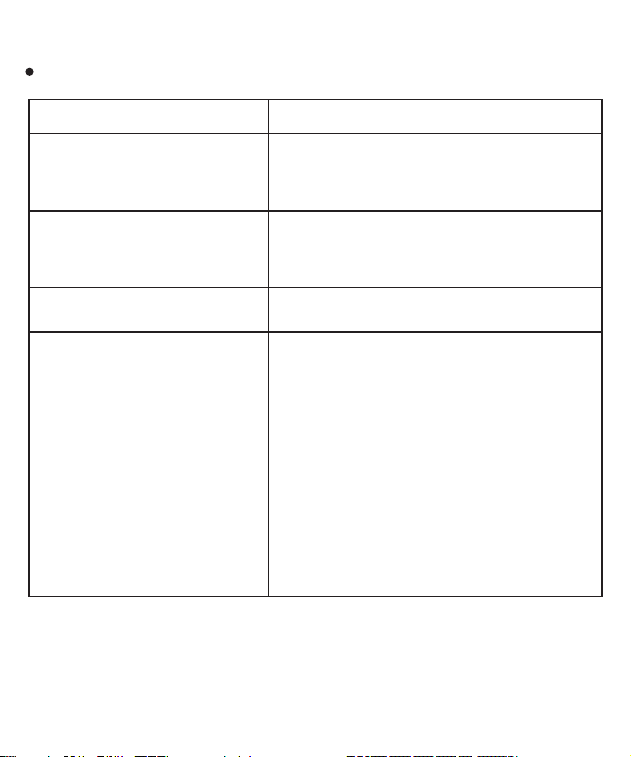
Timer dial is not set
to ON position.
Turn the dial to ON position.
Cannot keep some zones
always-off.
Set HOW LONG of the desired
always-off zones to 0 hour 0 minute.
Battery is low. Replace with new batteries if low
battery indicator flashes.
Rain Delay is on. To cancel rain delay, turn the dial to
OFF and back to ON.
CLOCK, START TIME,
HOW LONG, HOW
OFTEN are set to
incorrect.
Turn the dial to each position and
make sure all setups are correct.
Watering program does not work as preset.
15
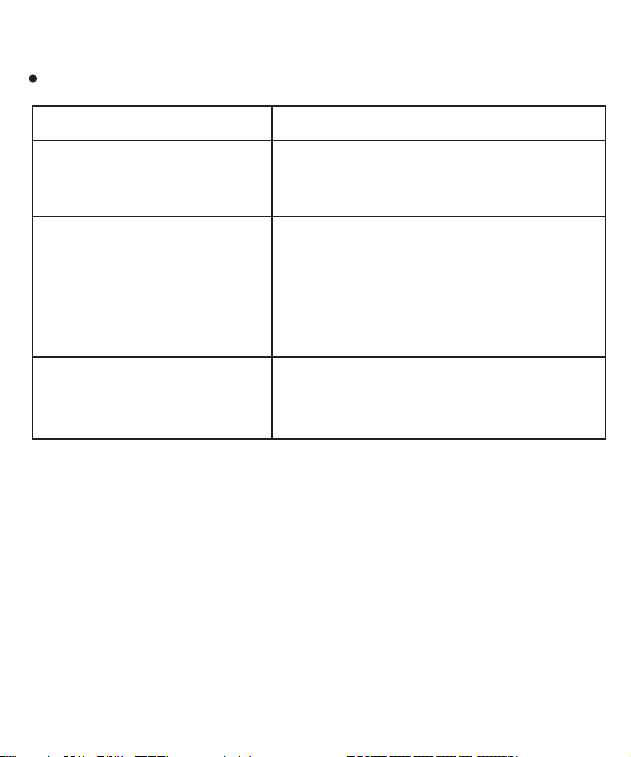
Note:
This timer is built with a solenoid valve. Technically, all solenoid valves decrease
water pressure. Restmo also has ball-valve timers that do not decrease water
pressure.
If you are not satisfied with the decreased water pressure, please contact us
directly for more details about ball-valve timers.
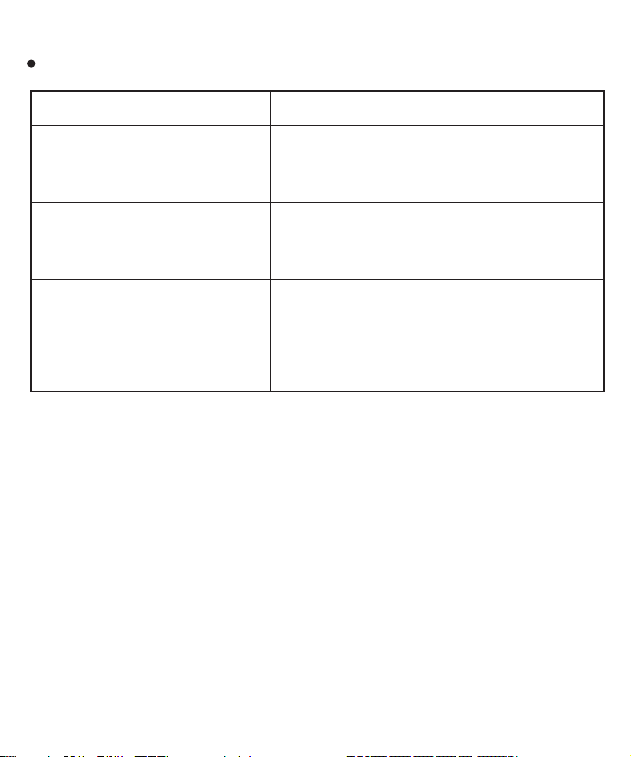
Possible Factors
Solutions may help
The filter is blocking
by dirt or stones.
Clean the filter or replace it
with a new one.
Hose connection is
cross-threaded.
Make sure the timer is installed
properly and not cross-threaded.
Inlet pressure is not
sufficient to support
watering needs.
Install a booster pump or other
booster pressurizing equipment.
Timer dropped water pressure.
16
The diaphragm inside the
built-in solenoid valve is
stuck.
Reset the solenoid valve:
Step 1: Attach timer on a faucet and
open the faucet to max.
Step 2: Manually turn timer on for
more than 5 secs and turn it off.
Repeat it more than 5 times until
water get through the valve properly.
Possible Factors
Solutions may help
Timer dial is at OFF
position.
Turn the dial to ON position.
Battery is low. Replace with new batteries if low
battery indicator flashes.
Hose faucet is off. Turn on the faucet.
Timer valve never turns on.

17
Impurities, like stones or
hairs, are stuck in the
solenoid valve.
Reset the solenoid valve:
Step 1: Attach timer on a faucet and
open the faucet to max.
Step 2: Manually turn timer on for
more than 5 secs and turn it off.
Repeat it more than 5 times until water
get through the valve properly.
Possible Factors
Solutions may help
Manual watering is on. To cancel manual watering, turn the
dial to OFF and back to ON.
Timer valve never turns off.
18
Possible Factors
Solutions may help
Filter washer lost or
damaged.
Check if filter washer is clean and
undamaged.
Hose connection leaks.
Water pressure should be
8-120PSI (0.5-8.0Bar).
Incorrect faucet installa-
tion.
Check if the faucet or hose are
3/4"NH thread while all connections
are hand tight and not cross=thread-
ed.
Water pressure is too
high.

19
Possible Factors
Solutions may help
Air condenses inside the
screen due to the tempera-
ture difference between
inside and outside.
The fog will disappear when the
temperature rises, or leave it stand for
a period of time.
Battery is dead or is not
installed properly.
Replace with new batteries.
Remember to keep your hands dry
when install batteries.
LCD is broken or defective. Contact the customer service for a
new replacement.
LCD screen does not display properly.