
To reduce the risk of injury, the user must read and understand the Operator’s
Manual before using this product. Save these instructions for future reference.
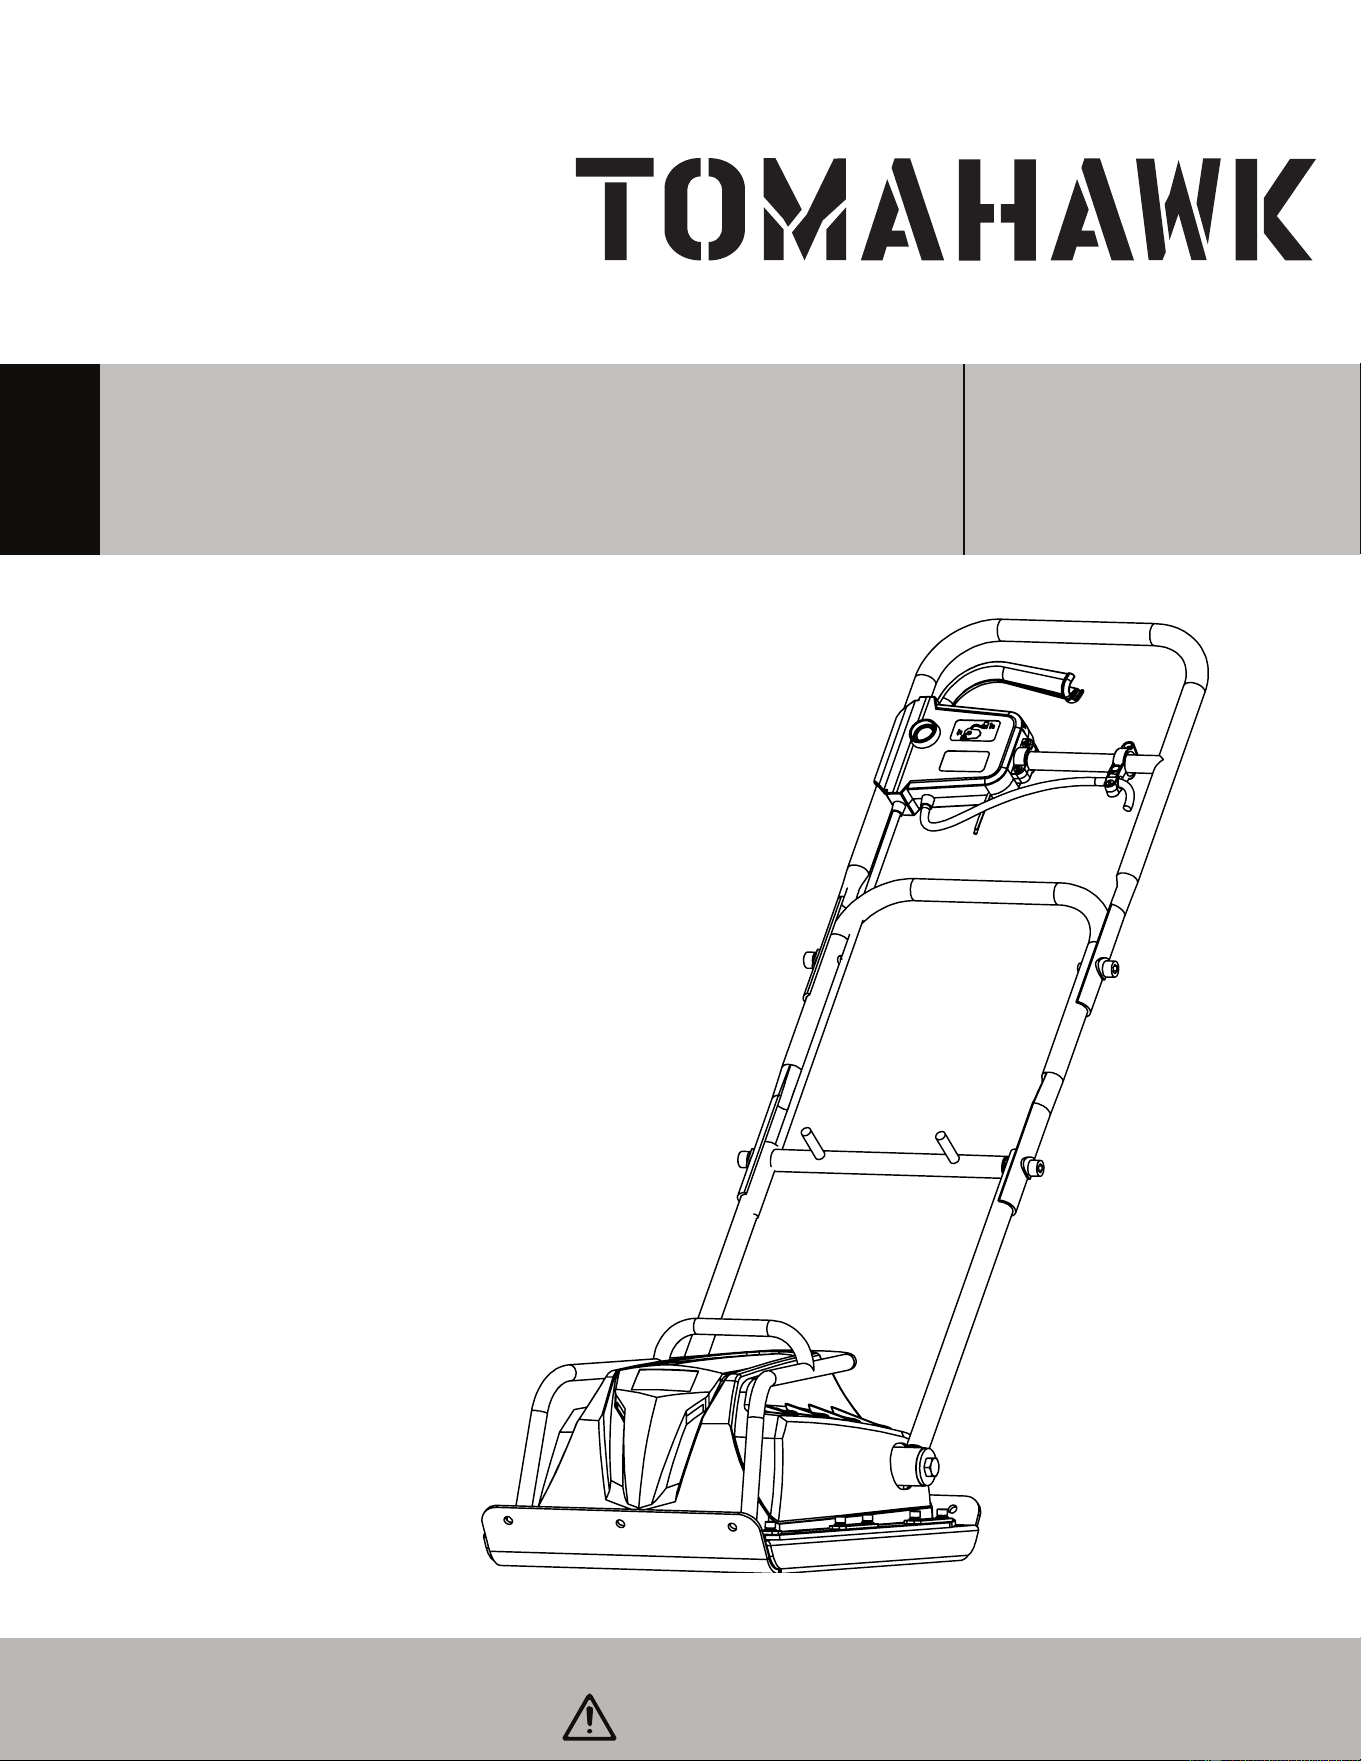
ELECTRIC PLATE
COMPACTOR
Operations Manual
MODEL NUMBER: eJXPC20
W
A
R
R
A
N
T
Y

2
Table of Contents
1. SAFETY INFORMATION
1.1 Fire Safety
1.2 Operating Safety
1.3 Service Safety
1.4 Electric Motors
1.5 Plugs
1.6 Extension Cables
1.7 NVR - No Volt Release
1.8 Health and Safety
2. TECHNICAL DATA
2.1 Product Features
2.2 Product Dimensions
2.3 Compactor Specifications
2.4 Product Parts
3. COMPACTION
3.1 Reasons for Compaction
3.2 Compaction Specification
3.3 Applications
4. OPERATION
4.1 Pre Start Checks
4.2 Operating Instructions
4.3 Starting the Motor
4.4 Stopping the Motor
5. SERVICE & MAINTENANCE
5.1 Maintenance
5.2 Cleaning
5.3 Maintenance Record
5.4 Replacement Parts
5.5 Storage
6. TROUBLESHOOTING
7. WARRANTY
7.2 Warranty Claims
8. SERVICE CENTERS
9. MORE COMPACTION TIPS
10. PARTS MANUAL
4
5
5
6
7
7
7
8
8
8
8
8
9
9
10
10
10
10
10
11
11
12
12
12
12
12
13
13
13
14
15
15
15
16
22

3
Register Your Equipment
Thank you for purchasing TOMAHAWK equipment! Your product is covered by the
TOMAHAWK Warranty policy, but in order to activate your warranty, we need you to register
your product. In addition to activating your equipment warranty, product registration will
grant you access to important product updates, streamlined customer service and more.
INCLUDED WITH YOUR REGISTRATION
☑ Equipment Warranty Activation
☑ Product Updates
☑ Streamlined Customer Service
☑ Excusive Discounts and Sales
STEPS TO REGISTER YOUR EQUIPMENT
1. Visit www.tomahawk-power.com
2. Choose “Product Registration” at the bottom of the page
3. Enter your equipment’s serial number to get started
4. Provide all required information
5. Submit Registration
Equipment Resources
Tomahawk Customer Service doesn’t stop at checkout. We understand to keep a job-site
running smoothly - the proper equipment, spare parts, instruction manuals, and more are
needed at the drop of a hat. Visit www.tomahawk-power.com to gain access to the incredible
resources below.
How To Video Library
More of a visual person? Visit our Video Library for equipment
assembly instructions, troubleshooting tips, and more!
Found on each product listing or the Service Videos Page
Manual and Assembly Guide Library
Visit our Manual Library if you are looking for a lost
operations manual or a particular spare part?
Found on each product listing or the Tomahawk Manuals Page
Service Requests
In need of a quick fix or a service center referral? Submit a
Service Request and a Tomahawk Technician will respond
shortly to get you the help you need.
Choose “Service Request” at the bottom of www.tomahawk-power.com

This manual provides information and procedures to safely operate and maintain this
model. For your own safety and protection from injury, carefully read, understand and
observe the safety instructions described in this manual.
Keep this manual or a copy of it with the machine. If you lose this manual or need an
additional copy, please contact Tomahawk Power LLC or visit www.tomahawk-power.com
This machine is built with user safety in mind; however, it can present hazards if improperly
operated and serviced. Follow operating instructions carefully. If you have questions about
operating or servicing this equipment, please contact Tomahawk Power.
The information contained in this manual is based on machines in production at the time
of publication. Tomahawk Power reserves the right to change any portion of this
information without notice.
No part of this publication may be reproduced in any form or by any means, electronic
or mechanical, including photocopying, without express written permission from
Tomahawk Power.
Any type of reproduction or distribution not authorized by Tomahawk Power represents an
infringement of valid copyrights and will be prosecuted. We expressly reserve the right to
make technical modifications, even without due notice, which aim at improving our
machines or their safety standards.
1. Safety Information
This manual contains DANGER, WARNING, CAUTION, and NOTE callouts which must be
followed to reduce the possibility of personal injury, damage to the equipment,
or improper service.
This is the safety alert symbol. It is used to alert you to potential personal injury
hazards. Obey all safety messages that follow this symbol to avoid possible injury
or death.
DANGER indicates an imminently hazardous situation which, if not avoided, will
result in death or serious injury.
WARNING indicates a potentially hazardous situation which, if not avoided, could
result in death or serious injury.
CAUTION indicates a potentially hazardous situation which, if not avoided, may
result in minor or moderate injury.
DANGER
WARNING
CAUTION
4

5
1.1 Fire Safety
If your machine catches fire, turn o the electric supply. Using a dry powder or C02 fire
extinguisher, put out the fire. If the fire cannot be put out, keep away and call the fire
departement. If you are in any doubt about the safety condition of your machine, please
consult Tomahawk Power.
1.2 Operating Safety
Familiarity and proper training are required for the safe operation of equipment!
Equipment operated improperly or by untrained personnel can be dangerous! Read
the operating instructions contained in both this manual and the engine manual and
familiarize yourself with the location and proper use of all controls. Inexperienced operators
should receive instruction from someone familiar with the equipment before being allowed
to operate the machine.
1.2.1 NEVER allow anyone to operate this equipment without proper training. People
operating this equipment must be familiar with the risks and hazards associated with it.
1.2.2 NEVER use accessories or attachments for this equipment, which are not
recommended by TOMAHAWK POWER. Damage to the rammer and/or injury to user may
occur.
1.2.3 NEVER leave machine running unattended.
1.2.4 ALWAYS be sure operator is familiar with proper safety precautions and operation
techniques before using machine.
1.2.5 ALWAYS wear hearing protection when operating equipment.
1.2.6 ALWAYS wear protective clothing appropriate to the job site when operating
equipment.
1.2.7 ALWAYS wear hearing protection when operating equipment.
1.2.8 ALWAYS store equipment properly when it is not being used. Equipment should be
stored in a clean, dry location out of the reach of children.
1.2.9 ALWAYS operate machine with all safety devices and guards in place and in working
order. DO NOT modify or remove safety devices. DO NOT operate machine if any safety
devices or guards are missing or inoperative.
1.2.10 ALWAYS read, understand, and follow procedures in Operator's Manual before
attempting to operate equipment.
WARNING

1.3 Service Safety
For your own personal protection and for the safety of those around you, please read
and ensure you fully understand the following safety information. It is the
responsibility of the operator to ensure that he/she fully understands how to operate
this equipment safely. If you are unsure about the safe and correct use of the eJXPC20 Plate
Compactor, consult your supervisor.
1.3.1 DO NOT attempt to clean or service machine while it is running. Rotating parts can
cause severe injury.
1.3.2 ALWAYS replace worn or damaged components with spare parts designed and
recommended by Tomahawk Power.
1.3.3 ALWAYS keep machine clean and labels legible. Replace all missing and hard-to-read
labels. Labels provide important operating instructions and warn of dangers and hazards.
1.3.4 This equipment is heavy and must not be lied single-handedly. Must be listed with
two people or use suitable liing equipment.
1.3.5 Cordon o the work area and keep members of the public and unauthorized personnel
at a safe distance.
1.3.6 Personal Protective Equipment (PPE) must be worn by the operator whenever this
equipment is being used.
1.3.7 Make sure you know how to safely switch this machine OFF before you switch it ON in
case you get into diculty.
1.3.8 Always switch OFF and unplug the motor before transporting, moving it around the
site, or servicing it.
1.3.9 During use, the motor becomes very hot, allow the motor to cool before touching it.
Never leave the motor running and/or unattended.
1.3.10 NEVER remove or tamper with any guards fitted, they are there for your protection.
Always check that guards are in proper condition, if any are damaged or missing, DO NOT
USE THE MACHINE until the guard has been replaced or repaired.
1.3.11 NEVER pull or guide the machine using the cable and never pull on the cable to
diconnect the plug.
1.3.12 DO NOT operate the machine when you are ill, feeling tired, or when under the
influence of alcohol or drugs.
1.3.13 Ensure that any trailing cable is protected against damage and not liable to be tripped
over or trapped underneath the machine.
1.3.14 DO NOT use the Motor Guard as a Liing Point.
1.3.15 DO NOT Jet Wash the machine as this could result in serious injury or even death!
1.3.16 DO NOT use this machine in wet conditions.
WARNING
6
DANGER The electrical components of the machine NEVER be exposed to
water or liquid of any kind as this could result in serious injury or even death!
DANGER

7
1.4 Electric Motors
All portable electric appliances are dangerous if abused. This machine will only operate on
one voltage. Check the power supply to ensure it corresponds to the voltage as stamped on
the motor. Make sure that the motor is switched OFF before you plug it into the power
supply.
When using a portable transformer it must have a minimum output of 3.3kw and be
continuously rated. The symbols on the ON/OFF switch are 0=OFF and I=ON in accordance
with international standards.
1.5 Plugs
The eJXPC20 Plate Compactor is intended for DIY or site usage, the following plug types are
supplied/fitted to the product: 15 amp rated 120 volt plug type.
GREEN / YELLOW = GROUND, BLUE = NEUTRAL, BROWN = LIVE
The wire which is colored Green and Yellow must be connected to the terminal in the plug
marked E or colored Green and Yellow. The wire which is colored Brown must be connected
to the terminal in the plug marked L or colored Red. The wire which is colored Blue must be
connected to the terminal in the plug marked N or colored Black. Always ensure before
connecting to the supply that the supply voltage is the same as the rated voltage marked on
the motor
1.6 Extension Cables
If you need to use an extension cable it must be no longer than 25 metres (82 feet) in length.
The wire section must be 2.5mm2 on 240v and 2.5mm2 on 120v. Ensure that the extension
cable is carefully laid out avoiding liquids, sharp edges and places where vehicles might run
over it. Avoid allowing the extension cable to be trapped underneath the plate compactor.
Unroll it fully or it will overheat and could catch fire. Make sure that any extension cable
connections are dry and safe.
DO NOT use an extension cable between the transformer and the power
supply. Always ensure that the cable between the 120v machine and
transformer is a minimum length of 10. Ensure cable is fitted with cable clip
to the operating handle at all times.
WARNING
THIS PRODUCT MUST BE GROUNDED
IMPORTANT: The wires in the mains lead are colored in accordance with the
following code:
WARNING
1.7 NVR - No Volt Release
The motors which are fitted to the machine are fitted with a NVR (No Volt Release) Switch.
This mean that if the power fails, the motor will not automatically restart when the power is
restored. The machine will need to be manually restarted.
1.8 Health and Safety
1.8.1 Vibration
Some vibration from the compacting operation is transmitted through the handle to the
operator's hands. Refer to specifications & technical data for vibration levels and usage
times (recommended maximum daily exposure time). DO NOT exceed the maximum usage
times.
1.8.2 PPE (Personal Protective Equipment)
Suitable PPE must be worn when using this equipment i.e. Safety Goggles, Gloves, Ear
Protection, Dust Mask, and Steel Toe capped footwear (with anti-slip soles for added
protection). Wear clothing suitable for the work you are doing. Always protect skin from
contact with concrete.
1.8.3 Dust
The compaction process can produce dust, which may be hazardous to your health. Always
wear a mask that is suited to the type of dust being produced.
2. TECHNICAL DATA
2.1 Product Features
The future of compaction is here: introducing the Tomahawk Electric Plate Compactor.
Extreme power, zero emissions. The new eJXPC20 Electric Plate Compactor combines the
old with the new: the same unstoppable force as our gas-powered compactors, without
engine emissions for use outdoors and indoors.
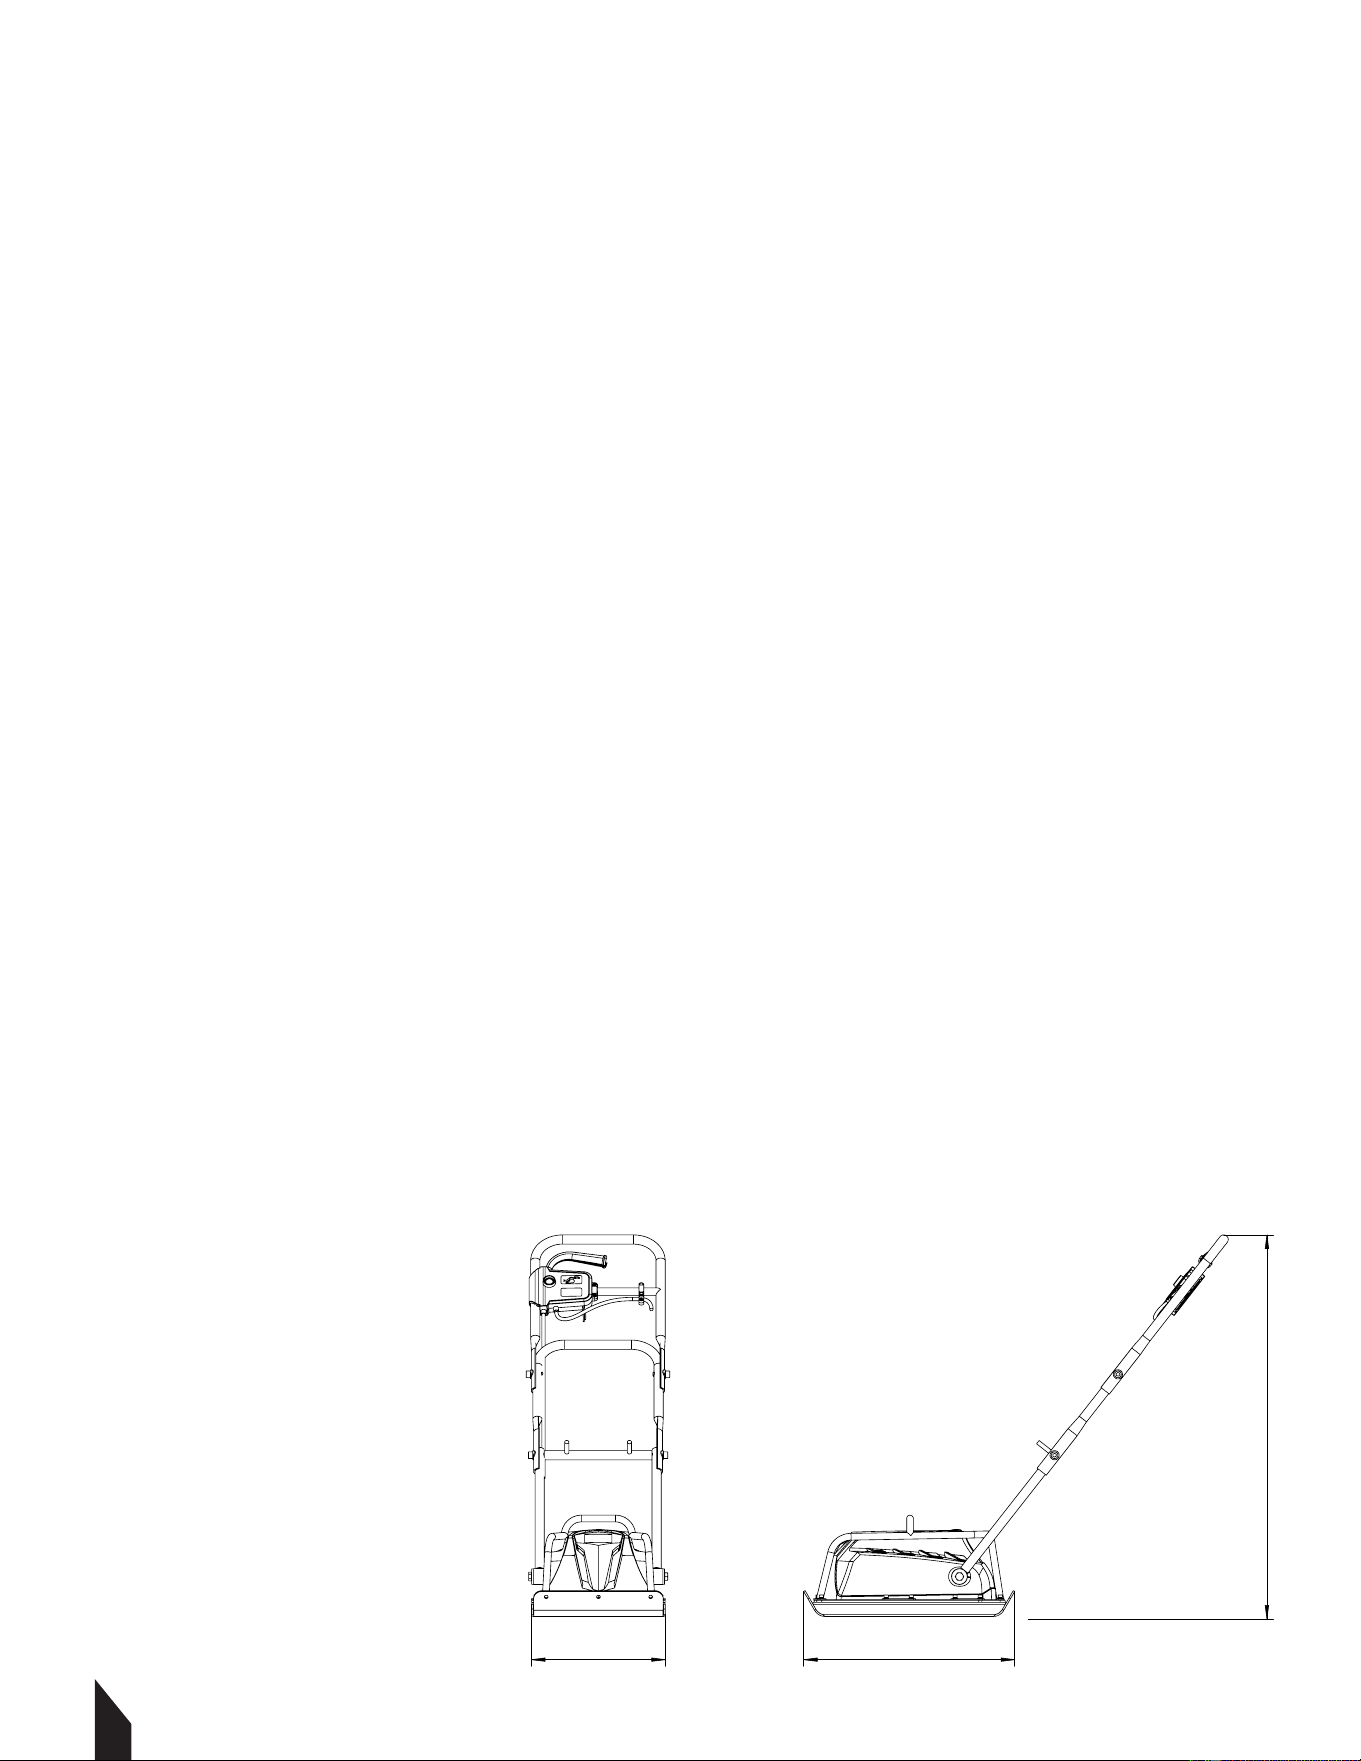
2.2 Product Dimensions
8
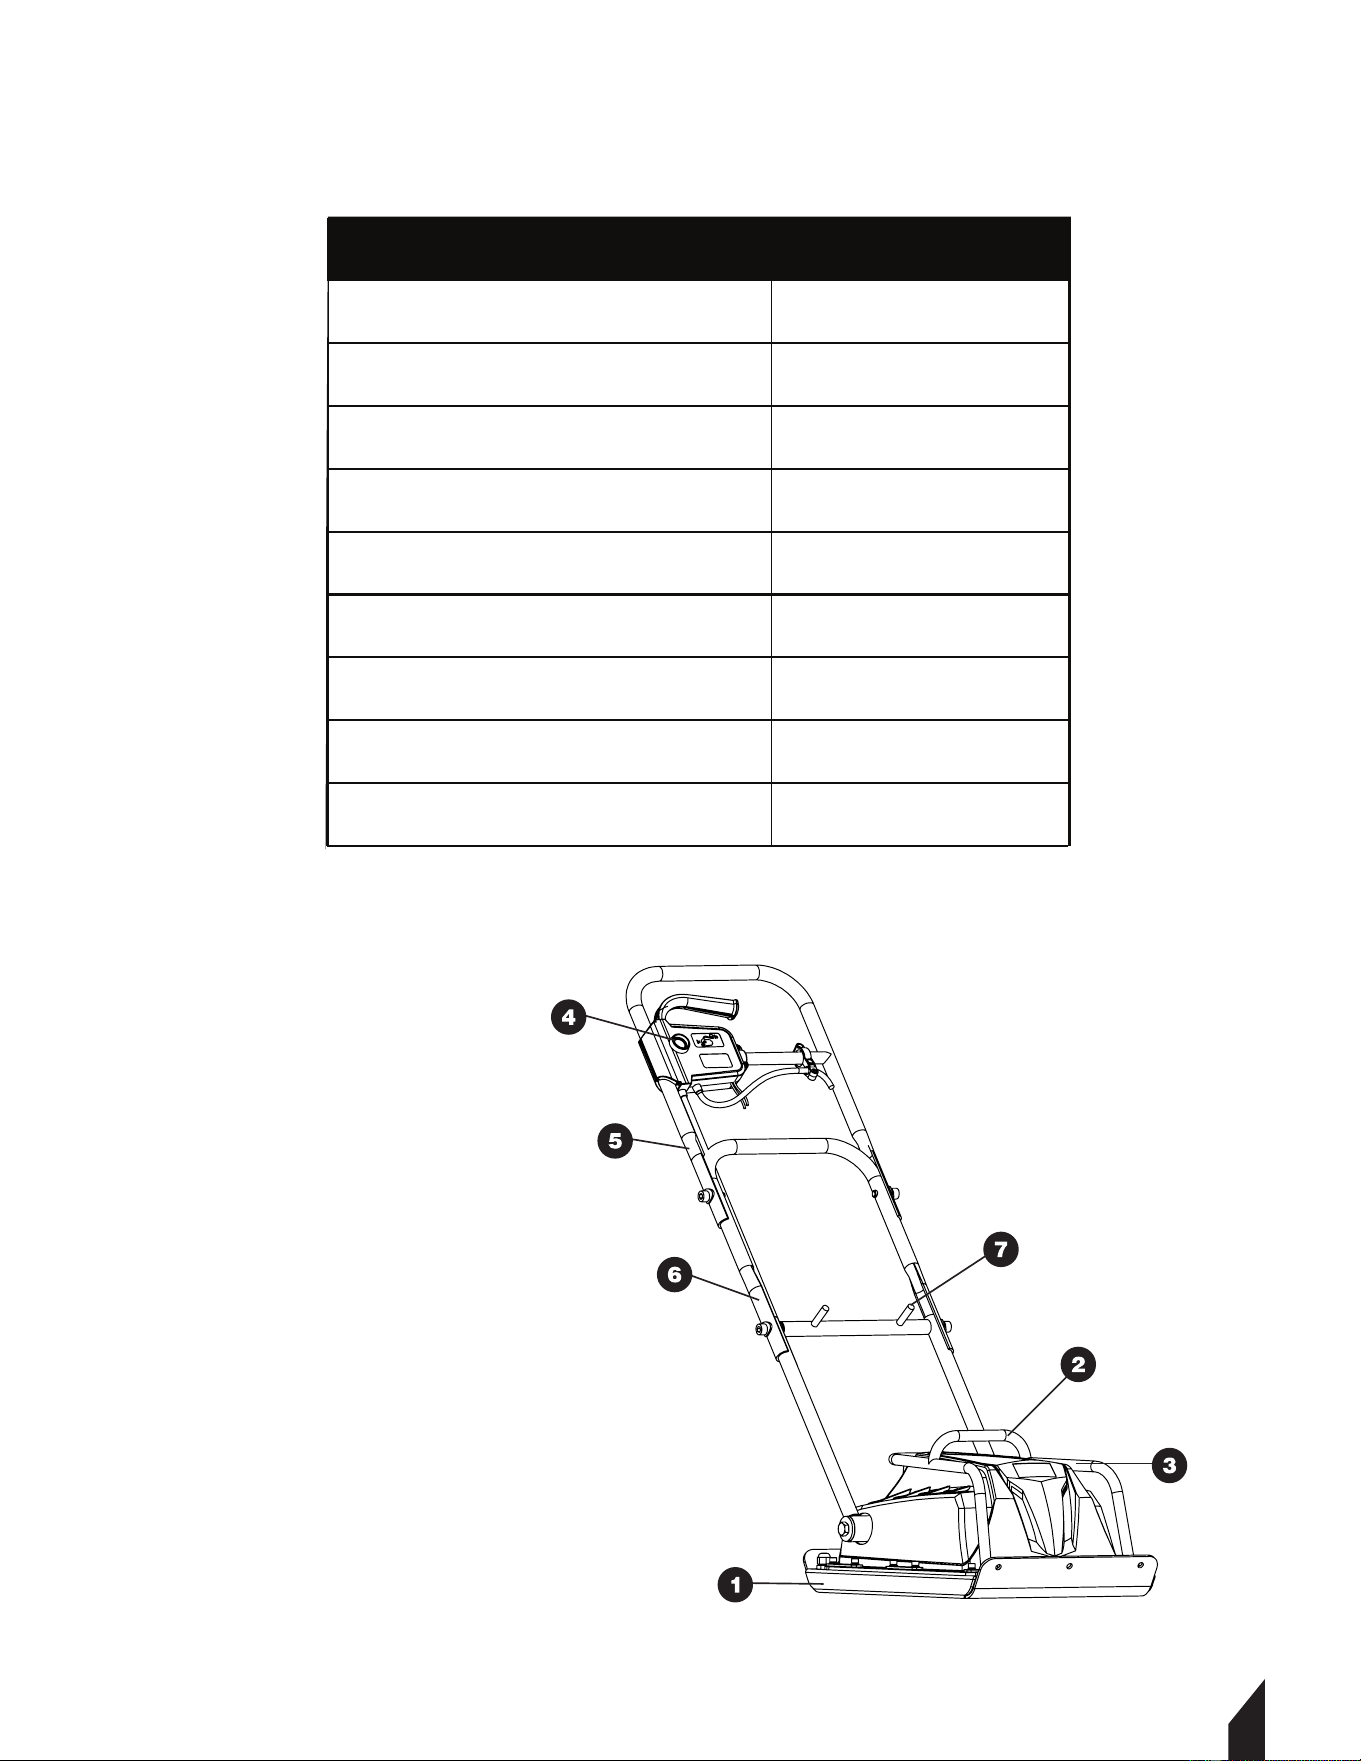
2.3 Compactor Specifications
2.4 Product Parts
1. Vibrating Plate
2. Liing Hook
3. Roll Over Cage
4. Safety Start On\O Switch
5. Upper Section Handle
6. Middle Section Handle
7. Cable Store
9
Model
eJXPC20
Motor
120V~60Hz
Power
130W
Motor Speed (rpm)
3450
Input Power Current
14.2
Compaction Force
5kN
Base Plate Dimensions(LxW)
16x13 in.( 40x32 cm)
Cable Length
32 ft (10 m)
Noise
94 dB(A)
Product Weight
62 lbs (28kg)

3. COMPACTION
3.1 Reasons for Compaction
Soil, which has been disturbed or new infill, subbase and blacktop, will have small voids or
air pockets which, if not compacted, will lead to one or more problems occurring.
3.1.1 As traic crosses the surface of an uncompacted area, the material is compressed.
This leads to subsidence of the top surface as the material fills the voids.
3.1.2 A similar situation occurs with static loads on uncompacted ground. The load (e.g. a
building) will sink.
3.1.3 Materials with voids are more susceptible to water seepage, leading to erosion. Water
ingress may also cause the soil to expand during freezing temperatures and contract during
dry spells. Expansion and contraction is a major cause of damage to building foundations
and normally leads to the structure requiring underpinning.
Compaction increases the density of the material and therefore increases its load bearing
capacity. Reduces air voids and therefore reduces the risk of subsidence, expansion and
contraction, due to ingress of water.
3.2 Compaction Specification
Various methods have been employed in the past to specify the compaction required for
various applications. The factors to consider are, material properties, layer thickness,
pressure applied, vibration and number of passess. Greater understanding of how
compaction works has lead to new compaction specifications being introduced.
3.3 Applications
Applications/materials fall into three categories:
3.3.1 Cohesive materials (less than 20% granular) e.g clay, silt & heavy soils.
3.3.2 Granular materials (more than 20% granular) e.g hard core, sand & light soils.
3.3.3 Bituminous materials e.g asphalt (tarmac), cold lay (bitumin emulsion products).
4. OPERATION
4.1 Pre Start Checks
The following pre start-up inspection must be performed before the start of each work
session or aer every four hours of use, whichever is first. Please refer to the service section
for detailed guidance. If any fault is discovered, the eJXPC20 plate compactor must not be
used until the fault is rectified.
10

11
4.2 Operating Instructions
4.2.1 Take the compactor to where it is needed.
4.2.2 NEVER leave the motor running whilst transporting or moving the Electric Plate
Compactor, even if it is only a short distance.
4.2.3 Having carried out the checks listed in the Pre Start Checks section, you may start the
motor.
4.2.4 Switch the machine ON and use the control handle to steer or turn the Electric Plate
Compactor. This will not only cause the baseplate to vibrate but will also cause it to travel
forward. During normal operation you should not have to push the eJXPC20 but allow it to
travel at its own pace.
The speed of travel will be determined by the condition of the surface being compacted. If
the surface to be compacted is on a slope, great care must be taken when controlling the
compactor’s direction of travel. If necessary, use a suitable rope attached to the eJXPC20 at
a low point on the chassis, to allow a helper to take part of the eJXPC20's weight. Work up
and down a slope not across.
4.2.5 Work the eJXPC20 over the surface in an organized pattern until the required
compaction has been achieved.
Where there are a number of different layers to be compacted on top of each other,
compact each layer individually.
NOTE: eJXPC20 is fitted with a Safety Start ‘On/Off’ switch. The safety interlock prevents
the switch lever from being operated until the safety lock button is depressed.
NEVER pass over the electric cable with the compactor during operation.
WARNING
DO NOT use a Mechanical Hoist on the Hand Liing Points Transporting the
compactor is a 2 person operation. Use the provided Hand Liing Points.
WARNING

12
4.3 Starting the Motor
1. Press the safety lock button (A) and pull the
switch lever (B) to start the machine.
4.4 Stopping the Motor
1. Release the switch lever to
switch o the machine.
5. SERVICE & MAINTENANCE
5.1 Maintenance
The Electric Plate Compactor is designed to give many years of trouble free operation. It is
recommended that an approved TOMAHAWK POWER dealer or service center carries out all
major maintenance and repairs. Always use genuine TOMAHAWK POWER replacement
parts, the use of spurious parts may void your warranty. Before any maintenance is carried
out on the machine, switch o the motor and disconnect the power supply.
Always set the Electric Plate Compactor on level ground to ensure any fluid levels will be
correctly read.
5.2 Cleaning
This is an electrical appliance. During cleaning, the electrical components of this machine
MUST NEVER be exposed to water or liquid
of any kind as this could result in serious injury or even death!
Make sure that the plate is unplugged from the power source prior to carrying
out first steps or the visual inspection!
WARNING
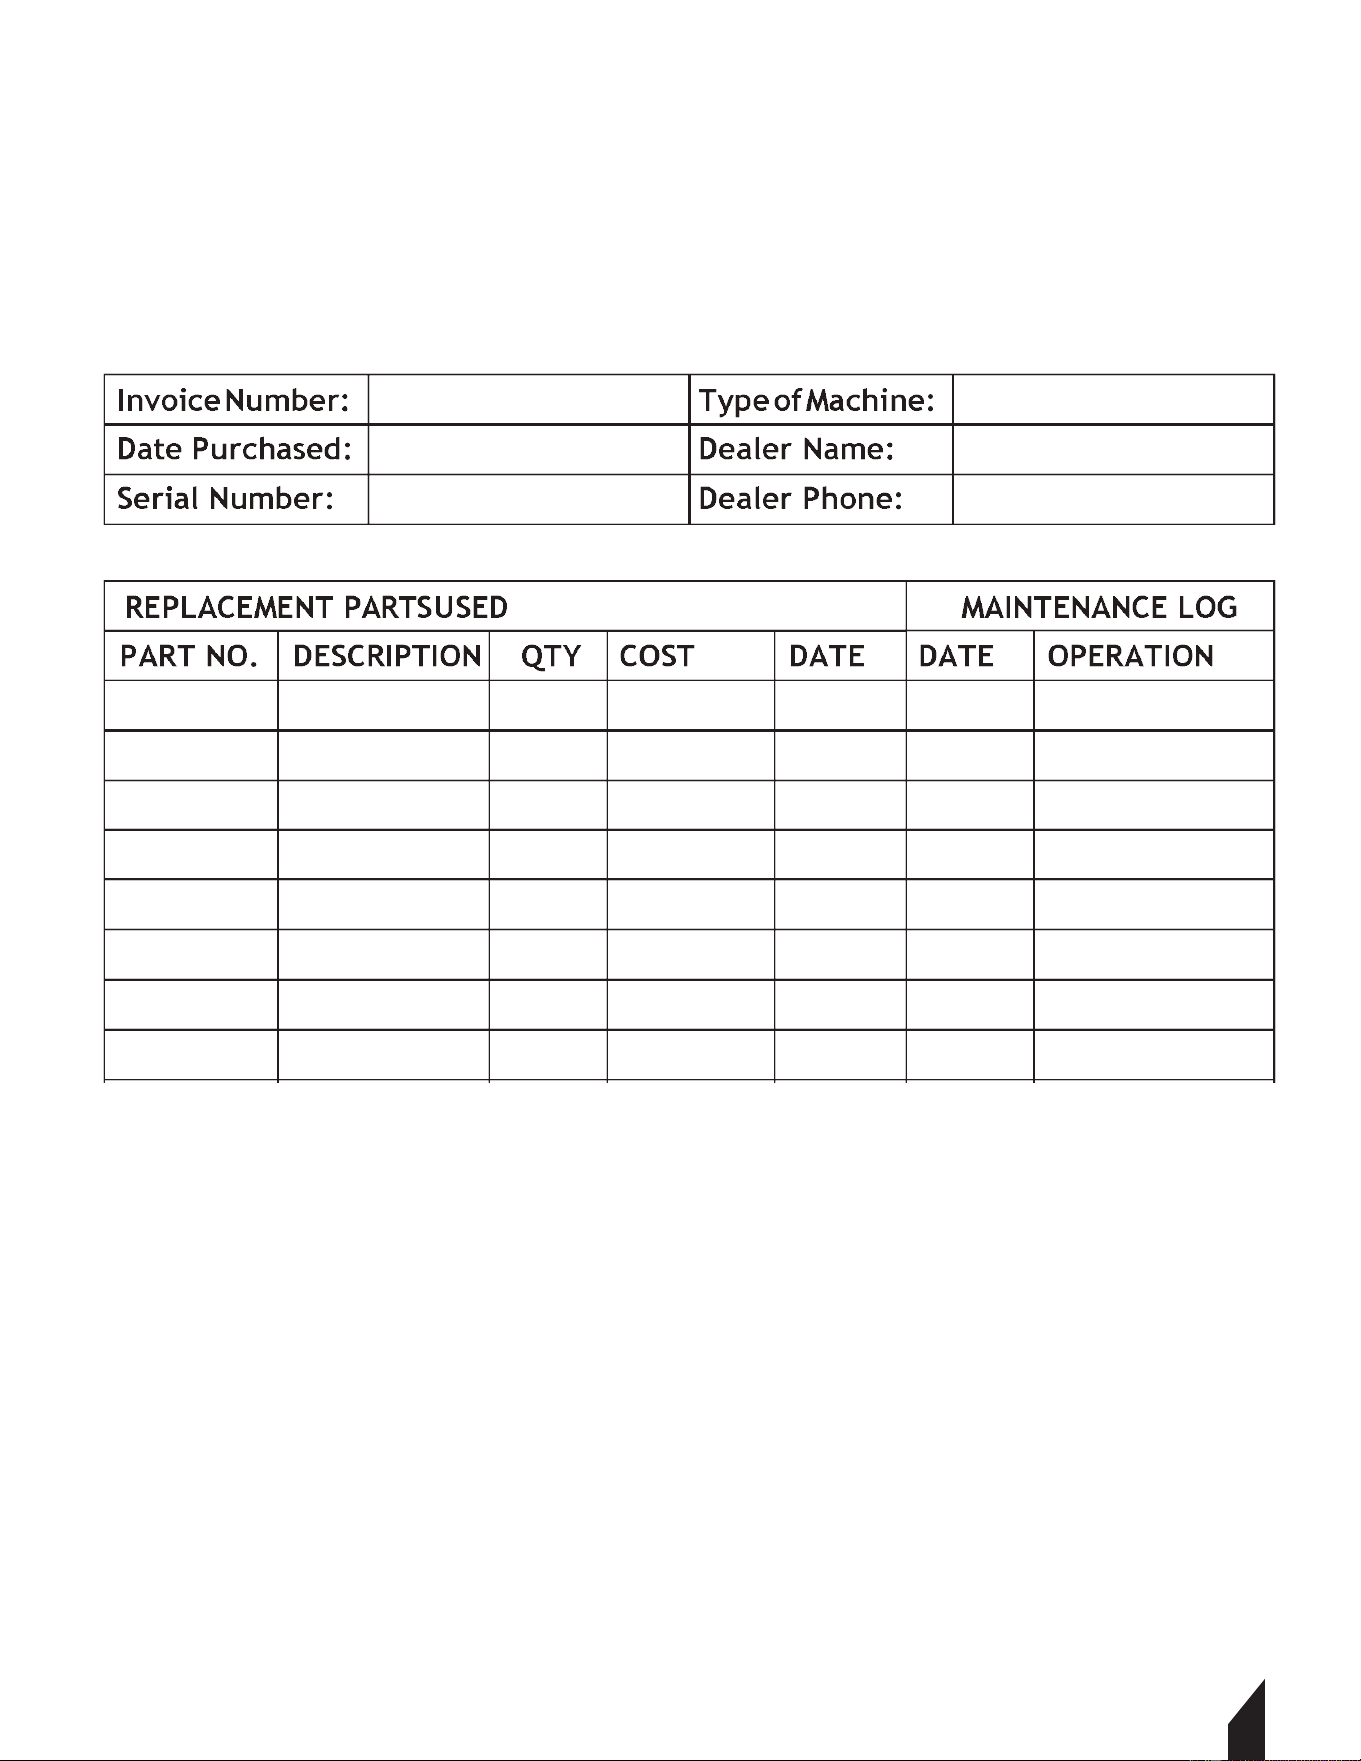
5.4 Maintenance Record
Preventative maintenance and routine service are essential to the long life of your
equipment. Reading through this manual thoroughly, you will find that you can do some of
the regular maintenance yourself. However, when in need of parts or major service, be sure
to see your dealer. For your convenience we have provided this space to record relevant data
about your plate compactor.
5.5 Replacement Parts
For replacement parts and technical questions visit www.tomahawk-power.com or scan
the QR code on the front of this manual.
• Not all equipment components are available for replacement. The illustrations within this
manual are a convenient reference to the location and position of parts in the assembly
sequence.
• When ordering parts, the following will be required: model number, serial number/lot date
code, and description.
• The manufacturer reserves the right to make design changes and/or improvements to
product lines and manuals without notice.
5.6 Storage
The compactor should be stored on level ground, aer the motor and machine have cooled
down. Be sure to secure the compactor as necessary to avoid it from falling down.
13

14
Problem Cause Solution
Fuse or Circuit Breaker tripped Replace Fuse or reset the breaker
Stator is shorted or went to ground Motor will make
a humming noise and the circuit breaker or fuse will
trip
Contact Tomahawk Power
Motor overloaded or load jammed
Inspect to see that the load is free. If free, Contact
Tomahawk Power.
Capacitor (on single phase motor) may have failed Contact Tomahawk Power
Starting switch has failed Contact Tomahawk Power
Voltage drop
If voltage is less than 10% of the motor's rating
contact power company or check if some other
equipment is taking power away from the motor or
Contact Tomahawk Power.
Load increased
Verify the load has not changed. Verify equipment
hasn't got tighter. If fan application verify the air low
hasn't changed or Contact Tomahawk Power
Defective capacitor Contact Tomahawk Power
Faulty stationary switch Contact Tomahawk Power
Bad bearings Contact Tomahawk Power
Voltage too low
Make sure that the voltage is within 10% of the
motor's nameplate rating. If not, contact power
company or check if some other equipment is
taking power away from the motor or Contact
Tomahawk Power
Load too high
Verify that the load is not jammed. If motor is a
replacement, verify that the rating is the same as
the old motor. If previous motor was a special
design, a stock motor may not be able to duplicate
the performance. Remove the load from the motor
and check motor doesn’t trip.
Ambient temperature too high
Verify that the motor is getting enough air for proper
cooling. Most motors are designed to run in an
ambient temperature of less than 40°C. (Note: A
properly operating motor may be hot to the touch.)
Protector may be defective Contact Tomahawk Power
Winding shorted or grounded Contact Tomahawk Power
The motor
makes a loud
rubbing or
grinding
noise
Damage to internal workings Contact Tomahawk Power
Drive failure Contact Tomahawk Power
Vibrator failure Contact Tomahawk Power
Lack of lubrication Use water
Over compaction Remove and relay
Layer thickness too deep Remove some of the material
Moisture content too high or too low Remove material and adjust
Asphalt
adhering to
plate
Bituminous
surface
laking
(laminating)
Low travel
speed (plate
sinking)
Motor fails to
start
Motor runs
but dies
down
Motor takes
too long to
accelerate
Motor
overload
protector
continually
trips
Unit will not
vibrate
6. TROUBLESHOOTING

15
7. EQUIPMENT WARRANTY
Your new TOMAHAWK® equipment is warranted to the original purchaser for a period of
one-year (12 months) from the original date of purchase. The TOMAHAWK® warranty is
against defects in design, materials and workmanship.
The following are not covered under the warranty:
7.1.1 Damage caused by abuse, misuse, dropping or other similar damage caused by or as a
result of failure to follow assembly, operation or user maintenance instructions.
7.1.2 Alterations, additions or repairs carried out by persons other than TOMAHAWK® or
their recognized agents.
7.1.3 Transportation or shipment costs to and from TOMAHAWK® or their recognized
agents, for repair or assessment against a warranty claim, on any machine.
7.1.4 Materials and/or labor costs to renew, repair or replace components due to fair
wear and tear.
7.1.5 TOMAHAWK® and/or their recognized agents, directors, employees or insurers will not
be held liable for consequential or other damages, losses or expenses in connection with or
by reason of or the inability to use the machine for any purpose.
7.2 Warranty Claims
Before submitting any warranty claim, you will need to register your
new TOMAHAWK® equipment through www.tomahawk-power.com
or email support@tomahawk-power.com.
Follow the steps on page 3 or scan this QR codes to complete
the equipment registration. Aer registration is complete,
all warranty claims should firstly be directed to TOMAHAWK® through
the online Service Request form found
at www.tomahawk-power.com/pages/service-request.
8. SERVICES CENTERS
Our service centers are equipped to handle your equipment maintenance and repair needs
efficiently. With a network of authorized local service locations , you can find expert
support and genuine parts needed to keep your equipment running smoothly. All locations
are listed on the webpage https://tomahawk-power.com/pages/find-a-service-center.
For Service Call (866) 577- 4476

16
9. MORE COMPACTION TIPS
9.1 Soil Drop Test: Soil preparedness refers to the “wetness” of the dirt or soil. Soil needs
to be 50% dry and 50% wet, before starting compaction. A simple “hand test” can deter-
mine this. Pick up a handful of soil with your hand and squeeze the dirt. Observe whether
the soil is powdery or if it breaks apart when dropped. If the soil does break apart, it means
that it is too dry. If the soil keeps together in one piece when dropped, it is ready for com-
paction.
9.2 Soil Testing: Testing: The function of this step is to measure the density of an aggregate
material to ensure the increase of density when driving out air. At a low moisture content
level, there are more soil particles assembling together. In order to determine if the soil is
compacted properly, there are several methods.
9.2.1 Soil Testing: Test strips are useful to determine the method of compaction and
understand how many passes of your plate compactor are needed to achieve the optimum
compaction. Every layer of compacted soil meets a specific percentage on the proctor
curve. Through soil testing, it is possible to identify optimum moisture. Soil testing mea-
sures the soil density compared to the degree of compaction specifications, as well as the
eect of the moisture.
A common laboratory method called the Proctor Compaction Test can be used to deter-
mine the optimal moisture content for a given soil type. The goal of this method is to
understand the soil’s maximum dry density. A second method of soil testing is known as
the California Test 216 and is used to find the relative compaction of untreated and treated
soils.
Four factors account for optimum compaction including li thickness, pressure, and soil
moisture content. During the compaction process, the soil's moisture adds density and
lubricates soil particles, until there is a maximum dry unit weight without voids in the soil.
The table below explains the dierent outcomes and properties of fill materials.

17
9.3 Compaction Terms
9.3.1 Cohesive soils: Clays and mixes have a particular particle size of less than .003” or
.002” and are typically classified as cohesive soils. This type of soil is primarily used for
retaining pond beds and mound fills. These soils are dense due to the strongly bound mo-
lecular attraction. Cohesive soils and water will not mix easily, but only once the soils are
moist it will feel sticky.
9.3.2 Granular soils: These soils have particle sizes of .003” or greater, like sand. Water
drains easily through the soils particles of granular soils. The larger the particles, the larger
the equipment needed to achieve lower frequencies and higher compaction force. Plate
compactors are typically the best option for compacting granular soils - however, depend-
ing on the vibration frequency and particle size, reversible plate compactors and double
drum rollers may be more appropriate for this type of work.
9.3.3 Mixed soils: Sometimes soils can be a mixture of both types, cohesive and granular.
Thus choosing the appropriate compaction equipment is more diicult. We recommend
testing your equipment to match the best machine to the desired job.

1718
9.4.4 Static Force: Found in the deadweight of machines, static force applies pressure
downward on soil surfaces. As a result, soil particles compress in the topsoil layer.
9.4.5 Vibratory Force: This force is engine-driven, creating a downward force, in addition
to the machine's static weight. Vibrations compress the soil material closer together to
increase density.
9.4.6 Types of Compaction: There are four types of compaction that can be applied to soils
or asphalt. Each one takes place using one of the two types of the forces explained above
(static or vibratory).
A. Vibration: Periodic motion of particles with rotating weight in opposite directions
from a position of equilibrium.
B. Impact: An action of one object coming into contact with another.
C. Kneading: Force is applied by alternating movement in adjacent positions.
D. Pressure: The process of continuous physical force against solid materials.

Item #: eTPS18
4.75 GALLON BATTERY
BACKPACK SPRAYER
www.tomahawk-power.com
POWER YOUR WORLD
Powered by a superior 7Ah lithium battery with up to 11 hours of
lifeя .+-4 ШТТТ ȅ $) УТ ($)0/ . *- ' ..ѓ Ȃ -$)" adjustable
pressure from 20 to 70 PSI, Tomahawk Battery Sprayers are
+ -! /!*-.+-4$)"- .$ )/$')*(( -$'- .ѓ

Item #: JXPT46K
24” - 36” - 46”
POWER TROWELS
www.tomahawk-power.com

24
NEVER PUMP
NEVER LOSE PRESSURE
Lose the manual pump and gain the power to spray 15,000 ² in 10 minutes
or less while maintaining constant, adjustable pressure from 50-435 PSI with
your ideal concrete sealant, cure, top cast, form release, and more!
Item #: TCS6.5
6.5 GAL MOTORIZED
CONCRETE SPRAYER
www.tomahawk-power.com
To reduce the risk of injury, the user must read and understand the Operator’s
Manual before using this product. Save these instructions for future reference.
ELECTRIC PLATE
COMPACTOR
Parts Manual
MODEL NUMBER: eJXPC20

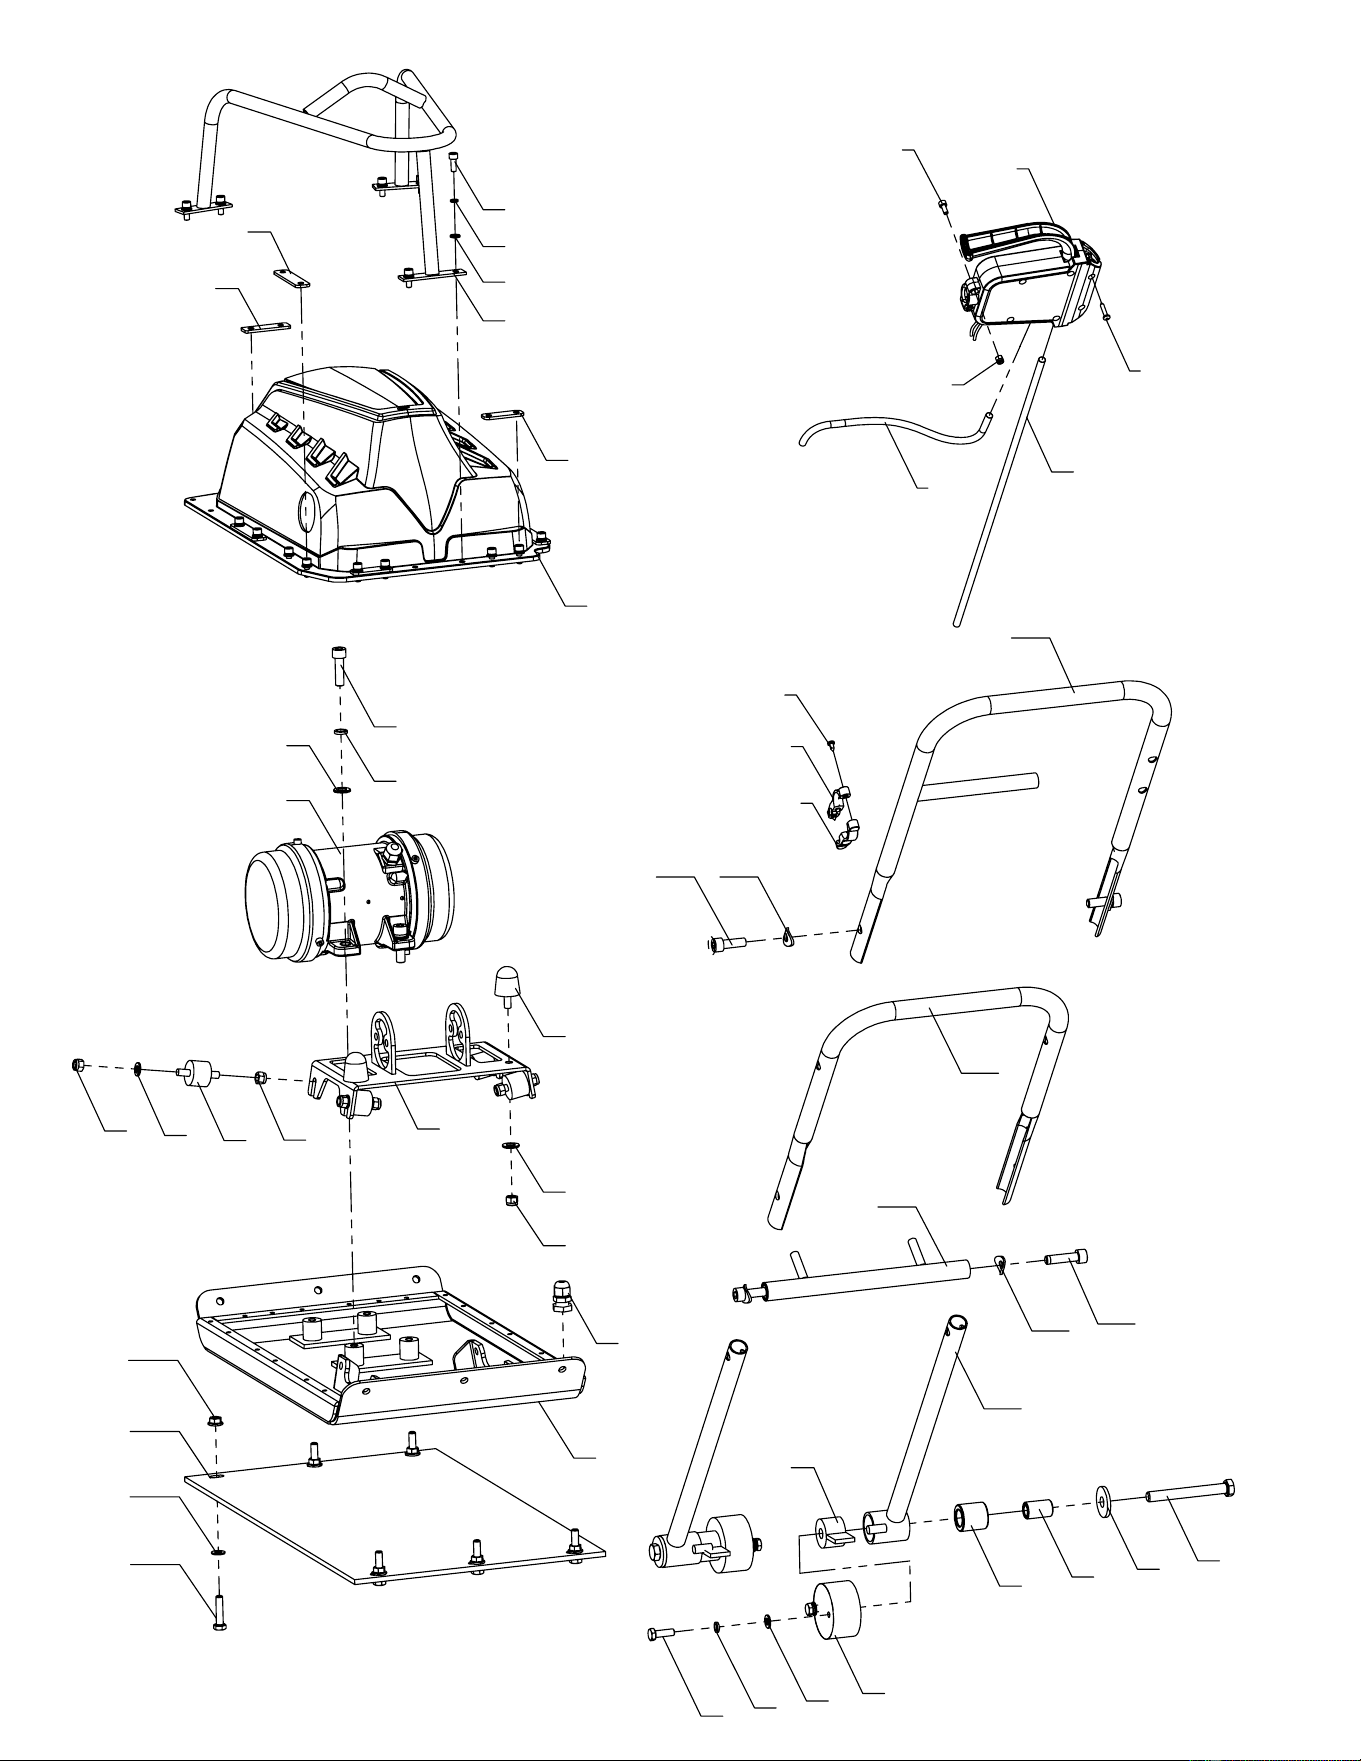

Item NO. Description Part No. Qty
1 On-off switch assembly 3141804003 1
22 Cover fixing bar Front 3021804003 4
23 Cover fixing bar Side 3021804005 2
24 Cover fixing bar Rear 3021804004 2
25 Motor cover 3141804004 1
26 Inner socket bolt 4010400089 4
27 Spring washer 4030100006 4
28 Washer 4040100005 6
29 Vibrating motor 3141804002 1
30 Lock nut 4020200005 10
31 Shock absorber, motor 3141004003 4
32 Stopper 3140200017 2
33 Motor mounting plate 3021804001 1
34 Cable connector 3141402050 1
35 Base plate 3021804002 1
36 Paver st
one mat 3141804999 1
26Kg 3141804021 1
36-1 Paver stone mat 3141804022 1
36-2 Bolt 4010100038 6
36-3 Washer 4040100004 6
36-4 Nut 4020300003 6
37 Power cable 3141801023 1
38 Handle adapter 3011804001 2
Item NO. Description Part No. Qty
1 On-off switch assembly 3141804003 1
2 Inner socket bolt 4010400005 2
3 Lock nut 4020200003 2
4 Crosshead tapping screw 4012200021 6
5 Switch inlet cable 3141804005 1
6 Crosshead tapping screw 4012200017 3
7 Cable cleat,R 3141804006 1
8 Cable cleat,L 3141804007 1
9-1 Handle, upper 3051804009 1
9-2 Handle, middle 3051804004 1
9-3 Handle, lower 3051804005 2
9-4 Handle middle axl 3051804006 1
9-5 Inner socket bolt 4010
400084 2
9-6 Washer 4040900001 4
9-7 Inner socket bolt 4010400090 2
10 Inner socket bolt, half thread 4010200094 2
11 Washer 4041000001 2
12 Bush 3140000002 2
13 Rubber collar 3140000003 2
14 Shock absorber, Handle 3140000100 2
15 Washer 4040100004 8
16 Spring washer 4030100005 4
17 Hex head bolt 4010100032 4
18 Inner socket bolt 4010400016 22
19 Spring washer 4030100004 22
20 Washer 4040100003 22
21 Frame cage 3051804007 1
eJXPC20 Parts List

Rammers
8 ft Hydraulic Steer, 35 HP Vanguard,
CVT Clutch, 180 RPM
10 ft Full Hydrostatic, 74 HP Hatz
Diesel
Part#:
TPT24H
TPT36H
TPT46H
Part#: JXPT30T
Part#:
TRT46V
TRT60V
2 ft Edger, Honda GX160, 0-28
o
Blade Pitch
3 ft, Honda GX160/GX270, 0-28
o
Blade Pitch
4 ft, Honda GX270/GX390, 0-28
o
Blade Pitch
HAVE QUESTIONS?
Contact us. We’re here to help!
Email us at [email protected]
Forward Plate Compactors
Reverse Plate Compactors
Part#:
TR68H
JX60H
eJX60H
TVSA-H
eTVSA
Part#:
Part#:
TPC80H
COMPACTION
Power Screeds
Porta-Trowels
Concrete Sprayers
Walk Behind Trowels
Ride on Trowels
Early Entry Saws
Part#:
6-16 ft Magnesium Blades
Honda GX35, Adjustable Handles
6-16 ft Magnesium Blades
36V/5 Ah Battery, Adjustable Handles
Part#:
TFS6H
TFS10H
Part#: TCS6.5
6" Blade Diameter, Blade Compatibility,
Honda GX120
10" Blade Diameter, Self Propelled,
Blade Compatibility, Honda GX270/GX390
CONCRETETROWELS
(866) 577-4476
TPC85H
TPC90H
TPC170H
TPC100H
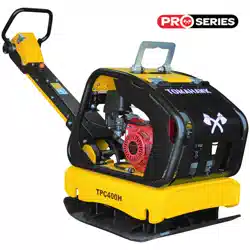
TPC400H
Equipment Guide
3,000 lbs/sq ft, Honda, 21”x17” Plate
3,200 lbs/sq ft, Honda, 23”x17” Plate
3,400 lbs/sq ft, Honda, 22”x20” Plate
3,500 lbs/sq ft, Honda, 19”×14” Plate
7,000 lbs/sq ft, Honda, 28”x20” Plate
11,690 lbs/sq ft, Honda, 32”x22” Plate
Lightweight at 40 lbs
Adjustable 18 ft Extension Bull Float Poles
30" Diameter, 4-Blade Assembly
Adjustable Blade Pitch from 0-28
o
Adjustable from 0-450 PSI
Handles 30% + Solids,1.8 HP 2 Stroke Motor,
24" Brass Wand 0.5 GPM, Fan Nozzle Included,
Spray 15,000 ft
2
in10 Minutes
3,550 lbs/sq ft, Honda GX120
3,350 lbs/sq ft, Honda GX100
3,350 lbs/sq ft, Honda GXE2.0S
Items Listed Includes Combo Blades

QUIET INVERTER SERIES
QUIET INVERTER SERIES
Welder GeneratorsPower Buggy
48V-20Ah Battery
Handles up to 8 cu ft or 660 lbs. Bucket Capacity
Hydraulic Bucket with 92
o
Tilt, 8 Hour Run Time
Snow Plow Attachment & Bucket Extender Available
Part#:
TGDR10
TSCP8
4,500 - 5,500 Watt Series
10,500 Watt Series
Concrete Scarifier
Floor Sweepers
Grinders and Scrapers
Part#: TSCAR-8H
Trash Water Pumps
Part#:
TW3H
TW4H
3" Pump, Honda GX270, 375 GPM,
Elevation: 89ft, Suction: 25ft
4" Pump, Honda GX390, 581 GPM,
Elevation: 92ft, Suction: 26ft
QUIET INVERTER SERIES
OUTDOOR POWER GENERATORSFLOORING
www.tomahawk-power.com
(866) 577-4476
ASSEMBLED IN THE
PARTS SOURCED GLOBALLY
USA
TG2000i
TG3000i
2,000 - 3,300 Watt Series
Equipment Guide
10" Disc, 120V, 1/32" Per Pass,
11 AMP, 1.5 HP, 1,725 RPM
8" Blade, 120V, 11 AMP, 3/4 HP,
1,725 RPM, Carpet & Tile Remover
Honda GX160 Engine, Scarifies 350 - 500ft
2
/hr
OSHA Compliant Vacuum Port
8" Carbide Tungsten Drum Kit, 1/8" Per Pass
38" Working Width, Triple Broom
System, 14.5 Gallon
30" Working Width, Battery Powered
Triple Broom System, 13.5 Gallon
120 Amp Welder, 60% Duty Cycle,
2000w, Includes Wheel Kit
210 Amp Welder, 60% Duty Cycle,
2000w, Includes Wheel Ki
t
4,500w Max / 3,800w Rated
5,500w Max / 5,000w Rated, 120/220V
Run Time 8 Hrs @ 50% Load
CARB Compliant, GFCI
TG4500i
TG5500i
10,500w Max / 8,500w Rated
Voltage Selector, 120/220V
Run Time 14.5hrs @ 25% Load
CARB Compliant,
GFCI, CO Detector
TG9000i
2,200w Max / 2,000w Rated
3,300w Max
/ 3,000w Rated,
120/220V, 30 AMP Twist Lock
Run Time 8 Hrs @ 50% Load
CARB Compliant, GFCI 120v
6010-7024 Rods Compatible
Part#: TBUGGY300e
Part#:
TWG120A
TWG210A
Part#:
TOS38
eTOS30
Assorted Blade Choices Assorted Blade Choices
Assorted Brush Choices

Tomahawk Power, LLC
San Diego, CA
Sales Support
(866) 577-4476
Equipment Support
(866) 577-4476
www.tomahawk-power.com
Tomahawk understands to keep a job-site running smoothly the proper equipment and
spare parts are needed at the drop of a hat. With same day shipping and faster
delivery times, count on Tomahawk to keep you powered throughout the day! With
long lasting parts and engines, Tomahawk equipment will be the star of your fleet for
years to come. Visit www.tomahawk-power.com to get started today!
Power Your World
FACEBOOK
facebook.com/TomahawkPowerUSA
YOUTUBE
youtube.com/TomahawkPower
INSTAGRAM
@tomahawkpower