SAVE THESE INSTRUCTIONS CAREFULLY
Read these instructions carefully before using your
microwave oven, a
nd keep it carefully.
If you follow the instructions, your oven will provide you with
many years of good service.
INSTRUCTION MANUAL
MODEL:
1
dd/mm/yy
6/01/24
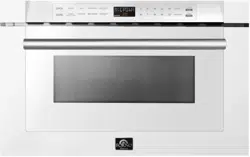
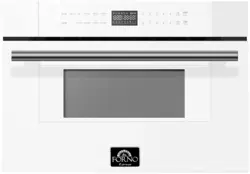
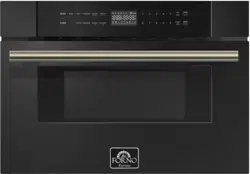
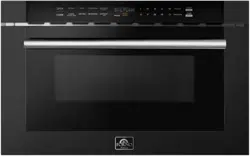
FMWDR3000-24BLK
FMWDR3000-24WHT

TABLE OF CONTENTS
Precautions to avoid possibleexposure
To excessive microwaveenergy
5
Specifications 5
Important safety instructions 6
Grounding instructions 7
Radio interference 8
Utensils 9
Setting up your oven 11
Operation 12
Materials you can use in microwave oven.............. 10
Materials you can use in microwave oven.............. 10
•
•
•
Control Panel and Features.....................................
12
• Power On.................................................................
13
• Setting the Clock .....................................................
13
• Setting the Kitchen Timer ........................................
13
• Microwave Cooking..................................................
14
• Speedy Cooking.......................................................
14
• Defrost by Weight.....................................................
14
• Defrost by Time........................................................
15
• Auto Menu--Beverage..............................................
15
• Auto Menu--Popcorn................................................
15
• Auto Menu--Melt.......................................................
15
•
Auto Menu--Soften................................................
16
• Silent mode..............................................................
17
• Lock Function for Children.......................................
17
• Inquiring Function....................................................
17
• Other specifications.................................................
17
• Troubleshooting.......................................................
18
Warranty
Customer Care
2
3-4

EN-2
Thank you for purchasing a Frono product. Please read the entire instruction manual before operating your new
appliance for the first time. Whether you are an occasional user or an expert, it will be beneficial to familiarize yourself
with the safety practices, features, operation and care recommendations of your appliance.
Both the model and serial number are listed inside the product. For warranty purposes, you will also need the date of
purchase .
Services in Canada and Untied States
Keep the instruction manual handy to answer your questions. If you don’t understand something or need more
assistance, please visit our website for fast support. Please provide us your name, number, address,serial number
of the product that troubleshooting, proof of purchase, and a short description of the issue. A customer service
representative will contact you as soon as possible. All warranty work needs to be authorized by FORNO customer
service. All our authorized service providers are carefully selected and rigorously trained by us.
Product Information Service Information
Model Number : _________________________________________
Use these numbers in any
correspondence or services calls
concerning your product.
If you received a damaged product,
immediately contact Forno.
To save time and money, before
you call for serviced, check the
troubleshooting guide. It listed the
causes of minor operation problems
that you can correct yourself.
Serial Number : __________________________________________
Date of Purchase :________________________________________
Purchase Address And Phone : _____________________________
_______________________________________________________
_______________________________________________________
Customer Care
“Need some quick help? Simply scan the qr code and get access
to our fast support form. We’re always here to assist you with any
questions or concerns you may have. So, don’t hesitate to reach out!”

What this limited warranty covers:
The Warranty coverage provided by Forno Appliances in this
statement applies exclusively to the original Forno
appliance (“Product”) sold to the consumer (“Purchaser”) by an authorized Forno dealer/distributor/retailer,
purchased and installed in the United States or Canada, and which has always remained within the original
country of purchase (the United States or Canada). Warranty coverage is activated on the date of the Product's
original retail purchase and has a duration of two (2) years.
Warranty coverage is non-transferable. In the event of replacement of parts or of the entire product, the
replacement Product (or parts) shall assume the remaining original Warranty activated with the original retail
purchase document. This Warranty shall not be extended with
respect to such replacement. Forno Appliances
will repair or replace any component/part which fails or proves defective due to materials and/or workmanship
within 2 years of the date of the original retail purchase and under conditions of ordinary residential,
non-commercial use. Repair or replacement will be free of charge,
including labor at standard rates and shipping
expenses. Purchaser is responsible for making the Product reasonably accessible for service. Repair service
must be performed by a Forno Authorized Service company during normal working hours.
IMPORTANT
Retain proof of original purchase to establish warranty period. Forno’s liability on any claim of any kind, with
respect to the goods and/or services provided, shall in no event exceed the value of the goods or service or part
there of which has given rise to the claim.
30-Day Cosmetic Warranty
The Purchaser must inspect the product at the time of delivery. Forno warrants that the Product is free from
manufacturing defects in materials and workmanship for a period of thirty (30) days from date of the original retail
purchase of the Product.
This coverage includes:
- Paint blemishes
- Chips
- Macroscopic finish defects
Cosmetic warranty does NOT cover:
> issues resulting from incorrect transport, handling and/or installation (e.g.: dents, broken, warped or deformed
structures or components, cracked or otherwise damaged glass components);
> slight color variations on painted/enameled components;
> differences caused by natural or artificial lighting, location or other analogous factors;
> stains/corrosion/discoloration caused by external substances and/or environmental factors;
> labor costs, display, floor, B-stock, out- of-box,“as is” appliances and demo units.
How to receive service
To receive warranty services, the Purchaser must contact the Forno Support department in order to determine
the problem and the required service procedures. Troubleshooting with a customer service representative will be
necessary before moving forward with the service. Model number, serial number and date of original retail
purchase will be requested.
Warranty
EN-3

THERE ARE NO EXPRESS WARRANTIES OTHER THAN THOSE LISTED AND DESCRIBED ABOVE, AND NO
WARRANTIES, EITHER EXPRESS OR IMPLIED, INCLUDING, BUT NOT LIMITED TO, ANY IMPLIED
WARRANTIES OF MERCHANTABILITY OR FITNESS FOR A PARTICULAR PURPOSE THAT SHALL APPLY
AFTER THE EXPRESS WARRANTY PERIODS STATED ABOVE, AND NO OTHER EXPRESS WARRANTY OR
GUARANTEE GIVEN BY ANY PERSON, FIRM OR CORPORATION WITH RESPECT TO THIS PRODUCT
SHALL BE BINDING ON FORNO. FORNO SHALL NOT BE LIABLE FOR LOSS OF REVENUE OR PROFITS,
FAILURE TO REALIZE SAVINGS OR OTHER BENEFITS, TIME AWAY FROM WORK, MEALS, LOSS OF FOOD
OR BEVERAGES, TRAVELING OR HOTEL EXPENSES, EXPENSES TO RENT OR PURCHASE APPLIANCES,
REMODELING/CONSTRUCTION EXPENSES IN EXCESS OF DIRECT DAMAGES WHICH ARE UNDENIABLY
CAUSED EXCLUSIVELY BY FORNO OR ANY OTHER SPECIAL, INCIDENTAL OR CONSEQUENTIAL
DAMAGES CAUSED BY THE USE, MISUSE OR INABILITY TO USE THIS PRODUCT, REGARDLESS OF THE
LEGAL THEORY ON WHICH THE CLAIM IS BASED, AND EVEN IF FORNO HAS BEEN ADVISED OF THE
POSSIBILITY OF SUCH DAMAGES. NOR SHALL RECOVERY OF ANY KIND AGAINST FORNO BE GREATER
IN AMOUNT THAN THE PURCHASE PRICE OF THE PRODUCT SOLD BY FORNO AND CAUSING THE
ALLEGED DAMAGE.WITHOUT PREJUDICE TO THE FOREGOING, PURCHASER ASSUMES ALL RISK AND
LIABILITY FOR LOSS, DAMAGE OR INJURY TO PURCHASER AND PURCHASER’S PROPERTY AND TO
OTHERS AND THEIR PROPERTY ARISING FROM THE USE, MISUSE, OR INABILITY TO USE THIS PRODUCT
SOLD BY FORNO THAT IS NOT A DIRECT RESULT OF NEGLIGENCE ON THE PART OF FORNO THIS
LIMITED WARRANTY SHALL NOT EXTEND TO ANYONE OTHER THAN THE ORIGINAL PURCHASER OF
THIS PRODUCT, IS NON-TRANSFERABLE, AND STATES YOUR EXCLUSIVE REMEDY.
> Use of the Product in any non-residential,
commercial application.
> Use of the Product for anything other than its
intended purpose.
> Repair services provided by anyone other than a
Forno Authorized Service agency.
> Damages or repair services to correct services
provided by unauthorized parties or the use of
unauthorized parts.
> Installation not in accordance with
local/state/city/county fire codes, electrical codes, gas
codes, plumbing codes, building codes, laws or
regulations.
> Defects or damage due to improper storage of the
Product.
> Defects,damage or missing parts on products sold
out of the original factory packaging or from displays.
> Service calls or repairs to correct an incorrect
installation of the Product and/or related accessories.
> Replacement of parts/service calls to connect,
convert or otherwise repair the electrical wiring and/or
gas line in order to properly use the product.
> Replacement of parts/service calls to provide
instructions and information on the use of the Product.
> Replacement of parts/service calls to correct issues
arising from the product being used in a manner other
than what is normal and customary for residential use.
> Replacement of parts/service calls due to wear and
tear of components such as seals, knobs, pan
supports, shelving, cutlery baskets, buttons, touch
displays, scratched or broken ceramic-glass tops.
> Replacement of parts/service calls for lack
of/improper maintenance, including but not limited to:
build up of residues, stains, scratches, discoloration,
corrosion.
> Defects and damages arising from accidents,
alteration, misuse, abuse or improper installation.
> Defects and damages arising from Product
transport, logistics and handling. Inspection of the
product must be made at time of delivery. Following
receipt and inspection, the selling dealer/delivery
company must be notified of any issues arising from
handling, transport and logistics.
> Defects and damages arising from external forces
beyond the control of Forno Appliances, including but
not limited to wind, rain, sand, fires, floods, mudslides,
freezing temperatures, excessive moisture or
extended exposure to humidity, power surges,
lightning, structural failures surrounding the appliance
and other acts of God.
> Products whose serial number has been
altered/damaged/tampered with. In no case shall
Forno be held liable or responsible for damage to
surrounding property, including furniture, cabinetry,
flooring, panels, and other structures surrounding the
Product. Forno is neither liable nor responsible for the
Product if it is located in a remote area or an area
where certified trained technicians are not reasonably
available. Purchaser must bear any transportation and
delivery costs of the Product to the nearest Authorized
Service Center or the additional travel expenses of a
certified trained technician
Warranty Exclusions:
What Is Not Covered
EN-4
PRECAUTIONS TO AVOID POSSIBLE
EXPOSURE TO EXCESSIVE MICROWAVE
ENERGY
(a) Do not attempt to operate this oven with the door open since
operation can result in harmful exposure to microwave energy.
It is important not to defeat or tamper with the safety interlocks.
(b) Do not place any object between the oven front face and the door or allows soil or
cleaner residue to accumulate on sealing surfaces.
(c) Do not operate the oven if it is damaged. It is particular important that
the oven door close properly and that there is no damage to the:
(1) DOOR (bent)
(2) HINGES AND LATCHES (broken or loosened)
(3) DOOR SEALS AND SEALING SURFACE
(d) The oven should not be adjusted or repaired by anyone except properly
qualified service personnel.
open door
S
l
y
Specifications
120VAC,60Hz
1 0W
Model:
Rated Voltage:
Rated Input Power(Microwave):
Rated Output Power(Microwave):
Oven Capacity:
External Dimensions (WxHxD):
Net Weight:
Approx. 31.96kg
1000W
50
1.2 cu.ft.
600x380x640mm
EN-5
FMWDR3000-24BLK
FMWDR3000-24WHT

WARNING -
1. Read all instructions before using the
appliance.
2. Read and follow the specific:
EXCESSIVE MICROWAVE ENERGY " found on page 5.
combustible materials are placed
inside the oven to facilitate cooking.
only to properly grounded outlet. See
accordance with the provided installation
instructions.
To reduce the risk of burns, electric shock, fire, injury to persons or exposure
to excessive microwave energy:
3. This appliance must be grounded. Connect
"PRECAUTIONS TO AVOID POSSIBLE EXPOSURE TO
"GROUNDING INSTRUCTIONS" found on page 7
4. Install or locate this appliance only in
5. Some products such as whole eggs and sealed containers - for example, closed glass
jars - are able to explode and should not be heated in this oven.
6. Use this appliance only for its intended use as described in the manual. Do not use
corrosive chemicals or vapors in this appliance. This type of oven is specifically
designed to heat, cook or dry food. It is not designed for industrial or laboratory use.
7. HOT CONTENTS CAN CAUSE SEVERE BURNS. DO NOT ALLOW CHILDREN TO
USE THE MICROWAVE. Use caution when removing hot items.
damaged cord or plug, if it is not
working
properly,
or if it
has been
damaged or dropped.
8. Do not operate this appliance if it has a
by qualified service personnel.
Contact
nearest
authorized service
facility for examination, repair, or
adjustment.
9. This appliance should be serviced only
10. Do not cover or block any openings on the appliance.
11. Do not store this appliance outdoors.
Do not use this product near water - for
example,
near a kitchen sink, in a wet
basement, near a swimming pool, or
similar location.
1 . D
o not immerse cord or plug in water.2
1 . Keep cord away from heated surface.
14. Do not let cord hang over edge of
table or counter.
3
15. When cleaning surfaces of door and oven that comes together on closing the door,
16. To reduce the risk of fire in the oven cavity:
1). Do not overcook food. Carefully attend appliance when paper, plastic, or other
2). Remove wire twist-ties from paper or plastic bag before placing bag in oven.
3). If material inside of the oven ignite, keep oven door closed, turn oven off, and
disconnect the power cord, shut off power at the fuse or circuit breaker panel.
4). Do not use the cavity for storage purposes. Do not leave paper products, cooking
utensils, or food in the cavity when not in use.
point without appearing to be boiling. Visible bubbling or boiling when the container is
removed from the microwave oven is not always present.
17. Liquids, such as water, coffee, or tea are able to be overheated beyond the boiling
IMPORTANT SAFETY INSTRUCTIONS
precautions should be followed, including
When using electrical appliances basic safety
foll
owing:the
use only mild, nonabrasive soaps, or detergent applied with a sponge or soft cloth.
or
.
EN-6

stand in the microwave oven for a short time
before removing the container.
spoon or other utensil into the container.
THIS COULD RESULT IN VERY HOT LIQUID SUDDENLY BOILING OVER WHEN
THE CONTAINER IS DISTURBED OR A UTENSIL IS INSERTED
INTO THE LIQUID.
To reduce the risk of injury to persons:
1) Do not overheat the liquid.
2) Stir the liquid both before and halfway through heating it.
3) Do not use straight-sided containers with narrow necks.
4) After heating, allow the container to
5) Use extreme care when inserting a
on top of the appliance surface when the appliance is in
20. Do not mount over sink.
21. Do not store anything directly
operation.
operate any heating or cooking appliance beneath the appliance.18. Do not
19. Do not mount unit over or near any portion of heating or cooking appliance.
EN-7
This appliance must be grounded. In the event of
an electrical short circuit, grounding
of electric shock by providing an escape wire for the
appliance is equipped with a
cord having a
plugged into an outlet that is
properly installed and grounded.
GROUNDING INSTRUCTIONS
grounding wire with a grounding plug.
reduces the risk
electric current. This
The plug
WARNING -
Improper use of the grounding can result in a risk of electric shock.
Consult a qualified electrician or serviceman if the
grounding instructions are not
completely
or if doubt exists as to whether the appliance is
properly grounded.
extension cord, use only a 3-wire extension cord that
has a
The marked rating of the extension cord shall be
equal to or greater than the electrical
appliance.
understood,
If it is necessary to use an
3-blade grounded plug, and 3-slot
receptacle that will accept the plug on the appliance.
rating of the
Electric Shock Hazard
T
ouching some of the internal
components can cause serious
personal injury or death.
disassemble this appliance.
DANGER -
Do not
Electric Shock Hazard
Improper use of the grounding
can result in electric shock. Do
not plug into an outlet until
appliance is properly installed
and grounded.
WARNING -
SA E THESE INSTRUCTIONS
must be
V

1. Operation of the microwave oven may cause interference to your radio, TV
or similar
2. When there is interference, it may be reduced or eliminated by taking the
following
1) Clean door and sealing surface of the oven
2) Reorient the receiving antenna of radio or television.
3) Relocate the microwave oven with respect to the receiver.
4) Move the microwave oven away from the receiver.
5) Plug the microwave oven into a different outlet so that microwave oven
are on different branch circuits.
RADIO INTERFERENCE
equipment.
measures:
and receiver
EN-8
1. A short power supply cord is provided to reduce the risks resulting from becoming
entangled in or tripping over a longer cord.
2. Longer cord sets or extension cords are available and may be used if care is exercised
in their use.
3. If a long cord or extension cord is used:
1) The marked electrical rating of the cord set or extension cord should be at least as
great as the electrical rating of the appliance.
2) The extension cord must be a grounding-type 3-wire cord.
3) The longer cord should be arranged so that it will not drape over the counter top or
tabletop
w
h
e
re it can be pulled on by children or tripped over unintentionally.
-
This device complies with part 18 of the FCC Rules.
(only for USA)

Personal Injury Hazard
Tightly-closed utensils
could explode. Closed
containers should be opened
and plastic
pierced before cooking.
Utensil Test:
1. Fill a microwave-safe container with 1 cup of cold
water (250ml) along with the
2. Cook on maximum power for 1 minute.
3. Carefully feel the utensil. If the empty utensil is
warm, do not use it for microwave
4. Do not exceed 1 minute cooking time.
UTENSILS
See the instructions on "Materials you can use in
microwave oven or to be avoided in
There may be certain non-metallic utensils that are not
safe to use for microwaving. If
utensil in question following the procedure below.
CAUTION -
pouches should be
microwave oven."
in doubt, you can test the
utensil in question.
cooking.
EN-9

Microwave-safe only. Follow the manufacturer* instructions. Should be
labeled "Microwave Safe". Some plastic containers soften, as the food
inside gets hot. "Boiling bags" and tightly closed plastic bags should be
slit, pierced or vented as directed by package.
Microwave-safe only. Use to cover food during cooking to retain
moisture. Do not allow plastic wrap to touch food.
Thermometers Microwave-safe only (meat and candy thermometers).
Wax paper Use as a cover to prevent splattering and retain moisture.
Plastic
Plastic wrap
Materials to be avoided in microwave oven
Utensils Remarks
Aluminum tray
Food carton with
metal handle
Metal or metal-
trimmed utensils
Metal twist ties
Paper bags
Plastic foam
Wood
Metal shields the food from microwave energy. Metal trim may
cause arcing.
May cause a fire in the oven.
Plastic foam may melt or contaminate the liquid inside when exposed
to high temperature.
Wood will dry out when used in the microwave oven and may split
or crack.
May cause arcing. Transfer food into microwave-safe dish.
May cause arcing. Transfer food into microwave-safe dish.
May cause arcing and could cause a fire in the oven.
EN-10
Materials you can use in microwave oven
Utensils Remarks
Follow manufacturer* instructions. The bottom of browning dish must be
at least 3/16 inch (5mm) above the turntable. Incorrect usage may cause
the turntable to break.
Microwave-safe only. Follow manufacturer's instructions. Do not use
cracked or chipped dishes.
Always remove lid. Use only to heat food until just warm. Most glass jars
are not heat resistant and may break.
Heat-resistant oven glassware only. Make sure there is no metallic trim.
Do not use cracked or chipped dishes.
Follow manufacturer* instructions. Do not close with metal tie. Make
slits to allow steam to escape.
Use for short*erm cooking/warming only. Do not leave oven unattended
while cooking.
Use to cover food for reheating and absorbing fat. Use with supervision
for a short-term cooking only.
Use as a cover to prevent splattering or a wrap for steaming.
Browning dish
Glass jars
Glassware
Oven cooking
bags
Paper plates
and cups
Paper towels
Parchment
paper
Dinnerware
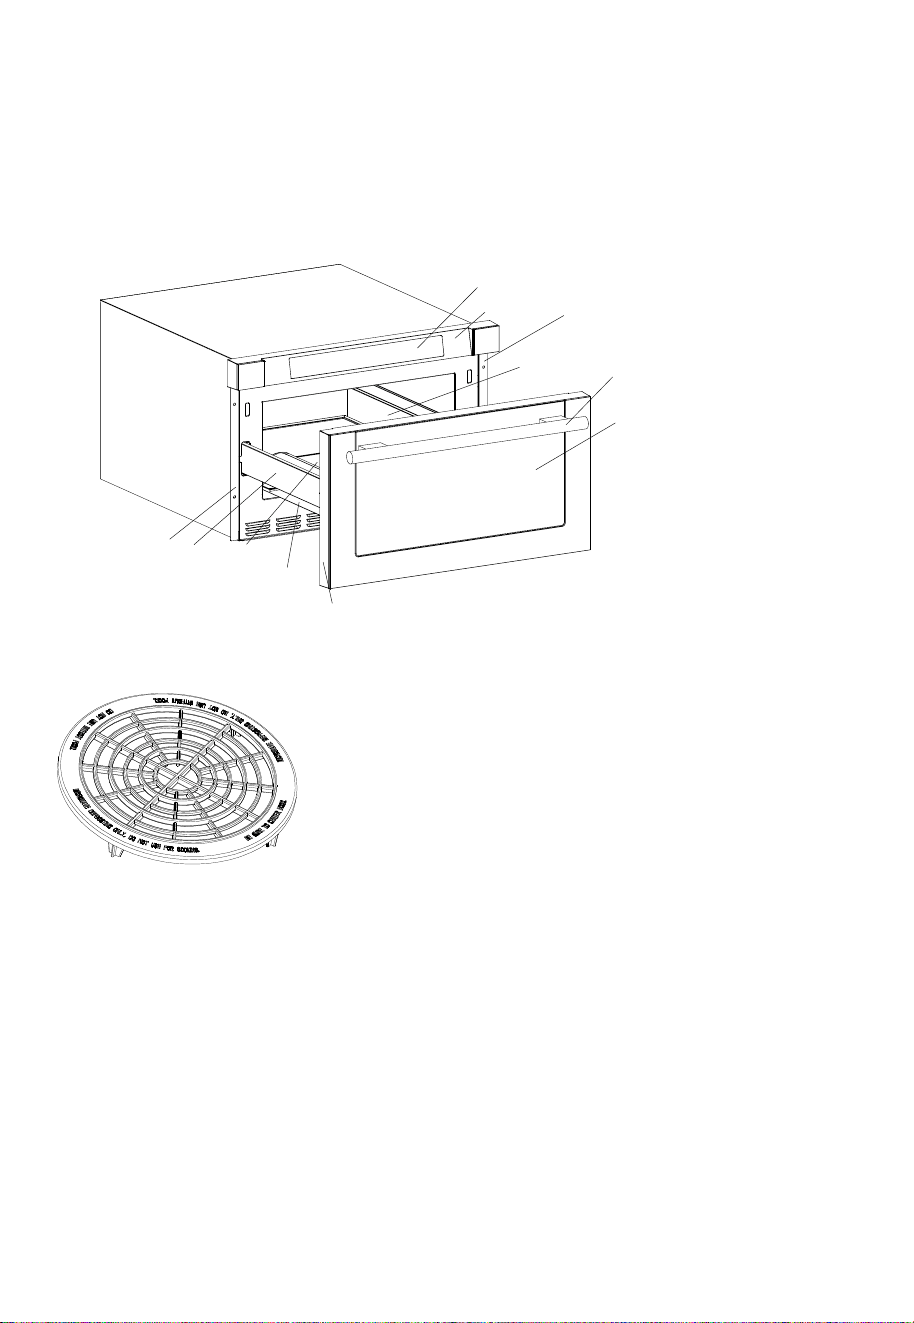
SETTING UP YOUR OVEN
Names of Oven Parts and Accessories
Remove the oven and all materials from the carton and oven cavity.
Your oven comes with the following accessories:
and do not use for cooking. Do not use without food )
Defrosting Rack( Only be used in defrosting function
A) Control an
B) Control Box
C) Right Mounting Plate
D) Cavity
E) Windows
F) Door Frame
G) Automatic putter
H) Drawer
I) Hinge Joint Board
J) Left Mounting Plate
P
K) Handle
el
A
B
C
D
E
K
F
G
H
I
J
EN-11
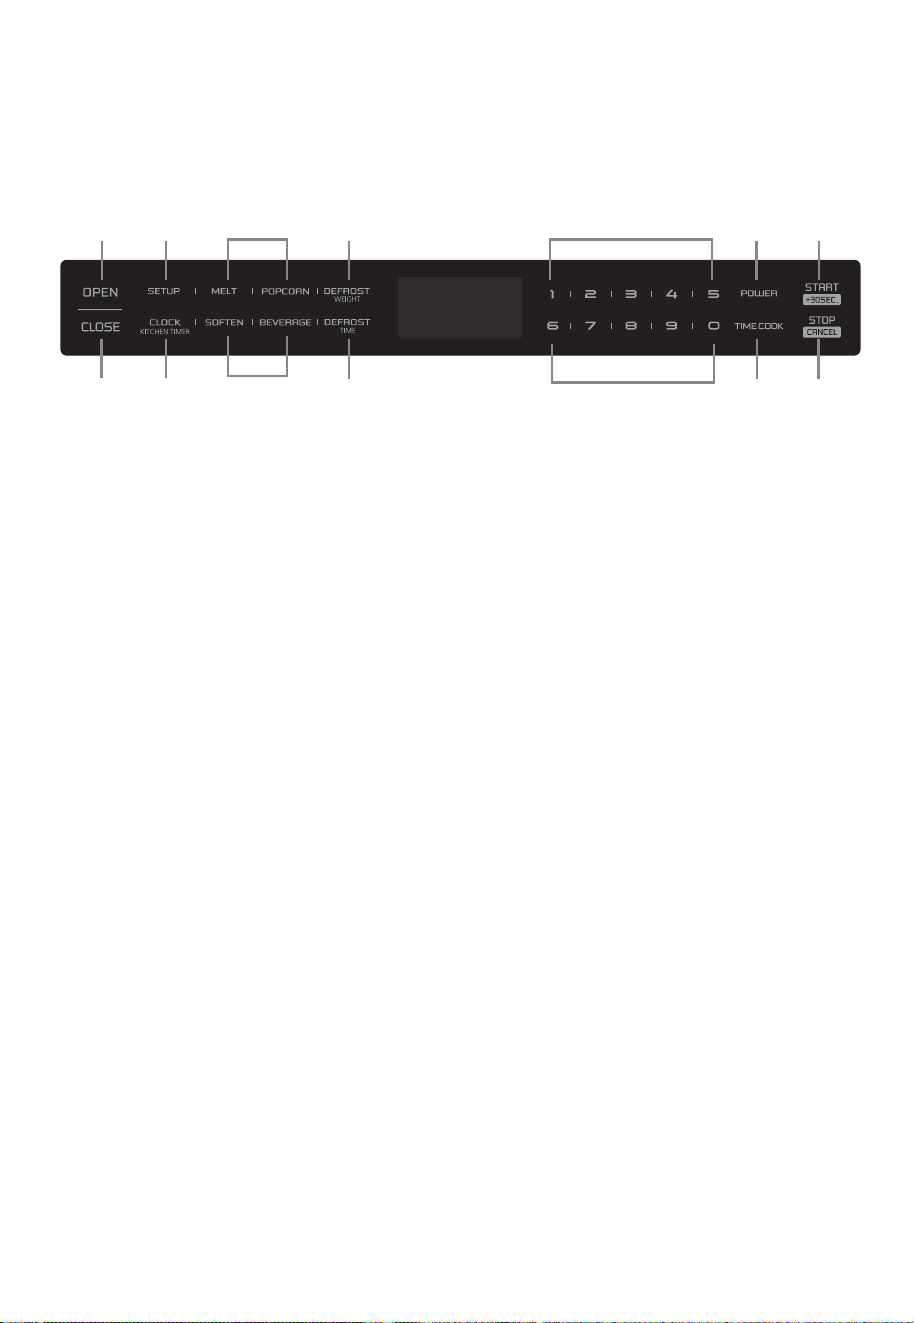
Control Panel and Features
OPERATION
(5)
(2)
(3)
(4) (9) (10)
(6)
(7) (11) (12)
(1)
(8)
(1) Open
(2) Setup
(3) Auto Menu
(4) Weight Defrost
(5) Close
(6) Clock/Kitchen timer
(7) Time Defrost
(8) Number keys
(9) Power
(10) Start/ +30sec.
(11) Time Cook
(12) Stop/C ncel
(3)
a
(8)
EN-12

(3) Press "
Note: 1) The kitchen timer is differ from 12-hour system. Kitchen Timer is a timer.
OPERATION
outlet, buzzer sounds once. Screen displays
"WELCOME". Then the oven turns into standby mode. The screen displays
"00:00".
(1) When the microwave oven is plugged into an
(2) In standby mode, the screen will display the current time if the clock has been set.
(1) Press "CLOCK/KITCHEN TIMER" once. The first
hour figure will flash and other
(2) Press the number keys to enter the correct time. The input time should be between
(3) Press "CLOCK/KITCHEN TIMER" to confirm. The clock is set.
START/+30SEC." to confirm. The timer starts counting down.
)3 "STOP/CANCEL" can be pressed to cancel the Kitchen Timer.
01:00-12:59.
Otherwise, "00:00" will display.
(3) Press "OPEN" to open the drawer, and screen displays "OPEN". The screen will
Press "CLOSE" to close the drawer, and the screen displays "CLOSE". The screen
If there are mistakes to open or close the drawer, buzzer will sound five times, and the
display "PLEASE CLOSE" when the drawer is fully opened.
will display the current time or "00:00" when the drawer is fully closed.
screen will display "CLOSE ".
"
0" will light.
EN-13
OR OPEN
Notes:
(1) In the process of clock setting, if the "STOP/CANCEL" is pressed or if there is no
operation within 1 minute, the setting is invalid.
(2) To reset the clock, please repeat step 1 to step 3.
(3) If the clock is not set,it would not work when powered.
2)
Any other program can’t be set during kitchen timer.
(1) Press "CLOCK/KITCHEN TIMER" twice, “00:00”
(2) Press the number
will display .
keys to enter the time. The maximum cooking time is “99:99”.
1. Power nO
2. Setting the Clock
3. Setting the Kitchen Timer

Level
Power
10
100%
9
90%
8
80%
7
70%
6
60%
5
50%
4
40%
3
30%
2
20%
1
10%
Display
PL100 PL90 PL80 PL70 PL60 PL50 PL40
PL30
PL20
PL10
11 power levels are available.
0%
PL00
0
Note: "START/+30SEC." cannot be pressed to increase cooking time for defrost by weight
and Auto menu.
(2) During microwave cooking and defrosting by time, "START/+30SEC."
can be pressed to
cooking time. Each press will increase 30 seconds.
EN-14
(1) Press "DEFROST WEIGHT" once. "WEIGHT DEFROST" will display.
(2) Press numeber keys to input the weight of the food. The input weight should be
between 0.1-6.0 lbs.
(3) Press "START/+30SEC." to start defrosting.
(4) Once defrosting has finished, the buzzer will sound five times and “FINISH” will display.
Note: The buzzer will sound to remind you to turn the food over during defrosting.
If no operation, the oven will continue working.
Press number keys to enter the cooking time. The maximum cooking time is “99:99”.
(2)
Press “POWER” and then press number keys to adjust the power level.
The 11 power levels are available
(3) Press "START/+30SEC." to start cooking.
Note: In the process of ing, if the "STOP/CANCEL" is pressed or if there is no
operation within 1 minute, the setting is invalid.
sett
Example: To cook the food with PL50 for 15 minutes.
a.Press “TIME COOK” once.
b.Press “1”, “5”, “0”, “0” in order.
c.Press “POWER” and then press “5” to select
PL50.
d.Press “
START/+30SEC.” to start cooking.
(1) Press "TIME COOK" once, "00:00" will display.
(1) In standby mode,
press “START/+30SEC.” to cook food with 100% power level for
30 seconds. Each press on the same key can increase 30 seconds.
to increase
4. Microwave Cooking
5. Speedy Cooking
6. Defrost by Weight

(1) Press "DEFROST TIME" once.
Note: The defrost power is PL30.
(2) Press number keys to set the desired defrost time. The maximum time value is 99:99.
(1) Press "BEVERAGE" once. displays "1". "AUTO MENU" and " " indicators
(3) Press "START/+30SEC." to start cooking. Buzzer sounds once. The cooking time
begins to count down. Once cooking has finished, buzzer sounds five times and "FINISH"
displays.
(2) Continue to press "BEVERAGE", "1" or "2" will display in order.
will light.
(1) Press "POPCORN" once.
(3) Press "START/+30SEC." to start cooking. Buzzer sounds once. The cooking time
displays.
(2) Continue to press "POPCORN", "1.75", "3" or "3.5" will display in order.
displays "1.75". "AUTO MENU" and "OZ" indicators
(1) Press "
(5) Press "START/+30SEC." to start cooking. Buzzer sounds once. "OZ" will go out. The
displays.
(2) Continue to press "MELT", "BUTTER", "CHOCOLA", "CHEESE" or "MARSHMA"
cooking time starts counting down. Once cooking has finished, buzzer sounds five
MELT" once.
displays "BUTTER". "AUTO MENU" indicator will light.
will display in order.
(3) Press "START/+30SEC." to confirm the selection.
(4) Press "MELT" to select the weight. "OZ" will light except butter menu.
will light.
EN-15
"TIME DEFROST" will displays.
(3) Press "START/+30SEC." to start defrosting.
(4) Once defrosting has finished, the buzzer will sound five times and “FINISH” will display.
The screen
The screen
The screen
times and "FINISH"
starts counting down. Once cooking finished, buzzer sounds five times and "FINISH"
7. Defrost by Time
8. Auto Menu--Beverage
9. Auto Menu--Popcorn
10. Auto Menu--Melt
Menu
Display
Butter/Margarine
BUTTER
1(STICH)
2(STICHS)
3(STICHS)
Weight
Chocolate
Cheese
Marshmallows
CHOCOLA
CHEESE
MARSHMA
4
8
8
16
5
10
(1) Press "
(5) Press "START/+30SEC." to start cooking. Buzzer sounds once. "OZ" will go out. The
displays.
(2)
Continue to press "SOFTEN", "BUTTER", "ICE-CRE" or "CHEESE" will display
cooking time starts counting down. once cooking has finished, buzzer sounds five
in order.
(3) Press "START/+30SEC." to confirm the selection.
( Press " "
to
select the weight. "OZ" will light .4) except butter menu
SOFTEN" once.
displays "BUTTER". "AUTO MENU" indicator will light.
SOFTEN
Menu
Display
Butter BUTTER
Weight
CHEESE
Ice cream/ Frozen juice
ICE-CRE
8
3
8
Cream Cheese
16
32
1(STICH)
2(STICHS)
3(STICHS)
EN-16
The Screen
times and "FINISH"
1 Auto Menu--Soften1.

(1) Press "
(2)
SETUP" once.The
displays "BUZ OFF".
Press "START/+30SEC." The oven will turn to standby mode. Buzzer is turned off.
No beep will sound.
(1) Press "SETUP" once. displays "BUZ ON".
(2) Press "START/+30SEC." The oven will turn to stanby mode. Buzzer is turned on.
Buzzer will sound normally.
(2)
( )
(1) The buzzer sounds once by efficient press, inefficient press will be no responce.
In cooking state, "OPEN" cannot be pressed to open the drawer unless "STOP/CANCEL"
"START/+30SEC." must be pressed to continue cooking.
(3) If the cooking programme has been set , "START/+30SEC." is not pressed within 1 minute,
The setting will be cancelled.
4 I
f the oven door is open, the lamp will light until the oven is power off.ed
EN-17
(1) If the clock has been set, the current time will display for three seconds by pressing
“CLOCK/KITCHEN TIMER” in the cooking state.
(2) In the microwave cooking state, press “POWER” to inquire the power level.
It will display for three seconds. In defrosting state and auto menu, the power level
cannot be inquired.
is pressed to pause the cooking. Press "CLOSE" to close the drawer. Then
You can use this function to prevent children from accidentally turning the oven on.
To activate the lock:
In standby mode, press and hold “STOP/CANCEL” for three seconds. A beep sounds
and the locked icon will display.
To deactivate the lock:
In locked state, press and hold “STOP/CANCEL” for three seconds. A beep sounds.
Note: The lock function for children cannot be set when the oven door has opened.
screen
The screen
To deactivate the silent mode:
12. Silent mode
13. Lock Function for Children
14. Inquiring Function
15. OTHER SPECIFICATIONS

Troubleshooting
Check your problem by using the chart below and try the solutions for each problem. If the
microwave oven still does not work properly, contact the nearest authorized service center.
TROUBLE
Oven will not start
POSSIBLE CAUSE
POSSIBLE REMEDY
a. Electrical cord for oven is
not plugged in.
b. Door is open.
c. Wrong operation is set.
a. Plug into the outlet.
b. Close the door and try
again.
c. Check instructions.
Arcing or sparking
a. Materials to be avoided in
microwave oven were
used.
b. The oven is operated when
empty.
c. Spilled food remains in the
cavity.
a. Use microwave-safe
cookware only.
b. Do not operate with oven
empty.
c. Clean cavity with wet towel.
Unevenly cooked
foods
a. Materials to be avoided in
microwave oven were
used.
b. Food is not defrosted
completely.
c. Cooking time, power level
is not suit ble.
d. Food is not turned or stirred.
a. Use microwave-safe
cookware only.
b. Completely defrost food.
c. Use correct cooking time,
power level.
d. Turn or stir food.
Overcooked foods
Cooking time, power level is
not suitable.
Use correct cooking time,
power level.
Undercooked foods
a. Materials to be avoided in
microwave oven were used.
b. Food is not defrosted
completely.
c. Oven ventilation ports are
restricted.
d. Cooking time, power level is
not suitable.
a. Use microwave-safe
cookware only.
b. Completely defrost food.
c. Check to see that oven venti-
lation ports are not restricted.
d. Use correct cooking time,
power level.
Improper defrosting
a. Materials to be avoided in
microwave oven were used.
b. Cooking time, power level is
not suitable.
c. Food is not turned or stirred.
a. Use microwave-safe
cookware only.
b. Use correct cooking time,
power level.
c. Turn or stir food.
M
AINTENANCE
a
EN-18