
User Manual
Household use only
For optimal performance, please read the user guide carefully before using your
new appliance. We also recommend keeping the instructions for future reference
to easily recall its functions
ZM1523

CONTENTS
01
SAFETY PRECAUTIONS IN USE 2
CHAPTER 1:
PARTS AND FUNCTIONS 4
CHAPTER 2:
DIRECTIONS FOR USE 6
CHAPTER 3:
MAINTENANCE 9
CHAPTER 4:
SAFETY INDEXES 11
CHAPTER 5:

CHAPTER 1:
SAFETY PRECAUTIONS IN USE
1. The input voltage of the appliance is 120V/60Hz. Please confirm it before using the
appliance.
2. Do disconnect the power supply before dismantling, assembling or adjusting any
part of the appliance.
3. The appliance has Y connection. If its power cord is damaged, please contact our
customer service department for replacement
to avoid danger. Do not dismantle
and repair it by yourself.
4. Before use, please check if the power cord, the plug, the juice strainer, the spiral
pusher and any other parts are damaged. lf any of the said part is damaged, stop
using the appliance and contact our customer service department promptly. Do not
dismantle and repair it by yourself, otherwise danger may happen.
5. lf it is necessary to repair the appliance during use, please contact our customer
service department. Do not dismantle it by yourself, otherwise dangers may happen.
6. lt is necessary before connecting the power supply to ensure that the juicing body,
the spiral pusher, the juicing body cap and all other dis-mountable parts are
properly installed.
7. Never put hands or sharp objects into the feed port or contact the spiral pusher
when the appliance is running, otherwise injuries may be caused or the appliance
may be damaged; never replace the spiral pusher with any other objects or have
eyes get close to the feed port, otherwise accidents may happen.
8. Cut food ingredients into small blocks with sizes fitting the feed port of the juicing
body. Do not begin to process any vegetables or fruits with cores, hard seeds or
thick skin or shells until they are removed.
9. When feeding a food ingredient, do not make the pushing force too large but have
it just enough to cut the food ingredient.
10. Dyeing of the juice strainer, the juicing body cap, the spiral pusher and other
accessories after juicing some vegetables or fruits is normal and will neither
affect food eating nor do harm to health.
11. Do not dismantle the dis-mountable parts of the appliance immediately after use
but after both the motor and the spiral pusher have stopped and the power supply
is disconnected.
12. Do not sterilize any accessories of the appliance with hot water that is higher than
80 ℃ or a microwave oven, otherwise they may be heated, deformed and damaged.
The materials of all parts in contact with food ingredients should comply with food
hygiene certification and be clean, hygienic and reliable.
13. Do not put the main body into water or another liquid or flush it with water or
another liquid, otherwise it may be damaged.
02

14. Do not clean the appliance with steel wool, abrasive cleaning agents or corrosive
liquids(such as gasoline or acetone].
15. The appliance is applicable to use by individuals or families only.
16. The appliance is not to be used by persons (including children) with reduced
physical, sensory or mental capabilities, or lack of experience and knowledge,
unless they have been given supervision or instruction.
17. Accessories, other than those supplied with the appliance, include instructions
for their safe use.
18. Use a wet cloth to clean surfaces in contact with food before unplug the plug.
19. Switch off the appliance and disconnect from supply before changing accessories
or approaching parts that move in use.
20. If the supply cord is damaged, it must be replaced by the manufacturer, its service
agent or similarly qualified persons in order to avoid a hazard.
21. Warning: potential danger may be against misuse
22. Always disconnect the appliance from the supply if it is left unattended and before
assembling, disassembling or cleaning.
23. To enhance product durability and safeguard its functionality, we have integrated
an intelligent protection chip into the device. This chip ensures that after 20 minutes
of uninterrupted operation, the device will automatically stop. For optimal protection
and extended lifespan, we kindly advise waiting for 20 minutes before resuming its
usage.
03
CHAPTER 1:
SAFETY PRECAUTIONS IN USE
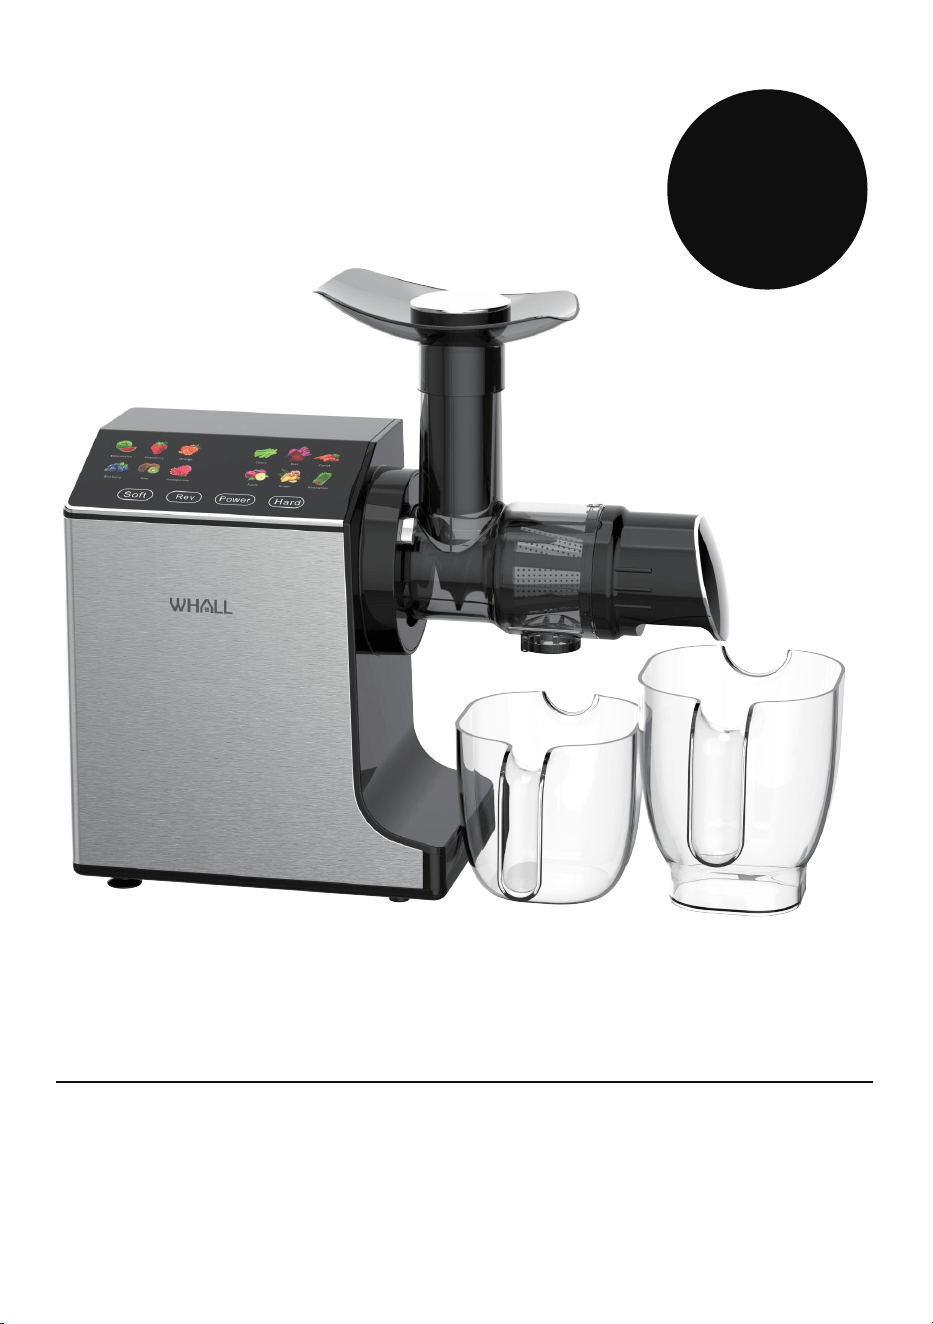
The masticating slow juicer incorporates IMD touch buttons on its
control screen. The control screen offers various functions, including
Soft Speed, Hard Speed, Power, and Reverse. Here's a detailed
description of each functions
04
CHAPTER 2:
PARTS AND FUNCTIONS
No.
1
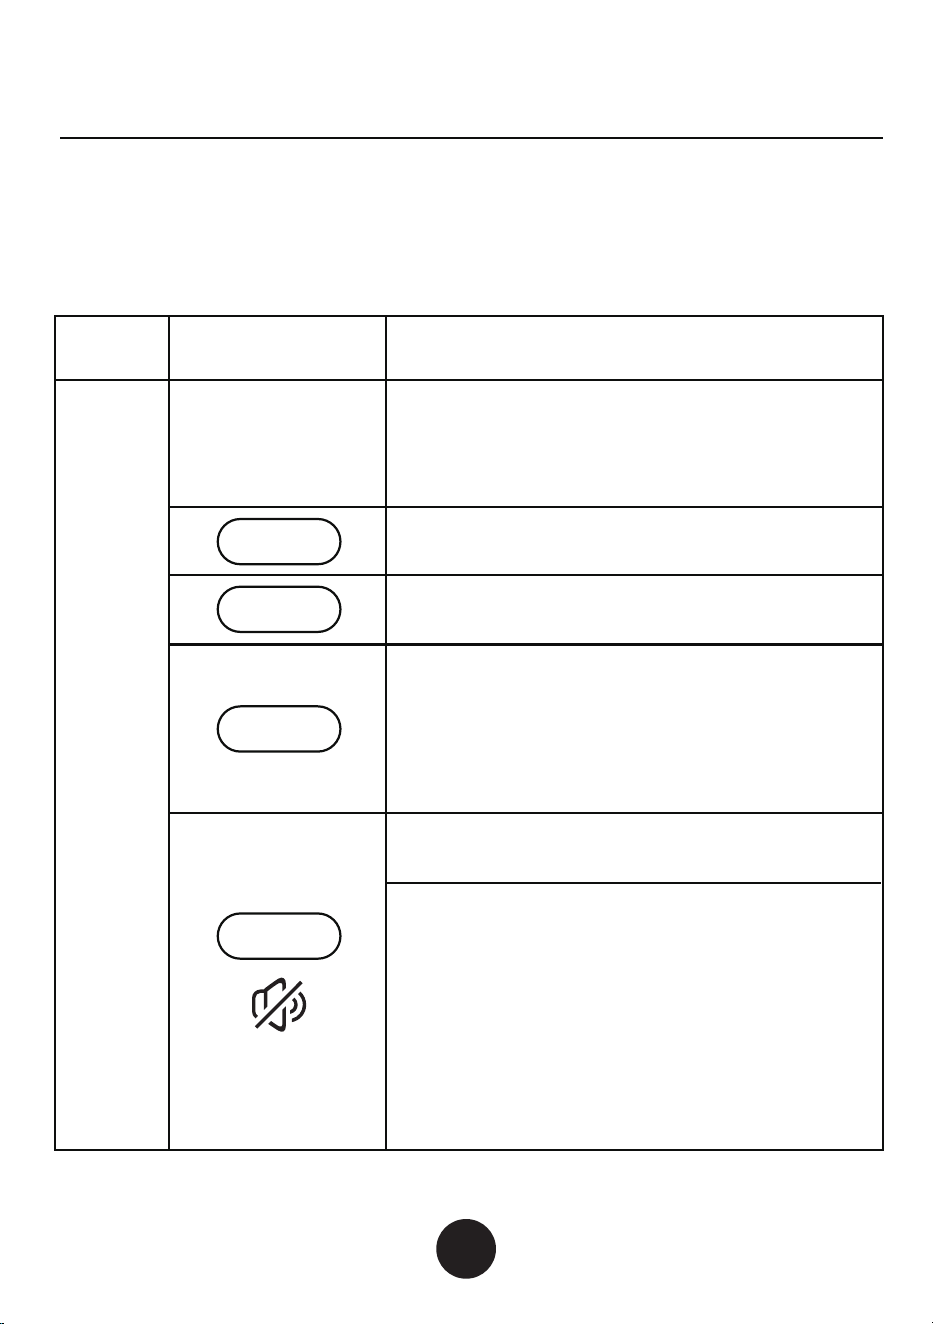
Product displays the ICONS of various food
items are not related to function selection.They
represent only the suit to use “Soft speed” and
“Hard speed” the extraction of fruit and
vegetables.
Soft Speed: This setting is especially designed
for extracting juice from soft fruits.
Hard Speed: Use this option when juicing hard
fruits and high-fiber vegetables.
Part name
Function
Soft
Rev
The reverse function serves its purpose when
encountering a food blockage during the juicing
process. Its activation aids in clearing such
obstructions.
NOTE: THE REVERSE FUNCTION WILL
AUTOMATICALLY CEASE OPERATION AFTER A
DURATION OF 10 SECONDS.
Button mute function :Slow juicer has the button
mute function.To activate or to cancel the mute
mode, long press the ” Power” button for 2
seconds until one sounds alert.
NOTE: THE SOUND GENERATED BY THE
NORMAL OPERATION OF THE MACHINE
CANNOT BE CANCELLED.
JUICER NO MEMORY FUNCTION.EVERY TIME
EQUIPMENT ON ELECTRICITY, THE SOUND
WILL BE RESTORED.
Power
Power: The power button serves as the on/off
switch for the juicer.
Hard
05
CHAPTER 2:
PARTS AND FUNCTIONS
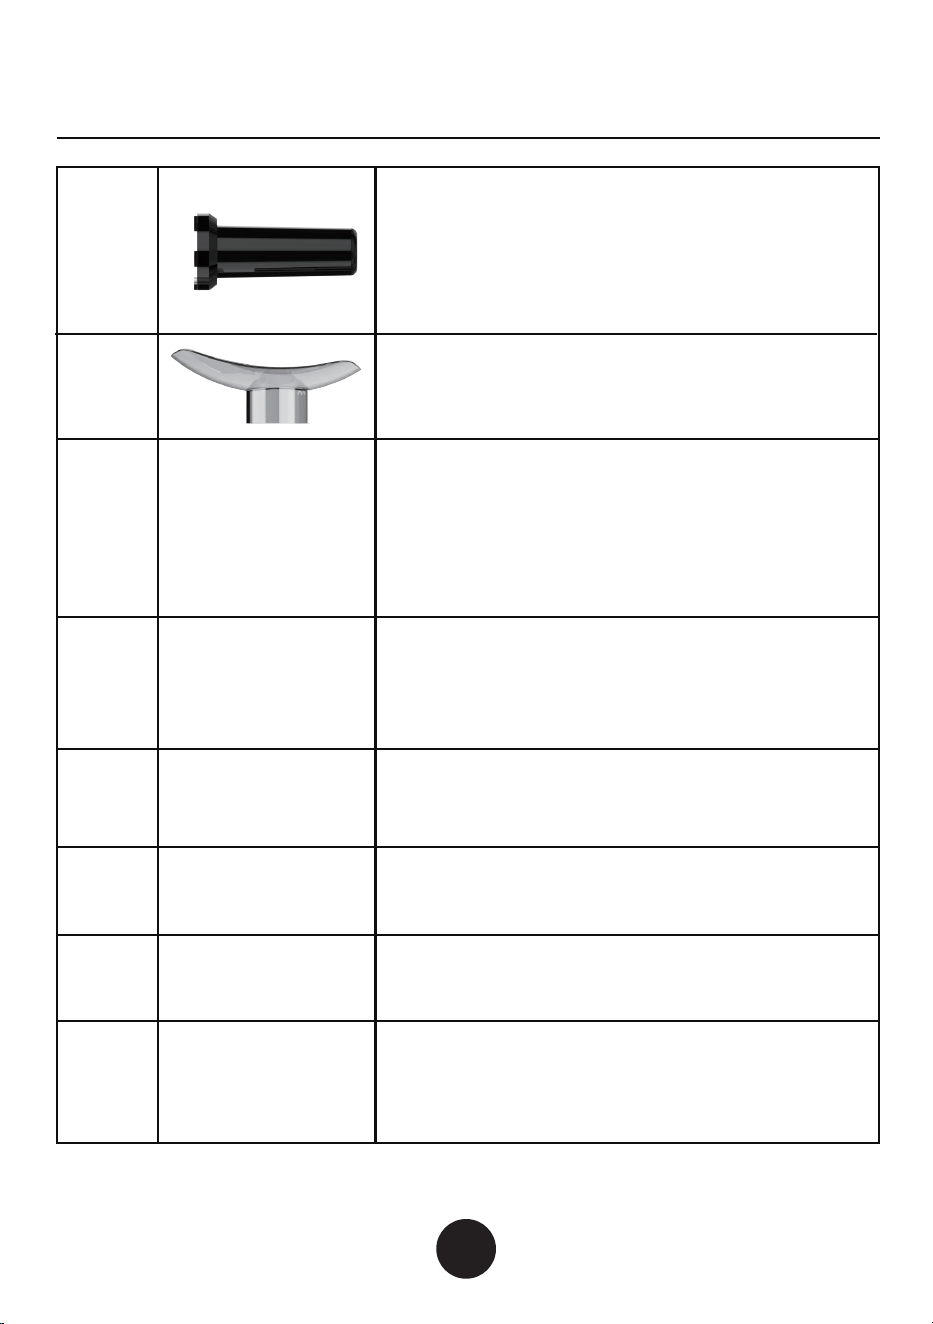
3
4
Tray: It is mainly used for storing the extracted
food ingredients.
Juicing body:It is a main part for juicing. Food
ingredients are first fed via the feed port at the
top of the juicing body and then discharged in
forms of juice and pulp via the juice outlet and
the pulp outlet respectively.
5
Auger: As a main part for juicing, it is used for
conveying food ingredients and grinding them
by breaking in with the juice strainer or the
squeezer.
6
Filter: By means of breaking in with the spiral
pusher it is used for grinding and filtering the
extracted food ingredients to get juice.
7
End Cup: Drainage of fruit pomace.
8
Pulp Container: It is used for loading residue.
9
Juice Container: It is used to load juice.
2
Pusher: It is used for squeezing the fed food
ingredients gently for their full contact with the
spiral pusher and higher juice extraction
efficiency.
06
Before using the appliance for the first time, clean its parts in
contact with food ingredients thoroughly (please refer to “Chapter
4: Maintenance”).
Please install and use the appliance following the steps below.
CHAPTER 3:
DIRECTIONS FOR USE
I. Use of the appliance
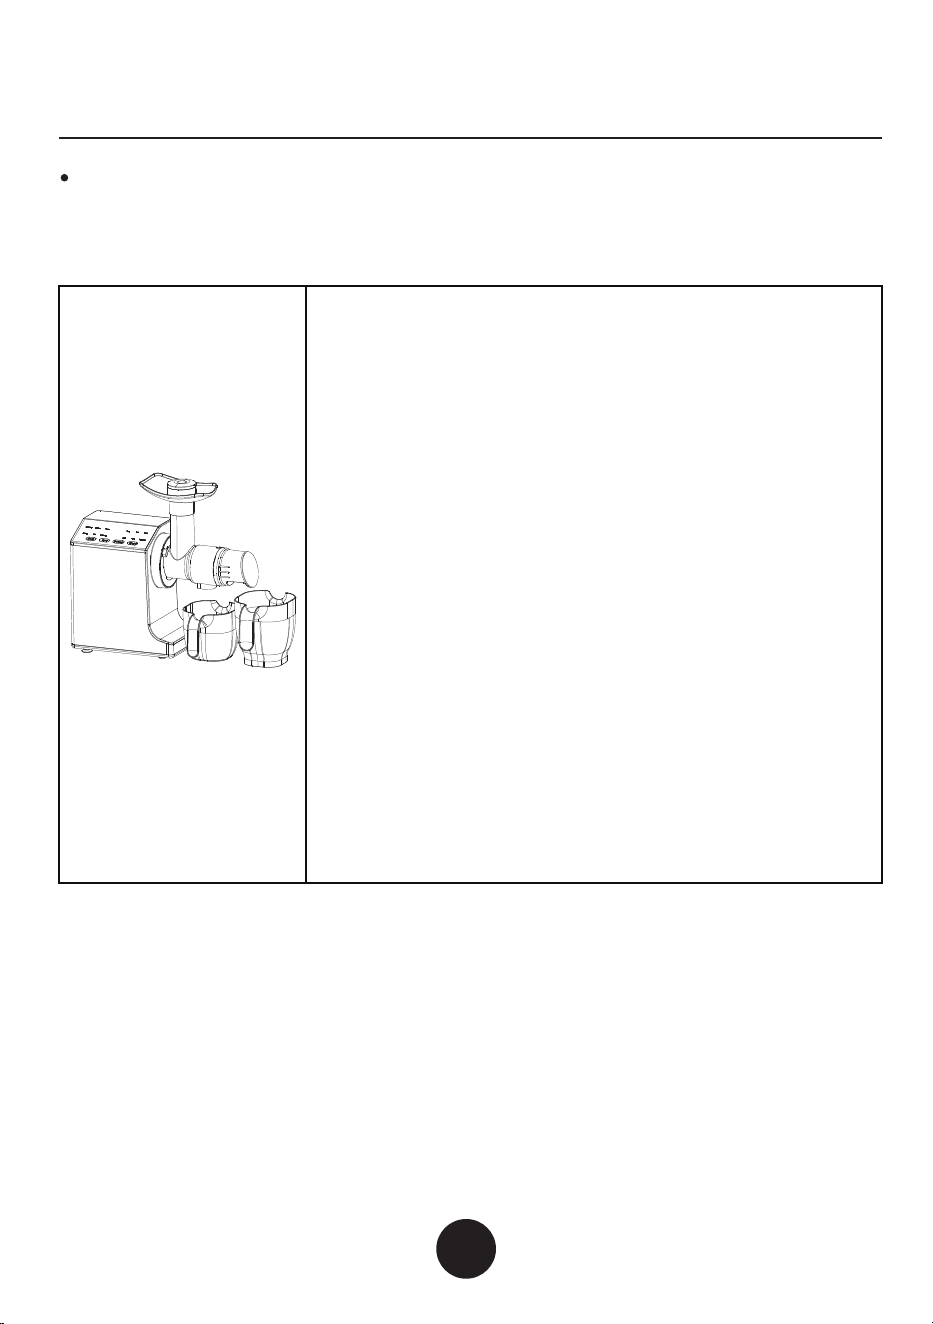
1.Power Button Status:
After turning on the power, the power button will
display a flashing red light. Pressing the power
button once will put the juicer in standby. In standby,
all four buttons on the control screen will emit white
light, with the Soft, Hard, and Reverse buttons
flashing. At this time, you can select any function
button to start juicing.
2.Working Process:
During the juicing process, the power button and the
selected function button will remain illuminated. To
stop the juicer, press either the power button or the
corresponding function button.
3.Power Failure:
If the juicer remains powered on (with the power
button flashing red) without any action for more than
three minutes, the screen will turn off, indicating a
complete power failure. To resume juicing, simply
press any button to enter standby. In standby, all four
buttons will emit white light, with the Soft, Hard, and
Reverse buttons flashing.
07
CHAPTER 3:
DIRECTIONS FOR USE
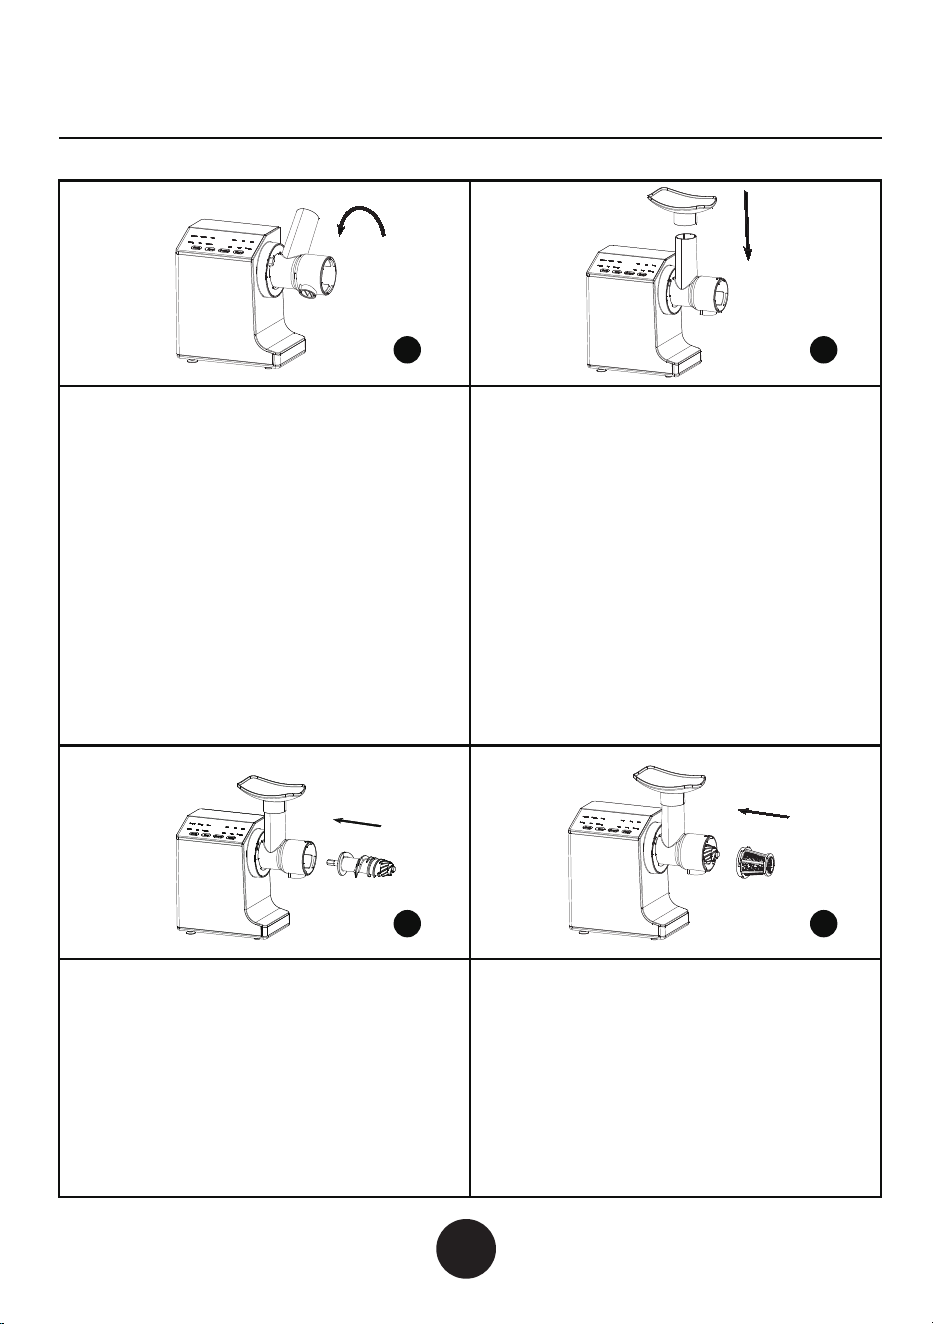
1. Have the triangular aligning sign“▼”
on the juicing body aligned with the
aligning “unlocking triangular sign” on
the main body and then put the juicing
body into the main body (the three clips
on the juicing body will realize
alignment).
2. Then turn the juicing body
anticlockwise. When there is a click, it
suggests that the connection is finished.
Connect the juicing body and the
main body:
Install the tray on the upper end of the
feed port of the juicing body. The tray
can make feeding of food ingredients
more conveniently, particularly when
small-particle food ingredients are
processed.
Have the hexagonal shaft of the spiral
pusher aligned with the hole on the
main body and push it horizontally
until it reaches the bottom (when
alignment fails, just turn the spiral
pusher slightly
Fit the larger-hole end of the juicer
strainer into the tail of the spiral
pusher and push it while the three
clips of the juicer strainer align with
the three clamping slots in the juicing
body.(The juice strainer is used with
the juicing button in the rear only. This
function is used for juicing.)
21
3 4
08
CHAPTER 3:
DIRECTIONS FOR USE
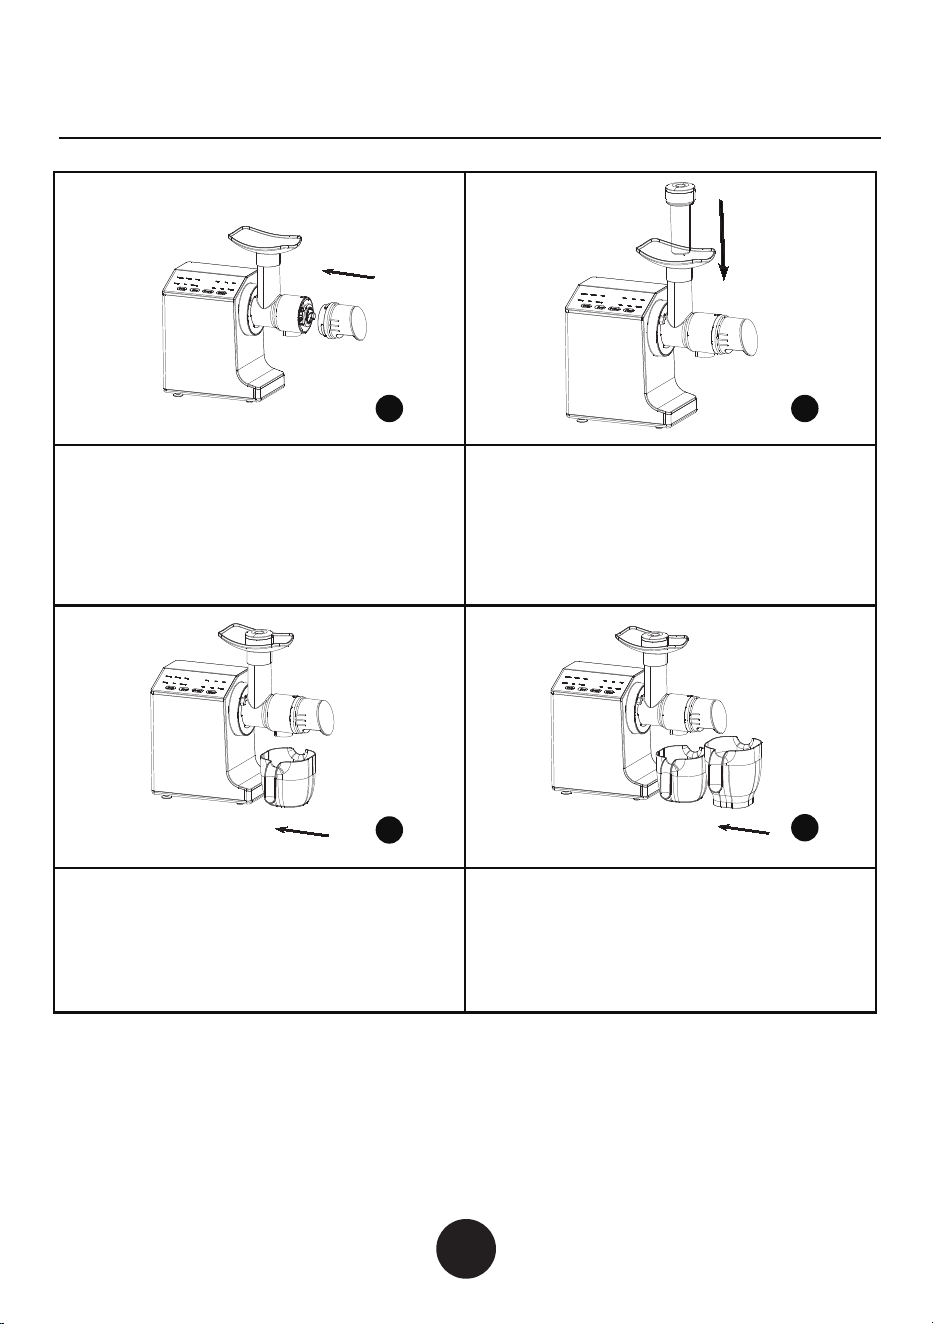
Align the triangle alignment mark on
the juice extractor with the unlock
triangle mark on the juice extractor,
and then put the end cup into the juice
extractor.
Put food ingredients into the feed port
on the juicing body cap to squeeze the
fed food ingredients gently for their
full contact with the spiral pusher and
higher juice extraction efficiency.
Put the juice cup in the corresponding
place and have its opening aligned with
the bottom of the juice outlet of the
juicing body.
Put the pulp cup below the pulp outlet
of the juicing body and have it close to
the juice cup.
5
7
8
6
09
CHAPTER 4:
MAINTENANCE
1. Before cleaning the appliance, do switch off the switch and
disconnect the power supply.
2. After use, clean the appliance promptly.
3. Do not wash the main body with water but wipe the stains on it with
a piece of wrung rag or cotton cloth.
4. Before storing the appliance, make sure it is clean and dry.
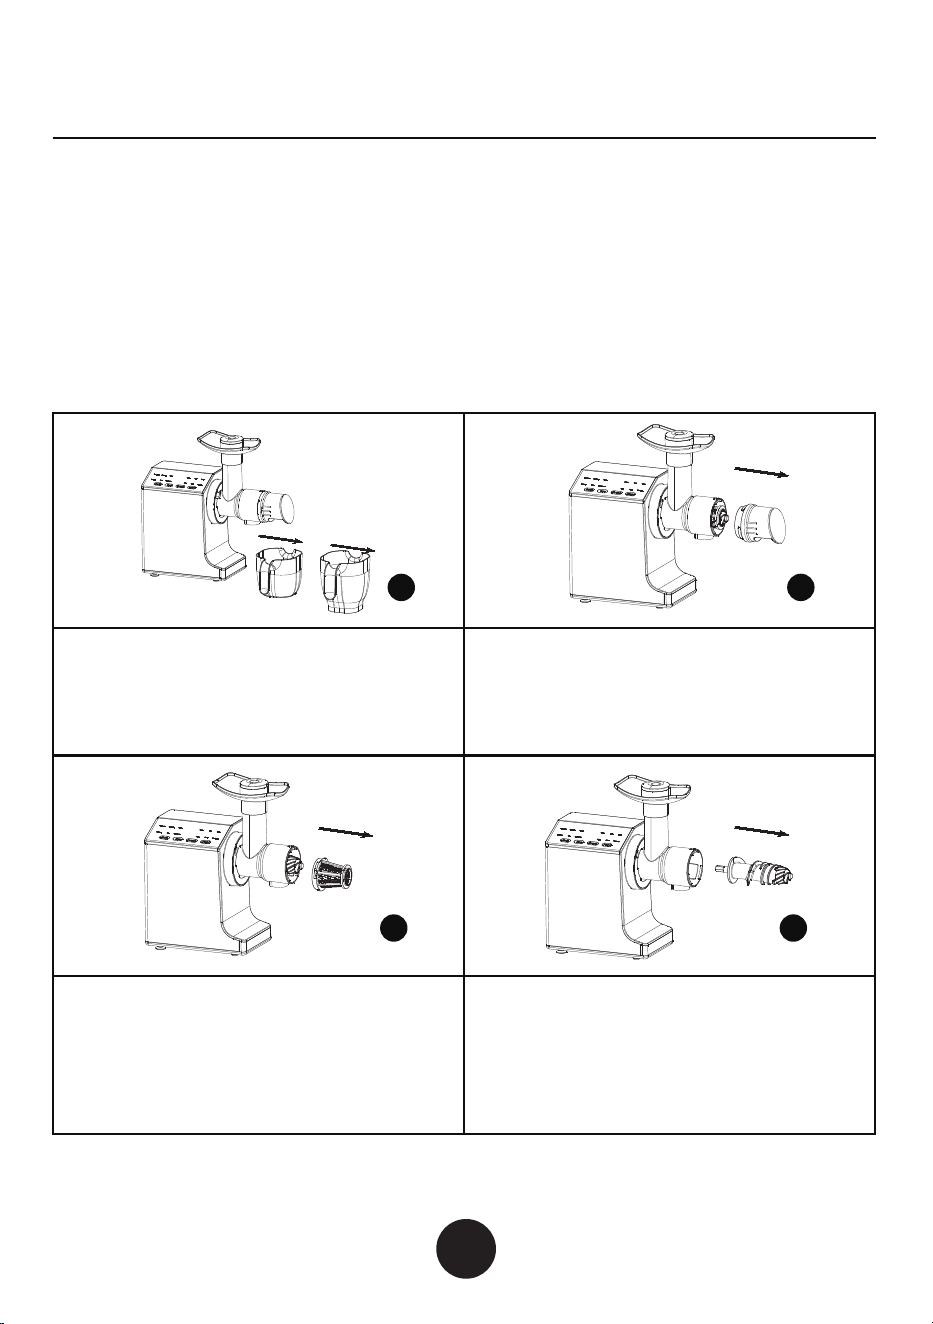
5. Clean the appliance after dismantling it following the steps below.
After the operation is completed,
please remove the juice cup and pulp
cup in order and rinse them directly
with water.
Disassemble the end cup and rinse it
with water directly.
Remove the filter and rinse it with
water. For any food residue, you can
use a brush for cleaning.
Remove the auger and rinse it with
water directly.
1 2
3 4
10
CHAPTER 4:
MAINTENANCE
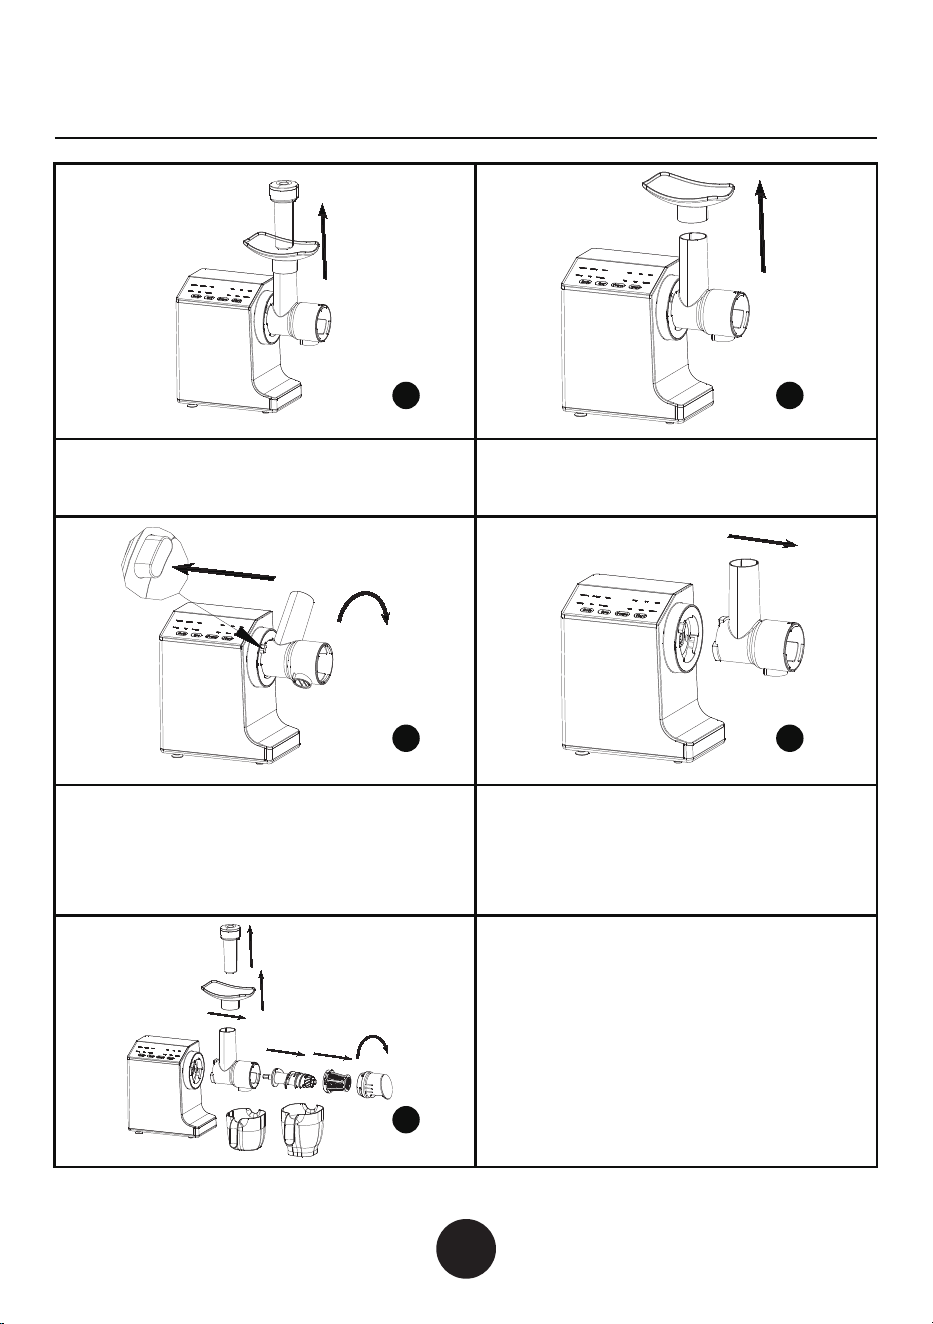
Remove the tray and rinse it with
water directly.
To disassemble the juicing body, press
and hold the button to unlock it, and
then rotate the juicing body in the
opposite direction to disassemble it.
After removing the juicing body,
remove the juicing button, juicing
body cap, juice strainer (or squeezer),
and other detachable parts. These
parts can be flushed with clean water.
Remove the juicing body and rinse it
with water directly.
Remove the pusher and rinse it with
water directly.
5 6
7
9
8
Notes:
11
CHAPTER 5:
SAFETY INDEXES
What given about are the analysis and elimination methods of
ordinary faults. For other faults, please contact our customer
service department. Do not dismantle and repair it by yourself.
120V~
Rated voltage
150WRated power
60HzRated frequency
≤10 min
≤10 min
Continuous operating time
Time interval