Tools
Needed
for
Installation
INCLUDED
IN
KIT
Easy
Bolt
Easy
Driver
010210410
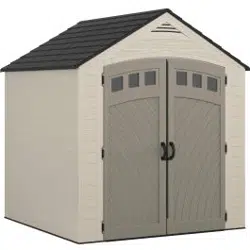
BMS7702
VistaTM
Storage
Shed
ASSEMBLY
INSTRUCTIONS
KEEP
THESE
INSTRUCTIONS.
You
will
need
Quality
Control
Number
shown
below
to
register
your
product.
Quality
Control
Number:
0
2021
Suncast
Corporation,
Batavia,
IL
0361449x

A
Before
You
Begin...
•
Consult
your
local
authorities
for
any
permits
required
to
construct
shed.
Prior
to
the
construction
of
your
shed,
check
with
the
local
building
code
official
to
review
any
required
permits
or
building
limitations.
• A
level
and
sturdy
foundation
is
required
before
shed
construction
can
begin.
Site
preparation
information
is
available
on
pages
11-12.
A
foundation
that
differs
from
the
suggestions
within
this
manual
could
prevent
proper
assembly
and
may
damage
parts.
•
Read
instructions
thoroughly
prior
to
assembly.
This
kit
contains
parts
that
can be
damaged
if
assembled
incorrectly
or
in
the
wrong
sequence.
•
Please
follow
instructions.
Suncast
is
not
responsible
for
replacing
parts
lost
or
damaged
due
to
incorrect
assembly.
•
Assistance
is
required
during
entire
assembly.
[
I]
IMPORTANT
OPEN
ALL
BOXES
FIRST
AND
NEATLY
LAYOUT
PARTS.
SMALL
PARTS
MAY
BE
CONTAINED
IN
EACH
BOX.
PLEASE
REFERENCE
PARTS
LIST
WITHIN
THIS
MANUAL
TO
VERIFY
ALL
PARTS
ARE
PRESENT.
COMPLETE
SITE
PREPARATION
AND
FOUNDATION
CONSTRUCTION
BEFORE
UNPACKING
ALL
PARTS.
A
CAUTION
•
Proper
site
preparation
required.
•
Shed
not
intended
for
use
in
extreme
weather
conditions.
•
Shed
not
intended
for
storage
of
flammable
or
caustic
chemicals.
•
Store
heavy
items
near
the
bottom
of
shed.
•
Shed
not
intended
for
use
by
children.
•
DO
NOT
stand,
sit,
or store
items
on
storage
shed
roof.
•
Treat
carefully
in
extreme
temperatures.
•
Repair
or
replace
broken
parts
immediately.
•
Suncast
is
not
responsible
for
damage
caused
by
weather
or
misuse.
•
At
regular
intervals,
inspect
your
shed
to
make
sure
that
assembly
integrity
has
been
maintained.
•
Periodically
check
that
the
location
you
have
chosen
to
set
your
shed
is
still
level.
•
This
kit
contains
parts
with
metal
edges.
Please
be
careful
when
handling.
Suncast
Products
and
Replacement
Parts
To
purchase
Suncast
replacement
parts
and
learn
about
other
Suncast
products,
visit
us
online or
call.
www.suncast.com
,AminiK
24
hours
a
day,
7
days
a
week,
365 days
a
year.
• I
gli
r
Is • •
• • •
1-800-846-2345
or
1-630-879-2050.
2

A
Shed
Safety
and
Care
•
Hot
items,
such
as
recently
used
grills,
blowtorches,
etc.,
must
not
be
stored
in
the
shed.
•
Heavy
articles
should
not
be
leaned
against
the
walls,
as
this
may
cause
panel
distortion
and
permanent
damage.
•
Keep
roof
clean
of
snow
and
leaves.
•
The
shed
walls
and
roof
sections
have
a
textured
exterior,
much
like
vinyl
home
siding.
Over
time,
dust
may
accumulate
in
the
texture.
When
combined
with
moisture,
this
could
encourage
the
growth
of
moss
or
mold on
the
shed.
To
maintain
the
look
of
your
shed,
we
recommend
cleaning
it
each
year
with
mild
soap and
water.
DO
NOT
use
bleach,
ammonia,
or
other
caustic
cleaners,
and
DO
NOT
use
stiff
bristle
brushes.
Failure
to
perform
annual
cleaning
could
result
in
permanent
staining of
the
plastic.
This
is
not
a
manufacturing
defect
and
is
not
covered
under
warranty.
Assembly
Day
Tips
•
Complete
site
preparation
and
foundation
construction
before
unpacking
parts
and
beginning
assembly.
•
DO
NOT
attempt
to
assemble
on
a
day
with
strong
winds.
•
DO
NOT
attempt
to
assemble
on days
when
temperature
is
below
32 degrees
Fahrenheit.
•
Set
aside
appropriate
amount
of
time
to
completely
assemble
shed.
•
Make
sure
you
have
assistance
nearby
to
lift
and
secure
parts
in
place.
•
Wear
light
duty
work
gloves
while
assembling
shed.
•
Once
roof
is
assembled,
a
flashlight
may
be
of
use
when
assembling
smaller
components
inside
shed.
•
DO
NOT
use
a
torque
wrench
or
hand
drill
to
tighten
provided
Easy
bolts.
Use
010210410
Easy
Bolt
Easy
Driver
tool (
provided)
ONLY.
•
Suncast
provides
extra
hardware
for
small
fasteners
for
customer
convenience.
In
some
cases,
there
will
be
extra
small
fasteners
once
the
assembly
is
complete.
Note:
This
product
contains
parts
that
are
used
in
different
orientations
to
construct
the
shed.
Please
take
note
of
the
orientation
of
the
parts
shown
throughout
this
instruction
manual.
Failure
to
follow
instructions
could
result
in
damage
to parts.
Suncast
is
not
responsible
for
replacing
parts
lost
or
damaged
due
to
incorrect
assembly.
3

Parts -
BMS7702
Walls
and
Floors
-
IMPORTANT
OPEN
ALL
BOXES
FIRST
AND
NEATLY
LAYOUT
PARTS.
SMALL
PARTS
MAY
BE
CONTAINED
IN
EACH
BOX.
PLEASE
REFERENCE
THE
PARTS
LIST
WITHIN
THIS
MANUAL
TO
VERIFY
ALL
PARTS
ARE
PRESENT.
COMPLETE
SITE
PREPARATION
AND
FOUNDATION
CONSTRUCTION
BEFORE
UNPACKING
ALL
PARTS.
0
o
OB00433 OB00435
0
OB00434
Side
panel
x2
Left
front
OB00431
Front
floor
Back
left
corner
OB00432
Rear
floor
o
OB00436
Back
panel
x2
OB00438
Right
front
OB00437
Back
right
corner
1MR003003—
Wall
edge
X7
PART
HAS
BEEN
PRE-
ASSEMBLED
TO
PANELS
DO
NOT
REMOVE
4

Parts -
BMS7702
Doors
IMPORTANT
OPEN
ALL
BOXES
FIRST
AND
NEATLY
LAYOUT
PARTS.
SMALL
PARTS
MAY
BE
CONTAINED
IN
EACH
BOX.
PLEASE
REFERENCE
THE
PARTS
LIST
WITHIN
THIS
MANUAL
TO
VERIFY
ALL
PARTS
ARE
PRESENT.
COMPLETE
SITE
PREPARATION
AND
FOUNDATION
CONSTRUCTION
BEFORE
UNPACKING
ALL
PARTS.
o
0463780 —
Left
door
0440631 —
D-
ring
slide
bolt
x2
o
0631703 —
Left
door
window
0463779 —
Right
door
0631702
Right
door
window
0510868
Window
gasket
x2
5

Parts -
BMS7702
Headers
-
IMPORTANT
OPEN
ALL
BOXES
FIRST
AND
NEATLY
LAYOUT
PARTS.
SMALL
PARTS
MAY
BE
CONTAINED
IN
EACH
BOX.
PLEASE
REFERENCE
THE
PARTS
LIST
WITHIN
THIS
MANUAL
TO
VERIFY
ALL
PARTS
ARE
PRESENT.
COMPLETE
SITE
PREPARATION
AND
FOUNDATION
CONSTRUCTION
BEFORE
UNPACKING
ALL
PARTS.
,
o
OMR001010
Ridge
beam
11;
OB00444
—
Front
header
0
0M
P000001 —
Roof
ridge
beam
header
bracket
x2
0
OB00445—
Rear
header
OMR002002 —
Front
header
beam
(
57")
OMR002001 —
Rear
header
beam (
62")
6

Parts -
BMS7702
Roof
Truss
IMPORTANT
OPEN
ALL
BOXES
FIRST
AND
NEATLY
LAYOUT
PARTS.
SMALL
PARTS
MAY
BE
CONTAINED
IN
EACH
BOX.
PLEASE
REFERENCE
THE
PARTS
LIST
WITHIN
THIS
MANUAL
TO
VERIFY
ALL
PARTS
ARE
PRESENT.
COMPLETE
SITE
PREPARATION
AND
FOUNDATION
CONSTRUCTION
BEFORE
UNPACKING
ALL
PARTS.
o
OMR005004
Truss
leg
x2
OMR004002
Side
adaptor
x2
o
OMP000003
Truss
bracket
o
OMR00901
2 —
Roof
support
bar
x8
OMR006001
Truss
cross
beam
x2
OMP000004
Truss
strap
x2
7

Parts -
BMS7702
Roof
IMPORTANT
OPEN
ALL
BOXES
FIRST
AND
NEATLY
LAYOUT
PARTS.
SMALL
PARTS
MAY
BE
CONTAINED
IN
EACH
BOX.
PLEASE
REFERENCE
THE
PARTS
LIST
WITHIN
THIS
MANUAL
TO
VERIFY
ALL
PARTS
ARE
PRESENT.
COMPLETE
SITE
PREPARATION
AND
FOUNDATION
CONSTRUCTION
BEFORE
UNPACKING
ALL
PARTS.
o
OB00442A —
Left
roof
x2
o
0102231 —
Skylight
x2
OB00443A —
Front
roof
peak
o
0440691 —
Skylight
gasket
x4
010247607 —
lllumiventTM
base
x2
o
OB00452A—
Rear
roof
peak
0
010247507 —
III
umiventTm
cover
x2
I
OB00441A —
Right
roof
x2
8

OMP000002 —
Metal hinge
plate
x6
Hardware -
BMS7702
0480340 -
Hardware
bag
.25"
x
2"
Hex
bolt
x4
.25"
Locking
nut
x6
.25 -
20
x
1"
Hex
bolt
x2
0480375 -
Hardware
bag
.625"
Screw
x210
0480374
—
Hardware
bag
.25"
x
2"
Hex
bolt
x2
.25"
Locking
nut
x2
0480337
—
Hardware
bag
o
.25"
x .
75"
Screw
x6
.25"
Locking
nut
x6
Hardware
shown
at
actu
0480452 -
Hardware
bag
#8
x .
625
Screw
x9
0480446
—
Hardware
bag
#10
x .
375
Screw
x22
0480437
—
Hardware
bag
Easy
bolt
7/8"
x28
*Easy
bolt
easy
driver
al
size (*
unless
otherwise
noted).
Extra
hardware
provided
0480438 -
Hardware
bag
#10
x .
75"
Screw
w/
washer
x22
#10
Rubber
sealing
washer
x22
.
Not
all
are
used.
9

Door
Handle
Kit -
Parts -
BMS7702
0463795 -
Door
handle
kit
Hardware
o
0102479
Door
handle
x2
0463797 -
Door
latch
kit
OMP000020 —
Left
latch
plate
o
0463812 —
Door
Latch
Assembly
0480370 -
Hardware
bag
#10
x
1"
Fender
washer
x4
#10
x 2
1/4"
Pan
head
screw
x4
0480439 -
Hardware
bag
.25"
Washer
x4
.25"
Locking
nut
x4
.25"
x
20
x 11/2"
Carriage
Bolt
x4
Hardware
shown
at
actual
size (*
unless
otherwise
noted).
Extra
hardware
provided.
Not
all
are
used.
10

Site
Preparation
and
Platform
Construction
Materials
NOT
supplied
with
BMS7702
Shed
Kit
Note:
Site
preparation
is
required
for
this
shed.
Placing
the
shed
on
a
constructed
foundation
is
required.
Without
a
constructed
foundation,
settling
will
probably
occur,
causing
distortion
and
damage
to
the
shed.
Suncast
is
not
responsible
for
replacing
parts
damaged
or
property
lost
due
to
incorrect
assembly.
Warranty
requires
foundation.
Note:
Complete
the
site
preparation
and
foundation
construction
before
unpacking
parts
and
beginning
assembly.
For
tips
on
site
preparation,
go
to
www.suncast.com,
consult
retailer,
or
local
code.
To
prepare
your
shed
site,
follow
the
steps
below:
1)
Consult
your
local
authorities
for
building
codes
and
covenants
before
beginning
foundation
or
erecting
shed.
2)
Before
any
digging,
check
with
local
utilities
to
determine
location
of
buried
cables,
pipes,
etc.
3)
Decide
which
type
of
foundation
you
want:
-
Concrete
slab,
4"
thick
o
-
Wood
platform
Use
exterior
grade
wood.
The
wood
platform
should
be
set
on
pier
blocks
or
footing.
Consult
your
local
retailer
for
help
to
determine
the
best
anchoring
method
for
your
particular
installation.
The
provided
plans
are
sized
for
the
minimum
number
of
cuts
to
lumber
and
plywood.
4)
Prepare
the
building
site:
-
The
ground
should
slope
away
from
the
foundation
area
to
provide
drainage.
-
The
foundation
surface
must
be
flat
and
level.
- A
vapor
barrier
should
be
provided
to
prevent
excessive
condensation
in
the
shed.
-
Follow
local
building
codes
for
a
proper
vapor
barrier.
5)
Anchoring
the
shed
to
the
foundation:
-
Consult
your
local
retailer
for
help
to
determine
the
best
anchoring
method
for
your
particular
installation.
-
To
secure
the
shed
to
a
concrete
slab,
use
masonry
fasteners
available
at
your
local
hardware
retailer.
-
To
secure
the
shed
to
a
wood
platform,
use
1/4"
x
3"
long
lag
screws
with
washers.
Anchoring
floor
panel
to
concrete
slab
•
Secure
shed
to
concrete
slab
using
masonry
fasteners.
•
Dimensions
allow
for
shed
to
fit
within
the
nearest
1"
on
each
side.
Anchoring
floor
panel
to
wood
platform
•
Secure
shed
to
wood
platform
using
1/4"
x
3"
lag
screws.
11

Site
Preparation
and
Platform
Construction
(
continued)
Materials
NOT
supplied
with
BM7702
Shed
Kit
Wood
platform
critical
spacing
8
15.500
13.250
h
I
7125
30.000
I I
5
250
11.375
—
30.000
i I
6.6:
84.750
•
Check
all
critical
spacing
measurements.
Wood
platform
materials
list
Item
a
Qty
1
Size
37.25"
x
84.75"
x .
75"
b
1
48"
x
84.75"
x .
75"
c
2
2"
x
6"
x
84.75"
d
4
2"
x
6"
x
12.5"
e
7
2"
x
6"
x
82.25"
f 4
2"
x
6"
x
11.75"
•
Please
note-
dimensional
lumber
is
actually
1/2"
smaller
than
noted
sizes.
12

Door
Pre-
Assembly
Peel
film
from
both
sides
of
left
door
window (
N).
Separate
the
two
window
gaskets (
P)
and
peel
off
backing.
gi
Place
gasket (
P)
and
left
door
window (
N)
into
left
door
(J)
channel.
Secure
with
thirteen
screws ( NN),
starting
at
corners.
DO
NOT
over
tighten
screws.
Note:
The
cut
portion
of
gasket
(
F)
MUST
be
assembled
on
top
of
door
channel.
Repeat
for
right
door (
K)
and
right
door
window (
R).
At
top
interior
side
of
left
door (
J),
attach
D-
ring
slide
bolt (
0)
with
four
screws (
DDD)
through
provided
holes.
13
At
bottom
interior
side
of
left
door (
J),
attach
D-
ring
slide
bolt (
0)
with
four
screws (
DDD)
through
provided
holes.

Header
Pre-
Assembly
5
[1]
Slide
roof
ridge
beam
bracket (
U)
under
tabs
on
inside
peak
of
front
header (
G)
and
secure
with
two
screws (
NN).
DO
NOT
over
tighten
screws.
Lay
front
header (
G)
on
ground
with
lettering
side
facing
up.
Place
front
header beam (
X,
57")
into
pocket
on
inside
of
front
header (
G).
Attach
with
six
screws (NN).
DO
NOT
over
tighten
screws.
Repeat
for
rear
header (
H)
and
rear
header
beam
(EEE,
62").
14

Roof
and
Truss
Pre-
Assembly
Attach
truss
bracket (
Z)
to
end
of
one
truss
leg
(
Y)
with
1"
hex
bolt (
KK)
and
locking
nut (
LL).
Repeat
for
second
truss
leg
(
Y).
gi
Attach
two
truss
cross
beams (
CC)
to
two
truss
legs
(Y)
using
two
hex
bolts (
JJ)
and two
locking
nuts (
LL).
Stand
truss
and
check
cross
beam
is
level.
Place
side
adaptor
bracket (
BB)
at
end
of
left
truss
leg
(Y).
Secure
adaptor
bracket
with
one
2"
hex
bolt (
JJ)
and
one
locking
nut (
LL).
Repeat
for
other
truss
leg.
Note:
DO NOT
over
tighten
side
adaptor
bracket (
BB)
onto
end
of
truss
legs (?).
This
makes
roof
assembly
difficult.
15

Skylight
and
Wall
Pre-
Assembly
Place
IllumiventTM
cover (
GG)
onto
bottom (
HH).
Secure
from
underside
with
four
screws ( NN).
Place
gasket
(
FF)
into
IllumiventTM
bottom (
HH).
Place
skylight
gasket
(
FF)
into
skylight (
EE).
Place
skylight (
EE)
onto
left
roof
panel (
L).
Secure
from
underside
with
eight
screws ( NN).
Screw
corners
in
first.
Make
sure
rib
on
plastic
parts
is
seated
fully
against
gasket
on
skylight.
Repeat
for
remaining
left
roof
panel.
12
Place
IllumiventTM
assembly (
GG,
HH,
FF)
onto
right
roof
panel (
M).
Secure
from
underside
with
eight
screws
(NN).
Screw
corners
in
first.
Make
sure
rib
on
plastic
parts
is
seated
fully
against
gasket
on
IllumiventTM
Repeat
for
remaining
right
roof
panel.
16

secure
with
six
screws (
NN).
Note:
Refer
to
pages
11
and
12
for
information
about
how
to
secure
floors
to
foundation.
Align
tab
on
bottom
right
side
of
left
front
corner (
B)
with
slot
on
front
floor (
A).
Lower
panel
into
slot
and
lock
in
place
by
sliding
panel
toward
outside
of
floor.

Shed
Assembly/Walls
(
continued)
Tip
left
front
corner (
B)
outward
slightly
and
bend
corner
hinge.
19
Before
proceeding,
make
sure
corner
is
square (
top
view)
where
it
meets
the
floor
and
that
panel
is
flush
(side
view)
with
floor.
If
not,
repeat
Steps
16-18
until
square
and
flush.
Tip
left
front
corner (
B)
back
to
vertical
position
and
align
lower
tabs
on
right
side
with
slots
in
floor.
Note:
You
will
hear
a
snap
when
tab
is
fully
engaged.
18

Shed
Assembly/Walls
(
continued)
Align
tabs
on
bottom
of
side
panel (
N)
with
slots
along
front
and
rear
floors.
Lower
panel
into
slots
and
lock
in
place
by
sliding
panel
toward
front
corner.
7
Note:
Use
a
rubber
mallet
to "
push"
side
panel
(
Ai)
into
locked
position.
Secure
side
panel
with
four
easy
bolts (
RR),
working
from
floor
to
roof.
DO
NOT
use
torque
wrench.
Use
easy
bolt
easy
driver (
SS)
and
hand
tighten.
Easy
bolt
head
will
be
flush
when
fully
seated.
DO
NOT
over
tighten
easy
bolts.
Note:
You
may
hear
a
click
when
easy
bolt
has
been
tightened
completely.
19


Place
rear
header (
H)
over
back
walls
and
fit
four
protruding
support
legs
into
pockets
molded
in
back
walls.
Secure
rear
header
using
eight
screws (
NN).
Place
front
header (
G)
over
door
opening
and
fit
two
protruding
support
legs
into
pockets
molded
in
front
corners.
Secure
front
header
using
two
screws (
NN)
in
each
front
corner.
Slide
truss
assembly
into
place.
Secure
with
four
screws (
NN)
in
each
side
adaptor
bracket.

Shed
Assembly/Headers
and
Truss
(
continued)
Raise
ridge
beam (
S)
up
and
into
rear
roof
ridge
beam
bracket.
Secure
with
one
2"
hex
bolt (
JJ)
and
one
locking
nut (
LL).
Repeat
with
front
ridge
beam
bracket.
Note:
Make
sure
open
end
of
ridge
beam
faces
down.
Note:
Alignment
of
ridge
beam
to
bracket
may
require
header
panels
to
be
pushed
inwards
or
outwards
slightly
as
ridge
beam
is
slid
into
place.
Attach
truss
strap (
DD)
to
side
adaptor
bracket (
BB)
and
truss
leg
(
Y)
with
two
screws (
NN).
Repeat
for
remaining
truss
strap.
Attach
truss
bracket (
Z)
to
ridge
beam (
S)
with
one
screw
NN.
22

Shed
Assembly/Roof
Place
the
front
roof
peak
(
Q)
onto
a
right
roof
panel
(
M).
Secure
with
five
rubber
washers (
UU) and
five
sealing
screws (
Tr).
Repeat
for
rear
roof
peak (
W)
and
remaining
right
roof
panel
(
M).
Note:
Rubber
side
of
washer
should
be
against
plastic
panel.
Before
proceeding,
locate
and
identify
the
six
slots
on
interior
side
of
left
roof
panels (
L).
Before
proceeding,
locate
and
identify
the
five
slots
on
interior
side
of
right
front
(
M,Q)
and
right
rear
(
M,W)
roof
panel
assemblies.
23

Shed
Assembly/Roof
(
continued)
Before
proceeding,
locate
and
identify
six
front
header
tabs
and
six
rear
header
tabs.
Mr
Slide
left
roof (
L)
down
towards
the
outside
of
shed.
Lay
left
roof (
L)
directly
over
three
tabs
on
left
side
of
front
header (
G).
With
left
roof
slots
seated
over/on
header
tabs,
check
alignment
in
all
three
spots.
Press
edge
of
left
roof (
L)
into
channel
on
truss
leg
(
Y).
24

Lay
right
roof (
M)
with
front
roof
peak (
Q)
directly
over
three
tabs
on
right
side
of
front
header (
G).
With
right
roof
slots
seated
over/on
header
tabs,
check
alignment
in
all
three
spots.

Shed
Assembly/Roof
(
continued)
Repeat
steps
34-36
for
remaining
right
roof
panel (
M)
and
rear
roof
peak (
W).
Pull
down
each
lower
corner
of roof
from
outside.
From
inside
shed,
attach
tabs
on
right
front
corner (
F)
and
side
panel (
N)
to roof
panel
with
four
screws ( NN).
Push
down
the
right
roof
panels
with
roof
peaks
from
outside.
From
inside
shed,
secure
roof
peaks
to
left
roof
panels
together
using
10
rubber
sealing
washers (
UU)
and
10
sealing
screws (
Tr).
Note:
For
clarity,
illustration
is
shown
with
front
header
removed.
40
Secure
roof to
both
sides
of roof
truss
using
eight
screws ( NN).
Each
screw
will
attach
at
a
corresponding
screw
boss
on
the
roof.
Make
sure
roof
peak
is
secured
(highest
screw
holes
on
roof
truss).
26

Raise
roof
support (
AA)
into
position
against
roof.
Slide
roof
support (
AA)
into
front
header.
Secure
roof
support
to
underside
of
truss
leg
with
one
screw (
NN).
Secure
roof
support (
AA)
to
roof
using
three
screws (NN).
Raise
second
roof
support (
AA)
to
top
of
roof
panel.
(Shown
in
next
step)

Shed
Assembly/Doors
With
metal hinge
plates
in
open
position,
slide
one
hinge
over
each
hinge
receptacle
on
inside of
right
front
panel.
Note:
For
clarity,
illustration
is
shown
with
roof
removed.
i
rr
Note:
Use
a
rubber
mallet
if
necessary.
Stand
right
door (
K)
upright
with
three
hinge
mounts
facing
right.
Slide
one
metal hinge
plate (
II)
up
onto
each
hinge
mount.
Rotate
hinges
to
outside
of
door.
gi
Secure
each
metal hinge
plate
with
one
screw (
00)
and
one
locking
nut (
PP).
Repeat
Steps 44-45
for
left
door (
J).
Note:
For
clarity,
illustration
is
shown
with
roof
removed.
28

Shed
Assembly/Doors
(
continued)
Insert
two
screws (
CCC)
into
right
latch
plate
(
XX)
and
through
right
door.
While
holding
plate
in
place
on
exterior
of
door,
secure
each
screw
with
two
washers (
AAA)
and
two
locking
nuts (
BBB).
From
the
outside
of
doors,
insert
door
handle (
VV)
stems
into
holes
of
left
and
right
doors.
On
inside of
doors,
place
washers (
YY)
on
each
door
handle
stem,
and
secure
each
with
one
screw (
ZZ).
Insert
screws (
CCC)
into
left
latch
plate (
WW)
and
through
left
door.
While
holding
plate
in
place
on
exterior
of
door,
secure
each
screw
with
two
washers (
AAA)
and
two
locking
nuts (
BBB).
Lift
upper
D-
ring (
0)
up
to
engage
in
front
of
header.
Turn
D-
ring
to
right
for
locked
position.
29

Shed
Assembly/Doors
(
continued)
Push
lower
D-
ring (
0)
down
to
engage
with hole
in
floor.
Turn
D-
ring
to
right
for
locked
position.
Attach
a
5/16"
lock (
not
provided)
to
door
latch
to
properly
secure
shed.
30

Warranty
SUNCAST®
Building,
Shed
and
Gazebo
Ten
Year
Limited
Warranty
Your
SUNCAST®
Building,
Shed
or
Gazebo
has
a
TEN
YEAR
LIMITED
WARRANTY
against
product
failure
resulting
from
defects
in
manufacturing
or
materials.
The
warranty
period
starts
on
the
delivery
date.
Incidental
and
consequential
damages
are not
covered.
Warranty
Claims
To
file
a
warranty
claim
contact
the
manufacturer,
SUNCAST®
CORPORATION,
701
North
Kirk
Road,
Batavia,
Illinois,
60510.
Call
toll
free (
800)
846-
2345
or
visit
www.Suncast.com.
SUNCAST®
will
repair
or
replace
only
the
parts
that
failed
under
the
terms
of
the
warranty.
In
some
cases,
the
replacement
parts
may
not
be
identical,
but
they
shall
be
of
equal
or
greater
performance
than
the
original
part.
We
may
require
proof
of
purchase.
Proof
of
purchase
may
be
the
original
dated
store
receipt.
We
may
require
evidence
of
the
failure.
Evidence
of
failure
may
include
photographs
or
returning
failed
components
to
SUNCAST.
WARRANTY
LIMITATIONS
THIS
WARRANTY
COVERS
ONLY
DEFECTS
THAT
AFFECT
THE
FORM,
FIT
OR
FUNCTION
OF
THE
UNIT.
It
excludes
natural
aging
of
the
unit,
discoloration,
ordinary
wear
and
tear,
ordinary
weathering,
sunlight
fading,
or
rust.
It
excludes
staining
caused
by
mold,
mildew
or
tree
sap
and
damage
caused
by animals
including
insects,
vermin
or
household
pets.
The
warranty
does
not
cover
damage
caused
by
Acts
of
Nature
including
but
not
limited
to:
wind
in
excess
of
65
mph;
tornado;
hurricane;
microburst;
hail;
flood;
blizzard;
extreme
heat;
pollution
or
fire
events.
For
all
storm
and
windy
conditions,
the
doors
must
be
closed,
latched,
and
a
padlock
used
through
the
door
handle
padlock
receptacles.
Left
and
right
doors
may
have
different
latches,
and
both
must
be
engaged.
Latching
devices
vary
by
model.
The
warranty
does
not
cover
damage
caused
by
Sun
energy
reflected
from "
Low-
E"
windows
or
other
reflective
materials.
The
user
is
responsible
for
protecting
the
product
from
damage
in
this
situation.
The
following
actions
void
the warranty:
improper
assembly;
assembly
on
a
foundation
other
than
as
described
in
the
assembly
instructions;
use
above
intended
and
reasonable
capacity;
misuse;
abuse;
failure
to
perform
ordinary
maintenance;
failure
to
remove
snow
over
8
inches
deep;
modification;
cleaning
with
abrasive
tools,
exposing
the
unit
to
heat
sources
and
vandalism.
Painting,
sandblasting,
cleaning
with
harsh
chemicals
not
recommended
for
plastics
voids
the
warranty
on
resin
components.
Modification
of
the
original
product
voids
all
warranties.
Suncast
assumes
no
liability
for
any
modified
product
or
consequences
resulting
from
failure
of
a
modified
product.
Damage
due
to
moving,transporting,
or
relocating
the
product
voids
the
warranty.
Disassembly
of
this
unit for
reasons
other
than
authorized
repair
voids
the
warranty.
Suncast
is
not
responsible
for:
loss of
use
of
the
unit;
labor
for
repair;
inspection
fees
or
disposal
costs.
SUNCAST®
reserves
the
right
to
reimburse
the
owner
the
purchase
price
of
the
unit
on
a
STRAIGHT
LINE
DEPRECIATED
BASIS
FOR
THE LENGTH
OF
THE
WARRANTY
IN
LIEU
OF
REPAIR
OR
REPLACEMENT.
The
Purchase
Price
does
not
include
taxes,
delivery
charges,
site
preparation
costs,
permits,
fees,
assembly
costs,
or
disposal
costs.
THIS
WARRANTY
IS
NONTRANSFERABLE.
IT
IS
VALID
FOR
NORMAL
HOUSEHOLD
USE
ONLY.
THE
WARRANTY
IS
VOIDED
BY
COMMERCIAL OR
INDUSTRIAL
USE.
IT
EXCLUDES
FLOOR
MODELS,
CLEARANCE
AND
OPEN
BOX
UNITS.
Notice
Suncast®
does
not
represent
that
this
unit
will
meet
city,
county,
state,
homeowner's
association
standards
or
zoning
requirements.
The
owner
is
responsible
for
securing
all
permits
and
meeting
other
requirements
needed
for
placement,
construction
and
use.
THE
MANUFACTURER'S
LIABILITY
HEREUNDER
IS
LIMITED
SOLELY
TO
THE
REPAIR
OR
REPLACEMENT
OF
THE
DEFECTIVE
PRODUCT
OR
PART
AND
THE
MANUFACTURER
SHALL
IN
NO
EVENT
BE
LIABLE
FOR
ANY
INCIDENTAL
OR
CONSEQUENTIAL
DAMAGES
WHICH
MAY
RESULT
FROM
ANY
DEFECT
IN
MATERIAL
OR
WORKMANSHIP
OR
FROM
THE
BREACH
OF
ANY
EXPRESS
OR
IMPLIED
WARRANTY.
This
warranty
gives
you
specific
legal
rights,
and
you
may
also
have
other
rights
which
vary
from
state
to
state.
Some
states
do
not
allow
the
exclusion
or
limitation
of incidental
or
consequential
damages;
the
limitation
or
exclusion
may
not
apply
to
you.
31