Streamo CD
Internetradio + CD-Player + BT + DAB/DAB+
Internet Radio CD-Player + BT + DAB/DAB+
Radio Internet + lecteur CD + BT + DAB/DAB+
Internet Radio+ Reproductor de CD + BT + DAB/DAB+
Internet Radio+ Leore CD + BT + DAB/DAB+
10034055
10034056


3
DE
Sehr geehrter Kunde,
wir gratulieren Ihnen zum Erwerb Ihres Gerätes.
Lesen Sie die folgenden Hinweise sorgfältig
durch und befolgen Sie diese, um möglichen
Schäden vorzubeugen. Für Schäden, die durch
Missachtung der Hinweise und unsachgemäßen
Gebrauch entstehen, übernehmen wir keine
Haftung. Scannen Sie den QR-Code, um Zugri
auf die aktuellste Bedienungsanleitung und
weitere Informationen rund um das Produkt zu
erhalten.
INHALT
Technische Daten 4
Sicherheitshinweise 5
Lieferumfang 6
Geräteübersicht 7
Inbetriebnahme 12
DLNA 17
Übersicht Menü 18
Hauptmenü 20
Internet Radio 28
Media Center 29
Informationscenter 30
FM-Radio 31
CD-Wiedergabe 32
BT 32
Fernsteuerung über Apps 33
Spezielle Entsorgungshinweise für Verbraucher in Deutschland 34
Hinweise zur Entsorgung 36
Konformitätserklärung 36

4
DE
TECHNISCHE DATEN
Artikelnummer 10034055, 10034056
Stromversorgung Netzgerät
Eingang: 100-240 V ~ 50/60 Hz max. 0,8 A
Atusgang: 12 V / 2,5 A
Anschlüsse
Aux-Eingang (3,5 mm)
FM-Radio
Frequenzbereich 87,5 MHz - 108 MHz
DAB/DAB+
Frequenzbereich 174-240 MHz
WLAN
Standard
Verschlüsselung
Frequenzband
Sendeleistung
802.11b/g/n
WEP, WPA, WPA 2(PSK), WPS
2402–2480MHz
14-20dBm
BT-Spezikationen
Frequenzband
Max. Sendeleistung
2402–2480MHz
10dBm
Streaming
UPnP, DLNA
Unterstützte Dateiformate
WMA, MP3

5
DE
SICHERHEITSHINWEISE
Lesen Sie die Sicherheitshinweise und die Bedienungsanleitung sorgfältig
durch, bevor Sie das Gerät bedienen.
• Bewahren Sie die Bedienungsanleitung an einem sicheren Ort auf,
damit Sie später darauf zurückgreifen können.
• Halten Sie sich an alle erforderlichen Bedienungsschritte.
• Stellen Sie das Gerät nicht an einem feuchten Ort auf. Auch nicht
an einem Ort mit elektromagnetischen Feldern, mit direkter
Sonneinstrahlung oder mit einer hohen Umgebungstemperatur.
• Wenn Sie das Gerät lange nicht benutzen, ziehen Sie den Netzstecker.
Nehmen Sie die Batterie aus dem Mikrofon.
• Ziehen Sie den Netzstecker, bevor Sie das Gerät reinigen. Verwenden
Sie zur Reinigung keine üchtigen Gase, Verdünner oder andere
chemischen Reinigungsmittel.
• Verwenden Sie ausschließlich Zubehör vom Hersteller.
• Die Stromversorgung des Gerätes darf nur nach den Angaben auf dem
Typenschild erfolgen.
• Führen Sie Wartungen und Reparaturen nicht selbst durch. Die
gefährliche Spannung im Gerät kann durch das Önen des Gehäuses zu
einem Stromschlag führen. Reparaturen dürfen nur vom qualizierten
Kundendienst ausgeführt werden.
• Wenn ein Teil ersetzt werden muss, muss es zu den
Herstellerspezikationen passen oder ein Originalbauteil sein.
• Wenn das Gerät defekt ist oder nicht ordnungsgemäß funktioniert,
wenden Sie sich an den Kundendienst. Das Gehäuse nicht önen, um
das Gerät selbst zu richten.
• Dieses Gerät ist nicht dafür bestimmt, durch Personen (einschließlich
Kinder) mit eingeschränkten physischen, sensorischen oder geistigen
Fähigkeiten oder mangels Erfahrung und/oder mangels Wissen
benutzt zu werden, es sei denn,sie werden durch eine für ihre Sicherheit
zuständige Person beaufsichtigt oder erhielten von ihr Anweisungen,
wie das Gerät zu benutzen ist. Kinder sollten beaufsichtigt werden, um
sicherzustellen, dass sie nicht mit dem Gerät spielen.
• Dieses Gerät dient der Tonwiedergabe. Es ist ausschließlich für diesen
Zweck bestimmt und darf nur zu diesem Zweck verwendet werden.
Es darf nur in der Art und Weise verwendet werden, wie es in dieser
Gebrauchsanleitung beschrieben ist.

6
DE
Power Menu
Volume
Preset
Scan
Up
Down
Enter
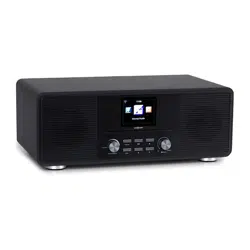
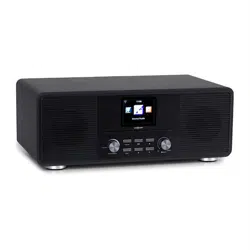
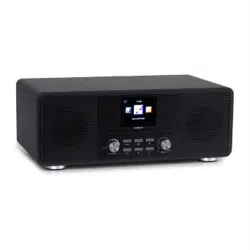
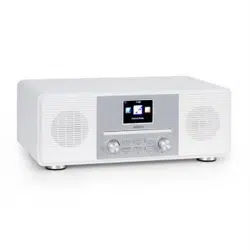
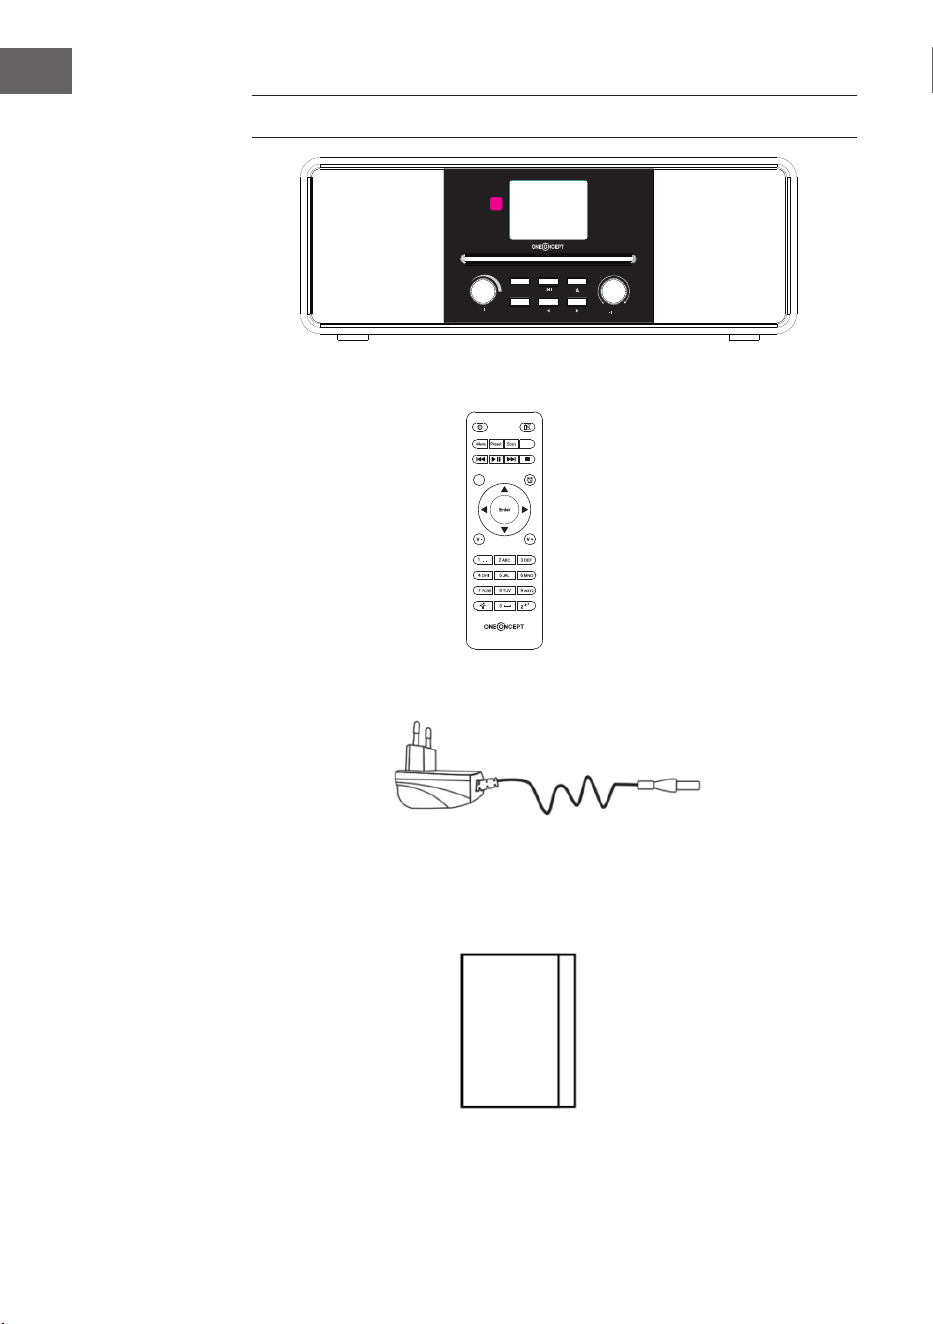
LIEFERUMFANG
Streamo CD
Netzgerät
Fernbedienung
Bedienungsanleitung
EQ
Eject

7
DE
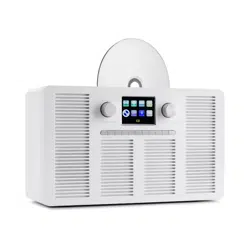
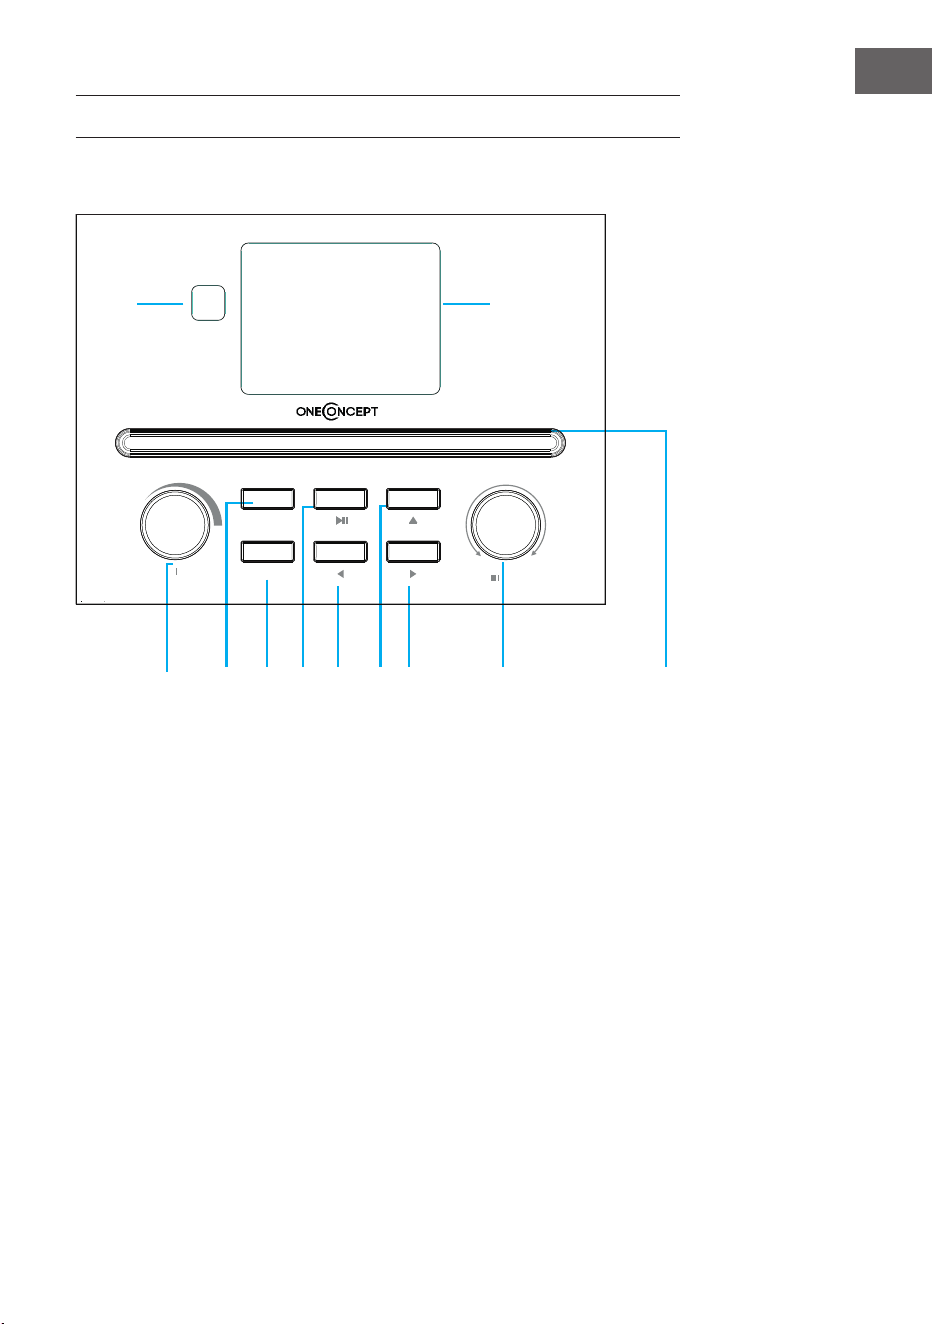
GERÄTEÜBERSICHT
Vorderansicht
1 IR-Emfpänger
2 LCD-Bildschirm
3 Ein-/ Ausschalt- und Menütaste
4 Preset-Speicher
5 Sendersuche
6 Wiedergabe/Pause
7 Links
8 Auswurftaste
9 Rechts
10 Navigationsknopf/Bestätigen
11 CD-Lade
4
2
1
3
5 6
7
8
9
10
11
Power Menu
Volume
Preset
Scan
Down
Up
Enter
8
DE
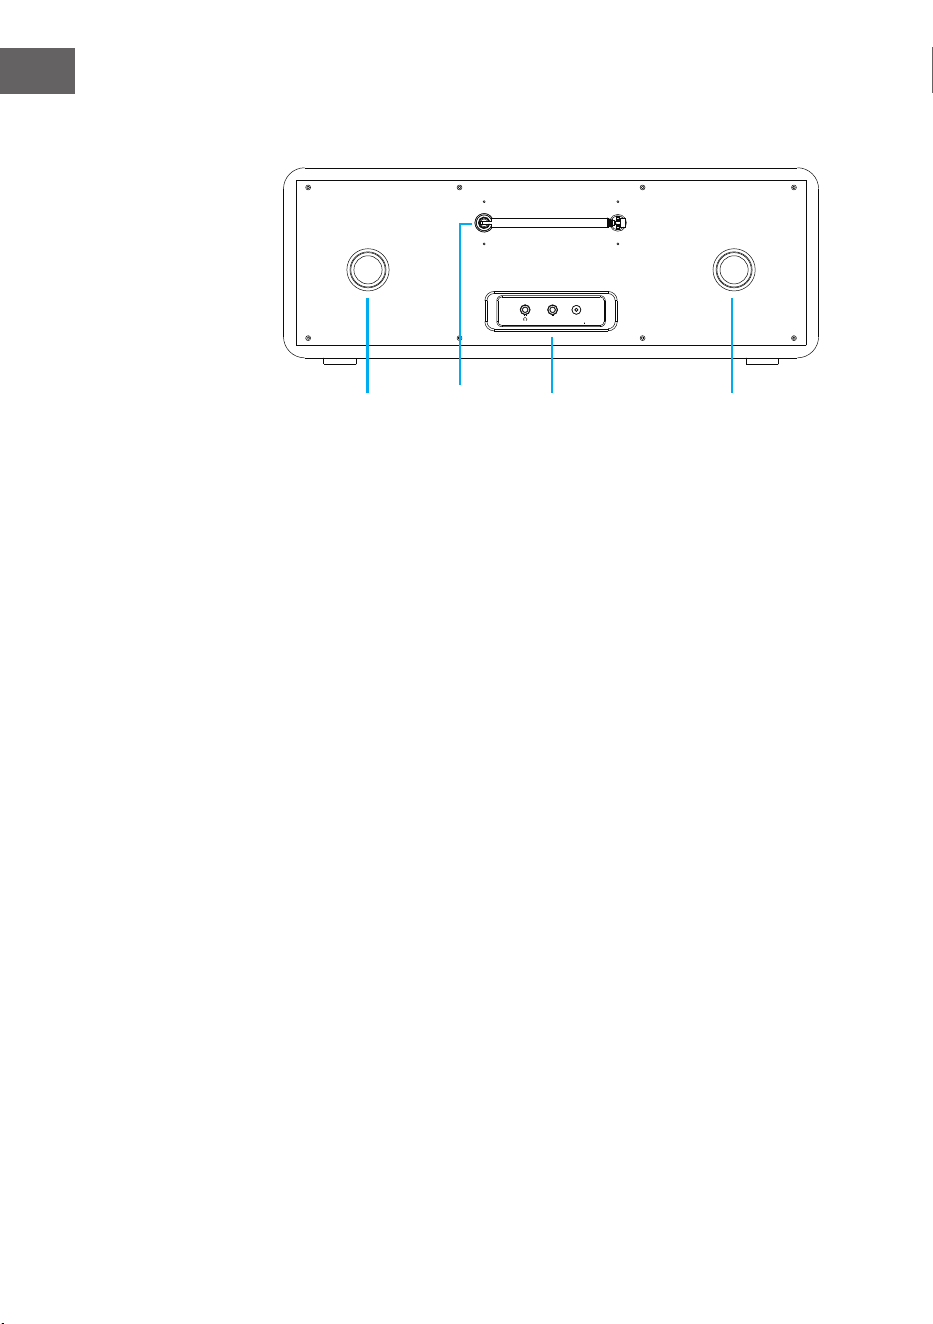
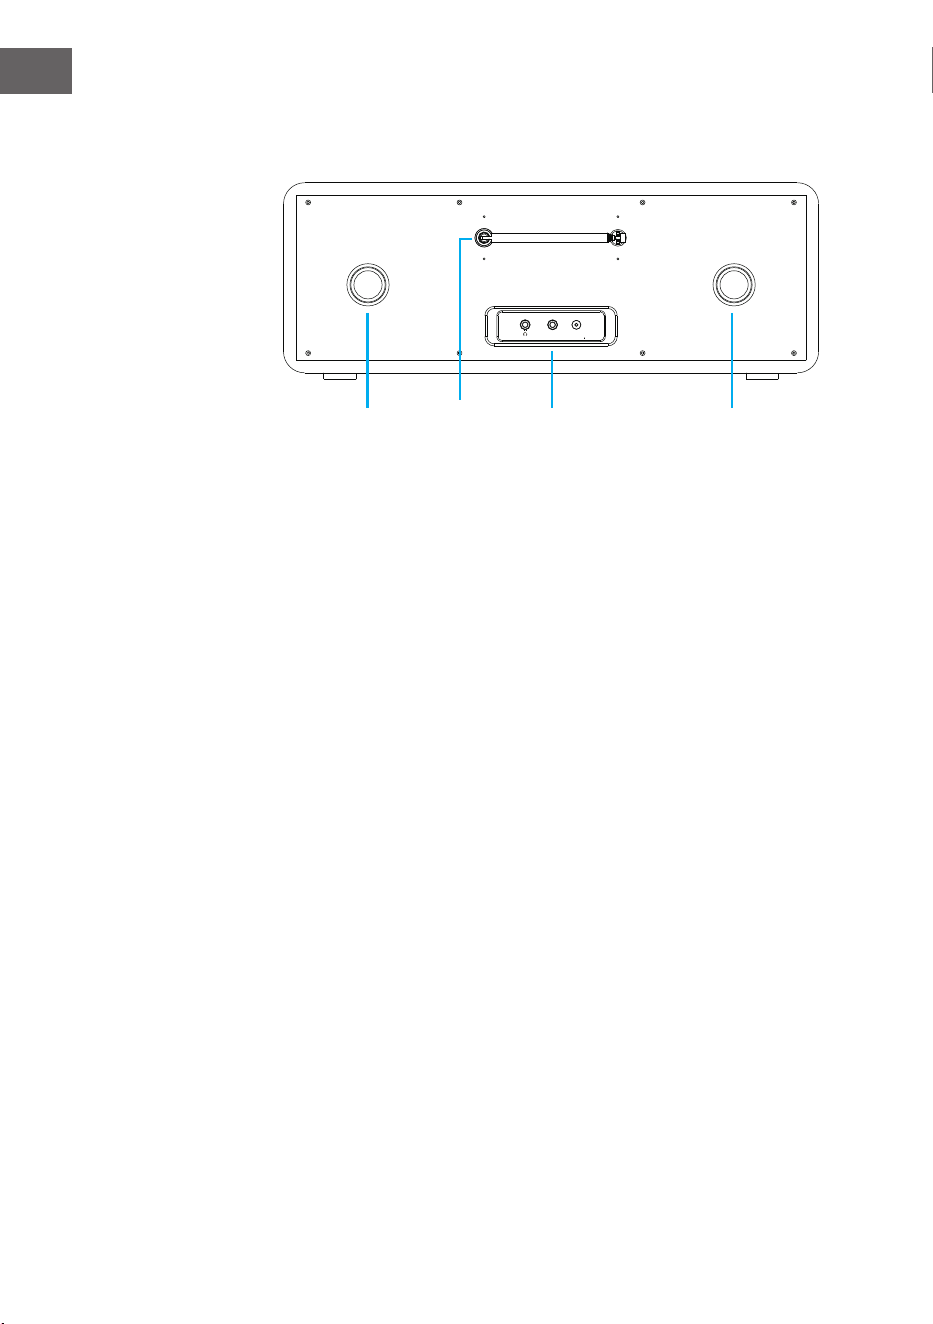
Rückansicht
12 Bassreexröhre
13 Stabantenne
14 Kopfhörereingang/AUX in/ Netzadapteranschluss
15 Bassreexröhre
Dc inAux
12 13 14 15
9
DE
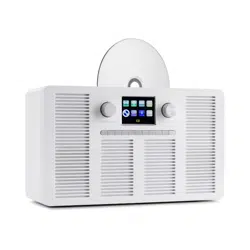
Fernbedienung
EQ
Eject
1 2
5
6
9
12
13
16
19
20
22
10
3
4
7
8
11
14
17
18
21
15

10
DE
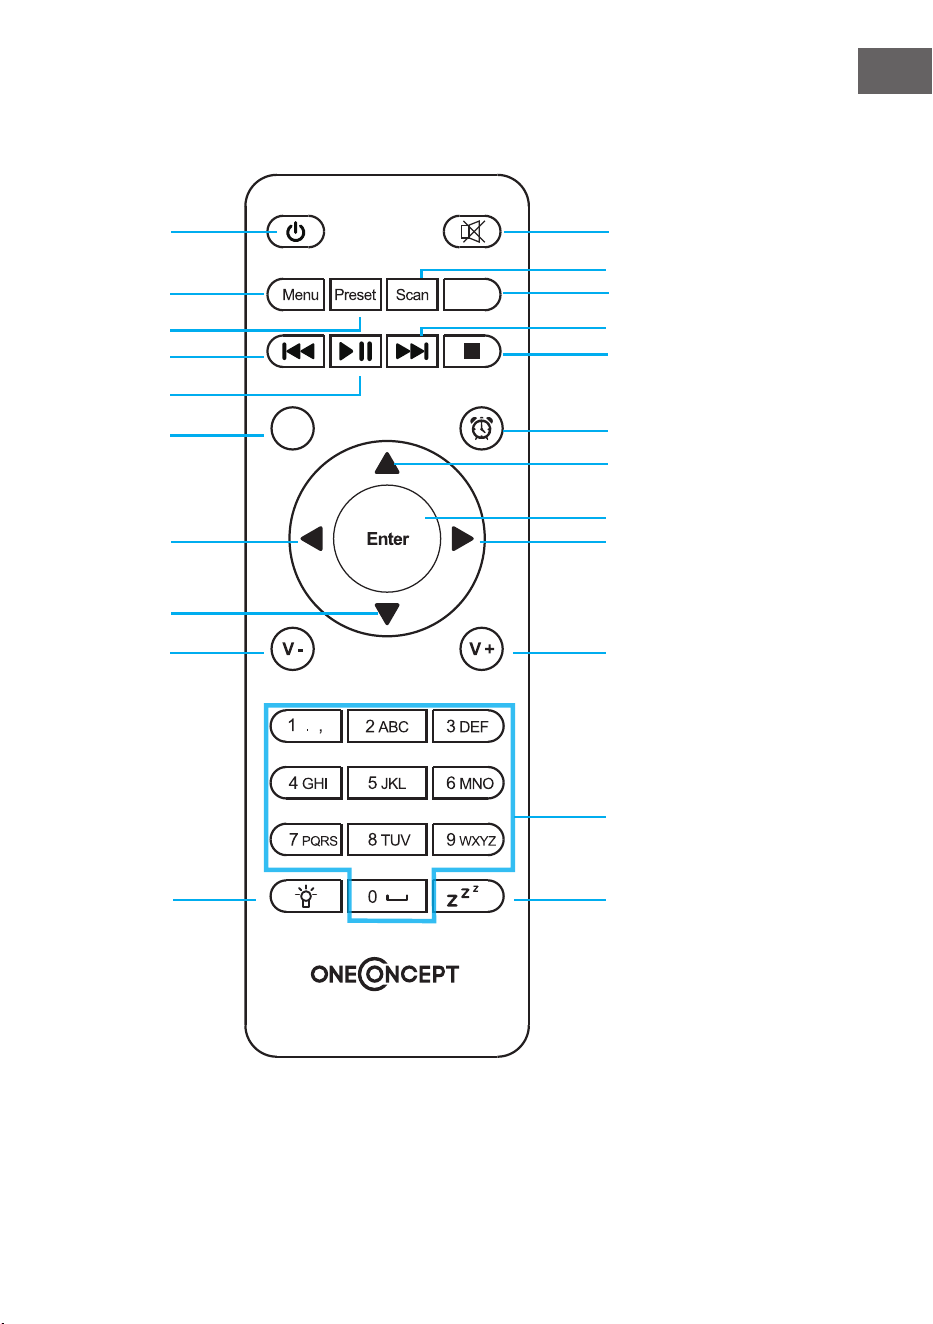
1 Standby
2 Lautsprecher an/ aus
3
MENU
Hauptmenü
4
Preset
gespeicherte Sender, Favoriten ua.
5
Scan
Senderscan DAB/FM
6
Eject
CD auswerfen
7
Mediacenter, ein Titel zurück
8
Mediacenter, Wiedergabe/ Pause
9
Mediacenter, ein Titel vor
10
Wiedergabe beenden
11 EQ Equalizer
12 Wecker
13
nach oben, Zahl/ Buchstabe auswählen
14
nach links, bei Texteingabe: vorheriger
Eingabebereich, löschen
15
Enter
ENTER – Eingabe bestätigen
16
nach rechts, bei Texteingabe: nächster
Eingabebereich, speichern der letzten Eingabe
17
nach unten/ Zahl/ Buchstabe auswählen
18
V-
Lautstärke reduzieren
19
V+
Lautstärke erhöhen
20
0.....9
Favoriten aufrufen/ Speicher; Eingabe von
Buchstaben und Zahlen
21 Dimmer
22 Schlummertaste
11
DE
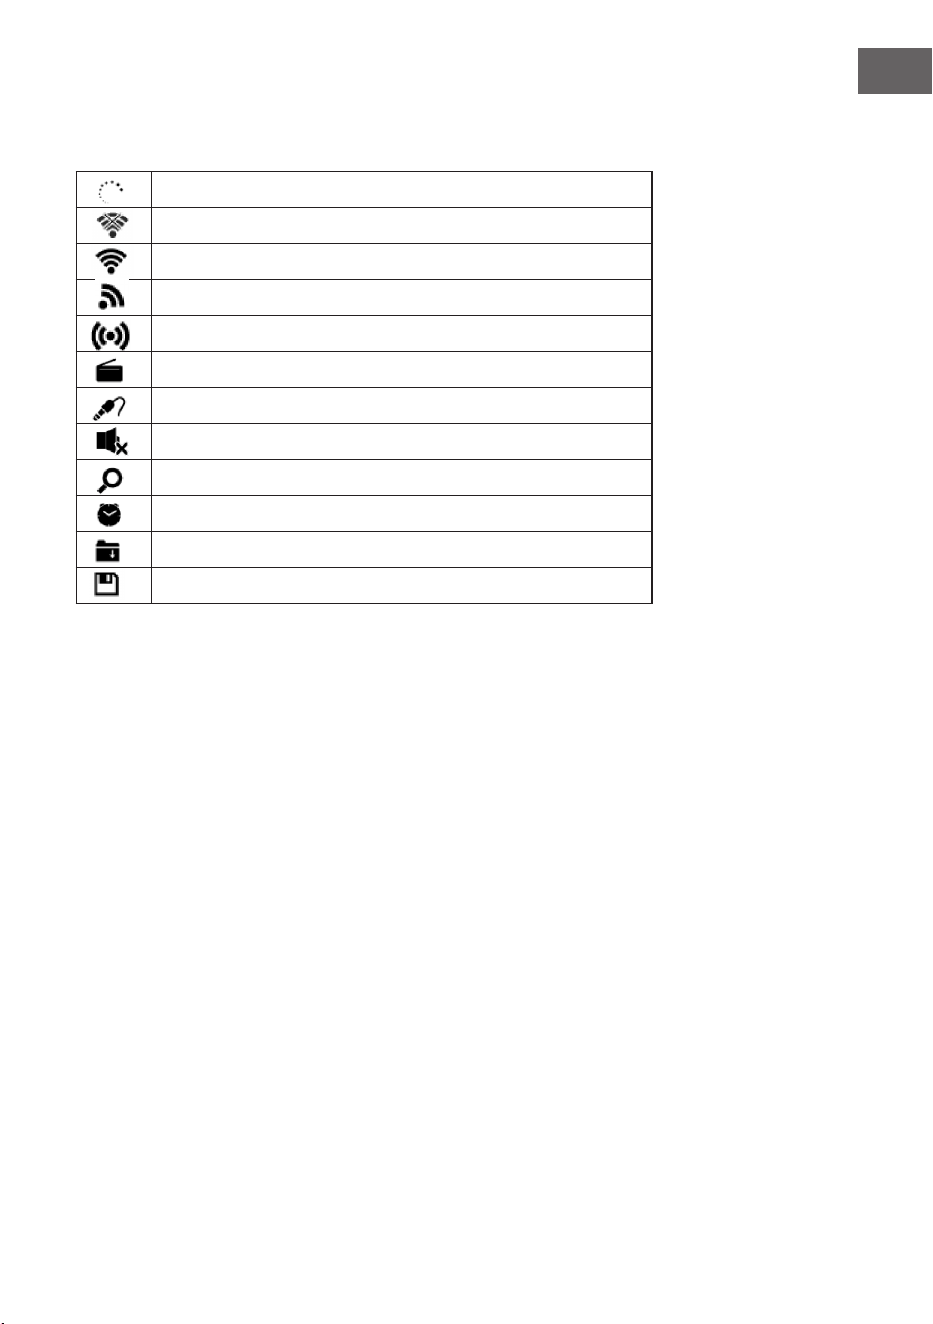
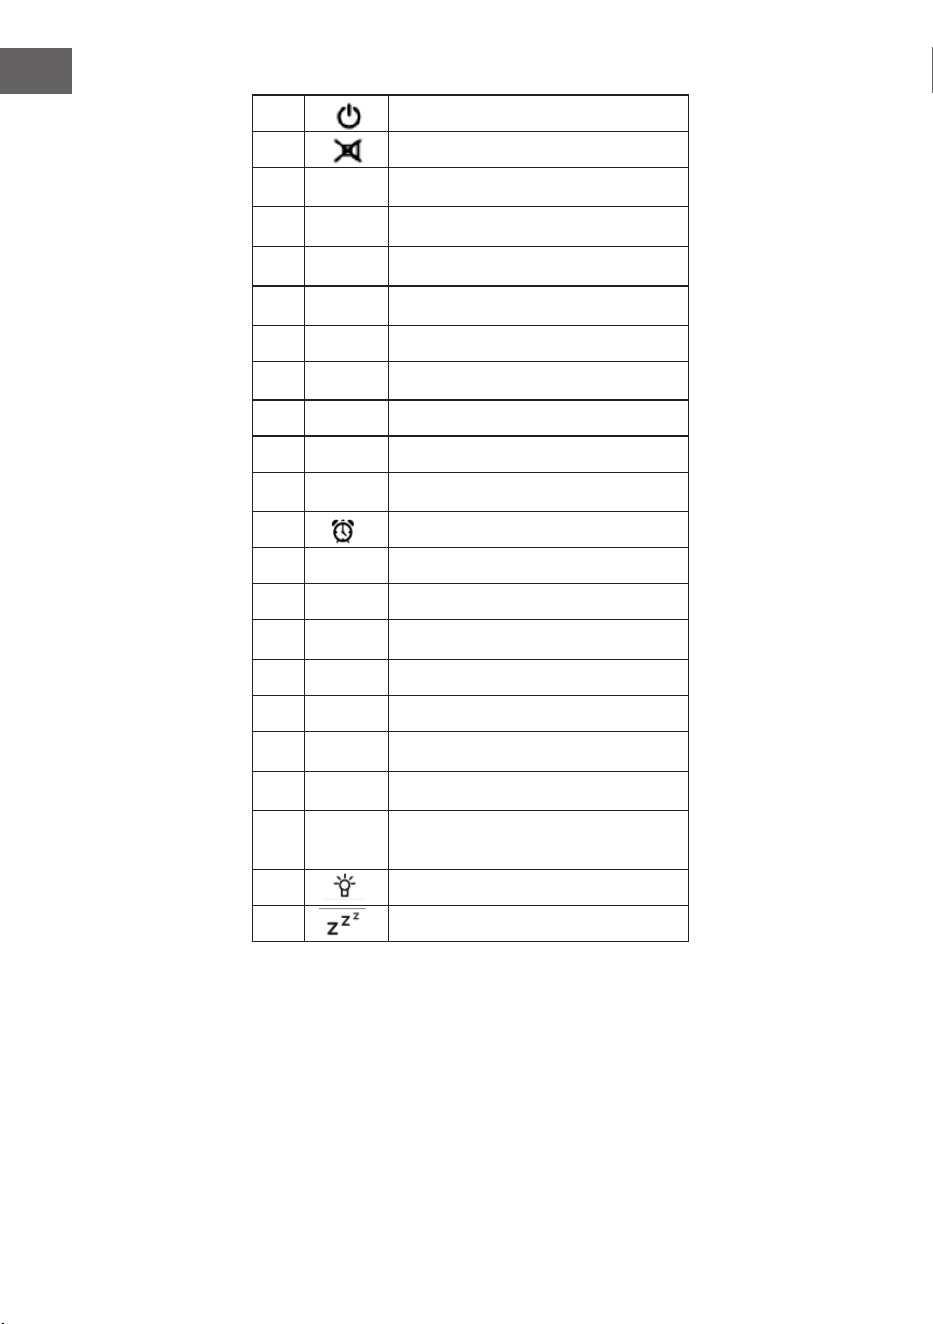
Symbole auf dem Display
Die Verbindung wird hergestellt, das Gerät funktioniert
Keine WLAN-Verbindung
WLAN-Verbindung wurde hergestellt
VHF Radioempfang: Mono
VHF Radioempfang: Stereo
VHF Radiofunktion
AUX
Lautsprecher aus
Suche
Wecker ein
Ein Internetradiosender wurde gespeichert
Ein FM-Radiosender wurde gespeichert
12
DE
INBETRIEBNAHME
Für die Nutzung der Stereoanlage Streamo, werden die folgenden
Anforderungen benötigt:
• Eine Breitbandverbindung in Kombination mit einem verkabelten/
kabellosen Zugangspunkt, Router oder einem ähnlichen Netzwerkgerät.
• Das Netzwerkgerät muss die drahtlose Verbindung über WLAN
(802.11b/g/n) unterstützen.
• Ein Computer oder Smartphone muss bereit sein und sich im gleichen
Netzwerk benden wie das Gerät.
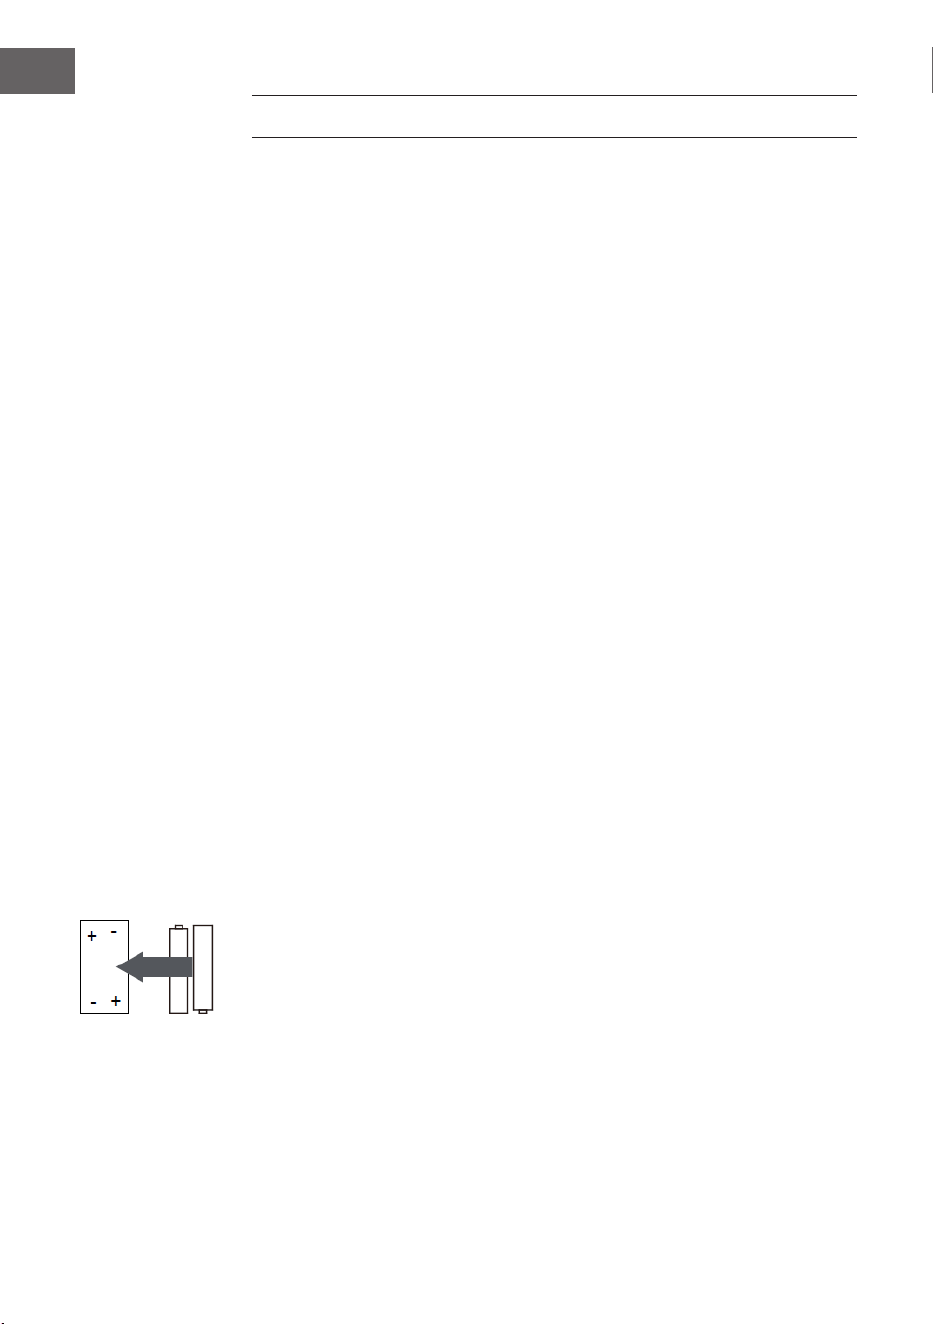
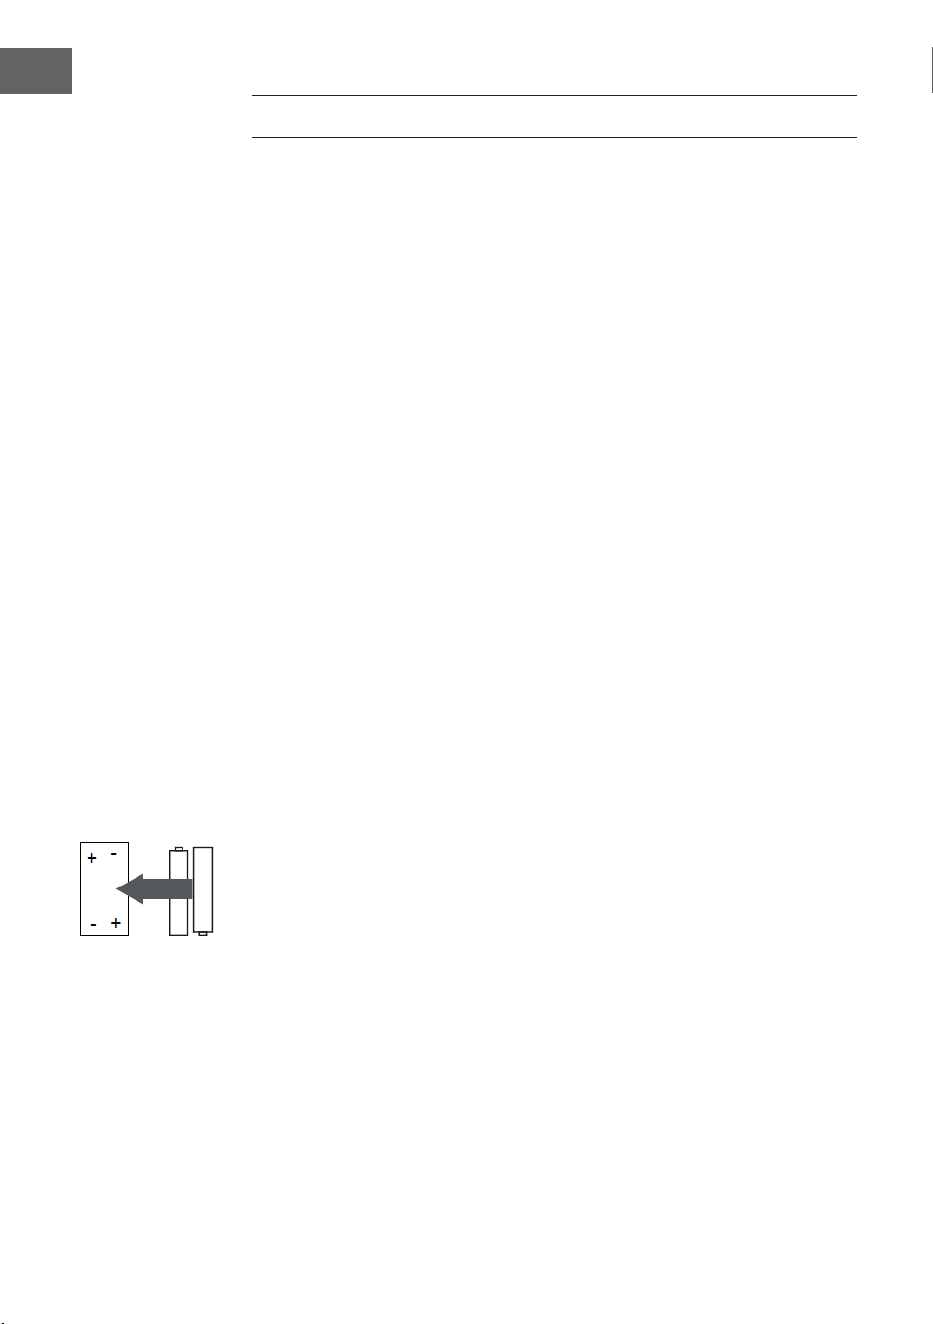
Batterien in die Fernbedienung einsetzen
1. Drücken Sie die Einkerbung an der Batteriefachabdeckung nach innen
und nehmen Sie diese ab.
2. Legen Sie zwei Batterien des Typs AAA in das Batteriefach ein (siehe
Abbildung). Beachten Sie die Polarität innerhalb des Batteriefachs.
3. Setzen Sie die Batteriefachabdeckung wieder ein.
Sicherheitshinweise für Batterien
Befolgen Sie die folgenden Sicherheitshinweise, wenn Sie Batterien
verwenden:
• Verwenden Sie ausschließlich Batterien der richtigen Sorte und Größe.
• Achten Sie darauf, dass Sie die Batterien richtig in das Batteriefach
einlegen. Beachten Sie die Polaritätsmarkierungen. Eine falsche herum
eingelegte Batterie kann zu Schäden an dem jeweiligen Gerät führen.
• Verwenden Sie niemals unterschiedliche Batteriesorten gleichzeitig und
vermischen Sie niemals alte und neue Batterien.
• Falls die Batterien leer sind oder Sie das Gerät für einen längeren
Zeitraum nicht verwenden, entnehmen Sie die Batterien aus dem
Batteriefach, um ein Auslaufen der Batterien zu verhindern.
• Versuchen Sie keinesfalls, Batterien aufzuladen, welche nicht explizit
dafür geeignet sind, da die Batterien dann überhitzen und platzen
könnten. Befolgen Sie die Anweisungen des Batterieherstellers.
• Setzen Sie Batterien niemals einer oenen Flamme aus, da diese dann
explodieren oder auslaufen könnten.
• Reinigen Sie die Kontakte der Batterien und die Kontakte im
Batteriefach, bevor Sie die Batterien in das Batteriefach einlegen.
13
DE
Netzwerkverbindung herstellen
Für die drahtlose LAN (WLAN) Netzwerkverbindung:
Überprüfen Sie, ob die WLAN KINK/ACT Leuchte des verkabelten/
kabellosen Zugangspunktes oder Routers erleuchtet ist. Lesen Sie bei
Fragen die jeweilige Bedienungsanleitung durch.
WLAN ermöglicht den kabellosen Datentransfer zwischen den Geräten über
kurze Distanzen unter 20 Metern. Wände oder Decken können die Stärke
der WLAN-Verbindung reduzieren. Versuchen Sie deshalb, den Streamo
und/ oder den Zugangspunkt innerhalb der oben genannten Distanz
zu halten und vermeiden Sie es, zwischen den Geräten Hindernisse zu
platzieren.
• Schließen Sie den Netzadapter an die Rückseite des Streamo an und
stecken Sie den Netzstecker in die Steckdose.
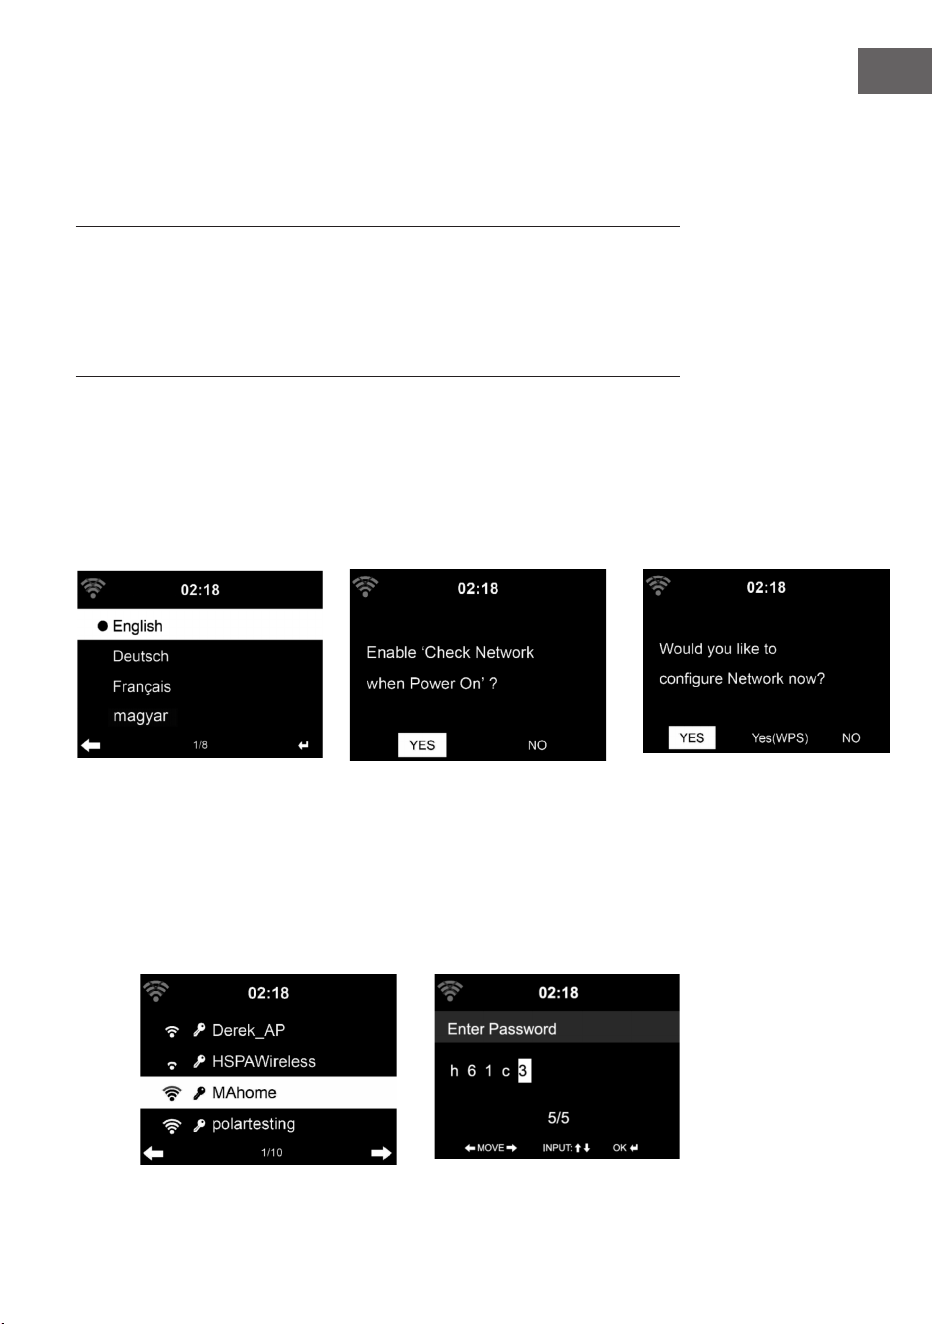
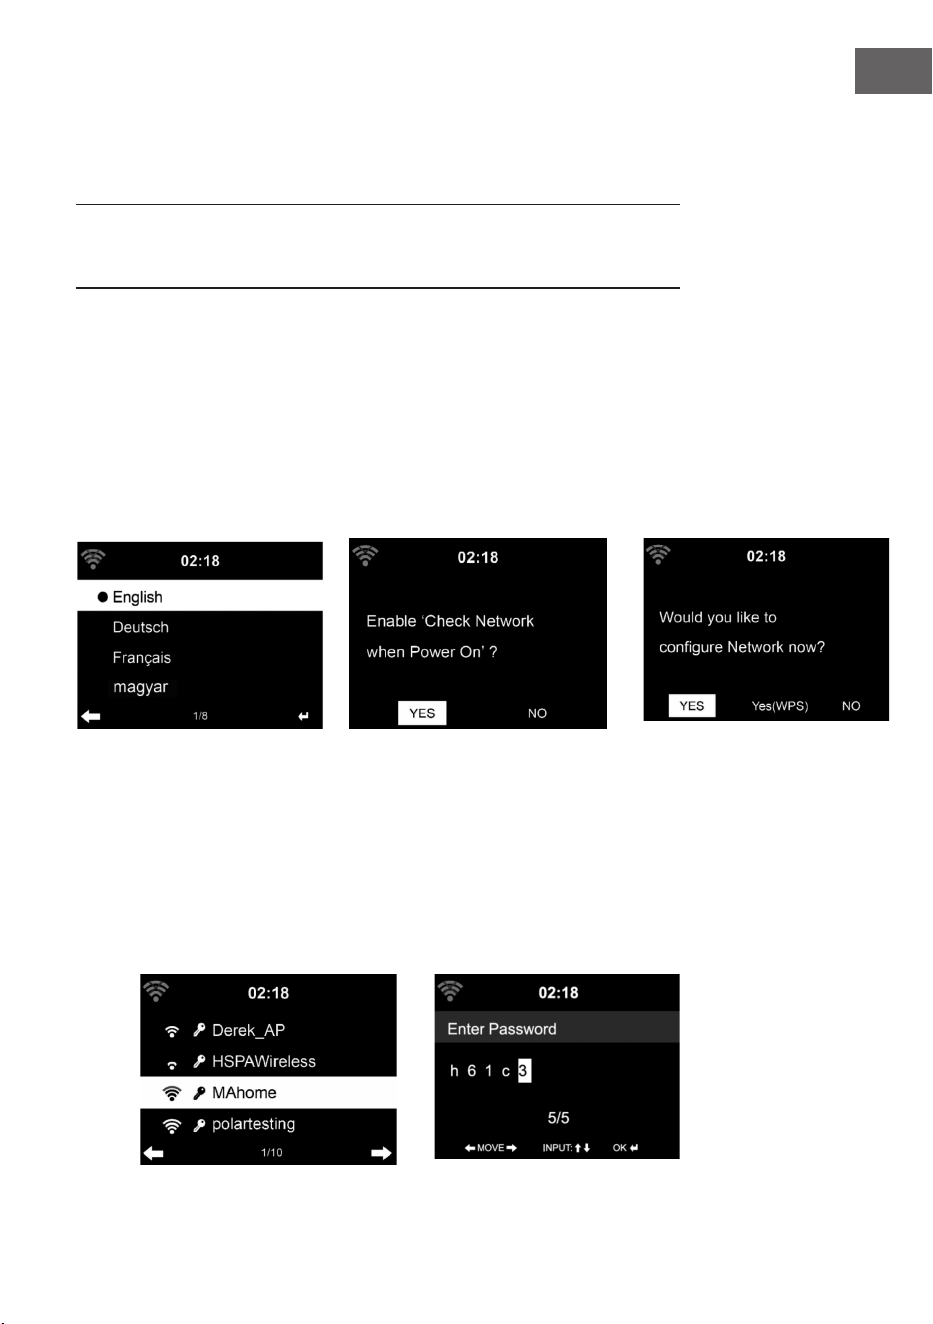
• Wenn Sie das Gerät zum ersten Mal verwenden, müssen zunächst die
Sprache und die Netzwerkeistellungen vorgenommen werden.
2
1 2
3
• Wählen Sie zum Herstellen der Netzwerkverbindung „YES“ (ja) aus.
• Wählen Sie „YES“ (WPS (nur bei WPS-Routern)) aus. Drücken Sie
anschließend die WPS-Taste Ihres Routers.
• Wenn Sie „YES“ auswählen, sucht das Gerät automatisch nach
verfügbaren WLAN-Netzwerken und listet diese auf dem Bildschirm auf.
1

14
DE
• Die Anzahl der Balken des WLAN-Symbols vor dem Netzwerknamen
(SSID) zeigt die relative Verbindungsstärke des Netzwerks an.
• Das Schlüsselsymbol bedeutet, dass das jeweilige Netzwerk
passwortgeschützt ist.
• Falls das Gerät kein drahtloses Netzwerk ndet wird „No wireless
networks found“ auf dem Bildschirm angezeigt. Ändern Sie den
Standort des Geräts oder überprüfen Sie den WLAN-Router.
• Sie können die SSID des Zugangspunktes in den Einstellungen des
Zugangspunktes (Router) einsehen.
• Wählen Sie das gewünschte Netzwerk aus und bestätigen Sie mit OK.
• Falls das ausgewählte Netzwerk passwortgeschützt ist, werden Sie zur
Eingabe des Passworts aufgefordert.
• Geben Sie das Passwort mithilfe der Zahlen und Buchstaben auf der
Fernbedienung ein.
• Achten Sie bei der Eingabe des Passwort auf Groß- und Kleinschreibung.
• Sie können zur Eingabe des Passworts ebenfalls am Drehregler des
Geräts drehen. Wenn Sie eine falsche Eingabe gemacht haben, drücken
Sie zum Korrigieren die Taste .
Eingabe über die Fernbedienung
The cursor indicates the current entry space.
Press the corresponding number button repeatedly.
0 0 (Eingabe löschen)
1 1(Leertaste) @ ! ” # $ % & ( ) * ’ + - { \ | }< >?........
2 2 A B C a b c
3 3 D E F d e f
4 4 G H I g h i
5 5 J K L j k l
6 6 M N O m n o
7 7 P Q R S p q r s
8 8 T U V t u v
9 9 W X Y Z w x y z
‘ ’ Zum vorangehenden Zeichen gehen. Das Zeichen kann überschrieben
werden.
‘ ’ Zum nachfolgenden Zeichen gehen. Das letzte Zeichen wird
überschrieben.
‘ ’ Wahl zwischen Ziern und Buchstaben.
Enter Eingabe bestätigen
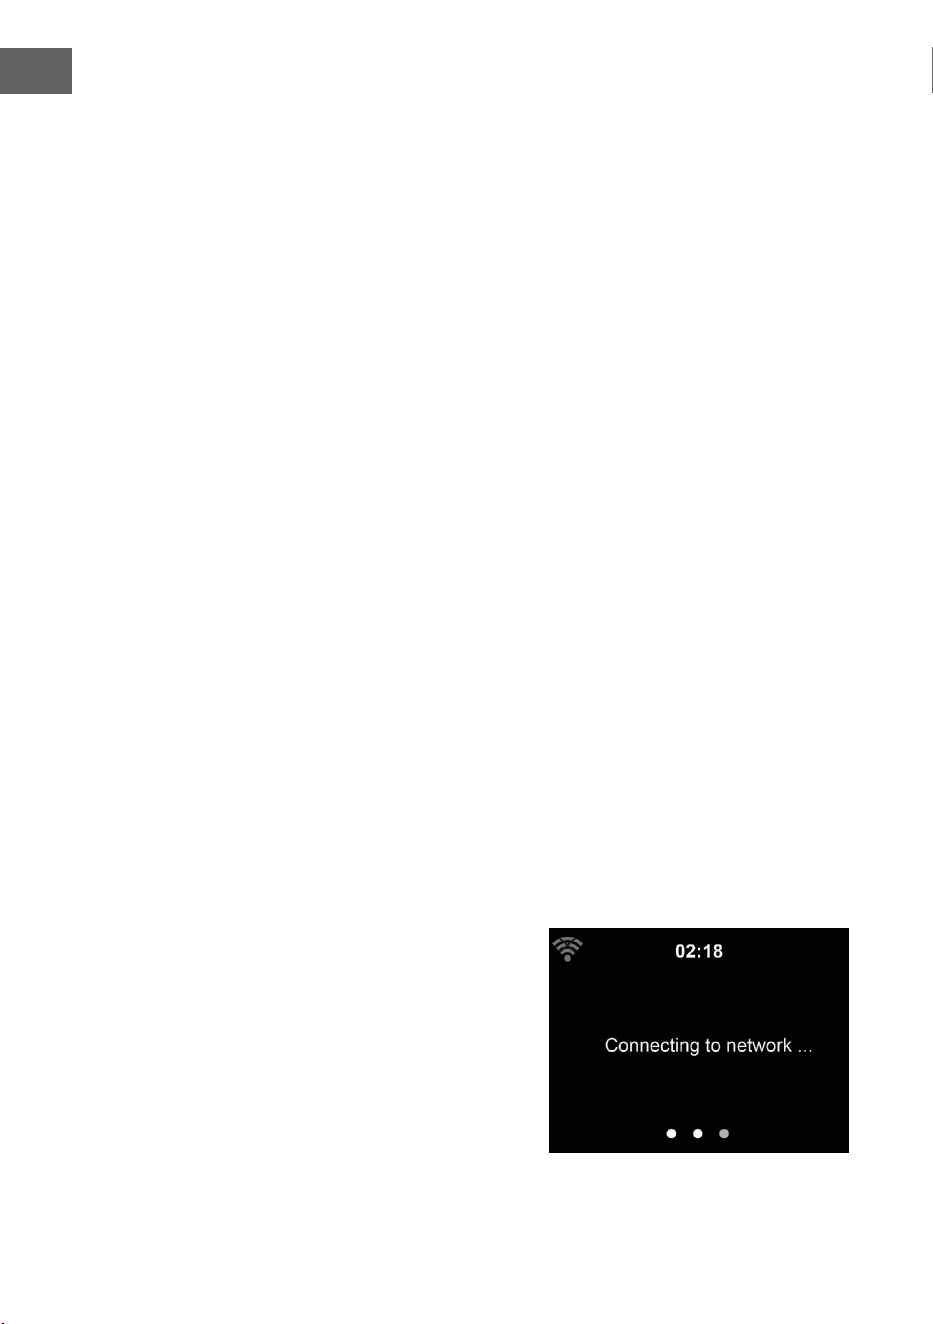
Die Herstellung der Netzwerkverbindung dauert mögicherweise einige
Sekunden.
15
DE
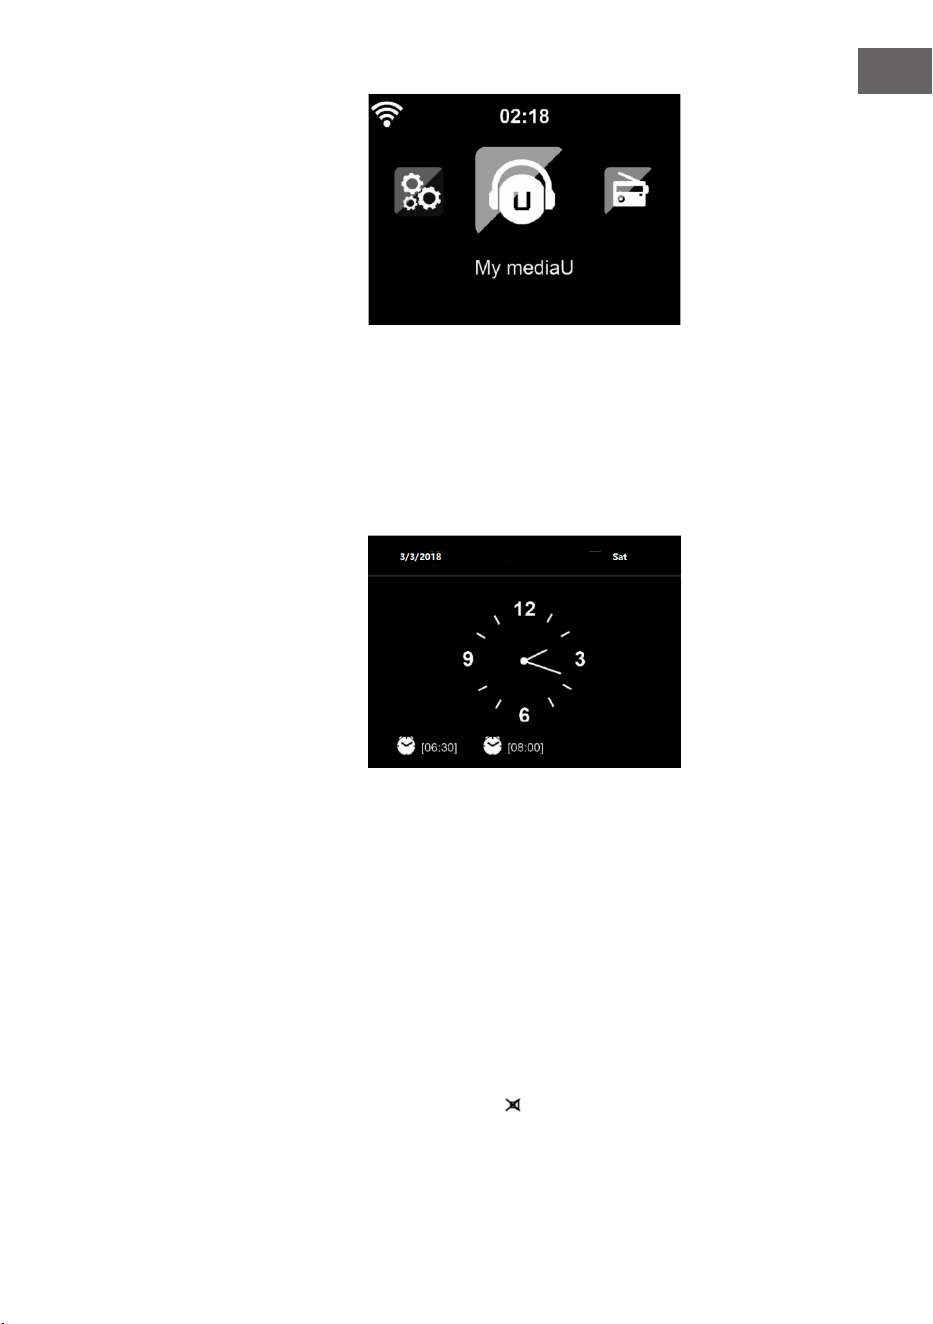
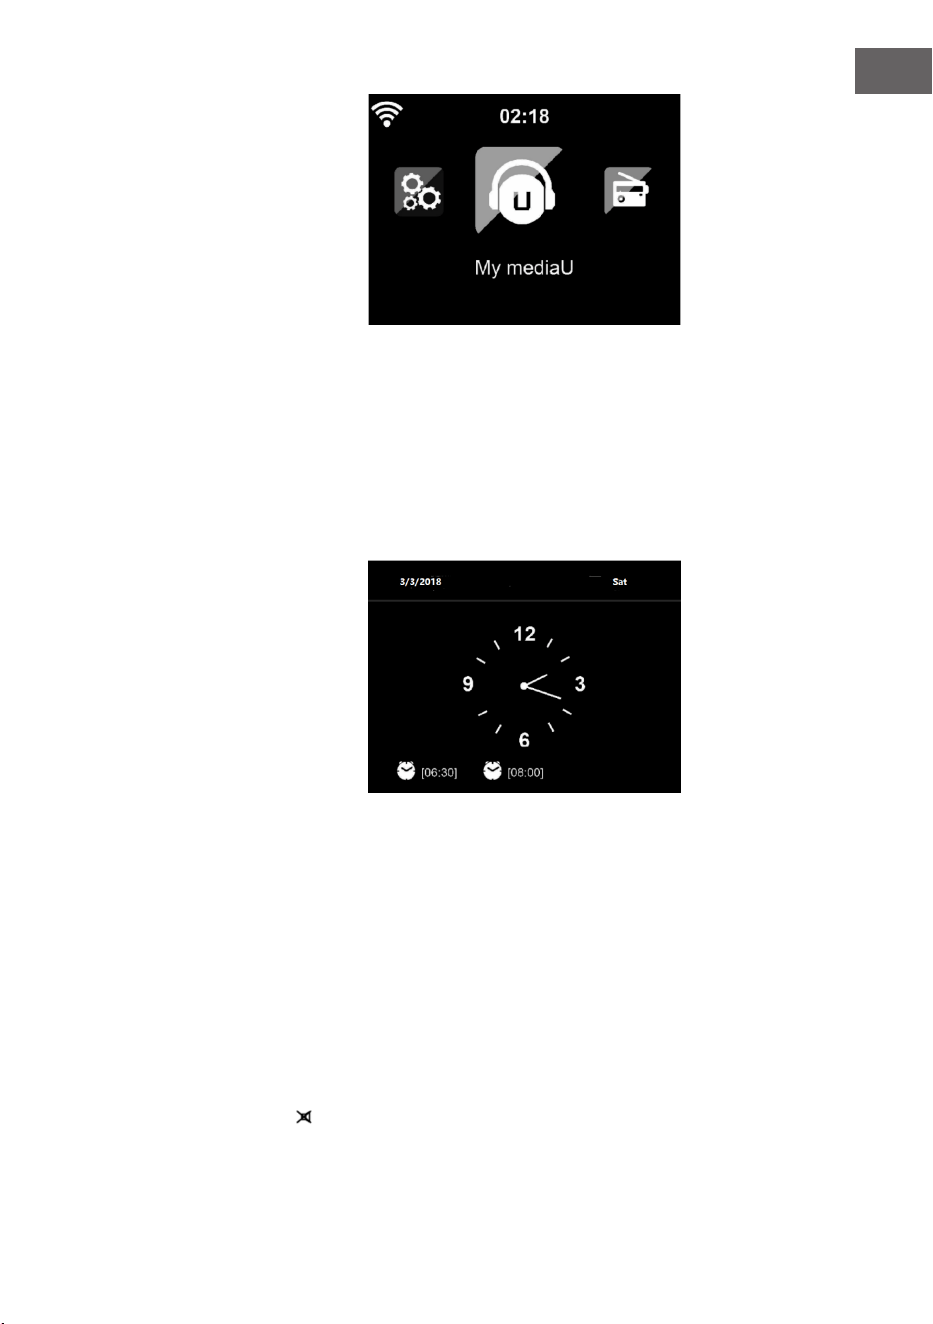
Sobald die Verbindung
hergestellt wurde, erscheint das
Hauptmenü mit den wichtigsten
Hauptmenüunterpunkten:
• Internetradio: Zugang zu
Radiosendern weltweit
• Media Center: Zugang zu Ihren
UPnP Geräten via Software mit
Streamingfähigkeit
• Informationscenter: Zugang zu
Informationen über das Wetter, Finanzen und Systeminformationen
• Einstellungen: Mehrere Systemeinstellungen
• Lokale Radiosender: Zugang zu Radiosendern einer bestimmten Region
(z.B. nur deutsche Sender)
• My mediaU: Zugang zu einer online Medienbibliothek. Dieses Symbol
erscheint nur dann, wenn diese Funktion bereits unter „Einstellungen“
aktiviert wurde.
Drücken Sie die Standby-Taste,
um in den Standby-modus
zu gelangen. Die Uhrzeit, das
Datum und alle aktiven Alarme
werden auf dem Bildschirm
angezeigt.
Wenn Sie die Netzwerkverbindung erfolgreich hergestellt haben und
Streamo erneut mit dem Netzwerk verwenden, stellt das Gerät die
Netzwerkverbindung automatisch her. Falls Sie das Netzwerk ändern
möchten, stellen Sie die entsprechende Verbindung unter „Einstellungen“
her.
Drehen Sie zur Eingabe der Zahlen/ Buchstaben am runden
Lautstärkeregler. Drücken Sie, sobald Sie den Buchstaben, welchen Sie
eingeben möchten, erreicht haben, die Taste und fahren Sie mit der
Eingabe der nächsten Buchstaben fort. Drücken Sie, sobald Sie Ihre Eingabe
beendet haben, die Taste zum Bestätigen der Eingabe die Taste ENTER.
Sie können die Taste drücken, um zur vorherigen Eingabe zu gelangen.
Drehen Sie am Lautstärkeregler des Geräts oder drücken Sie die Tasten V-/
V+ der Fernbedienung, um die Lautstärke anzupassen. Wenn Sie das Gerät
stummschalten möchten, können Sie direkt die Taste drücken.

16
DE
Informationen zum Streamen von Musik
• Der voreingestellte Gerätename ist Streamo. Sie können das
Gerät beliebig umbenennen (siehe Abschnitt „Inbetriebnahme und
Bedienung“.
• Die nachfolgenden Informationen sind eine Einführung in die
Einrichtung von Musikstreaming vom Computer und anderen Medien
aus.
• Beachten Sie, dass von Ihnen verwendete Apps zum Musik streamen
eigene Anleitungen besitzen.
• Vergewissern Sie sich, dass die Mediendateien, welche mit Streamo
gestreamt werden sollen, im MP3-, WMA-, WAV- oder AAC-Format sein
müssen.
• Details über die Medienwiedergabe via Streaming können Sie dem
Abschnitt „Inbetriebnahme und Bedienung“ entnehmen.
UPnP
Damit Musik vom Computer gestreamt werde kann, müssen auf dem
Computer die nachfolgenden Schritte durchgeführt werden:
• Verbinden Sie den Computer mit dem Netzwerk.
• Vergewissern Sie sich, dass Streamo eingeschaltet und mit demselben
Netzwerk wie der Computer verbunden ist.
• Önen Sie die UPnP-Plattform Windows Media Player (11 oder höher).
Alternativ können andere Plattformen oder Server, wie beispielsweise
Windows Media Connection, verwendet werden.
Sie können Musik ebenfalls von anderen Musikservern, wie beispielsweise
Ihrem Smartphone, streamen (Android):
• Verbinden Sie das Smartphone mit dem Netzwerk.
• Suchen Sie in Google Play nach Apps zum Teilen von Musik und
installieren Sie diese auf Ihrem Smartphone.
• Fügen Sie die auf Ihrem Smartphone bendlichen Mediendateien,
welche geteilt werden sollen, hinzu.
• Wählen Sie nun die Musik, welche Sie über Streamo abspielen möchten,
in der App aus und passen Sie die Lautstärke über Streamo an.

17
DE
DLNA
Abgesehen von UPnP, unterstützt Streamo die DLNA-Funktion. Das
bedeutet, dass Sie Musikdateien vom PC oder Android-Smartphones mit
Streamo teilen und die Wiedergabe über Ihren PC, Android-Smartphone
oder iPhone/ iPad kontrollieren (es ist nicht notwendig jede Wiedergabe
über Streamo anzupassen).
Die Systemanforderungen für DLNA auf dem PC sind mindestens
Windows7 und Windows Media Player 12. Die Einstellungen werden
folgendermaßen vorgenommen:
• Teilen Sie die Medien auf Ihrem PC zunächst mit Streamo
• Sie können in Google Play oder im Apple Store nach beliebigen
kostenlosen oder kostenpichtigen DLNA-Apps suchen, wenn Sie ein
Smartphone, Tablet, iPhone oder iPad verwenden. Die Verwendung von
Bubble UPnP wird empfohlen.
• Es besteht die Möglichkeit, dass einige Apps das Streamen vom iPhone
und iPod nicht unterstützen. iPhone und iPod können aber dennoch
zur Steuerung der Musikwiedergabe von anderen Servern verwendet
werden:
Gehen Sie zur Wiedergabe von Musik aus der App folgendermaßen vor:
• Wählen Sie als Wiedergabemedium Streamo aus. Einige Apps
ermöglichen die Musikwiedergabe über mehrere Medien gleichzeitig.
• Wählen Sie den Musikserver aus und wählen Sie die Musik aus. Bei
einigen Apps besteht die Möglichkeit, eine Wiedergabeliste zu erstellen.

18
DE
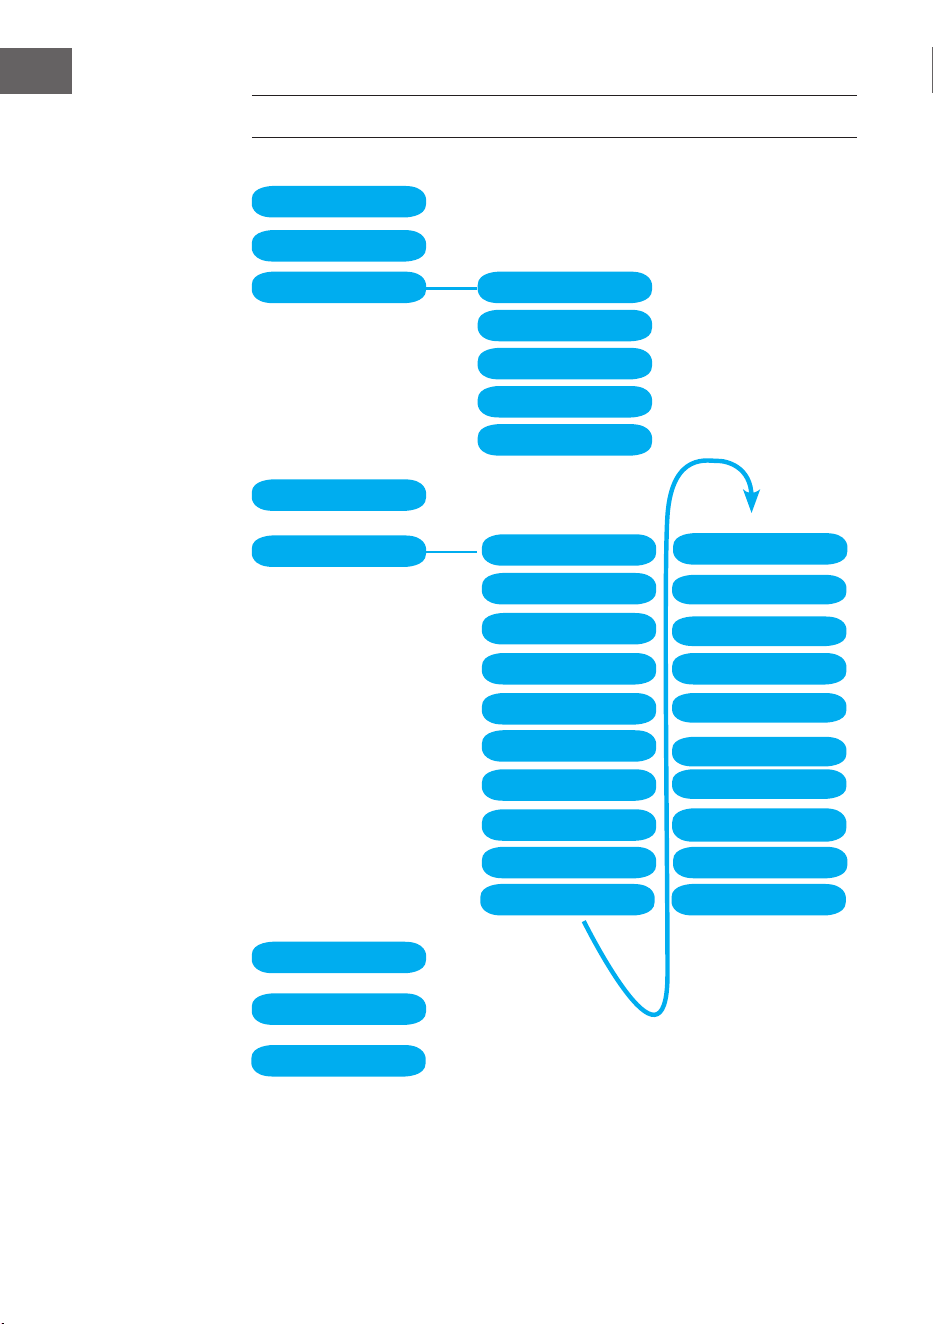
ÜBERSICHT MENÜ
Standby
My mediaU
Internet Radio
Local Radio
Conguration
BT
CD Playback
AUX IN
My Favorite
Local Radio
History
Service
Radio Station Music
Power management Reset to default
Manage my mediaU
Time Display
Dimmer
Display
Alarm
Sleep Timer
Timer
Scheduled Playing
Language
Weather
Local Radio Setup
Local Radio Setup
Internet Radio
Device
Playback Setup
Resume when power on
Date & Time
Software update

19
DE
Information Center
DAB-Radio
FM
Media Center UPnP
My Playlist
Clear My Playlist
Übersicht Menü 2
20
DE
HAUPTMENÜ
Im Hauptmenü können die folgenden Modi ausgewählt werden: My media
U, DAB-Radio, FM-Radio, AUX in, USB-Wiedergabe, Spotify, Internetradio,
Lokale Radiosender, Einstellungen, Information Center, Media Center.
Einstellungen
„My mediaU“ verwalten
My mediaU Bibliothek – Radiosender via Internet verwalten.
Um jederzeit Zugri auf Ihre weltweiten Lieblingsradiosender zu haben,
können Sie, wenn Sie über ein mobiles Endgerät mit Streaming-Fähigkeit
verfügen, einen kostenfreien Zugang zur Medienbibliothek unter www.
mediayou.net erstellen und dem Konto so viele Geräte wie sie möchten
hinzufügen. Wählen Sie einen Nutzernamen und ein Passwort Ihrer Wahl
aus.
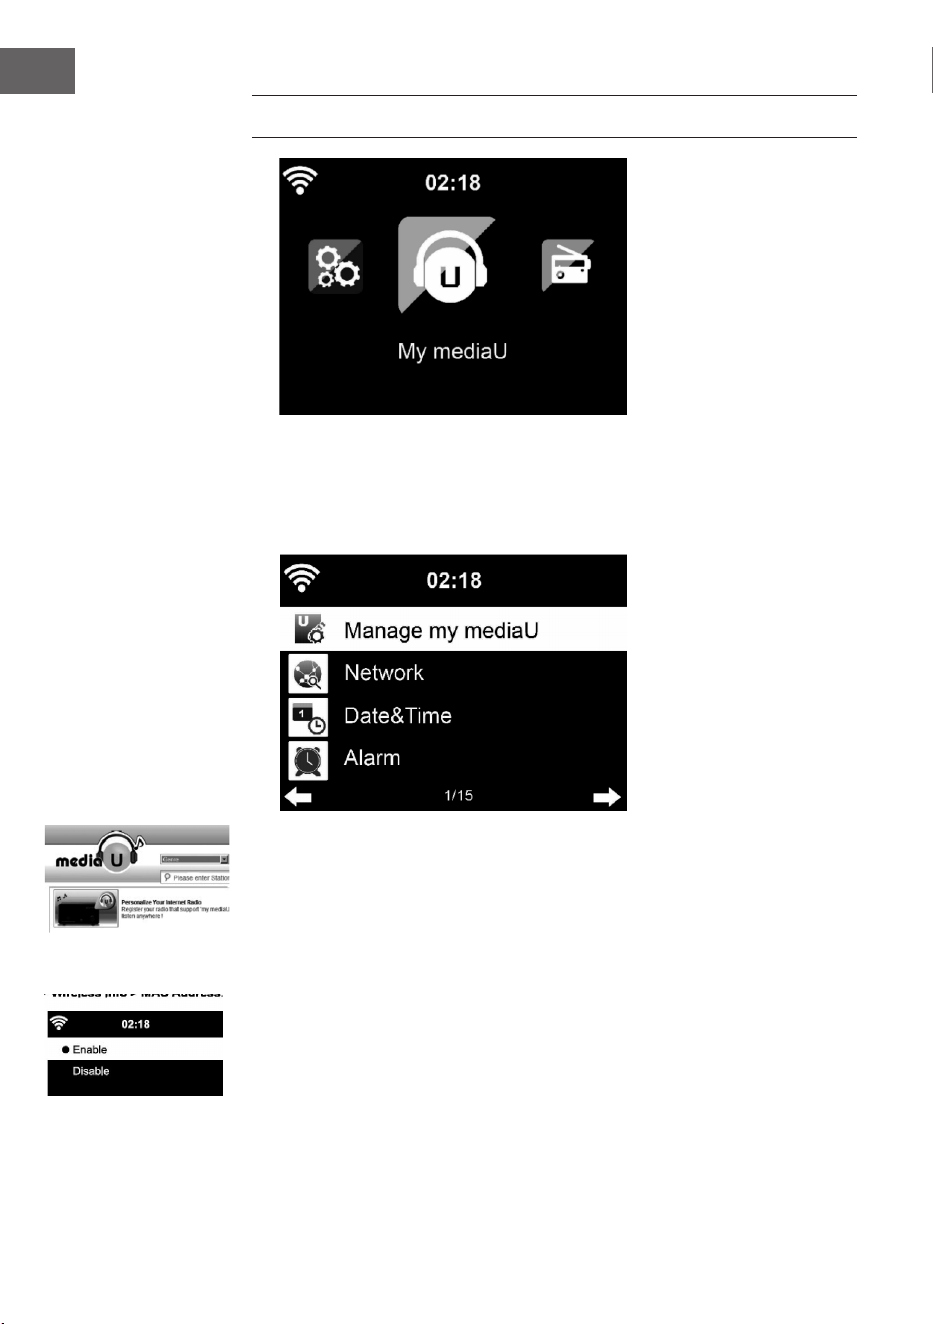
Sie müssen ebenfalls die MAC-Adresse Ihres Geräts (auf Media You
Seriennummer genannt)kennen, um Ihr Gerät unter „Personalize Your
Interner Radio“ registrieren zu können.
Auf diese kann unter Information Center > System information > Wireless
Info > MAC Adress zugegrien werden.
21
DE
Nach der Registrierung muss diese Funktion unter Information Center >
System information > Wireless Info > MAC Address aktiviert werden, damit
das Internetradio auf die Medienbibliothek zugreifen kann.
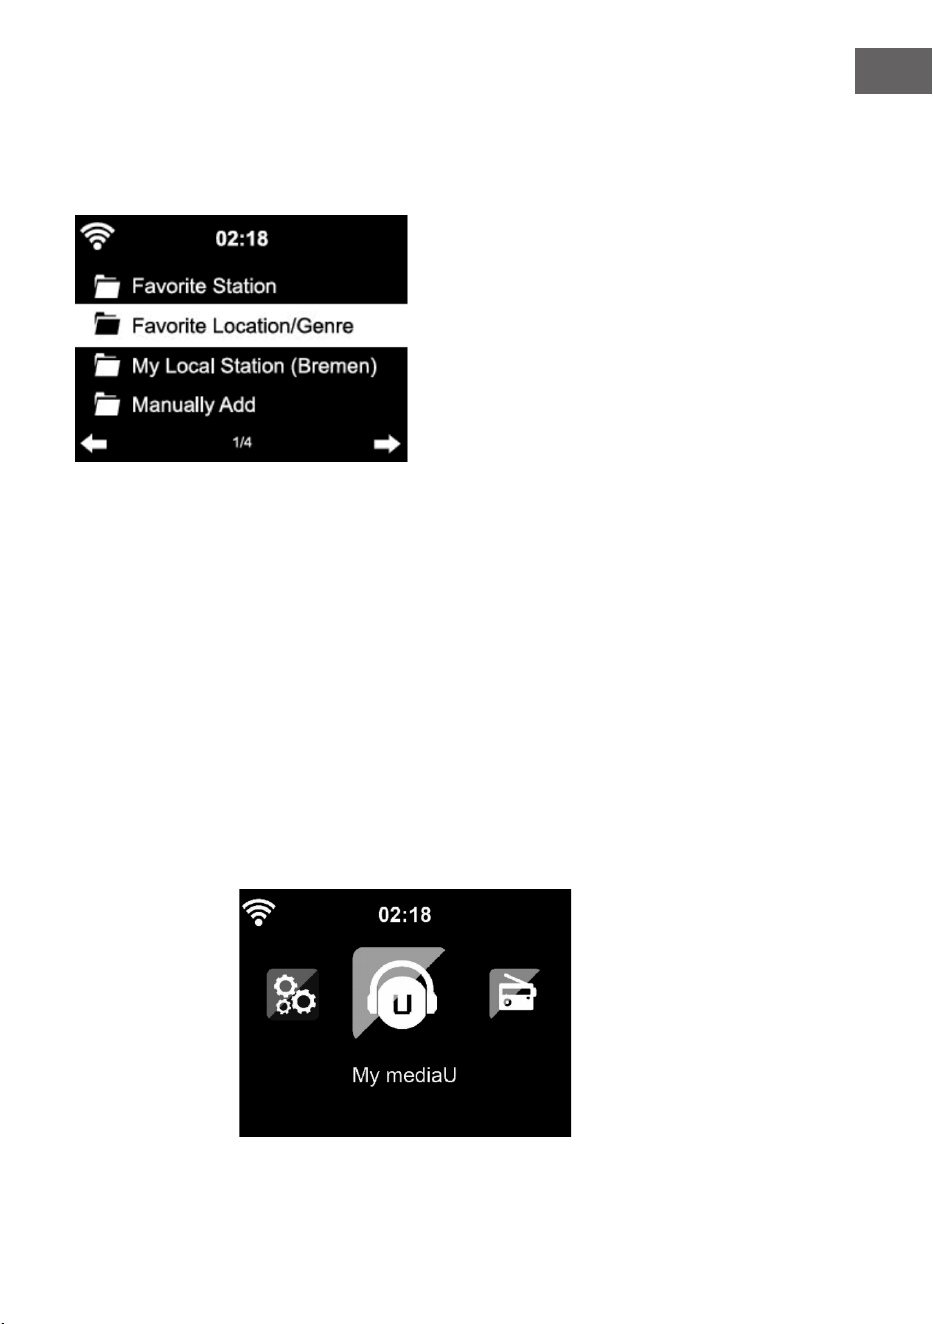
Das Gerät verbindet sich automatisch mit Ihrem Konto und zeigt an, was
dort gespeichert wurde:
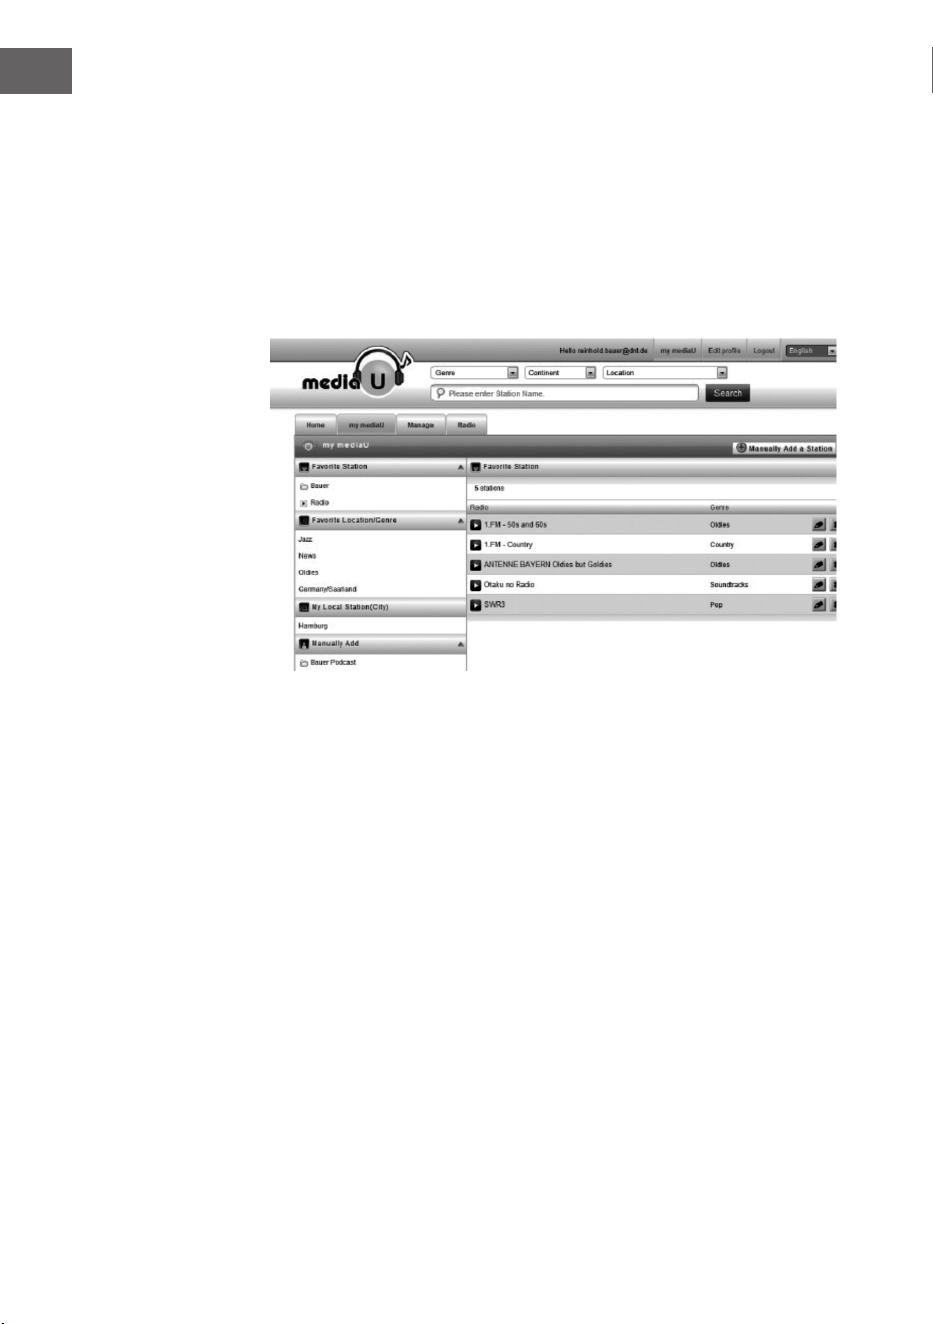
• Lieblingssender
• Lieblingsstandort/ Genre
• Meine lokalen Sender
• Manuell hinzufügen
• Abhängig von Ihren persönlichen My mediaU Einstellungen, kann das
Aussehen des Bildschirms Ihres Streamo variieren.
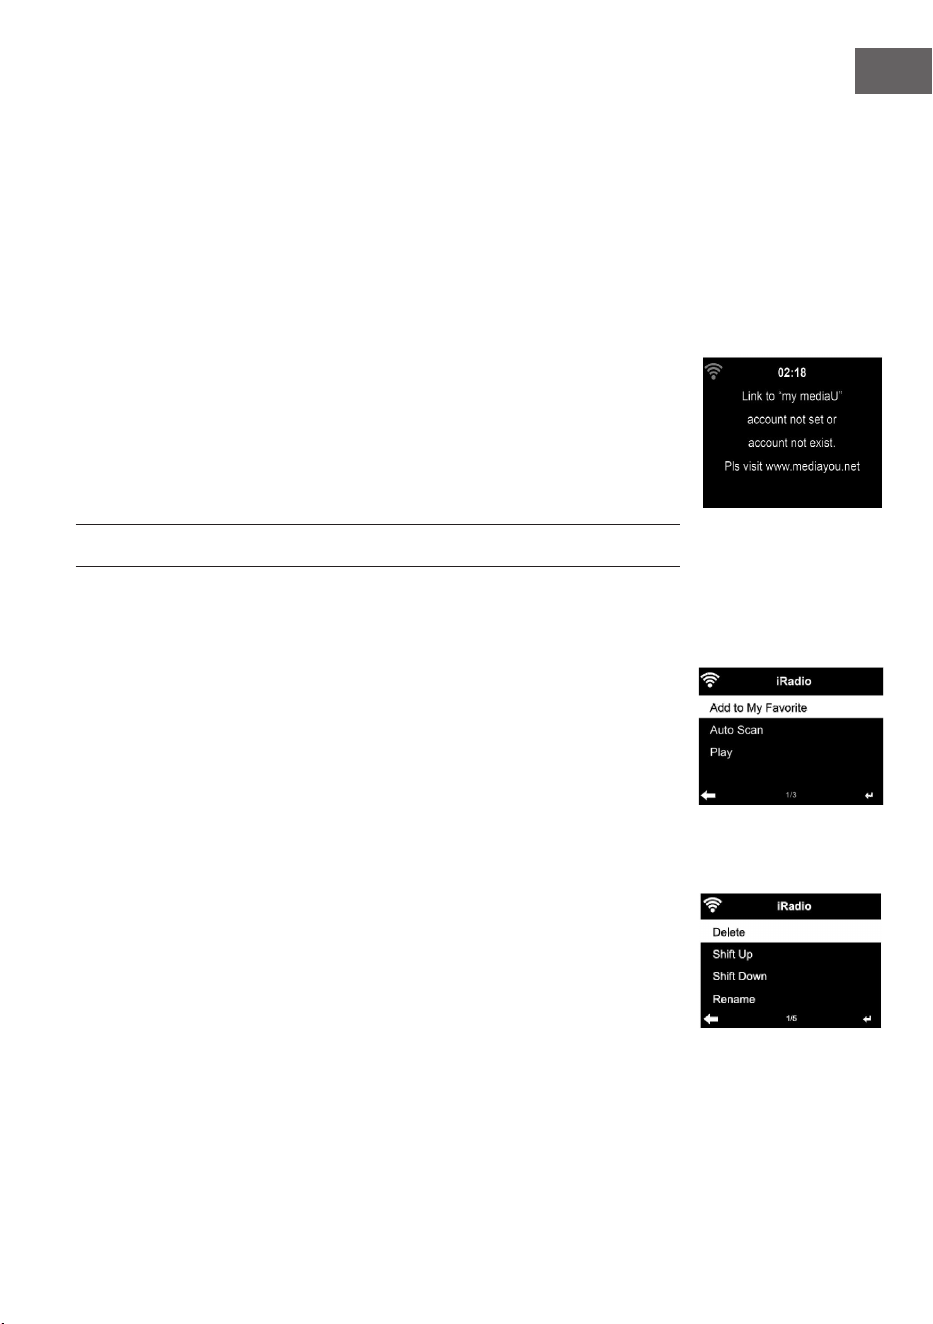
• Wenn Ihr Gerät noch nicht bei MediaYou registriert wurde, erscheint
eine entsprechende Nachricht, wenn Sie My mediaU aktivieren
möchten.
• Falls Sie Ihr Gerät auf mehreren Konten registriert haben, werden diese
nach der Aktivierung alle angezeigt, so dass Sie das gewünschte Konto
auswählen können. Die Eingabe eines Passworts ist nicht notwendig.

22
DE
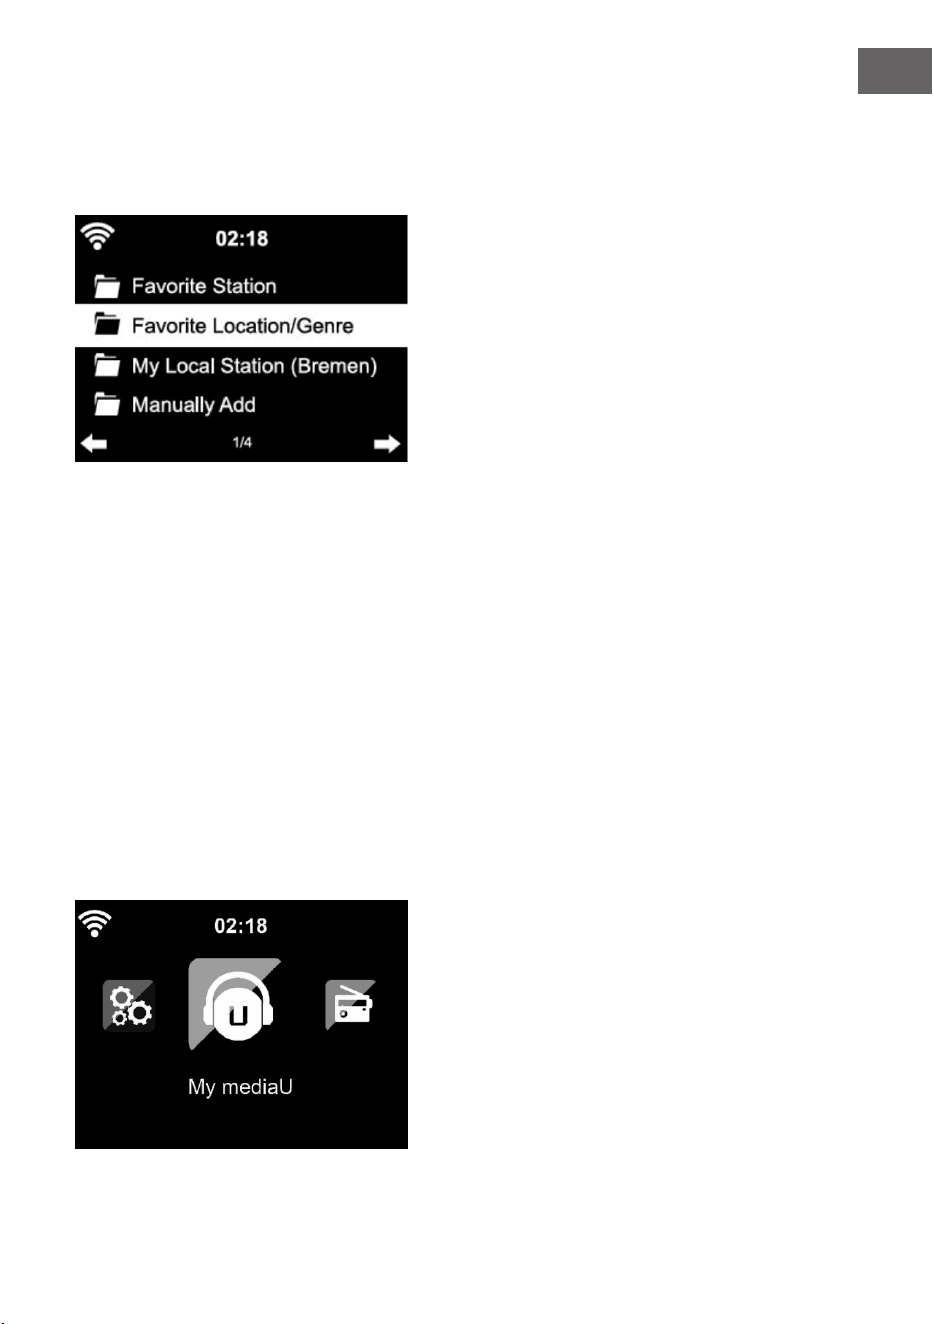
Das Symbol für My mediaU erscheint ebenfalls im Hauptmenü. Folgende
Unterpunkte stehen Ihnen zur Verfügung:
• Favorite Station
• Favorite Location/Genre
• My Local Station
• Manually Add
Diese Unterpunkte werden Ihnen ebenfalls in der Medienbibliothek
angezeigt, wo Sie die Radiosender entsprechend anordnen und verwalten
können.
Wenn Sie beispielsweise einen Podcast manuell hinzufügen möchten,
müssen Sie die jeweilige URL kennen. Gehen Sie hierfür folgendermaßen
vor.
1. Füllen Sie in Ihrem MediaYou-Konto unter „Add Manually“ die
markierten Felder aus.
2. Gehen Sie im Stream unter Conguration > Manage my mediaU und
aktivieren Sie dieses erneut durch Drücken von „enable“.
3. Unter My mediaU > Manually Add können Sie alle manuell
hinzugefügten Ordner und Adressen einsehen und den Podcast
auswählen.
Folgende Podcastformate werden unterstützt:
- asx
- m3u
- pls
- reines Streamen mit HTTP-, RTSP-, MMS-Protokoll
23
DE
Netzwerk
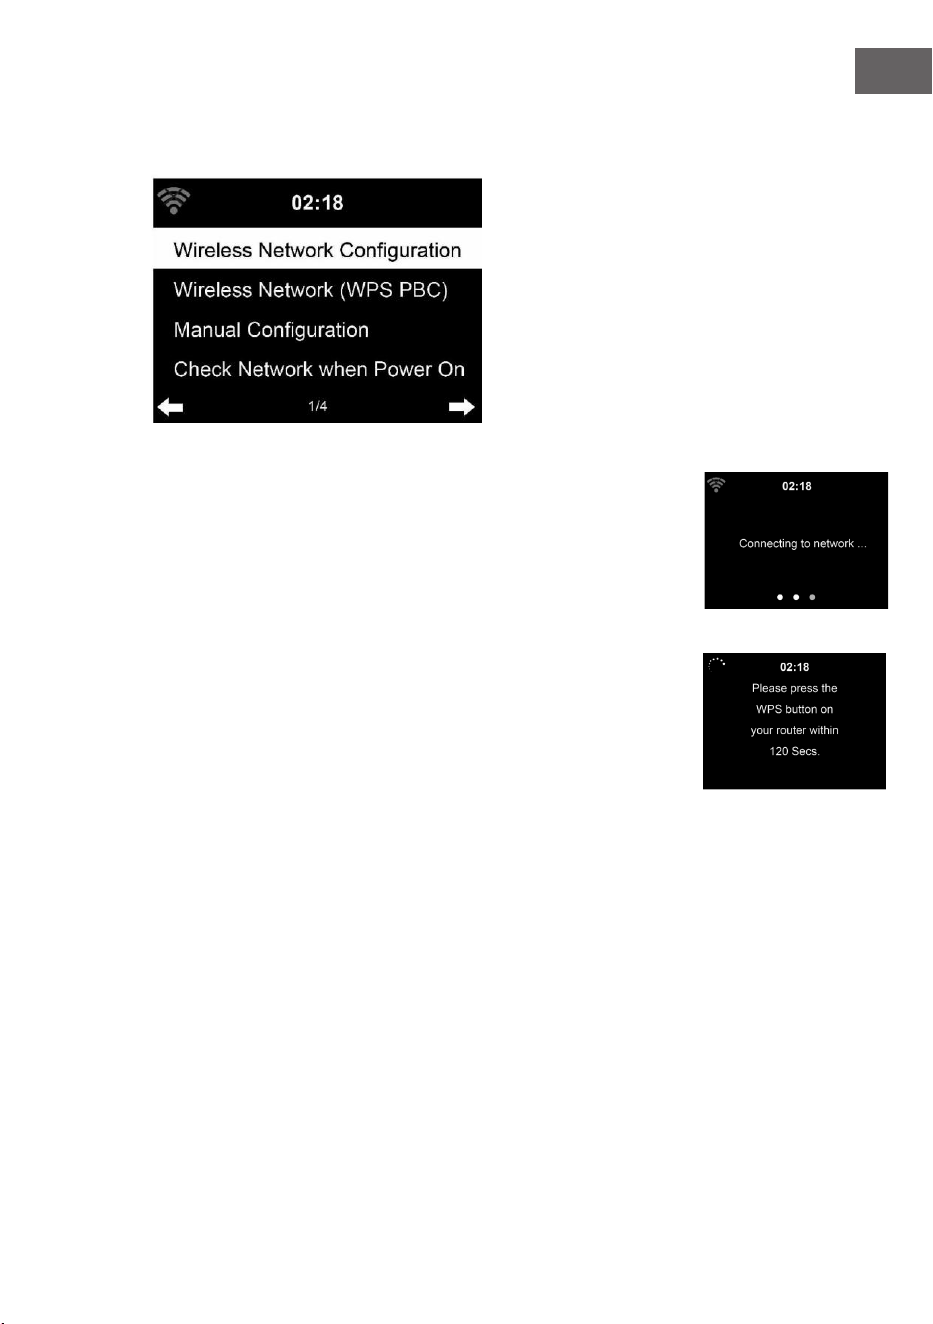
Konguration drahtloses Netzwerk
Aktivieren/ Deaktivieren Sie das WLAN-Netzwerk. Sobald Sie das WLAN
aktivieren, verbindet sich das Gerät automatisch damit.
Wählen Sie den gewünschten Router aus (siehe Abschnitt „Netzwerkverbin-
dung herstellen“)
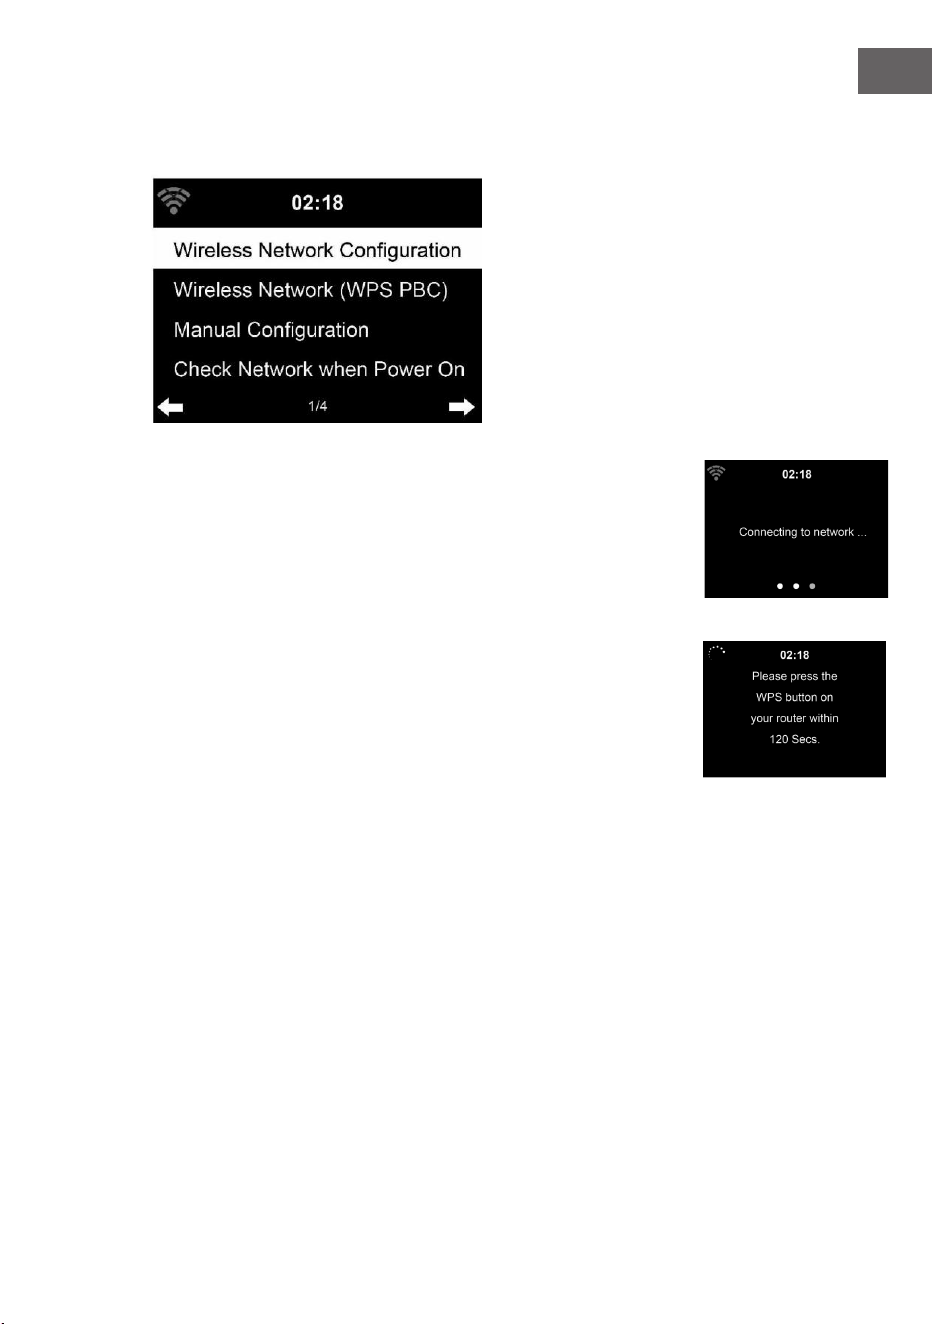
Wireless Network (WPS PBC)
Falls Sie einen Router mit WPS/QSS- Taste verwenden, können Sie die
Netzwerkverbindung einfach via WPS-Funktion einrichten. Önen Sie die
Funktion und drücken Sie innerhalb von 120 Sekunden die Taste WPS/QSS.
Die Verbindung zwischen dem Router und Streamo wird dann automatisch
konguriert.
Manuelle Konguration
Sie können DHCP auswählen (die IP-Adresse wird automatisch zugeordnet)
oder die IP-Adresse für die drahtlose Netzwerkverbindung manuell
eingeben.
Wenn Sie die manuelle Einstellung für eine Kabelverbindung auswählen,
stehen folgende Möglichkeiten zur Auswahl:
1. SSID (Name des Zugangspunktes)
2. IP-Adresse
3. Subnet Mask
4. Default Gateway
5. Bevorzugter DNS Server
6. Alternativer DNS-Server.
Falls innerhalb des Bereichs mehr als eine Netzwerkverbindung besteht,
24
DE
können Sie ein bestimmtes Netzwerk auswählen.
Netzwerk überprüfen, während das Gerät eingeschaltet ist
WLAN aktivieren/ deaktivieren.
Wenn Sie das WLAN-Netzwerk aktivieren, sucht das Gerät automatisch nach
verfügbaren Netzwerken. Wählen Sie das gewünschte WLAN-Netzwerk aus.
Geben Sie das WEP- oder WPA-Passwort zum Verbinden ein.
Falls keine Verbindung zum Netzwerk besteht oder die Verbindung nicht
hergestellt werde konnte, ist das Symbol in der linken oberen Ecke
durchgestrichen.
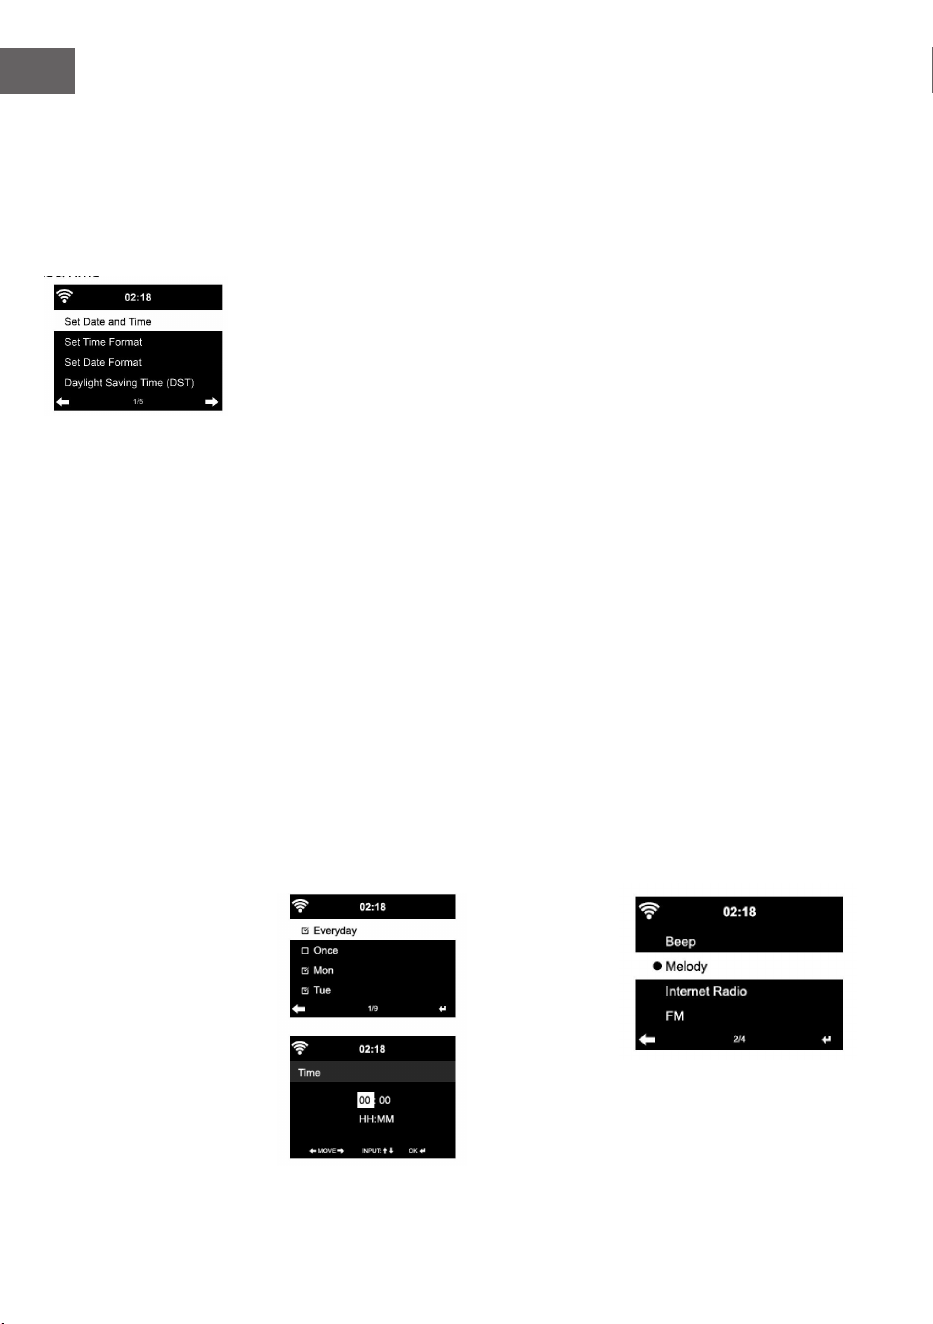
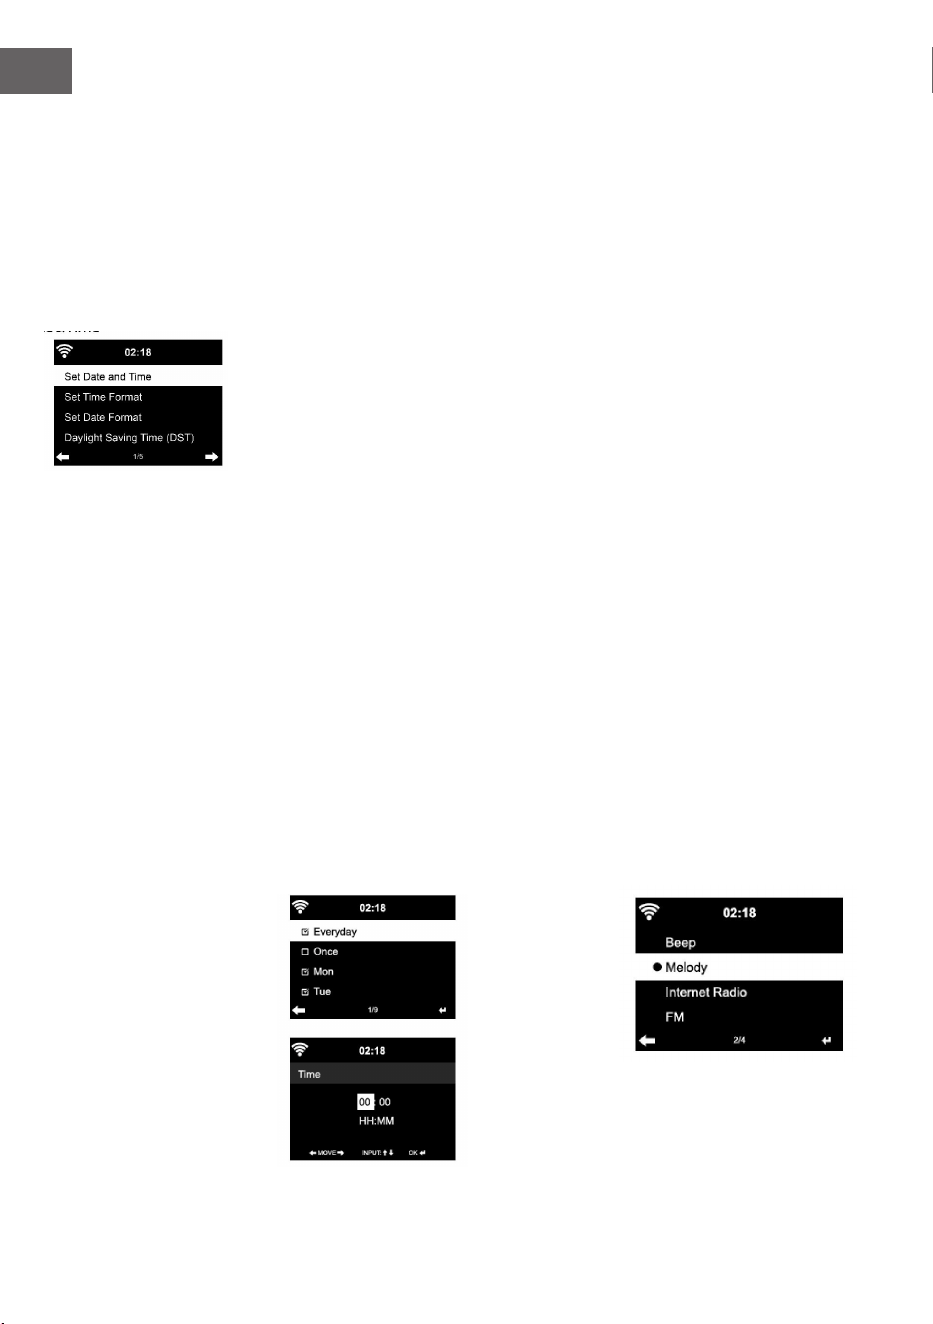
Datum und Uhrzeit
Die Datums- und Zeiteinstellungen können nur dann vorgenommen
werden, wenn Ihr Gerät mit einem drahtlosen Netzwerk verbunden ist.
Das Gerät stellt die Uhrzeit und das Datum automatisch ein, sobald eine
Netzwerkverbindung hergestellt wurde und bezieht seine Daten von einem
zentralen Server.
Die Umstellung von Sommer- auf Winterzeit muss manuell vorgenommen
werden.
Sie können zwischen 12- und 24-Stunden-Format wählen.
Das Datum YY (Jahr), MM (Monat) und DD (Tag) kann in den Formaten YY/
MM/DD, DD/MM/YY oder MM/DD/YY eingestellt werden.
Aktivieren oder deaktivieren Sie die Sommerzeit (DST).
Bestätigen Sie Ihre Eingabe durch Drücken der Taste ENTER oder durch
Drücken des Lautstärkereglers.
Wenn Sie mit einem drahtlosen Netzwerk verbunden sind, ist GMT
(+01:00) die Referenzeinstellung. Beachten Sie, dass Sie für Ihre Zeitzone
gegebenenfalls Stunden reduzieren oder hinzufügen müssen.

25
DE
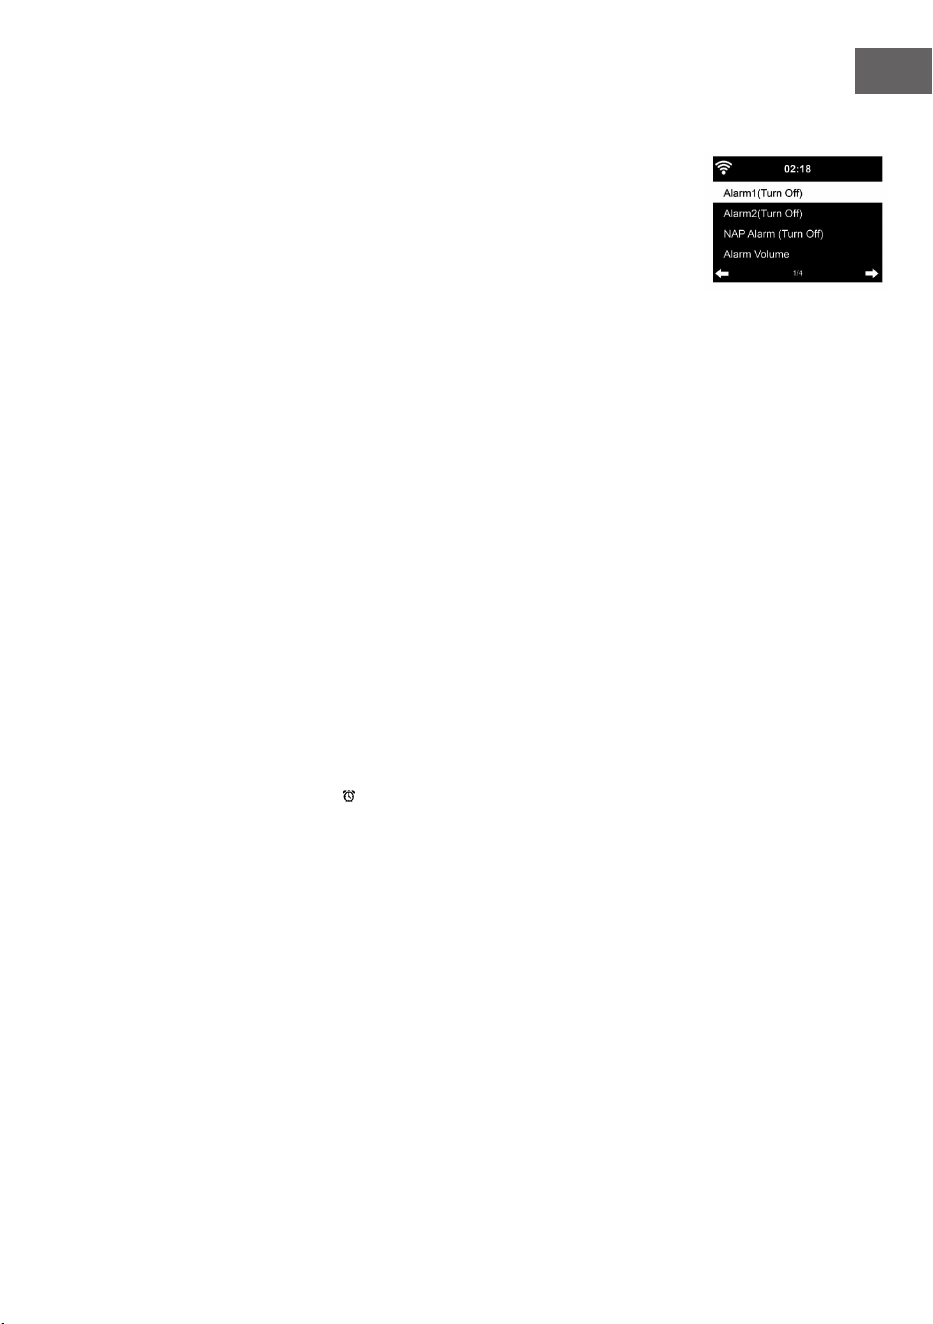
Wecker
Es gibt drei voneinander unabhängige Wecker. 2 Wecker für die absolute
Zeiteinstellung (Alarm 1 und Alarm 2) und einen Wecker für die relative
Zeiteinstellung (NAP Alarm). Wählen Sie im Menü „Alarm“ aus.
Die ersten beiden Alarme sind ähnlich dem normalen Alarm. Schalten
Sie das Gerät ein, stellen Sie die aktuelle Uhrzeit ein und stellen Sie
anschließend ein, wie häug der Alarm klingeln soll. Sie können zwischen
„täglich“, „einmalig“ und „an bestimmten Wochentagen“ auswählen.
Stellen Sie die entsprechenden Werte durch Drehen des Lautstärkereglers
oder durch Drücken der Tasten / auf der Fernbedienung ein. Durch
Drücken der Taste , gelangen Sie zum nächsten Eingabefeld. Drücken
Sie zum Bestätigen die Taste ENTER der Fernbedienung oder den
Lautstärkeregler.
Stellen Sie den gewünschten Weckton ein. Sie können zwischen Piepen,
Melodie und Internetradio (DAB/ FM/ USB) auswählen.
Sobald ein Alarm eingestellt wurde, erscheint neben der aktuellen Uhrzeit
das Symbol auf dem Bildschirm.
Hinweis: Wenn Sie als Weckton Internetradio (DAB/ FM/ USB) ausgewählt
haben, wird ein gespeicherter Lieblingssender abgespielt. Für Alarm 1
und Alarm 2 kann nur der gleiche Sender eingestellt werden. Sobald die
eingestellte Weckzeit erreicht ist und der Weckton „Internetradio“ ist,
verbindet sich das Gerät, falls das Netzwerk verfügbar ist, mit dem Internet.
Deshalb kann es vorkommen, dass es zwischen der eingestellten Weckzeit
und dem tatsächlichen Abspielen des Radiosenders eine kurze Verzögerung
gibt. Falls zu diesem Zeitpunkt keine Netzwerkverbindung zur Verfügung
steht, wechselt das Gerät automatisch zu „Melodie“. Wenn Sie den NAP-
Alarm aktiviert haben, klingelt der Wecker, abhängig von Ihrer Einstellung,
alle 5/ 10/ 20/ 30/ 60/ 90/ 120 Minuten.
Sie können zum Anpassen der Lautstärke des Weckers „Alarm Volume“
auswählen.
Sobald eine oder mehrere Weckzeiten eingestellt wurde/ n, wird
das Alarmsymbol an der Unterseite des Bildschirms angezeigt. Das
Wecksymbol mit Zeitanzeige wird ebenfalls im Standby-Modus auf dem
Bildschirm angezeigt.
Drücken Sie zum Unterbrechen des Alarms die Taste }. Drücken Sie zum
Aktivieren des Schlummermodus die Taste SLEEP auf dem Gerät oder die
Taste der Fernbedienung. Der Alarm erklingt dann bereits nach 5 Minuten
wieder.
Sprache
Wählen Sie die Sprache in der Anzeige: Englisch/ Deutsch/ Französisch/

26
DE
Ungarisch/ Tschechisch/ Slowakisch/ Polnisch/ Türkisch.
Hintergrundbeleuchtung anpassen
Sie können die Helligkeit der Hintergrundbeleuchtung anpassen.
Wählen Sie „Power Saving“ aus, um die Helligkeit der Hintergrundbeleuch-
tung im Standby-Modus zu regulieren und wählen Sie zum Aktivieren „Turn
On“ aus.
Sie können Einstellen, wie lange der Bildschirm des Radios beleuchtet ist,
wenn Sie das Radio nicht bedienen.
Bildschirm
Sie können den Bildschirm entweder auf Farbe oder auf Schwarz/ Weiß
einstellen.
Energieverwaltung
Sie können einstellen, dass das Gerät im Hauptmenü oder wenn keine
WLAN-Verbindung besteht, automatisch in den Standby-Modus wechselt.
Stellen Sie den Timer der Energieverwaltung (5/ 15/ 30 Minuten) so ein,
dass sich das Gerät, wenn Sie es nicht bedienen, automatisch in den
Standby-Modus begibt.
Schalten Sie das Gerät mit „Turn O“ aus, wenn Sie die Energieverwaltung
ignorieren möchten.
Sleep Timer (Zeit bis zum automatischen Ausschalten)
• Schalten Sie das Gerät direkt aus oder stellen Sie die Zeit
bis zum automatischen Abschalten ein. Sie können zwischen
15/30/60/90/120/150/180 Minuten auswählen.
• Sobald Sie die Zeit bis zum automatischen Ausschalten eingestellt
haben, wird ein Bettsymbol mit der noch verbleibenden Zeit in der
oberen rechten Ecke angezeigt.
• Sobald die Zeit abgelaufen ist, wechselt Streamo in den Standby-
Modus.
Buer
Sie können die Buerzeit der Musikwiedergabe auf 2/ 4/ 8 Sekunden
einstellen.
Wetter
Streamo kann die aktuellen Wetterdaten im Standby-Modus anzeigen.
Aktivieren Sie im Standby-Modus den Bildschirm und stellen Sie die
Temperatureinheit (°C oder °F) ein, um das Wetter im Standby-Modus
anzeigen zu lassen.
Wenn das Gerät eingeschaltet ist, werden die aktuelle Uhrzeit und das
aktuelle Wetter im Wechsel von 10 Sekunden angezeigt.

27
DE
Wiedergabeeinstellung
Wählen Sie den gewünschten Wiedergabemodus im Media Center aus.
Sie können zwischen „O“ (keine Wiederholung oder Zufallswiedergabe),
„Repeat all“ (Wiederholung aller Titel), „Repeat one“ (einen Titel
wiederholen) oder „Shule“ (Zufallswiedergabe).
DLNA Einstellung
Der voreingestellte Gerätename für DLNA ist Streamo.
Der Gerätename kann am PC oder Smartphone in den DLNA-Einstellungen
geändert werden.
Equalizer
Der voreingestellte Equalizermodus ist „Normal“.
Sie können zwischen „Normal“, „Flat“, „Jazz“, „Rock“, „Soundtrack“,
„Classical“, „Pop“ oder „News“ auswählen.
Drücken Sie die Taste EQ der Fernbedienung, um zwischen den einzelnen
Modi zu wechseln
Beim Einschalten Wiedergabe fortsetzen
Das Gerät ist so eingestellt, dass das Gerät die Wiedergabe der letzten
Einstellung bei erneutem Einschalten fortsetzt.
Wenn diese Funktion aktiviert ist und das Gerät sich zum Zeitpunkt des
Ausschaltens im Internetradiomodus bendet, wird das Internetradio bei
erneutem Einschalten des Geräts fortgesetzt.
Software Update
Falls auf dem Server eine neue Softwareversion verfügbar ist, weißt das
Gerät Sie darauf hin, sobald Sie ins Hauptmenü gehen.
Reset
Das Gerät wird auf Werkseinstellung zurückgesetzt.
Nachdem Streamo auf Werkseinstellung zurückgesetzt wurde, ruft das
Gerät automatisch die Spracheinstellung auf.
Sobald die gewünschte Sprache ausgewählt wurde, wechselt das Gerät zur
Netzwerkeinstellung.
FM-Einstellung
Wählen Sie bei der Radio-Wiedergabe MONO oder STEREO aus.
My MediaU
Lassen Sie Ihre mediaU Senderliste auf dem mediaU Server anzeigen und
wiedergeben. Erstellen Sie zunächst Ihr Konto (siehe Abschnitt Anpassung
von My mediaU).
28
DE
INTERNET RADIO
Nachdem die Verbindung zu einem Sender erfolgreich hergestellt wurde,
werden die Bitgeschwindigkeit und das Senderformat auf dem Bildschirm
angezeigt.
Meine Favoriten
Sie können eine Liste Ihrer Lieblingssender erstellen und Speichern.
Sie können bis zu 250 Favoriten speichern, inklusive Sender und Ordnern.
Halten Sie während der Wiedergabe die Taste PRESET gedrückt, um einen
Sender in den Favoriten zu speichern.
Sie können einen zuvor gespeicherten Sender durch einen neuen ersetzen.
Während des Speichervorgangs erscheint das Symbol im oberen
Bildschirmbereich.
Sie können zum Speichern ebenfalls eine Zahl (1, 2, 3) auf der
Fernbedienung drücken, um einen Sender auf dem jeweiligen Speicherplatz
#1, #2 oder #3 zu speichern.
Wenn ein Sender auf einem Speicherplatz gespeichert wurde, kann der
gleiche Sender nicht auf einem anderen Speicherplatz gespeichert werden.
Die gespeicherten Sender werden in diesem Menü angezeigt. Sie können
zum Anzeigen der gespeicherten Senderliste ebenfalls die Taste PRESET
drücken.
Wenn Sie die gespeicherte Senderliste geönet haben, wählen Sie einen
Sender aus und drücken Sie zum Starten der Wiedergabe die Taste Enter.
Wenn Sie einen Sender markiert haben, gelangen Sie durch Drücken der
Taste in das Untermenü. Dort können Sie einen Sender löschen (ein
Sender wird von der Favoritenliste entfernt), Sie können die Liste nach
oben und unten durchgehen, Umbenennen (Sie können einen Radiosender
beliebig benennen), den Sender wiedergeben, oder den Sender als
Weckton nutzen (falls Sie als Weckeinstellung „Internetradio“ auswählen.
Drücken Sie zum Aufrufen eines gespeicherten Senders zunächst die Taste
PRESET und wählen Sie durch Drehen des Lautstärkereglers oder Drücken
der Tasten / einen gespeicherten Sender aus.
Radiosender/ Musik
Die Sender werden nach „Globale Top 20“, „Genre“, „Land/ Standort“ und
„Highlight“ kategorisiert.
Drücken Sie die Taste ENTER, um in das Untermenü zu gelangen und
wählen Sie zur Musikwiedergabe einen Sender aus.
Drücken Sie für die direkte Wiedergabe, nach der Auswahl eines Senders,
die Taste ENTER.
Drücken Sie die Taste , um in das Untermenü zu gelangen. Sie können den
Sender zu den Favoriten hinzufügen, die automatische Sendersuche starten,
einen Sender wiedergeben oder einen Sender als Weckton einstellen (falls

29
DE
Sie in den Alarmeinstellungen „Internetradio“ ausgewählt haben.
Wenn Sie „Auto Scan“ auswählen, wird jeder Sender des Untermenüs für
30 Sekunden abgespielt, bis alle Sender ausgewählt wurden oder Sie zum
Unterbrechen die Taste ENTER drücken.
Drücken Sie die Taste Info, um die jeweilige Senderinformation anzeigen zu
lassen.
Verlauf
Eine Liste der zuletzt gehörten Sender. Bis zu 10 Sender können im Verlauf
gespeichert werden.
Drücken Sie für die direkte Wiedergabe, nach der Auswahl eines Senders,
die Taste ENTER.
Drücken Sie die Taste , um in das Untermenü zu gelangen. Sie können den
Sender zu den Favoriten hinzufügen, die automatische Sendersuche starten,
einen Sender wiedergeben oder einen Sender als Weckton einstellen (falls
Sie in den Alarmeinstellungen „Internetradio“ ausgewählt haben.
Wenn Sie „Auto Scan“ auswählen, wird jeder Sender des Untermenüs für
30 Sekunden abgespielt, bis alle Sender ausgewählt wurden oder Sie zum
Unterbrechen die Taste ENTER drücken.
Lokale Radiosender
Im Internetradiomenü gibt es eine Verknüpfung zu lokalen Radiosendern,
so dass Sie ganz einfach Sender aus Ihrer Region hören können.
Ihr Gerät kann ihren aktuellen Standort durch die IP-Adresse ermitteln und
auf Grundlage dessen eine Senderliste erstellen.
Falls Sie möchten, können Sie aber auch ein anderes Land als Standort
angeben, um Sender von dort wiedergeben zu lassen.
MEDIA CENTER
UPnP
Falls Sie „geteilte Medien“ eingerichtet haben, können Sie diese via UPnP
anzeigen lassen.
Falls mehr als ein Gerät zum Teilen von Medien zur Verfügung steht, werden
die Alternativen aufgelistet.
Wählen Sie das Medium aus, von welchem Sie Musik über das Gerät
wiedergeben lassen möchten.
Hinweis: Das Gerät kann lediglich Titel lesen, deren Name weniger als 40
Zeichen umfasst. Die Zeichen sollten in europäischer Sprache sein. Falls
das Gerät einen Titel im UPnP-Modus nicht wiedergeben kann, sollten
30
DE
Sie zunächst versuchen, den Titel umzubenennen. Falls der Titel sich dann
noch immer nicht wiedergeben lässt, können Sie versuchen, diesen in ein
anderes Format umzuwandeln.
Meine Wiedergabeliste
Sie können im UPnP-Modus eine Liste Ihrer Lieblingslieder erstellen.
Drücken und halten Sie die Taste ENTER, wenn ein Lied abgespielt wird, um
dieses unter „My Playlist“ zu speichern.
Meine Wiedergabeliste löschen
• Sie können alle Lieder auf Ihrer Wiedergabeliste „My Playlist“
gespeicherten Titel löschen.
INFORMATIONSCENTER
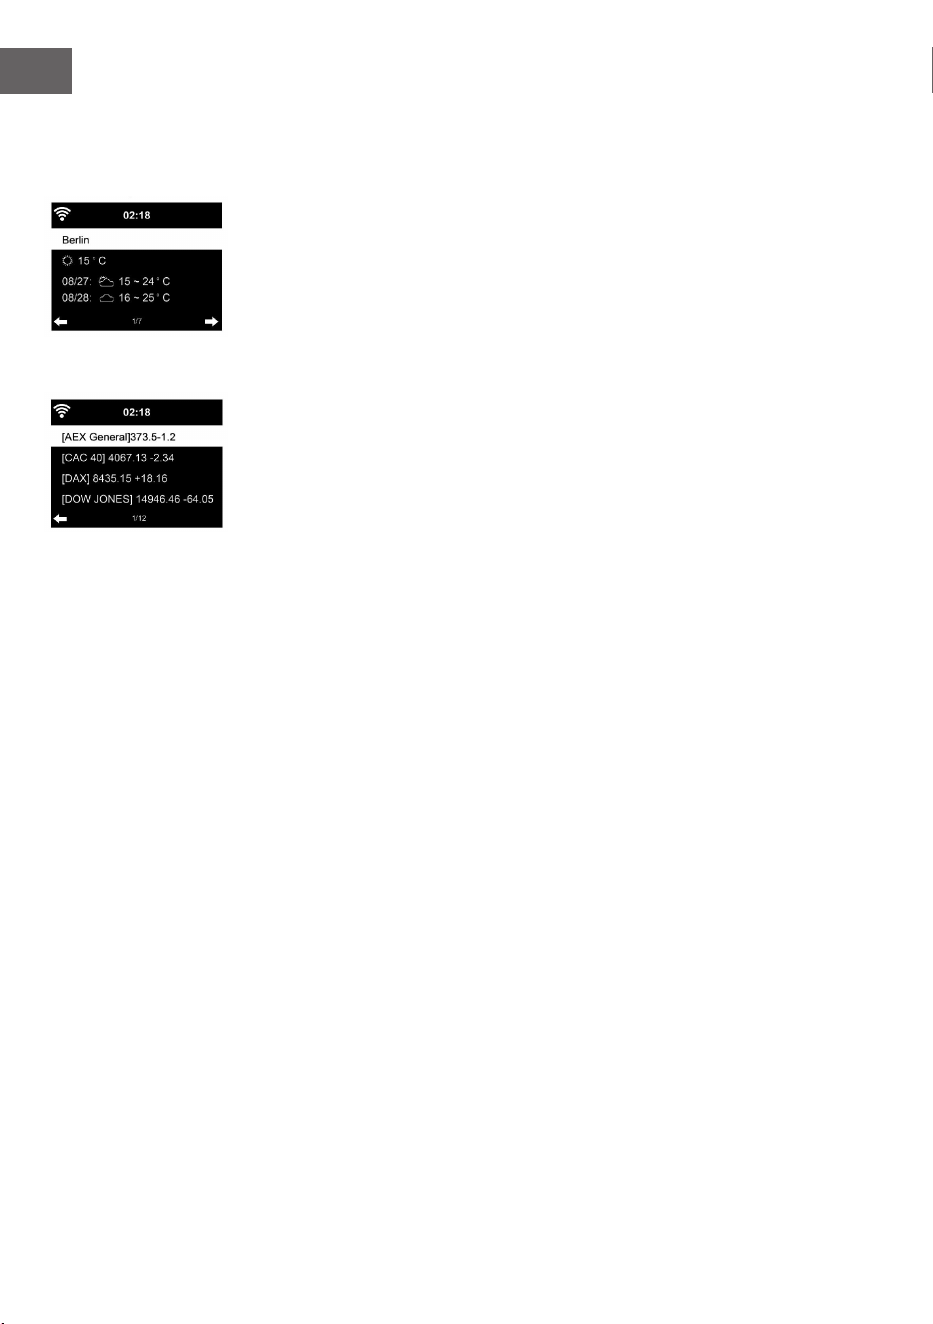
Wetterinformationen
Es stehen für 2000 Städte Wetterinformationen und Wettervorhersagen zur
Verfügung. Wählen Sie für genaue Wetterangaben das Land und die Stadt
aus.
Wenn Sie das Wetter der von Ihnen ausgewählten Stadt auch im Standby-
Modus angezeigt bekommen möchten, drücken Sie nun die Taste ENTER.
Finanzinfos
Lassen Sie sich den weltweiten Aktienindex anzeigen.
Geräteinformationen
Die aktuelle Systemversion und die Details zur Netzwerkverbindung werden
angezeigt. Die Informationen beinhalten die MAC-Adresse, welche für die
Registrierung bei my mediaU benötigt wird.
31
DE
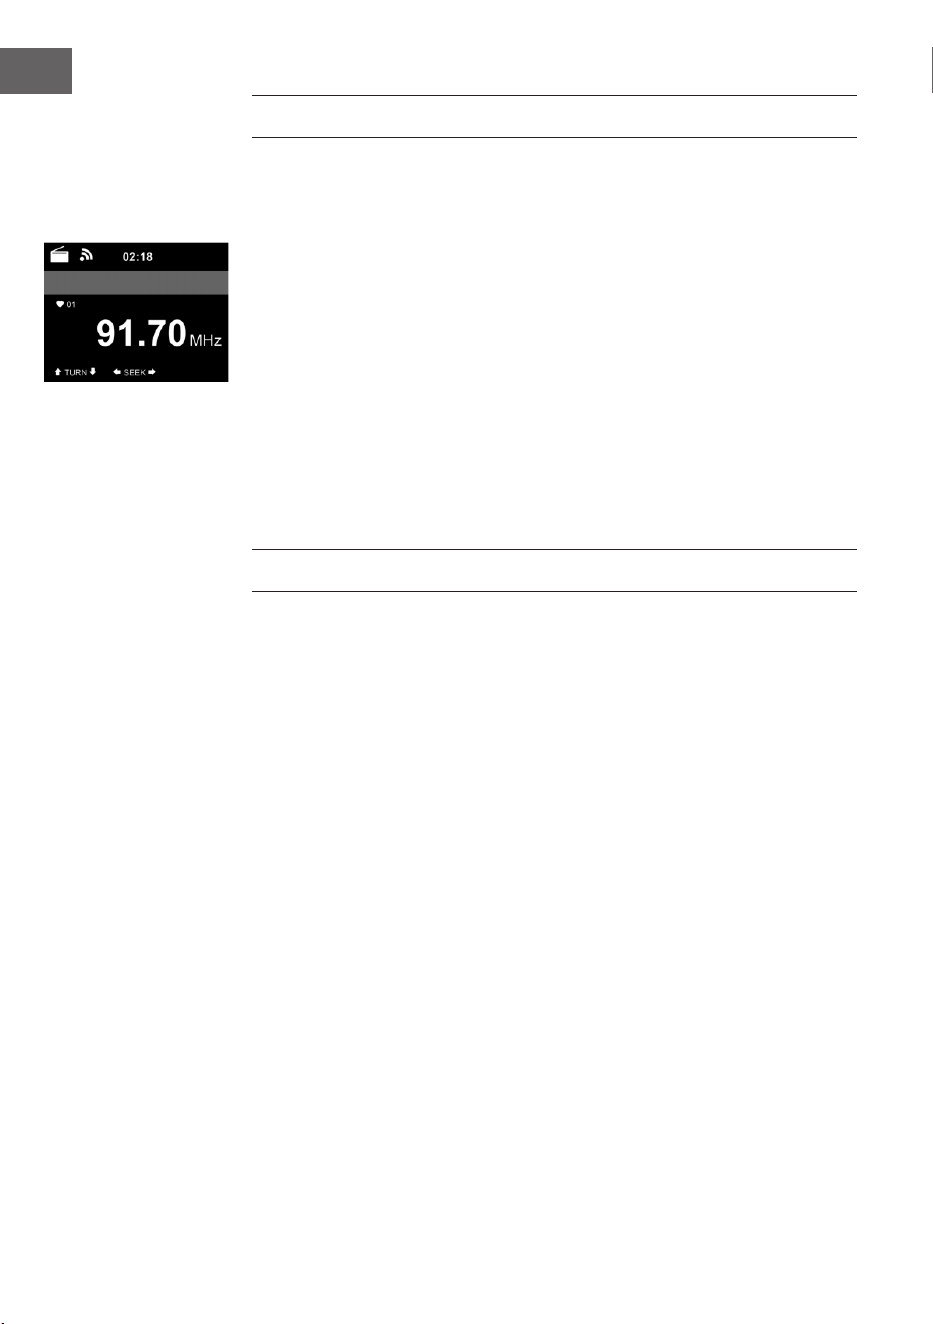
FM-RADIO
Im FM-Radiomodus wird analoges Breitbandradio empfangen.
Drücken Sie die Tasten oder des Geräts oder der Fernbedienung, um
die FM-Sendersuche zu starten.
Die Frequenzanzeige geht während der Suche nach oben.
Sobald ein Sender empfangen wird, stoppt der Sendersuchlauf.
Drücken Sie für die manuelle Sendersuche die Tasten /. Die manuelle
Suche erfolgt in Schritten von 0,05 MHz.
Drücken und halten Sie zum Speichern eines Senders die Taste PRESET.
Sie können bis zu 20 FM-Sender speichern.
Drücken Sie zum Aufrufen eines gespeicherten Senders die Taste PRESET
auf dem Gerät oder die Tasten / der Fernbedienung.
Alternativ können Sie den automatischen Sendersuchlauf aller Sender,
durch Drücken der Taste ENTER des Geräts oder SCAN der Fernbedienung,
starten. Die gefundenen Radiosender werden dann automatisch in der
Senderliste gespeichert.

32
DE
CD-WIEDERGABE
CD/ MP3 Bedienung
• Drücken Sie die Taste MENU, um den CD-Modus auszuwählen.
• Drücken Sie auf die obere Abdeckung, um das CD-Fach zu önen.
• Legen Sie eine CD in das CD-Fach ein.
• Drücken Sie zum Starten der Wiedergabe die Taste ENTER des Geräts
oder die Taste der Fernbedienung.
• Drücken Sie zum Pausieren der Wiedergabe die Taste ENTER des Geräts
oder die Taste der Fernbedienung.
• Drücken Sie zum Stoppen der Wiedergabe die Taste .
• Drücken Sie kurz die Taste oder um einen Titel zu überspringen.
• Drehen Sie zum Anpassen der Lautstärke am Lautstärkeregler des
Geräts oder drücken Sie die Tasten / der Fernbedienung
BT
Wählen Sie eine Audioquelle aus.
Drücken Sie so lange die Taste ENTER, bis „BT“ auf dem Bildschirm
angezeigt wird.
Vergewissern Sie sich, dass kein anderes BT-Gerät mit Streamo verbunden
ist.
Auf dem Bildschirm wird „No Connection“ angezeigt.
Aktivieren Sie auf Ihrem externen Gerät „BT“.
Suchen Sie in der Geräteliste nach Streamo.
Wählen Sie Streamo aus der Geräteliste aus. Falls die Eingabe eines
Passworts notwendig sein sollte, geben Sie „0000“ (vier Nullen) ein.
Bei einigen Geräten kann es zusätzlich notwendig sein, dass die Verbindung
bestätigt wird.
Sobald die Verbindung erfolgreich hergestellt wurde, wird „Connected“ auf
dem Bildschirm von Streamo angezeigt.
Starten Sie die BT-Wiedergabe auf Ihrem externen Gerät.
Sie können die BT-Wiedergabe über Ihr externes Gerät oder über Streamo
steuern. Die Lautstärke kann über beide Geräte angepasst werden.
Die BT-Verbindung kann durch Drücken der Taste ENTER für drei Sekunden
unterbrochen werden. Die Nachricht „No Connection“ wird auf dem
Bildschirm angezeigt.
33
DE
FERNSTEUERUNG ÜBER APPS
Einige Android-Apps, wie beispielsweise Air Music Control, ermöglichen die
Steuerung des Geräts via Smartphone oder Tablet.
Sobald die Geräte mit Streamo verbunden sind, wird die gleiche
Menüanzeige wie auf dem Bildschirm von Streamo, auch auf dem
Smartphone/ Tablet angezeigt.
Sie können alle Funktionen auf die gleiche Weise wie bei Streamo
auswählen.
Die ausgewählten Funktionen/ Menüsymbole des Geräts ändern sich
entsprechend der Handlungen, die Sie auf dem Smartphone/ Tablet
vornehmen.
Wenn Sie das Gerät via App steuern, kann es vorkommen, dass die UPnP-
Verbindung zum Windows Media Player nicht möglich ist.
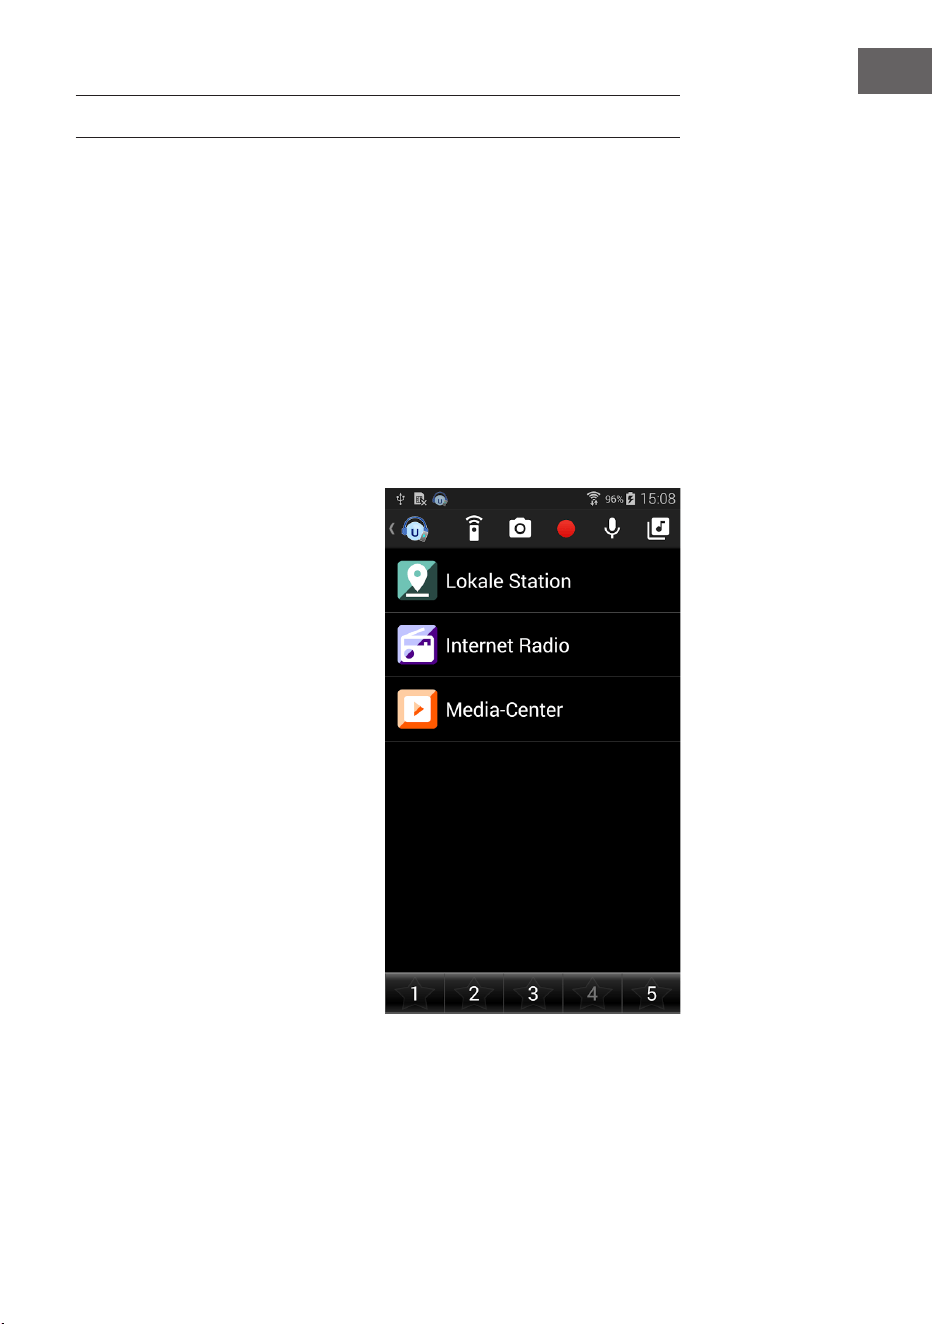
App-Steuerung über Air Music Control
Sie können das Internetradio
über Ihr Smartphone oder Tablet
bedienen.
Laden Sie dazu die App „Air Music
Control“ aus dem „Google Play
Store“ oder dem „Apple AppStore“
herunter.
Die Geräte müssen dazu in
demselben Netzwerk verbunden
sein.
34
DE
SPEZIELLE ENTSORGUNGSHINWEISE FÜR
VERBRAUCHER IN DEUTSCHLAND
Entsorgen Sie Ihre Altgeräte fachgerecht. Dadurch wird gewährleistet,
dass die Altgeräte umweltgerecht verwertet und negative Auswirkungen
auf die Umwelt und menschliche Gesundheit vermieden werden. Bei der
Entsorgung sind folgende Regeln zu beachten:
• Jeder Verbraucher ist gesetzlich verpichtet, Elektro- und
Elektronikaltgeräte (Altgeräte) sowie Batterien und Akkus
getrennt vom Hausmüll zu entsorgen. Sie erkennen die
entsprechenden Altgeräte durch folgendes Symbol der
durchgestrichene Mülltonne (WEEE-Symbol).
• Sie haben Altbatterien und Altakkumulatoren, die nicht vom Altgerät
umschlossen sind, sowie Lampen, die zerstörungsfrei aus dem
Altgerät entnommen werden können, vor der Abgabe an einer
Entsorgungsstelle vom Altgerät zerstörungsfrei zu trennen.
• Bestimmte Lampen und Leuchtmittel fallen ebenso unter das Elektro-
und Elektronikgesetz und sind dementsprechend wie Altgeräte zu
behandeln. Ausgenommen sind Glühbirnen und Halogenlampen.
Entsorgen Sie Glühbirnen und Halogenlampen bitte über den Hausmüll,
sofern sie nicht das WEEE-Symbol tragen.
• Jeder Verbraucher ist für das Löschen von personenbezogenen Daten
auf dem Elektro- bzw. Elektronikgerät selbst verantwortlich.
Rücknahmepicht der Vertreiber
Vertreiber mit einer Verkaufsäche für Elektro- und Elektronikgeräte von
mindestens 400 Quadratmetern sowie Vertreiber von Lebensmitteln mit
einer Gesamtverkaufsäche von mindestens 800 Quadratmetern, die
mehrmals im Kalenderjahr oder dauerhaft Elektro- und Elektronikgeräte
anbieten und auf dem Markt bereitstellen, sind verpichtet,
1. bei der Abgabe eines neuen Elektro- oder Elektronikgerätes an einen
Endnutzer ein Altgerät des Endnutzers der gleichen Geräteart, das
im Wesentlichen die gleichen Funktionen wie das neue Gerät erfüllt,
am Ort der Abgabe oder in unmittelbarer Nähe hierzu unentgeltlich
zurückzunehmen und
2. auf Verlangen des Endnutzers Altgeräte, die in keiner äußeren
Abmessung größer als 25 Zentimeter sind, im Einzelhandelsgeschäft
oder in unmittelbarer Nähe hierzu unentgeltlich zurückzunehmen; die
Rücknahme darf nicht an den Kauf eines Elektro- oder Elektronikgerätes
geknüpft werden und ist auf drei Altgeräte pro Geräteart beschränkt.

35
DE
• Bei einem Vertrieb unter Verwendung von Fernkommunikationsmitteln
ist die unentgeltliche Abholung am Ort der Abgabe auf Elektro- und
Elektronikgeräte der Kategorien 1, 2 und 4 gemäß § 2 Abs. 1 ElektroG,
nämlich „Wärmeüberträger“, „Bildschirmgeräte“ (Oberäche von mehr
als 100 cm²) oder „Großgeräte“ (letztere mit mindestens einer äußeren
Abmessung über 50 Zentimeter) beschränkt. Für andere Elektro- und
Elektronikgeräte (Kategorien 3, 5, 6) ist eine Rückgabemöglichkeit in
zumutbarer Entfernung zum jeweiligen Endnutzer zu gewährleisten.
• Altgeräte dürfen kostenlos auf dem lokalen Wertstohof oder in
folgenden Sammelstellen in Ihrer Nähe abgegeben werden: www.take-
e-back.de
• Für Elektro- und Elektronikgeräte der Kategorien 1, 2 und 4 bieten
wir auch die Möglichkeit einer unentgeltlichen Abholung am Ort der
Abgabe. Beim Kauf eines Neugeräts haben Sie die Möglichkeit, eine
Altgerätabholung über die Webseite auszuwählen.
• Batterien können überall dort kostenfrei zurückgegeben werden, wo sie
verkauft werden (z. B. Super-, Bau-, Drogeriemarkt). Auch Wertsto- und
Recyclinghöfe nehmen Batterien zurück. Sie können Batterien auch per
Post an uns zurücksenden. Altbatterien in haushaltsüblichen Mengen
können Sie direkt bei uns von Montag bis Freitag zwischen 08:00 und
16:00 Uhr unter der folgenden Adresse unentgeltlich zurückgeben:
Chal-Tec Fulllment GmbH
Norddeutschlandstr. 3
47475 Kamp-Lintfort
• Wichtig zu beachten ist, dass Lithiumbatterien aus Sicherheitsgründen
vor der Rückgabe gegen Kurzschluss gesichert werden müssen (z. B.
durch Abkleben der Pole).
• Finden sich unter der durchgestrichenen Mülltonne auf der Batterie
zusätzlich die Zeichen Cd, Hg oder Pb ist das ein Hinweis darauf, dass
die Batterie gefährliche Schadstoe enthält. (»Cd« steht für Cadmium,
»Pb« für Blei und »Hg« für Quecksilber).
Hinweis zur Abfallvermeidung
Indem Sie die Lebensdauer Ihrer Altgeräte verlängern, tragen Sie dazu
bei, Ressourcen eizient zu nutzen und zusätzlichen Müll zu vermeiden.
Die Lebensdauer Ihrer Altgeräte können Sie verlängern, indem Sie defekte
Altgeräte reparieren lassen. Wenn sich Ihr Altgerät in gutem Zustand
bendet, könnten Sie es spenden, verschenken oder verkaufen.

36
DE
HINWEISE ZUR ENTSORGUNG
Wenn es in Ihrem Land eine gesetzliche Regelung
zur Entsorgung von elektrischen und elektronischen
Geräten gibt, weist dieses Symbol auf dem Produkt
oder auf der Verpackung darauf hin, dass dieses
Produkt nicht im Hausmüll entsorgt werden darf.
Stattdessen muss es zu einer Sammelstelle für
das Recycling von elektrischen und elektronischen
Geräten gebracht werden. Durch regelkonforme
Entsorgung schützen Sie die Umwelt und die
Gesundheit Ihrer Mitmenschen vor negativen
Konsequenzen. Informationen zum Recycling
und zur Entsorgung dieses Produkts, erhalten
Sie von Ihrer örtlichen Verwaltung oder Ihrem
Hausmüllentsorgungsdienst.
Dieses Produkt enthält Batterien. Wenn es in Ihrem
Land eine gesetzliche Regelung zur Entsorgung
von Batterien gibt, dürfen die Batterien nicht im
Hausmüll entsorgt werden. Informieren Sie sich
über die örtlichen Bestimmungen zur Entsorgung
von Batterien. Durch regelkonforme Entsorgung
schützen Sie die Umwelt und die Gesundheit Ihrer
Mitmenschen vor negativen Konsequenzen.
KONFORMITÄTSERKLÄRUNG
Hersteller:
Chal-Tec GmbH, Wallstraße 16, 10179 Berlin,
Deutschland.
Importeur für Großbritannien:
Berlin Brands Group UK Limited
PO Box 42
272 Kensington High Street
London, W8 6ND
United Kingdom
Hiermit erklärt Chal-Tec GmbH, dass der
Funkanlagentyp Streamo CD der Richtlinie 2014/53/
EU entspricht. Der vollständige Text der EU-
Konformitätserklärung ist unter der folgenden
Internetadresse verfügbar: use.berlin/10034055

37
EN
Dear Customer,
Congratulations on purchasing this equipment.
Please read this manual carefully and take care
of the following hints to avoid damages. Any
failure caused by ignoring the items and cautions
mentioned in the instruction manual are not
covered by our warranty and any liability. Scan
the QR code to get access to the latest user
manual and other information about the product.
CONTENTS
Technical Data 38
Safety Instructions 39
Scope of Supply 40
Overview 41
Getting started 46
DLNA Function 51
Menu Overview 52
Main Menu 54
Internet Radio 61
Media Center 63
Information Center 63
FM Radio 64
CD Playback 64
BT 65
Remote Control Via Apps 66
Disposal Considerations 67
Declaration of Conformity 67

38
EN
TECHNICAL DATA
Item number 10034055, 10034056
Power adaptor
Input: 100-240 V ~ 50/60 Hz 0.8 A max.
Output: 12 V / 2.5 A
Connections
AUX IN (3.5 mm)
FM radio
Frequency range 87.5 MHz - 108 MHz
DAB/DAB+
Frequency range 174-240 MHz
WLAN
Standard
Encryption
Frequency band
Transmit power
802.11b/g/n
WEP, WPA, WPA 2(PSK), WPS
2402–2480MHz
14-20dBm
BT specications
Frequency band
Max. transmit power
2402–2480MHz
10dBm
Streaming
UPnP, DLNA
Supported le formats WMA, MP3

39
EN
SAFETY INSTRUCTIONS
Read the safety instructions and the manual carefully, before operating the
appliance.
• Keep the instructions manual in a safe play, so you can refer to it later.
• Follow all necessary operating steps.
• Do not place the appliance in a humid location, neither a place which
with electromagnetic elds, direct sunlight, and do not expose it to
high temperatures.
• If you do not use the appliance for a ling time, pull the plug and take the
batteries out of the microphone.
• Pull the plug before cleaning the unit. Do not use volatile gasses,
thinners or other chemical cleaners.
• Only use accessories produced by the manufacturer.
• The appliance must only be powered according the ratings on the rating
label.
• Do not carry out maintenance and repairs by yourself. The dangerous
voltage in the appliance can cause an electric shock, when being
opened. Repairs must only be carried out by the qualied customer
service.
• If a part must be replaced, it must comply with the manufacturer’s
specication or be an original spar part.
• If the appliance is broken or does not function properly, contact the
customer service. Do not open the housing to make any repairs.
Designated use
• This device is for the reproduction of sound. It is solely designed and
may only be used for this purpose. It may only be used in the manner
described in this manual.
• This appliance is not intended for use by persons (including children)
with reduced physical, sensory or mental capabilities, or lack of
experience and knowledge, unless they have been given supervision or
instruction concerning use of the appliance by a person responsible for
their safety.
40
EN
SCOPE OF SUPPLY
unit
power adapter
remote control
user manual
Power Menu
Volume
Preset
Scan
Up
Down
Enter
EQ
Eject
41
EN
OVERVIEW
Front view
1 Remote control receiver
2 TFT panel
3 Power/Menu /Volume button
4 Preset button
5 Scan button
6 Play/Pause button
7 Left or Prev button
8 Eject button
9 Right or next
10 Up/Down/Stop/Enter
11 CD tray
4
2
1
3
5 6
7
8
9
10
11
Power Menu
Volume
Preset
Scan
Down
Up
Enter
42
EN
Rear view
Dc inAux
12 Inverter tube
13 Telescopic Antenna
14 Headphones/Aux in/DC in
15 Inverter tube
12 13 14 15

43
EN
Remote control
EQ
Eject
1 2
5
6
9
12
13
16
19
20
22
10
3
4
7
8
11
14
17
18
21
15
44
EN
1 Standby button
2 Switch speaker on/o
3
MENU
Main menu
4
Preset
Saved stations, favourites, etc.
5
Scan
DAB/FM scan
6
Eject
Eject CD
7
Media center, go back one track
8
Media center, play/pause
9
Media center, play/pause
10
Stop play
11
EQ
Equalizer
12 Alarm
13
Cursor up
14
Cursor left button
15
Enter
Conrm selection
16
Cursor right
17
Cursor down button
18
V-
Decrease volume
19
V+
Volume
20
0.....9
Call up favourites/memory; input
letters and numbers
21 Dimmer
22 Sleep
45
EN
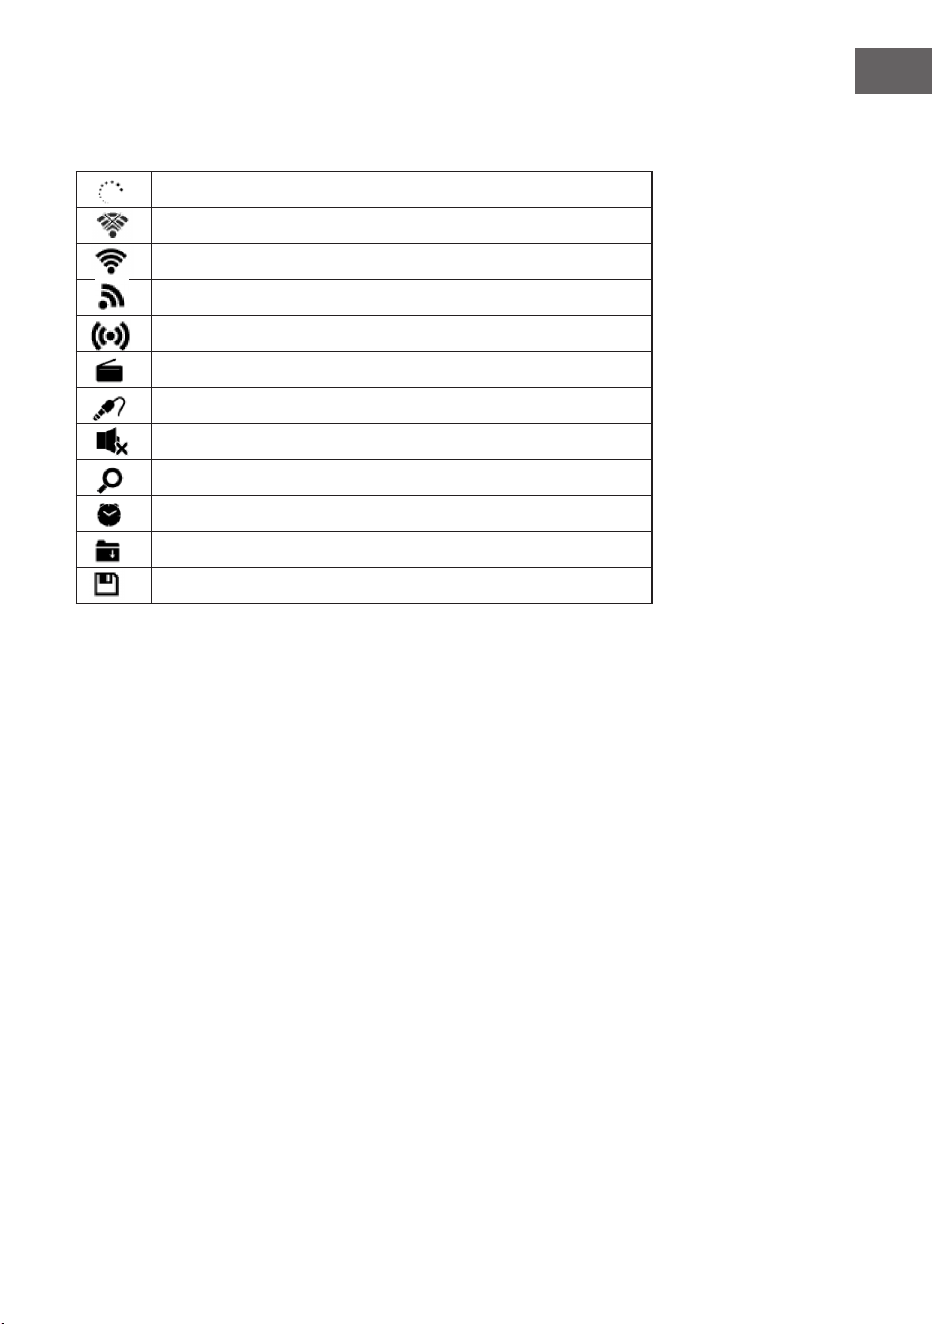
Symbols on the display
Connection is being established, device functioning
No wireless connection
Wireless connection
VHF radio reception: Mono
VHF radio function select: Stereo
VHF radio fuction select
AUX function select
Speaker o
Search
Alarm on
Internet radio station saved as preset
FM radio station saved
46
EN
GETTING STARTED
Before using the device, the following requirements are needed:
• A broadband connection in combination with a wired/wireless access
point, router or similar network device.
• The network device needs to support WIFI (802.11b/g/n) wireless
connection.
• A PC or smart phone with a network ready. This network has to be the
same one as the device eqtuipped with.
Battery installation (remote control)
1. Press the tab on the battery door and lift it o.
2. Install two (2) x AAA size batteries into the battery compartment as the
gure on right and the polarity markings inside battery compartment.
3. Replace the battery door
Battery precautions
Follow these precautions when using a battery in this device:
• Use only the size and type of battery specied.
• Besure to follow the correct polarity when installing the battery as
indicated in the battery compartment. A reversed battery may cause
damage to the device. Remove batteries to prevent damage or injury
from possible battery leakage.
• Do not mix dierent types of batteries together (e.g. alkaline and
carbon-zinc) or old batteries with fresh ones.
• Do not dispose of battery in re. Battery may explode or leak.
• Clean the battery contacts and also those of the device prior to battery
installation.
• If the batteries in the device are consumed or the device is not to be
used for a long period of time, remove the batteries to prevent damage
or injury from possible battery leakage.
• Do not try to recharge the battery not intended to be recharged; it can
overheat and rupture.
47
EN
Get the network ready
For wireless LAN(WLAN) network connection: Cheak if WLAN LINK/ACT
light of the wired/wireless access point or router is illuminated. Consult the
user guide of that for any questions.
Note: WiFi allows date transfer over short distances within 20 meters
without the need of cabling between the devices. Any walls or ceilings may
reduce the strength of the WiFi connectivity.
• Therefore try to locate the Streamo and/or the access point within the
distance above, and avoid any obstacles between two devices.
• Connect the power adaptor to the back of the appliance and plug into
DC IN socket.
• When it is rst time running the device, the system will ask you to set
Language and Network Congurations.
1 2
1 2
3
• Select Yes to establish connection to the network
• Select Yes(WPS)(Only for WPS routers). Then press the WPS button on
your router.
If you answer ‘Yes’, the display goes to scanning for Wireless Network and
shortly afterwards a list of available wieless networks will appear.
48
EN
The number of bars in the wireless symbol in front the network name(SSID)
shows the relative signal strength of the network. The key symbol indicates
that the network is password-protected.
If the device does bot nd any wireless networks, , No wireless Networks
found' appears on the display. Change your location, if necessary. And
check your WLAN router. You can nd the SSID of your Access Point in the
conguration of the Access Point(Router). Select your network and conrm
witk OK. If your WLAN is password-protected, you will be prompted to enter
your password.
Enter the password using the buttons on the device or the number and
letter of the remote control. Note the use of upper and lower case when
entering the password.
You can rotate reel to choose the code. If it is accidentally pressed ‘’ to
move a redundant entry. Press ‘’ to correct.
With remote control
The cursor indicates the current entry space.
Press the corresponding number button repeatedly.
0 0(delete entry)
1 1(space) @ ! ” # $ % & ( ) * ’ + - { \ | }< >?........
2 2 A B C a b c
3 3 D E F d e f
4 4 G H I g h i
5 5 J K L j k l
6 6 M N O m n o
7 7 P Q R S p q r s
8 8 T U V t u v
9 9 W X Y Z w x y z
buttons:
: Go to previous entry space, entry can be overwritten
: Go to next entry space, the last entry is saved
elect number/letter
Enter Conrm entire entry.
It may take a few seconds to
establish the connection to the
network
49
EN
Once the connection is established,
the main menu appears with the
main menu items:
• Internet Radio: Access to
worldwide radio stations
• Media Centre: Access to your
UPnP devices via software with
streaming capability.
• Information Center: Access to
weather, nancial and system
information
• Conguration:Various system settings
• Local Radio: Access to radio stations in a particular region (e.g. only
German stations)
• My media U :Access to an online media library. This menu item only
appears if the function has already been enabled under Conguration
• Manage my media U.
Press the standby button to
enter standby mode. The time,
date and any active alarm times
display on the screen.
If you have setup a network connection, and use 'Streamo' again within
the network, Streamo will automatically make the connection. In case
you desire to change the network, enter conguration to setup the
corresponding connection.
Rotate the UP/DOWN roll to input numbers/letters.
Once you are on the letter you want, press to move to the next entry.
When you are at the end the input, press Enter to conrm. You can press
to move to previous entry.
Rotate the volume reel or press the V-/V+ button of remote control to adjust
the volume. Or direct press to mute the sound.

50
EN
About Music Streaming
'Streamo' is the default device name for DLNA, and you may rename it as
you like.
The information below is the introduction of how to setup up media
steaming from PC or other media server. Study the own instruction of the
software of apps you use to enjoy music streaming if necessary.
Make sure the music les are in the format of MP3. WMA, WAV or AAC for
music steaming to Streamo.
Refer to section 5.7 for the details of the control on Streamo for music
steaming playback.
UPnP
To enjoy the streaming music form PC, the following steps are to be done
on the PC:
Connect the PC to the network.
Ensure Streamo is powered on and connected to the same network.
Open the UPnP platform Windows Media Player (11 or later).
Alternatively, other platforms or server such as Windows Media Connection
may be used.
Add the audio les and folders you want to share with Streamo to the media
library.
You may also enjoy the streaming music from other music server. Such as
smart phone (Android platform).
• Connect the mobile to the network
• Search and install media sharing apps form Google Play.
• Add the audio les form your mobile you want to share.
After setup the shared server, choose the music and control playback on
Streamo.

51
EN
DLNA FUNCTION
Besides UPnP, Streamo supports DLNA function, you share the music les
form PC or Android mobile, and you use your PC, Android mobile or iPhone
/ iPad to control music playback on the Streamo. (It is not required to
control each playback on the Streamo)
The PC system requirement for DLNA is Windows 7 and Windows Media
Player 12. Setup as below:
Firstly, share the media on your PC to Streamo.
Control Panel > Network and Internet Network and sharing Center >
Media streaming options.
You may search and install any free or commercial DLNA apps from Google
Play or Apple Store if you are using Android mobile, tablet or iPhone/iPad.
It is suggested to use Bubble UPnP, Media Share on Android mobile, tablet
or iPhone/iPad.
Some apps may not support streaming music form iPhone/iPod but iPhone/
iPod could still be used to control steaming music from other servers.
Procedures for playing shared music on the app are as follows:
Select Streamo as the player. Some apps may allow to play the music to
multi players at the same time.
Select music server and choose the music. Some app can create a playlist if
you choose several music.
When using DLNA music steaming function on Music Link, you can only
control the volume and standby via the unit. It is restricted to control the
other functions.
Stop DLNA on PC, mobile or tablet before you resume Music Link’s own
control.
52
EN
MENU OVERVIEW
Standby
My mediaU
Internet Radio
Local Radio
Conguration
BT
CD Playback
AUX IN
My Favorite
Local Radio
History
Service
Radio Station Music
Power management Reset to default
Manage my mediaU
Time Display
Dimmer
Display
Alarm
Sleep Timer
Timer
Scheduled Playing
Language
Weather
Local Radio Setup
Local Radio Setup
Internet Radio
Device
Playback Setup
Resume when power on
Date & Time
Software update

53
EN
Information Center
DAB-Radio
FM
Media Center UPnP
My Playlist
Clear My Playlist
Menu overview page 2

54
EN
MAIN MENU
Under the main menu, you can select the following modes: My media U,
DAB Radio, FM Radio, AUX in, Internet Radio, Local Radio, Conguration,
Information Center, Media Center.
Conguration
Manage my mediaU
My mediaU media library – managing radio stations via Internet.
In order to access your favourite radio stations worldwide, at any time and
using any device with streaming capability, you can create a free account for
a media library at www.mediayou.net and add as many devices as you like.
You can access the service with a username and password of your choice.
You must also know the MAC address of your device (called a serial number
on Media You) in order to register this device under” Personalize Your
Internet Radio”.
You can nd the AC address of the Internet radio under Information Center
> System information > Wireless Info > MAC Address.
55
EN
After registering the device, you must enable this function under
Conguration > Manage my mediaU. So that the Internet radio can access
the media library.
The device automatically connects to your account and displays what has
been saved there:
• Favorite Station
• Favorite Location/Genre
• My Local Station
• Manually Add
Depending on your personal My mediaU settings, the display on the
Internet radio may look dierent.
If the device has not yet been registered with MediaYou, a corresponding
message appears when you wish to enable My mediaU.
If you have registered a device with multiple accounts, these will be
dispolayed after the activation and you can select the account you wish to
use. It is not necessary to enter a password.
56
EN
The menu Item my mediaU also appears in the main menu. You can nd the
selection again here:
• Favorite Station
• Favorite Location/Genre
• My Local Station
• Manually Add
You can also nd this selection in tthe media library, where you can assign
and manage the radio stations accordingly.
Under add manually, you can link the device to podcasts, for example.
You must know the URL of the podcast for this purpose.
1. Fill in the highlighted elds in your MediaYou account under “Add
Manually”.
2. On the Internet radio. , go to Conguration > Manage my mediaU and
enable once again.
3. Under My mediaU > Manually Add, you can nd all manually added
folders and addresses and can select the podcast.
The following podcast formats are supported:
- asx
- m3u
- pls
- pure streaming with HTTP, RTSP, MMS protocol
57
EN
Network
Wireless Network Conguration
Enable / disable WiFi network. When you enable the WiFi network, the
system will connect automatically.
You may refer to the section 3, Getting Started for the network setting.
Wireless Network (WPS PBC)
If you are using a router with WPS/QSS button, you may set up the network
connection simple via WPS function. Enter it go to press the WPS/QSS
button on your router within 120seconds. The connection between the
router and Streamo will then be congured automatically.
Manual Conguration
You can choose DHPC (which IP assigned automatically) or manually input
IP address for wireless network connection.
When you select manual setting for wired connection, the following to be
entered:
1. SSID (the name of Access Point);
2. IP Addressd
3. Subnet Mask;
4. Default Gateway;
5. Preferred DNS Server;
6. Alternate DNS Server.
You may choose (Manage) specic network if you have setup more than one
network connection within an area.
58
EN
Check Network when Power On
Enable / disable WiFi network.
When you enable the WiFi network, the system will automatically search
the available AP. Select you required AP. Enter WEP or WPA code to connect
the WIFI. If the wireless network connection is not existed or failed, the icon
at the top left corner will have a cross on it.
Date and Time
The date and time settings can only be made if the Internet radio is
connected to a wireless network.
Setup the date and time: The internet radio takes the date and time
automatically from a central server once a network connection has been
established. However, you will need to change the time manually to account
for the change from winter time to summer time.
• Set time format display as 12 Hour or 24 Hour.
• Set date format in the positions of YY (year), MM (month) and DD (day )-
• YY/MM/DD, DD/MM/YY or MM/DD/YY.
• Turn on/o the Daylight Saving Time (DST).
• Conrm with Enter or by pressing the reel.
With a wireless network connected , GMT (+01:00) time is a time reference
of time setting . Add or deduce the hour according to your time zone when
you set the time.
Alarm
There are three independent alarms – 2 alarms of absolute time setting
(Alarm 1 and Alarm 2) and 1 alarm for relative time setting (NAP Alarm ).
Select Alarm in the menu.
59
EN
The rst two alarms are similar to the normal alarm, turn on then set the
time and set it alarms Everyday, Once or every specic day of week.
Select Alarm time. Set the respective values using the Navigate reel on the
device or using the button of remote control and switch to the next entry
eld using the Conrm or by pressing the reel.
Choose Sound to set the sound to Beep, Melody or Internet Radio /DAB/
FM. An alarm symbol will appear on the top of the display next to the time.
Note that the alarm source is from the favorite internet radio stations if
Alarm Sound is set to be Internet Radio/FM/DAB. It Can only set one same
IR/DAB/FM station for alarm 1 and Alarm 2. When it reached the alarm time,
if set the alarm source is internet Radio, the unit connects to the internet if
the set network is available. Therefore there may be some delay from the
alarm to the radio play. If no network is connection in one minute, the alarm
will change to melody automatically.
After NAP Alarm is set, it alarms once in 5/10/20/30/60/90/120 minutes
depending on which one you have set.
You may choose Alarm Volume to congure the volume of the alarms.
When the alarm(s) is /are set, there will be a clock icon at the bottom of
the display. The clock icon with alarm time will also clearly display on the
standby mode screen.
You may choose Alarm Volume to congure the volume of the alarms.
When the alarm(s) is /are set, there will be a clock icon at the bottom of
the display. The clock icon with alarm time will also clearly display on the
standby mode screen.
During alarm, press Standby button to stop the alarm, Press the SLEEP
button on the device or press the to enter to snooze mode. It will alarm
again in 5 minutes.
Language
Select the OSD language: English /German/ French /Hungarian/ Czech/
Slovakian /Polish /Turkish.
Dimmer
Congure the brightness of backlight on the display.
Select ”Power Saving” to set the brightness of backlight in standby mode,
and select “Turn On” to set that in operation mode.
Choose Dimmer Timer to set the duration of the radio changing backlight
when you are not controlling it.

60
EN
Display
Set the display to Color display or Monochrome display.
Power Management
Congure to go to standby mode automatically during in the menu or/and
without Wi signal.
Choose the power management timer (5/15/30mins) to set the duration
of the radio to switch standby mode automatically when you are not
controlling it.
Choose “Turn O” to ignore the power management function.
Sleep Timer
Turn o or set the sleep time of 15/30/60/90/120/150/180 minutes. Once
the time is set, there will be a bed icon with remaining minutes at the top
right comer and Streamo will turn to standby then.
Buer
Congure the buer time of the music playback, 2/4 /8 seconds.
Weather
Streamo is able to display the current weather information (refer to 5.9.1)
under standby mode. Turn on Standby Display and set Temperature Unit (°C
or °F) to get the weather displayed at the standby mode.
When it is turned on, the current time and the current weather will display
in alternative 10 seconds.
Playback Setup
Select the playback mode of media center – O (no repeat or shule),
Repeat all , Repeat one, or Shule.
DLNA Setup
Default device name for DLNA is Streamo. You may rename it for DLNA
setup on the PC or mobile.
Equalizer
Default equalizer is Normal. You may change to Normal, Flat, Jazz, Rock,
Soundtrack, Classical, Pop, or News.
Press EQ on the remote control to swap among the EQ mode for shortcut
Resume When Power On
The system is default to resume the main menu when switching on the unit.
If turn this setting on, the system will remain in the internet radio playback.
If you were listening to internet radio or media center before switch o the
unit.
61
EN
Software Update
Update software. If there is an updated software version on the server, the
system will notify you when you return to the main menu.
Reset
Restore the default settings.
After the device is reset, the system will move to Language setting menu.
And it will automatically turn to Network setting menu once the OSD
language is elected.
FM Setup
Choose MONO/STEREO mode when listening to FM station.
My MediaU
Display and playback your own mediaU station list on the mediaU server.
Set your account rst.
INTERNET RADIO
After the connection of any station is succeeded, the bit rate and the format
of the station will display on the playing screen.
My Favorite
List of my favorite preset stations. It supports 250 favorite entries including
station and folder.
During the station playing screen, press and hold Preset to save the station
as my favorite. You may replace the previous saved station to the new one.
The symbol appears in the top line of the display while the device is saving.
Or press and hold the shortcut preset number key (1, 2, 3) on the device to
save the station on its location Preset #1, #2 ,#3.
If the Selected station have been saved, you cannot save it again.
The saved stations are showed under this menu. You may also press Preset
to enter the saved station list.
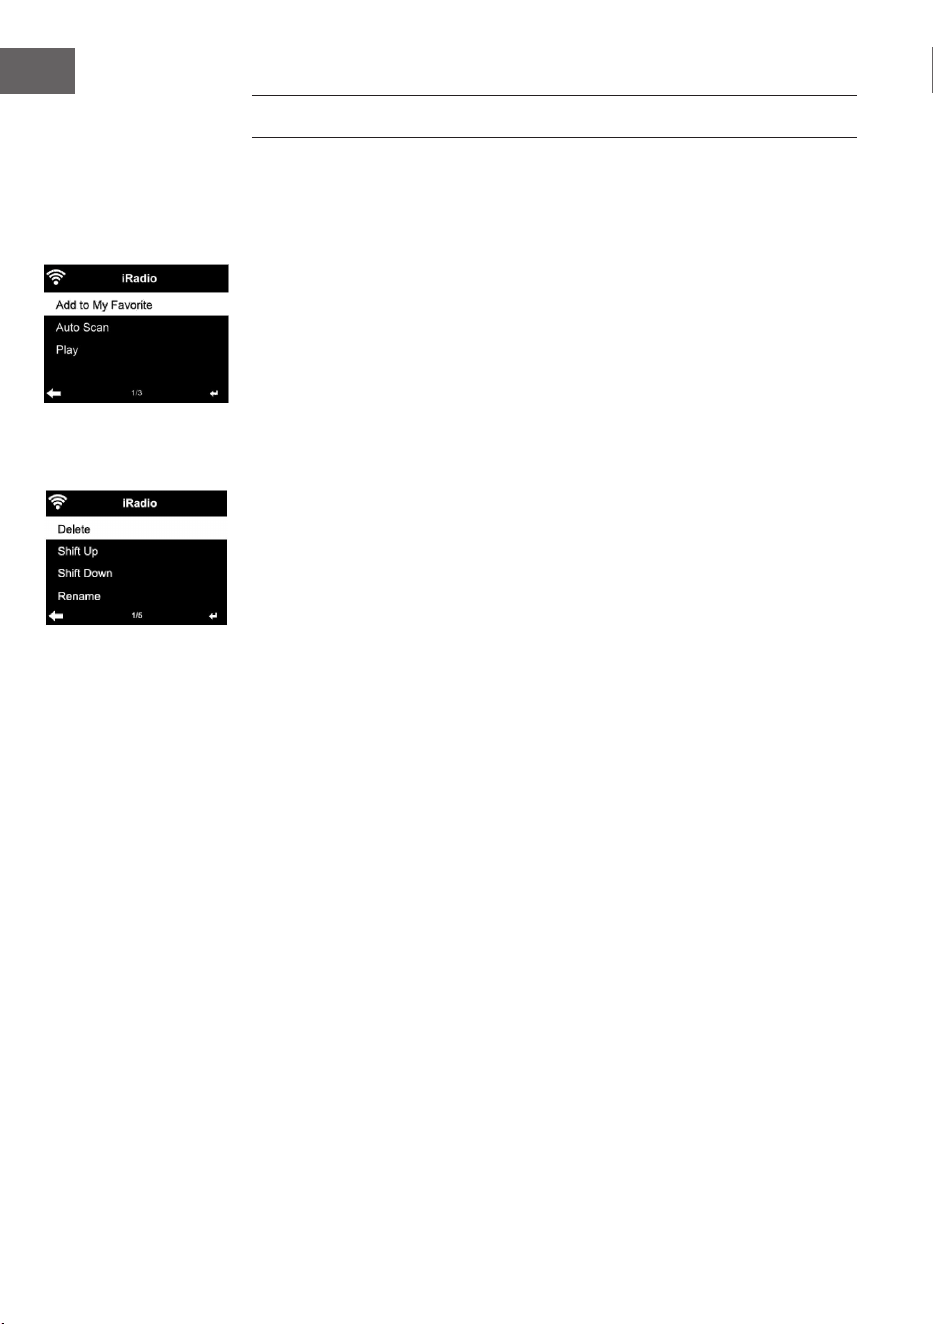
Under the preset station list, move to your station, press Enter to listen, You
may also press to enter its submenu to Delete (deletes a radio station
from the favourites list), Shift Up/down along the list, Rename (you can give
the radio station a name of your choice), Play, or Use as Alarm Sound (if you
chose internet as alarm sound in alarm conguration).
Press PRESET, then rotate the UP/DOWN reel on the device or using the
/ of remote control to recall the saved station.
62
EN
250 storage spaces are available for your favorites.
Radio Station/Music
Stations are categorized into Global Top 20, Genre, Country/Location and
Highlight.
Enter to continue the subcategories and choose the station to listen.
For each station, press Enter to play directly. You may press Right to enter
its submenu – you can Add to Favorite, Auto Scan, Play or Use as Alarm
Sound( if you chose internet as alarm sound in alarm conguration).
If you select Auto Scan, it becomes the playback of marquee for each
station in the subcategory. Each station plays 30 seconds until all have
played. Or your press Enter to stop the marquee listening.
Press Info to view the display information of the station.
History
A list of last listened stations. It can save up to 10 history stations.
For each station, press Enter to play directly. You press to enter its
submenu – you can select Add to Favorite, Auto Scan, Play or Use as Alarm
Sound (if you chose internet as alarm sound in alarm conguration).
When you choose Auto Scan, it becomes the playback of marquee for each
station in the history. Each station plays 30 seconds until all have played or
you press Enter to stop the marquee listening.
Local Radio
There is a shortcut Local Radio under internet radio so that you can easily
go to the station list of your location.
The device can use the IP address to detect its current location and can then
automatically generate a list of local radio stations. However, you can also
enter a dierent country.

63
EN
MEDIA CENTER
UPnP
If you have set up shared media, you should see the shared media form
UPnP.
If you have more than one computer sharing media, the alternative are
listed. SELECT the shared media you want to play.
Press Menu to view the display information of the playing track.
Tips. The radio can only read the track with the le name less than 40
characters. And the characters should be in European language. If you
encounter failure of reading the track under UPnP mode, you may try to
rename the le.
However, if the track is still unable to play, you can try converting the le to
dierent formats.
My Playlist
You can create a play list of favourious music from UPnP. When you playing
the music, press and hold Enter to save it into My Playlist.
Clear My Playlist
You can remove all the saved music under My Playlist
INFORMATION CENTER
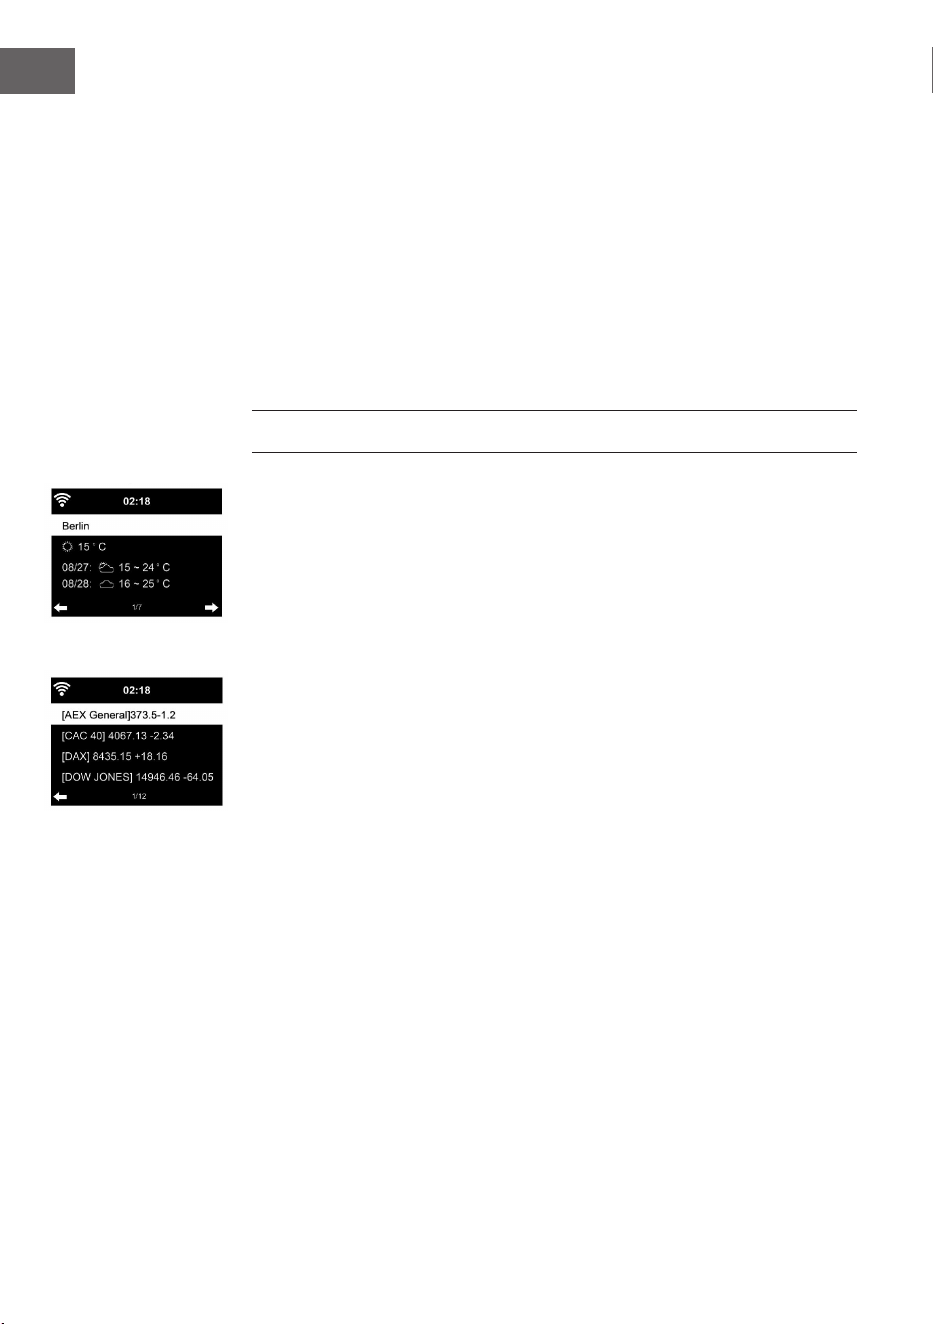
Weather Information
There are weather information and forecasts for 2000 cities. Select the
country and then the city for the weather details.
It is able to display the weather information on this standby mode. On the
weather information page, press Right, then show “ Add to Standby “.
If you want the weather of the city you selected displaying on the Standby,
press Enter to set the city to displaying on the standby mode.
Financial Service
View the stock index from around the world.
System Information
Check out the version of the system, and the details of connected network.
The information includes MAC address which you are required to ll in when
registration of my mediaU membership.
64
EN
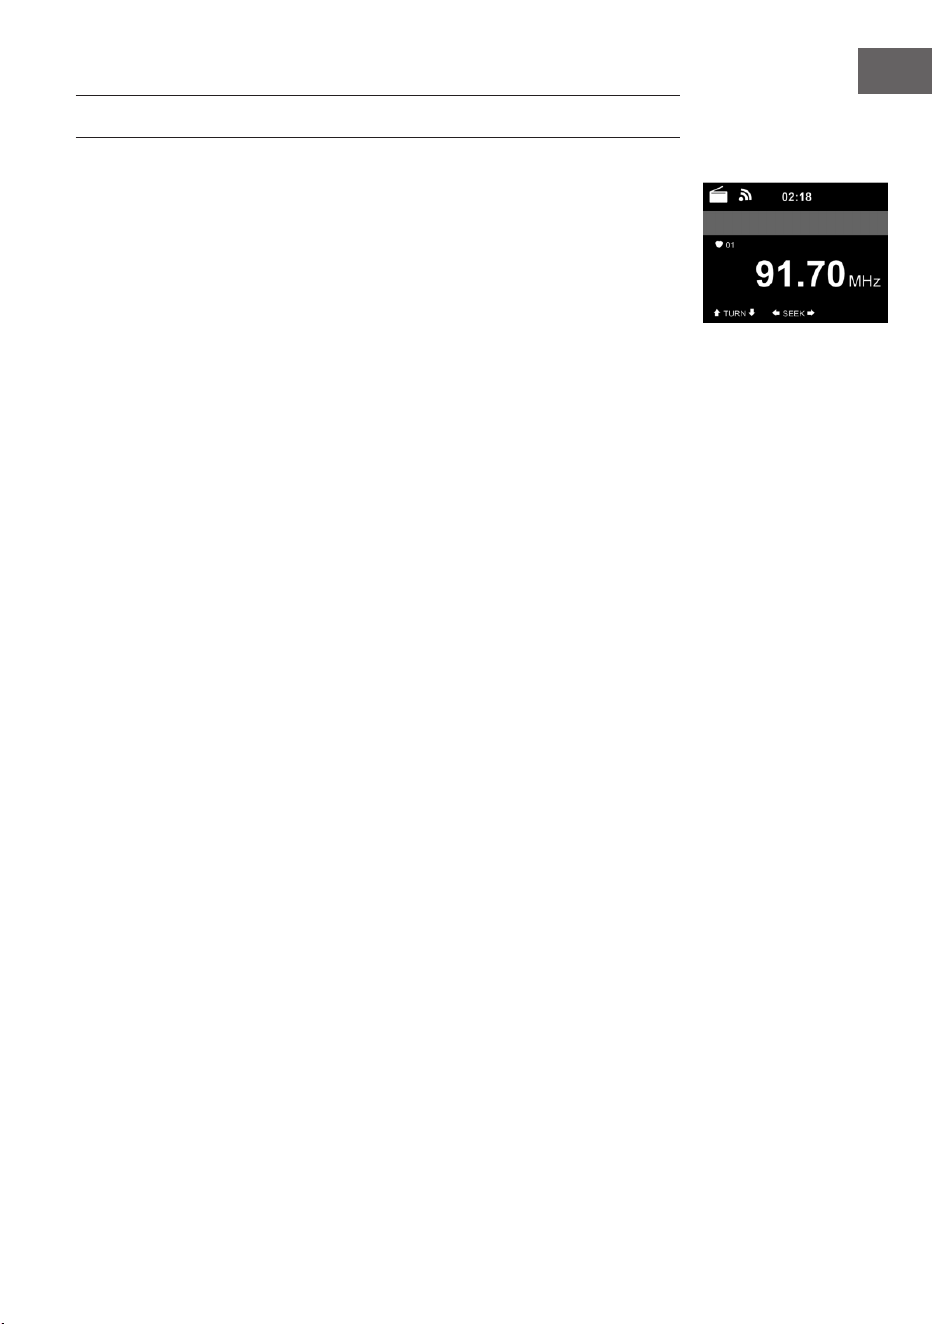
FM RADIO
FM radio mode receives analogue radio from the FM band
Press button on the device or using the button of remote control
to search FM station. The frequency display starts to run up as Streamo CD
scans the FM band. It stops when it has received a station, you may press
/ on the remote control to tune station manually. Each step moves 0.05
MHz.
Press and hold the PRESS button on the remote control and the device to
save the station.
You can save up to 20 station. Press PRESET, then press on the remote
control or press PRESET button on the device to recall the saved station.
Alternatively, you can let the system scan ALL station for you by
pressing ENTER or Scan on the remote control. The searched station will
automatically be stored in preset station list.
CD PLAYBACK
CD/MP3 OPERATION
Press Menu button on the Device or on the remote control to select CD
mode.
Open the CD door by press the top cap.
Insert a CD disc into the CD compartment.
PLAY/PAUSE operation
Press Enter button on the device or button on the remote control to start
play.
Press Enter button on the device or button on the remote control to Pause .
Press button on the device or on the remote control to stop play.
Pressor to skip backward or forward to the desired track.
Rotary the knob on the device or press or button on the remote
control to skip backward or forward to the desired track.

65
EN
BT
Selecting an audio source: Press ENTER (4) repeatedly until “BT” appears on
the display.
Make sure that no other BT device is connected to the radio. “No
Connection" will appear on the display.
Activate BT mode on the device that you want to connect. Look for
The radio on the list of detected devices on the BT device (refer to the
instruction manual of the device). Once the devices have found each other,
the radio will appear as 'Streamo' on the BT device.
Select 'Streamo' from the list. If you are required to enter a PIN code, enter
0000 (four zeros). Certain devices may also require you to approve the
connection.
Once the connection has been successful, “Connected” will appear on the
display of the radio.
Start playback on your BT device.
Control the playback from the BT device or from the radio using the Vol+/
Vol- on the device and remote control, Adjust the volume both on the BT
device and the radio.
To disconnect a connected BT device: Press and hold down the Enter button
for 3 seconds. The message “No Connection” will appear on the display.
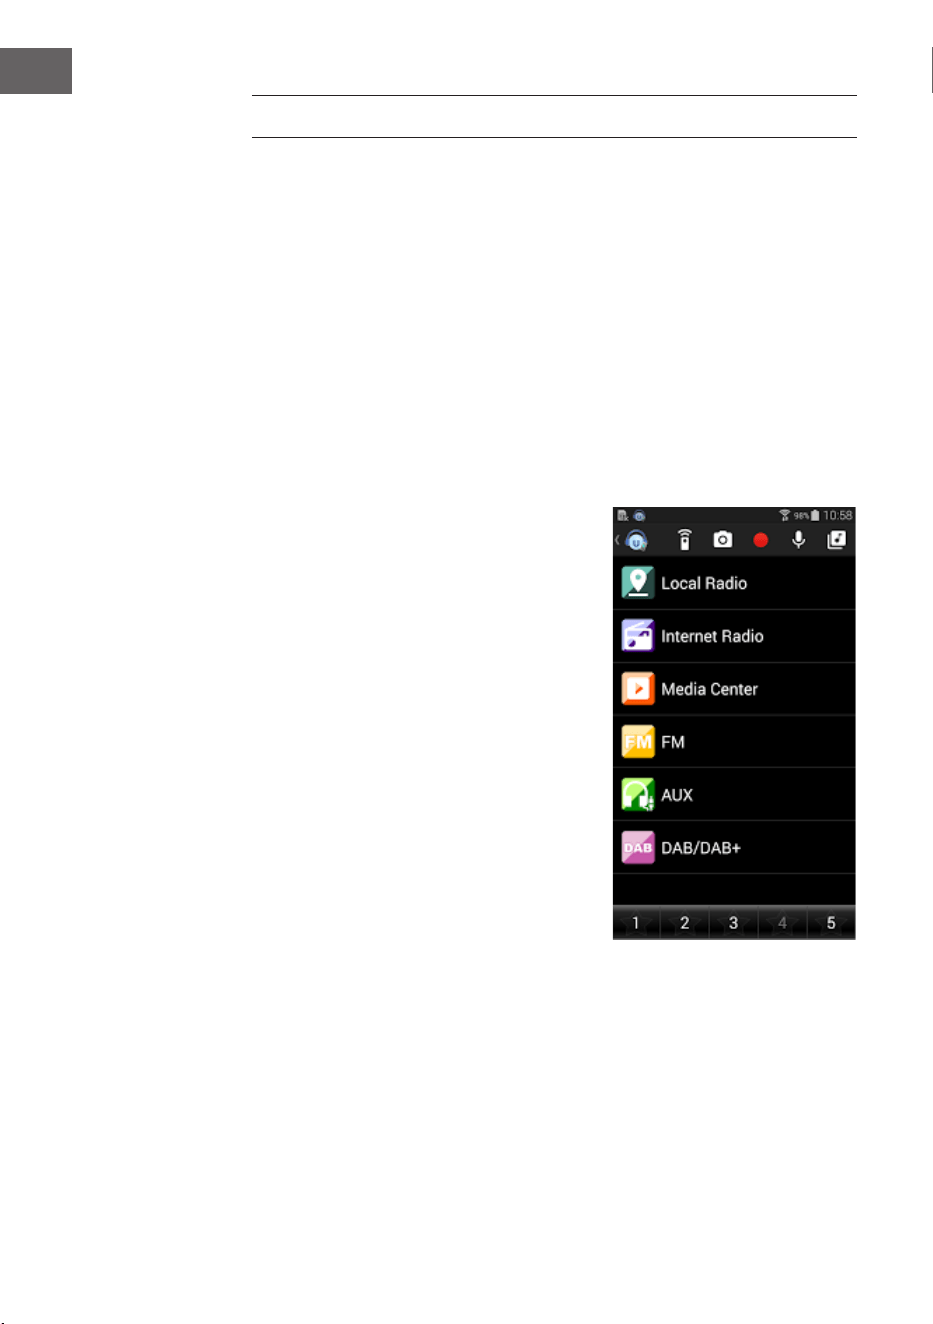
66
EN
REMOTE CONTROL VIA APPS
Some apps for Android, e. g. Air Music Control, let you control the internet
radio from your smart phone or tablet.
As soon as the devices are connected, the same menu structure shown on
the internet radio will appear on the smart phone/tablet. You can select all
functions just like on the radio. The selected functions /menu items shown
on the radio will change according to the actions taken on your mobile
device.
If you are controlling the internet radio via app, a UPnP connection to
Windows Media Player may not be possible.
Control via Air Music Control
You can operate the internet radio via you
smartphone or tablet.
Download “Air Music Control“ from the
“Google Play Store“ or “Apple AppStore“.
The devices must be connected to the
same network.

67
EN
DISPOSAL CONSIDERATIONS
If there is a legal regulation for the disposal of
electrical and electronic devices in your country,
this symbol on the product or on the packaging
indicates that this product must not be disposed of
with household waste. Instead, it must be taken to
a collection point for the recycling of electrical and
electronic equipment. By disposing of it in accordance
with the rules, you are protecting the environment and
the health of your fellow human beings from negative
consequences. For information about the recycling
and disposal of this product, please contact your local
authority or your household waste disposal service.
This product contains batteries. If there is a legal
regulation for the disposal of batteries in your country, the
batteries must not be disposed of with household waste.
Find out about local regulations for disposing of batteries.
By disposing of them in accordance with the rules, you are
protecting the environment and the health of your fellow
human beings from negative consequences.
DECLARATION OF CONFORMITY
Manufacturer:
Chal-Tec GmbH, Wallstrasse 16, 10179 Berlin,
Germany.
Importer for Great Britain:
Berlin Brands Group UK Limited
PO Box 42
272 Kensington High Street
London, W8 6ND
United Kingdom
Hereby, Chal-Tec GmbH declares that the radio
equipment type Streamo CD is in compliance with
Directive 2014/53/EU. The full text of the EU declaration
of conformity is available at the following internet
address: use.berlin/10034055
For Great Britain: Hereby, Chal-Tec GmbH declares that
the radio equipment type Streamo CD is in compliance
with the relevant statutory requirements. The full text of
the declaration of conformity is available at the following
internet address: use.berlin/10034055


69
FR
Chère cliente, cher client,
Toutes nos félicitations pour l’acquisition de ce
nouvel appareil. Veuillez lire attentivement et
respecter les instructions de ce mode d’emploi
an d’éviter d’éventuels dommages. Nous ne
saurions être tenus pour responsables des
dommages dus au non-respect des consignes
et à la mauvaise utilisation de l’appareil.
Scannez le QR-Code pour obtenir la dernière
version du mode d‘emploi et des informations
supplémentaires concernant le produit.
SOMMAIRE
Fiche technique 70
Consignes de sécurité 71
Contenu de l'emballage 72
Aperçu de l'appareil 73
Mise en marche 78
Dlna 83
Présentation du menu 84
Menu principal 86
Internet radio 94
Media center 95
Centre d‘informations 96
Radio FM 97
Lecture d'un CD 98
BT 98
Commande à distance par application 99
Conseils pour le recyclage 100
Déclaration de conformité 100

70
FR
FICHE TECHNIQUE
Numéro d‘article 10034055, 10034056
Alimentation de l‘adaptateur
secteur
Entrée: 100-240 V ~ 50/60 Hz max. 0,8 A
Sortie: 12 V / 2,5 A
Connexions Entrée Aux (3,5 mm)
Radio FM
Plage de fréquences 87,5 MHz - 108 MHz
DAB/DAB+
Bande de fréquence 174-240 MHz
WLAN
Standard
Cryptage
Bande de fréquence
Puissance d‘émission
802.11b/g/n
WEP, WPA, WPA 2(PSK), WPS
2402–2480MHz
14-20dBm
BT specications
Bande de fréquence
Puissance d‘émission max
2402–2480MHz
10dBm
Streaming UPnP, DLNA
Formats de chiers
compatibles
WMA, MP3

71
FR
CONSIGNES DE SÉCURITÉ
Lisez attentivement toutes les consignes de sécurité et le mode d'emploi
avant d'utiliser l'appareil.
• Conservez le mode d'emploi en lieu sûr pour pouvoir vous y référer
ultérieurement.
• Respectez toutes les étapes nécessaires pour l'utilisation.
• Ne placez pas l'appareil dans un endroit humide, ni en présence de
champs électromagnétiques, ne l'exposez pas à l'ensoleillement direct
ou à une température ambiante élevée.
• Si vous n'utilisez pas l'appareil pendant une longue période, débranchez
le cordon d'alimentation. Retirez la pile du micro.
• Débranchez le cordon d'alimentation avant de nettoyer l'appareil.
N'utilisez pas de gaz volatiles, de diluants ou d'autres agents de
nettoyage chimiques pour le nettoyage.
• Utilisez uniquement les accessoires du fabricant.
• L’appareil ne doit être alimenté que dans le respect des indications de
la plaque signalétique.
• N'eectuez pas la maintenance et les réparations vous-même. La
tension dangereuse dans l'appareil peut entraîner un choc électrique
en cas d'ouverture du boîtier. Les réparations ne doivent être eectuées
que par un service après-vente qualié.
• Si une pièce doit être remplacée, elle doit correspondre aux
spécications du fabricant ou être une pièce d'origine.
• Si l'appareil est défectueux ou fonctionne mal, contactez le service
clientèle. N'ouvrez pas le boîtier pour réparer vous-même l'appareil.
• Cet appareil n'est pas destiné à être utilisé par des personnes (enfants
y compris) ayant des capacités physiques, sensorielles ou mentales
limitées, ou dénuées d'expérience et / ou de connaissances, à moins
d'être supervisées ou d'avoir été formées à l'utilisation de l'appareil par
une personne responsable de leur sécurité.
• Surveillez les enfants pour vous assurer qu'ils ne jouent pas avec
l'appareil.
• Cet appareil est destiné à la reproduction du son. Il est destiné et ne
doit être utilisé qu'à cette n. Il ne peut et ne doit être utilisé que de la
manière décrite dans ce manuel.

72
FR
Power Menu
Volume
Preset
Scan
Up
Down
Enter
CONTENU DE L'EMBALLAGE
Streamo CD
Adaptateur
secteur
Télécommande
Mode d'emploi
EQ
Eject

73
FR
APERÇU DE L'APPAREIL
Vue de face
1 Capteur IR
2 Ecran LCD
3 Touche de marche/arrêt et de menu
4 Touches mémoire
5 Recherche de station
6 Lecture / Pause
7 Gauche
8 Touche d'éjection
9 Droite
10 Bouton de navigation / conrmer
11 Tiroir à CD
4
2
1
3
5 6
7
8
9
10
11
Power Menu
Volume
Preset
Scan
Down
Up
Enter

74
FR
Vue de dos
12 Tubes Bassreex
13 Antenne fouet
14 Entrée casque /AUX in/ prise de l'adaptateur secteur
15 Tubes Bassreex
Dc inAux
12 13 14 15

75
FR
Télécommande
EQ
Eject
1 2
5
6
9
12
13
16
19
20
22
10
3
4
7
8
11
14
17
18
21
15

76
FR
1 Veille
2 Enceinte activée/désactivée
3
MENU
Menu principal
4
Preset
Stations mémorisées, favoris entre autres
5
Scan
Recherche de stations DAB/FM
6
Eject
Pour éjecter un CD
7
Mediacenter, titre précédent
8
Mediacenter, lecture / pause
9
Mediacenter, titre suivant
10
Pour arrêter la lecture
11 EQ Egaliseur
12 Alarme
13
haut, sélection de chire/lettre
14
gauche, pendant la saisie : champ précédent,
eacer
15
Enter
ENTER – conrmer la saisie
16
droite, pendant la saisie : champ suivant,
mémorisation de la dernière saisie
17
bas/ sélection de chire / lettre
18
V-
Pour réduire le volume
19
V+
Pour augmenter le volume
20
0.....9
Rappel des favoris / mémoire ; saisie de lettre et
de chires
21 Réglage de la luminosité
22 Touche répétition de l'alarme

77
FR
Icônes à l'écran
Connexion en cours, l'appareil fonctionne
Pas de connexion Wi
Connexion Wi établie
Réception de radio VHF : Mono
Réception de radio VHF : Stéréo
Fonction radio VHF
AUX
Pour couper l'enceinte
Recherche
Alarme activée
Une station de radio Internet a été mémorisée
Une station de radio FM a été mémorisée
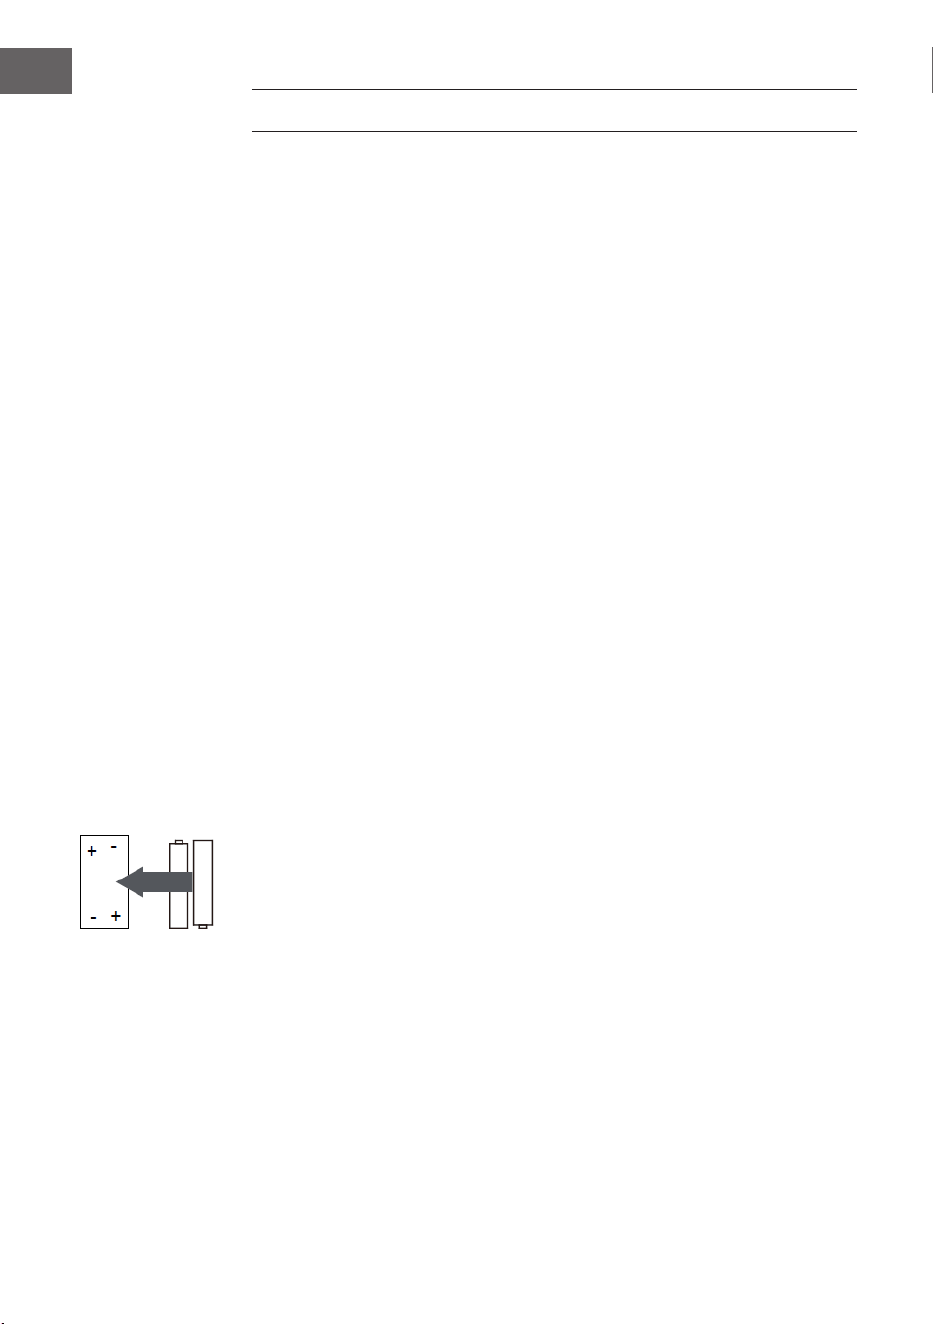
78
FR
MISE EN MARCHE
Pour utiliser la chaîne stéréo Streamo, les conditions suivantes sont
nécessaires :
• Une connexion haut débit avec un point d'accès laire / sans l, un
routeur ou un périphérique réseau similaire.
• Le périphérique réseau doit prendre en charge la connexion sans l via
Wi-Fi (802.11b / g / n).
• Un ordinateur ou un smartphone doit être disponible et se trouver sur le
même réseau que l'appareil.
Installation des piles dans la télécommande
1. Appuyez sur l'encoche située à l'intérieur du couvercle du compartiment
à piles et retirez-le.
2. Insérez deux piles AAA dans le compartiment, comme indiqué.
Respectez la polarité à l'intérieur du compartiment à piles.
3. Réinstallez le couvercle du compartiment à piles.
Consignes de sécurité pour les piles
Respectez les consignes de sécurité suivantes lorsque vous utilisez des piles
:
• Utilisez uniquement des piles de type et de taille adaptés.
• Veillez à insérer correctement les piles dans le compartiment à
piles. Respectez les marques de polarité. Une pile mal insérée peut
endommager l'appareil.
• Ne mélangez jamais diérents types de piles et ne mélangez jamais des
piles anciennes et neuves.
• Si les piles sont épuisées ou si vous n'utilisez pas l'appareil pendant une
longue période, retirez-les du compartiment à piles pour éviter toute
fuite.
• N'essayez pas de recharger des piles qui ne sont pas spécialement
conçues pour cela, car elles pourraient surchauer et éclater. Suivez les
instructions du fabricant de la pile.
• N'exposez jamais les piles à une amme nue, elles pourraient exploser
ou fuir.
• Nettoyez les contacts des piles et les contacts du compartiment à piles
avant d'insérer les piles dans le compartiment.
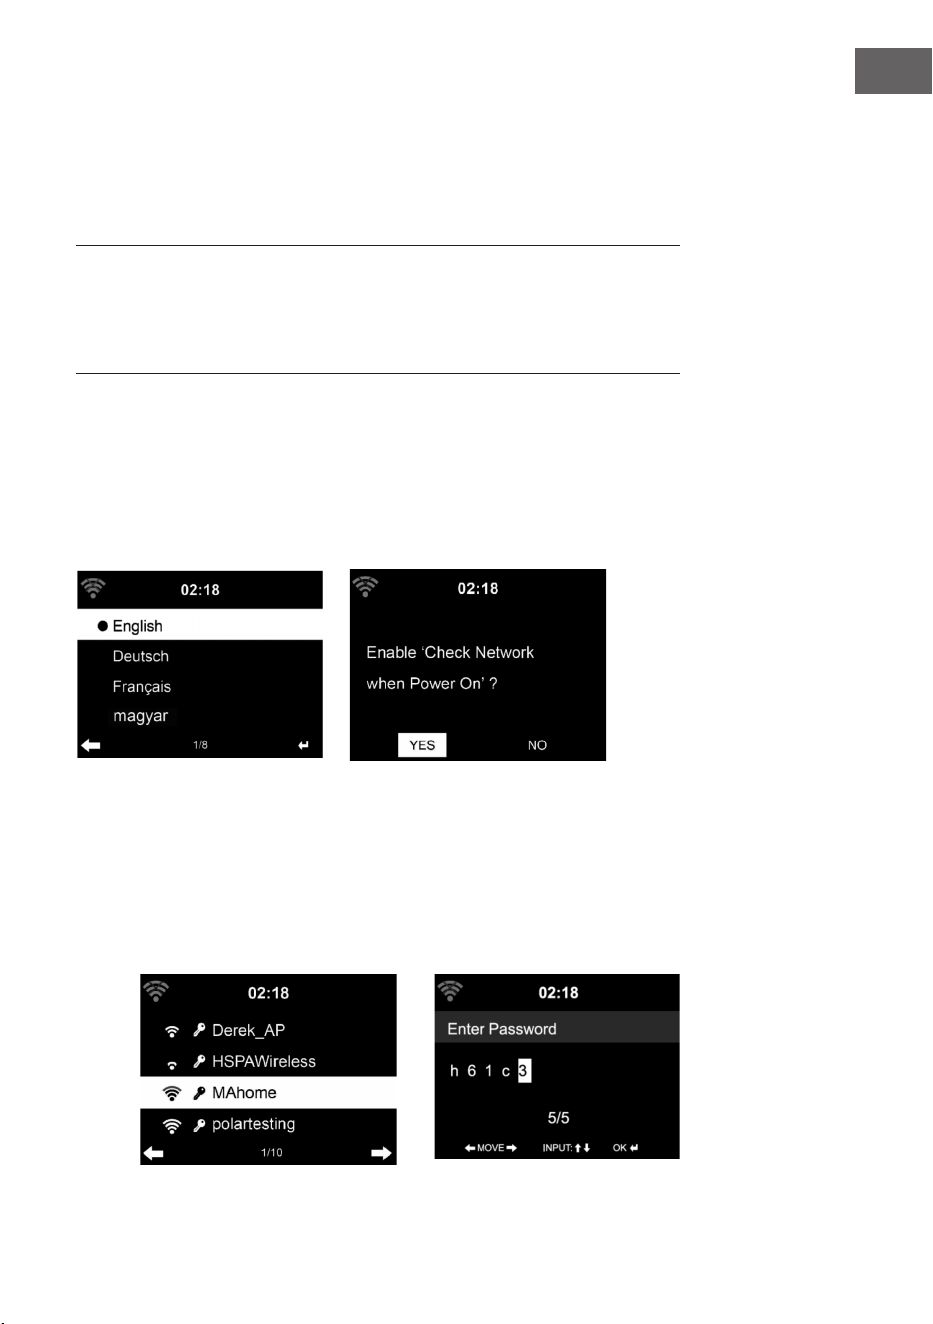
79
FR
Etablissement de la connexion réseau
Pour la connexion au réseau sans l (Wi) :
Vériez que le voyant KINK / ACT Wi du point d'accès câblé / sans l ou
du routeur est allumé. Si vous avez des questions, lisez les instructions
d’utilisation correspondantes.
Le Wi permet le transfert de données sans l entre appareils sur de
courtes distances inférieures à 20 mètres. Les murs ou les plafonds
peuvent réduire la puissance de la connexion Wi. Par conséquent,
essayez de maintenir le Streamo et / ou le point d‘accès dans la distance
susmentionnée et évitez de placer des obstacles entre les appareils.
• Branchez l'adaptateur secteur à l'arrière du Streamo et branchez le
cordon d'alimentation dans la prise secteur.
• Lorsque vous utilisez l'appareil pour la première fois, vous devez
d'abord dénir les paramètres de langue et de réseau.
2
1 2
3
• Sélectionnez "YES" (oui) pour établir la connexion réseau.
• Sélectionnez "YES" (oui) (WPS pour les routeurs WPS uniquement).
Appuyez ensuite sur la touche WPS de votre routeur.
• Si vous sélectionnez "YES", l'appareil recherche automatiquement les
réseaux Wi disponibles et aiche la liste à l'écran.
1

80
FR
• Le nombre de barres de l'icône Wi devant le nom du réseau (SSID)
indique la force de connexion relative du réseau.
• Le symbole de clé signie que le réseau respectif est protégé par un
mot de passe.
• Si l'appareil ne trouve pas de réseau sans l, le message "No wireless
networks found" s'aiche à l'écran. Modiez l'emplacement de l'appareil
ou vériez le routeur sans l.
• Vous pouvez voir le SSID du point d'accès dans les paramètres du point
d'accès (routeur).
• Sélectionnez le réseau souhaité et conrmez par OK.
• Si le réseau sélectionné est protégé par un mot de passe, celui-ci vous
sera demandé.
• Entrez le mot de passe en utilisant les chires et les lettres de la
télécommande.
• Lors de la saisie du mot de passe, respectez la casse.
• Vous pouvez également utiliser le bouton rotatif de l'appareil pour
entrer le mot de passe. Si vous avez fait une erreur de saisie, appuyez
sur la touche pour corriger.
Saisie avec la télécommande
Le curseur indique l'espace de saisie actuel.
Appuyez plusieurs fois sur la touche numérique correspondante. 0 0 (pour
eacer la saisie)
0 0 (Eacer la saisie)
1 1(touche espace) @ ! ” # $ % & ( ) * ’ + - { \ | }< >?........
2 2 A B C a b c
3 3 D E F d e f
4 4 G H I g h i
5 5 J K L j k l
6 6 M N O m n o
7 7 P Q R S p q r s
8 8 T U V t u v
9 9 W X Y Z w x y z
‘ ’ pour retourner au caractère précédent. Vous pouvez écraser le
caractère.
‘ ’ pour aller au caractère suivant. Le dernier caractère est écrasé.
‘ ’ pour choisir entre les chires et les lettres.
Enter pour conrmer la saisie
Quelques secondes peuvent être nécessaires pour établir la connexion
réseau.

81
FR
Dès que la connexion est établie,
le menu principal apparaît avec ses
éléments :
• Radio Internet : accès aux
stations de radio du monde
entier
• Media Center : accès à vos
appareils UPnP avec possibilité
de streaming par Software.
• Centre d'informations : accès
aux informations météo, nancières et système
• Paramètres : plusieurs paramètres système
• Stations de radio locales : accès aux stations de radio d'une région
donnée (par exemple, stations françaises uniquement)
• My mediaU : accès à une bibliothèque de médias online. Ce symbole
apparaît uniquement lorsque la fonction a été activée auparavant dans
les "paramètres".
Appuyez sur la touche de veille
pour passer en mode veille.
L'heure, la date et toutes les
alarmes actives sont aichées à
l'écran.
Lorsque vous avez déjà établi la connexion réseau et que vous utilisez
Streamo sur le réseau, l'appareil s'y reconnecte automatiquement. Si vous
souhaitez modier le réseau, établissez la connexion appropriée sous
"Paramètres".
Tournez le bouton de volume rond pour entrer les chires / lettres. Dès
que vous avez atteint la lettre que vous souhaitez entrer, appuyez sur la
touche et continuez avec la saisie de la lettre suivante. Dès que vous
avez terminé, appuyez sur la touche ENTER pour conrmer la saisie. Vous
pouvez appuyer sur la touche pour accéder à la saisie précédente. Drehen
Tournez le bouton de volume de l'appareil ou appuyez sur les touches V- /
V + de la télécommande pour régler le volume. Si vous souhaitez mettre
l'appareil en sourdine, vous pouvez appuyer directement sur la touche .

82
FR
Informations sur la musique en streaming
• Le nom par défaut de l'appareil est Streamo. Vous pouvez renommer
l'appareil selon vos besoins (voir la section "Mise en marche et
utilisation").
• Les informations suivantes sont une introduction à la conguration du
streaming de musique à partir d’un ordinateur ou d’un autre support.
• N'oubliez pas que les applications que vous utilisez pour diuser de la
musique ont leurs propres instructions.
• Assurez-vous que les chiers multimédias que vous souhaitez diuser
avec Streamo sont au format MP3, WMA, WAV ou AAC.
• Vous trouverez des informations détaillées sur la lecture multimédia en
streaming dans la section "Mise en marche et utilisation".
UPnP
Pour pouvoir diuser de la musique en streaming depuis un ordinateur, vous
devez eectuer les réglages suivants sur l'ordinateur :
• Connectez l'ordinateur au réseau.
• Vériez que Streamo est allumé et connecté au même réseau que
l'ordinateur.
• Ouvrez le lecteur Windows Media de la plateforme UPnP (11 ou plus).
Vous pouvez également utiliser d'autres plateformes ou serveurs, tels
que Windows Media Connection.
Vous pouvez aussi diuser de la musique en streaming depuis d'autres
serveurs de musique comme par exemple votre smartphone (Android) :
• Connectez le smartphone au réseau.
• Recherchez des applications de partage de musique sur Google Play et
installez-les sur votre smartphone.
• Ajoutez les chiers multimédias que vous souhaitez partager sur votre
smartphone.
• Sélectionnez ensuite la musique que vous voulez écouter sur le Streamo
dans l'application et réglez le volume depuis le Streamo.

83
FR
DLNA
Outre UPnP, Streamo prend en charge la fonctionnalité DLNA. Cela signie
que vous pouvez partager des chiers de musique de votre PC ou de vos
smartphones Android avec Streamo et contrôler la lecture à partir de votre
PC, smartphone Android ou iPhone / iPad (il n'est pas nécessaire de régler
chaque lecture depuis le Streamo).
La conguration système requise pour DLNA sur le PC est au moins Windows
7 et Windows Media Player 12. Réglez les paramètres comme suit :
• Commencez par partager le contenu multimédia sur votre PC avec
Streamo.
• Vous pouvez rechercher des applications DLNA gratuites ou payantes
dans Google Play ou dans l'Apple Store si vous utilisez un smartphone,
une tablette, un iPhone ou un iPad. L'utilisation de Bubble UPnP est
recommandée.
• Il est possible que certaines applications ne prennent pas en charge
le streaming à partir de l'iPhone et de l'iPod. iPhone et iPod peuvent
toutefois être utilisés pour contrôler la lecture de musique à partir
d'autres serveurs:
Procédez de la façon suivante pour lire de la musique depuis une
application :
• Sélectionnez Streamo comme support de lecture. Certaines
applications permettent la lecture de musique sur plusieurs supports en
même temps.
• Sélectionnez le serveur de musique et sélectionnez la musique.
Certaines applications vous permettent de créer une liste de lecture.
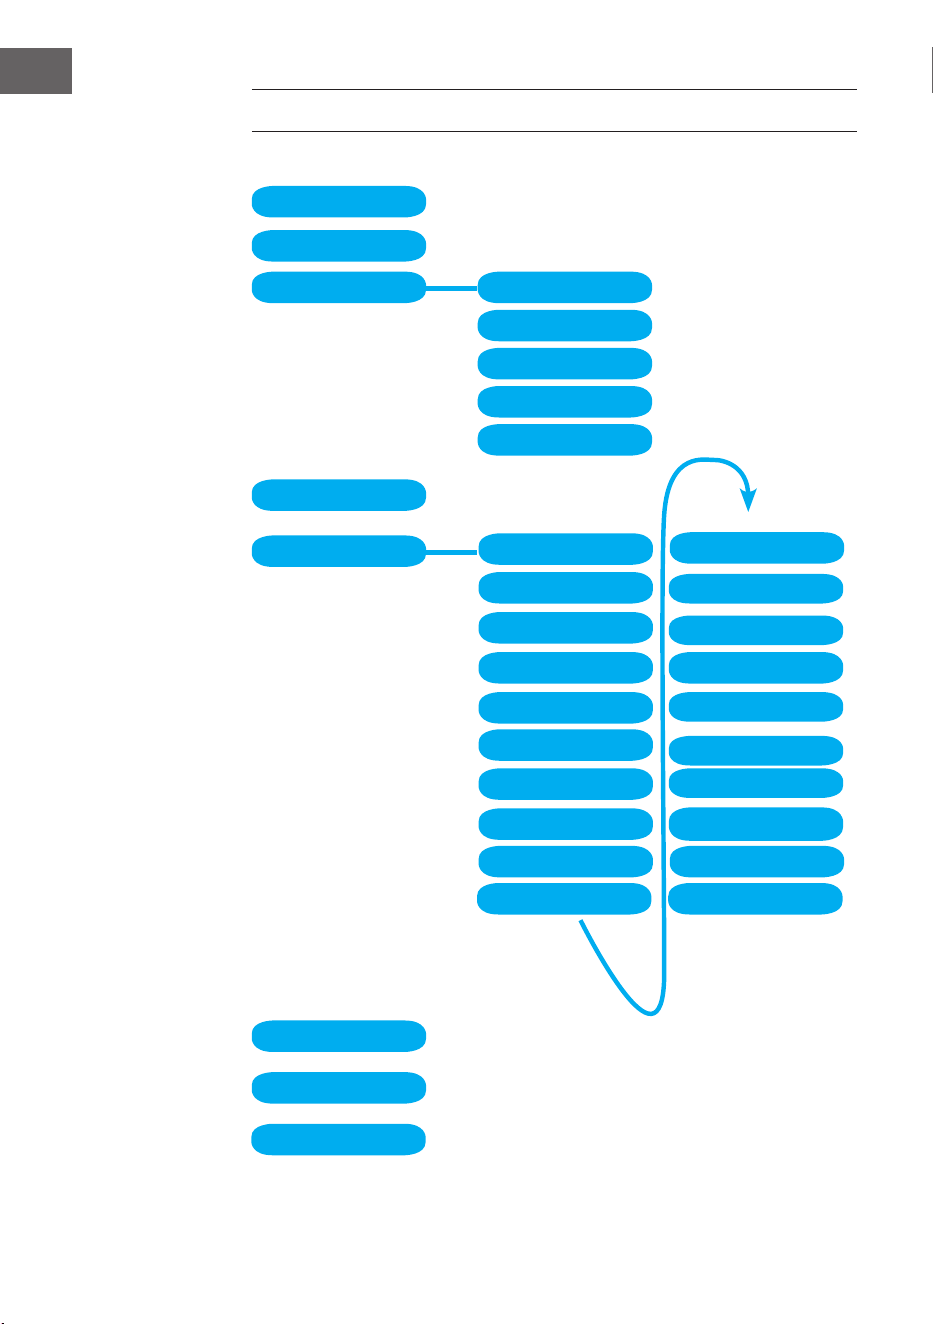
84
FR
PRÉSENTATION DU MENU
Standby
My mediaU
Internet Radio
Local Radio
Conguration
BT
CD Playback
AUX IN
My Favorite
Local Radio
History
Service
Radio Station Music
Power management Reset to default
Manage my mediaU
Time Display
Dimmer
Display
Alarm
Sleep Timer
Timer
Scheduled Playing
Language
Weather
Local Radio Setup
Local Radio Setup
Internet Radio
Device
Playback Setup
Resume when power on
Date & Time
Software update

85
FR
Information Center
DAB-Radio
FM
Media Center UPnP
My Playlist
Clear My Playlist
Présentation du menu 2

86
FR
MENU PRINCIPAL
Vous pouvez sélectionner les modes suivants dans le menu principal : Mes
médias U, Radio DAB, Radio FM, Entrée auxiliaire, Lecture USB, Spotify,
Radio Internet, Stations de radio locales, Paramètres, Centre d'information,
Media Center.
Paramètres
Gestion de "My mediaU"
Bibliothèque My mediaU – gestion des stations de radio par Internet.
Pour avoir accès à vos stations de radio mondiales préférées à tout
moment, si vous avez un appareil mobile avec fonction de streaming,
vous pouvez accéder gratuitement à la bibliothèque de médias avec
www.mediayou.net en créant un compte et en y ajoutant ensuite autant
d'appareils que vous le souhaitez. Choisissez un nom d'utilisateur et mot de
passe.
Vous devez également connaître l'adresse MAC de votre appareil (appelé
le numéro de série de Media You) pour enregistrer votre appareil sous
"Personalize Your Interner Radio". Vous pouvez y accéder sous Centre
d'information> Informations système> Informations sur les réseaux sans l>
Adresse MAC.

87
FR
Après l'enregistrement, cette fonction doit être activée sous Information
Center > System information > Wireless Info > MAC Address pour permettre
à la radio Internet d'accéder à la bibliothèque de médias.
L'appareil se connecte automatiquement à votre compte et aiche ce qui y
a été stocké :
• Stations favorites
• Emplacement favori / genre
• Mes stations locales
• Ajout manuel
• En fonction de vos paramètres personnels My mediaU, l'aspect de
l'écran de votre Streamo peut varier.
• Si votre appareil n'a pas encore été enregistré auprès de MediaYou, un
message apparaît si vous souhaitez activer My mediaU.
• Si vous avez enregistré votre appareil sous plusieurs comptes, ils
s'aicheront tous après l'activation pour vous permettre de sélectionner
le compte souhaité. Il n'est pas nécessaire d'entrer un mot de passe.
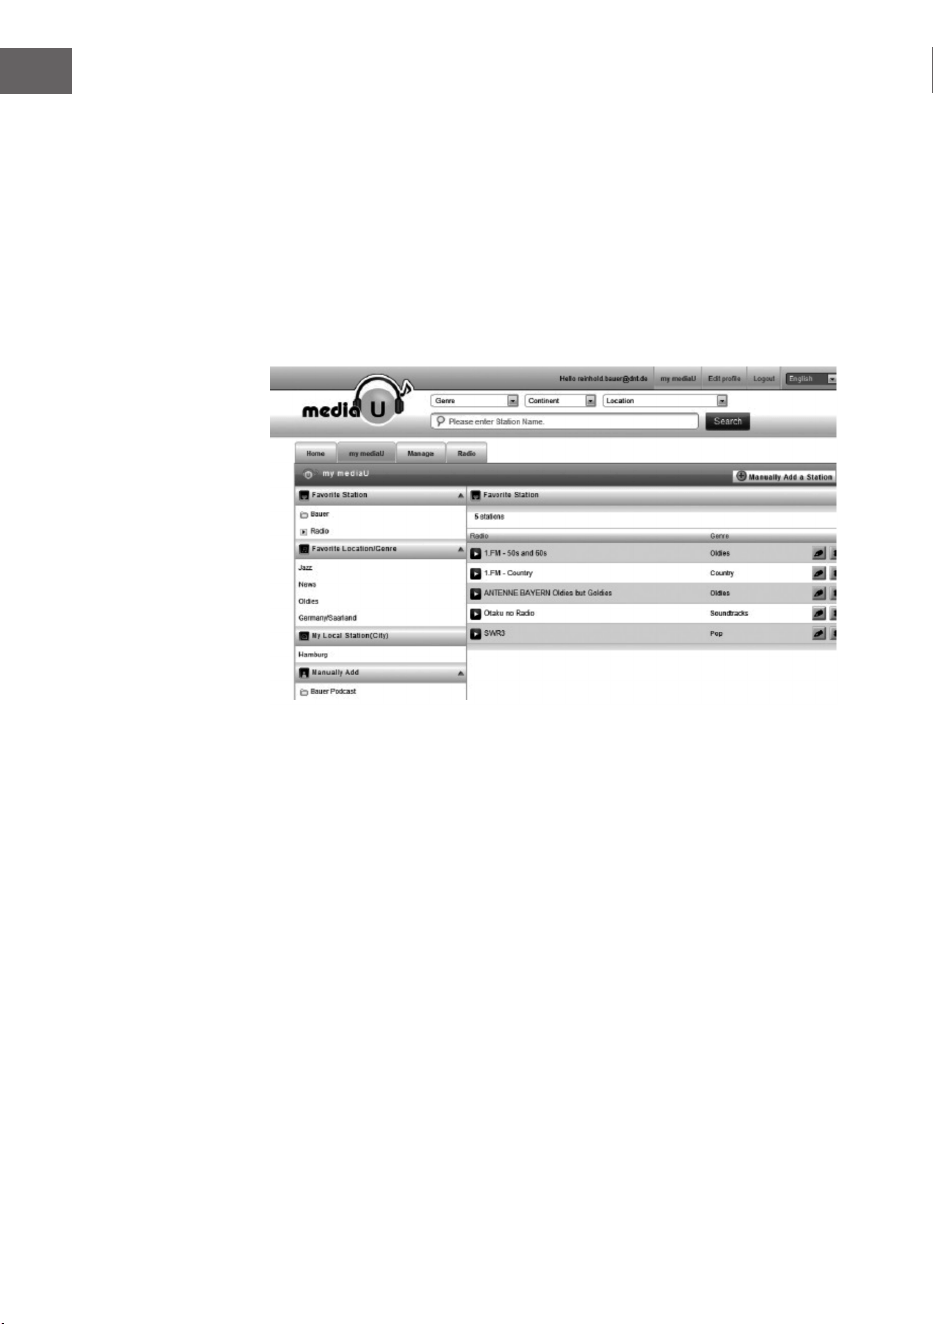
88
FR
Das Symbol für My mediaU erscheint ebenfalls im Hauptmenü. Folgende
Unterpunkte stehen Ihnen zur Verfügung:
• Favorite Station
• Favorite Location/Genre
• My Local Station
• Manually Add
Ces sous-éléments sont également présents dans la bibliothèque de
médias où vous pouvez organiser et gérer les stations de radio en
conséquence.
Par exemple, si vous souhaitez ajouter un podcast manuellement, vous
devez connaître l'URL. Procédez comme suit.
1. Remplissez les champs marqués sous "Add Manually" dans votre
compte MediaYou.
2. Dans le ux, allez à Conguration> Manage my mediaU et activez-le à
nouveau en appuyant sur "enable".
3. Dans My mediaU> Manually Add, vous pouvez aicher tous les dossiers
et adresses ajoutés manuellement et sélectionner le podcast.
Les formats de podcast suivants sont compatibles :
- asx
- m3u
- pls
- streaming pur avec les protocoles HTTP-, RTSP-, MMS
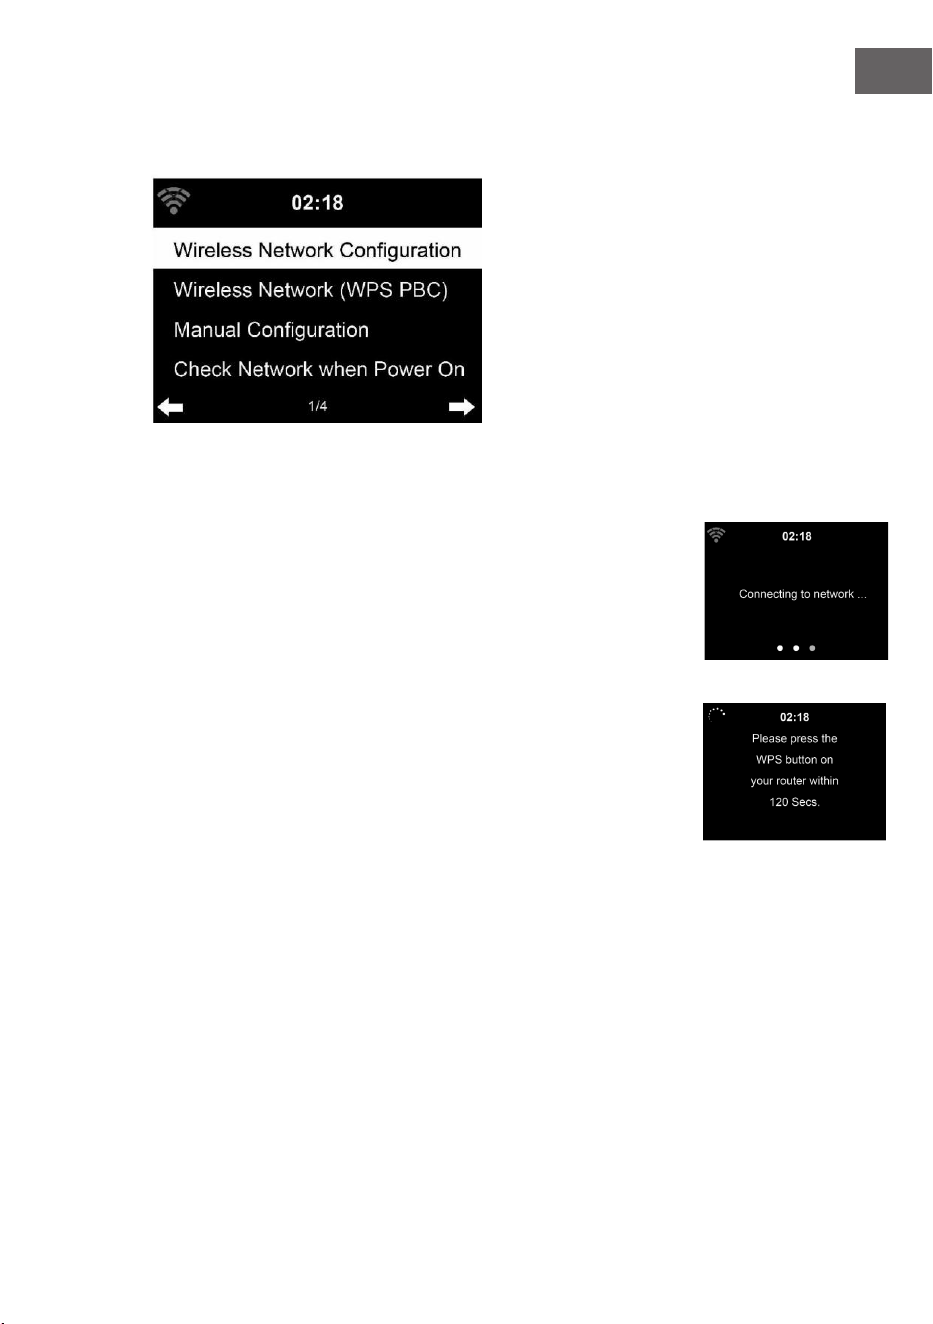
89
FR
Réseau
Conguration du réseau sans l
Activez / désactivez le réseau Wi. Dès que vous activez le WLAN, l‘appareil
se connecte automatiquement à celui-ci.
Sélectionnez le routeur souhaité (voir la section „Établissement de la
connexion réseau“).
Réseau sans l (WPS PBC)
Si vous utilisez un routeur avec un bouton WPS / QSS, vous pouvez
facilement congurer la connexion réseau via la fonction WPS.
Ouvrez la fonction et appuyez sur la touche WPS / QSS dans les 120
secondes. La connexion entre le routeur et Streamo est alors congurée
automatiquement.
Conguration manuelle
Vous pouvez sélectionner DHCP (l‘adresse IP est attribuée
automatiquement) ou entrer manuellement l‘adresse IP de connexion
réseau sans l.
Si vous sélectionnez le réglage manuel pour une connexion laire, vous
disposez des options suivantes :
1. SSID (nom du point d‘accès)
2. Adresse IP
3. Masque de sous-réseau
4. Passerelle par défaut
5. Serveur DNS préféré
6. Serveur DNS alternatif.
S‘il existe plusieurs connexions réseau disponibles, vous pouvez choisir un
réseau.
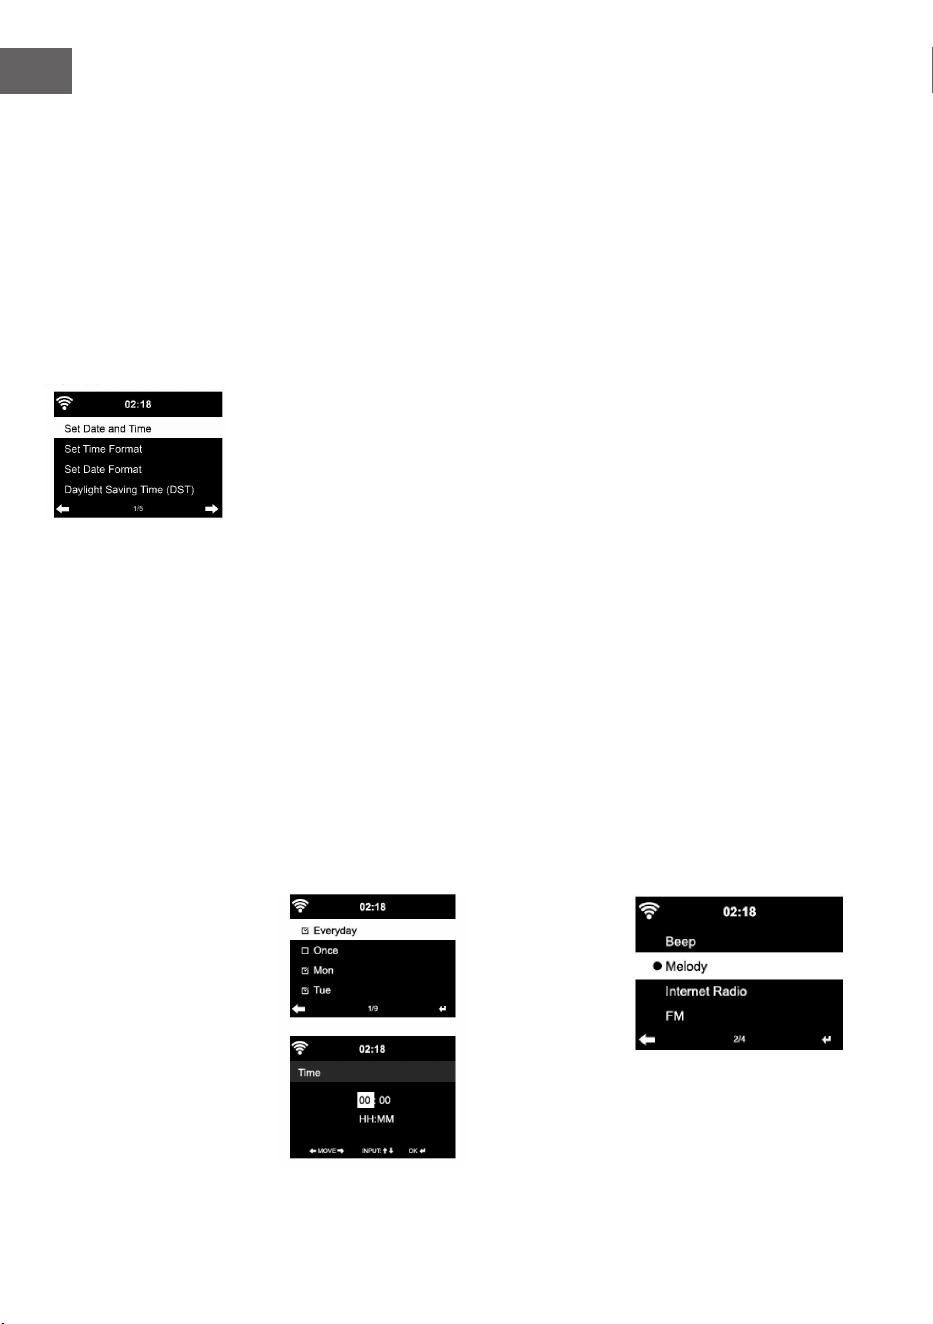
90
FR
Contrôle du réseau avec l‘appareil allumé
Pour activer / désactiver le Wi
Lorsque vous activez le réseau Wi, l‘appareil recherche automatiquement
les réseaux disponibles. Sélectionnez le réseau Wi souhaité.
Entrez le mot de passe WEP ou WPA pour vous connecter.
S‘il n‘y a pas de connexion au réseau ou si la connexion n‘a pas pu être
établie, le symbole dans le coin supérieur gauche est barré.
Date et heure
Les paramètres de date et d’heure ne peuvent être dénis que si votre
appareil est connecté à un réseau sans l. L‘appareil règle automatiquement
l‘heure et la date une fois la connexion réseau établie et récupère ses
données depuis un serveur central.
Le passage de l‘heure d‘été à l‘heure d‘hiver doit être eectué
manuellement.
Vous pouvez choisir entre le format 12 et 24 heures.
La date AA (année), MM (mois) et JJ (jour) peut être réglée dans les formats
AA/MM/JJ, JJ/MM/AA ou MM/JJ/AA.
Activez ou désactivez l‘heure d‘été (DST).
Conrmez votre saisie en appuyant sur la touche ENTER ou en appuyant sur
le contrôle du volume.
Si vous êtes connecté à un réseau sans l, GMT (+01: 00) est le paramètre
de référence. Notez que vous devrez peut-être retirer ou ajouter des heures
pour votre fuseau horaire.

91
FR
Alarme
Trois alarmes indépendantes sont disponibles. 2 alarmes pour le réglage
de l‘heure absolue (alarme 1 et alarme 2) et une alarme pour le réglage de
l‘heure relative (alarme NAP). Sélectionnez „Alarme“ dans le menu.
Les deux premières alarmes sont similaires à l‘alarme normale. Allumez
l‘appareil, réglez l‘heure actuelle, puis dénissez la fréquence de
déclenchement de l‘alarme. Vous pouvez choisir entre „quotidien“, „une
fois“ et „certains jours de la semaine“.
Réglez les valeurs correspondantes en tournant le contrôle du volume ou
en appuyant sur les touches / de la télécommande. Appuyez sur la
touche , pour passer au champ de saisie suivant. Appuyez sur la touche
ENTER de la télécommande ou sur le bouton de volume pour conrmer.
Réglez la tonalité d‘alarme souhaitée. Vous pouvez choisir entre bip,
mélodie et radio Internet (DAB / FM / USB).
Une fois l‘alarme dénie, l‘icône apparaît à côté de l‘heure sur l‘écran.
Remarque : Si vous avez réglé l‘alarme sur Radio Internet (DAB / FM / USB),
une station mémorisée favorite sera diusée. Pour l‘alarme 1 et l‘alarme
2 vous êtes obligé de régler la même station. Dès que l‘heure dénie est
atteinte et si l‘alarme est réglée sur „Radio Internet“, l‘appareil se connecte
à Internet si le réseau est disponible. Par conséquent, il peut y avoir un court
délai entre l’heure réglée pour l’alarme et la lecture réelle de la station
de radio. Si aucune connexion réseau n‘est disponible à ce moment-là,
l‘appareil passe automatiquement à „Mélodie“. Si vous avez activé l‘alarme
NAP, l‘alarme sonne toutes les 5/10/20/30/60/90/120 minutes, selon votre
réglage.
Vous pouvez sélectionner „Alarm Volume“ pour régler le volume de
l‘alarme.
Si une ou plusieurs alarmes ont été dénies, l’icône d’alarme s’aiche en
bas de l’écran. L‘icône d’alarme et l‘heure s‘aichent également à l‘écran en
mode veille.
Pour arrêter l‘alarme, appuyez sur la touche }. Pur activer le mode répétition
de l‘alarme, appuyez sur la touche SLEEP de l‘appareil ou bien sur la touche
de la télécommande. L‘alarme sonne alors à nouveau au bout de 5
minutes.
Langue
Sélectionnez la langue à l‘écran : anglais / allemand / français / hongrois /
tchèque / slovaque / polonais / turc.

92
FR
Réglage de l‘intensité du rétroéclairage
Vous pouvez régler la luminosité du rétroéclairage. Sélectionnez „Power
Saving“ pour régler la luminosité du rétro-éclairage en mode veille et
sélectionnez „Turn On“ pour l‘activer.
Vous pouvez régler la durée d’éclairage de l’écran de la radio lorsque vous
ne l’utilisez pas.
Ecran
Vous pouvez régler l‘écran en couleur ou en noir et blanc.
Gestion de l‘énergie
Vous pouvez congurer l‘appareil pour qu‘il passe automatiquement en
mode veille dans le menu principal ou en l‘absence de connexion Wi.
Réglez le minuteur de gestion de l’alimentation (5/15/30 minutes) pour que
l’appareil se mette automatiquement en mode veille s’il n’est pas utilisé.
Eteignez l‘appareil avec „Turn O“ si vous souhaitez ignorer la gestion de
l‘alimentation.
Sleep Timer (durée avant ‚arrêt automatique)
• Éteignez l‘appareil directement ou réglez la durée avant l‘arrêt
automatique. Vous pouvez choisir entre 15/30/60/90/120/150/180
minutes.
• Une fois que vous avez réglé la durée avant l‘arrêt automatique,
un symbole de lit indiquant le temps restant s‘aiche dans le coin
supérieur droit.
• Une fois la durée écoulée, Streamo passe en mode veille.
Buer
Vous pouvez régler le temps de la mémoire tampon pour la lecture de
musique sur 2/4/8 secondes.
Météo
Streamo peut aicher les données météorologiques en mode veille.
En mode veille, activez l‘écran et réglez l‘unité de température (°C ou °F)
pour aicher la météo en mode veille.
Lorsque l‘appareil est allumé, l‘heure et la météo s‘aichent en alternance
toutes les 10 secondes.
Paramètres de lecture
Sélectionnez le mode de lecture souhaité dans le Media Center.
Vous pouvez choisir entre „O“ (aucune lecture répétée ou aléatoire),
„Repeat all“, „Repeat one“ ou „Shule“ (lecture aléatoire).

93
FR
Paramètres DLNA
Le nom de l‘appareil par défaut pour DLNA est Streamo.
Le nom de l’appareil peut être modié sur le PC ou le smartphone dans les
paramètres DLNA.
Egaliseur
Le mode d’égalisation par défaut est Normal.
Vous pouvez choisir entre Normal, Flat, Jazz, Rock, Soundtrack, Classical,
Pop ou News.
Appuyez sur la touche EQ de la télécommande pour passer d’un mode à
l’autre.
Reprise de la lecture au démarrage
L‘appareil est réglé pour reprendre la lecture au redémarrage.
Lorsque cette fonction est activée et que l‘appareil est en mode radio
Internet au moment de sa mise hors tension, la radio Internet reprend
lorsque vous rallumez l‘appareil.
Mise à jour logicielle
Si une nouvelle version du logiciel est disponible sur le serveur, l‘appareil
vous alertera dès que vous entrerez dans le menu principal.
Réinitialisation
L‘appareil est réinitialisé aux paramètres d‘usine.
Une fois que Streamo est réinitialisé aux paramètres d‘usine, l‘appareil
passe automatiquement au réglage de la langue.
Une fois que la langue désirée a été sélectionnée, l‘appareil passe aux
paramètres réseau.
Paramètres FM
Choisissez MONO ou STEREO lorsque vous écoutez la radio.
My MediaU
Aichez et lisez votre liste de canaux mediaU sur le serveur mediaU.
Commencez par créer votre compte (voir la section Personnalisation de My
mediaU).
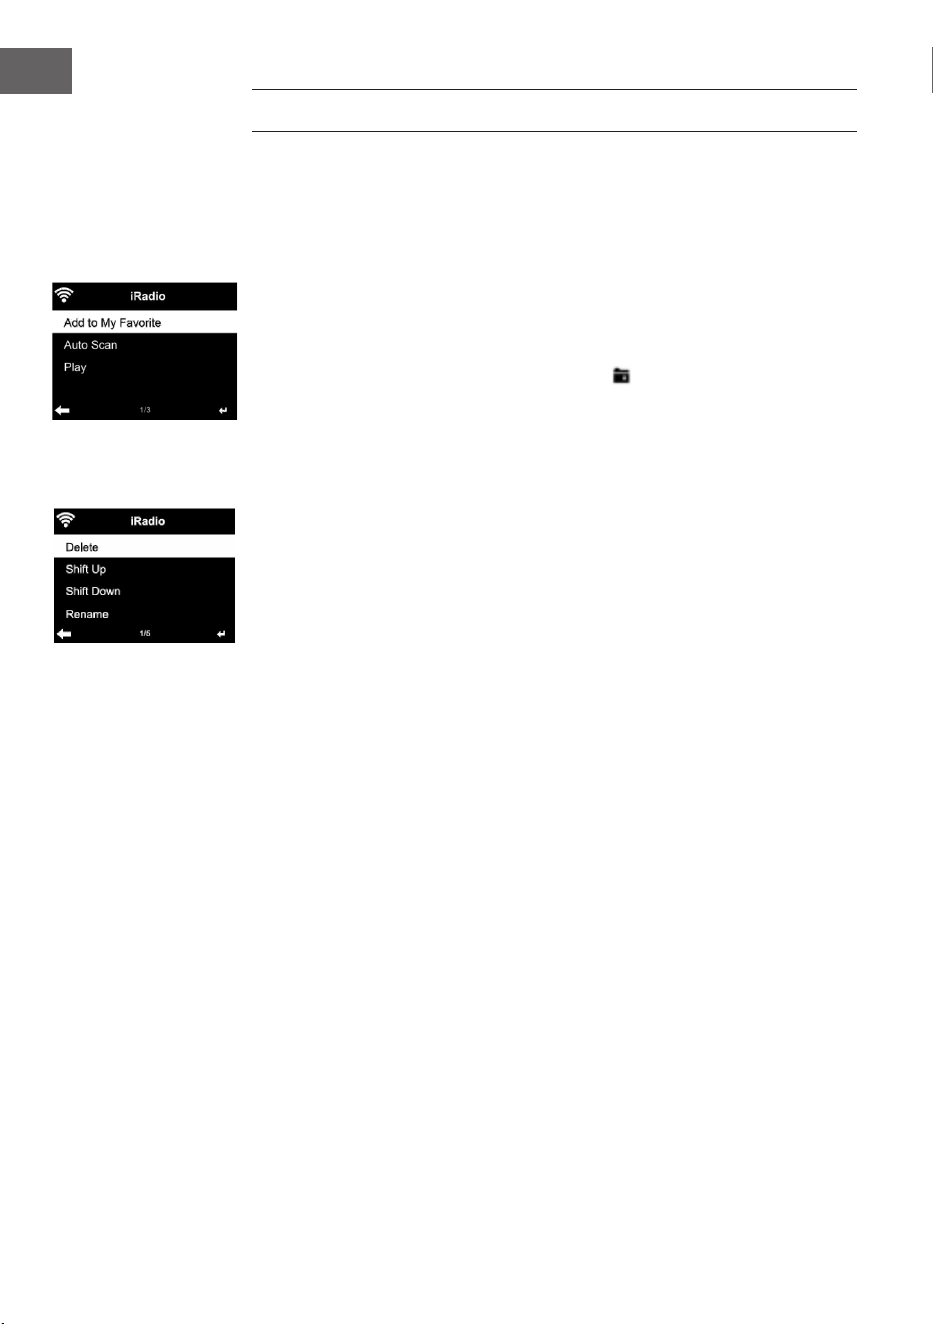
94
FR
INTERNET RADIO
Une fois la connexion établie avec une station, le débit et le format de la
station s‘aichent à l’écran.
Mes favoris
Vous pouvez créer et enregistrer une liste de vos stations préférées.
Vous pouvez enregistrer jusqu‘à 250 favoris, stations et dossiers compris.
Pendant la lecture, maintenez la touche PRESET pour enregistrer une
station dans les favoris.
Vous pouvez remplacer une station précédemment enregistrée par une
nouvelle. Pendant la sauvegarde, le symbole apparaît dans la partie
supérieure de l‘écran.
Vous pouvez également enregistrer une station en appuyant sur un
numéro (1, 2, 3) de la télécommande pour enregistrer la station sur les
emplacements de mémoire #1, #2 ou #3.
Si une station a été enregistrée dans un emplacement de mémoire,
vous ne pouvez pas l‘enregistrer à nouveau dans un autre emplacement.
Les stations mémorisées sont aichées dans ce menu. Vous pouvez
également appuyer sur la touche PRESET pour aicher la liste des stations
enregistrées.
Lorsque vous avez ouvert la liste des chaînes enregistrées, sélectionnez une
station et appuyez sur Entrée pour lancer la lecture.
Si vous avez marqué une station, vous pouvez accéder au sous-menu en
appuyant sur la touche Vous pouvez y eacer une station (supprimer une
station des favoris), parcourir la liste vers le haut et vers le bas, renommer
(renommer une station comme vous le souhaitez), écouter la station, ou
l‘utiliser comme source pour l‘alarme (si vous sélectionnez „radio Internet“
comme source pour l‘alarme.
Pour rappeler une station préréglée, appuyez d’abord sur la touche PRESET
puis tournez la commande de volume ou appuyez sur les touches / pour
choisir une station mémorisée.
Stations de radio / musique
Les chaînes sont classées par „Global Top 20“, „Genre“, „Pays / Lieu“ et
„Surbrillance“.
Appuyez sur la touche ENTER pour accéder au sous-menu et sélectionnez
une station pour écouter de la musique.
Pour une lecture directe, après avoir sélectionné une station, appuyez sur la
touche ENTER.
Appuyez sur la touche , pour accéder au sous-menu. Vous pouvez ajouter
la station aux favoris, lancer une recherche automatique, écouter une
station ou dénir une station comme alarme (si vous avez sélectionné
„Radio Internet“ dans les paramètres de l‘alarme).
Si vous sélectionnez „Auto Scan“, chaque station du sous-menu sera lue

95
FR
pendant 30 secondes jusqu‘à ce que toutes les chaînes aient été lues ou que
vous appuyez sur ENTER pour l‘interrompre.
Appuyez sur la touche Info pour aicher les informations de la station
correspondante.
Historique
Liste des dernières stations écoutées. Jusqu‘à 10 stations peuvent être
enregistrées dans l‘historique.
Pour une lecture directe, après avoir sélectionné une station, appuyez sur la
touche ENTER.
Appuyez sur la touche , pour accéder au sous-menu. Vous pouvez ajouter
la station aux favoris, lancer une recherche automatique, écouter une
station ou dénir une station comme alarme (si vous avez sélectionné
„Radio Internet“ dans les paramètres de l‘alarme).
Si vous sélectionnez „Auto Scan“, chaque station du sous-menu sera lue
pendant 30 secondes jusqu‘à ce que toutes les stations aient été lues ou
que vous appuyez sur la touche ENTER pour interrompre la lecture.
Stations de radio locales
Le menu Radio Internet comprend un lien vers les stations de radio locales
an que vous puissiez facilement écouter les stations de votre région.
Votre appareil peut utiliser l‘adresse IP pour trouver son emplacement
actuel, puis créer une liste de chaînes basée sur celle-ci.
Si vous préférez, vous pouvez également spécier un pays diérent comme
emplacement pour lire les chaînes correspondant à cet emplacement.
MEDIA CENTER
UPnP
Si vous avez conguré des „médias partagés“, vous pouvez les aicher via
UPnP.
Si plusieurs périphériques de partage multimédia sont disponibles, les
possibilités sont répertoriées.
Sélectionnez le support à partir duquel vous souhaitez lire de la musique sur
l‘appareil.
Remarque : L’appareil ne peut lire que les titres dont le nom est inférieur
à 40 caractères. Les caractères doivent être en langue européenne. Si
l‘appareil ne peut pas lire une piste en mode UPnP, essayez tout d‘abord de
la renommer. Si l‘appareil ne lit toujours pas la piste, vous pouvez essayer
de la convertir dans un autre format.
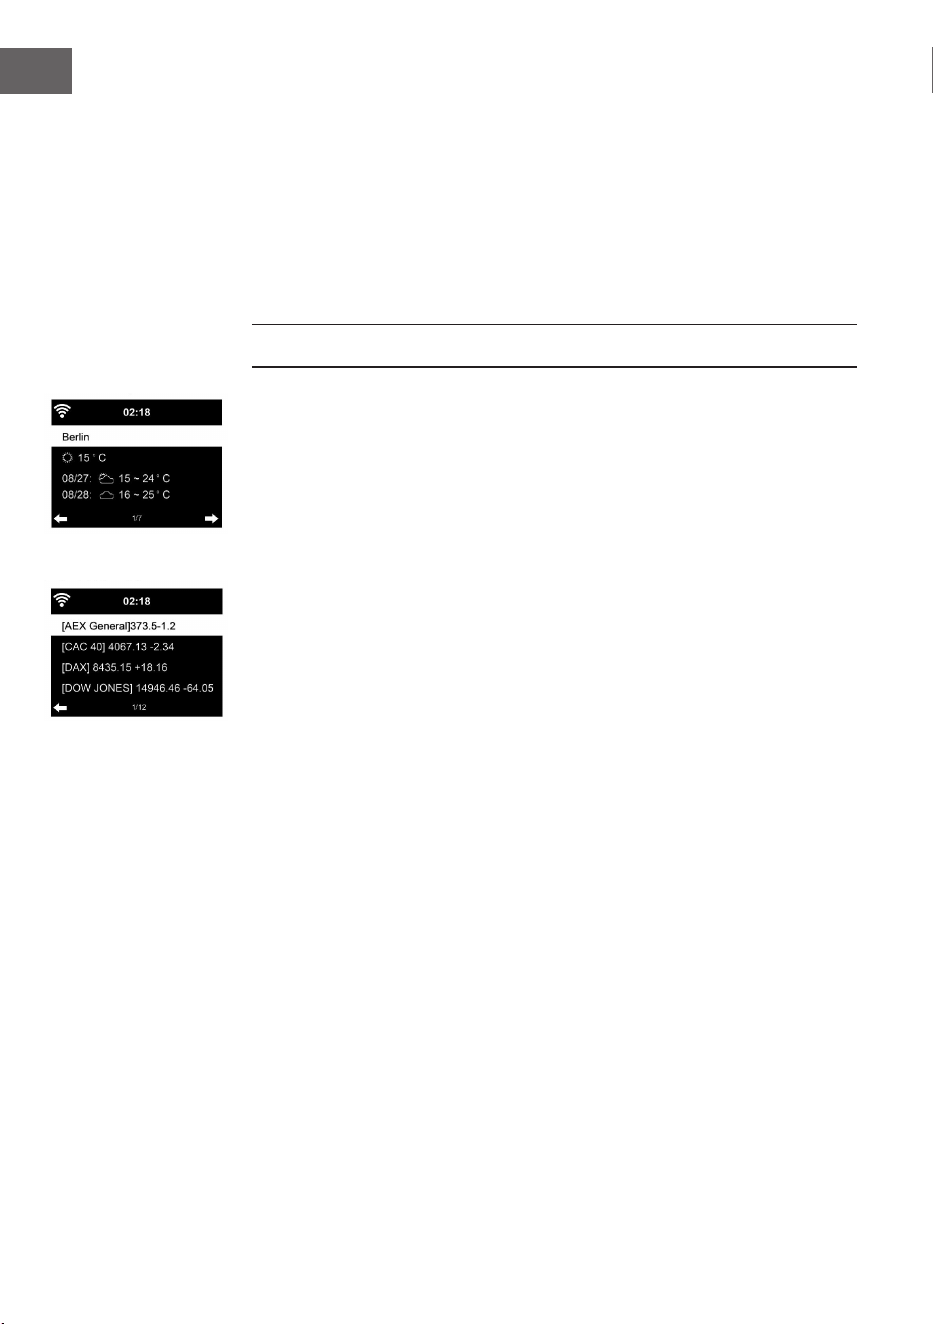
96
FR
Ma liste de lecture
Vous pouvez créer une liste de vos chansons préférées en mode UPnP.
Maintenez la touche ENTER pendant la lecture d‘une chanson pour
l‘enregistrer dans „My Playlist“.
Eacer la liste de lecture
• Vous pouvez supprimer toutes les chansons stockées dans votre liste de
lecture „My Playlist“.
CENTRE D‘INFORMATIONS
Informations météo
Les informations et prévisions météorologiques sont disponibles pour 2000
villes. Pour la météo exacte, sélectionnez le pays et la ville.
Si vous souhaitez également voir la météo de la ville sélectionnée en mode
veille, appuyez sur la touche ENTER.
Informations nancières
Aichez l‘indice boursier mondial.
Informations sur l‘appareil
La version actuelle du système et les détails de la connexion réseau sont
aichés. Les informations comprennent aussi l‘adresse MAC requise pour
s‘enregistrer auprès de mon mediaU.
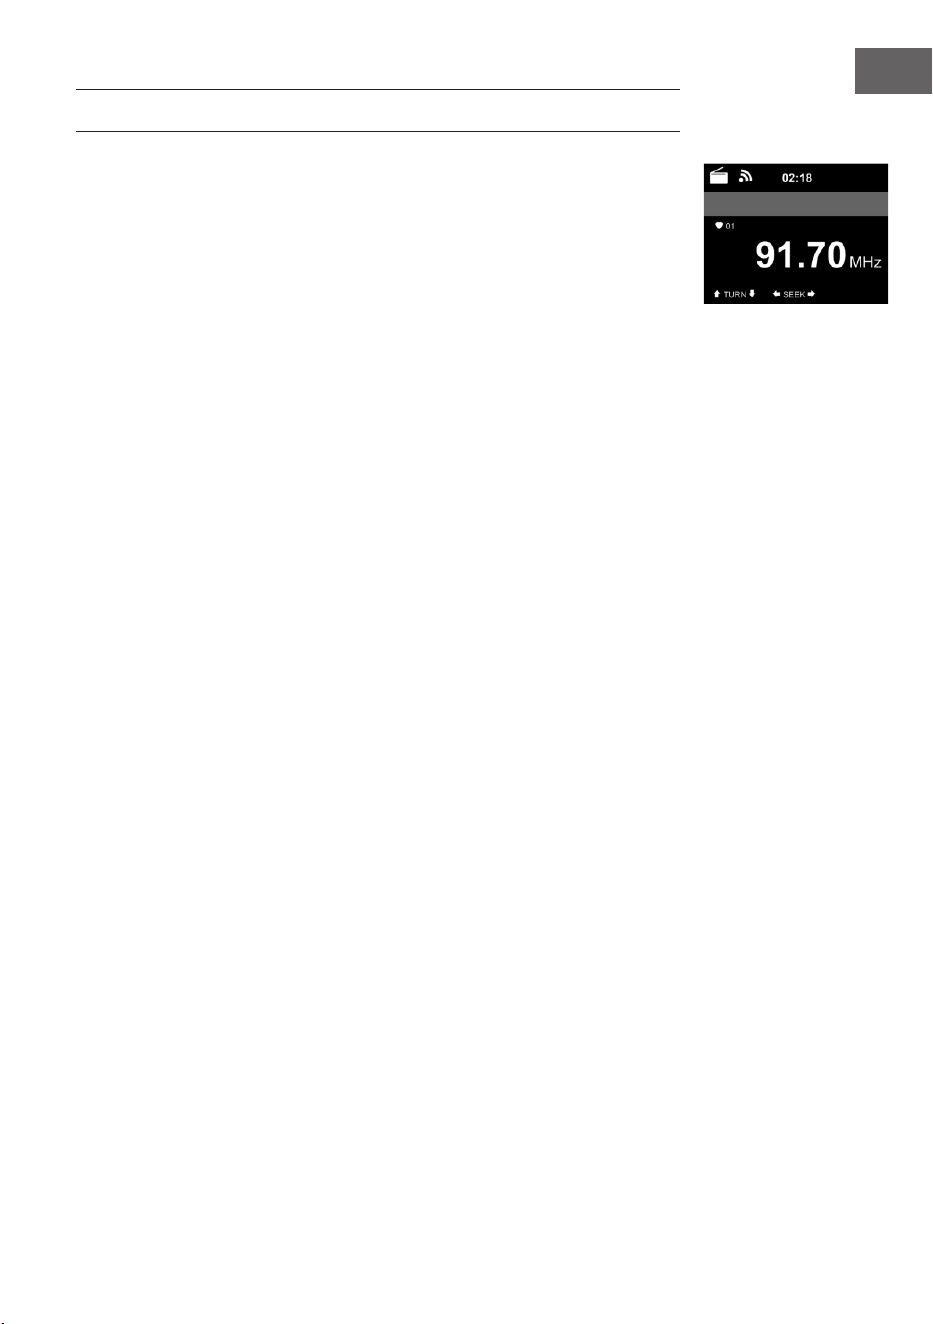
97
FR
RADIO FM
En mode radio FM, l‘appareil reçoit en haut débit analogique large bande.
Appuyez sur les touches ou de l‘appareil ou de la télécommande pour
démarrer la recherche de stations FM.
L‘aichage de la fréquence augmente pendant la recherche.
Dès qu‘une station est reçue, la recherche de station s‘arrête.
Pour une recherche manuelle des stations, appuyez sur les touches /. La
recherche manuelle se fait par incréments de 0,05 MHz.
Appuyez et maintenez la touche PRESET pour enregistrer une station. Vous
pouvez stocker jusqu‘à 20 stations FM.
Pour rappeler une station mémorisée, appuyez sur la touche PRESET de
l‘appareil ou sur les touches / de la télécommande.
Vous pouvez également lancer la recherche automatique de toutes
les stations en appuyant sur la touche ENTER de l’appareil ou SCAN
de la télécommande. Les stations de radio trouvées sont ensuite
automatiquement enregistrées dans la liste des stations.

98
FR
LECTURE D'UN CD
Fonctionnement CD/ MP3
• Appuyez sur la touche MENU pour sélectionner le mode CD.
• Appuyez sur le capot supérieur pour ouvrir le compartiment à CD.
• Insérez un CD dans le compartiment à CD.
• Pour commencer la lecture, appuyez sur la touche ENTER de l'appareil
ou la touche de la télécommande.
• Pour mettre en pause la lecture, appuyez sur la touche ENTER de
l'appareil ou la touche de la télécommande.
• Pur arrêter la lecture, appuyez sur la touche.
• Appuyez brièvement sur la touche ou pour sauter un titre.
• Pour ajuster le volume, tournez le bouton de réglage sur l'appareil ou
appuyez sur les touches / de la télécommande.
BT
Choisissez une source audio.
Appuyez sur la touche ENTER jusqu'à ce que "BT" s'aiche à l'écran.
Assurez-vous qu'aucun appareil BT n'est connecté avec le Streamo.
L'écran aiche "No Connection".
Activez "BT" sur votre appareil externe.
Dans la liste des périphériques, recherchez Streamo.
Sélectionnez Streamo dans la liste des appareils. Si vous devez entrer un
mot de passe, saisissez "0000" (quatre zéros). Pour certains appareils, il
peut également être nécessaire de conrmer la connexion.
Une fois la connexion établie, „Connected“ apparaît sur l‘écran de Streamo.
Démarrez la lecture BT sur votre appareil externe.
Vous pouvez contrôler la lecture BT depuis votre périphérique externe ou
Streamo. Vous pouvez régler le volume sur les deux appareils. La connexion
BT peut être interrompue pendant trois secondes en appuyant sur la touche
ENTER. Le message „No connection“ s‘aiche à l‘écran.
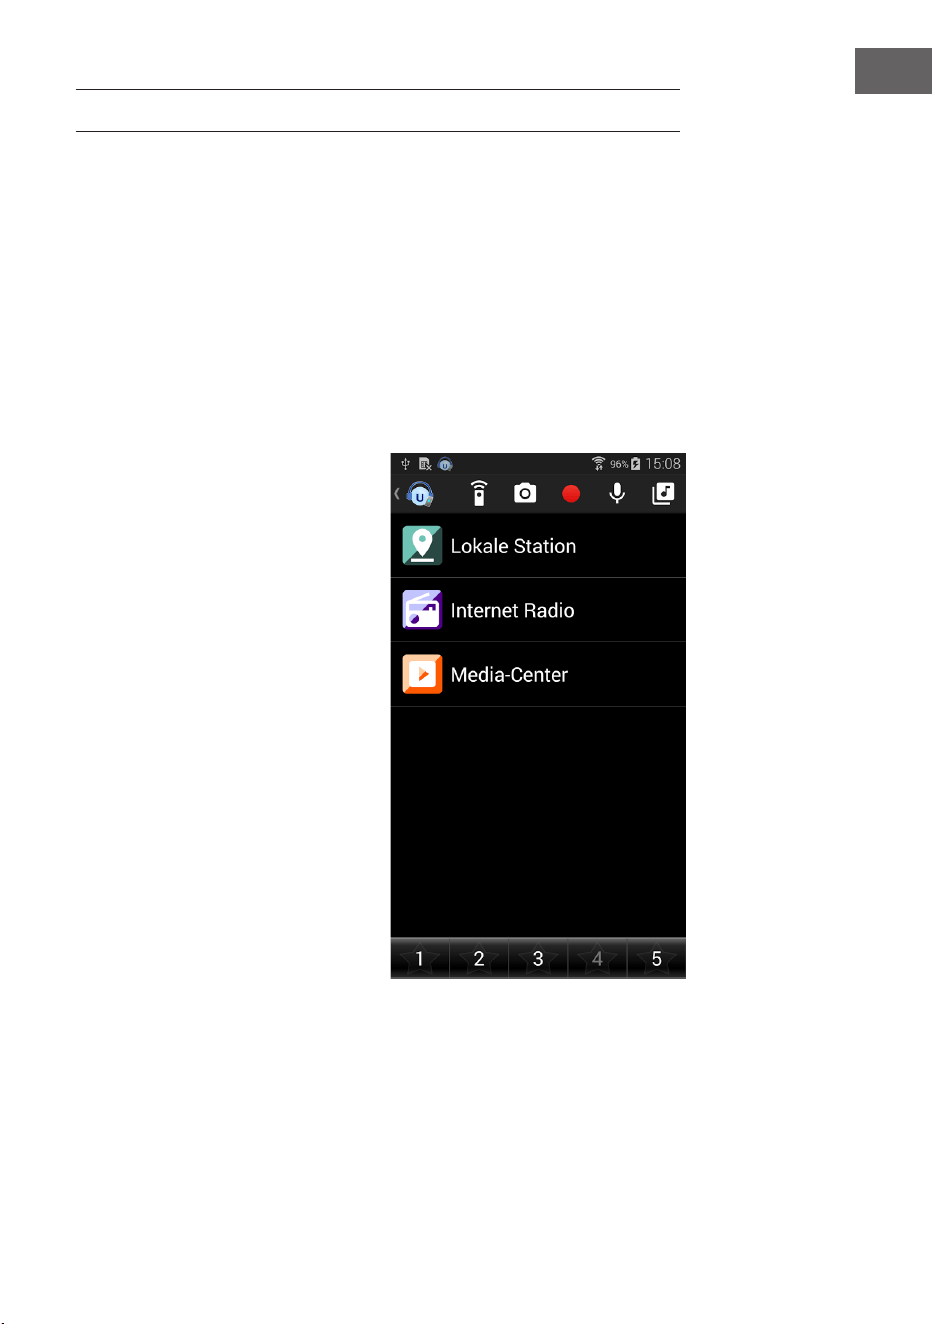
99
FR
COMMANDE À DISTANCE PAR APPLICATION
Certaines applications Android, telles qu'Air Music Control, vous permettent
de contrôler l'appareil depuis un smartphone ou une tablette.
Une fois les appareils connectés à Streamo, le même écran de menu que
celui de l'écran de Streamo sera également aiché sur le smartphone / la
tablette.
Vous pouvez sélectionner toutes les fonctions de la même manière qu'avec
le Streamo.
Les fonctions / icônes de menu sélectionnées sur l'appareil changent en
fonction des actions que vous eectuez sur le smartphone / la tablette.
Si vous contrôlez l'appareil avec une application, il peut arriver que la
connexion UPnP avec Windows Media Player ne soit pas possible.
Contrôle par application avec Air Music Control
Vous pouvez utiliser la radio
Internet via votre smartphone ou
votre tablette.
Pour ce faire, téléchargez
l'application "Air Music Control" à
partir du "Google Play Store" ou de
"l'AppStore Apple".
Les appareils doivent être
connectés au même réseau.

100
FR
CONSEILS POUR LE RECYCLAGE
S‘il existe une réglementation pour l‘élimination ou le
recyclage des appareils électriques et électroniques
dans votre pays, ce symbole sur le produit ou sur
l‘emballage indique que cet appareil ne doit pas
être jeté avec les ordures ménagères. Vous devez le
déposer dans un point de collecte pour le recyclage
des équipements électriques et électroniques.
La mise au rebut conforme aux règles protège
l‘environnement et la santé de vos semblables des
conséquences négatives. Pour plus d‘informations
sur le recyclage et l‘élimination de ce produit, veuillez
contacter votre autorité locale ou votre service de
recyclage des déchets ménagers.
Ce produit contient des piles. S‘il existe une
réglementation pour l‘élimination ou le recyclage
des piles dans votre pays, vous ne devez pas les
jeter avec les ordures ménagères. Renseignez-vous
sur les dispositions locales relatives à la collecte
des piles usagées. La mise au rebut conforme aux
règles protège l‘environnement et la santé de vos
semblables des conséquences négatives.
DÉCLARATION DE CONFORMITÉ
Fabricant :
Chal-Tec GmbH, Wallstraße 16, 10179 Berlin,
Allemagne.
Importateur pour la Grande Bretagne :
Berlin Brands Group UK Limited
PO Box 42
272 Kensington High Street
London, W8 6ND
United Kingdom
Le soussigné, Chal-Tec GmbH, déclare que
l’équipement radioélectrique du type Streamo CD est
conforme à la directive 2014/53/UE. Le texte complet
de la déclaration UE de conformité est disponible à
l’adresse internet suivante : use.berlin/10034055

101
ES
Estimado cliente:
Le felicitamos por la adquisición de este
producto. Lea atentamente el siguiente manual
y siga cuidadosamente las instrucciones de uso
con el n de evitar posibles daños. La empresa
no se responsabiliza de los daños ocasionados
por un uso indebido del producto o por haber
desatendido las indicaciones de seguridad.
Escanee el siguiente código QR para tener acceso
al manual de instrucciones más actualizado y a
información adicional sobre el producto.
ÍNDICE
Datos técnicos 102
Indicaciones de seguridad 103
Partes suministradas 104
Descripción del aparato 105
Puesta en marcha 110
Dlna 115
Resumen del menú 116
Menú principal 118
Radio internet 126
Centro multimedia 127
Centro de información 128
Radio FM 129
Reproducción de CD 130
BT 130
Control remoto a través de aplicaciones 131
Retirada del aparato 132
Declaración de conformidad 132

102
ES
DATOS TÉCNICOS
Número de artículo 10034055, 10034056
Suministro eléctrico fuente de
alimentación
Entrada: 100-240 V ~ 50/60 Hz max. 0,8 A
Salida: 12 V / 2,5 A
Conexiones Entrada AUX (3,5 mm)
Radio FM
Rango de frecuencia 87,5 MHz - 108 MHz
DAB/DAB+
Rango de frecuencia 174-240 MHz
WLAN
Estándar
Codicación
Rango de frecuencia
Potencia de transmisión
802.11b/g/n
WEP, WPA, WPA 2(PSK), WPS
2402–2480MHz
14-20dBm
BT specications
Rango de frecuencia
Potencia máxima de transmisiónr
2402–2480MHz
10dBm
Streaming UPnP, DLNA
Tipos de archivos compatibles WMA, MP3

103
ES
INDICACIONES DE SEGURIDAD
Lea las indicaciones de seguridad y el manual de instrucciones antes de
manejar el aparato.
• Conserve este manual de instrucciones en un lugar seguro para que
pueda consultarlas con posterioridad.
• Cíñase a los pasos de uso necesarios.
• No ubique el aparato en un sitio húmedo. Tampoco en un lugar con
campos electromagnéticos, expuesto a la luz directa del sol o con una
temperatura ambiente elevada.
• Desconecte el enchufe de la toma de corriente cuando no utilice el
aparato. Retire la pila del micrófono.
• Desconecte el enchufe antes de limpiar el aparato. No utilice gases
volátiles, disolventes ni otros productos químicos para limpiar el
aparato.
• Utilice exclusivamente los accesorios del fabricante.
• El suministro eléctrico del aparato solamente debe realizarse conforme
a los datos de la placa técnica.
• No realice reparaciones ni trabajos de mantenimiento por su cuenta. La
tensión peligrosa del aparato puede provocar una descarga eléctrica al
abrir la carcasa. Las reparaciones deberán ser realizadas por personal
de atención al cliente cualicado.
• Cuando sea necesario sustituir un componente, este debe coincidir con
las especicaciones del fabricante o ser un repuesto original.
• Contacte con el servicio de atención al cliente si el aparato tiene fallos
en el funcionamiento o no funciona correctamente. No abra la carcasa
para hacerlo usted mismo.
• Las personas, incluidos niños, con discapacidades físicas, psíquicas o
sensoriales o carentes de la experiencia y conocimiento necesarios
no podrán utilizar el aparato salvo que estén bajo supervisión o hayan
sido previamente instruidas sobre su utilización y las indicaciones
de seguridad y se hayan familiarizado con sus funciones. Los niños
deberán estar vigilados para evitar que jueguen con el aparato.
• Este aparato se utiliza para reproducir sonido. Se ha diseñado
solamente para tal efecto y no debe ser utilizado para ningún otro n.
No debe ser utilizado para ningún otro modo distinto al del indicado en
estas instrucciones de uso.

104
ES
Power Menu
Volume
Preset
Scan
Up
Down
Enter
PARTES SUMINISTRADAS
Streamo CD
Fuente de
alimentación
Mando a
distancia
Manual de instrucciones
EQ
Eject

105
ES
DESCRIPCIÓN DEL APARATO
Vista frontal
1 Receptor IR
2 Pantalla LCD
3 Botón menú y on/o
4 Memoria preset
5 Búsqueda de emisoras
6 Reproducción/pausa
7 Izquierda
8 Botón de expulsión
9 Derecha
10 Botón de navegación/conrmar
11 Compartimento para CD
4
2
1
3
5 6
7
8
9
10
11
Power Menu
Volume
Preset
Scan
Down
Up
Enter

106
ES
Vista trasera
12 Tubo reector de graves
13 Antena de varilla
14 Entrada para auriculares/AUX in/Toma de adaptador de red
15 Tubo reector de graves
Dc inAux
12 13 14 15

107
ES
Mando a distancia
EQ
Eject
1 2
5
6
9
12
13
16
19
20
22
10
3
4
7
8
11
14
17
18
21
15

108
ES
1 Standby
2 Altavoz on/o
3
MENU
Menú principal
4
Preset
Emisoras guardadas, favoritos, etc.
5
Scan
Búsqueda de emisoras DAB/FM
6
Eject
Expulsar CD
7
Centro multimedia, retroceder una pista
8
Centro multimedia, Reproducción/pausa
9
Centro multimedia, avanzar una pista
10
Finalizar reproducción
11 EQ Ecualizador
12 Despertador
13
hacia arriba, seleccionar número/letra
14
hacia la izquierda, al introducir texto: carácter
anterior, eliminar
15
Enter
ENTER - Conrmar selección
16
hacia la derecha, al introducir texto: siguiente
carácter, guardar el último valor introducido
17
hacia abajo, seleccionar número/letra
18
V-
Bajar volumen
19
V+
Subir volumen
20
0.....9
Acceder a favoritos/memoria; introducir letras y
números
21 Regulador
22 Botón de posposición

109
ES
Símbolos en pantalla
Estableciendo la conexión, el aparato funciona
Sin conexión WiFi
Se ha establecido la conexión WiFi
Recepción de radio VHF: Mono
Recepción de radio VHF: Estéreo
Radio en modo VHF
AUX
Altavoz desactivado
Búsqueda
Despertador activado
Se ha guardado una emisora de radio de internet
Se ha guardado una emisora de radio FM
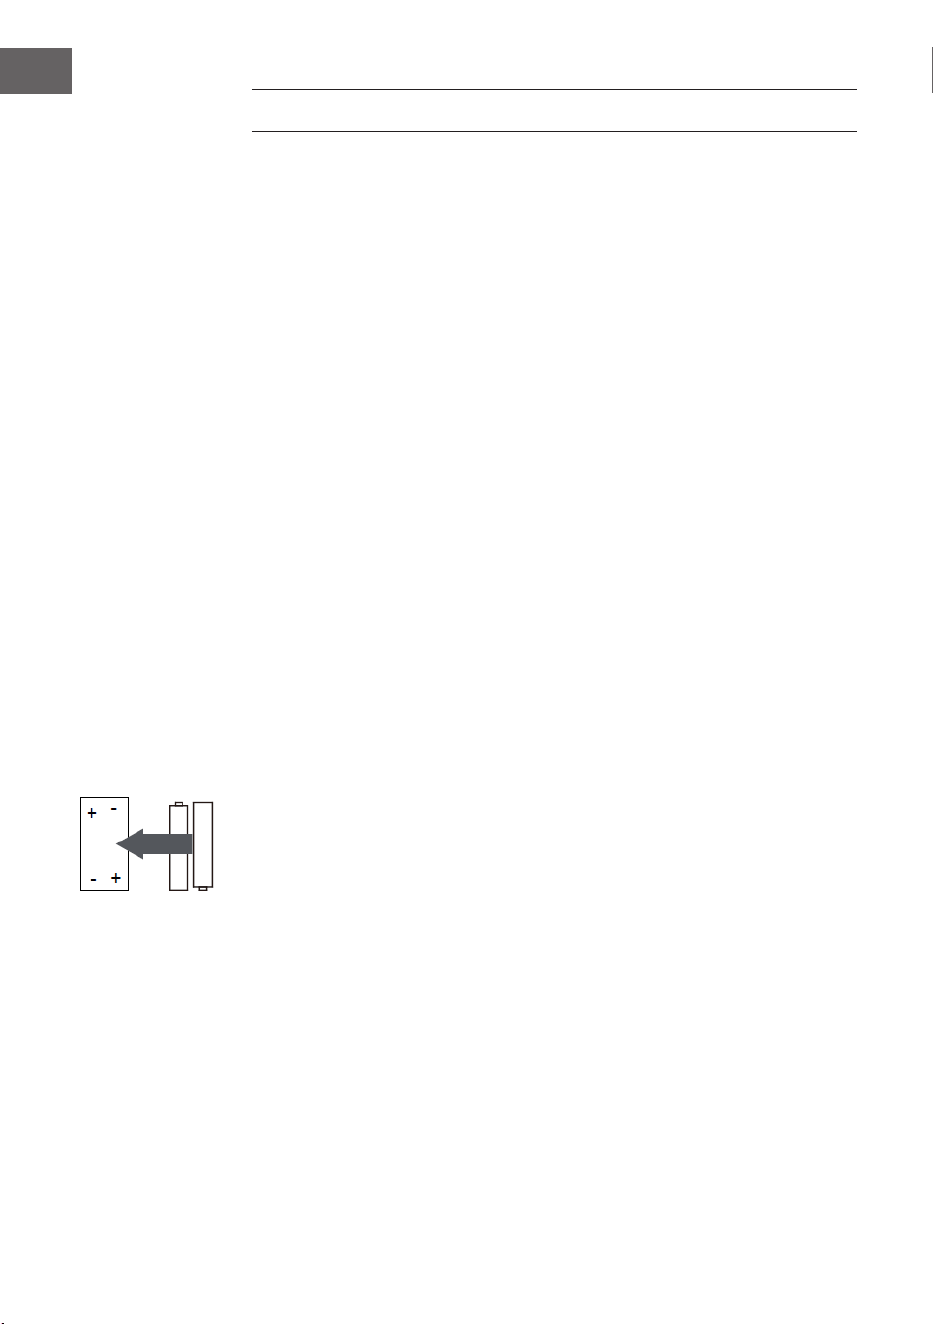
110
ES
PUESTA EN MARCHA
Para utilizar el equipo estéreo Streamo es necesario cumplir con estos
requisitos:
• Una conexión de banda ancha junto con un punto de acceso por cable/
inalámbrico, router o dispositivo de red similar.
• El dispositivo de red debe ser compatible con una conexión inalámbrica
por WiFi (802.11b/g/n).
• Un ordenador o smartphone debe estar disponible en la misma red que
el aparato.
Colocación de las pilas en el mando a distancia
1. Presione la muesca del compartimento para las pilas hacia adentro y
extráigalo.
2. Introduzca dos pilas del tipo AAA en el compartimento de las
pilas (véase ilustración). Tenga en cuenta la polaridad dentro del
compartimento de las pilas.
3. Vuelva a colocar la tapa del compartimento.
Indicaciones de seguridad sobre las pilas
Siga estas indicaciones de seguridad cuando utilice las pilas:
• Utilice exclusivamente pilas del tipo y tamaño correctos.
• Asegúrese de introducir correctamente las pilas en su compartimento.
Tenga en cuenta la marca de la polaridad. Una colocación incorrecta de
la pila puede averiar el aparato.
• Nunca utilice distintos tipos de pilas simultáneamente ni mezcle las
pilas usadas con las nuevas.
• Si las pilas se agotan o si no utiliza el aparato durante un periodo de
tiempo prolongado, retire las pilas de su compartimento para evitar
vertidos.
• Nunca intente recargar pilas que no estén concebidas para tal n, pues
podrían sobrecalentarse y explotar. Siga las instrucciones del fabricante
de la pila.
• Nunca exponga las pilas a una llama abierta, pues podrían explotar o
verter su contenido.
• Limpie los contactos de las pilas y del compartimento del aparato antes
de introducir las pilas.

111
ES
Establecer conexión de red
Para la conexión de red inalámbrica (WiFi):
Compruebe si la luz WLAN KINK/ACT del punto de acceso inalámbrico/
por cable o router está iluminada. En caso de dudas, lea el manual de
instrucciones correspondiente.
El WiFi permite transferir datos de manera inalámbrica entre dispositivos a
distancias inferiores a 20 metros. Las paredes o los techos pueden reducir
la intensidad de la conexión WiFi. Por ello, intente mantener al Streamo y/o
al punto de de acceso dentro de la distancia mencionada y evite colocar
obstáculos entre los dispositivos.
• Conecte el adaptador de red a la parte trasera del aparato y conecte el
enchufe a la toma de corriente.
• Si enciende el aparato por primera vez, primero deberá aceptar los
ajustes de idioma y de red.
2
1 2
3
• Para establecer la conexión de red, seleccione "YES" (sí).
• Seleccione "YES" (WPS) (solo con router WPS). A continuación, pulse el
botón WPS de su router.
• Si selecciona "YES", el aparato busca automáticamente redes WiFi
disponibles y las enumera en una lista en pantalla.
1

112
ES
• El número de barras del símbolo WiFi delante del nombre de la red
(SSID) muestra la intensidad relativa de la red.
• El símbolo de la llave signica que la red en cuestión está protegida con
una contraseña.
• Si el aparato no encuentra ninguna red inalámbrica, la pantalla
mostrará "No wireless networks found". Modique la ubicación del
aparato o compruebe el router WiFi.
• Puede visualizar el SSID del punto de acceso en los ajutes del punto de
acceso (router).
• Seleccione la red deseada y conrme con OK.
• Si la red seleccionada está protegida con contraseña, se le requerirá
que la introduzca.
• Introduzca la contraseña con los botones del aparato.
• Tenga en cuenta las mayúsculas y minúsculas al introducir la
contraseña.
• Para ello, también puede valerse el regulador del aparato. Si, por error,
pulsa pulse para corregir el botón.
Introducción a través del mando a distancia
El cursor indica el espacio de entrada actual.
Pulse varias veces la tecla numérica correspondiente. 0 0 0 0 (para borrar la
entrada)
0 0 (Borrar)
1 1(botón de espacio) @ ! ” # $ % & ( ) * ’ + - { \ | }< >?........
2 2 A B C a b c
3 3 D E F d e f
4 4 G H I g h i
5 5 J K L j k l
6 6 M N O m n o
7 7 P Q R S p q r s
8 8 T U V t u v
9 9 W X Y Z w x y z
‘ ’ Para ir al carácter anterior. El carácter se puede sobrescribir.
‘ ’ Para ir al carácter siguiente. El último carácter se guarda.
‘ ’ Seleccionar número/letra.
Enter - Conrmar introducción de valores
El establecimiento de la conexión de red puede tardar unos segundos.

113
ES
En cuanto se haya establecido la
conexión, el menú principal aparece
con los subpuntos más importantes:
• Radio internet: Acceso a
emisoras de radio de todo el
mundo
• Centro multimedia: Acceso a
sus dispositivos UpnP a través
de software compatible con
streaming
• Centro de información: Acceso a información meteorológica, nanciera
y del sistema
• Ajustes: Varios ajustes del sistema
• Emisoras de radio locales: Acceso a emisoras de radio de una región
determinada (p. ej. solo emisoras españolas)
• My mediaU: Acceso a una biblioteca multimedia online. Este símbolo
solo aparece si esta función se ha activado en "Ajustes".
Pulse el botón Standby para
acceder al modo standby.
La hora, la fecha y todas las
alarmas activas aparecen en el
monitor.
Cuando se haya establecido correctamente la conexión de red y
Streamo se vuelva a utilizar con la misma red, la conexión se realizará
de manera automática. Si desea modicar la red, establezca la conexión
correspondiente en "Ajustes".
Para introducir números/letras, utilice el regulador de volumen redondo.
En cuanto haya introducido la letra deseada, pulse el botón y continúe
con la letra siguiente. En cuanto haya nalizado de introducir todos los
caracteres, pulse el botón ENTER para conrmar. Puede pulsar el botón
para acceder al carácter anterior. Gire el regulador de volumen del aparato
o pulse los botones V-/V+ del mando a distancia para ajustar el volumen. Si
desea silenciar el aparato, puede pulsar el botón directamente.

114
ES
Información sobre la transmisión de música
• El nombre predeterminado del aparato es Streamo. Puede renombrar el
aparato si lo desea (consulte la sección "Puesta en marcha y uso").
• La siguiente información es una introducción para transmitir música
desde ordenadores y otros medios.
• Tenga en cuenta que las aplicaciones que utilice para transmitir música
cuentan con algunas instrucciones.
• Asegúrese de que los datos multimedia que se vayan a transmitir en
Streamo estén en los formatos MP3, WMA, WAV o AAC.
• Los detalles sobre la reproducción de medios a través de streaming
están disponibles en la sección "Puesta en marcha y uso".
UPnP
Para que se pueda transmitir música desde el ordenador, deben realizarse
en este último las siguientes acciones:
• Conecte el ordenador a la red.
• Asegúrese de que Streamo esté encendido y conectado a la misma red
que el ordenador.
• Abra el reproductor de Windows Media de la plataforma UpnP (11
o superior). Como alternativa, puede utilizar otros programas o
servidores, como Windows Media Connection.
También puede transmitir música desde otros servidores de música, como
desde su smartphone (Android):
• Conecte el smartphone a la red.
• Busque en Google Play aplicaciones para compartir música e instálelas
en su smartphone.
• Añada en su smartphone los archivos multimedia que desea reproducir.
• Ahora, seleccione en la aplicación la música que desea reproducir en
Streamo y regule el volumen en el propio aparato.

115
ES
DLNA
Además de UPnP, Streamo es compatible con la función DLNA. Esto
signica que los archivos de música del ordenador o smartphones de
Android se pueden compartir con Streamo y la reproducción se puede
controlar a través de su ordenador, smartphone de Android o iPhone/iPad
(no es necesario ajustar la reproducción a través de Streamo).
Los requisitos del sistema para DLNA en el PC son de Windows 7 o superior
y de Windows Media Player 12 o superior. Los ajustes se realizan del
siguiente modo:
• Comparta los medios multimedia de su PC con Streamo en primer lugar
• Puede buscar aplicaciones de DLNA en Google Play o Apple Store,
tanto gratuitas como de pago, si utiliza un smartphone, tableta, iPhone
o iPad. Se recomienza la utilización de Bubble UPnP.
• Existe la posibilidad de que algunas aplicaciones no sean compatibles
con la transmisión desde iPhone y iPod. iPhone y iPod pueden utilizarse
para controlar la reproducción musical desde otros servidores:
Para reproducir música a través de la aplicación, haga lo siguiente:
• Seleccione Streamo como medio de reproducción. Algunas aplicaciones
permiten reproducir música en varios reproductores al mismo tiempo.
• Seleccione el servidor de música y la música. Algunas aplicaciones
permiten crear una lista de reproducción.

116
ES
RESUMEN DEL MENÚ
Standby
My mediaU
Internet Radio
Local Radio
Conguration
BT
CD Playback
AUX IN
My Favorite
Local Radio
History
Service
Radio Station Music
Power management Reset to default
Manage my mediaU
Time Display
Dimmer
Display
Alarm
Sleep Timer
Timer
Scheduled Playing
Language
Weather
Local Radio Setup
Local Radio Setup
Internet Radio
Device
Playback Setup
Resume when power on
Date & Time
Software update

117
ES
Information Center
DAB-Radio
FM
Media Center UPnP
My Playlist
Clear My Playlist
Resumen del menú 2
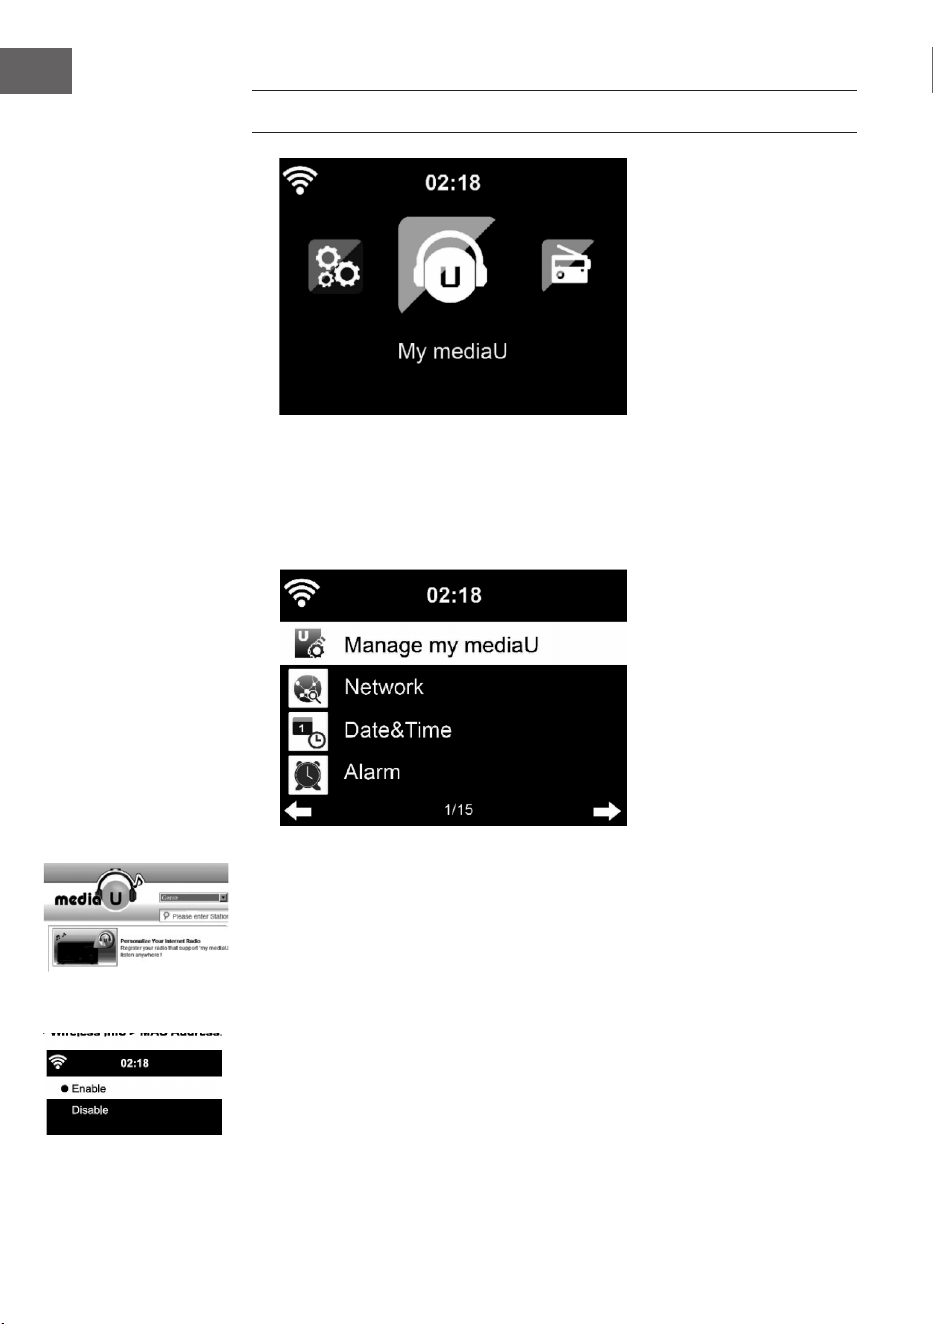
118
ES
MENÚ PRINCIPAL
En el menú principal puede seleccionar los siguientes modos: My
media U, radio DAB, radio FM, AUX in, reproducción USB, Spotify, radio
internet, emisoras de radio locales, ajustes, centro de información, centro
multimedia.
Ajustes
Gestionar mi Media U
Biblioteca My mediaU - Gestionar emisoras de radio a través de internet.
Para tener acceso en cualquier momento a sus emisoras de radio favoritas
de todo el mundo, puede crear un acceso gratuito a su biblioteca de medios
en www.mediayou.net si dispone de un dispositivo nal móvil compatible
con streaming y añadir posteriormente a su cuenta tantos dispositivos
como desee. Escoja un nombre de usuario y una contraseña.
También debe conocer la dirección MAC de su aparato (llamado número de
serie en Media You) para registrar el aparato en "Personalize Your Internet
Radio". Puede acceder a él en Information Center > System information >
Wireless Info > MAC Address.
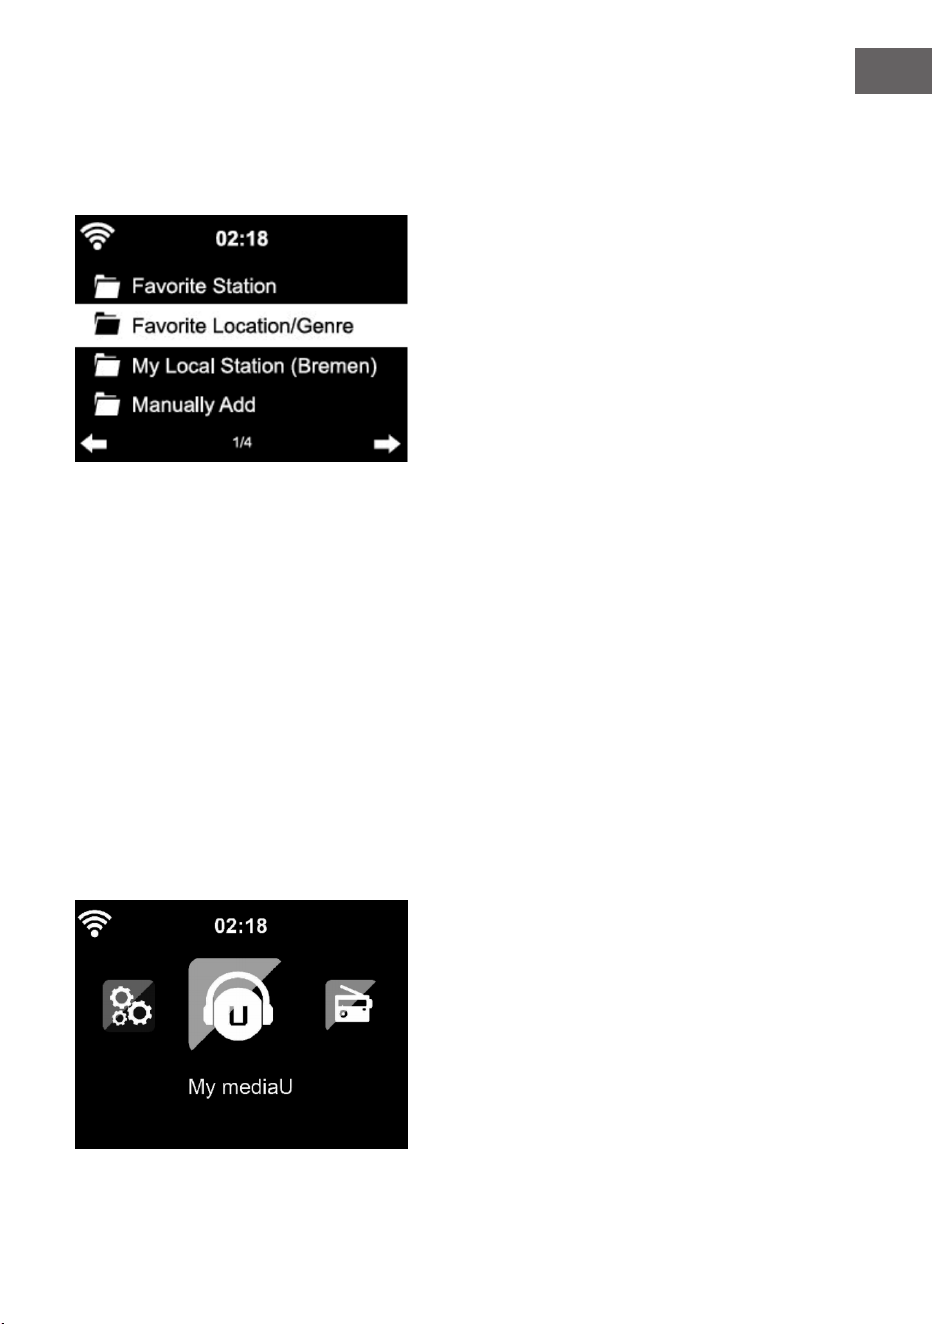
119
ES
Tras el registro, debe activarse esta función en Information Center > System
information > Wireless Info > MAC Adress para que la radio de internet
pueda acceder a la biblioteca multimedia.
El aparato se conecta automáticamente a su cuenta e indica qué contenido
se ha almacenado.
• Emisoras favoritas
• Ubicación/género favorito
• Mis emisoras locales
• Añadir manualmente
• En función de su conguración personal de My mediaU, la apariencia de
la pantalla de su Streamo puede variar.
• Si su aparato todavía no está registrado en MediaYou, aparecerá el
mensaje correspondiente que le pregunta si desea activar My mediaU.
• Si ha registrado su dispositivo en varias cuentas, tras la activación se
mostrarán todas para que escoja la cuenta que desee. No es necesario
introducir una contraseña.

120
ES
El símbolo de My mediaU aparece en el menú principal. Están disponibles
los siguientes subpuntos:
• Favorite Station
• Favorite Location/Genre
• My Local Station
• Manually Add
Estos subpuntos aparecen igualmente en la biblioteca de medios donde
puede ordenar y gestionar como desee las emisoras de radio.
Si, por ejemplo, desea añadir manualmente un Podcast, debe conocer la
URL correspondiente. Siga estos pasos:
1. Rellene los campos marcados con "Add Manually" de su cuenta
MediaYou.
2. Vaya a la transmisión en Conguration > Manage my mediaU y actívela
de nuevo presionando "enable".
3. En My mediaU > Manually Add puede visualizar las carpetas añadidas
manualmente y seleccionar el podcast.
Son compatibles los siguientes formatos de podcast:
- asx
- m3u
- pls
- transmisión pura con HTTP, RTSP, protocolo MMS

121
ES
Red
Conguración de la red inalámbrica
Active/desactive la red WiFi. En cuanto active el WiFi, el aparato se co-
nectará automáticamente. Seleccione el router deseado (consulte sección
«Establecer conexión de red»)
Red inalámbrica (WPS PBC)
Si utiliza un router con botón WPS/QSS, puede realizar fácilmente la
conguración de la red con la función WPS. Abra la función y pulse el botón
WPS/QSS durante 120 segundos. La conexión entre el router y Streamo se
congurará automáticamente.
Conguración manual
Puede seleccionar DHCP (la Dirección IP se asigna automáticamente) o
asignar manualmente la dirección IP para la conexión de red inalámbrica.
Si selecciona una conguración manual para una conexión por cable, tiene
disponibles las siguientes opciones:
1. SSID (nombre del punto de acceso)
2. Dirección IP
3. Máscara de subred
4. Pueta de acceso predeterminada
5. Servidor DNS prioritario
6. Servidor DNS alternativo.
Si dentro del área existe más de una conexión de red, puede seleccionar
una red en concreto.

122
ES
Comprobar la red mientras el aparato está encendido
Activar/desactivar WiFi.
Si activa la red WiFi, el sistema busca automáticamente las redes
disponibles. Seleccione la red WiFi deseada.
Introduzca la contraseña WEP o WPA para conectarse.
Si no existe ninguna conexión a la red o no se puede establecer la
conexión, aparece tachado el símbolo en la esquina superior izquierda.
Fecha y hora
Los ajustes de fecha y hora solamente se pueden llevar a cabo si su aparato
está conectado a una red inalámbrica. El aparato ajusta la hora y la fecha
de manera automática en cuanto se establezca la conexión de red y tome
los datos desde un servidor central. El cambio horario de verano e invierno
debe realizarse manualmente.
Puede elegir entre el formato horario de 12 y 24 horas. Le fecha YY (año),
MM (mes) y DD (día) se puede congurar en los formatos YY/MM/DD,
DD/MM/YY o MM/DD/YY. Active o desactive el horario de verano (DST).
Conrme la introducción pulsando el botón ENTER o presionando el
regulador de volumen.
Si hay una red inalámbrica conectada, GMT (+01:00) será el valor de
referencia. Tenga en cuenta que deberá añadir o reducir las horas para su
zona horaria.
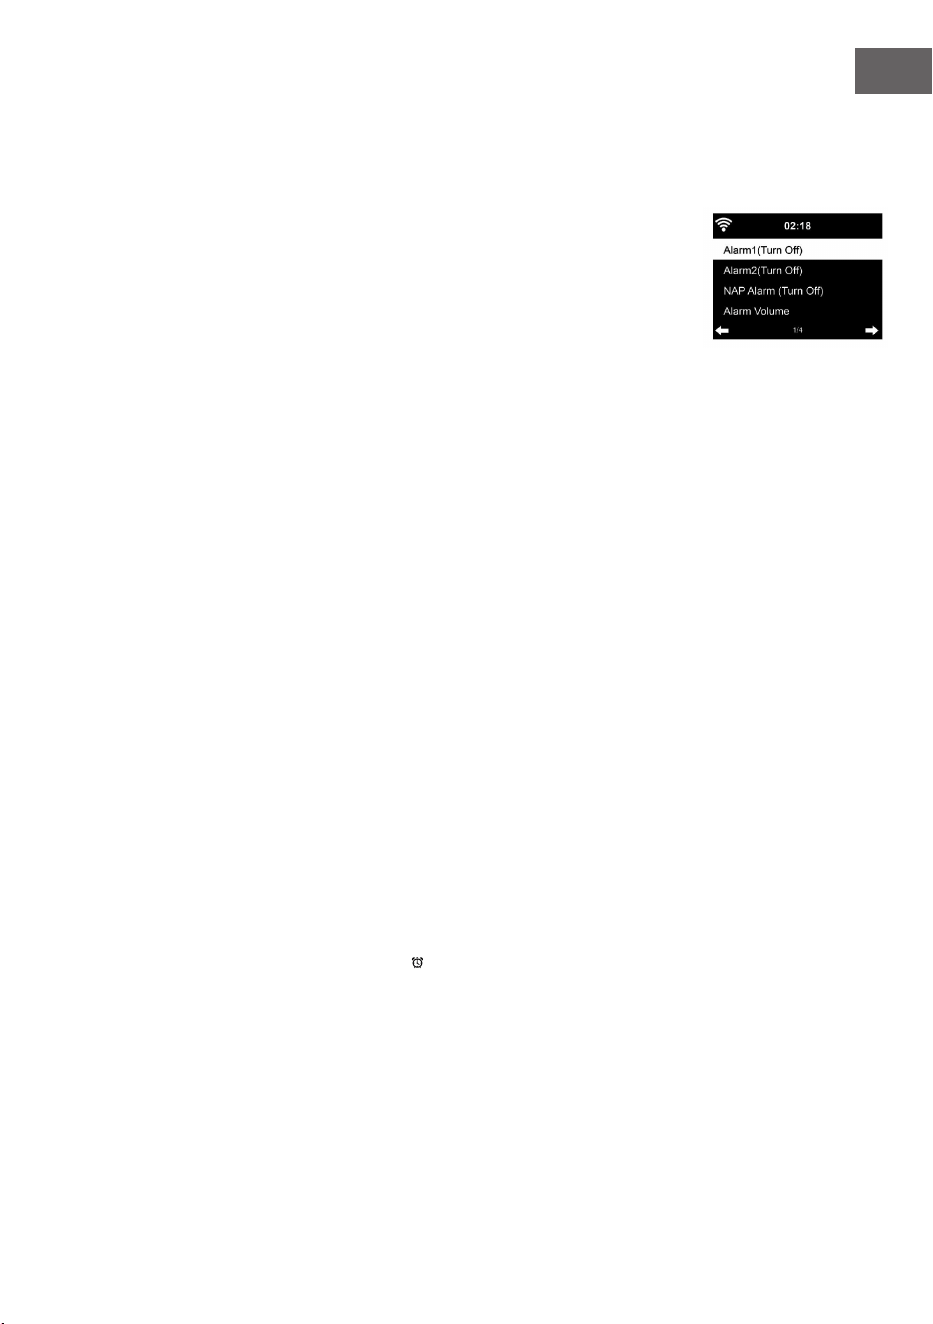
123
ES
Despertador
Hay 3 alarmas independientes entre sí. 2 despertadores para el ajuste de
hora absoluto (Alarm 1 y Alarm 2) y un despertador para el ajuste relativo de
la hora (NAP Alarm). Seleccione «Alarm» en el menú.
Las dos primeras alarmas son iguales que la alarma normal. Encienda el
aparato, seleccione la hora actual y a continuación congure cada cuánto
tiempo debe sonar la alarma. Puede elegir «diariamente», «una vez» y «en
un día determinado de la semana».
Ajuste los valores correspondientes girando el regulador de volumen o
pulsando los botones / en el mando a distancia. Pulsando el botón ,
accederá al siguiente campo de introducción. Para conrmar, pulse el botón
ENTER del mando a distancia o el regulador de volumen.
Seleccione el tono deseado para la alarma. Puede elegir entre un pitido,
una melodía y la radio internet (DAB/FM/USB).
En cuanto se haya congurado la alarma, aparece su símbolo en pantalla,
junto a la hora actual.
Nota: Si ha seleccionado la radio de internet (DAB/FM/USB) como tono de
alarma, se reproducirá una de sus emisoras favoritas guardadas. Para Alarm
1 y Alarm 2 solamente se puede congurar la misma emisora. En cuanto
se llegue a la hora congurada en la alarma y el tono de despertador sea
«radio internet», el aparato se conectará a internet si hay una conexión
de red disponible. Por ello, puede ocurrir que entre la hora de alarma
congurada y la activación real de la emisora de radio se produzca un
pequeño retardo. En caso de que en ese momento no exista ninguna
conexión de red, el aparato cambia automáticamente a «melodía»: Si ha
activado la Alarma NAP, el despertador sonará en función de su selección
cada 5/10/20/30/60/90/120 minutos.
Puede seleccionar «Alarm volumen» para regular el volumen del
despertador.
En cuanto se haya establecido una o varias horas de alarma, el símbolo de
la alarma se muestra en la parte inferior de la pantalla. El símbolo de la
alarma con el indicador de la hora también aparece en la pantalla en modo
standby.
Para interrumpir la alarma, pulse el botón Para activar el modo de
posposición, pulse el botón SLEEP del aparato. La alarma volverá a sonar
cada 5 minutos.
Idioma
Seleccione un idioma en la pantalla: Ingles/Alemán/Francés/Húngaro/
Checo/Eslovaco/Polaco/Turco.

124
ES
Regular iluminación de fondo
Puede regular el brillo de la iluminación de fondo. Seleccione «Power
Saving» para regular el brillo de la iluminación de fondo en modo standby y
seleccione «Turn on» para activar.
Puede ajustar el tiempo en que se mantiene encendida la pantalla de la
radio cuando no la utilice.
Pantalla
Puede congurar la pantalla en blanco y negro o a color.
Administración de energía
Puede programar que el aparato pase a modo standby automáticamente
cuando se encuentra en el menú principal o cuando no existe una conexión
WiFi. Congure el temporizador de administración de energía (5/15/30
minutos) para que el aparato entre en modo standby automáticamente
cuando no lo utilice.
Apague el aparato con «turn o» si desea ignorar la administración de
energía.
Sleep Timer (Tiempo hasta el apagado automático)
• Apague directamente el aparato o congure el tiempo hasta el apagado
automático. Puede elegir entre 15/30/60/90/120/150/180 minutos.
• En cuanto haya transcurrido el tiempo hasta el apagado automático,
el símbolo de una cama con el tiempo restante aparece en la esquina
superior derecha.
• Cuando haya transcurrido el tiempo, Streamo pasa automáticamente al
modo standby.
Buer
Puede regular el tiempo de almacenamiento de la reproducción musical en
2/4/8 segundos.
Información meteorológica
Streamo puede mostrar los datos meteorológicos actuales en modo
standby. Active el modo standby de la pantalla y ajuste la unidad de
temperatura (°C o °F) para mostrar el tiempo en modo standby.
Con el aparato encendido, se muestra la hora actual y el tiempo
meteorológico actual alternándose cada 10 segundos.
Conguración de reproducción
Seleccione el modo de reproducción deseado en el centro multimedia.
Puede elegir entre «o» (sin repetición ni modo aleatorio), «Repeat all»
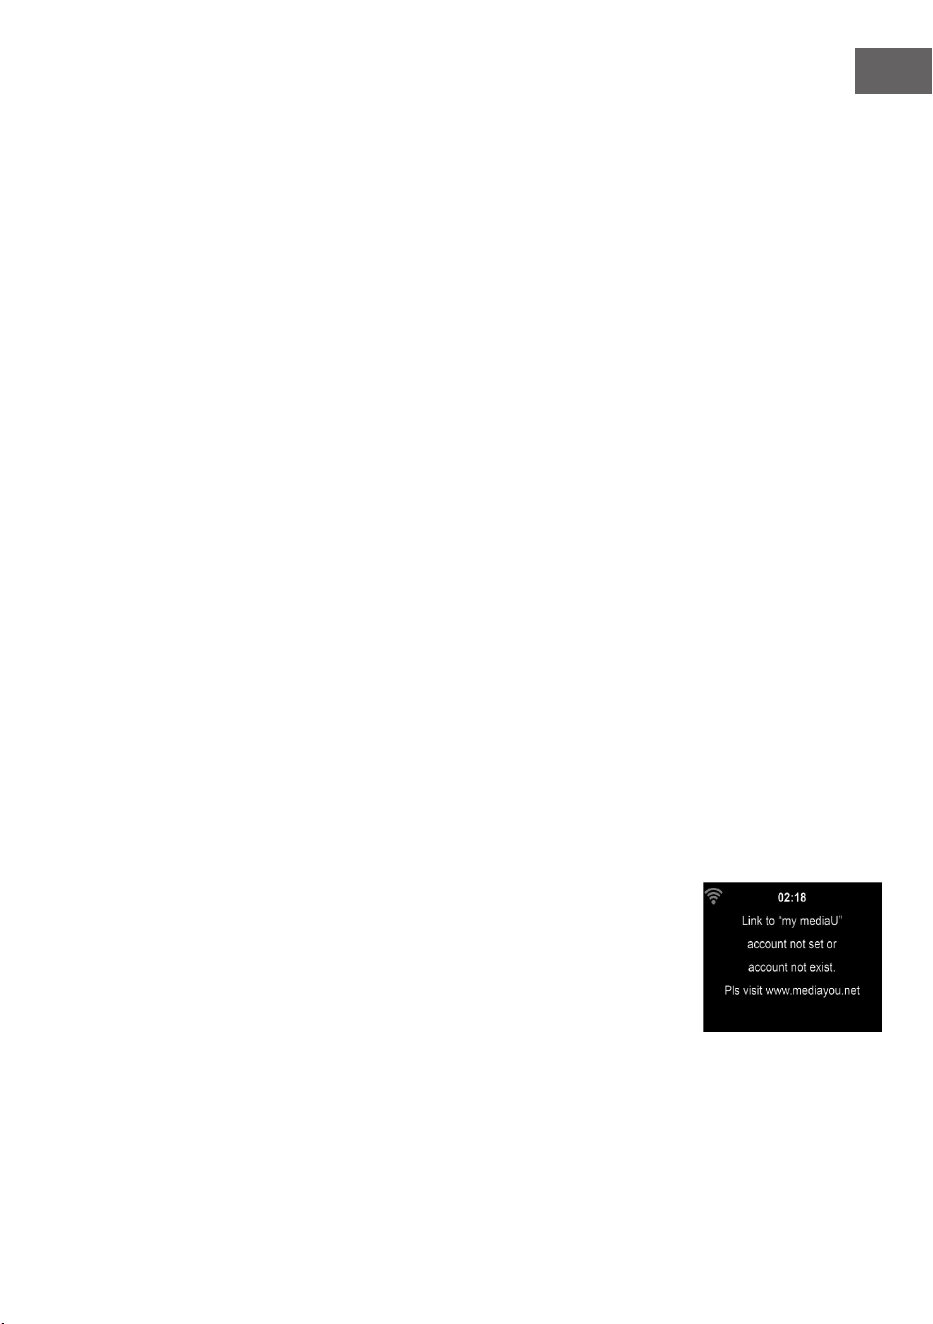
125
ES
(repetir todas las pistas), «Repeat one» (repetir una pista) o «Shule» (modo
aleatorio).
Ajustar DLNA
El nombre predeterminado del aparato para DLNA es Streamo.
El nombre del aparato se puede modicar en el PC o smartphone, en los
ajustes DLNA.
Ecualizador
El modo de ecualizador predeterminado es «normal».
Puede elegir entre «Normal», «Flat», «Jazz», «Rock», «Soundtrack»,
«Classical», «Pop» o «News».
Pulse el botón EQ para navegar entre los distintos modos
Continuar con la reproducción al encender
El aparato se ha congurado de tal manera que continúa con la
reproducción de la última fuente seleccionada cuando lo enciende de
nuevo. Con esta función activada y con el aparato en modo internet en el
momento de apagarlo, la radio internet reanuda la reproducción cuando
vuelva a encender el aparato.
Actualización de software
Si en el servidor hay una nueva versión de software disponible, el aparato
le advierte en cuanto entre en el menú principal.
Reset
El aparato se restablece a los valores de fábrica. Después de que Streamo
se haya restaurado a los valores de fábrica, este entra automáticamente en
la conguración de idioma. Cuando se haya elegido un idioma, cambiará a
la conguración de red.
Ajustes FM
Seleccione MONO o STEREO con la reproducción de radio.
My MediaU
Visualice y reproduzca la lista de emisoras mediaU en el servidor mediaU.
Primero, cree una cuenta (consulte la sección «Ajustes de My mediaU»).

126
ES
RADIO INTERNET
Después de haber establecido correctamente la conexión con una emisora,
se mostrará la velocidad de bits y el formato de la emisora en pantalla.
Mis favoritos
Puede crear y guardar una lista de sus emisoras favoritas. Puede guardar
hasta 250 favoritas, incluyendo emisoras y carpetas. Mantenga pulsado
el botón PRESET durante la reproducción para guardar una emisora en
favoritos.
Puede sustituir una emisora anteriormente guardada por otra. Durante el
proceso de almacenamiento aparece en el símbolo de la carpeta en la
parte superior de la pantalla.
También puede presionar un número en el aparato (1, 2, 3) para guardar una
emisora en el espacio de memoria correspondiente #1, #2 o #3.
Si se ha guardado una emisora en un espacio de memoria, la misma
emisora no podrá guardarse en otro espacio. Las emisoras guardadas
aparecen en este menú. Para mostrar la lista de emisoras guardadas puede
pulsar el botón PRESET.
Si ha abierto la lista de emisoras guardadas, seleccione una emisora y pulse
el botón Enter para iniciar la reproducción. Si ha marcado una emisora,
acceda a ella pulsando el botón del submenú. Allí puede eliminar una
emisora (una emisora se quita de la lista de favoritos), puede navegar hacia
arriba y abajo de la lista, renombrar (puede nombrar una emisora de radio
como desee), reproducir la emisora o utilizarla como tono de alarma (si
selecciona como fuente de alarma “Radio internet”). Para acceder a una
emisora guardada, pulse primero el botón PRESET y seleccione la emisora
guardada girando el regulador de volumen o pulsando los botones /.
Emisora de radio/ música
Las emisoras se categorizan según «Top 20 mundial», «género», «país/
ubicación» y «destacados».
Pulse el botón ENTER para acceder al submenú y seleccione una emisora
para reproducir la música.
Presione el botón ENTER para una reproducción directa tras seleccionar una
emisora.
Pulse el botón , para acceder al submenú. Puede añadir la emisora a
Favoritos, iniciar una búsqueda automática de emisoras, reproducir una
emisora o congurar una emisora como tono de alarma (si previamente
ha seleccionado en los ajustes de alarma «Radio internet»). Si selecciona
«Auto Scan», se reproducirán todas las emisoras del submenú durante
30 segundos hasta haber seleccionado todas o hasta que pulse el botón
ENTER para interrumpir la reproducción.
Pulse el botón Info para visualizar la información correspondiente de la
emisora.

127
ES
Historial
Una lista de las últimas emisoras escuchadas. Se guardan hasta 10 emisoras
en el historial.
Presione el botón ENTER para una reproducción directa tras seleccionar una
emisora.
Pulse el botón , para acceder al submenú. Puede añadir la emisora a
Favoritos, iniciar una búsqueda automática de emisoras, reproducir una
emisora o congurar una emisora como tono de alarma (si previamente ha
seleccionado en los ajustes de alarma «Radio internet»).
Si selecciona «Auto Scan», se reproducirán todas las emisoras del submenú
durante 30 segundos hasta haber seleccionado todas o hasta que pulse el
botón ENTER para interrumpir la reproducción.
Emisoras de radio locales
En el menú de radio internet existe una vinculación con las emisoras de
radio locales para que pueda escuchar fácilmente emisoras de su zona.
Su aparato puede enviar su ubicación actual a través de la dirección IP y
crear una lista de emisoras basándose en esta.
Si lo desea, también puede introducir otro país como ubicación para
reproducir emisoras de allí.
CENTRO MULTIMEDIA
UPnP
Si ha congurado «medios compartidos», puede visualizarlos a través de
UPnP.
Si hay disponible más de un dispositivo para compartir medios, se listarán
todas las alternativas.
Seleccione el medio desde el que desea reproducir música a través del
aparato.
Nota: El aparato solamente puede leer pistas cuyo nombre cuente con
menos de 40 caracteres. Los caracteres deben estar en idioma europeo.
Si el aparato no puede reproducir una pista en modo UpnP, primero debe
intentar renombrar la pista. Si la pista sigue sin poder reproducirse, puede
intentar convertirla en otro formato.
Mi lista de reproducción
Puede crear una lista con sus canciones favoritas en modo UPnP. Mantenga
pulsado el botón ENTER mientras se reproduce una canción para guardarla
en «My Playlist».
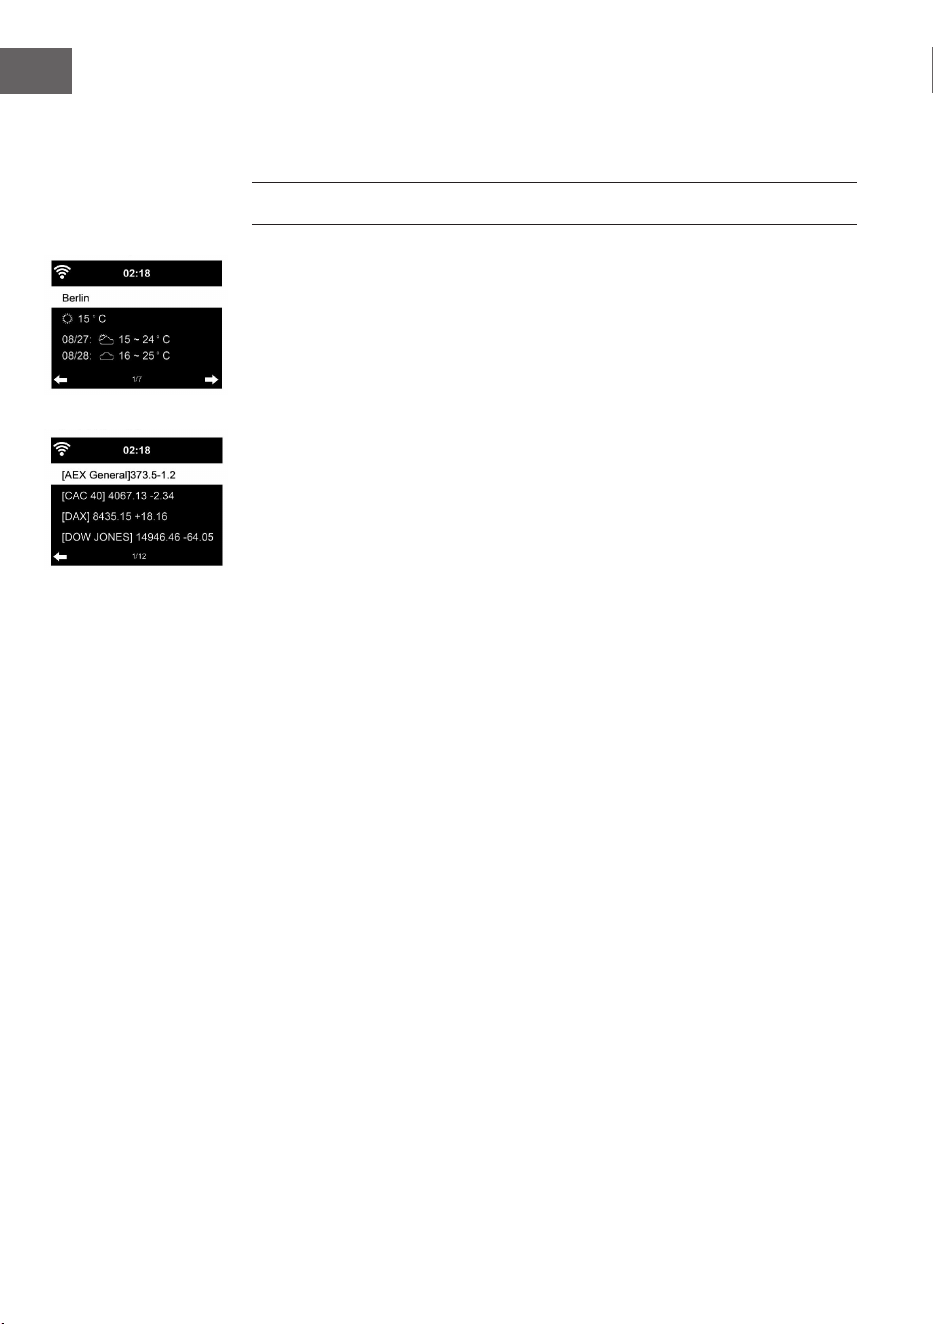
128
ES
Eliminar mi lista de reproducción
• Puede eliminnar todas las pistas incluidas en la lista de reproducción «My
Playlist».
CENTRO DE INFORMACIÓN
Información meteorológica
Existe información y predicciones meteorológicas para 2000 ciudades.
Seleccione el país y la ciudad para obtener datos meteorológicos más
exactos.
Si desea que el tiempo de la ciudad que ha escogido también se muestre en
modo standby, pulse el botón ENTER.
Información nanciera
Consulte los índices de bolsa de todo el mundo.
Información del aparato
La versión actual del sistema y los detalles sobre la conexión de red están
disponibles para su consulta. La información incluye la dirección MAC que
ha introducido en el registro de «my mediaU».
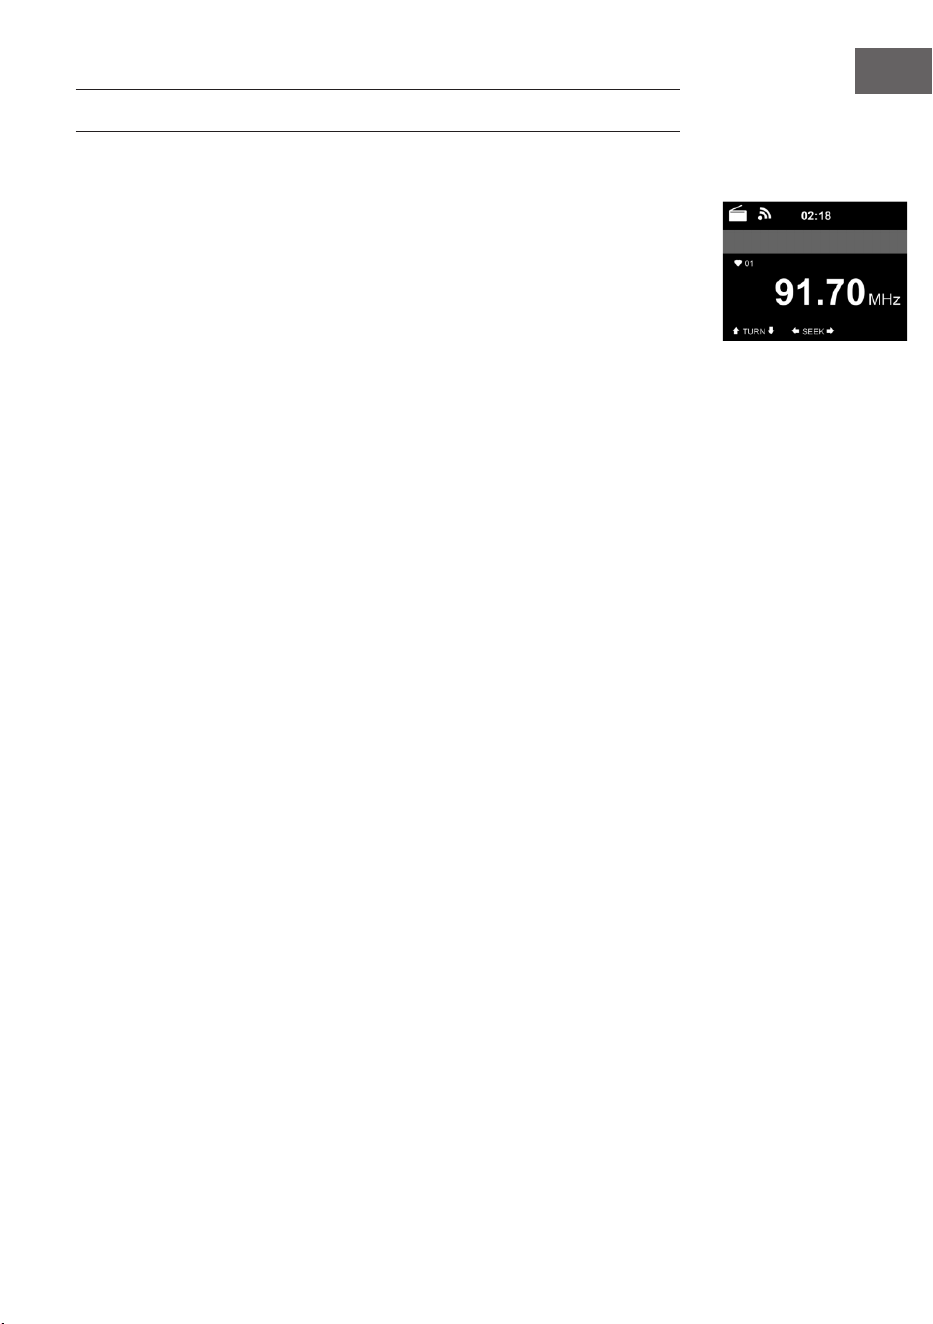
129
ES
RADIO FM
En el modo radio FM se recibe la radio analógica de banda ancha.
Appuyez sur les touches o del aparato o del mando a distancia para
iniciar una búsqueda de emisoras FM.
El indicador de frecuencia se desplaza hacia arriba durante la búsqueda.
En cuanto se detecte una emisora, se detiene la búsqueda de emisoras.
Para realizar una búsqueda manual de emisoras, pulse los botones /. La
búsqueda manual se realiza en intervalos de 0,05 Mhz.
Mantenga pulsado el botón PRESET para guardar una emisora. Puede
guardar hasta 20 emisoras FM.
Pulse el botón PRESET para acceder a una emisora guardada o en el
aparato o los botones / en el mando a distancia.
Como alternativa puede iniciar una búsqueda automática de todas las
emisoras pulsando el botón ENTER del aparato o SCAN del mando
a distancia. Las emisoras de radio encontradas se almacenarán
automáticamente en la lista de emisoras.

130
ES
REPRODUCCIÓN DE CD
Uso de CD/MP3
• Pulse el botón MENU para seleccionar el modo CD.
• Pulse el botón X para abrir el compartimento del CD.
• Introduzca un CD en el compartimento.
• Para iniciar la reproducción, pulse el botón ENTER del aparato o el
botón del mando a distancia.
• Para pausar la reproducción, pulse el botón ENTER del aparato o el
botón del mando a distancia.
• Pulse el botón para detener la reproducción.
• Pulse el botón o para saltar una pista.
• Gire el regulador de volumen del aparato o pulse los botones / del
mando a distancia para regular el volumen.
BT
Seleccione una fuente de audio
Mantenga pulsado el botón ENTER hasta que "BT" aparezca en pantalla.
Asegúrese de que no haya ningún otro dispositivo BT conectado a Streamo.
En pantalla se muestra "No Connection".
Active el "BT" de su dispositivo externo.
Busque Streamo en la lista de dispositivos.
Seleccione Streamo de la lista de dispositivos. Si fuera necesario introducir
una contraseña, introduzca "0000" (cuatro ceros).
En algunos dispositivos puede que se necesite también conrmar la
conexión.
Si se ha establecido correctamente la conexión, «Connected» se mostrará
en la pantalla de Streamo.
Inicie la reproducción BT en su dispositivo externo.
Puede controlar la reproducción BT a través de su dispositivo externo o de
Streamo. El volumen se puede regular en ambos dispositivos.
La conexión BT se puede interrumpir presionando el botón ENTER durante
tres segundos. El mensaje «No Connection» se muestra en pantalla.

131
ES
CONTROL REMOTO A TRAVÉS DE
APLICACIONES
Algunas aplicaciones de Android, como Air Music control, permiten
controlar el aparato a través de un smartphone o tableta. En cuanto conecte
los dispositivos a Streamo, se mostrarán los mismos indicadores de menú
en el smartphone/tableta que en la pantalla de Streamo.
Puede seleccionar todas las funciones del mismo modo que lo hace en
Streamo.
Las funciones/símbolos de menú seleccionados del aparato cambian en
función de las acciones que realice en el smartphone/tableta.
Si controla el aparato a través de la aplicación, puede ocurrir que no sea
posible establecer una conexión UPnP con el Reproductor multimedia de
Windows.
Control por aplicación a través de Air Music Control
Puede controlar la radio de
internet a través de su smartphone
o tablet.
Para ello, descargue la app "Air
Music Control" de la "Google Play
Store" o de la "Apple AppStore".
Los dispositivos deben estar
conectados a la misma red.

132
ES
RETIRADA DEL APARATO
Si en su país existe una disposición legal relativa a
la eliminación de aparatos eléctricos y electrónicos,
este símbolo estampado en el producto o en
el embalaje advierte que no debe eliminarse
como residuo doméstico. En lugar de ello, debe
depositarse en un punto de recogida de reciclaje
de aparatos eléctricos y electrónicos. Una gestión
adecuada de estos residuos previene consecuencias
potencialmente negativas para el medio ambiente
y la salud de las personas. Puede consultar más
información sobre el reciclaje y la eliminación de este
producto contactando con su administración local o
con su servicio de recogida de residuos.
Este producto contiene baterías. Si en su país existe
una disposición legal relativa a la eliminación de
baterías, estas no deben eliminarse como residuo
doméstico. Infórmese sobre la normativa vigente
relacionada con la eliminación de baterías. Una
gestión adecuada de estos residuos previene
consecuencias potencialmente negativas para el
medio ambiente y la salud de las personas.
DECLARACIÓN DE CONFORMIDAD
Fabricante:
Chal-Tec GmbH, Wallstraße 16, 10179 Berlín, Alemania.
Importador para Gran Bretaña:
Berlin Brands Group UK Limited
PO Box 42
272 Kensington High Street
London, W8 6ND
United Kingdom
Por la presente, Chal-Tec GmbH declara que el tipo
de equipo radioeléctrico Streamo CD es conforme
con la Directiva 2014/53/UE. El texto completo de la
declaración UE de conformidad está disponible en la
dirección Internet siguiente: use.berlin/10034055
133
IT
Gentile Cliente,
La ringraziamo per aver acquistato il dispositivo.
La preghiamo di leggere attentamente le seguenti
istruzioni per l’uso e di seguirle per evitare
possibili danni tecnici. Non ci assumiamo alcuna
responsabilità per danni scaturiti da una mancata
osservazione delle avvertenze di sicurezza e da
un uso improprio del dispositivo. Scansionare il
codice QR seguente, per accedere al manuale
d’uso più attuale e per ricevere informazioni sul
prodotto.
INDICE
Dati tecnici 134
Avvertenze di sicurezza 135
Volume di consegna 136
Panoramica del dispositivo 137
Messa in funzione 142
Dlna 147
Panoramica menu 148
Menu principale 150
Internet radio 158
Media center 159
Centro informazioni 160
Radio FM 161
Riproduzione CD 162
BT 162
Controllo a distanza tramite app 163
Smaltimento 164
Dichiarazione di conformità 164

134
IT
DATI TECNICI
Numero articolo 10034055, 10034056
Alimentazione alimentatore Ingresso: 100-240 V ~ 50/60 Hz max.
0,8 A
Uscita: 12 V / 2,5 A
Connessioni Ingresso AUX (3,5 mm)
Radio FM
Rango de frecuencia 87,5 MHz - 108 MHz
DAB/DAB+
Intervallo di frequenza 174-240 MHz
WLAN
Standard
Encryption
Intervallo di frequenza
Potenza di trasmissione
802.11b/g/n
WEP, WPA, WPA 2(PSK), WPS
2402–2480MHz
14-20dBm
BT specications
Intervallo di frequenza
Potenza massima di trasmissione
2402–2480MHz
10dBm
Wi 802.11b/g/n
Codica: WEP, WPA, WPA 2(PSK), WPS
Streaming UPnP, DLNA
Formati dei le supportati WMA, MP3

135
IT
AVVERTENZE DI SICUREZZA
Leggere attentamente tutte le avvertenze di sicurezza e il manuale d’uso
prima di utilizzare il dispositivo.
• Conservare il manuale in un luogo sicuro per future consultazioni.
• Rispettare tutti i passaggi di utilizzo necessari.
• Non posizionare il dispositivo in un luogo umido o in luoghi con campi
elettromagnetici, luce solare diretta o temperatura ambiente elevata.
• Se non si utilizza il dispositivo per tempi prolungati, staccare la spina e
togliere la batteria dal microfono.
• Staccare la spina prima di pulire il dispositivo. Non utilizzare gas volatili,
diluenti o altri detergenti chimici per pulire il dispositivo.
• Utilizzare solo accessori consigliati dal produttore.
• L’alimentazione del dispositivo deve rispettare le indicazioni sulla
targhetta.
• Non realizzare autonomamente opere di manutenzione e riparazione. La
tensione pericolosa all’interno del dispositivo può causare folgorazioni
se si apre l’alloggiamento. Le riparazioni devono essere realizzate
esclusivamente da un servizio di assistenza ai clienti qualicato.
• Se è necessario sostituire un componente, deve corrispondere alle
speciche del produttore o essere un pezzo originale.
• Se il dispositivo è guasto o non funziona correttamente, rivolgersi
al servizio di assistenza ai clienti. Non aprire autonomamente
l’alloggiamento per riparare il dispositivo.
• Questo dispositivo non può essere utilizzato da persone (inclusi
bambini) con limitate capacità siche e psichiche o con conoscenza ed
esperienza limitate, a meno che non siano stati istruiti sulle modalità
di utilizzo del dispositivo e non siano supervisionati da una persona
responsabile del loro controllo. Fare attenzione ai bambini per
assicurarsi che non giochino con il dispositivo.
• • Questo dispositivo serve a riprodurre audio. È progettato solo per
questo scopo e deve essere utilizzato solo a tal ne. Utilizzare il
dispositivo solo secondo le modalità descritte in questo manuale.
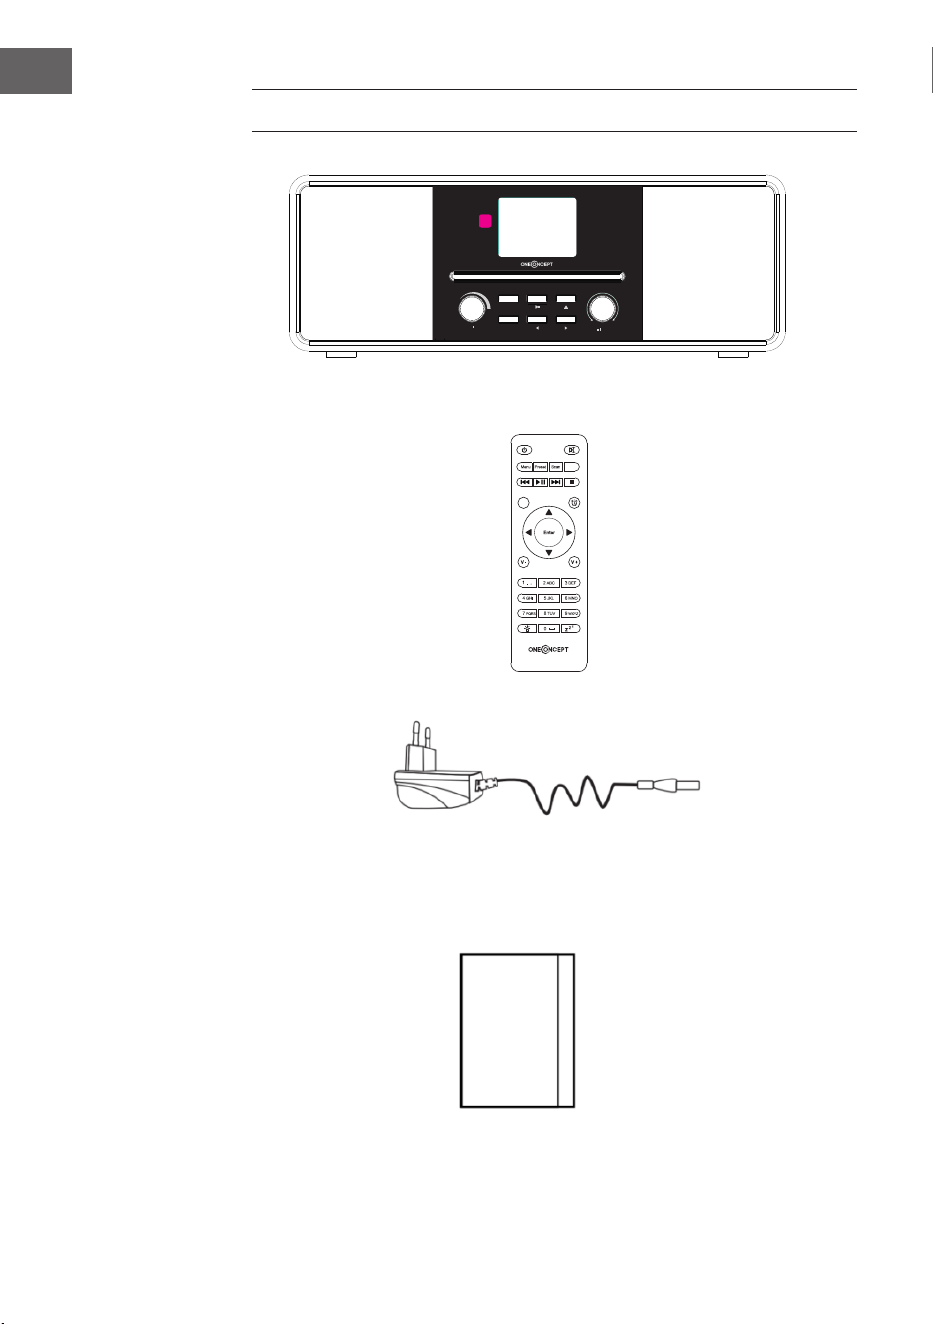
136
IT
Power Menu
Volume
Preset
Scan
Up
Down
Enter
VOLUME DI CONSEGNA
Streamo CD
Alimentatore
Telecomando
Manuale di istruzioni
EQ
Eject
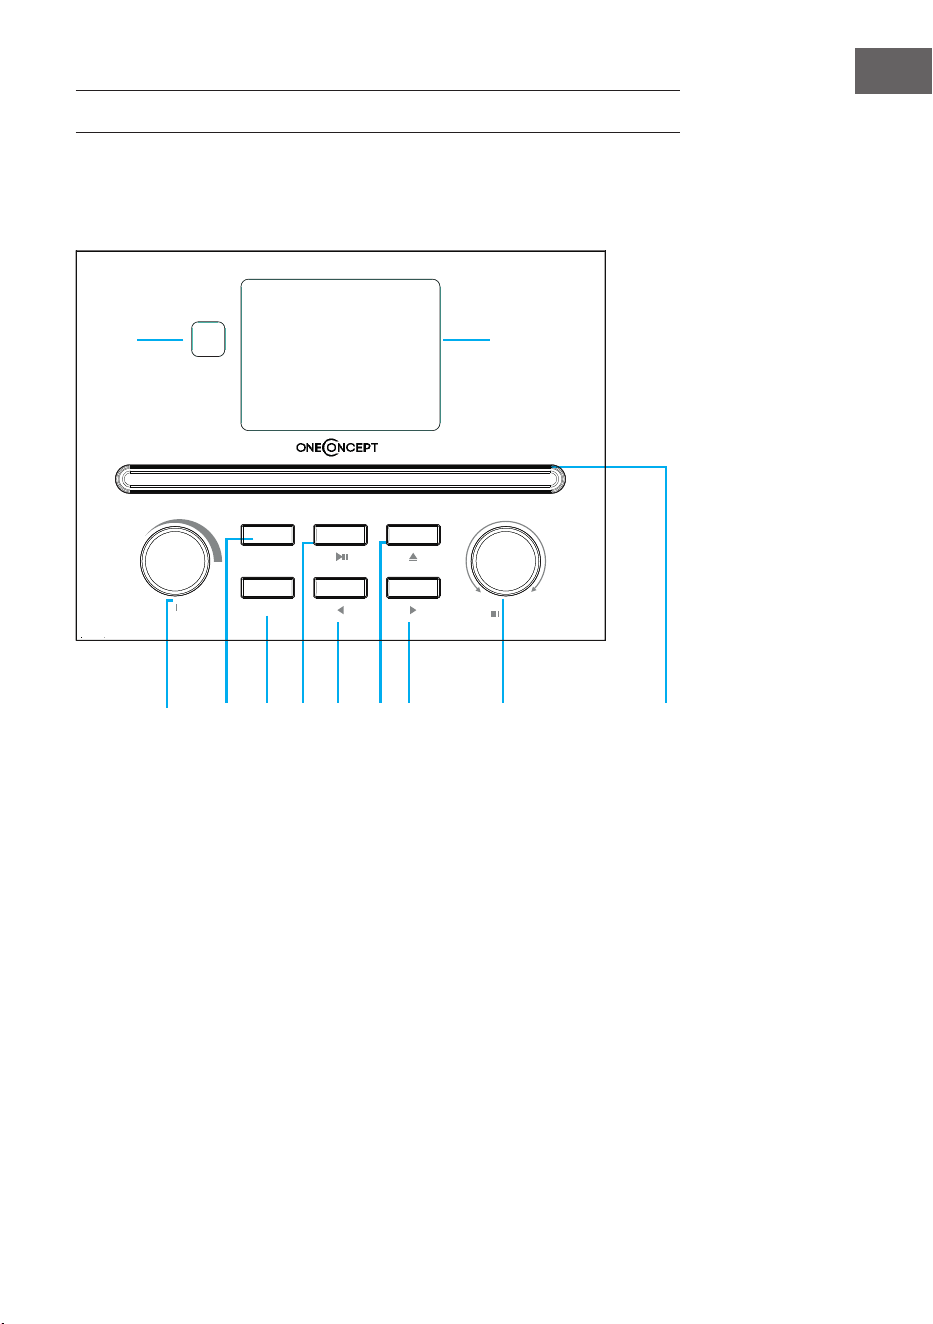
137
IT
PANORAMICA DEL DISPOSITIVO
Vista frontale
1 Ricevitore IR
2 Schermo LCD
3 Tasto On/O e Menu
4 Preset memoria
5 Ricerca emittenti
6 Play/Pausa
7 Sinistra
8 Avanti
9 Destra
10 Tasto Navigazione/Confermare
11 Vano CD
4
2
1
3
5 6
7
8
9
10
11
Power Menu
Volume
Preset
Scan
Down
Up
Enter
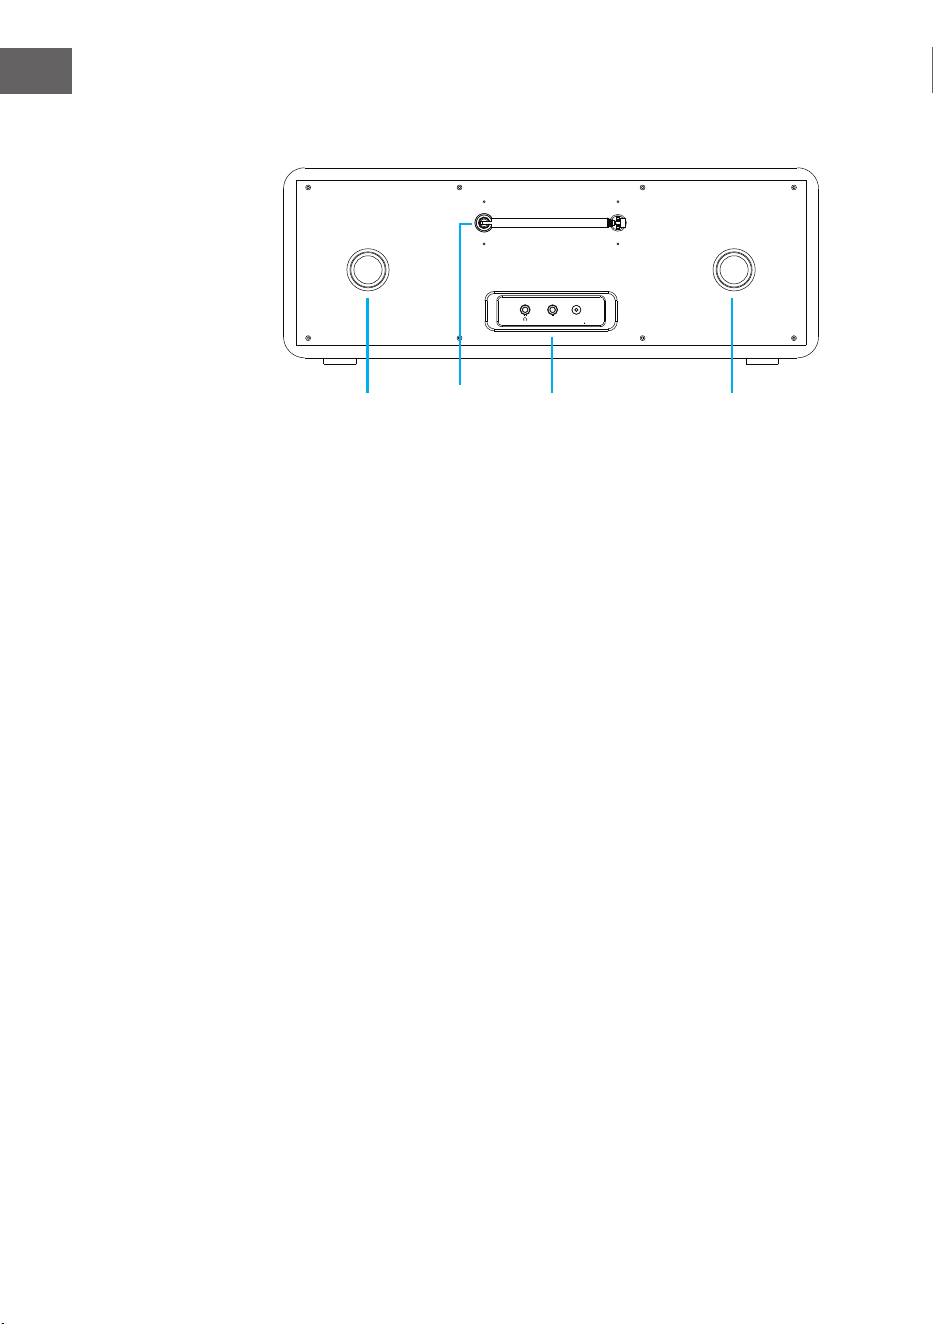
138
IT
Vista posteriore
12 Tubi Bassreex
13 Antenna ad asta
14 Ingresso cuie/AUX in/connessione adattatore
15 Tubi Bassreex
Dc inAux
12 13 14 15

139
IT
Telecomando
EQ
Eject
1 2
5
6
9
12
13
16
19
20
22
10
3
4
7
8
11
14
17
18
21
15
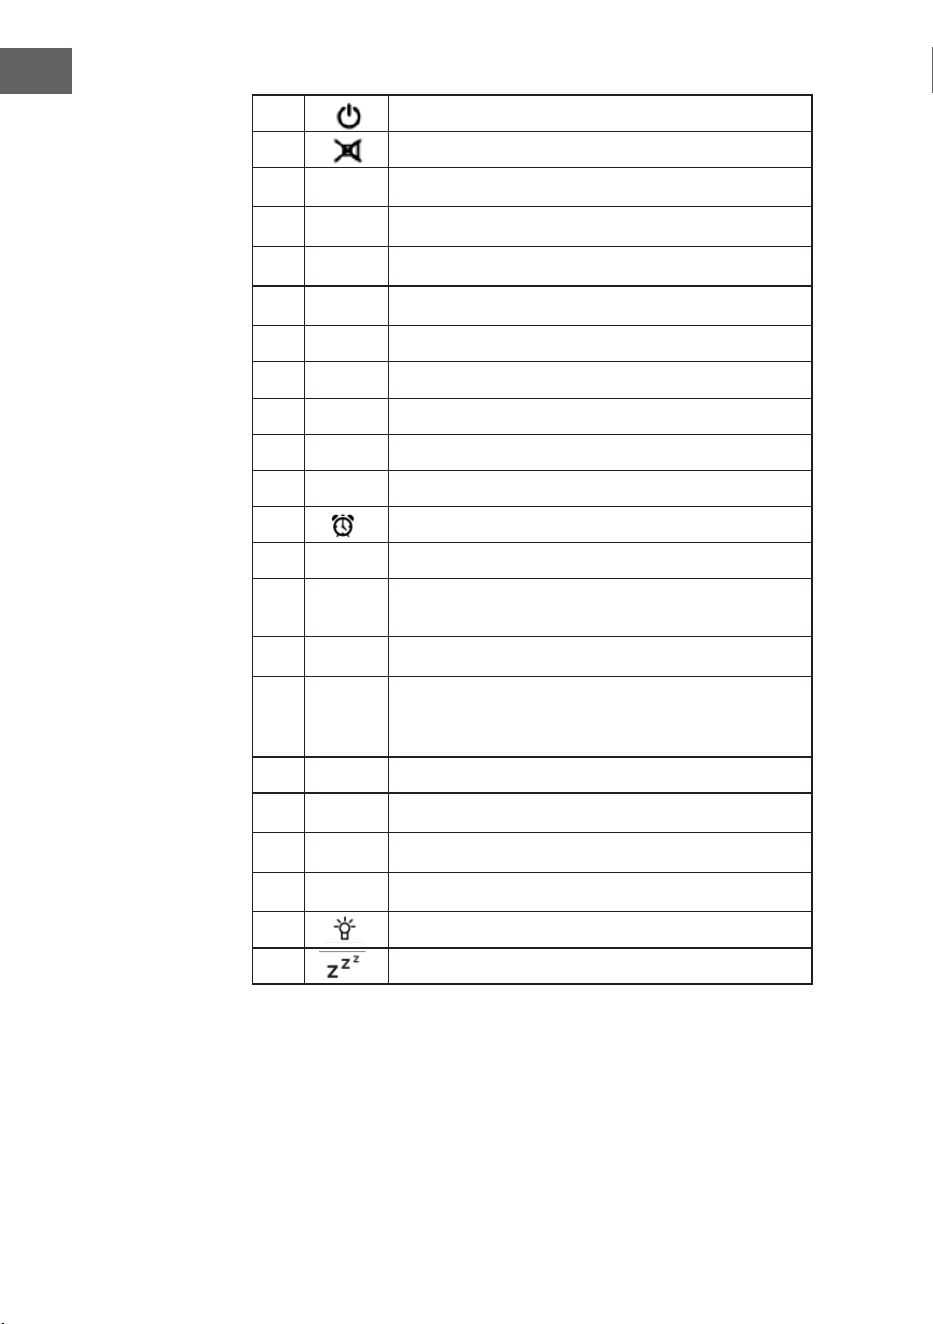
140
IT
1 Standby
2 Altoparlanti on/o
3
MENU
Menu principale
4
Preset
Emittenti salvate, Preferiti, ecc.
5
Scan
Scansione emittenti DAB/FM
6
Eject
Espellere CD
7
Media center, indietro di un titolo
8
Media center, Play/Pausa
9
Media center, avanti un titolo
10
Terminare la riproduzione
11 EQ Equalizzatore
12 Sveglia
13
Verso l’alto, selezionare cifra/lettera
14
Verso sinistra, quando si inserisce testo: area di
inserimento precedente, cancellare
15
Enter
ENTER – confermare l’inserimento
16
Verso destra, quando si inserisce testo: area
di inserimento successiva, salvare l’ultimo
inserimento
17
Verso il basso, selezionare cifra/lettera
18
V-
Abbassare il volume
19
V+
Alzare il volume
20
0.....9
Aprire i Preferiti/la memoria; inserire lettere e cifre
21 Dimmer
22 Tasto muto

141
IT
Simboli sul display
La connessione viene stabilita, il dispositivo funziona.
Nessuna connessione WLAN
La connessione WLAN viene stabilita
Ricezione radio VHF: mono
Ricezione radio VHF: stereo
Funzione radio VHF
AUX
Altoparlante o
Cerca
Sveglia on
Un’emittente radio web è stata salvata
Un’emittente radio FM è stata salvata
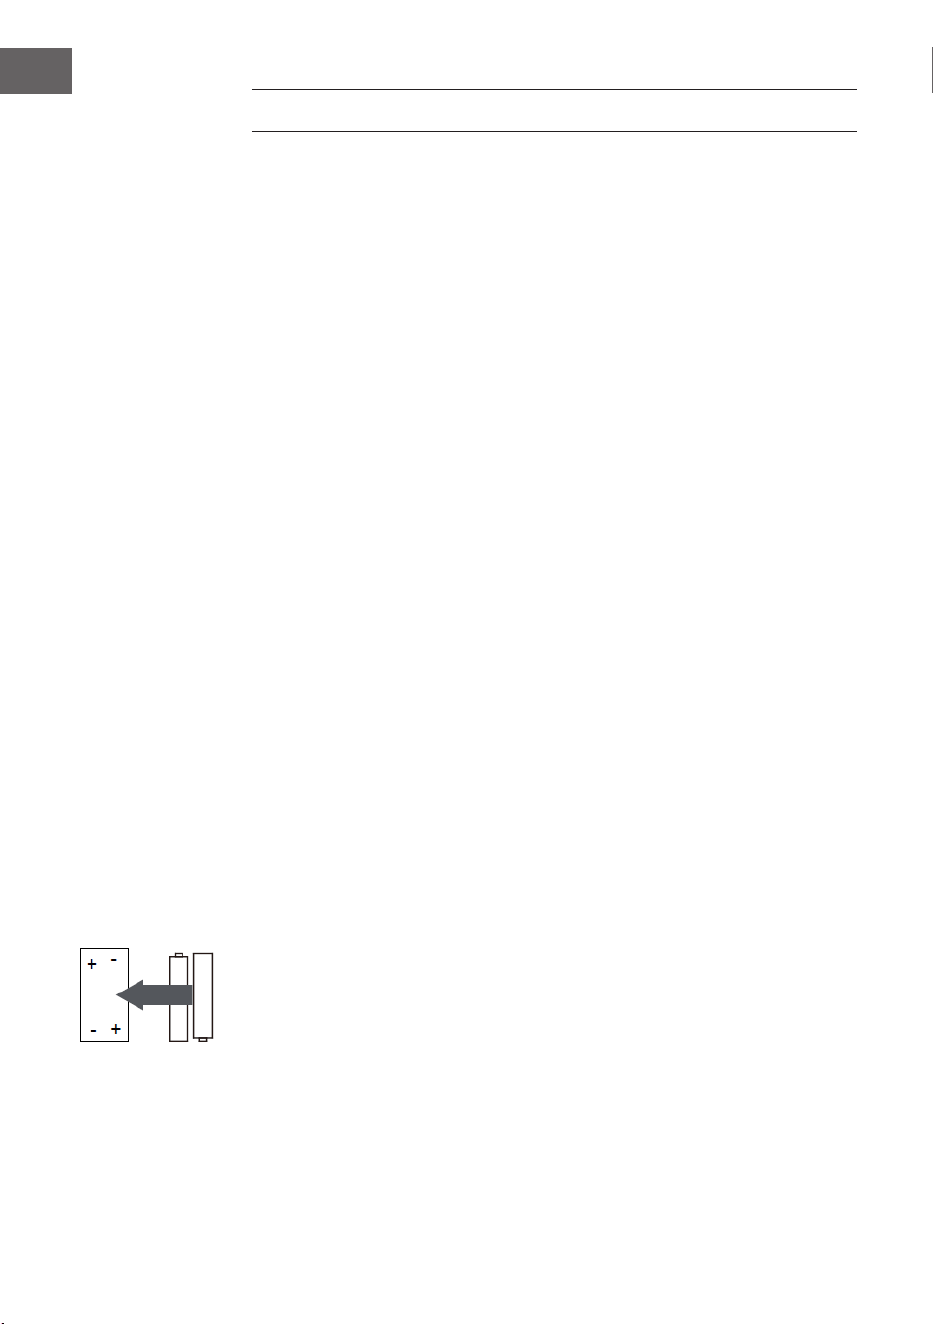
142
IT
MESSA IN FUNZIONE
Per utilizzare l’impianto stereo Streamo, sono necessari i seguenti requisiti:
• Una connessione a banda larga combinata con un punto di accesso
con/senza cavo, router o dispositivo di rete simile.
• Il dispositivo di rete deve supportare la connessione senza lo tramite
WLAN (802.11b/g/n).
• Un computer o uno smartphone deve essere a portata di mano e deve
trovarsi nella stessa rete del dispositivo.
Inserire le batterie nel telecomando
1. Premere verso l’interno l’intaglio sulla copertura del vano batterie e
togliere la copertura.
2. Inserire due batterie AAA nel vano (v. immagine). Fare attenzione alla
corretta polarità delle batterie.
3. Rimettere la copertura del vano batterie.
Avvertenze di sicurezza per batterie
Rispettare queste avvertenze quando si utilizzano batterie:
• Utilizzare solo batterie della tipologia e delle dimensioni corrette.
• Assicurarsi di inserire correttamente le batterie nel vano. Fare
attenzione ai simboli che indicano la polarità. Una batteria inserita al
contrario può danneggiare i relativi dispositivi.
• Non utilizzare mai tipi diversi di batterie contemporaneamente e non
mescolare mai batterie vecchie e nuove.
• Se le batterie sono scariche o se il dispositivo non viene utilizzato per
periodi prolungati, toglierle dal vano per evitare che perdano.
• Non cercare assolutamente di ricaricare batterie che non sono
esplicitamente adatte alla ricarica, altrimenti si possono surriscaldare
ed esplodere. Seguire le istruzioni del produttore delle batterie.
• Non esporre mai le batterie a amme aperte, altrimenti possono
esplodere o avere perdite.
• Pulire i contatti delle batterie e i contatti nel vano, prima di inserire le
batterie.
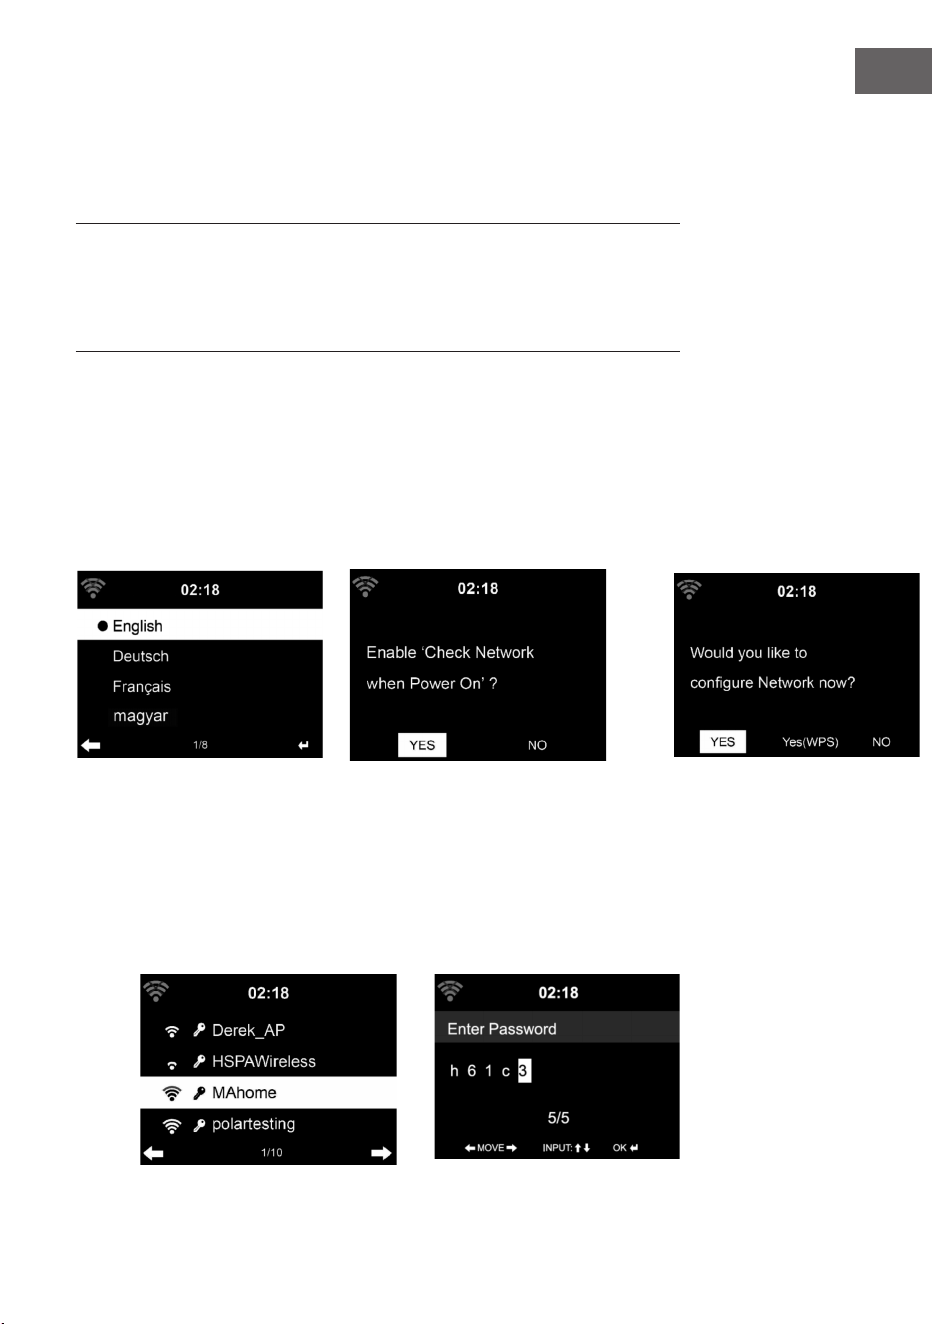
143
IT
Stabilire la connessione alla rete
Per la connessione LAN senza li (WLAN):
Controllare se la spia WLAN KINK/ACT del punto di accesso con/senza cavo
o del router è accesa. In caso di dubbi, leggere il relativo manuale d’uso.
La WLAN permette il trasferimento di le senza lo tra dispositivo entro
una distanza contenuta sotto i 20 metri. Pareti o soitti possono inuire
sull’intensità della connessione WLAN. Cercare di tenere Streamo e/o il
punto di accesso entro tale distanza ed evitare di posizionare ostacoli tra i
dispositivi.
• Collegare l’adattatore al retro di Streamo e inserire la spina nella presa.
• Quando si utilizza il dispositivo per la prima volta, è necessario
impostare rete e lingua.
2
1 2
3
• Selezionare “YES” (sì) per stabilire la connessione.
• Selezionare “YES” (WPS(solo per router WPS)). Premere poi il tasto
WPS del router.
• Se si seleziona “YES”, il dispositivo cerca automaticamente le reti WLAN
disponibili e le elenca sullo schermo.
1

144
IT
• Il numero di barre del simbolo WLAN prima del nome della rete (SSID)
indica l’intensità del segnale della rete.
• Il simbolo della chiave indica che la rete in questione è protetta da
password.
• Se il dispositivo non trova reti senza li, sullo schermo compare “No
wireless networks found”. Cambiare la posizione del dispositivo o
controllare il router WLAN.
• L’SSID del punto di accesso può essere visualizzato nelle impostazioni
del punto di accesso (router).
• Selezionare la rete desiderata e confermare con OK.
• Se la rete selezionata è protetta da password, ne verrà richiesto
l’inserimento.
• Inserire la password con cifre e lettere sul telecomando.
• Fare attenzione a maiuscole e minuscole quando si inserisce la
password.
• Per inserire la password è anche possibile utilizzare la manopola sul
dispositivo. Se sono stati fatti errori durante l’inserimento, premere il
tasto per correggere.
Inserimento dal telecomando
Il cursore indica l’area di inserimento corrente.
Premere ripetutamente il tasto con il numero corrispondente.
0 0 (cancellare l’inserimento)
1 1(tasto spazio vuoto) @ ! ” # $ % & ( ) * ’ + - { \ | }< >?........
2 2 A B C a b c
3 3 D E F d e f
4 4 G H I g h i
5 5 J K L j k l
6 6 M N O m n o
7 7 P Q R S p q r s
8 8 T U V t u v
9 9 W X Y Z w x y z
‘ ’ andare al simbolo precedente. Il simbolo può essere sovrascritto.
‘ ’ andare al simbolo successivo. L’ultimo simbolo viene sovrascritto.
‘ ’ scegliere tra cifre e lettere.
Enter - confermare l’inserimento.
Per stabilire la connessione alla rete possono essere necessari alcuni
secondi.
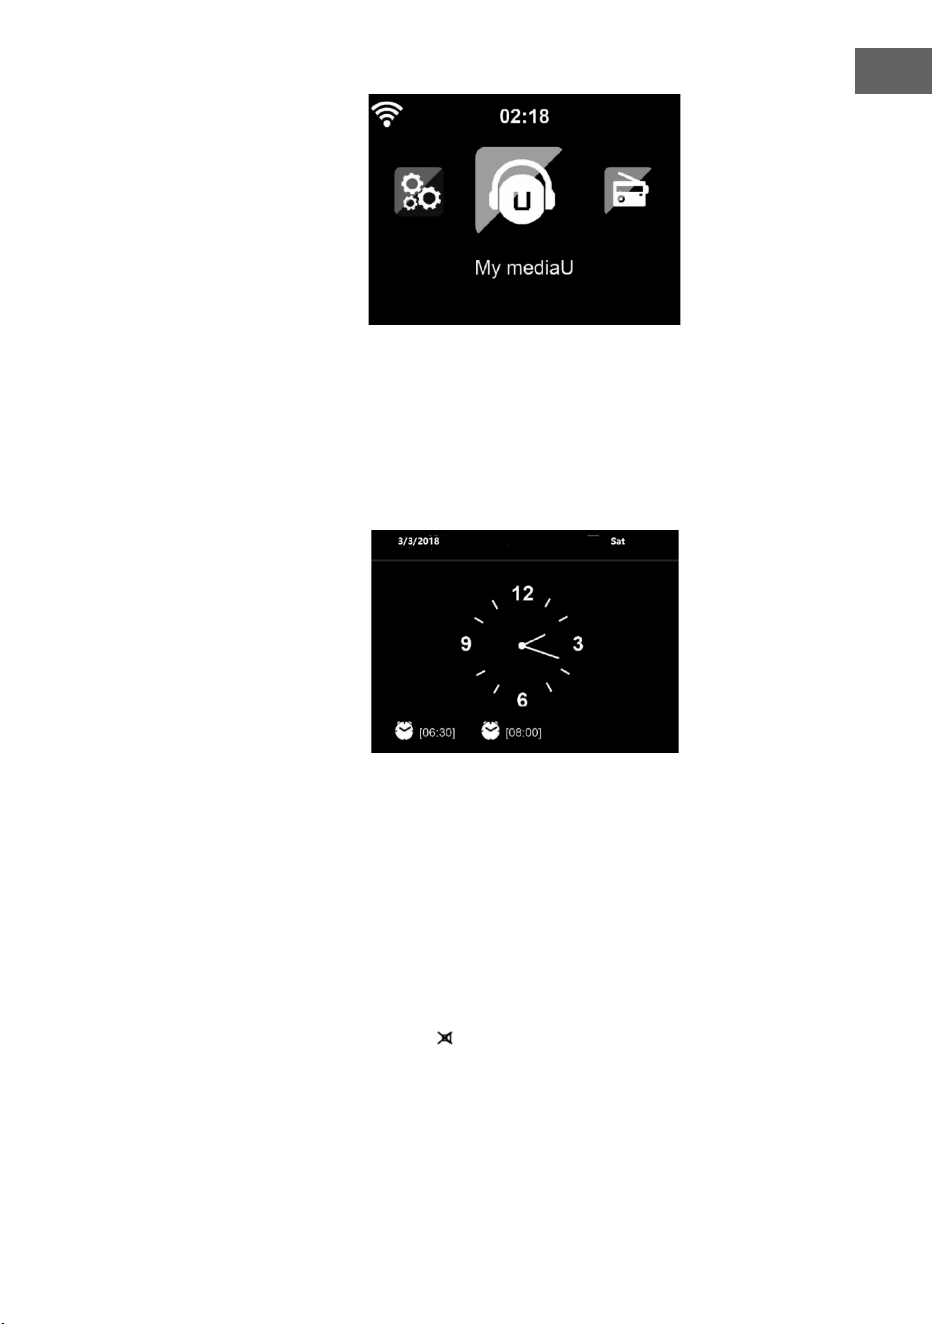
145
IT
Quando la connessione è stata
stabilita, compare il menu principale
con le voci più importanti:
• Internet Radio: accesso a
emittenti radio di tutto il mondo.
• Media Center: accesso ai
vostri dispositivo UPnP
tramite software con funzione
streaming.
• Centro informazioni: accesso a
informazioni come meteo, nanza e informazioni di sistema.
• Impostazioni: diverse impostazioni di sistema.
• Emittente radio locale: accesso a emittenti radio di una determinata
regione (ad es. solo emittenti italiane).
• My mediaU: accesso a una biblioteca multimediale online. Questo
simbolo compare solo se la funzione è già stata attivata nelle
“Impostazioni”
Premere il tasto Standby per
passare in modalità standby.
L’ora, la data e tutte le sveglie
attive vengono mostrate sullo
schermo.
Quando la connessione alla rete è stata stabilita con successo e si utilizza
di nuovo Streamo con la rete, il dispositivo stabilisce la connessione
automaticamente. Se si desidera cambiare rete, stabilire la connessione in
questione su “Impostazioni”.
Ruotare la manopola del volume per inserire cifre/lettere. Premere non
appena si raggiunge la lettera da inserire e proseguire con l’inserimento
della lettera successiva. Una volta terminato l’inserimento, premere ENTER
per confermare. Si può premere il tasto per raggiungere l’inserimento
precedente. Ruotare la manopola del volume sul dispositivo o utilizzare i
tasti V-/V+ sul telecomando per regolare il volume. Se si desidera attivare la
funzione muto, premere direttamente il tasto .

146
IT
Informazioni sullo streaming musicale
• Il nome predenito del dispositivo è Streamo. Il nome può essere
cambiato a piacere (v. paragrafo “Messa in funzione e utilizzo”).
• Le seguenti informazioni sono un’introduzione per realizzare lo
streaming musicale da computer e altri dispositivi.
• Tenere presente che le app utilizzate per lo streaming musicale hanno
istruzioni proprie.
• Assicurarsi che il le media da riprodurre in streaming con Streamo
siano in formato MP3, WMA, WAV o AAC.
• Dettagli sulla riproduzione di media in streaming sono disponibili al
paragrafo “Messa in funzione e utilizzo”.
UPnP
Per poter riprodurre musica in streaming dal computer, è necessario
realizzare questi passaggi sul computer:
• Collegare il computer alla rete.
• Assicurarsi che Streamo sia acceso e connesso con la stessa rete del
computer.
• Aprire la piattaforma UPnP Windows Media Player (11 o successivo). In
alternativa, è possibile utilizzare altre piattaforme o altri server, come
ad es. Windows Media Connection.
La musica può essere riprodotta in streaming anche da altri server, come ad
es. smartphone (Android):
• Collegare lo smartphone alla rete.
• Cercare una app per la condivisione di musica su Google Play e
installarla sullo smartphone.
• Aggiungere i le media che si trovano sullo smartphone e che devono
essere condivisi.
• Selezionare la musica da riprodurre in streaming su Streamo dalla app e
regolare il volume su Streamo.

147
IT
DLNA
A parte UPnP, Streamo supporta la funzione DLNA. Questo signica, che i
le musicali su PC o smartphone Android vengono condivisi con Streamo e
la riproduzione viene controllata su PC, smartphone Android, iPhone o iPad
(non è necessario regolare ogni riproduzione su Streamo).
I prerequisiti di sistema per DLNA sul PC sono almeno Windows 7 e
Windows Media Player 12. Le impostazioni avvengono in questo modo:
• Condividere i le sul PC con Streamo.
• Possono essere cercate app DLNA gratuite o a pagamento su Google
Play o Apple Store se si utilizzano smartphone, tablet, iPhone o iPad. Si
consiglia l’utilizzo di Bubble UPnP.
• Alcune app potrebbero non essere supportate da iPhone e iPod.
iPhone e iPod possono comunque essere utilizzati per controllare la
riproduzione musicale da altri server:
Procedere in questo modo per riprodurre musica dall’app:
• Selezionare Streamo come mezzo di riproduzione. Alcune
app permettono la riproduzione musicale da diversi mezzi
contemporaneamente.
• Selezionare il server musicale e la musica da riprodurre. Alcune app
permettono di creare una playlist.

148
IT
PANORAMICA MENU
Standby
My mediaU
Internet Radio
Local Radio
Conguration
BT
CD Playback
AUX IN
My Favorite
Local Radio
History
Service
Radio Station Music
Power management Reset to default
Manage my mediaU
Time Display
Dimmer
Display
Alarm
Sleep Timer
Timer
Scheduled Playing
Language
Weather
Local Radio Setup
Local Radio Setup
Internet Radio
Device
Playback Setup
Resume when power on
Date & Time
Software update

149
IT
Information Center
DAB-Radio
FM
Media Center UPnP
My Playlist
Clear My Playlist
Panoramica menu 2
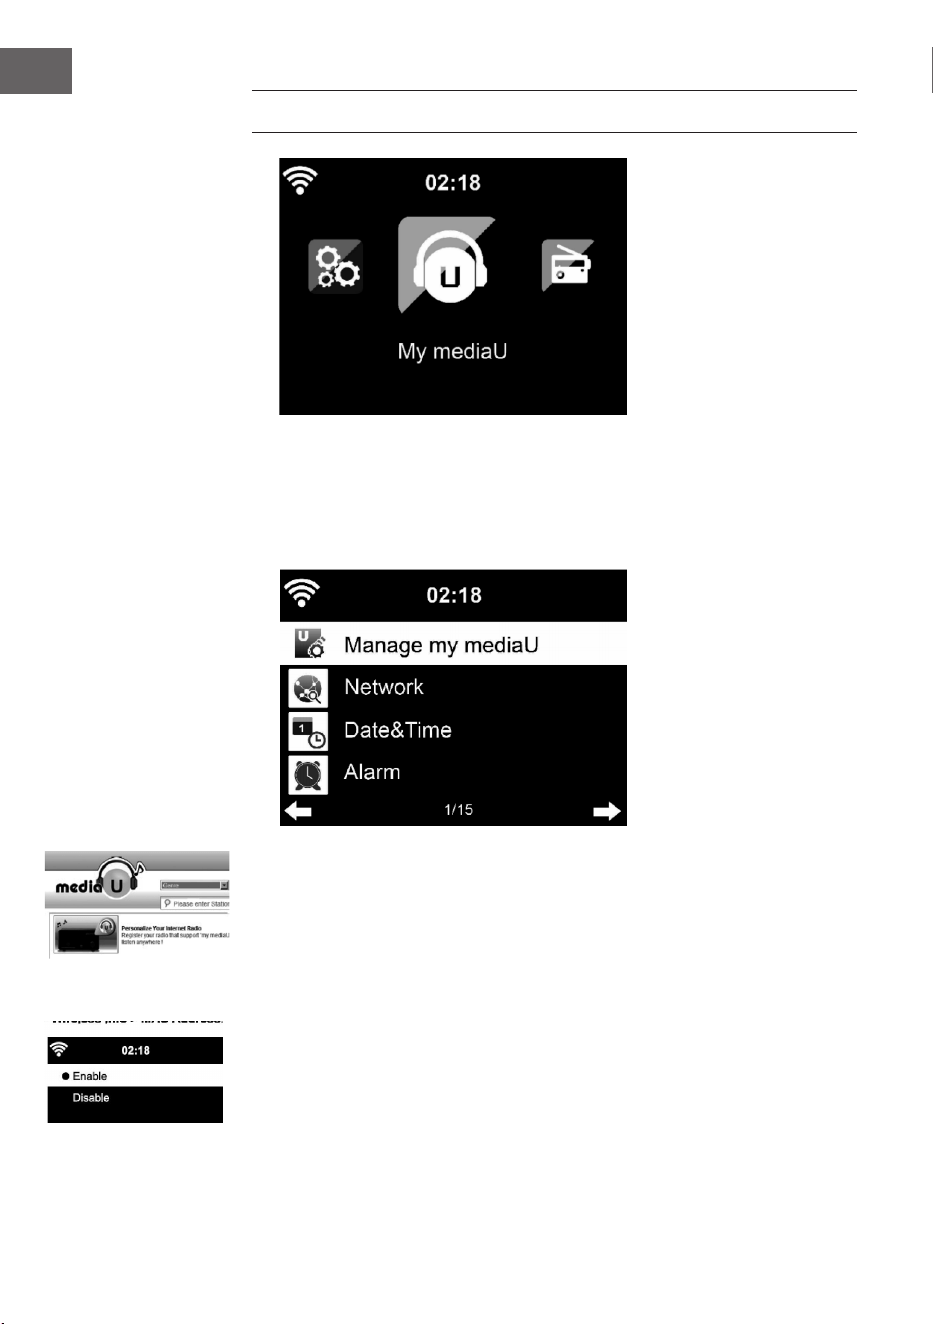
150
IT
MENU PRINCIPALE
Nel menu principale è possibile selezionare le seguenti modalità: My media
U, radio DAB, radio FM, AUX in, riproduzione USB, Spotify, Internet radio,
emittenti radio locali, impostazioni, Information Center, Media Center.
Impostazioni
Gestire “My media U”
Gestire biblioteche My media U – emittenti radio tramite Internet.
Se si ha a disposizione un dispositivo mobile adatto a streaming, per avere
accesso in ogni momento alle emittenti radio preferite, è possibile creare un
accesso gratuito a biblioteche di le su www.mediayou.net e aggiungere al
conto tutti i dispositivi che si desiderano. Selezionare un nome utente e una
password a piacere.
È necessario conoscere anche l’indirizzo MAC del vostro dispositivo
(chiamato numero di serie su Media You) per poter registrare il dispositivo
su “Personalize Your Internet Radio”. L’accesso è possibile da Information
Center > System information > Wireless Info > Mac Address.

151
IT
Dopo la registrazione è necessario attivare questa funzione presso
Information Center > System Information > Wireless Info > MAC Address, in
modo che la Internet Radio possa accedere alla biblioteca.
Il dispositivo si connette automaticamente con il vostro conto e mostra
cosa vi è stato salvato:
• Emittente preferita
• Località preferita/genere
• Le mie emittenti locali
• Aggiungere manualmente
• A seconda delle impostazioni My mediaU individuale, l’aspetto dello
schermo di Streamo può cambiare.
• Se il vostro dispositivo non è ancora stato registrato su MediaYou,
compare un messaggio a riguardo quando si vuole attivare My mediaU.
• Se il vostro dispositivo è stato registrato su diversi conti, questi
vengono mostrati dopo l’attivazione, in modo da poter selezionare il
conto desiderato. Non è necessario inserire una password.

152
IT
Anche il simbolo di My mediaU compare nel menu principale. I seguenti
sottopunti sono a vostra disposizione:
• Favorite Station
• Favorite Location/Genre
• My Local Station
• Manually Add
Questi sottopunti vengono mostrati nella biblioteca, dove è possibile
ordinare e gestire di conseguenza le emittenti radio.
Se si desidera ad esempio aggiungere manualmente un podcast, è
necessario conoscere i relativi URL. Procedere in questo modo.
1. Compilare i campi segnati nel vostro conto MediaYou, al punto “Add
Manually”.
2. Andare su Conguration > Manage my MediaU e attivare nuovamente
premendo “enable”.
3. Al punto My mediaU > Manually Add è possibile visualizzare tutte le
cartelle e gli indirizzi aggiunti e selezionare il podcast.
Vengono supportati i seguenti formati podcast:
- asx
- m3u
- pls
- Puro streaming con protocolli HTTP, RTSP, MMS.

153
IT
Rete
Congurazione rete senza li
Attivare/Disattivare la rete WLAN. Quando si attiva la WLAN, il dispositivo
si connette automaticamente a essa.
Selezionare il router desiderato (v. paragrafo “Stabilire una connessione di
rete”).
Wireless Network (WPS PBC)
Se si utilizza un router con tasto WPS/QSS è possibile stabilire la
connessione tramite la funzione WPS. Aprire la funzione e premere
WPS/QSS entro 120 secondi. La connessione tra router e Streamo viene
congurata automaticamente.
Congurazione manuale
È possibile selezionare DHCP (indirizzo IP assegnato automaticamente) o
inserire manualmente l’indirizzo IP per la connessione alla rete senza li.
Se si seleziona l’impostazione manuale per una connessione con cavo, sono
disponibili le seguenti opzioni:
1. SSID (nome del punto di accesso)
2. Indirizzo IP
3. Subnet Mask
4. Default Gateway
5. Server DNS preferito
6. Server DNS alternativo
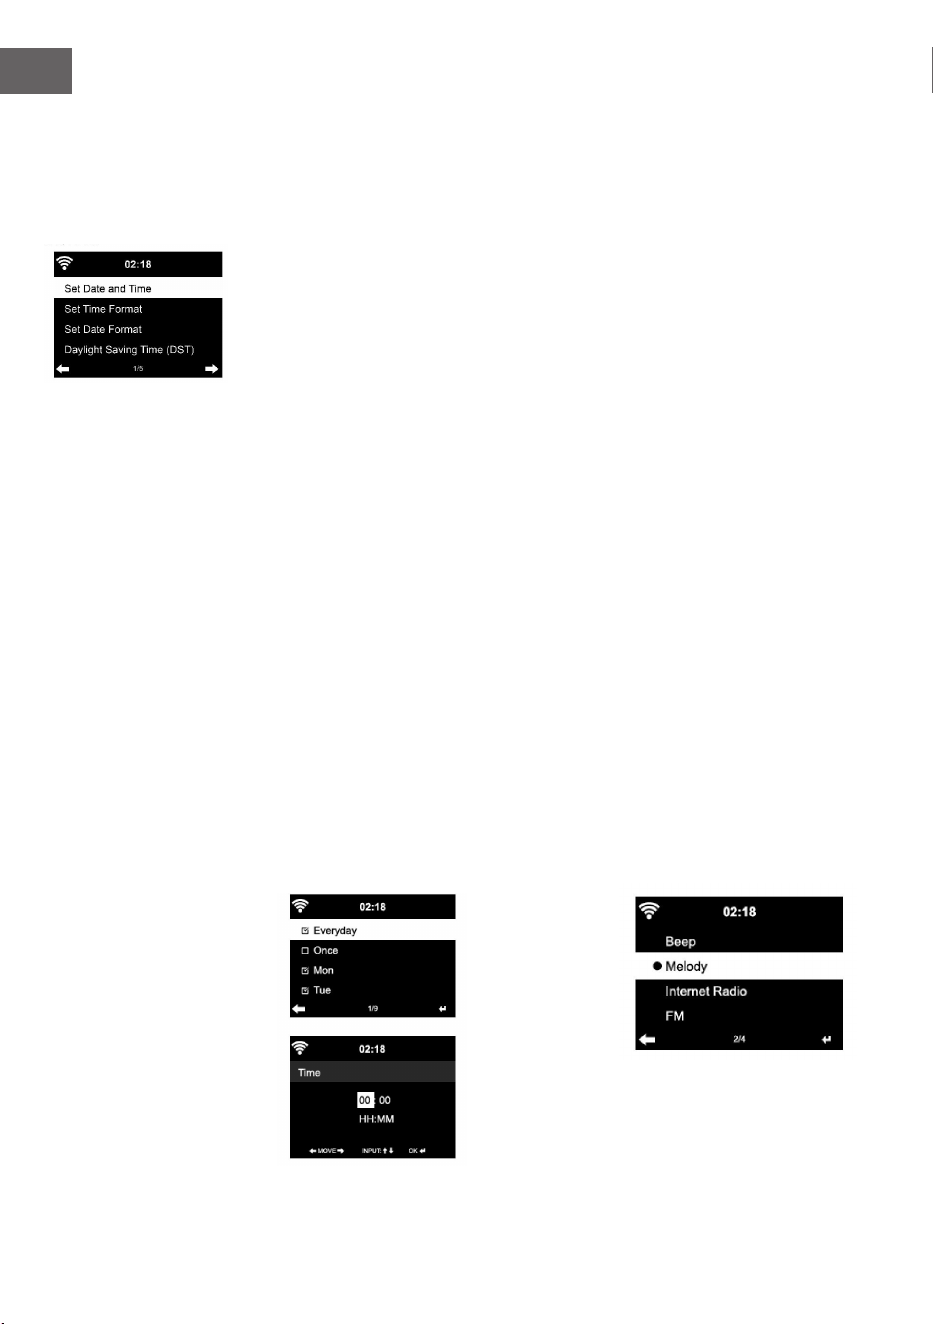
154
IT
Se all’interno del settore in questione sono presenti più di una connessione
alla rete, è possibile selezionare una determinata rete.
Controllare la rete mentre il dispositivo è acceso
Attivare/disattivare la WLAN.
Quando si attiva la WLAN, il dispositivo cerca automaticamente le reti
disponibili. Selezionare la rete WLAN desiderata. Inserire la password WEP
o WPA per connettersi.
Se non c’è connessione alla rete o se non è stato possibile stabilire la
connessione, il simbolo nell’angolo in alto a sinistra è sbarrato.
Data e ora
Le impostazioni di data e ora possono essere inserite quando il dispositivo
è collegato a una rete senza li. Il dispositivo imposta ora e data
automaticamente non appena è stata stabilita una connessione e si basa su
dati di un server centrale.
Il passaggio da ora solare a ora legale deve essere realizzato manualmente.
Può essere selezionato il formato a 12 o 24 ore.
La data YY (anno), MM (mese) e DD (giorno) può essere impostata nei
formati YY/MM/DD o MM/DD/YY.
Attivare o disattivare l’ora legale (DST).
Confermare l’inserimento con ENTER o premendo la manopola del volume.
Quando si è collegati a una rete senza li, l’impostazione di riferimento è
GMT (+01:00). Tenere presente che, in base al vostro fuso orario potrebbe
essere necessario aggiungere o togliere delle ore.

155
IT
Sveglia
Ci sono tre sveglie indipendenti tra loro. 2 sveglie per l’impostazione oraria
assoluta (Alarm 1 e Alarm 2) e una sveglia per impostazione oraria relativa
(NAP ALARM). Selezionare “Alarm” nel menu.
Le prime due sveglie sono simili alla normale sveglia. Accendere il
dispositivo, impostare l’ora corrente e impostare poi la frequenza con cui
deve suonare la sveglia. Sono disponibili le opzioni: “ogni giorno”, “una
volta” e “in determinati giorni della settimana”.
Impostare i valori desiderati ruotando la manopola del volume o con i tasti
/ sul telecomando. Premendo il tasto , si raggiunge il successivo
campo di inserimento. Premere ENTER su dispositivo o telecomando per
confermare.
Impostare l’audio desiderato per la sveglia. Si può scegliere tra segnale
acustico, melodia e Internet radio (DAB/FM/USB).
Quando la sveglia è stata impostata, compare il simbolo sullo schermo
accanto all’ora corrente.
Avvertenza: se è stata selezionata la Internet radio (DAB/FM/USB) come
audio della sveglia, viene riprodotta un’emittente preferita salvata. Per
Alarm 1 e Alarm 2 è possibile impostare la stessa emittente. Una volta
raggiunta l’ora della sveglia e se l’audio è “Internet radio”, il dispositivo si
connette automaticamente a Internet, qualora la rete sia disponibile. Può
quindi capitare che ci sia un lieve ritardo tra l’eettiva ora della sveglia
e la riproduzione eettiva dell’emittente radio. Se a questo punto non è
disponibile alcuna rete, il dispositivo passa automaticamente a “Melodia”.
Se si è attivato NAP Alarm, la sveglia suona in base alle vostre impostazioni
ogni 5/ 10/ 20/ 30/ 60/ 90/ 120 minuti.
Per regolare il volume della sveglia, selezionare “Alarm Volume”.
Quando è stata impostata una sveglia/sono state impostare più sveglie,
il simbolo della sveglia viene mostrato nel lato inferiore dello schermo. Il
simbolo della sveglia con indicazione oraria viene mostrato sullo schermo
anche in modalità standby.
Per interrompere la sveglia, premere il tasto }. Premere SLEEP sul
dispositivo o sul telecomando per attivare la funzione snooze. La sveglia
suona di nuovo dopo 5 minuti.
Lingua
Selezionare la lingua sullo schermo: inglese/tedesco/francese/ungherese/
ceco/slovacco/polacco/turco.

156
IT
Regolare l’illuminazione di fondo
L’intensità dell’illuminazione di fondo può essere regolata. Selezionare
“Power Saving” per regolare l’illuminazione di fondo in modalità standby e
selezionare “Turn On” per attivarla.
È possibile impostare per quanto tempo l’illuminazione di fondo resta
accesa quando la radio non viene utilizzata.
Schermo
Lo schermo può essere impostato a colori o in bianco/nero.
Gestione energetica
È possibile impostare il dispositivo in modo tale che passi automaticamente
in standby nel menu principale o quando non c’è connessione WLAN.
Impostare il timer per la gestione energetica (5/15/30 minuti) in modo tale
che il dispositivo passi in standby quando non viene utilizzato.
Spegnere il dispositivo con “Turn O” se si desidera ignorare la gestione
energetica.
Sleep Timer (timer per lo spegnimento automatico)
• Spegnere direttamente il dispositivo o impostare il tempo no allo
spegnimento automatico. Si può scegliere tra 15/30/60/90/120/150/180
minuti.
• Una volta impostato il tempo no allo spegnimento automatico, viene
mostrato nell’angolo in alto a destra il simbolo del letto con il tempo
rimanente.
• Quando il tempo è scaduto, Streamo passa in standby.
Buer
Il tempo di buering della riproduzione musicale può essere impostato su
2/4/8 secondi.
Meteo
Streamo è in grado di mostrare i dati meteo attuali in modalità standby.
Attivare lo schermo in modalità standby e impostare l’unità della
temperatura (°C o °F) per mostrare il meteo in standby.
Quando il dispositivo è acceso, vengono mostrati alternativamente ogni 10
secondi il meteo attuale e l’ora attuale.
Impostazione di riproduzione
Selezionare la modalità di riproduzione desiderata nel Media Center. Si può
scegliere tra “o” (nessuna ripetizione o riproduzione casuale), “Repeat all”
(ripetizione di tutti i titoli), “Repeat one” (ripetizione di un titolo) o “Shule”
(riproduzione casuale).
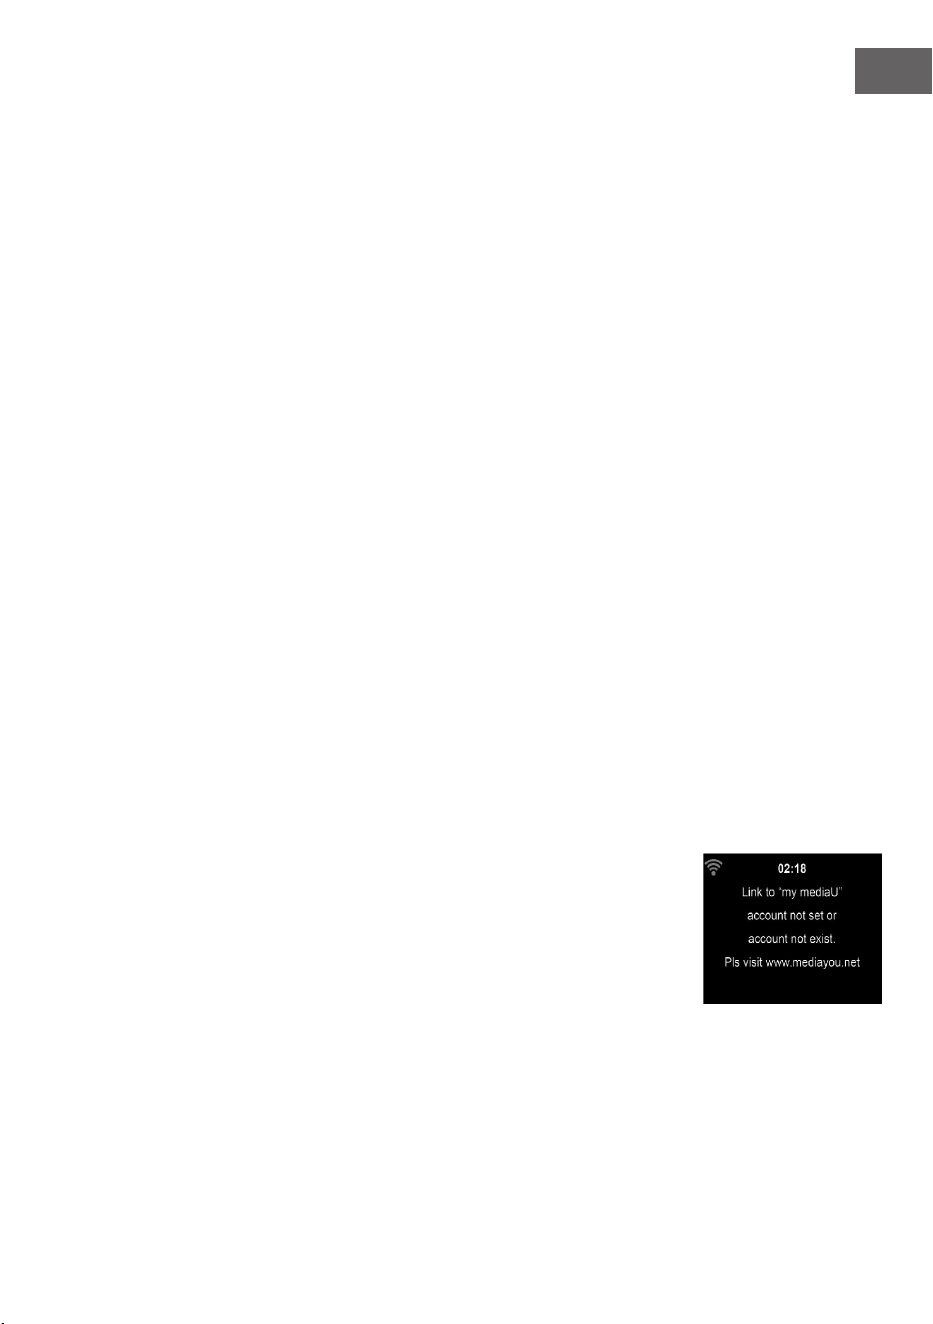
157
IT
Impostazione DLNA
Il nome del dispositivo predenito per DLNA è Streamo.
Il nome del dispositivo può essere modicato nelle impostazioni DLNA su
PC o smartphone.
Equalizzatore
La modalità predenita è “Normal”.
Sono disponibili: “Normal”, “Flat”, “Jazz”, “Rock”, “Soundtrack”, “Classical”,
“Pop” o “News”.
Premere EQ sul telecomando per passare da una modalità all’altra.
Proseguire la riproduzione all’accensione
Il dispositivo è impostato per proseguire la riproduzione dell’ultima
impostazione quando lo si riaccende.
Se questa funzione è attiva e il dispositivo si trova in modalità Internet radio
quando viene spento, quando si riaccende il dispositivo si proseguirà con
l’Internet radio.
Aggiornamento software
Se sul server è disponibile una nuova versione del software, il dispositivo vi
avverte non appena entrate nel menu principale.
Reset
Riportare il dispositivo alle impostazioni di fabbrica.
Dopo aver resettato il dispositivo alle impostazioni di fabbrica, Streamo
chiede automaticamente di impostare la lingua. Una volta impostata la
lingua, il dispositivo passa all’impostazione di rete.
Impostazione FM
Selezionare MONO o STEREO nella riproduzione radio.
My MediaU
Lasciare mostrare e riprodurre la lista di emittenti mediaU sul server
mediaU. Create poi il vostro conto (v. paragrafo “Regolazione di My
mediaU”).
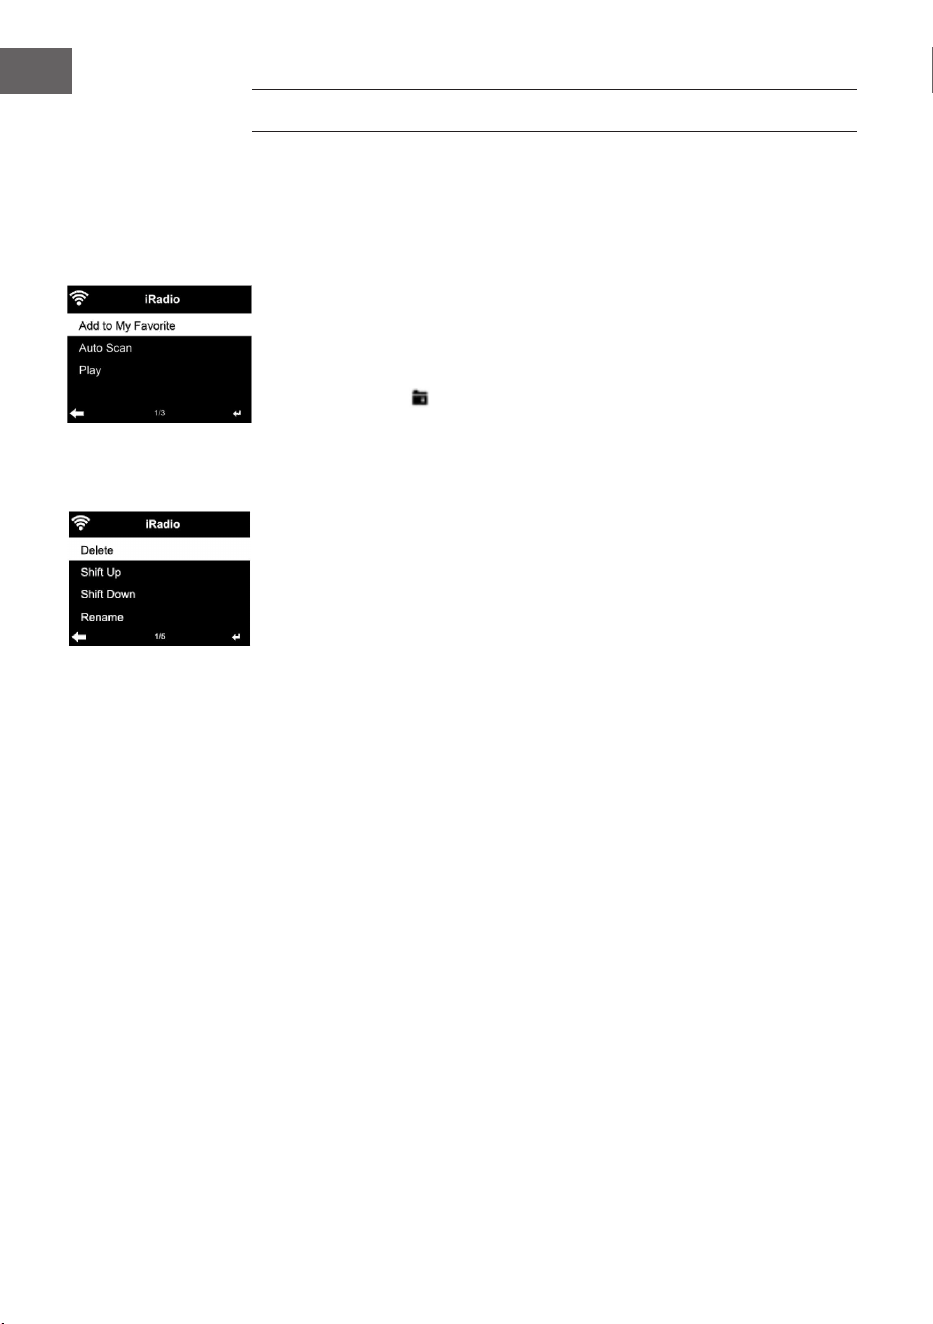
158
IT
INTERNET RADIO
Dopo aver stabilito con successo la connessione a un’emittente, vengono
mostrati sullo schermo la velocità di bit e il formato dell’emittente.
I miei preferiti
È possibile creare e salvare una lista di emittenti preferite.
Possono essere salvati no a 250 preferiti, incluse emittenti e cartelle.
Tenere premuto PRESET durante la riproduzione per salvare un’emittente
nei preferiti.
Un’emittente salvata in precedenza può essere sostituita con una nuova.
Durante la procedura di salvataggio, sulla zona superiore dello schermo
compare il simbolo .
Per salvare, è possibile anche premere una cifra (1, 2, 3) sul telecomando per
salvare l’emittente rispettivamente in posizione #1, #2 o #3.
Quando un’emittente è stata salvata in una posizione, la stessa emittente
non può essere salvata in un’altra posizione. Le emittenti salvate vengono
mostrate in questo menu. Per mostrare le emittenti salvate è anche
possibile premere PRESET.
Quando è stato aperto l’elenco delle emittenti salvate, selezionarne una e
premere Enter per iniziare la riproduzione. Se è stata marcata un’emittente,
premendo . si raggiunge il sottomenu. Qui è possibile cancellare
un’emittente (rimuovere un’emittente dall’elenco dei preferiti), scorrere
l’elenco verso l’alto o verso il basso, rinominare (è possibile cambiare nome
a piacere a un’emittente radio), riprodurre l’emittente o utilizzare l’emittente
come sveglia (se si seleziona l’impostazione per la sveglia “Internet Radio”).
Per aprire un’emittente salvata, premere PRESET e selezionare l’emittente
ruotando la manopola del volume o premendo /.
Emittente radio/musica
Le emittenti vengono categorizzate in base a “Top 20 globale”, “Genere”,
“Paese/Località” e “Highlight”.
Premere ENTER per raggiungere il sottomenu e selezionare un’emittente da
riprodurre.
Per la riproduzione diretta, premere ENTER dopo aver selezionato
l’emittente.
Premere , per raggiungere il sottomenu. Qui è possibile aggiungere
l’emittente ai preferiti, avviare la ricerca emittenti automatica, riprodurre
un’emittente o impostare un’emittente come audio della sveglia (se nelle
impostazioni della sveglia è stata selezionata “Internet Radio”). Se si
seleziona “Auto Scan”, ogni emittente del sottomenu viene riprodotta per
30 secondi, no a quando sono state selezionate tutte le emittenti o si
preme ENTER per interrompere.
Premere Info per mostrare le informazioni della relativa emittente.

159
IT
Cronologia
Un elenco delle ultime stazioni ascoltate. Nella cronologia vengono salvate
no a 10 stazioni.
Premere il tasto ENTER per la riproduzione diretta dopo aver selezionato
una stazione.
Premere il pulsante , per entrare nel sottomenu. È possibile aggiungere la
stazione ai preferiti, avviare una ricerca automatica delle stazioni, riprodurre
una stazione o impostare una stazione come allarme (se nelle impostazioni
di allarme è stata precedentemente selezionata “Internet Radio”).
Se si seleziona “Auto Scan”, tutte le stazioni del sottomenu vengono
riprodotte per 30 secondi no a quando non vengono selezionate tutte le
stazioni o no a quando non si preme il tasto ENTER per interrompere la
riproduzione.
Emittenti radio locali
Nel menu della Internet radio c’è un collegamento con le emittenti radio
locali, in modo da poter ascoltare con grande facilità emittenti della vostra
regione.
Il dispositivo può rilevare la vostra posizione tramite l’indirizzo IP e creare
una lista di emittenti basata sulla vostra località.
Se si desidera, è possibile inserire un altro paese come località, per
ascoltare emittenti di quella nazione.
MEDIA CENTER
UPnP
Se avete congurato “media condivisi”, potete visualizzarli tramite UPnP.
Se sono disponibili diversi dispositivi per la condivisione di media, vengono
elencate le alternative.
Selezionare il messo da cui si desidera riprodurre musica attraverso il
dispositivo.
Nota: il dispositivo può leggere solo titoli con nome inferiore ai 40 caratteri.
I caratteri devono essere in lingua europea. Se il dispositivo non è in
grado di riprodurre un titolo in modalità UPnP, cercare per prima cosa di
rinominare il titolo. Se non è comunque possibile riprodurre il titolo, cercare
di trasformarlo in un altro formato.
La mia playlist
In modalità UPnP è possibile creare una lista di brani preferiti. Tenere
premuto ENTER quando viene riprodotto un brano per salvarlo in “My
Playlist”.
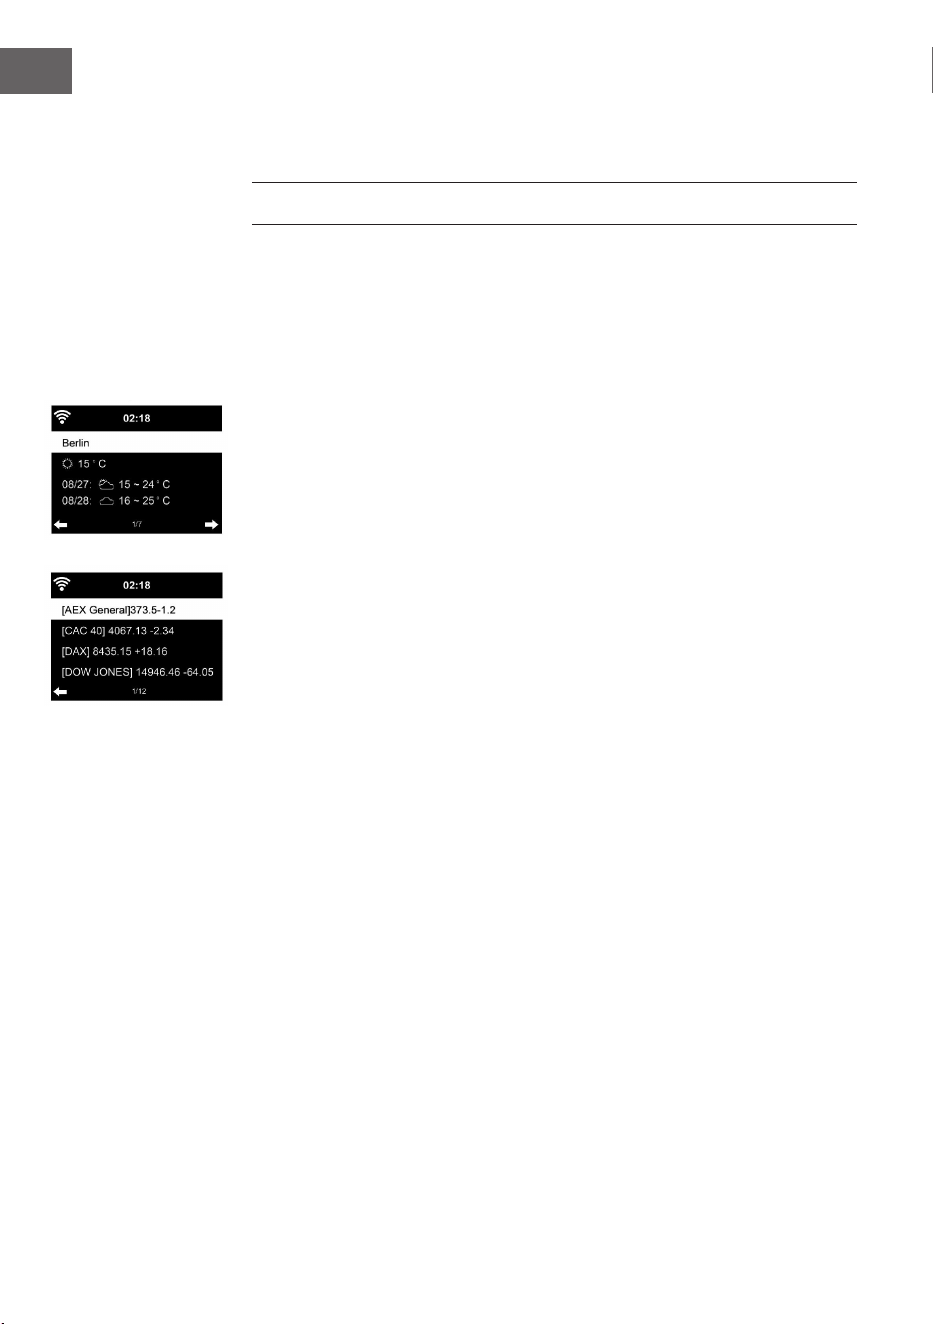
160
IT
Cancellare la mia playlist
Tutti i titoli salvati nell’elenco di riproduzione “My Playlist” possono essere
cancellati.
CENTRO INFORMAZIONI
Informazioni meteo
Sono disponibili informazioni e previsioni meteo per 2000 città. Selezionare
Paese e città per precise informazioni meteo.
Se si desidera visualizzare il meteo della città selezionata anche in standby,
premere ora ENTER.
Informazioni nanziarie
Mostra l’indice delle azioni in tutto il mondo.
Informazioni sul dispositivo
Mostrano le informazioni di sistema attuali e i dettagli sulla connessione
alla rete. Le informazioni comprendono l’indirizzo MAC, necessario per la
registrazione a My mediaU.
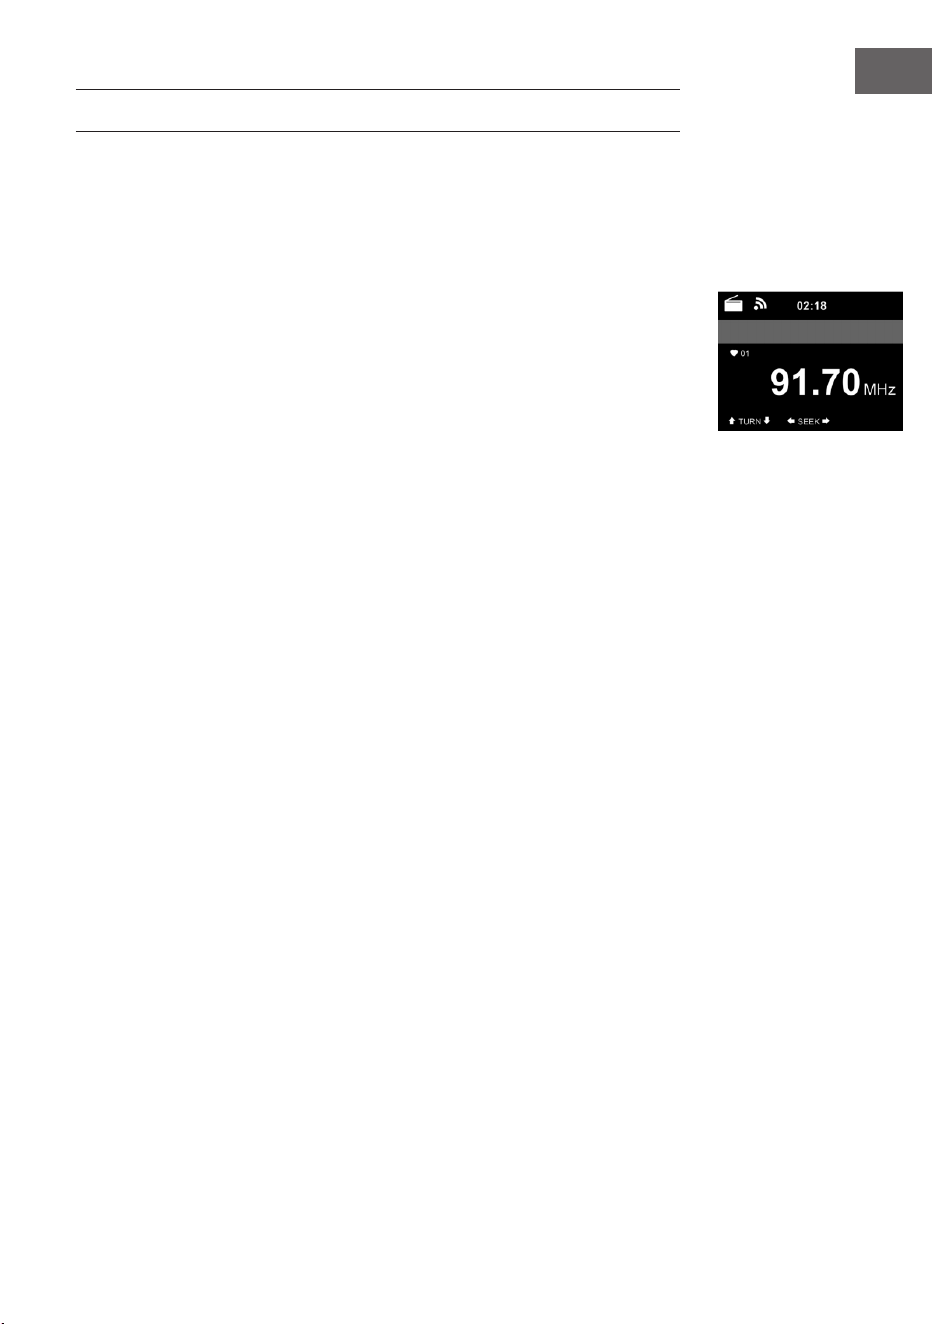
161
IT
RADIO FM
In modalità FM viene ricevuta radio analogica a banda larga.
Premere o dsul dispositivo o sul telecomando per iniziare la ricerca
emittenti FM.
L’indicazione della frequenza aumenta durante la ricerca. Non appena viene
ricevuta un’emittente, la ricerca si arresta.
Premere /. per la ricerca emittenti manuale. La ricerca manuale avviene
in intervalli di 0,05 MHz.
Tenere premuto PRESET per salvare un’emittente. Possono essere salvate
no a 20 emittenti FM.
Premere PRESET sul dispositivo o / sul telecomando per aprire
un’emittente salvata.
In alternativa, è possibile avviare la ricerca automatica di tutte le
emittenti premendo ENTER sul dispositivo. Le emittenti trovate vengono
automaticamente salvate nell’elenco.

162
IT
RIPRODUZIONE CD
Utilizzo CD/MP3
• Premere MENU per selezionare la modalità CD.
• Premere sulla copertura superiore per aprire il vano CD.
• Inserire un CD nel vano.
• Premere ENTER sul dispositivo o sul telecomando per iniziare la
riproduzione.
• Premere ENTER sul dispositivo o sul telecomando per mettere in
pausa la riproduzione.
• Premere per arrestare la riproduzione.
• Premere o per saltare un titolo.
• Per regolare il volume, utilizzare la manopola sul dispositivo o / sul
telecomando.
BT
Selezionare una fonte audio.
Premere ENTER no a quando compare “BT” sullo schermo.
Assicurarsi che non ci siano altri dispositivi BT connessi con Streamo.
Sullo schermo compare “No Connection”.
Attivare il Bluetooth sul dispositivo esterno.
Cercare e selezionare Streamo dall’elenco di dispositivi disponibili. Se viene
richiesta una password, inserire “0000” (quattro zeri).
In alcuni dispositivi può essere necessario anche confermare la
connessione.
Una volta stabilita la connessione, compare “Connected” sullo schermo di
Streamo.
Iniziare la riproduzione BT sul dispositivo esterno.
La riproduzione BT può essere gestita da Streamo o dal dispositivo esterno.
Il volume può essere regolato su entrambi i dispositivi.
La connessione BT può essere interrotta premendo ENTER per tre secondi.
Sullo schermo compare il messaggio “No Connection”.
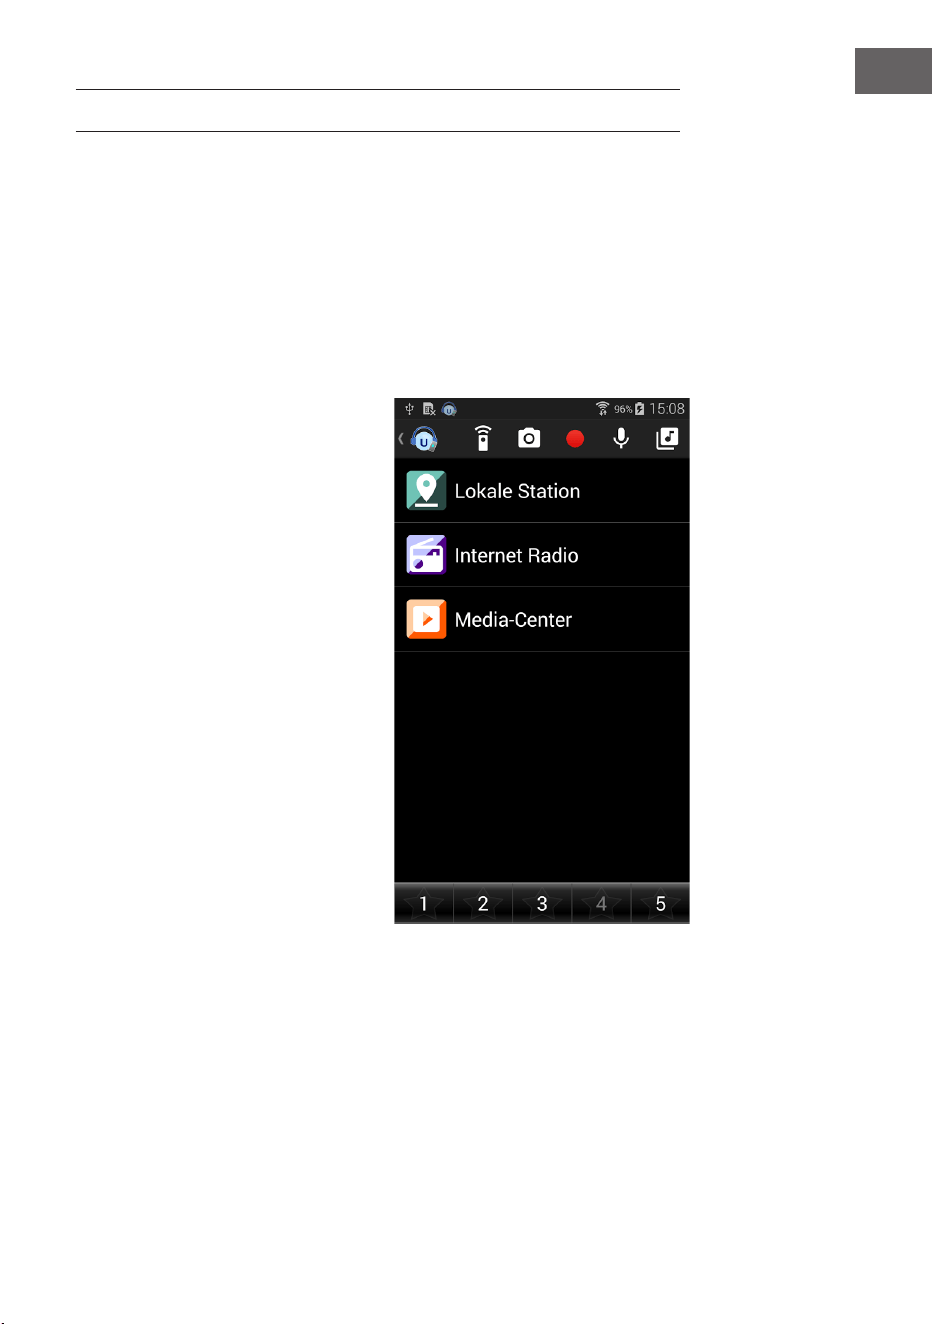
163
IT
CONTROLLO A DISTANZA TRAMITE APP
Alcune app Android, come ad es. Air Music Control, permettono la gestione
del dispositivo tramite smartphone o tablet. Una volta che i dispositivi sono
connessi con Streamo, vengono mostrati gli stessi menu sullo schermo di
Streamo e sullo schermo di smartphone/tablet.
Se si controlla il dispositivo tramite app, può capitare che la connessione
UPnP a Windows Media Player non sia possibile.
Controllo per app con Air Music Control
La Internet Radio può essere
controllata tramite smartphone o
tablet.
Scaricare la app “Air Music
Control” dal “Google Play Store” o
dall’”Apple AppStore”.
I dispositivi devono essere collegati
alla stessa rete.
.

164
IT
SMALTIMENTO
Se nel proprio paese si applicano le
regolamentazioni inerenti lo smaltimento di
dispositivi elettrici ed elettronici, questo simbolo
sul prodotto o sulla confezione segnala che questi
prodotti non possono essere smaltiti con i riuti
normali e devono essere portati a un punto di
raccolta di dispositivi elettrici ed elettronici. Grazie
al corretto smaltimento dei vecchi dispositivi si
tutela il pianeta e la salute delle persone da possibili
conseguenze negative. Informazioni riguardanti
il riciclo e lo smaltimento di questi prodotti si
ottengono presso l’amministrazione locale oppure il
servizio di gestione dei riuti domestici.
Il prodotto contiene batterie. Se nel proprio
paese si applicano le regolamentazioni inerenti
lo smaltimento di batterie, non possono essere
smaltite con i normali riuti domestici. Preghiamo
di informarvi sulle regolamentazioni vigenti sullo
smaltimento delle batterie. Grazie al corretto
smaltimento dei vecchi dispositivi si tutela l’ambiente
e la salute delle persone da conseguenze negative.
DICHIARAZIONE DI CONFORMITÀ
Produttore:
Chal-Tec GmbH, Wallstraße 16, 10179 Berlino,
Germania.
Importatore per la Gran Bretagna:
Berlin Brands Group UK Limited
PO Box 42
272 Kensington High Street
London, W8 6ND
United Kingdom
Il fabbricante, Chal-Tec GmbH, dichiara che il tipo
di apparecchiatura radio Streamo CD è conforme
alla direttiva 2014/53/UE. Il testo completo della
dichiarazione di conformità UE è disponibile al
seguente indirizzo Internet: use.berlin/10034055