User 's manual
V1

Thank you for using our MP3 lossless music
player.
In order to familiarize yourself with the operation
of this unit as soon as possible, we are equipped
with a detailed user manual, from which you can
get information about the product introduction,
usage, system settings and safety precautions.
Before using this product, please be sure to
carefully read all the materials provided, which will
help you to use this product better.
At the time of writing this manual, we are very
careful and rigorous, and believe that the informa-
tion provided in this manual is correct and reliable.
If there are any omissions, please bear with us
and warmly welcome you to correctus.
If you find any problems during the using of the
product, please contact us in time, thank you for
your cooperation!

Catalogue
I Before Use
Foreword..................................1
1.Product features....................1
2.Attachment ............................2
3.Product safety info.................3
4.Product icon and function......4
II Quick Operation
1.Boot.......................................5
2.Shutdown...............................5
3.Lock key.................................5
4.Reset.....................................6
5.Pause....................................6
6.Music files choose.................6
7.Last,Rewind/Next,
Fast forward...........................7
8.Volume adjustment................7
9.Return....................................7
10.A-B Repeat..........................8
III File management and playback
1.Delete files ............................8
2.Song classification.................9
3.Playlist...................................9
4.Update song library...............10
5.Playback settings..................10
6.Bluetooth ..............................14
7.E-book ..................................16
8.FM Radio ..............................19
9.Voice recording .....................24
10.Video....................................27
IV System settings
1.Display settings ..............30
2.Sleep timer .....................30
3.Date and time .................31
4.Language .......................31
5.Information ......................31
6.Screen Saver...................32
7.Tool..................................32
8.Format device..................33
9.Factory settings...............33
V Connect to computers
1.Connect with a
computer ......................34
2.Upload download file.......34
3.Disconnect from
the computer....................35
4.Battery and charging.......35
5.Troubleshooting...............36
6.Q&A.................................37
7.Technical specifications...38

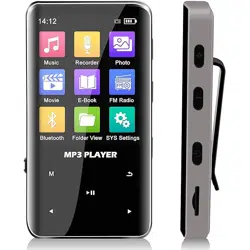
1. Features
Chapter I Before Use
A new generation of high-fidelity MP3 digital lossless
music player;
High precision CNC zinc alloy casing manufacturing
process;
High-definition IPS 2.4-inch TFT color display, song
name display function;
Single-point microphone recording, using professional
recording DSP chip, built-in digital noise reduction
technology;
Song intelligent classification function, can be
classified by album, singer, style;
Breakpoint memory function, can remember the boot
volume;
High-quality voice playback function, outstanding
sound quality;
Support MP3, WMA, WAV, FLAC, APE, OGG, and
other music formats, with outstanding sound quality;
Support video playback function;
E-book, picture auto-browsing function, freely adjust
the automatic browsing time;
Support FM radio;
Support external TF card expansion memory;
Touch button operation function, convenient and fast;
-1--1-

2. Attachment
This product includes the following accessories. If there is
any missing after receive it, please contact your local
dealer.
Note: If the above accessories are changed, please refer
to the actual product in the box.
5.0One-way Bluetooth transmission function (not
supporting car dynamic password Bluetooth)
MP3 equalizer functions, including rock, funk, Hip-hop,
jazz, classical, electronic music, custom scene sound
effects;
Multi-tasking operating system, energy saving
settings, custom shutdown time;
Multiple play modes: single repeat, full repeat,
browse play, random play;
Music files can be deleted on this unit, locker key
function;
Built-in lithium battery, smart fast charge;
1*MP3 player
1*User manual
1*TYPC-C cable
-2-

3. Product safety information
WARNING: Failure to follow these safety instructions
can result in injury and danger!
Do not drop or violently hit the unit, as it will cause
serious damage or malfunction.
Do not open or disassemble the unit, and there are no
parts to be maintained inside.
If it is not used for a long time, please charge and
discharge the product once every 2 months.
This product should not be used in humid and high
temperature environment. Do not put this product into
water or any liquid. Do not expose this product to
sunlight or put it into an empty trash can. Do not put
this product into fire. It will explode and catch fire.
-3-
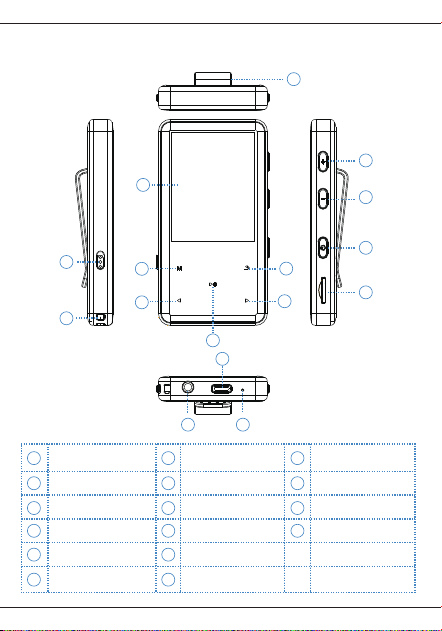
4. Product icon and function
Clip
Recording key
Hang rope hole
Last/Rewind
Menu
2.4 inch Display
screen
Pause/Confirm/Play TF Card Slot
Headphone holder
Typc - c interface
RESET
Return
Next/Fast forward
+Volume
- Volume
Power switch/Lock
Screen buttom
1
2
3
4
5
6
7
9
8
10
11
12
13
14
15
16
1 7 13
14
15
16
8
9
10
11
12
2
3
4
5
6
-4-
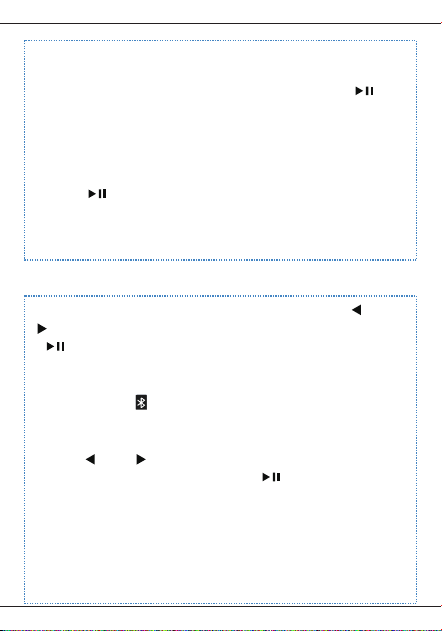
Chapter II Quick Operation
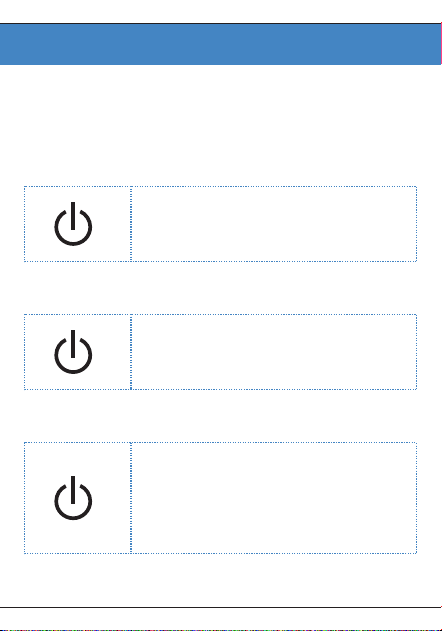
1. Boot
Reference: Short Press is press the button with a very
short time then release, Long press is hold the button for
2 to 3 seconds then release.
Long Press the power switch for 3
seconds. The boot-up interface shown
in the display screen appears.
2. Shutdown
Press the power switch for 3 seconds
to turn off the player.
3. Lock key
In standby or playback state, short
press the power switch to lock the key,
then short press the key to unlock
again in the lock state. (Screen saver
will lock automatically)
-5-
4. Reset System
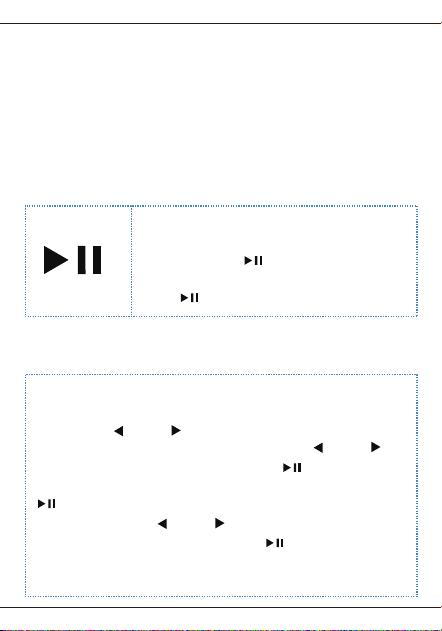
5. Pause
6. Music File Selection
If the player crashes, press the "RESET" button to reset
the system and force it to shut down. If it still can't turn on,
make sure if the battery is dead.
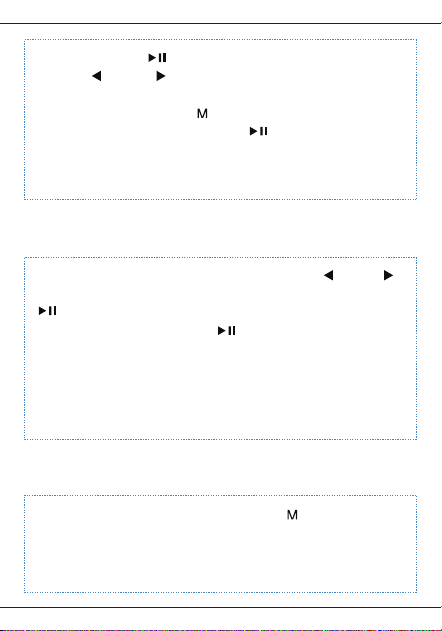
In the state of the music playing interface, short press
the "Back" button to display the music file list, then short
press the " "or" "Key to select the music file;
In the main interface state, short press " "or" "key
to select “Music” menu, and press " " to confirm the
entry, select “All Songs” and short press "
" to confirm the entry, it will display for all songs list.
, short press the " "or" "key to select the song you
want to play, and short press the " " button to confirm
the playback
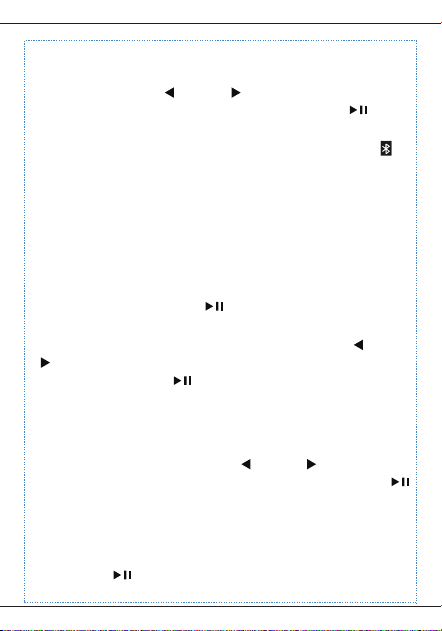
Pause the current music
In the music playing interface, you can
pause the current music by short
pressing the " " key and continue
playing the current music by pressing
the " " key again.
-6-
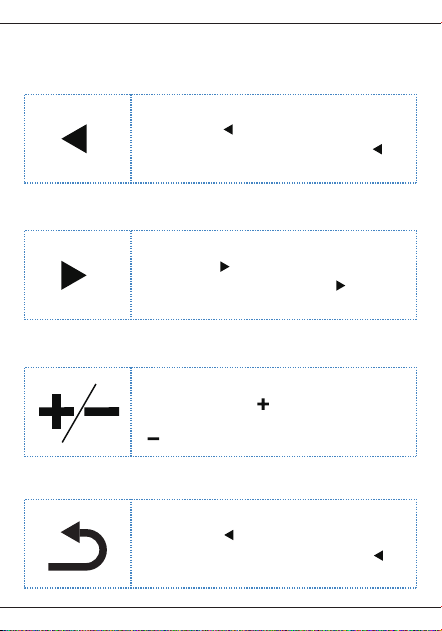
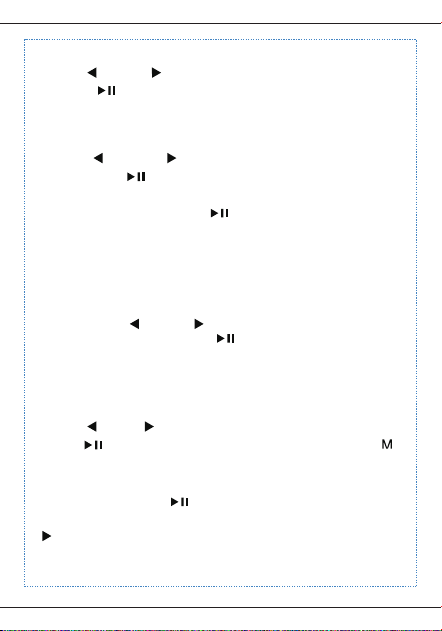
7. Last、rewind/Next、fast forward
1) Last、rewind
In the playback interface state, short
press the " " button to switch to the
previous track, long press the" "
button to rewind.
In the playback interface state, short
press the " " button to switch to the
previous track, long press the" "
button to rewind.
2) Next、fast forward
8. Volume adjustment
9. Return
In the playback interface state, short
press the" " button to switch to the
next track, long press the" " button
for fast forward.
In the play or pause interface state,
short press the " " button to increase
the volume, short press the "
" button to decrease the volume.
-7-
Chapter III File Management and Playback
1. File deletion
In the playback state, long press " "
key once to set the repeat start point A.
At this time, the screen displays A, and
B flashes. Long Press " " key once
again to set the repeat end point B. At
this time, the screen displays AB and
does not Flashing, the repeat function
between A and B is realized. If AB
repeat is canceled, long press the "
" key once again to exit the repeat
mode.
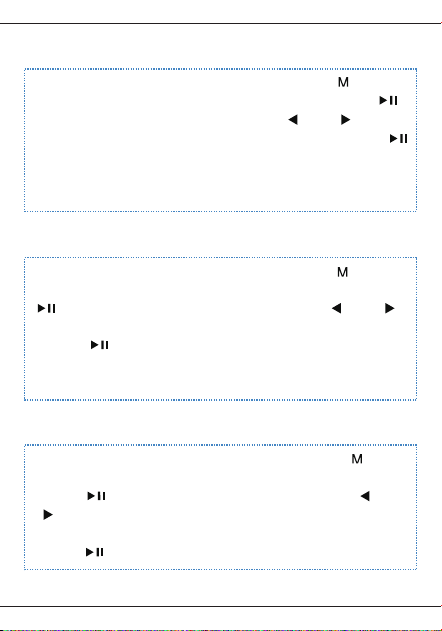
In the main menu state, select to the "Folder View"
menu and press the " " button to enter, find the file
you want to delete, short press the " " button, select
the delete menu option, then short press the "
"button to select whether to delete, If you quit and
press the "Back" button to exit the delete option.
(Note: cannot be restored after deletion, please pay
attention to backup)
10. A-B Repeat
-8-
1)Add songs to the playlist
2)Remove from playlist
2. Song classification
3. Playlist
In the main menu state, short press the " " or"
" button to select the “Music” menu, short press the "
" button to enter, respectively: All songs, Artists,
Albums,Genres four categories, select and enter the
playlist After the status, press the " " button to select
the selected track.
In the list of all songs, short press the " " or" "
button to select the track you want to add. Short press
the " " button to select the “Add to Playlist” menu
and short press the " " button to confirm the
participation in the playlist. The playlists are: Playlist
on the go [1], Playlist on the go [2], Playlist on the go
[3], the list is your favorite category, after selecting the
playlist, short press" " and select "Yes" to confirm
the addition.
In the main menu state, short press the " " or" "
button to select the music menu, and press the " "
button to confirm the entry, select the “Playlist” menu
-9-
4. Update song library (playlist)
and press the " " button to confirm the entry, short
press " " or" " Select and confirm to enter the “
Playlist on the go [1], [2], [3]” list, select the file to be
deleted, press the " " key, select “Delete from
playlist” and then press short. " " and select "Yes" to
confirm the deletion of the current file; if you select
"Clear Playlist" the system will clear all the tags in one
of my favorites list.
In the main menu state, short press the " " or"
" button to select the “Music” menu, short press the "
" button to confirm the entry and select “Creat
Playlist”, then press the " " button to confirm, the
system will be updated again. A list of all music files.
(Note: The more song files on the disk, the longer it
takes to update the song library. When you enter the
music menu to display no songs, you need to update
the playlist.)
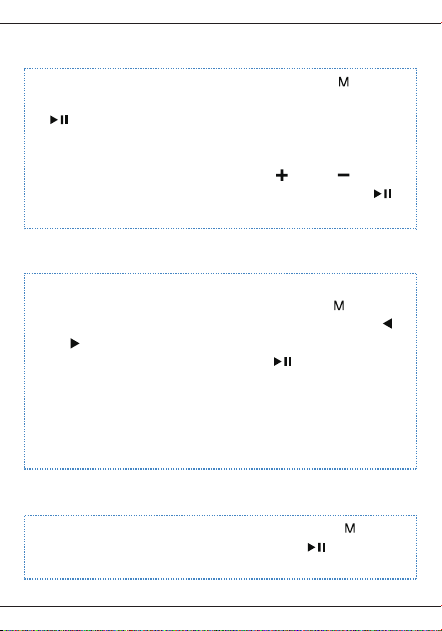
In the playback state, short press " " to pop up the
music playback setting menu, which has: play mode,
sound setting, add to playlist, remove from playlist,
delete one, delete all five options from playlist;
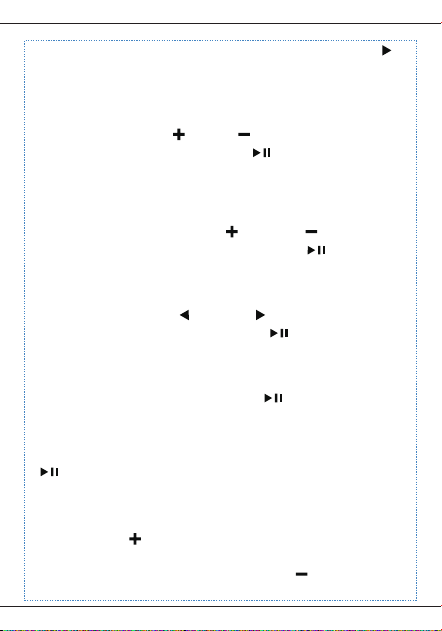
5. Playback settings
-10-
1. Play mode: In the state of playing setup menu, short
press " " or " " to select “play mode” menu, and
press " " to confirm and enter. There are three
options: repeat, shuffle and repeat settings. ;
1) Repeat play: In the play mode menu state, short
press " " or " " to select “Repeat play” menu,
and press " " to confirm and enter, respectively:
repeat off, repeat 1, repeat all, select the desired
repeat mode and press " " to confirm the selection;
2) Shuffle play: When the shuffle play is set on, the
system will not play in the copy order of the song, and
will play randomly.
2. Repeat settings: In the play mode menu state,
short press " " or " " to select “Repeat settings”
menu, and short press " " to confirm and enter,
respectively: Repeat mode, Repeat times, Repeat
interval three options;
1) Repeat mode: Under the repeat setting menu, short
press " "or" " to select “Repeat mode” and short
press " " to In the playback state, short press " "
to pop up the music playback setting menu, at this
time, the screen displays A, and A flashes, repeat
mode starts, press " " again. Once the key is set, set
the repeat start point A, and B flashes. Press the "
" key once again to set the repeat end point B.
At
this time, the screen displays AB and does not flash,
realizing the repeat function between the two points A
-11-
and B, canceling the AB repeat. Then press the " "
button once again to exit the repeat mode;
2) Repeat times: It is the option of A-B repetition
times. There are 1-10 times for you to choose. Short
press the volume " " or " " to select the number
of repetitions; short press " " to confirm the
selection;
3) Repeat interval: It is the time between A-B
repetitions; there are 1-10 seconds for you to choose;
short press the volume " " or " " button to
select the repeat interval; short press " " to confirm
the selection;
2. Sound setting: In the state of playing the setting
menu, short press " " or " " to select “Sound
Setting” menu, and short press " " to confirm and
enter, respectively: equalizer, variable speed playback
two options;
1) Equalizer: After pressing the" " button to enter
the equalizer options, there are: Off, Rock, Funk, Hip
Hop, Jazz, Classical, Techno Effects for you to
choose, select the desired sound effect and press "
" key to confirm the selection;
2) Variable speed playback: It is the adjustment of the
playback speed of the song being played. Short press
the volume " " button for fast playback. The higher
the level, the faster the playback speed, the fastest
level is
8; short press the volume " " button For
-12-
slow playback, the higher the level, the slower the
playback speed, and the slowest level is also 8 levels;
3. Add to playlist: This menu is an option to add a
playlist to the currently playing music. Short press "
" to enter and select to join the current Playlist on the
go [1], [2], [3]" list, short Press the " " button to
confirm the join;
4. Remove from playlist: This menu is for the current-
ly playing music to be deleted from the Playlist on the
go [1], [2], [3], short press " " to enter and select from
the Playlist in the [1], [2], [3], short press the "
"button to confirm the deletion;
5.Bookmarks
In the play/pause state, short press the " " button
and select “Bookmark” and then press " " to
confirm, enter bookmark, go to bookmark, delete
bookmark, delete voice bookmark.
Add bookmarks: When pause/play, select the time to
add the current bookmark according to your needs.
The bookmark function can only be added on the
currently playing song.
Note: Add up to 10 bookmarks per song Go to
bookmarks:
Go to Bookmarks: In the Bookmarks menu, choose
Go to Bookmarks. Enter the time list, such as adding
bookmark time: 00:03:48 Select the current time, the
system will automatically switch to 00:03:48 to start
playing.
-13-
6. Bluetooth
Delete bookmark: In the bookmark menu, select
Delete bookmark, enter the time list and select the
bookmark you want to delete, and press " " to
confirm.
6. Delete one: This is the deletion option for the
current music. If you want to delete the music
currently playing, select “Delete” menu and short
press " " to select whether to delete; If you confirm
to delete, select “Yes” and confirm the deletion;
7. Delete all: Delete all music files
In the main menu state, short press the " "or "
" button to select the “Bluetooth” menu and press the
" " button to confirm the entry. After the Bluetooth
enters, the search will start automatically. At this time,
the status bar at the upper right of the display will
appear. The" "symbol is flashing. At this time, it
means that Bluetooth is searching. After the search is
completed, the Bluetooth symbol stops flashing; short
press" "or" " to select the Bluetooth device you
need to connect, and press " " to confirm And
connect;
In the Bluetooth list state, short press the "Back"
button to return to the Bluetooth settings menu. In the
Bluetooth settings menu, there are three options:
Bluetooth Switch control, Search for device, Device
list,and Update the Bluetooth.
-14-
1. Bluetooth switch control: Bluetooth switch is the
option to open and close the Bluetooth. After entering
this menu, press" "or" " to select Bluetooth to
open or Bluetooth to turn off, short press " " to
confirm the selection; select Bluetooth to turn off, the
upper right of the display The square status bar"
"symbol will disappear; when the Bluetooth switch is
set to the on state, the Bluetooth device will automati-
cally search;
2. Search for device: This function is used for search-
ing of Bluetooth device. When Bluetooth needs to
search for device again when connected, you must
disconnect the connection before you can search for
the device. Short press" " to confirmand search for
the device. After Bluetooth search is completed, the
displayed device will be displayed, press the" "or "
" button to select the Bluetooth device you want to
connect, press the" " button to confirm the connec-
tion;
3. Device list: The device list is a list display of all
Bluetooth devices searched by this machine. In the
device list state, short press" " or " "to select the
Bluetooth device you want to connect, short press "
" to confirm the connection; in the connection status
Next, when you need to switch devices, please
disconnect the Bluetooth device that is connected,
select the Bluetooth device you need to connect, and
press the " " button to confirm the connection;
-15-

1)E-book Reading
In the e-book reading state, long press the " " button
and select “Add Bookmark” and then press " " to
confirm, select Yes and confirm to add the current page
bookmark.
In the main menu state, press the " " or " " button
to select the “e-book” menu and short press the " "
button to confirm the entry. Short press the " "or"
" button to select the e-book file you want to read and
press the " " button. You can read the e-book. At this
time, press the " "or" " button to scroll up and
down the e-book.
E-book automatic reading: In the e-book reading state,
short press the " " button to automatically read the
e-book, the system will automatically open the page
turning function; at this time, the e-book reading
interface displays " " in the upper left corner; press
the " " button again Cancel the automatic reading to
the manual reading state; at this time, the" " symbol
of the e-book reading interface disappears;
(Note: This unit only supports TXT format)
7. E-book
1)Add bookmark
-16-
In the e-book reading state, long press the " " button
and select “Bookmark Selection” and then press " "
to confirm the entry. Short press the" "or" " button
to select the desired bookmark position and press "
" to confirm. At this time, the e-book will jump directly to
the position where the bookmark stays according to the
selected bookmark.
2)Bookmark selection
In the e-book reading state, long press the " " button
and select “Delete Bookmark” and then short press "
" to confirm the entry. Short press the " "or" "
button to select the bookmark you want to delete and
press " "to select “Yes” to confirm and delete the
current bookmark; short press the “Back” button to exit
the delete option;
3)Delete bookmark
In the e-book reading state, long press the " " key
and select “Page number selection” and then short
press " " to confirm the entry. Short press " "or"
" key to select the number of pages to jump up and
down, select the jump The number of pages and short
press" " to confirm.
4)Page number selection
-17-
In the e-book reading state, long press the " " button
to select “Auto Play Time Setting” and then short press
" " to confirm the entry. This function is the time for
the page to stay when the e-book automatically turns
pages. It can be selected from 2 seconds to 30
seconds. Short press the volume " " or " " button
to select the appropriate time and press the " "
button to confirm.
5)Auto play time setting
Under the e-book reading, if you want to delete the
currently read E-book file, long press the " " key to
enter the e-book sub menu function, short press "
"or" " to select
"Delete e-book" and short press " " to confirm and
select whether to delete, select "Yes" to confirm and
delete the current e-book file, select "No" to exit the
delete option;
(Note: cannot be restored after deletion, please pay
attention to backup)
6)Delete E-book
In the e-book reading state, long press the " " button
and select “Font Size” and then press " " to confirm
the entry. There are two fonts to choose from,
7)Font Size
-18-
In the state of e-book reading, long press the " " key
and select "Background Settings",Then short press "
" to confirm entry. There are four color theme to
choose from: black, sea sky blue, book color, and eye
protection. Short press " " or " " to select the
theme you need and short press " " to confirm. The
reading interface will change to the color theme you
selected.
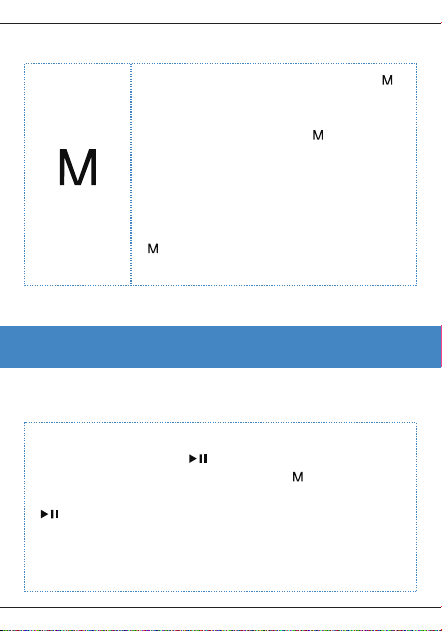
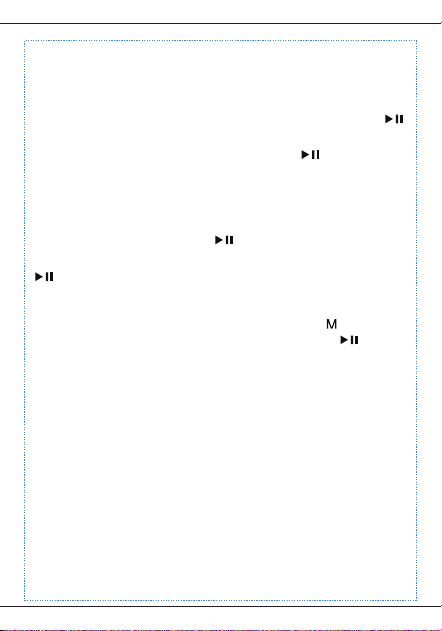
In the main menu state, short press the" " or" "
button to select the “FM Radio” menu and press the "
" button to confirm the entry. Short press " " or
" " to switch channel, short press M to enter the sub
menu, there are eight options: Start FM radio
recording, Preset, Save to preset, Clear preset, Auto
tune, Manual Tune, Tuner Region, FM recording.
When exiting the menu, you can choose to quit or play
in the background, select "Yes" to directly exit "No" to
enter the background play.
8. FM Radio
8)Background setting
choose the font size you need, press " " to confirm
the selection, and the e-book content font will become
larger.
-19-
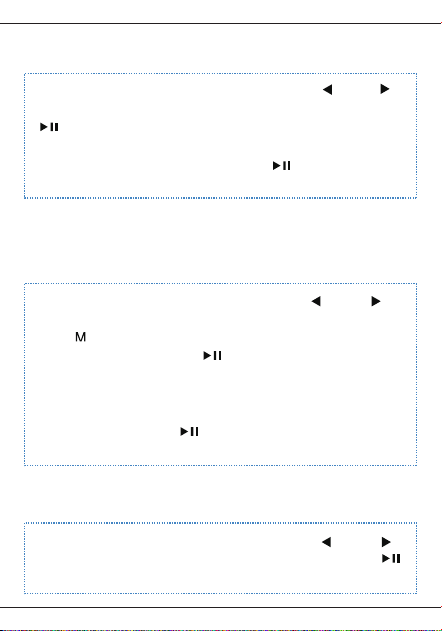
This machine supports recording FM radio. When you
need to record the FM you are currently listening to,
you can short press the " " key to enter the FM radio
sub-menu, and short press the " " or " " key to
select "Start FM radio recording" ”Menu and short
press the " " button to confirm to enter. At this time,
the recording interface will pop up and the recording
time will move, and the currently listening FM radio
station will start recording;
1. Pause the current recording: In the recording state,
short press the " " button to pause the current
recording, and press the " " button again to continue
the current recording.
2. Stop recording: In the recording or pause state, short
press the "Back" button, you can stop recording, the
system will prompt whether to save the current file,
select Yes and short press the " " button to confirm
and save;
1) Start voice recording
In the FM radio state, short press the " "or " "
button to select the “Preset Station” menu and press
the " "button to confirm to enter the preset station;
the radio is in the preset station list state, short press
" "or " " button switches to the list of preset
stations;
1. Clear the preset: In the preset station list state,
2)Preset Radio
-20-
short press the " " button and select “Clear Preset”.
Short press the " " or " " button to select the
station you want to clear, short press the "
" button to confirm the clearing station. Selected
radio station;
2. Clear all presets: In the preset station list state, short
press the " " button and select “Clear all presets”.
Short press " " to confirm and clear all stations;
In the FM radio state, when the station you are listening
to needs to save to the preset station, short press the "
" button to select the “Save to Preset” menu and
press the " " button. After the preset station list is
popped up, press the short button again. Select the
" " or " " key to save to the first segment and
press the " " button to confirm the save;
The preset station can only store up to 30 stations; if
you use the auto tuning function to search for stations,
the system will automatically save the searched
stations to the preset stations after the search is
completed;
(Note: To use the FM radio function, you must first plug
in the headset as an antenna, otherwise the radio will
not be able to find the station.
3)Save to preset
-21-
In the FM radio state, short press the " " key to
select the "Clear Preset" menu and short press the "
" key. After the preset radio station list pops up,
short press the " " or " " key to select to clear the
preset short press " " key, select "Yes" or "No" and
press " " key to confirm.
4) Clear all presets
In the FM radio state, short press the" "or"
"button to select the “Auto Tune” menu and press the "
" button to confirm to start the automatic search
function. After the search is completed, the system will
automatically save the searched stations to the preset.
The radio station pops up the station list, press the "
" button to confirm and enter the station. In the radio
receiving state, short press " " to switch the preset
station;
(Note: To use the FM radio function, you must first plug
in the headset as an antenna, otherwise the radio will
not find the station.)
5)Auto Tune
1. In the FM radio state, short press the " "or" "
button to select the “Manual Tune” menu and press the
" " button to confirm the entry. Short press the"
"or" " button to search for the manual band, long
press" "or" " key is a fast band search;
6)Manual Tune
-22-

2. After the auto tuning is finished, after entering the
radio receiving interface, short press the" "or" "
key to search for the manual frequency band, long
press the" "or" " key to search for the fast
frequency band;
(Note: To use the FM radio function, you must first plug
in the headset as an antenna, otherwise the radio will
not find the station.)
In the FM radio state, short press the" "or" "
button to select the "radio band" and short press the"
" button to confirm the entry, respectively: ordinary
frequency band, Japanese frequency band;
The FM band range of the common frequency band is:
87MHZ--108MHZ;
The FM band range of the Japanese band is:
76MHZ--90MHZFM
7)Radio Frequency Band
The audio files saved by the FM radio recording are
displayed in the FM recording. Short press the " "or"
"key to select “FM Recording” and press the "
" key to confirm the entry. Short press the " "or"
"key to select the file, short press " "You can
play it;
1. FM recording delete: In the recording list of FM
recording, short press " "or" "to select the file
8)FM Recording
-23-
9. Recorder
1)Start voice recording
you want to delete, short press " " to select and
“delete”menu, short press " " to confirm and Delete
the current file;
2. Delete all: In the recording list of FM recording,
press" " or " " to select “Delete All” menu, and
press " " to confirm and delete all;
(Cannot be restored after deletion, please pay
attention to the backup file)
In the main menu state, press the " " or " " button
to select the “Record” menu, and press the "
" button to confirm the entry. Select the “Start Voice
Recording” menu and press the " " button to confirm
and start recording. After entering the
In the main menu state, press the " " or " " button
to select the “Recorder” menu and press the "
" button to confirm the entry. There are three
options for start voice recording, recordings library and
recording settings.
There are two formats for local recording. MP3 and
WAV formats, MP3 and WAV formats have different
recording bit rates. You can select different recording
formats according to your needs. Short press" " to
confirm the selection.
-24-
2)Recording library
The files saved after recording are saved in the
recording library. In the recording menu state, short
press " "or " " to select “Recording Library” and
press " " to confirm the entry. Short press " "or "
" to select the required file, and short press the "
" button to confirm and play;
1. Delete: In the recording list state, short press " "or
" " to select the file you want to delete, short press
" " to select and “delete” menu, short press " " to
confirm and delete the current file.
2. Delete All: In the recording list of FM recording,
press " "or " " to select “Delete All” menu, and
press " " to confirm and delete all;
(Cannot be restored after deletion, please pay
attention to the backup file)
recording, The recording timer starts to move;
1. Pause the current recording: In the recording state,
short press the " " button to pause the current
recording, and press the " " button again to continue
the current recording.
2. Stop recording: In the recording or pause state, short
press the "Back" button, you can stop recording, the
system will prompt whether to save the current file,
select Yes and short press the " " button to confirm
and save;
-25-
In the recording menu state, short press the " " or "
" button to select “Recording Settings” and press
the " " button to confirm the entry. There are two
options:Set rec bit rate and Tarck AVR mode.
1. Set rec bit rate: The recording bit rate is adjusted
according to the “recording format”. When the
recording format selects the MP3 format, the recording
bit rate is optional: four kinds of bit rates: 32Kbps,
64Kbps, 128Kbps, and 192Kbps. The bit rate is MP3
format; when the WAV format is selected for the
recording format, the recording bit rate is 512Kbps,
768Kbps,1024Kbps, and 1536Kbps. The four bit rates
are all in WAV format; the higher the bit rate is, the
higher the bit rate is. The higher the quality, the larger
the memory space is, and can be set as needed;
2. Recording mode: The recording mode has normal
mode and AVR mode, the normal mode is normal
recording mode, and the AVR mode is voice control
mode. When AVR mode is selected, when there is no
sound source or no sound output during recording, the
recording will enter the pause state. After the sound
source is available, the recording will automatically
resume and start recording; the corresponding
recording mode can be set as needed;
3)Recording Settings
-26-
In the main menu state, short press the " "or " "
button to select the “Movie” menu and short press the "
" button to confirm the entry into the video file list;
In the video file list state, short press the " " or" "
button to select the video file you want to play and
press the " " button to confirm.
(Note: The video only supports AMV and AVI formats.
When downloading video, please use the dedicated
video conversion tool to convert the desired video file
into AMV or AVI format and then copy)
10. Video
1)Video playback
In the video playback or pause state, short press the "
" button to enter the video playback sub-menu, which
has three options: Repeat , Delete video, and Create
playlist.
1. Repeat: In the video play or pause state, short press
the " " key to enter the video play sub-menu, then
short press " " to enter “repeated play”, the repeat
play setting has “repeated off” “Repeat 1 ”the “ Repeat
All” option to select the desired repeat mode and press
the button to confirm.
2)Video playback settings
-27-
2. Delete video: In the video list state, short press the"
" or" " button to select the video file you want
to delete and short press the " " button video
sub-menu, short press the " " or" " button to
select "Delete video" And short press the " " button
to select whether to delete, if you quit and press the
"Back" button to exit the delete option.
3. Create playlist: In the video list state, short press the
" " button to enter the video play sub-menu, press
the " " or" " button to select “Create Playlist” and
short press the " " button to confirm and update the
list. The list of all video files will be re-updated.
(Note: The more video files on the disk, the longer it
takes to update the playlist. If you enter the video menu
and display no files, you need to update the playlist.)
Photo: Select the “Photo” menu and press " " to
confirm the entry. At this time, the system will enter the
picture list state. Press " "or" " to select the
picture file you want to view and press " " to view
the picture. Press the " " or " " button to browse
the picture manually; during the browsing process,
short press " " as the slide show automatic show
mode, cancel the slide show automatically, then press
" " again to switch to manual browsing;
1. Slide show settings: In the picture file list state, short
press the " " button and select the “Slide show
settings” menu, then press the " " button to confirm
and enter;
-28-
Time per slide: This function is the time for the picture
to stay when the slideshow is automatically played. It
can be selected from 2 seconds to 30 seconds. Press
the " " or " " button to select the appropriate time
and press the " " button to confirm. .
Repeat: This function is the switch for repeating the
slide show. Short press the " " or" " button to
select on or off and short press the “play pause” button
to confirm;
Shuffle: Select this function to turn on the status, the
slide show will not automatically show in the order of
the pictures, but will be randomly displayed;
2. Delete picture:In the picture list state, press the " "
or" " button to select the picture to be deleted, short
press the " " button and select the “Delete Picture”
menu, then press the " " button to select “Yes” to
confirm and delete the current picture. ;
(Note: cannot be restored after deletion, please pay
attention to backup)
3. Create playlist: In the picture list state, short press "
" to enter the picture sub menu, press " " or"
" to select “Create playlist” and short press " "
to confirm and update the list. At this time, the system
All images will be refreshed again.
(Note: The more image files on the disk, the longer it
takes to refresh the image list. If you enter the picture
-29-
Chapter IV System Settings
In the main menu state, press the " " or" "
button to select the setup menu, press the
" "
button to enter, respectively: display settings,
timed shutdown, date and time, language, Screen
Saver information, formatting device, factory
settings select.
Display settings, including backlight timer, brightness,
screen saver;
(1) Backlight timer: This unit has a display backlight timer
function, which can be set: 10 seconds / 20 seconds / 30
seconds and always on. In order to save power, please
do not set the backlight to always light. ;
(2) Brightness: The brightness of the display can be
adjusted according to the intensity of natural light.
The time of the regular shutdown is adjustable from 1 to
120 minutes. The timed shutdown is forcibly shut down
1. Display settings
2. Sleep timer
menu and display no files, you need to refresh the
image)
-30-
This machine has a high-precision clock circuit. When the
battery is powered, it will be memorized after setting the
time and date. If there is no power for a long time, the
date will be restored to the factory initialization state. You
need to manually adjust the calibration. After entering the
time setting mode, Press" " or " " to switch between
hours and minutes, press " " or " " to switch the
value, press " " to confirm the selection, enter the date
setting mode, press " " or "
" to switch the year, month and day. Press " " or "
" to switch the value and press the" " menu button
to confirm the selection.
during playback or recording. After the shutdown time is
set, the system will be forced to shut down after the time
is up.
Note: This unit has automatic power saving function.
If the button is not operated for 3 minutes in the stop
or pause state, the system will automatically shut
down (not including the recording pause state).
3. Date and Time
4. Language
5. Information
Simplified Chinese, Traditional Chinese, English, Korean,
Japanese, etc.
After entering the information settings, there are local
This machine has multi-language settings, which are:
-31-
6. Screen Saver
7. Tool
In the main menu state, short press the " " or" "
button to select the "T
ools" menu and short press the "
" button to confirm the entry, respectively: calendar,
stopwatch, alarm four function options;
Calendar: Select the “Calendar” menu and press " "
to confirm the entry, the system will display the
calendar display; when you exit the calendar option,
press the “Back” button to return;
Stopwatch: Select the “Stopwatch” menu and press "
" to confirm the entry. At this time, the system will
display the stopwatch function. In the stopwatch
function state, short press " " to start timing, short
press " " to record the next time, short Press the "
" button to record the last time;
Alarm: Select the “Alarm” menu and press " " to
confirm the entry. There are five menu options:
information and software versions, as well as disk space
information.
Note: Since the local system will occupy a part of the
memory, it is normal to not match the nominal capaci-
ty.
-32-
This screen can be set to protect the screen.
When the screen saver is pressed, the screen saver will
appear as a digital clock.

In the main interface state, press the " " button to enter
the menu option, press the " "or" " button to select
the format device, press" " to enter; and press the"
"or" " button to select whether to format; press the"
" button to select yes and Confirm the formatted
device. The more files, the longer the formatting time.
8. Format device
9. Factory settings
alarm (on/off), alarm time, alarm period, alarm music,
and alarm volume. You can set the alarm function as
needed.
After selecting this menu, press the " " menu button
to enter the rear screen and you will be prompted to
restore to the factory settings. Then press" " or" "
to switch“Yes” or “No”. If you want to restore to the factory
settings, select “Yes”. ” Short press " " to confirm,
short press “Back” to cancel the selection.
-33-
(Note: Unable to recover after formatting, please pay
attention to backup. Do not force the power switch to
be turned off when formatting the device, otherwise it
will cause system error)
Chapter V Connecting to a Computer
1 Connect with a computer
2 Upload download file
In order to download and upload files
from your computer, connect the
USB port of the PC to the unit with
the supplied USB cable, and it will
automatically turn on when connect-
ed.
The first time you connect, the
computer will promptly create a
driver information base, find new
hardware and other information, you
can automatically detect the
machine. At this time, the display
shows as shown on the right,
indicating that the connection is
successful.
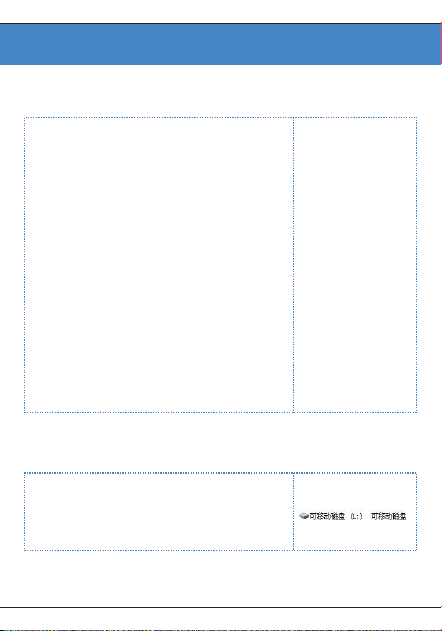
The disk character will appear under
Windows system
-34-
3 Disconnect from the computer
4 Battery and charging
This unit has a built-in lithium battery. You can charge the
unit by connecting the computer with the supplied
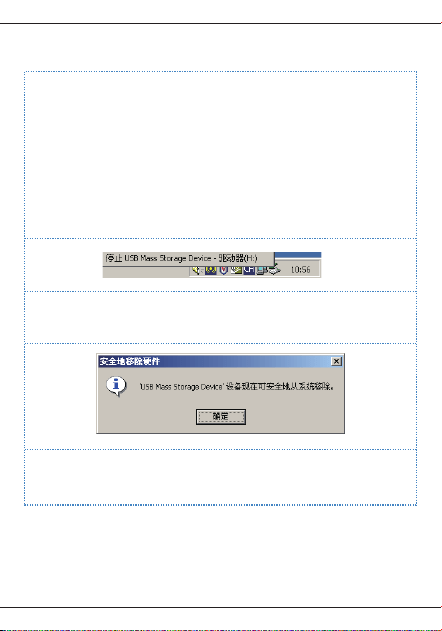
After the file transfer is complete, please close my
computer or explorer and then unplug the cable as
follows.
For users of WINDOW 2000 and higher than WINDOW
2000 operating systems, follow the steps below:
* Click the green arrow in the lower right corner of the
computer.
* Click to stop the USB Disk - drive.
* After the Safely Remove Hardware dialog box
appears, click OK to unplug the USB cable.
* !Reference: Different operating system picture tips are
slightly different, the above picture is for reference only.
-35-

5 Troubleshooting
USB cable. When charging, the battery icon will cycle.
When the battery is full, the battery full icon ( ) will be
displayed. The built-in lithium battery can be fully charged
in about 2 hours.
Note: If charging with an adapter, please use the
maximum output is 5V, 1A charger for charging.
The player is not displayed when the power
button is pressed.
The cause of the fault and its troubleshooting method:
The lithium battery has no power, so please charge the
lithium battery in time.
If the MP3 player crashes, press the “RESET” button
to reset the system and restart it. If it still does not turn
on, check if the battery is dead.
The cause of the fault and its troubleshooting: the
volume is too small, adjust the volume; or there is no
music file in the MP3 player, please download.
Causes and troubleshooting: Your motherboard may
not support the USB interface and you need to
upgrade your motherboard driver.
No sound when playing a file
Cannot download music files after connection
Why sometimes when the player is plugged and
unplugged, it will cause an abnormality on the
computer side.
-36-

6 Q&A
The cause of the fault and its troubleshooting method:
mainly due to the USB plugging and unplugging during
file transfer, it is recommended that the user do not
disconnect during the transfer process to avoid
causing the computer to be abnormal.
Reason: Mainly because you need some memory
space to store programs and display fonts, so the total
memory you see is smaller than the actual nominal.
The cause of the fault and its troubleshooting: In the
strict sense, MP3 refers to the music files compressed
by the MPEG I Layer 3 standard. Most MP3 songs are
currently in this format. When you encounter an MP3
song format that the player cannot match, you can
choose one of the following two measures: l) Remove
the incompatible song from the player to ensure the
normal operation of the player. 2) When using the
software to compress itself, please select the encoding
method of MPEG I Layer 3.
Why is the total memory display in the player
inconsistent with the actual nominal.
Why are some MP3 songs not playing properly in
the player?
Why can't I delete files in the player through
themanagement software? Or when I delete files
-37-

7 Technical specifications
Use "My Computer" to check whether the files in the
player are read-only. If it is, modify the read-only
attribute to the archive attribute and delete it.
No need to install the driver. The WINDOWS98
operating system is not supported at present.
Product name MP3 lossless music player
As a mobile hard disk, do you need to install a
driver in WINDOWS XP/VISTA/WINDOWS 10?
in the player, I am prompted with “Delete Failed or
Deleted Errors”?
Storage medium 32GBTF card(maximum support 128GB)
Battery Built-in lithium battery: 3.7V 500mAh
Signal to noise ratio ≥80dB
Speaker Built-in speaker: condenser microphone
Audio format MP3 WMA WAV APE FLAC GOO
Audio stream rate
MP3/WAV/APE/FLAC:32Kbps -1536Kbps
WMA:32Kbps -320Kbps
LCD Size: 2.4 inch TFT color display
Resolution: 240*320 color display
Play time About 10 hours (volume 10 screensaver
play lossless music) (internal playback)
Battery charging
time
About 2 hours (using a 5V, 1000 mAh
charger)
-38-

Volume contro 32-level digital volume control
Recording format WAV/MP3
Bluetooth 5.0 One-way transmission of Bluetooth
File system FAT32
Headphone output Φ3.5/Two-channel output
Transmission TYPE-C USB2.0
Interface WINDOWS XP/VISTA/WINDOWS 10
Size (L×W×H) 50*95*12MM
System language 26 languages
Net weight
90 g(Including battery)
Operating
temperature
-5℃~40℃
-39-
