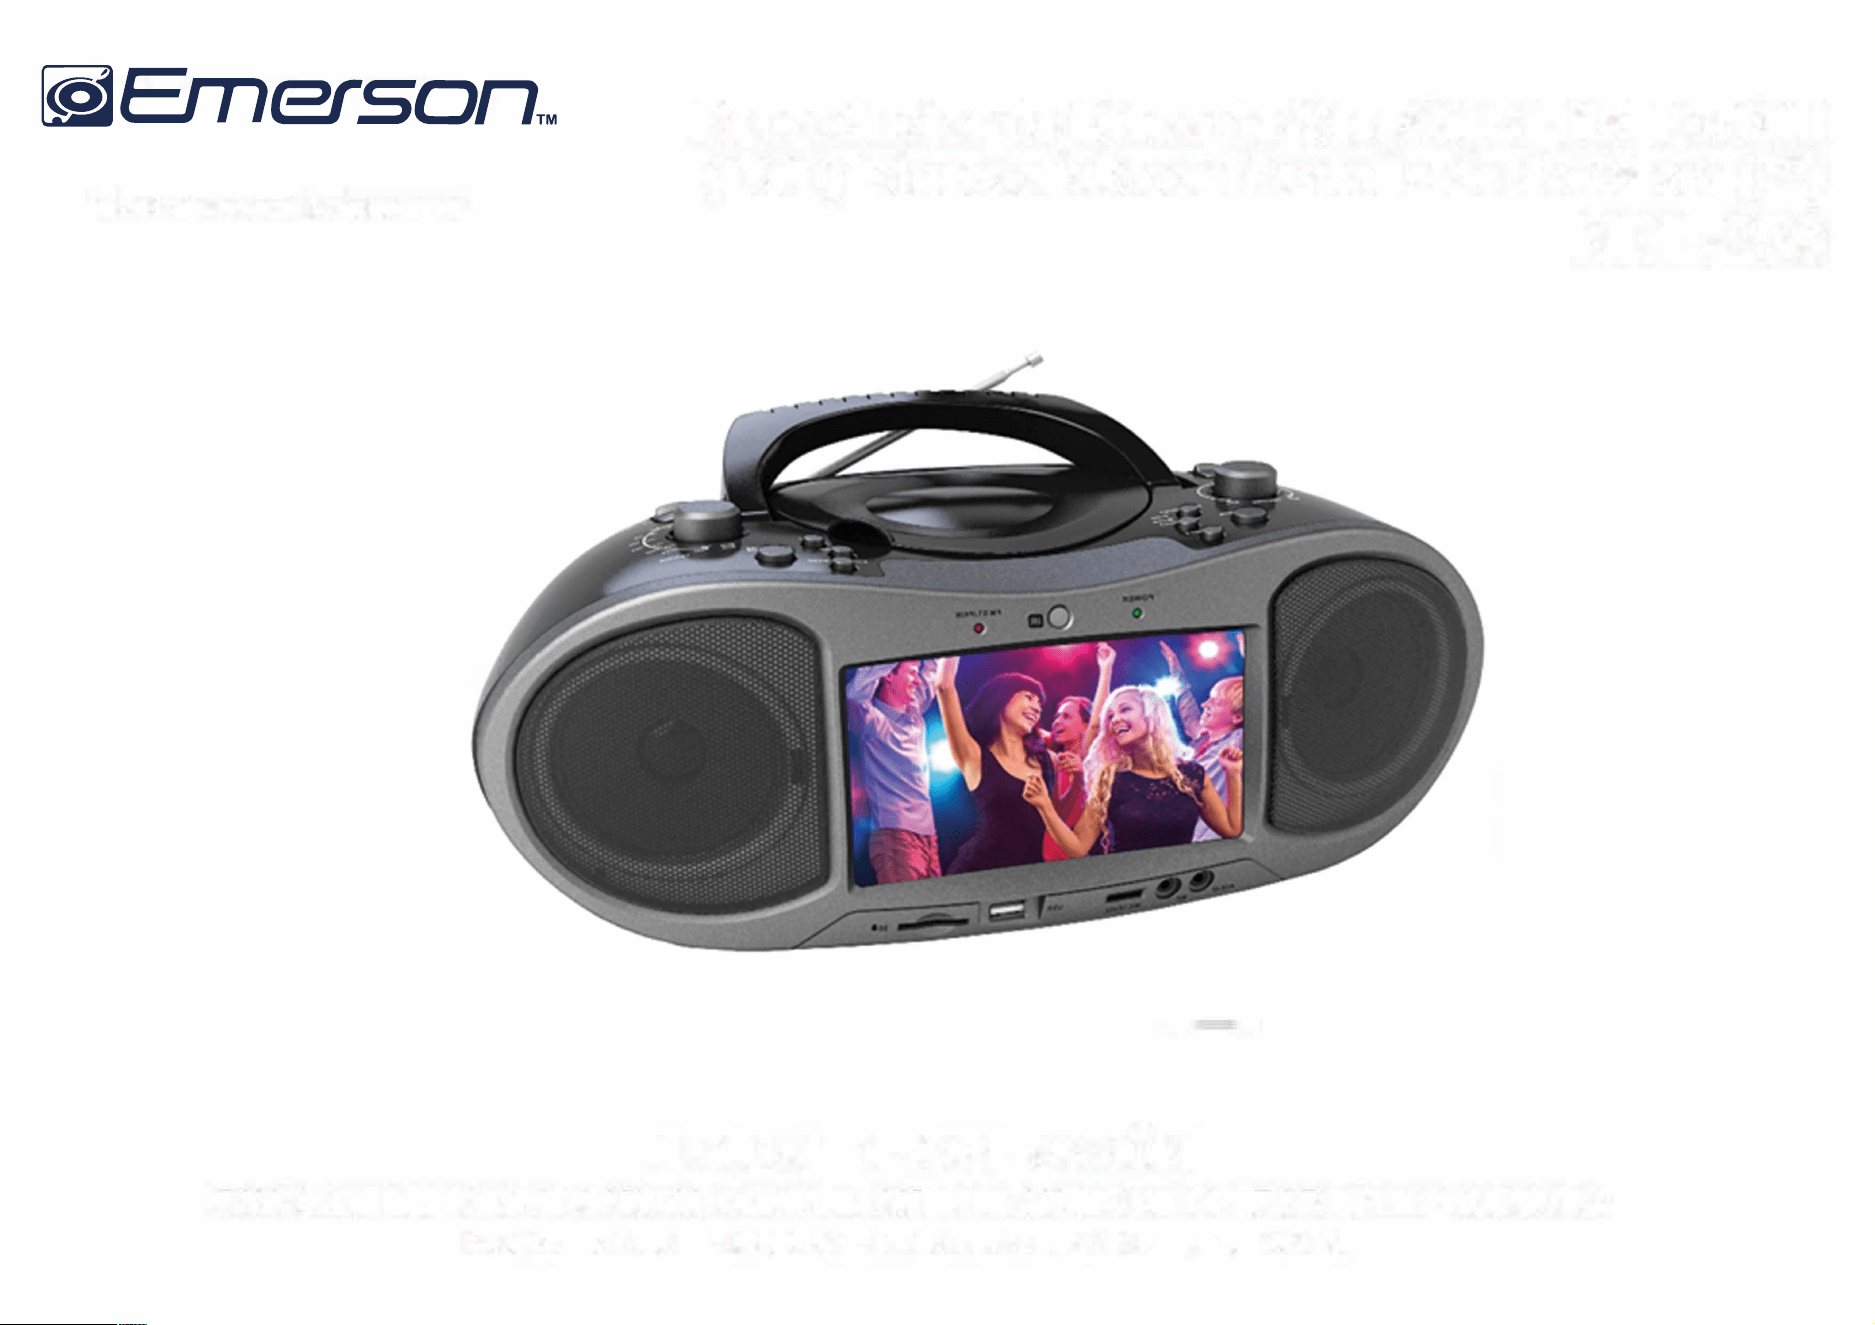
7” Bluetooth
®
DVD Boombox
EDL-2560H
Instruction Manual
Please read carefully before use and keep for future reference.
Table of Contents
Thank You ..................................................................... 4 DVD Mode ..................................................................... 18
Playing a DVD ................................................................................ 18
In the Box ...................................................................... 4
Program Mode ............................................................................... 19
Playing Digital Music/Video Files .............................................. 20
Before You Start ........................................................... 5
Playing Digital Photo Files .......................................................... 21
At a Glance .................................................................... 6
Main Unit ......................................................................................... 6
Remote Control ............................................................................. 13
Bluetooth
®
Mode ........................................................ 22
Connecting a Device for the First Time (Pairing) .................... 22
Playing Connected Devices ........................................................ 23
Using the Remote Control .................................................. 14
Installing or Replacing the Batteries ................................ 14
AUX Mode .................................................................... 24
Connect Power ............................................................. 15
USB/Ca.rd Mode ........................................................... 24
Using AC Power .............................................................................. 15
Using the DC Car Adapter ............................................................ 16
Radio
(
AM
/
FM
)
Mode .................................................. 25
Using Batteries .............................................................................. 16
Tuning to a Radio Station .......................................................... 25
Bas
i
c Funct
i
ons ............................................................ 17
Setup Menu ................................................................. 26
Turning the Unit On and Off ....................................................... 17
General Setup Page ..................................................................... 26
Adjusting the Volume ................................................................... 17 Audio Setup Page ......................................................................... 27
Turning the Screen On and Off ................................................... 17
Video Setup Page ......................................................................... 28
Using the Number l<eypad .......................................................... 17 Preference Page ........................................................................... 28
Page2
EDL-2560H
HDMI Mode
.................................................................... 25

Optional Connections ................................................ 30
Connect to a TV (AV Out) ............................................................. 30
About Optical Discs ..................................................... 31
Disc Types ....................................................................................... 31
Video DVDs ............................................................................ 31
Audio CDs .............................................................................. 31
Picture CDs OPEG) ................................................................ 32
DVD Features ................................................................................ 32
DVD Region Codes ........................................................................ 32
Disc Care and Maintenance ........................................................ 33
Handling a Disc ..................................................................... 33
Cleaning a Disc ..................................................................... 33
Warnings and Precautions ......................................... 34
Troubleshooting ......................................................... 38
Specications ............................................................. 40
Support ........................................................................ 41
www.emersonaudio.com
Page3
Thank You
We know you have many choices when it comes to
technology.
We trust that you will be happy with your purchase.
Please read this manual carefully and save it for
reference. You may also nd the latest FAQ,
documentation, and other product material at our
website. Come visit us on the web at
www.emersonaudio.com and see all that we have to
offer!
In the Box
Please take a moment to make sure that you have ev
erything in the list below. Although we make every
effort to ensure that each device is securely packed
and sealed, we know a lot can happen in between us
and you. If anything is missing, check back with your
local retailer to get immediate assistance. If they can
not help you, please contact our Emerson Support
team at www.
e
m
er
sonau
di
o.com.
•
EDL-2560
H
•
AC power cable
Page4
•
DC car adapter cable
•
A/V cable
•
Remote control
•
User manual
EDL-2560H
Before You Start
Please take note of the following before you start.
•
Do not block the ventilation openings or holes.
•
Avoid installing the unit in locations described be
low:
•
Places exposed to direct sunlight or close to
heat radiating appliances (such as electric
heaters, or on top of other stereo equipment
that radiate heat).
•
Places Lacking ventilation or dusty places.
•
Places suect to constant vibration.
•
Places that are humid or moist.
•
Operate turning controls and switches as instruct
ed in manual.
•
Before turning on the power for the rst time, make
sure that the power cord is properly installed.
•
Store your DVDs and CDs in a cool area to avoid
damage from heat.
CAUTION: TO REDUCE THE RISI< OF ELECTRIC SHOCK,
DO DOT REMOVE COVER (OR BACK). NO USER SER
VICEABLE PARTS INSIDE, REFER SERVICING TO QUALI
FIED SERVICE PERSONNEL.
WARNING: The battery used in this device may pres
ent a re or chemical burn if mistreated. Do not disas
semble, incinerate, or heat the battery. Do not leave
the battery in a place subject to direct sunlight, or in a
car with its windows closed.
Pages
www.emersonaudio.com
At a Glance
Main Unit
Page6
1
2
3
4
5
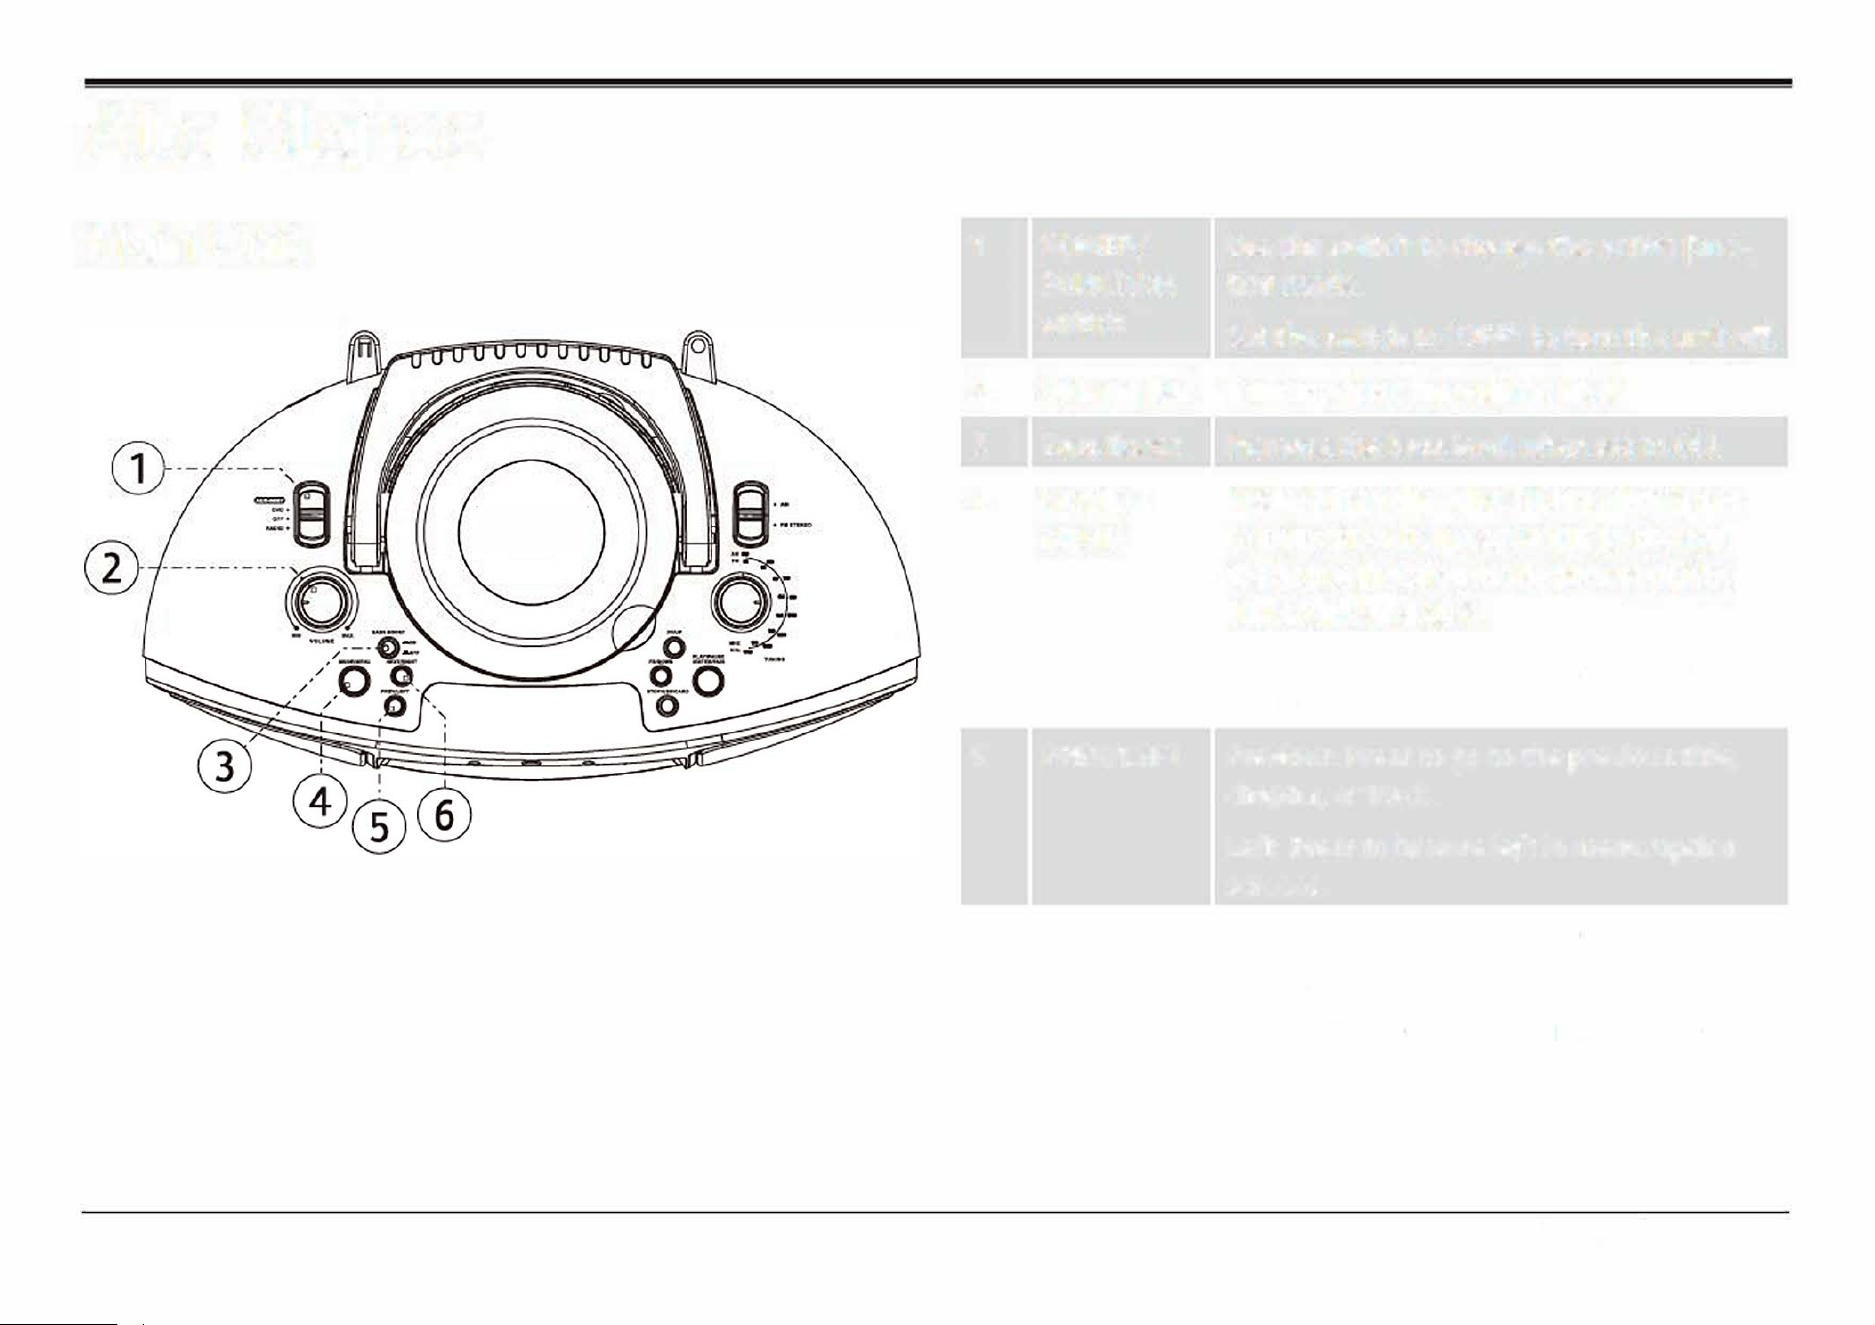
POWER/
FUNCTION
switch
Use the switch to change the active func
tion mode.
Set the switch to "OFF" to turn the unit off
Volume dial Turn to adjust the volume level.
Bass Boost
Increase the bass level when set to ON.
MODE/
MENU
PREV/LEFT
Mode: When the FUNCTION switch is set
to DVD/BT/AUX/HD
-
IN, press MODE to
change the active function mode
between DVD, Bluetooth, and AUX.
Menu: Press and hold to access the menu
screen.
Previous: Press to go to the previous title,
chapter, or track.
Le�: Press to browse le� in menu/option
screens.
6 NEXT/RIGHT Next: Press to go to the next title, chapter,
or track.
Right: Press to browse right in menu/option
screens.
EDL-2560H
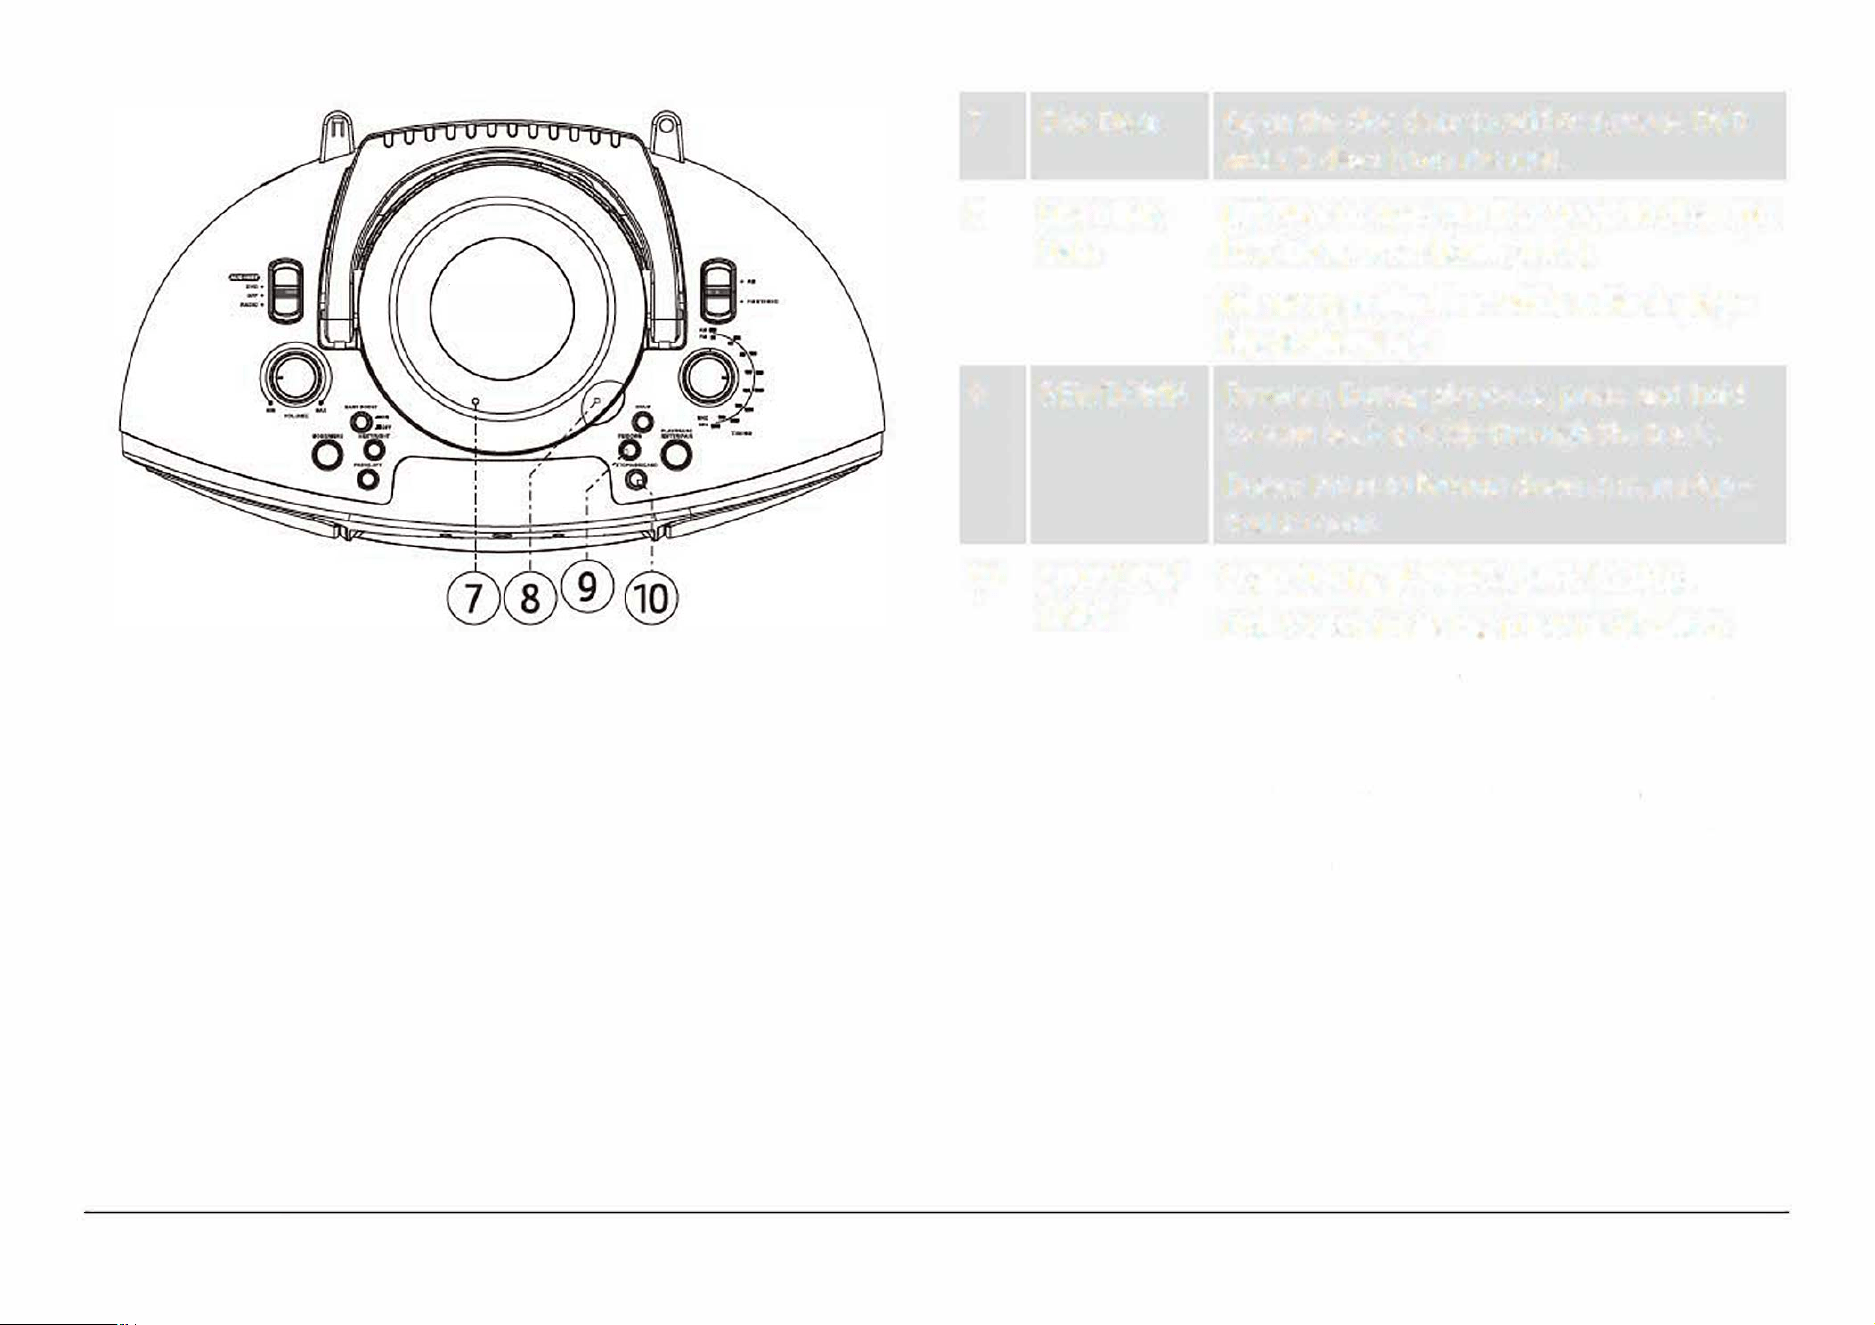
7
8
9
10
Disc Door
Open Disc
Door
REV/DOWN
STOP/USB/
CARD
Open the disc door to add or remove DVD
and CD discs from the unit.
Li� here to open the Disc Door. To close the
Disc Door, press down gently.
Never open the door while a disc is play
ing or spinning!
Reverse: During playback, press and hold
to scan back quickly through the track.
Down: Press to browse down in menu/op
tion screens.
Stop: During playback, press to stop.
USB/CARD: While the FUNCTION switch
is set to DVD/BT/AUX/
H
D
-
IN, press and
hold to change the active function mode
between DVD/BT, USB, and CARD (SD).
Note: Make sure no cables are connected
to the AUX IN jack of the unit otherwise it
will stay in AUX mode.
Page7
www.emersonaudio.com
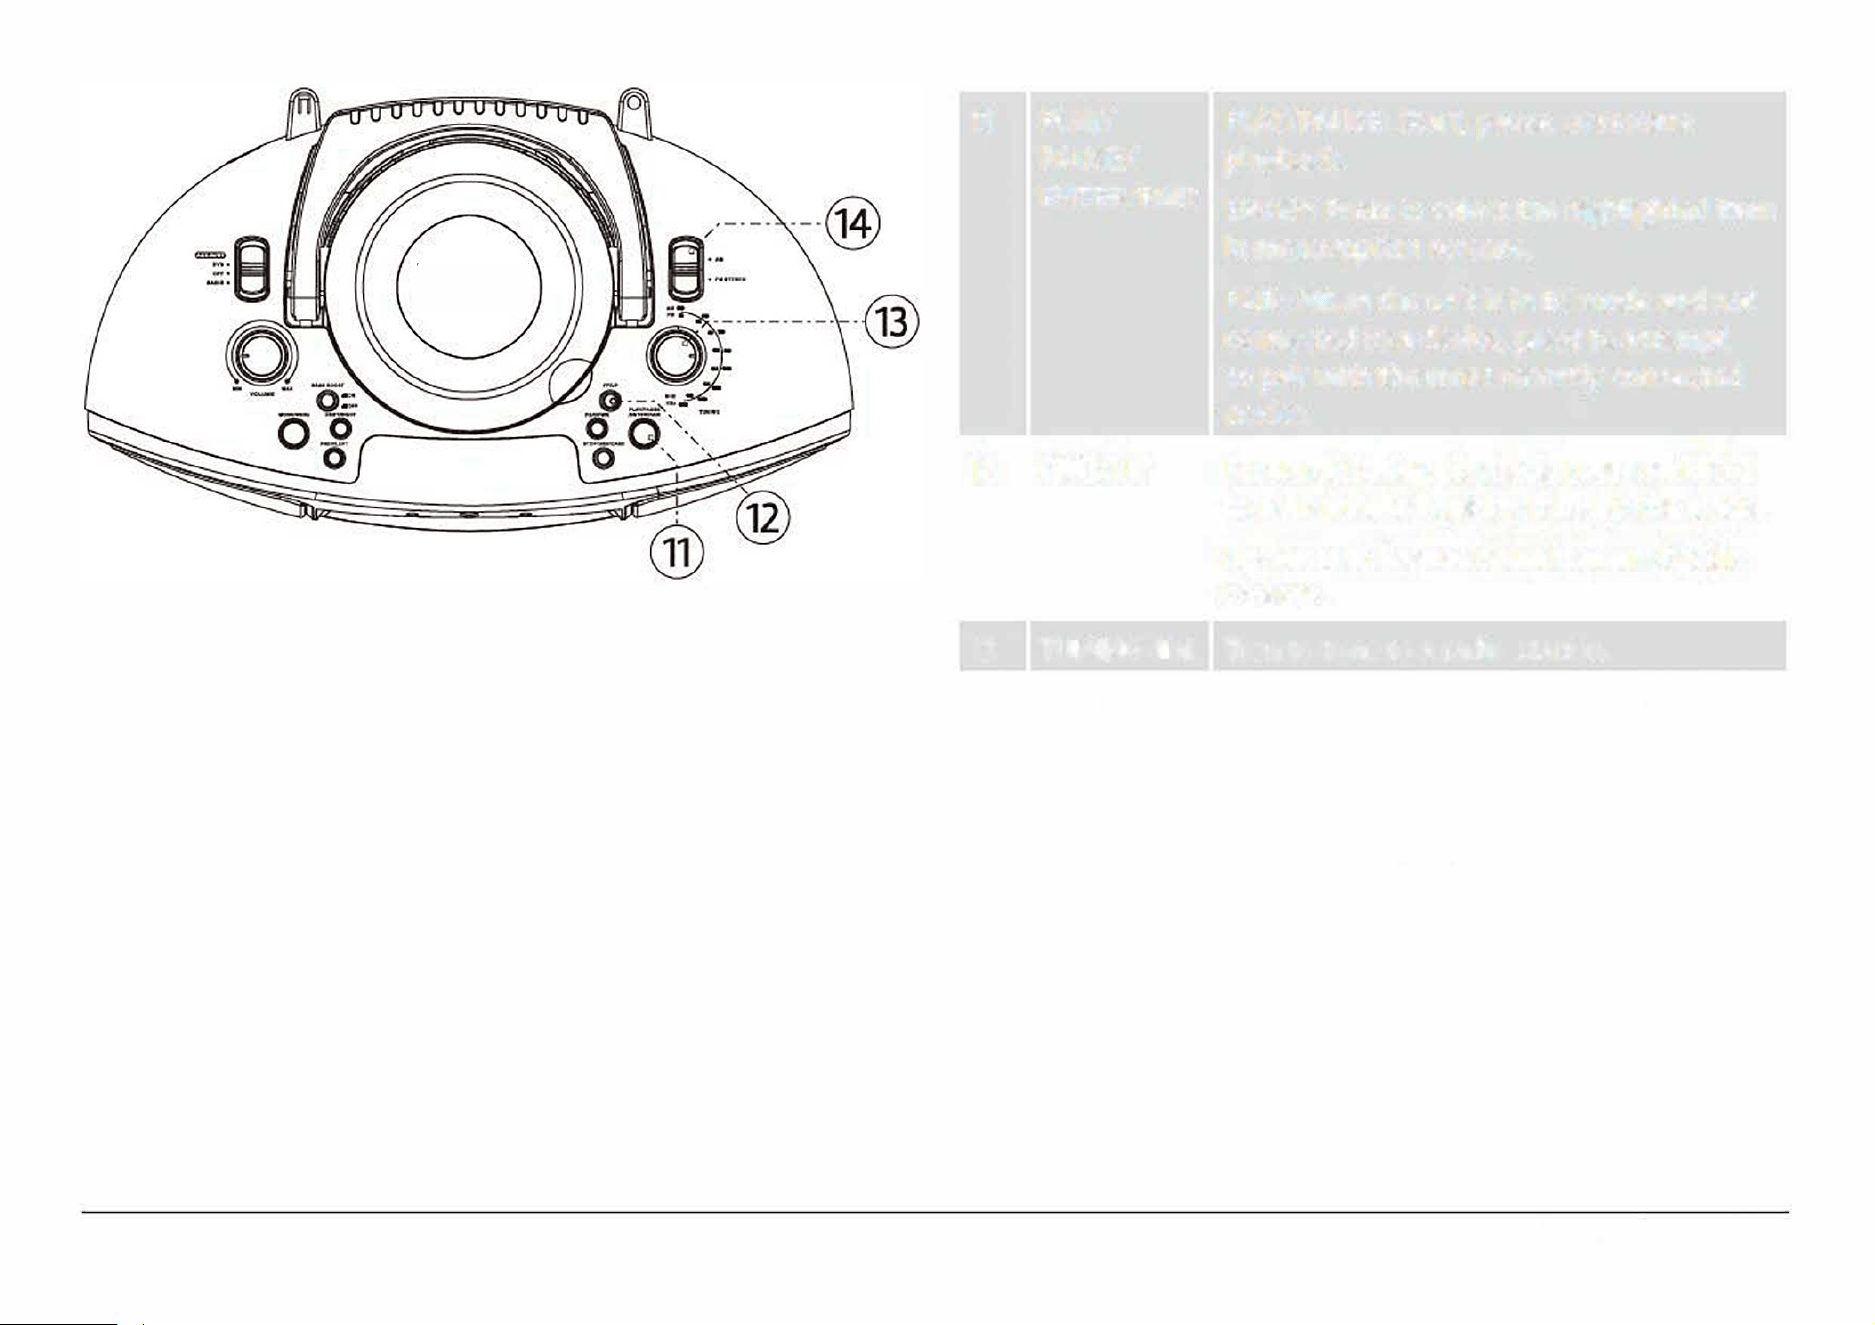
11
PLAY/ PLAY/PAUSE: Start, pause, or resume
PAUSE/
playback.
ENTER/PAIR
ENTER: Press to select the highlighted item
in menu/option screens.
PAIR: When the unit is in BT mode and not
connected to a device, press to attempt
to pair with the most recently connected
device.
12 FWD/UP Forward: During playback, press and hold
to scan forward quickly through the track.
Up: Press to browse down in menu/option
screens.
13
TUNING dial
Turn to tune to a radio station.
14 BAND When the FUNCTION switch is set to
switch
RADIO:
• Set to AM to tune to AM radio frequen-
cies (kHz).
• Set to
FM STEREO to tune to
FM
radio
frequencies (MHz).
Page8
EDL-2560H
@
®
®
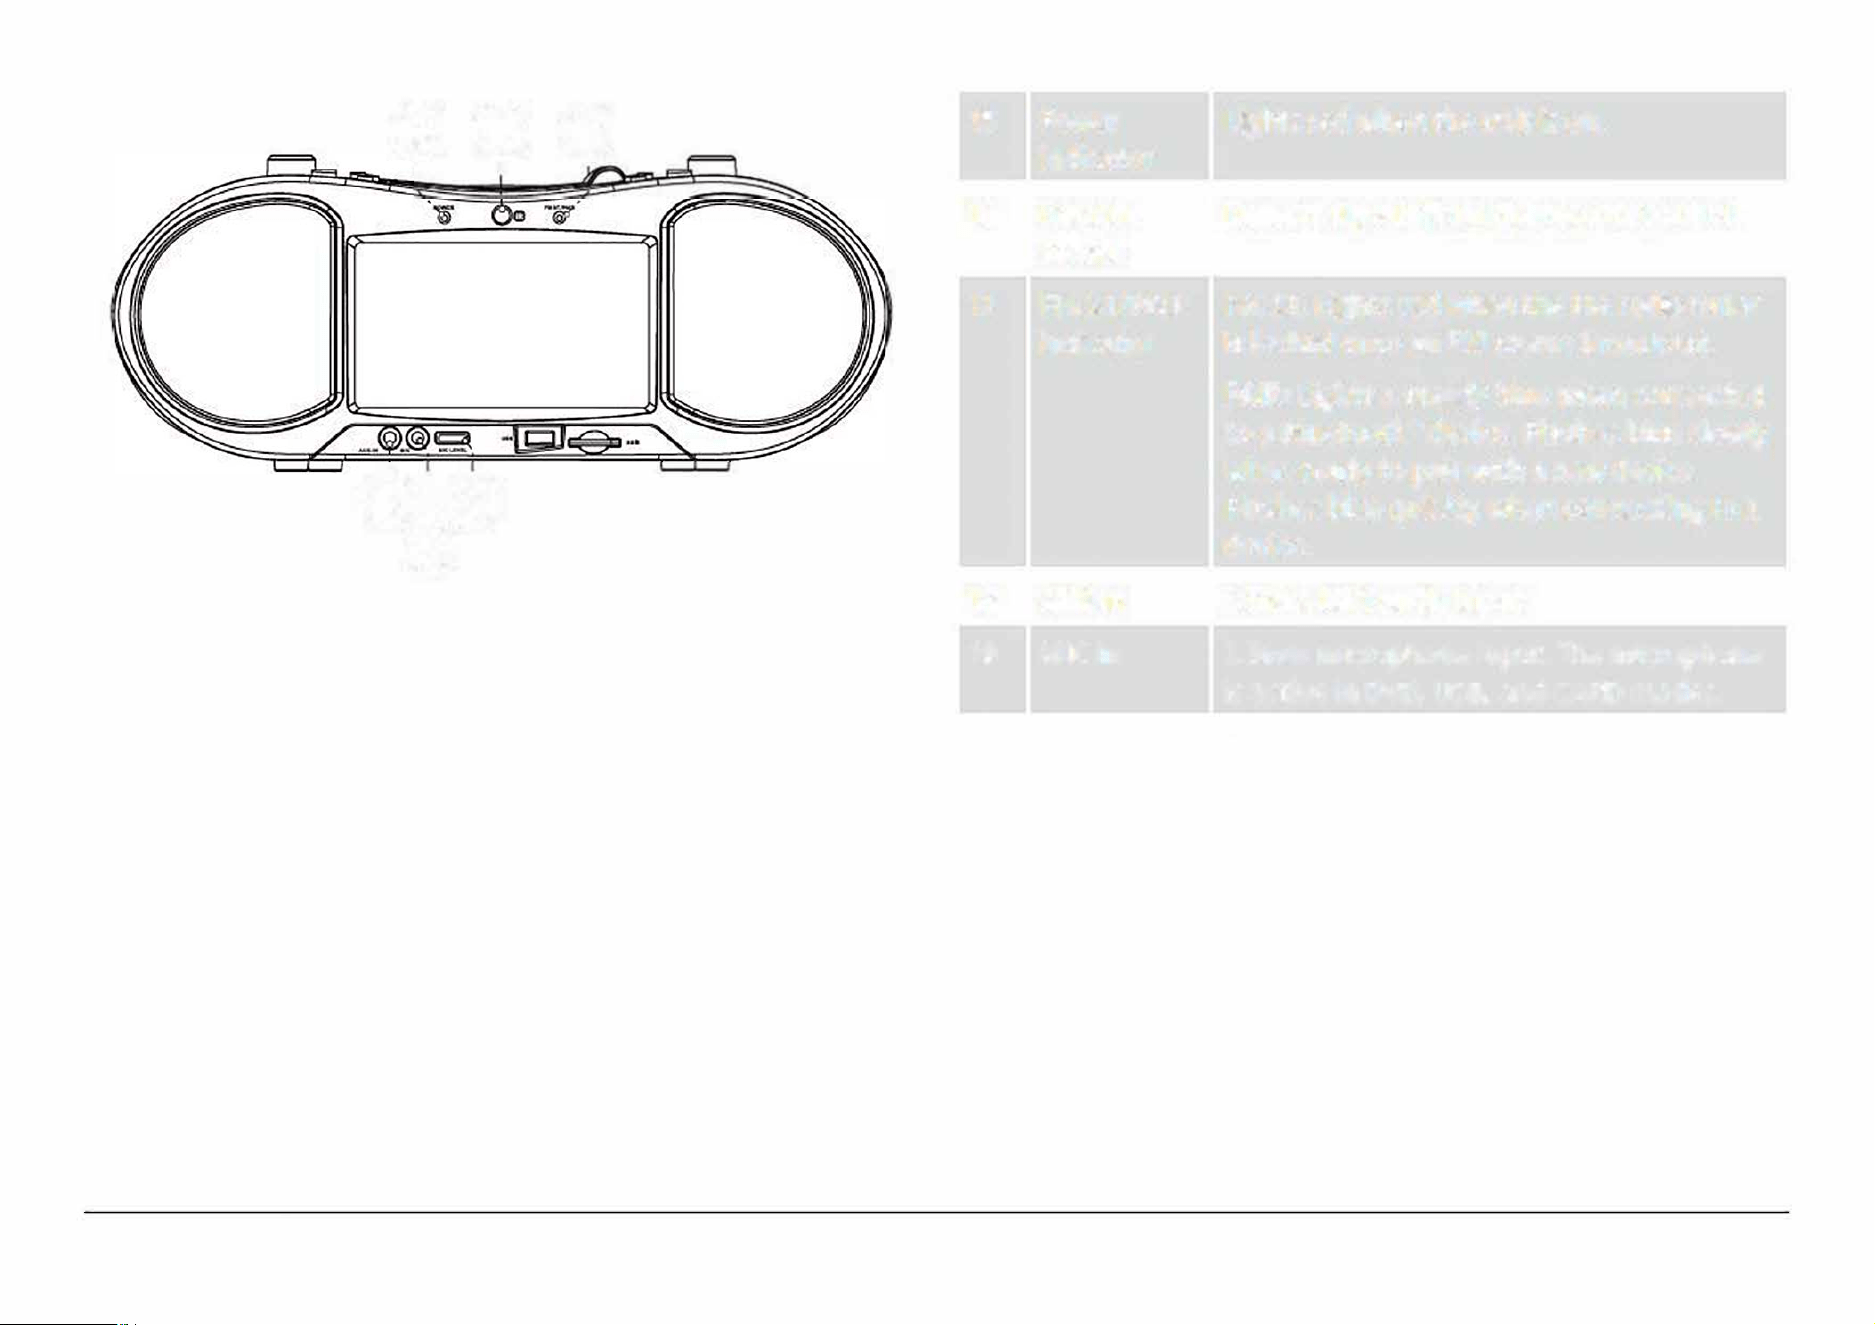
15
Power
Lights red when the unit is on.
indicator
I
'
16 Remote
Detects signals from the remote control.
sensor
17
FM ST/PAIR
FM ST: Lights red when the FM radio tuner
indicator
is locked onto an FM stereo broadcast.
PAIR: Lights a steady blue when connected
to a Bluetooth
®
device. Flashes blue slowly
@!@
when ready to pair with a new device.
Flashes blue quickly when connecting to a
®
device.
18
AUX In
3.5mm AUX audio input.
19 MIC In
3.5mm microphone input. The microphone
is active in DVD, USB, and CARD modes.
20
MIC level
Turn the dial to adjust the MIC In level (i.e.,
dial
the volume of a connected microphone).
Pageg
www.emersonaudio.com
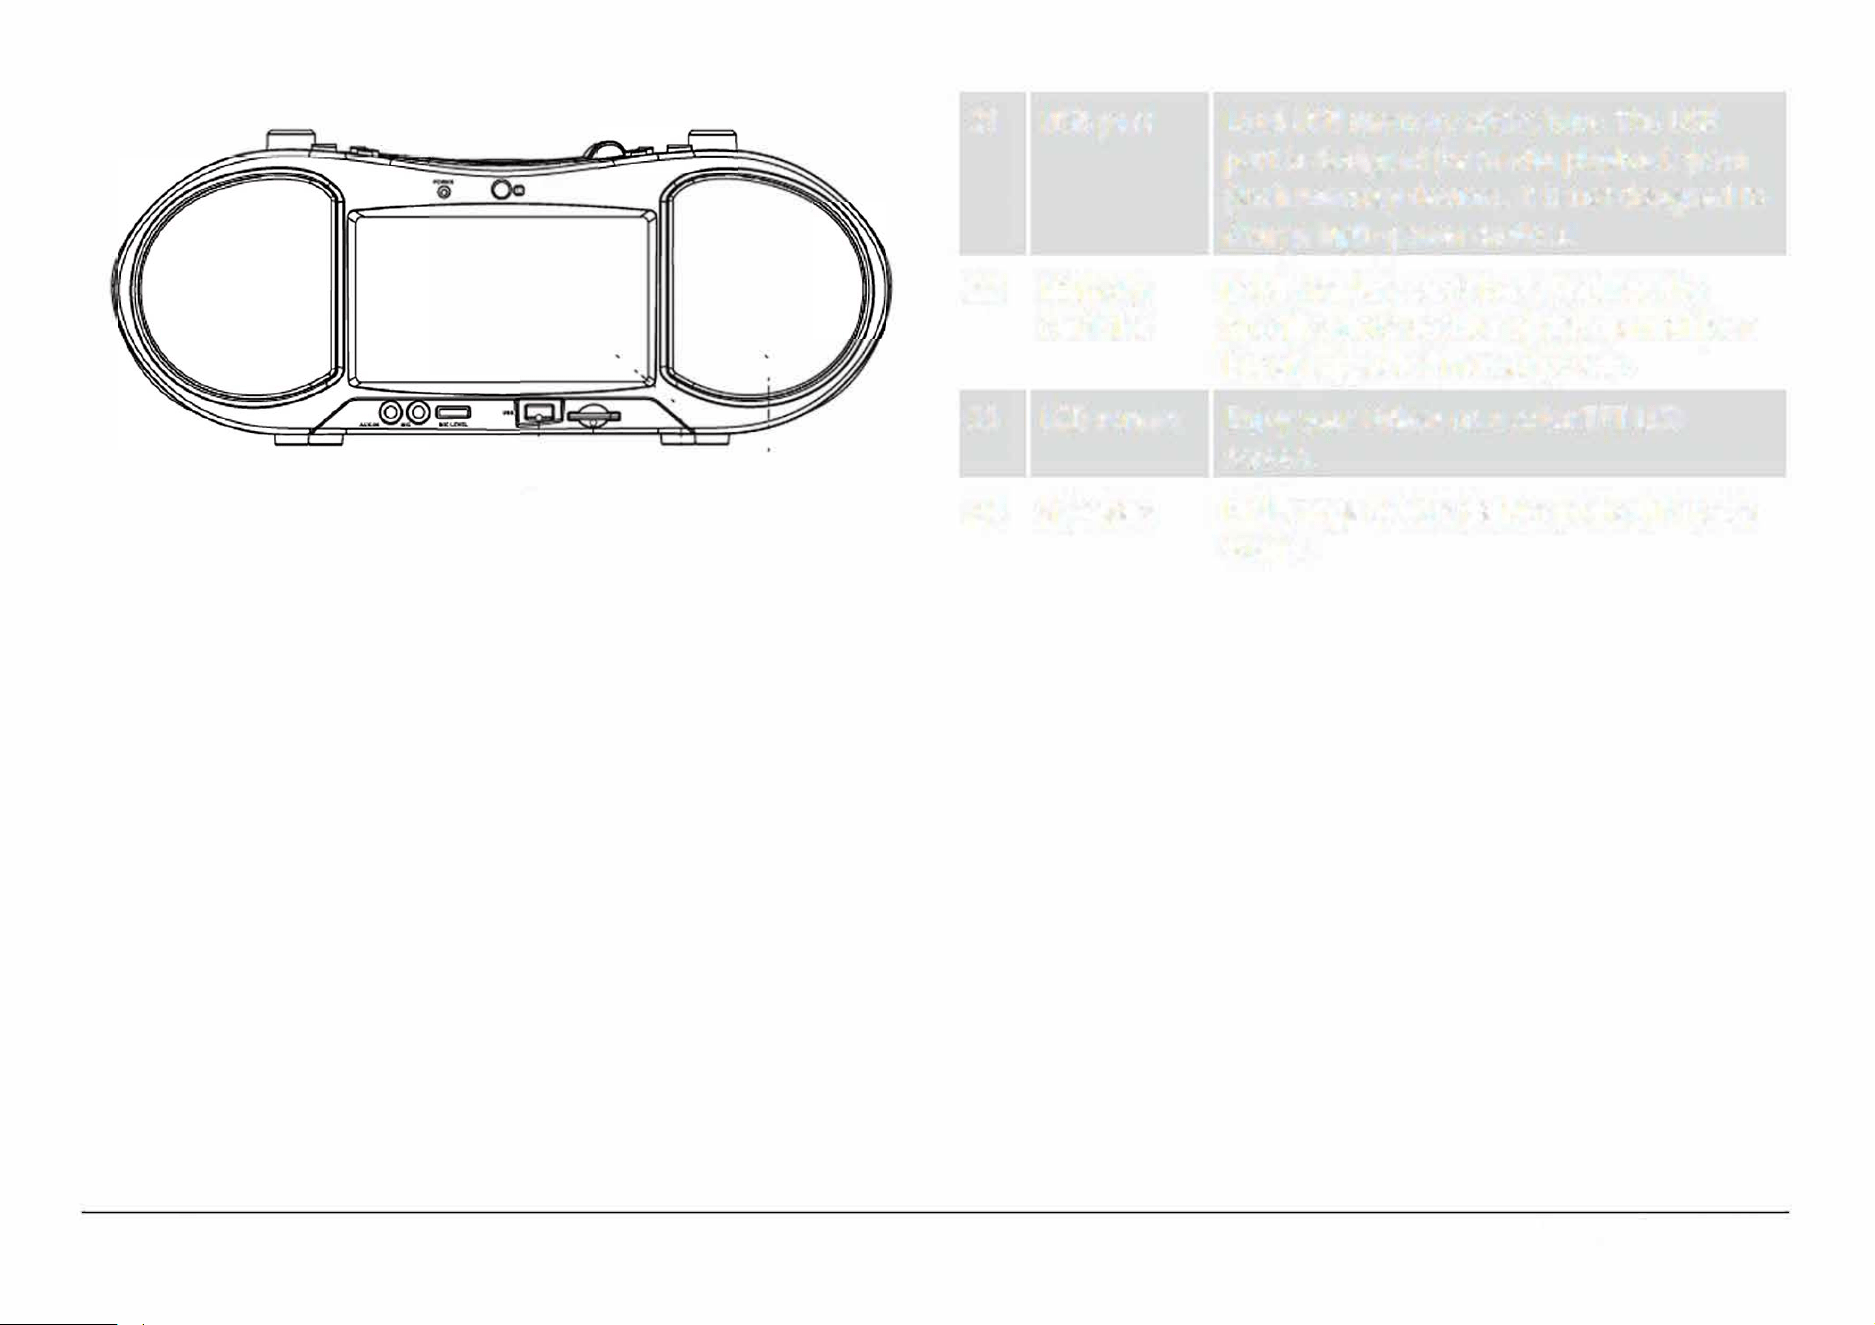
21 USB port Load USB memory sticks here. The USB
port is designed for media playback from
·e
ash memory devices. It is not designed to
charge high-power devices.
22 Memory Load memory cards here. Refer to the
card slot
Specications section of this manual for a
"
"
list of supported memory cards.
'
I
'
..
1
23
LCD screen Enjoy your videos on a color TFT LCD
@!
I
I
I
screen.
@ @
@
24
Speakers Full-range drivers deliver powerful stereo
sound.
Page 10
EDL-2560H
@-·-·-·-·,.
@· ---------·-·-
@@
I
-- !
□ -¼
I
25
26
27
28
29
30
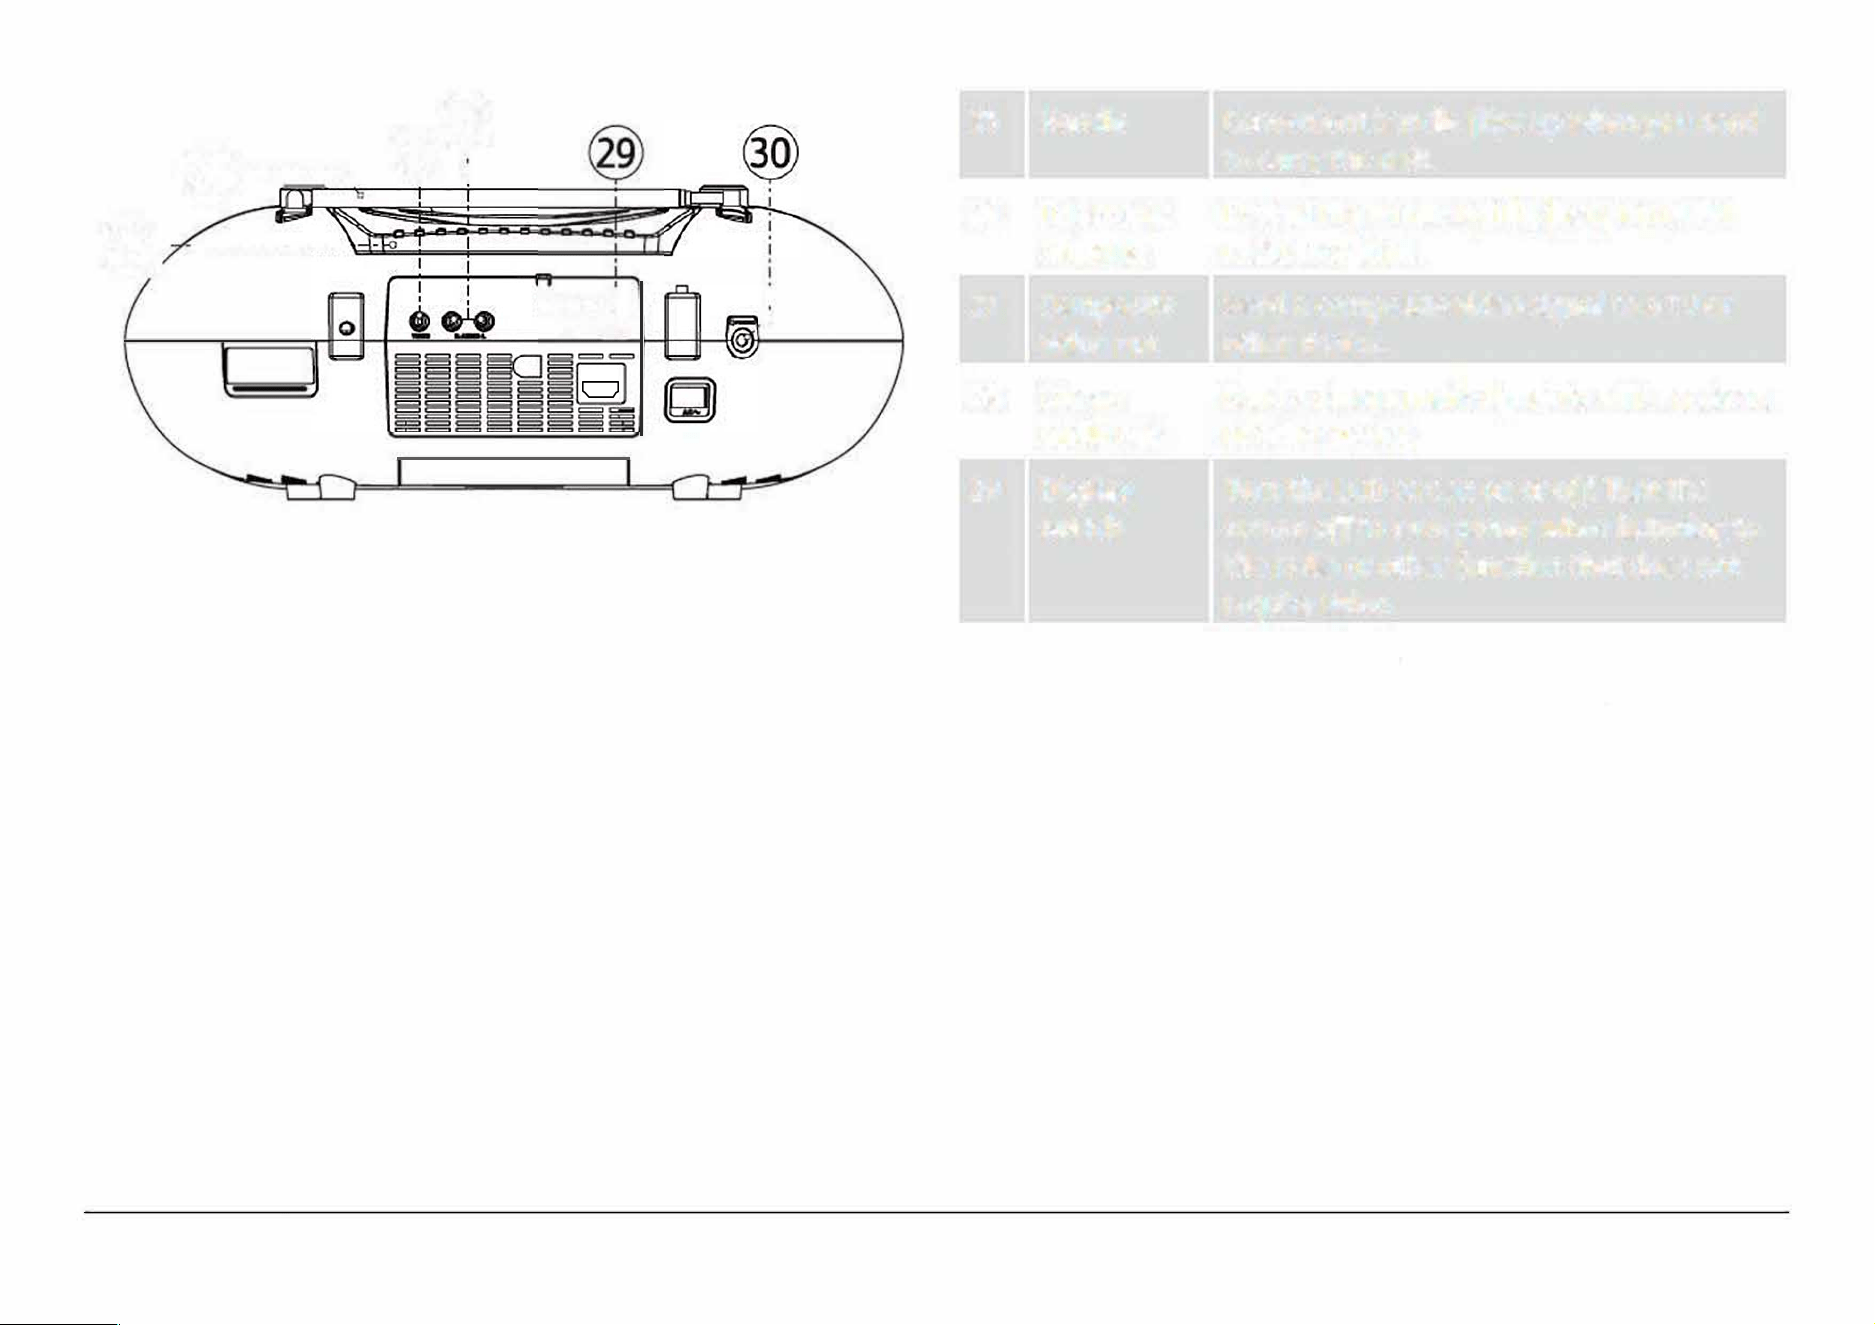
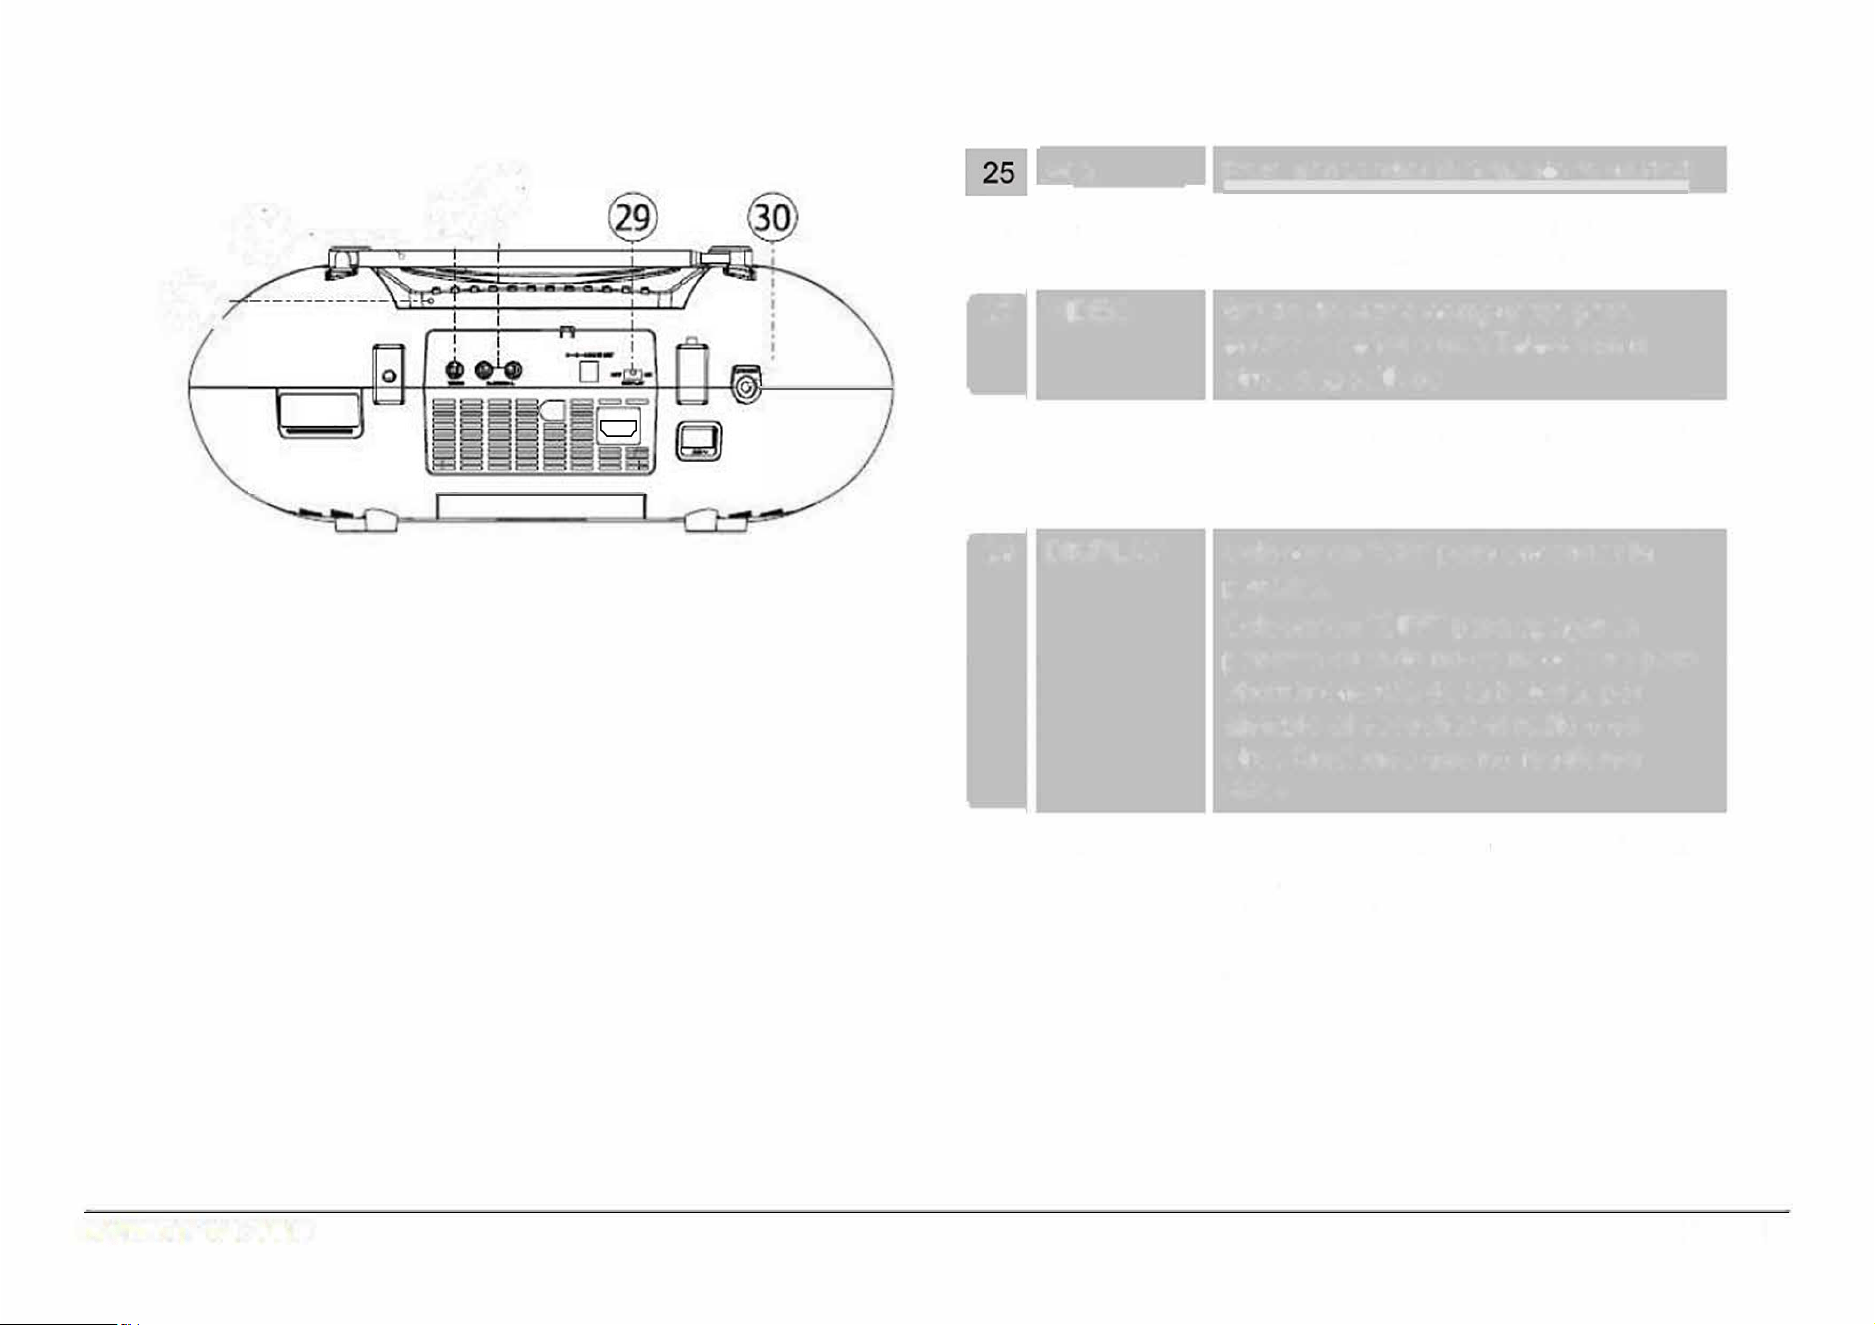
Handle Convenient handle ips up when you need
to carry the unit.
Telescopic Extend the antenna fully for optimal FM
antenna radio reception.
Composite
Send a composite video signal to a TV or
video out other device.
Stereo Send a stereo audio signal to a TV, receiver,
audio out
or other device.
Display
Turn the LCD screen on or off. Turn the
switch screen o to save power when listening to
the radio or other function that does not
require video.
Headphone Connection for headphones or earphones
out
with a 3.5 mm plug. The speakers will be
disabled when this connection is in use.
Page 11
www.e mersonaudio.com
31
32
33
I
34
----
----
----
----
----
----
----
---
---
---
0
o
=
Page 12
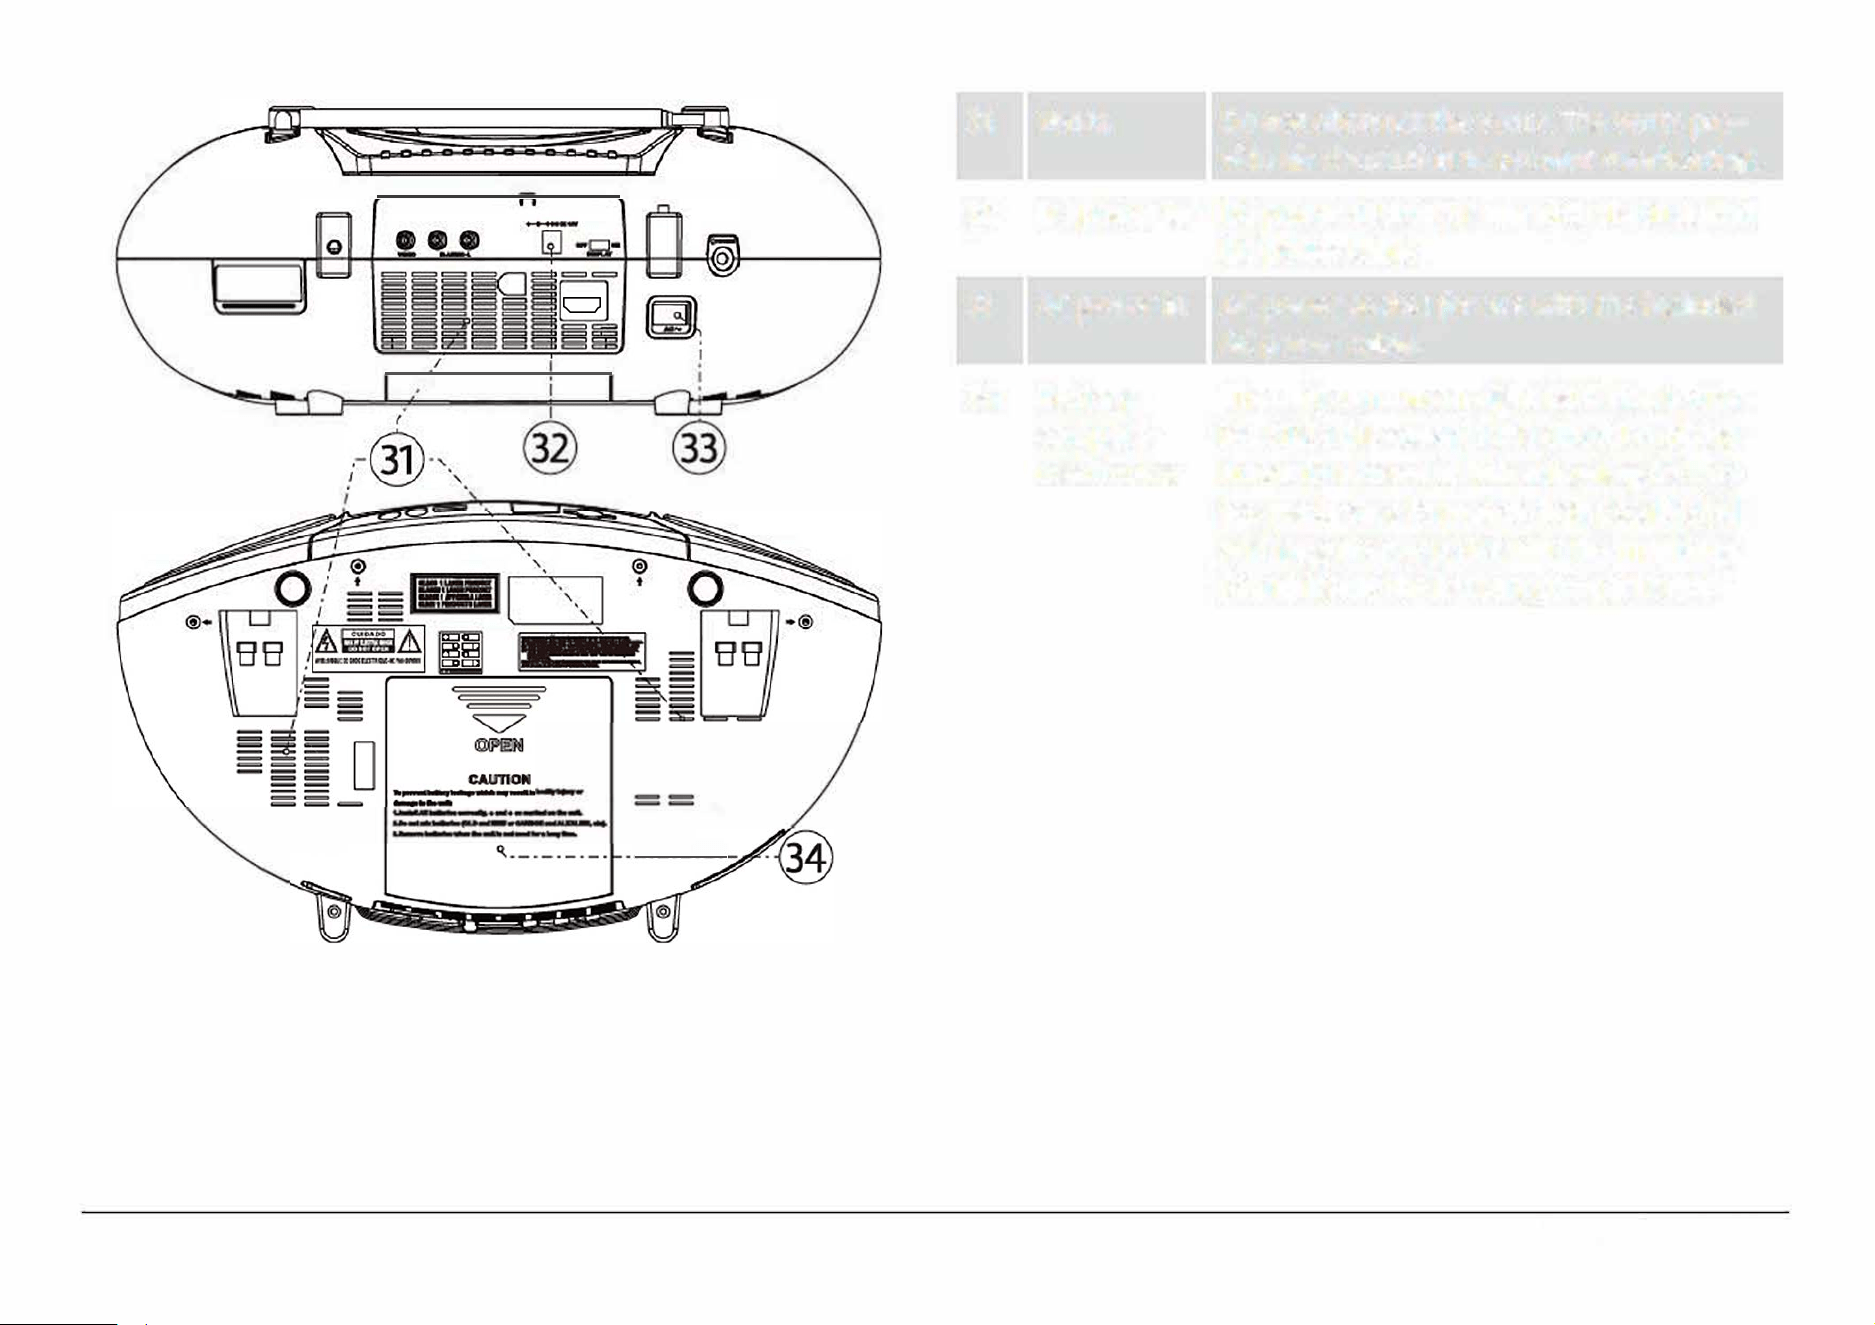
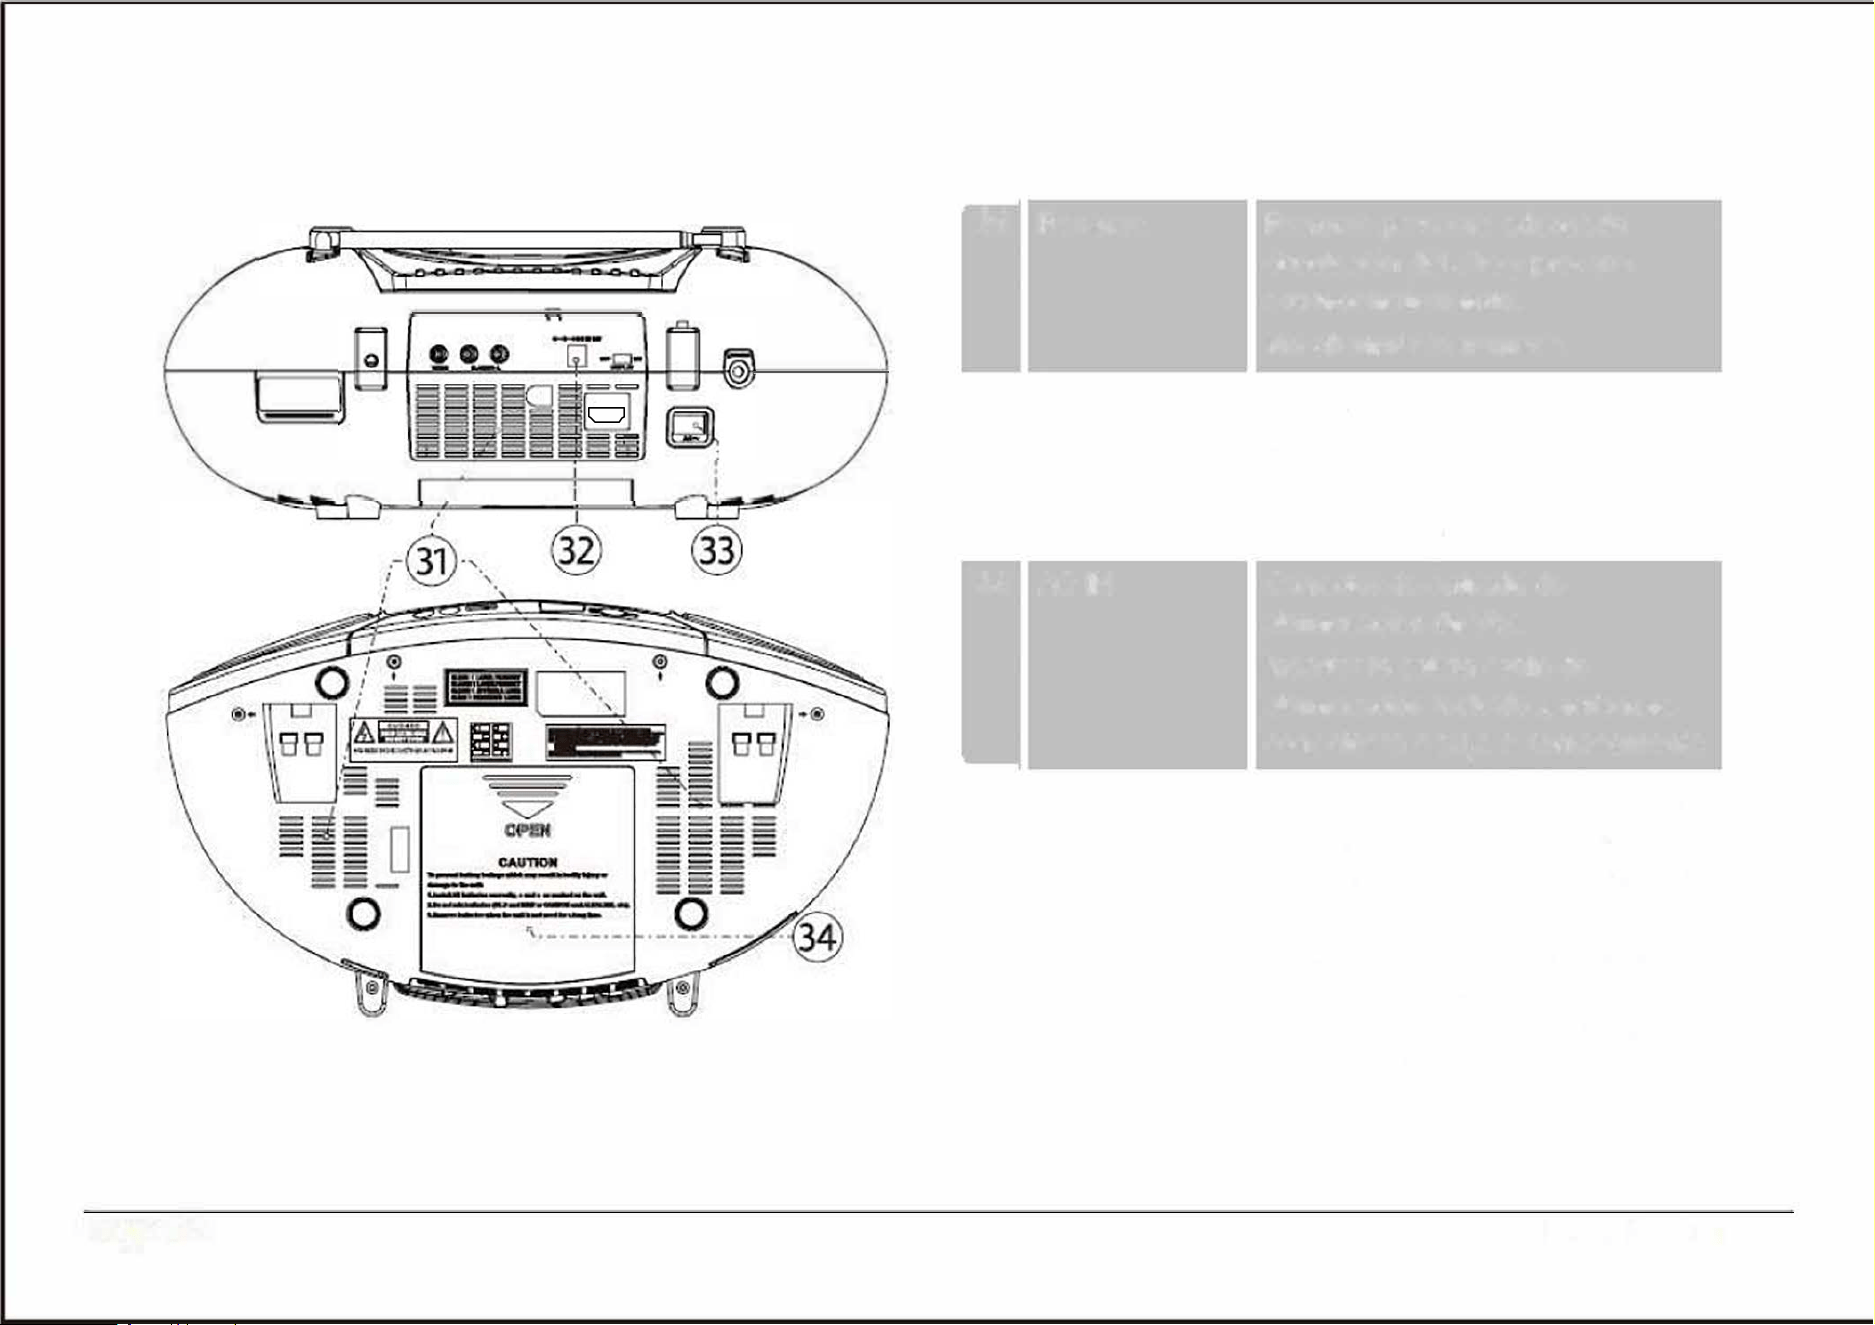
Vents
DC power in
AC power in
Batte
compart-
ment cover
Do not obstruct the vents. The vents pro
vide air circulation to prevent overheating.
DC power socket for use with the included
DC power cable.
AC power socket for use with the included
AC power cable.
The unit can run on eight (8) C size batter
ies. Slide the cover in the direction of the
arrow to remove it. When loading batter
ies, make sure to match their positive(+)
and negative (-) poles with the markings
found inside the battery compartment.
H
D-
I
N socket for use with an
H
D
MI
cable
(not included) from an external device.
EDL-2560H
I
I
I
I
0
I
I
I
I
I
I
I
I
I
3
5
3
5
H
D
-
I
N
Remote Control
DISPLAY
MOOE
ON/OFF
-□□•
MU
DISPLAY
200M
SLOW
DO
D
D
·-
·
�-�-�
P�SE
W
4.
D
D
00
D
GOTO
D
OD
D
PROGRAM REPEAT
A•B
RETURN
DODD
BT IR
CLEAR ANGLE
SUBTIRE
MODE
DEFAU
USB/SD
DISPLAY
ON/OFF
MUTE
DISPLAY
ZOOM
SLOW
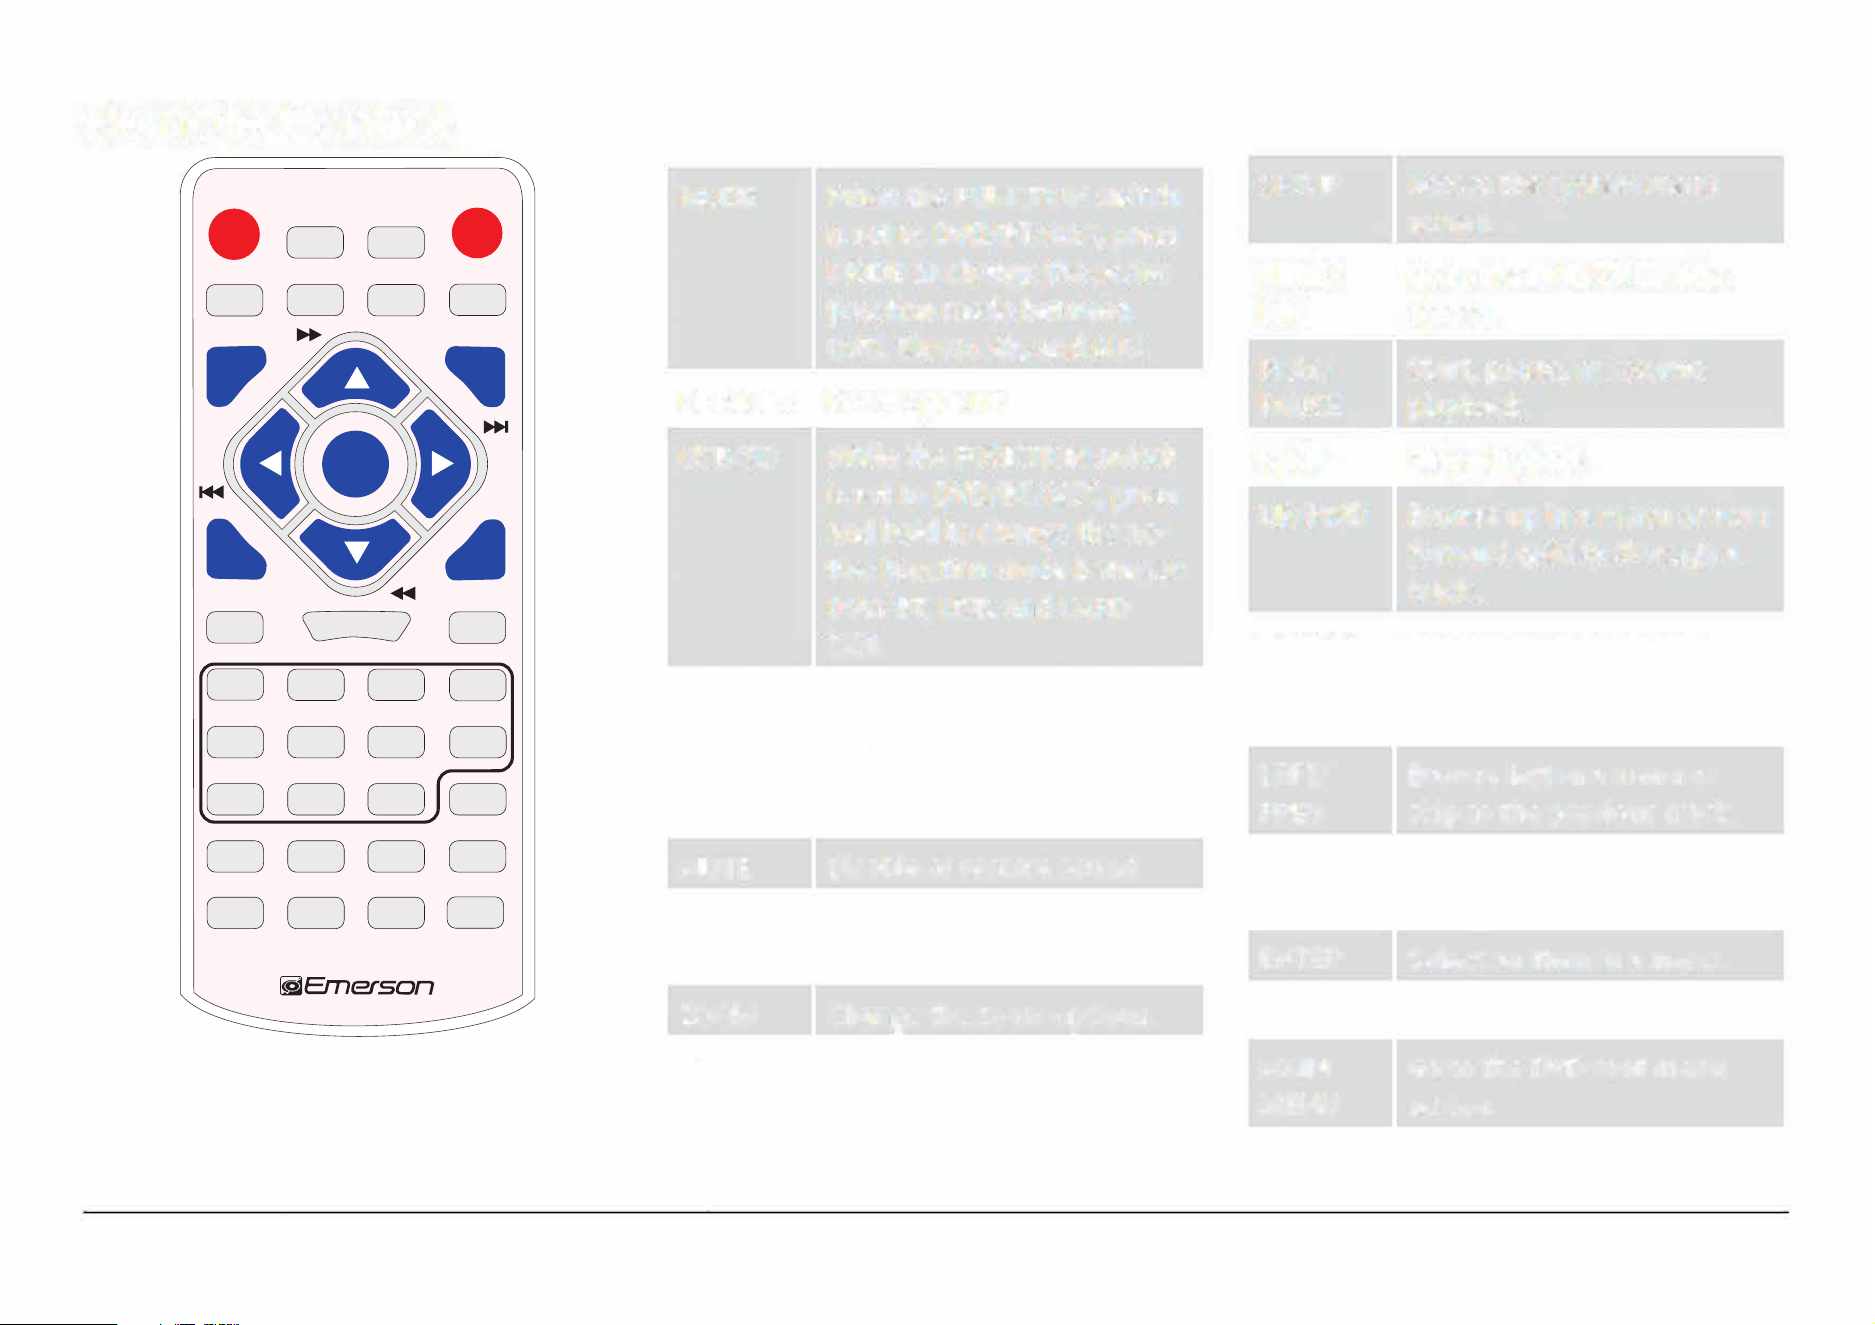
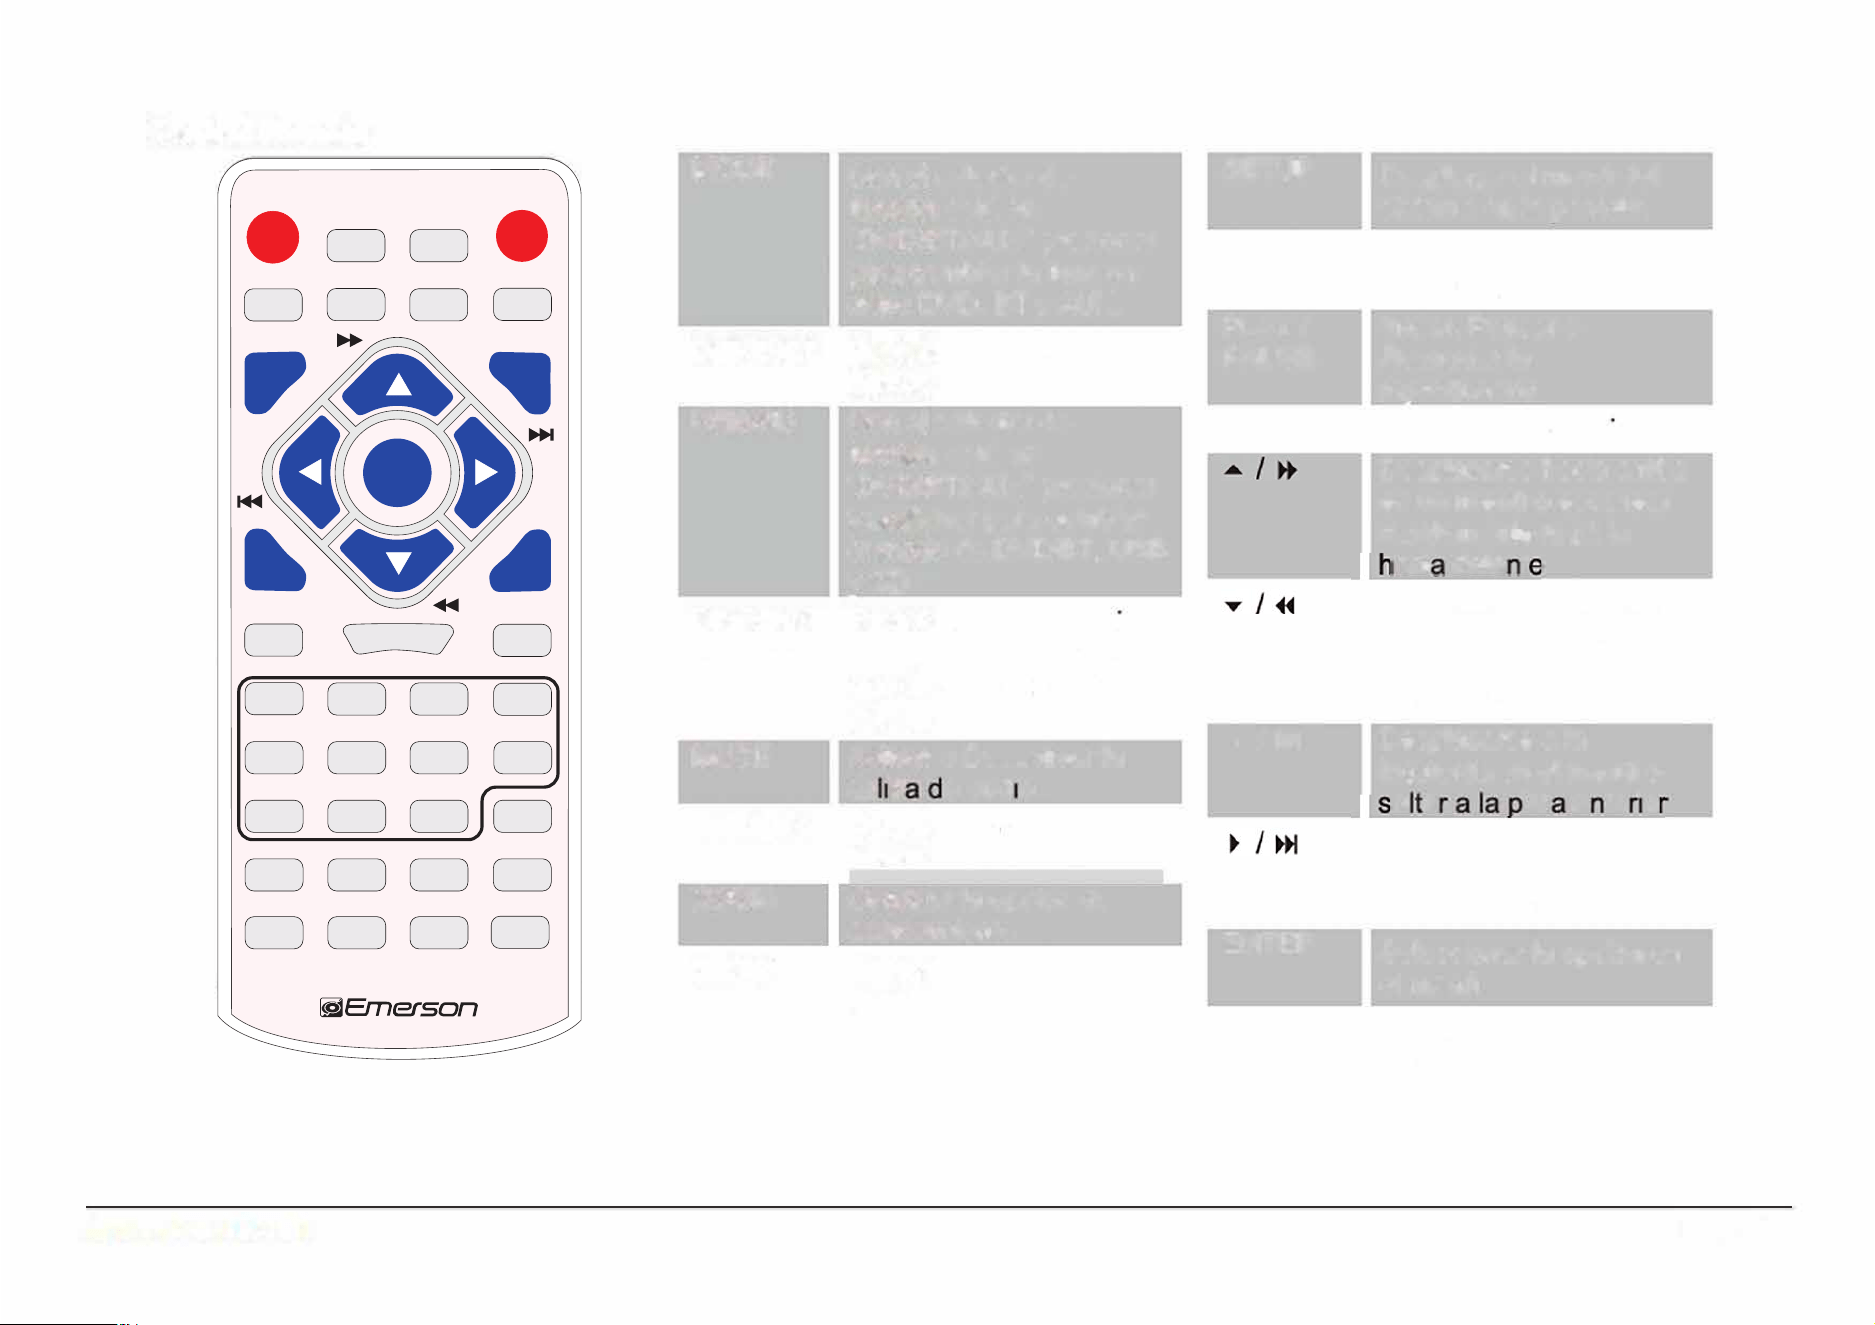
When the FUNCTION switch
SETUP
Access the system menu
is set to DVD/BT/AUX, press
screen.
MODE to change the active
TITLE/
Go to the DVD/SVCD title
function mode between
PBC
screen.
DVD, Bluetooth, and AUX.
PLAY/ Start, pause, or resume
Reset options.
PAUSE playback.
While the FUNCTION switch
STOP
Stop playback.
is set to DVD/BT/AUX, press
and hold to change the ac-
UP/FWD
Browse up in a menu or scan
tive function mode between
forward quickly through a
DVD/BT, USB, and CARD
track.
(SD).
DOWN/
Browse down in a menu
Turn the LCD screen on or
REV
or scan backward quick
through a track.
o. Make sure that the Dis-
play switch (29] on the back
LEFT/
Browse left in a menu or
of the unit is set to ON. PREV
skip to the previous track.
Disable or restore sound.
RIGHT/
Browse right in a menu or
View program information
NEXT
skip to the next track.
on the LCD screen.
ENTER Select an item in a menu.
Change the zoom options.
AUDIO Change the audio options.
Slow motion playback.
MAIN Go to the DVD root menu
MENU
screen.
Page 13
www.emersonaudio.com
MODE
DEFAULT USB/SD
DISPLAY
ON/OFF
CLEARBT PAIR
A-B
SUBTITLE
MUTE DISPLAY ZOOM
SLOW
TITLE/PBC
SETUP
PLAY/PAUSE
STOP
1
2
3
4
5
6 7 8
9 0 10+
REPEAT
P/N
ANGLE
PROGRAM RETURN
GOTO
MAIN MENU
AUDIO
ENTER
P/N
Change between PAL, NTSC,
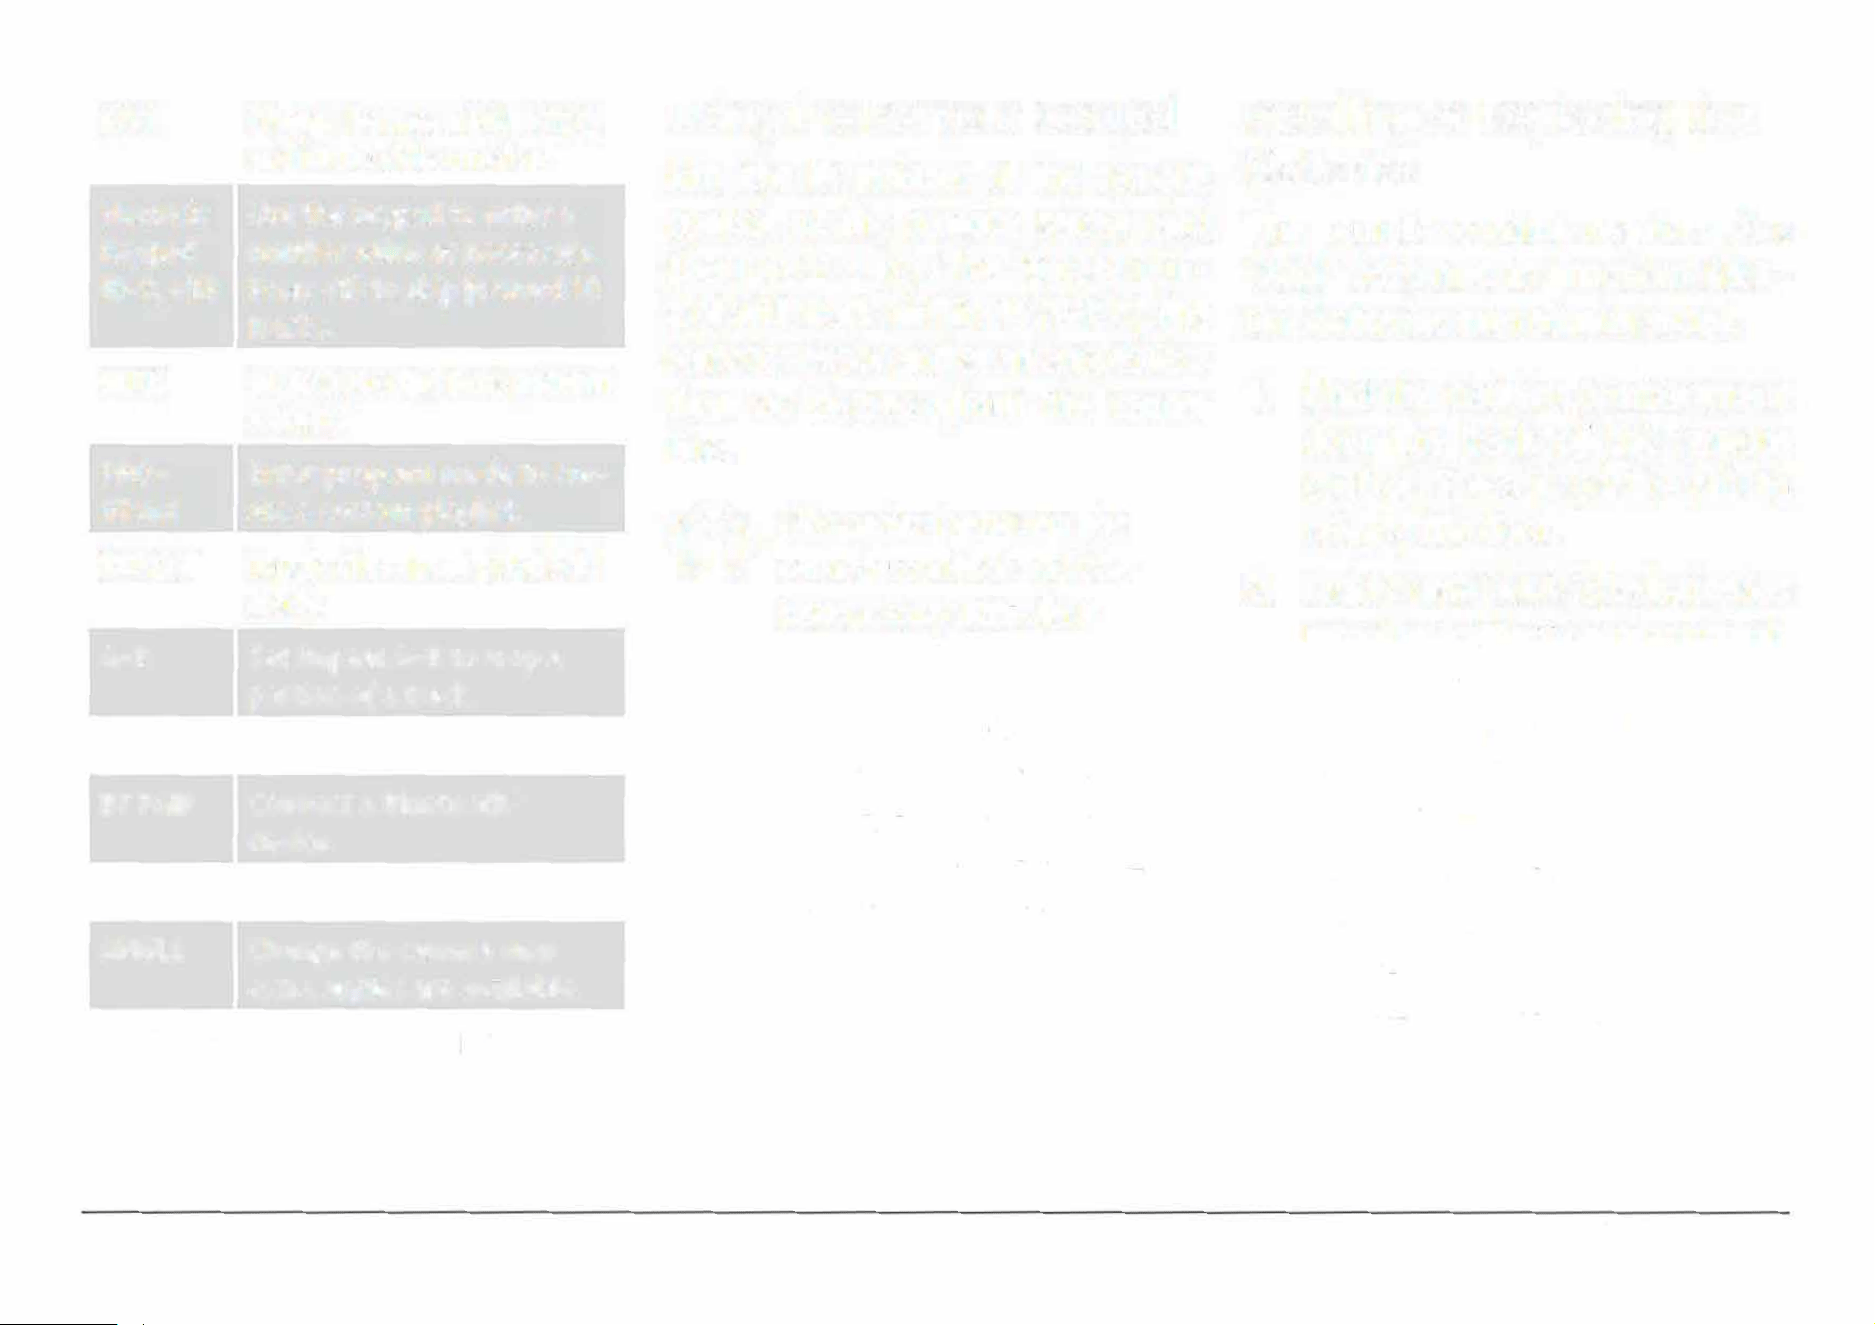
Using the Remote Control
Installing or Replacing the
and AUTO video modes.
Aim the IR emitter of the remote
Batteries
Numeric
Use the keypad to enter a
control at the remote sensor and
The remote control requires 2 x
Keypad
number value as necessary.
then press a key. The remote con-
"AAA" batteries to function. Alka-
(0-9, +10)
Press +10 to skip forward 10
trol will work within 15 feet of the
line batteries are recommended.
tracks.
remote sensor and at an angles less
Go to a specic time point in
1.
Find the battery compartment
GOTO
than 30 degrees from the
center
a track.
door the back of the remote
line.
PRO-
Enter program mode to ere-
control. Press in on the tab to
GRAM
ate
a custom playlist.
Obstacles between
the
release the door.
REPEAT
Toggle the repeat playback
remote control and the
2.
Load 2 new "AAA" size batteries
mode.
sensor may interfere
into the battery compartment.
A-B
Set
Repeat A-B to loop a
with the signal.
Make sure to match the"+"
and
portion of a track.
Direct sunlight, incan-
"
-" poles of the batteries with
RETURN
Go back.
descent or ourescent
the markings found inside the
BT PAIR
Connect a Bluetooth
e
lamps, and other strong
compartment.
device.
light sources may inter-
3.
Replace the battery compart-
CLEAR
Cancel.
fere with the signa.
ment door.
ANGLE
Change the camera view
�
Use only the size and
extra angles are available.
type of batteries speci-
SUBTITLE
Change the subtitle options.
ed.
Page
EDL-2560H
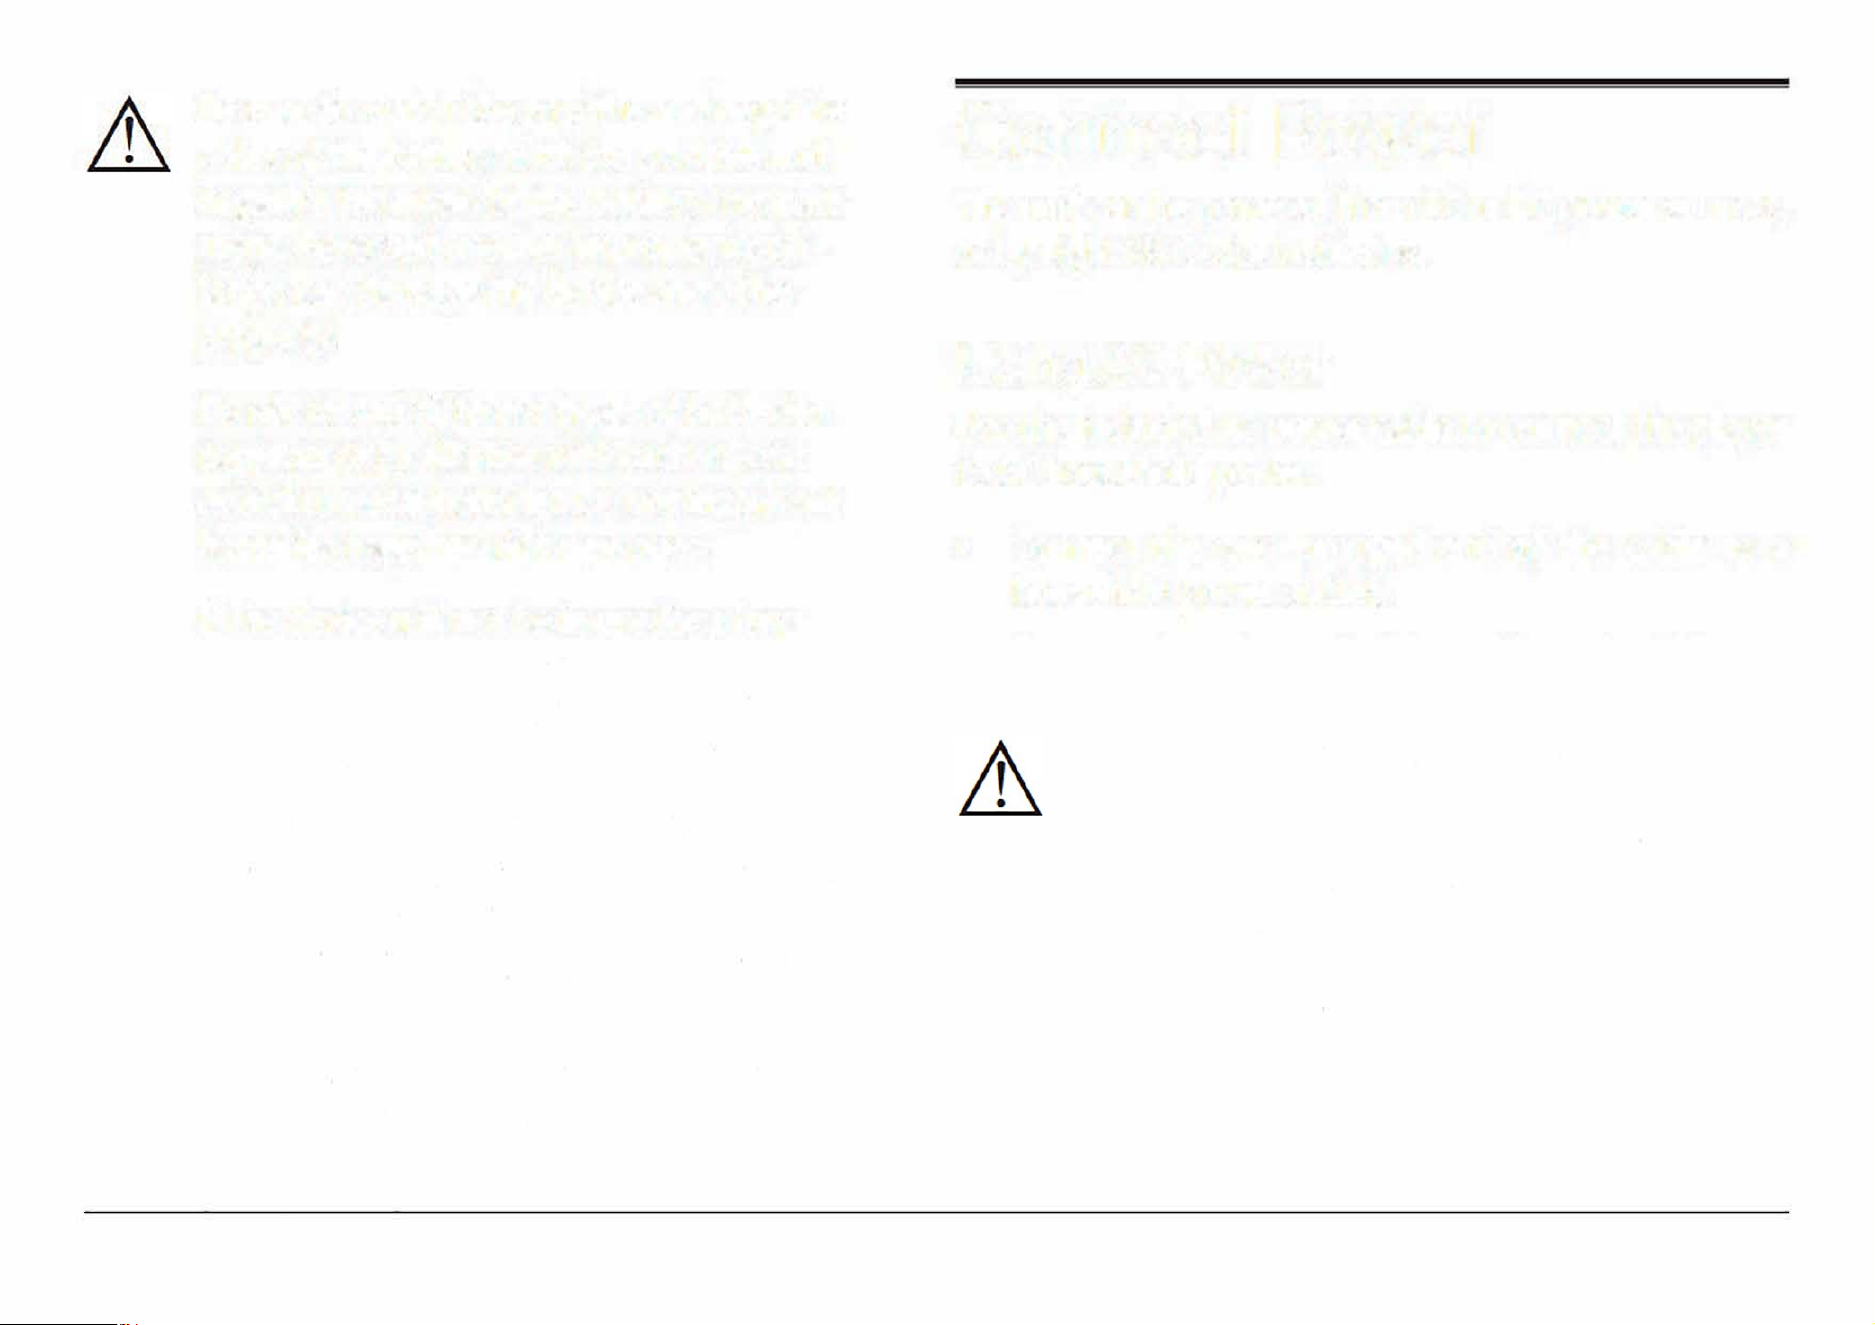
Be sure to match the positive and negative
poles of the battery with the positive and
negative terminals of the battery compart
ment. Reversed or other improper instal
lation can damage the device and other
property.
Do not install different types of batteries
together (e.g., alkaline with carbon-zinc
or nickel metal hydride). Do not install old
batteries together with new ones.
If the device will not be in use for a long
time, remove the batteries prevent battery
leakage. Battery leakage can cause injury
and damage to your device and property.
Always follow directions provided by the
battery manufacturer. Do not charge bat
teries that are not intended to be re
charged; doing so can cause the batteries
to overheat and rupture.
Do not incinerate batteries or otherwise ap
p heat to them; they may explode or leak.
Connect Power
The unit can be powered from AC or DC power sources,
or by eight (8) C-size batteries.
Using AC Power
Use the included AC power cable to connect the player
to AC household power.
•
Connect the two-pronged end of the cable to a
household power outlet.
•
Connect the other end of the cable to the AC Power
In socket [33] of the player.
The unit supports AC 120 V power only.
Do not connect the unit to a power outlet
other than that which is indicated here or
on the label as this may result in the risk of
re or electric shock.
Do not handle the power plug with wet
hands. Doing so may cause electric shock.
Page 15
www.emersonaudio.com
Using the DC Car Adapter
Use the included DC car adapter to connect the player
to DC power socket found on cars, campers, boats, and
more.
•
Connect the large end of the DC car adapter to a
standard DC car power socket.
•
Connect the barrel plug end of the adapter to the
DC Power In socket [32] of the player.
Using Batteries
The unit can operate on eight (8) C-size batteries.
Batteries designed for high-drain devices are recom
mended (e.g., alkaline or rechargeable Ni-MH).
Page 16
Use on the size and type of batteries
specied.
Be sure to match the positive and negative
poles of the battery with the positive and
negative terminals of the battery compart
ment. Reversed or other improper instal
lation can damage the device and other
proper.
Do not install dirent types of batteries
together (e.g., alkaline with carbon-zinc
or nickel metal hydride). Do not install old
batteries together with new ones.
If the device will not be in use for a long
time, remove the batteries prevent battery
leakage. Battery leakage can cause iury
and damage to your device and property.
Alws follow directions provided by the
battery manufacturer. Do not charge bat
teries that are not intended to be re
charged; doing so can cause the batteries
to overheat and rupture.
Do not incinerate batteries or otherwise ap
ply heat to them; they may explode or leak.
EDL-2560H
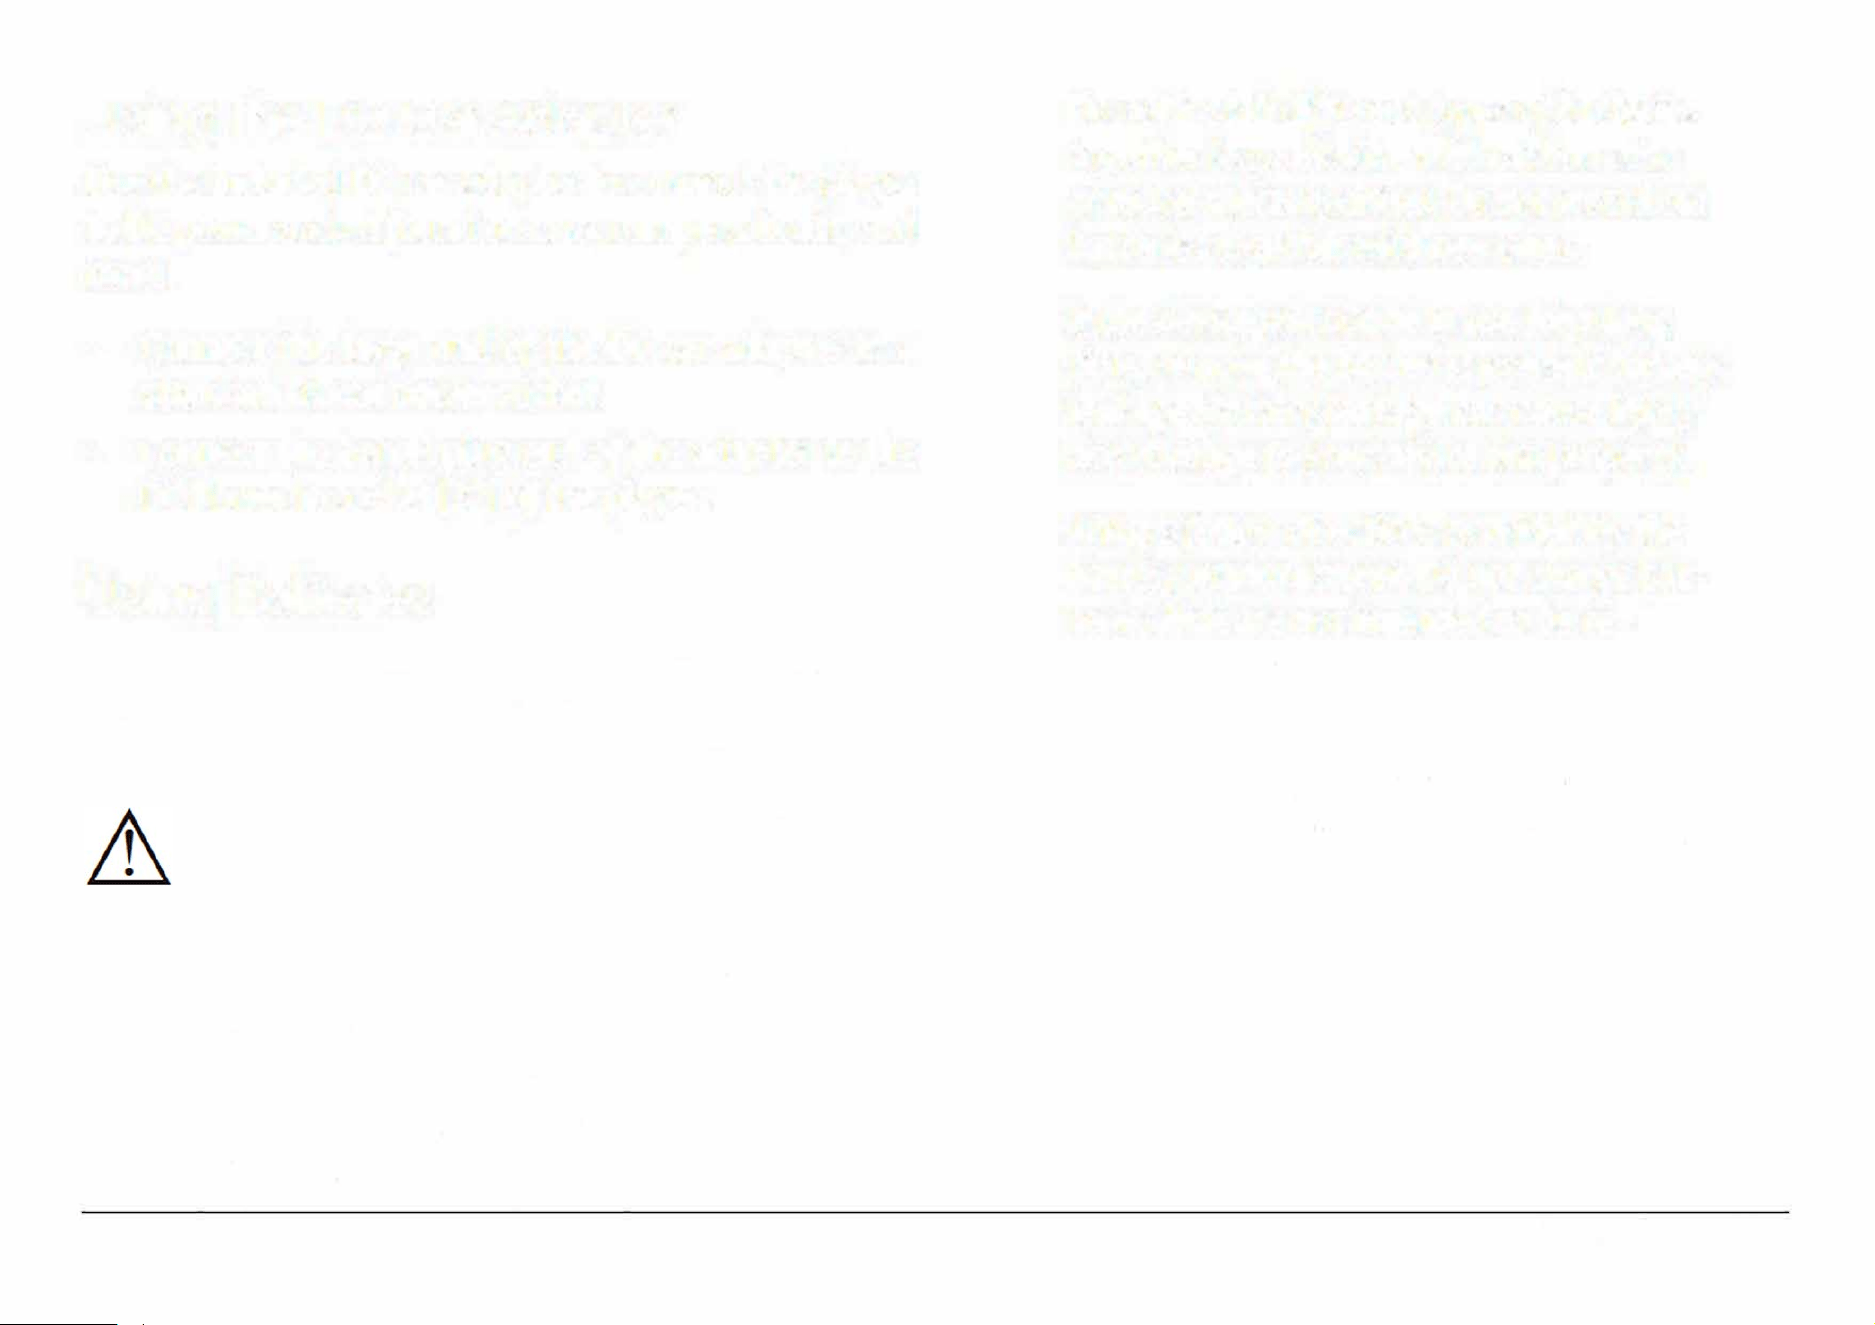
Basic Functions
Turning the Unit On and O
To turn the unit on, set the POWER/FUNCTION switch [1]
to any position other than OFF. The Power indicator [15]
will light red.
To turn the unit o, set the POWER/FUNCTION switch
to the OFF position. The Power indicator will darken.
Adjusting the Volume
•
Turn the Volume dial [2] clockwise to increase the
volume. Turn it counter-clockwise to decrease the
volume.
•
Press the MUTE key on the remote to disable sound
output completely. Press the MUTE key again to
restore sound output.
Turning the Screen On and O
You can turn the LCD screen o to conserve power.
•
Press the LCD ON/OFF key [10] to turn the screen
o. Press it again to turn it back on again.
You may want to turn the LCD screen o
when listening to music or whenever you are
not watching video.
e LCD screen consumes a lot of power.
You can prolong the lifetime of your batter
ies if you avoid using the LCD screen.
Using the Number Keypad
Use the number keypad (1-0, 9) on the remote to input
a value when prompted on a menu or option screen.
For instance, to go to track 15:
1.
Press the "1" key.
2.
Press the "5" key.
3.
Press the ENTER key.
Page 17
www.emersonaudio.com
DVD Mode
To set the active source mode to DVD, set the
FUNCTION switch [1] to DVD/BT/AUX/
H
D
-IN
.
Playing a DVD
Load a DVD disc in the disc compartment. The player
will automatically attempt to read the disc.
•
•
•
•
Press PLAY/PAUSE/ENTER/PAIR [11] to start, pause,
or resume playback.
Press STOP/USB/CARD [10] to stop playback .
Press MAIN MENU on the remote to show the root
menu screen of the DVD. (This function will on
work with DVDs that have been mastered with a
main menu.)
Press the TITLE key on the remote to select a title
to play. (This function will only work with DVDs that
have been mastered with titles or chapters.)
Page 18
During playback:
PREV/LEFT
NEXT/RIGHT
FWD/UP
(FORWARD)
REV/DOWN
(REVERSE)
STOP
REPEAT
Press to return to the beginning of the chapter.
Continue pressing to skip to the previous chap
ter or until you have reached the beginning of
the disc.
Press to skip to the next chapter.
Press to change the rate of forward playback
(2x, 4x, Bx, 2
0
x). Press
PLAY/PAUSE/ENTER/PAIR to resume playback
at normal speed (1x).
Press to change the rate of reverse playback
(2x, 4x, Bx, 2
0
). Press PLAY/PAUSE/EN
TER/PAIR to resume playback at normal speed
(1x).
Press to stop playback. The pler will remem
ber the point where you stopped the disc and
resume playback from there.
Press again while playback is stopped to clear
the saved timepoint from memory.
Using the remote, press to repeat the current
chapter/track, title, or to repeat the entire disc.
EDL-2560H
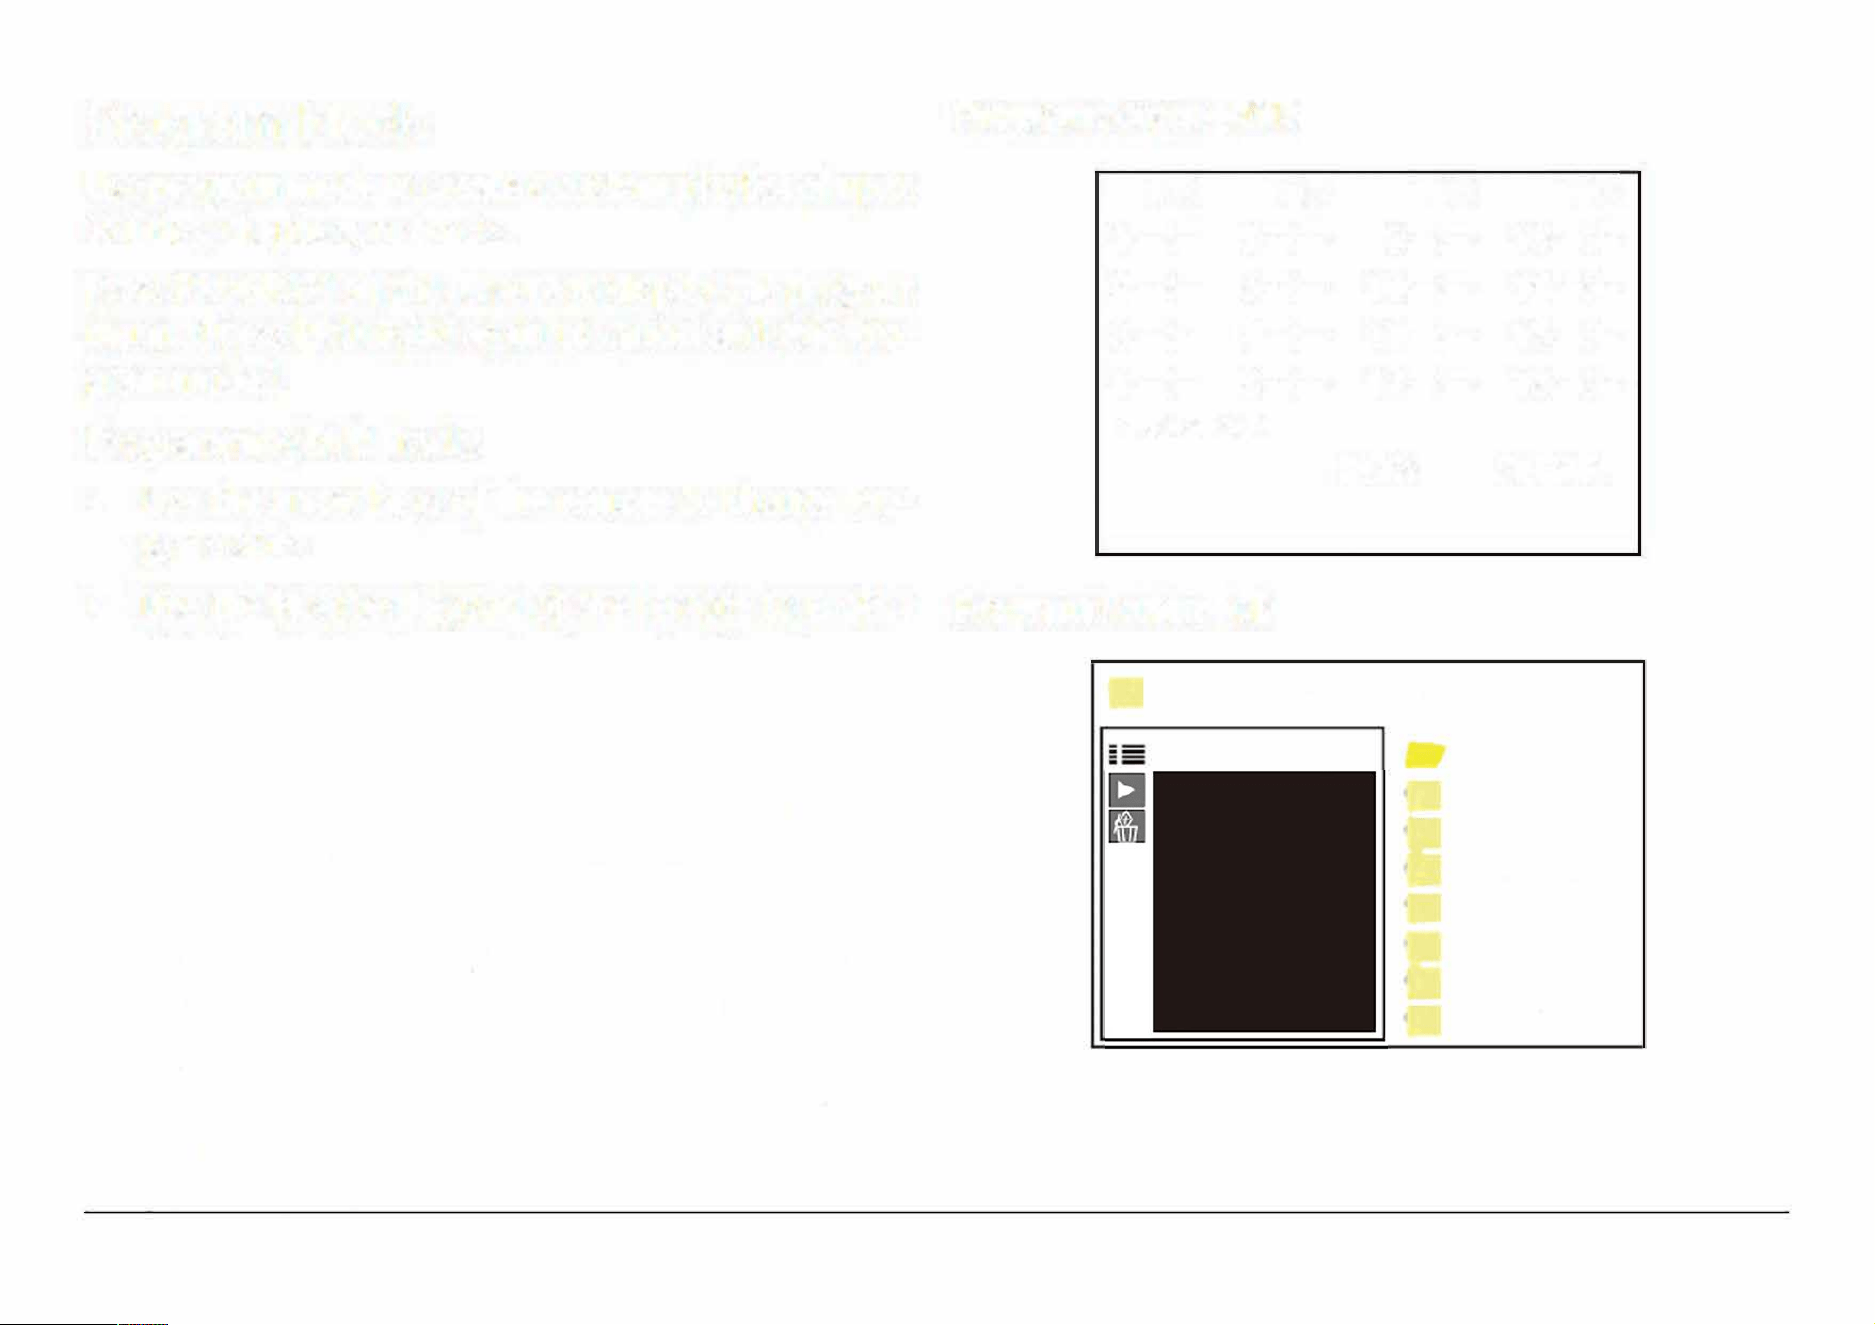
Program Mode
Program Screen-DVD
Use program mode to create a custom playlist of up to
16 titles, chapters, or tracks.
Press PROGRAM on the remote to display the program
menu. (Press PROGRAM again to cancel and exit Pro
gram mode.)
Programming DVD Tracks
•
Use the arrow keys of the remote to change Pro
gram slots.
TC
TC
1
-
-:-
-
5
-
-
:
-
-
2
--:--
6
--
:
--
3 --:--
7 --:--
4 --:--
8
--
:
--
PROGRAM
TC
TC
9-:--
13
-:
-
10-:--
14-:-
11
-:--
15-:-
12-:-- 16-:-
PLAY CLEAR
•
Use the Number keypad of the remote to enter a
title/track/chapter number in each of the Program
slots.
Program Screen-CD
Programming CD and MP3 Tracks
•
Use the arrow keys of the remote to select the desired
program track, then press ENTER key to add it to
the program list.
•
To start Program playback, use the arrow keys to
highlight PLAY and then press the ENTER key.
•
To stop Program playback, press the STOP key. To
clear the program list, press the STOP key again
while play is stopped.
... [10 DEEP] MMJB.MP3
·-
0/16 ...
0001.01 DENZ
0
0002.02 500
0003.03 TEAR
0004.04 JUDG
0005.05 FRID
0006.06 LOOK
0
0007.07 COMI
Page 19
www.emersonaudio.com
Playing Digital Music/Video Files
This unit will play discs that contain digital media les
instead of DVD video. Refer to the Specications sec
tion to learn more about media le compatibility.
When a disc is loaded that contains les, the unit will
read the disc and then list all of the les and folders on
the LCD screen.
•
Use the direction buttons to browse the le/folder
list; press PLAY/PAUSE/ENTER/PAIR [11] to select
an item from the list.
•
If the item selected was a folder, the unit will
display the contents of the folder.
•
If the item selected was
a
music or video le,
the unit will start playback.
Page 20
During playback:
PREV/LEFT
NEXT/RIGHT
FWD/UP
(FORWARD)
REV/DOWN
(REVERSE)
STOP
REPEAT
Numeric
P
ress to return to the beginning of the track.
Continue pressing to skip to the previous track
or until you have reached the beginning of the
folder.
Press to skip to the next track.
Press to change the rate of forward playback
(2x, 4x, Bx, 20x). Press PLAY/PAUSE/EN
TER/PAIR to resume playback at normal speed
(1x).
Press and hold to browse up the list of les.
Press to change the rate of reverse playback
(2x, 4x, Bx, 20x). Press PLAY/PAUSE/EN
TER/PAIR to resume playback at normal speed
(1x).
Press and hold to browse down the list of les.
Press to stop playback.
Using the remote, press to repeat the current
track or all tracks in the folder.
Using the remote, enter a track number and
Keypad (0-9,
then press
ENTER
to skip directly to it.
+10)
EDL-2560H
Playing Digital Photo Files
This unit will play discs that contain digital photo les
instead of DVD video. Refer to the Specications sec
tion to learn more about photo le compatibility.
When a disc is loaded that contains photo les, the unit
will read the disc and then list all of the les and fold
ers on the LCD screen.
•
Use the direction buttons to browse the le/folder
list; press PLAY/PAUSE/ENTER/PAIR [11] to select
an item from the list.
•
•
If the item selected was a folder, the unit will
display the contents of the folder.
If the item selected was a photo le, the unit
will display the photo (and continue displaying
any other photos as a slideshow).
e unit will return to the le list when the
slideshow ends.
During playback:
PREV/LEFT Press to skip to the previous photo.
NEXT/RIGHT
Press to skip to the next photo.
FWD/UP
Press to rotate the photo clockwise.
REV/DOWN
Press to rotate the photo counterclockwise.
STOP
Press to stop the slideshow and see a thumb
nail index.
Use the direction keys to select a thumbnail to
view it, or choose one of the menu items at the
bottom of the screen.
• Slide Show: return to viewing the slideshow.
• Menu: View photo controls.
• Previous: Display the previous page of
thumbnails.
• Next: Display the next page of thumbnails.
MAIN MENU
Using the remote, press to stop the slideshow
and see a list of les and folders.
Numeric
Using the remote, enter a track number and
Keypad
(0-9,
then press ENTER to skip directly to it.
+10)
Page 21
www.emersonaudio.com
ZOOM
REPEAT
PROGRAM
Page 22
Using the remote, press to increase the magni
cation Level of the current photo. When mag
nication is greater than 100%, you can use the
direction keys to pan around the photo.
Continue pressing ZOOM to return to
a
normal
100% view.
Using the remote, press to repeat the current
photo or all photos in the folder.
Using the remote, press to change the slide
show transition eect.
Bluetooth
®
Mode
To set the active source mode to Bluetooth (BT):
1. Set the FUNCTION switch [1]
to DVD/BT/AUX/
H
D
-IN
.
2
. Press MODE/MENU [4] to change from DVD to BT
mode. The FM ST/PAIR indicator [17) will light up
b
lue.
Use this mode to stream audio wirelessly from play
ers with Bluetooth. Bluetooth devices may include lap
tops, tablets, smartphones, and more. Make sure that
the device has its Bluetooth radio enabled and that it is
set to be discoverable.
Connecting a Device for the First
Time (Pairing)
Before using a wireless device with Bluetooth, you
will need to establish a connection between it and the
Boombox. This process is called "pairing" and you will
on have to do it once. Once two devices are paired,
they will automatically connect when they detect each
other.
EDL-2560H

1. When you set the Boom box to Bluetooth mode and
it does not detect a paired device, it will automati
cally
switch to pairing mode. The FM ST/PAIR in
dicator [17] will flash blue when the Boombox is in
pairing mode.
2. On your Bluetooth device, go to its Bluetooth set
t
i
n
g
s
m
e
n
u
.
3. Have your Bluetooth device "search for devices".
Select
the boombox (EMERSON EDL-256
0
H) when
it is
found. Enter 0000 as a passkey if the device
asks for one.
4. When pairing is complete, the Boombox will emit a
soft tone and the FM ST/PAIR indicator will light a
steady blue.
The boom box will automatically connect to your Blue
tooth device next time as long as it has Bluetooth en
abled, is within range, and is set to be visible to paired
devices.
If the pairing process fails
,
the FM ST/PAIR
indicator will
f
ash slowl
y
. Press PLAYi
PAUSE/ENTER/PAIR
[
11
)
to return to pairing
mode and then repeat steps 2-4.
There are many di
rent Bluetooth en
abled devices
;
we cannot provide instruc
tions for all of them. Please refer to your
device manufacturer's instructions or
website to learn more about connecting
with Bluetooth.
Playing Connected Devices
Control playback from your Bluetooth device.
Set the volume level of the Bluetooth device to maxi
mum, then adjust the volume to a comfortable Level by
turning the VOLUME dial [2] of the boom box.
Basic playback (such as play/pause, next, previous)
may also be controlled by the boom box and its remote
control if your Bluetooth device supports it.
Page 23
www.emersonaudio.com
AUX Mode
To set the active source mode to AUX input:
1. Set the FUNCTION
switch [1] to DVD/BT/AUX/
H
D
-IN
.
2. Connect an audio player to the AUX IN jack [18] on
the front of the unit with a 3.5 mm AUX cable (i.e., a
3.5 mm male-to-male s
tereo patch cable).
When the cable is plugged into the AUX IN jack, the unit
will automatically detect it and switch to AUX mode.
Disconnect the cable from the AUX IN jack
to return to DVD or Bluetooth mode.
When an audio player is connected:
1.
Set the volume level of the connected audio player
to approximately 80%. Adjustment the volume to
a comfortable level by turning the VOLUME dial [2]
of the unit.
2.
Start and control playback with the audio player.
Page 24
USB/Card Mode
To set the active source mode to USB or CARD (SD):
1. Set t
he FUNCTION switch [1] to DVD/BT/AUX/
H
D
-IN
.
2. Press and hold STOP/USB/CARD [10] to change
from DVD to USB or CARD (SD). The LCD screen will
display "Detecting Device" then show a list of les
on your USB drive or SD card.
I
A USB drive or SD card with compatible
media les must be present. If the unit
cannot nd a USB drive or SD card, it will
return to DVD mode.
To change between USB, CARD, and DVD
modes, press and hold STOP/USBICARD.
Th
is unit will play digital media les from USB or SD
memory cards. Refer to the Specications section to
learn more about media le compatibility.
When a USB/SD card is loaded that contains les, the
unit will read it and then list all of the les and folders
on the LCD screen.
EDL-2560H
•
Use the direction buttons to browse the le/folder
list; press PLAY/PAUSE/ENTER/PAIR [11] to select
an item from the list.
•
If the item selected was a folder, the unit will
display the contents of the folder.
If the item selected was a music, video, or photo le,
the unit will start playback.
Playback controls for USB/Card mode are identical to
those in DVD mode. Please refer to the following sec
tions to learn more about the controls available to you
during digital media playback:
• DVD Mode> Playing Digital Music/Video Files
• DVD Mode > Playing Digital Photo Files
Radio (AM/FM) Mode
To set the active source mode to Radio, set the FUNC
TION switch [1] to RADIO.
To optimize reception when listening to
stations on the FM band, extend the tele
scopic antenna to i full length. To opti
mize reception for AM band stations, gently
move the unit around, or position the unit
in an open place.
Tuning to a Radio Station
1. Select the band.
•
Set the BAND switch [14] to AM to tune to AM
radio frequencies (kHz).
•
Set the BAND switch [14] to FM to tune to FM
radio frequencies (MHz).
2. Tune to a station by turning the TUNING dial [13].
I
The FM ST/PAIR indicator [17) will light red
when the tuner is locked onto an FM stereo
broadcast.
Page 25
www.emersonaudio.com
,D/DŽĚĞ
1. Set the FUNCTION switch [1] to TV/DVD/BT/AUX/HD-IN.
2. Press the MODE/MENU [4] to select HDMI input
function.
3. Connect an HDMI cable or HDMI device to the HD-
INPUT jack [35] on the back of the unit for audio and video
input.
4. Use the external device controls to play audio tracks.
Setup Menu
Access the Setup menu to adjust the player options.
•
Press and hold MODE/MENU [4] to access the Set
up menu.
•
The "Preference Page" options will not be
available unless the player is stopped com
pletely. Press STOP/USB/CARD (10] twice to
make sure that the player is stopped.
•
Use the direction keys to browse the menu screens
and to adjust the options {PREV/LEFT, NEXT/RIGHT,
FWD/UP, REV/DOWN).
•
Press PREV /LEFT [5] to go back to the previous Level
or screen.
•
Press
PL/PAUSE/ENTER/PAIR (11] to conrm a
highlighted selection.
You may also use the arrow keys and the
ENTER key on the remote control.
Page 26
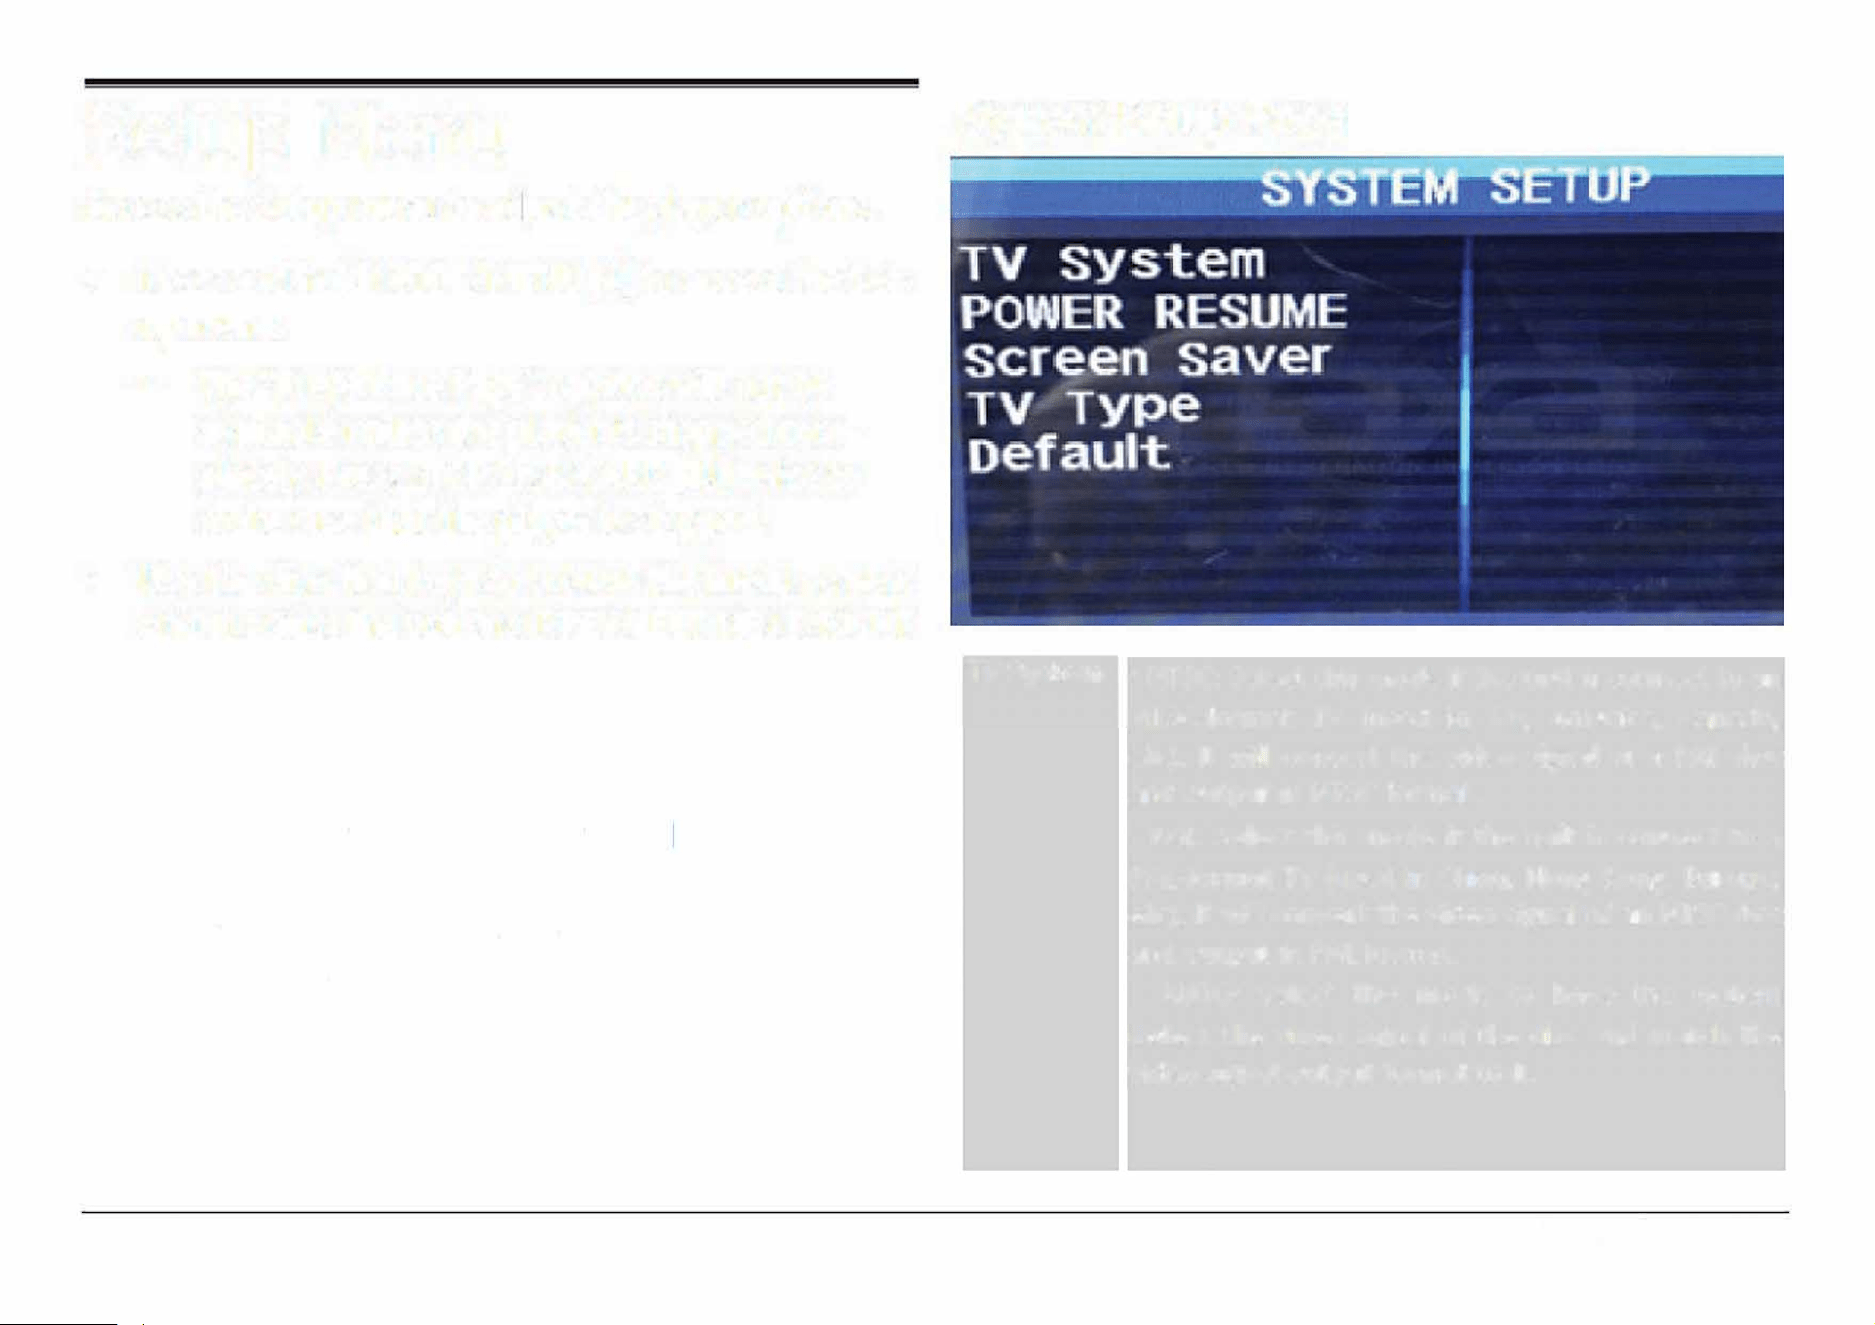
System Setup Page
System
• NTSC: Select this mode if the unit is connect to an
NTSC-format TV (used in Tai, America, Canada,
etc). It will convert the video signal of a PAL disc
and output in NTSC format.
• PAL: Select this mode if the unit is connect to a
PAL-format TV (used in China, Hong Kong, Europe,
etc). It will convert the video signal of an NTSC disc
and output in PAL format.
• AUTO: Select this mode to have the system
detect the video signal of the disc and match the
video signal output format to it.
EDL-2560H
Power
Resume
Screen
Saver
TV Type
Default
• On: During playback or in the paused/stopped
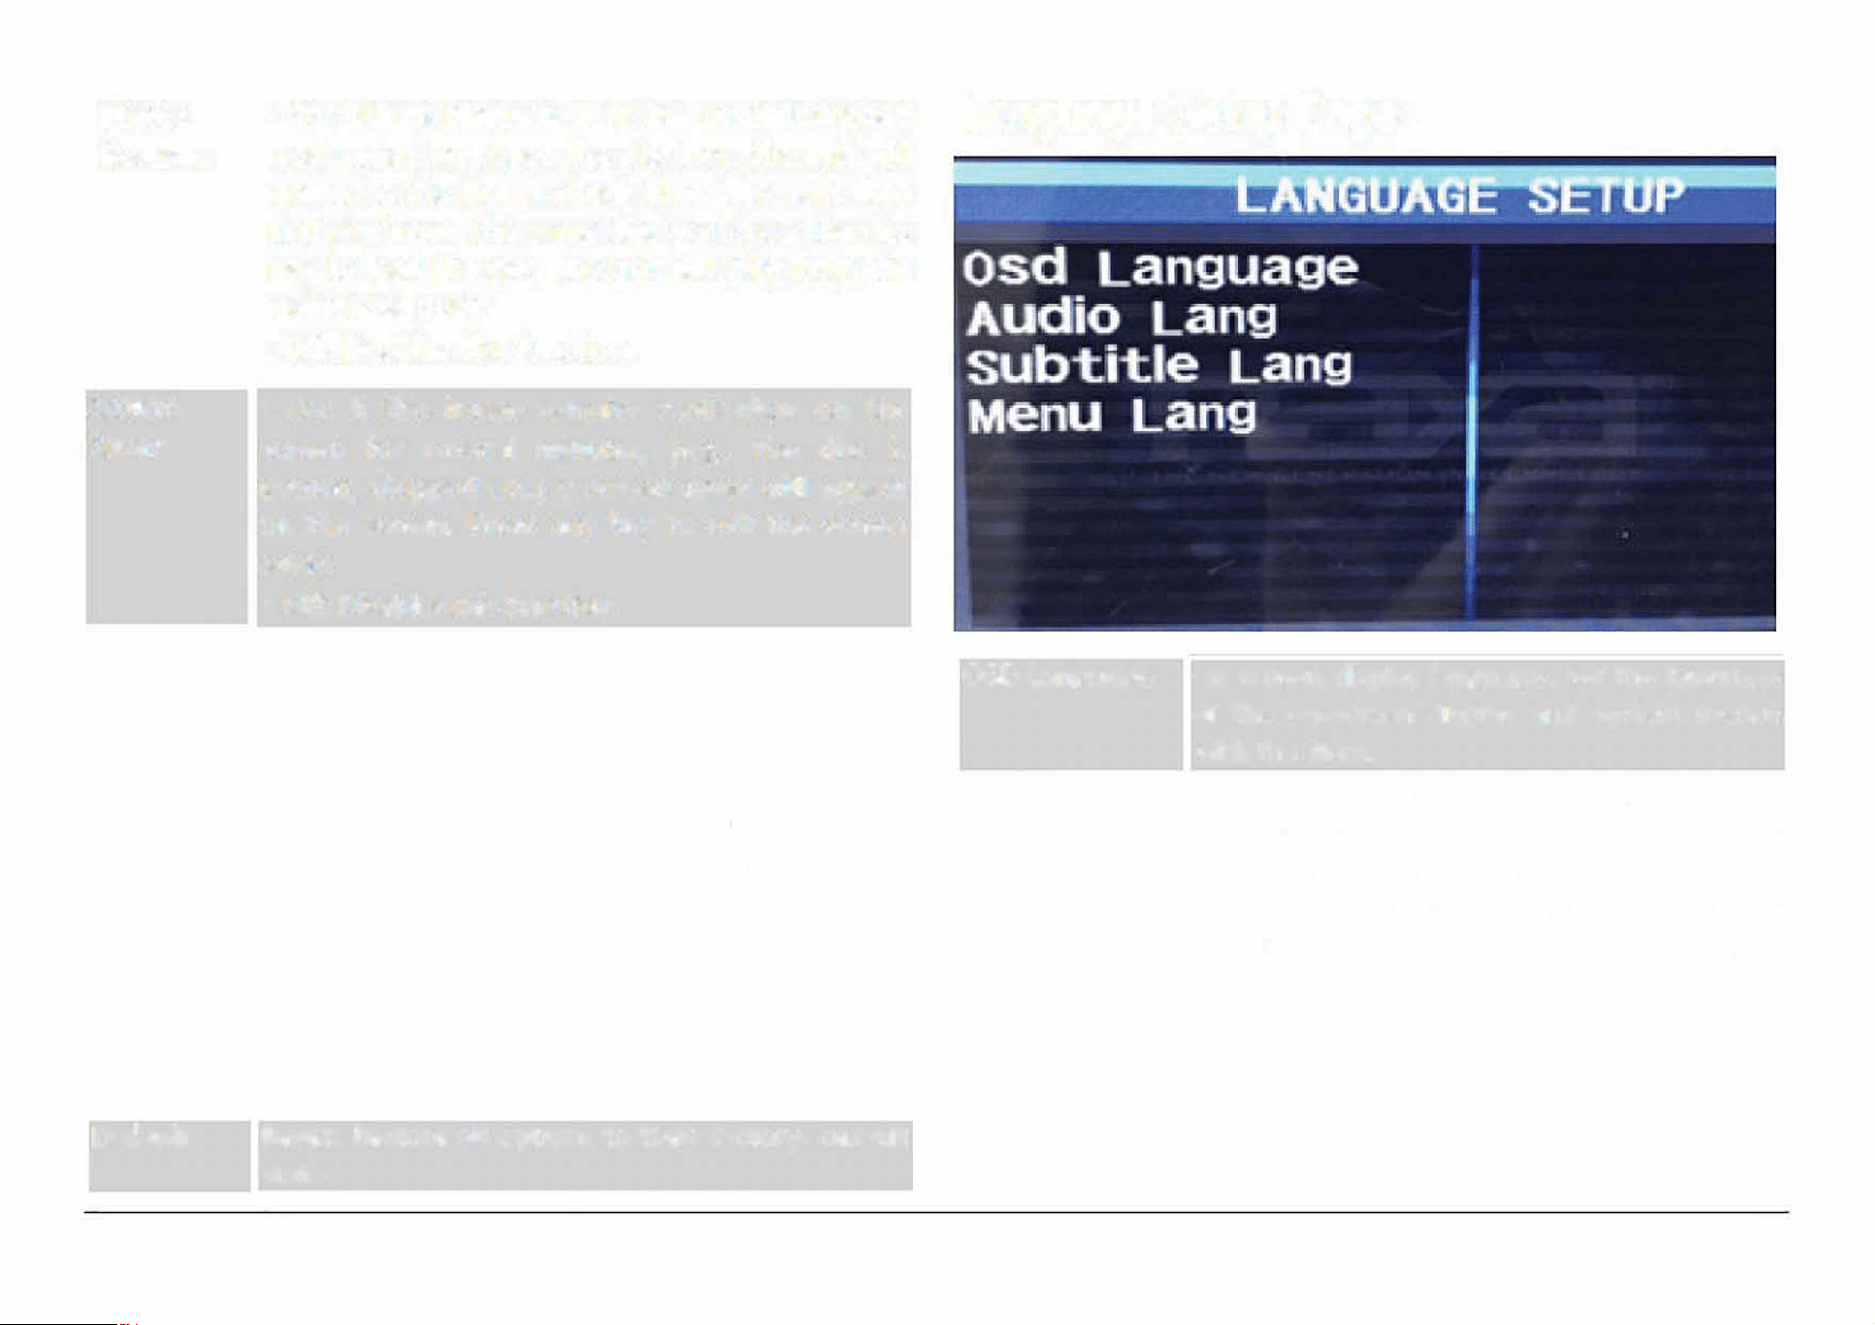
Language Setup Page
mode when you open the disc tray, the unit will
memorize the last playback time. The next time
that you insert the same disc and close the disc
tray to load the disc, the unit will play from the
memorized point.
• Off: Disables this function.
• On: If the image remains motionless on the
screen for several minutes, (e.g., the disc is
paused, stopped etc.) a screen saver will appear
on the screen. Press any key to exit the screen
saver.
• Off: Disables this function.
• Normal/PS: Pan and Scan. The wide-screen image
will be displayed on the screen in its naaspect ratio
with some part on the left and right cut off.
• Normal/LB: Letterbox. The wide-screen image will
be displayed in its native aspect ratio with black
bands on the upper and lower sections of the
screen.
• Wide: Widescreen (16:9). If the unit is connected
to a widescreen TV set, select this option. The
widescreen image will be displayed in full screen in
its native aspect ratio while the 4:3 image will be
stretched out horizontally to fit in the screen.
Reset: Restore all options to their factory- default
state.
OSD Language
Audio Lang
On screen display language. Set the language
of the on-screen display and system menus
with this item.
Select a preferred audio language. You can
change the audio language by pressing the
AUDIO key on the remote control.
If the selected language is not available
for the disc, the disc's default setting
will remain enabled.
Page 27
www.emersonaudio.com
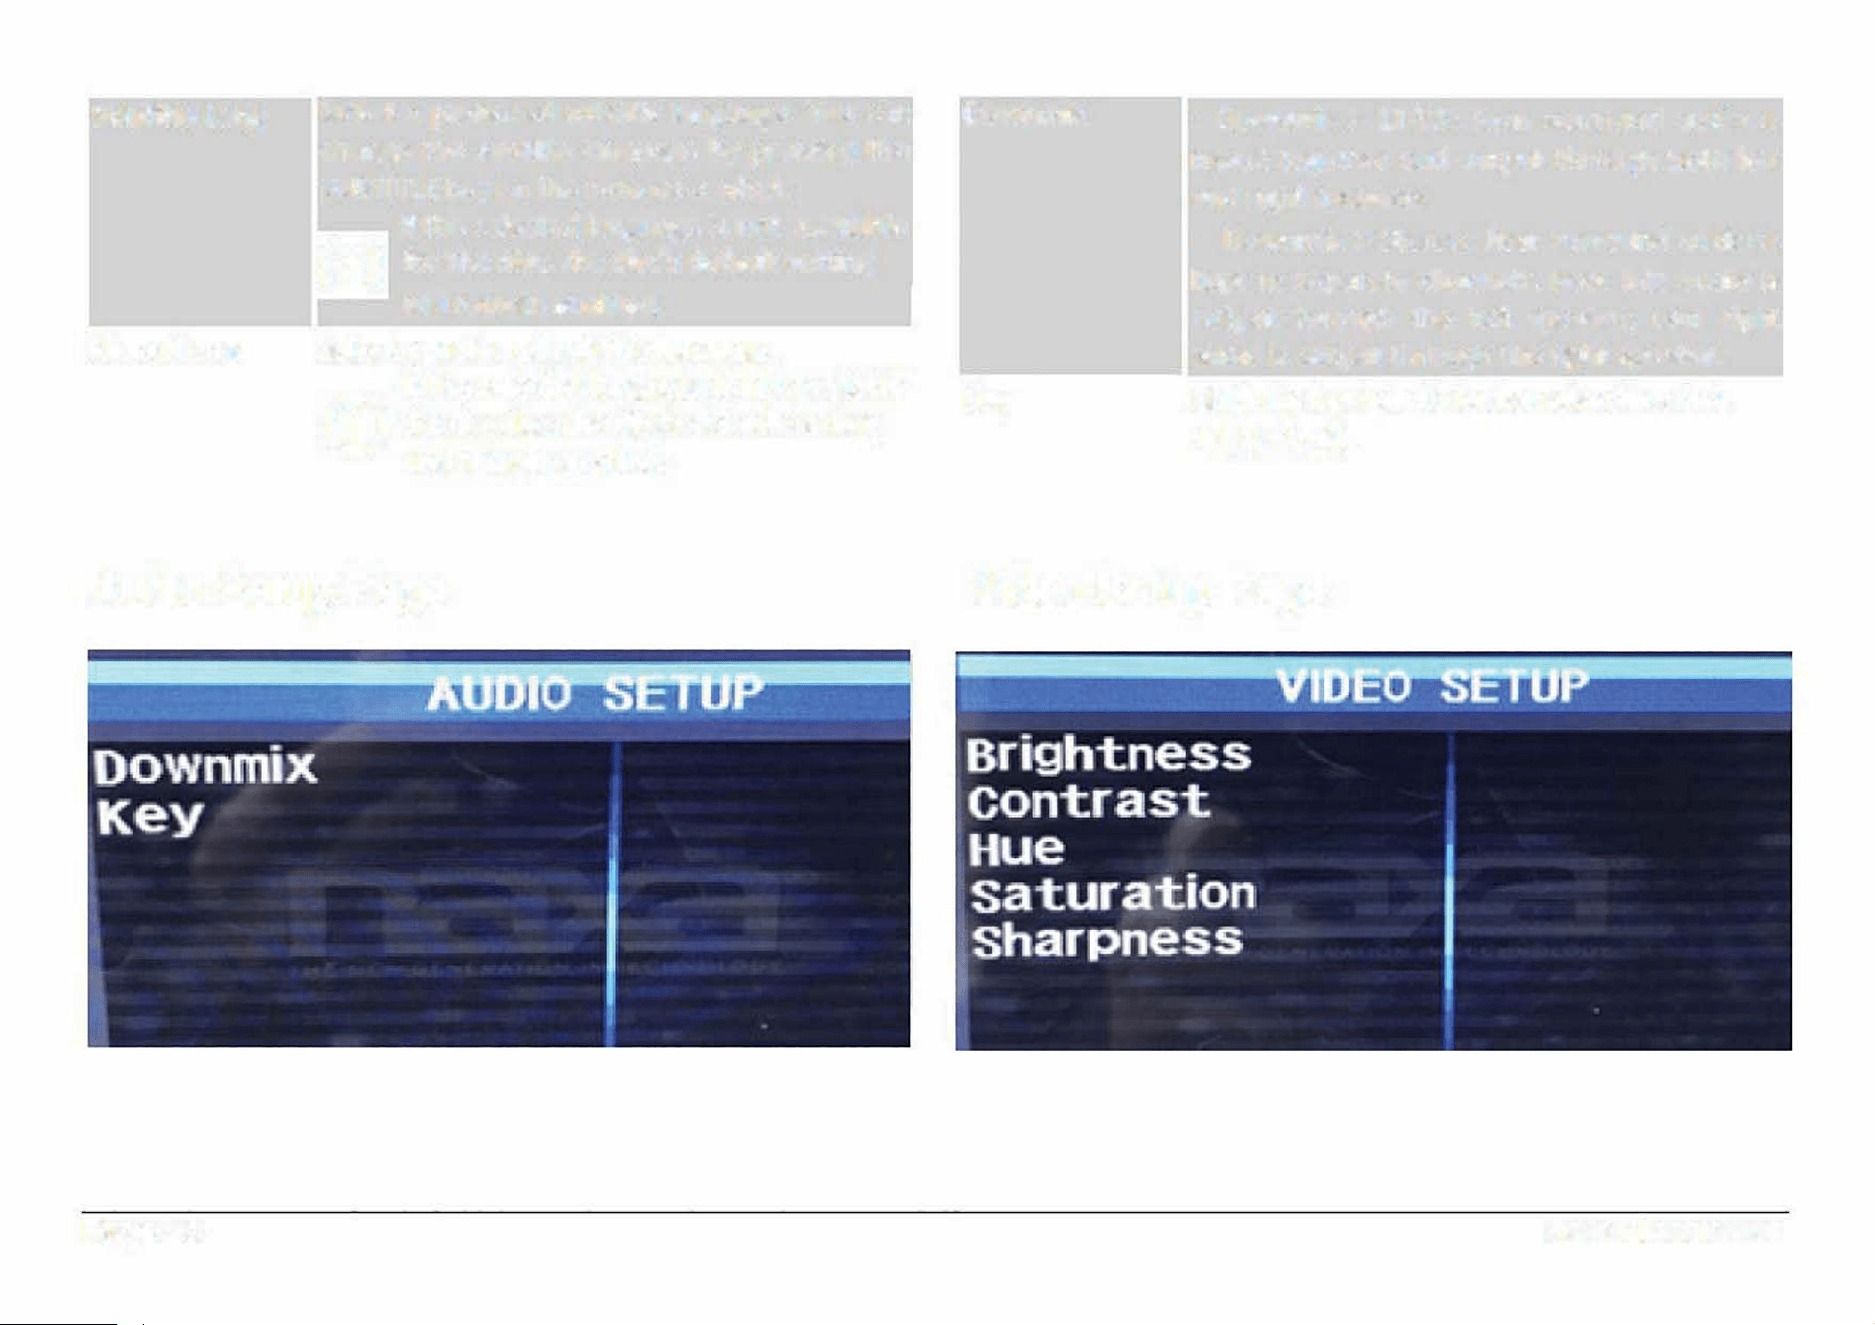
Subtitle Lang
Menu Lang
Select a preferred subtitle language. You can
change the subtitle language by pressing the
SUBTITLE key on the remote control.
If the selected language is not available
for the disc, the disc's default setting
will remain enabled.
Select a preferred subtitle language.
If the selected language is not available
for the disc, the disc's default setting
will remain enabled.
Audio Setup Page
Page 28
Downmix
Key
•
Downmix > LT/RT: Rear surround audio is
mixed together and output through both le1
and right speakers.
•
Downmix > Stereo: Rear surround audio is
kept in separate channels. Rear left audio is
output through the left speaker; rear right
audio is output through the right speaker.
Shi the key (pitch) for karaoke discs (+4,
+2, 0, -2, -4).
Video Setup Page
EDL-2560H
Panel Quality
Apply image correction options in varying
intensities. {Press PY/PAUSE/ENTER/PAIR
[11) or ENTER to apply the image correction.)
• Brightness
• Contrast
• Hue
• Saturation
• Sharpness
Page 29
www.emersonaudio.com
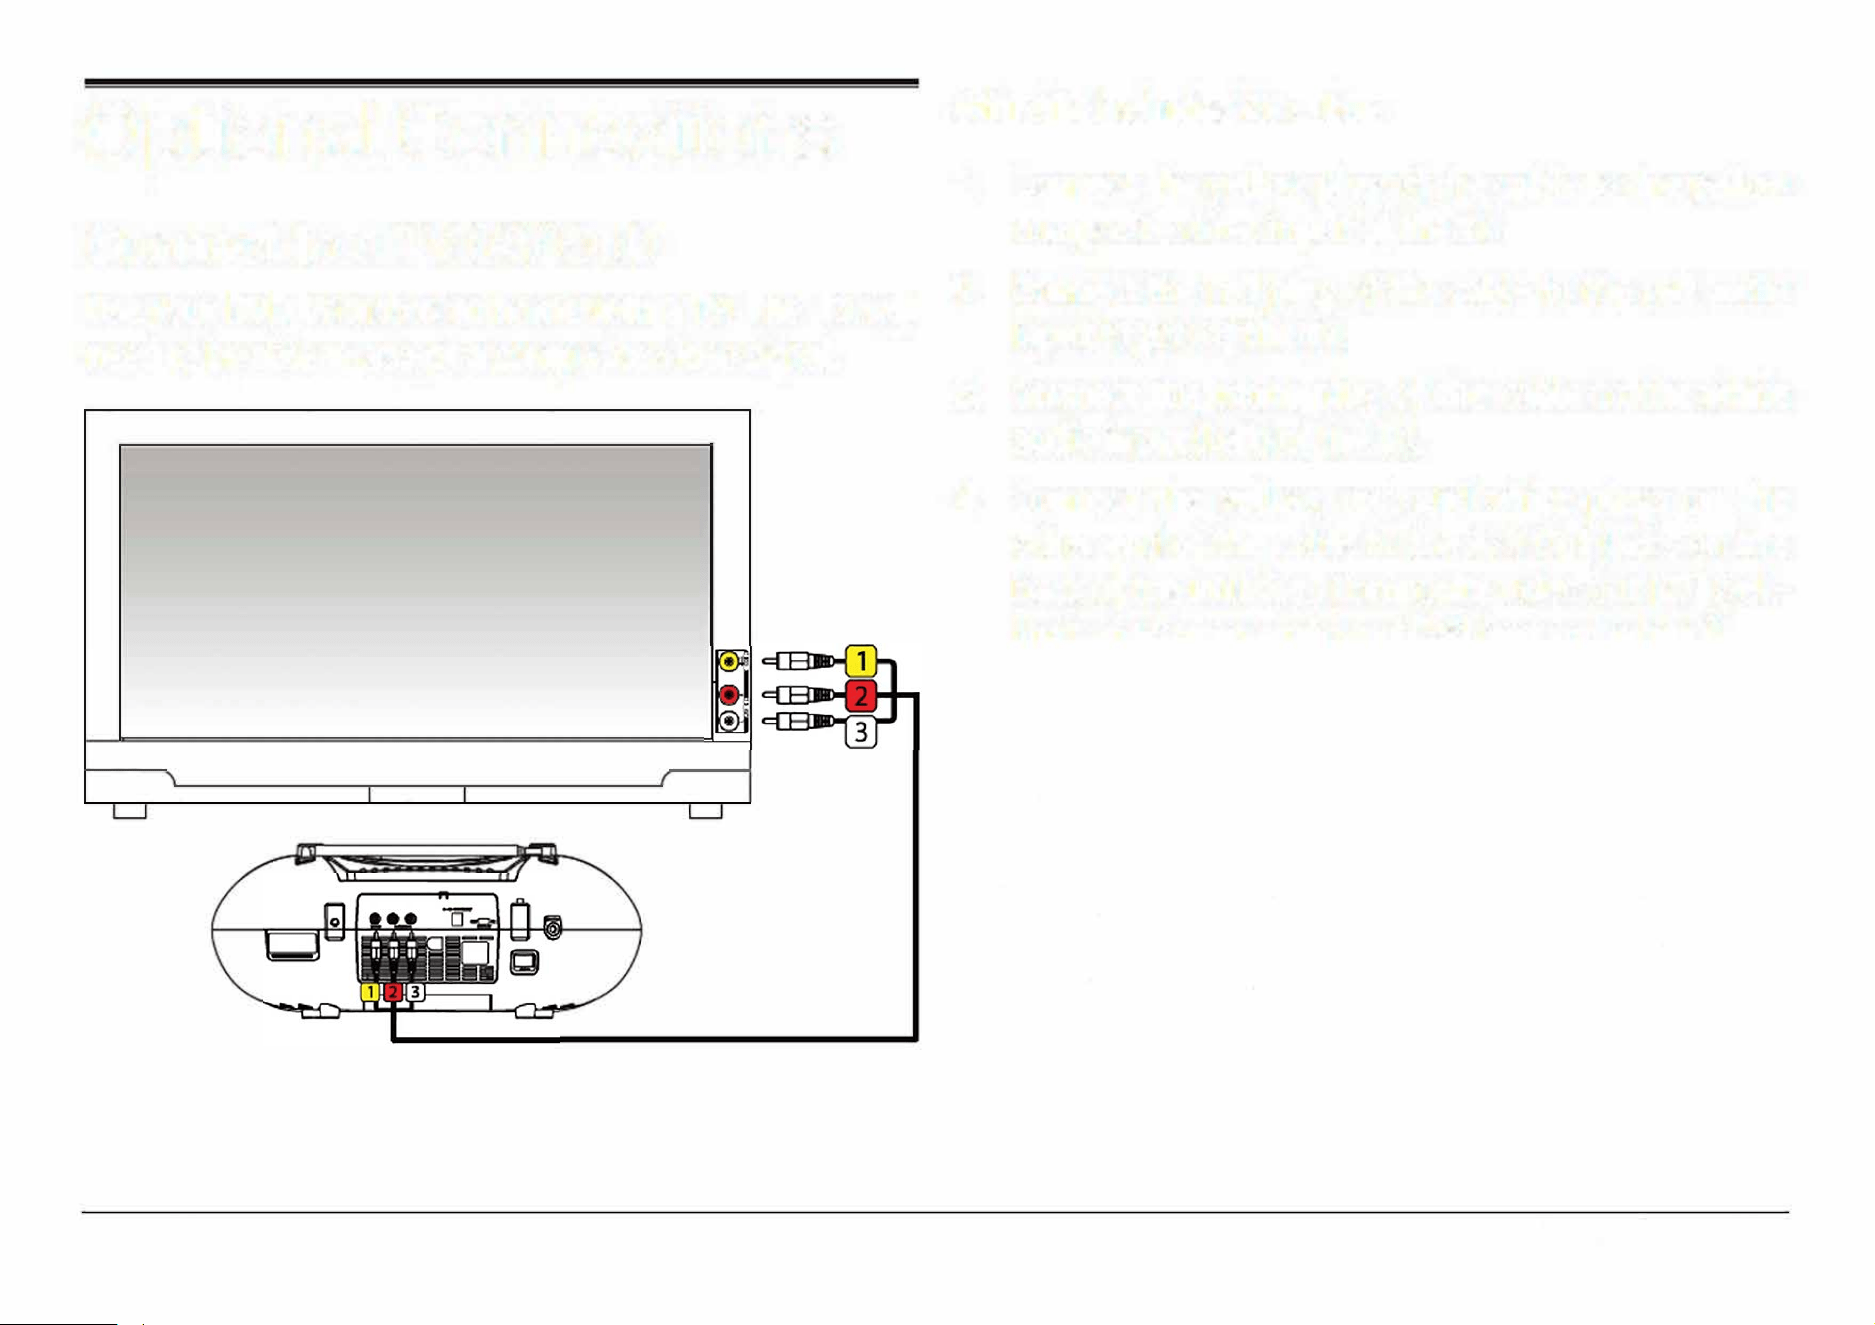
Optional Connections
Connect to a TV (AV Out)
With the included AV cable:
1. Connect the yellow plug of the cable to the yellow
composite video input of the TV.
Use your DVD boombox at home with a TV! The TV will
2. Connect the red plug of the cable to the red audio
need to be able to accept a composite video signal.
input (right) of the TV.
---- .
J
Page 30
3.
Connect the white plug of the cable to the white
audio input (Left) of the TV.
4. Connect the yellow, red, and white plugs on the
other end of the cable to the A/V Out jacks on the
back of the unit (i.e., Composite video out [27] (yel
low) and Stereo audio out [28] (red and white)).
5.
Turn the TV and the unit on.
6.
Set the TV to display the composite video source.
You will see the unit's output on the screen when
the source is set correctly.
Please refer to the owner's manual pro
vided with the TV to learn how to set the
display source.
EDL-2560H
About Optical Discs
Disc Types
This player supports playback of the following media
types and discs.
Type Content Type
DVD
Audio + Video
MP3 Audio
CD Audio
Video CD (VCD) Audio + Video
Picture CD (JPEG) Still Picture
This unit can play back optical discs or memory cards
that contain MP3 or JPEG les. Discs and media types
not listed above are not supported by this unit (e.g., PC
CD-ROM, CD-Extra, CD-G, CD-I, etc.)
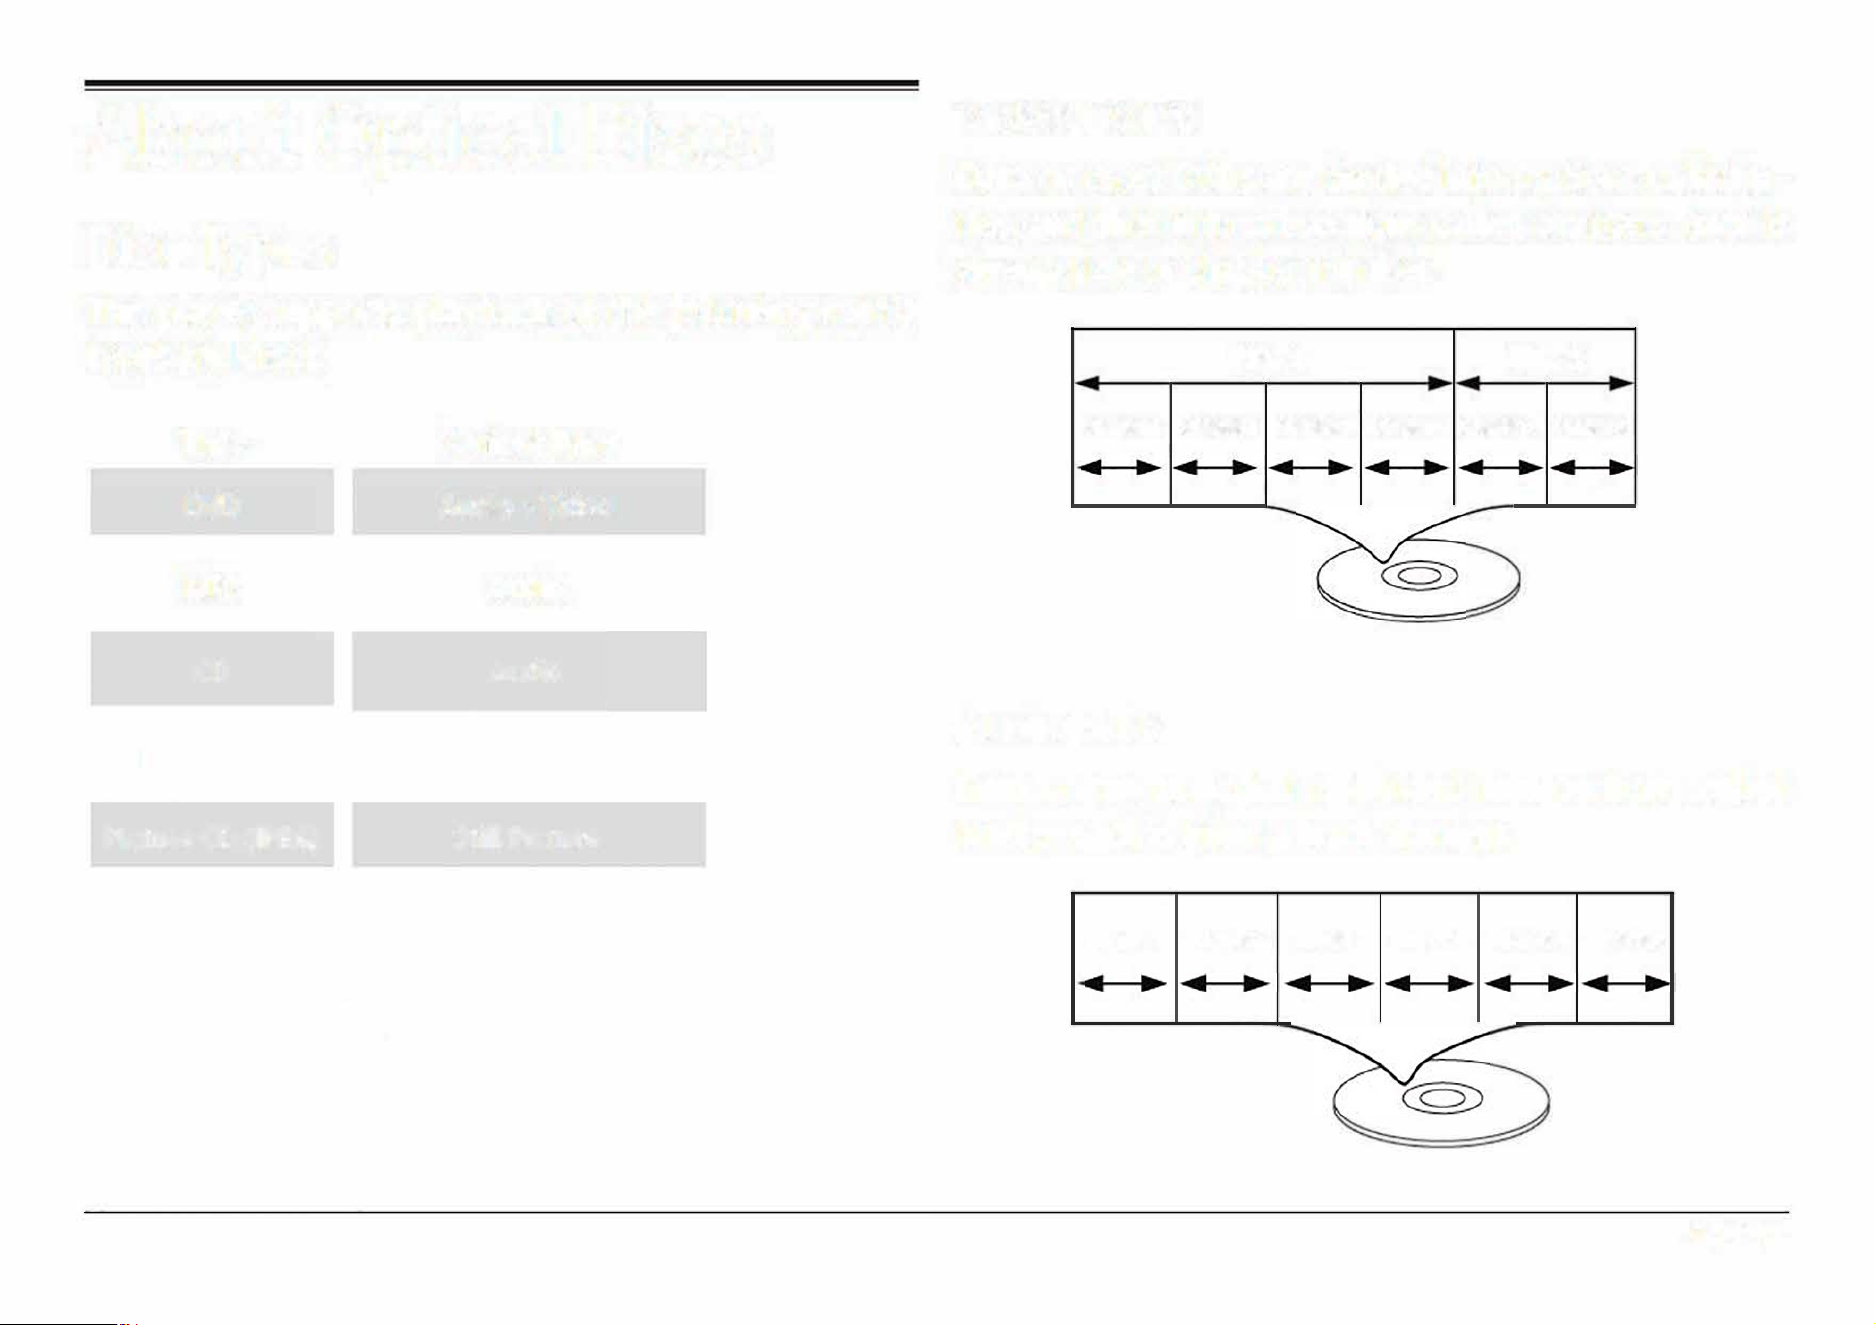
Video DVDs
Data on most DVDs are divided into sections called ti
tles, and then into subsections called chapters; each is
given a title or chapter number.
Title 1 Title 2
Chapter 1 Chapter 2 Chapter 3 Chapter 4 Chapter 5 Chapter 6
Audio CDs
Data on an audio CD is divided into sections called
tracks; each is given a track number.
Track 1 Track 2 Track 3 Track 4 Track 5 Track 6
Page 31
www.emersonaudio.com
Picture CDs (JPEG)
Data on a JPEG picture CD is usually not divided into
separate folders. The picture les should appear in the
root directory.
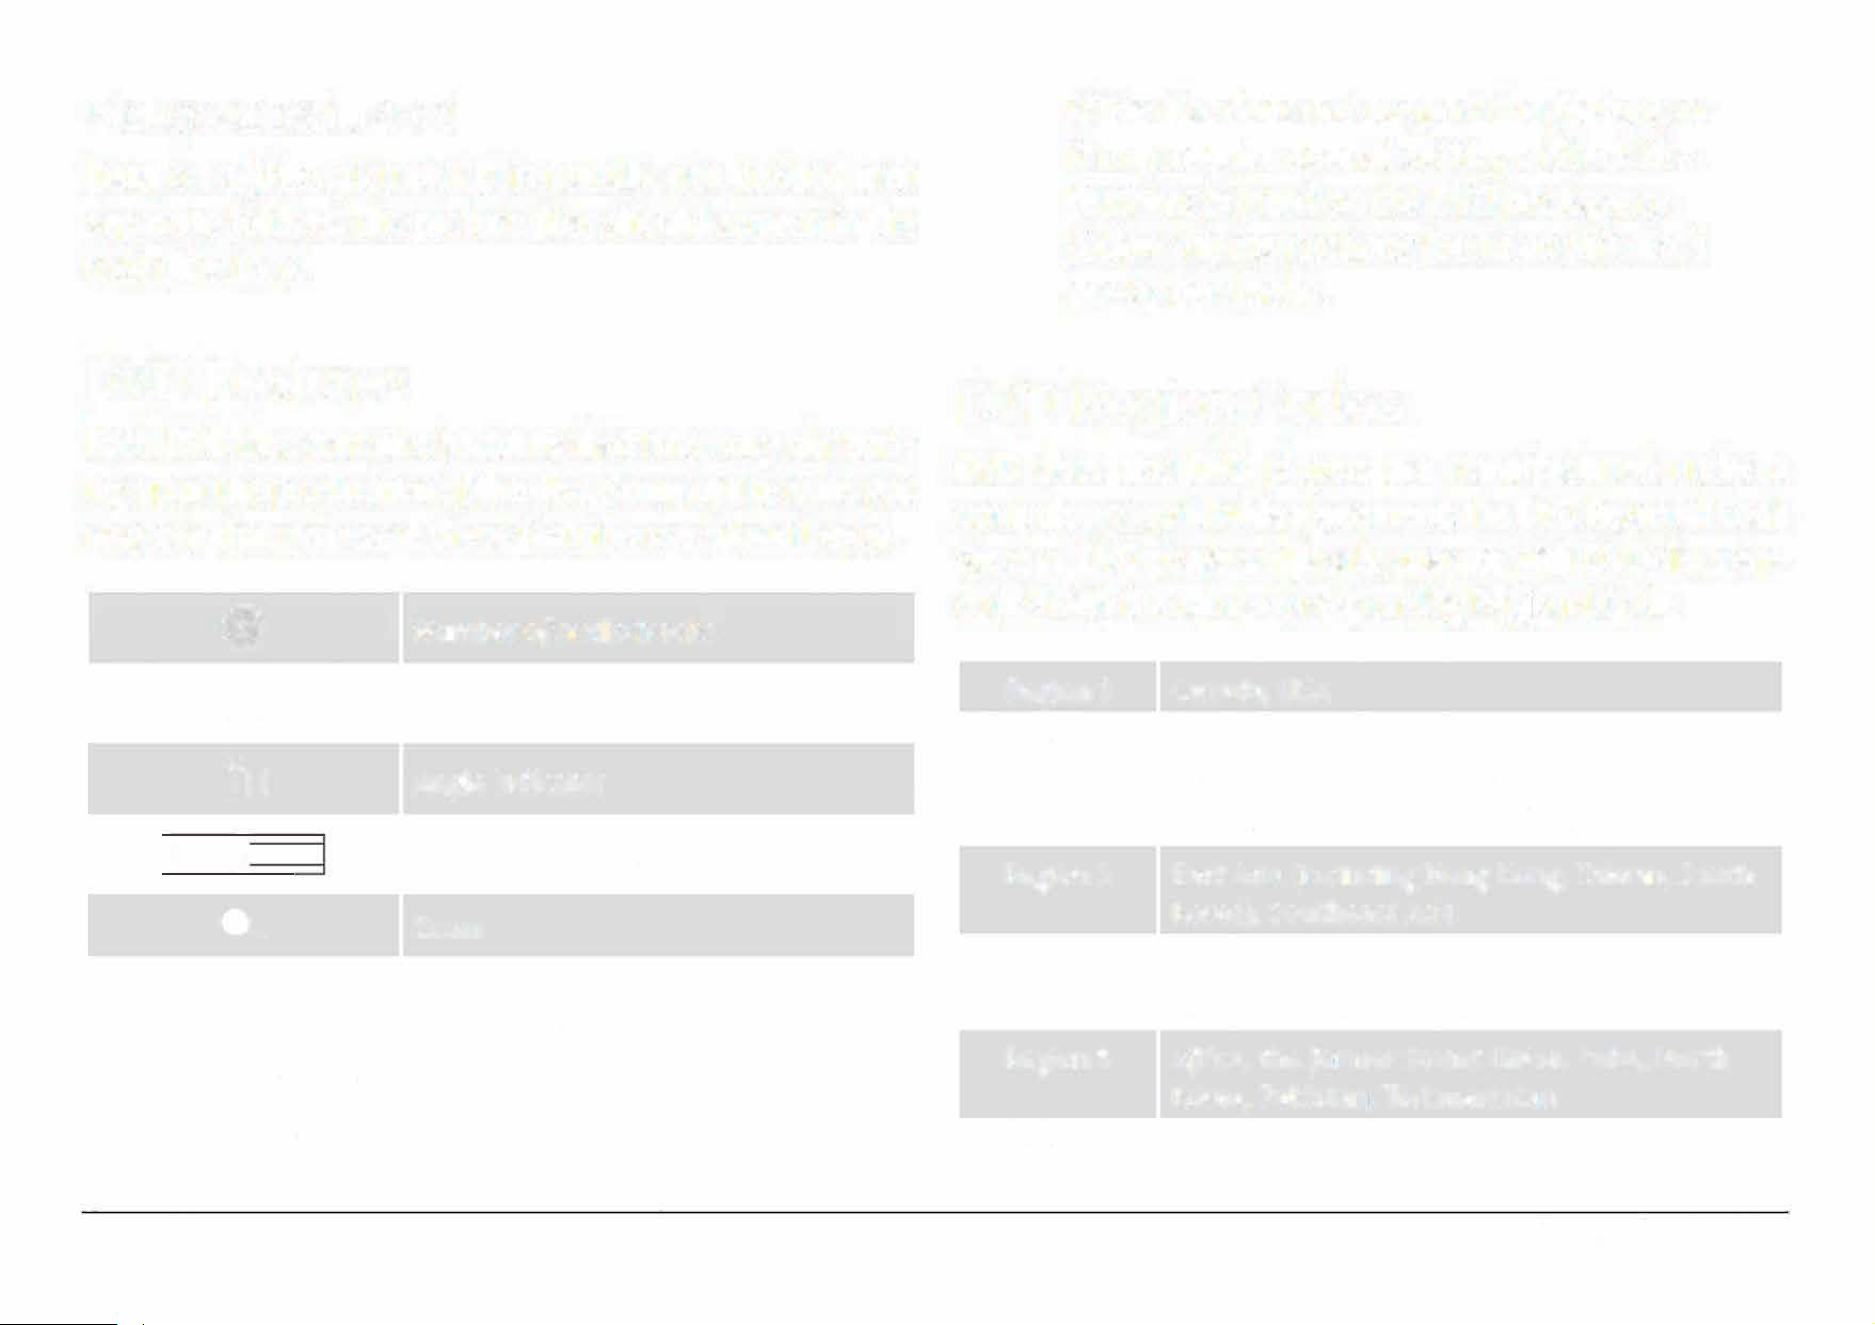
DVD Features
Each DVD disc contains features that may va depend
ing upon the production of the disc. Some of the icons you
may see that represent these features are shown below.
@
Number of audio tracks
m
�
Number of subtitles
Angle indicator
116:9 I
LB
Screen format (aspect ratio)
Page 32
�
Zoom
Some of the DVD features enabled by this
player depend on how the DVD was pro
duced. Some features m not be enabled
if the disc does not support the feature, or
it may require special settings. Check the
features printed on the DVD package or
follow the instructions found on the disc's
on-screen menu.
DVD Region Codes
DVD discs and DVD players are manufactured under a
compulsory worldwide agreement, the D
�
D Regio
�
al Code
System. DVD players will on operate with DVD discs en
coded with the same corresponding Regional Code.
Region 1
Region 2
Region 3
Region 4
Region 5
Region 6
Canada, USA
Europe (including Poland, Romania, Czech
Republic), Japan, Middle East (including Saudi
Arabia, Egypt, Iran, South Africa)
East Asia (including Hong Kong, Taiwan, South
Korea), Southeast Asia
Australia, Caribbean, Central America, South
America, Mexico, New Zealand
Africa, the former Soviet Union, India, North
Korea, Pakistan, Turkmenistan
China
EDL-2560H

Disc Care and Maintenance
Optical discs (DVDs, CDs) contain high-density com
pressed data and need proper handling.
Handling a Disc
•
Hold a DVD/CD by its edges. Avoid touching the re
corded side of the disc. To remove a DVD/CD from
its storage case, press down on the center reten
tion mechanism of the case and Li� the disc out.
•
Do not bend or press discs.
•
Do not subject discs to prolonged exposure to di
rect sunlight, high humidity, or high temperatures.
•
To
reduce the risk of scratches, always put discs
back in their case after use. Store discs vertically
in a cabinet.
•
Do not place stickers or labels on either side of a
disc.
Cleaning a Disc
Use a dry, soft cloth to wipe o any ngerprints and
dusts from the playing surface of the disc. Wipe in a
straight line radially from the center to the outside
edge of the disc. Small dust particles and light stains
will not affect playback quality.
Never use chemicals such as record sprs,
anti-static sprays, benzene, or thinners
to clean a disc. Doing so will damage the
surface of the disc permanently.
Page 33
www.emersonaudio.com
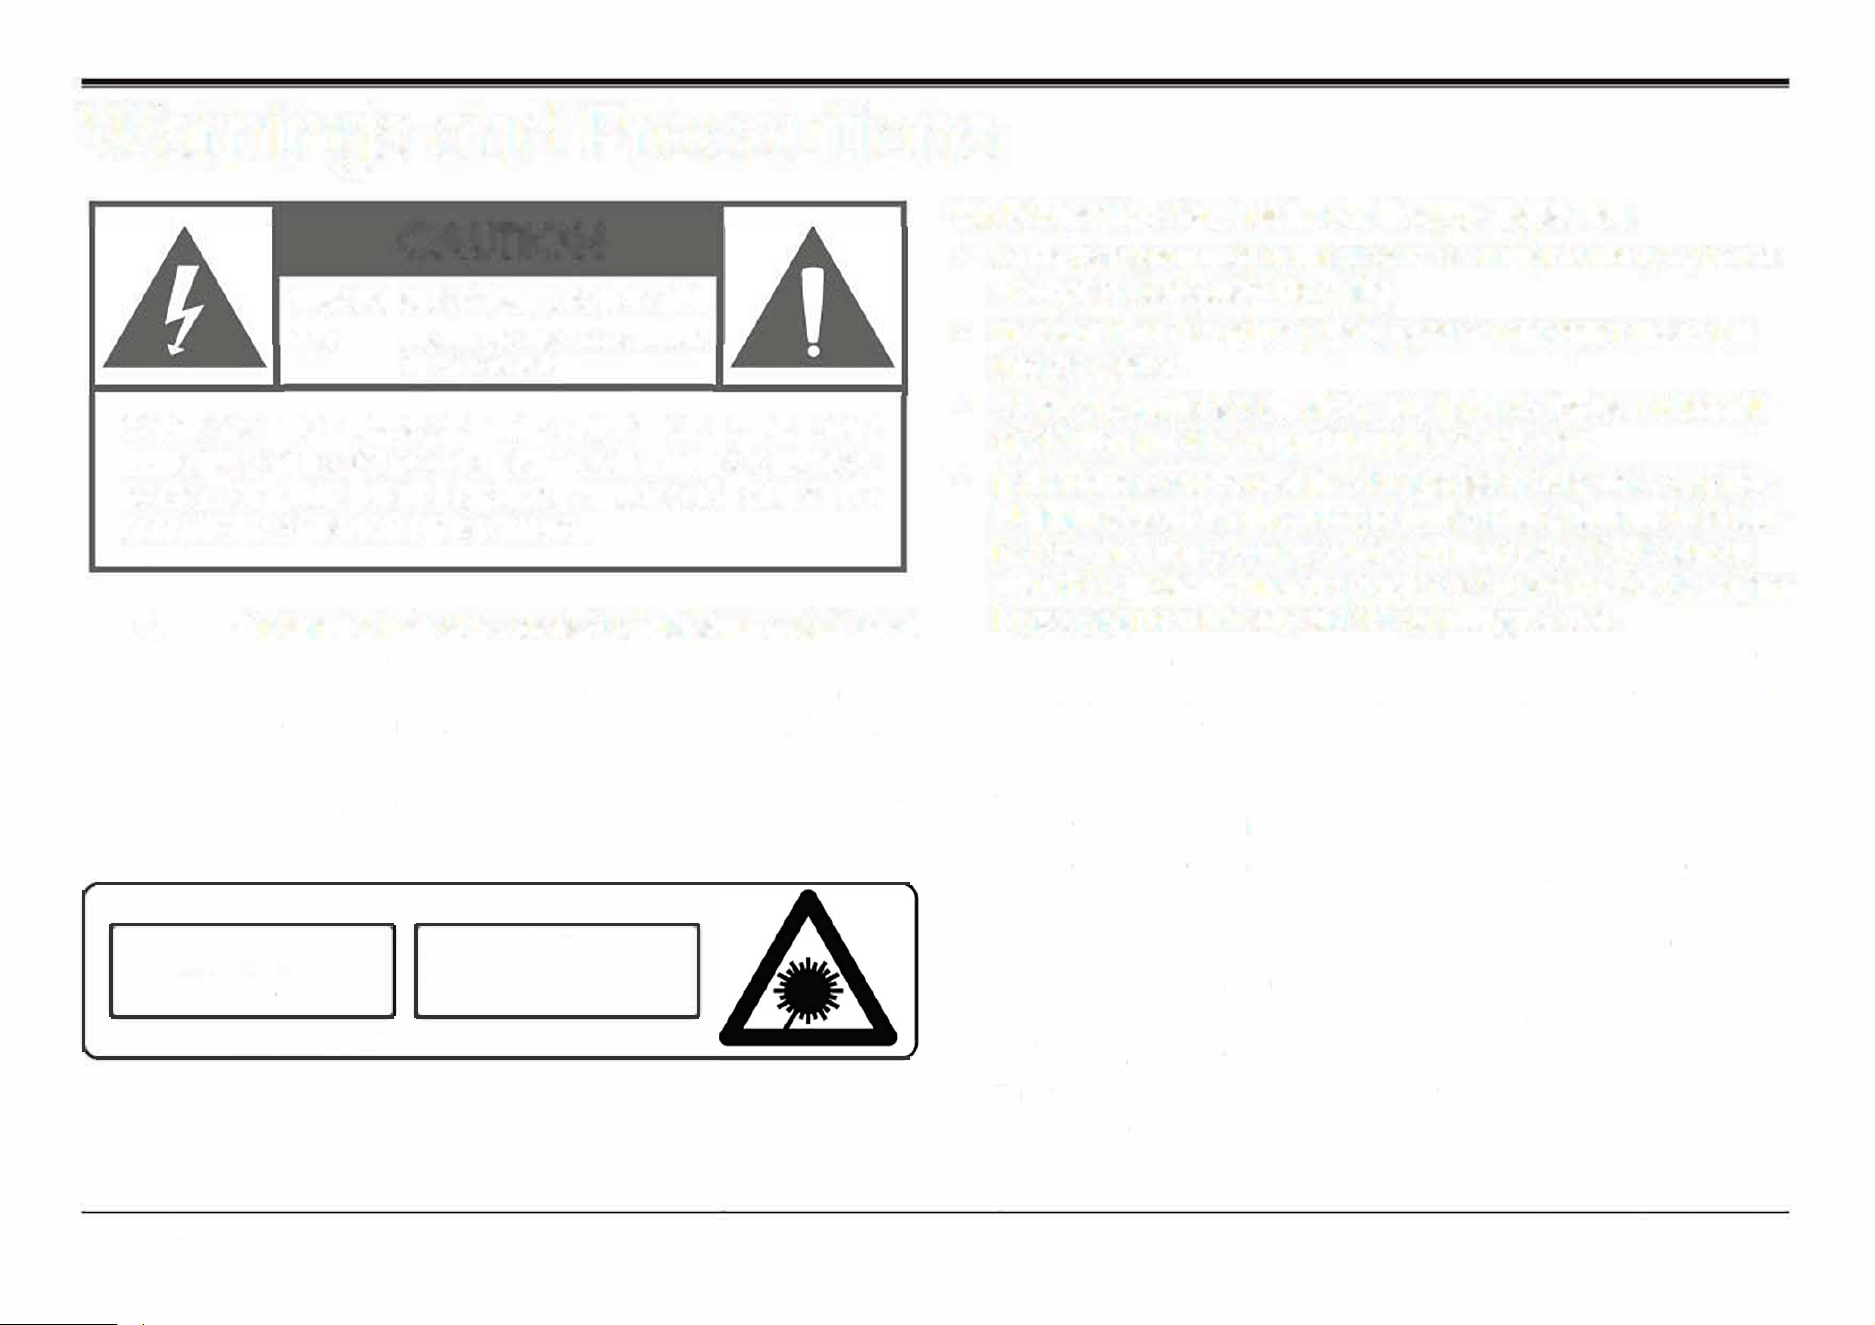
Warnings and Precautions
CAUTION
WARNING: SHOCK HRD. DO NOT OPEN.
AVIS:
RISQUE DE CHOC ELECTRIQUE.
NE PAS OUVRIR
CAUTION: TO REDUCE THE RISK OF FIRE AND
ELECTRIC SHOCK, DO NOT REMOVE THE COVER (OR
BACK) OF THE UNIT. REFER SERVICING ONLY TO
QUALIFIED SERVICE PERSONNEL.
A
A
The lightning flash with arrowhead symbol within an equilateral
triangle is intended to alerthe user to the presence of uninsulat
ed "dangerous voltage" within the product's enclosure that may
be
of signicant magnitude to constitute risk of electric shock
The excmation point within an equilateral triangle is intended
to alert the user to the presence of important operation and ser
vicing instructions in the literature accompanying the appliance.
CSS 1 SER PRODUCT
CSS 1 SER PRODUCT
APPAREIL SER DE CLASSE 1
PRODUCTO LASER DE CSE 1
CAUTION
INLE LASER 1N WHEN
OPEN AHO INTERLOCKS DEFEATED,
AV POSURE TO BEAM
This product contains a low power laser device.
Page 34
On Protection Against Laser Energy Exposure
•
As the laser beam used in this product is harmful to the eyes, do not
attempt to disassemble the casing.
•
Stop operation immediately if any Liquid or solid object should fall
into the cabinet.
•
Do not put anything in the safety slot. If you do, the Laser diode will
be ON when the disc compartment door is still open.
•
If the unit is not to be used for a Long period of time, make sure that
all power sources are disconnected from the unit. Remove all batter
ies from the battery compartment, and unplug the AC-DC adapter
from the wall outlet. Make it a practice to remove the AC-DC adapter
by grasping the main body and not by pulling the cord.
•
This unit employs a Laser. The use of controls or adjustment or per
formance of procedures other than those specied here may result in
exposure to hazardous radiation.
CAUTION
•
Do not block the ventilation openings or holes.
•
Do not place any naked flames (such as Lighted candles) on the ap
paratus.
•
When discarding batteries, follow au Local rules and Laws governing the
disposal of batteries. Consider the environmental impact of your actions!
•
Invisible Laser radiation when open and interlock has failed or been
defeated. Avoid direct exposure to beam.
•
To prevent pre or shock hazard, do not expose this appliance to rain
or moisture.
EDL-2560H
Important Safety Information
1.
Read Instructions: All the safety and operating instructions should be
read before the product is operated.
2.
Retain Instructions: The safety and operating instructionshould be
retained for future reference.
3.
Heed Warnings: All warnings on the product and in the operating in
structions should be adhered to.
4. Follow Instructions: All operating and usage instructions should be
followed.
5. Cleaning: Unplug this product from the wall outlet before cleaning.
Do not use liquid cleaners or aerosol cleaners. Use a damp cloth for
cleaning.
6. Attachments: Use only attachments recommended by the manufac
turer. Use of other attachments may be hazardous.
7. Water and Moisture: Do not use this product near water (e.g., near a
bathtub, washbowl, kitchen sink, laundry tub, in wet basements, or
near a swimming pool and the like).
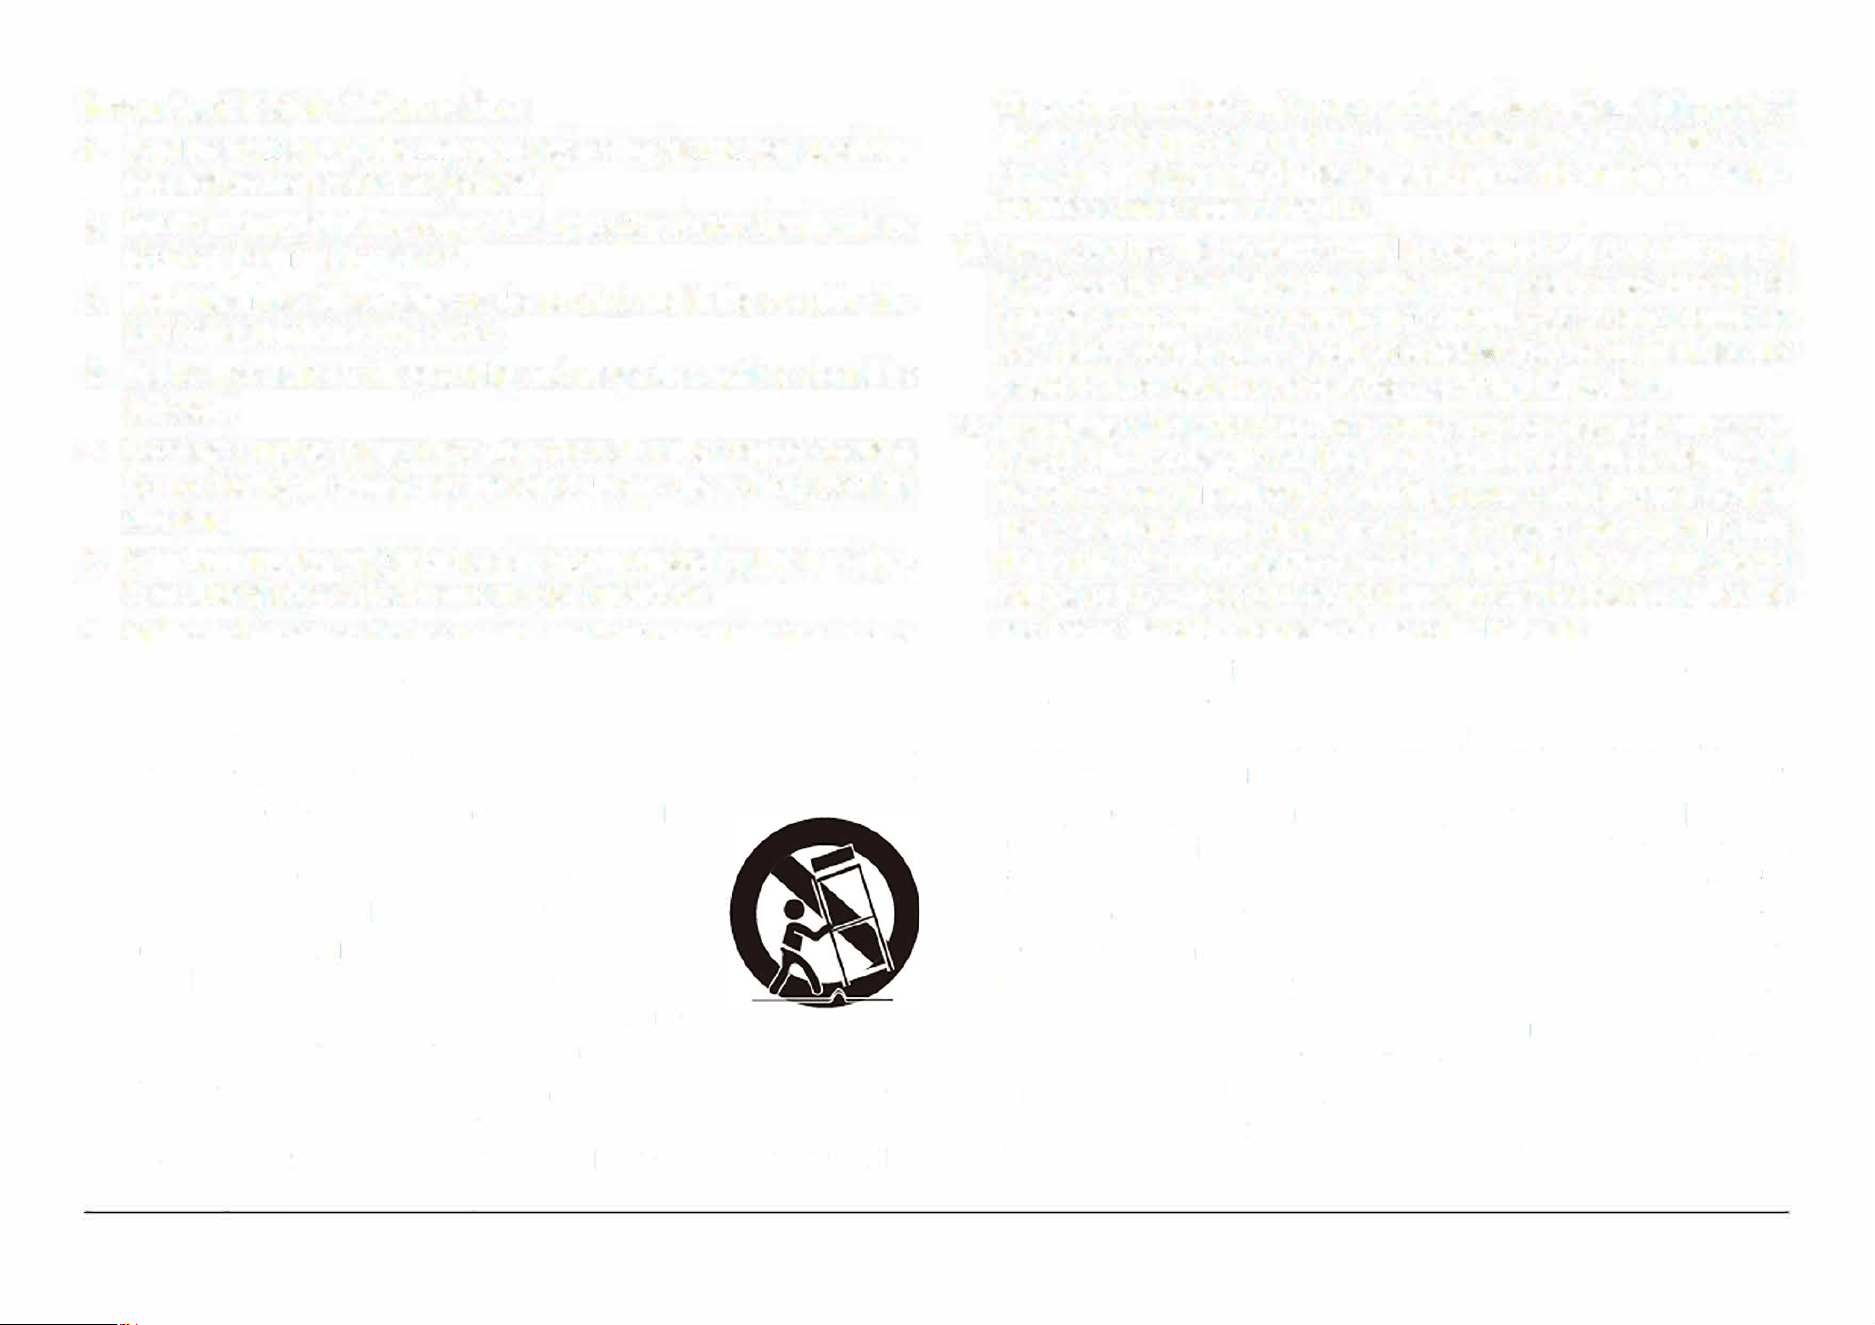
8. Accessories: Do not place this product on an unstable cart, stand,
tripod, bracket, or table. Use only with carts, stands, tripods, brack
ets, or tables recommended by the manufacturer or
sold with the product. Any mounting of the product
should follow the manufacturer's instructions and
should use a mounting accessory recommended
by the manufacturer. A product and cart com
bination should be moved with care. Quick stops,
excessive force, and uneven surfaces may cause the
product and cart combination to overturn.
9. Ventilation: Slots and openings in the cabinet are provided for ven
tilation to ensure reliable operation of the product and to protect it
from overheating. These openings should never be blocked by placing
the product on a bed, sofa, rug, or other similar surface. This product
should not be placed in a built-in installation such as a bookcase or
rack unless proper ventilation is provided or the manufacturer in
structions have been adhered to.
10. Power Sources: This product should be operated only from the type of
power source indicated on the rating label. If you are not sure of the
type of power supp to your home, consult your product dealer or
local power company. For products intended to operate from battery
power or other sources, refer to the operating instructions.
11. Grounding or Polarization: This product may be equipped with a po
larized alternating-current line plug that has one blade wider than
the other. This plug will only t into the power outlet in one direction.
This is a safety feature. If you are unable to insert the plug fully into
the outlet, try reversing the direction of the plug. If the plug should
still fail to t, contact an electrician to replace the obsolete outlet. Do
not defeat the safety purpose of the polarized plug.
12. Power-Cord Protection: Power supply cords should be routed so that
they are not likely to be walked on or pinched by items placed upon
or against them, paying particular attention to cords at plugs, conve
nience receptacles, and at the point which they exit from the product.
13. Protective Attachment Plug: The product may be equipped with an at
tachment plug with overload protection. This is a safety feature. See
the operating instructions for replacement or directions to reset the
protective device. If replacement of the plug is required, be sure the
seice technician has used a replacement plug that has the same over
load protection as the original plug as specied by the manufacturer.
14. Outdoor Antenna Grounding: If an outside antenna is connected to
the product, be sure the antenna system is grounded so as to provide
some protection against voltage surges and built-up static charges.
Article 810 of the NationalElectrical Code, ANS/NFPA70 provides in
formation withregard to proper grounding o�he mast and support-
Page 35
www.emersonaudio.com
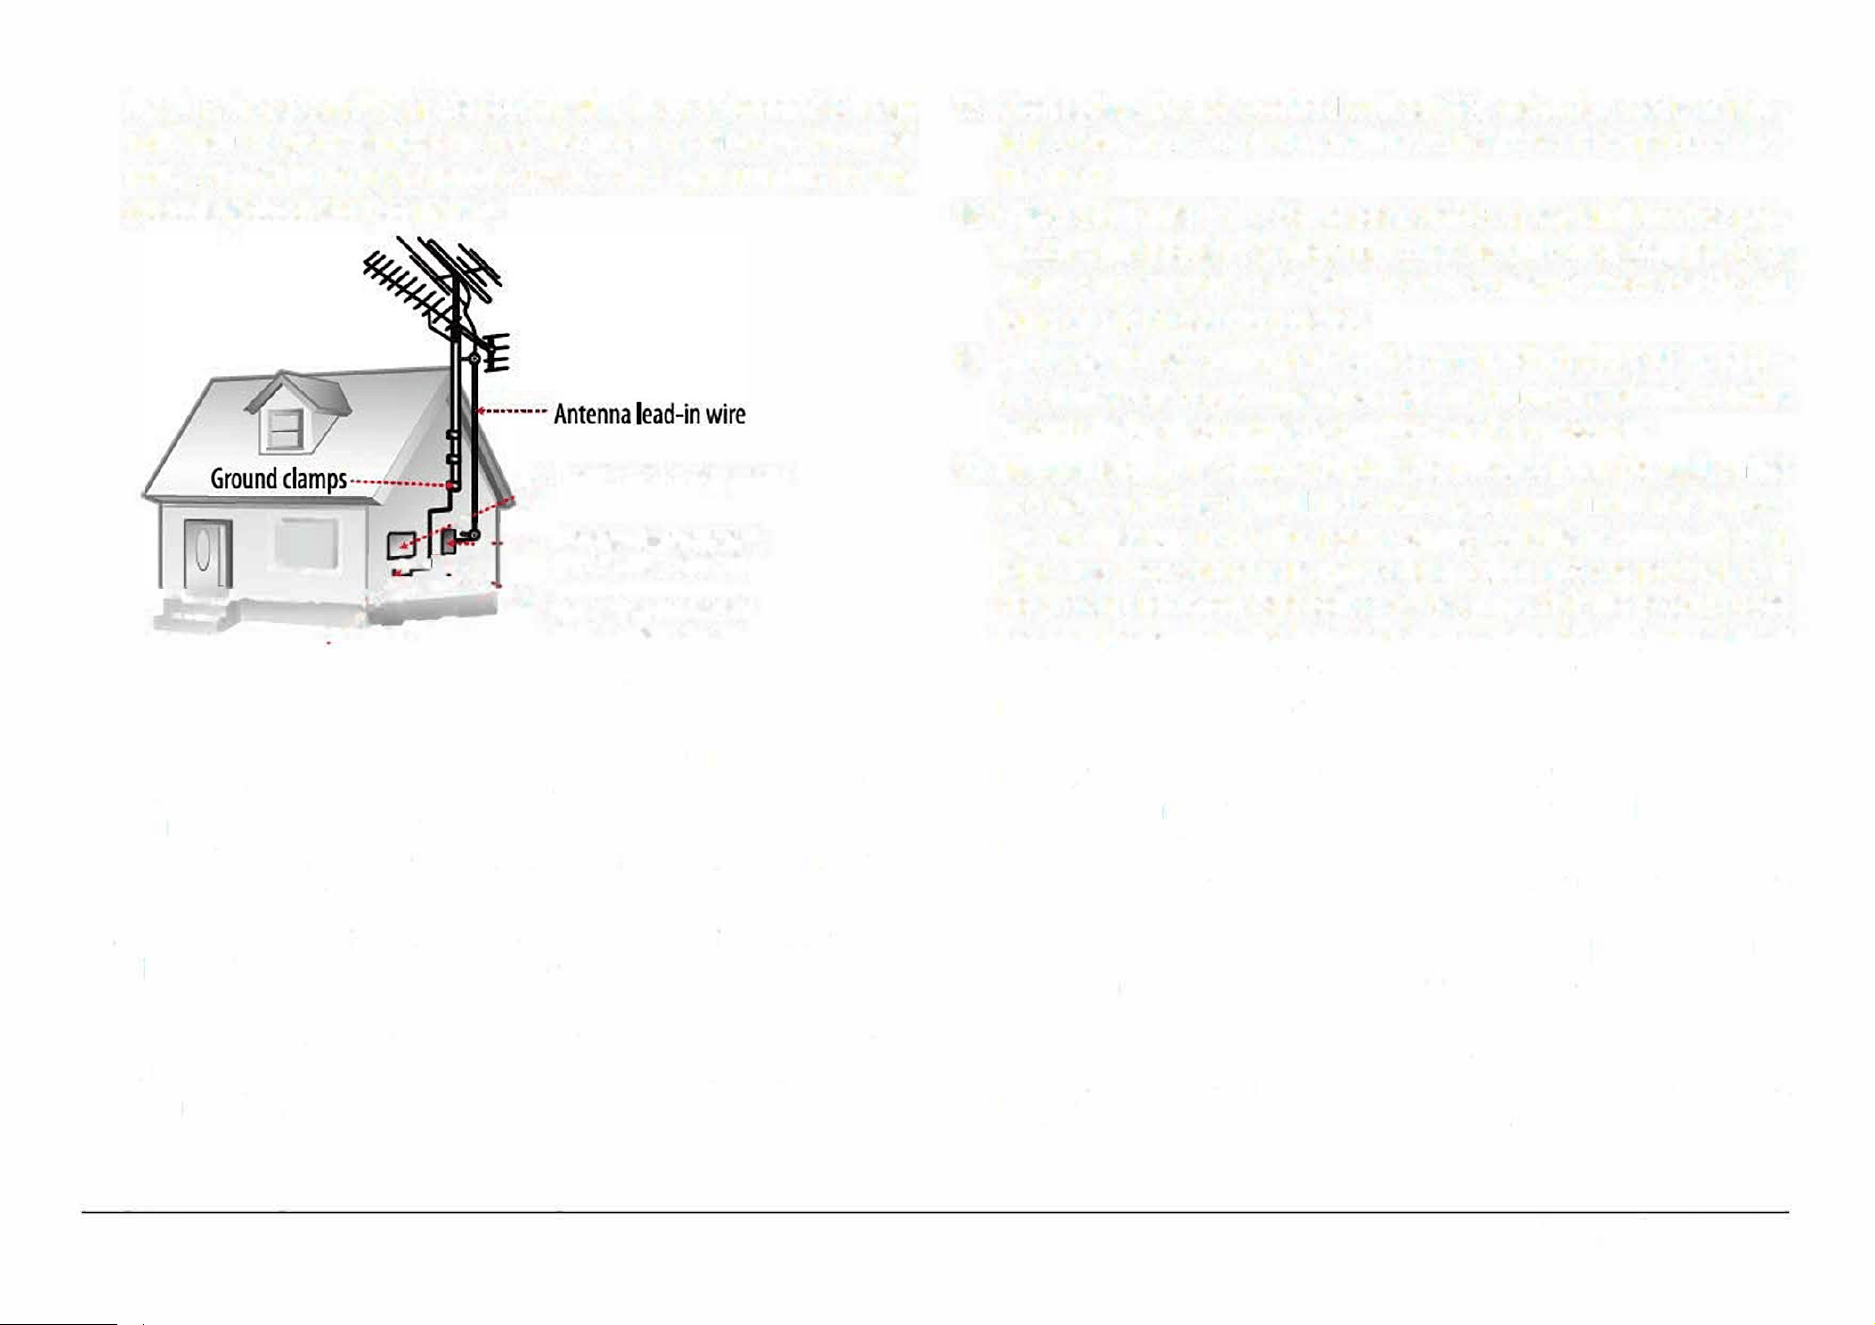
ing structure,grounding of the lead-in wire to an antenna-discharge
unit, size of groundingconductors, location of antenna-discharge
unit, connection to groundingelectrodes, and requirements for the
grounding electrode (see gure).
.
..
•
· Electric service equipment
□
•
•
• .. . ..... Antenna dischae unit
-
,
.
,
.
.
.
.
.
(NEC Section 8120)
���
=�
.-i: :-�•::
·
1
;
::_
•
•
.
J:
.
:,, • .._
Grou
ndin
9
co
n
ductors
C
••.
.
(NEC Section 810-21)
Ground clamps
•
•
•
•
•
•
•
•
•
•
••
•
•
•
•
•
Power service grounding electrode
system (NEC Art 250, Part H)
15. Lightning: For added protection for this product, unplug it from the
walloutlet and disconnect the antenna or cable system during a
lightning stormor when it is le� unattended and unused for long pe
riods of time. This willprevent damage to the product due to lightning
or power-line surges.
16. Power Lines: An outside antenna system should not be located in the
vicinityof overhead power lines or other electric light or power cir
cuits, orwhere it can fall into such power lines or circuits. When in
stalling an outsideantenna system, extreme care should be taken to
keep from touching such power lines or circuits, as contact with them
might be fatal
Page 36
17. Overloading: Do not overload wall outlets, extension cords, or inte
gral conveniencereceptacles as this can result in a risk of re or elec
tric shock.
18. Oect and Liquid Entry: Never push objects of any kind into this pro
ductthrough openings as they may touch dangerous voltage points or
shout-outparts that could result in a re or electric shock. Never spill
liquid of any kindon the product.
19. Servicing: Do not attempt to service this product yourself as open
ing orremoving covers may expose you to dangerous voltage or other
hazards.Refer all servicing to qualied service personnel.
20. Damage Requiring Service: Unplug this product from the wall outlet
and referservicing to qualied service personnel under the follow
ing conditions:a) when the power-supply or plug is damaged; b) if
liquid has been spilledor if objects have fallen into the product; c) if
the product has been exposedto rain or water; d) if the product does
not operate normally by following theoperating instructions. Adjust
only those controls that are covered by theoperating instructions as
improper adjustment of other controls may resultin damage and will
o�en require extensive work by a qualied technician to restore the
product to its normal operation; e) if the product has been dropped or
damaged in any way; f) when the product exhibits a distinct change in
performance-this indicates a need for service.
21. Replacement Parts: When replacement parts are required, be sure
thatyour service technician has used replacement parts specied
by the manufactureror have the same characteristics as the original
part. Unauthorizedsubstitutions m result in re, electric shock, or
other hazards.
22. Safety Check: Upon completion of any service or repairs to this
product,ask the service technician to perform safety checks to ensure
that the productis in proper operating condition.
EDL-2560H

23. Wall or Ceiling Mounting: The product should be mounted to a wall or
ceiling only as recommended by the manufacturer.
24. Heat: The product should be situated aw from heat sources such as
radiators.heat registers, stoves, or other products (including ampli
ers) thatproduce heat.
FCC NOTICE
This device complies with Part 15 of the FCC Rules. Operation is subject
to the following two conditions: (1) this device may not cause harmful
interference, and (2) this device must accept any interference received,
including interference that may cause undesired operation.
Note: This equipment has been tested and found to comply with the lim
its for a Class B digital device, pursuant to Part 15 of the FCC Rules. These
limits are designed to provide reasonable protection against harmful in
terference in a residential installation. This equipment generates, uses
and can radiate radio frequency ener and, if not installed and used in
accordance with the instructions, may cause harmful interference to ra
dio communications. However, there is no guarantee that interference
will not occur in a particular installation. If this equipment does cause
harmful interference to radio or television reception, which can be de
termined by turning the equipment off and on, the user is encouraged to
try to correct the interference by one or more of the following measures:
•
Reorient or relocate the receiving antenna.
•
Increase the separation between the equipment and receiver.
•
Connect the equipment into an outlet on a circuit different from that
to which the receiver is connected.
•
Consult the dealer or an experienced radio technician for help.
CAUTION ON MODIFICATIONS
Any changes or modications not expressly approved by the grantee of
this device may void the authority granted by the FCC to operate the
equipment.
WARNING:
This product contains lead, a chemical known to the State of California to
cause cancer and birth defects or other reproductive harm. Wh hands
aer handling.
Page 37
www.emersonaudio.com
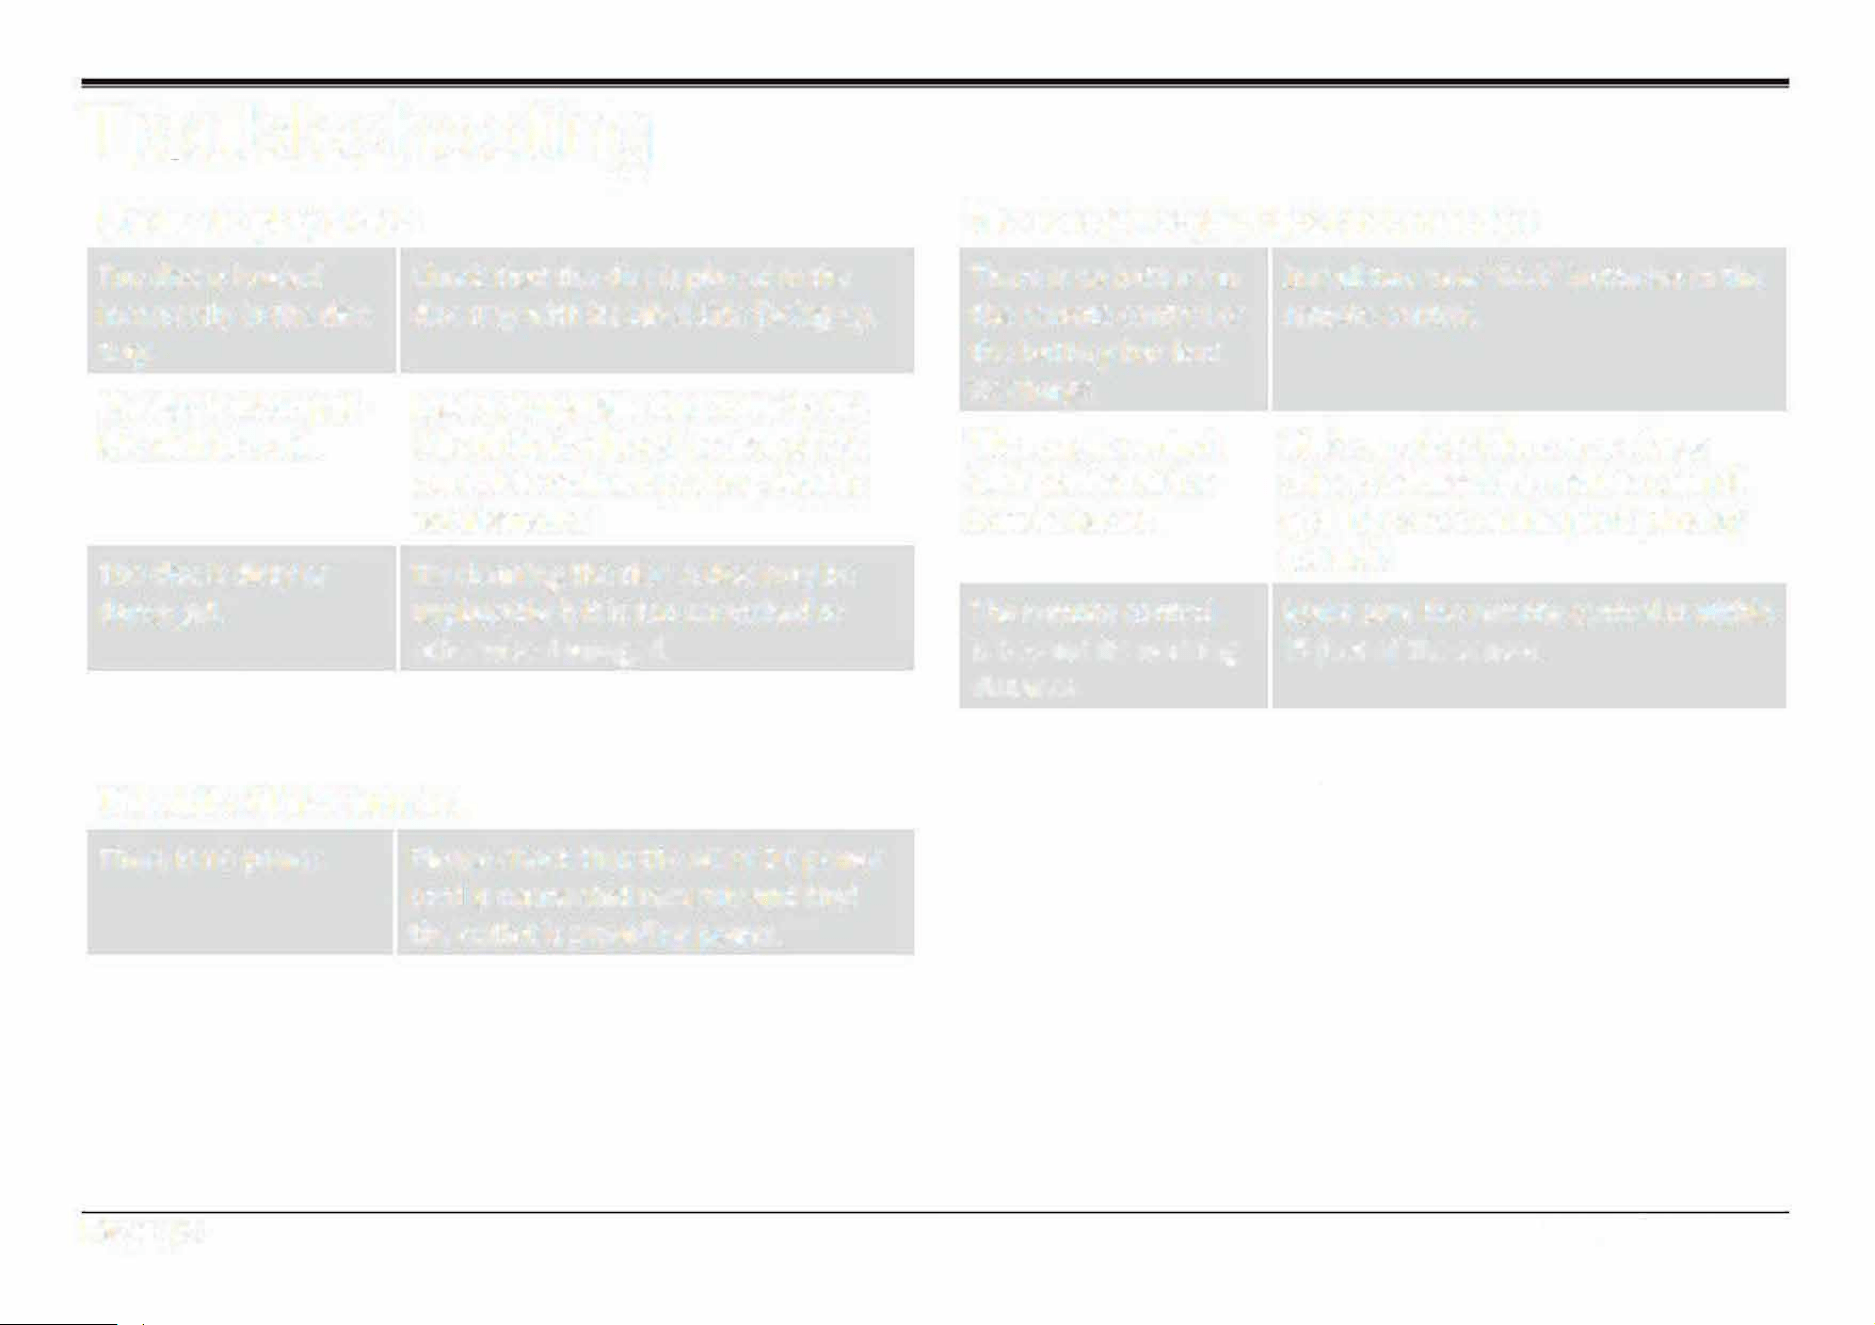
Troubleshooting
Unable to play a disc
The disc is loaded
incorrectly in the disc
tray.
The disc is incompat
ible with the unit.
The disc is dirty or
damaged.
Check that the disc is placed in the
disc tray with its label side facing up.
Load a compatible disc. Refer to the
"About Optical Discs" section of this
manual to review disc compatibility
requirements.
Try cleaning the disc. A disc may be
unplayable if it is too scratched or
otherwise damaged.
The unit will not turn on.
There is no power.
Page 38
Please check that the AC or DC power
cord is connected securely and that
the outlet is providing power.
The remote control does not function
There is no battery in
the remote control or
the battery has lost
its charge.
The remote control
isn't pointed at the
remote sensor.
The remote control
is beyond its working
distance.
The unit has shut
down.
Install two new "AAA" batteries in the
remote control
Make sure that there are no large
objects between the remote control
and the sensor on the front panel of
the unit.
Make sure the remote control is within
15 feet of the sensor.
Switch the unit off and disconnect it
from the AC outlet. Then, reconnect
the power and switch it on again.
EDL-2560H
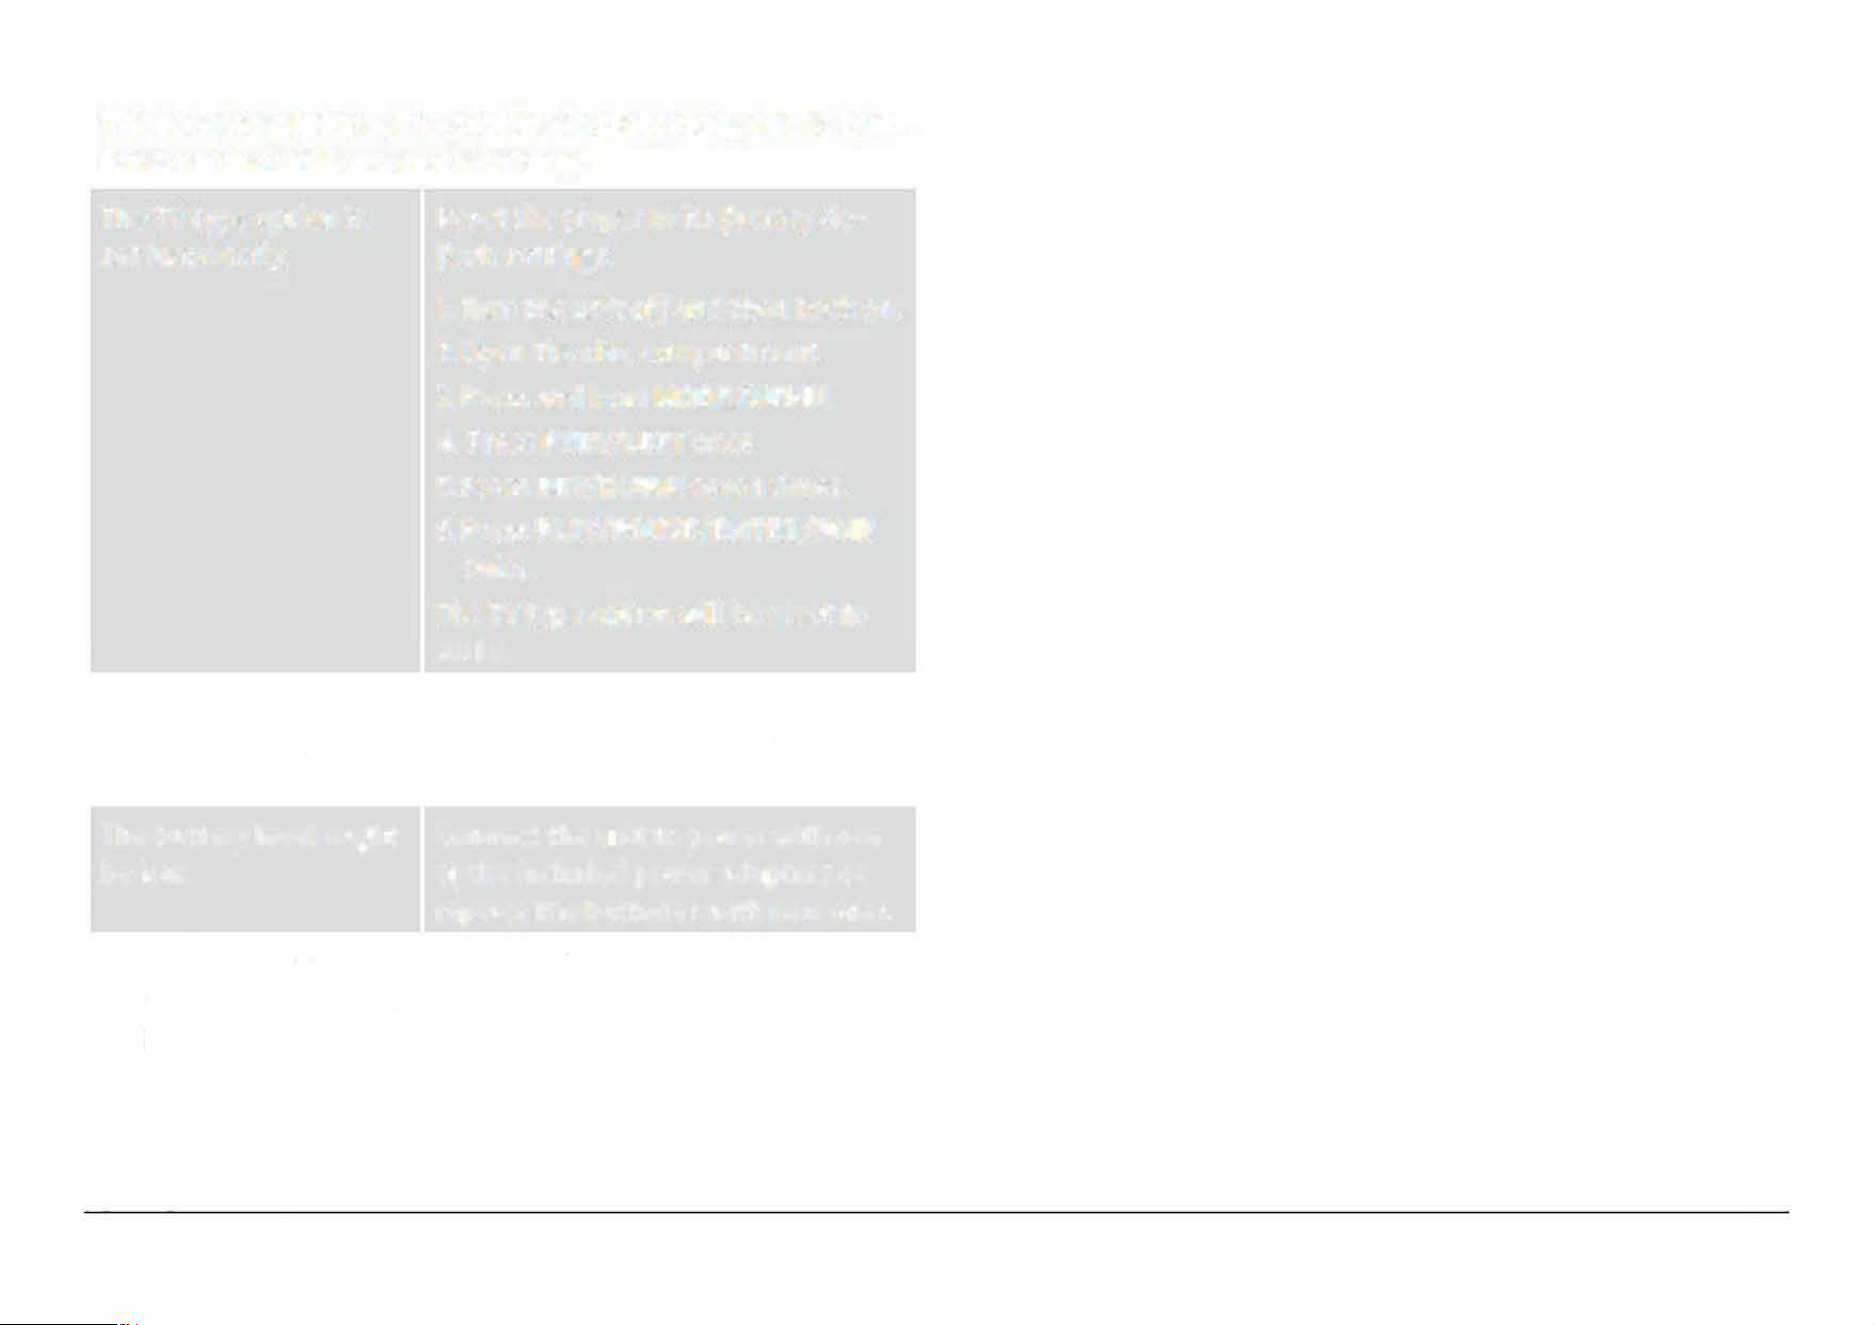
There is no picture, the picture is distorted, or the but
tons on the unit are not working.
The TV type option is
Reset the player to its factory de-
set incorrectly. fault settings.
The disc might be
scratched, dirty, or
warped.
The battery Level might
be Low.
Static electricity may
have interfered tempo
rarily with the
opera
tion of the unit.
1. Turn the unit o and then back on.
2. Open the disc compartment.
3. Press and hold MODE/MENU.
4. Press PREV/LEFT once.
5. Press REV/DOWN seven times.
6. Press PLAY /PAUSE/ENTER/PAIR
twice.
The TV type option will be reset to
AUTO.
Try cleaning the disc. A disc may be
unplayable if it is too scratched or
otherwise damaged.
Connect the unit to power with one
of the included power adapters or
replace the batteries with new ones.
Switch off and unplug the unit. Then
reconnect the unit to power and
switch it on again.
Page 39
www.emersonaudio.com

Specications
Screen Type
Speakers
Disc Support
Removable
Memory Support
Playable Media
Formats
Broadcast Tuner
Output
Input
Power Source
Page40
7"TFT LCD
Resolution: 800 x 480
Brightness: 230 cd/m2 (typical)
Contrast ratio: 400:1 (typical)
Twin speakers with full-range drivers
RMS: SW
Peak: 8 W
DVD, OVO±R/RW, CO, CO-R/RW
USB, SO/SOHC (max 32 GB)
Video: MPEG-2 (DVD), MPEG-1
Audio: CO-audio, MP3, WMA, AC-3, OGG
AM/FM radio (analog)
RCA composite video
RCA
stereo audio
3.5 mm headphone
Bluetooth 5.3
3.5 mm AUX audio
3.5 mm microphone, HD-Input
AC 120 V
OC 12 V
8 "C" size batteries (not included)
Operating Power 20 W
Standby Power
28 W
Note: Product are improved continuously. We reserve the right to modi
the product and specications without prior notice.
EDL-2560H

Support
Page 41
www.emersonaudio.com
If
you have problems with your device, please consult
the instructions in this manual. Please also visit us on
the web at www.emersonaudio.com to get up to the
minute news, alerts, and documentation for your device.
For additional assistance, please contact Emerson
Technical Support.
Emerson Technical Suppor
t
2320 East 49th St.
Vernon, CA
90058
Tel: 8
66-
4
11-6
292
Email : su pport@emersonaud io .com
MADE IN CHINA
Reproductor de Disco de Versatil Digital Portatil
(DVD) Bluetooth® con Pantalla de 17. 78 cm (7")
E
DL-256
0H
MANUAL DE OPERACl6N
FAVOR DE LEER ESTE MANUAL COMPLETAMENTE ANTES DE OPERAR ESTE PRODUCTO.
CONSERVAR EL MANUAL PARA FUTURAS REFERENCIAS

indice
Agradecimiento
Contenido en el empaque
Antes de lniciar
Descripcion de paes
Unidad principal
Control remoto
Usando el control remoto
Reemplazando las baterias
Fuentes de alimentacion
Operaci6n con Vea
Operaci6n con Vee
Operaci6n con baterias
Funciones Basicas
Encender I Apagar
Ajuste def volumen
Activar / Desactivar Pantalla
Page2
4
4
5
6
6
13
14
14
15
15
16
16
17
17
17
17
Usando el T eclado Numerico
Modo de Reproductor de Disco Versatil Digital
Reproducci6n de un DVD
Programaci6n
Reproducci6n de archivos de Audio y Video
Reproducci6n de archivos de imagenes
Modo de Bluetooth®
17
18
18
19
20
21
22
Conectando con un dispositivo por primera vez
(sincronizando)
22
Reproducci6n de los dispositivos conectados
23
Modo de Entrada Auxiliar
24
Modo de Memoria USB I Tarjeta de Memoria
24
Modo de Radio AM/FM
Sintonizando una estaci6n
Menu de Ajustes
Pagina de Ajustes del sistema
Pagina
de Ajustes de
idioma
2
5
25
26
26
27
EDL-2560H
M
odo de
H
DM
I
25

Pagina de Ajustes de Audio
28
Pagina de ustes de Video
28
Especificaciones
40
Pagina de Preferencias
28
Soporte
41
Conexion Opcional
30
Conexi6n a una Televisi6n (Salida de AV)
30
Acerca de los Discos
31
Tipo de Discos
31
DVD de Video
31
CD de Audio
31
CD de lmagenes (JPEG)
32
Caracterfsticas de los DVD
32
C6digo de Region de los DVD
32
Cuidado y Mantenimiento de los Discos
33
Manejo de los Discos
33
Limpieza de los Discos
33
Limpieza y mantenimiento de la unidad
33
Advertencias y precauciones 34
Guia rapida para la soluci6n de problemas
38
Page3
www.emersonaudio.com

Agradecimiento
Sabemos que usted tiene muchas opciones cuando se
trata de tecnologfa.
Confiamos en que usted sera feliz con su compra. Favor,
de leer atentamente este manual y guardelo para futura
referencia. Usted tambien puede encontrar las preguntas
mas frecuentes, documentacion y otro material del
producto
en nuestro sitio web. Venga a visitarnos en
www.emersonaudio.com y ver todo lo que tenemos para
ofrecer
Page4
Contenido en el empaque
Favor de tomar unos momentos para asegurarse de que
se tiene todo lo que se enlista abajo. Aunque hacemos
todo lo posible para asegurarnos de que cada dispositivo
Naxa este bien empacado y sellado, sabemos que
pueden pasar muchas cosas durante el empacado y
transporte. Si falta algun componente, acudir
inmediatamente con el proveedor para obtener asistencia
inmediata. Favor de contactar al equipo de sopoe naxa
en www.naxa.com/supportcenter
• E
DL-2560
H
• Cordon de alimentacion
• Adaptador para automovil cc/cc
• Cable de AudioNideo "A/V"
• Antena de Television
• Control remoto
• Manual de operacion
EDL-2560H

Antes de lniciar
Tomar nota de las siguientes indicaciones antes de
iniciar la operaci6n de este producto.
•
•
•
•
No bloquear las aberturas ni ranuras de ventilaci6n.
No instalar el producto en las ubicaciones que se
describen a continuaci6n:
•
Lugares expuestos a los rayos directos al sol o
cerca de aparatos radiadores de calor (como
calentadores o encima de otros aparatos que
emiten calor).
•
•
•
Lugares sin ventilaci6n o lugares con polvo.
Lugares expuestos a vibraci6n constante .
Lugares con polvo o humedad .
Operar los botones, controles e interruptores de
acuerdo a como se describe en este manual.
Antes de encender el producto por primera vez,
asegurarse que el cord6n de alimentaci6n este
instalado adecuadamente.
•
Almacenas los discos en su estuche y colocarlos en
un lugar fresco para prevenir daos por el calor.
PRECAUCl6N: PARA REDUCIR EL RIESGO DE
CHOQUE ELECTRICO NO REMOVER LA CUBIERTA
(0 TAPA), DENTRO DE ESTE APARATO
NO
HAY
PARTES QUE EL USUARIO PUEDA DARLE SERVICIO,
ACUDIR A UN CENTRO DE SERVICIO AUTORIZADO 0
CON PERSONAL CALIFICADO.
ADVERTENCIA: La bateria usada en este producto
puede presentar riesgo de fuego o quemaduras si es
usada de manera inadecuada. No desensamblar,
incinerar o calentar la bateria. No dar el producto y/o la
bateria bajo los rayos directos del sol o en un autom6vil
con las ventanas cerradas .
Page 5
www.emersonaudio.com
Descripci6n de Paes
Unidad Principal
1 . ·-·-·,
. '
..
0
·
-
·
-
·
-
·
'
=
-_,.-. -. ., . =
��� -�
4®©
Page6
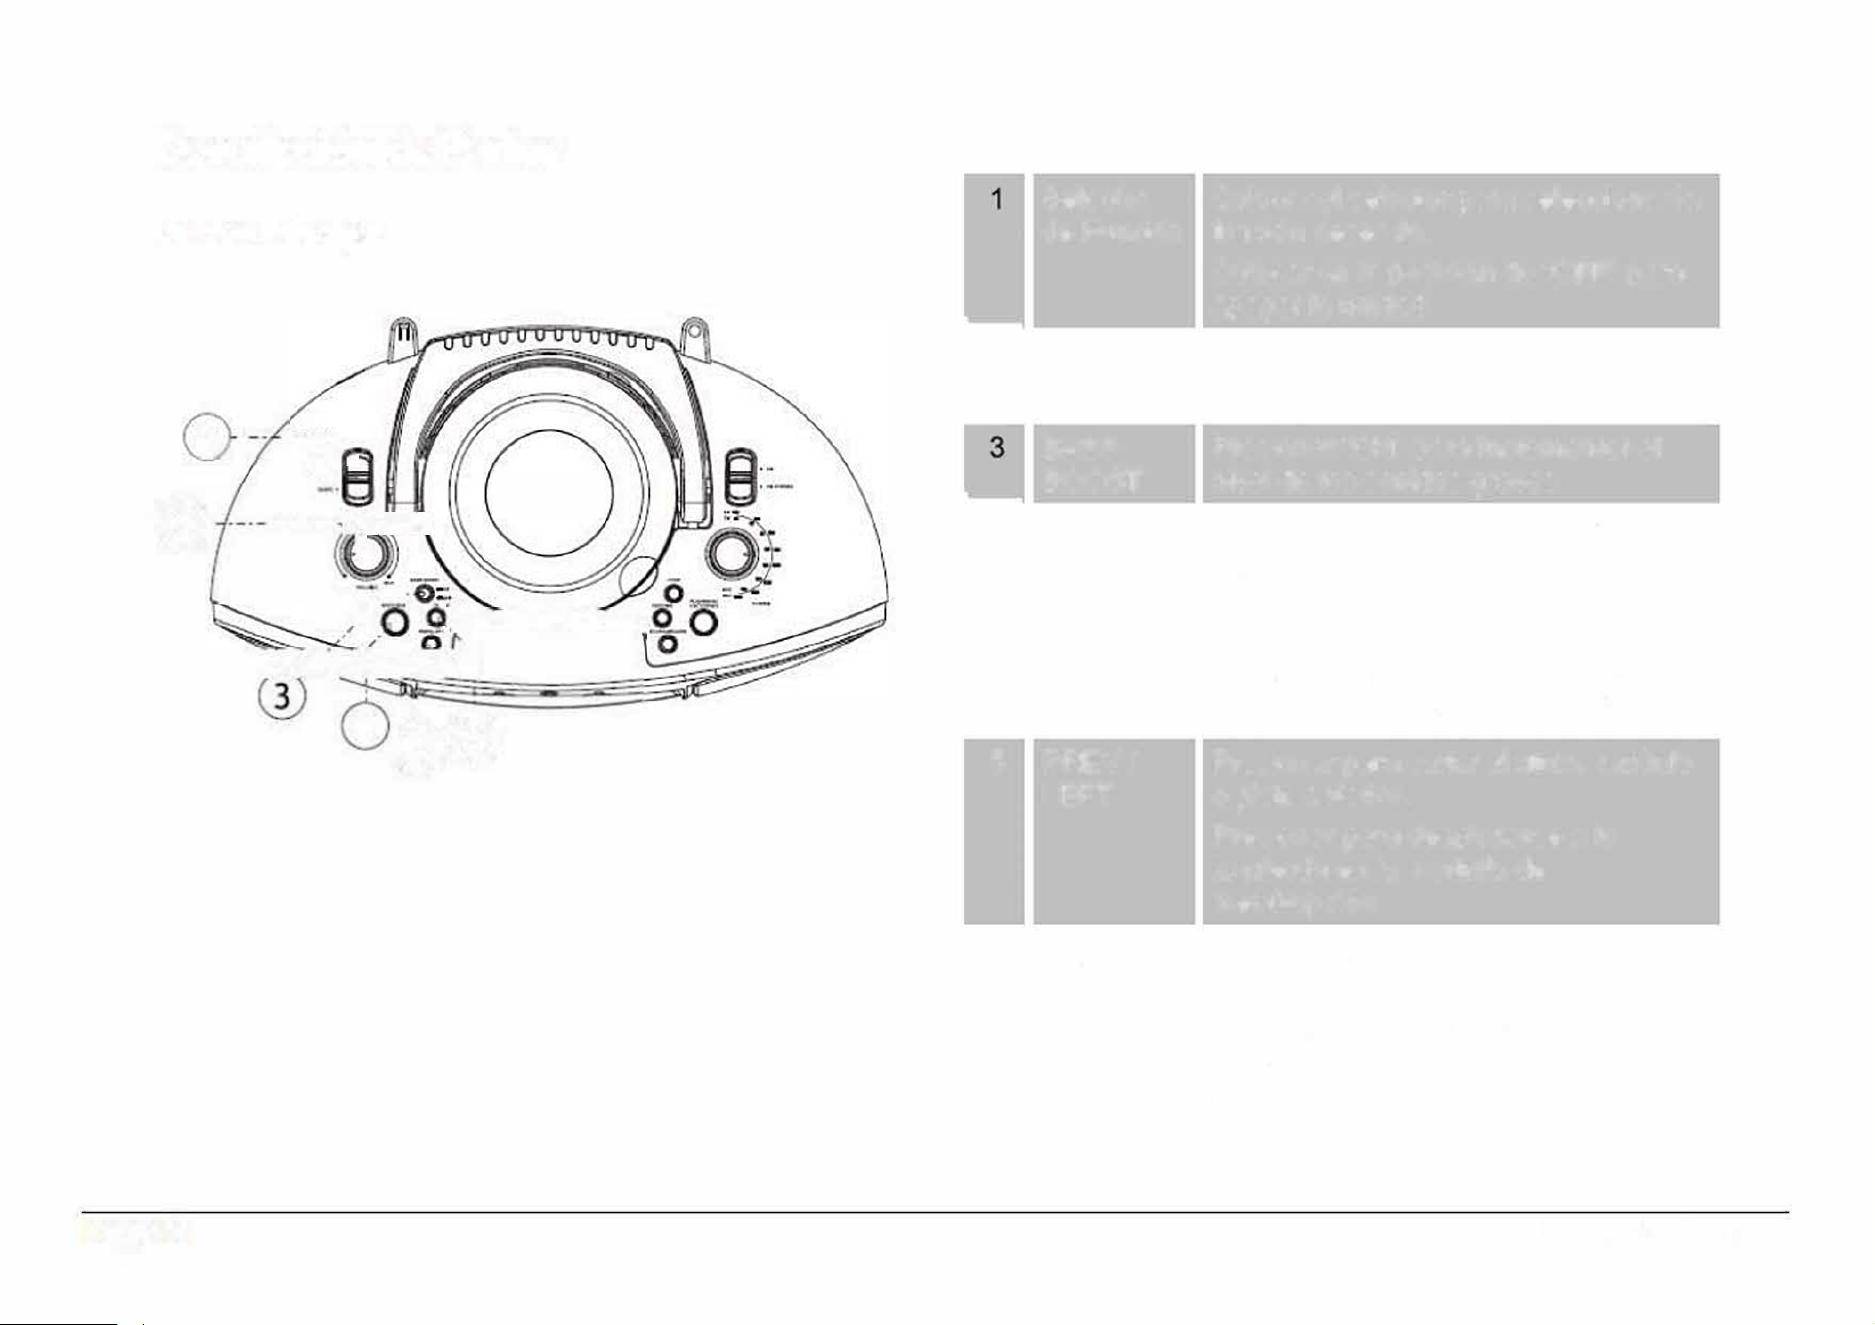
Selector
de Funci6n
-
2 Control de
Volumen
BASS
BOOST
-
4 MODE /
MENU
5
PREV /
LEFT
6 NEXT/
RIGHT
C
olocar el selector para seleccionar la
funci6n deseada.
Colocar en la posici6n de "OFF" para
apagar la unidad
Girar para ajustar el volumen al nivel
deseado
Presionar "ON" para incrementar el
nivel de los sonidos graves
Modo: Cuando el selector de funci6n
esta en "DVD/BT/AUX/HD
-
IN" presionar
para cambiar la funci6n entre DVD, BT y
AUX.
Menu: Presionar y sostener para
desplegar el menu en la pantalla
Presionar para saltar al titulo, capitulo
o pista anterior.
Presionar para desplazarse a la
izquierda en la pantalla de
menu/opci6n
Presionar para saltar al tftulo, capitulo
o pista siguiente.
Presionar para desplazarse a la
derecha en la pantalla de
menu/opci6n
EDL-2560H
,.
·
·-
,
C
:./
-
�- ��
-
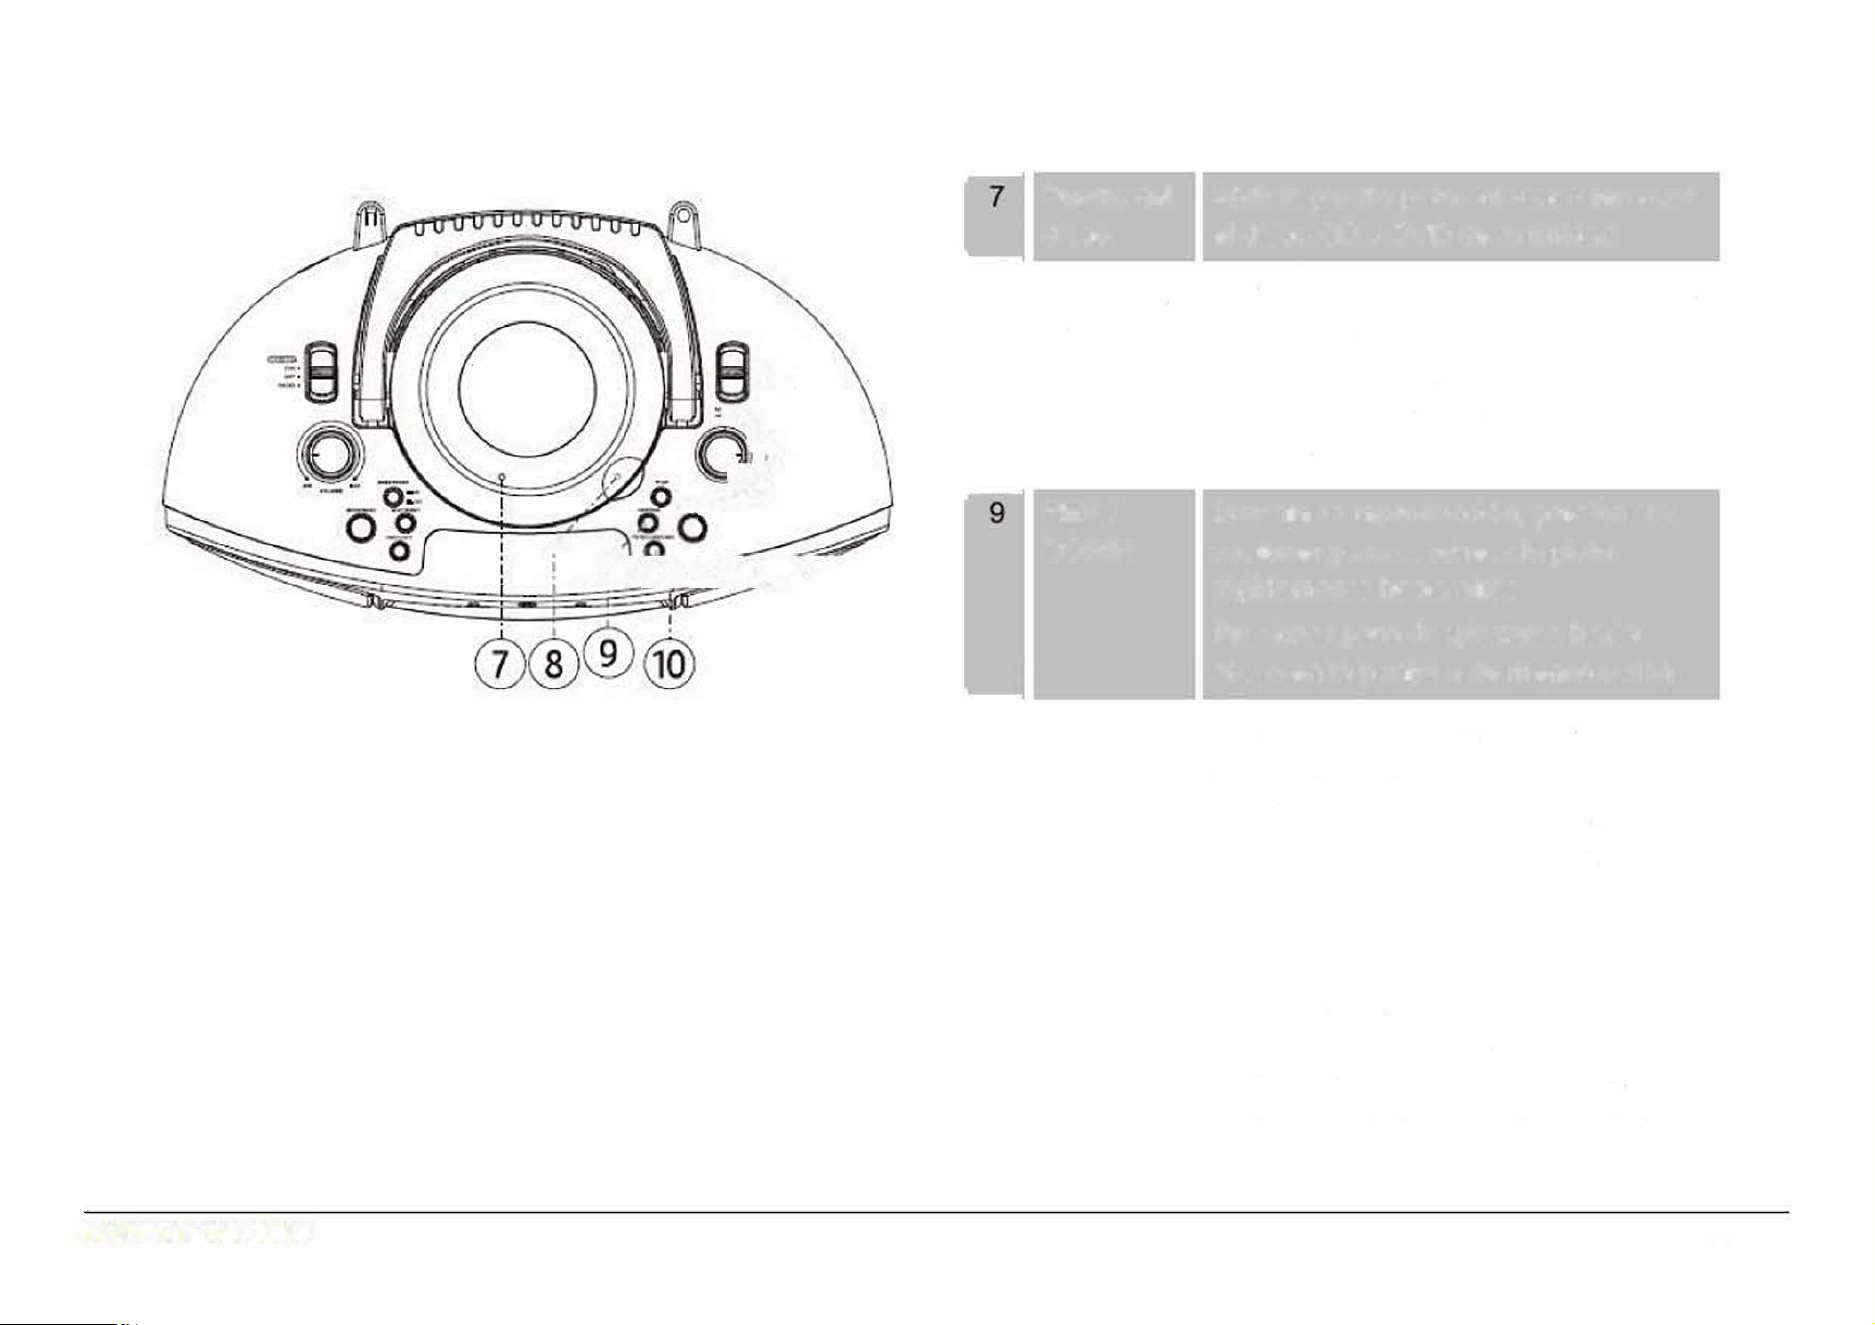
Puea del
disco
-
8 Area para
abrir la
puerta
-
REV/
DOWN
-
10 STOP /
USB /
CARD
Abrir la puea para colocar o remover
el disco CD o DVD de la unidad
Levantar para abrir la puerta del disco.
Presionar suavemente para cerrar.
jNunca abrir la puea cuando el
disco esta en reproduccion o
girando!
Durante la reproducci6n, presionar y
sostener para escanear la pista
rapidamente hacia atras
Presionar para desplazarse hacia
abajo en la pantalla de menu/opci6n
Durante la reproducci6n, presionar
para detenerla.
USB/CARD: Cuando el selector de
funci6n esta en "DVD/BT/AUX"
presionar, presionar y sostener para
cambiar el modo entre DVD/BT, USB t
CARD (tarjeta SD).
Nota: Asegurse que no hay ning(.m
cable conectado en la Entrada Auxiliar
de la unidad, de otra forma la unidad
estara en modo de Entrada Auxiliar
Page 7
www.emersonaudio.com
Page 8
-
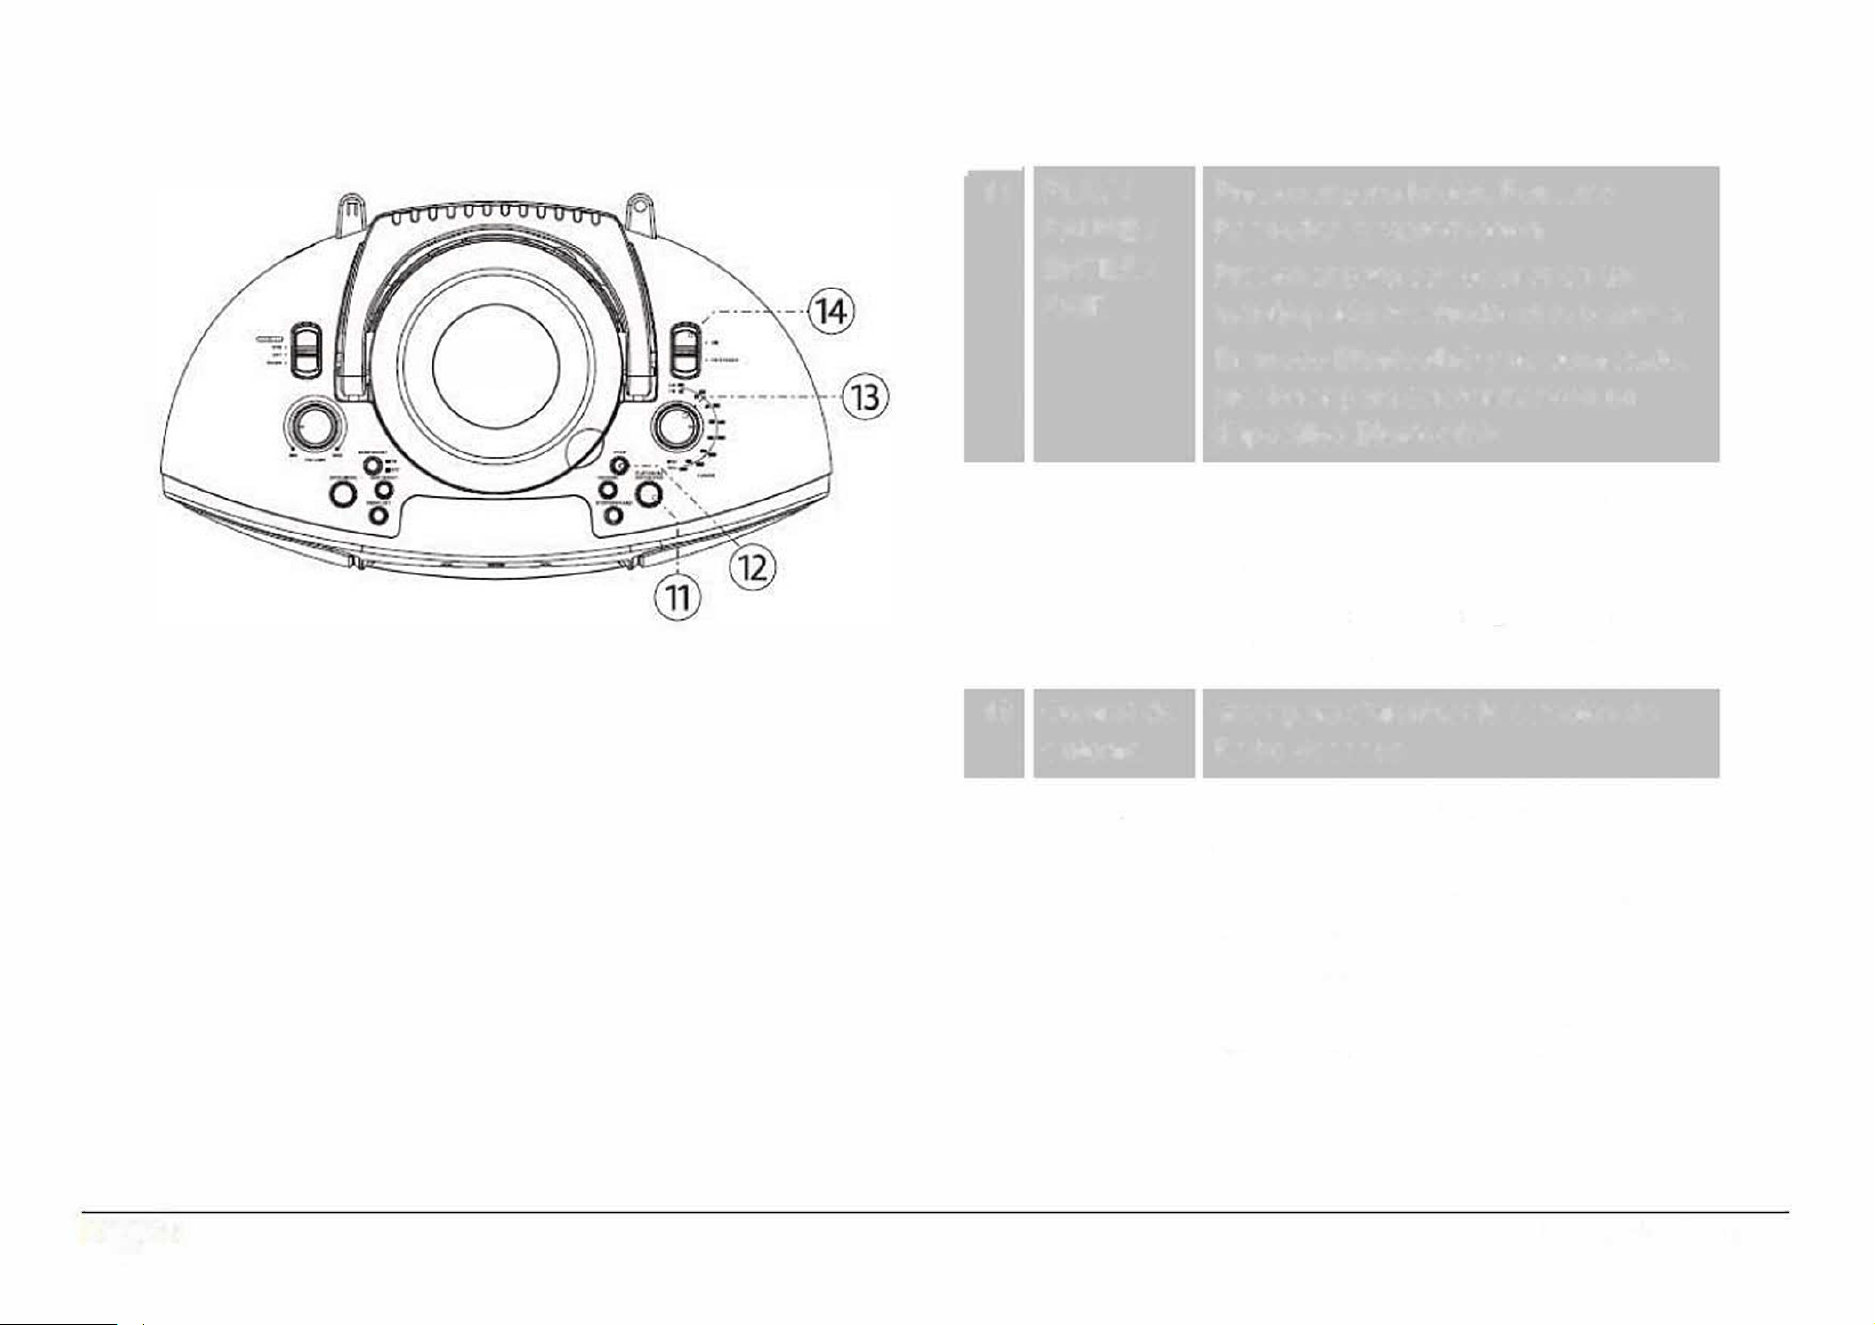
11
PLAY/ Presionar para lniciar, Pausar o
PAUSE/ Reanudar la reproducci6n
ENTER/
Presionar para seleccionar en un
PAIR
menu/opci6n resaltado en la pantalla
En modo Bluetooth® y no conectado,
presionar para sincronizar con un
dispositivo Bluetooth®
12 FWD/ UP
Durante la reproducci6n, presionar y
sostener para escanear la pista
rapidamente hacia delante
Presionar para desplazarse hacia
arriba en la pantalla de menu/opci6n
13
Control de Girar para sintonizar la estaci6n de
sintonia
Radio deseada
14 Selector Estando el selector de funci6n en el
de Banda modo de Radio
Colocar en AM para sintonizar las
estaciones de Radio de las
frecuencias de AM (kHz)
Colocar en AM para sintonizar las
estaciones de Radio de las
frecuencias de FM (MHz)
EDL-2560H
@®®
I
'
-
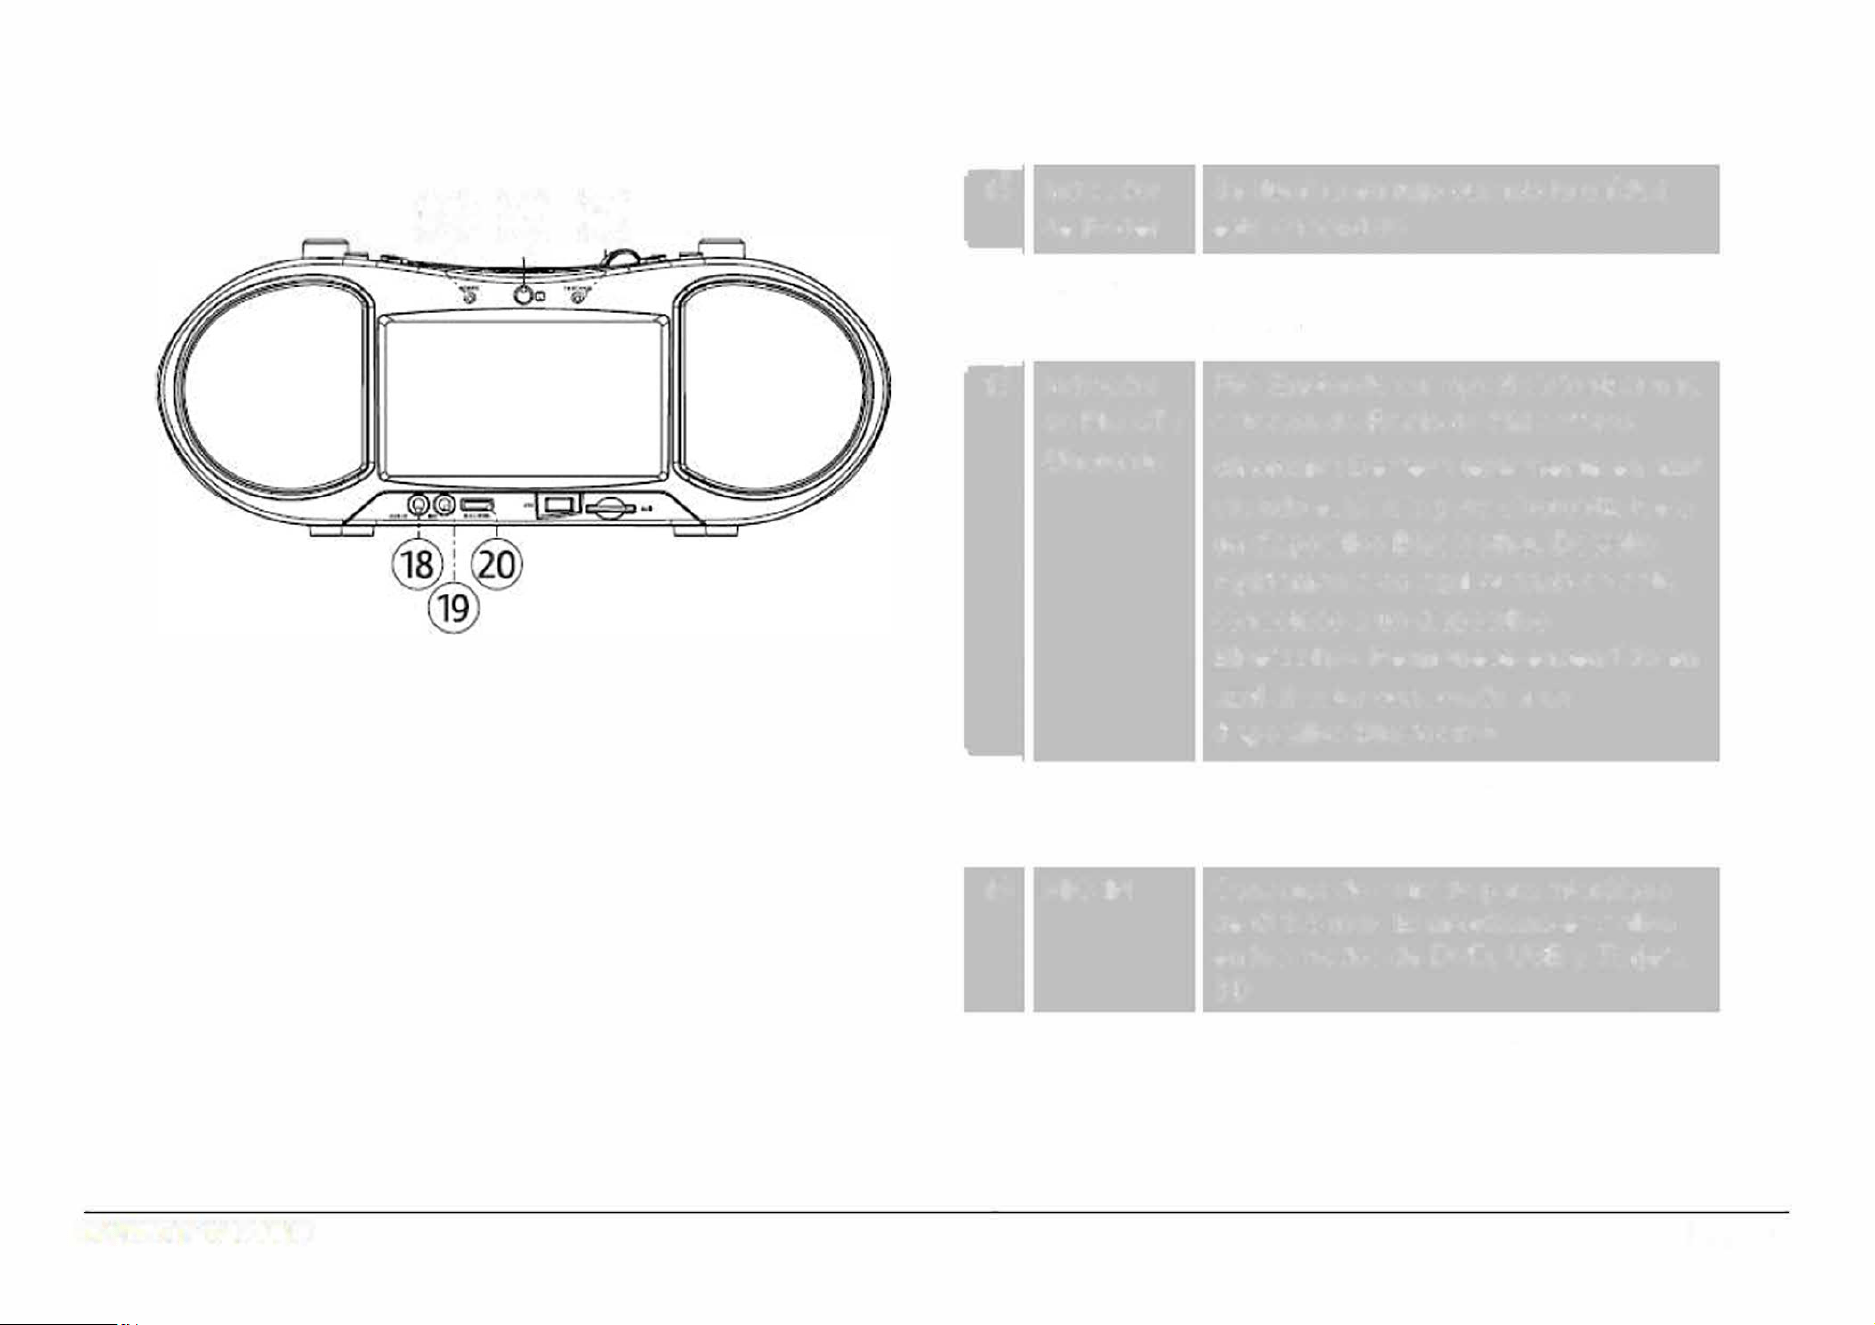
15
lndicador
de Poder
-
16 Sensor
lnfrarrojo
-
17
lndicador
de FM ST/
Sincronfa
-
18 AUX IN
19 MICIN
20 Volumen
micr6fono
Se ilumina en rojo cuando la unidad
esta encendida
Detecta la seal emitida del control
remoto
FM: Enciende en rojo al sintonizar una
estaci6n de Radio de FM estereo
Sincronfa: Destella lentamente en azul
cuando esta listo para sincronizarse a
un dispositivo Bluetooth®. Destella
rapidamente en azul cuando se esta
conectado a un dispositivo
Bluetooth®. Permanece encendido en
azul al estar conectado a un
dispositivo Bluetooth®.
Conector de entrada de audio auxiliar
de 0 3.5 mm
Conector de entrada para micr6fono
de 0 3.5 mm. El micr6fono es activo
en los modos de DVD, USB y Taeta
SD
Girar para ajustar el nivel del volumen
del micr6fono conectado
Page 9
www.emersonaudio.com

21
USB
Qo ·o
-
22 SD
23 Pantalla
24 Bocinas
Page 10
lnsertar una memoria USB. El puerto
USB esta diseado para la
reproducci6n de archivos de una
memoria USB.
El puerto USB no esta diseado
para cargar la bateria de
dispositivos de alto poder, por
ejemplo telefonos celulares
lnsertar una tarjeta de memoria SD.
Referirse a la secci6n de
especificaciones para ver las tarjetas
de memoria sopoadas
Pantalla de cristal liquido LCD-TFT
para disfrutar de los videos a color
Controladores de rango completo para
liberar todo el poder del sonido
estereo
EDL-2560H
@- -·-·-·,.
'
I
@·
,
Para transportar facilmente la unidad
-----
Asa
26 Antena
Extender la antena para mejorar la
-
27
-
Telesc6pica recepci6n de las estaciones de FM
VIDEO
Salida de video compuesta para
enviar la seal a una Television u
otros dispositivos
28 R AUDIO L
Salida de audio estereo para enviar la
seal a una Television u otros
dispositivos
-
29 DISPLAY
-
30 PHONES
Colocar en "ON" para encender la
pantalla.
Colocar en "OFF" para apagar la
pantalla cuando no es necesaria para
ahorrar energfa de la baterfa, por
ejemplo al escuchar el radio o en
otras funciones que no requieren
video
Conector para audffonos de 0 3.5 mm
para escuchar en privado. Las
bocinas se desconectan
automaticamente al conectar los
audffonos.
Page 11
www.emersonaudio.com
,
.'
Page 12
-
31
Ranuras Ranuras para una adecuada
circulaci6n del aire y prevenir
sobrecalentamiento.
No obstruir la ranuras
32 DC IN
Conector de entrada de
alimentaci6n de Vee
33
ACIN
-
lnsertar la salida del adaptador de
cc/cc para autom6vil incluido
Conector de entrada de
alimentaci6n de Vea
lnsertar la salida cable de
alimentaci6n incluidos, entonces
conectar la clavija al tomacorriente
34
Compartimiento La unidad opera con 8 baterias de
baterias
1.5 Vee tamano "C". Deslizar la
tapa en direcci6n de la flecha para
removerla. lnsertar las baterias
verificando la correcta polaridad
"+" y "-" como se obsea en el
compartimiento. Colocar la tapa
nuevamente
EDL-2560H
3
5
0
I
I
I
I
I
I
I
I
I
I
I
I
I
I
I
35
HD-
IN
T
oma
H
D-IN para usar con un
cable
H
D
M
I
(
no incluido
)
desde un
dispositivo e
x
terno.
Control Remoto
eD
lO
DODD
PROGRAM REPEAT
A8
ETURN
DODD
BT PA!R CLEA� A�OLE SUBllTLE
MODE
Con el selector de
funci6n esta en
"DVD/BT/AUX" presionar
para cambiar la funci6n
entre DVD, BT y AUX.
DEFAULT Restablecer valores de
fabrica
USB/SD
DISPLAY
ON/OFF
MUTE
DISPLAY
ZOOM
SLOW
Con el selector e
funci6n esta en
"DVD/BT/AUX" presionar
y sostener para cambiar
el modo de DVD/BT, USB
vSD
Para Activar o Desact1var
la pantalla. Asegurarse
que el interruptor (29)
este en "ON"
Activar o Desactivar la
sa "d e aud·o
Para ver programas e
informaci6n en la pantalla
Cambiar la opci6n e
acercamiento
Reproducci6n a velocidad
lenta
SETUP
TITLE /
PBC
PLAY/
PAUSE
STOP
◄
I I◄◄
ENTER
AUDIO
Desplegar el menu del
sistema en la pantalla
Ir al titulo del DVD/SVCD
en la pantalla
lniciar, Pausar o
Reanudar la
reoroducci6n
Detener reproducc16n
Desplazarse hacia arriba
en un menu o escanear
rapidamente la pista
aci dela t
Desplazarse hacia abajo
en un menu o escanear
rapidamente la pista
hacia atras
Desplazarse a la
izquierda en el menu o
a a ist a te ·o
Desplazarse a la derecha
en el menu o saltar a la
pista siguiente
Seleccionar la opci6n en
el menu
Seleccionar la opci6n de
audio
Page 13
www.emersonaudio.com
MODE
DEFAULT USB/ SD
DISPLAY
ON/OFF
CLEARBT PAIR
A-B
SUBTITLE
MUTE DISPLAY ZOOM
SLOW
TITLE/PBC
SETUP
PLAY/PAUSE
STOP
1
2
3
4
5
6 7 8
9 0 10+
REPEAT
P/N
ANGLE
PROGRAM RETURN
GOTO
MAIN MENU
AUDIO
ENTER
MAIN
Desplegar el menu del
MENU
disco DVD
P/N
Seleccionar el modo de
Video de PAL, NTSC o
Automatico
9, + 10
lngresar un valor
numerico directamente.
Presionar +10, para
saltar 10 Ristas
GOTO
Ir a un punto especffico
en una pista.
PROGRAM
Entrar al modo para
programar la lista de
reproducci6n
REPEAT
Seleccionar el modo de
repetici6n
A-B
Seleccionar una secci6n
A-B para repetir
RETURN Regresar
BT PAIR
Conectar a un
dispositivo Bluetooth®
CLEAR
Limpiar o Cancelar
ANGLE
Seleccionar el angulo
de camara si hay
disponible
SUBTITLE Seleccionar subtitulo
Page 14
Usando el Control Remoto
Apuntar con el transmisor infrarrojo del
control remoto directamente al sensor
infrarrojo de la unidad
y
presionar el
bot6n deseado.
El control remote opera dentro de una
distancia de 5 metros
aproximadamente y una angulo de 30
°
respecto a los costados del sensor
infrarrojo de la unidad.
Obstacu/os entre el sensor
infrao y el transmisor
infrao pueden provocar
que el control remoto no
opere adecuadamente. Los
rayos def sol, /amparas
incandescentes
y
uorescentes o cualquier
otra fuente luminosa fuerte
sob el sensor infraojo de
la unidad pueden provocar
que el control remoto no
ope adecuadamente.
Reemplazando las baterias
El control remote opera con 2 baterias
de 1.5 Vee tamao "AAA", se
recomiendan baterlas alcalinas.
1. Remover la tapa del
compaimiento de las baterias.
2.
lnsertar las 2 baterias verificando
la correcta polaridad "+" y " "
coma se obsea en el
compaimiento.
3.
Colocar la tapa nuevamente.
Reemplazar las baterias si el
control remoto no opera.
Desechar las baterias de
foa adecuada de acuerdo
con las /eyes de desechos
s6/idos de su localidad pa
evitar daos al medio
ambiente.
No usar el control remoto de
otro equipo al mismo tiempo
No derramar agua u otros liquidos
sobre el control moto, ni exponer al
goteo o salpicadu de agua, 1/uvia o
humedad.
EDL-2560H
Usar solo el tipo de baterias especicadas.
Vericar la correcta polaridad "+" y '�" como se
obsea
en el interior def compaimiento al
instalar la baterias, una po/aridad incorrecta
puede daar el control remoto
y
otras
propiedades.
No instalar baterias de dirente tipo al mismo
tiempo (por ejemplo, a/calinas con zinc-ca6n o
nfquel). No instalar bater/as nuevas con usadas.
Si el contl remoto no va ser usado por un
peodo largo de tiempo, remover las bater/as
para prevenir fuga de acido de las mismas.
acido puede causar daos en el contl,
propiedades e inc/uso /esiones persona/es.
Seguir las instrucciones de/ fabcante de las
bater/as para un manejo adecuado.
No intentar cargar baterias que no estan
diseadas para recaarse, estas se pueden
sobrecalentar y explotar.
Las bateria usadas en el control remoto pueden
generar esgo de fuego o quemaduras quimicas
si estas son usadas de rma incorrecta.
No recargar, desarmar, incinerar, go/pear o
calentar las baterias.
Remover las baterias de/ control remoto si las
mismas estan agotadas.
No exponer las baterias a ca/or excesivo, por
ejemplo bajo /os rayos directos de/ sol, fuego o
similares.
Mantener las baterias /os de /os nios,
personas con capacidades direntes y mascotas.
Fuente de Alimentacion
La unidad puede alimentarse con las fuentes de
alimentaci6n
de Vee, Vea o con 8 baterlas de 1.5 Vee
tamao "C"
Operaci6n con Vea:
Verificar que el voltaje de su localidad corresponde con el
voltaje marcado en el producto.
1.
Conectar el extrema correspondiente del cord6n de
alimentaci6n en el conector de alimentaci6n de Vea
(33) de la unidad.
2.
Conectar el otro extrema del cordon de alimentaci6n
(clavija) en un tomacorriente (si hay baterfas
instaladas, estas se desconectan automaticamente
al conectar el cord6n de alimentaci6n)
La unidad opera a un voltaje de entda de 120
V~ {micamente. No conectar a un tomacorente
con un volte diferente al especicado en el
manual y etiquetado, esto puede generar riesgo
de fuego o choque electrico.
Desconectar el cordon de alimentaci6n def
tomacorente
y
de la unidad si no va ser
operada por un periodo largo de tiempo.
No conectar o desconectar el cord6n de
alimentaci6n def tomacorriente o de la unidad
con las manos mojadas o humedas, esto puede
gener riesgo de choque electco.
Page 15
www.emersonaudio.com
Operaci6n con Vee
Usar el adaptador para autom6vil de cc/cc incluido para
conectar la unidad a encendedor de cigarros o conector
de un autom6vil, bote, camioneta y mas
1.
Conectar la salida del adaptador al conector DC (32)
de la unidad.
2.
Conectar el adaptador al encendedor de cigarros.
No usar un adaptador para autom6vil ccc
diferente al incluido
Operaci6n con Baterias
La unidad puede operar con 8 baterias de 1.5 Vee
tamano "C". Se recomienda el uso de baterfas disenadas
para dispositivos de alto drenaje (por ejemplo, alcalinas o
recargables de Ni-MH).
1.
Remover la tapa del compartimiento de las baterias.
2. lnsear 8 baterias de 1,5 Vee tamano "C", "UM-1",
verificar la correcta polaridad c6mo se observa en el
interior del compartimiento.
3.
Colocar la tapa del compartimiento de las baterias
nuevamente.
Page 16
Usar solo el tipo de baterias especicadas.
Vericar ta coecta polaridad "+" y ·�" como se
observa en el interior def compartimiento al
instalar la baterias, una po/aridad incoecta
puede daar la unidad y otras propiedades.
No insta/ar baterias de diferente tipo al mismo
tiempo (por ejemplo, alcalinas con zinc-carbon o
niquel). No insta/ar baterias nuevas con usadas.
Si la unidad no va ser usado por un periodo largo
de tiempo, remover las baterfas para prevenir
fuga de acido de las mismas. El acido puede
causar daos en la unidad, propiedades e inc/uso
/esiones persona/es.
Seguir las instrucciones def fabricante de las
baterias para un manejo adecuado.
No intentar cargar baterias que no estan
diseadas para recargarse, estas se pueden
sobrecalentar
y explotar.
Las baterfa usadas en la unidad pueden generar
riesgo de fuego o quemaduras qufmicas si estas
son usadas de forma incoecta.
No recargar, desarmar, incinerar, go/pear o
calentar las baterias.
Remover las baterias def control remoto si las
mismas estan agotadas.
No exponer las baterfas a ca/or excesivo, por
ejemplo bajo /os rayos directos def sol, fuego o
simares.
Mantener las baterias /ejos de /os nios,
personas con capacidades diferentes y mascotas.
EDL-2560H

lniciando
Encender / Apagar
Para encender la unidad, colocar el selector de funci6n
(1) en la posici6n de la funci6n deseada y el indicador de
poder (15) se ilumina en rojo.
Para apagar la unidad, el selector de funci6n (1) en la
posici6n de la funci6n de "OFF" y el indicador de poder
( 15) se apaga.
Ajuste de volumen
• Girar el control de volumen (2) en la unidad para
ajustar el volumen al nivel deseado.
• Presionar "MUTE" en el control remoto para
desactivar la salida de audio (silencio), presionar
"MUTE" nuevamente para volver a activar la salida
de audio.
Activar / Desactivar Pantalla
Puede Activar o Desactivar la pantalla de cristal liquido
de la unidad para mantener la energia de la bateria.
• Estando el interruptor de pantalla (29) en la posici6n
de "ON", presionar "DISPL ON/OFF" en el control
remoto para Activar o Desactivar la pantalla.
Desactivar la pantalla al escuchar musica u
operar ots funciones que no requieren estar
viendo videos
La pantalla consume a/go de energia de la
baterfa. Puede extender la duraci6n de la
baterfa al desactivar la pantalla cuando no es
necesaria
Operacion del Teclado Numerico
Usar el teclado numerico (0-9, +10) en el control remoto
para ingresar un valor directamente en la pantalla de
menu u opci6n.
Pore ejemplo, para ir a la pista 15:
1. Presionar "1"
2. Presionar "5"
3. Presionar "ENTER"
Page 17
www.emersonaudio.com
Modo de Reproductor de Disco Versatil
Digital
Colocar el selector de funci6n (1) en la posici6n de
"DVD/B T/AUX/HD-IN" para entrar al modo de DVD.
Reproducci6n de un DVD
Colocar un disco DVD en el compartimiento con la
imagen hacia arriba. La unidad lee el disco
automaticamente al cerrar la puerta.
•
Presionar "PLAY/PAUSE/ ENTER/PAIR" (11) para
lniciar, Pausar o Reanudar la reproducci6n.
•
Presionar "STOP/USB/CARD" (10) para Detener la
reproducci6n.
•
Presionar "MAIN MENU" en el control remoto para
desplegar la raiz del menu del disco DVD en la
pantalla (esta funci6n solo opera si el disco DVD
contiene un menu principal).
•
Presionar "T IT LE" en el control remoto para
seleccionar el titulo que desea reproducir (esta
funci6n solo opera si el disco DVD contiene tftulos o
capftulos).
Page 18
Durante la Reproducci6n
◄
I I◄◄
► I �
I I
CH+
/ ◄◄ !
CH-
STOP
REPEAT
Presionar para regresar al inicio del capftulo,
continuar presionando para saltar a capftulos
anteriores o hasta regresar al inicio del disco.
Presionar para saltar al capitulo siguiente
Presionar para cambiar la velocidad de
avance rapido en 2x, 4x, 8x, 20x; presionar
"PLAY/PAUSE/ ENTER/PAIR" para regresar
a la reproducci6n a velocidad normal.
EDL-2560H
Presionar para repetir el capftulo/pista
o tftulo actual o el disco completo
Presionar para Detener la reproducci6n.
La unidad recuerda el punto donde se
detiene el disco y reanuda la
reproduccion desde dicho punto.
Estando la reproduccion detenida,
presionar nuevamente para borrar el
punto de memoria.
Presionar para cambiar la velocidad de
regreso rapido en 2x, 4x, 8x, 20x;
presionar "PLAY/PAUSE/ ENTER/PAIR"
para regresar a la reproducci6n a
velocidad normal.
Programacion
Usar el modo de programa para programar la
reproducci6n en el orden deseado de hasta 16 tftulos,
capitulos o pistas.
Presionar "PROGRAM" en el control remoto para
desplegar el menu del programa (presionar "PROGRAM"
nuevamente para cancelar y salir del modo de
programa).
Programaci6n de las pistas en un disco DVD
•
Presionar " ◄ ► " en el control remoto para
cambiar la lfnea de programa.
•
Usar el teclado numerico en el control remoto para
ingresar el numero del tftulo, capftulo o pista deseado
en cada lfnea de programa.
Programaci6n de pistas en un disco CD o MP3
•
Presionar " ◄ ► " en el control remoto para
seleccionar la pista deseada, entonces presionar
"ENTER" para agregarla a la lista del programa.
•
Para iniciar la reproducci6n del programa, presionar
"◄ ► .. en el control remoto para resaltar "PY",
Presionar " ◄ ► " en el control remoto.
•
Para Detener la reproducci6n del programa,
presionar "STOP"; para borrar la lista del programa
de memoria, presionar "STOP" estando la
reproducci6n detenida.
Pantalla de programa de un disco DVD
TC TC TC TC
1 -:- 5--:- 9 -
:
-- 13
-:-
2
-:-
6
--:-
10
-:--
14
-:-
3-:-
7--:- 11
-
:--
15
-:-
4-:-
8
--:
-
1
2
-:--
16
-:-
PROGRAM
PLAY
CLEAR
Pantalla de programa de un disco CD
... (10 DEEP) MMJB.MP3
I
·-
M
011s
e
...
0 01.01 OENZ
02.02 5
@ 03.03 TEAR
0.04 JUDG
�
05.05 FRID
0.06 LOOK
07.07 COMI
Page 19
www.emersonaudio.com
Reproducci6n de archivos de Audio y Video
Esta unidad puede reproducir discos DVD que contengan
archivos de media. Referirse a la secci6n de
Especificaciones para conocer mas acer de los
archivos de media compatibles.
Al cargar un disco que contiene archivos de media, la
unidad lee el disco automaticamente y despues de uno
segundos despliega en la pantalla la lista de archivos y
carpetas en el disco.
•
Presionar " ◄ ► " en el control remoto para
Page 20
seleccionar el archivo o carpeta deseado; presionar
"PLAY/PAUSE/ ENTER/PAIR" (11) para seleccionar
una opci6n de la lista.
•
Si la opci6n seleccionada es una carpeta, la
pantalla despliega los archivos contenidos en la
carpeta.
•
Si la opci6n seleccionada es un archivo de audio o
video, la unidad inicia la reproducci6n automatica
del audio o video.
Durante la Reproduccion
◄ /
Presionar para regresar al inicio dela pista,
continuar presionando para saltar a pistas
anteriores o hasta regresar al inicio del disco
o carpeta.
►
I
»1
I
STOP
Presionar para saltar a la pista siguiente
Presionar para cambiar la velocidad de
avance rapido en 2x, 4x, Bx, 20x; presionar
"PLAY/PAUSE/ ENTER/PAIR" para
regresar a la reproducci6n a velocidad
normal.
Presionar para cambiar la velocidad de
regreso rapido en 2x, 4x, Bx, 20x; presionar
"PLAY/PAUSE/ ENTER/PAIR" para
regresar a la reproducci6n a velocidad
normal.
Presionar para Detener la reproducci6n.
REPEAT
Presionar para repetir la pista actual o todas
las pistas del disco o carpeta
0-9, +10
Presionar para ingresar el numero de la pista
directamente, entonces presionar "ENTER"
EDL-2560H
Reproducci6n de archivos de imagenes
Esta unidad puede reproducir discos DVD que contengan
archivos de imagenes digitales. Referirse a la secci6n de
Especificaciones para conocer mas acerca de los
archivos de imagenes compatibles.
Al cargar un disco que contiene archivos de imagenes, la
unidad lee el disco automaticamente y despues de uno
segundos despliega en la pantalla la lista de archivos y
carpetas en el disco.
•
Presionar " ◄ ► • " en el control remoto para
seleccionar el archivo o carpeta deseado; presionar
"PLAY/PAUSE / ENTER/PAIR" (11) para seleccionar
una opci6n de la lista.
•
Si la opci6n seleccionada es una carpeta, la
pantalla despliega los archivos contenidos
en la
carpeta.
•
Si la opci6n seleccionada es un archivo de
imagen, la unidad despliega la imagen y continua
desplegando otras imagenes en deslizamiento.
La unidad regresar a la lista de archivos cuando
teina el desfizamiento de las imagenes
Durante la Reproducci6n
◄ I I
►
I
►H
STOP
Presionar para saltar a la imagen anterior
Presionar para saltar a la imagen siguiente
Presionar para girar la imagen en sentido
de las manecillas del reloj
Presionar para girar la imagen en sentido
contrario de las manecillas del reloj
Presionar para Detener el deslizamiento de
las imagenes y verlas en miniatura.
Presionar " ◄ ► • " en el control remoto
para seleccionar una imagen en miniatura o
seleccionar una de las opciones de menu
en la parte inferior de la pantalla:
•
Slideshow: Regresa al modo de
deslizamiento.
•
Menu: Ver control de imagenes
•
Previous: Despliega la pagina anterior
de miniaturas
•
Next: Despliega la pagina anterior de
miniaturas
Page 21
www.emersonaudio.com
MAIN
MENU
0-9, +10
ZOOM
REPEAT
Presionar "MAIN MENU" para detener el
deslizamiento de las imagenes y desplegar
la lista de archivos y carpetas
Presionar para ingresar el numero de la
imagen directamente, entonces presionar
"ENTER"
Presionar para aumentar el tamano de la
imagen actual, cuando la imagen es mayor
al 100% presionar " ◄ ► • • para
desplazarse a traves de la misma.
Continuar presionando "ZOOM" para volver
al tamano normal (100%) de la imagen
Presionar para repetir la imagen actual o
todas las imagenes del disco o carpeta
PROGRAM
Presionar para cambiar el modo de efecto
de transici6n del deslizamiento
Page 22
Modo de Bluetooth®
1. Colocar el selector de funci6n (1) en la posici6n de
"DVD/BT/AUX/
HD -IN
".
2. Presionar "MOD E/ MENU" (4) para cambiar de modo
de DVD a modo de BT. El indicador de FM ST/
Sincronfa (17) se ilumina en azul.
Usar este modo para transmitir audio de forma
inalambrica de un dispositivo Bluetooth® como son
computadoras personales, tabletas, telefonos inteligentes
y mas. Asegurarse que el dispositivo Bluetooth® se
encuentra dentro del rango Bluetooth® y que esta
habilitado para ser localizado.
Conectando con un dispositivo por primera
vez {sincronizando)
Antes de usar los dispositivos inalambricos Bluetooth®,
necesitan conectarse el dispositivo Bluetooth® con la
unidad. Este proceso se conoce como "sincronfa" y solo
se requiere realizar una vez. Cuando dos dispositivos
han sido sincronizados, estos se conectan
automaticamente cuando se encuentran encendidos y
dentro del rango de operaci6n Bluetooth®.
EDL-2560H

1. Al colocar la unidad en modo de Bluetooth® y no
detecta ningun dispositivo sincronizado, cambia
automaticamente al modo de sincronia y el indicador
de FM ST/ Sincronia (17) destella en azul.
2. Activar la funci6n de Bluetooth® en el dispositivo a
sincronizar (asegurarse que se encuentre a una
distancia de 3 metros de la unidad). Referirse al
manual de operaci6n del dispositivo Bluetooth® para
mayor informaci6n.
3. Una vez activada la funci6n Bluetooth® en el
dispositivo, este buscara dispositivos disponibles y
despliega la lista de dispositivos encontrados. En la
lista, seleccionar el nombre de sincronia de la unidad
que es " EMERS
O
N EDL-2560".
En caso de requerir contrasea, ingresar "0000" para
finalizar la sincronizaci6n.
4. Una vez que la sincronizaci6n ha sido exitosa, la
unidad emite un tono y el indicador de FM ST /
Sincronia (17) permanece iluminado en azul.
5. Si la sincronia falla, el indicador de FM ST/ Sincronia
(17) destella en azul, presionar "PLAY/PAUSE/
ENTER/PAIR" (11) para entrar nuevamente al modo
de sincronia y repetir los pasos arriba indicados.
Solo un dispositivo 8/uetooth® puede
sincronizarse a la vez con la unidad.
Deshabilitar la funci6n de Bluetooth® de ots
dispositivos pa evitar inteerencias.
La baa de sonido intenta conectarse
automaticamente con el ultimo dispositivo
Bluetooth® conectado al estar en el modo de
Bluetooth®. Si la conexi6n Bluetooth® se pierde
debido a factores exteos o no se conecta
automaticamente, sincronizar la unidad
nuevamente.
Boar "
EMER
S
O
N
E
DL-256
0
" en la lista de
dispositivo Bluetooth® def dispositivo antes de
sincnizaos nuevamente.
Reproduccion de los dispositivos conectados
Controlar la reproducci6n desde el dispositivo
Bluetooth®.
Ajustar el volumen del dispositivo Bluetooth® al maximo,
entonces ajustar el volumen a un nivel confortable a
traves del control de volumen (2) de la unidad.
La operaci6n basica (como reproducir/pausar, siguiente,
anterior, etc.) pueden ser controlados desde la unidad y
desde el dispositivo Bluetooth® conectado.
Page 23
www.emersonaudio.com

Operaci6n del Entrada Auxiliar
1. Colocar el selector de funci6n ( 1) en la posici6n de
"DVD/BT/AUX/
H
D
-
IN".
2. lnsertar la salida de audio de un reproductor de audio
externo al conector de entrada auxiliar "AUX IN" (18)
de la unidad a traves de un cable de lfnea estereo de
0 3.5 mm (cable estereo macho a macho)
3. Cuando el cable es insertado en el conector de
entrada auxiliar, la unidad lo detecta automaticamente
y cambia al modo de Entrada Auxiliar.
Desconectar el cable de lfnea de la entda
auxiliar pa volver al modo de DVD, Bluetooth o
TV.
Al conectar un reproductor de audio externo:
•
Ajustar el volumen del reproductor de audio externo
al 80 %, entonces ajustar el volumen a un nivel
confortable a traves del control de volumen (2) de la
unidad.
•
lniciar y controlar la reproducci6n a traves del
reproductor de audio.
Page 24
Modo de Memoria USB / Tarjeta de
Memoria
1. Colocar el selector de funci6n ( 1) en la posici6n de
"DVD/BT/AUX/
H
D
-
IN".
2. Presionar
y
sostener "STOP/USB/CARD" (10) para
cambiar del modo de DVD al modo USB o Taeta
(microSD). La pantalla despliega dispositivo
detectado y despliega la lista de archivos
encontrados en la memoria USB o tarjeta de
memoria microSD.
Deben insertarse en la unidad una memoa USB
o taeta de memoa microSD con archivos
compatibles, si la unidad no detecta una
memoa USB o taeta de memoa microSD,
regresa automaticamente al modo de DVD.
Para cambiar entre los modos de D, USB y
microSD, presionar y sostener
"STOPIUSB/CARD
n
(10)
La unidad reproduce archivos de media de una la
memoria USB o tarjeta de memoria microSD. Referirse a
la secci6n de especificaciones para mas detalles sobre
los archivos de media compatibles.
EDL-2560H

Cuando la memoria USB o tarjeta de memoria microSD
con archivos compatibles es inseada, la unidad los lee
automaticamente y despues de unos segundos la
pantalla despliega la lista de archivos y carpetas
contenidos.
•
Presionar " ◄ ► •" para seleccionar el archivo o
carpeta deseado, entonces presionar "PLAY/PAUSE
/ ENTER/PAIR" para seleccionar una opci6n de la
lista.
•
Si la opci6n seleccionada es una carpeta, la
pantalla despliega los archivos contenidos en la
carpeta.
•
Si la opci6n seleccionada es un archivo de audio,
video o imagen, la unidad inicia automaticamente
la reproducci6n.
Los controles de reproducci6n para los modos de
Memoria USB / Tarjeta de memoria son similares al
modo de DVD.
Modo de DVD - Reproducci6n de ahivos de Audio y
Video
Modo de DVD- Reproducci6n de archivos de imagenes
Modo de Radio AM/FM
Colocar el selector de funci6n (1) en la posici6n de
"RADIO" para entrar al modo de Radio AM/FM.
Pa optimizar la recepci6n de las estaciones de
Radio FM, extender la antena telesc6pica
completamente y gia.
Para
optimizar la recepci6n de las estaciones de
Radio AM, gir suavemente la unidad o
colocaa en un area abierta
Sintonizando una estaci6n
1. Seleccionar la banda
•
Colocar el selector de banda (14) en
la posici6n
de
AM, para sintonizar las frecuencias de Radio
AM (kHz)
•
Colocar el selector de banda (14) en la posici6n
de FM, para sintonizar las frecuencias de Radio
FM (MHz)
2. Girar el control de sintonia (13) para sintonizar la
estaci6n deseada.
El indicador de FM ST I Sincronia (17) se umina
en rojo cuando el Radio sintoniza una estaci6n
de FM estereo
Page 25
www.emersonaudio.com
Modo HDMI
1. C
oloque el interruptor FUNCTION [1] en TV/DVD/BT/AUX/HD-IN.
2. Presione MODE/MENU [4] para seleccionar la función de entrada HDMI.
3. C onecte un cable HDMI o un dispositivo HDMI al conector HD-INPUT [35] en la
parte posterior de la unidad para entrada de audio y video.
4. U tilice los controles del dispositivo externo para reproducir pistas de audio
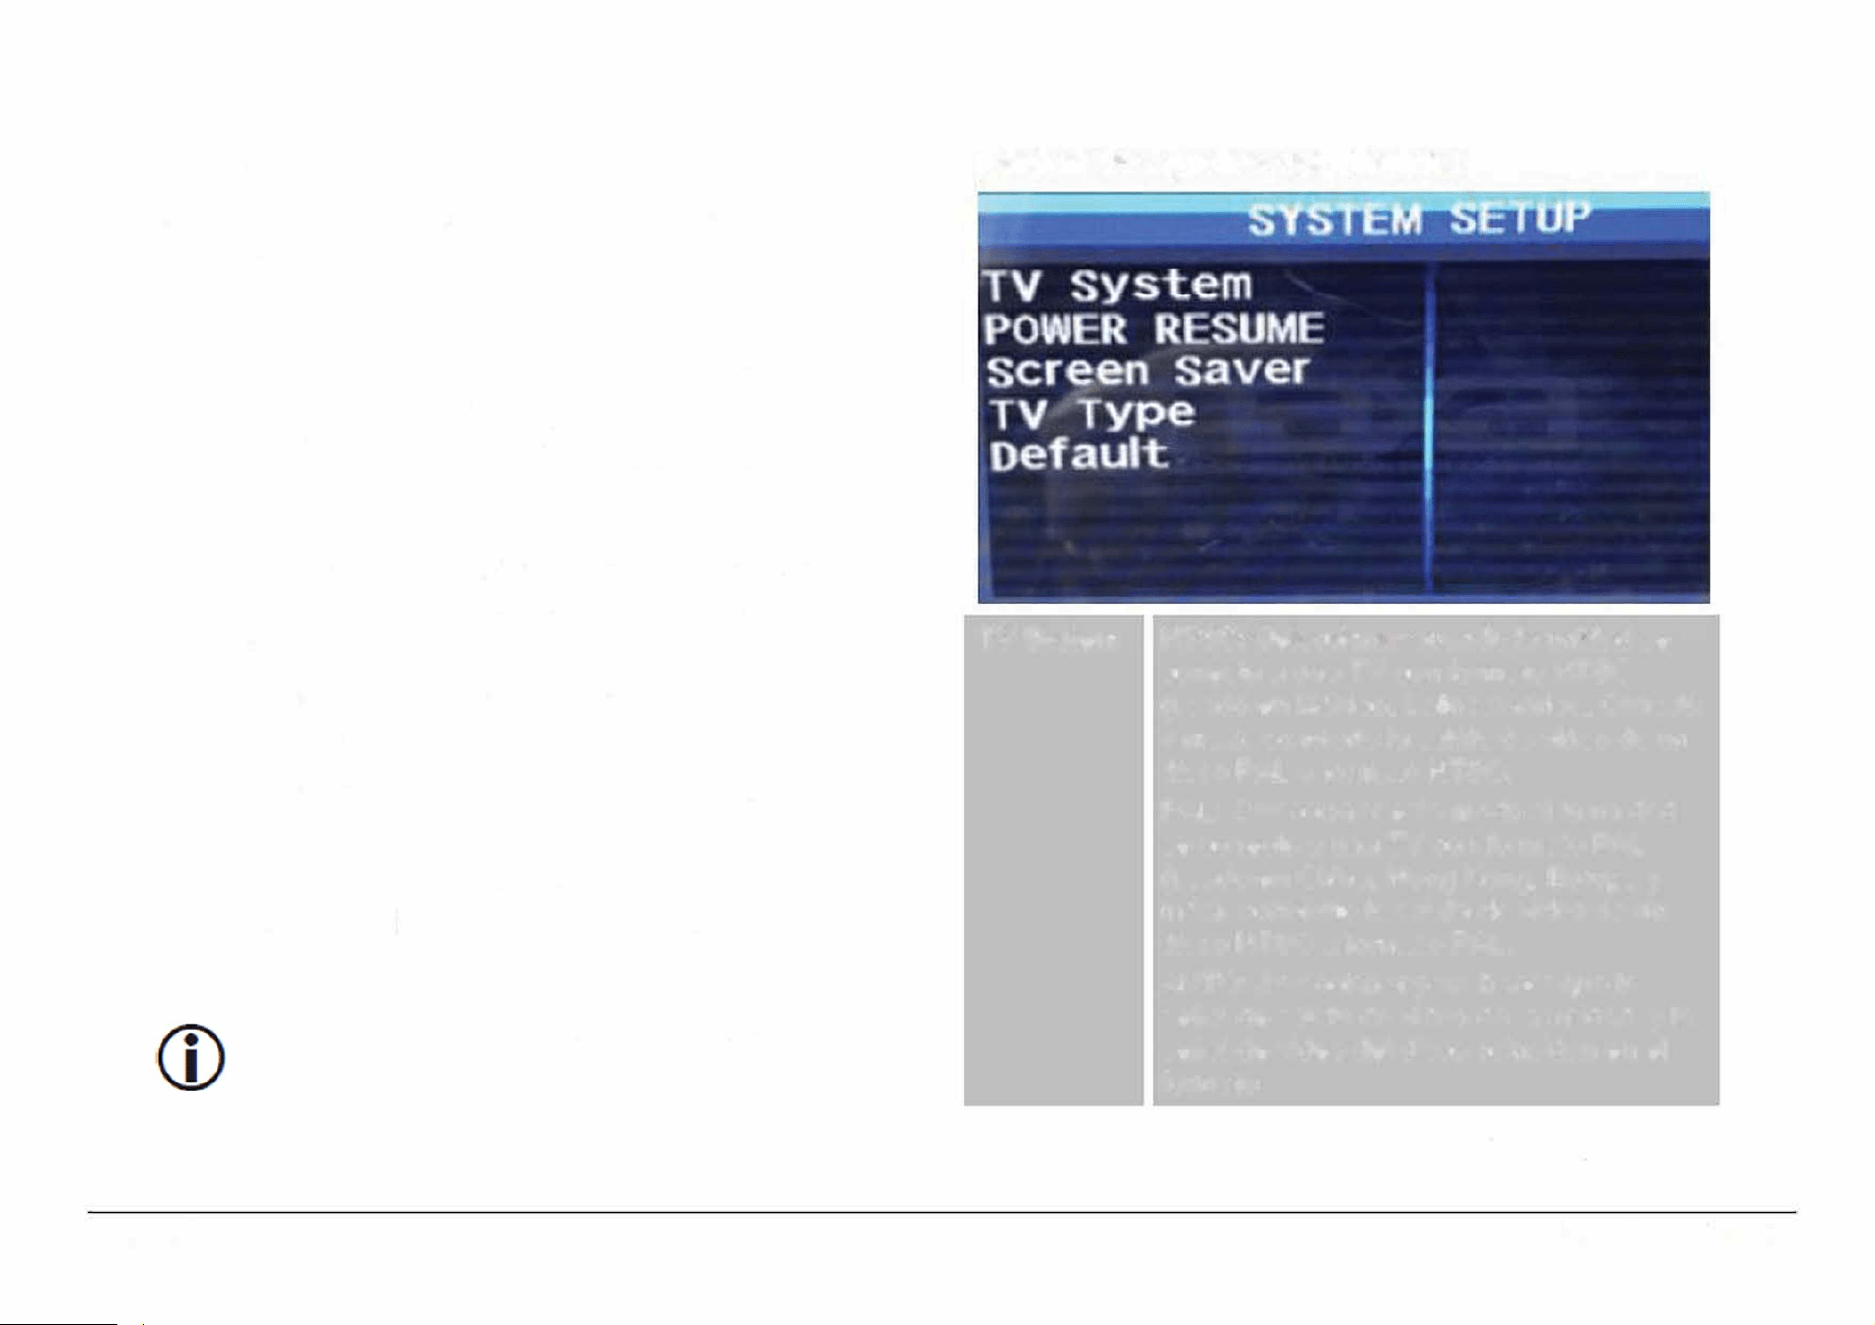
Menu de Ajustes
lngresar al menu de ajustes para ajustar las opciones del
reproductor.
•
Para ingresar al menu de ajustes, abrir la puea del
disco (7) y colocar el selector de funci6n en la
posici6n de "D VD/BT/AUX" (1 ). Presionar y sostener
"MOD E/ MENU" (4) para desplegar el menu de
ajustes.
•
La "pagina de preferencias" no estara disponible a
menos que el reproductor este detenido
completamente.
•
Presionar " ◄ ► " para seleccionar el menu y
ajustar la opciones deseadas.
•
Presionar" ◄ " para regresar al nivel o pantalla
anterior.
•
Presionar "PLAY/PAUSE/ ENTER/PAIR " (11) para
confirmar un ajuste o selecci6n resaltada.
Page 26
Puede usar los botones coespondientes en la
unidad o contl remoto para las funciones
Pagina de Ajustes del Sistema
TV System
Power
NTSC: Seleccionar cuando la unidad se
conecta a una TV con formato NTSC
(usado en Mexico, Latinoamerica, Canada
y mas), conviee la salida de video de un
disco PAL a f
o
rmato NTSC.
PAL: Seleccionar este modo si la unidad
se conecta a una TV con formato PAL
(usado en China, Hong Kong, Europa y
mas), convierte la salida de video de un
disco NTSC a f
o
rmato PAL.
AUTO: Seleccionar para hacer que la
seal de salida de video de la unidad y la
seal de video del disco coincidan en el
formato
ON: En el modo de Reproducci6n,
Detenido o Pausa al abrir la puea di
EDL-2560H
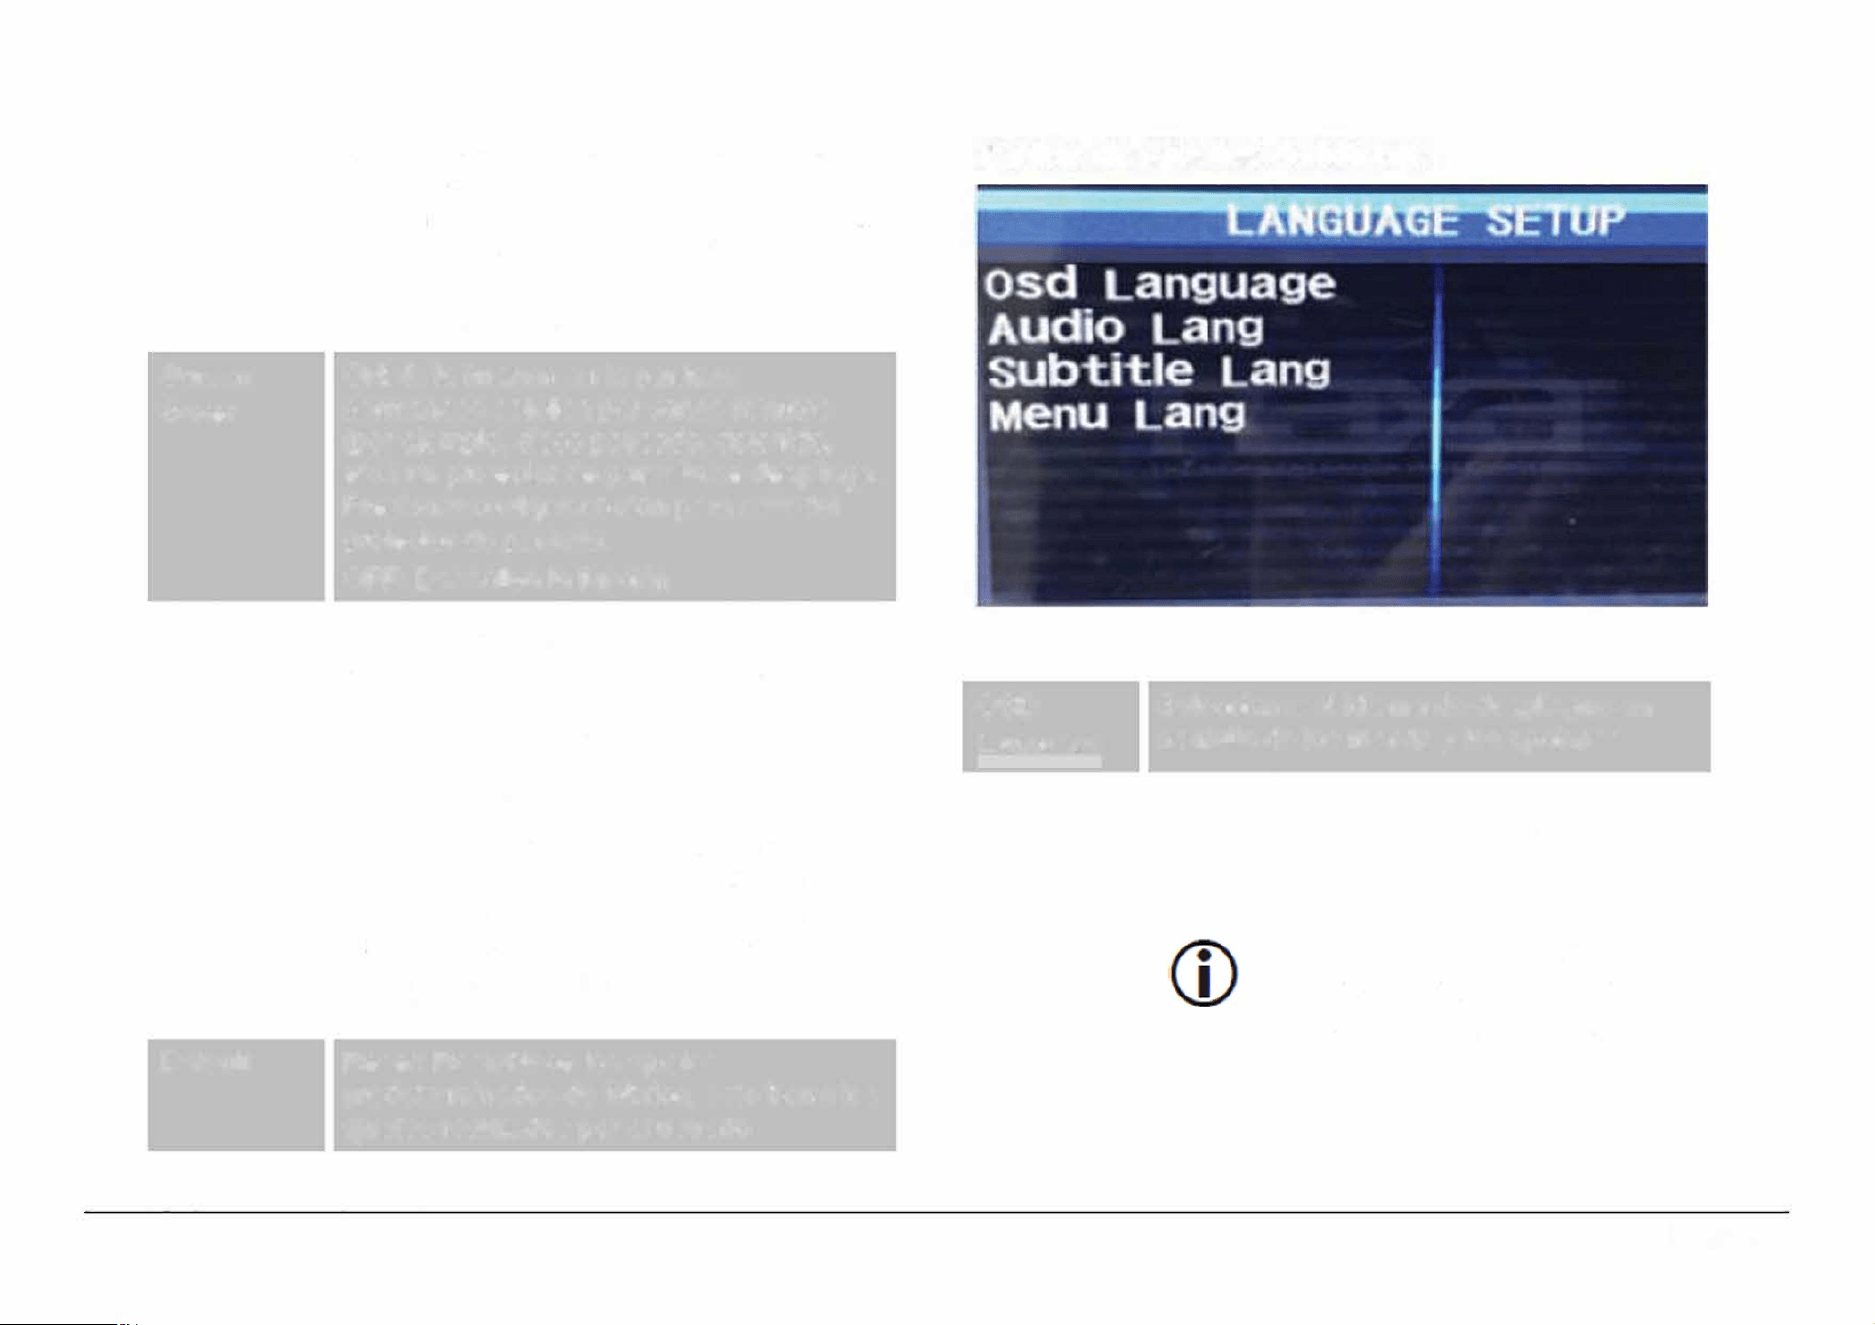
Resume
Screen
Saver
TV Type
Default
disco, la unidad memoriza el ultimo punto
de reproducci6n. La siguiente vez que se
inserta el mismo disco, la unidad empieza
la reproducci6n desde el punto
memorizado.
OFF: Desactiva la funci6n
ON: Si la imagen en la pantalla
permanece estatica por varios minutos
(por ejemplo, disco pausado, detenido,
etc.) un protector de pantalla se despliega.
Presionar cualquier bot6n para salir del
protector de pantalla.
OFF: Desactiva la funci6n
Normal /PS: La imagen se despliega en la
pantalla con algunas partes cortadas en
los lados izquierdo y derecho
Normal/LB: La imagen se despliega en la
pantalla con bandas negras en la parte
superior e inferior
Wide: Si la unidad se conecta a una TV de
pantalla ancha, seleccionar esta opci6n, la
imagen se despliega en la pantalla con
rango de 4:3, la imagen se estrecha de
forma horizontal para que se ajuste a la
pantalla
Reset: Restablece los ajustes
predeterminados de fabrica, esto borra los
ajustes realizados por el usuario
Pagina de Ajustes de ldioma
OSD
Language
Audio lang
Seleccionar el idioma de despliegue en
pantalla de los menus y las opciones
Seleccionar el idioma de audio deseado.
Tambien puede cambiar el idioma de
audio al presionar "AUDIO" en el control
remoto.
Si el idioma seleccionado no
esta disponible, el idioma de
audio predeterminado sera
activado
Page 27
www.emersonaudio.com
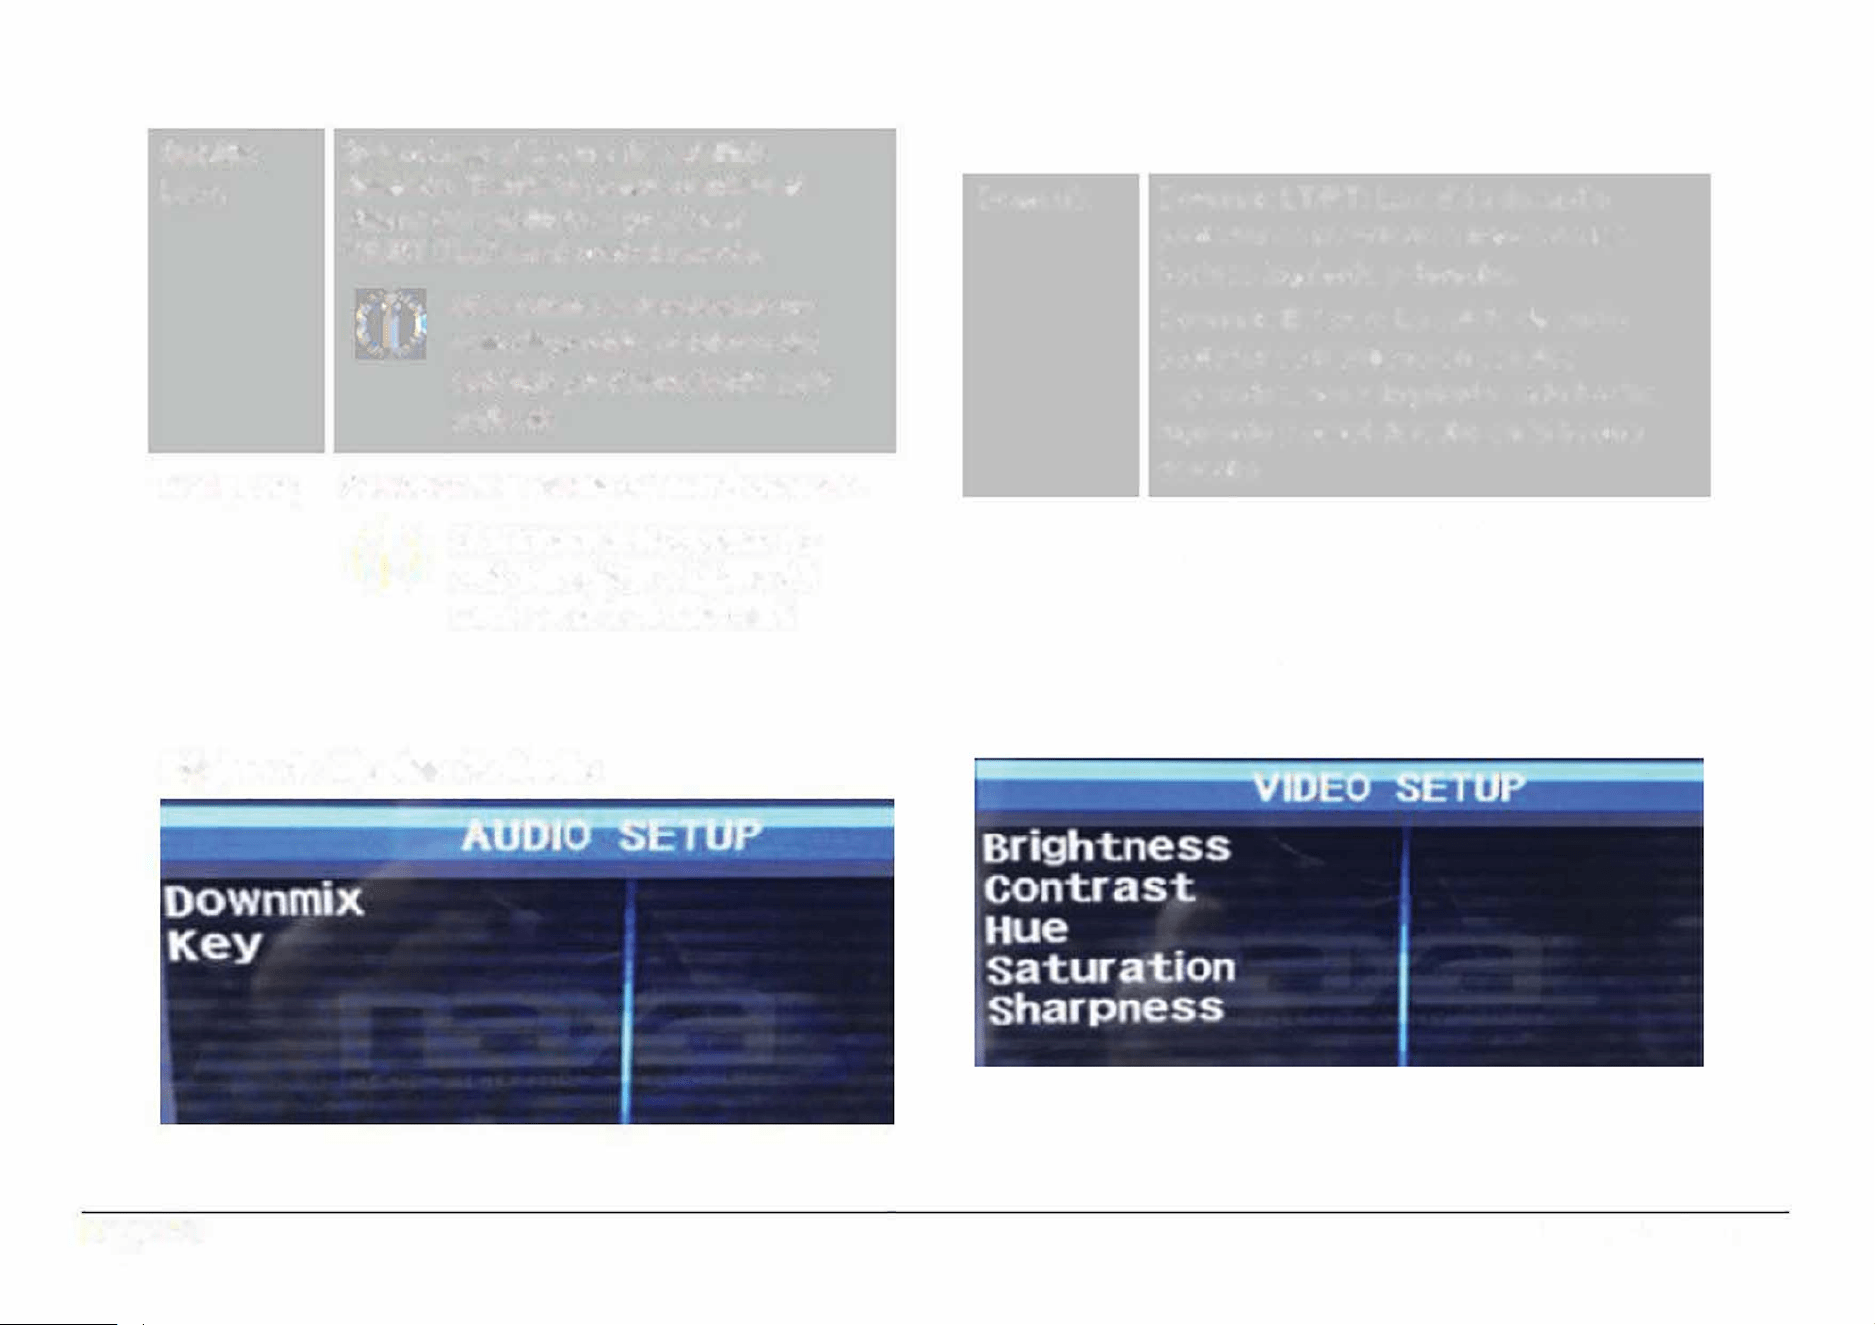
Subtitle
Lang
Menu Lang
Seleccionar el idioma del subtitulo
deseado. Tambien puede cambiar el
idioma del subtitulo al presionar
"SUBTITLE" en el control remoto.
@
Si el idioma seleccionado no
esta disponib/e, el idioma de/
subtulo predeterminado sera
activado
Seleccionar el idioma del menu deseado.
Si el idioma seleccionado no
esta disponible, el idioma def
menu predeterminado sera
actido
Pagina de Ajustes de Audio
Page 28
Downmix
Downmix LT/RT: La salida de audio
posterior es mezclada a traves de las
bocinas izquierda y derecha.
Downmix Estereo: La salida de audio
posterior se mantiene en canales
separados, canal izquierdo en la bocina
izquierda y canal derecho en la bocina
derecha
Key
Cambiar la llave para discos Karaoke (+4,
+2, 0, -2, -4)
Pagina de Ajustes de Video
EDL-2560H
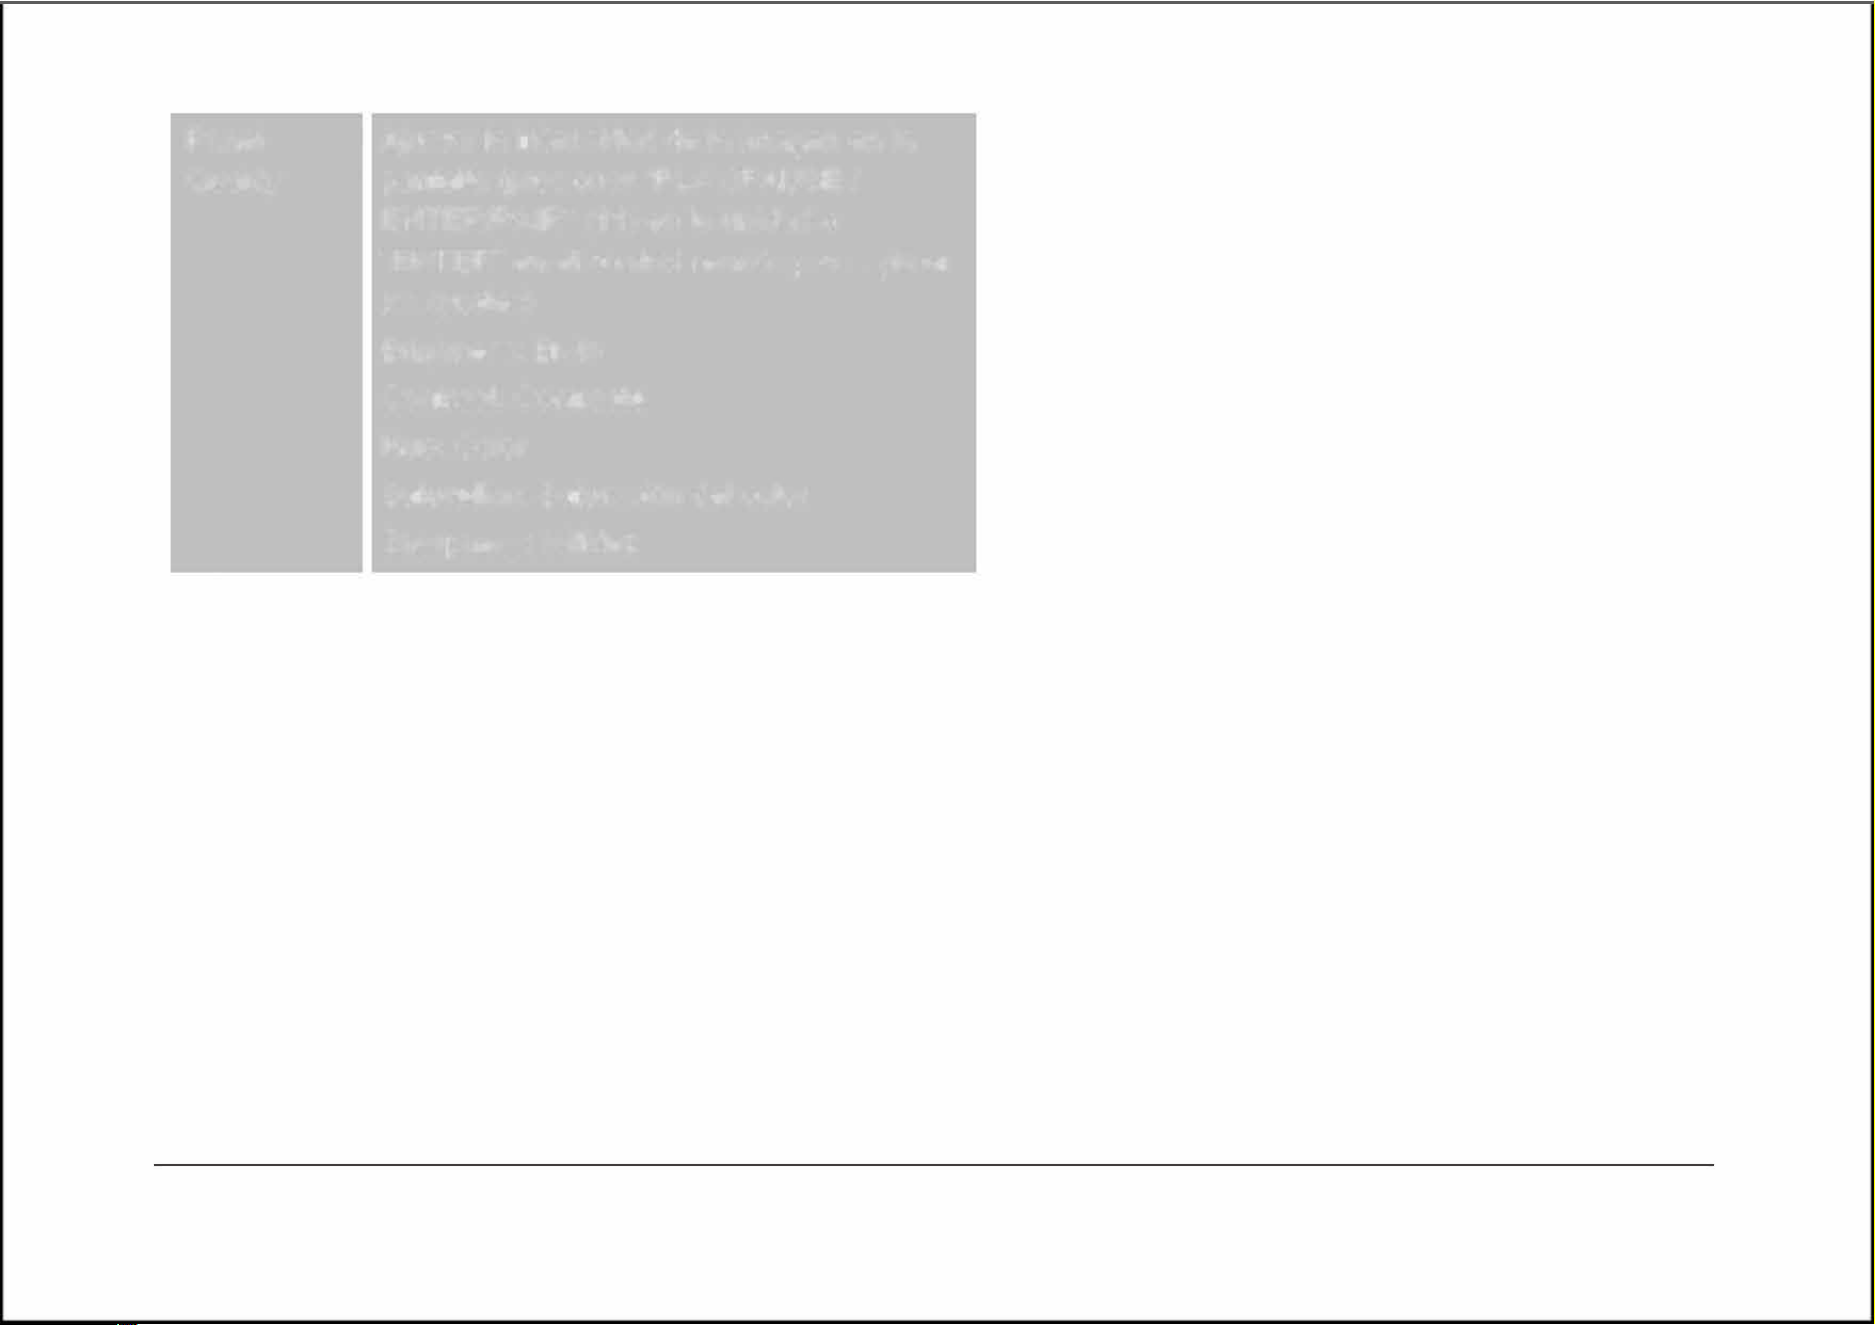
Panel
ustar la intensidad de la imagen en la
Quality
pantalla (presionar "PLAY/PAUSE/
ENTER/PAIR" (11) en la unidad o
"ENTER" en el control remoto para aplicar
los ajustes)
Brighness: Brillo
Contrast: Contraste
Hue: Color
Saturation: Saturaci6n del color
Sharpness: Nitidez
Pagina de Preferencias
Page 29
www.emersonaudio.com
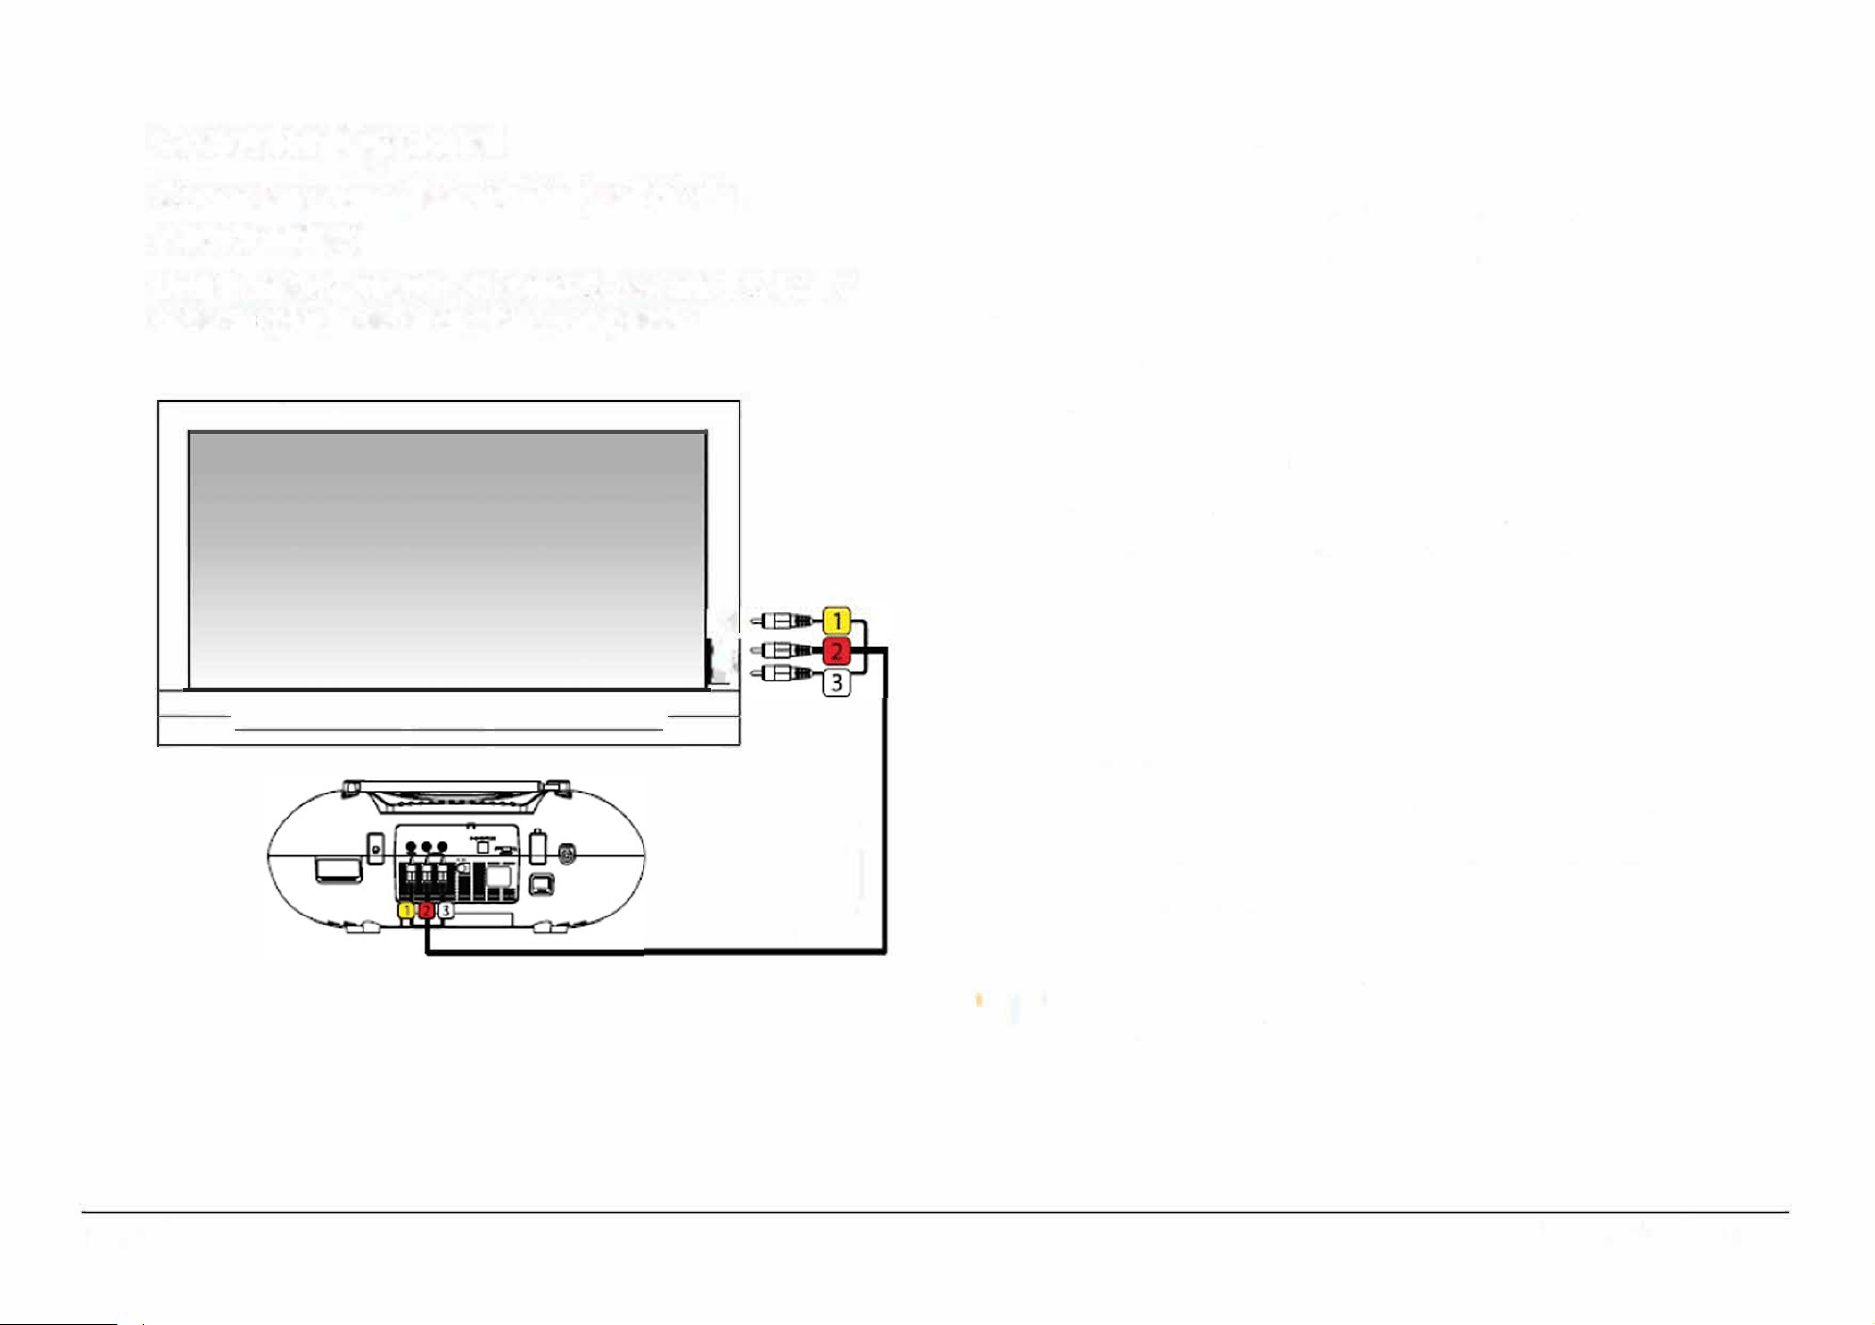
Conexi6n Opcional
Conectar a una Television (salida de
AudioNideo}
Usar la unidad en casa en conjunto con una TV. La TV
debe aceptar la seal de video compuesta.
�
t!
----
•
' ,
I I
J
Page 30
Con el cable de Audio / Video incluido (}
1. lnsertar el conector amarillo del cable al conector de
entrada de video compuesto (amarillo) de la TV
2. lnsertar el conector rojo del cable al conector de
entrada de audio derecho (rojo) de la TV.
3.
lnsertar el conector blanco del cable al conector de
entrada de audio izquierdo (blanco) de la TV.
4. lnsertar los conectores amarillo, rojo y blanco del
cable en los conectores de salida de V de la unidad
(27, 28) verificando el c6digo de colores al
insertarlos.
5.
Encender la unidad y la .
6. Ajustar la fuente de video compuesto para despliega
en la pantalla de la TV. Podra ver la salida de la
unidad en la pantalla de la TV cuando el ajuste de la
fuente es correcto.
Refee al manual de operaci6n de la para
conocer mas de las fuentes de deliegue
EDL-2560H
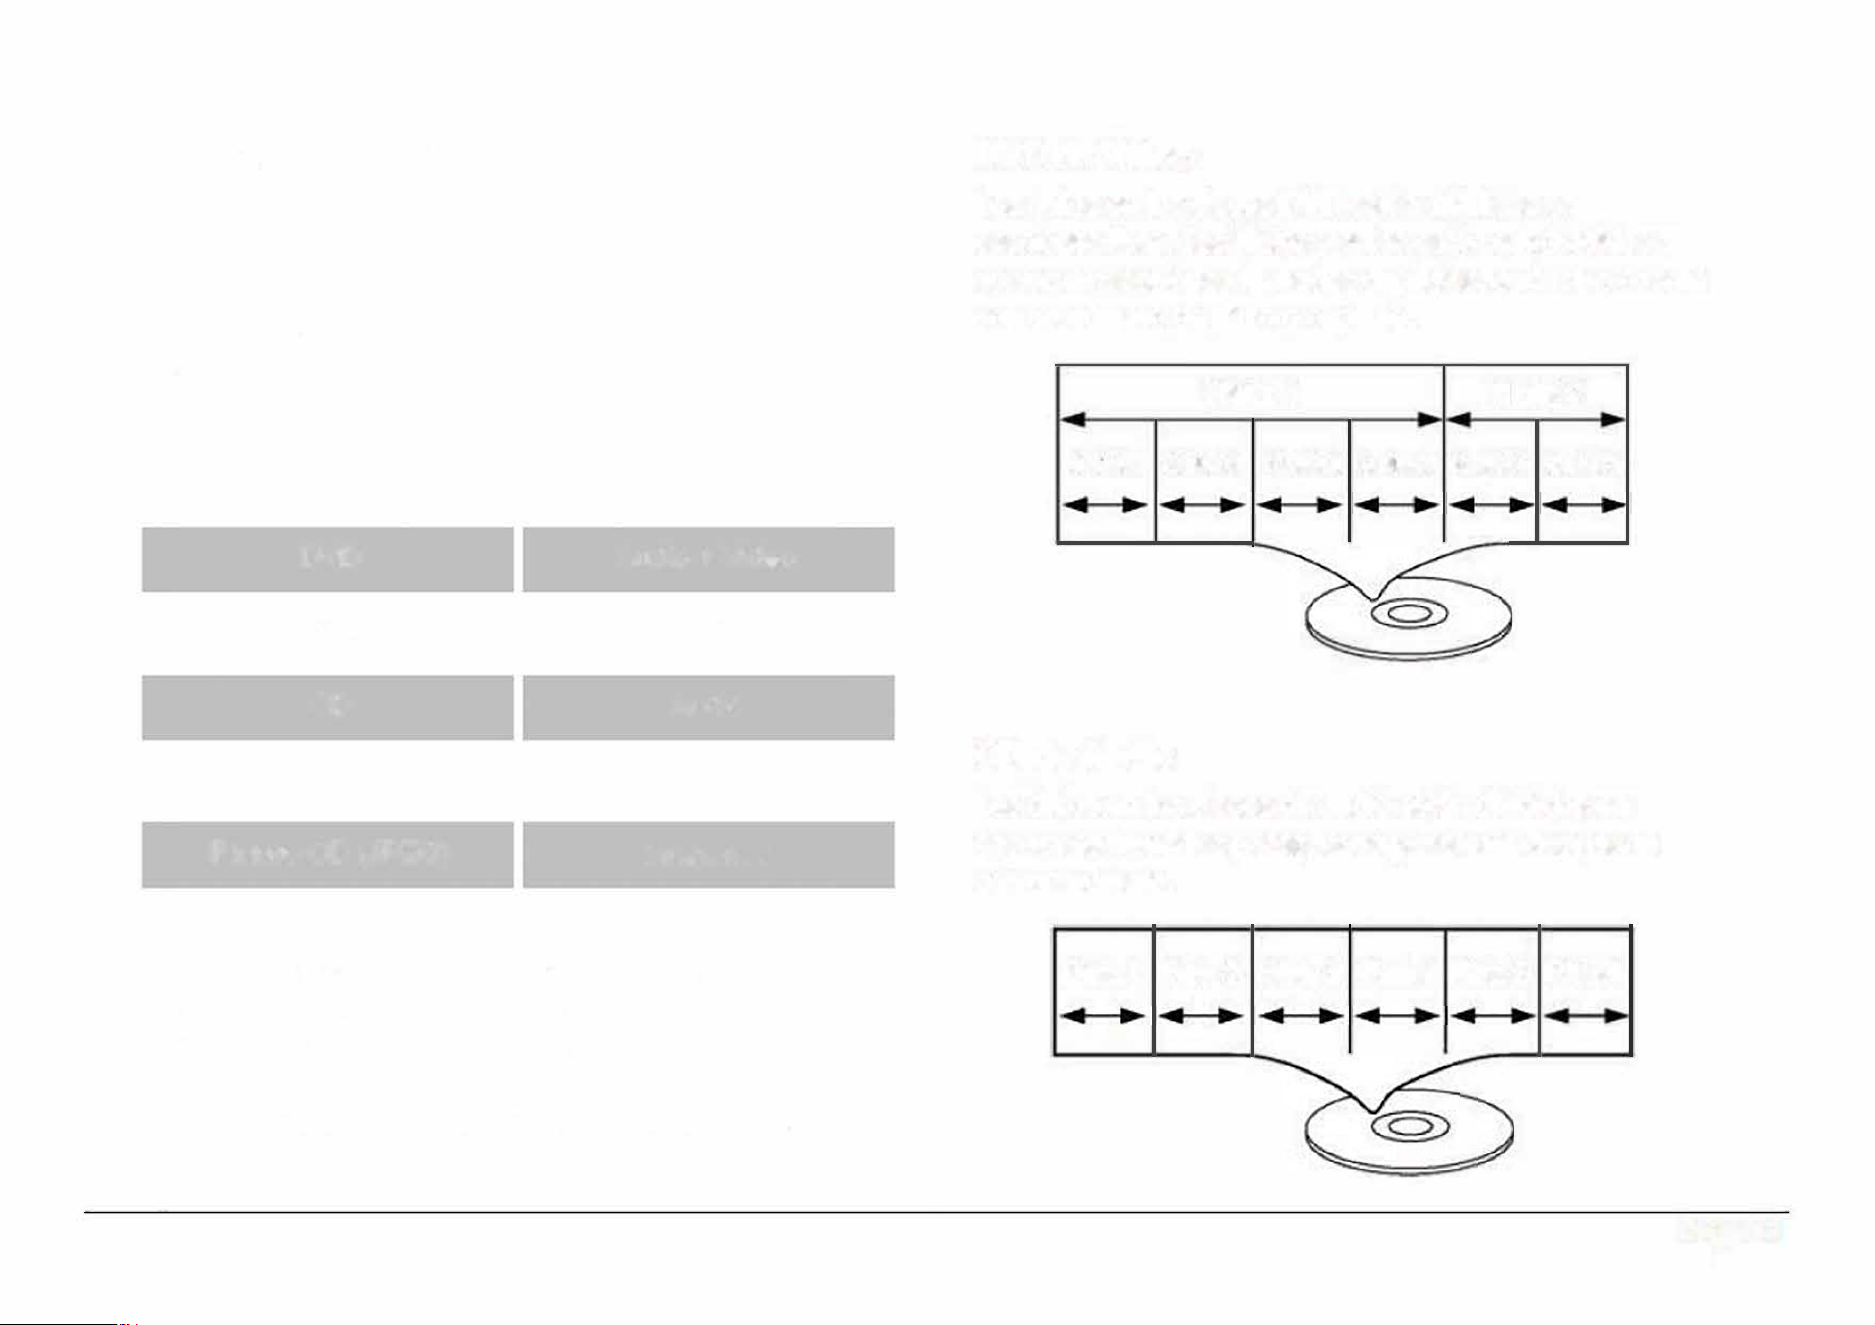
Acerca de los Discos
Tipo de Discos
Esta unidad soporta la reproducci6n de las siguientes
tipos de discos
Tipo Contenido
DVD
Audio + Video
MP3
Audio
CD
Audio
Video CD (VCD)
Audio + Video
Picture CD (JPEG)
lmagenes
Esta unidad puede reproducir discos o memorias
externas que contengan archives en formate MP3 o
JPEG.
Los discos y tipos de media no enlistados
anteriormente no son soportados par la unidad (par
ejemplo, PC CD-ROM, CD-Extra, CD-G, CD-I, etc.).
DVD de Video
Los datos en las discos DVD estan divididos en
secciones llamadas titulos y estos estan subdivididos a
su vez en secciones llamadas capitulos, cada uno cuenta
con un numero de titulo o capitulo.
Titulo 1 Titulo 2
Capdu I Caulo 2 C111lo 3 Calu • Capdulo 5 Capitu 6
CD de Audio
Los datos en las discos de audio estan divididos en
secciones llamadas pistas, cada pista esta designada
con un numero.
Pista 1
Pista 2 Pista 3 Plsta 4 Pista 5 Pista 6
Page 31
www.emersonaudio.com
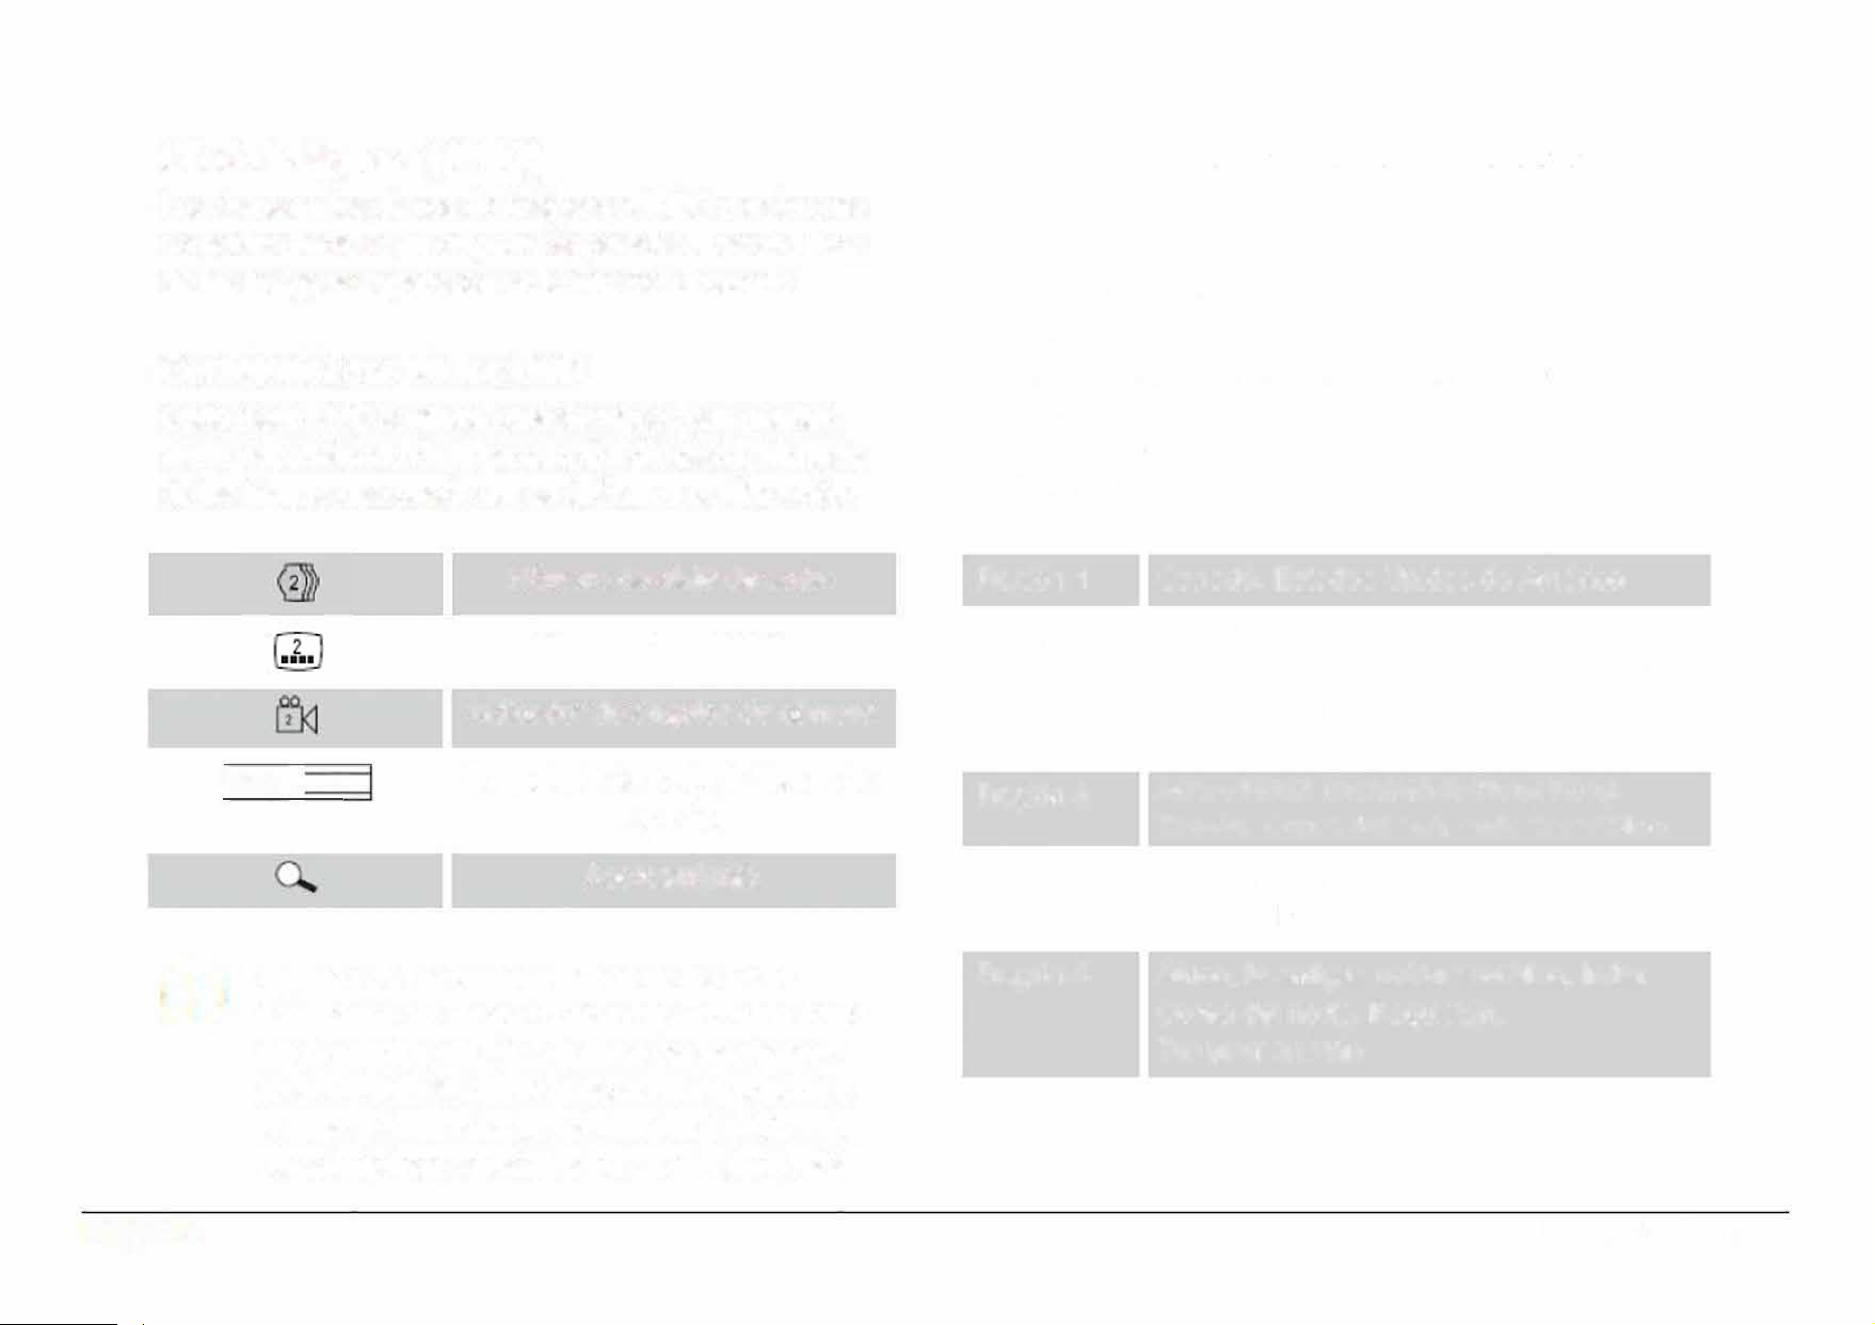
CD de lmagenes (JPEG)
Los datos en los discos de imagenes JPEG usualmente
no estan divididos en carpetas separadas. Los archives
de las imagenes aparecen en la rafz del directorio.
Caracteristicas de los DVD
Cada disco DVD contiene caracterfsticas que pueden
variar dependiendo de la produccion del disco. Algunas
de las figuras que puede ver se indin a continuacion:
116:9 I
LB
+
Numero de pista de audio
Numero de subtitulos
lndicador de angulos de camara
Formato de la pantalla (rango de
aspecto)
Acercamiento
Algunas de las caracteristicas de los DVD
habilitadas en el reproductor dependen de c6mo
fue producido el DVD. Algunas caracterfsticas
no estan habitadas si el disco no las sopoa o
si se requieren ajustes adicionales. Vericar las
caracterfsticas especicadas en el estuche def
Page 32
DVD o seguir las instrucciones de/ disco
delegadas en el menu en la pantalla
C6digo de Region de los DVD
Los discos y reproductores DVD son fabricados bajo
reglas mundiales obligatorias, el c6digo de region de los
sistemas de DVD. Los reproductores de DVD solo
pueden reproducir discos DVD codificados con el mismo
codigo de region.
Region 1
Region 2
Region 3
Region 4
Region 5
Region 6
Canada, Estados Unidos de America
Europa (incluidos Polonia, Rumania,
Republica Checa), Japon, Medio Oriente
(incluido Arabia Saudita, Egipto, Iran,
Sudafrica)
Asia oriental (incluyendo Hong Kong,
Taiwan, Corea del sur), sudeste asiatico
Australia, Caribe, Centroamerica,
Sudamerica, Mexico, Nueva Zelanda
Africa, la antigua union sovietica, India,
Corea del norte, Paquistan,
Turquemenistan
China
EDL-2560H
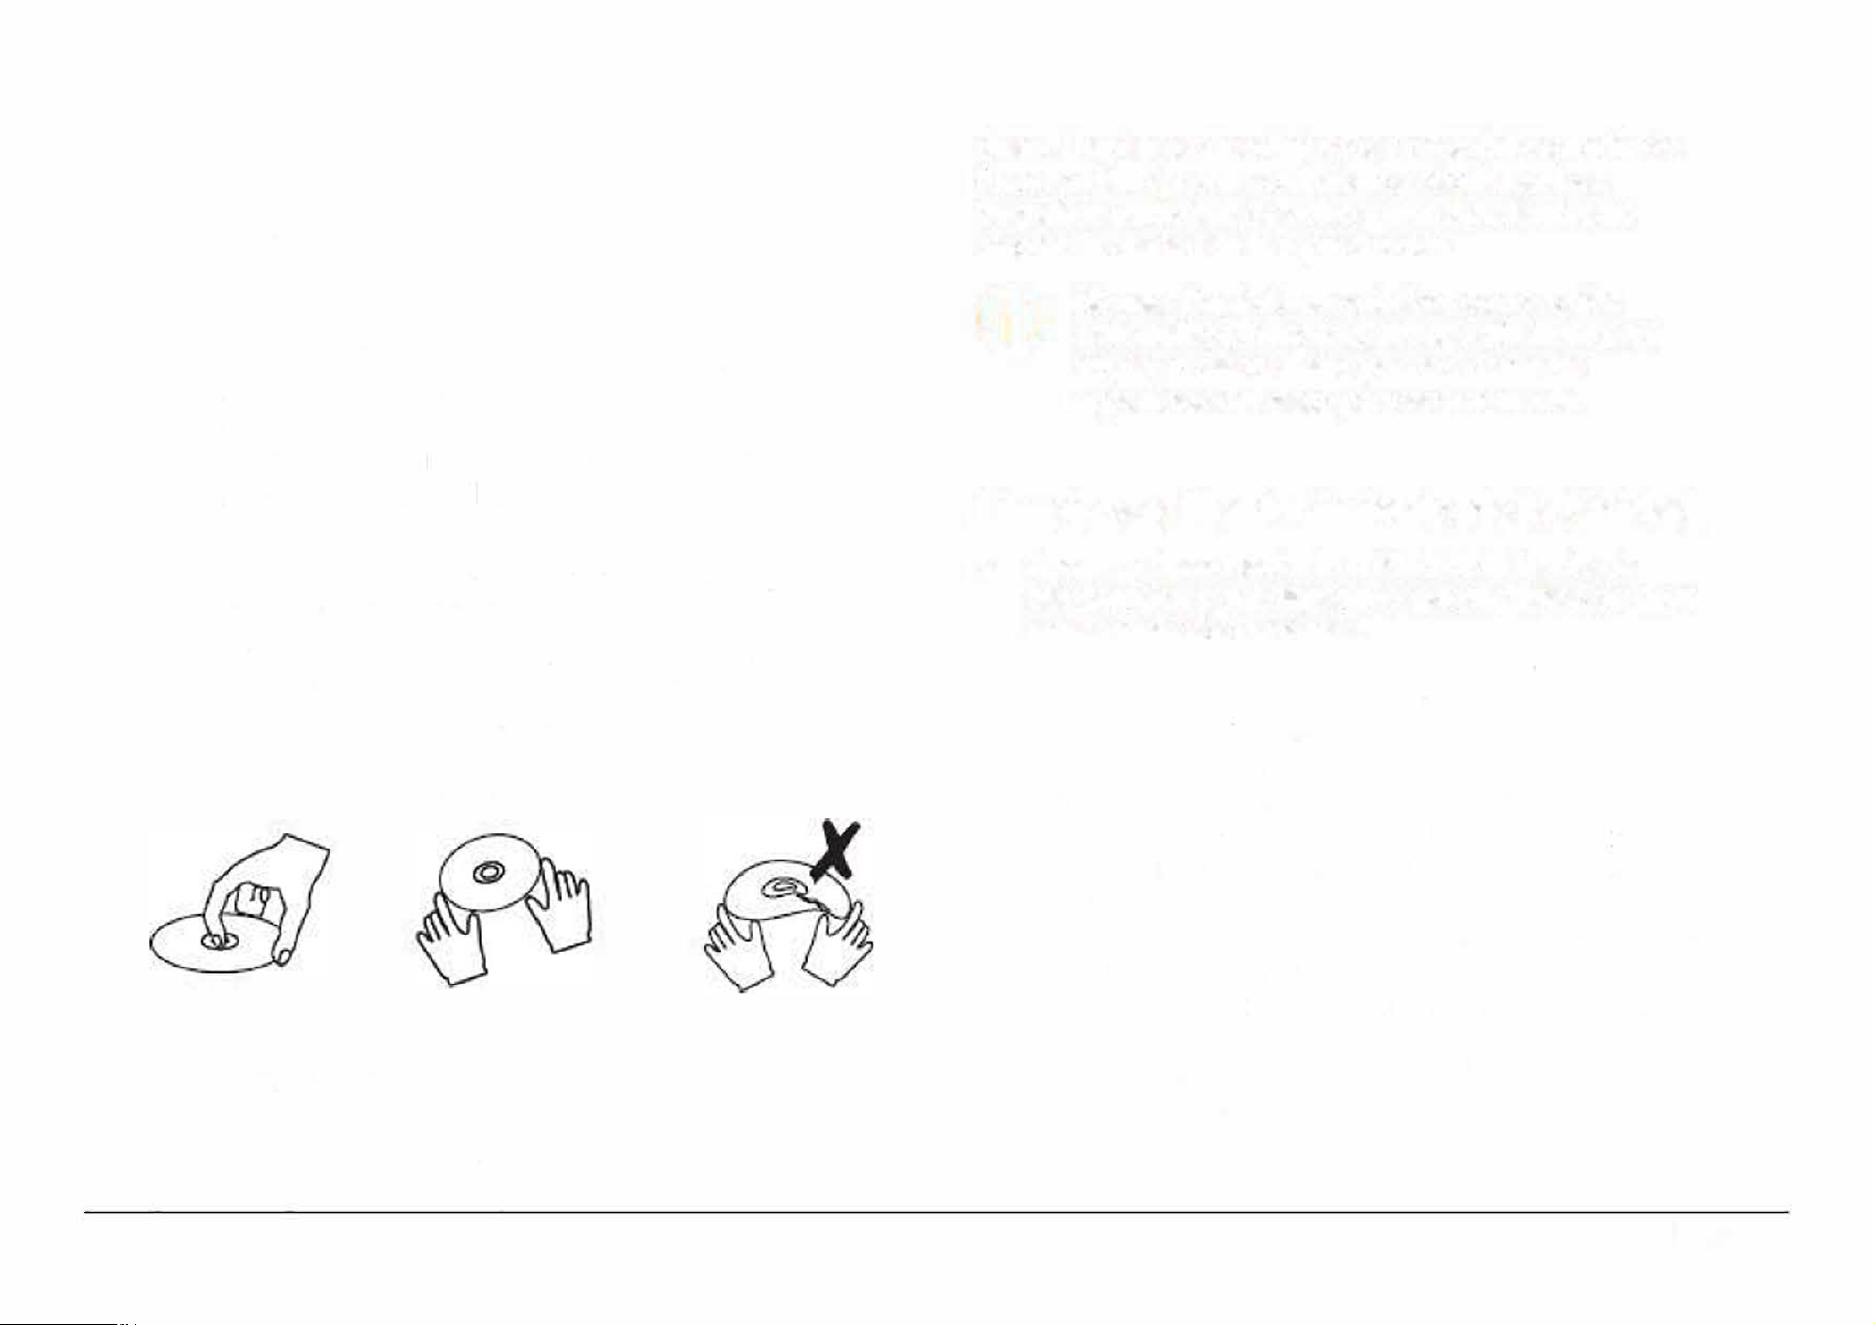
Cuidado y Mantenimiento de los Discos
Los discos DVD, CD contienen datos de alta densidad
comprimidos y requieren de un cuidado adecuado.
Manejo de los Discos
•
Sujetar los discos por los bordes, evitar tocar las
superficies de los discos. Para remover un disco de
su estuche, presionar en la espiga central del
mecanismo de sujeci6n del estuche y levantarlo
sujetando de los bordes.
•
No doblar o presionar los discos.
•
No exponer los discos a los rayos del sol, alta
humedad o temperatura.
•
Para reducir el riesgo de ralladuras en los discos,
almacenar los discos en su estuche despues de
usarlos. Almacenarlos de forma veical.
•
No colocar etiquetas o cinta adherible en las
superficies de los discos.
Limpieza de los Discos
Usar una tela suave, limpia, seca y libre de pelusa para
limpiar las huellas de los dedos de las supeicies del
disco. Limpiar con movimientos rectos del centro hacia
fuera, no limpiar con movimientos circulares. Las
pequeas particulas de polvo y manchas ligeras no
afectan la calidad de la reproducci6n.
No usar limpiadores quimicos como rocios
antiestaticos, benceno, thiner o similares para
limpiar el disco. Estos pueden daar las
supeicies def disco permanentemente.
Limpieza y Mantenimiento de la Unidad
•
•
•
•
•
•
Apagar y desconectar la unidad de la fuente de
alimentaci6n y del dispositivo externo antes de darle
mantenimiento o limpieza.
El gabinete de la unidad debe limpiarse con una tela
suave, limpia, seca y libre de pelusa.
Para manchas fuertes, humedecer la tela con una
soluci6n de agua con jab6n neutro; secar
completamente despues de la limpieza.
No usar limpiadores qufmicos coma alcohol, thiner,
etc. o materiales abrasives estos pueden daar el
gabinete.
No almacenar la unidad en lugares con temperaturas
extremas, estas pueden acortar la vida de los
dispositivos electr6nicos, causar daos en la baterla
o deformar las partes plasticas.
Almacenar la unidad en un lugar libre de polvo,
pelusa, cabellos, agua, humedad, etc.
Page 33
www.emersonaudio.com
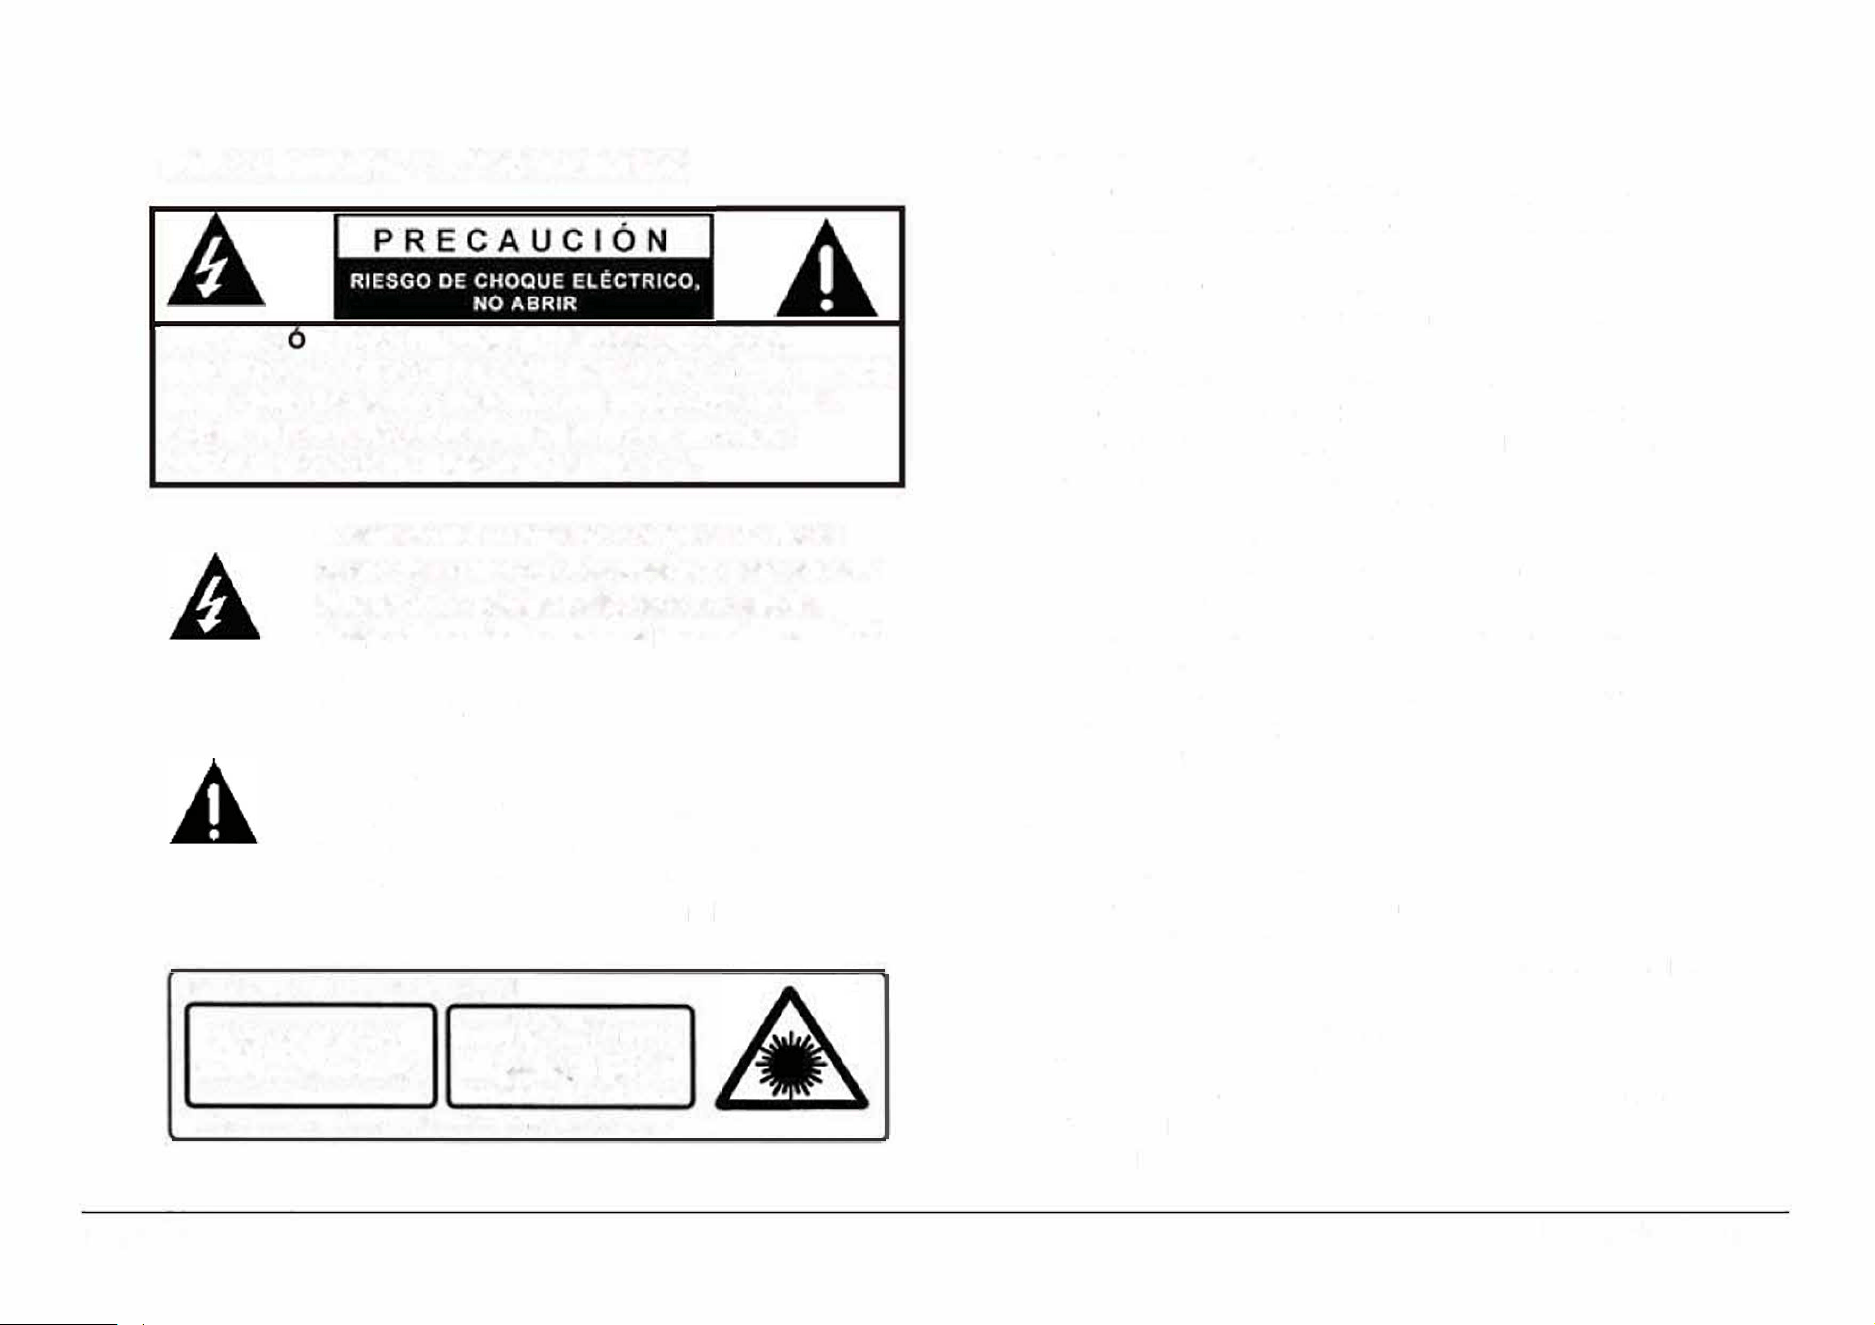
Advertencias y Precauciones
PRECAUCI N: PARA REDUCIR EL RIESGO DE CHOQUE
ELECTRICO NO REMOVER LA CUBIERTA (0 TAPA), DENTRO DE
ESTE APARATO NO HAY PARTES QUE EL USUARIO PUEDA
DARLE SERVICIO, ACUDIR A UN CENTRO DE SERVICIO
AUTORIZADO O CON PERSONAL CALIFICADO.
El simbolo del relampago con punta de flecha
dentro de un triangulo, es diseado para adveir
al usuario de voltajes peligrosos no aislados
dentro del producto que pueden ser de magnitud
suficiente para constituir riesgo de fuego o
choque electrico para las persona.
El simbolo de exclamaci6n dentro de un
triangulo, es para alertar al usuario de la
presencia de instrucciones impoantes de
operaci6n, mantenimiento y seicio que se
encuentran dentro de este instructivo
PRODUCTO LASER CLASE 1
1
E
IR I
PA R I
PRECAUCl;
CI LASE INV1SE
AL A8RIR V UBER L
SEO EV AR LA
ESION AL RAYO LAS
Sto prto cont un dlsstvo lhor do 1Jo
Page 34
Protecci6n contra la exposici6n a la energia laser.
•
El laser usado en este reproductor es danino para los ojos,
por lo tanto no intentar desensamblarlo para prevenir la
exposici6n a la radiaci6n laser invisible.
•
Detener la operaci6n inmediatamente si se ha derramado
liquido o algun objeto s61ido cae en el interior del
reproductor.
•
No tocar o presionar el lente laser. Esto puede danarlo
provocando que el reproductor no opere adecuadamente.
•
No colocar nada en las ranuras de seguridad. Esto puede
activar la radiaci6n laser al abrir la puerta del
compartimiento del disco y provocar exposici6n a la
radiaci6n laser invisible
•
Si el reproductor no va ser usado por un periodo largo de
tiempo, desconectar las fuentes de alimentaci6n. Remover
las baterias del compartimiento y/o desconectar el cordon
de alimentaci6n del tomacorriente.
•
Este reproductor usa un lente laser. El uso de controles,
ajustes o procedimiento diferentes a los especificados en el
manual pueden resultar en exposici6n a radiaci6n laser
peligrosa.
Precaucion
•
No bloquear las ranuras de ventilaci6n.
•
No colocar fuentes generadoras de flama (como velas,
veladoras, etc.) sobre la unidad.
•
Al
desechar las baterias seguir la reglas de desechos s61idos
de su localidad para evitar danos al medio ambiente.
•
Radiaci6n laser invisible peligrosa al abrir y liberar los seguros.
•
Evitar la exposici6n a la radiaci6n laser.
Para prevenir riesgo de fuego o choque electrico no exponer
esta
unidad al goteo o salpicadura de agua, a la lluvia o
humedad.
EDL-2560H

lmpoante lnformacion de Seguridad
1.
Leer las instrucciones. Deben leerse todas las instrucciones de
operaci6n y de seguridad antes de operar este producto.
2. Conservar las instrucciones. Deben conservarse las
instrucciones de operaci6n
y
seguridad para futuras referencias.
3.
Poner atenci6n a las advertencias. Todas las advertencias en el
producto
y
las instrucciones de operaci6n
y
seguridad deben de
respetarse.
4.
Seguir las instrucciones. Deben seguirse todas las instrucciones
de uso
y
operaci6n.
5. Limpieza. Desconectar el cord6n de alimentaci6n del
tomacorriente antes de darte mantenimiento o limpieza al
reproductor. Limpiar con una tela, suave, limpia y seca, No usar
limpiadores lfquidos o en aerosol.
6. Accesorios. Usar solo accesorios/refacciones recomendados
por el fabricante.
7.
Agua y humedad. No usar este producto cerca del agua, por
ejemplo cerca de una baera, lavabo, fregadero de cocina o de
lavar, s6tanos humedos o cerca de una piscina.
8.
Manejo y desplazamiento. No colocar este producto en un
carrito, plataforma, repisa o mesa ,
inestables, el producto puede caerse
generando serias lesiones y daos a las
personas y/o al producto. Usar este
producto solo con el carrito, plataforma,
repisa o mesa recomendado por el
fabricante o vendido con el producto. La
combinaci6n del producto y de un carrito debe moverse con
cuidado. Las paradas repentinas, fuerza excesiva y las
superficies desniveladas pueden generar que el producto y el
carrito se vuelquen.
9.
Ventilaci6n. Las ranuras y abeuras en la pae posterior y
posterior del gabinete son provistas para la venlilaci6n y
asegurar la buena operaci6n del producto y protegerto del
sobrecalentamiento. No deben bloquearse o taparse estas
abeuras, colocando el producto sobre una cama, sofa
alfombra u otra superficie similar. El producto no debe colocarse
cerca o sobre un radiador o fuentes de calor. Este producto no
debe colocarse en un librero o estante que impida el ujo del
aire a !raves de las ranuras de ventilaci6n.
10.
Fuentes de alimentaci6n. Este producto debe ser operado solo
con los tipos de fuentes de alimentaci6n indicados en la etiqueta
de marcado, si no esta seguro del tipo de la fuente de poder de
su casa, consultar con su proveedor o con la compala de
electricidad local. Para producto diseados para operar con
baterias u otras fuentes, referirse al manual de operaci6n.
11.
Terminal de tierra y polarizaci6n. No eliminar la caracteristica de
seguridad de una clavija polarizada o clavija con terminal a
tierra, esta es una medida de seguridad. Una clavija polarizada
cuanta con dos terminales con una terminal mas ancha que la
otra. Una clavija con terminal a lierra cuenta con dos terminales
con una tercera terminal con conexi6n a tierra. Si la clavija no
entra completamente en el tomacorriente, intentar meterta
nuevamente volteandola; si tampoco entra completamente
consultar a un electricista o personal calificado para reemplazar
el tomacorriente obsoleto.
12. Protecci6n del cord6n de alimentaci6n. El cord6n de
alimentaci6n debe colocarse de forma tal que no exista
probabilidad de pisarto o apretarlo sobre los lugares donde sera
colocado o contra el producto mismo. Poner atenci6n particular
en el cord6n, la clavija, el tomacorriente y en los puntos en
donde estos salen del producto.
13. Clavija con protecci6n. Este producto puede contar con una
clavija con protecci6n contra sobrecarga. Esta es una
caracterfstica de seguridad. Ver las instrucciones de operaci6n
para reemplazar o restablecer el dispositivo de protecci6n. Si
requiere reemplazar la clavija, asegurarse que se use una
clavija con protecci6n contra sobrecarga original y de las
mismas caracterfsticas de acuerdo a lo especificado por el
fabricante.
14. Antena exterior. Si una antena exterior es conectada en el
producto, asegurar de que el sistema de antena es puesto a
tierra para proveer protecci6n contra sobre voltaje y cargas de
corriente estalica acumulada. La secci6n 810 del NEC (National
Electrical Code), ANSI/NFPA 70, Provee informaci6n respecto a
la
apropiada puesta a tierra del poste y la estructura de sopoe,
Page 35
www.emersonaudio.com
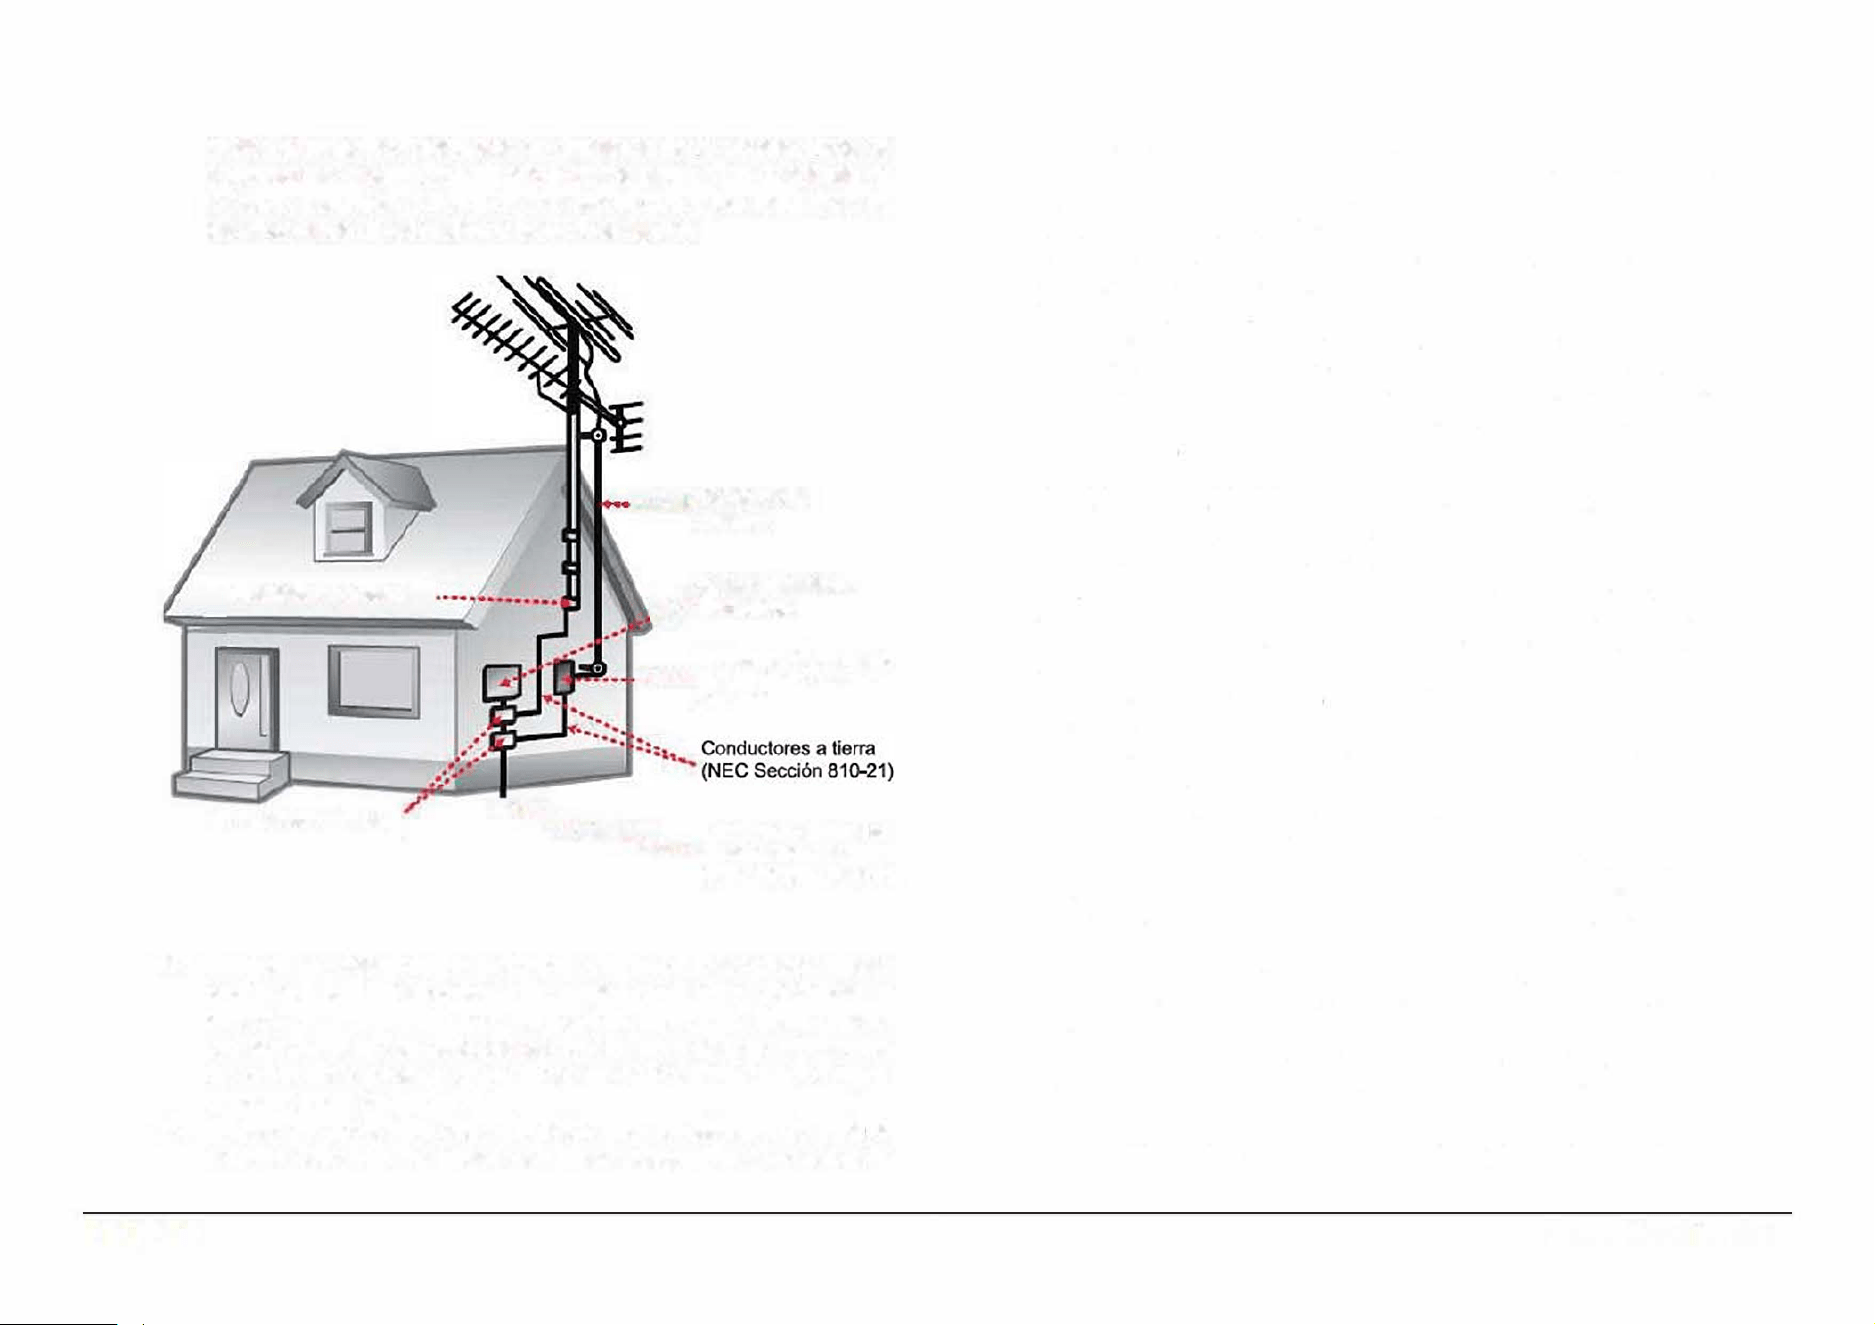
15.
16.
Page 36
cables principales, productos de descarga de la antena, tipos de
conductores a tierra, localizaci6n de los puntos de descarga de
la tierra, conexi6n a tierra de los electrodos y los requisitos de
los electrodos de conexi6n a tierra (ver figura)
Abrazaderas a tlerra
Abrazaderas a tierra
·•·---
--• Cable de la
antena
Aparato Elerico •
,.•·· Electr6nico
Unidad de descarga de
•
•
•••• antena (NEC Sei6n
810
-
20)
···-
-
-..
Sistema de electros
•• • •
•
• de conexl6n a tie
r
ra
(NEC Art 250, Parle H)
Toentas electricas o periodos sin uso. Desconectar este
producto del tomacorriente durante tormentas electricas o
cuando va ser usado por un periodo largo de tiempo para
protegerlo. Tambien desconectar la antena exterior o el sistema
de cable. Esto protege al producto de daos debido a los rayos
o sobre lfneas de poder.
Lineas de poder. No debe de colocarse un sistema de antena
exterior cerca de las lineas electricas aereas, luces o circuitos
electricos, o donde pueda caer sobre dichas lineas electricas o
circuitos. Al instalar un sistema de antena exterior, tener mucho
cuidado de no tocar las l!neas o circuitos electricos, el contacto
con ellos puede resultar fatal.
17. Sobrecarga. No sobrecargar los tomacorrientes, cordones de
extensi6n y los receptaculos ya que pueden generar riesgo de
fuego o choque electrico.
18.
Entrada de objetos y lfquidos. No introducir objetos de cualquier
tipo dentro de este producto a traves de las ranuras o abeuras,
estos pueden llegar a tocar puntos de voltaje peligroso o salidas
que pueden resultar en riesgo de fuego o choque electrico. No
derramar o rociar cualquier tipo de lfquido sobre las ranuras de
ventilaci6n del producto.
19. Servicio. No intentar dar servicio usted mismo a este producto,
abriendo o removiendo las cubiertas, puede exponerse a
voltajes peligrosos u otros riesgos.
20. Danos que requieren servicio. Desconectar el producto del
tomacorriente de pared y acudir a un centro de seicio
autorizado o con personal calificado bajo las siguientes
condiciones
a) Cuando la clavija o el cordon de alimentaci6n esten
daados.
b) Cuando ha sido derramado liquido o han caido objetos en el
interior del producto.
c) Si el producto ha sido expuesto a la lluvia o agua.
d) Si el producto no opera adecuadamente siguiendo las
instrucciones de operaci6n. Ajustar solo los controles que
son indicados en este manual de operaci6n. El ajuste de
otros controles puede ocasionar daos y a menudo se
requiere de trabajo excesivo del servicio tecnico para
restablecer la operaci6n noal del producto.
e) Si el producto se ha cafdo o golpeado o si la cubierta esta
daada.
f)
Si el producto exhibe cambios en su funcionamiento normal.
Todo lo anterior indica la necesidad de darle servicio al
producto.
21. Reemplazo de partes. Cuando es necesario el reemplazo de
partes, asegurarse que el servicio tecnico use partes
EDL-2560H
especificadas per el fabricante o que tengan las mismas
caracterfsticas que las paes originales. El reemplazo de paes
no autorizadas puede resultar en fuego, cheque electrico u otros
riesgos.
22. Vericar las medidas de seguridad. Una vez que se ha
completado cualquier tipo de seicio o reparaci6n a este
producto, solicitar al tecnico de seicio que realice las pruebas
de seguridad para poder determinar que el producto esta en
condiciones apropiadas de operaci6n.
23.
Colocaci6n en la pared o !echo. El producto debe de colocarse
en la pared o techo de acuerdo a come lo especifica el
fabricante.
24. Caler. El producto debe colocarse lejos de fuentes de calor
come radiadores, registros de calor, estufas u otros productos
que producen calor (incluso amplificadores).
NOTICI AFCC
Este dispositivo cumple con la parte 15 de las reglas FCC. La
operaci6n del aparato esta sujeta a las dos siguientes condiciones:
( 1) Este aparato no puede causar interferencia perjudicial y (2) este
aparato debe aceptar cualquier interferencia recibida, incluyendo
interferencias que puedan causar un funcionamiento no deseado.
Neta: Este dispositivo ha side probado y cumple con las limitaciones
de un equipo digital Clase B, de acuerdo con la Parte 15 de las
Normas FCC. Estes limites estan diseados para permitir una
protecci6n razonable contra interferencia daina en una instalaci6n
residencial. Este equipo genera, usa y puede emitir energfa de
frecuencia radial y, de no ser instalado y utilizado de acuerdo con las
instrucciones, puede causar interferencia daina a las
comunicaciones radiales. Sin embargo, no existe garantfa de que la
interferencia no pueda ocurrir en una instalaci6n particular. Si este
equipo causa una interferencia daina a la recepci6n de la radio o la
televisi6n, lo cual se puede determinar encendiendo y apagando el
equipo, se recomienda al usuario tratar de corregir la interferencia
mediante una o mas de las siguientes medidas:
•
Orientar nuevamente o reubicar la antena receptora.
•
Aumentar la separaci6n entre el equipo y el receptor.
•
Conectar el equipo a una salida de un circuito diferente al
receptor.
•
Consultar a su proveedor o a un tecnico de Radio y televisi6n.
PRECAUCION SOBRE MODIFICACIONES
Cualquier cambio o modificaci6n no expresamente aprobada por la
parte responsable del cumplimiento puede anular la autoridad del
usuario para operar este reproductor.
ADVERTENCIA
Este producto contiene plomo, una sustancia quimica que el estado
de california conoce come causante de cancer, defectos de
nacimiento u otros daos reproductives. Lavarse las manos
despues de operarlo.
lndicaciones sobre el medio ambiente
Al termino de la vida util de este producto, este no debe ser
desechado en la basura domestica para evitar daos al
medic ambiente, en su case acudir al centre de desechos
-
s6Iidos de su localidad. La separaci6n adecuada de los
desechos ayuda a evitar posibles efectos negatives sobre la salud
humana y el medic ambiente y promueve el reciclaje de los
materiales que componen el producto. lnfoarse en su localidad
sobre los organismos de eliminaci6n de este tipo de desechos.
Page 37
www.emersonaudio.com
Guia rapida para soluci6n de problemas
Esta guia presenta los problemas mas comunes y la
posible
soluci6n. Favor de referirse a la guia antes de
acudir al centro de seicio autorizado. Si requiere futura
asistencia, favor de contactar la pagina de soporte
tecnico .naxa.com/supportcenter/
El disco no se reproduce
El disco fue colocado
de forma incorrecta en
la bandeja
El disco no es
compatible
El disco esta sucio o
danado
La unidad no enciende
No hay fuente de
alimentaci6n
Page 38
Verificar que el disco este
colocado de forma correcta y
con la etiqueta hacia arriba
Colocar un disco compatible.
Ir a la secci6n de
especificaciones para ver los
discos compatibles
Limpiar el disco. Un disco
puede
no reproducirse si esta
demasiado rallado o danado
de otra forma
Verificar que la fuente de
alimentaci6n este conectada
adecuadamente y que
cuentan con poder
No opera el control remoto
No hay baterias o estan
agotadas
No apunta directamente
al sensor infrarrojo de la
unidad
La distancia y angulo
de operaci6n del control
remoto estan fuera de
los rangos
lnstalar unas baterias nuevas
Apuntar directamente el
control remoto al sensor
infrarrojo de la unidad
Asegurase de estar a 5
metros maximo de la unidad y
con un angulo de 30
°
maximo
con respecto al sensor
infrarrojo de la unidad
La unidad esta apagada
Encender la unidad
Hay obstaculos entre el
transmisor infrarrojo del
control remoto y el
sensor infrarrojo de la
unidad
Apuntar directamente el
control remoto al sensor
infrarrojo de la unidad
EDL-2560H
No hay Imagen, la Imagen esta dlstorslonada o no
operan los botones en la unidad
El tipo de TV ajustado
es incorrecto
El disco esta sucio o
danado
Restablecer los ustes de
fabrica de la unidad
1. Apagar y encender la
unidad.
2. Abrir el compaimiento
del disco.
3. Presionar y sostener
"MODE / MENU"
4. Presionar "PREV/LEFT"
una vez.
5. Presionar "REV/DOWN"
siete veces
6. Presionar "PLAY/PAUSE/
ENTER/PAIR" dos veces.
Ahora el tipo de TV se
restablece a automatico.
Limpiar
el disco. Un disco
puede no reproducirse si esta
demasiado rallado o danado
de
otra forma
La carga de las baterias Reemplazar la baterias por
es baja unas nuevas o usar una
fuente de alimentaci6n
La electricidad estatica
puede interferir
temporalmente la
operaci6n de la unidad
diferente de las baterias
Apagar la unidad y
desconectar la fuente de
alimentaci6n. Reconectar la
fuente de alimentaci6n y
encender la unidad
Page 39
www.emersonaudio.com
Especificaciones
Pantalla
Bocinas
Discos soportador
Memorias
externas
soportadas
Formatos de
media sopoados
Sintonizador
Page 40
Pantalla de cristal liquido LCD-TFT
de 17.78 cm (7")
Resoluci6n: 800 x 480
Brillo: 23 0 cd/m
2
(Tipico)
Rango de contraste : 400:1 (Tipico)
2 bocinas con controlador de rango
completo
5Ws
8W pico
DVD, DVD±R/RW, CD, CD-R/RW
USB, SD/SDHC
32 GB maximo
Video: MPEG-2 (DVD), MPEG-1
Audio: CD-Audio, MP 3, WMA, AC-
3, 0GG
Radio AM/FM (anal6gico)
Salidas
Entradas
Fuente de
alimentaci6n
Potencia de
entrada
Potencia en modo
de espera
Sa
lida de video compuesta RCA Salida
de audio estereo RCA
Conector para audifonos de 0 3.5 mm
Bluetooth 5.3
Entrada Auxiliar de audio de 0 3.5 mm
Entrada
para micr6fonos de 0 3.5
mm
Entrada HD
120 Vea
12Vcc
8 baterias de 1.5 Vee tamao ·c• (no
inclidas)
20W
2.8W
Nola: Las especicaclones y diseo de este producto est�n
sujetos a cambios sin previo aviso para mejoras de los mismos.
EDL-2560H

Sopoe
Page 41
www.emersonaudio.com
Si tiene problemas con la operación de este producto, favor de consultar las instrucciones en
este manual, asi como las ultimas noticias, recomendaciones y documentación que puede
encontrar en nuestra pagina web www.emersonaudio.com. Si necesita asistencia futura, favor
de contactar al centro de servicio autorizado o soporte técnico autorizado.
Soporte Técnico EMERSON
2320 East 49th ST
Vernon, CA 90058
Tel: 866 - 411 -6292
Hecho en China