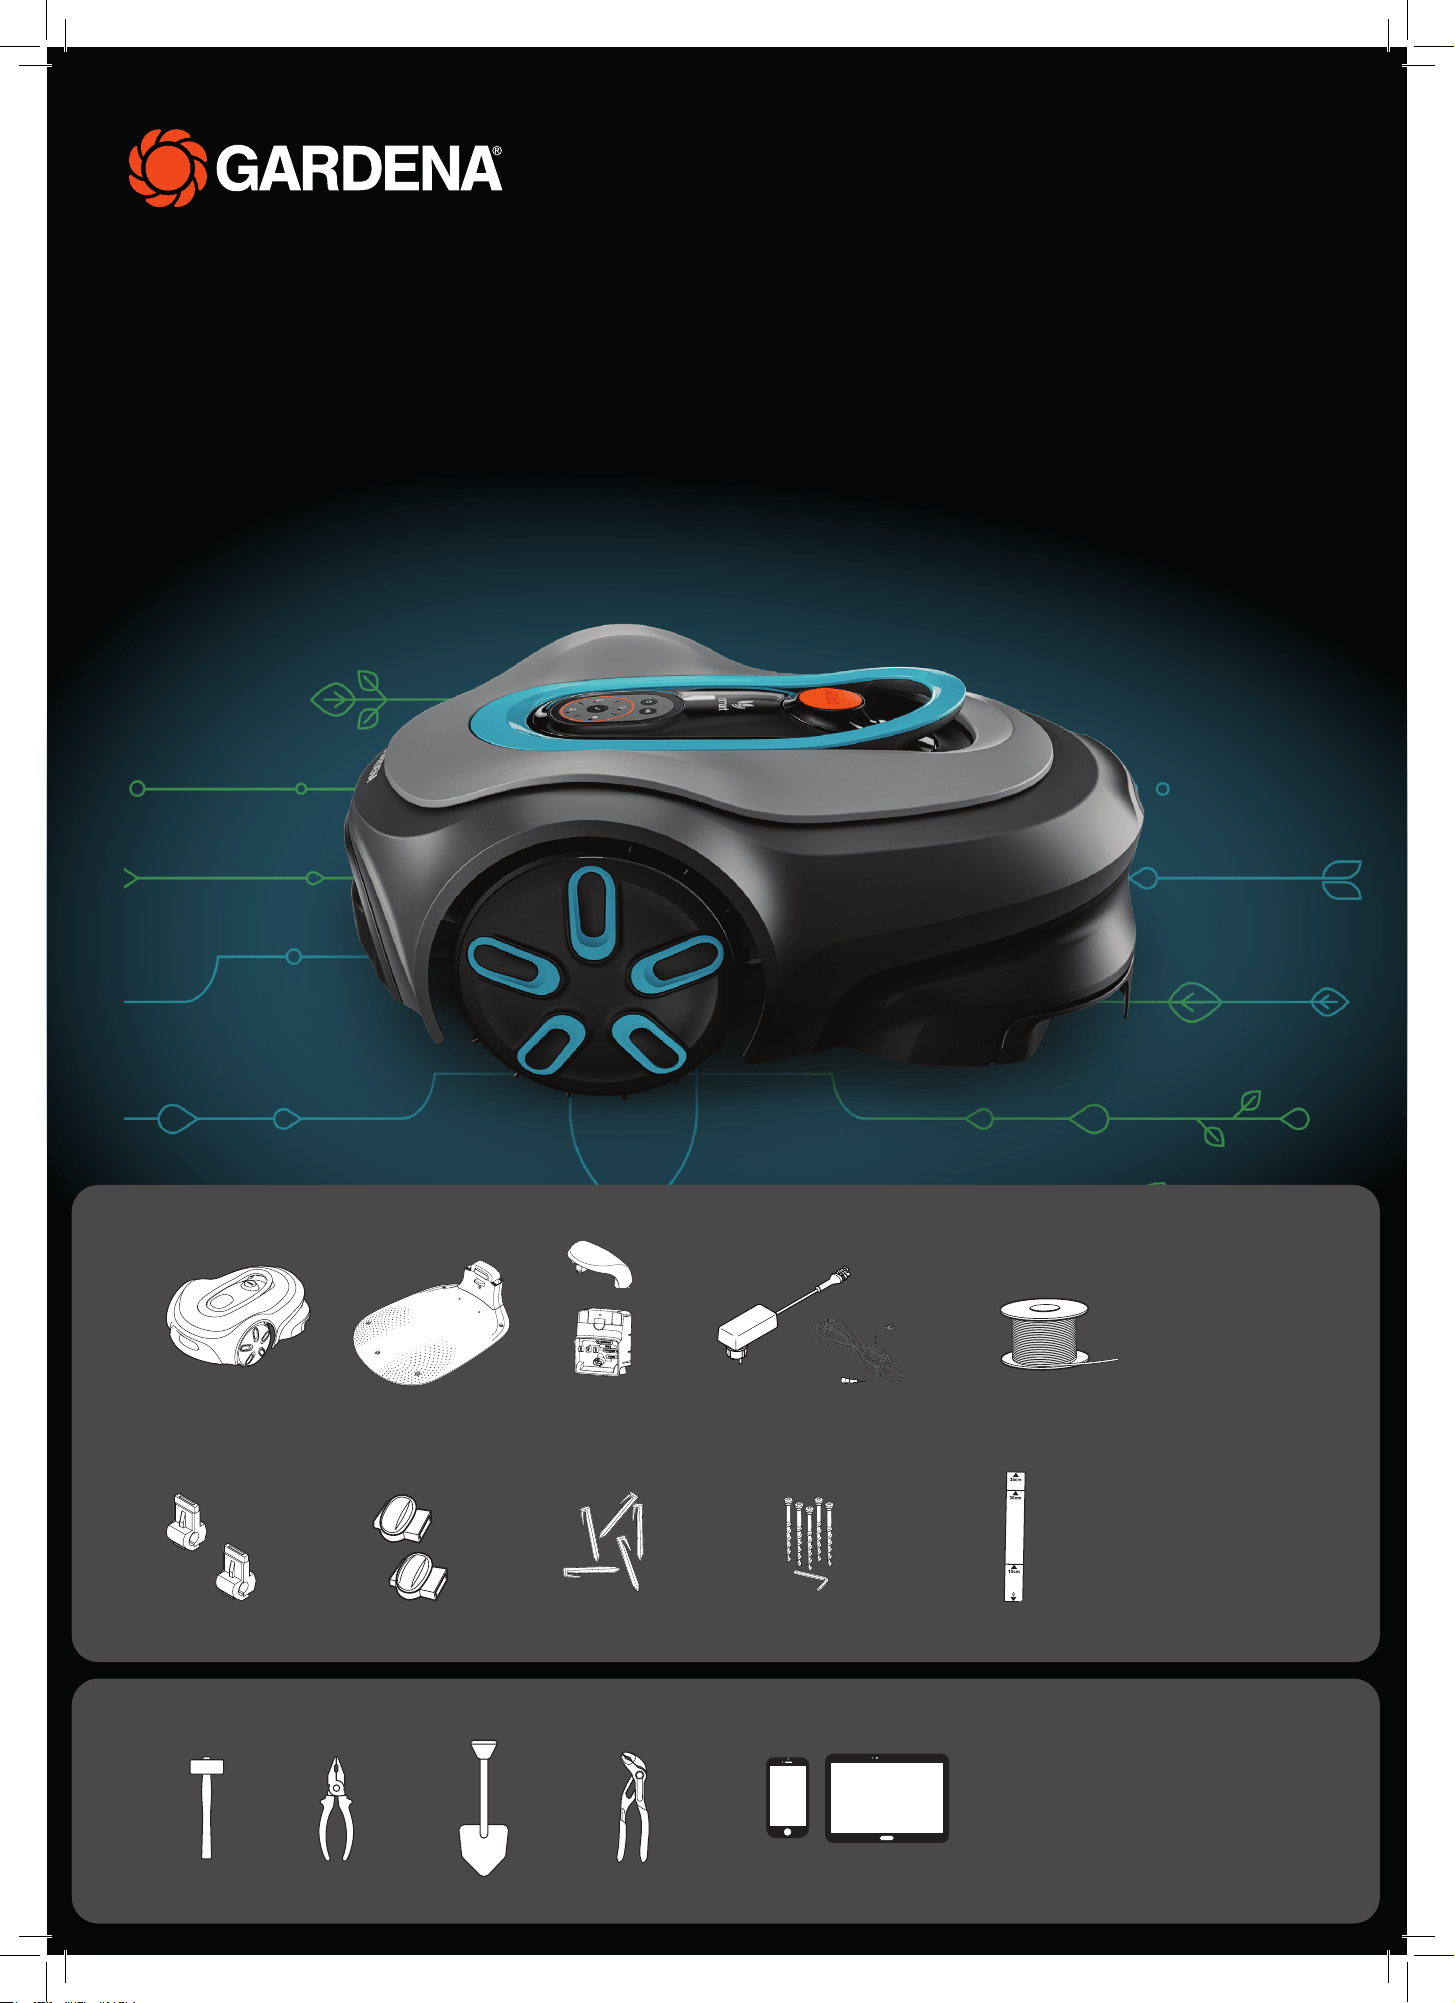
Quick guide
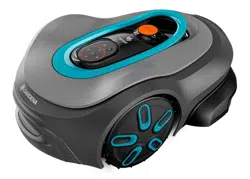
SILENO pro
SILENO max
smart SILENO pro
smart SILENO max
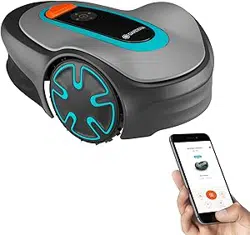
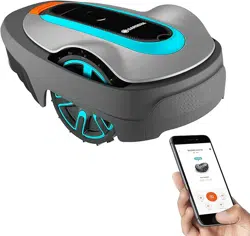
Mobile device
Use the app to control and make
settings for your robotic lawn mower
Robotic lawn mower Charging station
baseplate
Charging top &
charging module
Power supply &
low-voltage cable
Wire
For both boundary wire & guide wire
Connectors Couplers
Stakes
Screws & allen key to
attach the charing station
Ruler
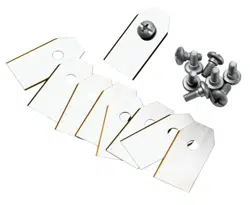
Incorporated in the box
Hammer Combination pliers Spade (optional)
What‘s in your box
What else you need
Adjustable pliers
QG Gardena P14 SILENO promax_1144052.indd 1QG Gardena P14 SILENO promax_1144052.indd 1 2024-09-23 12:23:112024-09-23 12:23:11
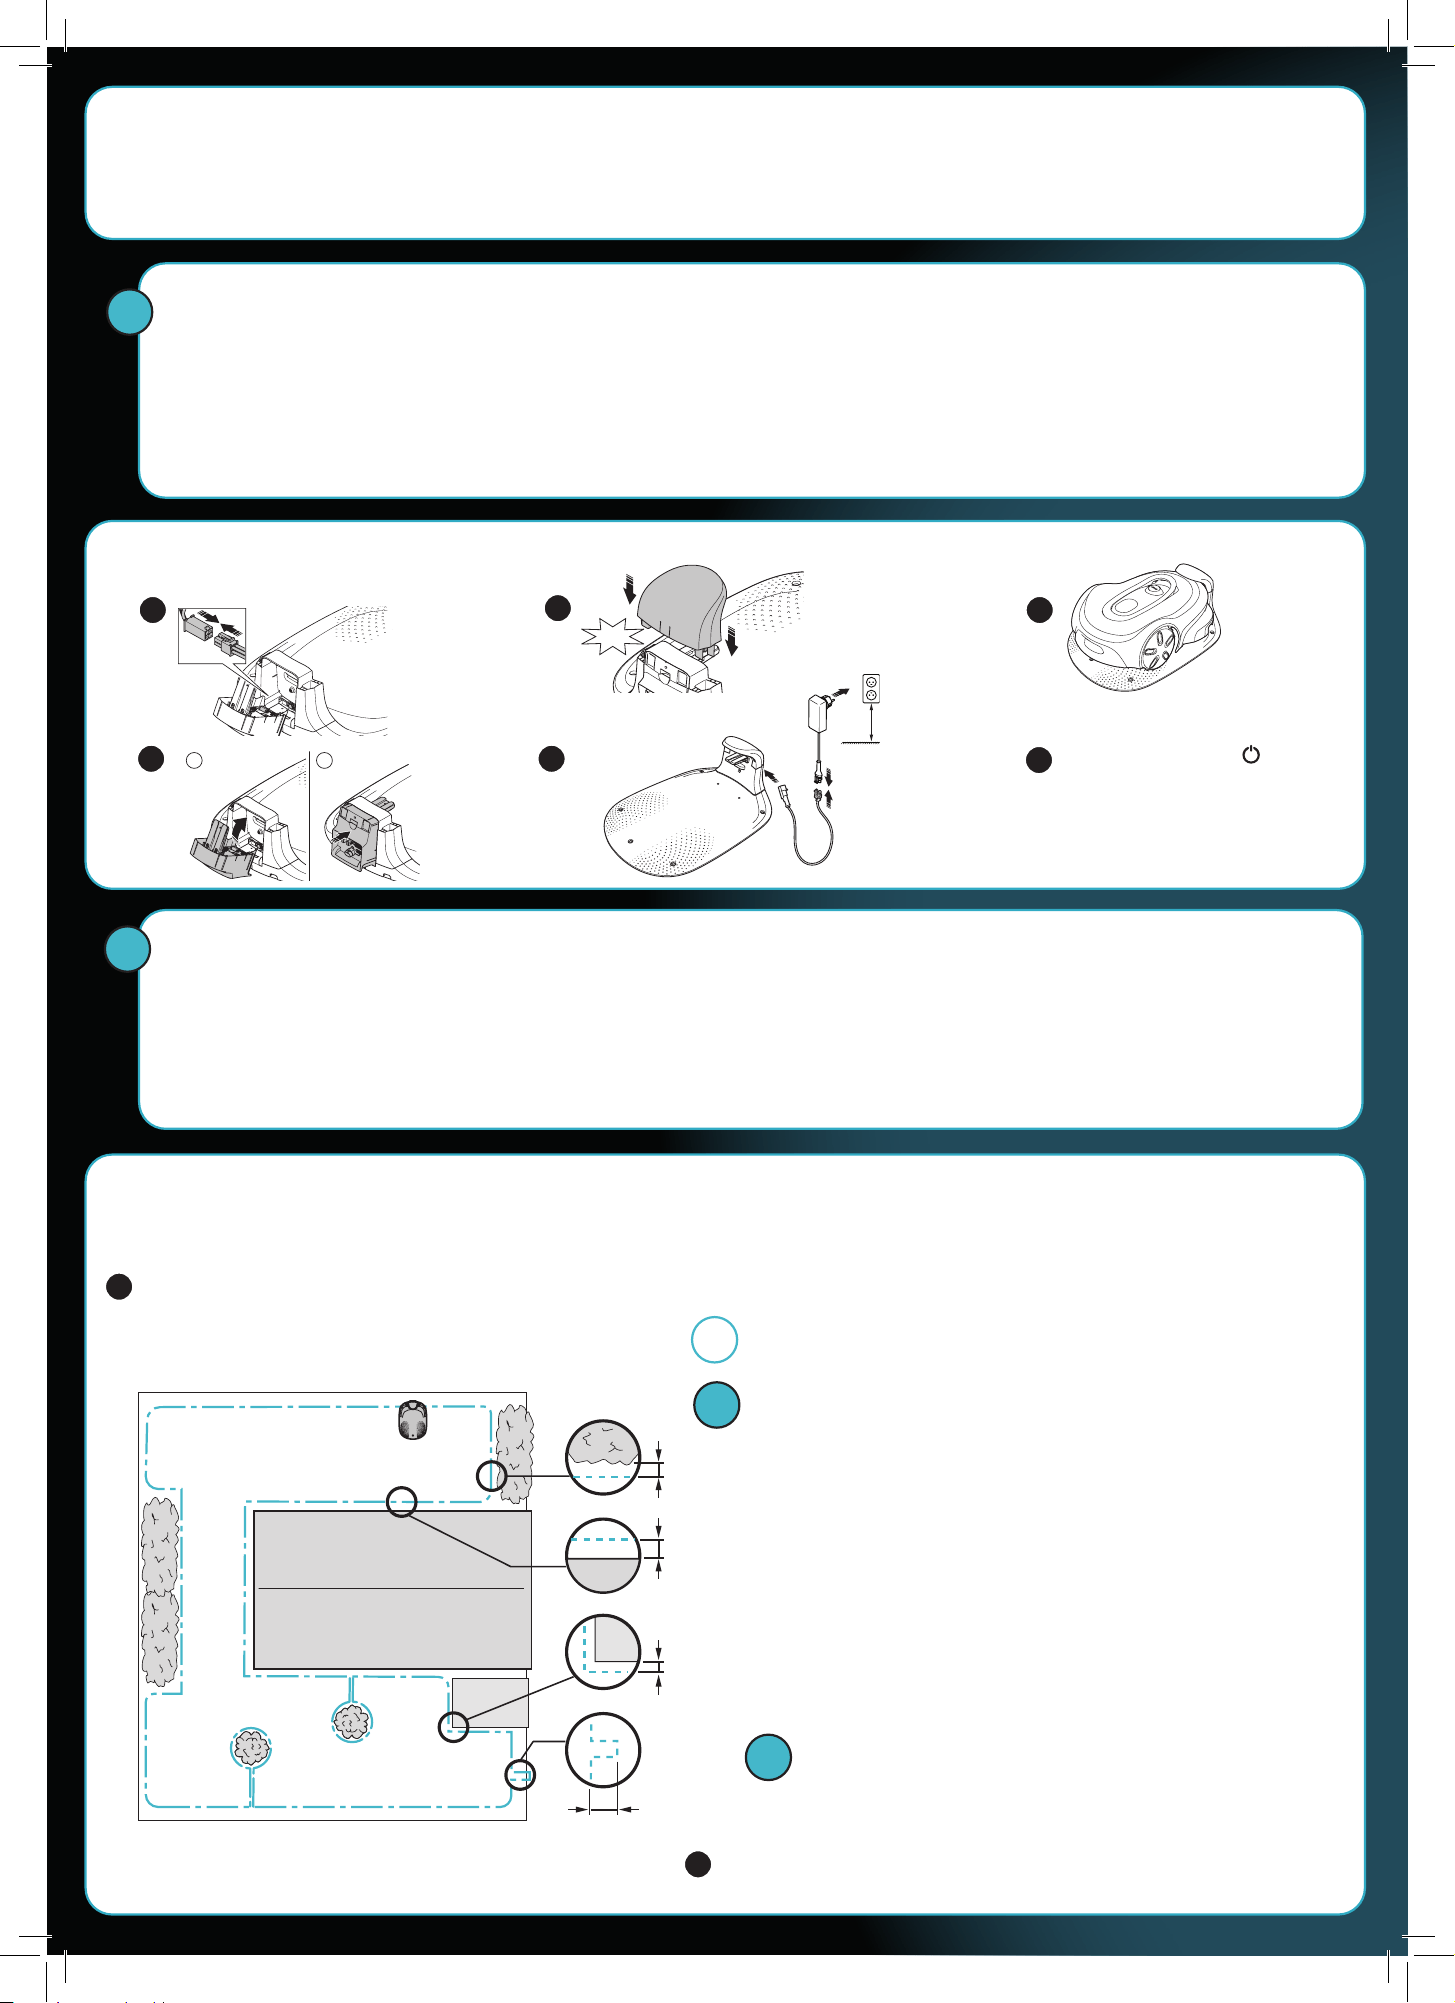
Getting started with the GARDENA robotic lawn mower
For more information, read the operator’s manual supplied with the product.
Before the installation
For an easy installation make sure that the grass is not higher
than 4 cm when you install the robotic lawn mower.
Good to know: The robotic lawn mower is rainproof and does
not need a garage or other shelter.
Criteria for placing the charging station:
• On level ground.
• Near an electrical outlet.
• Obstacle-free 2 m space in front of the charging station.
• If possible, in a shady spot.
To connect the charging station
Use the wire supplied with the robotic lawn mower for the installation. It serves a dual purpose:
• Boundary wire that defines the work area.
• Optional guide wires which helps the robotic lawn mower to find its way to remote areas and back to the charging station.
We recommend to install the guide wire if there is a narrow passage in the work area.
Boundary wire and guide wire must be connected at the end of the installation process. To ensure there is enough wire to do this, use about 20 cm of the boundary
wire to form an eyelet at the position where the wires will be connected when laying it.
Push the On/Off button
for 3 seconds to set the robotic
lawn mower to ON and to charge
the battery.
To lay the boundary wire
Lay out the wire on the lawn and fasten it with the stakes or bury it 1-20 cm into the ground.
Starting from the charging station, place the boundary wire around the
designated work area and all the way back to the charging station.
Lay the boundary wire and guide wire before connecting them to the
charging station.
Keep the distance: The robotic lawn mower drives past the boundary wire. To
avoid damage to the robotic lawn mower, maintain the distances indicated below:
For objects higher than 2 cm:
e.g., walls, shrubs.
For objects between 1 and 2 cm in height:
e.g., flower beds, low edging.
For objects up to 1 cm in height:
e.g., paving stones, paths.
35 cm
30 cm
10 cm
10 cm
Don’t forget the eyelet: If you use a guide wire, make the
eyelet at the point where the wire is the furthest away from the
charging station.
Cut the boundary wire by the charging station, leave an extra 50 cm to
be on the safe side. Continue with the guide wire.
Minimum
30 cm.
Refer to chapter 3 in the operator’s manual for
details about dealing with trees, slopes,
passages and secondary areas.
CLICK!
BA
!
!
Tip!
!
!
8
1 5
6
7
2
3
4
QG Gardena P14 SILENO promax_1144052.indd 2QG Gardena P14 SILENO promax_1144052.indd 2 2024-09-23 12:23:122024-09-23 12:23:12
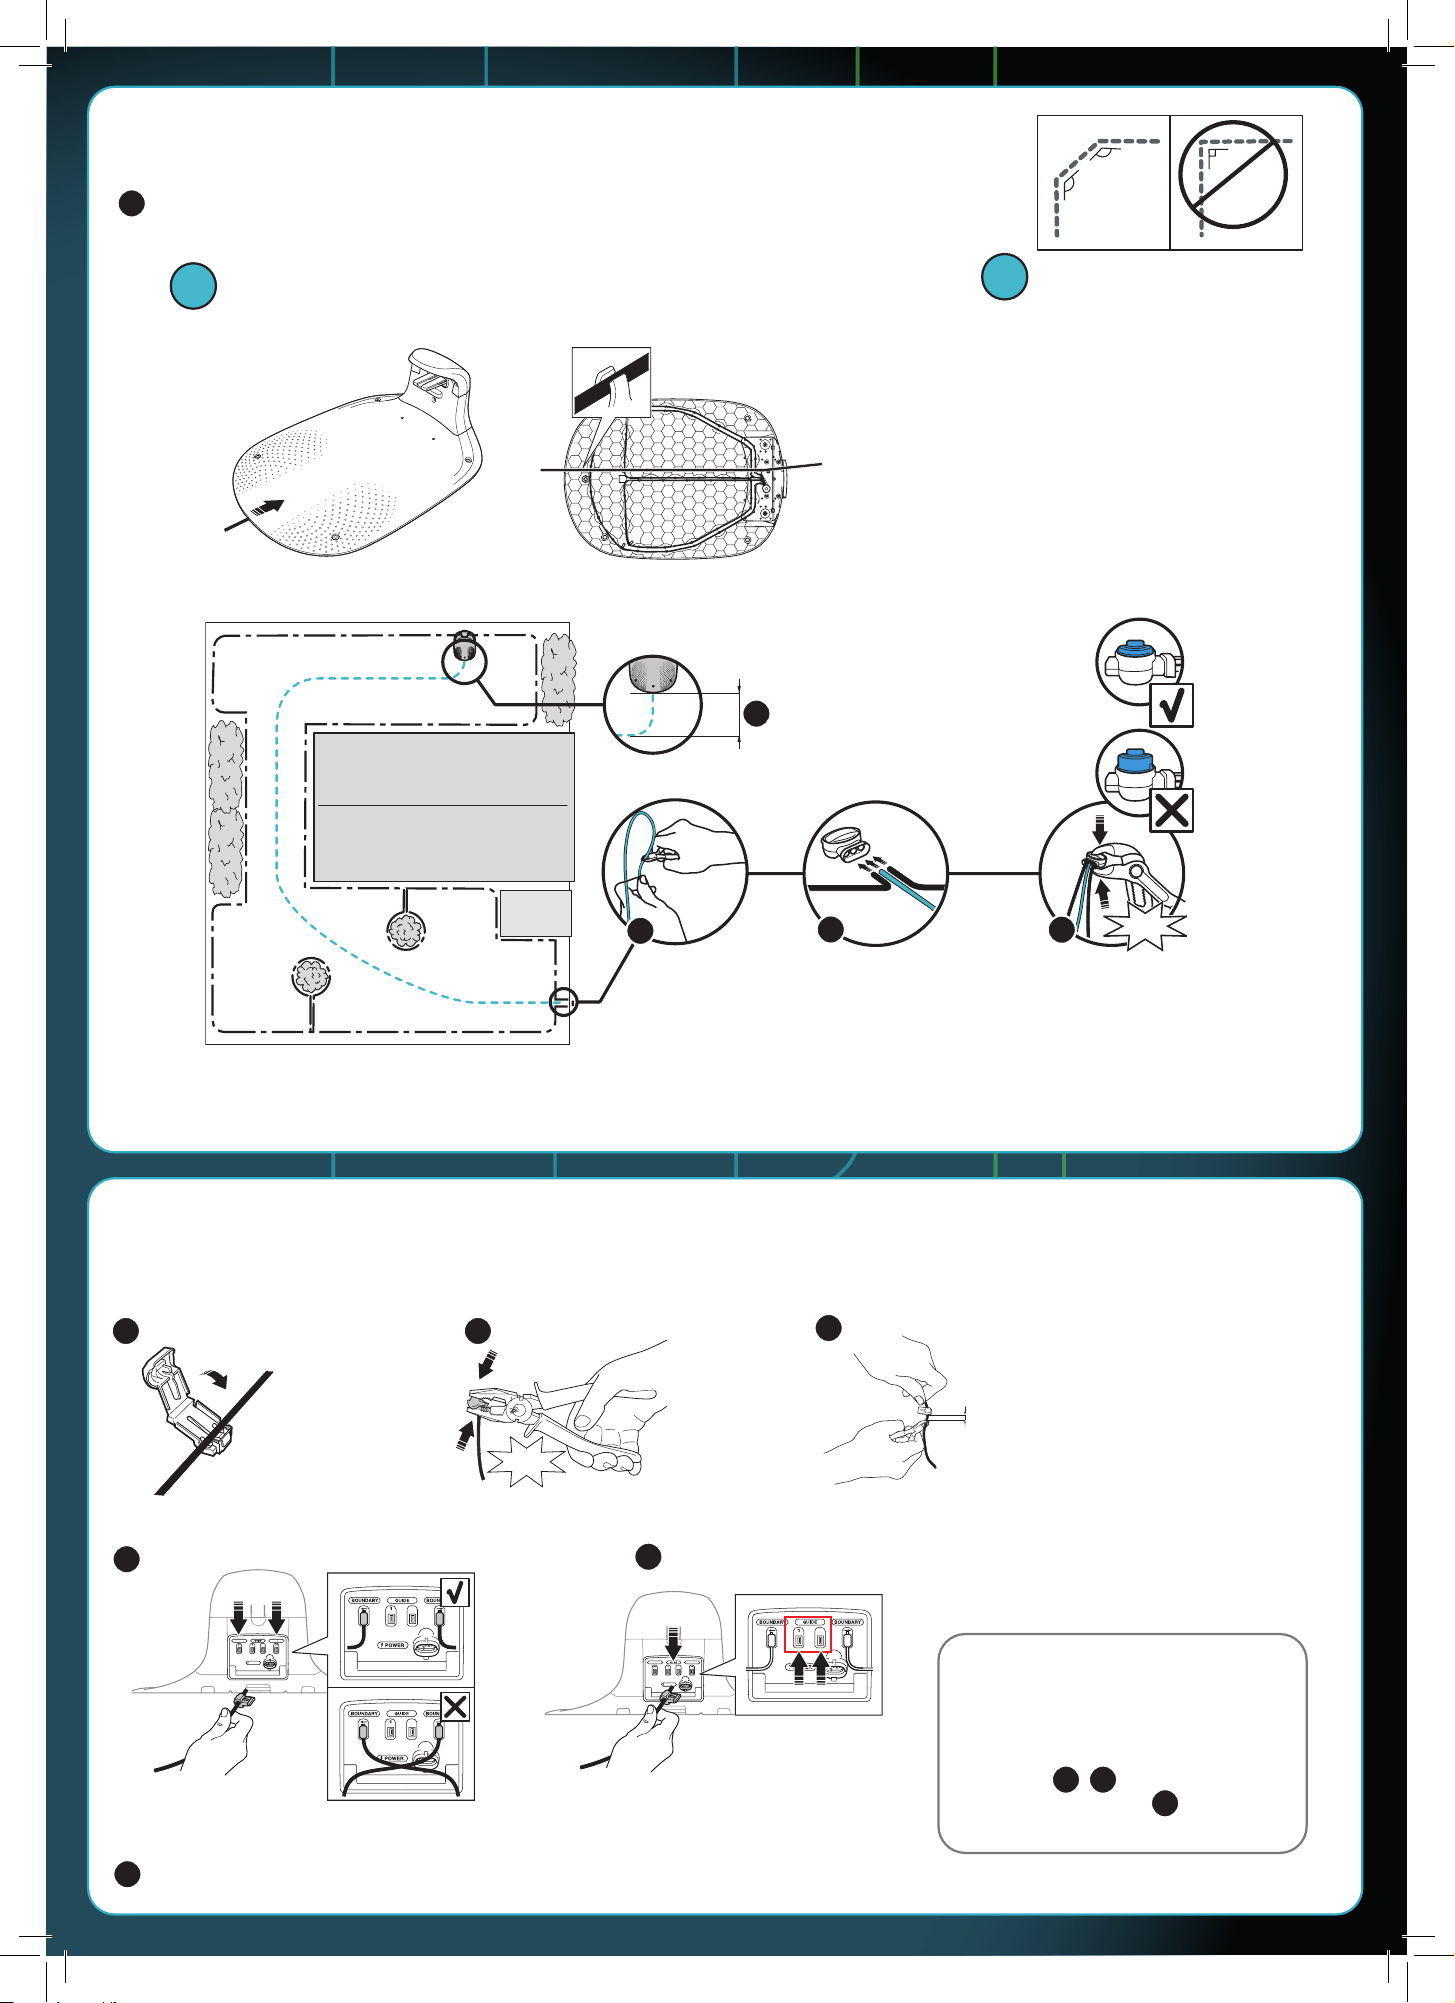
To lay the guide wire
Installation of guide wires is optional. Lay out a new wire between the charging station
and the eyelet you made earlier so that you can connect it with the boundary wire.
This wire guides the robotic lawn mower back to the charging station.
The guide wire and boundary wire must not cross each other at any point.
The guide wire must lead away straight
from the charging station for at least 2 m.
Cut the wire
at the centre
of the eyelet.
Insert the guide wire
and the two ends of the
boundary wire in the
couplers.
Push down the cover
on the coupler to attach
the wires.
To connect the wires to the charging station
Almost done! Attach the connectors to the ends of the wires by the charging station.
Boundary wire
Guide wire
Did everything work so far?
If yes, the LED status light of the charging
station is lit green. If it flashes blue,
check if the wires are properly connected
(see steps , and that the coupler is
fully pushed in (see step ).
Attach the charging station to the ground with the supplied screws and the allen key.
Do not lay the guide wire in sharp bends.
If necessary, shorten the wires
so that 1–2 cm stick out.
BOUNDARY
2
BOUNDARY
POWER
2
BOUNDARY
2
BOUNDARY
POWER
2
2
CLICK!
135º
135º
90º
CLICK!
CLICK!
13
9
!
14
10
11
12
13
15
16
17
18
17 18
19
!
QG Gardena P14 SILENO promax_1144052.indd 3QG Gardena P14 SILENO promax_1144052.indd 3 2024-09-23 12:23:172024-09-23 12:23:17
The Bluetooth® word mark and logos are registered trademarks owned by
Bluetooth SIG, inc. and any use of such marks by GARDENA is under license.
App Store and Apple logo are trademarks of Apple Inc.
Google Play and the Google Play logo are trademarks of Google LLC.
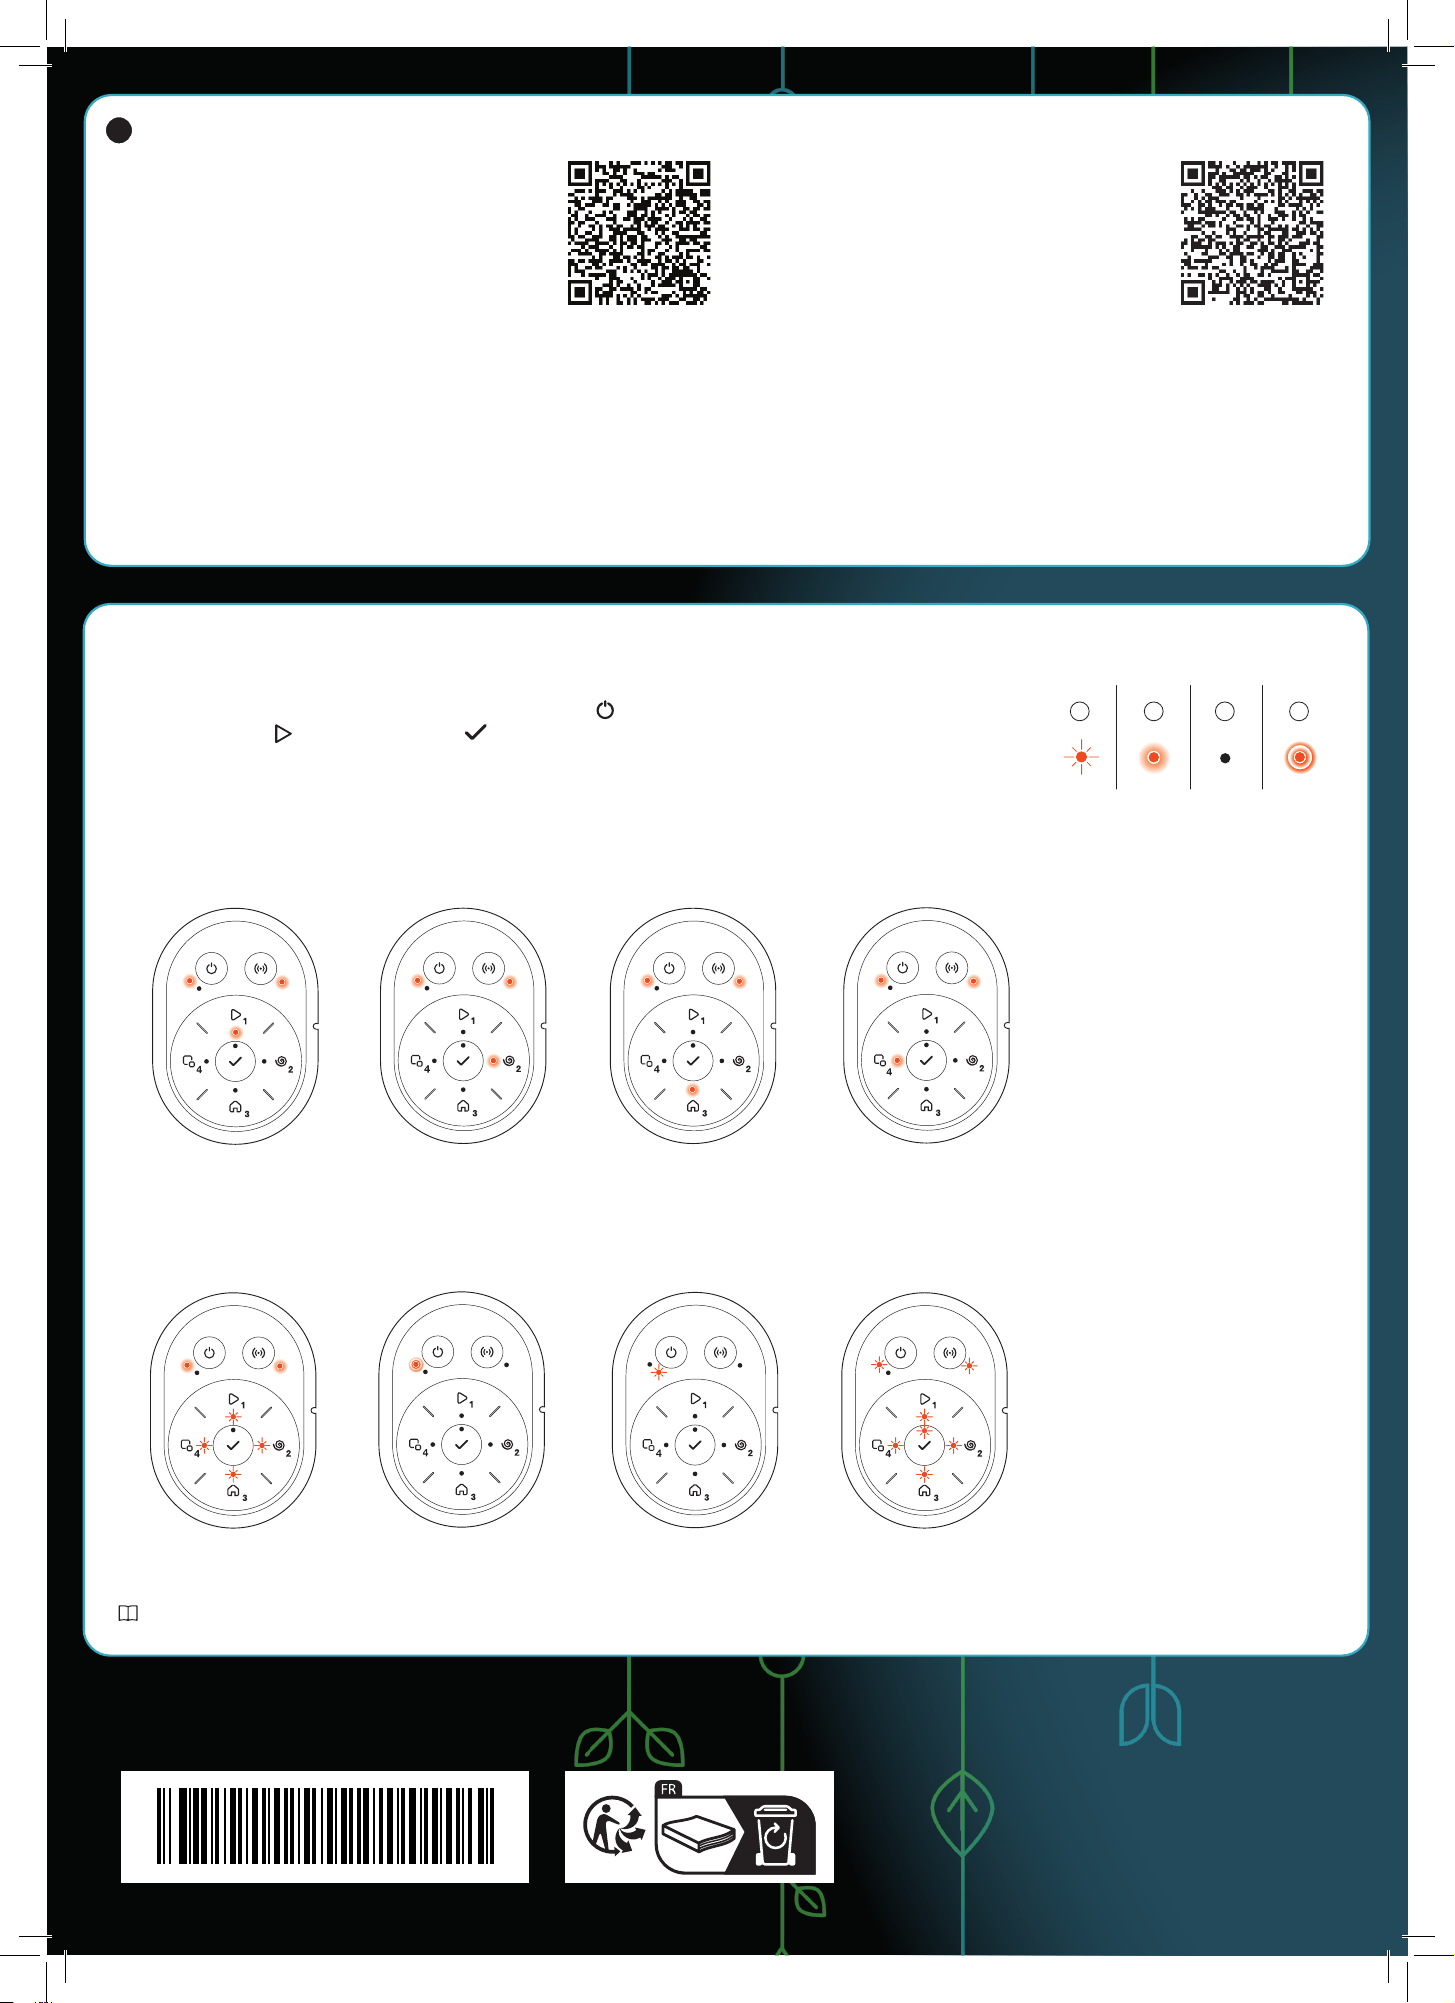
Parked. Cutting in operating
mode Secondary area.
Cutting according to
set Schedule or in
operating mode
Override schedule.
Error after 3 minutes. Error.
To download and pair with the
GARDENA Bluetooth®
App
A. Use the QR code or visit your app store to download
the GARDENA Bluetooth® App.
B. Activate Bluetooth® on your mobile device.
C. Push the On/Off button for 3 seconds to set the
robotic lawn mower to ON.
D. Enter the factory PIN code 1234 with the keypad on the robotic lawn mower.
E. Push the Connectivity button on the robotic lawn mower to enable the
pairing operation mode.
The Bluetooth® pairing operation mode is active for 3 minutes.
F. Add the robotic lawn mower in the GARDENA Bluetooth® App.
G. Follow the instructions and enter the factory pin code 1234. Change to a
new pin code in the app’s settings.
Operating modes for the robotic lawn mower and LED status lights
Start the robotic lawn mower with the app or use the On/Off button and enter the PIN code on the robotic lawn mower.
Push the Start button and then the OK button . Push the STOP button to stop the robotic lawn mower. There are 4 light
modes on the LED indicator: the light flashes quickly (A) the light is solid (B), the light is out (C), and the light pulsates (D).
While the robotic mower is parked, you may set it to idle and select a different operating mode by pushing the STOP button.
Learn more about operating modes and error messages in the operator’s manual.
The right to make changes without prior notice is reserved.
Copyright © 2024 GARDENA Manufacturing GmbH. All rights reserved.
www.gardena.com
Cutting in operating
mode SpotCut.
Waiting for
PIN code.
A. Install the GARDENA smart Gateway and read the
instruction for the GARDENA smart system.
B. Use the QR code or visit your app store to download
the GARDENA smart system App.
C. Open the app and register as a user.
D. Select “Include product“ on the overview page in the app.
E. Push the On/Off button for 3 seconds to set the robotic lawn mower to ON.
F. Enter the factory PIN code 1234 with the keypad on the robotic lawn mower.
G. Push the Connectivity button on the robotic lawn mower to enable the
pairing operation mode.
H. Follow the instructions and enter the factory pin code 1234. Change to a new
pin code in the app’s settings.
To download and pair with the
GARDENA smart system App
Charging or Standby
A B C D
21
gardena.com
QG Gardena P14 SILENO promax_1144052.indd 4QG Gardena P14 SILENO promax_1144052.indd 4 2024-09-23 12:23:252024-09-23 12:23:25
1144052-26
2024-09-24