
eufy Security SoloCam S340
User Guide (T8170)
AT A GLANCE
①
LED Indicator
⑦
Wide-Angle Lens
②
Speaker
⑧
LED Light
③
Telephoto Lens
⑨
Solar Panel Mounting Hole
④
Photosensitive Sensor
⑩
Mounting Hook
⑤
PIR Sensor
⑪
USB-C Charging Port
⑥
Microphone
⑫
SYNC Button
CHARGING YOUR CAMERA
Fully charge before
fi
rst use.
Solid blue Charging
Light O
ff
Fully Charged
Charging Time 8 Hours
SETTING UP THE SYSTEM
1. Download and install the eufy Security app, then sign in or create an account.
2. Follow the in-app instructions to add the camera to the device list.
MOUNTING YOUR CAMERA
Select a Location and a Height
Select a location where you can get the desired view. We recommend hanging the camera 7-10 ft (2-3 m) above the ground.
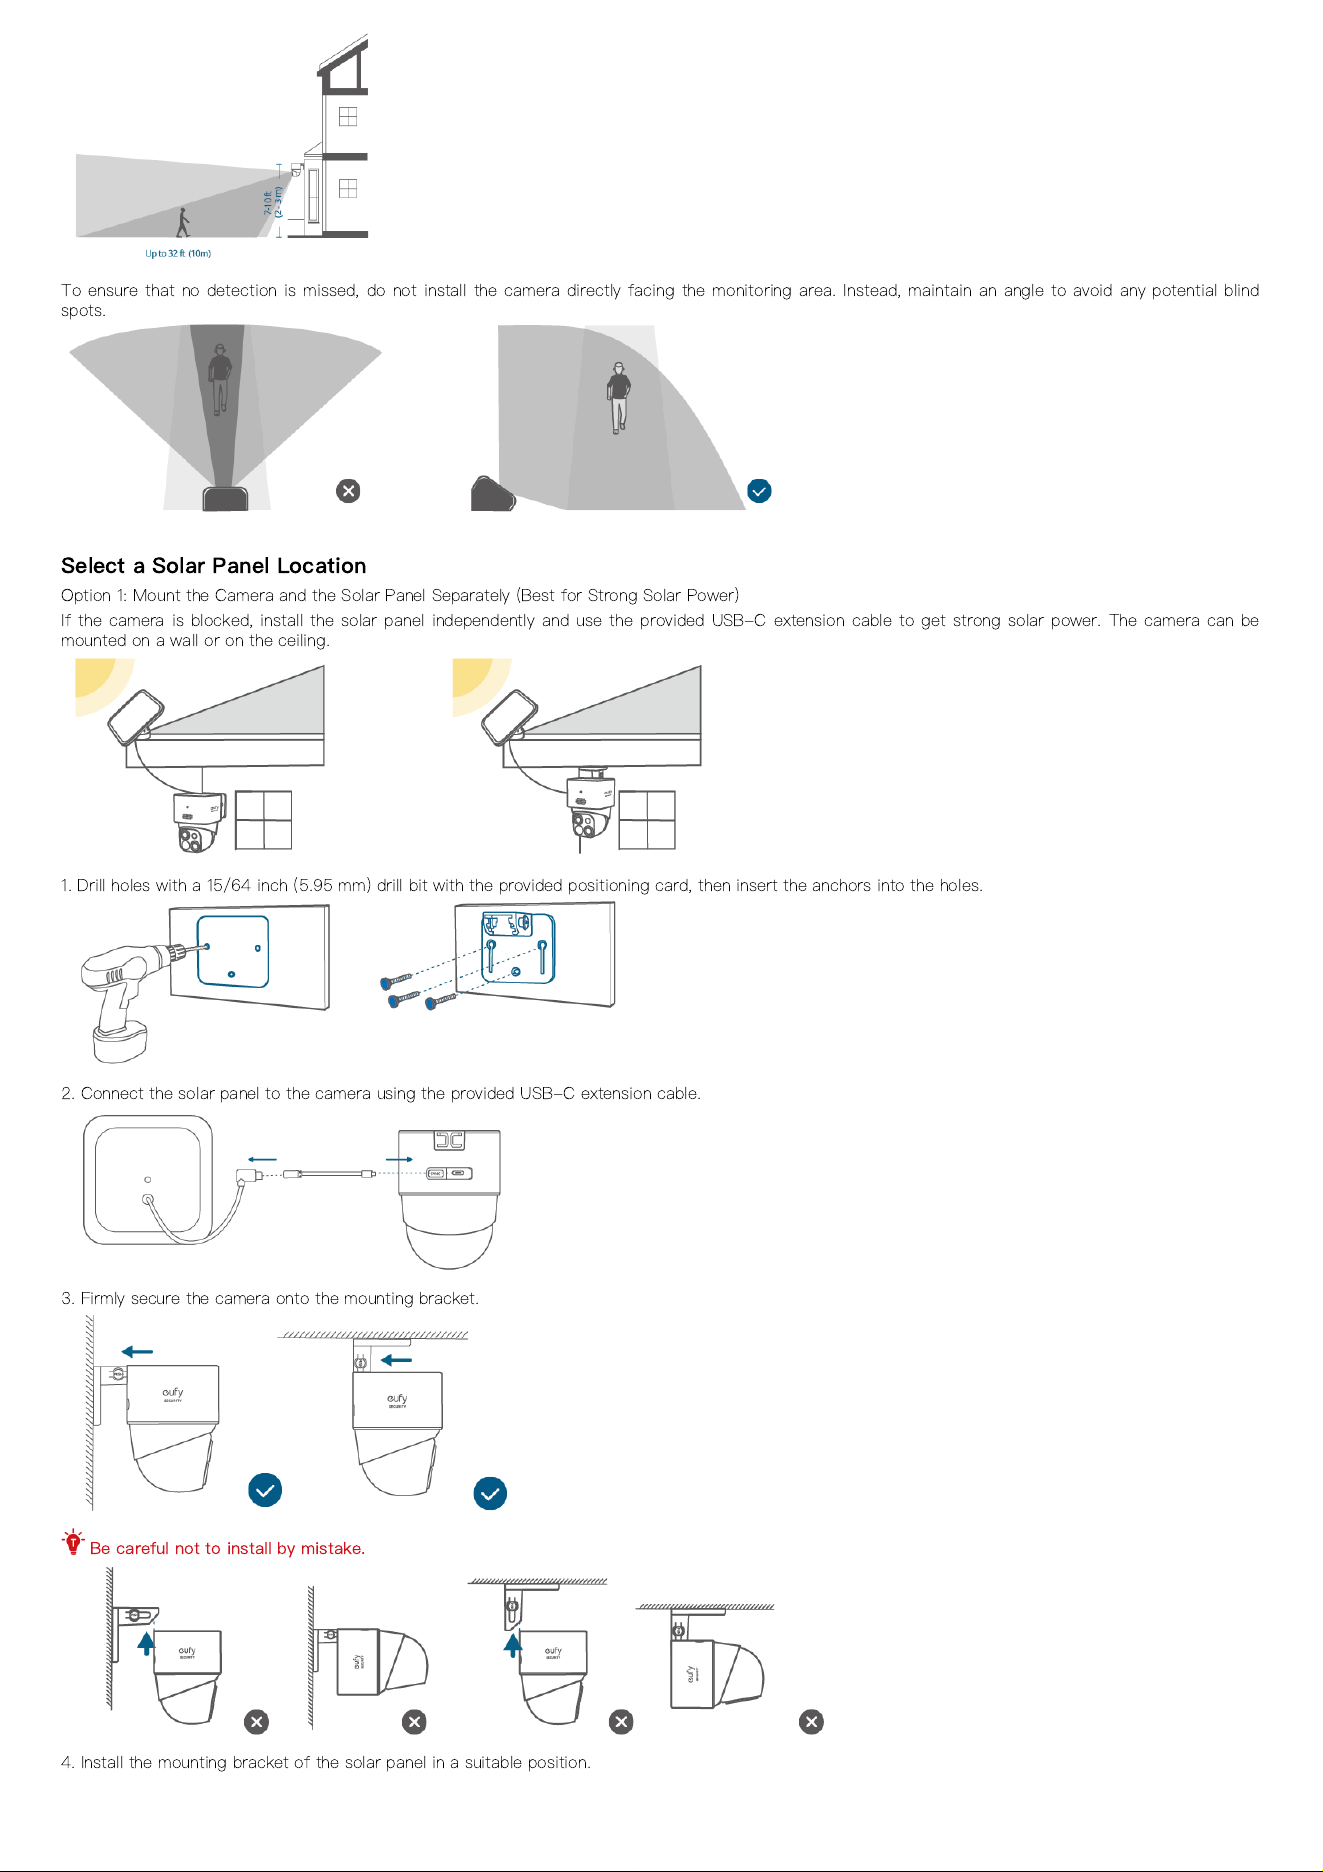
To ensure that no detection is missed, do not install the camera directly facing the monitoring area. Instead, maintain an angle to avoid any potential blind
spots.
Select a Solar Panel Location
Option 1: Mount the Camera and the Solar Panel Separately (Best for Strong Solar Power)
If the camera is blocked, install the solar panel independently and use the provided USB-C extension cable to get strong solar power. The camera can be
mounted on a wall or on the ceiling.
1. Drill holes with a 15/64 inch (5.95 mm) drill bit with the provided positioning card, then insert the anchors into the holes.
2. Connect the solar panel to the camera using the provided USB-C extension cable.
3. Firmly secure the camera onto the mounting bracket.
Be careful not to install by mistake.
4. Install the mounting bracket of the solar panel in a suitable position.
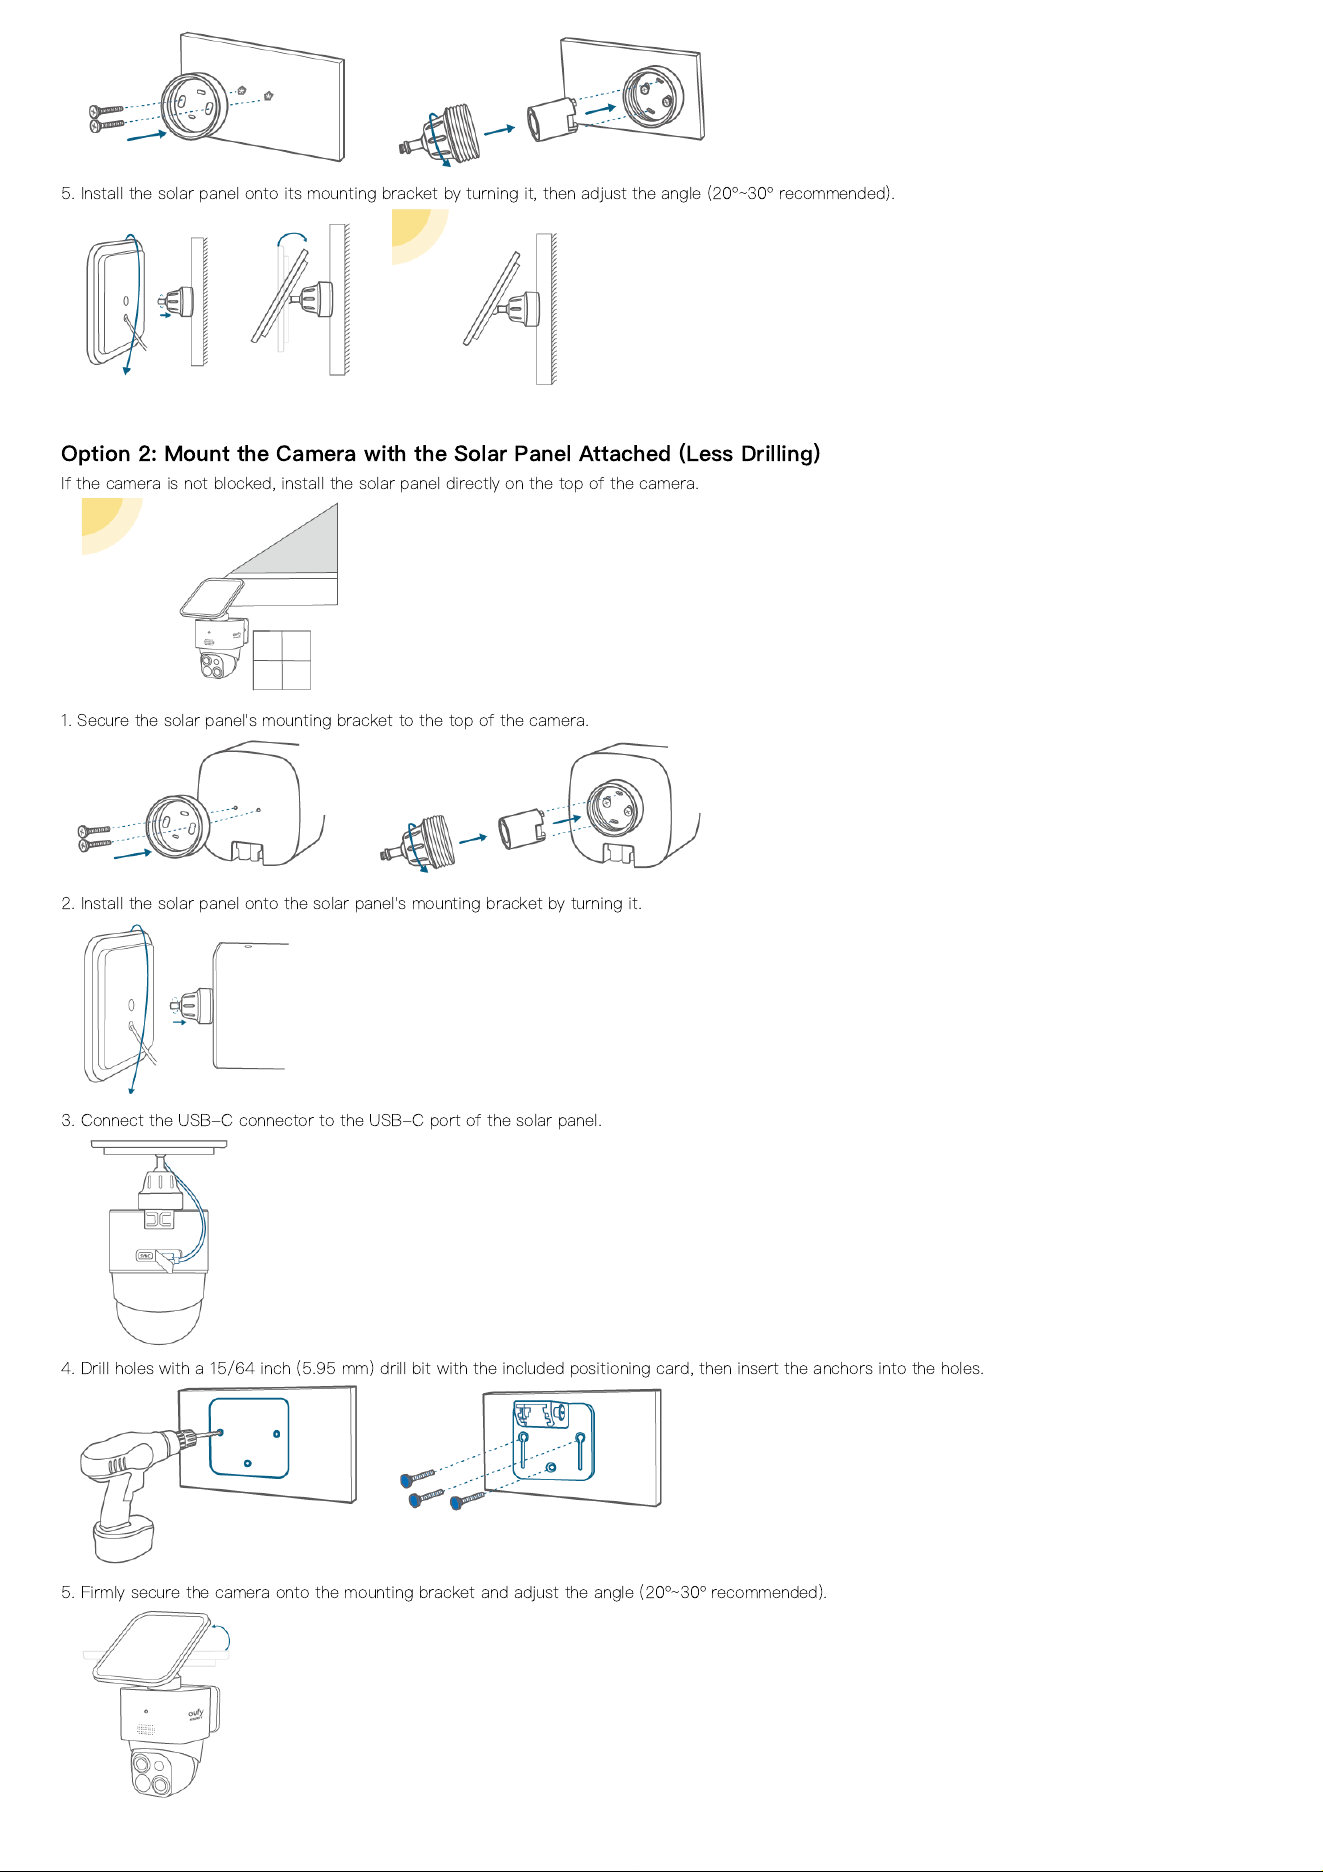
5. Install the solar panel onto its mounting bracket by turning it, then adjust the angle (20º~30º recommended).
Option 2: Mount the Camera with the Solar Panel Attached (Less Drilling)
If the camera is not blocked, install the solar panel directly on the top of the camera.
1. Secure the solar panel's mounting bracket to the top of the camera.
2. Install the solar panel onto the solar panel's mounting bracket by turning it.
3. Connect the USB-C connector to the USB-C port of the solar panel.
4. Drill holes with a 15/64 inch (5.95 mm) drill bit with the included positioning card, then insert the anchors into the holes.
5. Firmly secure the camera onto the mounting bracket and adjust the angle (20º~30º recommended).