FKWS18 - Wall Sconce
PLEASE READ ALL THE INSTRUCTIONS BEFORE USE

2
English Manual
Manuel d’utilisation en français
Gebrauchsanleitung auf Deutsch
Manual de Instrucciones en Español
Manuale D’istruzioni In Italiano
Instrukcja obsługi. Polski
3
13
23
33
43
53
Contents
3
English Manual

4
• This appliance is for indoor/household use only. Do not use outdoors.
• This y trap is not to be used in garages, sheds, barns, horse stables or
any out-house building where ammable material is present, or in any
locations where ammable vapour or explosive dust may exist.
• This appliance is not designed for commercial or industrial use; it is for
household use only.
• Make sure the electrical voltage is the same as that indicated on the rating
plate of the appliance.
• This appliance is not intended for use by persons (including children) with
reduced physical, sensory or mental capabilities, or lack of experience
and knowledge, unless they have been given supervision or instruction
concerning use of the appliance by a person responsible for their safety.
• Children should be closely supervised at all times to ensure that they do
not play with the appliance.
• Never carry the appliance by the power cable.
Safety Information
Please read these instructions fully and keep for future reference.
WARNING: If the machine is operated with a defective or damaged
mains cable, there is a potential danger of fatal electric shock.
Never use a machine which is damaged or has a damaged mains
cable.
• If either the appliance or power cable are damaged, return it to Duronic for
service or repair by professional technician.

5
• Only connect the appliance to an electrical outlet with the voltage and
frequency mentioned on the appliance label.
• Never try to replace the parts and repair the unit by yourself, apart from
replacing the bulb and adhesive boards.
• Do not modify the machine in any way that is not described in the
instructions for use. The machine contains live parts. Repairs may only be
carried out by Duronic, using original spare parts and accessories.
• Always operate the appliance on a dry, smooth, even and stable surface.
Do not place the unit on a damaged wall or a wall covered in damp/mould.
• Do not operate the machine or handle the plug with wet hands.
• Do not immerse in water or other liquids. Cleaning should be done as per
instructions in this manual.
• Keep the light away from ammable objects such as curtains, and away
from ammable liquids of gases as there is a danger of explosion.
• When installing, position the light away from windows or doors to avoid
interference from draft and daylight.
• For hygeine reasons, it is best that this light is not positioned near places
where food will be prepared or served.
• This appliance is only suitable for wall mounting.
6
Specications
Included in the Box
Model: FKWS18
Power: 18W
Size: 37.5 x 14 x 19.6 cm
Weight: 1.16 kg
Bulb type: UV bulb: 18W PL BL
Glue boards included: 5
• Wall sconce xture
• 2x screws
• 2x raw plugs
• 5x glue boards
• 1x UV bulb

7
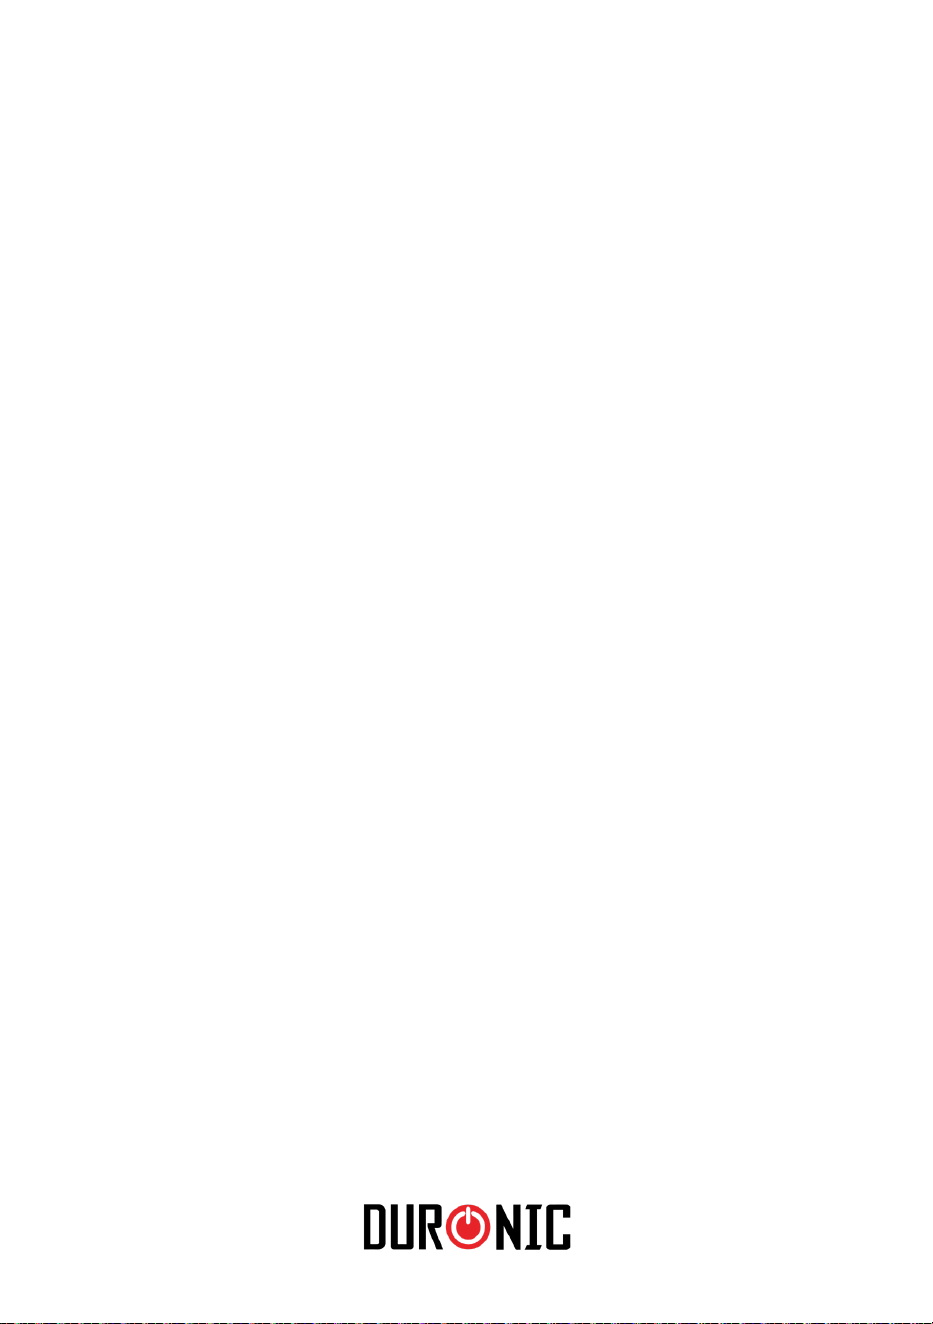
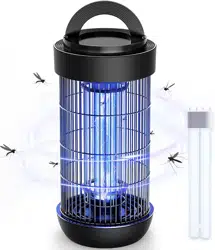
About the FKWS18 Wall Sconce
Before Installing
Flying insects are naturally attracted to ultra-violet light. This y catcher has
an ultra-violet (UV) bulb that prooves to be utterly irresistible to ying insects.
Once the ies are attracted into the device, they will come to rest on the
adhesive-coated glue board inside and become permanently captured. Once
the board is full, it can quickly and easily be replaced. It is easy to check as the
front of the device lifts up to enable easy access to the adhesive board.
Your FKWS18 comes with 5 adhesive sheets. If you need more, you can order
these separately from Duronic (Shine-Mart Ltd).
Designed with an ornate elegant design, this light xing will t in beautifully
with any interior design.
No chemical substances are involved, so this appliance is safe to use for
humans and pets. The ultra-violet light provides an odorless, noiseless and
safe method of ridding your home of pesky ying insects.
1. Remove the device from the package carefully. Check the body and parts
for any potential shipping damage.
2. Check the posistion of the bulb and the glue board to see if they are
positioned correctly.
3. Connect the device to the nearest mains electrical socket to test the light.
4. If the bulb lights up immediately, proceed to installing the lamp.
5. If the bulb doesn’t light up, refer to the troubleshooting section to
determind the issue.

8
Installation
Preparation:
• Ensure that the light is installed above eye level (at least 70 inches from
the oor) so that it is out of the line of anyones sight, and so that no one
can bump into the xture.
• Install the light close to the area where ies come in, but away from any
draft or wind.
• Choose a location with high insect density, close to an electrical outlet
(hard wired availability) and easy serviceability.
• Do not install the lamp near any competing light sources, such as bright
sunlit windows, indoor lighting xtures etc. as this will render the FKWS18
light useless.
• The distance between the lamp and the ceiling should be 24” or more for
maximum light attraction.
Instruction:
1. Lift the front cover and remove the UV bulb to avoid causing any damage
to it during the installation.
2. Hold the back plate of the xture against the wall in your chosen location.
Determine the location you would like to install the light and mark the
screws’ locations with a pencil.
3. Place the xture aside. Drill holes on the marked locations and insert the
plastic raw plugs.
4. Next reposition the light xing over the top of the holes you have prepared,
and insert one screw and tighten with a screw driver. Then repeat this for
the next screw.
5. Install the bulb and the sticky glue board. Note that the sticky side of the
board should be placed facing up.
6. Close the cover of the light.
7. Plug in the power cable into the mains power socket and switch on. Your
light should immediately illuminate.
NOTE: If you do not use the appliance for an extended period, ensure you
remove the plug from the electrical socket.

9
Maintenance
Replacing the Adhesive Glue Board
It’s recommended to replace the glue board every 1-2 months.
To replace the glue board:
1. Unplug the power cable and wait for 5 minutes for the bulb to cool
down.
2. Lift the front cover and remove the old sticky glue board.
3. Install a new sticky glue board with the sticky side facing the bulb.
4. Close the front shell.
5. Re-connect the power cable by plugging it back into the mains
socket and switching on.
Replacing the UV Bulb
It is recommended to replace the UV bulb after around 5000 hours of normal
operation.
To replace the bulb:
1. Unplug the power cord and wait for 5 minutes for the bulb to cool
down.
2. Lift the front cover and remove the old UV bulb by rotating it.
3. Insert the new UV bulb in reversed rotation.
4. Close the front cover.
5. Re-connect the power cable by plugging it back into the mains
socket.
IMPORTANT: Ensure that disposal of the old UV bulb is done
responsibly and in line with the local council’s waste and recycling
regulations.

10
Maintenance (continued)
Troubleshooting Guide
Cleaning:
Before cleaning, ensure the power cable is unplugged from the mains socket.
To clean the light xing, use a dry dusting cloth to remove any dust and dirt
that has collected over time.
When nished, check the bulb and glue board are in the correct position, then
plug the cable back into the plug socket.
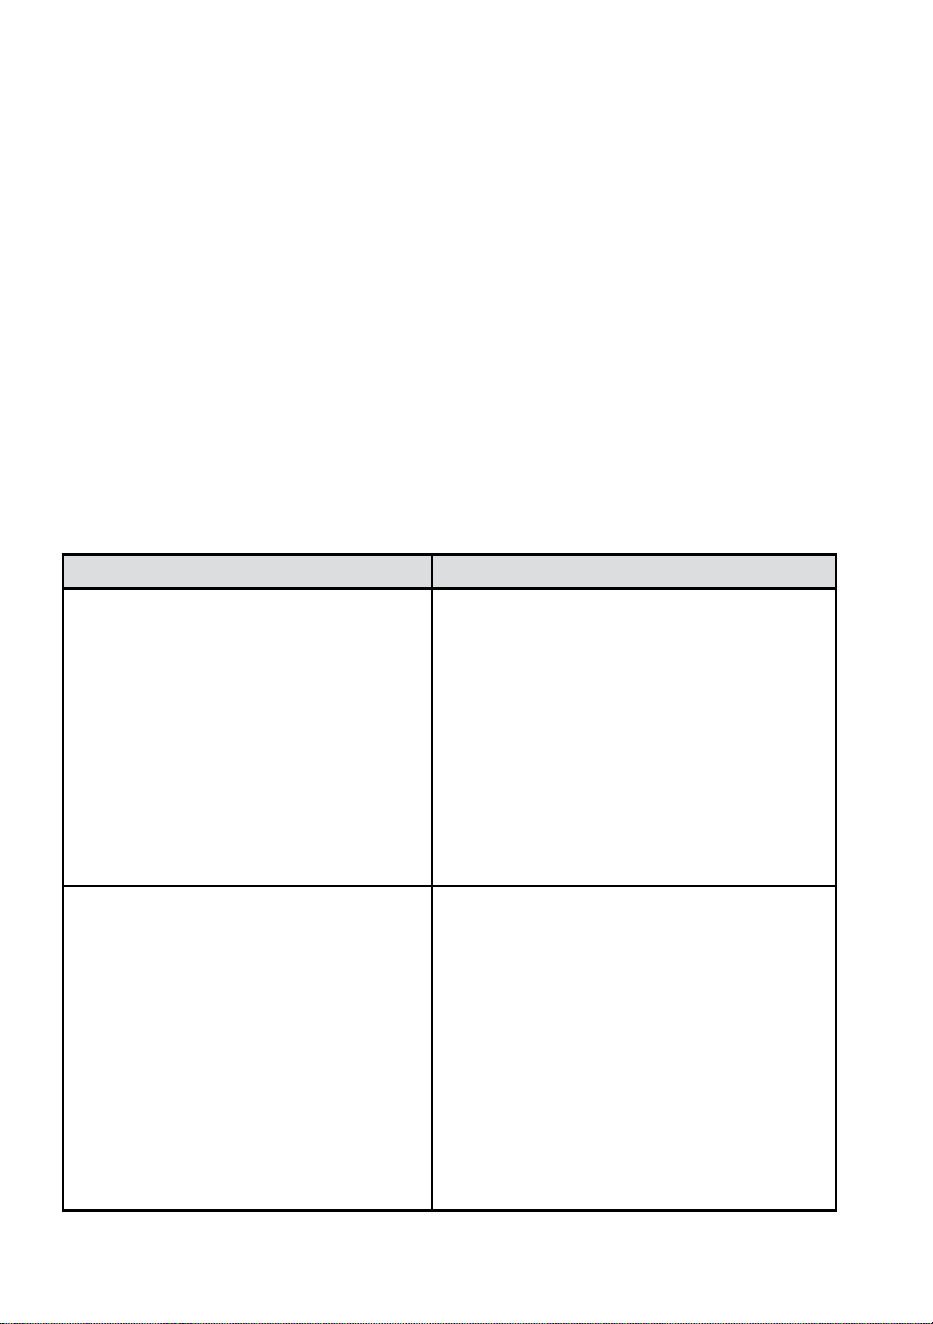
Issue Solution/s
The bulb doesn’t light up when I
connect it to the mains socket.
A. Check if the bulb has popped out
of the correct seating position during
shipping.
B. Check if the power cable is plugged
into the mains plug socket.
C. Unplug the power cable, lift the
front cover of the light and rotate the
bulb slightly to adjust the contact point
between the bulb and the bulb holders.
The light ickers when it lights up. It’s normal for a new uorescent light
bulb to icker when used for the rst
time.
Unplug the power cable and plug it
back after a few seconds. Leave the
lamp on for 48 hours and the icker
should not occur again.
If the issue persists after 48 hours,
please contact Duronic Customer Care
Team for further assistance.
11
Warranty
1 Year Guarantee from Shine-Mart Ltd, Trademark owners of Duronic Products.
NOTE: THESE STATEMENTS DO NOT AFFECT YOUR STATUTORY RIGHTS AS A
CONSUMER
This product has been manufactured under the strictest or quality control procedures, and
using the highest quality of materials, to ensure excellent performance and reliability. It will
give very good and long lasting service, provided it is properly used and maintained. The
product is guaranteed for 1 years from the date of original purchase. If any defect arises due
to a faulty materials or poor workmanship, the faulty product must be returned to the original
place of purchase. Refund or replacement is at the discretion of that company.
Duronic Products are offered with a 1 year guarantee under the following conditions:
1. The product must be returned to the retailer with original proof of purchase.
2. The product must be installed and used in accordance with the instructions
contained in this operating manual.
3. It must be used only for domestic purposes.
4. It does not cover wear and tear, malicious damage, misuse, neglect,
inexpert repairs or consumable parts.
5. Shine-Mart Ltd has no responsibilities for accidental or consequential loss or damage.
6. Shine-Mart Ltd are not liable to carry out any type of servicing work,
under the guarantee
7. Valid in the UK only
This product is tted with CE:1363 plug and fuse
Imported by Shine-Mart Ltd, RM3 8SB
Information on waste Disposal for Consumers of
Electrical & Electronic Equipment.
This mark on a product and/or accompanying documents indicates that when it
is to be disposed of, it must be treated as Waste
Electrical & Electronic Equipment, (WEEE).
Any WEEE marked products must not be mixed with general household waste,
but kept separate for the treatment, recovery and recycling of the materials used.
For proper treatment, recovery and recycling; please take all WEEE marked
waste to your Local Authority Civic waste site,
where it will be accepted free of charge.
If customers dispose of Waste Electrical & Electronic Equipment correctly, they
will be helping to save valuable resources and preventing any potential negative
effects upon human health and the environment, of any hazardous materials that
the waste may contain.

12
13
Manuel d’utilisation en Français

14
• This appliance is for indoor/household use only. Do not use outdoors.
• This y trap is not to be used in garages, sheds, barns, horse stables or
any out-house building where ammable material is present, or in any
locations where ammable vapour or explosive dust may exist.
• This appliance is not designed for commercial or industrial use; it is for
household use only.
• Make sure the electrical voltage is the same as that indicated on the rating
plate of the appliance.
• This appliance is not intended for use by persons (including children) with
reduced physical, sensory or mental capabilities, or lack of experience
and knowledge, unless they have been given supervision or instruction
concerning use of the appliance by a person responsible for their safety.
• Children should be closely supervised at all times to ensure that they do
not play with the appliance.
• Never carry the appliance by the power cable.
Safety Information
Please read these instructions fully and keep for future reference.
WARNING: If the machine is operated with a defective or damaged
mains cable, there is a potential danger of fatal electric shock.
Never use a machine which is damaged or has a damaged mains
cable.
• If either the appliance or power cable are damaged, return it to Duronic for
service or repair by professional technician.

15
• Only connect the appliance to an electrical outlet with the voltage and
frequency mentioned on the appliance label.
• Never try to replace the parts and repair the unit by yourself, apart from
replacing the bulb and adhesive boards.
• Do not modify the machine in any way that is not described in the
instructions for use. The machine contains live parts. Repairs may only be
carried out by Duronic, using original spare parts and accessories.
• Always operate the appliance on a dry, smooth, even and stable surface.
Do not place the unit on a damaged wall or a wall covered in damp/mould.
• Do not operate the machine or handle the plug with wet hands.
• Do not immerse in water or other liquids. Cleaning should be done as per
instructions in this manual.
• Keep the light away from ammable objects such as curtains, and away
from ammable liquids of gases as there is a danger of explosion.
• When installing, position the light away from windows or doors to avoid
interference from draft and daylight.
• For hygeine reasons, it is best that this light is not positioned near places
where food will be prepared or served.
• This appliance is only suitable for wall mounting.

16
Specications
Included in the Box
Model: FKWS18
Power: 18W
Size: 37.5 x 14 x 19.6 cm
Weight: 1.16 kg
Bulb type: UV bulb: 18W PL BL
Glue boards included: 5
• Wall sconce xture
• 2x screws
• 2x raw plugs
• 5x glue boards
• 1x UV bulb

17
About the FKWS18 Wall Sconce
Before Installing
Flying insects are naturally attracted to ultra-violet light. This y catcher has
an ultra-violet (UV) bulb that prooves to be utterly irresistible to ying insects.
Once the ies are attracted into the device, they will come to rest on the
adhesive-coated glue board inside and become permanently captured. Once
the board is full, it can quickly and easily be replaced. It is easy to check as the
front of the device lifts up to enable easy access to the adhesive board.
Your FKWS18 comes with 5 adhesive sheets. If you need more, you can order
these separately from Duronic (Shine-Mart Ltd).
Designed with an ornate elegant design, this light xing will t in beautifully
with any interior design.
No chemical substances are involved, so this appliance is safe to use for
humans and pets. The ultra-violet light provides an odorless, noiseless and
safe method of ridding your home of pesky ying insects.
1. Remove the device from the package carefully. Check the body and parts
for any potential shipping damage.
2. Check the posistion of the bulb and the glue board to see if they are
positioned correctly.
3. Connect the device to the nearest mains electrical socket to test the light.
4. If the bulb lights up immediately, proceed to installing the lamp.
5. If the bulb doesn’t light up, refer to the troubleshooting section to
determind the issue.

18
Installation
Preparation:
• Ensure that the light is installed above eye level (at least 70 inches from
the oor) so that it is out of the line of anyones sight, and so that no one
can bump into the xture.
• Install the light close to the area where ies come in, but away from any
draft or wind.
• Choose a location with high insect density, close to an electrical outlet
(hard wired availability) and easy serviceability.
• Do not install the lamp near any competing light sources, such as bright
sunlit windows, indoor lighting xtures etc. as this will render the FKWS18
light useless.
• The distance between the lamp and the ceiling should be 24” or more for
maximum light attraction.
Instruction:
1. Lift the front cover and remove the UV bulb to avoid causing any damage
to it during the installation.
2. Hold the back plate of the xture against the wall in your chosen location.
Determine the location you would like to install the light and mark the
screws’ locations with a pencil.
3. Place the xture aside. Drill holes on the marked locations and insert the
plastic raw plugs.
4. Next reposition the light xing over the top of the holes you have prepared,
and insert one screw and tighten with a screw driver. Then repeat this for
the next screw.
5. Install the bulb and the sticky glue board. Note that the sticky side of the
board should be placed facing up.
6. Close the cover of the light.
7. Plug in the power cable into the mains power socket and switch on. Your
light should immediately illuminate.
NOTE: If you do not use the appliance for an extended period, ensure you
remove the plug from the electrical socket.

19
Maintenance
Replacing the Adhesive Glue Board
It’s recommended to replace the glue board every 1-2 months.
To replace the glue board:
1. Unplug the power cable and wait for 5 minutes for the bulb to cool
down.
2. Lift the front cover and remove the old sticky glue board.
3. Install a new sticky glue board with the sticky side facing the bulb.
4. Close the front shell.
5. Re-connect the power cable by plugging it back into the mains
socket and switching on.
Replacing the UV Bulb
It is recommended to replace the UV bulb after around 5000 hours of normal
operation.
To replace the bulb:
1. Unplug the power cord and wait for 5 minutes for the bulb to cool
down.
2. Lift the front cover and remove the old UV bulb by rotating it.
3. Insert the new UV bulb in reversed rotation.
4. Close the front cover.
5. Re-connect the power cable by plugging it back into the mains
socket.
IMPORTANT: Ensure that disposal of the old UV bulb is done
responsibly and in line with the local council’s waste and recycling
regulations.
20
Maintenance (continued)
Troubleshooting Guide
Cleaning:
Before cleaning, ensure the power cable is unplugged from the mains socket.
To clean the light xing, use a dry dusting cloth to remove any dust and dirt
that has collected over time.
When nished, check the bulb and glue board are in the correct position, then
plug the cable back into the plug socket.
Issue Solution/s
The bulb doesn’t light up when I
connect it to the mains socket.
A. Check if the bulb has popped out
of the correct seating position during
shipping.
B. Check if the power cable is plugged
into the mains plug socket.
C. Unplug the power cable, lift the
front cover of the light and rotate the
bulb slightly to adjust the contact point
between the bulb and the bulb holders.
The light ickers when it lights up. It’s normal for a new uorescent light
bulb to icker when used for the rst
time.
Unplug the power cable and plug it
back after a few seconds. Leave the
lamp on for 48 hours and the icker
should not occur again.
If the issue persists after 48 hours,
please contact Duronic Customer Care
Team for further assistance.
21
Garantie et service après-vente
1 an de garantie de la part de Shine-Mart Ltd, propriétaire de la marque Duronic.
NOTE : CES DÉCLARATIONS N’AFFECTENT EN RIEN VOTRE DROIT STATUTAIRE EN
TANT QUE CONSOMMATEUR
Ce produit a été produit en suivant les procédures de contrôle de qualité les plus strictes en
utilisant des matériaux de qualité pour assurer une excellente durabilité et performance.
Cette centrifugeuse vous offrira de longues années de service tant que vous utilisez
correctement cette machine et suivez les instructions de maintenance contenues dans ce
manuel. Ce produit est garanti pour 1 an à partir de la date originelle d’achat. Si ce produit
était endommagée en raison d’un problème électrique ou d’une fabrication imparfaite,
le produit défectueux peut être remplacé au vendeur à la discrétion de la marque sous
conditions:
1. Le produit doit être retourné avec la preuve originale d’achat.
2. Le produit doit être installé et utilisé en accord avec les instructions contenues
dans ce manuel d’utilisation.
3. Le produit doit être réservé à un usage privé.
4. La garantie ne protège pas contre les dommages dus à l’usure normale,
l’utilisation malveillante, la mauvaise utilisation, la négligence, les réparations
conduites par des non-experts ainsi que les pièces consommables.
5. Shine-Mart Ltd ne porte pas de responsabilité pour tout dommage ou perte
accidentel ou conséquent causé par ce produit.
6. Shine-Mart Ltd se dégage de toute responsabilité en matière de réparation
durant la période de garantie.
7. Valide dans toute l’Union Européenne.
Ce produit est fourni avec une prise européenne
et un fusible de 3 ampères.
Importé par Shine-Mart Ltd, RM3 8SB.
Ce symbole apparaît sur le produit et/ou les documents accompagnant ce
produit pour indiquer que pour procéder à la destruction de ce produit, celui-ci
doit être traité comme un déchet électrique et électronique (WEEE).
Les produits marqués WEEE ne doivent être mélangés avec les déchets
ménagers et doivent être séparés pour traitement et recyclage des composants.
An de traiter et recycler ce produit, veuillez déposer tous les composants
marqués WEEE au site de recyclage le plus proche où ce produit sera repris
gratuitement. Si les clients jettent les déchets électriques et électroniques
WEEE correctement, ce geste aidera la préservation de ressources précieuses
et prévient les potentiels effets négatifs que ces composants ou tout autre
composant dangereux ont sur la santé humaine et l’environnement.
Garantie
suivez nous
www.duronic.com @Duronic_FranceDuronic France@duronic_france

22
23
Gebrauchsanleitung auf Deutsch

24
•
•
Dieses Gerät ist nur für den Gebrauch in Innenräumen / zu Hause
bestimmt. Nicht im Freien benutzen.
Diese Insektenfalle darf nicht in Garagen, Schuppen, Ställen oder
anderen Außengebäuden verwendet werden, in denen brennbares
Material vorhanden ist, oder an Orten, an denen brennbare Dämpfe
vorhanden sein können.
•
Dieses Gerät ist nicht für den gewerblichen oder industriellen
Gebrauch bestimmt. Es ist nur für den Heimgebrauch bestimmt.
•
Überprüfen Sie die örtliche Stromstärke, bevor Sie dieses Gerät in
Betrieb nehmen.
•
Dieses Gerät ist nicht zur Verwendung durch Personen (einschließlich
Kinder) mit eingeschränkten körperlichen, sensorischen oder geistigen
Fähigkeiten oder mangelnder Erfahrung und mangelndem Wissen
vorgesehen, es sei denn, sie wurden hinsichtlich der Verwendung des
Geräts beaufsichtigt oder unterwiesen von einer für ihre Sicherheit
verantwortlichen Person
•
Kinder müssen jederzeit beaufsichtigt werden, um sicherzustellen,
dass sie nicht mit dem Gerät spielen.
•
Tragen Sie das Gerät niemals am Netzkabel.
WARNUNG: Wenn die Insektenfalle mit einen defekten oder
beschädigten Netzkabel verwendet wird, besteht die Gefahr eines
tödlichen Stromschlags.
Sicherheitshinweise
Lesen Sie diese Anweisungen sorgfältig durch und bewahren
Sie sie zum späteren Nachschlagen auf.
Verwenden Sie niemals ein beschädigtes Gerät mit ein
beschädigtes Netzkabel.
•
Wenn das Gerät oder das Netzkabel beschädigt ist, senden Sie es zur
Wartung oder Reparatur durch einen Fachmann an Duronic.

25
•
•
Schließen Sie das Gerät nur an eine Steckdose mit der auf dem
Gerät angegebenen Stromstärke an.
•
Versuchen Sie niemals, das Gerät selbst zu reparieren, außer die
Glühbirne und die Kleeblätter auszutauschen.
•
Verändern Sie das Gerät nicht auf eine Weise, die nicht in der
Gebrauchsanweisung beschrieben ist. Reparaturen dürfen nur von
Duronic mit Originalersatzteilen und -zubehör durchgeführt werden.
Verwenden Sie das Gerät immer auf einer trockenen, gleichmäßigen
und stabilen Oberfläche.
•
•
Benutzen Sie das Gerät nicht und fassen Sie den Stecker mit nassen
Händen an.
Tauchen Sie das Gerät nicht in Wasser oder andere Flüssigkeiten. Die
Reinigung sollte gemäß den Anweisungen in diesem Handbuch
durchgeführt werden.
•
Halten Sie die Insektenfalle von brennbaren Gegenständen wie Gardinen
und brennbaren Flüssigkeiten fern, da Explosionsgefahr besteht.
•
Montieren Sie die Insektenfalle nicht in der Nähe von Fenstern oder
Türen.
•
Aus hygienischen Gründen wird empfohlen, diese Insektenfalle nicht in
der Nähe Lebensmittel zu montieren.
•
Dieses Gerät ist nur zur Wandmontage geeignet.

26
Technische Daten
Packungsinhalt
FKWS18
18W
37.5 x 14 x 19.6 cm
1.16 kg
UV Lampe 18W PL BL
5
Modell:
Leistung:
Abmessungen:
Gewicht:
Lampe:
Klebeblätter:
•
•
Applique für die Falle
2x Schrauben
• 2x Dübel
• 5x Klebeblätter
• 1x UV-Lampe

27
Insekten werden von Natur aus von ultraviolettem Licht angezogen. Diese
Falle hat eine UV-Lampe, die für Insekten absolut unwiderstehlich ist.
Sobald die Fliegen vom Gerät angezogen werden, landen sie auf dem
Klebeblatt und werden dauerhaft erfasst. Sobald das Blatt voll ist, kann es
schnell und einfach ausgetauscht werden
Diese Falle mit elegantem Design passt perfekt in jedem Ambiente.
Da die Insektenfalle keine Chemikalien nutzt, ist dieses Gerät Menschen
und Haustiere freundlich. Ultraviolettes Licht bietet eine geruchsneutrale,
geräuschlose und sichere Methode, um Ihr Zuhause von lästigen
Insekten zu befreien.
1.
Über die FKWS18 Insektenfalle
Der FKWS18 wird mit 5 Klebeblätter geliefert. Wenn mehr Klebeblätter
benötigt werden, können diese bei Duronic bestellt werden.
Vor der Montage
2.
Nehmen Sie das Gerät vorsichtig aus der Verpackung. Überprüfen Sie
das Gehäuse und die Teile auf Transportschäden.
Überprüfen Sie die Lampe und die Klebeblätter, um sicherzustellen, dass
sie richtig positioniert sind.
3.
Schließen Sie das Gerät an die nächste Steckdose an, um das Licht zu
testen.
4. 4.
5.
Wenn das Licht sofort aufleuchtet, fahren Sie mit der Montage der
Insektenfalle fort.
Wenn sich die Lampe nicht einschaltet, lesen Sie den
Abschnitt zur Fehlerbehebung, um das Problem zu ermitteln.

28
•
Montage
Stellen Sie sicher, dass das Licht über Augenhöhe (mindestens 177
cm vom Boden) montiert wird, damit sich das Licht nicht auf
Augenhöhe befindet.
•
Wählen Sie einen Ort mit einer hohen Insektendichte in der Nähe
einer Steckdose, um die Reinigung zu erleichtern.
•
Montieren Sie die Falle nicht in der Nähe von Luftquellen oder
Sonnenlicht, Fenstern, Innenbeleuchtung usw. Dadurch wird die
FKWS18-Leuchte nutzlos.
•
Der Abstand zwischen der Falle und der Decke sollte 60 cm oder
mehr betragen.
1.
Heben Sie die vordere Abdeckung an und entfernen Sie die UV-Lampe,
um Beschädigungen bei der Montage der Insektenfalle zu vermeiden.
2.
Halten Sie die Rückwand des Geräts in der gewählten Position an die
Wand. Markieren Sie die Position der Schrauben mit einem Bleistift.
3.
Bohren Sie die zuvor mit dem Bleistift markierten Punkte und setzen
Sie die Dübel ein.
4.
Setzen Sie dann die Falle wieder an die Wand in den zuvor vorbereiteten
Löchern und setzen Sie eine Schraube ein und schrauben Sie diese mit
einem Schraubendreher fest. Wiederholen Sie den Vorgang für die
nächste Schraube.
5.
Setzen Sie die Lampe und die Klebeblätter ein. Beachten Sie, dass
die Klebrige Seite des Blattes nach oben zeigen muss.
6.
Schließen Sie die Lichtabdeckung.
7.
Schließen Sie es an und schalten Sie es ein. Die Lampe sollte sofort
aufleuchten.
WARNUNG: Wenn Sie das Gerät längere Zeit nicht nutzen, ziehen Sie den Stecker
aus der Steckdose.
29
Wir empfehlen, die Klebeblätter alle 1-2 Monate auszutauschen.
So ersetzen Sie die Klebeblätter:
1.
Wartung
Klebeblätter austauschen
2.
Schalten Sie das Gerät aus und warten Sie 5 Minuten, bis sich
die Lampe abgekühlt.
3.
Heben Sie die vordere Abdeckung an und entfernen
Sie das alte Klebeblatt.
Legen Sie eine neues Klebeblatt mit der Klebrigen Seite ein.
5.
5. Schließen Sie die Abdeckung.
Schalten Sie das Gerät wieder an.
Es wird empfohlen, die UV-Lampe nach ca. 5000 Betriebsstunden
auszutauschen.
1.
UV-Lampe austauschen
Trennen Sie das Netzkabel und warten Sie 5 Minuten, bis sich
die Lampe abgekühlt.
2.
Heben Sie die Abdeckung an und entfernen Sie die alte
UV-Lampe, indem Sie sie drehen.
3.
4.
Setzen Sie die neue UV-Lampe ein.
5.
Schließen Sie die vordere Abdeckung.
Schalten Sie das Gerät wieder an.
Wichtig: Stellen Sie sicher, dass die alte UV-Lampe
verantwortungsbewusst und gemäß den Vorschriften für Recycling
entsorgt wird.

30
Stellen Sie vor dem Reinigen sicher, dass das Netzkabel aus der Steckdose
gezogen ist.
Verwenden Sie zum Reinigen der Insektenfalle ein trockenes Tuch.
Wenn Sie fertig sind, überprüfen Sie, ob sich die Lampe und das Klebeblatt
in der richtigen Position befinden, und schalten Sie das Gerät wieder an.
Reinigung:
Wartung
Fehlerbehebung
A. Überprüfen Sie, ob die Lampe
nicht richtig angeschraubt ist.
B.
C. Trennen Sie das Netzkabel, heben
Sie die vordere Abdeckung der
Insektenfalle an und drehen Sie die
Lampe leicht, um den Kontaktpunkt
zwischen der Lampe und der Falle
einzustellen.
Wenn das Problem nach 48 Stunden
weiterhin besteht, wenden Sie sich an
den Duronic-Kundendienst, um
weitere Unterstützung zu erhalten.
Problem
Die Lampe schaltet sich nicht
ein, wenn diese an die
Steckdose angeschlossen ist.
Das Licht blinkt, wenn es
angeschaltet ist.
Lösung
Überprüfen Sie, ob das Netzkabel
in die Steckdose eingesteckt ist.
Es ist normal, dass eine neue
UV-Lampe blinkt, wenn sie zum ersten
Mal verwendet wird.
Trennen Sie das Netzkabel und
schließen Sie es nach einigen
Sekunden wieder an. Lassen Sie die
Lampe 48 Stunden lang eingeschaltet
und das Blinken sollte sich nicht
wiederholen.
31
Shine-Mart Ltd, der Markeninhaber von Duronic Produkten, bietet 1 Jahr Gewährleistung.
HINWEIS: DIESE BEDINGUNGEN BEEINFLUSSEN IHRE GESETZLICHE RECHTE ALS
VERBRAUCHER NICHT
Dieses Produkt wurde unter strengen Qualitätskontrollen produziert und aus hochwertigen
Materialien hergestellt, um ausgezeichnete Leistung und Zuverlässigkeit zu gewährleisten.
Sofern das Produkt korrekt benutzt und gewartet wird, kann eine langlebige Lebensdauer
erwartet werden.
Das Produkt hat eine Gewährleistung von einem Jahr ab Kaufdatum. Beim Auftreten eines
Schadens, der von fehlerhalten Materialien oder Verarbeitung verursacht wurde, sollte das
defekte Produkt an den ursprünglichen Verkäufer zurückgegeben werden. Die Erstattung
oder Umtausch erfolgt nach Vorschriften des Unternehmens.
Duronic Produkte haben 1 Jahr Gewährleistung unter folgenden Bedingungen:
1. Das Produkt muss mit dem Kaufnachweis zurückgegeben werden.
2. Das Produkt muss unter den Anweisungen und Anleitungen installiert und benutzt
worden sein.
3. Es muss ausschließlich für den Hausgebrauch genutzt worden sein.
4. Natürliche Abnutzung oder Verschleiß, böswillige Beschädigung, Missbrauch,
Vernachlässigung und unsachgemäße Reparaturen sind von der Gewährleistung
ausgeschlossen.
5. Shine-Mart Ltd übernimmt keine Verantwortung für zufällige oder Folgeschäden.
6. Shine-Mart Ltd ist nicht für Wartungsarbeiten zuständig. Diese fallen nicht unter die
Gewährleistung.
7. Gültig in der EU
Dieses Produkt ist mit tted CE geprüfte Typ-F
Euro Stecker/BS Stecker ausgestattet
Von Shine-Mart Ltd, RM3 8SB importiert
Information über Abfalllagerung für Verbraucher von elektronischen Geräten.
Dieses Zeichen auf dem Produkt und/oder auf mitgelieferte Dokumenten
zeigt, dass, wenn eine Entsorgung erfolgt, das Gerät an einer Elektro- und
Elektronikgeräte-Abfall-Sammelstelle (WEEE) abgegeben werden muss.
Um eine weitere Behandlung und Weiterverarbeitung der Materialien zu
gewährleisten dürfen diese WEEE-markierten Produkte nicht mit dem Hausmüll
vermischt werden.
Für die korrekte Behandlung, Aufbereitung und Wiederverwendung geben Sie
alle WEEE-markierten Produkte zur kommunalen Abfallbeseitigungsanlage.
Dort können Sie diese kostenlos abgeben.
Wenn die Beseitigung von Elektro-und Elektronik-Altgeräten korrekt
durchgeführt wird, tragen Sie zur Gewinnung von wertvollen Ressourcen
bei, sowie einer möglichen Vermeidung von negativen Auswirkungen auf
Gesundheit und Umwelt.
Gewährleistung
Folgen Sie Uns

32

33
Manual De Instrucciones En Español

34
•
•
Utilice este aparato en un espacio interior/doméstico. No se
recomienda su uso en el exterior.
Esta trampa para insectos no debe utilizarse en garajes, cobertizos,
graneros, establos para caballos, edificios exteriores donde haya
material inflamable o en cualquier lugar donde pueda haber gases o
sustancias combustibles.
•
Este aparato no se ha creado con un fin comercial o industrial. Su
uso es doméstico.
•
Antes de conectar el aparato a la toma de corriente, asegúrese de que
el voltaje que se indica en la etiqueta de clasificación energética (situada
en la parte inferior) corresponde al de su hogar.
•
No se recomienda la operación de este aparato por personas adultas o
niños con capacidades físicas, sensoriales o mentales reducidas a
menos que se encuentren bajo la supervisión de una persona
responsable de su seguridad.
•
Mantenga este aparato fuera del alcance de los niños y asegúrese de
que no juegan con este.
•
ADVERTENCIA: Tenga en cuenta que si se usa el aparato y
algún cable está dañado o estropeado, corre el riesgo de sufrir
una descarga eléctrica mortal. Nunca use un aparato electrónico
estropeado.
Instrucciones de seguridad
Lea este manual con atención y consérvelo para futuras consultas
•
Nunca utilice el aparato si el cable o la unidad no funcionan
correctamente. Si la lámpara o el cable se ha estropeado, devuélvalo al
servicio de Duronic o póngase en contacto con un técnico profesional
para repararlo.
No arrastre el aparato por el cable.

35
•
•
Conecte la lámpara sólo a una toma de corriente con la tensión y la
frecuencia indicadas en la etiqueta del aparato.
•
No intente reemplazar alguna pieza o reparar el aparato usted
mismo. Solo cambie la bombilla y la lámina adhesiva.
•
Nunca desmonte el aparato con el fin de arreglarlo usted. No realice
modificaciones que no se describan en el manual de instrucciones ya
que el aparato contiene piezas móviles. Duronic es el responsable de
las reparaciones puesto que se necesitan recambios y accesorios de la
marca original.
Utilice el aparato sobre una superficie plana, estable y resistente al
calor. No coloque el aparato en una pared con grietas, humedad o
moho.
•
•
No conecte o desconecte el aparato de la corriente con las manos
mojadas.
Nunca sumerja el aparato en agua u otros líquidos. La limpieza de este
calefactor debe realizarse según se indica en las instrucciones.
•
Mantenga la lámpara alejada de objetos que puedan prender, como
por ejemplo unas cortinas, y de líquidos o gases inflamables, ya que
existe peligro de explosión.
•
Al instalarlo, coloque la lámpara lejos de ventanas y puertas para
evitar la interferencia de las corrientes de aire y la luz diurna.
•
Por higiene, no coloque la lámpara cerca de lugares donde se vaya a
servir comida.
•
Este aparato está diseñado para instalarse en una pared.

36
Características técnicas
Contenido de la caja
Modelo: FKWS18
Voltaje
:
18 W
Tamaño: 37.5 x 14 x 19.6 cm
Peso: 1.16 kg
Bombilla: luz UV: 18W PL BL
Láminas adhesivas: 5
•
•
Lámpara de pared
2x Tornillos
•
2x Tacos
•
de plástico
5x Láminas adhesivas
• 1x Bombilla UV

37
La luz ultravioleta atrae a los insectos voladores, es por eso que esta
lámpara tiene una bombilla ultravioleta (UV) que hace que todo este tipo
de insectos vayan hacia ella. Para retenerlas, hay unas láminas adhesivas
tras las bombillas UV que retienen a los insectos. Estas láminas pueden
reemplazarse fácil y rápidamente con tan solo levantar la parte frontal de la
lámpara.
La lámpara FKWS18 viene con 5 trampas adhesivas. En caso de necesitar
más, puede pedirlas por separado a Duronic (Shine-Mart Ltd).
Su elegante y discreto diseño encajará perfectamente allá donde quiera
colocarlo.
Esta lámpara es segura para personas y animales domésticos puesto que
no contiene sustancias químicas. La luz ultravioleta es un método seguro,
inodoro y silencioso para deshacerse de los insectos voladores que tanto
le incordian.
1.
Lámpara mata insectos FKWS18
Antes de la instalación
Saque el aparato del paquete con cuidado y compruebe si alguna parte se
ha podido dañar durante el transporte.
2. Compruebe la posición de la bombilla y la lámina adhesiva para ver si
están colocadas correctamente.
3. Conecte la lámpara a la toma de corriente más cercana para comprobar
que la luz funciona.
4. Si la bombilla se enciende inmediatamente, proceda a instalar la lámpara.
5. Si la bombilla no se enciende, consulte la sección de resolución de
problemas para identificar el problema.

38
•
Instalación
Preparación:
Asegúrese de que la luz se instala por encima del nivel de los ojos, al
menos a 1.8 metros del suelo, de manera que esté fuera de la línea
de visión de las personas y que nadie pueda chocarse con el aparato.
•
Instale la luz cerca del área por donde entran las moscas, pero lejos
de cualquier corriente de aire o viento.
•
Elija un lugar con mucha concentración de insectos y que esté
cerca de una toma de corriente.
•
No instale la lámpara cerca de cualquier otra luz, como, por ejemplo,
fuentes de luz solar brillante, ventanas, iluminación interior, etc., ya
que esto hará que la luz del FKWS18 sea inservible.
•
La distancia entre la lámpara y el techo debe ser de un metro o más
para conseguir una máxima atracción de la luz.
1.
Instrucciones:
Levante la cubierta frontal y retire la bombilla UV para evitar que se
dañe durante la instalación.
2.
Sostenga la placa trasera del aparato contra la pared en el lugar que
desee instalar la lámpara y marque con un lápiz en la pared dónde va a
colocar los tornillos.
3.
Deje la lámpara a un lado para poder hacer los agujeros donde marcó
anteriormente e inserte el taco de plástico.
4.
A continuación, vuelva a colocar la lámpara sobre la parte superior de
los agujeros de la pared para poder atornillarlo. Repítalo con el otro
agujero y tornillo.
5.
Coloque la bombilla y la lámina adhesiva. Tenga en cuenta que el
lado pegajoso de la lámina debe colocarse mirando hacia fuera.
6.
Cierre la tapa frontal de la lámpara.
7.
Enchufe el cable en la toma de corriente y enciéndalo. La luz debe
encenderse inmediatamente.
Nota: si no utiliza el aparato durante un largo período, asegúrese de desenchufarlo.
39
Se recomienda reemplazar la lámina adhesiva cada 1-2 meses.
1.
Mantenimiento
Cambiar la lámina adhesiva
Para reemplazar la lámina adhesiva:
Desenchufe el cable de alimentación y espere 5 minutos
hasta que la bombilla se enfríe.
2. Levante la cubierta frontal y retire la lámina que desea
cambiar.
3. Coloque una nueva lámina con el lado adhesivo mirando
hacia la bombilla.
4. Cierre la cubierta frontal.
5. Vuelva a enchufar la lámpara y enciéndala.
Se recomienda cambiar la bombilla UV después de unas 5000 horas de
funcionamiento normal.
Cambiar la bombilla ultravioleta
Para cambiar la bombilla:
1. Desenchufe el cable de alimentación y espere 5 minutos para
que la bombilla se enfríe.
2. Levante la cubierta frontal y gire la bombilla para poder retirarla.
3. Inserte la nueva bombilla girandola hacia el lado contrario al
anterior.
4. Cierre la cubierta frontal.
5. Vuelva a enchufar la lámpara y enciéndala.
Importante: asegúrese de desechar la bombilla UV gastada de
forma responsable y de acuerdo con las normas sobre el
desecho de residuos y reciclaje.
40
Asegúrese de que el cable de la lámpara está desenchufado.
Para limpiar la lámpara, ayúdese con un paño seco para retirar el polvo y
la suciedad acumulada.
Una vez hecho esto, compruebe que la bombilla y la lámina adhesiva están
correctamente colocados y vuelva a enchufar el aparato.
Mantenimiento
Limpieza
Resolución de problemas
A. Compruebe si la bombilla se ha
podido desplazar.
B. Check if the power cable is plugged
into the mains plug socket.
C. Unplug the power cable, lift the
front cover of the light and rotate the
bulb slightly to adjust the contact point
between the bulb and the bulb holders.
The light ickers when it lights up. It’s normal for a new uorescent light
bulb to icker when used for the rst
time.
Unplug the power cable and plug it
back after a few seconds. Leave the
lamp on for 48 hours and the icker
should not occur again.
If the issue persists after 48 hours,
please contact Duronic Customer Care
Team for further assistance.
Problema Solución
La bombilla no se ilumina
cuando enciendo la lámpara
41
Síguenos
NOTA: ESTAS DECLARACIONES NO AFECTAN SUS DERECHOS LEGALES COMO
CONSUMIDOR
Este producto ha sido fabricado bajo las más estrictas control de calidad y utilizando
materiales de
alta calidad para asegurar conabilidad y excelente funcionamiento. Le dará buen servicio y
una larga duración, siempre y cuando se utilice correctamente y sea bien mantenido.
El producto está garantizado por 1 año desde la fecha de compra original. Si surge
cualquier defecto debido a un error/defecto de fábrica o mano de obra, entonces el producto
debe ser devuelto al lugar original de compra. Reembolso o reemplazo es a discreción de la
compañía.
Productos Duronic se ofrecen con una garantía de 1 año bajo las siguientes condiciones:
1. El producto debe ser devuelto al vendedor con comprobante de compra original.
2. El producto debe instalarse y usarlo según las instrucciones
contenidas en este manual.
3. Este aparato es únicamente de uso doméstico.
4. No cubre desgaste, daños maliciosos, uso indebido, negligencia,
reparaciones inexpertas o partes consumibles.
5. Shine-Mart Ltd no será responsable por cualquier daño consecuente,
accidentes o pérdidas.
6. Shine-Mart Ltd no es responsable ah llevar a cabo cualquier tipo de
servicio, bajo la garantía.
7. Valido solamente dentro de la (EU).
Este producto esta equipado con enchufe/fusible Europeo
Importado por Shine-Mart Ltd, RM3 8SB
Información sobre la eliminación de residuos para los consumidores
de equipos eléctricos y eléctricos:
Esta marca en un producto y/o documentos adjuntos indica que cuando se va a
desechar, se debe tratar como equipos residuos eléctricos y electrónicos (RAEE)
Cualquier producto marcado (RAEE) no debe ser mezclado con la basura
doméstica, sino separado para el tratamiento, recuperación y reciclaje
de los materiales utilizados.
Para el tratamiento adecuado, recuperación y reciclaje; por favor, tome todos los
productos (RAEE) y llévelo al sitio de residuos de su
Autoridad Local, donde será aceptado de forma gratuita.
Si los clientes desechan los residuos eléctricos y electrónicos correctamente,
ayudar a ahorrar valiosos recursos y prevenir los efectos negativos sobre la salud
humana y el medio ambiente, de materiales peligrosos que pueden
contener los residuos
Garantía

42

43
Manuale D’istruzioni In Italiano
44
•
•
Questo apparecchio è solo per uso interno / domestico. Non usare all’esterno.
Questa trappola per insetti non deve essere utilizzata in garage,
capannoni, stalle o qualsiasi edificio esterno in cui sia presente
materiale infiammabile o in qualsiasi luogo in cui possano essere
presenti vapori infiammabili o polvere esplosiva.
•
Questo apparecchio non è progettato per uso commerciale o
industriale; è solo per uso domestico.
•
Accertarsi che la tensione elettrica sia la stessa indicata sulla targhetta
dei dati tecnici dell'apparecchio.
•
Questo apparecchio non è destinato all'uso da parte di persone (compresi i
bambini) con ridotte capacità fisiche, sensoriali o mentali o mancanza di
esperienza e conoscenza, a meno che non siano state sottoposte a
supervisione o istruzione relative all'uso dell'elettrodomestico da parte di una
persona responsabile della loro sicurezza.
•
I bambini devono essere attentamente sorvegliati in ogni momento per
assicurarsi che non giochino con l'apparecchio.
•
Non trasportare mai l'apparecchio per il cavo di alimentazione.
Se la trappola viene utilizzata con un cavo di rete difettoso o
danneggiato, persiste un potenziale pericolo di scossa elettrica mortale.
Istruzioni di sicurezza
Leggere attentamente queste istruzioni e conservarle per riferimento futuro.
Non utilizzare mai un elettrodomestico danneggiato o con un
cavo di alimentazione danneggiato.
•
Se l'apparecchio o il cavo di alimentazione sono danneggiati, restituirlo a
Duronic per assistenza o riparazione da parte di un tecnico
professionista.

45
•
•
Collegare l'apparecchio a una presa elettrica solo con la tensione
indicate sull'etichetta dell'apparecchio.
•
Non tentare mai di riparare l'unità da soli, a parte la sostituzione della
lampadina e dei pannelli adesivi.
•
Non modificare la macchina in modo non descritto nelle istruzioni per
l'uso. Le riparazioni possono essere eseguite esclusivamente da
Duronic, utilizzando ricambi e accessori originali.
Utilizzare sempre l'apparecchio su una superficie asciutta, uniforme e
stabile.
•
•
Non utilizzare la macchina o maneggiare la spina con le mani bagnate.
Non immergere in acqua o altri liquidi. La pulizia deve essere eseguita
secondo le istruzioni in questo manuale.
•
Tenere la trappola lontana da oggetti infiammabili come tende e liquidi
infiammabili, poiché persiste il pericolo di esplosione.
•
Durante l'installazione, posizionare la luce lontano da finestre o porte
per evitare interferenze da correnti d'aria e luce diurna.
•
Per motivi di igiene, è consigliato che questa trappola non venga
posizionata vicino a luoghi nei quali sia presente cibo.
•
Questo apparecchio è adatto solo per il montaggio a parete.

46
Specifiche
Contenuto della confezione
FKWS18
18W
37.5 x 14 x 19.6 cm
1.16 kg
Lampa UV: 18W PL BL
5
Modello:
Potenza:
Misure:
Peso :
Tipo di lampadina:
Fogli adesivi:
•
•
Applique per la trappola
2x viti
• 2x tasselli
• 5x fogli
•
adesivi
1x lampadina UV
47
Gli insetti sono naturalmente attratti dalla luce ultravioletta. Questa trappola
ha una lampadina ultravioletta (UV) che si rivela assolutamente irresistibile
per gli insetti. Una volta che le mosche sono attratte nel dispositivo, si
poseranno sul foglio di colla e verranno catturate in modo permanente.
Una volta che il foglio è pieno, può essere sostituita rapidamente e
facilmente
Progettato con un design elegantemente, questa trappola si adatta
perfettamente a qualsiasi ambiente.
Non sono coinvolte sostanze chimiche, quindi questo apparecchio è
sicuro da utilizzare per persone e animali domestici. La luce ultravioletta
fornisce un metodo inodore, silenzioso e sicuro per liberare la casa da
fastidiosi insetti.
1.
Informazioni su FKWS18 Trappola per zanzare
L'FKWS18 viene fornito con 5 fogli adesivi. Se si necessitano di più foglio
adesivi, possono essere ordinati da Duronic.
Prima del montaggio
2.
Rimuovere il dispositivo dalla confezione con attenzione. Controllare il
corpo e le parti per eventuali danni di spedizione.
Controllare la lampadina e del foglio adesivo per verificare che
siano posizionati correttamente.
3.
Collegare il dispositivo alla presa elettrica di rete più vicina per testare
la luce.
5.
4. Se la lampadina si accende immediatamente, procedere all'installazione
della trappola.
Se la lampadina non si accende, consultare la sezione sulla
risoluzione dei problemi per determinare il problema.

48
•
Montaggio
Preparazione:
Accertarsi che la luce sia installata al di sopra dell'altezza degli occhi
(almeno 177 cm dal pavimento) in modo che sia fuori dalla linea visiva
e nessuno possa urtare la trappola.
•
Scegliere un luogo con elevata densità di insetti, vicino a una presa
elettrica, facilitando così la manutenzione.
•
Non montare la trappola vicino a fonti di luce concorrenti d’aria,
come una luce solare intensa, finestre, illuminazioni interni ecc. in
quanto ciò renderà la luce FKWS18 inutile.
•
La distanza tra la trappola e il soffitto dovrebbe essere di 60 cm o più.
1.
Istruzione:
Sollevare il coperchio anteriore e rimuovere la lampadina UV per evitare
danni durante il montaggio della trappola.
2.
Tenere la piastra posteriore del dispositivo contro il muro nella
posizione prescelta. Marcare la posizione delle viti con una matita.
3.
Forare nei punti precedentemente segnati con la matita e inserire i
tasselli.
4.
Quindi riposizionare la trappola alla parte sui buchi precedentemente
preparati e inserire una vite e avvitare con un cacciavite. Quindi ripetere
l'operazione per la vite successiva.
5.
Montare la lampadina e il foglio adesivo. Si noti che il lato adesivo del
foglio deve essere posto rivolto verso l'alto.
6.
Chiudere il coperchio della luce.
7.
Collegare alla presa elettrica e accenderla. La trappola dovrebbe
illuminarsi immediatamente.
NOTA: se non si utilizza l'apparecchio per un periodo prolungato, assicurarsi di
rimuovere la spina dalla presa elettrica.

49
Si consiglia di sostituire il foglio adesivo ogni 1-2 mesi.
1.
Manutenzione
Sostituzione del foglio adesivo
Come sostituire il foglio adesivo:
2.
Scollegare il cavo di alimentazione e attendere 5 minuti affinché
la lampadina si raffreddi.
3.
Sollevare il coperchio anteriore e rimuovere il vecchio foglio
adesivo.
Posizionare un nuovo foglio adesivo con il lato adesivo rivolto
verso la lampadina.
4.
5.
Chiudere il coperchio anteriore.
Ricollegare il cavo di alimentazione.
Si consiglia di sostituire la lampadina UV dopo circa 5000 ore di
funzionamento.
1.
Sostituzione della lampadina UV
Come sostituire la lampadina UV:
Scollegare il cavo di alimentazione e attendere 5 minuti affinché la
lampadina si raffreddi.
2.
Sollevare il coperchio anteriore e rimuovere la vecchia lampadina UV
ruotandola.
3.
4.
Inserire la nuova lampadina UV.
5.
Chiudere il coperchio anteriore.
Ricollegare il cavo di alimentazione.
Importante: Assicurarsi che lo smaltimento della vecchia
lampadina UV avvenga in modo responsabile e in linea con le
normative sui rifiuti e sul riciclaggio comunali.

50
Per pulire la trappola, utilizzare un panno per spolverare asciutto.
Al termine, controllare che la lampadina e il foglio adesivo siano nella
posizione corretta, quindi ricollegare il cavo alla presa.
Manutenzione
Pulizia:
Risoluzione dei problemi
A. Controllare se la lampadina non
è avvitata correttamente.
B.
C.
È normale che una nuova lampadina
UV lampeggi quando viene utilizzata
per la prima volta.
Se il problema persiste dopo 48 ore,
contattare l’assistenza clienti Duronic
per ulteriore assistenza.
Problema
La lampadina non si accende
quando collegato alla presa di
corrente.
La luce lampeggia quando si
accende.
Soluzione
Controllare se il cavo di
alimentazione è inserito nella presa di
corrente.
Scollegare il cavo di alimentazione,
sollevare il coperchio anteriore della
luce e ruotare leggermente la
lampadina per regolare il punto di
contatto tra la lampadina e la trappola.
Scollegare il cavo di alimentazione
e ricollegarlo dopo alcuni secondi.
Lasciare la lampada accesa per 48
ore e il lampeggiare non dovrebbe
ripetersi.
Prima della pulizia, assicurarsi che il cavo di alimentazione sia scollegato dalla
presa elettrica.
51
Questo prodotto è garantito per una durata determinata con il distributore a partire dalla data
di acquisto contro ogni difetto derivante da difetti di fabbricazione o dei materiali. Questa
garanzia non copre difetti o danni derivanti da installazione impropria, uso improprio o usura
anomala del prodotto.
L’apparecchio deve essere restituito nella sua confezione originale e accompagnato dalla
ricevuta e deve essere stato utilizzato in modo corretto. È importante rispettare le istruzioni
per l’uso e le precauzioni di sicurezza indicate di seguito. Inoltre, non possiamo garantire
l’apparecchio se è stato modicato o riparato dall’acquirente o da terzi.
1 anno di garanzia da Shine-Mart Ltd, proprietari del marchio commerciale Duronic.
NOTA: QUESTE DICHIARAZIONI NON INFLUISCONO SUI DIRITTI LEGALI DEL
CONSUMATORE
Questo prodotto è stato realizzato con le rigorose procedure del controllo qualità, e
utilizzando materiali di altissima qualità, per garantire afdabilità e prestazioni eccellenti.
Vi regalerà un servizio ottimo e a lungo termine, purchè venga opportunamente usata e
mantenuta. Il prodotto è garantito per 1 anno dalla data di acquisto. Se sorge qualche
difetto a causa di materiali difettosi o scarsa manodopera, il prodotto difettoso dovrà essere
restituito al luogo originale di acquisto. Il rimborso o la sostituzione sono a discrezione
dell’azienda. I prodotti Duronic offrono 1 anno di garanzia alle seguenti condizioni:
1. Il prodotto deve essere restituito al rivenditore con la prova d’acquisto originale
2. Il prodotto deve essere installato e usato seguendo le istruzioni contenute nel manuale.
3. Il prodotto va utilizzato solo per scopi domestici. Non è da utilizzarsi per uso commerciale.
4. La garanzia non copre usura, danni volontari, abuso, negligenza, riparazioni
inesperte o consumo dei materiali.
5. Shine-Mart Ltd non è responsabile per Danni accidentali o consequenziali.
6. Shine-Mart Ltd non è tenuta a eseguire qualsiasi tipo di riparazione, ai sensi
della garanzia.
7. Termini validi in tutta l’unione europea *Ci riserviamo il diritto di modicare le sopracitate
condizioni Per parti di ricambio si prega di consultare il sito www.duronic.com
Corretto smaltimento del prodotto.
Qusto prodotto è inclusivo di spina certicata CE
importata da Shine-Mart Ltd, RM3 8SB
Questo segno su un prodotto o su documenti indica che quando deve essere
smaltito, deve essere trattato come i riuti elettrici ed elettronici (WEEE)
Tutti I prodotti marcati WEEE non devono essere buttati nei riuti domenistici
generici, ma separati per il trattamento, il recupero
e il riciclaggio dei materiali utilizzati.
Per un corretto trattamento, recupero e riciclaggio; si prega di portare tutti I
prodotti marcati WEEE al Vostro centro smaltimenti riuti autorizzato, dove
saranno accettati gratuitamente.
Se i consumatori sono propensi allo smaltimento corretto di riuti elettrici ed
elettronici, aiuteranno a salvare risorse importanti e a prevenire i potenziali
effetti negativi sulla salute umana e sull’ambiente di tutti i materiali pericolosi
che i riuti possono contenere.
Garanzia
Seguici

52
53
Instrukcja obsługi. Polski
54
•
•
Urządzenie przeznaczone wyłącznie do użytku domowego. Nie stosuj
na świeżym powietrzu.
Urządzenie nie nie zostało zaprojektowane do użytku w garażach,
stodołach, stajniach lub innych budynkach przydomowych, gdzie
znajdują się łatwopalne materiały lub w innych miejscach, w których
mogą występować łatwopalne opary lub wybuchowe pyły.
•
Urządzenie nie zostało zaprojektowane do użytku komercyjnego lub
przemysłowego, a jedynie do zastosowania w gospodarstwach
domowych.
•
Przed podłączeniem urządzenia do gniazdka upewnij się, czy napięcie
domowej sieci elektrycznej jest zgodne z napięciem oznaczonym na
tabliczce znamionowej.
•
Urządzenie nie jest przeznaczone do obsługi przez osoby (również
dzieci) o ograniczonych zdolnościach fizycznych, sensorycznych i
psychicznych oraz z niewystarczającą wiedzą i doświadczeniem, chyba
że znajdują się pod opieką lub zostały przeszkolone w zakresie
użytkowania urządzenia przez osobę odpowiedzialną za ich
bezpieczeństwo.
•
Dzieci powinny znajdować się pod stałym nadzorem, aby nie bawiły
się urządzeniem.
•
Nigdy nie przenoś urządzenia pociągając za przewód zasilający.
Ostrzeżenie: Jeżeli urządzenie jest użytkowane z uszkodzonym
lub wadliwym przewodem zasilającym, istnieje ryzyko
wystąpienia śmiertelnego porażenia prądem.
Bezpieczeństwo użytkowania
Przed użyciem zapoznaj się z instrukcją i zachowaj ją do wglądu.
Nigdy nie używaj urządzenia, gdy jest ono uszkodzone lub, gdy
kabel zasilający jest uszkodzony.
•
Jeżeli przewód zasilający lub urządzenie jest uszkodzone, zwróć je do
firmy Duronic, w celu naprawy przez wykwalifikowanego technika.
55
•
•
Podłączaj urządzenie tylko do gniazdka elektrycznego o napięciu i
częstotliwości zgodnej z naklejką znamionową.
•
Nigdy nie próbuj samodzielnie wymieniać części lub naprawiać
urządzenia, poza wymianą ś lub płytki klejowej.wietlówek
•
Nie modyfikuj urządzenia w sposób, który nie jest opisany w instrukcji
użytkowania. Maszyna zawiera części pod napięciem. Naprawy mogą
być przeprowadzane wyłącznie przez Duronic, przy użyciu oryginalnych
części zamiennych i akcesoriów.
Zawsze używaj urządzenia na suchej, gładkiej, równej i stabilnej
powierzchni. Nie montuj urządzenia na uszkodzonej ścianie lub ścianie
pokrytej wilgocią / pleśnią.
•
•
Nie obsługuj urządzenia ani nie dotykaj wtyczki mokrymi rękami.
Nie zanurzaj urządzenia w wodzie lub innych płynach. Czyszczenie
urządzenia powinno zostać wykonane zgodnie z instrukcją zawartą w
dokumencie.
•
Trzymaj światło z dala od łatwopalnych przedmiotów, takich jak
zasłony, oraz z dala od łatwopalnych cieczy, gazów, ponieważ istnieje
niebezpieczeństwo wybuchu.
•
Podczas instalacji umieść światło z dala od okien lub drzwi, aby
uniknąć zakłóceń spowodowanych przeciągiem i światłem dziennym.
•
Ze względów higienicznych najlepiej nie umieszczać tego urządzenia w
pobliżu miejsc, w których jest przygotowywane lub podawane jedzenie.
•
To urządzenie nadaje się wyłącznie do montażu na ścianie.

56
Specyfikacja
Zawartość opakowania:
Model: FKWS18
18W
37.5 x 14 x 19.6 cm
1.16 kg
Świetlówka UV 18W PL BL
sztuk5
Moc:
Rozmiar:
Waga:
Rodzaj świetlówka:
Płytki klejowe
•
•
Kinkiet ścienny
2x śruby
• 2x kołki
• 5x płytki
•
klejowe
1x świetlówka UV

57
Lampa owadobójcza wyposażona jest w ultrafioletową świetlówkę (UV),
której światło przyciąga owady latające. Kiedy zwabiony owad
przysiądzie na płycie klejącej wewnątrz urządzenia i zostaje na stałe
unieruchomione. Kiedy płyta zostanie zapełniona można ją bardzo łatwo
i szybko wymienić. Poziom zapełnienia płytki możesz sprawdzić,
unosząc przednią obudowę urządzenia.
Elegancki, ponadczasowy design sprawia, że kinkiet z lampą
owadobójczą będzie pasował do każdego wnętrza.
Urządzenie nie wykorzystuje żadnych substancji chemicznych, dlatego
można je stosować w pobliżu ludzi i zwierząt. Światło ultrafioletowe
zapewnia bezwonną, bezgłośną i bezpieczną metodę pozbycia z się
domu owadów latających.
1.
Informacje o FKWS18
Lama FKWS18 jest dostarczana z pięcioma płytkami klejącymi. Jeżeli
potrzebujesz większej ilości sztuk zamów je oddzielnie od producenta -
Duronic (Shine-Mart Ltd).
Przed instalacją
2.
Ostrożnie wyjmij urządzenie z opakowania. Sprawdź urządzenie i
kompletność elementów na wypadek ewentualnych uszkodzeń w
transporcie.
Sprawdź położenie żarówki i płytki klejącej, aby upewnić się, czy
są prawidłowo zamontowane.
3.
Podłącz urządzenie do najbliższego gniazdka elektrycznego, aby
sprawdzić, czy lapa działa.
4. Jeśli
5.
świetlówka natychmiast się zaświeci, przejdź do instalacji lampy.
Jeśli świetlówka się nie świeci, zapoznaj się z rozdziałem
Rozwiązywanie Problemów, aby znaleźć rozwiązanie.

58
•
Instalacja
Przygotowanie:
Upewnij się, że lampa znajduje się powyżej poziomu oczu (min. 177
cm od poziomu podłogi), aby mieć pewność, że nie będzie kolidować.
•
Zainstaluj światło w pobliżu miejsca, gdzie często pojawiają się owady,
ale z dala od jakiegokolwiek przeciągu lub bezpośredniego wiatru.
•
Wybierz lokalizację, gdzie owady pojawiają się najczęściej, w pobliżu
gniazdka elektrycznego (zasięg przewodu) i łatwej dostępności w celu
wygodnego serwisowania.
•
Nie instaluj lampy w pobliżu innych źródeł światła, takich jak mocno
nasłonecznione okna, oświetlenie wewnętrzne itp. ponieważ spowoduje
to, że FKWS18 stanie się bezużyteczna.
•
Odległość między lampą a sufitem powinna wynosić 60 cm lub więcej,
aby zapewnić maksymalne zwabianie owadów.
1.
Instrukcja:
Podnieś przednią pokrywę i wyjmij świetlówkę UV, aby uniknąć
uszkodzenia tego elementu podczas instalacji.
W wybranej lokalizacji przytrzymaj tylną płytę kinkietu na ścianie.
Określ miejsce, w którym chcesz zainstalować urządzenie i zaznać
ołówkiem pozycję śrub.
3.
Odłóż na bok urządzenie i wywierć otwory w wyznaczonych miejscach.
W otworach umieść plastikowe kołki.
4.
Następnie nałóż obudowę kinkietu na wywiercone otwory i przykręć
śrubę śrubokrętem. Powtórz czynność z pozostałymi śrubami.
5.
Zainstaluj świetlówkę i płytę klejącą. Zwróć uwagę, że lepka
strona płytki powinna być ustawiona przodem.
6.
Zamknij pokrywę oświetlenia.
7.
Podłącz kabel zasilający do gniazdka sieciowego i włącz urządzenie.
Lampa powinna od razu zacząć świecić.
UWAGA: Jeśli nie będziesz używać urządzenia przez dłuższy czas,
upewnij się, że wyciągnąłeś wtyczkę z gniazdka elektrycznego.
2.

59
Zaleca się wymianę płytki klejącej co 1-2 mieś.
1.
Wymiana płytki klejowej
Konserwacja
Aby wymienić płytkę klejową:
2.
Odłącz przewód zasilający i odczekaj ok. 5 min., aby świetlówka
się schłodziła.
3.
Podnieś przednią obudowę i usuń zużytą płytkę klejową.
Zainstaluj nową płytkę klejową umieszczając klejącą stronę po
stronie świetlówek.
4. Zamknij
5.
przednią obudowę.
Podłącz ponownie przewód zasilający w gniazdku elektrycznym i
włącz urządzenie.
Zaleca się wymianę świetlówek UV po ok. 5000 godzinach standardowej
pracy.
1.
Wymiana świetlówek UV
Aby wymienić świetlówkę:
Odłącz przewód zasilający i odczekaj ok. 5 min., aby
świetlówka się schłodziła.
2.
Podnieś przednią obudowę i wykręć zużytą świetlówkę.
3.
4.
Wkręć nowe świetlówki UV.
Zamknij
5.
przednią obudowę.
Ponownie podłącz kabel zasilający do gniazdka
elektrycznego.
WAŻNE: Upewnij się, że wyrzucasz starą świetlówkę UV w
sposób odpowiedzialny i zgodny lokalnym prawem gospodarki
odpadami i recyklingiem.

60
Przed czyszczeniem upewnij się, że kabel zasilający jest odłączony od
gniazdka sieciowego.
Aby wyczyścić lekkie zabrudzenia, użyj suchej szmatki, aby usunąć kurz i
brud, który zbierał się z czasem.
Po zakończeniu sprawdź, czy świetlówka i płytka klejowa znajdują się we
właściwej pozycji, następnie ponownie
podłącz przewód do gniazdka.
Konserwacja c.d.
Czyszczenie:
Rozwiązywanie Problemów
A. Sprawdź, czy żarówka znajduje
się w prawidłowej pozycji. Podczas
transportu mogła się obluzować.
B. Sprawdź,
C. Odłącz kabel zasilający, podnieś
przednią osłonę lampy i obróć lekko
żarówkę, aby wyregulować punkt
styku między żarówką a oprawkami
żarówki.
Jeżeli problem występuje po 48 godz.
skontaktuj się z Działem Obsługi
Klienta Duronic, aby uzyskać pomoc.
RozwiązanieProblem
Świetlówka nie świeci się,
kiedy podłączam urządzenie do
gniazdka sieciowego.
czy kabel zasilający jest
prawidłowo podłączony do gniazdka
sieciowego.
Światło świetlówki migocze.
Odłącz kabel zasilający i podłącz go
ponownie po kilku sekundach.
Pozostaw lampę włączoną na 48
godzin, a migotanie powinno ustąpić.
Jest to normalne, że nowa świetlówka
UV migocze przy pierwszym użyciu.
61
Warunki Gwarancji
1 Rok Gwarancji firmy Shine-Mart LTD, marki handlowej Duronic Products.
UWAGA: ten dokument nie wpływa na twoje ustawowe prawo jako konsumenta.
Ten produkt został wykonany zgodnie z restrykcyjnymi normami kontroli i wykorzystuje
najwyższej jakości materiały dla uzyskania doskonałej wydajności i niezawodności.
Długotrwałość produktu zostaje osiągnięta przez właściwe użytkowanie i konserwację.
Gwarancja obejmuje 1 rok od daty zamówienia. Jeżeli jakikolwiek defekt powstanie ze
względu na wadliwość materiału lub niewłaściwe wykonanie to uszkodzony produkt musi
zostać dostarczony do miejsca, z którego został zamówiony. Zwrot pieniędzy lub wymiana
produktu jest w gestii firmy.
Duronic Products oferuje jeden rok gwarancji na podstawie poniższych warunków:
1. Produkt musi zostać zwrócony do sprzedawcy z oryginalnym dowodem zakupu.
2. Produkt był instalowany i użytkowany zgodnie z instrukcją obsługi.
3. Produkt użytkowany był wyłącznie w celach domowych.
4. Gwarancja nie obejmuje naturalnego zużycia się produktu, celowego uszkodzenia,
niewłaściwego użycia, zaniedbania, niewłaściwych napraw lub części eksploatacyjnych.
5. Shine-Mart Ltd. nie ponosi odpowiedzialności za przypadkowe albo celowe zgubienie
produktu lub jego uszkodzenie.
6. Firma Shine-Mart Ltd nie jest zobowiązana do przeprowadzania jakichkolwiek prac
serwisowych w ramach gwarancji.
7. Obowiązuje na obszarze Unii Europejskiej.
Ten produkt jest wyposażony we wbudowaną wtyczkę typu Euro-Plug / BS z
certyfikatem CE importowaną przez Shine-Mart Ltd, RM3 8SB
Informacja o odpadach i utylizacja dla użytkowników sprzętu elektrycznego i
elektronicznego.
Usuwanie wyeksploatowanych urządzeń elektrycznych i elektronicznych (dotyczy
krajów Unii Europejskiej i innych krajów europejskich z wydzielonymi systemami
zbierania odpadów). Ten symbol na produkcie lub jego opakowaniu oznacza, że
produkt nie powinien być zaliczany do odpadów domowych. Należy go przekazać
do odpowiedniego punktu, który zajmuje się zbieraniem i recyklingiem urządzeń
elektrycznych i elektronicznych. Prawidłowe usunięcie produktu zapobiegnie
potencjalnym negatywnym konsekwencjom dla środowiska naturalnego i zdrowia
ludzkiego, których przyczyną mogłoby być niewłaściwe usuwanie produktu.
Recykling materiałów pomaga w zachowaniu surowców naturalnych.
Śledź Nas