USE + CARE
MANUAL
REV.092025
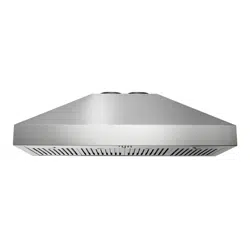
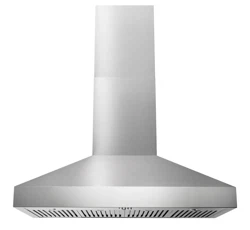
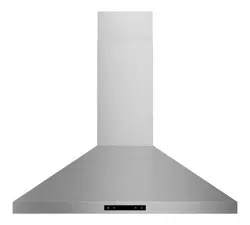
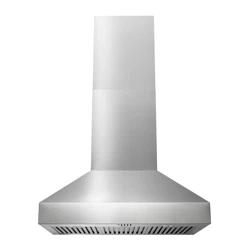
TRHP | TRHPB | TRHPW Models
TRH48P | TRH36P | TRH30P
TRH48PB | TRH36PB | TRH30PB
TRH48PW | TRH36PW | TRH30PW

W

Dear Customer,
If you follow the recommendations contained in this
Instruction Manual, our appliance will give you constant high
performance and will remain efficient for many years to
come.
IMPORTANT SAFETY INSTRUCTIONS
ATTENTION
WARNING
GROUNDING INSTRUCTIONS
NOTICE
DIMENSIONS
PRODUCT DIMENSION
INSTALLATION & USE
INSTALLATION DRILLING AND ALINING
MOUNTING THE HOOD
FIX THE AIR OUTLET
DUCT FIXING
CONNECTIONS
OPERATION OF CONTROLS CONTROL SWITCH
MAINTENANCE
GREASE FILTER
CHARCOAL FILTER FOR DUCTLESS
INSTALLATION(NOT INCLUDED)
LED BULBS
HOOD CLEANING
WARRANTY
TABLE OF CONTENTS
4
4
4-6
7
7
8
8
9
9
9-10
10
10
11
12
13
13
14
14
15
16
03

IMPORTANT SAFETY INSTRUCTIONS
ATTENTION
*The manufacturer will not be held liable for any damages
resulting from incorrect or improper installation.
*Please read this instruction manual before installing and using
this range hood. Properly keep this instruction manual in a safe
place for future reference.
*This range hood can be used in Ducted or Ductless installation
(internal air recirculation ).For ductless installation accessory
charcoal filters will need to be purchased separately.
* Only a qualified and trained service technician can the perform
installation and service.
WARNING
READ AND SAVE THESE INSTRUCTIONS.
WARNING:TO REDUCE THE RISK OF FIRE,ELECTRIC
SHOCK,OR INJURY TO PERSONS,READ THE FOLLOWING
INSTRUCTIONS:
*Use this unit only in the manner intended by manufacturer.
Please contact customer service if you have any questions.
*Before servicing or cleaning the unit,securely fasten a
prominent warning device,such as a tag,to the service panel.
*Installation work and electrical wiring must be done by qualified
technician(s)in accordance with all applicable codes and
standards including fire-rated construction.
*Do not operate any fan with a damaged cord or plug.
*Sufficient air is needed for proper combustion and exhaust of
gas through the flue(chimney)of fuel burning equipment to
prevent back drafting.Follow the appliance manufacturer's
guideline and safety standards,such as those published by
National Fire Protection Association(NFPA),the American
Society for Heating. Refrigeration and Air Conditioning
Engineers(ASHRAE),and the local code authorities.
*When cutting and drilling into wall or ceiling;do not damage
electrical wiring and other utilities.
*Ducted fans must always be vented outdoors.
*CAUTION:For residential kitchen ventilating use only.Do not
use to exhaust hazardous or explosive materials and vapors.
04

*CAUTION:To reduce risk of fire and to properly exhaust air,be
sure to duct air outside-do not vent exhaust air into space within
walls or ceilings,attics or into crawl spaces,or garages.
WARNING - TO REDUCE THE RISK OF FIRE, USE ONLY
METAL DUCTWORK.
WARNING- TO REDUCE THE RISK OF A RANGE TOP GREASE
FIRE:
a) Never leave surface units unattended at high settings. Boil
overs cause smoking and greasy spillovers that may
ignite.Heat oils slowly on low or medium settings.
b) Always turn hood ON when cooking at high heat or when
flambeing food (i.e.Crepes Suzette,Cherries
Jubilee,Peppercorn Beef Flambe).
c) Clean ventilating fans frequently.Grease should not be
allowed to accumulate on fan or filter.
d) Use proper pan size.Always use cookware appropriate for
the size of the surface burner /element .
WARNING-TO REDUCE THE RISK OF INJURY TO PERSONS
IN THE EVENT OF A RANGE TOP GREASE FIRE,OBSERVE
THE FOLLOWING:
a) SMOTHER FLAMES with a close-fitting lid,cookie sheet, or
metal tray,then turn off the burner. BE CAREFUL TO
PREVENT BURNS. If the flames do not go out
immediately,EVACUATE AND CALL THE FIRE
DEPARTMENT.
b) NEVER PICK UP A FLAMING PAN– You may be burned.
c) DO NOT USE WATER,including wet dishcloths or towels - a
violent steam explosion will result.
d) Use an extinguisher ONLY if:
1)You know you have a Class ABC extinguisher,and you
already know how to operate it.
2)The fire is small and contained in the area where it
started.
3)The fire department is being called.
4)You can fight the fire with your back to an exit.
Based on"Kitchen Fire Safety Tips"published by NFPA.
WARNING:TO REDUCE THE RISK OF FIRE OR ELECTRICAL
SHOCK,DO NOT USE THIS FAN WITH ANY SOLID-STATE
SPEED CONTROL DEVICE
*Check voltage corresponds to the one indicated on the rating
plate/label plate fixed inside the hood.
IMPORTANT SAFETY INSTRUCTIONS
05

*Check that the domestic power supply guarantees adequate
grounding.
*Do not connect the hood to exhaust ducts carrying combustion
fumes(boilers,fireplaces,etc.)
*If the hood is used in conjunction with non-electrical
appliances(e.g.gas burning appliances),a sufficient degree of
aeration must be guaranteed in the room in order
to prevent the backflow of exhaust gas.The kitchen must have
an opening directly with the open air in order to guarantee the
entry of clean air.
*The minimum distance is 30 inches from the range hood to a
gas cooktop,and is 25 inches to an electric cooktop.If the
installation instructions for gas cooktop specify a greater
distance,this must be taken into account.
In certain circumstances electrical appliances may be a danger
hazard.
*Do not check the status of the filters while the range hood is
operating.
*Do not touch the light bulbs during or right after appliance in
use.
*Do not operate or disconnect the appliance with wet hands.
*Avoid free flame,as it is damaging for the filters and a fire
hazard.
*Constantly check food frying to prevent that overheated oil may
become a fire hazard.
*Disconnect electrical plug prior to any maintenance.
* The hood should not be used by children or person not
instructed in its correct use.Children don't recognize the risks of
electrical appliances. Therefore, use or keep the appliance only
under supervision of adults and out of the reach from children.
* Don't use this product outdoor.
*There shall be adequate ventilation of the room when the range
hood is used at the same time as appliances burning gas or
other fuels.
*There is a fire risk if cleaning is not carried out in accordance
with instructions.
* Do not flambe under the range hood.
*The discharge air must not be discharged into a flue which is
used for exhausting fumes from appliances burning gas or other
fuels.
WARNING:TO PROVIDE PROTECTION AGAINST ELECTRIC
SHOCK,CONNECT TO PROPERLY GROUNDED OUTLETS
ONLY
IMPORTANT SAFETY INSTRUCTIONS
06

GROUNDING INSTRUCTIONS
This appliance must be grounded.In the event of an electrical
short circuit,grounding reduces the risk of electric shock by
providing an escape wire for the electric current.This appliance
is equipped with a cord having a grounding wire with a grounding
plug.The plug must be plugged into an outlet that is properly
installed and grounded.
WARNING: IMPROPER GROUNDING CAN RESULT IN A RISK
OF ELECTRIC SHOCK
Consult a qualified electrician if you do not fully understand the
grounding instructions or if there is any doubt as to whether the
appliance is properly grounded.
Key Grounding Safety Tips:
Never remove or alter the grounding prong from the plug.
Do not use an extension cord with this appliance. If the power
cord is too short, have a licensed electrician install a grounded
outlet near the appliance.
Ensure the outlet is grounded. Cutting or tampering with the
electrical cord will void the warranty and may result in serious
safety hazards.
IMPORTANT:If you have any concerns about proper grounding
or installation, please consult a qualified electrician before use.
NOTICE
*Installation and Handling:
Important: Due to the appliance's weight, two or more people are
required for installation or moving. Attempting to move or install
it alone may result in physical injury.
*Intended Use:
This rangehood is designed solely for residential use and is
intended to eliminate kitchen fumes. It should not be used for
any other purpose.
*Fire Safety:
Never leave an open flame unattended under the rangehood
while it is in operation.
Adjust the flame intensity to ensure it is directed only onto the
bottom of the pan, avoiding any contact with the pan sides to
prevent excess heat or flare-ups.
*Deep Fryer Safety:
If using a deep fryer, always monitor it continuously during
operation. Overheated oil can catch fire quickly and cause
serious hazards.
IMPORTANT SAFETY INSTRUCTIONS
07
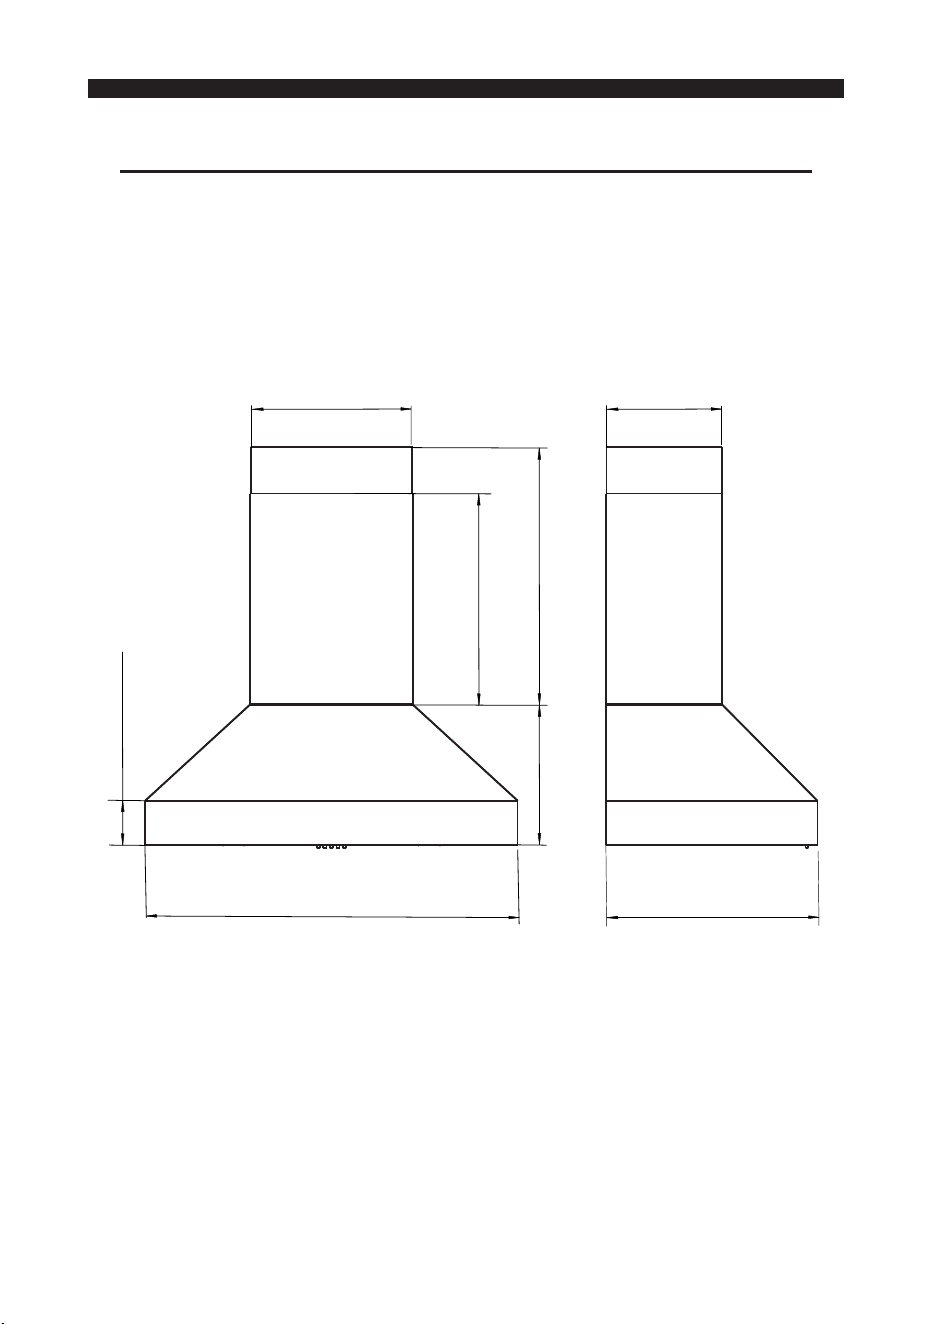
DIMENSIONS
PRODUCT DIMENSION
*All measurements in parenthesis are in millimeter(mm).
*For the most accurate measurements, refer to the millimeter
values.
Inch measurements are approximate, as they are converted
from millimeters and may vary slightly.
08
30
"
(
7
62
mm
)
/36"(914
m
m
)/48
"
(1
2
19m
m)
4
-
1
/
2"(
114mm)
1
4"
(356mm)
2
0-1
/
2
"
(
5
20m
m
)
2
1
"
(530m
m
)
2
1
"(
5
30
mm
)
-4
1
"
(1
04
0
mm
)
15-
3
/
4"(
400
m
m)
11
-1/
4
"
(2
8
6mm
)
INSTALLATION & USE
USE ONLY THE PROVIDED RANGE HOOD CORD
CONNECTION KITS FOR THIS APPLIANCE. USING
UNAUTHORIZED KITS MAY AFFECT PERFORMANCE AND
SAFETY.
Note 1: Before installation, carefully remove the plastic
protective film from all exterior surfaces, including the hood,
filters, and duct cover.
Note 2: Due to the weight and size of the range hood, a minimum
of two people is required for mounting.
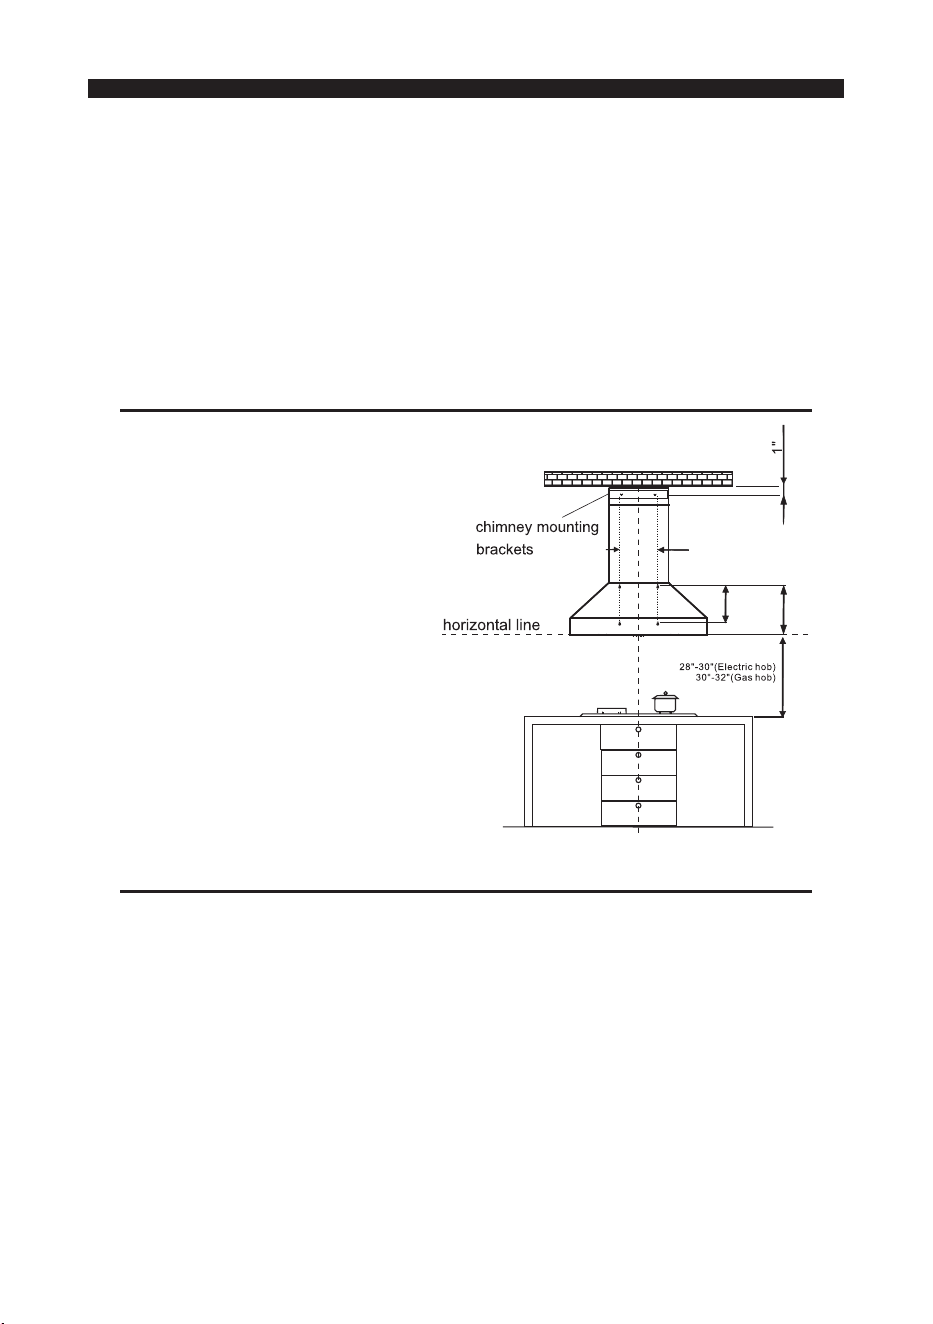
INSTALLATION DRILLING AND ALINING
1. Draw a vertical reference
line on the wall where the
hood will be installed, extending
up to the ceiling or as high
as needed.
2. Draw a horizontal line 28-30
inches above an electric
cooktop, or 30-32 inches
above a gas cooktop.
3. Position the chimney
mounting brackets on the
wall as shown, about 1”
(27mm) from the ceiling
or upper limit. Align the center
notch of the bracket with the
vertical reference line.
MOUNTING THE HOOD
1. Install the two main mounting screws into the wall, along a line
that is 13” above the horizontal line. Ensure the screws are
parallel to the horizontal line to maintain proper alignment.
09
10"
13-3/ 8"
10"
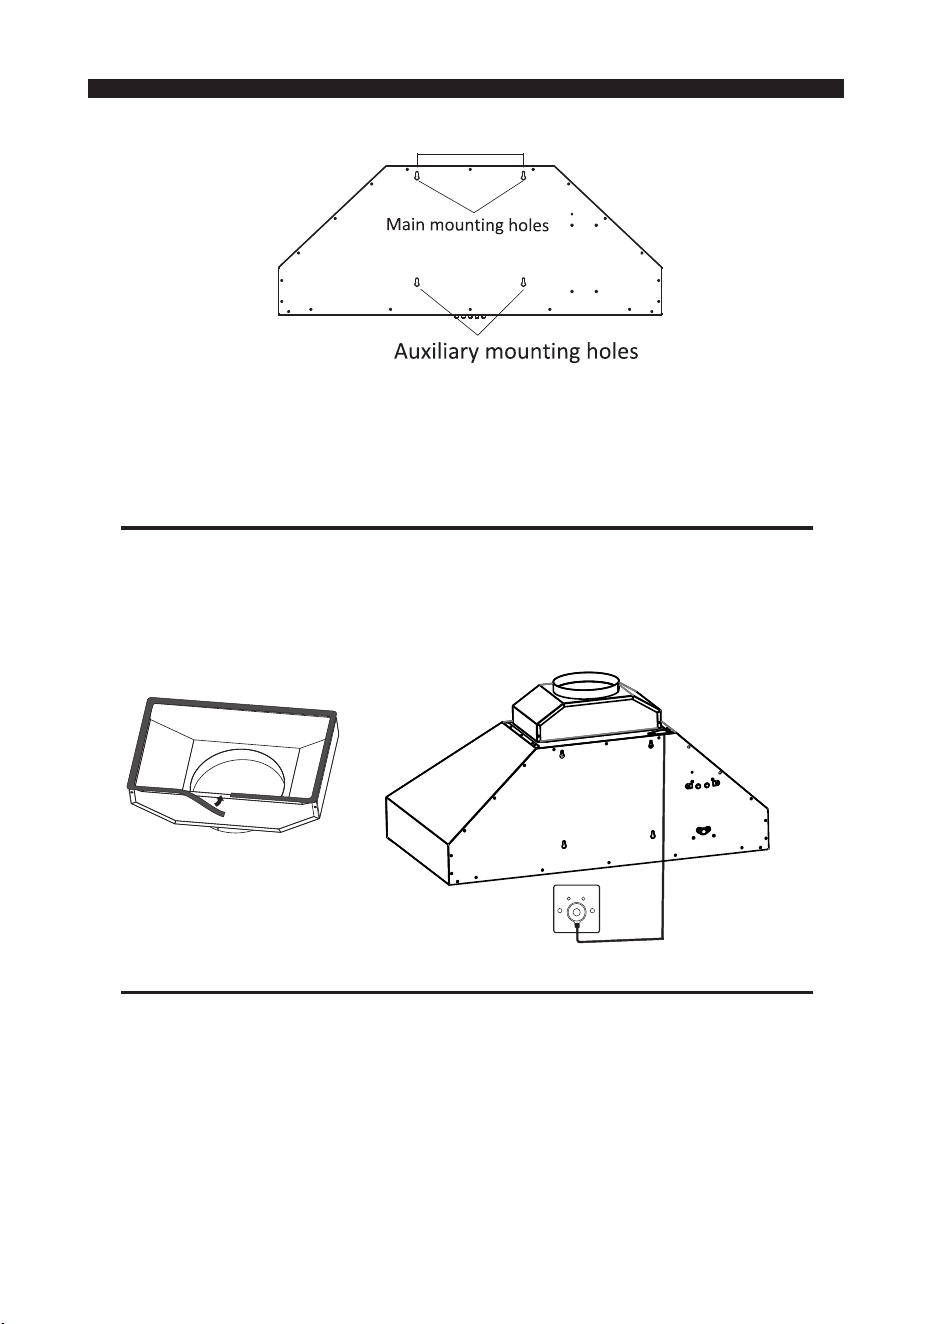
2. Align the mounting holes on the back of the range hood with
the mounting screws on the wall.
3. Place the range hood onto the screws and tighten them
securely.
FIX THE AIR OUTLET
1.Place the sealing strip (provided in the accessories bag)
around the air outlet joint cover. Ensure it forms a complete
circle to prevent air leakage.
2.Install the joint cover onto the range hood using the 4 screws
provided.
DUCT FIXING
Caution: To reduce the risk of fire, use only metal ductwork.
(Metal ducts can be easily sourced from local hardware stores.)
1. Attach a sufficient length of 8” round duct to the top of the
outlet adapter (Φ).
2.Secure the duct using fasteners, ensuring it is firmly attached.
INSTALLATION & USE
10
10"
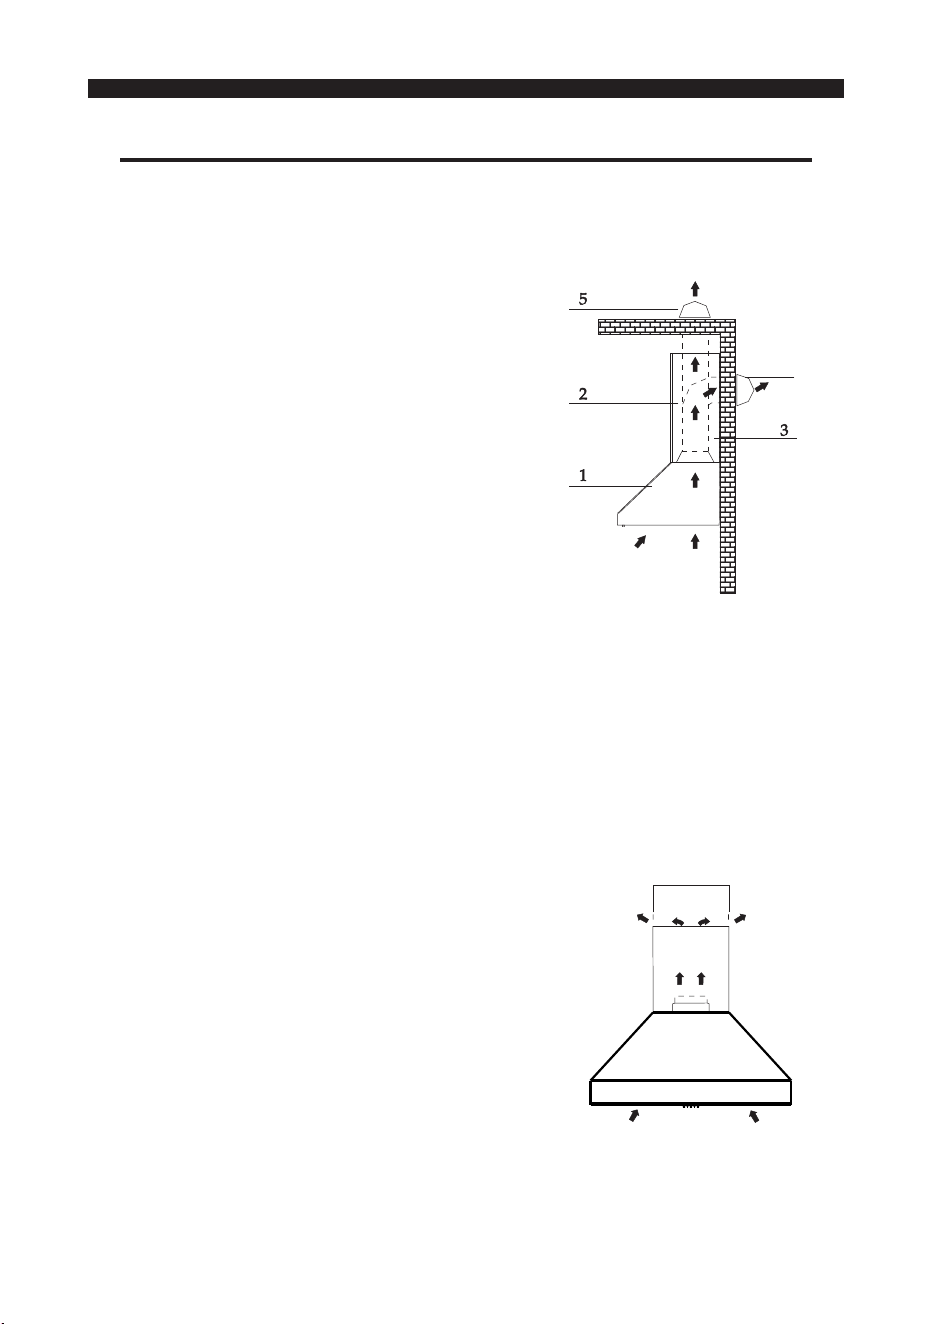
CONNECTIONS
Ducted Mode Air Exhaust System
Caution: To reduce the risk of fire, use only metal ductwork.
(Metal ducts should be sourced locally.)
1.Determine the ductwork path between
the hood and the outside. A straight and
short duct run is ideal for optimal
performance.
2. Minimize long duct runs, elbows,
and transitions, as they can reduce
the performance of the hood.
3.Use as few of these as possible, and
consider using larger ducting for
longer runs.
4.Attach the 8” round duct to the
air outlet adapter.
5.Ensure the air is not discharged into a
flue that is used for exhausting fumes from
gas or other fuel-burning appliances.
6.Install a wall or roof cap, then connect the round metal
ductwork to the cap. Work your way back towards the hood.
Seal all ductwork joints with duct tape to ensure a tight fit.
Recirculation Mode
Caution: Do not use plastic or rigid metal ducting.
1.Install the charcoal filter as instructed.
2.Note that in recirculation mode, air will flow
out from the two grids located at the top sides
of the chimney.
3. Ensure a gap of at least 20mm between the
cabinet or chimney cover and the ceiling when
installing the recirculation kit for smooth airflow.
INSTALLATION & USE
11
4
Electrical Connection
*Wiring must be performed by a qualified professional in
accordance with all applicable codes and standards. Ensure
electrical power is turned off at the service entrance before starting
any wiring work.
*If the supply cord is damaged, it must be replaced by the
manufacturer, its service agent, or similarly qualified individuals to
avoid any hazards.
*Do not use any plugs or extension cords other than the ones
initially supplied with the range hood.
*Grounding is required: This appliance must be properly grounded.
In the event of an electrical short circuit, grounding reduces the
risk of electric shock by providing an escape path for the electrical
current.
*This appliance is equipped with a cord that includes a grounding
wire and plug. The plug must be inserted into a properly grounded
outlet.
*Do not remove the grounding prong from the plug, as it is a critical
safety feature.
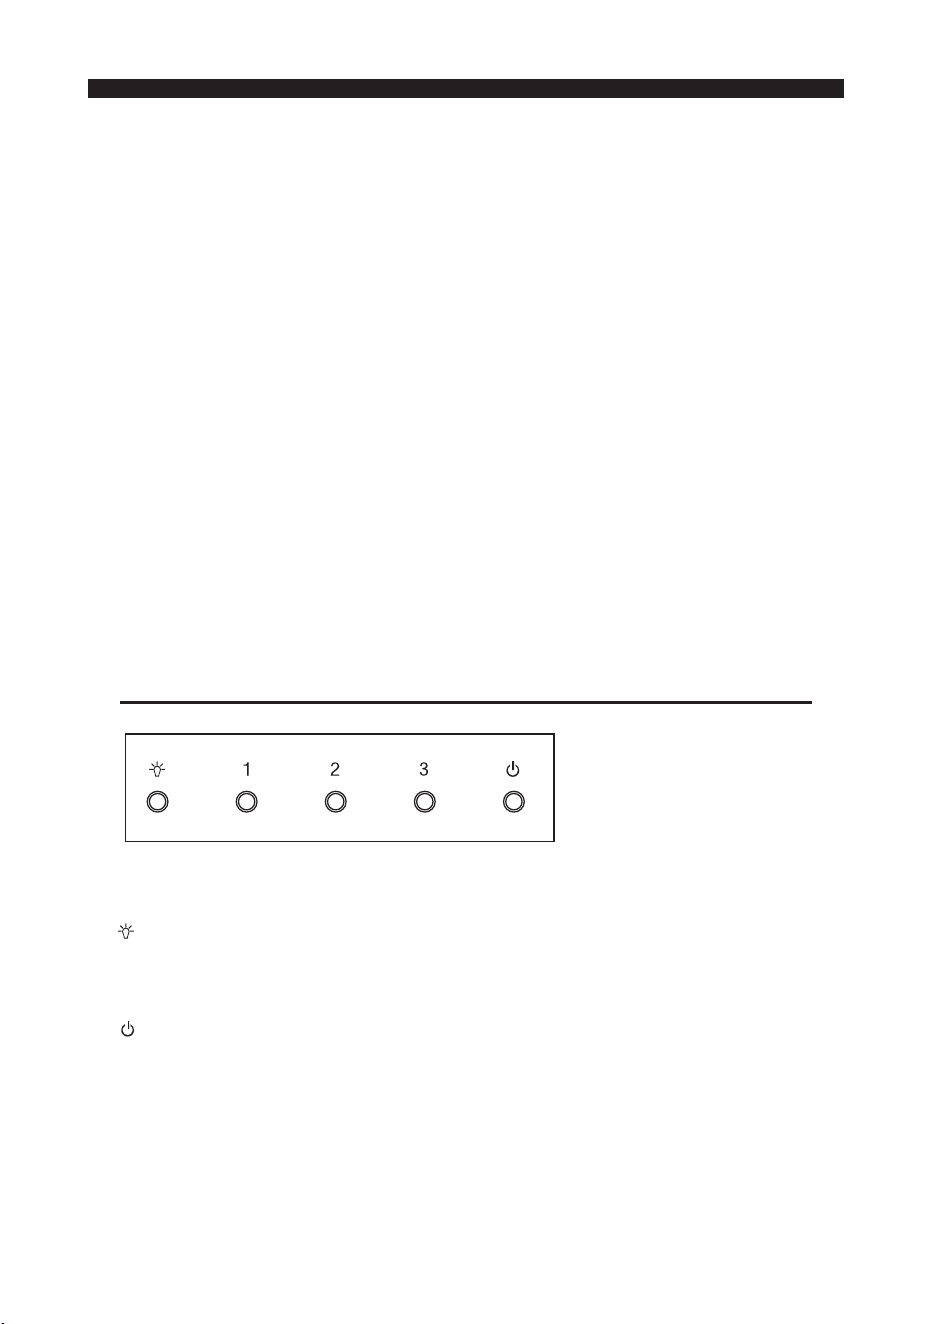
OPERATION OF CONTROLS CONTROL SWITCH
–Turn the light on/off
1 – Low speed setting
2 – Medium speed setting
3 – High speed setting
– Turn the hood on or off
INSTALLATION & USE
12
MAINTENANCE
Maintenance
Proper maintenance of the range hood is essential for
ensuring its optimal performance and longevity.
Before performing any maintenance, disconnect the hood
from the main power supply to prevent any electrical
hazards.
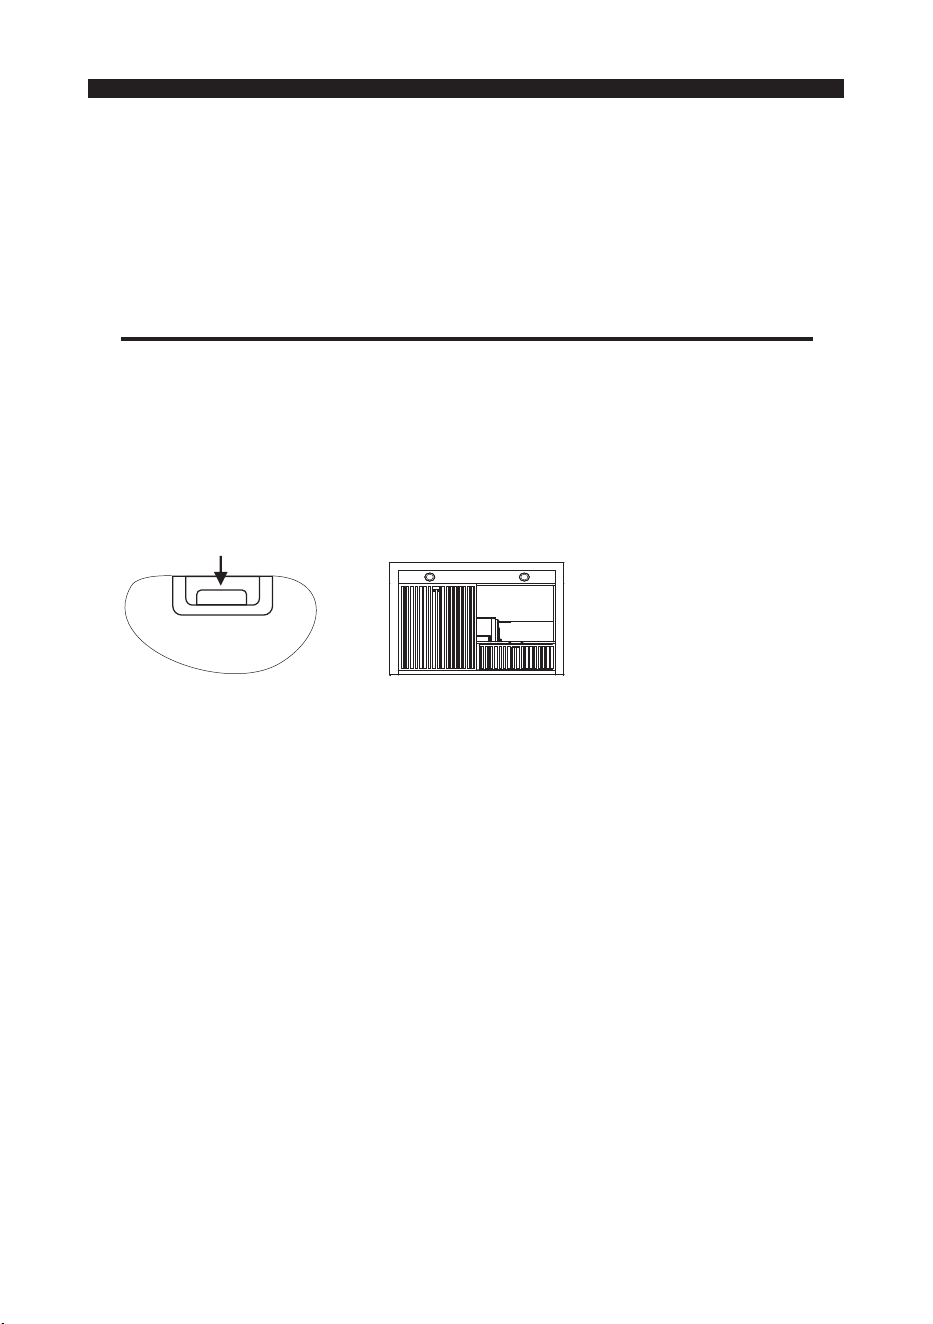
GREASE FILTER
*Clean the grease filters regularly to maintain optimal
performance. It is recommended to clean them every two
months, or more frequently if the range hood is used heavily.
*Grease filters are washable. Clean them with a warm detergent
solution to remove grease buildup.
* Replacement filters can be purchased at www.thorkitchen.com
(1) PUSH DOWN (2)LIFT OUT
Grease Filter Maintenance
1.To remove the grease filter, push down each latch to
disengage the filter from the hood. Tilt the filter downward and
remove it.
2. Wash the filters carefully, ensuring they are not bent. Allow
them to dry completely before refitting.
3. When refitting the filters, make sure the handle is visible from
the outside.
4. To install the grease filter, align the rear filter tabs with the
slots in the hood. Push down the latch, insert the filter, and
release the latch. Ensure the filter is securely in place after
installation.
13
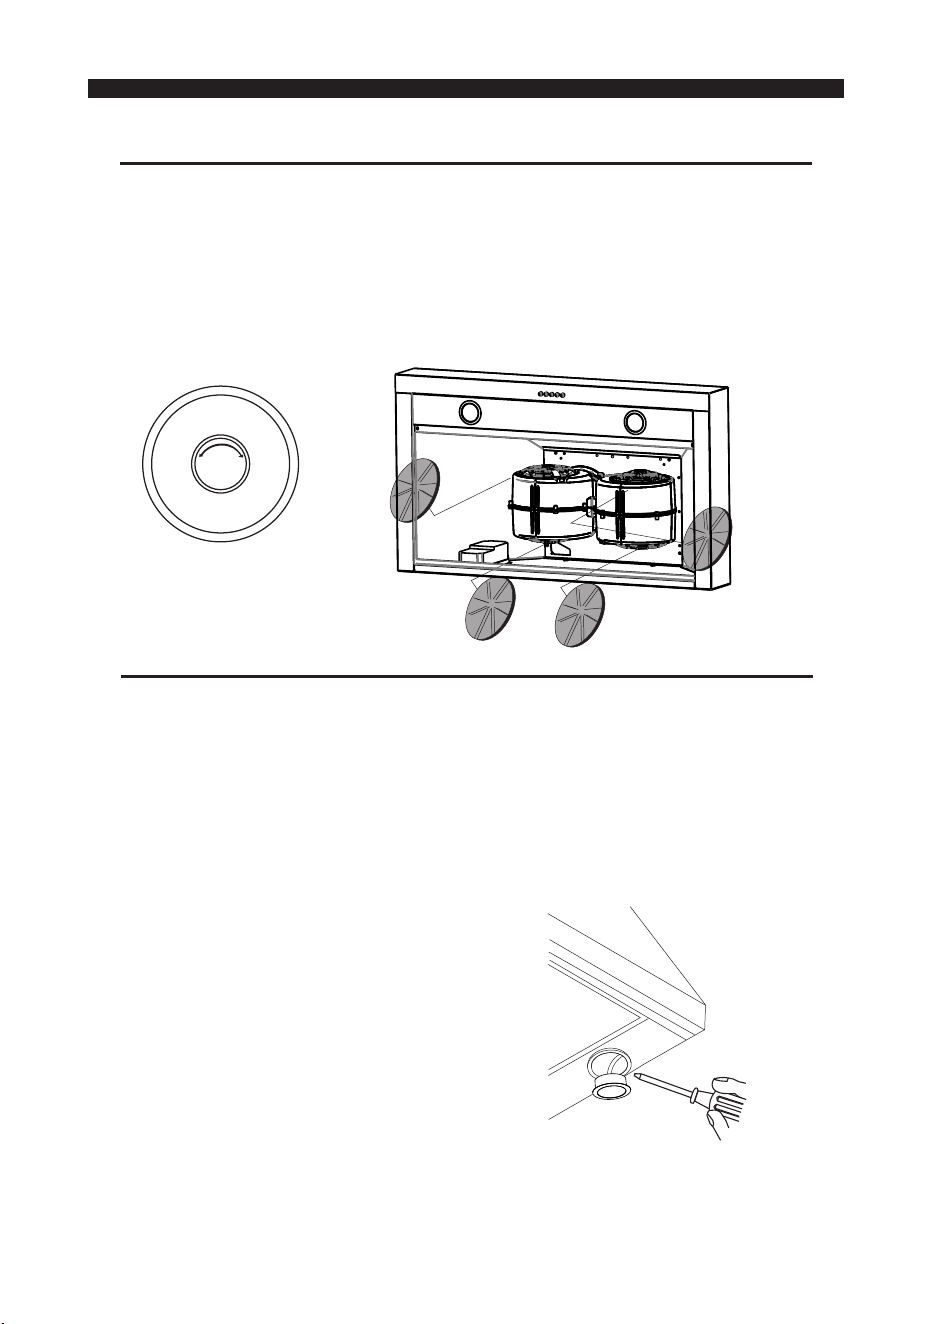
CHARCOAL FILTER (FOR DUCTLESS INSTALLATION)
Note: The charcoal filter is not washable and cannot be
regenerated. It should be replaced approximately every 3
months, or more frequently for heavy use.
1. To install the charcoal filter (not included), insert it into the slot
and lock it into place until you hear a click.
2.Install the grease filter after the charcoal filter is locked in
place.
LED BULB REPLACEMENT
This range hood uses two DC12V 2.0W LED bulbs.
Warning: Always switch off the electrical supply before
performing any maintenance on the appliance.
1.Switch off the power and wait for 5 minutes for the bulbs to cool
down.
2. Wear gloves and remove the bulb by gently pulling it
sideways, as indicated in the installation instructions.
3.Replace with DC12V 2.0W LED bulbs.
MAINTENANCE
14
lock
open

IMPORTANT SAFETY NOTES:
CAUTION: THE SURFACE OF THE BULBS MAY BE HOT.
H A N D L E T H E M W I T H C A R E W H E N R E M O V I N G O R
REPLACING.
HOOD CLEANING
Stainless steel is easy to clean and maintain. Follow these tips
to keep it looking great:
*General Cleaning: Use warm water with soap or detergent.
Rinse with clear water and wipe dry with a soft cloth to avoid
watermarks.
* For persistent discoloration or deposits: Use a non-scratching
household cleaner or stainless steel polish with a soft cloth. For
stubborn spots, use a plastic scouring pad or soft bristle brush
with cleanser and water. Rub lightly in the direction of the grain
to avoid marring the surface.
*Important: Do not allow deposits to sit for long periods. Avoid
using ordinary steel wool or steel brushes as small bits of steel
may scratch and cause rust.
*Chemical Caution: Do not allow salt solutions, disinfectants,
bleaches, or cleaning compounds to remain in contact with
stainless steel for extended periods. These chemicals may
damage the surface. Rinse and wipe dry immediately after
exposure.
Painted Surfaces: Clean only with warm water and mild
detergent.
Disposal
Do not dispose of this product as unsorted municipal waste.
Separate collection for special treatment is required.
MAINTENANCE
15

WARRANTY
Warranty
This product has been manufactured by Thor International, 4651
EAirport Drive, California 91761.
For Customer Service, please call (877) 288 - 8099
For the most up to date warranty and service policy, please refer
to our website
WWW.THORKITCHEN.COM/WARRANTY-REGISTRATION
For in-warranty service requests, please visit our website at
WWW.THORKITCHEN.COM/SERVICE
Please Note: You must provide proof of purchase or installation
date for any in-warranty service requests.
16

Warranty Registration
Made Easy.
We Stand Behind
the Quality of Our
Appliances.
Reliability and customer satisfaction are our top priorities. We offer a
solid two-year warranty on both parts and labor. Enjoy professional-grade
performance with the condence that we’ve got you covered.
01
02
03
Scan the QR Code or visit thorkitchen.
com/register-your-product.
Input your purchase and product
information and select register.
That’s it. You’re all set.
Enjoy!
WARRANTY
PARTS
Questions: [email protected]