1
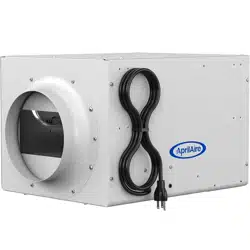
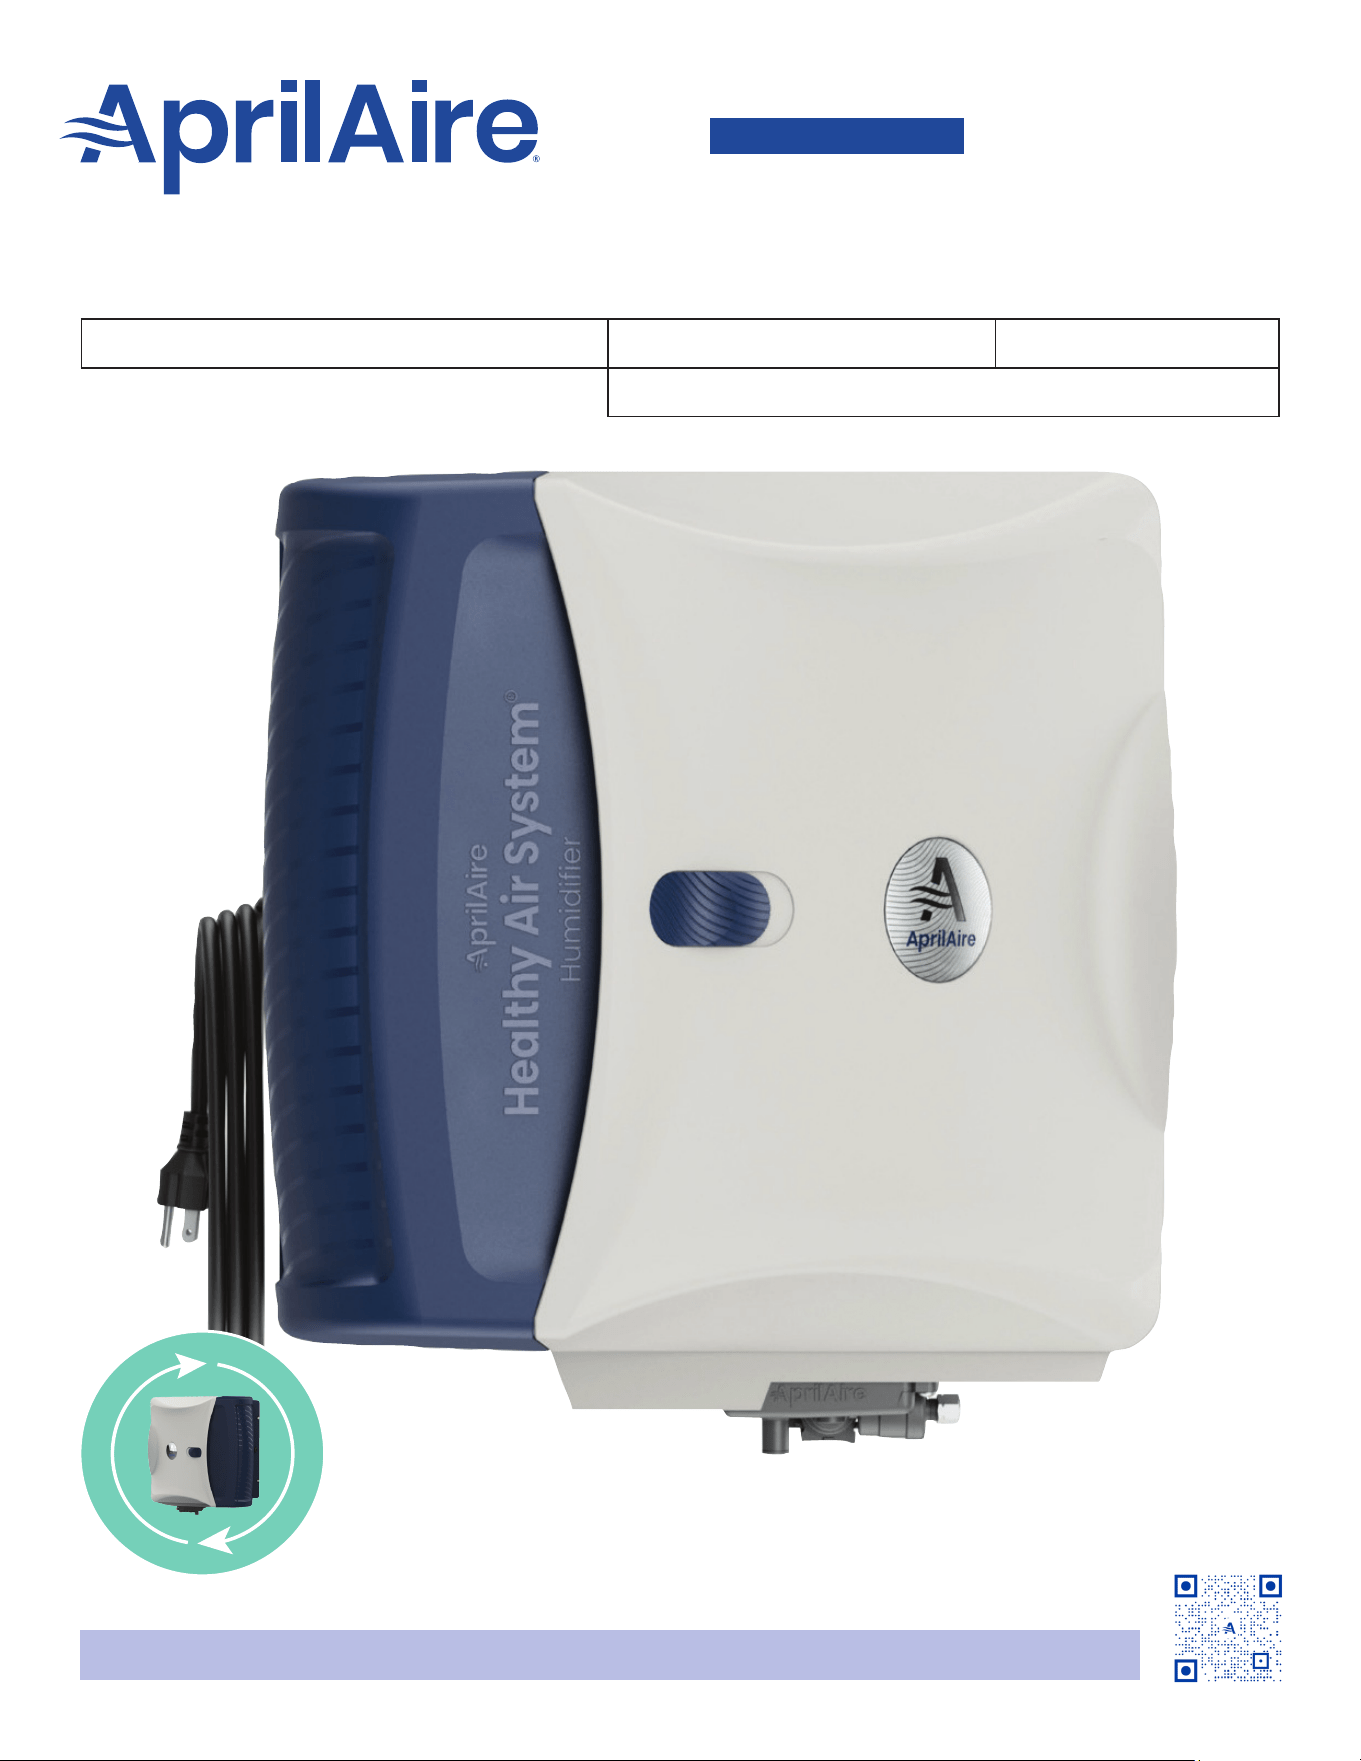
Series 720
Fan-Powered Evaporative Humidier
Humidier
OWNER'S MANUAL
Installed By: Installer Phone: Date Installed:
Serial Number:
READ AND SAVE THESE INSTRUCTIONS
Product Info &
Digital Manual
Shown in factory standard and recongured states.
English 1
INTRODUCTION . . . . . . . . . . . . . . . . . . . . . . . . . . . . . . . . . . . . . . . . . . . . . . . . . . . . . 2
Register Your Humidier ........................................2
PRINCIPLE OF OPERATION . . . . . . . . . . . . . . . . . . . . . . . . . . . . . . . . . . . . . . . . . . 3
OPERATING INSTRUCTIONS - MODEL 720A . . . . . . . . . . . . . . . . . . . . . . . . 3
Automatic Digital Humidier Control Indicator Lights.........3
Blower Activation................................................3
Automatic Mode ................................................3
Manual Mode....................................................4
Change Water Panel Indicator . . . . . . . . . . . . . . . . . . . . . . . . . . . . . . . . . 4
Test/Reset........................................................4
OPERATING INSTRUCTIONS - MODEL 720M. . . . . . . . . . . . . . . . . . . . . . . . 4
Check the Humidier Operation - Manual
Humidier Control...............................................5
TROUBLESHOOTING GUIDE .........................................5
EFFECT OF WATER CHARACTERISTICS .............................6
FAN SPEED ..........................................................6
ANNUAL MAINTENANCE ............................................6
Annual Summer Shutdown .....................................6
Maintenance Instructions.......................................6
LIMITED WARRANTY ................................................8
REGISTER YOUR HUMIDIFIER
Register your product at aprilaire.com/warranty
or by using the QR code, to receive important
updates and notications, and to streamline
the process in the unlikely event you le a claim.
Purchase only a genuine HydroCore™ to maintain
peak performance. For more information, visit our
website at aprilaire.com.
TABLE OF CONTENTS
WARNING
• ELECTRIC SHOCK HAZARD: 120 volts may cause serious
injury from electric shock. Disconnect electrical power
and water before servicing. Leave power and water
disconnected until service is completed.
• RISK OF SCALDING. Water temperature over 125°F (52°C)
can cause severe burns and scald instantly. Shut off the
hot water supply before disconnecting or tapping into
any hot water supply line.
CAUTION
• SUDDEN OPERATION MAY CAUSE PERSONAL INJURY OR
PROPERTY DAMAGE. Turn the humidier control to OFF or
lowest setting before servicing.
• Shut off HVAC system and humidier before removing
cover. Loose particulate may irritate eyes.
INTRODUCTION
When humidity is properly controlled within a home, it
provides effective virus protection. Air that’s too dry can lead
to conditions that allow airborne viruses to thrive. By adding
humidity to dry air, the amount of time a virus can survive in
the air drops drastically. By maintaining balanced humidity
between 40% and 60% RH (relative humidity) year round, you
can reduce the airborne incidence of health concerns like
bacteria, viruses, and dust mites.
While 40% to 60% is ideal, this is hard to achieve in some
climates during cold months without potential condensation
damage to the home. Your AprilAire Humidier can help
maintain up to 45% RH, with a recommended range of 35% to
45% RH. As the temperature drops, the lower range may be
all a home can manage depending on various conditions
such as age of windows, air exchanges, insulation type, etc.
As temperatures warm, higher levels can be maintained. See
TAB LE 1 and TABLE 2 for guidelines.
Your humidier will require annual maintenance to assure
continued peak performance. Continue reading to learn more
about benets, maintenance, and operation of your humidier.
Register Your
Humidier
SERIAL NUMBER LOCATION
2 English
90-1235
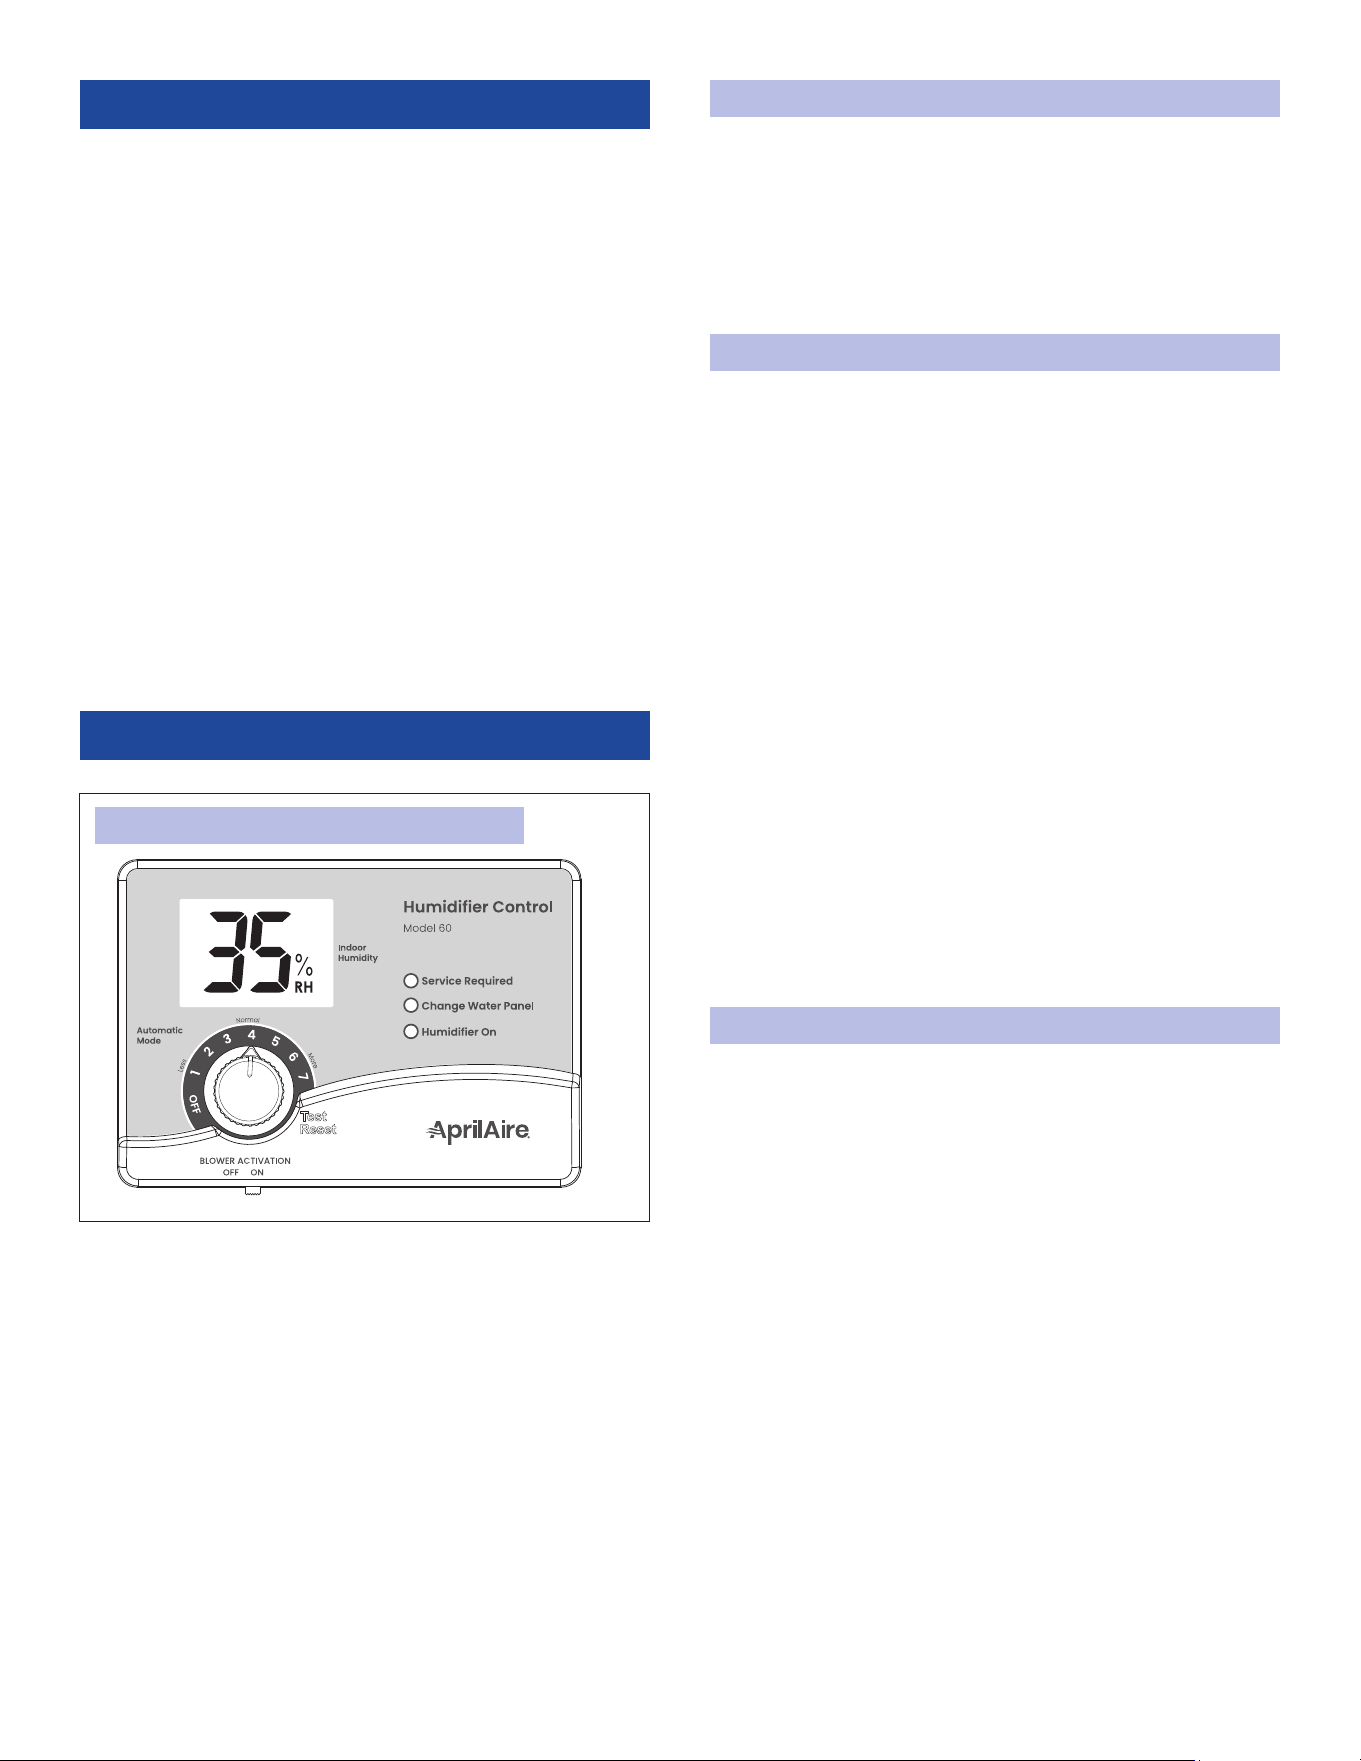
FIGURE 1: MODEL 60 ADHC (AUTOMATIC MODE)
PRINCIPLE OF OPERATION
The AprilAire 720 Fan-Powered Evaporative Humidier delivers
maximum moisture output with superior water efciency for
ducted HVAC systems.
1. When humidity is low, the humidier control makes a call for
humidity and the solenoid valve opens.
2. Water ows through the orice to the HydroCore.
3. The humidier fan pulls air from the HVAC system through
the HydroCore and evaporation occurs.
4. The HVAC system fan disperses humidied air throughout
the home.
5. Increased output and water conservation are realized with
water recirculation technology. Water may or may not be
noticed in the drain line due to improved efciency.
6. Once humidity levels are reached, the humidier control
deactivates the valve causing the ow of water into the
unit to stop. As recirculated water is no longer needed, a
surge of water may be noticed going down the drain. This is
essential to purge solids left behind during evaporation and
to prevent standing water during long periods of inactivity.
OPERATING INSTRUCTIONS - MODEL 720A
The Model 60 Automatic Digital Humidier Control (ADHC) offers
two modes of operation, Automatic or Manual (see FIGURE 1 for
Automatic mode. See FIGURE 2 on page 4 for Manual mode).
Benets of Automatic mode:
• Control automatically adjusts RH setting based on outdoor
temperature
• Helps prevent excess condensation
• Simple operation with few manual adjustments
AUTOMATIC DIGITAL HUMIDIFIER CONTROL INDICATOR LIGHTS
Service Required: The red light indicates that the humidier is
not operating normally and that service is required.
Change Water Panel: The yellow light indicates that it is time to
change the HydroCore in the humidier (see pages 6 and 7).
Humidier On: The green light indicates that the humidier is
actively adding healthy humidity to your home.
BLOWER ACTIVATION
Setting the BLOWER ACTIVATION switch to ON (see FIGURE 1)
allows the humidier control to activate the HVAC system fan
for maximum humidication. For this setting the humidier is
recommended to be connected to hot water.
This function will operate in two ways:
1. If the HVAC system has been idle for one hour, the humidier
control will activate the HVAC system fan to sample the
air for 3 minutes. If the RH is lower than the set point, the
humidier control will activate the humidier and keep the
fan running.
2. If the RH set point has not been reached by the end of a call
for heat, the control will continue to operate the humidier
and the HVAC system fan.
Once blower activation mode is initiated, the humidier and
HVAC system fan will continue to operate for 2 hours or until the
humidication set point is reached.
When the BLOWER ACTIVATION switch is in the OFF position, the
humidier control will only operate the humidier if the HVAC
system fan or heat is on AND if the RH is lower than the set
point.
NOTE: Humidier output is lower without heat so it is normal for
it to run longer to satisfy humidity requirements.
AUTOMATIC MODE
Your AprilAire Digital Humidier Control is installed in the cold air
return duct. Use the dial to adjust the RH setting and the digital
display to read the current RH.
1. When rst installed, turn the dial to 5, which is within the
normal range.
2. During the next 24-48 hours it may be necessary to adjust
the dial for more or less humidity, depending on your
personal comfort and home’s requirements. Refer to TABLE 3.
3. During the coldest portion of the rst heating season, minor
adjustments may be necessary. This is dependent upon your
home’s construction. Refer to TABLE 3.
English 3
Condensation or frost on the inside surface of windows
is usually an indication of too much humidity. This same
condensation can occur in other areas in your home, possibly
resulting in damage.
CHANGE WATER PANEL INDICATOR
The control keeps track of humidier operation time. The yellow
Change Water Panel light ashes after a preset amount of
running time has elapsed. This running time is preset by the
installer based on the humidier model and water hardness.
Refer to the ANNUAL MAINTENANCE section for instructions
on changing the HydroCore or call your HVAC contractor for
service. The Change Water Panel indicator light can be reset by
following the Test/Reset instructions.
TEST/RESET
Use the Test/Reset feature to check humidier operation even if
there is no call for humidity, or to reset the Change Water Panel
indicator light.
1. Make sure the water saddle valve is open and that there is
electricity to the humidier.
2. The HVAC system fan must be running for the humidier to
function. Make a heat or fan call at your thermostat.
3. Rotate the dial clockwise to Test/Reset (past the click) and
the Humidier On light will start to blink. The humidier will
operate for one minute.
4. Rotate the dial counterclockwise to set control to original
position. DO NOT LEAVE IN TEST MODE AS HUMIDIFIER WILL
NOT OPERATE AFTER 1 MINUTE HAS ELAPSED.
OPERATING INSTRUCTIONS -
MODEL 720M
Your AprilAire Humidier is controlled by a Model 4655 Manual
Humidier Control (see FIGURE 3). The Manual Humidier Control
is installed either in the cold air return duct or on an interior wall
of the home. With the Manual Humidier Control, it is important
to anticipate a drop in outdoor temperature and reduce the RH
set point accordingly to avoid excessive condensation, just as
with the Digital Humidier Control installed in Manual mode.
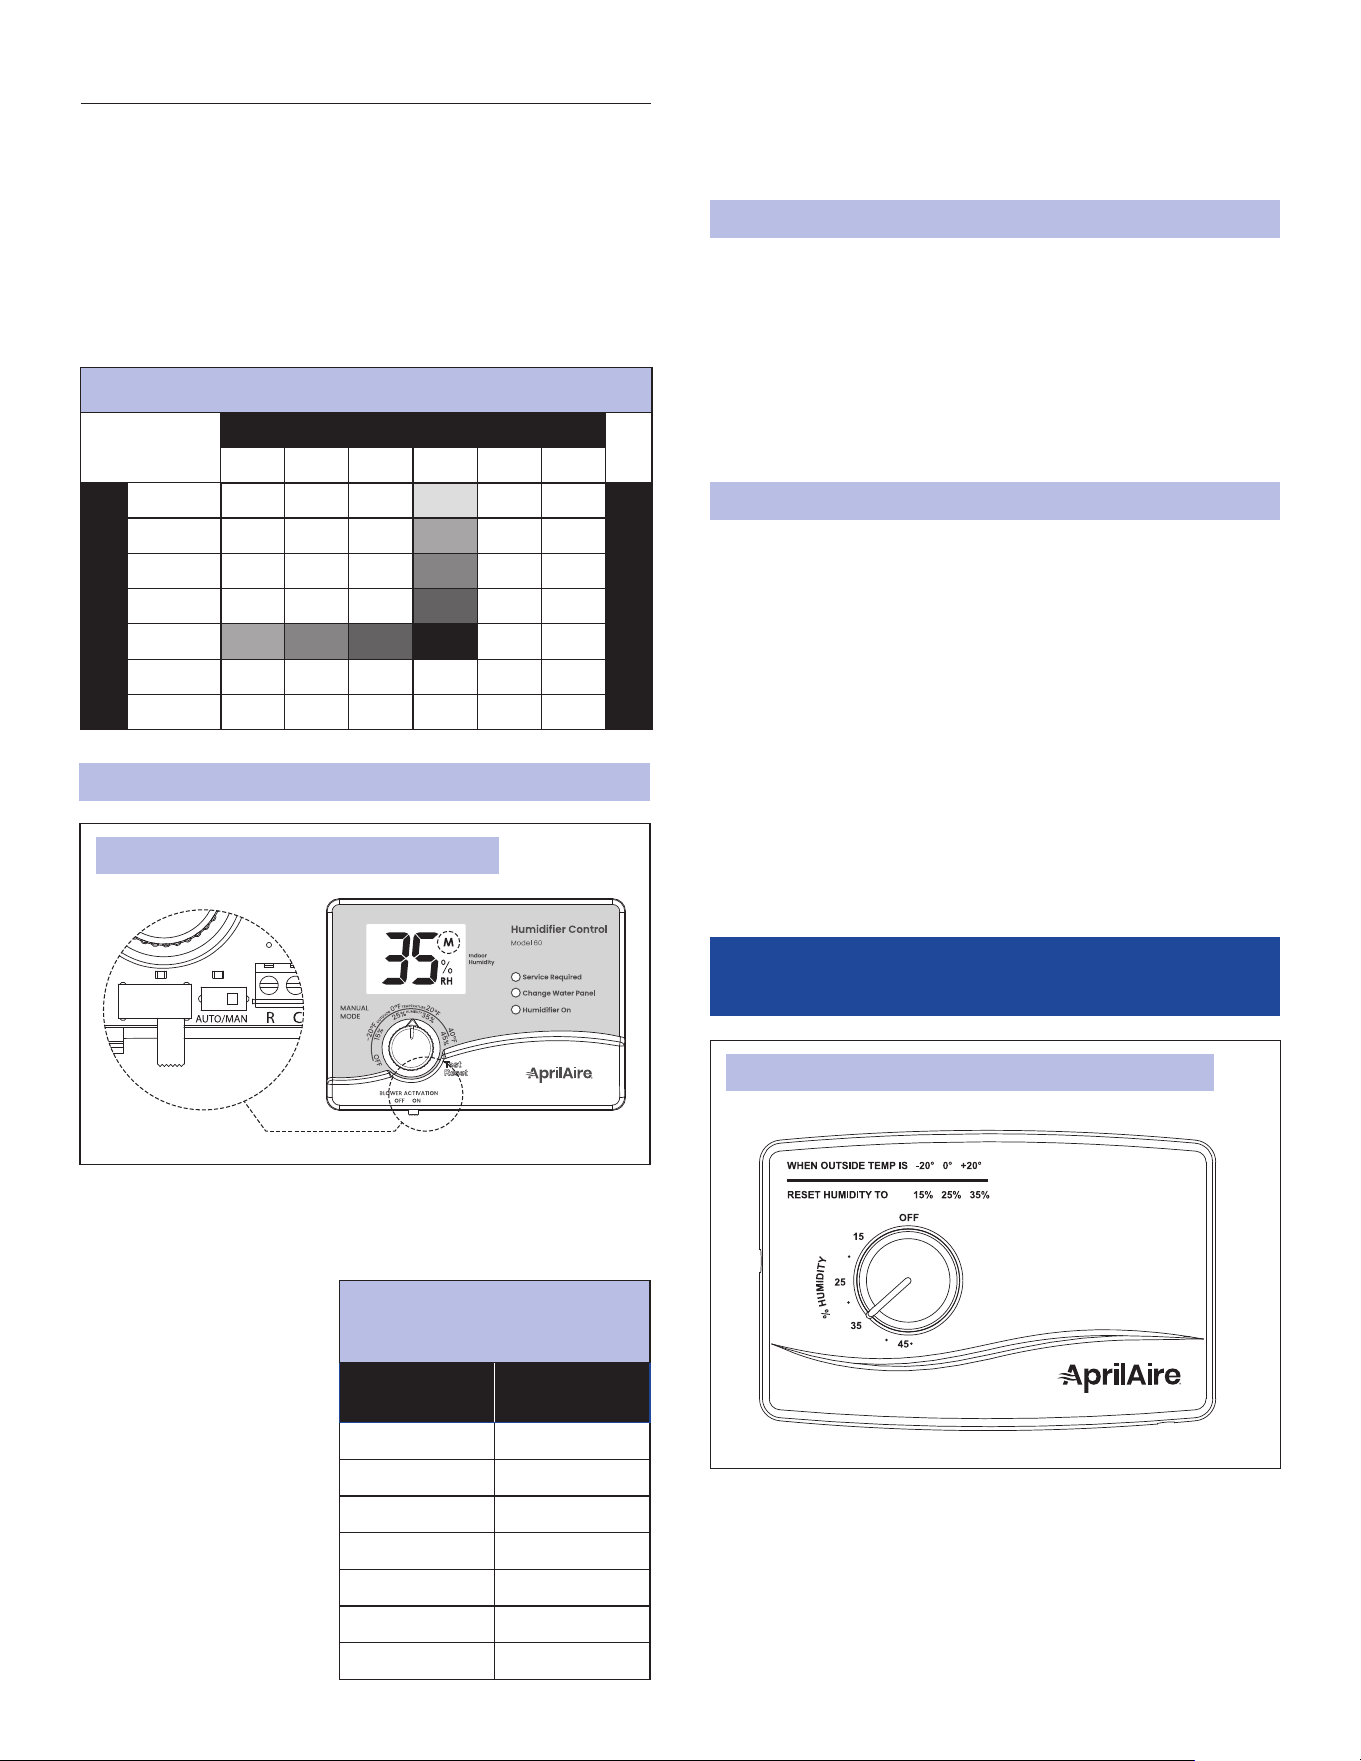
ADDITIONAL INFORMATION
• For every 2°F change in outdoor temperature, the Digital
Humidier Control will automatically adjust the indoor RH
by 1%.
• The Automatic Digital Humidier Control will accurately
control the humidity in your home to a maximum of 45% RH.
• The RH values in TABLE 1 are targets based on outdoor
temperature and the Automatic Digital Humidier Control
setting. The actual RH may vary due to conditions in the
home (cooking, showering, etc.).
When installed in the Manual mode (see FIGURE 2 – internal
switch in MAN position and M in the display), it is important
to anticipate a drop in outdoor temperature and reduce the
setting accordingly
to avoid excessive
condensation.
For example, with an
outdoor temperature of
20°F the correct setting
will be 35% RH. If the
temperature is expected
to fall to 0°F, then reduce
the setting to 25%
several hours prior to the
temperature change.
See TABLE 2 for the
recommended settings.
90-1236
FIGURE 2: MODEL 60 ADHC (MANUAL MODE)
TABLE 2: OUTDOOR
TEMPERATURE/INDOOR
RELATIVE HUMIDITY
Outside
Temperature
Recommended
RH
+40°F 45%
+30°F 40%
+20°F 35%
+10°F 30%
0°F 25%
-10°F 20%
-20°F 15%
TABLE 1: % RELATIVE HUMIDITY GUIDE
Outdoor Temperature (°F)
-10°F 0°F 10°F 20°F 30°F 40°F
Dial Setting
1 10% 10% 10% 15% 20% 25%
Relative Humidity (%)
2 10% 10% 15% 20% 25% 30%
3 10% 15% 20% 25% 30% 35%
4 15% 20% 25% 30% 35% 40%
5 20% 25% 30% 35% 40% 45%
6 25% 30% 35% 40% 45% 45%
7 30% 35% 40% 45% 45% 45%
90-1237
FIGURE 3: MODEL 4655 MANUAL HUMIDIFIER CONTROL
MANUAL MODE
4 English
To determine the indoor RH, slowly turn the dial clockwise and
counterclockwise and listen for 2 clicks. The indoor RH is within
the range of the 2 clicks.
CHECK THE HUMIDIFIER OPERATION - MANUAL
HUMIDIFIER CONTROL
1. The HVAC system fan must be running for the humidier to
function. Make a heat or fan call at your thermostat.
2. Set the dial to the highest RH set point, make sure that the
water saddle valve is open and that there is electricity to the
humidier.
3. Return control dial to the desired RH set point.
TROUBLESHOOTING GUIDE
TABLE 3: TROUBLESHOOTING GUIDE
Condition
Solution
Condensation on windows
• Reduce humidier control set
point by 1 increment or 5%.
• If humidier is not running,
some indoor activities (cooking,
showers, etc.) may raise the
RH level. If such condensation
persists for several hours or days,
your home should be ventilated
to dissipate excess moisture.
AprilAire offers a line of home
ventilation products.
Lack of humidity
• Ensure doors, windows, and
replace dampers are closed.
• Increase humidier control set
point by 1 increment or 5%.
• Turn on BLOWER ACTIVATION
model (Model 60 only).
• Verify unit is plugged into live
120 VAC outlet and water supply
valve is open.
• If humidier fan does not turn
on, contact your installer or
Technical Support.
Humidier does not
operate
Set control to Test/Reset. Make
certain HVAC system fan is
operating. If unit still does not
operate, consult your HVAC
contractor or contact Technical
Support.
Humidier won’t shut off
Turn dial to OFF. If unit continues
to operate, contact your installer
or Technical Support. If fan runs
continuously and humidity is low,
check for water blockage of orice or
water line.
Humidier is loud
• Switch the fan speed from HIGH
(default) to LOW (see page 6).
• Turn off BLOWER ACTIVATION
mode.
Screen ashes r3, r4, etc.
(Model 60 only)
If the control dial is left in the Test/
Reset position, after 1 minute the
display will ash the software
revision level, e.g., r3.
NOTE: Placing the dial in Test/Reset
resets the HydroCore change timer.
Red Service Required light
ashes (Model 60 only -
see FIGURE 1)
Note the error code on the display
(E1, E2, or E3) and contact your
installer or Technical Support.
Yellow Change Water
Panel light ashes (Model
60 only - see FIGURE 1)
Refer to ANNUAL MAINTENANCE on
page 7 for instructions on changing
the HydroCore, or contact your
installer. After the HydroCore is
replaced, turn the control dial to the
Test/Reset position until the green
Humidier On light ashes, to reset
the HydroCore change timer.
English 5
EFFECT OF WATER CHARACTERISTICS
Your humidier is designed to operate using cold, hot, hard,
or soft water. Depending on the mineral content of your water
source, annual replacement of the orice and cleaning of
the valve may be necessary to ensure your humidier is
maintaining efciency throughout the heating season. Installing
a scale-reducing inline water lter is recommended to lessen
the effects of hard water.
Water contains varying amounts of minerals. The residue
remaining as a result of hard water evaporation is primarily
calcium and magnesium components and is usually quite hard,
scaly, and dense. Residue from softened water tends to be soft
and uffy and has a greater volume than hard water deposits.
At the end of a humidication cycle, most of the mineral solids
are ushed down the drain.
In either case, the service life of the HydroCore will be the same.
The HydroCore should be changed at least once per year. Units
installed on hard water require annual replacement of the
orice (see page 7).
FAN SPEED
The fan speed of the unit can be switched from HIGH (default)
to LOW if noise is a concern. Note that lowering the fan speed
will also decrease capacity by approximately 10%. Low speed is
recommended if the unit is installed near the living space or if
the humidier is installed to run independent of a heat call.
1. Take note of the humidier control set point and turn the dial
to OFF position.
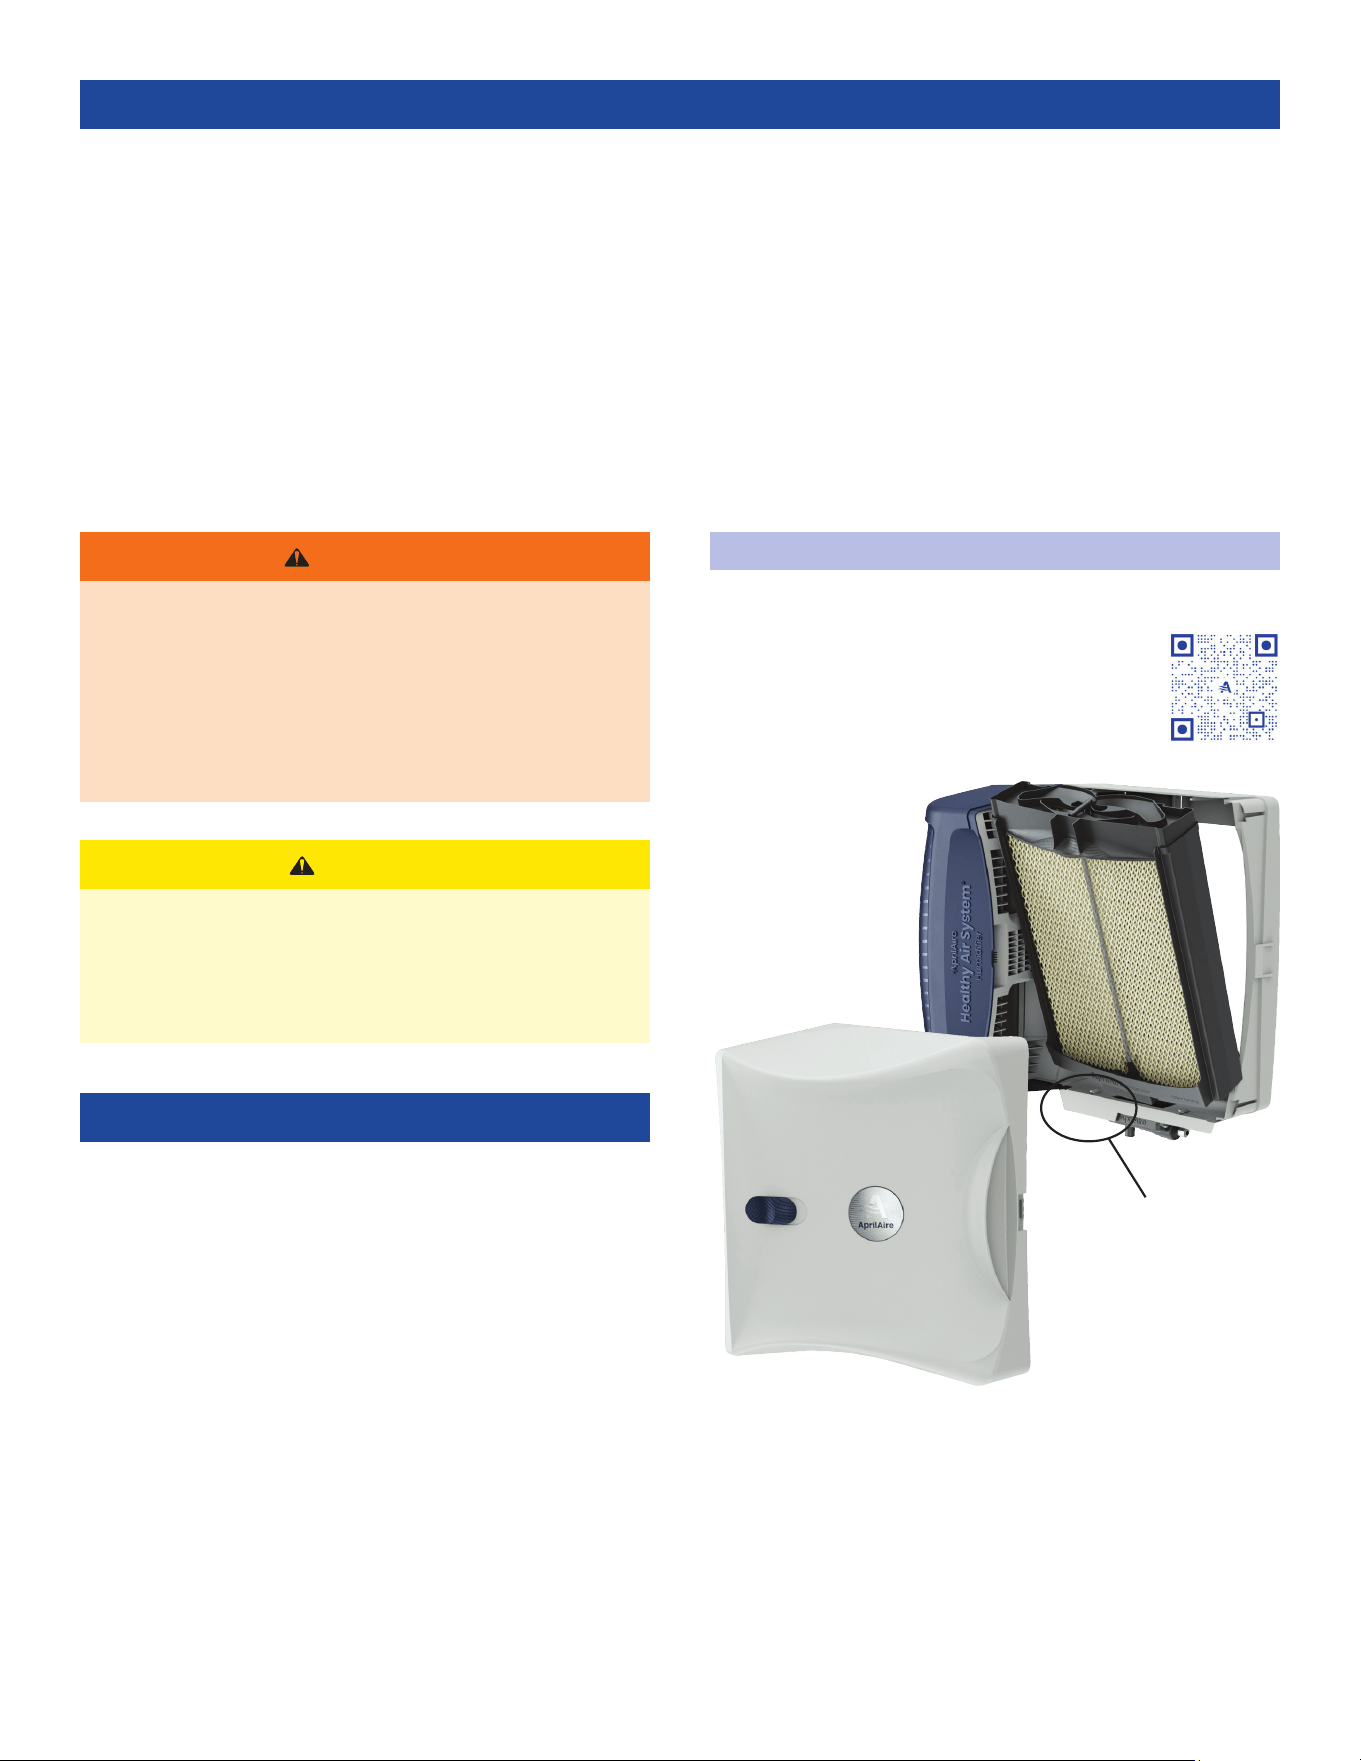
2. Grip the handle on the front cover and slide the latch. Rotate
the cover away from the assembly and pull away from the
base and set aside (see FIGURE 4).
3. Toggle the fan switch to HIGH (+) or LOW (-) (see FIGURE 5).
4. Replace cover and turn the humidier control dial back to the
desired set point.
ANNUAL MAINTENANCE
For best performance, replace the HydroCore in your AprilAire
Humidier at least annually. Detailed instructions can be
found on page 7.
The Change Water Panel indicator light (Digital Control only,
see page 4 for details) will blink when it is time to change your
HydroCore.
To purchase a new Genuine AprilAire HydroCore:
• Call the installer of your AprilAire Humidier. This information is
often found on your equipment.
• Call your HVAC contractor.
• Use our Find a Pro tool at aprilaire.com.
• If none of the above is successful and you still need
information, contact Customer Service at 800.334.6011.
ANNUAL SUMMER SHUTDOWN
Humidier Control: Set the humidier control dial to the OFF
position.
Thermostat with IAQ Control: Set the humidier mode to OFF
when seasonal humidication is no longer desired.
MAINTENANCE INSTRUCTIONS
Periodic inspection and preventative maintenance of your total
heating system is important for efcient and safe operation.
Your HVAC contractor can service your humidier when they
service your HVAC system.
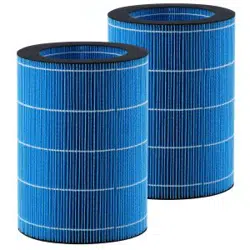
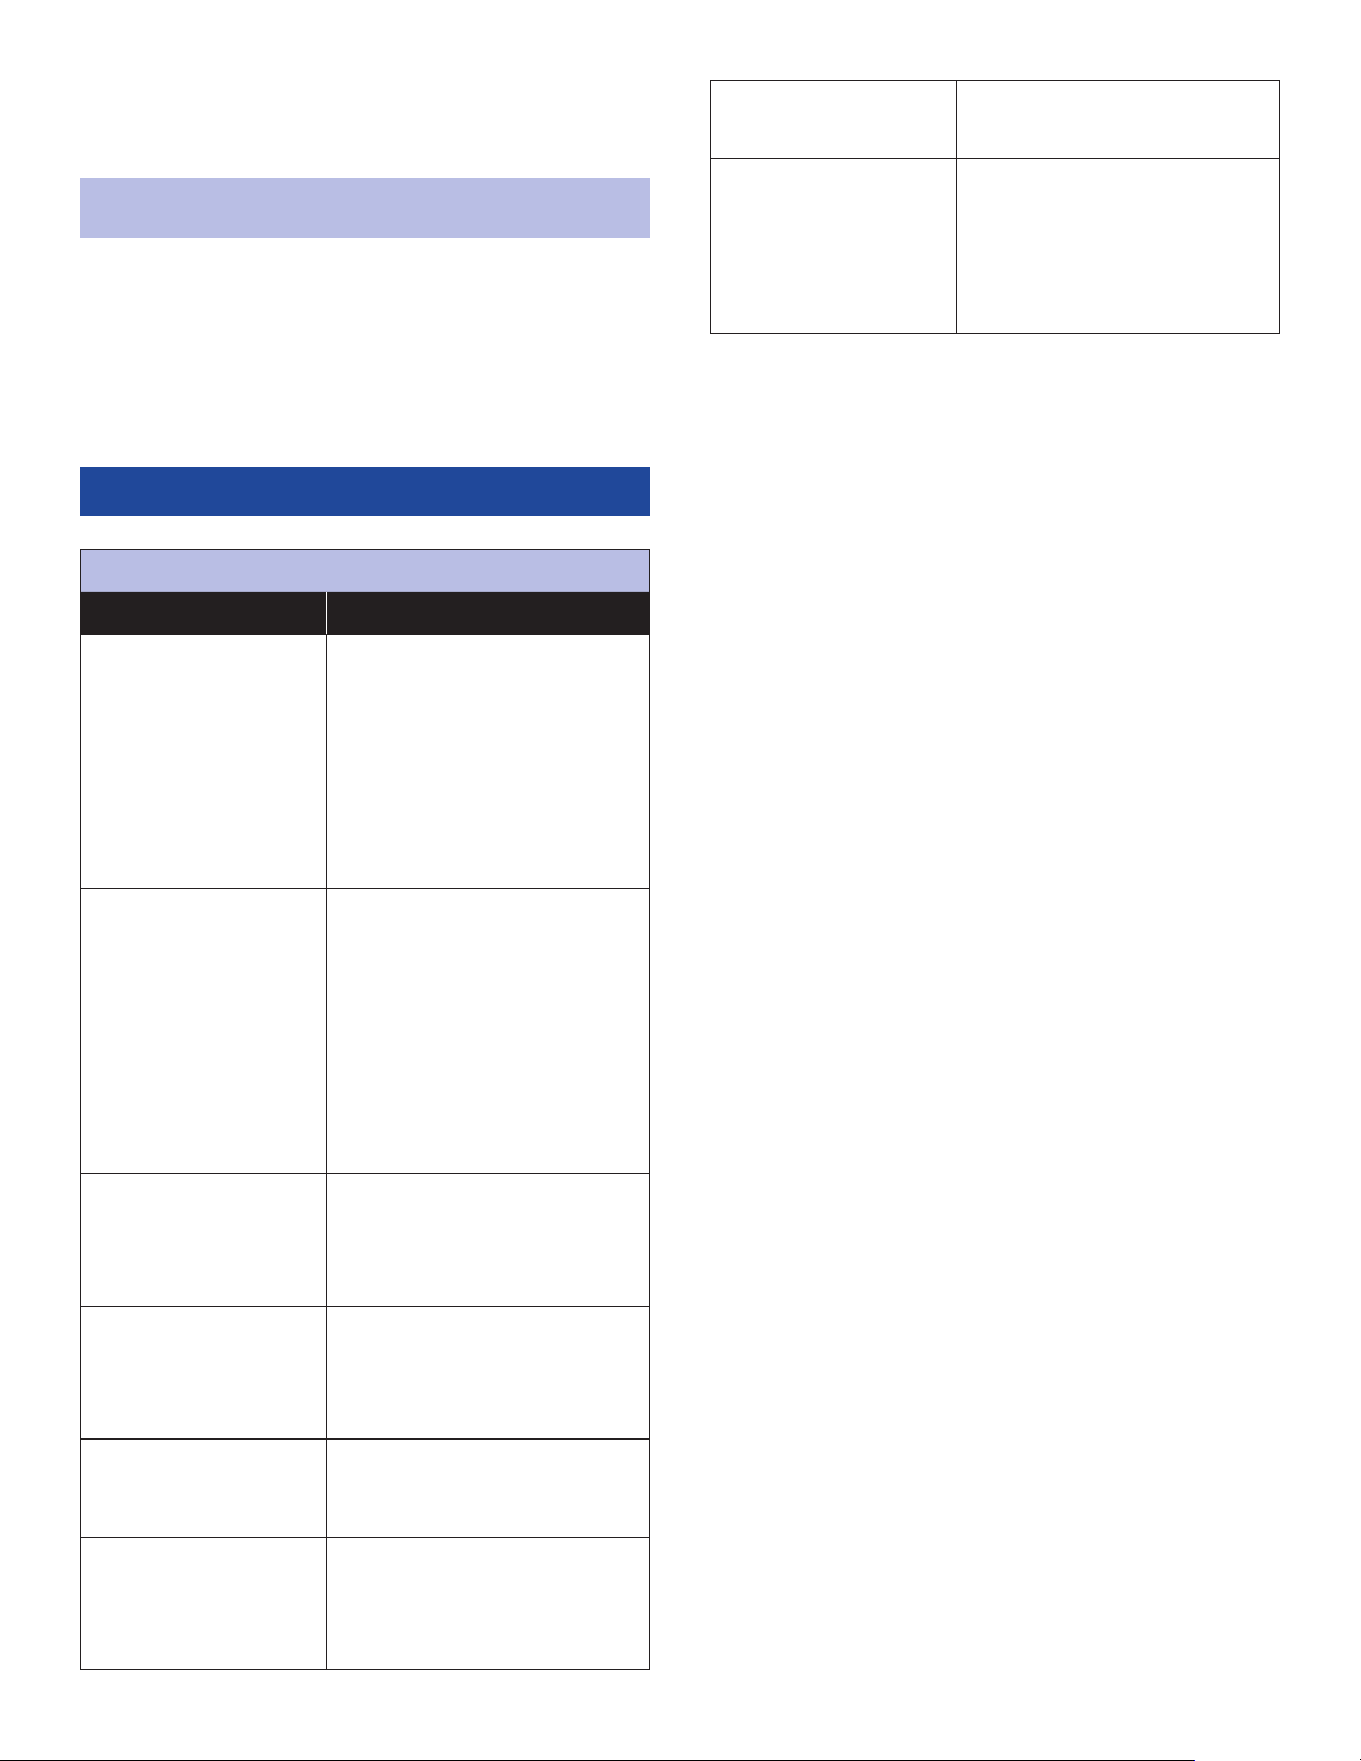
HydroCore
Model
Replacement
Cartridge
Hard Water
Kit*
Works With
L HYDROL HYDRLH 720
FIGURE 4:
FIGURE 5:
90-02817
*Includes replacement orice and seal cap
6 English
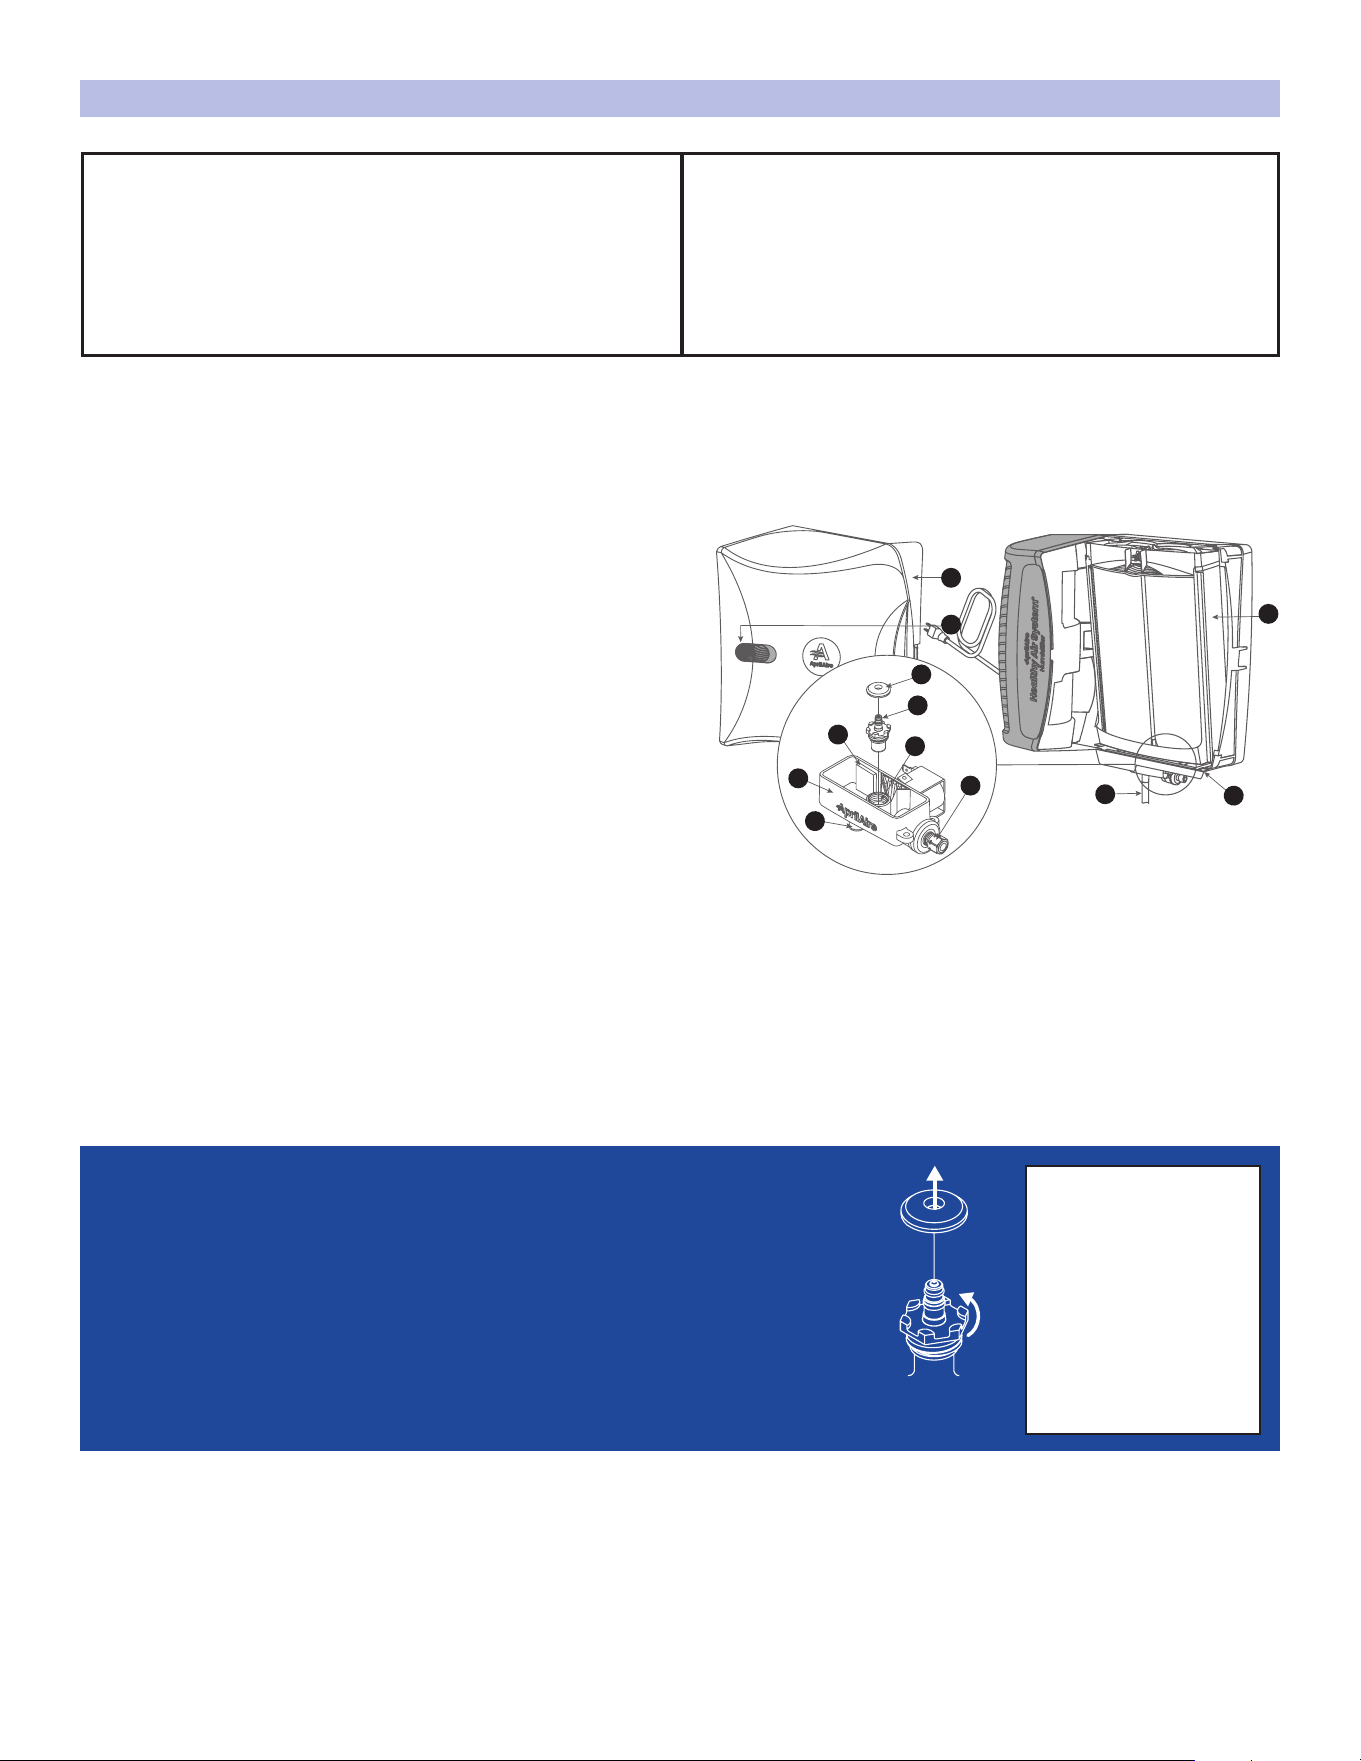
MAINTENANCE INSTRUCTIONS CONT.
I
J
K
L
H
G
E
C
F
A
B
D
VALVE
ASSEMBLY
1. Remove cover (A) by depressing latch (B) and pulling
away from base (C). Remove HydroCore (D) then
brush away any mineral deposits from the base.
2. Plug the drain port (E) or raise the end of the flexible drain
line (F) above the valve and secure to create a trap.
3. Pour white vinegar into the valve cup (G) up to the
clean line (H). Soak for up to 30 minutes.
4. Use a small plastic bristle brush to remove buildup in the
valve cup then drain vinegar solution. Flush with water.
5. Replace the rubber seal cap (I) and orifice (J) assembly
(PN: 70000037). See Orifice Replacement Instructions.
6. If applicable, remove the drain line and flex it to loosen
any mineral deposits or blockages then flush with water.
If it does not clear, replace it. Reattach drain line,
ensuring it has a constant downward slope and is not
flattened or blocked.
7. Install fresh HydroCore and test to confirm proper
function.
A.
B.
C.
D.
E.
F.
G.
H.
I.
J.
K.
L.
NOTE: Inlet strainer is designed to last for the life of the solenoid valve assembly and should not be removed from the water inlet (L).
Hard Water
Installation
*
Soft or Softened
Water Installation
*
Replace the orifice and clean the valve
every 3 years or as needed based on usage.
Annual replacement of the orifice and cleaning of the
valve is required to maintain optimal performance.
*To determine water connection, trace the water inlet (L) back to the water source to see if it is connected to a softener or contact your
service technician. Itchy skin, poor soap lather, and mineral residue or buildup on faucets or appliances are signs of hard water.
Contact AprilAire
Technical Support
for details:
800.334.6011
Orifice Replacement Instructions
1. Remove rubber seal cap (I) from the orifice (J).
2. Using an 11/16" socket or adjustable wrench, turn the orifice counterclockwise
to carefully loosen and remove it from the valve assembly. Ensure no debris
enters the orifice cavity (K).
3. Insert the new orifice, turn clockwise to tighten (finger-tight plus 1/8 to 1/4
turn-do not over-tighten), and press the rubber seal cap onto the orifice.
REQUIRED ANNUALLY FOR HARD WATER
(Included with Hard
Water Kit)
WARNING: Take note of humidier control set point and turn dial to off position before starting.
COVER
LATCH
BASE
HYDROCORE L
DRAIN PORT
DRAIN LINE
VALVE CUP
CLEAN LINE
RUBBER SEAL CAP
ORIFICE
ORIFICE CAVITY
WATER INLET
English 7
10020114A • 07.24
© 2024 AprilAire | aprilaire.com | 800.334.6011
AprilAire reserves the right to change specications without notice.
LIMITED WARRANTY
Terms of Coverage
Your AprilAire® Humidier is expressly warranted to be free from defects in
materials or workmanship for ve (5) years from date of purchase.
What Is Covered
The exclusive obligation of AprilAire under this Limited Warranty shall be, at
the sole discretion of AprilAire, to supply, without charge, a replacement for
any component or product which is found to be defective. A defective part will
be replaced pursuant to this Limited Warranty with a genuine AprilAire part. A
defective product will be replaced pursuant to this Limited Warranty with a new
AprilAire product of equal or similar features and functionality if the original
product has been discontinued or is no longer available.
Not Covered by the Limited Warranty
• Consumable or maintenance products, such as, but not limited to: Air Filters,
Evaporative Humidier Water Panels, Steam Canisters, or Steam Humidier
Electrode Wires.
• Labor charges, shipping costs, removal fees, service fees, or reinstallation costs.
• Damage caused by misuse, abuse, or improper installation due to failing to
install the product in accordance with the instructions provided.
• Damage to HVAC equipment caused by improper installation(s) or misapplication
installation(s).
• Modications, changes, repurposing, or alterations to the AprilAire product.
• Extended warranties or satisfaction guarantees offered by third parties.
• Cosmetic damage or normal wear and tear, including, but not limited to:
scratches, peeling finish, or dents that do not impede the mechanical
functionality of the product.
• Damage caused by acts of nature, including but not limited to: re, collision,
ood, wind, power surge, lighting strike, or mold.
• Damage caused during transit.
• Damage caused during installation due to failure to follow local, state, or
federal laws, statutes, codes, or ordinances.
• Defects in materials furnished by the installer.
Limit of Liability
IMPLIED WARRANTIES OF MERCHANTABILITY OR FITNESS FOR A PARTICULAR PURPOSE
SHALL BE LIMITED IN DURATION TO THE AFOREMENTIONED EXPRESS WARRANTY
PERIOD. APRILAIRE LIABILITY FOR INCIDENTAL OR CONSEQUENTIAL DAMAGES, OTHER
THAN DAMAGES FOR PERSONAL INJURIES, RESULTING FROM ANY BREACH OF THE
AFOREMENTIONED IMPLIED WARRANTIES OR THE ABOVE LIMITED WARRANTY IS EXPRESSLY
EXCLUDED. THIS LIMITED WARRANTY IS VOID IF DEFECT(S) RESULT(S) FROM FAILURE TO
INSTALL THE PRODUCT ACCORDING TO THE APRILAIRE INSTALLATION INSTRUCTIONS. IF
THE LIMITED WARRANTY IS VOID DUE TO MISAPPLICATION OR IMPROPER INSTALLATION,
ALL DISCLAIMERS OF IMPLIED WARRANTIES SHALL BE EFFECTIVE UPON INSTALLATION.
Some states do not allow limitations on how long an implied warranty lasts
or the exclusion or limitation of incidental or consequential damages, so the
above limitation(s) may not apply to your situation. This Limited Warranty gives
you specic legal rights, and you may also have other rights which vary from
state to state.
Register Your AprilAire® Product
Thank you for choosing AprilAire. Register your product at
aprilaire.com/warranty to receive important updates and
notications, and to streamline the process in the unlikely
event you le a claim.
Your warranty registration information will not be sold or shared
outside of this company.
Make a Warranty Claim
For questions regarding the Limited Warranty or to initiate a claim, contact
AprilAire Customer Service at 1.800.334.6011 Monday through Friday, 7:00 a.m.
– 5:00 p.m. Central Time.
At the sole discretion of AprilAire, you may be required to: return the product not
later than thirty (30) days after the warranty period to the place of purchase or
(if directed) to AprilAire, contact a professional contractor to provide warranty
service, submit a product for testing related to a warranty claim, and/or send
pictures of the original product with the serial number (if applicable) to AprilAire
Technical Support for inspection as a condition to reviewing a claim and/or
receiving a replacement product under this Limited Warranty.
AprilAire® is a registered trademark and division of Research Products Corporation.
8 English