3. Installation instructions
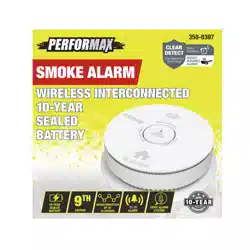
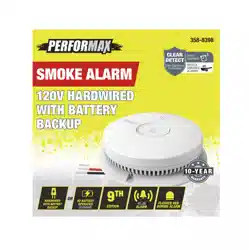
Smoke Alarm Instruction Manual
Model No.: GS562A
Table of Contents
1. What to do if the smoke alarm sounds
2. Product important information
3.6 Alarm installation
5019856
Release date:2024.10.29
RD-562A-39-001 Revision: G
Thank you for purchasing the GS562A smoke alarm. This model is a photoelectric smoke
alarm. This model is powered by 120V AC with a 9V battery backup. It is a multi-station alarm
and can be hardwired. This smoke alarm contains no radioactive material and is environmen-
tally friendly. It also can reduce the probability of nuisance alarms effectively.
1.What to do if the smoke alarm sounds ............................................................... 1
2.Product important information ............................................................................ 1
3.Installation instructions ....................................................................................... 2-3
4.Understanding your smoke alarm ...................................................................... 4
5.General maintenance ......................................................................................... 4
6.Battery information ............................................................................................. 5
7.Product specifications ........................................................................................ 5
8.Recognizing nuisance alarms ............................................................................ 5
9.Limitations of smoke alarms............................................................................... 5
10.Manufacturer information ................................................................................. 6
11.Special compliance considerations .................................................................. 6
12.Good safety habits - develop and practice a plan of escape............................ 6
13.Warranty information ........................................................................................ 6
14.Warranty card................................................................................................... 6
ELECTRICAL SHOCK HAZARD. Turn off the power to the circuit before wiring the
alarm. Failure to turn off the power first may result in serious electrical shock, injury or
death.
This unit will not alert hearing-impaired residents. It is recommended that you install
special units that use devices like flashing strobe lights to alert hearing-impaired
residents.
• There are situations where a smoke alarm may not be effective to protect against fire
as stated in the NFPA Standard 72. For instance:
a) Fires where the victim is intimate with a flaming-initiated fire; for example, when a
person's clothes catch fire while cooking;
b) Fires where the smoke is prevented from reaching the smoke alarm due to a closed
door or other obstruction;
c) Incendiary fires where the fire grows so rapidly that an occupants egress is blocked
even with properly located smoke alarms.
Smoke alarms are not to be used with smoke alarm guards unless the combination has
been evaluated and found suitable for that purpose.
This unit must be powered by a 24-hour, 120-volt, pure sine wave, 60 Hz circuit. Be sure
the circuit cannot be turned off by a switch, dimmer, or ground fault circuit interrupter.
Failure to connect this unit to a 24-hour circuit may prevent it from providing constant
protection.
• This smoke alarm must have AC or battery power to operate. If the AC power fails,
Battery backup will allow the alarm to sound for at least 4 minutes. If AC power fails and
the battery is weak, protection should last for up to 7 days. If AC power fails and the
battery is missing, the alarm cannot operate.
• Never disconnect the power from an AC-powered unit to stop an unwanted alarm.
Doing so will disable the unit and remove your protection. In the case of a true unwanted
alarm, open a window or fan the smoke away from the unit. The alarm will reset automati-
cally when it returns to normal operation. Never remove the batteries from a battery
operated unit to stop an unwanted alarm (caused by cooking smoke, etc.). Instead open
a window or fan the smoke away from the unit. The alarm will reset automatically.
• This Smoke alarm will not protect against the risk of smoke when the battery has been
drained with AC power disconnected.
• This device should be installed by a competent person.
1. The test button accurately tests the device's functions. Do not use any other test
method. Test the device weekly to ensure proper operation.
2. If you're sure it isn't a real alarm warning, open windows or fan the air around the device to
silence it.
3. Observe and follow all location and national electrical and building codes for installation.
4. This smoke alarm is designed to be used within a single family only. In multifamily buildings,
Each individual living unit should have its own smoke alarm device. Do not install it in non-resi-
dential buildings. It is not designed for use in a recreational vehicle (RV) or boat.And the device
is not a substitute for a complete alarm system.
5. This smoke alarm can only sound its alarm when it detects a dangerous level of smoke
in the air. The device is designed to give audible warning of dangerous smoke.
DANGER!
WARNING!
CAUTION!
Diagram 4
AC connector
AC Quick Connector harness
3.5 Wiring instructions for AC quick Connector Harness
FUSE OR CIRCUIT BREAKER
BLACK
RED
WHITE
BLACK RED
WHITE
BLACK
RED
WHITE
First
Alarm
Additional
Alarm
Additional
Alarm
1) For alarms that are used as single stations, do not connect the red wire to anything. Leave
the red wire insulating cap in place to make certain that the red wire cannot contact any metal
parts or the electrical box.
2) AII interconnected alarms must be supplied from a single power circuit.
3) The wire colors are: Live = Black; Neutral = White, Interconnect = Red.
Do not connect Interconnect wires to a line or neutral connection. An improper connection will
result in damage to the alarm, failure to operate, or a shock hazard. Check the connections
carefully before turning them on the main power to the circuit. Interconnect Wiring Diagram:
See Diagram 4.
4) A maximum of 12 alarms may be interconnected in a multiple-station arrangement.
5) Make certain alarms are wired to a continuous (non-switched) power line.
6) After selecting the proper location for your alarm and wiring the AC QUICK Connector
harness as described previously, attach the mounting bracket to the junction box.
7) Pull the AC QUICK CONNECTOR through the center hole in the mounting bracket and
secure the bracket.
8) Plug the AC QUICK CONNECTOR into the back of the unit, making sure that the locks on
the connector snap into place. Check all connections. Then push the excess wire back into the
electrical box through the hole in the center of the mounting bracket.
9) Rotate the alarm in the counterclockwise direction and install the alarm completely on the
mounting bracket.
10) Turn on the AC power. The green LED will turn on when the alarm is operating from AC
power.
11) If the green power indicator light does not light, turn off power to the junction box and
recheck all connections. If all connections are correct and the green power indicator still does
not light when you restore the power, the unit should be replaced immediately.
12) Single station alarms: Test each smoke alarm. Press and hold the test button until the unit
alarms.
Interconnected alarms: Press and hold the test button until the unit alarms. All interconnected
Alarms should sound. The other Alarms sounding only tests the interconnect signal among
alarms. It does not test each alarm’s operation. You must test each alarm individually to check
if the alarm works properly. If any unit in the series does not alarm, turn off power and recheck
connections. If it does not alarm when you restore power, replace it.
13) For new construction, place supplied dust cover over alarm to prevent damage from dust
and construction debris. Construction dust and chemicalscan cause contamination and false
alarms When construction is complete, remove dust cover.
STAND-ALONE ALARM ONLY:
• If you are only installing one Smoke Alarm, restore power to the junction box.
INTERCONNECTED UNITS ONLY:
• If you are interconnecting multiple Smoke alarms, repeat steps 1–9 for each Smoke
Alarm in the series. When you are finished, restore power to the junction box.
ELECTRICAL SHOCK HAZARD. Turn off the power to the circuit before wiring the
alarm. Failure to turn off the power first may result in serious electrical shock, injury or
death.
Improper wiring of the power connector or the wiring leading to the power connector will
cause damage to the Alarm and may lead to a non-functioning alarm.
DANGER!
To prevent injury, this device must be securely attached to the ceiling/wall in accordance
with the installation instructions.
Smoke will not be able to reach the smoke sensor while the dust cover is in place. Dust
cover must be removed!
AC Wired Interconnect Model Capability
This model has AC hardwire interconnect capability. When one hardwired interconnect unit
sounds an alarm, all other compatible hardwire or interconnected units will also alarm.
NOTE:
AC wiring must be completed properly and the AC quick connector must be attached to
the unit for the hard wire interconnect function to work.
WARNING!
Make sure the alarm is not receiving excessively noisy power. Examples of noisy power
could be major appliances on the same circuit, power from a generator or solar power,
light dimmer on the same circuit or mounted near fluorescent lighting. Excessively noisy
power may cause damage to your alarm.
WARNING!
This device should be located in an
open and unobstructed area and
shall not be located behind furniture,
drapes, or any other object where it
might not be seen or heard. The
alarm will be heard from all sleeping
areas.
If you install only one device in your
home, install it near bedrooms, not in
the basement or furnace room.
This device should be installed
by a competent person.
WARNING!
CAUTION!
3.3 Wiring Requirements
To reduce the likelihood of nuisance alarm of the device, the accommodation spaces should be
well ventilated when household cleaning supplies or similar contaminants are used.
The alarm cannot be operated with power derived from a square wave or modified
square wave. Wave, or modified sine wave, inverter. These types of inverters are
sometimes used to supply power to the structure in off-grid installations, such as solar or
wind-derived power sources. These power sources produce high peak voltages that will
damage the alarm.
WARNING!
3.1 Recommended location for alarms
The following suggestions are intended to help you with the location and installation of
your smoke alarm.
DINING
ROOM
LIVING
ROOM
BEDROOM
BEDROOM
BEDROOM
KITCHEN
LIVING
ROOM
BEDROOM
HALL
BEDROOM
KITCHEN
1) In all sleeping rooms and guest rooms.
2) Outside each separate dwelling unit sleeping area, within 21 feet (6.4 m) of any door to a
sleeping room, the distance measured along a path of travel.
3) On every level of a dwelling unit, including basements.
4) On every level of a residential board and care occupancy (small facility), including
basements, excluding crawl spaces and unfinished attics.
5) In the living area(s) of a guest suite.
6) In the living area(s) of a residential board and care occupancy.
7) Smoke, heat, and combustion products rise to the ceiling and spread horizontally.
Mounting the smoke alarm on the ceiling in the center of the room places it closest to all points
in the room. Ceiling mounting is preferred in ordinary residential construction.
Smoke alarm pattern is three long beeps, a 1.5 second pause, and three long beeps
repeating. The red LED blinks in time with the alarm pattern only on the alarm(s) that
detected the hazard (initiating alarm).
1.1 What to do in the event of a fire
1. Do not panic, stay calm.
2. While leaving, don't open any inside door without first feeling its surface. lf hot, or if you see
smoke seeping through cracks, don't open that door! Instead, use your alternate exit. lf the
inside of the door is cool, place your shoulder against it, open it slightly and be ready to slam it
shut if heat and smoke rush in.
3. Meet at a pre-arranged meeting place outside the building.
4. Call the fire department or 911 from outside the building.
5. Do not go back inside a burning building. Wait for the fire department to arrive.
NOTE: These guidelines will assist you in the event of a fire, however, to reduce the
chance that fires will start, practice fire safety rules, and prevent hazardous situations.
8) When mounting a device on the ceiling, locate it at a minimum of 4 inches (10 cm) from the
side wall.
9) When mounting the device on the wall, use an inside wall, with the top edge of the alarm at
a minimum of 4 inches (10 cm) and a maximum of 12 inch (30.5cm) below the ceiling.
10) Put the device at both ends of a bedroom hallway or large room, if the hallway or room is
more than 30 feet (9.1 m) long.
11) Install the device on a sloped, peaked or cathedral ceilings at or within 3 feet (0.9 m) of the
highest point (measured horizontally).
1) This alarm should be installed on a UL-listed or recognized junction box. All connections
should be made by a qualified electrician, and the electrical wiring used shall be in accordance
with Articles 210 and 300.3(B) of the U.S. National Electrical Code (ANSI/NFPA 70, NFPA 72).
And/or any other codes having jurisdiction in your area. The multiple-station interconnect
wiring to the alarms must be run on the same raceway or cable as the AC power wiring.
In addition, the resistance of the interconnect wiring shall be a maximum of 10 ohms.
2) The maximum wire run distance between the first and last unit in an interconnected system
is 1000 feet.
3) The appropriate power source is 120 Volt AC single phase supplied from a non-switchable
circuit.
4) Smoke alarms are not to be used with detector guards unless the combination (alarm and
detector guard) has been evaluated and found suitable for that purpose.
1). When drilling two 5.0mm holes in the ceiling or wall, the distance between the two hole
centers is 75 mm (2.95 inch), then inserting two plastic plugs provided into the holes.
2). Attach the bracket to the plastic plugs and fix the screws into the plastic plugs. Do not
over-tighten screws.
3). Install and rotate the alarm body on the bracket.
4). Test the device by pressing the test button. Ensure the device is working normally.
NOTE:
A missing or improperly installed battery will prevent the battery door from closing and
result in improper alarm operation.
• Do not connect it to any other type of alarm or auxiliary device. Connecting anything
else to this unit may damage it or prevent it from operating properly.
• The battery compartment door can not be closed unless a battery is installed.
• Do not paint over the unit. Paint may seal the openings to the sensing chamber and
prevent the unit from operating properly.
This smoke alarm is designed to be mounted on the ceiling or wall. Read “Recommended
location for alarms” and “Locations to avoid” before you begin installation.
Tools you will need:
• Needle-nose pliers or a utility knife;
• a standard flathead screwdriver.
01 02 03
04 05 06
NOTE:
Use standard UL Listed household wire (minimum 0.75mm² cable) available at all
electrical supply stores and most hardware stores.
THIS EQUIPMENT SHOULD BE INSTALLED IN ACCORDANCE WITH THE NATIONAL FIRE
PROTECTION ASSOCIATION'S STANDARD 72 (National Fire Protection Association, Battery march
Park, Quincy, MA 02269).
Typical installation drawing layouts for the unit(s), indicating recommended locations and wiring
methods, which shall be in accordance with the applicable requirements outlined in the following:
1)C22.1-12, Canadian Electrical Code, Part I, Safety Standard for Electrical Installations;
2)CAN/ULC-S553, Standard for Installation of Smoke alarms.
3) National Electrical Code, NFPA 70, Wiring Methods and Materials;
4) National Fire Alarm and Signaling Code, NFPA 72, Single- and Multiple-Station Alarms and
Household Fire Alarm Systems for US requirement.
The National Fire Protection Association (NFPA) and the manufacturer recommend replacing this
alarm ten years from the date code on back of alarm. Beyond which the device might no longer detect
smoke accurately and should be immediately replaced.This instruction manual contains important
information on starting operation and using the device.
ATTENTION-
Please take a few minutes to thoroughly read the instruction manual and familiarize
yourself and your families with its operation. And save it for future reference.
3.2 Locations to avoid
To ensure the Smoke Alarm work properly and provide detection performance, do not install
the device in the following places:
1)Normal cooking may cause nuisance alarms. If a kitchen alarm is desired,it should have
an alarm silence feature and should not be installed within 6 feet of cooking appliances.
2)Do not install within 6 feet of heating appliances.
3)In areas with high humidity, like bathrooms or areas near dishwashers or washing
machines or directly above a sink. Install at least 10 feet away from these areas.
4)Avoid spraying aerosols near the device.
5)Next to a door or window, an extractor fan, air returns or heating and cooling supply vents.
The air could blow smoke away from the device, interrupting its alarm.
6)In rooms where temperatures may fall below 4.4°C or rise above 37.8°C, or in humidity
higher than 95%. These conditions will reduce battery life or cause a fault alarm.
7)In extremely dusty, dirty, or insect infested areas influence particles interfere with the
device operation.
8)In the garage. Products of combustion are present when you start your automobile.
9)In an enclosed space (for example in a cupboard or behind a curtain).
10)Where it can be obstructed (for example by furniture).
11)Less than 4" (10cm) from the peak of an "A" frame type ceiling.
12)Near fluorescent lights. Electronic noise may cause nuisance alarms.
13)Avoid installing where the unit will be exposed to direct sunlight.
14)Place out of the reach of children. Under no circumstance should children be allowed to
handle the device.
Images are representative only. Actual product may vary slightly.
Single floor plan
Multiple floor plan
Smoke alarms for required protection
Smoke alarms for additional protection
Smoke alarms with silence control for additional protection
Ref: 358-8398
10.Manufacturer information
14.Warranty card
Last Name:
First Name:
Phone:
Address:
Country:
Zip Code:
Fault description:
Date of purchase:
Signature:
11.Special compliance considerations
5.General maintenance
4.2 Alarm Visual And Audible lndicators
4.Understanding your smoke alarm
4.1 Product overview
①:Sounder
②:Test/Silence Button
③:AC power indicator (Green)
④:Alarm indicator (Red)
Operation mode
Standby
Test Mode
Initiating Smoke
Alarm (multiple
alarms in an
interconnected
system)
Alarm Memory
Visual (flash) And Audible (beep)
Red LED flashes every 40 seconds.
Red LED blinks in time with alarm pattern indicating that this is the
unit initiating the alarm in an interconnected multiple alarm, system.
NOTE: lt is possible for more than one unit to detect a hazard and
become an initiating alarm unit.
1.After alarming without any operation in 24 hours, the device will
enter alarm memory mode, the red light will flash twice every 8
seconds.Alarm memory is only retained for 24 hours.
2.Push test button to clear alarm memory.
Silence Mode
4.3 Troubleshooting Guide
②
③
④
①
To keep your smoke alarm in good working order, please follow these simple steps:
1.Verify the unit's alarm sound and indicator operation by enabling the test button once a week
2.To remove the alarm from the bracket, rotate the alarm counter clockwise in the direction To
disconnect the AC power, squeeze the locking arms on the sides of the Ac Quick Connector while pulling
the connector away from the bottom of the alarm
3.Clean the alarm cover and vents with a soft brush attachment for the outside of the alarm once a
month to remove dust and dirt. You can clean the interior of your alarm (sensing chamber) by using
compressed air or a vacuum cleaner hose and blowing or vacuuming through the openings around the
perimeter of the alarm.
4.Never use water, detergents or other solvents to clean the unit.
5.Avoid spraying air fresheners, hair spray, or other aerosols near the device.
6.Never attempt to disassemble the unit or clean inside. This action will void your warranty.
7.As soon as possible, place the Smoke alarm back in its proper location to assure continuous protection
from fire.
8.When household cleaning supplies or similar contaminants are used, the area should be ventilated.
6.1 Battery type
This alarm is powered by a 9-volt external battery located in a battery compartment.
Under normal conditions, a fresh battery should last at least one year.
NOTE: Battery installation or replacement is necessary for the life of the device.
NOTE: Data comes from Siterwell labs. Actual battery life may vary depending on product
differences, usage habits, and environmental factors.
6.2 Battery Replacement
This alarm is equipped with a low battery monitor circuit. If the battery capacity is near the point
where it can no longer provide adequate power for all alarm functions, the low battery
condition will occur. See the "Troubleshooting Guide". The battery must be replaced within 7
days of the first occurrence of the “Low Battery Warning” to provide continuous alarm
protection.Follow the battery replacement steps.
Replace battery with one of the following approved brands:
9V Carbon zinc Battery: GP1604S
EVEREADY 1222
These batteries can be purchased at your local retailer.
13. Warranty information
WARNING!
Reinstall the alarm as soon as possible to ensure continuous detection.
WARNING!
Due to the loudness of the alarm, always stand about 3 feet (0.9 m) away from the unit
or use ear protection when testing.
Do not use an open flame to test your alarm, you could damage the alarm or ignite
combustible materials and start a structure fire.
1. Sounder
The sounder is used to send out Smoke alarms
and abnormal warning information.
2. Test/Silence button
The test button is used to test the device and to
silence the unit during a smoke alarm. Press to
hold it longer than 2 seconds to enable the test
function, or press once to enable the silence
function.
3. AC power indicator (Green)
The green indicator is used to indicate the power
status of the unit. The green indicator light is
always on while AC power is ON.
4. Alarm indicator (Red)
The red indicator is used to indicate the status of
the smoke alarm.
5.End-of-Life Reset
When the device enters the end-of-life warning state in the first 30 days, press the
TEST/SILENCE button to reset the end-of-life. At this point, if the device is still available. it
will enter the normal standby state for 72 hours, after 72 hours, the device will return to the
end-of-life warning state. After 30 days of the first end-of-life warning state, the device can
no longer be reset and needs to be replaced in a timely manner.
Press the test button for 2 seconds a week to verify proper alarm
operation.
Red LED flashes in time with alarm pattern.
Alarm pattern( 3 beeps, pause, 3 beeps).
The beeping sound is in gradual mode, and the test alarm rings
for two cycles.
When the smoke alarm occurs, press the button on the initiating uint
to enter the silence mode.
The LED will flash once approx every 8 seconds without sound.
Silence time: Approx 8 minutes.
Description/Action
Smoke Sensor
Fault
End-of-life
Operate mode Visual (flash) And Audible (beep)
Replace new battery
for your unit as soon
as possible.
Low Battery
Red LED flashes once
approx
every 40 sec.
Chirp once
approx
every 40 sec. (Simultaneously with red LED
flashing
)
Press test button once to silence mode for
approx
10 hours.
Silence mode: Red LED flashes once
approx
every 40 sec.
Red LED flashes once approx every 40 sec.
Chirp once approx every 40 sec.
(
Out of sync with red LED
flashing
)
Press button once to silence mode for approx 10 hours.
Silence mode: LED flashes every 40 sec.
Red LED flashes 3 times approx every 40 sec.
Chirp 3 times approx every 40 sec.
(
Simultaneously with red
LED flashing)
Review Cleaning Your
Alarm section.
Remove and dispose
your unit, and replace
as soon as possible
Remove and dispose
your unit, and replace
as soon as possible.
6.3 Battery disposal
Warning! Fire, explosion, and severe burn hazard. Do not recharge, crush, disassemble, heat
above 100°C, incinerate or expose contents to water.
1. Not to dispose of the battery (or the device) as unsorted municipal waste, but collect it
separately.
2. Dispose in accordance with all applicable federal, state and local regulations.
NOTE: Do not use lithium batteries in this unit. A good safety measure is to replace
the battery at least once a year.
Manufactured by:
SITERWELL ELECTRONICS CO.,LIMITED
No.666 Qingfeng Road, Jiangbei District, Ningbo, Zhejiang, China.
Distributed by:
Menard, Inc.
Eau Claire, WI 54703 U.S.A.
Visit MENARDS.COM
10-YEAR LIMITED WARRANTY
If this PERFORMAX
TM
product fails to perform to your satisfaction under normal use within the
10-year limited warranty period, return the product to a Menards® retail store for a replacement of
the same or similar PERFORMAX
TM
product.
Romove
Installation
8. Recognizing nuisance alarms
9.Limitations of smoke alarms
7. Product specifications
Model:
GS562A
Model Type: Multi-station photoelectric smoke alarm
Conforms to UL STD 217 9
th
Ed.
Certified to CAN/ULC Std. S531.
Product standards:
Hardware Interconnection : Up to 12 Alarms
Product Lifetime: 10 years
Indicator Light: Red and Green LED
Smoke alarm silence: About 8 minutes
Alarm Mode: Sound and light signal
Audible Alarm: 85+ dB at 10’ 3.0 to 3.5 KHz pulsing alarm
Flame Retardant Rating : V0,5VA
Installation Location: Ceiling or wall
Temperature Operating Range: 40°F (4.4°C) to 100°F (37.8°C)
Humidity Operating range: 10-95% RH non-condensin
g
Size:
Φ144*38mm
Weight: About 240g ( battery included )
Smoke Nuisance
SILENCE: If you know why the alarm is sounding, and you can verify that it is not a life-threat-
ening situation, you can push the button to silence the alarm for approx 8 minutes. If the smoke
is not too dense, that unit will be silenced. After the SILENCE period, the smoke alarm will
automatically reset and sound the alarm if particles of combustion are still present. You can use
SILENCE repeatedly until the air has been cleared of the condition causing the alarm.
NOTE: Pressing the button on the initiating smoke unit in your system will silence the alarm
notification, including all interconnected units.
NOTE: Dense smoke will override SILENCE and sound a continuous alarm. If no fire is present,
check to see if one of the reasons listed in "locations to avoid" may have caused the alarm. If a
fire is discovered, get out and call the fire department or 911.
This alarm is designed to minimize nuisance alarms. Cigarette smoke will not normally cause
the alarm, unless the smoke is blown directly into the alarm. Combustion particles from cooking
may set off the alarm if they are located too close to a cooking appliance. Large quantities
of combustible particles are generated from spills or when broiling. Using the fan on a range
hood that vents to the outside (the on-recirculating type) will also help prevent nuisance alarms
from occurring by removing these combustible products from the kitchen.
Smoke alarms have played a key role in reducing deaths resulting from home fires worldwide.
However, like any warning device, Smoke alarms can only work if they are properly located,
installed, and maintained, and if smoke reaches the Alarms.
They are not foolproof.
Smoke alarms may not waken all individuals.
Current studies have shown smoke alarms may not awaken all sleeping individuals, and that it
is the responsibility of individuals in the household that are capable of assisting other to provide
assistance to those who may not be awakened by the alarm sound, or to those who may be
incapable of safely evacuating the area unassisted.
Practice the escape plan at least twice a year, making sure that everyone is involved – from
kids to grandparents. Allow children to master fire escape planning and practice before holding
a fire drill at night when they are sleeping. If children or others do not readily waken to the
sound of the smoke alarm, or if there are infants or family members with mobility limitations,
make sure that someone is assigned to assist them in fire drill and in the event of an emergen-
cy. It is recommended that you hold a fire drill while family members are sleeping in order to
determine their response to the sound of the smoke alarm while sleeping and to determine
whether they may need assistance in the event of an emergency.
Smoke alarms cannot work without power.
Battery operated units cannot work if the batteries are missing, disconnected or dead, if the
wrong type of batteries are used, or if the batteries are not installed correctly. AC units cannot
work if the AC power is cut off for any reason (open fuse or circuit breaker, failure along a power
line or at a power station, electrical fire that burns the electrical wires, etc.). If you are
concerned about the limitations of battery or AC power, install both types of units.
6.Battery information
Battery Replacement Steps:
Replace the battery: (See Diagram 1-9)
Diagram 1
Diagram 2
Diagram 3
Diagram 6
Diagram 4 Diagram 5
Diagram 9
Diagram 7 Diagram 8
Test the alarm for correct operation using the test facility whenever the battery is replaced.
Use only the batteries specified. Use of different batteries may have a detrimental effect
on the alarm.
Constant exposure to high or low temperature or high humidity may reduce battery life.
CAUTION !
WARNING!
This smoke alarm alone is not a suitable substitute for complete fire detection systems in
places housing many people—like apartment buildings, condominiums, hotels, motels,
dormitories, hospitals, long-term health care facilities, nursing homes, day care facilities, or
group homes of any kind, even if they were once single-family homes. It is not a suitable
substitute for complete fire detection systems in warehouses, industrial facilities, and commer-
cial buildings, and special-purpose non-residential buildings that require special fire detection
and alarm systems. Depending on the building codes in your area, this smoke alarm may be
used to provide additional protection at these facilities.
The following information applies to all four types of buildings listed below: In new construction,
Most building codes require the use of only AC or AC/DC-powered smoke alarms only. AC,
AC/DC, or DC-powered smoke alarms can be used in existing construction as specified by local
building codes. Refer to NFPA 72 (the National Fire Alarm Code) and NFPA 101 (Life Safety
Code), local building codes, or consult your Fire Department for detailed fire protection
requirements in buildings not defined as "households.”
1. Single-Family Residence: single-family home, townhouse. It is recommended smoke alarms
be installed on every level of the home, in every bedroom, and in each bedroom hallway.
2. Multi-Family or Mixed Occupant Residence: Apartment building, condominium. This smoke
alarms are suitable for use in individual apartments or condos, provided a primary fire detection
system already exists to meet fire detection requirements in common areas like lobbies,
hallways, or porches. Using this smoke alarm in common areas may not provide sufficient
warning to all residents or meet local fire protection ordinances/regulations.
3. Institutions: Hospitals, daycare facilities, and long-term health care facilities. This smoke
alarm is suitable for use in individual patient sleeping/resident rooms, provided a primary fire
detection system already exists to meet fire detection requirements in common areas like
lobbies, hallways, or porches. Using this smoke alarm in common areas may not provide
sufficient warning to all residents or meet local fire protection ordinances/regulations.
4. Hotels and Motels: Also boarding houses and dormitories. This smoke alarm is suitable for
use inside individual sleeping/resident rooms, provided a primary fire detection system already
exists to meet fire detection requirements in common areas like lobbies, hallways, or porches.
Using this smoke alarm in common areas may not provide sufficient warning to all residents or
meet local fire protection ordinances and regulations.
Smoke alarms cannot detect fires if the smoke does not reach them.
Smoke from fires in chimneys or walls, on roofs, or on the other side of closed doors may not
reach the sensing chamber and set off the alarm. That is why one unit should be installed inside
each bedroom or sleeping area—especially if bedroom or sleeping area doors are closed at
night—and in the hallway between them.
Smoke alarms may not detect fire on another floor or area of the dwelling.
For example, a stand-alone unit on the second floor may not detect smoke from a basement fire
until the fire spreads. This may not give you enough time to escape safely. That is why the
recommended minimum protection is at least one unit in every sleeping area and every
bedroom on every level of your dwelling. Even with a unit on every floor, stand-alone units may
not provide as much protection as interconnected units, especially if the fire starts in a remote
area. Some safety experts recommend installing interconnected AC-powered units with
batteries. Backup or professional fire detection systems, so if one unit senses smoke, all units
alarm. Interconnected units may provide an earlier warning than stand-alone units, since all
units alarm when one detects smoke.
Smoke alarms may not be heard.
Though the alarm horn in this unit meets or exceeds current standards, it may not be heard if:
1) the unit is located outside a closed or partially closed door, 2) residents recently consumed
alcohol or drugs, 3) the Alarm is drowned out by noise from the stereo, TV, traffic, air condition-
er or other appliances, and 4) residents are hearing impaired or sound sleepers. Special-pur-
pose Units, like those with visual and audible alarms, should be installed for the hearing-im-
paired residents. Smoke alarms may not have time to sound before the fire itself causes
damage, injury, or death since smoke from some fires may not reach the unit immediately.
Examples of this include people smoking in bed, children playing with matches, or fires caused
by violent explosions resulting from escaping gas.
Smoke alarms are not foolproof.
Like any electronic device, Smoke alarms are made of components that can wear out or fail at
any time. You must test the unit weekly to ensure your continued protection. Smoke alarms
cannot prevent or extinguish fires. They are not a substitute for property or life insurance.
Smoke alarms have a limited life. The unit should be replaced immediately if it is not operating
properly. In addition, it is possible for the device to fail at any time. For this reason, you must
test the device weekly and replace it every 10 years.
01 02 03
04 05 06
WEEKLY TESTING
• Never use an open flame of any kind to test this unit. You might accidentally damage or set
fire to the unit or to your home.
• If the Alarm ever fails to test properly, replace it immediately. Products under warranty may be
returned to the manufacturer for replacement. See “Warranty Information” at the end of this
manual.
Do not stand close to the Alarm when the sounder is sounding. Exposure at close range may
be harmful to your hearing. Always stand an arms-length away from the unit it when testing. It
is important to test this unit every week to make sure it is working properly.
Using the test button is the recommended way to test this Smoke Alarm.
Press and hold the test button for 2 seconds to verify proper alarm operation.
During testing, the unit may flash a red LED accompanied by periodic alarm sounds.
(The beeping sound is in gradual mode, and the test alarm rings for two cycles.). If it does not
alarm, make sure the unit is powered properly and test it again. If it still does not work, replace
it immediately.
IMPORTANT: Retail canned smoke products vary by manufacturer and produce inconsistent
results. If the unit does not alarm when canned smoke is applied, conduct a push-to-test to
verify proper operation. Over-application of canned smoke can permanently damage the alarm.
Power Supply:120VAC/60Hz, 70mA Max, 9V battery backup
(GP1604S /EVEREADY 1222, Replaceable)
12. Good safety habits - develop and practice a plan of escape
Prepare and practice a home escape plan twice a year, including drills at night. Know two ways
out of every room(door & window) and identify a meeting place outside the home where
everyone will gather once they have exited the residence. When two people have reached the
meeting place, one should leave to call the fire department's telephone number while the second
person stay to account for additional family members. Establish a rule that once you're out,
you never reenter under any circumstance!
■Make a floor plan indicating all doors and windows and least two escape routes from each
room. Second story windows may need a rope or chain ladder.
■Have a family meeting and discuss your escape plan, showing everyone what to do in case of
fire and where to meet after they leave the house.
■Ensure that small children hear the alarm and wake when it sounds. They must wake up on
order to execute the escape plan. Practice allows all occupants to test your plan before an
emergency. You may not be able to reach your children. It is important they know what to do.
■Familiarize everyone with the sound of the smoke/CO alarm and train them to leave you home
when they hear it.
■Current studies have shown smoke/CO alarms may not awaken all sleeping individuals, and
that it is the responsibility of individuals in the household that are capable of assisting other to
provide assistance to those who may not be awakened by the alarm sound, or to those who may
be incapable of safely evacuating the area unassisted.
■Install and maintain fire extinguishers on every level of the home and in the kitchen, basement
and garage. Know how to use a fire extinguisher prior to an emergency.
3.8 Optional locking feature
The locking feature is designed to discourage unauthorized removal of the Alarm. It is not
necessary to activate the locks in single-family households where unauthorized battery or
Alarm removal is not a concern.
Tools you will need:
• Needle-nose pliers or utility knife
The locking feature uses locking pins, which are molded into the mounting bracket. Using
needle-nose pliers or a utility knife, remove one pins from the mounting bracket.
To lock the alarm onto mounting bracket
1. Using needle-nose pliers, detach one locking pin from mounting bracket.
2. Insert the locking pin into the lock located on side of alarm.
3. Pin head will be positioned outside the alarm as shown.
4. When you attach the Smoke Alarm to the mounting bracket, the locking pin's head will fit
into a notch on the bracket.
To unlock the mounting bracket
1. Remove the pin from mounting bracket.
2. Then turn the alarm clockwise(right).
3.4 Installation of the alarm
Rotate counterclockwise (left) to
install the alarm.
Rotate clockwise (right) to
remove the alarm.