
Technical Support and E-Warranty Certificate www.vevor.com/support
DOME TUNNEL GREENHOUSE USER MANUAL
We continue to be committed to provide you tools with competitive price.
"Save Half", "Half Price" or any other similar expressions used by us only represents an
estimate of savings you might benefit from buying certain tools with us compared to the major
top brands and does not necessarily mean to cover all categories of tools offered by us. You
are kindly reminded to verify carefully when you are placing an order with us if you are
actually saving half in comparison with the top major brands.

1
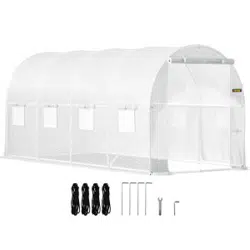
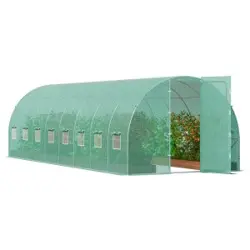
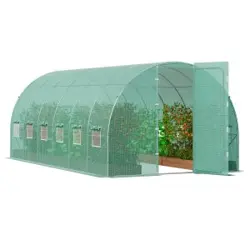
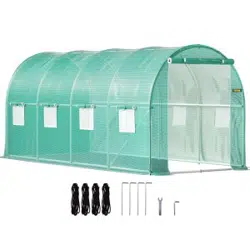
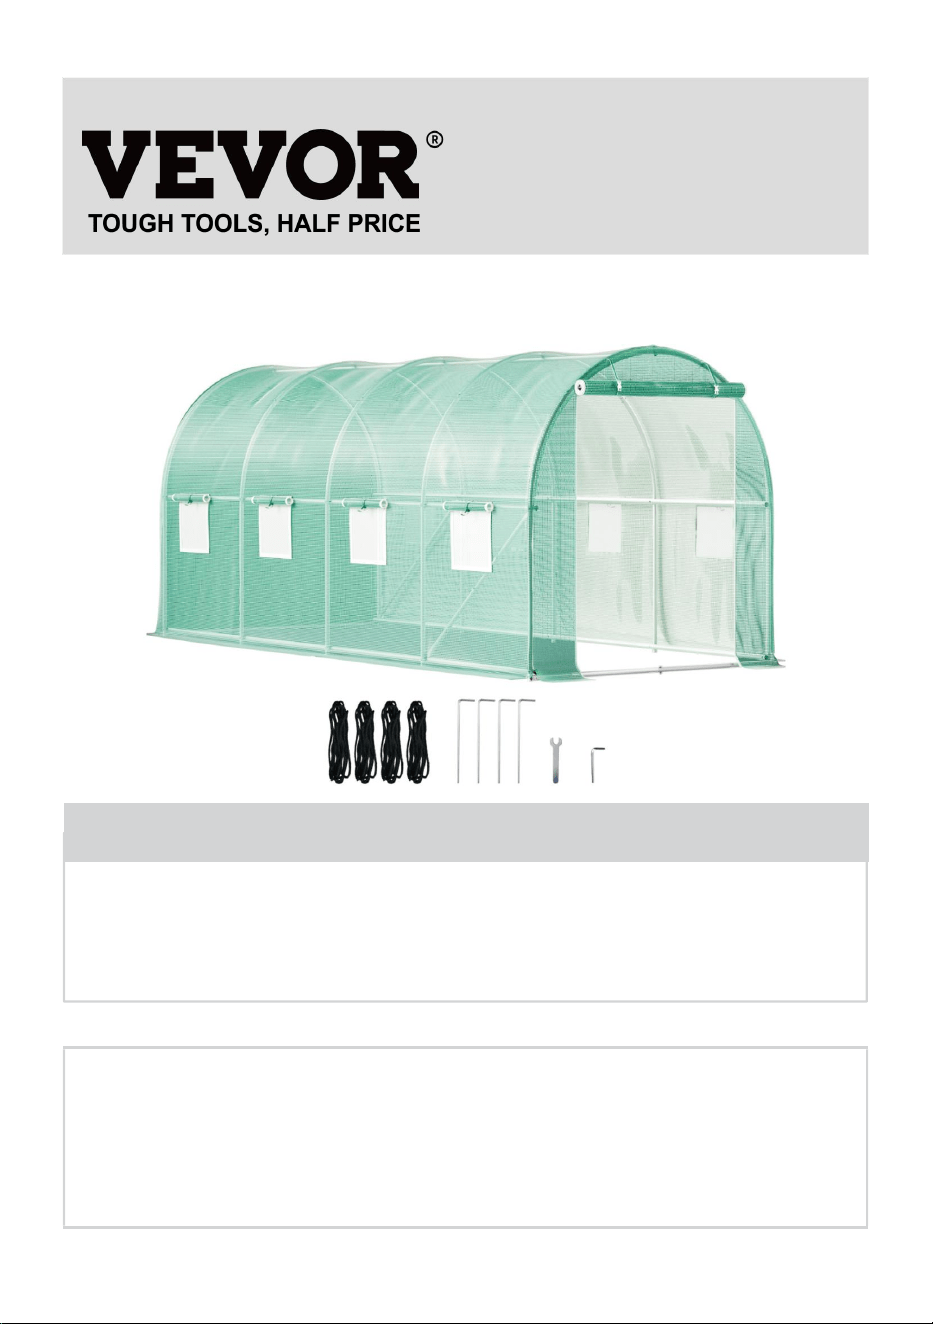
Model: 15*7*7 ft (Green)
15*7*7 ft (White)
Have product questions? Need technical support? Please feel free to
contact us:
Technical Support and E-Warranty Certificate
www.vevor.com/support
NEED HELP? CONTACT US!
This is the original instruction, please read all manual instructions
carefully before operating. VEVOR reserves a clear interpretation of our
user manual. The appearance of the product shall be subject to the
product you received. Please forgive us that we won't inform you again if
there are any technology or software updates on our product.
DOME TUNNEL GREENHOUSE
2
GENERAL SAFETY RULES
WARNING:
1. Please read this manual carefully before using the product.
2. Flammable: Keep away from open flame. This product will ignite and burn if
brought into contact with an open flame.
3. Keep away from sharp points,blades and other items,so as not to scratch
the product.
4. This product is not a toy, dome tunnel greenhouse cannot be used as toys
for children to play with.
5, Keep away from rain, water, hail, etc. to avoid damaging the documents in
your bag .
SAVE THESE INSTRUCTION
SPECIFICATIONS
Model
15*7*7 ft (Green)
Product Size
4.5×2×2m
Color
Green
Model
15*7*7 ft (White)
Product Size
4.5×2×2m
Color
White
Please carefully follow assembly instruction.Suggested 2-4 person to
construction.
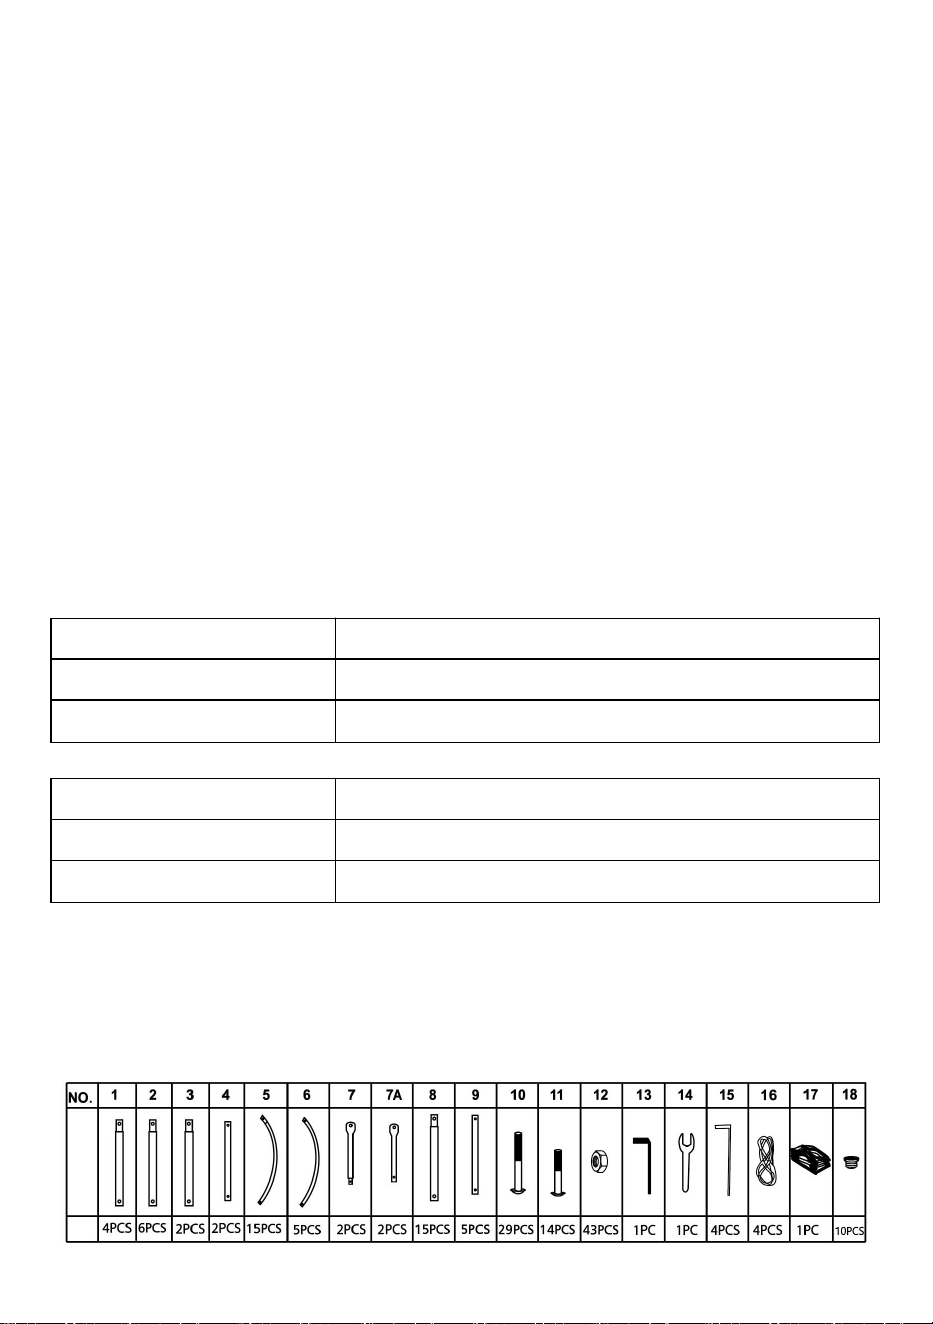
COMPONENTS
3
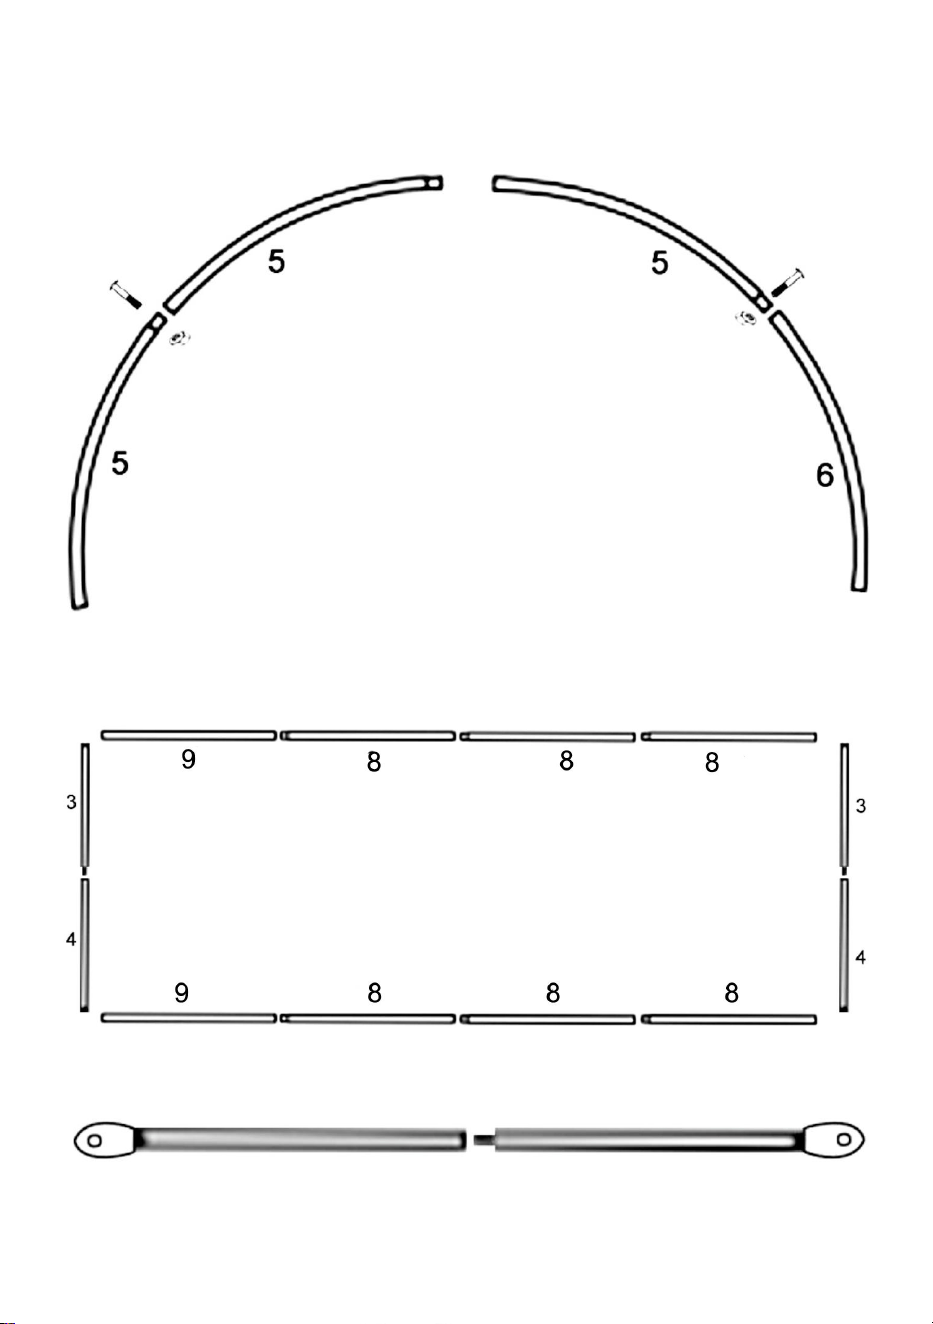
Assembly Instructions
STEP1
Main Structure
Assemble each 4 sets No.5+No.5 together, make them into one part first, use the shorter
bolts, put the curve tube on the flat ground, make both tubes horizontal, then tighten the
nuts. And assemble for 4 sets No.5+No.6 in the same way.
Assemble for 2 sets floor tubes No3+ No4 use the shorter bolts, and the horizontal frame
No9+No8+No8+No8 together.
Assemble for 2 sets support diagonal tubes No7 + No7A use the shorter bolts.
4
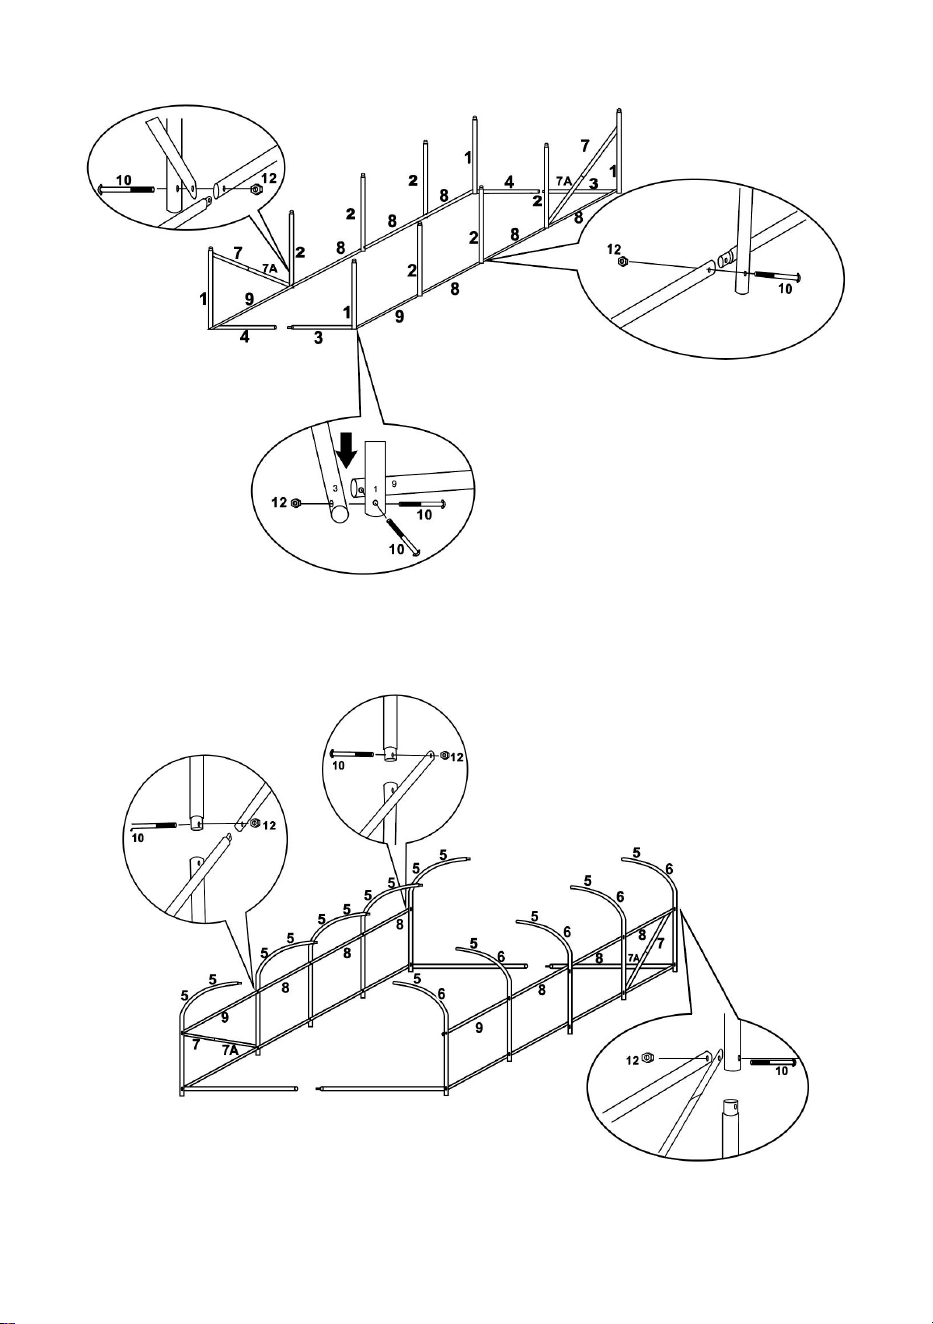
STEP2
Loosely assemble complete frame,before tightening all bolts in final position.
STEP3
Loosely assemble complete frame,before tightening all bolts in final position.

5
STEP4
Loosely assemble completed frame before tightening all bolts in final position.
6
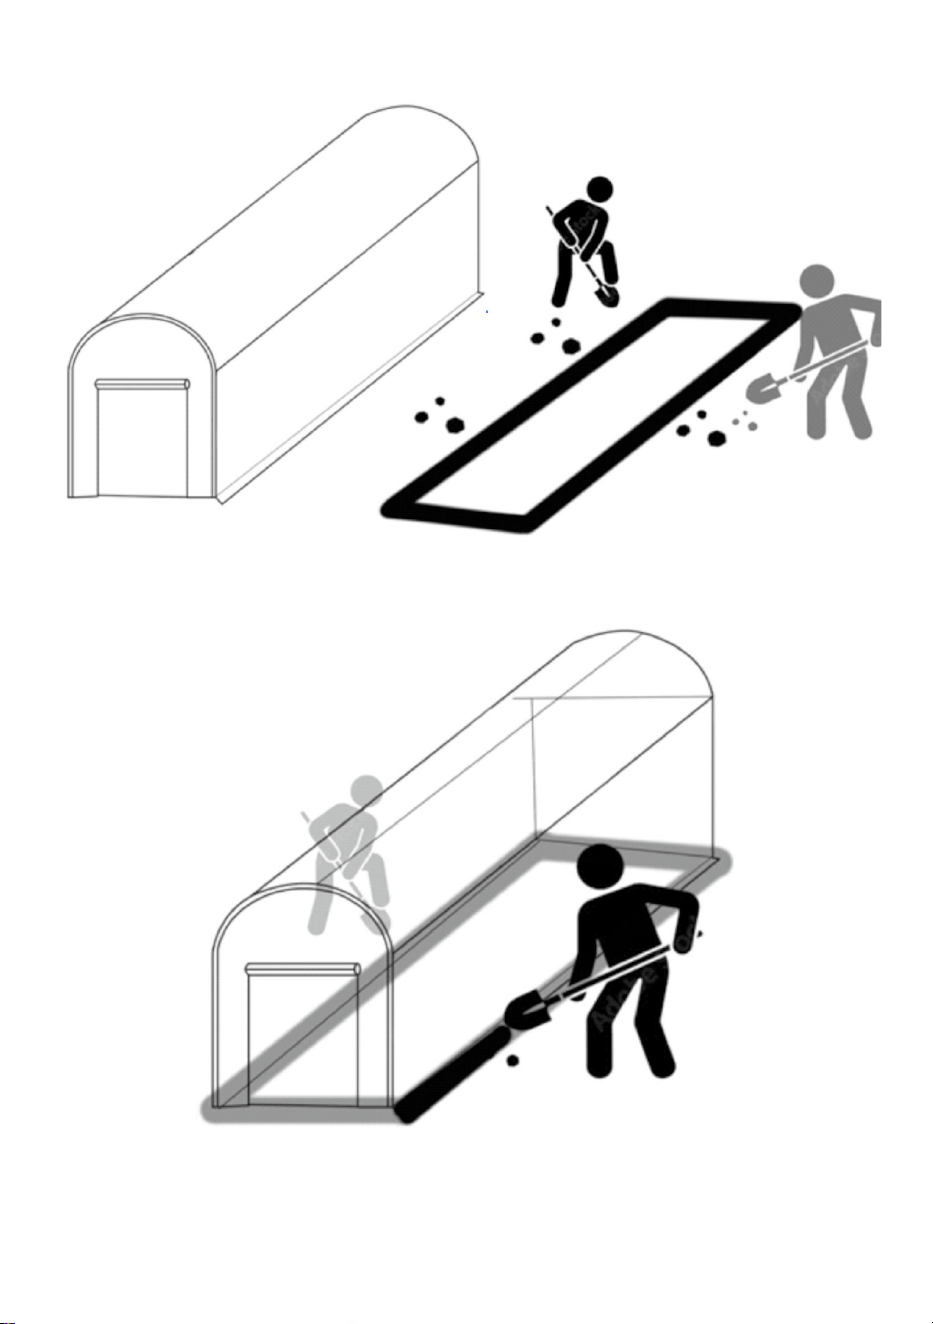
STEP5
For maximum stability of your polytunnel,we recommend digging a 20cm width trench
around the base of the polytunnel and back.
Put the frame inside the trench, ,filling with the soil.
7
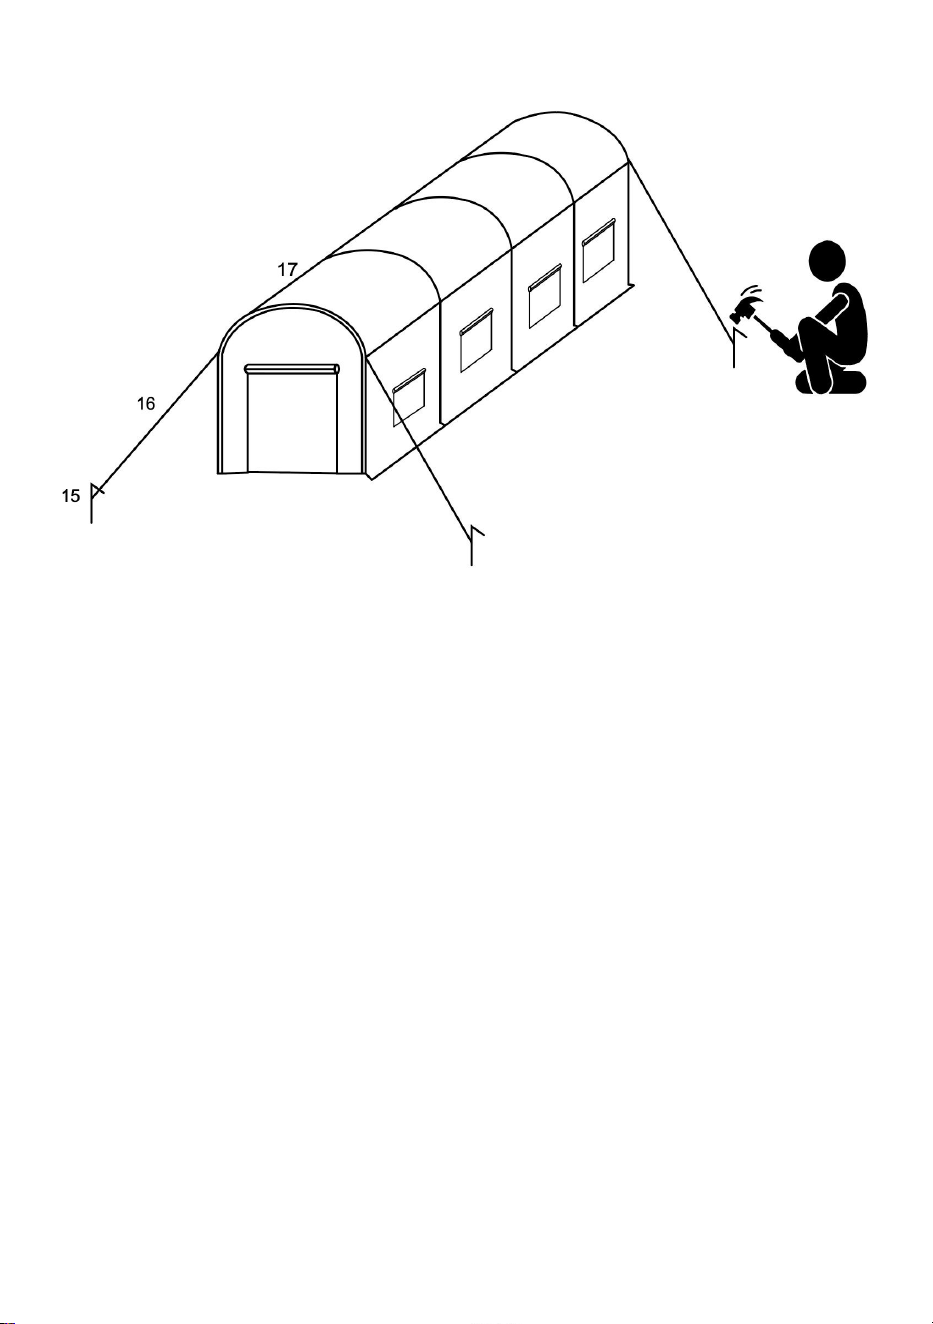
STEP6
Tied the string in the back of the cover to the frame.Use the ropes and stakes for four
corners of the greenhouse, to reinforce the stability of it.
WARNING
Covering the roof carefully, puts all places in the right position. As much as possible as not
make the frame structure of the greenhouse out of the shape.
Do not use it in bad weather conditions, such as a rainstorm, hailstone, heavy snow, and
heavy wind.

8
Manufacturer: Shanghaimuxinmuyeyouxiangongsi
Address: Shuangchenglu 803nong11hao1602A-1609shi, baoshanqu,
shanghai 200000 CN.
EC REP: E-CrossStu GmbH.
Mainzer Landstr.69, 60329 Frankfurt am Main.
UK REP: YH CONSULTING LIMITED.
C/O YH Consulting Limited Office 147, Centurion House, London Road,
Staines-upon-Thames, Surrey, TW18 4AX
Imported to AUS: SIHAO PTY LTD.
1 ROKEVA STREETEASTWOOD NSW 2122 Australia
Imported to USA: Sanven Technology Ltd.
Suite 250, 9166 Anaheim Place, Rancho Cucamonga, CA 91730