User Manual and Recipe Book | GPM1260
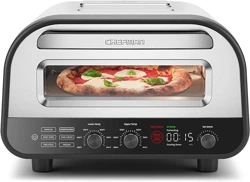
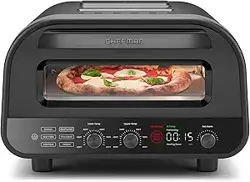
Pizzeria Indoor Pizza Oven

For customer service visit www.gourmia.com or call 888.552.0033
2
Contents
Congratulations 3
Important Safeguards 4
Know Your Oven 7
Control Panel / Displays 8
Before First Use 9
Using Your Oven 10
How to Shape Pizza Dough 11
How to Launch & Remove Pizza 11
Pizza Tips 12
Pizza–Style Presets Chart 13
Cleaning & Maintenance 13
Troubleshooting 14
Recipes 15
Warranty & Service 20
All rights reserved. No portion of this manual may be reproduced by any means whatsoever without written permission
from The Steelstone Group, except for the inclusion of quotations in a media review. Although every precaution has been
taken in the preparation of this manual, The Steelstone Group assumes no responsibility for errors or omissions. Nor is
any liability assumed for damages resulting from the use of the information contained herein. Although every effort has
been made to ensure that the information contained in this manual is complete and accurate, The Steelstone Group
is not engaged in rendering professional advice or services to the individual consumer; further, The Steelstone Group
shall not be held responsible for any loss or damage allegedly arising from any information or suggestions in this manual.
Model: GPM1260 | © 2025 Gourmia | 1.1
The Steelstone Group Brooklyn, NY | Gourmia.com

3User Manual | Pizzeria Indoor Pizza Oven | GPM1260
Here at Gourmia, our one and only goal is to make sure nutritious and delicious
meals are always a practical possibility no matter how fast-paced your life is.
Whether you’re in need of a hearty breakfast, a mid-day snack, or a satisfying
supper, our dependable, easy-to-use appliances are designed to work for you
while you work your way through your busy day.
This manual provides an overview and instructions on all the oven’s functions
and features, along with directions for assembling, operating, cleaning, and
maintaining your appliance. Please read all safety instructions before getting
started. Keep this manual handy for future use and review.
Our team is available to help with any and every question you might have about
your new oven. We’re excited for you and want you to get the most out of your
purchase—so whether you need assistance with setup or guidance on which
features to enable for which foods, we’re happy to walk you through it, step by
step.
Happy and easy cooking!
Congratulations on the purchase of your
Pizzeria Indoor Pizza Oven from Gourmia!
@gourmia
We’d love to hear about the delicious dishes you’re creating! Share your
thoughts, recipes, and photos with us.

Important Safeguards
For customer service visit www.gourmia.com or call 888.552.0033
4
IMPORTANT SAFEGUARDS
Read all instructions before using the electric appliance.
For household use only.
The following basic precautions should always be followed:
1. This appliance is not intended
for use by children or persons
with reduced physical, sensory,
or mental capabilities, or lack of
experience and knowledge, unless
they have supervision.
2. Close supervision is necessary
when any appliance is used near
children. Children should be
supervised to ensure that they
do not play with the appliance.
Cleaning and user maintenance
should not be done by children
unless they are supervised.
3. Remove and safely discard any
packing materials and promotional
labels before using the oven for
the first time.
4. Remove and safely dispose of the
protective cover fitted over the
power plug to avoid a choking
hazard for young children.
5. Before you connect the appliance,
check if the voltage indicated on
it corresponds to the local main
voltage.
6. Do not use the appliance if
the plug, the main cord, or the
appliance itself is damaged.
Always make sure that the plug
is inserted properly into a wall
outlet.
7. Always keep the power cord of
this oven, and other appliances
near the oven, away from the
oven housing.
8. Do not let the power cord hang
over the edge of a table or
counter, touch hot surfaces, or
become knotted.
9. To avoid electric shock, do not
immerse the cord, plug, or motor
base in water or other liquids.
10. Do not use the appliance near
the edge of a countertop or table.
Ensure the surface is stable, level,
heat-resistant, and clean.
11. Place the appliance on a stable,
level, and heat-resistant surface.
Ensure that the area is clean and
dry. Never place the appliance on
or near gas or electric burners and
ovens, even if the burner or oven
is cool / turned off.
12. Do not place the oven against a
wall or other appliances. To allow
for proper ventilation, leave at
least 4 inches of free space above
and around all sides of the oven.
13. Do not store any item on top of
the oven.
14. Do not use on a cloth-covered
surface, near curtains, or other
flammable materials. A fire may
occur if the oven is covered or
touches flammable materials,
including curtains, draperies, walls,
and the like, when in operation.
15. To avoid overheating or fire risk,
NEVER cover the crumb tray or
the oven walls with aluminum foil
or parchment paper.

Important Safeguards
5User Manual | Pizzeria Indoor Pizza Oven | GPM1260
SAVE THESE INSTRUCTIONS
16. Do not place cardboard, plastic,
paper, or other flammable
materials in the oven.
17. The oven's outer housing may
be hot during and after cooking.
Please do not touch hot surfaces.
18. Do not touch hot surfaces. To
avoid burns, use extreme caution
when removing the included pizza
stone, as it might be very hot.
19. Do not lay cooking utensils,
roasting pans, or dishes on the
glass door.
20. Oversized food and metal utensils
must not be inserted in the oven
as they may create fire or risk
electric shock.
21. Do not leave the door open for
extended periods.
22. Do not use nonstick or coated
pans in the oven.
23. Using accessories and
attachments not recommended or
supplied with this oven may cause
injuries.
24. Do not store any materials
other than the manufacturer's
recommended accessories in this
oven when not in use.
25. If the appliance is to be cleaned,
moved, assembled, or stored,
always turn the unit off and allow it
to cool entirely before unplugging
it from the power outlet.
26. Do not clean the oven with metal
scouring pads. Pieces can break
off the pad and touch electrical
parts, creating a risk of electric
shock.
27. Do not use the appliance outdoors
or for anything other than its
intended use. Misuse can cause
injury.
28. Do not use in any moving vehicles.
29. This appliance is for household
use only.
Important Safeguards
For customer service visit www.gourmia.com or call 888.552.0033
6
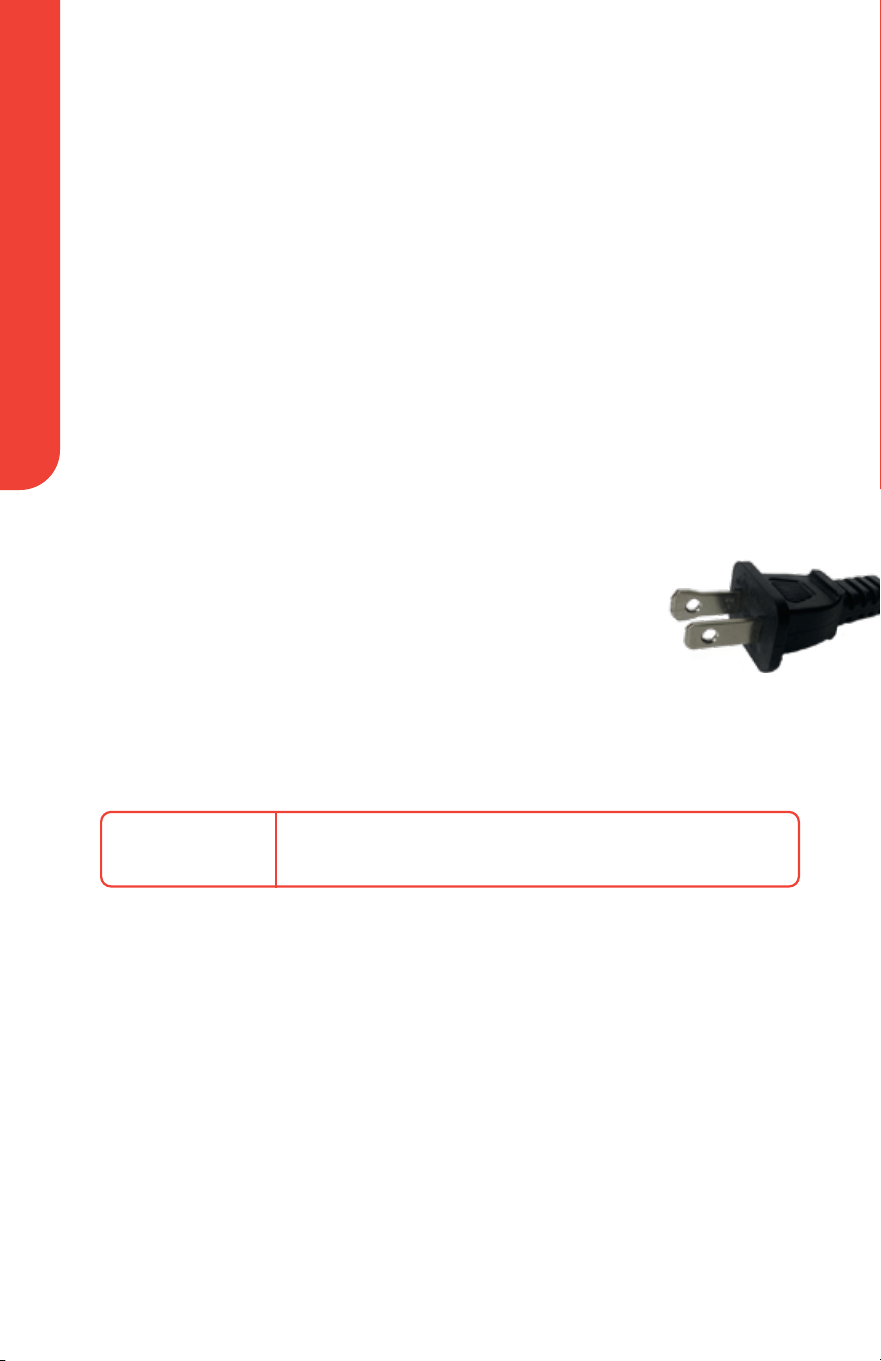
Electrical Polarized Plug
This appliance has a polarized plug (one blade is wider than
the other). To reduce the risk of electric shock, the plug is
intended to be used by inserting it into the electrical outlet
only one way. If the plug does not fit securely into the
outlet, reverse the plug and re-insert. If it still does not fit,
contact a qualified electrician for assistance. Do not modify
the plug in any way.
POWER
AC120V~ 60HZ 1,800W
Cord and Plug Safety
1. A short power-supply cord is provided to reduce risk of becoming
entangled in or tripping over a longer cord.
2. Extension cords may be used if care is exercised in their use.
3. If an extension cord is used:
• The marked electrical rating of the extension cord should be at least
equal to the electrical rating of the appliance.
• The longer cord should be arranged so that it will not drape over the
countertop or tabletop where it can be pulled on by children or tripped
over.
Know Your Oven
7User Manual | Pizzeria Indoor Pizza Oven | GPM1260
WARNING:
DO NOT put anything on top of the oven. The exterior walls get hot when
in use.
DO NOT place the oven against a wall or other appliances. To allow for
proper ventilation, leave at least 4 inches of free space above and around
all sides of the oven.
NEVER place the oven on any cooking surface, including gas or electric
cooktops, even if the surface is cool / turned off.
DO NOT remove pizza stone until it cools down.
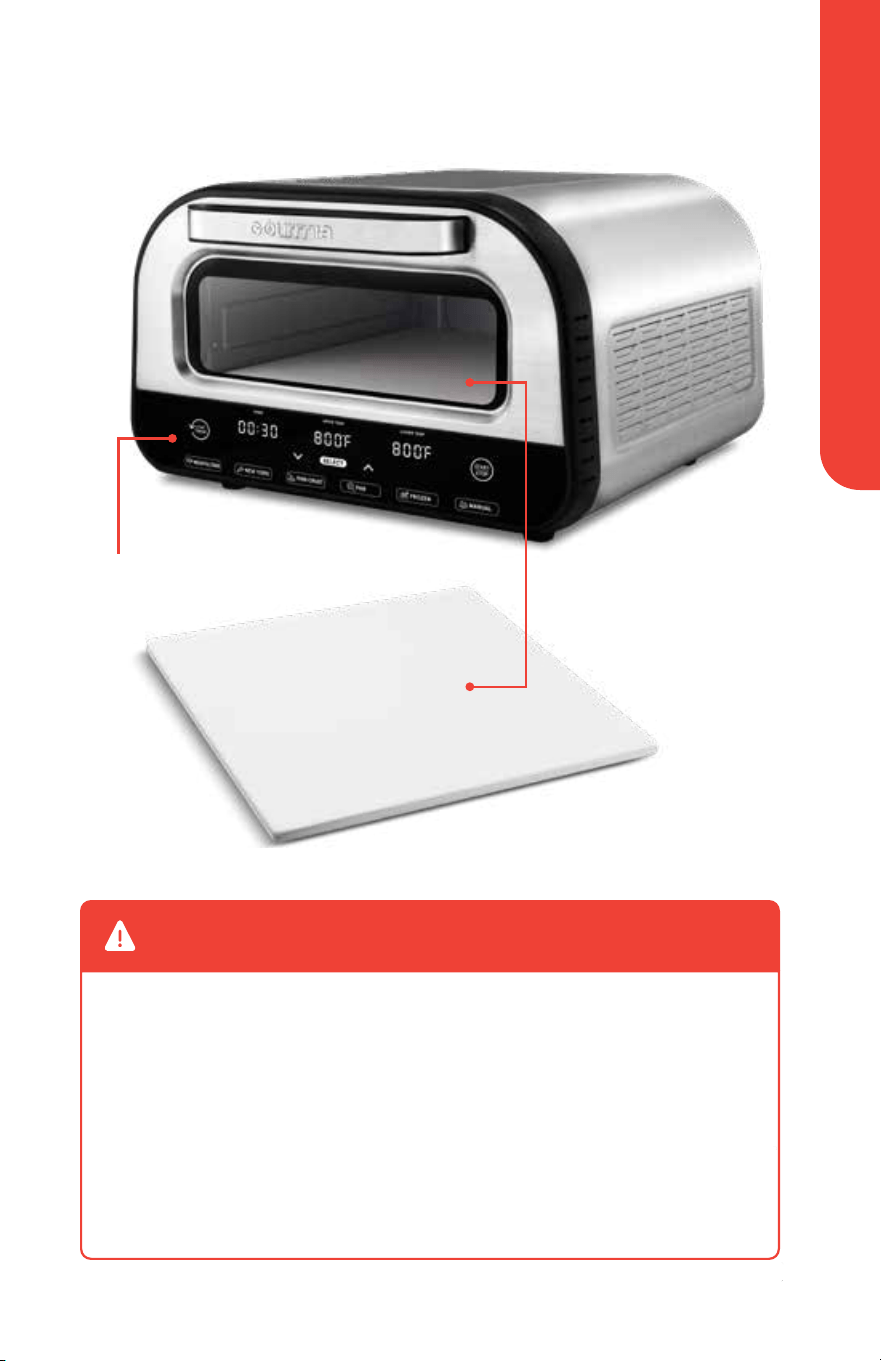
Know Your Oven
NOTE: Always preheat the oven with the pizza stone in place.
Pizza Stone
Control Panel / Displays
Know Your Oven
For customer service visit www.gourmia.com or call 888.552.0033
8
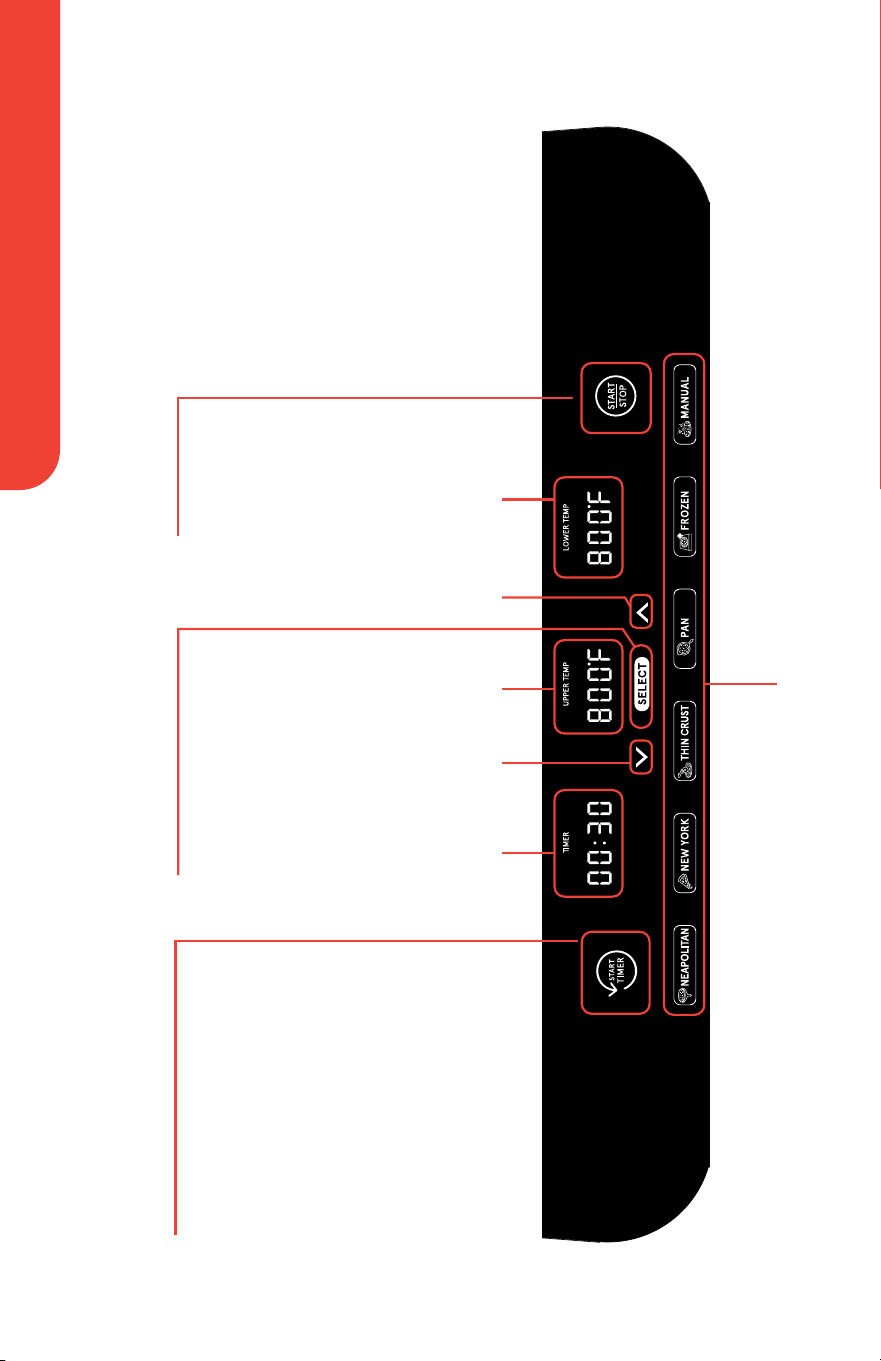
Control Panel / Display
Pizza–Style Presets
START TIMER SELECT
Tapping START TIMER will not
shut off the oven. To shut off the
oven, you must tap START / STOP.
The START TIMER button only
starts the countdown timer.
When the oven is finished
preheating and ready for pizza,
START TIMER will pulse on the
control panel.
Note: To toggle between
displaying temperature in
Fahrenheit and Celsius,
press and hold SELECT.
Countdown
Timer
Upper Temp
Down
Arrow
Up
Arrow
Lower Temp
START / STOP

Before First Use
9User Manual | Pizzeria Indoor Pizza Oven | GPM1260
Before First Use
1. Remove all packaging, stickers, labels, and tape from the oven. Safely
discard.
2. Gently wipe the surface of the pizza stone with a damp cloth. Dry
thoroughly.
3. Wipe the oven's interior with a soft, damp sponge. Dry thoroughly.
4. Place the oven on a dry, stable, level, and heat-resistant surface.
5. Plug the oven into a power outlet. The oven will beep, and On (
On) will
appear on the display
It is necessary to run the oven empty for 20 minutes to remove any
protective substances from the heating elements.
6. To insert the pizza stone, first raise and insert the pizza stone into the
center of the oven, then lower the pizza stone down on the bottom of the
oven. Do not insert the pizza stone by pushing or sliding the pizza stone
against the bottom of the oven to avoid scraping against the temperature
sensor sticking up in the middle of the oven.
7. Tap MANUAL.
8. Tap SELECT, the countdown timer will blink. Press the up arrow to
increase the countdown timer to 20 minutes. Tap SELECT to switch to
adjusting upper temp Upper temp will blink.
9. Press the up arrow to increase upper temp to 800°F. Tap SELECT to
confirm and switch to adjusting lower temp Lower temp will blink.
10. Press the up arrow to increase the lower temp to to 800°F. The setting will
be confirmed when the lower temp stops blinking.
11. Tap START / STOP. The oven will begin preheating, and Preheat (
Pre
Heat
) will appear on the display. The oven will preheat for 20-30 minutes.
12. When the oven is finished preheating, START TIMER will pulse on the
control panel. Tap START TIMER to start the countdown timer.
13. After 20 minutes, the oven will beep, and the display will show
0000
14. Tap START / STOP to stop cooking.
Warning: The oven will not shut off at the end of the cooking cycle. To
stop cooking, tap START / STOP
Note: Leave the oven plugged in for 20-30 minutes to ensure proper
cooling of the oven and electronics. The oven is now ready for use.
Using Your Oven
For customer service visit www.gourmia.com or call 888.552.0033
10
Using Your Oven
1. To begin, tap a pizza-style preset. The displays will show the preset’s
default countdown time, upper temp, and lower temp
Note: All pizza styles benefit from different levels of upper and lower
temperature. See the Pizza-Style Presets Chart on page 13 for each pizza
style's default upper temp, lower temp, and countdown time
2. Tap SELECT, the countdown time will blink. Press the up and down arrows
to adjust the countdown timer. Tap SELECT to switch to adjusting upper
temp Upper temp will blink.
3. Press the up and down arrows to adjust upper temp. Tap SELECT to
confirm and switch to adjusting lower temp Lower temp will blink.
4. Press the up and down arrows to adjust lower temp. The setting will be
confirmed when the lower temp stops blinking.
Warning: The oven will not shut off at the end of the cooking cycle. To
stop cooking, tap START / STOP.
Note: To cook without a timer, set the cooking timer to 00:00.
5. Tap START / STOP. The oven will begin preheating, and Preheat (
Pre
Heat
) will appear on the display. Depending on the temperature needed,
the oven will preheat for 20-30 minutes.
6. 10 minutes before the oven is preheated, shape your dough on a clean
work surface. See How To Shape Pizza Dough on page 11 for more details.
7. When the oven is finished preheating, START TIMER will pulse on the
control panel. Place dough onto the pizza peel, add sauce and toppings,
transfer your pizza from the pizza peel to the pizza stone, and close the
door. See How to Launch & Remove Pizza on page 11 for more details.
Note: If left untouched, the oven will maintain the set temperatures for 1
hour, then, as a safety measure, it will automatically shut off.
8. To start the countdown timer, tap START TIMER. During the countdown,
tap the up arrow to increase time. Tap START TIMER once to pause the
timer. Tap START TIMER again to resume the timer.
Note: It is essential to stay close to and monitor the oven when cooking
pizza at high temperatures with short cook times, as food can quickly
become overdone.
Note: Halfway through cooking, rotate pizza for even results.

Using Your Oven
11User Manual | Pizzeria Indoor Pizza Oven | GPM1260
How To Shape Pizza Dough
For different pizza-style dough recipes, see Recipes on pages 16-19.
1. Let the dough ball rest at room temperature for at least 1 hour before
shaping. See Recipes on pages 16-19 for the amount of dough for
different pizza styles.
2. While the dough is resting, begin preheating the oven. 10 minutes before
the oven is finished preheating, flour a clean work surface and place the
dough ball in the center.
3. Gently press out dough—don’t pull—from the center outward into a
6-inch circle; gently stretch the dough into a 10–12-inch circle.
Note: Dough can be hard to shape if it has not rested long enough. If the
dough won't stretch, let it rest for another 15-30 minutes, then try again.
How To Launch & Remove Pizza
For different pizza-style sauce recipes, see Recipes on page 15. Wait for the
oven to finish preheating, then begin topping your pizza:
1. Lightly flour a cool pizza peel, then place stretched dough onto the peel.
Note: Be sure to use a cool and clean pizza peel; if the peel is hot, the
dough will stick to the peel and be difficult to slide onto the pizza stone.
9. At the end of the cooking cycle, the oven will beep, and the display will
show
0000
Warning: The oven will not shut off at the end of the cooking cycle. To
stop cooking, tap START / STOP
10. Open the door and carefully remove your pizza.
Note: When cooking multiple pizzas, we recommend allowing the oven
to heat up again between pizzas, which can take 5-10 minutes. Assemble
your next pizza while waiting. As the oven temperature increases, Heat Up
(
HEAT UP) will appear on the display. When the oven is again at the correct
temperature, Heat Up (
HEAT UP) will disappear from the display, and
START TIMER will pulse on the control panel.
Note: After using the oven, leave it plugged in for 20-30 minutes to
ensure proper cooling of the oven and electronics.
DO NOT remove pizza stone until it cools down.

For customer service visit www.gourmia.com or call 888.552.0033
12
Pizza Tips
Pizza Tips
Store-Bought Dough: 16 oz of dough will yield approximately 2 Neapolitan
pizzas, 2 New York pizzas, 2 8x8” pan pizzas, or 3 thin-crust pizzas.
Dusting Flour on the pizza peel: Semolina is best because it helps the
pizza slide off the peel more easily, but all-purpose flour, or the flour you
used to make your dough, will also work.
Cheese: Fresh mozzarella has a high water content and should be
drained on paper towels for a few minutes and patted dry before use.
Pre-shredded cheese contains additives to keep the cheese from sticking
together; this keeps the cheese from melting correctly. It’s always best to
shred the cheese yourself. Larger shreds will melt more slowly and give the
pizza crust more time to brown.
Toppings: Adding too much sauce and toppings will make it difficult for
the pizza to cook correctly and much harder to slide off the peel. Some
toppings, like raw meat or eggplant, should be cooked first. Delicate
ingredients like arugula, basil leaves, or prosciutto should be added right
when you take the pizza out of the oven. This will allow them to warm up
and become aromatic without overcooking.
More Food You Can Cook in the Pizza Oven: Stuffed pizza, focaccia,
flatbreads, round artisanal breads, roasted vegetables, roasted meats, pies,
crackers, bagels, and calzones
Warning: Do not over-flour the peel. When cooking your pizza, the excess
flour will burn on the pizza stone and increase the chances of a fire
occurring in the oven after you remove your pizza.
2. Quickly begin topping your pizza. Work swiftly but carefully! If done slowly,
the dough will stick to the peel and be difficult to slide onto the pizza
stone. We recommend leaving your pizza on the peel for no more than 2
minutes.
Note: Do not weigh down your dough with too much sauce or cheese. The
dough will stick to the peel and be difficult to slide onto the pizza stone.
3. Before sliding your pizza onto the pizza stone, shake the peel slightly to
ensure the dough can move. If any dough is stuck to the peel, gently lift it
and sprinkle the area with additional flour.
4. Open the oven door and position the peel in the back. Raise the handle so
the peel is tilted forward, and jiggle the peel back and forth so the pizza tip
touches the pizza stone. Continue jiggling the peel out of the oven until
the whole pizza rests on the pizza stone. Close the door.
5. When the pizza is done, slide the peel under the pizza, lift the pizza, and
carefully remove it from the oven.
13User Manual | Pizzeria Indoor Pizza Oven | GPM1260
WARNING:
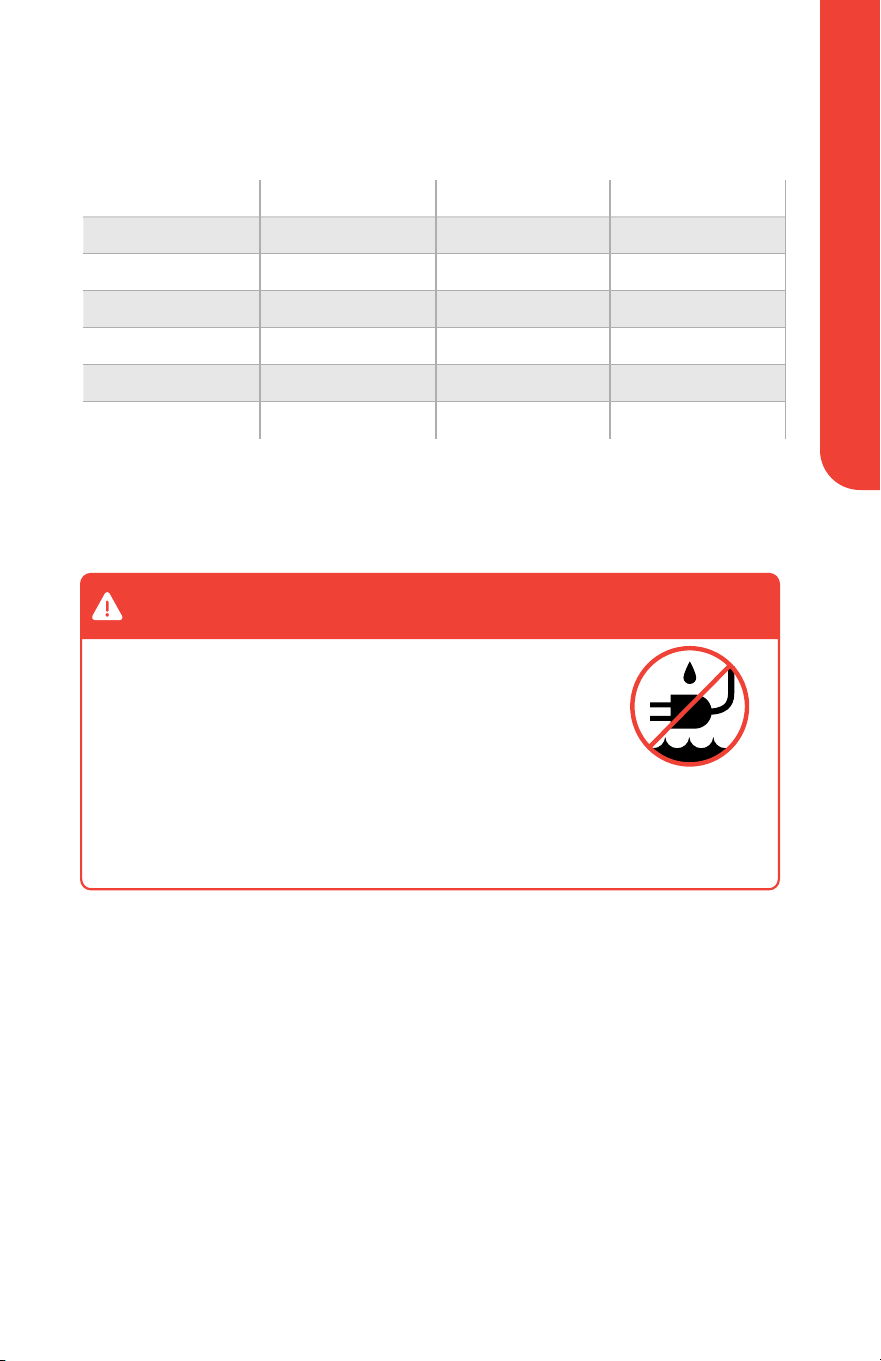
Pizza-Style Presets Chart
Pizza–Style Preset Countdown Time Upper Temp Lower Temp
Neapolitan 2 min 750˚F 750˚F
New York 6 min 550˚F 625˚F
Thin Crust 6 min 525˚F 625˚F
Pan 7 min 475˚F 600˚F
Frozen 12 min 425˚F 475˚F
Manual 5 min 500˚F 500˚F
Pizza-Style Presets Chart
NEVER immerse cord, plug, or oven in water or any
other liquid.
Before removing the pizza stone or cleaning any part
of the oven, unplug the appliance and ensure the
exterior and interior of the oven, and the pizza so are
completely cool.
Do not use metal kitchen utensils or abrasive cleaning
material to clean the unit or the accessories.
Cleaning and Maintenance
Cleaning
• To clean the oven's exterior, use a soft, damp cloth. Dry thoroughly.
• To clean the interior walls of the oven, use a soft, damp cloth and mild
liquid soap. Dry thoroughly.
• After every use, wipe the surface of the pizza stone with a soft, damp
sponge. Use a metal spatula or food scraper to remove any stuck-on food
debris from the pizza stone.
Note: The pizza stone cannot be soaked in water or put in a dishwasher;
the pizza stone can become damaged or cracked if wet and heated.

Troubleshooting
For customer service visit www.gourmia.com or call 888.552.0033
14
Troubleshooting
Problem Solution
START TIMER disappeared
from the control panel
When the oven is preheating, START TIMER will
disappear from the control panel; wait until it
reappears and pulses on the control panel, then
launch your pizza.
There is a noise coming from
the oven after it’s turned off
After cooking, the fan stays on to ensure proper
cooling of the oven and electronics. Do not unplug
the oven until the fan turns off.
Smoke is coming out of the
oven.
Due to the extreme temperatures, a small amount of
smoke is normal during cooking. To reduce smoke,
use less flour on the peel.
There’s a food fire in the
oven.
Stay calm. If the door is open, close it and wait 10-20
seconds for the fire to self-extinguish; if it doesn’t,
unplug the oven and keep the door closed until the
fire is out.
For Customer Service, Questions, or Comments
Visit gourmia.com
Email [email protected]
Call 888 552 0033
Mon-Thu 9:00 a.m. to 6:00 p.m. Et
Fri 9:00 a.m. to 3:00 p.m. Et
Languages: English, Spanish, French
Storage
• Unplug the appliance and let it cool down.
• Make sure all parts are clean and dry.
• Store the appliance in a clean and dry place.
Environment
Do not discard the appliance with normal household waste at the end of its
life; instead, hand it in at an official collection point for recycling. Doing so will
help to preserve the environment.
Guarantee and Service
If you need service or information or if you have a problem, please visit
www.gourmia.com or contact your distributor.

15User Manual | Pizzeria Indoor Pizza Oven | GPM1260
Makes 3 ½ cups, Approximately 4-6 Pizzas
Pizzeria Style
Pizza Sauce
Fresh
Pizza Sauce
1 28 oz. can crushed tomatoes
2 large garlic cloves, crushed or finely
chopped
2 tablespoons extra virgin olive oil
1 tablespoon Italian seasoning
½ teaspoon Diamond Crystal Kosher
Salt or ¼ teaspoon Morton’s Kosher
Salt or ¼ teaspoon table salt
½ teaspoon onion powder
¼ teaspoon sugar (optional)
1 28 oz. can whole plum tomatoes,
well-drained
8-10 fresh basil leaves, torn by hand
into pieces
1 tablespoon extra-virgin olive oil
½ teaspoon Diamond Crystal Kosher
Salt or ¼ teaspoon Morton’s Kosher
Salt or ¼ teaspoon table salt.
1. Add olive oil to a saucepan over medium
heat
2. When oil is warm, add garlic and sauté
for 1 minute
3. Add remaining ingredients—and stir
well to combine
4. Reduce heat to low and simmer,
partially covered, for 30 minutes
5. Cool to room temperature before using
1. Place tomatoes in a large bowl and
gently crush them by hand into large
pieces
2. Stir in the remaining ingredients
Recipes
Makes 2 ½ Cups, Approximately 4-6 Pizzas

For customer service visit www.gourmia.com or call 888.552.0033
16
Makes 4 Pizzas, Approximately 10" Each
RISE TIME: Overnight
Recipes
Neapolitan
Pizza Dough
4 cups 00 flour
4 teaspoons Diamond Crystal Kosher
Salt or 2 teaspoons Morton’s Kosher
Salt or 2 teaspoons table salt
2 teaspoons instant yeast
1 ½ cups room temperature water*
*Additional water may be needed to
form a cohesive dough
1. Combine flour, salt, and yeast in a large
bowl and whisk together
2. Add water and incorporate into flour until
no dry flour remains
3. Cover bowl tightly with plastic wrap and
allow to rise at room temperature for 8
hours
4. Turn dough out onto a lightly floured
surface and divide into 4 even balls (8oz.
each)
5. Place each dough ball into a zip bag
6. Place in refrigerator and allow to rest
overnight
7. Remove from the refrigerator, and allow
dough to rise at room temperature for at
least 2 hours before using

17User Manual | Pizzeria Indoor Pizza Oven | GPM1260
Makes 4 Pizzas, Approximately 12" Each
RISE TIME: At Least 2 Hours or Overnight
New York–Style
Pizza Dough
4 cups bread flour
2 teaspoons sugar
4 teaspoons Diamond Crystal Kosher
Salt or 2 teaspoons Morton’s Kosher
Salt or 2 teaspoons table salt
2 teaspoons instant yeast
3 tablespoons olive
1 ½ cups room temperature water*
*Additional water may be needed to
form a cohesive dough
1. Combine flour, sugar, salt, and yeast in stand
mixer bowl fitted with a dough hook
2. Run mixer on low speed for 30 seconds to
mix dry ingredients
3. With mixer still on low speed, slowly add
water and then olive oil
4. When all liquid is fully absorbed, raise speed
to high and continue mixing until dough forms a
ball and pulls away from the sides of the bowl
5. Place dough in a clean, lightly oiled bowl and
cover with plastic wrap
6. Allow dough to rest at room temperature for
at least 2 hours or overnight in the refrigerator
7. Turn dough out onto a lightly floured surface
and divide into 4 even balls (8oz. each)
8. Place each dough ball into a zip bag and allow
to rest for at least 1 hour before using (2 hours if
it was refrigerated)
Recipes

Recipes
For customer service visit www.gourmia.com or call 888.552.0033
18
Makes 2 Pizzas, 8" x 8" Pan
RISE TIME: At Least 2 Hours or Overnight
Recipes
Sicilian
Pizza Dough
2 cups bread flour
1 teaspoon sugar
2 teaspoons Diamond Crystal Kosher
Salt or 1 teaspoon Morton’s Kosher Salt
or 1 teaspoon table salt
1 teaspoon instant yeast
2 tablespoons olive oil
¾ cup room temperature water*
*Additional water may be needed to
form a cohesive dough
1. Combine flour, sugar, salt, and yeast in stand
mixer bowl fitted with a dough hook
2. Run mixer on low speed for 30 seconds to mix
dry ingredients
3. With mixer still on low speed, slowly add water
and then olive oil
4. When all liquid is fully absorbed, raise speed to
high and continue mixing until dough forms a ball
and pulls away from the sides of the bowl
5. Place dough into a clean, lightly oiled bowl and
cover with plastic wrap
6. Allow dough to rest at room temperature for at
least 2 hours or overnight in the refrigerator
7. Turn dough out onto a lightly floured surface
and divide into 2 even balls (8 oz. each)
8. Place dough into a well-oiled 8x8 inch square
pan, stretching dough out to fill the pan
9. Allow to rest for at least 1 hour before using (2
hours if it was refrigerated)

Recipes
19User Manual | Pizzeria Indoor Pizza Oven | GPM1260
Makes 3 Pizzas, Approximately 12" Each
RISE TIME: At Least 2 Hours or Overnight
Thin Crust
Pizza Dough
3 cups bread flour
3 teaspoons Diamond Crystal Kosher
Salt or 1 ½ teaspoons Morton’s Kosher
Salt or 1 ½ teaspoons table salt
1 ½ teaspoons instant yeast
1 teaspoon sugar
2 teaspoons olive oil
1 cup room temperature water*
*Additional water may be needed to
form a cohesive dough
1. Combine flour, sugar, salt, and yeast in stand
mixer bowl fitted with a dough hook
2. Run mixer on low speed for 30 seconds to
mix dry ingredients
3. With mixer still on low speed, slowly add
water and then olive oil
4. When all liquid is fully absorbed, raise speed
to high and continue mixing until dough forms a
ball and pulls away from the sides of the bowl
5. Place dough into a clean, lightly oiled bowl
and cover with plastic wrap
6. Allow dough to rest at room temperature for
at least 2 hours or overnight in the refrigerator
7. Turn dough out onto lightly floured surface
and divide into 3 even balls (approximately 5oz.
each)
8. Place each dough ball into a zip bag and allow
to rest for at least 1 hour before using (2 hours if
it was refrigerated)
Recipes

We’d love to hear from you!
888.552.0033
Warranty and Service
This Limited Warranty is for one full year from the date of purchase and
requires proof of purchase from an authorized seller. It is applicable to the
original purchaser only and is not transferable to a third party user. Repair or
replacement of defective parts is solely at Gourmia’s discretion. In the event
that repair isn’t possible, Gourmia will replace the product/part. If product
repair/replacement won’t suffice, Gourmia has the option of refunding the cash
value of the product or component returned.
Product defects not covered under the Warranty provisions include normal
wear and damage incurred from use or accidental negligence, misuse of
instruction specifications, or repair by unauthorized parties. Gourmia is
not liable for any incidental or consequential damages incurred by such
circumstances.
Only valid within the United States.
Register your product at
www.gourmia.com/warranty