
* ¥ 2 Z0JIRUSHI S IM )
MICOM WATER BOILER & WARMER
OPERATING INSTRUCTIONS
CD-WHC40
I
MPORTANT SAFEGUARDS
2................................................
SPECIFICATIONS 5..................................................................
PARTS NAMES AND FUNCTIONS
6
.....................................
BOIL
MODE 8............................................................................
DISPENSE HOT WATER 10......................................................
DISPOSE WATER 0..................................................................1
REBOIL MODE
1.......................................................................1
AUTOMATIC SHUT-OFF FUNCTION 11..................................
HOW TO SET THE KEEP WARM MODE 12............................
QUICK TEMP MODE 4.............................................................1
ENERGY-SAVING TIMER FUNCTION ..14..............................
CAFÉ DRIP DISPENSING MODE 15........................................
HOW TO CHANGE THE INFORMATION SOUND
15
.............
CL
EANING AND MAINTENANCE 16.......................................
•HOW TO REPLACE THE INNER LID GASKET ..16.........
HOW TO PERFORM CITRIC ACID CLEANING 17
................
R
EPLACEMENT PARTS 17.......................................................
Q&AON PRODUCT USE 8......................................................1
TROUBLESHOOTING GUIDE 18..............................................
ZOJIRUSHI CORPORATION
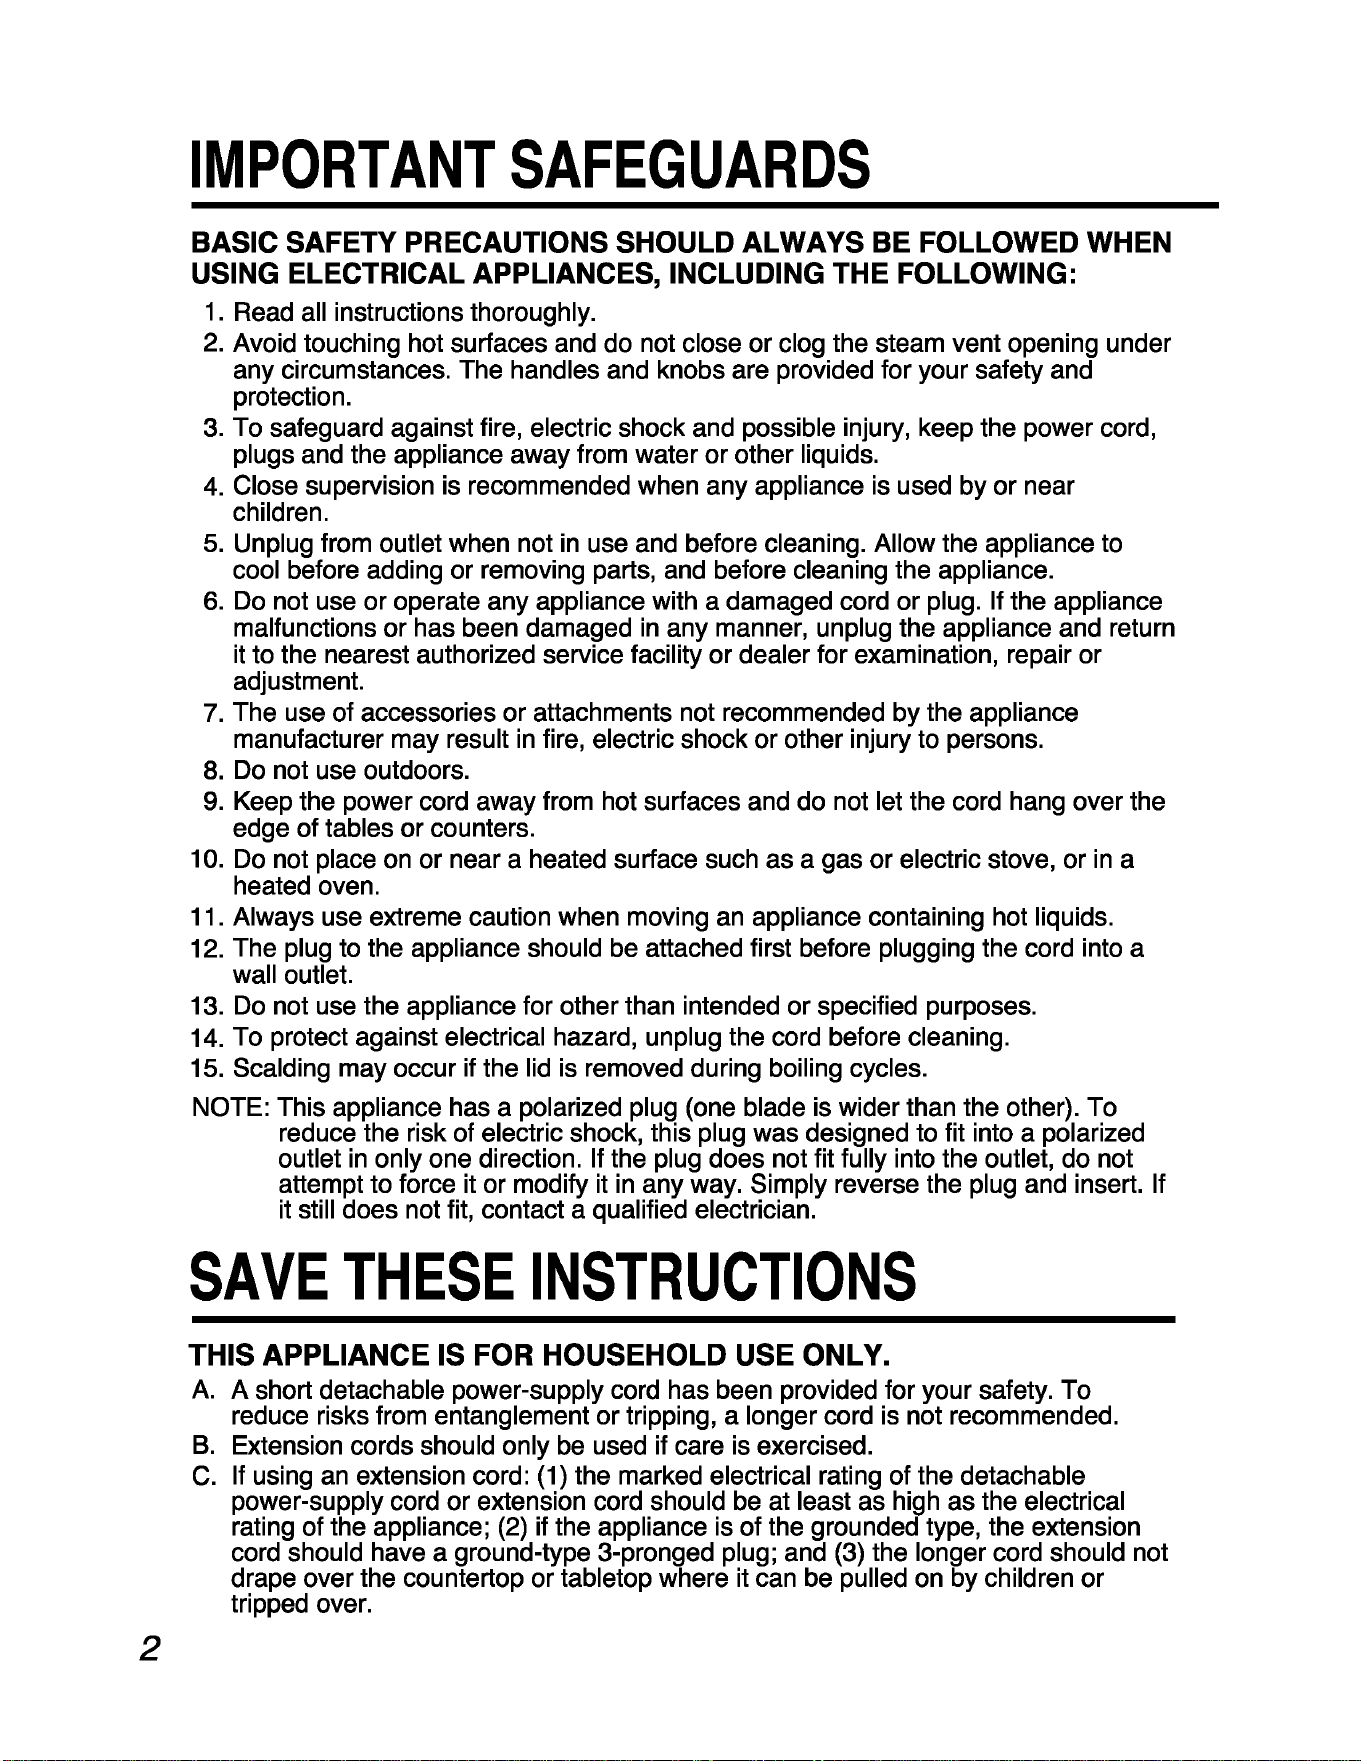
IMPORTANT SAFEGUARDS
BASIC SAFETY PRECAUTIONS SHOULD ALWAYS BE FOLLOWED WHEN
USING ELECTRICAL APPLIANCES, INCLUDING THE FOLLOWING:
1.
Read all instructions thoroughly.
2. Avoid touching hot surfaces and do not close or clog the steam vent opening under
any circumstances. The handles and knobs are provided for your safety and
protection.
3. To safeguard against fire, electric shock and possible injury, keep the power cord,
plugs and the appliance away from water or other liquids.
4. Close supervision is recommended when any appliance is used by or near
children.
5. Unplug from outlet when not in use and before cleaning. Allow the appliance to
cool before adding or removing parts, and before cleaning the appliance.
6. Do not use or operate any appliance with a damaged cord or plug. If the appliance
malfunctions or has been damaged in any manner, unplug the appliance and return
it to the nearest authorized service facility or dealer for examination, repair or
adjustment.
7. The use of accessories or attachments not recommended by the appliance
manufacturer may result in fire, electric shock or other injury to persons.
8. Do not use outdoors.
9. Keep the power cord away from hot surfaces and do not let the cord hang over the
edge of tables or counters.
10. Do not place on or near a heated surface such as a gas or electric stove, or in a
heated oven.
11. Always use extreme caution when moving an appliance containing hot liquids.
12. The plug to the appliance should be attached first before plugging the cord into a
wall outlet.
13. Do not use the appliance for other than intended or specified purposes.
14. To protect against electrical hazard, unplug the cord before cleaning.
15. Scalding may occur if the lid is removed during boiling cycles.
NOTE: This appliance has a polarized plug (one blade is wider than the other). To
reduce the risk of electric shock, this plug was designed to fit into a polarized
outlet in only one direction. If the plug does not fit fully into the outlet, do not
attempt to force it or modify it in any way. Simply reverse the plug and insert. I
it still does not fit, contact a qualified electrician.
f
SAVE THESE INSTRUCTIONS
_________
THIS APPLIANCE IS FOR HOUSEHOLD USE ONLY.
A. A short detachable power-supply cord has been provided for your safety. To
reduce risks from entanglement or tripping, a longer cord is not recommended.
B. Extension cords should only be used if care is exercised.
C. If using an extension cord: (1) the marked electrical rating of the detachable
power-supply cord or extension cord should be at least as high as the electrical
rating of the appliance; (2) if the appliance is of the grounded type, the extension
cord should have a ground-type 3-pronged plug; and (3) the longer cord should not
drape over the countertop or tabletop where it can be pulled on by children or
tripped over.
2

IMPORTANT SAFEGUARDS (cont.)
Before use
These WARNINGS and CAUTIONS are intended to protect you and others from personal injury and
household damage. To ensure safe operation, please follow carefully.
W ARNINGS
Do not modify the product. Only a repair technician
may disassemble or repair this unit.
■ Attempting to do so may cause fire, electric shock or
injury. Make any repair inquiries to Zojirushi Customer
Service.
Do not immerse the product in water or splash it
with water, and do not put it on a wet surface such
as a sink.
* Doing so may cause short circuit or electric shock.
Do not allow liquid to come into contact with the
Receptacle or Power Cord.
* Doing so may cause short circuit or electric shock.
Do not plug or unplug the Power Cord if your
hands are wet.
* Doing so may cause electric shock or injury.
Do not touch the Steam Vent or bring your hands
or face near the Steam Vent.
* Doing so may cause burns or scalding. Take special
precautions with children and infants.
Do not cover the Steam Vent with anything such
as a dishcloth.
* Hot water may spill out, resulting in scalds. It may also
cause deformation or discoloration of the Upper Lid or
breakdown of the product.
Do not allow children to use the product
unsupervised. Keep it out of the reach of infants.
* Children are at risk of burns, electric shock or injury.
Do not fill over the Maximum Water Level Line.
* Overfilling may cause hot water to spill out, resulting in
scalds.
Always remove the Upper Lid before disposing
hot water.
•The Upper Lid may fall off and cause hot water to splash,
resulting in scalds.
Do not tilt or shake the product or carry in your
arms. Do not move it or drain hot water by holding
the Upper Lid.
* Doing so may result in scalding by hot water spilling out
from the Spout or Steam Vent, even if the Automatic
Dispense Lock is on. Always use the handle when
carrying.
Do not tilt the product or tip it over.
* Hot water may spill from the Spout or Steam Vent,
even if the Automatic Dispense Lock is on.
Do not slam the Upper Lid when closing.
* Hot water may dispense or spill out, resulting in scalds.
Do not use the product if the Power Plug or Power
Cord is damaged or if the Power Plug is loosely
inserted into the electrical outlet.
■ Doing so may cause electric shock, short circuit or fire.
Close the Upper Lid securely.
• Hot water may spill out when the product is overturned,
resulting in scalds.
Do not remove the Upper Lid while boiling.
Do not damage the Power Cord.
• Do not bend, pull, twist, fold, or attempt to modify the
Power Cord. Do not place it on or near high
temperature surfaces or appliances, under heavy items
or between objects. A damaged Power Cord can cause
fire or electric shock.
Do not use the product as a cooler or place ice
inside of it.
• Doing so may cause condensation, resulting in electric
shock or breakdown of the product.
Do not allow the end of the Appliance Plug to
become soiled with dust or come into contact with
any metal objects.
• Doing so may cause electric shock, short circuit or fire.
Do not allow infants or children to put the
Appliance Plug in their mouth.
• Doing so may cause electric shock or injury. Take
special precautions with children and infants.
Insert the Power Plug completely and securely
into the electrical outlet.
• A loosely inserted Power Plug may cause electric
shock, short circuit, smoke or fire.
Use only an electrical outlet rated at 15 amperes
minimum, and do not plug other devices into the
same outlet.
• Plugging other devices into the same outlet may cause
the electrical outlet to overheat, resulting in fire.
If the blades or surface of the Power Plug become
soiled, wipe them clean.
• A dirty Power Plug may cause fire.
Do not use a power source other than 120 V AC.
• Use of any other power supply voltage may cause fire
or electric shock.
Do not boil anything other than water.
■ Attempting to boil, cook, or heat up the following items
may cause bubbling or boiling over, which may cause
scalding. Doing so may also cause clogging of the
water route or Electric Pump, or scorching or corrosion
of the Inner Container.
• Milk, sake, soup, charcoal, tea bags or tea leaves.
• Instant food.
• Food and sauce pouches or foods in plastic bags.
Replace the Inner Lid Gasket if it hardens, changes
shape, turns white, or otherwise becomes worn out.
• Hot water may spill out when the product is tilted or
tipped over accidentally, and may cause scalding.
Steam may also leak out from the gap and cause burns
or product failures.
iThe illustrations used in these Operating Instructions may vary from the actual product you have purchased.

IMPORTANT SAFEGUARDS (cont.)
This product is not intended for
use by persons (including
children) with reduced physical,
sensory or mental capabilities, or
lack of experience and
knowledge, unless they have
been given supervision or
instruction concerning use of the
product by a person responsible
for their safety. Children should
be supervised to ensure that they
do not play with the product.
Stop using immediately if you notice any of the following symptoms
indicating a malfunction or breakdown.
• Continued use of the product may cause smoke, fire, electric shocks or injury.
• The Power Plug or Power Cord has become very hot.
• The Power Cord is damaged or the electricity turns on and off when touched.
■ The Body is deformed or unusually hot.
■ Smoke is arising from the product or there is a burning smell.
• Some parts of the product is cracked, loose or unstable.
• The product emits steam for at least 10 minutes continuously and does not
turn to Keep Warm mode.
• Water leaks from the Body.
If any of the above occurs, unplug the product immediately and return to
Zojirushi Customer Service for check-ups and/or repairs.
CAUTIONS
Always use caution when opening the Upper Lid
and avoid skin contact with steam.
• Loose water or steam may escape upon opening the
Upper Lid and cause scalds.
Do not touch hot surfaces during or for a short
period of time after use.
• Touching hot surfaces may cause burns. Be especially
careful with metal parts such as the Inner Lid and the
Inner Container.
Please allow the product to cool down before
cleaning.
• Touching hot surfaces may cause burns.
Do not use the product near walls or furniture.
• Steam or heat may damage, discolor or deform walls or
furniture.
Do not swivel or move the product while
dispensing water.
• Hot water may splash out, resulting in scalds.
Do not place or use the product on unstable surfaces.
• Doing so may cause scalds or injuries.
Do not use on surfaces that are sensitive to heat.
• Doing so may cause fire.
Do not attempt to dispense hot water while it is
boiling.
• Hot water can spurt out, resulting in scalds.
Do not use other Power Cords than the one provided.
Do not use the Power Cord for other appliances.
Do not use the Power Cord for overseas models.
• Doing so may cause malfunction or fire.
Do not place the product over direct flame (such
as a gas stove top), or on top of electric or
induction heating (IH) cookers.
• Doing so may cause fire, breakdown or damage of the
product.
Unplug the Power Plug from the outlet when the
product is not in use.
• Leaving the Power Plug in an outlet may cause the
insulation to become damaged, resulting in electric
shock, short circuit or fire, or result in injuries or scalds.
Do not touch the Lid Lock when carrying the product.
• Doing so may cause the Upper Lid to open, resulting in
injuries or scalds.
Always unplug the product by holding the Power
Plug, not by pulling the Power Cord.
• Pulling the Power Cord to unplug the product may
cause electric shock, short circuit or fire.
If the Power Cord is damaged, it must be replaced
by an appropriate cord or assembly made
available by the manufacturer or its service agent.
IMPORTANT
Do not operate the product when it is empty.
• Doing so may burn or damage the product.
Avoid rough handling, dropping or bumping the
product.
• Doing so may cause damage or cease operation of the
product.
Avoid letting steam make contact with cabinets and
walls when using near or under a kitchen shelf.
• Doing so may cause discoloration or deformation.
Allow the product to dry completely when storing
the product for a long period of time where it may
freeze.
• If water left inside freeze, it may cause breakdown or
malfunction.
Avoid using the product near a radio, TV, computer, etc.
•The product may cause interference with certain electronics.
Do not drag the product over any surface while
attempting to move.
• Doing so may cause damage to surfaces such as
countertops.
Do not allow hot water to come into contact with
the Control Panel or the Water Level Gauge.
• Doing so may cause breakdown of the product.
Do not use the product where its steam may come
into contact with other electrical appliances.
• The steam may cause fire, malfunction, discoloration or
deformation to other electrical appliances.
This appliance is intended to be used in
household and similar applications such as;
• Staff kitchen areas in shops, offices and other working environments;
• Environments comparable to residential living rooms and kitchens;
iKThis appliance is not intended for use by many unspecified
people for a long period of time.

SPECIFICATIONS
r Model No.
CD-WHC40 ^
Capacity
135 oz. (4.0 liters)
Rating
AC 120 V 60 Hz
Electric Consumption 700 W
Average Power
Consumption
during Keep
Warm
208°F (98°C)
Approx. 48 W
195°F (90°C) Approx. 40 W
175°F (80°C) Approx. 31 W
160°F (70°C) Approx. 26 W
1 Length of the Power Cord
2' 11" (0.9 m)
External
Dimensions
(approx. inches)
8-K(W)x11-K(D)x13-^(H)
(approx. cm)
21 (W) x 28.5 (D) x 34 (H)
^Weight (including t
lie Power Cord) Approx. 6 lbs. (2.5 kg) j
•The average Keep Warm electric power consumption is for one hour, provided that the Inner
Container is full and the room temperature is approximately 73°F (23°C).
•The height refers to the product when the handle is down.
•In high altitudes or severely cold areas, the product may not perform as specified. Avoid using the
product in such areas or in other extreme conditions.
•This product is not suitable for use in countries or regions with different power supply voltages or
frequencies.
5

PARTS NAMES AND FUNCTIONS
The rattling or metallic noise
you may hear when opening or
closing the Upper Lid or during
boiling is normal, (see pg.19)
Lid Lock
Steam Vent
•Exercise care during the
boiling process as steam
emitting from the Steam
Vent is very hot.
Inner Lid Gasket
(Consumable Part)
•If the Inner Lid Gasket hardens,
changes shape, turns white, or
otherwise becomes worn out, please
replace it with a new one. (Separate
charge required.) (see pg.16)
Not doing so may cause hot water to
leak when the product is tilted or
tipped over, resulting in scalding.
Steam leaking from the gap may
also cause burns or product failures.
Water Removal Area
•Drain water here.
Inner Container
Control Panel
Spout
•Hot water dispenses from here.
Water Level Gauge
REFILL Line
•Fill water above the line.
Filter
•For care and use instructions,
see pg.16.
Hinge
Maximum Water
Level Line
Handle
Receptacle
•Appliance Plug
inserts here.
Swivel Base
•D o not let the Power Cord
wrap around the Main Body
when turning.
Twist Tie
•Please remove the twist tie holding the Power Cord before use.
•D o not use the Power Cord bundled up. Doing so may cause
the Power Cord to become excessively hot, resulting in
malfunction.
Appliance Plug
6

— — - — . _ _ _ f _ .
I f l i A l I B D l P a a N E L
«Press buttons down firmly.
*The Sound Signals and raised dot (• ) in the center of the
DISPENSE button is provided for those with visual impairment.
QUICK TEMP light
BOIL light
REBOIL/QUICK TEMP
button
_____
Starts the Reboil
mode, (see pg.11)
Sets the Quick
Temp mode.
(see pg.14)
Also used when
performing the Citric
Acid Cleaning (to
initiate cleaning, press
this button for more
than 3 seconds).
(see pg.17)
TEMP SET button
Sets the Keep Warm temperature
(see pg.12)
KEEP WARM light
Display
LCD display shows the water temperature and Timer settings.
NOTE: Illustration is for reference only. Actual display will not
show all functions simultaneously during use.
DISPENSE button
Press to dispense hot water, (see pg.10,15)
CAFÉ DRIP light
UNLOCK light
UNLOCK
button
This button must be
pressed to dispense hot
water, (see pg.10)
Press this button again
for Café Drip Dispensing
mode, (see pg.15)
Use this button when
changing the Information
Sound, (see pg.15)
ENERGY-SAVING
TIMER button
Use when setting the Energy-Saving
Timer function, (see pg.14)
How to Open/Close t he Upper Lid
To Open o Press the indented area of the
Lid Lock with your thumb.
© Pull the Lid Lock up with your
fingers to open the Upper Lid.
To Close Depress the Upper Lid until it
clicks shut.
V
How to Detach/Attach the Upper Lid
To Detach o Open the Upper Lid to about
a 45-degree angle.
© Push the Upper Lid Detach
button.
© Pull the Upper Lid forward
and up at an angle.
To Attach Push the Upper Lid back into

BOIL MODE
t
Open the Upper Lid and fill the
Inner Container with water using
a pitcher or other container.
r- When the Inner
▼ Container is empty.
I
Water
Level -
Gauge
To monitor the amount of
water you are filling, look at
the thickness of the stripes on
the Water Level Gauge.
The stripes on the
Water Level Gauge
appear thicker when
water is added.
•D o not fill the Inner
Container directly
from a water faucet
or place the product
on a wet surface
such as a sink.
(Exposing the
heating element
directly to water
may cause
malfunction.)
•Avoid splashing
water on the Body or
Control Panel. (May
cause malfunction.)
2 Close the Upper Lid and connect the Power Cord.
Close the Upper Lid
securely.
/ To ensure safe
operation while
boiling and to prevent
scalds if the product
is overturned.
Be sure to insert the
Power Cord securely.
Otherwise, may cause electric'
shock, short circuit, smoke or
fire.
It automatically starts the boiling
process.
The BOIL light turns on and the Display
shows the water temperature.
Below 170°F: Display shows the water
temperature in 10°F increments.
Above 175°F: Display shows M75J -*■ M80J
- T185J - T190J - T195J - T200J - T205J - T212J.
Do not allow the
end of the
Appliance Plug to
get soiled with dust
or come into contact
with metal objects
such as pins.
Turns on
208
(195)
175
4 m
* 1U
160 __J
f
>How to set the Quick
Temp mode: see pg. 14
J
8

■
•
Tempera
:ure
Convers on Guide
Fahrenheit (°F) Celsius (°C)
212
100
208 98
195 90
175 80
160 70
73 23
►Do not fill over the Maximum Water
Level Line. (Hot water may overflow
from the Steam Vent.)
►Do not fill the Inner Container with hot
water. (The Automatic Shut-Off function
may be activated.) (see pg.11)
►Do not fill the Inner Container with any
liquid other than water.
►Do not use water additives such as
charcoal for water purification or
mineral additives. (Small particles may
get clogged inside of the product.)
►If you wish to shorten the completion
time, add less water to the Inner
Container.
The first time
you use the product you
may notice the smell of
plastic. This is normal
and will gradually fade
using the product after a long period of storage:
Fill the Inner Container with water to the Maximum Water
Level Line ( a m ax ), and boil water as directed. Once it
reaches a boil, press the UNLOCK button, then press the
DISPENSE button to dispense about 34 oz. (1 liter) of hot
water in order to rinse the water route, and dispose the
remaining water. Fill with fresh water.
(Always remember to attach the Filter.)
When using mineral or Alkalized Ionic water:
When mineral or Alkalized Ionic water is used, a floating
residue may develop or a milky white substance may form
on the surface of the Inner Container. This is due to the
ingredients in the water and is harmless to your health.
Frequent cleaning is recommended.
When boiling has completed, a melody
sounds and it automatically switches
to 195°F Keep Warm mode.
__________
The BOIL light turns off, the Keep Warm light
turns on and "212" appears on the Display.
Turns off
Turns on
208
ÍI95I
175
J o
'C <c
160 J
Time required to boil water:
(At a room temperature of 73°F with the
Inner Container filled to the Maximum
Water Level Line with water temperature
at 73°F.)
£? Includes approx. 4 minutes to
Dechlorinate.
Length of time until the water
temperature reaches about 195°F:
(At a room temperature of 73°F with the
Inner Container filled to the Maximum
Water Level Line.)
•T he length of time for the water
temperature to reach 195°F will vary
depending on the temperature of the
room and water.
How to change the Information Sound
from a melody to a beep, (see pg. 15)
How to set the Keep Warm mode:
208°F Keep Warm Mode, (see pg.12)
175°F Keep Warm Mode, (see pg.12)
160°F Keep Warm Mode, (see pg.13)
Add water when the water level is
low during the Keep Warm mode.
(The product automatically begins
heating the water.) If the water level
is still not high enough, it will not
automatically switch to Boil. In this
case, press the REBOIL/QUICK
TEMP button to manually start the
process, (see pg.11)
'Please follow the instructions below
to prevent the risk of scalding:
Do not cover the Steam Vent with a
cloth.
Do not touch the Steam Vent or
bring your hands or face near the
Steam Vent.
Do not open the Upper Lid while
the BOIL light is on.
Do not dispense hot water while it
is boiling.
9

DISPENSE HOT WATER
The UNLOCK light turns on
and hot water can be
dispensed.
•DDoo nnoott u unnilo ck and press the
D
DI
I
S
S
P
P
E
E
N
N
S
S
I
E
button if the Inner
CCoonnttaaiinneerr is empty.
2 Press the
button to dispense hot water.
Do not swivel the product while dispensing water.
•Initially upon boiling or if it has been a while after dispensing, the
water may not be very hot. Please discard the first cup (of the hot
water).
•Do not attempt to dispense hot water while boiling.
•Water may not dispense smoothly for a short period of time after
boiling.
•Be careful as the Body heats up during the Boil and Keep Warm
modes.
DISPOSE WATER Dispose leftover water when the product is not in use.
and detach the Upper Lid.
When detaching the Upper Lid:
•Take precaution with the steam.
You may scald yourself.
_
2
Hold the product with both hands and dispose water where indicated
"EMPTY FROM HERE" on the wall of the Inner Container.
Hold the Handle
securely.
______
When disposing hot water:
•Take precaution with the
hot water and steam.
You may scald yourself.
•Take precaution as hot
water may drip from the
Spout, causing scalds.
10

DISPENSE HOT WATER (cont.)
________
T
u
rns off
-©
slow( UNLOCK'
10 seconds after dispensing,
the UNLOCK light turns off
and the Automatic Dispense
Lock is activated.
Automatic Dispense Lock
A safety function to prevent hot water
from dispensing if the DISPENSE
button is accidentally pressed.
•Even if no water is dispensed, the
Automatic Dispense Lock will be
activated after about 10 seconds.
Do not tilt or shake the
product after dispensing.
Hot water may drip from the
Spout, causing scalds.
This function is used when reboiling
water in the Keep Warm mode.
R
eboil mode
Press the
button.
T
urns on
208
I195I
175
.
iQC
' 1 Jljl
I
160
J
Short beep)
The BOIL light turns on when
th
e
boiling process begins.
Time required to
f
inis
h reboiling
(At a room temperature of
73
°F
/ 23°C with the Inner
Container filled to the
Maximum Water Level Line.)
208°F Keep Warm
M
od
e
Approx. 3-4 minutes
195°F Keep Warm
M
o
d
e
Approx. 5-8 minutes
When the Reboil process is completed,
a
me
lody sounds and the product
switches to Keep Warm mode.
•Pressing the REBOIL/QUICK TEMP button twice activates the
Quick
Temp
mode, (see pg.14)
•Do not attempt to dispense hot water while reboiling.
•Water may not dispense smoothly for a short period of time
after
reb
oiling.
•M
ake sure the water level is above the REFILL Line
before pressing the REBOIL/QUICK TEMP button.
►D
o
not plug or unplug the
Power Plug or Appliance
Plug with wet hands. (Doing
so may cause short circuit
or electric shock.)
•Do not dispose hot water
with the Upper Lid in place.
(The Upper Lid may come
off, spilling hot water and
causing scalds.)
•Do not allow water to splash
on the Control Panel, Hinge,
Handle or Receptacle.
(Could cause scalding or
breakdown.)
•Take precaution as not
attaching the Filter properly
may cause it to fall out
when dispensing hot water.
•Dispose the water at least
once a day. (Leaving water
in the Inner Container can
cause unwanted odor or
scale build-up.)
J
A
utomatic Shut-Off function
T
urns on
Turns on
10 Short
beeps
208
IJU
IIII
(195]
175
160
V.
The Automatic Shut-Off function activates to shut down power to the
h
ea
ter in order to prevent damage from overheating. The Display will
show "HH" and beeps will sound to alert you that the Automatic Shut-Off
has been activated. The following conditions may cause activation:
•When plugged in without filling the Inner Container with water.
•When the water level is lower than the REFILL Line and boiling
h
as
been attempted.
•When the Inner Container is empty or the Upper Lid is left open for
add
ing water.
•When pouring in hot water immediately after plugging in the unit.
U
nplug the product. Allow the Inner Container
to cool. Fill the Inner Container with water and
plug back in.
11

HOW TO SET THE KEEP WARM MODE
Press the (tempset) button to
change the settings.
E
ach press of the button changes the position
of the" 4 " on the Display.
•O
nce the temperature is set, it is stored in memory
even when the product is unplugged.
2
08°F is ideal for making coffee, tea and
instant noodles.
Select the "208" on the Display.
T
urns off
Turns on
208
[195)
175
< 3 o
c *c
1
160
J
I
W
hen the boiling process has completed, a
melody sounds, the BOIL light turns off and
the KEEP WARM light turns on.
208
(
195)
175
Ą jno
cuo
I
160
J
When the water
temperature reaches
208°F, "208" appears on
the Display.
•Depending on the altitude where the product
is used, the Keep Warm mode may be set at
205°F-207°F, in order to prevent continuous
boiling.
F
or making Japanese (green) tea^
175°F Keep Warm Mode
175°F is ideal for making Japanese
(green) tea.
Select the "175" on the Display.
T
urns on
W
hen the boiling process has completed, a
melody sounds, the BOIL light turns off, and
the KEEP WARM light begins to blink.
If initiated during Keep Warm mode, the light \
will blink 2 seconds after the selection. /
When the water
temperature reaches
about 175°F, "175"
appears on the Display,
and the KEEP WARM
light stops blinking and
remains on.
V
W
hen water is boiled in the Quick Temp mode,
the KEEP WARM light does not blink but turns
on. (see pg.14)
I Length of time for the water temperature to
reach 175°F after boiling:
Approx. 1 hour and 10 minutes
(At a room temperature of 73° F with the Inner Container
filled to the Maximum Water Level Line.)
•The length of time for the water temperature
to reach 175°F will vary depending on the
room temperature and amount of water.
V___________________________________________________/
12
_____________________________________________
/

S&You will hear 2 short beeps when 195°F Keep
Warm mode is selected.
•You can change the temperature setting during
Keep Warm mode.
I It may start reboiling depending on the water'
^ temperature and the selected setting.
•You cannot select the 208°F Keep Warm mode
while the Quick Temp mode is selected.
For preparing baby formula
160°F Keep Warm Mode
160°F is ideal for preparing baby formula.
S
elect the "160" on the Display.
W hen the boiling
process has
com pleted, a melody
sounds, the BOIL
light turns off, and
the KEEP W ARM
light begins to blink.
Í
lf initiated during Keep
Warm mode, the light
will blink 2 seconds
after the selection.
I
lf you wish to shorten
the time, add less water
to the Inner Container.
Jslr
G 3 S 3 9
Fill water up to 1.0
on the Water Level
Gauge.
Turns on
2 short beeps)
x 2 times
I
(TEMP SET
?08[
t e n
*Q u
▼
fl95l
175
160
When the water
temperature reaches
about 160°F, "160"
appears on the Display
and the KEEP WARM
light stops blinking and
remains on.
I When water is boiled in the Quick Temp mode, the KEEP \
\ WARM light does not blink but turns on. (see pg.14) /
■Length of tim e for the water tem perature to
reach 160°F after boiling:
1.0 L
Max Capacity
Approx. 1 hour
Approx. 2 hours
and 10 minutes
(At a room temperature of 73”F.)
•The length of time for the water temperature
to reach 160°F will vary depending on the
room temperature and amount of water.
W hen preparing baby formula:
160 F is ideal for preparing formula. Dissolve the
formula and let cool to optimum temperature
(slightly higher than body temperature). If fed
without cooling, babies are at risk of scalding.
- Be sure to check that the Keep Warm light is on
and NOT blinking before dispensing.
- Discard a cup of hot water before preparing baby
formula. (The water remaining in the Water Level
Gauge may not be very hot.)
- Do not use the Quick Temp mode, (see pg.14)
ITemperature
Conversion Guide
Fahrenheit (°F)
Celsius (°C)
212 100
208 98
207 97
205 96
195 90
175 80
160 70
73 23
13

QUICK TEMP MODE
This function heats the water to the selected Keep Warm temperature without reaching a boil. The water will reach the
selected Keep Warm temperature quicker than the regular Boil mode. Other benefits include reduced steam and
reduced energy use. Use this mode when dechlorination is not necessary, such as when using bottled or purified water.
While the water is heating,
press the ( ^ ) button to
select the Quick Temp mode.
You cannot activate Quick Temp mode
while the product is set at 208°F Keep
Warm mode.
After reaching the
selected temperature, it
will automatically switch
to Keep Warm.
A melody sounds, the QUICK TEMP
light turns off and the KEEP WARM
light turns on.
160°F Keep Warm mode:
•Once the water temperature
reaches about 175°F (80°C),
it will switch to Keep Warm
at 160°F (70°C).
Length of time for the water
temperature to reach 160°F
after heating up is approx.
40 minutes. (At a room
temperature of 73°F / 23°C
with the Inner Container
filled to the Maximum Water
Level Line.)
•After the KEEP WARM light
stops blinking, it will switch
to Keep Warm mode.
•You cannot select 208°F Keep Warm mode while Quick Temp mode is activated.
•There may be a lingering chlorine smell if tap water is used while Quick Temp mode is activated. If this is an issue, use the
regular Boil mode instead.
•Depending on the room temperature and amount of water the actual water temperature after heating may differ from that
shown on the Display.
•Depending on the temperature of the room and water, and atmospheric pressure, some steam may be produced.
•The Quick Temp mode may be canceled if the Power Cord is detached. Set to the desired mode again.
•The product begins the Regular Boil mode when water is added. Activate the QUICK TEMP mode again.
-----------------------------------------------------
•Water does not reach a boil under Quick Temp mode
and should not be used to prepare baby formula.
•Although the water will not reach a boil when
Quick Temp mode is activated, the Steam Vent
will become hot. Please do not touch it.
ENERGY-SAVING TIMER FUNCTION
The Boiling function will complete after the set time. (The Energy-Saving Timer Function helps save
energy by shutting off electricity to the heater until boiling begins.)
Press the (™ i) button until the desired length of time is displayed
I %You will hear 2 short beeps when 6H is selected.
(
A m
m
<
e
lody sounds and the Energy-
Saving Savi Timer function is activated
The
S
Boiling function will complete
the set time.
A melody sounds, the BOIL light turns off, and the
product switches to Keep Warm mode, (see pg.9,12,13)
Boiling may stop earlier than set, depending on room
temperature, water temperature and amount of water.
Timer settings: (H for hours)
6H
n
7H 8H ► 9H 10H
Cancel (temperature display)
r ~
•To cancel the Timer, press the TIMER button
several times or press the REBOIL/QUICK TEMP
button once.
•When using the Quick Temp mode with the
Energy-Saving Timer function, set the
Energy-Saving Timer function after selecting the
Quick Temp mode.
•If the Power Cord is detached, the Energy-Saving
Timer function will be cancelled and must be
reset.
J
14

CAFE DRIP DISPENSING MODE
This mode decreases the amount of water dispensed to 60% of the normal setting, making it suitable for
brewing café drip coffee.
1
Press the (unlock) button
twice.
When the CAFÉ DRIP light
turns on, Café Drip Dispensing
mode Is activated.
T
urns on
vLong beef))
if
sLowf un lo ck:
►Pressing the UNLOCK button again during
Café Drip Dispensing mode will reset the
product to the normal dispensing mode.
►When the light turns off, the Automatic
Dispense Lock will be activated.
►If the water level is low, it may take longer
for water to begin dispensing after pressing
the DISPENSE button.
►If the water level is low or boiling has just
completed, water may not dispense
smoothly.
2
Press the (™ )
button to dispense
hot water.
You can use the Café Drip
Dispensing mode for about 60
seconds while the CAFÉ DRIP
light is on.
---
----------------------------------------
•B e careful not to burn yourself.
• If using a cone filter placed directly on a
cup, be careful not to let it fall inside the
cup while brewing.
•When using a manual drip coffee cone,
dispense a cup of hot water before
brewing. (The first cup may not be hot
enough.)
J
HOW TO CHANGE THE INFORMATION SOUND
I
nformation Sound:
The product informs you with a melody or beeps that it has finished
boiling or the timer has been set.
r
1
Press the
button for more
than 3 seconds during the boiling
process or Keep Warm mode.
•Each button press changes the
Information Sound.
Melody
(U NLOCK
Press for more
than 3 seconds
*
Beeping
I (Default)
Press for more
than 3 seconds
(U NLOCK
Press for more
than 3 seconds
*
Long beepj
2
O
nce your desired sound
(melody or beep) is heard,
the setting is completed.
•The Information Sound will return to
Melody if the product is unplugged.
When and what types of
Information Sounds are heard:
* \ T y p e
W h e n \ ^
[ Melody
J
I Beeping 1
I Mute 1
Boiling stops
Minuet
5 long beeps
X
Timer is set
Beautiful Dreamer
X
X
y
V
-

Always unplug the Power Cord,
dispose all water, and allow to cool
completely before cleaning.
g l f f j A
•D
o n
ot attempt to dry the product by turning it upside down when the bottom is wet. (Water may get inside
the body and cause it to break or rust.)
•Do not use the following:
■ Thinner and bleach. (Doing so may cause discoloration, crack, degradation and corrosion.)
■ Polishing powder, nylon brushes, anything made with metal, eraser pads, hard nylon sponges and abrasive cleaners. (Doing so
may cause corrosion.)
■ Detergent. (Hot water may spill out, resulting in scalds or damage. Doing so may cause unwanted odor.)
•Do not use scrub brushes for any portions other than the Filter. (Doing so may cause corrosion.)
•When using chemically treated cloths, do not rub too hard or leave them on the product for a long time as the surfaces of the
product may be damaged by chemical reactions.
•Do not use a dishwasher or dish dryer for cleaning or drying. (Doing so may cause the plastic parts to deform.)
^ •Before storing the product for a longer period of time, dry it completely and pack in a plastic bag to prevent odors from being absorbed. y
Inner Lid
Wipe with a soft wet sponge.
\
^
_________________
In
ner
Container
Perform the Citric Acid Cleaning
see pg.17) periodically.
_
_
(
_______
E
spe
cially when...
•Red rust spots (Rust Stain) is visible on the Inner Container.
•Milky white, iridescent, or gray discoloration and/or
filmy objects are found in the water.
•Boiling is louder than usual.
•Hot water has an odor.
(The condition of the Inner Container will vary
depending on the water quality and frequency of use.) v ,
Filter
Remove the Filter from the Inner
Container and wash with a soft brush.
Pull the Filter up to release, and press
down firmly to attach.
If you find it difficult to clean the Filter, replace
it with a new one. (see pg. 17)
\
\
•N
eve
r use the product without installing the Filter.
(The Filter prevents foreign objects from entering the water
route or Electric Pump and obstructing the flow of hot water.) ^ y
Power Cord
Wipe clean with a dry cloth.
Body/Upper Lid
Wipe clean with a
damp well-wrung cloth.
►Do not wash any part of the Body, Control
Panel or Water Level Gauge with water.
(May cause malfunction or rust.)
H
OW TO
REPLACE THE INNER LID GASKET
The Inner Lid Gasket may need to be replaced due to time and
wear. We recommend that you replace it about once a year.
Wipe new Inner Lid Gaskets with a wet soft sponge before attaching to the Inner Lid.
To remove the Inner Lid Gasket
© Remove the three screws, and remove the Inner Lid.
•D o not lose these screws.
©Remove the Inner Lid Gasket which is installed on the
Inner Lid.
After removing the Inner Lid, check the plastic part of
the Upper Lid for abnormalities.
-H f this part is discolored or if it feels rough to the touch,
replace it (there will be a fee for this).
To attach the Inner Lid Gasket
©Fit the Inner Lid Gasket securely to the outer
circumference as shown in the figure.
©Line up the pin on the Upper Lid with the hole on the
Inner Lid correctly with the Upper Lid, and tighten the
three screws securely.
If the Inner Lid Gasket hardens, changes shape, turns white, or otherwise
becomes worn out, hot water may leak from the gap between the Upper Lid
and Body when tilted. Steam may also leak from the gap, causing burns
and product failures, which may result in scalds. If hot water spews from
the gap or there is steam even after replacing the Inner Lid Gasket, other
parts may be in need of repair. Please contact Zojirushi Customer Service.
When the Inner Lid Gasket
hardens, changes shape,
turns white, or otherwise
becomes worn out.
Hole on the Screws (x3)
Please purchase
and replace with
a new one.
1
6

P
erform
every 1-3 month(s) of usage
HOW TO PERFORM CITRIC ACID CLEANING
Do not drink
the water used
for citric acid
cleaning.
1 ! 1*11 ♦
In order to prevent gas bubbles and bubbllng-over, the Citric Acid Cleaner for
Electric Water Boilers (CD-K03E-JU) is recommended for cleaning. To purchase
this cleaner, please visit an authorized Zojirushi dealer or www.zojir
ushi.com.
Prepar
ation:
Check that the Filter is attached
to the Inner Container.
r
~
Hf
the Fi
lter is dirty, remove
it from the Inner Container,
wash with a soft brush and
reinstall.
J
7
Put 1 package of the Citric Acid Cleaner
CD-K03E-JU in a cup and add warm water to
dissolve. Pour it into the Inner Container and
fill with water to the Maximum Water Level Line.
r~
•D
o not fill ov
er the
Maximum Water Level
Line. (Hot water may spill
out, resulting in scalds.)
C
lo
se the Up
per Lid, insert the Power Plug and press the / reboiln button for
more than 3 seconds.
Beeps when the cleaning process begins. Beeps when the cleaning process is completed.
>
1
208
lo ss
1
75
Co]
160
Turns on
208
11951
175
r n
L J
1
160 J
5longbeeps) Cleaningtime:
Approx. 1.5 hours.
^C
leaning times may vary
depending on the amount
of water, water
temperature and room
temperature.
U
nplug the P
ower Plug, detach the
Upper Lid and dispose water where
indicated "EMPTY FROM HERE."
(Please take precautions not to splash water
on the Hinge.)
4m
•Repeated citric acid cleaning may
be necessaiy for hard-to-remove
residues or if water does not
dispense smoothly.
J
To rinse
, fill the Inner Container with
water. Boil and dispense about a cup of
hot water to rinse out the Spout, allow to
cool, then dispose the remaining water.
When disposing hot water:
•Take precaution with the hot water and
steam. You may scald yourself.
•Take precaution as hot water may drip
from the Spout, causing scalds.
Il
f mineral or Alkalized Ionic water is used,
calcium tends to build up on the surface
of the Inner Container. If scale
accumulates on the Inner Container or the
Filter, boiling may become louder than
usual and water may not dispense
smoothly. Frequent cleaning is
recommended when using mineral or
Alkalized Ionic water.
To cancel the Citric Acid Cleaning at any
time, unplug the Power Plug for more
than 5 seconds.
REPLACEMENT PARTS
•Replacement parts may be available for an additional
charge. Please replace damaged parts only with new parts.
•When replacing parts, please record the model number and
part name beforehand. Parts can be purchased through
Zojirushi.com, by contacting Zojirushi Customer Service, or
the store where you purchased the product.
Zojirushi Customer Service
1-800-733-6270 www.zojirushi.com
Parts Names Parts Number
Inner Lid Gasket
BW135008M-00
Filter
627402-00
Citric Acid Cleaner for
Electric Water Boilers
(1 oz. / 30 gX4 packets)
CD-K03E-JU
17
^

Q&A ON PRODUCT USE
Is it okay to use the product for
heating liquids other than water? ^
Do not fill the product with any liquid other than water. It may cause
malfunction, or may overflow and cause scalding.
^pg-3
Does the water need to be
changed every day?
^
r
To prevent scale from building up, please change the water at least once a
day.
y pg-10
Is it okay to use mineral water
or Alkalized Ionic water?
^
r
Yes. However, when mineral or Alkalized Ionic water is used, a floating
residue may develop or milky white substance may form on the surface of
the Inner Container. This is due to the ingredients in the water and is
harmless to your health. Frequent cleaning is recommended.
. pg.9
pg.17r
I accidentally drank water while
performing the Citric Acid Cleaning.
Is this harmful to my health?
^
Please follow the instructions shown on the package of the citric acid
cleaner CD-K03E-JU.
Is it okay to go out while the
product is turned on?
^
W
It is safe to use the product unattended as it has an Automatic Shut-Off
function (power to the heater will be automatically turned off), which will be
activated once it is empty of water.
^ pg-11
TROUBLESHOOTING GUIDE
p
oints before calling for servii
[
Condition
Cause Remedy
Water does not heat up.
Power Plug is not connected to an electrical outlet.
Connect the Power Plug.
Water does not boil.
The Quick Temp mode is selected.
(Water does not reach a boil under Quick
Temp mode.)
Press the REBOIL/QUICK TEMP
b
utton, select the regular Boil mode,
(see pg.14)
Hot water has a
disagreeable odor.
Scale or other residue has accumulated
on the Inner Container.
Perform citric acid cleaning.
(
see pg.17)
You have not performed citric acid
c
leaning regularly.
• A mild plastic odor may be
not
iceable with a new product.
This odor will gradually fade
away.
• You may smell chlorine (used
for ste
rilization of tap water)
after boiling.
The product has not been used for a long
ti
me.
Boil water, unlock and dispense
about
34 oz. (1 liter) of hot water.
Discard the remaining, (see pg.9)
If tap water is used under Quick Temp
m
ode, it will take an additional 15 minutes
after boiling completes to remove up to
80% of the chlorine.
If this is an issue, use the regular Boil
mode instead, (see pg.14)
The regular Boil mode purges chlorine
i
n tap water by boiling completion.
Water pours out by itself from
the Spout or Steam Vent.
Check that the Inner Container is not filled
over the Maximum Water Level Line.
Pour out the excess water until it is
below the Maximum Water Level Line.
The Quick Temp mode cannot
be selected.
Is the 208°F Keep Warm mode selected?
Select the 195,175 or 160°F Keep
W
arm mode, then select the Quick
Temp mode, (see pg.14)
The 208°F Keep Warm mode
cannot be selected during the
Quick Temp mode.
You cannot select the 208°F Keep Warm
mode during the Quick Temp mode.
Use the Quick Temp mode for other
t
han 208°F Keep Warm mode.
(see pg.14)
Water does not dispense or
does not pour properly.
Hot water does not pour properly a few
minutes after boiling.
Bubbles form from the bottom of the
I
nner Container while water is being
heated. Dispense hot water after
the bubbling stops.
Scale or other residue has accumulated
o
n the Inner Container and Filter.
Clean the Inner Container and Filter,
(see pg.16)
The Automatic Dispense Lock is
a
ctivated.
Press the UNLOCK button, then press
the DISPENSE button, (see pg.10)
Power Plug is not connected to an electrical outlet.
Connect the Power Plug.
Scale may build up in the water route or Electric
P
ump and prevent water from dispensing smoothly.
Perform citric acid cleaning.
(see pg.17)
J
k
, (
^ ( )
r ^
w
►
r ^
^ J
►
'
►
v
r >
V J
r
►
V J
►
v y
►
^
►
I ^ ( )
IM
f " \
18

[ Condition ]I
[ Cause ]
A filmy, floating residue is
noticeable.
Residue is due to the mineral content in
water, not from corrosion of the Inner
Container.
Perform citric acid cleaning,
(see pg.17)
Milky white and rough-surfaced
objects have built up on the
surface of the Inner Container.
Excessive accumulation of scale and
other build-up on the surface of the Inner
Container can cause the hot water to
smell and/or clog the hot water outlet.
Scale
Over time and use, calcium
and other minerals
contained in water build up
on the surface of the Inner
Container and the Filter. It is
called "scale" and is
harmless to your health.
Milky white or iridescent
discoloration of the Inner
Container is found.
Red rust-like spotting appears
on the surface of the Inner
Container.
Caused by iron in the water, not
deterioration of the Inner Container.
A white floating residue is
noticeable.
^
Remove the Inner Lid and check the
plastic part of the Upper Lid for
abnormalities, (see pg.16)
If this part is discolored or if it feels
rough to the touch, replace it.
Water is not hot.
Initially upon boiling or if it has been a
while after dispensing, the water may not
be very hot due to water remaining in the
Water Level Gauge.
Please discard the first cup (of the
hot water).
Is the Timer set?
Press the REBOIL/QUICK TEMP
button, (see pg.14)
The Body becomes hot.
• When the water temperature and/or room temperature is high, the outer surface of
the Body may reach up to 140°F (60°C). This is not a malfunction.
The Power Cord becomes hot.
• The Power Cord may become hot while the water is boiling. This is not a malfunction.
You may hear a rattling or metallic
noise when opening and closing
the Upper Lid or during boiling.
•
This sound is normal and comes from the movement of the weight which prevents hot
water from flowing out when the product is overturned.
Humidity builds in the Display
window.
• If water is filled from a faucet or the product is placed directly on a sink and the
bottom becomes wet, water may go inside of the Body and the Display may show
moisture. This may cause short circuit or electric shock. Unplug the Power Cord and
contact Zojirushi Customer Service.
A beep sounds,
lights turn on and
"HH" appears on
the Display.
The Inner Container is
low on water or hot water
was added to the Inner
Container, causing the
Automatic Shut-Off
function to engage.
Unplug the Power Plug and
wait
until the Inner Container
cools down. Add water and
plug in the Power Cord, (see
P9-11)
2 lights blink at the
same time and the
Display shows a
rotating square.
The Inner Container is in
a citric acid cleaning
cycle.
To cancel the citric acid
cleaning cycle, unplug the
Power Plug and wait more
than 5 seconds before
plugging back in. (see pg.17)
Indicates malfunction.
Please contact Zojirushi Customer
Se
rvice.
Inner Lid Gasket
• The Inner Lid Gasket is replaceable, and we recommend that you replace it about
once a year. If steam leaks from the gap between the Upper Lid and the Body, or if
the Inner Lid Gasket hardens, changes shape, turns white, or otherwise becomes
worn out, please replace it. (see pg. 16)
Plastic Parts
► The plastic part of the Upper Lid may deteriorate over use. When replacing the Inner
Lid Gasket, check the plastic part. If discoloration occurs or the surface becomes
coarse, replace the Upper Lid (must purchase separately). (We take care in only
using materials for the plastic parts that are safe and hygienic for food contact.)
Remed
y
►
1
11
M
J||
V J
V
I I
\Â
~ J||
c ^
V J
,
Turns on
(tbipset'
208
OS)
175
HH
v _ y
__
1 6 0
___
^
(REBOlftŁ
(temp set)
208
[1951
175
[oJ
__
160
___
y
K
i ’ i
S3
or |is j
displayed.
1
19