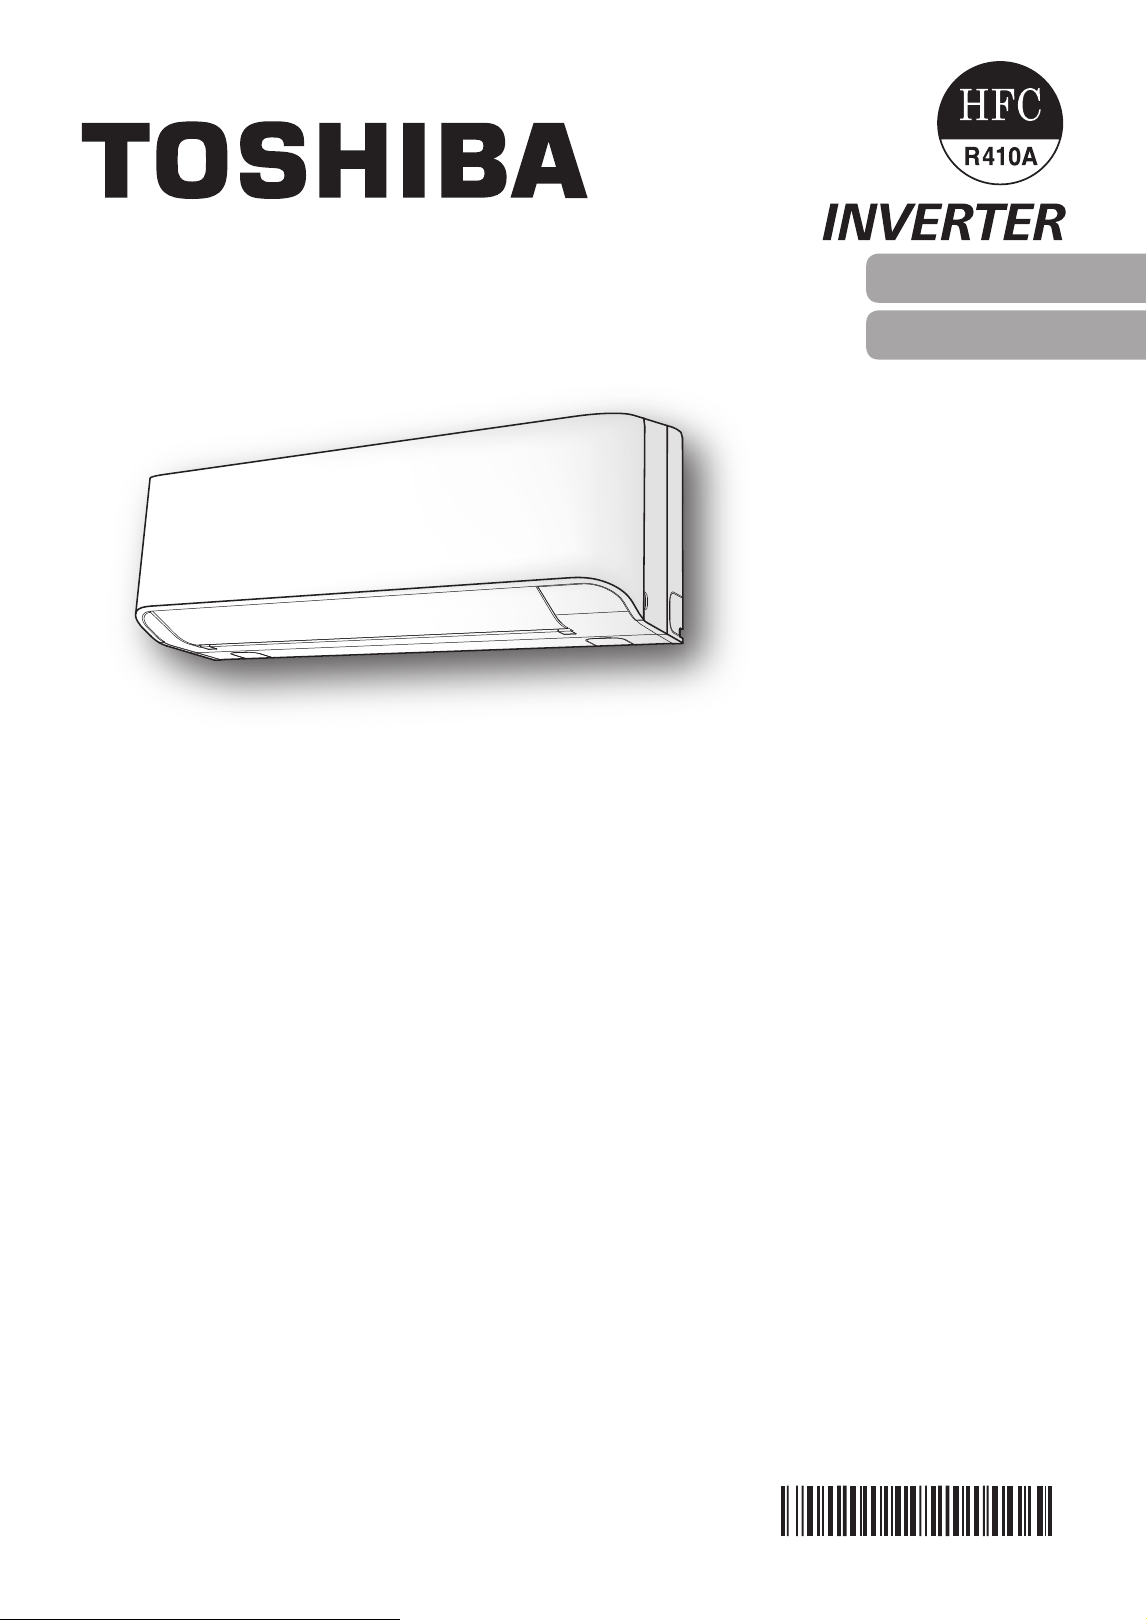
OWNER’S MANUAL
AIR CONDITIONER (MULTI TYPE)
For general public use
Indoor unit
RAS-M10, 13, 16N4KCV
1122350221
ENGLISH
繁體中文
• Keepthismanualwheretheoperatorcaneasilyndit.
• Readtheprecautionsinthismanualcarefullybeforeoperatingtheunit.
• Thisapplianceisintendedtobeusedbyexpertortrainedusersinshops,inlight
industryandonfarms,orforcommercialusebylaypersons.
• TheprecautionsdescribedhereinareclassiedasDANGER,WARNINGand
CAUTION.Theybothcontainimportantinformationregardingsafety.Besureto
observeallprecautionswithoutfail.
PRECAUTIONS FOR SAFETY
DANGER
• Donotinstall,repair,openorremovethecover.Itmayexposeyoutodangerous
voltages.Askthedealerorthespecialisttodothis.
• Turningothepowersupplywillnotpreventpotentialelectricshock.
• Theapplianceshallbeinstalledinaccordancewithnationalwiringregulation.
• Meansfordisconnectionfromthesupplyhavingacontactseparationofatleast
3mminallpolesmustbeincorporatedinthexedwiring.
• Theappliancemustbestoredinaroomwithoutcontinuouslyoperatingignition
sources(forexample,openamesanoperatinggasapplianceoranoperating
electricheater).
• Inordertoavoidreexplosionorinjury,donotoperatetheunitwhenharmful
gases(e.g.ammableorcorrosive)aredetectedneartheunit.
WARNING
• Donotexposeyourbodydirectlytocoolairforalongtime.
• Donotinsertyourngeroranyarticleintotheairinlet/outlet.
• Whenanabnormality(burningsmell,etc.)occurs,stoptheairconditionerand
disconnectthepowersupplyorturnothebreaker.
• Thisappliancecanbeusedbychildrenagedfrom8yearsandaboveandpersons
withreducedphysical,sensoryormentalcapabilitiesorlackofexperienceand
knowledgeiftheyhavebeengivensupervisionorinstructionconcerninguseofthe
applianceinasafewayandunderstandthehazardsinvolved.Childrenshallnot
playwiththeappliance.Cleaningandusermaintenanceshallnotbemadeby
childrenwithoutsupervision.
• Thisapplianceisnotintendedforusebypersons(includingchildren)withreduced
physical,sensoryormentalcapabilities,orlackofexperienceandknowledge,
unlesstheyhavebeengivensupervisionorinstructionconcerninguseofthe
appliancebyapersonresponsiblefortheirsafety.
• Theairconditionermustbeinstalled,maintained,repairedandremovedbya
qualiedinstallerorqualiedserviceperson.Whenanyofthesejobsistobe
done,askaqualiedinstallerorqualiedservicepersontodothemforyou.
• Childrenshouldbesupervisedtoensurethattheydonotplaywiththeappliance.
PRECAUTIONS FOR SAFETY
• Donotuseanyrefrigerantdierentfromtheonespecied(R410A)for
complementorreplacement.Otherwise,abnormallyhighpressuremaybe
generatedintherefrigerationcycle,whichmayresultinafailureorexplosionof
theproductoraninjurytoyourbody.
• Donotusemeanstoacceleratethedefrostingprocessortoclean,otherthan
thoserecommendedbythemanufacturer.
• Theapplianceshallbestoredinaroomwithoutcontinuouslyoperatingignition
sources(forexample:openames,anoperatinggasapplianceoranoperating
electricheater).
• Beawarethatrefrigerantsmaynotcontainanodour.
• Donotpierceorburnastheapplianceispressurized.Donotexposetheappliance
toheat,amessparks,orothersourcesorignition.Else,itmayexplodeandcause
injuryordeath.
CAUTION
• Donotwashtheunitwithwater.Itmaycauseanelectricshock.
• Donotusethisairconditionerforotherpurposessuchaspreservingfood,
breedinganimal,etc.
• Donotsteporputanythingontheindoor/outdoorunit.Itmaycauseaninjuryor
damagetheunit.
• Donottouchaluminiumnbecauseitmaycauseaninjury.
• Beforecleaningtheunit,turnothemainswitchorthecircuitbreaker.
• Whentheunitwon’tbeusedforalongtime,turnothemainswitchorthecircuit
breaker.
• Itisrecommendedthatmaintenancebeperformedbyaspecialistwhentheunit
hasbeenoperatedforalongtime.
• Themanufacturershallnotassumeanyliabilityforthedamagecausedbynot
observingthedescriptionofthismanual.
EN
2
3
4
5
1
1 ECO(White)
2 Wi-Fiaccess(White)
3 HiPower(White)
4 Timer(White)
5 Operation(White)
●
Displaybrightnesscanbeadjusted,followprocedureon@.
RequireWirelessLANconnectingadapterwhichavailableasaccessory.
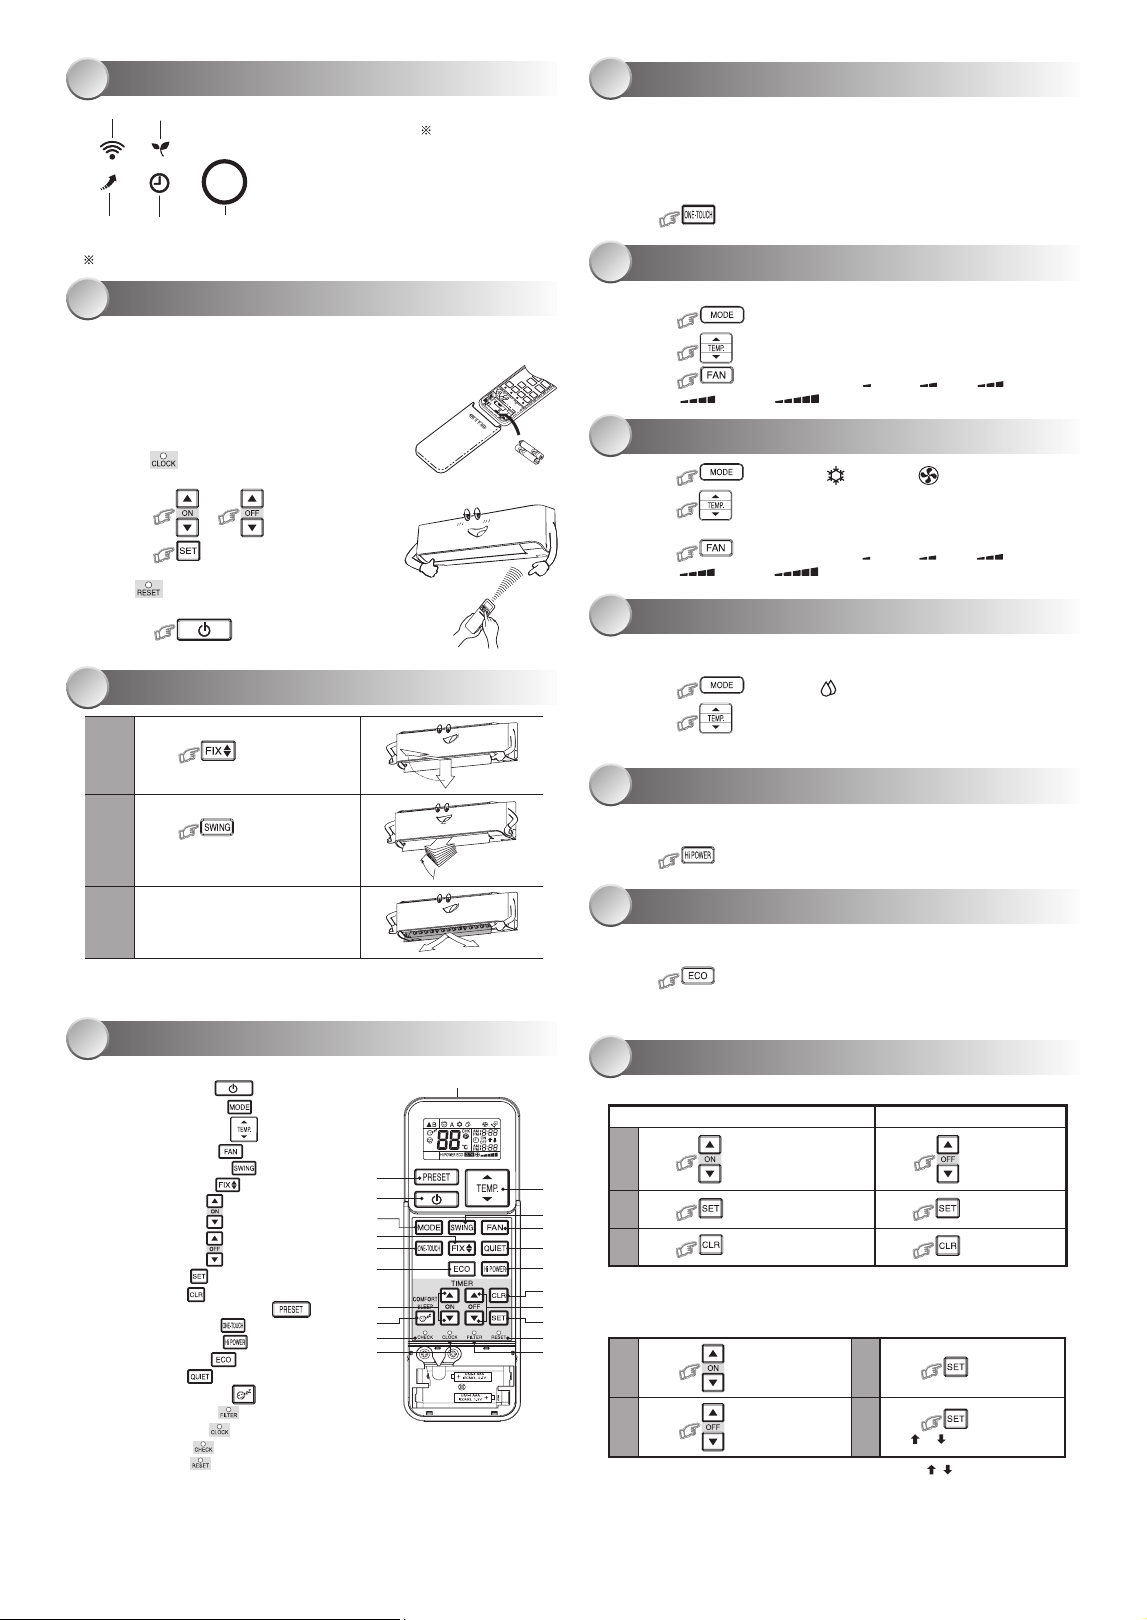
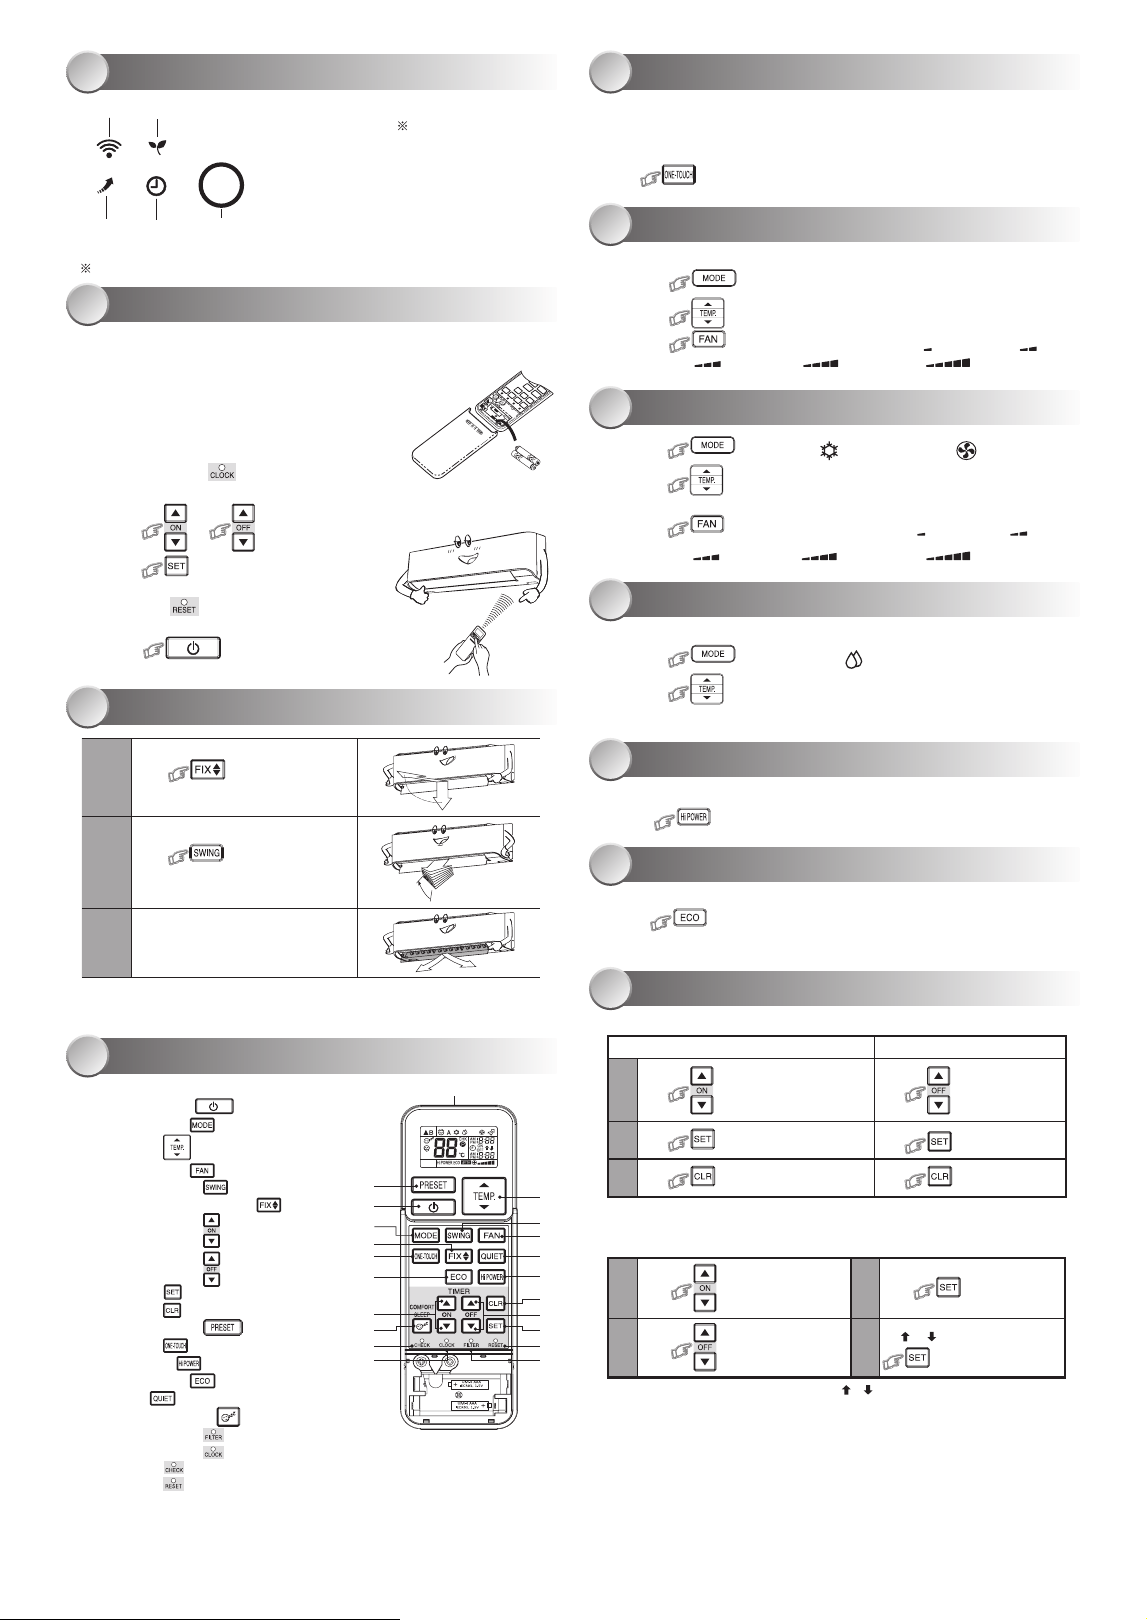
INDOOR UNIT DISPLAY
ONE-TOUCH
AUTOMATIC OPERATION
COOLING / FAN ONLY OPERATION
DRY OPERATION
Hi-POWER OPERATION
ECO OPERATION
TIMER OPERATION
PREPARATION BEFORE USE
AIR FLOW DIRECTION
REMOTE CONTROL
1
5
6
7
8
9
10
11
2
3
4
Preparing Filters
1.Opentheairinletgrilleandremovetheairlters.
2.Attachthelters.(seedetailintheInstallationmanual).
Loading Batteries (when use wireless operation.)
1.Removetheslidecover.
2.Insert2newbatteries(AAAtype)followingthe(+)
and(–)positions.
Clock Setup
1.Push bytipofthepencil.
Iftimerindicationisashing,gotothenextstep2.
2.Press or
:adjustthetime.
3.Press :Setthetime.
Remote Control Reset
Push bytipofthepencilor
1.Removethebatteries.
2.Press .
3.Insertthebatteries.
1
Press :Movethelouverin
thedesiredverticaldirection.
2
Press :Swingtheair
automaticallyandpressagainto
stop.
3
Forhorizontaldirection,adjust
manually.
Note:
●
Donotmovethelouvermanuallybyothers.
●
Thelouvermayautomationpositioningbysomeoperationmode.
1 Infraredsignalemitter
2 Start/Stopbutton( )
3 Modeselectbutton( )
4 Temperaturebutton( )
5 Fanspeedbutton( )
6 Swinglouverbutton( )
7 Setlouverbutton( )
8 Ontimerbutton( )
9 Otimerbutton( )
0 Setupbutton( )
! Clearbutton( )
@ MemoryandPresetbutton( )
# One-Touchbutton( )
$ Highpowerbutton( )
% Economybutton( )
^ Quietbutton( )
&
Comfortsleepbutton
( )
* Filterresetbutton( )
( Setclockbutton( )
) Checkbutton( )
- Resetbutton( )
1
@
2
3
7
#
%
8
&
)
(
4
6
5
^
$
!
9
0
-
*
Note:
• TheprovidedRemoteControllerisawirelesstype,whichalsocanbeusedasa
wire.Pleasesee“HowtoConnectTheRemoteControllerforWiredOperation”,
locatedininstallationinstruction,incaseofwiredcontrolisrequired.
• Inwireoperation,remotecontrollerwillreturntoinitialcondition(PRESET,
TIMERandCLOCKwillreturntoinitialcondition)whenusershutdownpower
supplyofAirconditioner.
Pressthe“ONE-TOUCH”buttonforfullyautomatedoperationthatiscustomized
tothetypicalconsumerpreferencedinyourregionoftheworld.Thecustomized
settingscontroltemperatureairflowstrength,airflowdirectionandothersettings
toprovideyoualternatecontactwith
“ONE-TOUCH”ofthebutton.Ifyoupreferothersettingsyoucanselectfromthe
manyotheroperatingfunctionsofyourToshibaunit.
Press :Starttheoperation.
Toautomaticallyselectcooling,orfanonlyoperation
1.Press :SelectAutoA.
2.Press
:Setthedesiredtemperature,Min.17°C,Max.30°C.
3.Press :SelectAUTO,LOW ,LOW+ ,MED ,
MED+ ,orHIGH .
1.Press :SelectCool orFanonly .
2.Press
:Setthedesiredtemperature.Min.17°C,Max.30°C,
FanOnly:Notemperatureindication
3.Press :SelectAUTO,LOW ,LOW+ ,MED ,
MED+ ,orHIGH .
Fordehumidification,amoderatecoolingperformanceiscontrolled
automatically.
1.Press :SelectDry .
2.Press
:Setthedesiredtemperature,Min.17°C,Max.30°C.
Note:DrymodefanspeedissettoAutoonly.
Toautomaticallycontrolroomtemperatureandairflowforfastercooling
operation(exceptinDRYandFANONLYmode)
Press :Startandstoptheoperation.
Toautomaticallycontrolroomtemperaturetosaveenergy(exceptinDRYand
FANONLYmode)
Press :Startandstoptheoperation.
Note:Coolingoperation;thesettemperaturewillincreaseautomatically
1degree/hourfor2hours(maximum2degreesincrease).
Setthetimerwhentheairconditionerisoperating.
Setting Daily Timer
Daily timer allows the user to set both the ON & OFF timers and will be
activated on a daily basis.
Setting the ON Timer Setting the OFF Timer
1
Press
:SetthedesiredONtimer.
Press:Setthedesired
OFFtimer.
2
Press :Setthetimer.
Press
:Setthetimer.
3
Press :Cancelthetimer.
Press
:Cancelthetimer.
1
Press :SettheONtimer.
3
Press .
2
Press :SettheOFFtimer.
4
Press buttonduring
the ( or )markflashing.
●
Duringthedailytimerisactivating,botharrows( , )areindicated.
Note:
●
Keeptheremotecontrolinaccessibletransmissiontotheindoorunit;
otherwise,thetimelagofupto15minuteswilloccur.
●
Thesettingwillbesavedforthenextsameoperation.
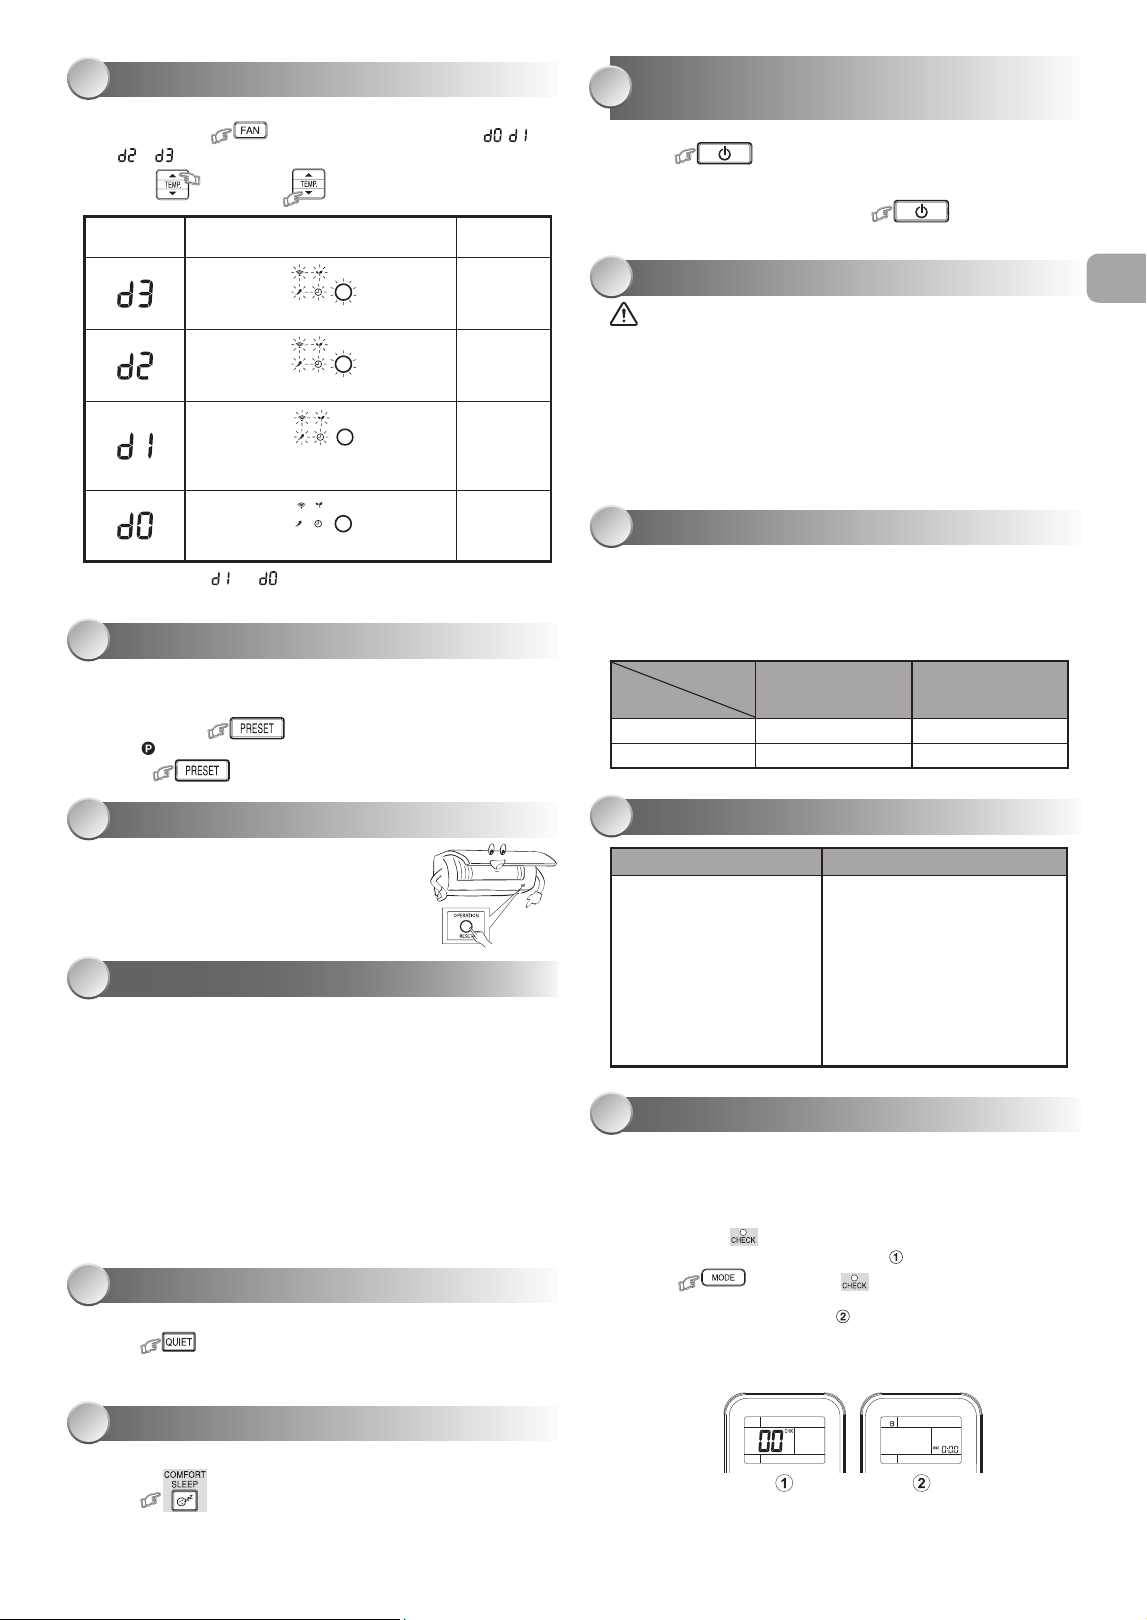
DISPLAY LAMP BRIGHTNESS ADJUSTMENT
PRESET OPERATION
TEMPORARY OPERATION
QUIET OPERATION
COMFORT SLEEP OPERATION
SELF CLEANING OPEATION
(COOL AND DRY OPEATION ONLY)
AUTO RESTART FUNCTION SETTING
12
13
14
16
17
18
15
Todecreasethedisplaylampbrightnessorturnitoff.
1. Pressandhold for3secondsuntilbrightnesslevel( , ,
or )isshownonremotecontrolLCDthenreleasethebutton.
2. Press
Rise
or
Decrease
toadjustbrightnessin4levels.
Remote control
LCD
Operationdisplay Brightness
Lampilluminatesfullbrightness.
100%
Lampilluminates50%brightness.
50%
Lampilluminates50%brightnessandthe
operationlampisturnedoff.
50%
Alllampsareturnedoff.
Allturnedoff
●
Intheexamplesof and ,thelampilluminatesfor5secondsbefore
goingoff.
Setyourpreferredoperationforfutureuse.Thesettingwillbememorizedby
theunitforfutureoperation(exceptairflowdirection).
1.Selectyourpreferredoperation.
2.Pressandhold for3secondstomemorizethesetting.
The markdisplays.
3.Press :Operatethepresetoperation.
Incaseofthemisplacedordischargedremotecontrol
●
PressingtheRESETbutton,theunitcanstartor
stopwithoutusingtheremotecontrol.
●
OperationmodeissetonAUTOMATICoperation,
presettemperatureis24°Candfanoperationis
automaticspeed.
Tooperateatsuperlowfanspeedforquietoperation(exceptinDRYmode)
Press :Startandstoptheoperation.
Note:Undercertainconditions,QUIEToperationmaynotprovideadequate
coolingduetolowsoundfeatures.
Forcomfortablesleep,automaticallycontrolairflowandautomaticallyturnOFF.
Press :Select1,3,5or9hrsforOFFtimeroperation.
Note:Thecoolingoperation,thesettemperaturewillincreaseautomatically
1degree/hourfor2hours(maximum2degreesincrease).
Toprotectbadsmellcausedbythehumidityintheindoorunit.
1.Ifthe buttonispressedonceduring“Cool”or“Dry”mode,
thefanwillcontinuetorunforother30minutes,thenitwillturnoff
automatically.Thiswillreducethemoistureintheindoorunit.
2.Tostoptheunitimmediately,pressthe more 2 times
within30seconds.
MAINTENANCE
OPERATION AND PERFORMANCE
TROUBLESHOOTING (CHECK POINT)
REMOTE CONTROL A-B SELECTION
19
20
21
22
Firstly,turnoffthecircuitbreaker.
Indoor Unit and Remote Control
●
Cleantheindoorunitandtheremotecontrolwithawetclothwhenneeded.
●
Nobenzine,thinner,polishingpowderorchemically-treatedduster.
Air filters
Cleanevery2weeks.
1.Opentheairinletgrille.
2.Removetheairfilters.
3.Vacuumorwashandthendrythem.
4.Reinstalltheairfiltersandclosetheairinletgrille.
1.Three-minuteprotectionfeature:Topreventtheunitfrombeingactivated
for3minuteswhensuddenlyrestartedorswitchedtoON.
2.Someminorcrackingsoundmayoccurwhenunitoperating.Thisisnormal
becausethecrackingsoundmaybecausedbyexpansion/contractionof
plastic.
Air conditioner operating conditions
Temp.
Operation
Outdoor Temperature Room Temperature
Cooling -10°C~46°C 21°C~32°C
Dry -10°C~46°C 17°C~32°C
The unit does not operate. Cooling or Heating is abnormally low.
●
The power main switch is
turnedoff.
●
Thecircuitbreakerisactivated
tocutoffthepowersupply.
●
Stoppageofelectriccurrent
●
ONtimerisset.
●
Thefiltersareblockedwithdust.
●
Thetemperaturehasbeenset
improperly.
●
Thewindowsordoorsareopened.
●
Theairinletoroutletoftheoutdoor
unitisblocked.
●
Thefanspeedistoolow.
●
TheoperationmodeisFANorDRY.
●
POWERSELECTIONfunctionis
set75%or50%(This function is
depend on remote controller).
Toseparateusingofremotecontrolforeachindoorunitincaseof2air
conditionersareinstallednearly.
Remote Control B Setup.
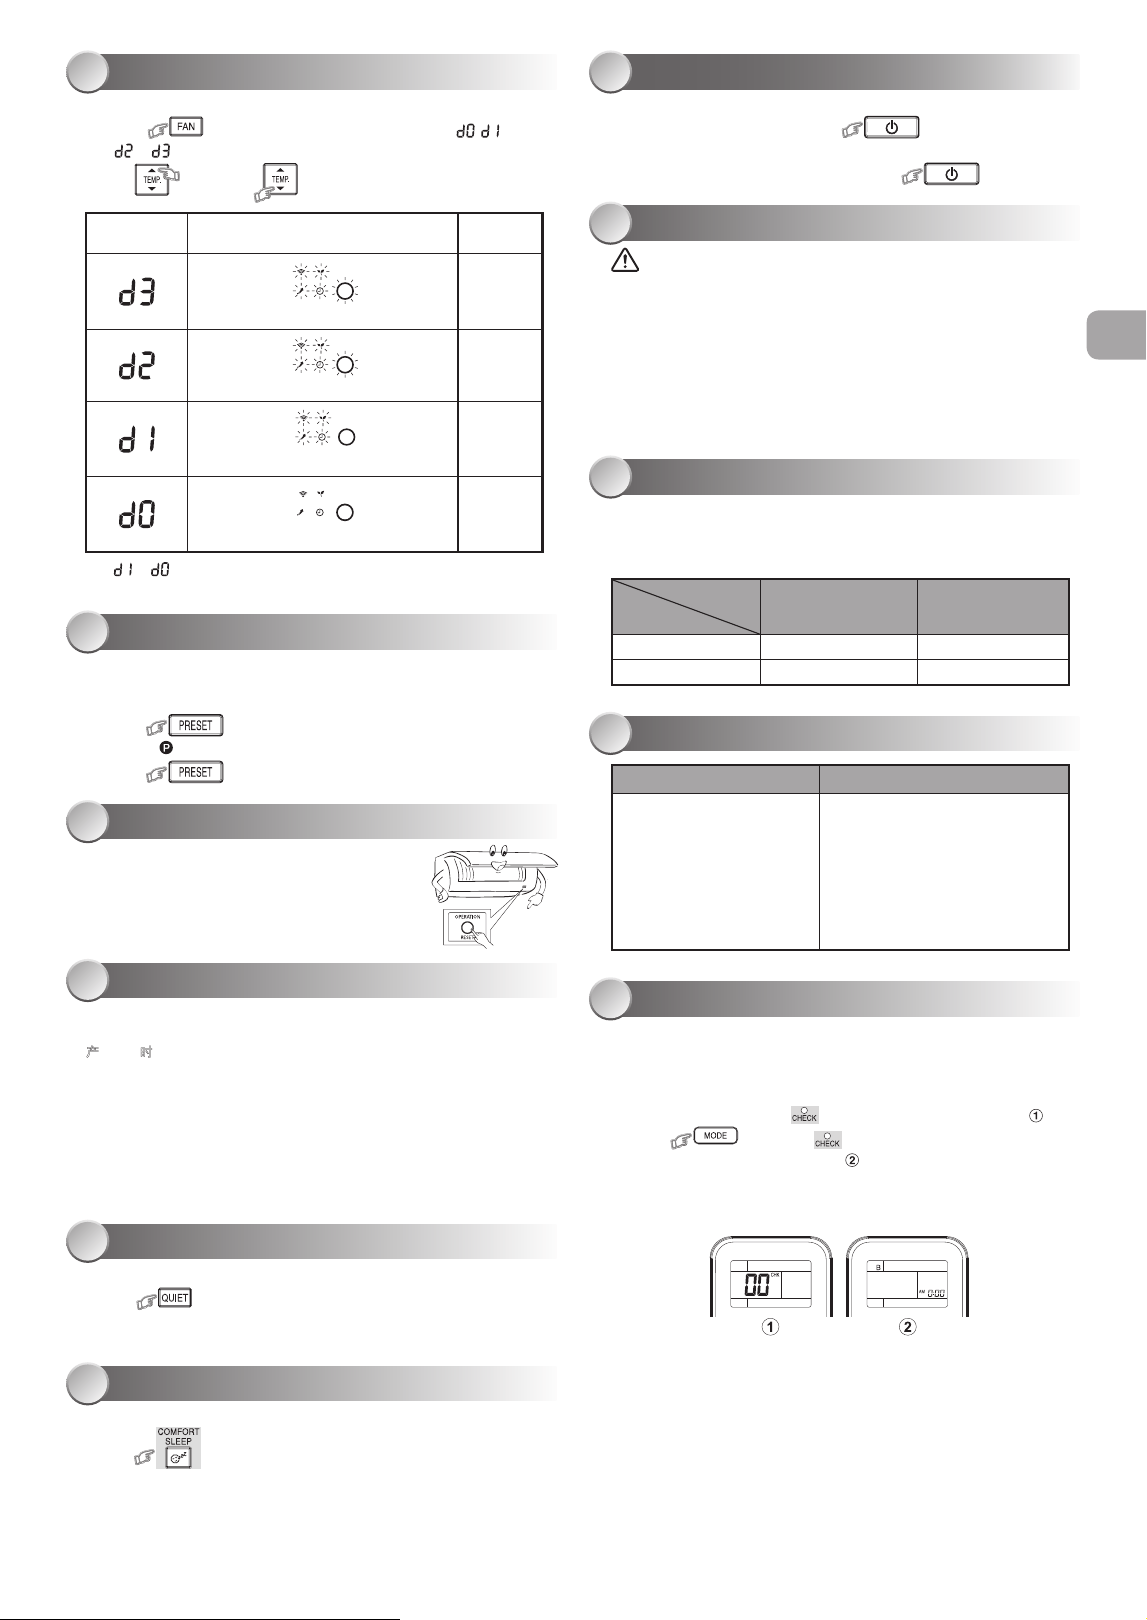
1.PressRESETbuttonontheindoorunittoturntheairconditionerON.
2.Pointtheremotecontrolattheindoorunit.
3.Pushandhold
buttonontheRemoteControlbythetipofthepencil.
“00”willbeshownonthedisplay.(Picture )
4.Press duringpushing .“B”willshowonthedisplayand
“00”willdisappearandtheairconditionerwillturnOFF.TheRemote
ControlBismemorized.(Picture )
Note:1.RepeatabovesteptoresetRemoteControltobeA.
2.RemoteControlAhasnot“A”display.
3.DefaultsettingofRemoteControlfromfactoryisA.
EN
Thisproductisdesignedsothat,afterapowerfailure,itcanrestart
automaticallyinthesameoperatingmodeasbeforethepowerfailure.
Information
TheproductisshippedwithAutoRestartfunctionintheONposition.
TurnitOFFifthisfunctionisnotrequired.
How to turn OFF the Auto Restart Function
● Pressandholdthe[OPERATION]buttonontheindoorunitfor3seconds
(3beepsoundsbutOPERATIONlampdoesnotblink).
How to turn ON the Auto Restart Function
● Pressandholdthe[OPERATION]buttonontheindoorunitfor3seconds
(3beepsoundsandOPERATIONlampblink5time/secfor5seconds).
Note:
● IncaseofONtimerorOFFtimerareset,AUTORESTARTOPERATION
doesnotactivate.

安全預防措施
• 將本手冊放置在操作人員容易找到的地方。
•
在操作本設備之前,請仔細閱讀本手冊中的注意事項。
•
本設備供專業或經過培訓的用戶在商店、輕工業和農場作業內使用,
或供非專業人士的商業使用。
•
本文所述的預防措施分為危險、警告和小心。它們均包含有關安全的重要信息。
務必遵守所有注意事項的要求。
危險
•
不要安裝、修理、打開或拆下蓋子。這樣做可能會讓你暴露在危險的電壓下。
請經銷商或專業人士來執行此操作。
•
關閉電源並不能防止潛在的觸電危險。
•
電器安裝應按照國家布線規範的規定執行。
•
固定布線中必須包含與電源斷開的裝置,所有電極的接觸間隔至少為3mm。
•
該設備必須存放於無持續操作火源(例如明火、操作中的燃氣設備或操作中的電加
熱器)的房間中。
•
為了避免火災、爆炸或傷亡,如在設備附近檢測到有害氣體(如易燃或腐蝕性氣體)
時,請勿操作啟用該設備。
警告
• 不要讓你的身體直接長時間暴露在冷氣中。
• 不要將手指或任何物品插入進風口/出風口。
• 當出現異常(焦味等)時,關閉空調並斷開電源或關閉斷路器。
• 如果年齡8歲及以上的兒童,身體、感官或精神能力下降或缺乏經驗和知識的人使
用該設備時,其應獲得使用本設備的安全監督或指導,並瞭解所涉及的危險後,方
可使用本設備。兒童不能觸碰本設備。未經監督的情況下,兒童不得從事清潔和用
戶維護的作業。
• 本設備不適用於體體能、感官或精神能力下降或缺乏經驗和知識的人(包括兒童)
使用,除非有一個負責其安全的人對設備的使用進行監督或指導。
• 空調必須由合格的安裝人員或合格的維修人員進行安裝、維護、修理和拆卸。當需要
執行上述工作時,請有資質的安裝人員或有資質的服務人員來執行進行以上工作。
• 應監督兒童,確保他們能不觸碰該設備。
• 不要使用與所規定的(R410A)補充或替換制冷劑不同類型的制冷劑。否則,制冷循環
中可能會產生異常高壓,這可能導致產品出現故障或發生爆炸,或對身體造成傷害。
• 不要使用手 加速除 程或清洁,除了那些由制造商推荐的其他。
• 該設備必須存放於無持續操作火源(例如明火、操作中的燃氣設備或操作中的電加
熱器)的房間中。
• 註意制冷劑可能無氣味。
• 當設備被施壓時,不要刺穿或燃燒。不要將設備暴露在高溫、火焰、火花或其他火源
或點燃的環境中。否則可能發生爆炸並導致傷亡。

安全預防措施
注意
• 請勿用水清洗設備。可能會導致觸電。
• 請勿將本空調用於其他用途,如保存食物、飼養動物等。
• 請勿在室內/室外機上踩踏或放置任何物品。它可能會導致人身傷害或設備損壞。
• 請勿觸摸鋁散熱片因其可能會造成傷害。
• 清潔設備前,關閉主開關或斷路器。
• 當長時間未使用設備時,關閉總開關或斷路器。
• 當長時間運行設備後應由專業人員對其進行維護。
• 對於因不遵守本手冊的說明而造成的損壞製造商不承擔任何責任。
CT
室內機顯示器 單觸
自動操作
制冷/僅風扇操作
乾式操作
高功率運行
ECO 節能操作
定時器操作
使用前的準備
氣流方向
遙控器
1 5
6
7
8
9
10
11
2
3
4
2
3
4
5
1
1 ECO節能(白色)
2 Wi-Fi連接(白色)
3 高功率(白色)
4 定時器(白色)
5 操作(白色)
● 顯示器亮度可以調整,請按照第@的步 操作。
需要隨配件而提供的無線局域網連接適配器。
準備過濾器
1.打開進氣格柵並拆下空氣濾清器。
2.安裝過濾器(请参阅《安装手册》中的详细信息) 。
裝入電池 (當使用無線操作時)
1.拆下滑動蓋。
2.插入2 新電池(AAA型)按照(+)和(–)
的位置裝入。
時鐘設置
1.用鉛筆尖壓一下 鍵。
如果計時器指示燈閃爍,即轉到下一步第2步。
2.按下 或 鍵:調整時間。
3.按下 鍵:設定時間。
遙控器設置
用鉛筆 一下
鍵, 或
1.取出電池。
2.按下 鍵。
3.插入電池。
1
按下 鍵:沿所需的垂直方
向移動百葉窗。
2
按下 自動搖擺氣流,再
按一次以停止。
3
至於水平方向,則請手動調整。
注:
●
請勿用手或其他方式手動移動百葉窗。
●
百葉窗可以通過某種操作方式自動定位。
1 紅外信號發射器
2 啓動/停止按鈕( )
3 模式選擇按鈕( )
4 溫度按鈕( )
5 風扇轉速按鈕( )
6 百葉窗擺動按鈕( )
7 設置百葉窗上下擺動按鈕( )
8 開啓定時器按鈕( )
9 關閉定時器按鈕( )
0 設置按鈕 ( )
! 清除按鈕( )
@ 內存和預設按鈕( )
# 單觸按鈕( )
$ 大功率按鈕( )
% 節能模式按鈕( )
^ 靜音鍵( )
& 舒適睡眠模式按鈕( )
* 過濾器重置按鈕( )
( 設置定時鐘按鈕( )
) 檢查按鈕 ( )
- 重置按鈕( )
1
@
2
3
7
#
%
8
&
)
(
4
6
5
^
$
!
9
0
-
*
注:
• 所提供的遙控器為無線型,也可用作有線遙控器。如需有線控制,
請參閱安裝說明中的“如何連接遙控器進行有線操作”。
• 在有線操作中,當用戶關閉空調電源時,遙控器將會回到初始狀態
(預設、定時器和時鐘將回到初始狀態)。
按下ONE-TOUCH(單觸)按鈕進行完全自動化的操作,它是根據所在地區用戶的
典型參數選擇定制的。定制設置控制溫度氣流強度、氣流方向和其他設置以便使您
可以選擇使用ONE-TOUCH按鈕。如果您更喜歡其他設置,可以從東芝設備的許
多其他操作功能中進行選擇。
按 :啟動操作。
自動選擇制冷、加熱或僅開啟風扇操作
1.按下 鍵:選擇自動A。
2.按下
鍵:設置所需溫度,最低:17°C,最高:30°C。
3.按下 鍵:選擇(自動)AUTO,(低)LOW ,(低+)LOW+ ,
(中)MED ,(中+)MED+ ,或(高)HIGH .
1.按下 鍵:選擇制冷 ,或僅風扇Fanonly 功能。
2.按下
鍵:設置所需溫度。
最低:17°C,最高:30°C,僅風扇操作:無溫度指示。
3.按下 鍵:選擇(自動)AUTO,(低)LOW ,(低+)LOW+ ,
(中)MED ,(中+)MED+ ,或(高)HIGH .
對於除濕,自動控制適度的制冷性能。
1.按下 鍵:選擇乾燥Dry 。
2.按下
鍵:設置所需溫度最低17°C,最高30°C。
注: 乾燥模式風扇轉速僅設置為自動。
自動控制室內溫度來節省能量(除了在除濕(DRY)和僅風扇(FANONLY)模式以外)
按下 鍵:開啓或停止操作。
室內自動控制以節能(除乾燥和僅風扇模式)
按下 鍵:開啓或停止操作。
注: 制冷操作;設定溫度將自動增加1度/小時,持續2小時(最多增加2度)。
空調運行時設置定時器。
ON(開啓)定時器設置 OFF(關閉)定時器設置
1
按下 鍵:設置所需的開啓
計時器。
按下 鍵:設置所需的關閉
計時器。
2
按下 鍵:設置定時器。
按下 鍵:設置定時器。
3
按下 鍵:取消定時器。
按下 鍵:取消定時器。
1
按下 鍵:設置ON(開啓)
計時器
3
按下
2
按下 鍵:設置OFF(關閉)
計時器。
4
在( 或 )標記閃爍時按下
鍵。
●
在激活每日計時器期間,兩個箭頭( , )都會顯示。
注:
●
將遙控器保持在可向室內機無障礙傳輸信號的狀態,否則將會出現長達
15分鐘的延時現象。
●
設置將被保存以用於下一次相同操作。
設置每日計時器
Daily Timer(每日計時器)允許用戶設置開啓/關閉計時器,並將每日被激活。
顯示燈的亮度調節
預設操作
臨時操作
自動重啓操作
靜音模式
舒適睡眠操作
自清潔操作 (僅用於制冷和乾燥操作)
維修
操作和性能
故障排除(檢查點)
遙控 A-B 選擇
12
13
14
15
16
17
18
19
20
21
22
降低或關閉顯示燈亮度.
1. 按住 鍵3秒鐘,直到遙控LCD上顯示亮度水平( , ,
或 ),然後松開按鈕。
2. 按
升高
鍵或
降低
鍵,在4個級別中調整亮度。
遙控器LCD 操作顯示 亮度
指示燈將完全亮起。
100%
指示燈亮度為50%。
50%
指示燈亮度為50%,操作燈熄滅。
50%
關閉所有燈。
全部關閉
●
在 和 示例中,燈亮5秒鐘後熄滅。
設置您的首選操作以備將來使用。設備將記住該設置以便將來操作的運行
(氣流方向除外)。
1.設置您的首選操作。
2.按住 鍵3秒鐘來進行記憶設置。
顯示出 標記。
3.按下 :進行預設操作。
如果遙控器放錯位置或被卸下
●
按下RESET(復位)按鈕,在無需使用遙控器的情況下
可啓動或停止設備。
●
運行模式設置為AUTOMATIC(自動)運行,預設溫度
為24°C,風扇運行為自動轉速。
在超低風扇速度下進行靜音運行(除濕(DRY)模式中除外)
按下 :啟動和停止操作。
注: 在某些條件下,由於低聲響特性,QUIET(靜音)操作可能無法提供足夠的製
冷效果。
為了舒適的睡眠,將自動控制氣流並自動將其關閉。
按下 鍵:選擇1,3,5或9小時以關閉計時器。
注: 制冷操作時,設定的溫度將自動增加1度/小時,持續2小時(最多增加2度)。
對於加熱操作,設定的溫度將降低。
防止室內機內濕度引起的異味。
1.如果在冷卻或乾燥模式下按 按鈕一次,風扇將繼續運行
30分鐘,然後自動關閉。這樣可以降低室內機的濕度。
2.要立即停止設備,請在30秒內按2次以上的 按鈕。
首先,關閉斷路器。
室內機和遙控器
●
必要時用濕布清潔室內機和遙控器。
●
不可使用汽油、稀釋劑、拋光粉或化學處理的噴粉機。
空氣過濾器
每兩周清洗一次
1. 打開進氣格柵。
2. 拆下空氣過濾器。
3. 用真空吸塵器或水清洗,然後擦乾。
4. 重新安裝空氣過濾器並關閉進氣格柵。
1. 三分鐘保護功能:防止設備突然重啓或打開時啓動3分鐘。
2. 設備運行時可能會發出輕微的開裂聲。這屬於正常現象,該破裂聲可能是由
塑料膨脹/收縮引起的。
空調運行條件
溫度
操作
室外溫度 室內溫度
制冷 -10°C~46°C 21°C~32°C
乾燥 -10°C~46°C 17°C~32°C
設備不工作 制冷或加熱異常低
●
電源總開關關閉。
●
激活斷路器切斷電源。
●
電流中斷
●
計時器打開設置
●
過濾器被灰塵堵塞。
●
溫度設置不當。
●
車窗或車門打開。
●
室外機進、出風口被堵塞。
●
風扇轉速過低。.
●
運行方式為FAN或DRY。
●
POWERSLECTION(功率選擇)功能
設定為75%或50%(此功能取決於
遙控器)。
在安裝兩台空調的情況下,每台室內機分別使用各自的遙控器。
遙控器 B 設置
1.按下室內機上的RESET(重設)按鈕來ON(打開)空調器。
2.將遙控器指向室內機。
3.用鉛筆尖壓住遙控器上的 按鈕。顯示屏上將顯示“00”。(圖片 )
4.推按 按鈕時按下 鍵。顯示屏上將顯示“B”,“00”消失,空
調被關閉。遙控器B被記憶。(圖片 )
注:1.重復上述步,將遙控器重置為A。
2.遙控器A沒有“A”顯示。
3.出廠遙控默認設置為A。
CT
本產品的設計使其在斷電後能以斷電前相同的工作模式自動重啓。
須知信息
产品出厂时在ON位置具有自动重启功能。如果不需要此功能,其置于OFF。
如何關閉自動重啓功能
● 按住室內機上的[OPERATION]按鈕3秒鐘
(發出3聲蜂鳴音,但操作燈不閃爍)。
如何開啓自動重啓功能
● 按住裝置上的[OPERATION]按鈕3秒鐘
(發出3聲蜂鳴聲,操作燈閃爍5次/秒,持續5秒鐘)。
注 :
● 如果設置了開啓定時器或關閉定時器,則不會激活自動重啓操作。


1122350221