This manual contains the information you need to install and use
your product. Keep the this manual for future reference.
Instruction
Manual
048-OPAC-5
048-OPAC-6


Table of Contents
Warning and Safety -------------------------------------------------------------------------
Product Specication ----------------------------------------------------------------------
Parts Details -----------------------------------------------------------------------------------
Installation Guide ----------------------------------------------------------------------------
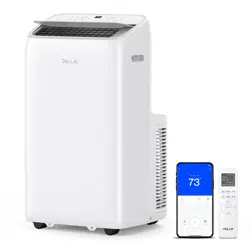
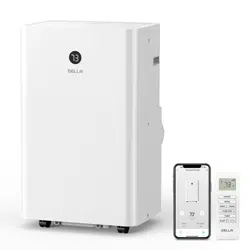
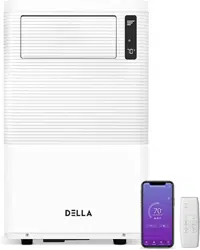
Control Panel ----------------------------------------------------------------------------------
Remote Control -------------------------------------------------------------------------------
Operation Instructions ---------------------------------------------------------------------
Care and Maintenance --------------------------------------------------------------------
Troubleshooting ------------------------------------------------------------------------------
Disposal Guideline ---------------------------------------------------------------------------
04
06
07
09
13
14
16
22
24
25
4
Instruction Manual
Warning and Safety
*Read this guide before installation and using this appliance. Failure to follow the safety instructions
may result in property damage, serious injury, or death.
• In the case of the appliance emitting smoke or burning smell, shut down the appliance and
disconnect from the power supply immediately.
• This appliance uses R32 refrigerant. Handle the air conditioner with care and check if there
is any refrigerant leakage. In the case of refrigerant leakage, shut down the appliance and
disconnect from the power supply. Contact a qualied technician for inspection. Refrigerant
can be toxic and ammable. Rapid evoporation of refrigerant may cause frostbite, cardiac
arrhythmia, and / or skin irritation.
• This appliance must be plugged directly into a wall power socket. Do not connect this
appliance to a power strip, extension cord, surge protector, timers, or direct breaker.
• Ensure the voltage and current rating of the power supply corresponds to that on the
product specication.
• Make sure the appliance is connected to a properly grounded power outlet only.
• Do not use the appliance with a damaged cord or plug, or after the appliance malfunctions,
has been dropped, or damaged in any manner.
• This appliance is designed to be used indoors only. Do not use this appliance outdoor or
expose it to outdoors elements such as rain, snow, sunlight, wind, or extreme temerpatures.
• Do not place or use the appliance in the bathroom, laundry area, or places that might come
into contact with water.
• Do not use this appliance near ammable substances such as alcohol, gasoline, paint, etc.
Or pressurized containers such as spray cans.
• Repairs should be carried out by a professional or qualied technician only. Incorrect repair
could expose the user to potential electric shock or other kinds of hazards.
• Do not place the appliance in contact with water. The electrical insulation could be damaged
and thus cause electric shock.
• Do not bend, tug, pull or compress the power cord to prevent damaging the power cord.
DANGER WARNING
DANGER
WARNING
CAUTION
Indicates an imminently
hazardous situation that, if not
avoided, will result in death,
serious injury, or serious
property damage.
Indicates a potentially
hazardous situation that, if not
avoided, will result in death,
serious injury, or serious
property damage.
Indicates a potentially
hazardous situation that, if not
avoided, will result in minor to
moderate injury. It may also
be used to indicate unsafe
practices.

5
v.02222024
Warning and Safety
• Do not run the power cord under the carpet or cover the cord with throw rugs, runners, or
similar covering. Arrange the cord away from high trafc area to prevent tripping over it.
• Only use this appliance as described in this manual.
• Do not obstruct the air inlet or outlet.
• Do not use abrasive solvents to clean this appliance.
• Proper adult supervision is required when using this appliance when there are children,
persons with reduced physical, sensory, or mental capabilities, or pets present.
• Do not leave the appliance operating unattended.
• Do not touch any moving parts when the air conditioner is in operation.
CAUTION

6
Instruction Manual
Product Specication
Model 048-OPAC-5 048-OPAC-6
Rated Voltage 115 V 115 V
Frequency 60 Hz 60 Hz
Cooling Capacity (Ashrae) 8000 BTU / h 10000 BTU / h
Recommended Room Size Up to 350 sq.ft Up to 450 sq. ft
Dehumidication 47.96 Pint / Day 47.96 Pint / Day
Noice Level 53 - 54 dB 54 - 55 dB
Refrigerant Type, Charge R32, 6.88 oz R32, 6.88 oz
Dimension 12.2" x 12.2"x 27.6" 12.2” x 12.2”x 27.6”
Net Weight 44.1 lb
47.4 lb
7
v.02222024
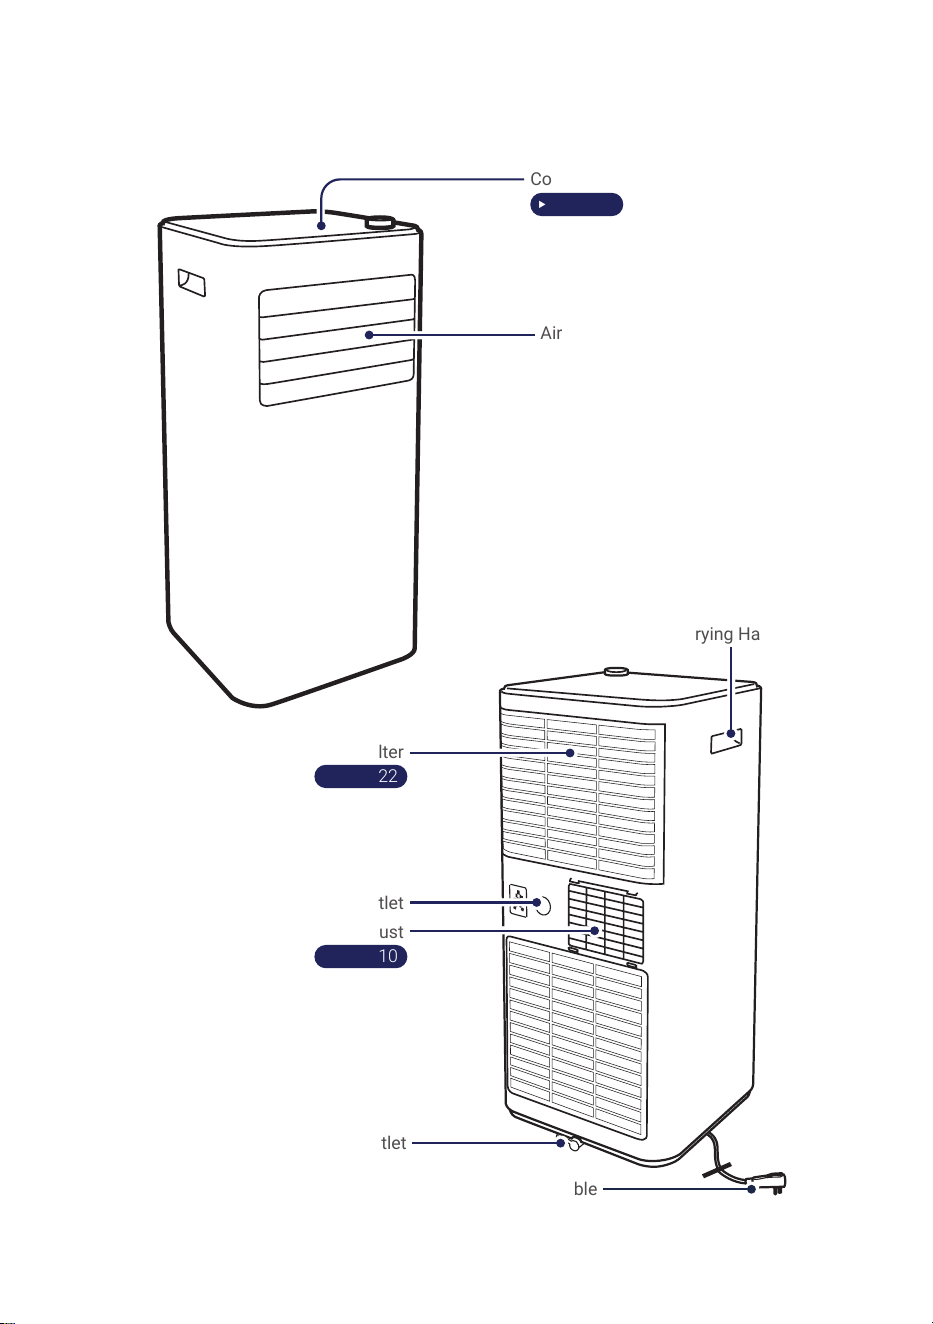
Parts Details
NOTE:
• The graphical representation might have slight differences than the actual product.
Control Panel
‣ Page 13
Air Outlet
Air Filter
‣ Page 22
Upper Drain Outlet
Air Exhaust
‣ Page 10
Bottom Drain Outlet
Power Cable
Carrying Handle
8
Instruction Manual
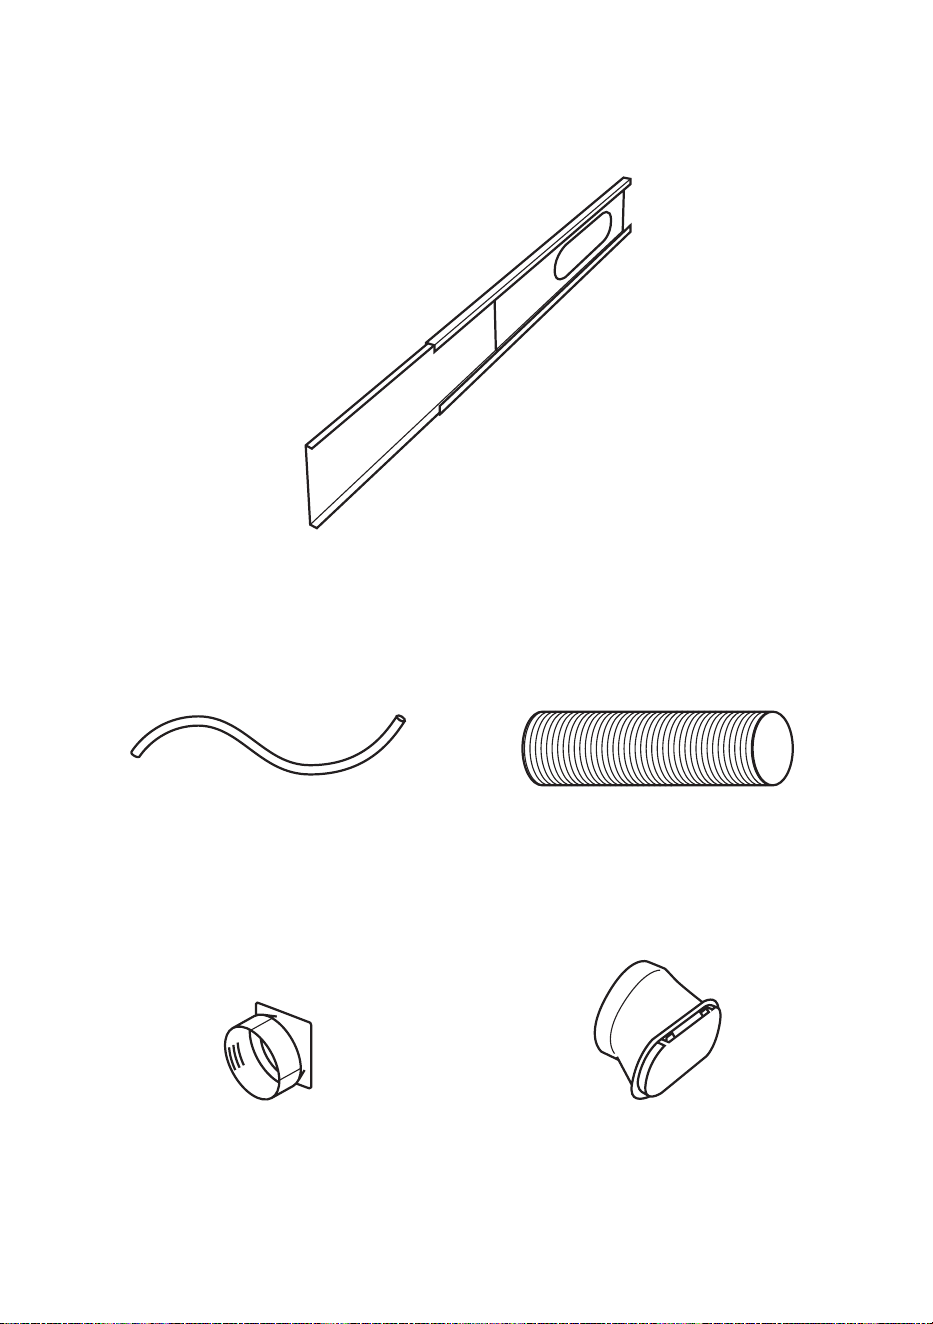
Parts Details
Window Slider Kit
1x
Drain Hose
1x
Hose Connector
1x
Exhaust Hose
1x
Window Kit Adapter
1x
9
v.02222024
≥50cm / 19.7"
≥50cm / 19.7"
Picking a installation location
• The air conditioner must be placed on a at ground.
• Keep the air conditioner at least 50 cm or 19.7" away from any wall or obstacles.
• Do not place the air conditioner in laundry room or near any open ignition sources such as open
ames, gas appliance, or electric heater.
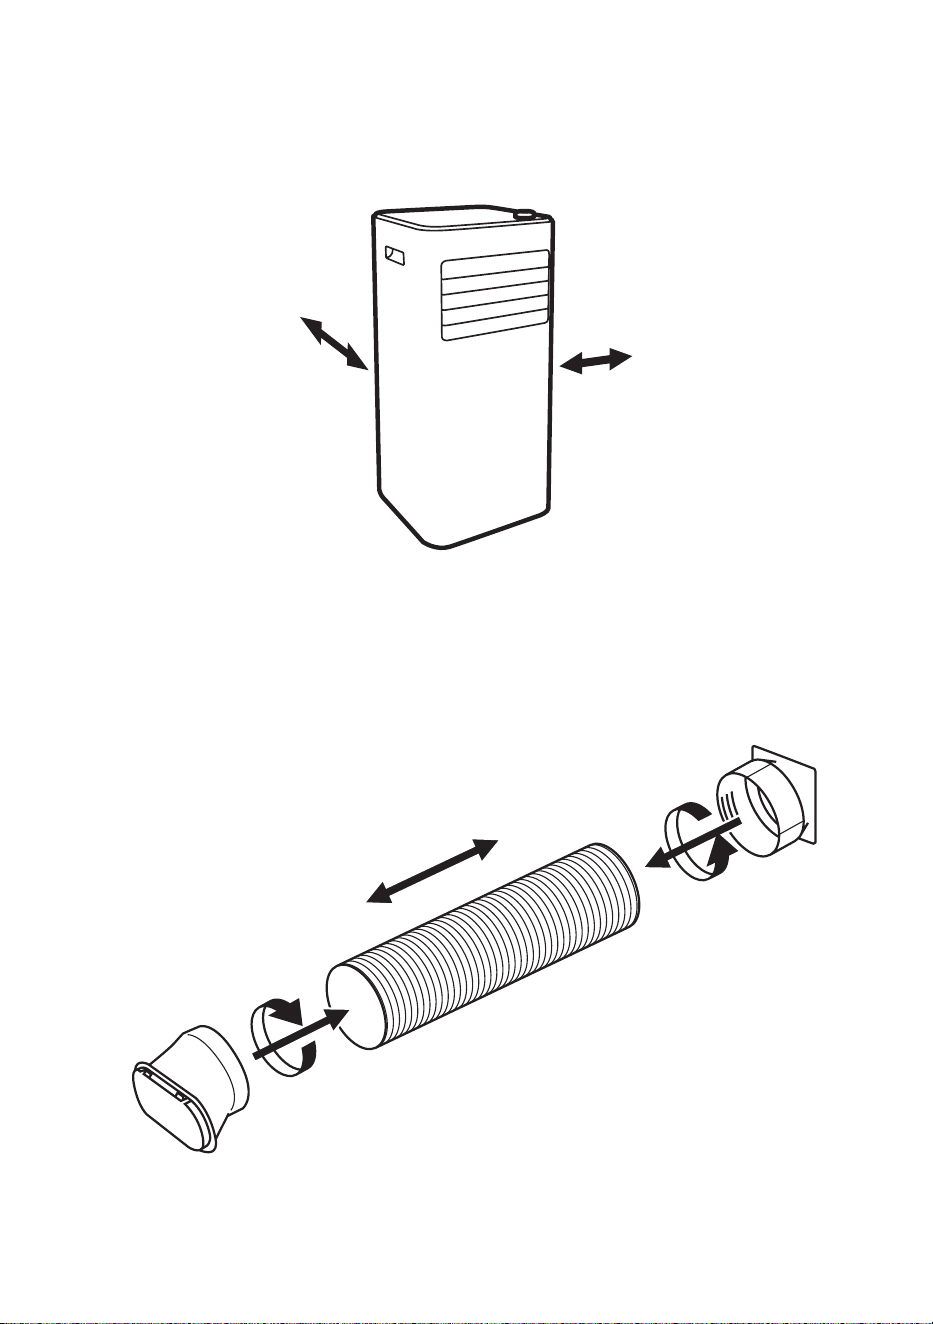
Installation Guide
Connecting the exhaust hose
• Connect the exhaust hose to the hose connector and window kit adapter.
10
Instruction Manual
Installtion Guide
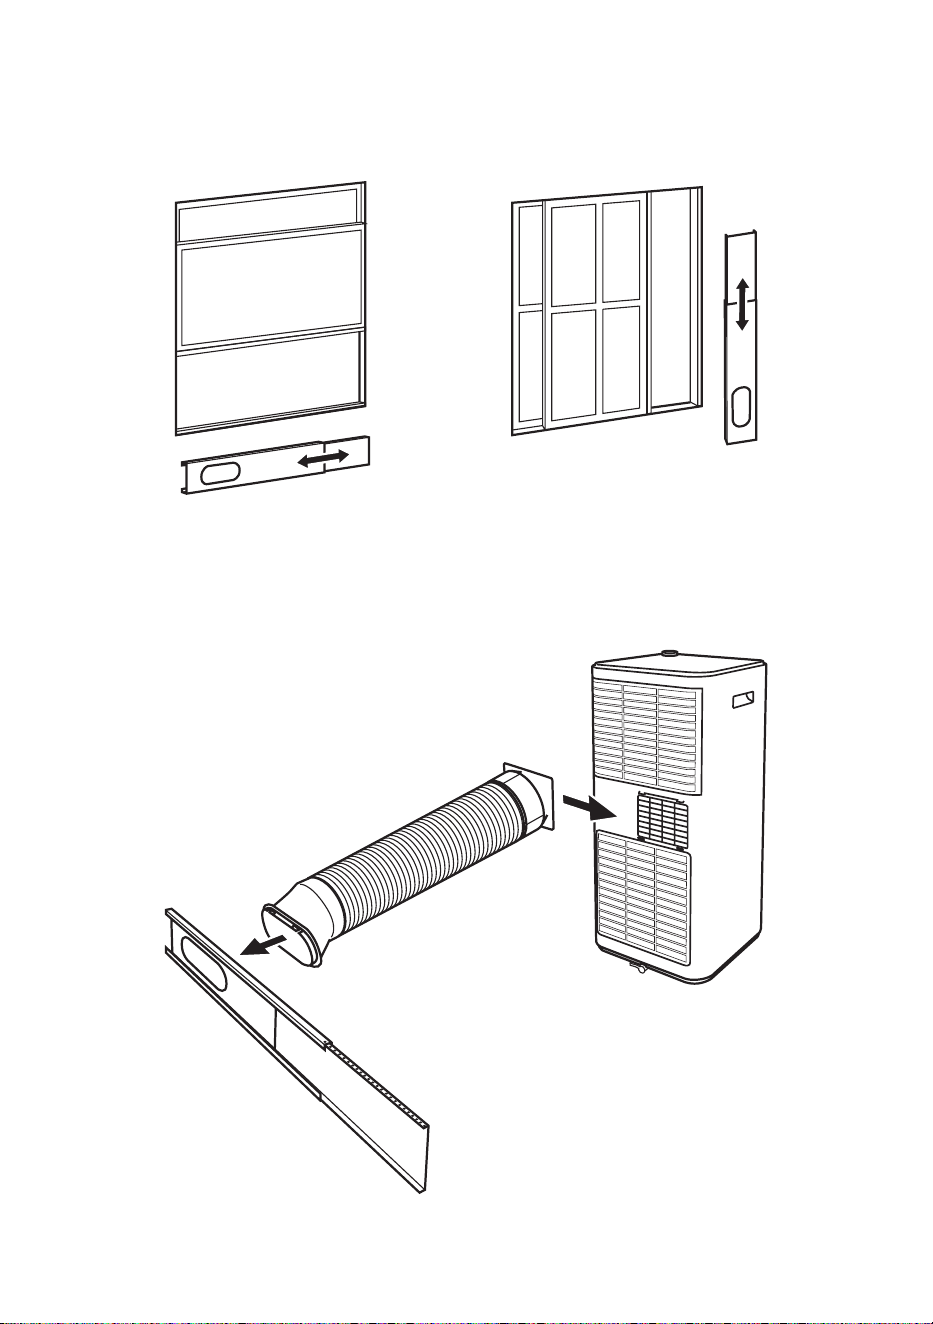
Extending the window slider kit
• Slide the hose connector to the air exhaust on the unit, and attach the window kit adapter to the
window slider kit.
• Adjust the length of the window slider kit according to your window, and then secure the position
with the provided screws.
Attaching exhaust hose to the unit
11
v.02222024
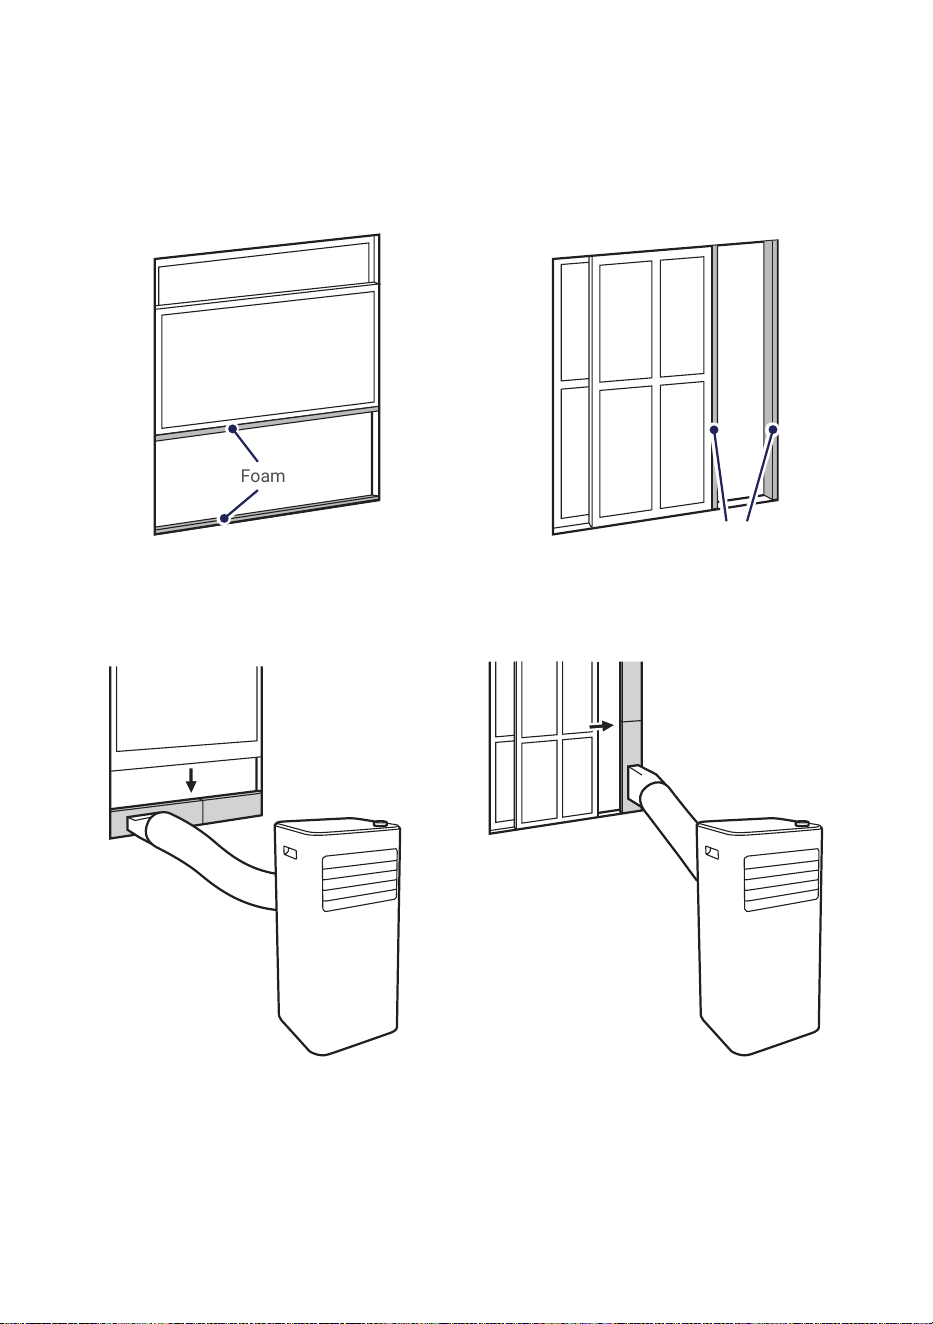
Installtion Guide
Horizontal WindowVertical Window
1. Attach foam seal to the window sash and the window frame.
2. Place the window slider kit between the window sach and window frame.
Connecting exhaust hose to the window
Foam Seal
Foam Seal

12
Instruction Manual
Installtion Guide
• Exhaust hose should be kept to a minimum length and as straight as possible.
• Stretching or bending the duct excessively will decrease cooling efciency.
13
v.02222024
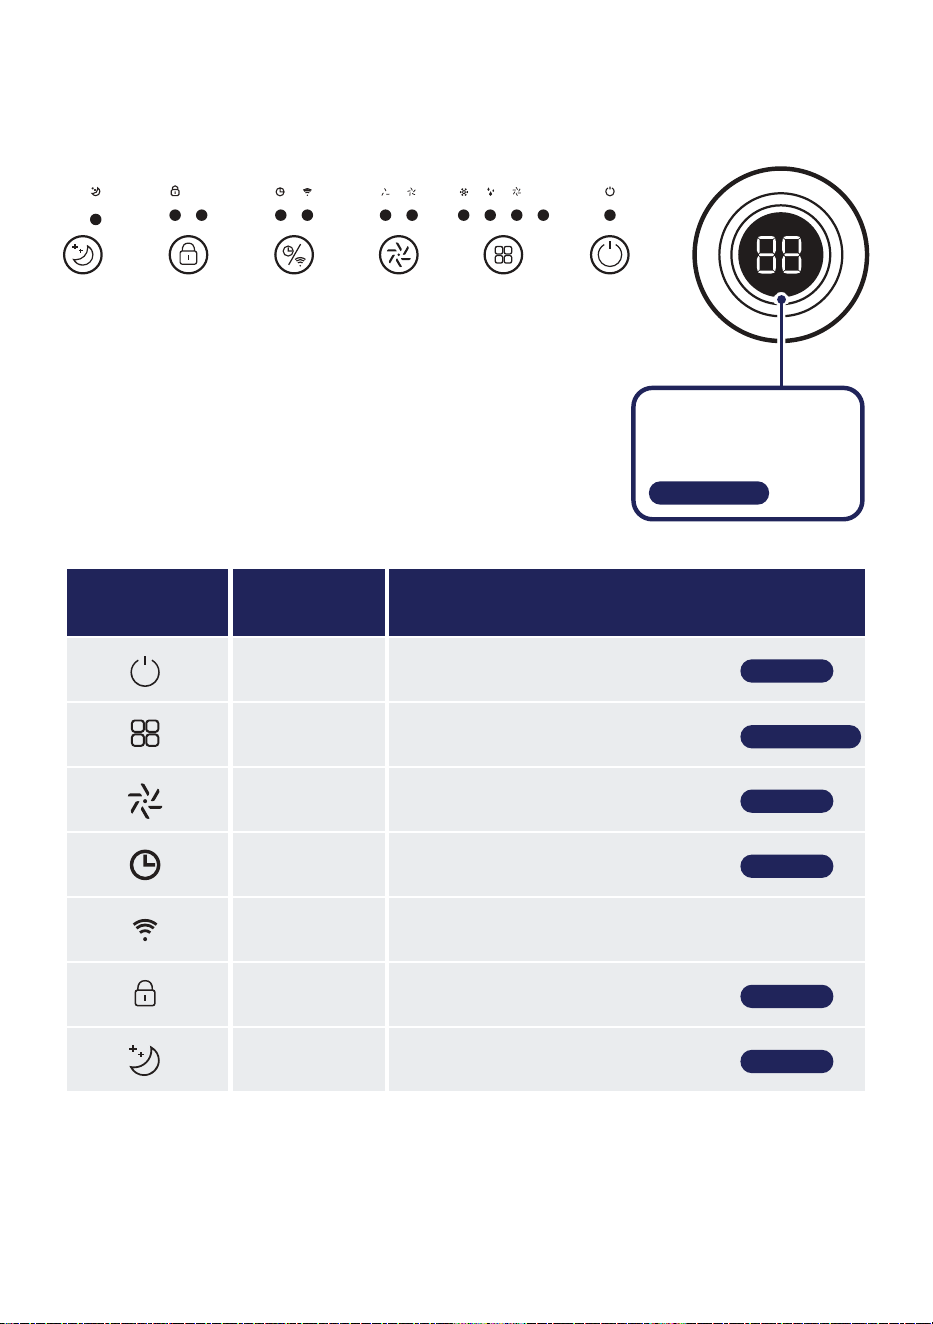
Control Panel
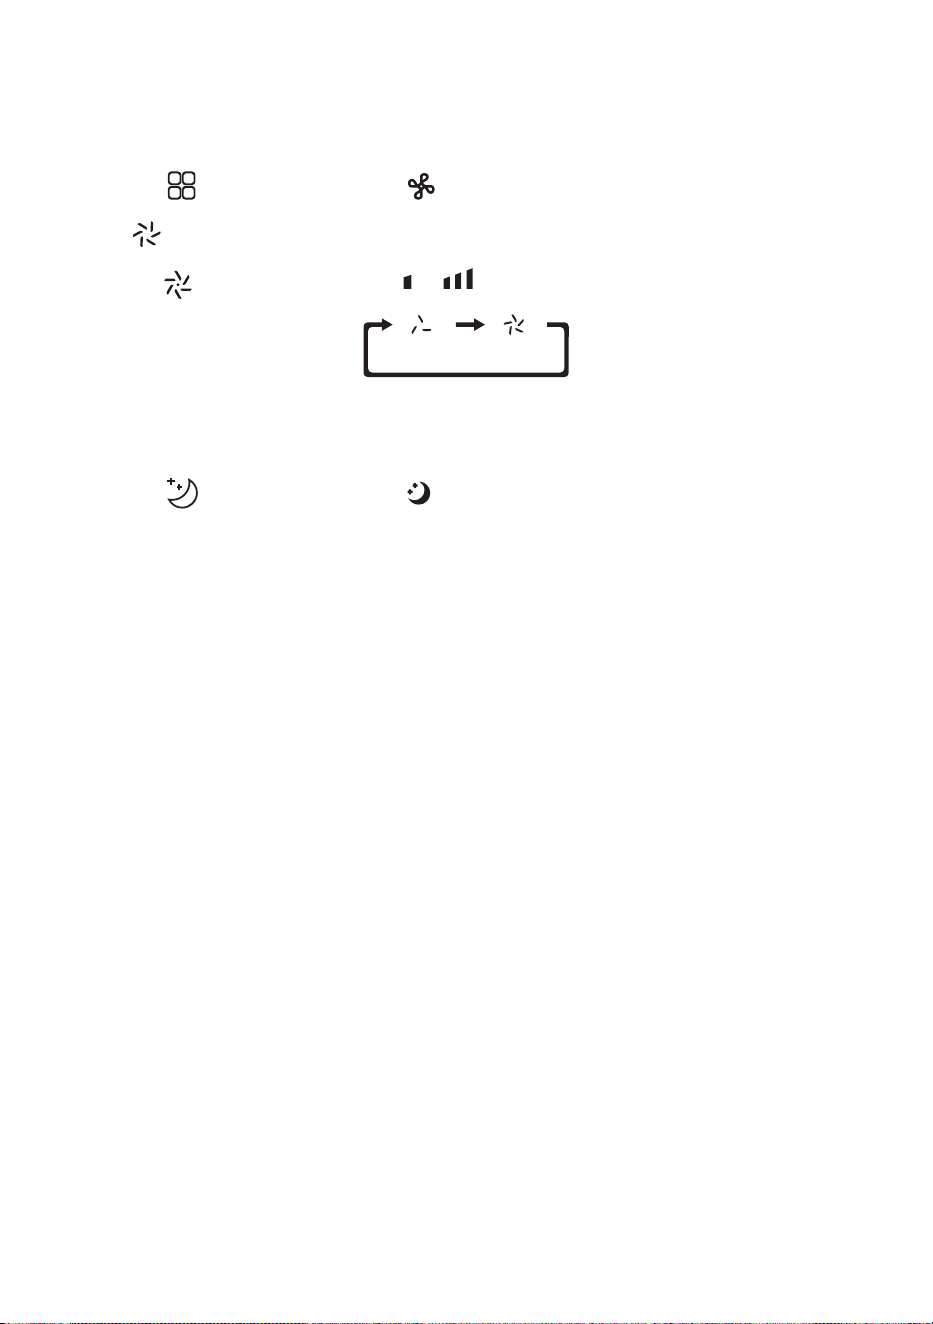
Icon Button Name Function
Power Button Power ON / OFF the air conditioner
Mode Button Change the operation mode setting
Fan Speed
Button
Control the fan speed
Timer Button Enable shut down / turn on timer
Wi-Fi Button Enable Wi-FI function
Child Lock Button Control child lock
Sleep Button Enable sleep function
‣ Page 16
‣ Page 18
‣ Page 17
‣ Page 18
‣ Page 17
‣ Page 16, 17
PowerModeSpeedTimer/wifiLockSleep
‣ Page 16-18
Turning Knob / Display
• Adjust temperature /
timer setting.
14
Instruction Manual
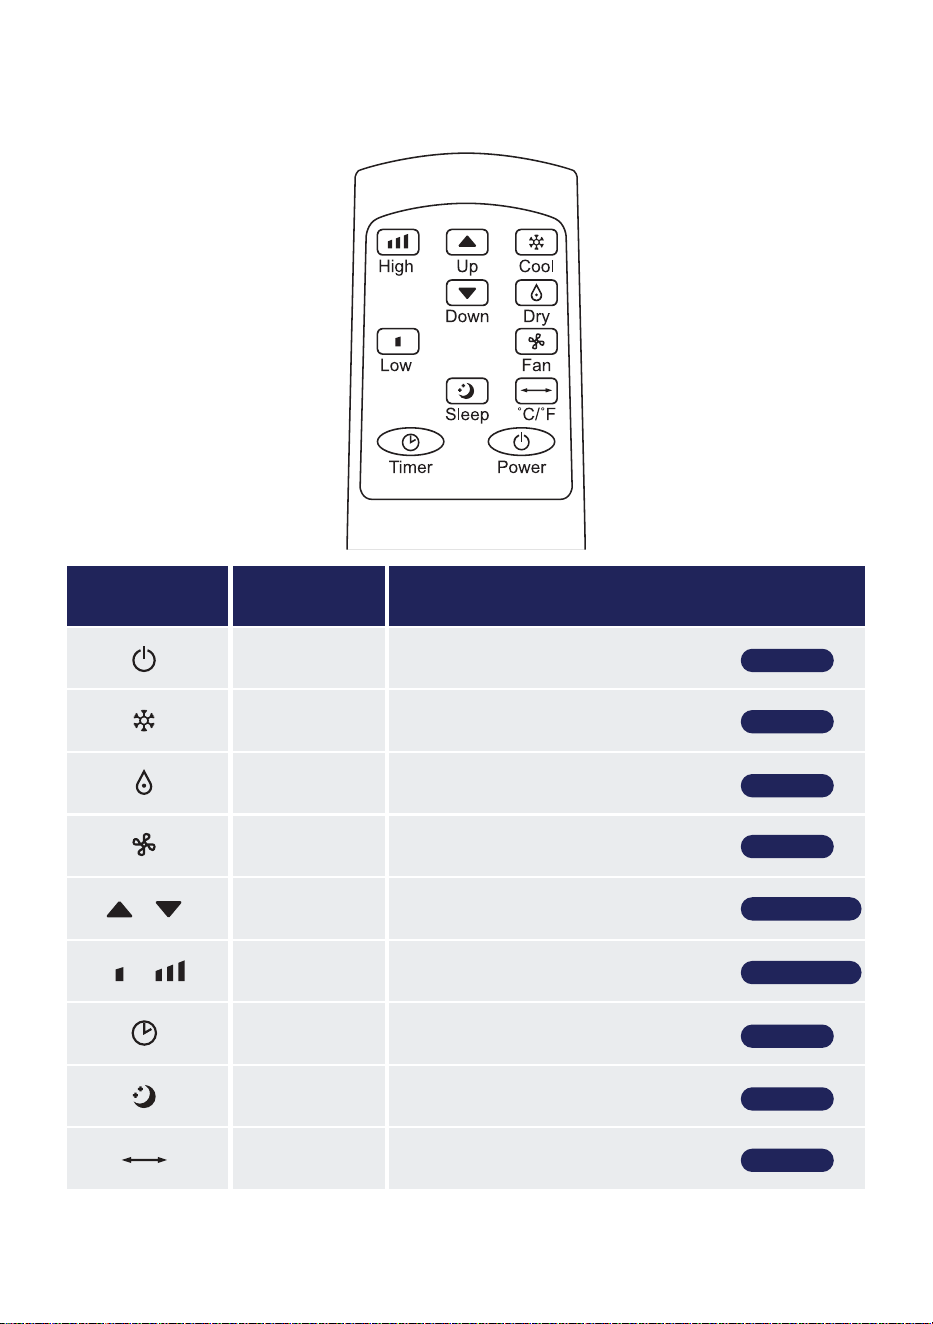
Icon Button Name Function
Power Button Power ON / OFF the air conditioner
Cool Button Shortcut for cool mode
Dry Button Shortcut for dry mode
Fan Button Shortcut for fan mode
Up / Down
Buttons
Adjust temperature / timer setting
High / Low
Buttons
Control Fan speed
Timer Button Enable shut down / turn on timer
Sleep Button Enable sleep mode
Unit Button Changing display unit between °C and °F
‣ Page 16
‣ Page 16
‣ Page 16
‣ Page 17
‣ Page 18
‣ Page 17
‣ Page 18
Remote Control
‣ Page 16-18
‣ Page 16, 17
15
v.02222024
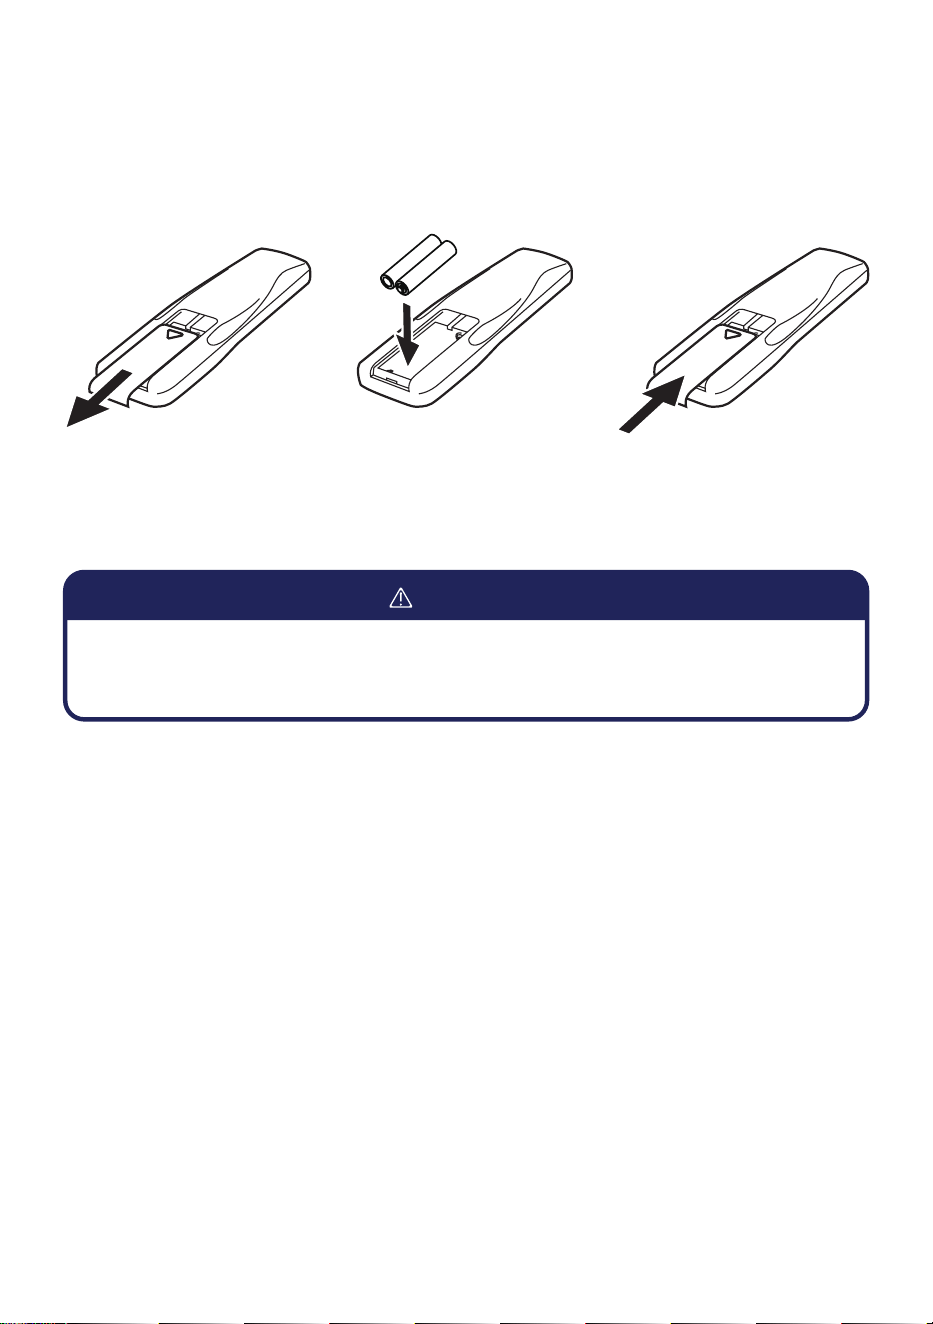
Remote Control
Changing Remote Control Battery
1. Remove the back cover and insert 2 new AAA 1.5v batteries.(not included)
2. Re-install the back cover to the remote control.
• Do not use rechargeable batteries.
• Replace the old batteries with new ones of the same type.
• Do not dispose battieries as unsorted municipal waste.
WARNING
16
Instruction Manual
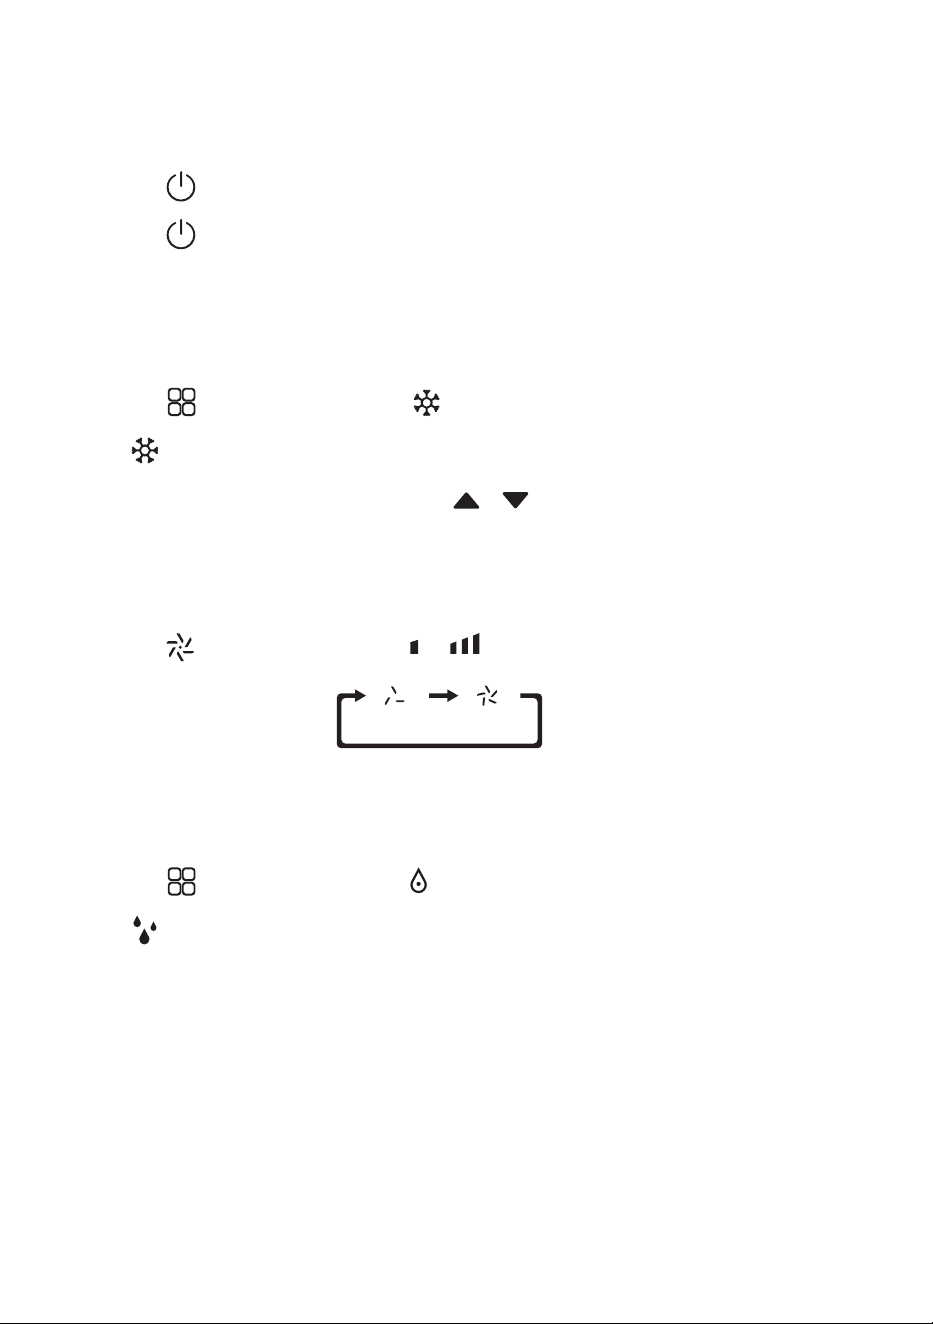
Operation Instructions
Power ON / OFF
Cool Mode
Dry Mode
1. Press on the control panel or on the remote control to turn on the unit.
2. Press on the control panel or on the remote control again to turn off the unit.
1. Press on the control panel or on the remote control to select cool mode.
- indicator will lights up on the control panel.
2. Turn the knob on the control panel or press on the remote control to adjust
temperature setting.
- Temperature can be set from 16°C - 32°C / 61°F - 90°F.
3. Press on the control panel or on the remote control to adjust fan speed.
1. Press on the control panel or on the remote control to select dry mode.
- indicator will lights up on the control panel.
17
v.02222024
1. Press on the control panel or on the remote control to select fan mode.
- indicator will lights up on the control panel.
2. Press on the control panel or on the remote control to adjust fan speed.
Operation Instructions
Fan Mode
Sleep Mode
1. Press on the control panel or on the remote control to enable sleep mode.
- In cool mode, the air conditioner will increase temperature by 2°F after 1 hour, and then another
2°F after the 2nd hour. Then the air conditioner will keep the temperature constant for 10 hours.
- In heat mode, the air conditioner will decrease temperature by 2°F after 1 hour, and then another
2°F after the 2nd hour. Then the air conditioner will keep the temperature constant for 10 hours.
18
Instruction Manual
Operation Instructions
Turn ON Timer
Shut OFF Timer
1. Make sure the air conditioner is OFF.
2. Press on the control panel or on the remote control to begin setting turn on timer.
3. Turn the knob on the control panel or press on the remote control to set the desired
time.
4. Leave the setting for 5 seconds, the air conditioner will start the timer automatically.
5. Set the timer to 00 or manually turn ON the unit to cancel the timer setting.
1. Make sure the air conditioner is ON.
2. Press on the control panel or on the remote control to begin setting shut off timer.
3. Turn the knob on the control panel or press on the remote control to set the desired
time.
4. Leave the setting for 5 seconds, the air conditioner will start the timer automatically.
5. Set the timer to 00 or manually turn OFF the unit to cancel the timer setting.
Changing Temperature Unit
Child Lock
1. Press on the remote control to change temperature unit between degree Celsius and
degree Fahrenheit.
1. Press on the control panel to enable child lock.
- When child lock is ON, all other buttons will not function.
2. Press on the control panel again to disable child lock.

19
v.02222024
Operation Instructions
Automatic Defrost
Overload Protection
At low room temperature, fost may build up at the evaporator during operation. The unit will
automatically start defrosting and the power indicator will blink. The defrost control sequence is as
follows:
• When the unit operates in cooling or drying mode, and the ambient temperature sensor detects the
evaporator coil temperature is below 30°F, the compressor will stop operating for 10 minutes or
with the coil temperature raises up to 44°F. After that, the unit will restart cool mode operation.
• When the unit operates in dry mode, once the coil temperature sensor detect the temperature of
the evaporator is below 104°F and rthe differential temperature between coil temperature and
room temperature is below 66°F after the compressor operation for 20 minutes, the unit start
defrosting for 5 minutes and the power indicator blinks.
In the event of power lost, there is a 3 minutes delay to protect the compressor before it restarts.
20
Instruction Manual
Operation Instructions
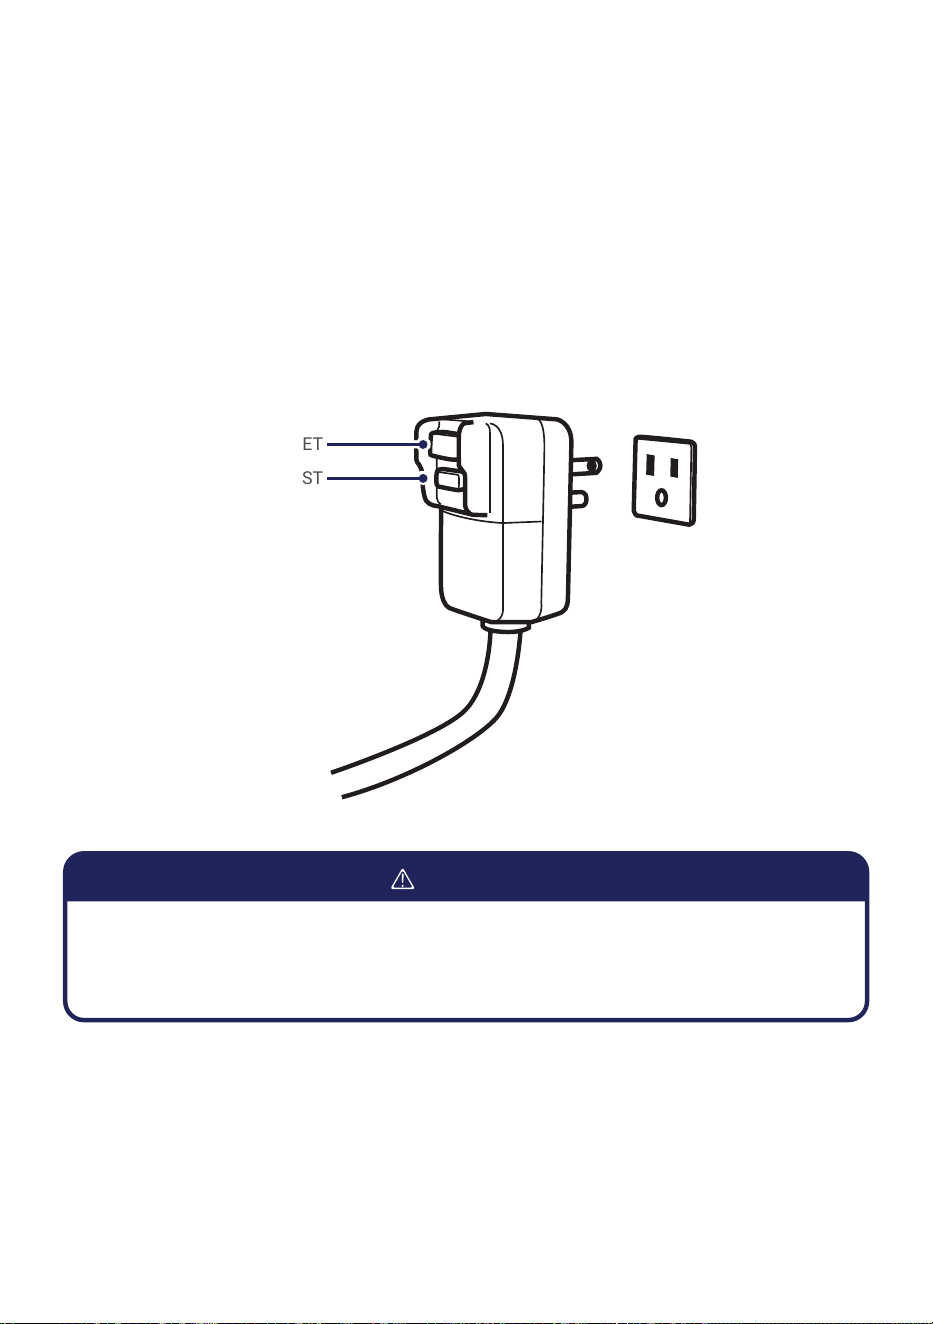
Grounding
This product must be properly grounded. If it should malfunction or breakdown, grounding provides a
path of least resistance for electric current to reduce the risk of electric shock.
For additional safety, the power cord features an integrated circuit breaker. Test and reset the buttons
provided on the plug.
The circuit breaker should be tested periodically by pressing the TEST button. If it does not cause the
circuit breaker to trip of if the RESET button will not stay engaged, unplug the unit immediately and
contact your service technican.
RESET
TEST
• Improper connection can result in a risk of electric shock. Check with a qualied electrician
or serviceman if you are in doubt as to weather the product is properly grounded.
• Do not modify the plug proveded with the product.
WARNING

21
v.02222024
Operation Instructions
Water Drainage
Drain Area
• When the internal water tank is full, the digital display will show “FL” error code.
• Carefully move the air conditioner to a drain location, then remove the bottom drain plug and drain
the water.
• After draining, re-install the drain plug and restart the air conditioner.
• For continue drainage during dry mode, remove the upper drain plug and insert a drain hose to the
outlet.
• Place the other end of the hose to a drain area.
Upper Drain Outlet
Attention
• Do not submerge the end of the hose into water to prevent air lock.
Bottom Drain Outlet
22
Instruction Manual
Care and Maintenance
Clean the Unit
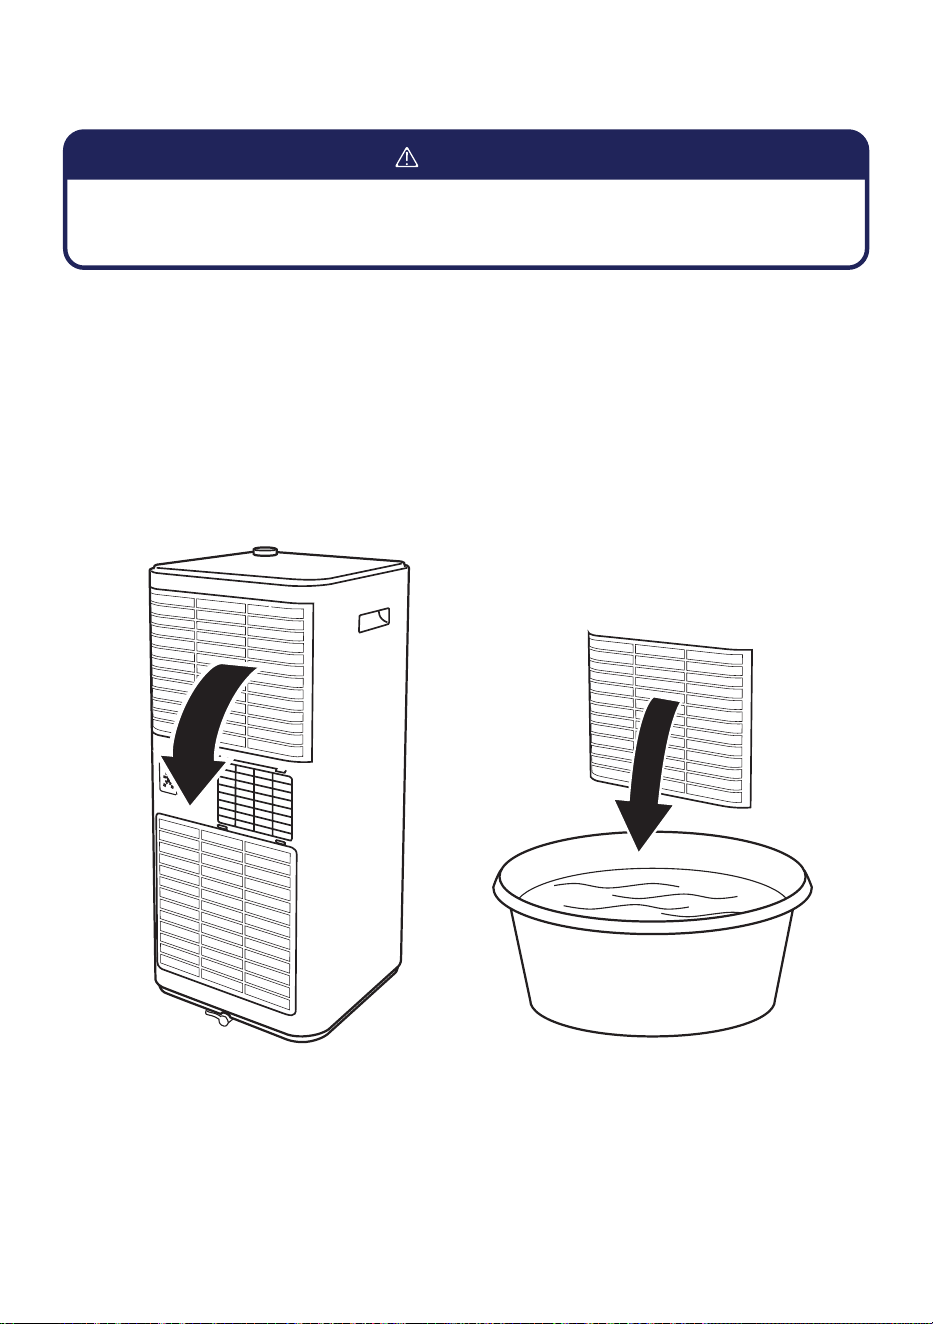
Clean the Air Filter
1. Clean the heater with a soft dry cloth or a damped cloth with neutral detergent.
1. Remove the air lters from the air conditioner.
2. Clean the air lters with vacuum cleaner or with warm water with mild neutral detergent.
3. Make sure air lters are dry and then re-install it to the air conditioner.
NOTE:
• Do not ush the machine with water.
• Do not use volatile liquids such as thinner or alcohol to prevent damaging the unit.
• Before cleaning the unit, you must shut down the machine and cut off the power supply.
• Never ush the air conditioner with water.
CAUTION

23
v.02222024
Care and Maintenance
Storage
If you will not be using the unit for an extended period of time, it is best to clean and dry out the unit
completely.
1. Unplug the unit from power outlet and detatch exhause hose and window sliding kit from the unit.
2. Drain the remaining water from the unit.
3. Clean and dry the air lter.
4. Re-install the cleaned air lter at its position.
5. Store the unit in a dry indoor location. The unit must be kept in upright position.
Attention
• The evaporator of the unit must be dried out before storage to prevent molds by leaving the
machine in a dry open area or turn on the machine with low speed fan mode.
24
Instruction Manual
Troubleshooting
Error Code
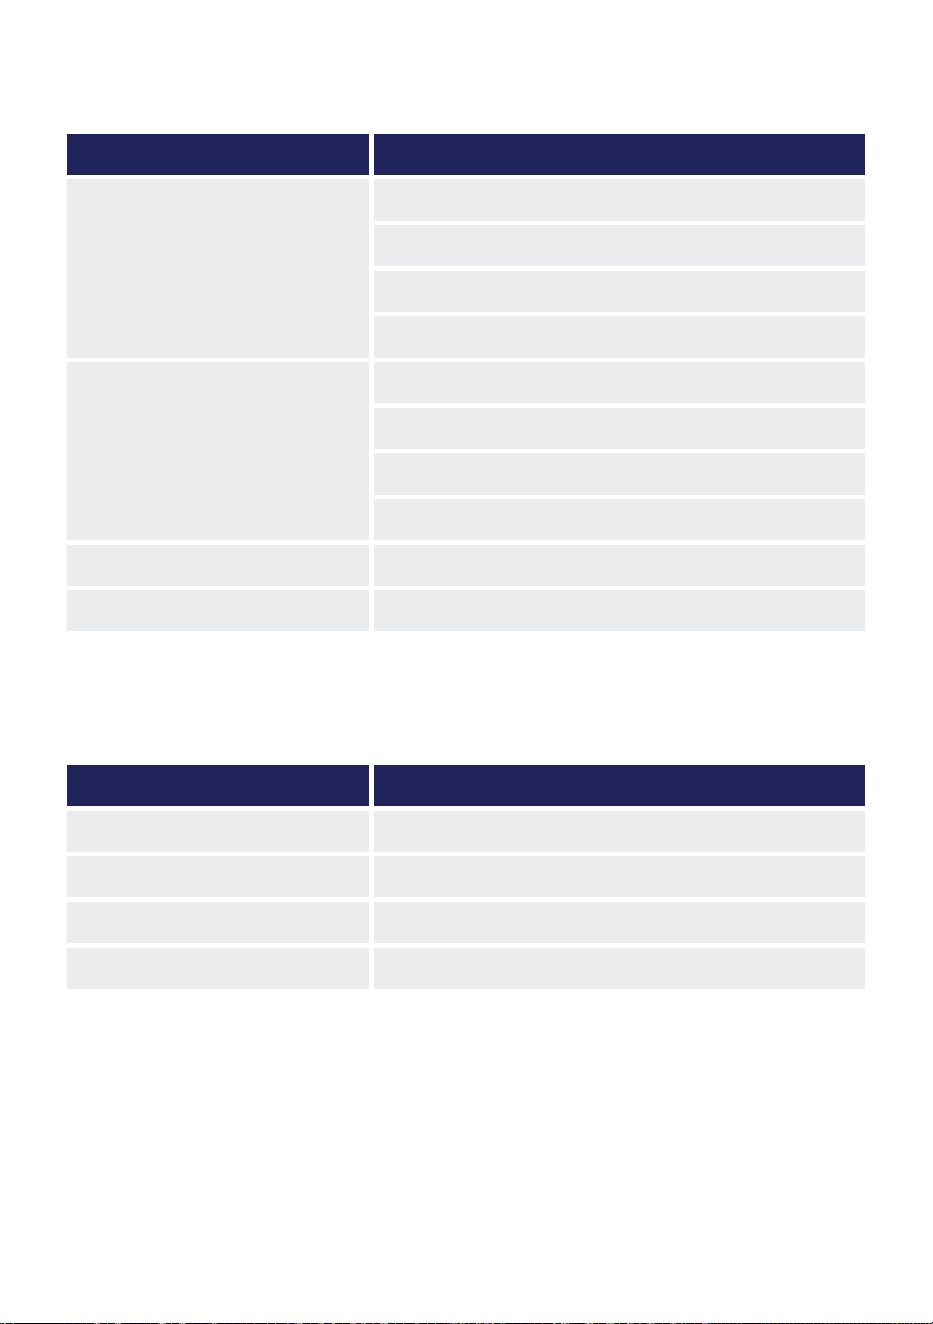
Problem Possible Causes
The appliance is nonoperational
Power failure / plug pulled out
Power breaker tripped
Full water tank
Outside of operation temperature
The appliance is working in reduced
capacity
Obstruction on the vent
Dirty air lter
Room is too big / window and / or door are open
Exhaust hose is not properly attached
Water Leak Full water tank
Noise or Vibration The appliance is placed on uneven ground
Code Meaning
E0 Communication fault between main PCB and display PCB
E1 Ambient temperature sensor failure
E2 Coil temperature sensor failure
Ft Full water Tank

25
v.02222024
Disposal Guideline
This appliance contains refrigerant and other potentially hazardous materials. When disposing the
appliance, follow all federal, state and local regulations. DO NOT dispose of this product as normal
household waste or unsorted municipal waste.
When disposing this appliance, you have the following options:
• Dispose of this appliance at a designated municipal electronic waste collection facility.
• When buying a new appliance, the retailer will take the old appliance.
• The manufacturer may take back the old appliance.
• Sell the appliance to a certied scrap metal dealer.

26
Instruction Manual
Model: 048-OPAC-5 / 048-OPAC-6
ID: 2ANDL-WBR3
FCC Caution
This device complies with part 15 of the FCC rules. Operation is subject to the following two conditions:
(1) This device may not cause harmful interference, and (2) this device must accept any interference
received, including interference that may cause undesired operation.
Any changes or modications not expressly approved by the party responsible for compliance could
void the user’s authority to operate the equipment.
NOTE: This equipment has been tested and found to comply with the limits for a Class B digital device,
pursuant to part 15 of the FCC Rules. These limits are dessigned to provide resonable protection against
harmful interference in a residential installation. This equipment generates users and can radiate radio
frequence energy and, if not installed and used in accordance with the instructions, may cause harmful
interference to radio communications, However, there is no garentee that interference will not occur
in a particular installation. If this equipment does cause harmful interference to a radio or television
reception, which can be determined by turning the equipment off and on, the user is encouraged to try to
correct the interference by one or more of the following measures:
• Reorient or relocate the receiving antenna.
• Increase the seperation between the equipment and receiver.
• Connect the equipment into an outlet on a circuit different from that to which the receiver is
connected.
• Consult the dealer or an experienced radio / TV technician for help.
IC Warning
This device complies with industry Canada’s license-exempt RSSs. Operation is subject to the following
two conditions:
(1) This device may not cause interference; and
(2) This device must accept any interference, including interference that may cause undesired operation
of the device.

27
v.02222024

www.dellahome.com
800-863-4143
6:00a.m. – 4:00p.m. PST Monday - Friday
©Della All rights reserved.
Under the copyright law, this document may not
be printed, translated, reproduced, or distributed,
in whole or in part without written permission from
DELLA.
Every effort has been made to ensure that the
information in this document is accurate, DELLA is
not responsible for printing or clerical errors.
All trademarks, logos, and brand names are the
property of their respective companies. Mention
of third-party products or service names is for
identification and informational purposes only.
Use of these names, brands, and trademarks
does not imply endorsement. DELLA assumes no
responsibility with regard to the performance or
use of these products.