


3
1. Usage Notices
All functionality, features, specifications, and other device information
provided in this document, including but not limited to, benefits, design,
pricing, components, performance, availability, and capabilities of the device
are subject to change without notice.
Samsung reserves the right to alter this document or the device described
herein at any time, without obligation to provide notification of such
changes.
1.1 Precautions for Repair
Samsung is not liable for any damage or defect determined to be caused
by repair by a non-authorised carrier, self repair or non-professional repair of
the device. Samsung is not liable for any resulting damage to the device, or
any injury or other device safety issue caused by any attempt to repair the
device which does not follow these repair and maintenance instructions.
Any damage to the device or defect caused by an attempt to repair the
device by any person other than a Samsung certified carrier will not be
covered by the warranty.
•
Use only demagnetised tools that are specifically designed for small
electronic repairs, as most electronic parts are sensitive to
electromagnetic forces.
•
Use only high quality screwdrivers when servicing devices. Low quality
screwdrivers can easily damage the heads of screws.
•
Always use genuine replacement parts. Third-party replacement parts
may not function properly and could cause a fire or injury.
• Some parts, such as sensors (laser AF/proximity/fingerprint), the rear
camera, the TSP (touch panel), speakers, and other components, may
need calibration to guarantee their performance after repair.
• The performance of the device’s water and dust resistance cannot be
guaranteed when it is repaired by the user or another unskilled worker.
• If you need to replace unsold parts, visit a Samsung Service Centre and
receive further instruction.
•
Before conducting repairs, remember to make backup copies of all
important data stored in the device.

4
•
Make sure to wear the appropriate safety equipment before carrying
out repairs.
Samsung is not responsible for injuries that may occur because of not
wearing the proper safety equipment. Refer to Tools for Disassembly
and Assembly for a list of tools that you will need for assembling and
disassembling the device.
•
Repair the device in a safe place.
•
Before repairing the device, make sure the device is turned off.
•
If the device is damaged, emits smoke, or if you smell something
burning, stop using the device immediately and contact Samsung.
•
It is recommended to use safety equipment such as glasses, gloves, and
a mask when repairing the device.
•
When connecting wires, make sure to connect them using the relevant
connectors and check that they are properly connected.
•
Completely remove any dust or foreign material from the housing,
wiring and connection parts.
•
At least two people should work when working with heavy products.
•
If you need to place the washing machine or dryer on its back for
servicing purposes, place a support(s) on the floor and lay it down
carefully so its side is on the floor.
•
Do not lay it down on its front.
•
Visit Samsung Electronics service center to find the cause of the failure
or get a more detailed diagnosis.
1.2 Instructional Icons
Warning: situations that could cause injury to yourself or others
Caution: situations that could cause damage to your device or other
equipment
Notice: notes, usage tips, or additional information
5
2. Disassembly and Reassembly
Be sure to wear protective equipment for your safety when repairing a product.
Be sure to proceed with disassembly while fixing the product on a flat
surface.
This is a standard disassembly diagram and may differ from the actual
product.
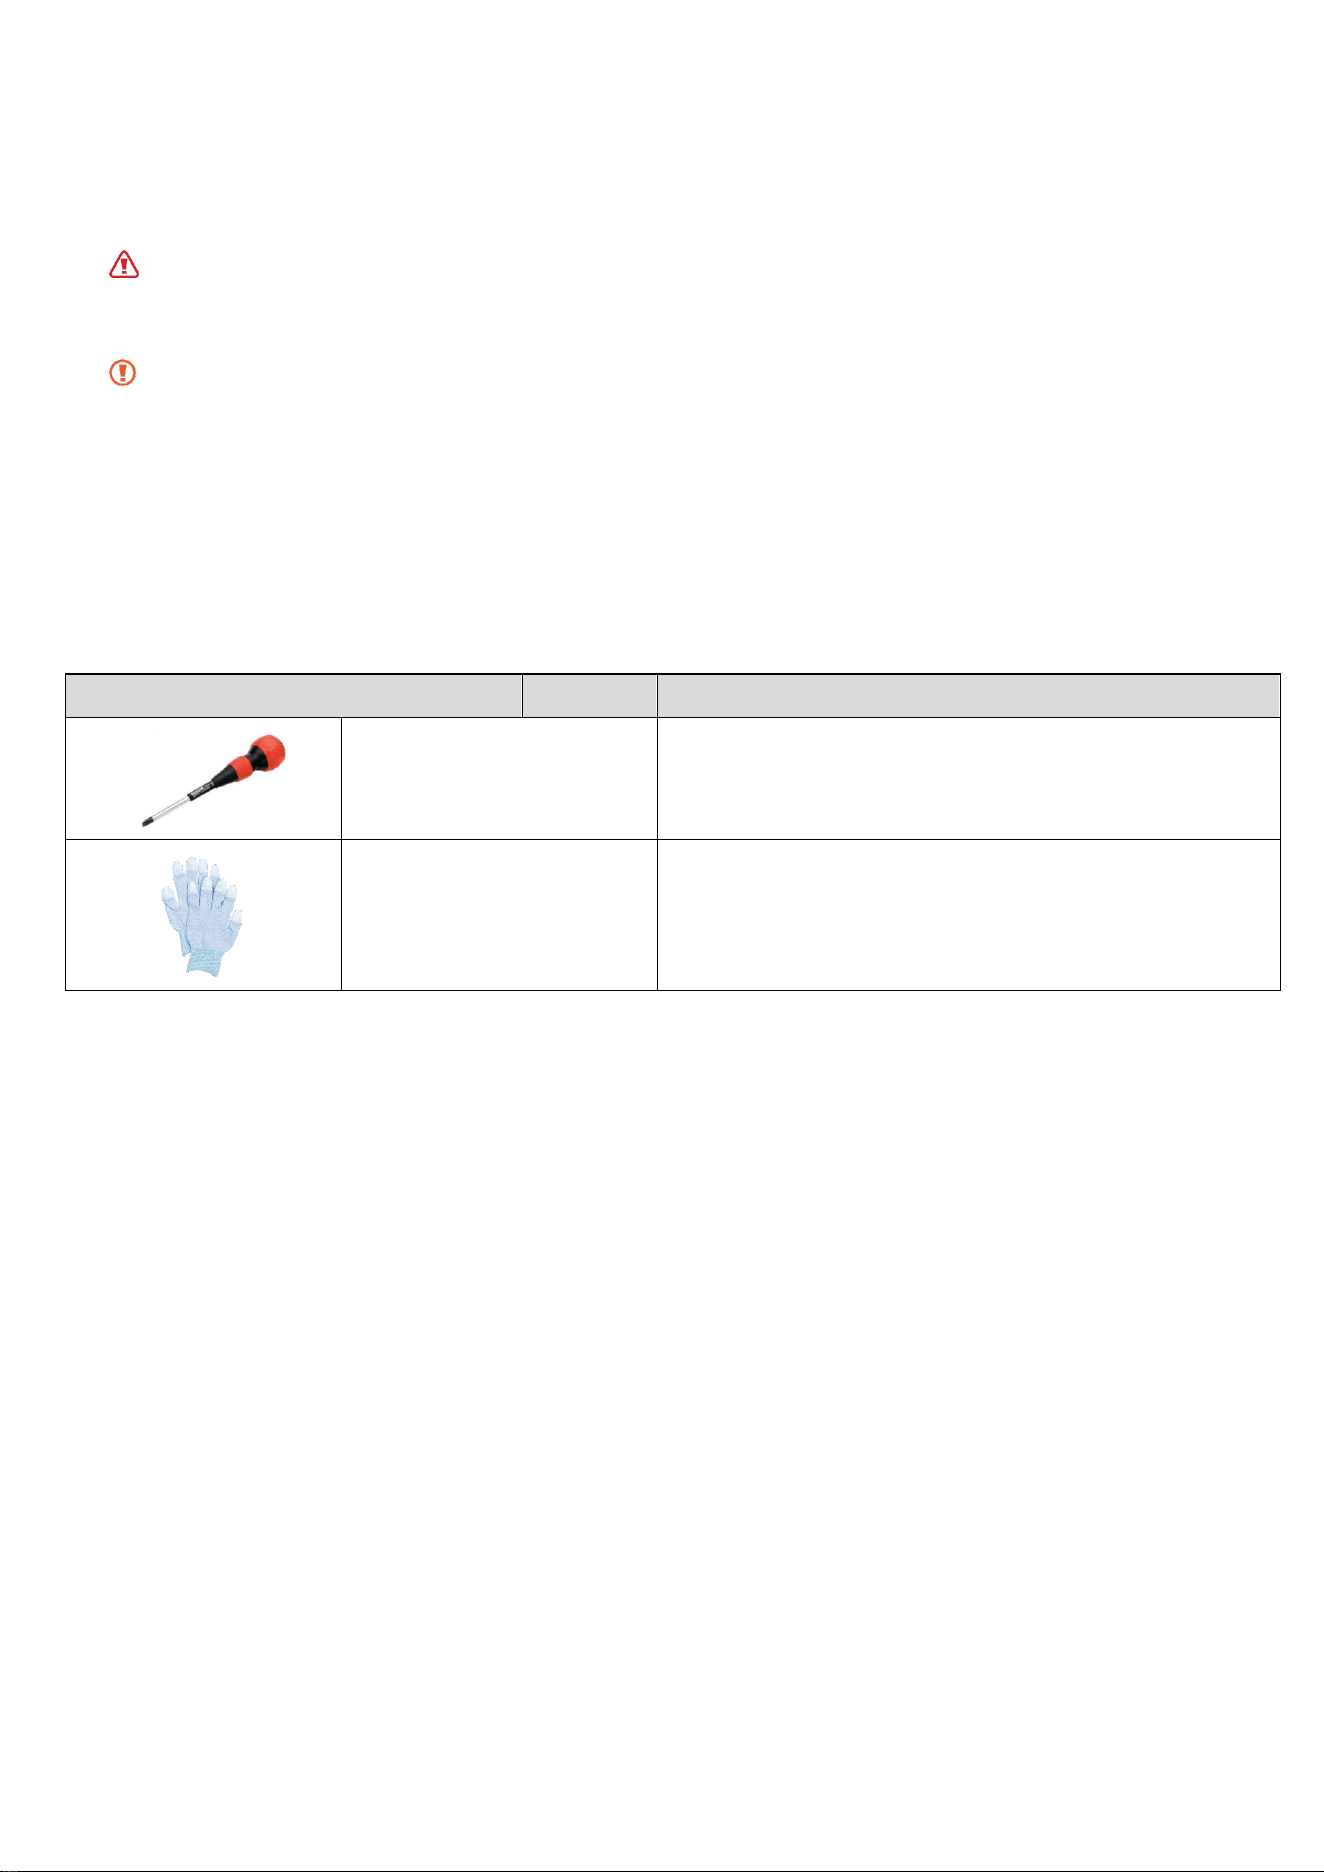
2.1. Tools for Disassembly and Reassembly
Tool
Type
Remarks
Screwdriver(+)
A tool to tight or loose screws
Gloves
(Essential) Prevent injury during repair

6
2.2. Standard Disassembly and Reassembly Drawings
Number Part Name
1 Door Holder
2 Door Seal
3 Lever Door
4 Water Tank
5 Filter
7
2.2.1. Door Holder
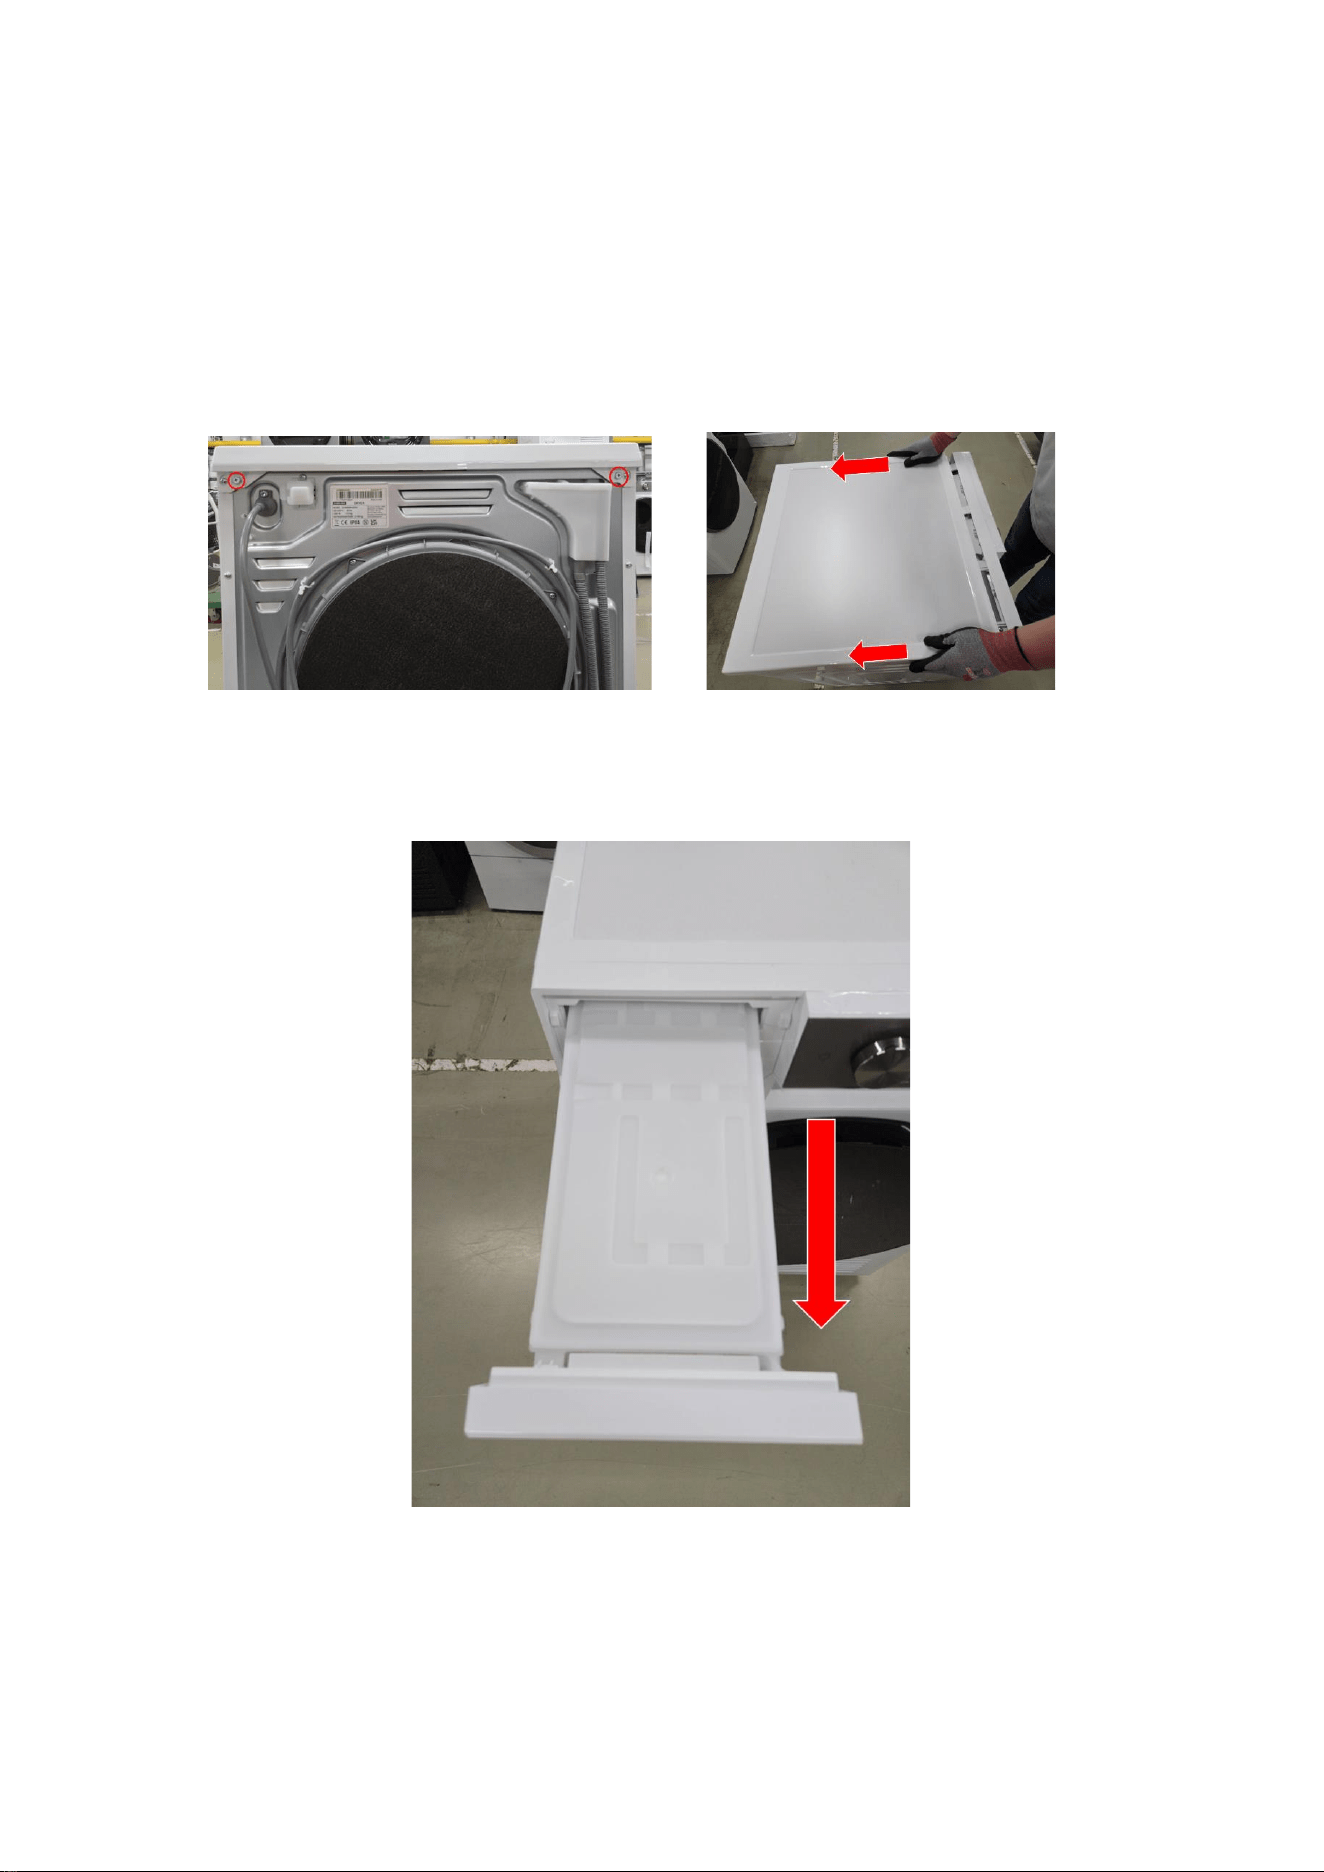
Disassembly
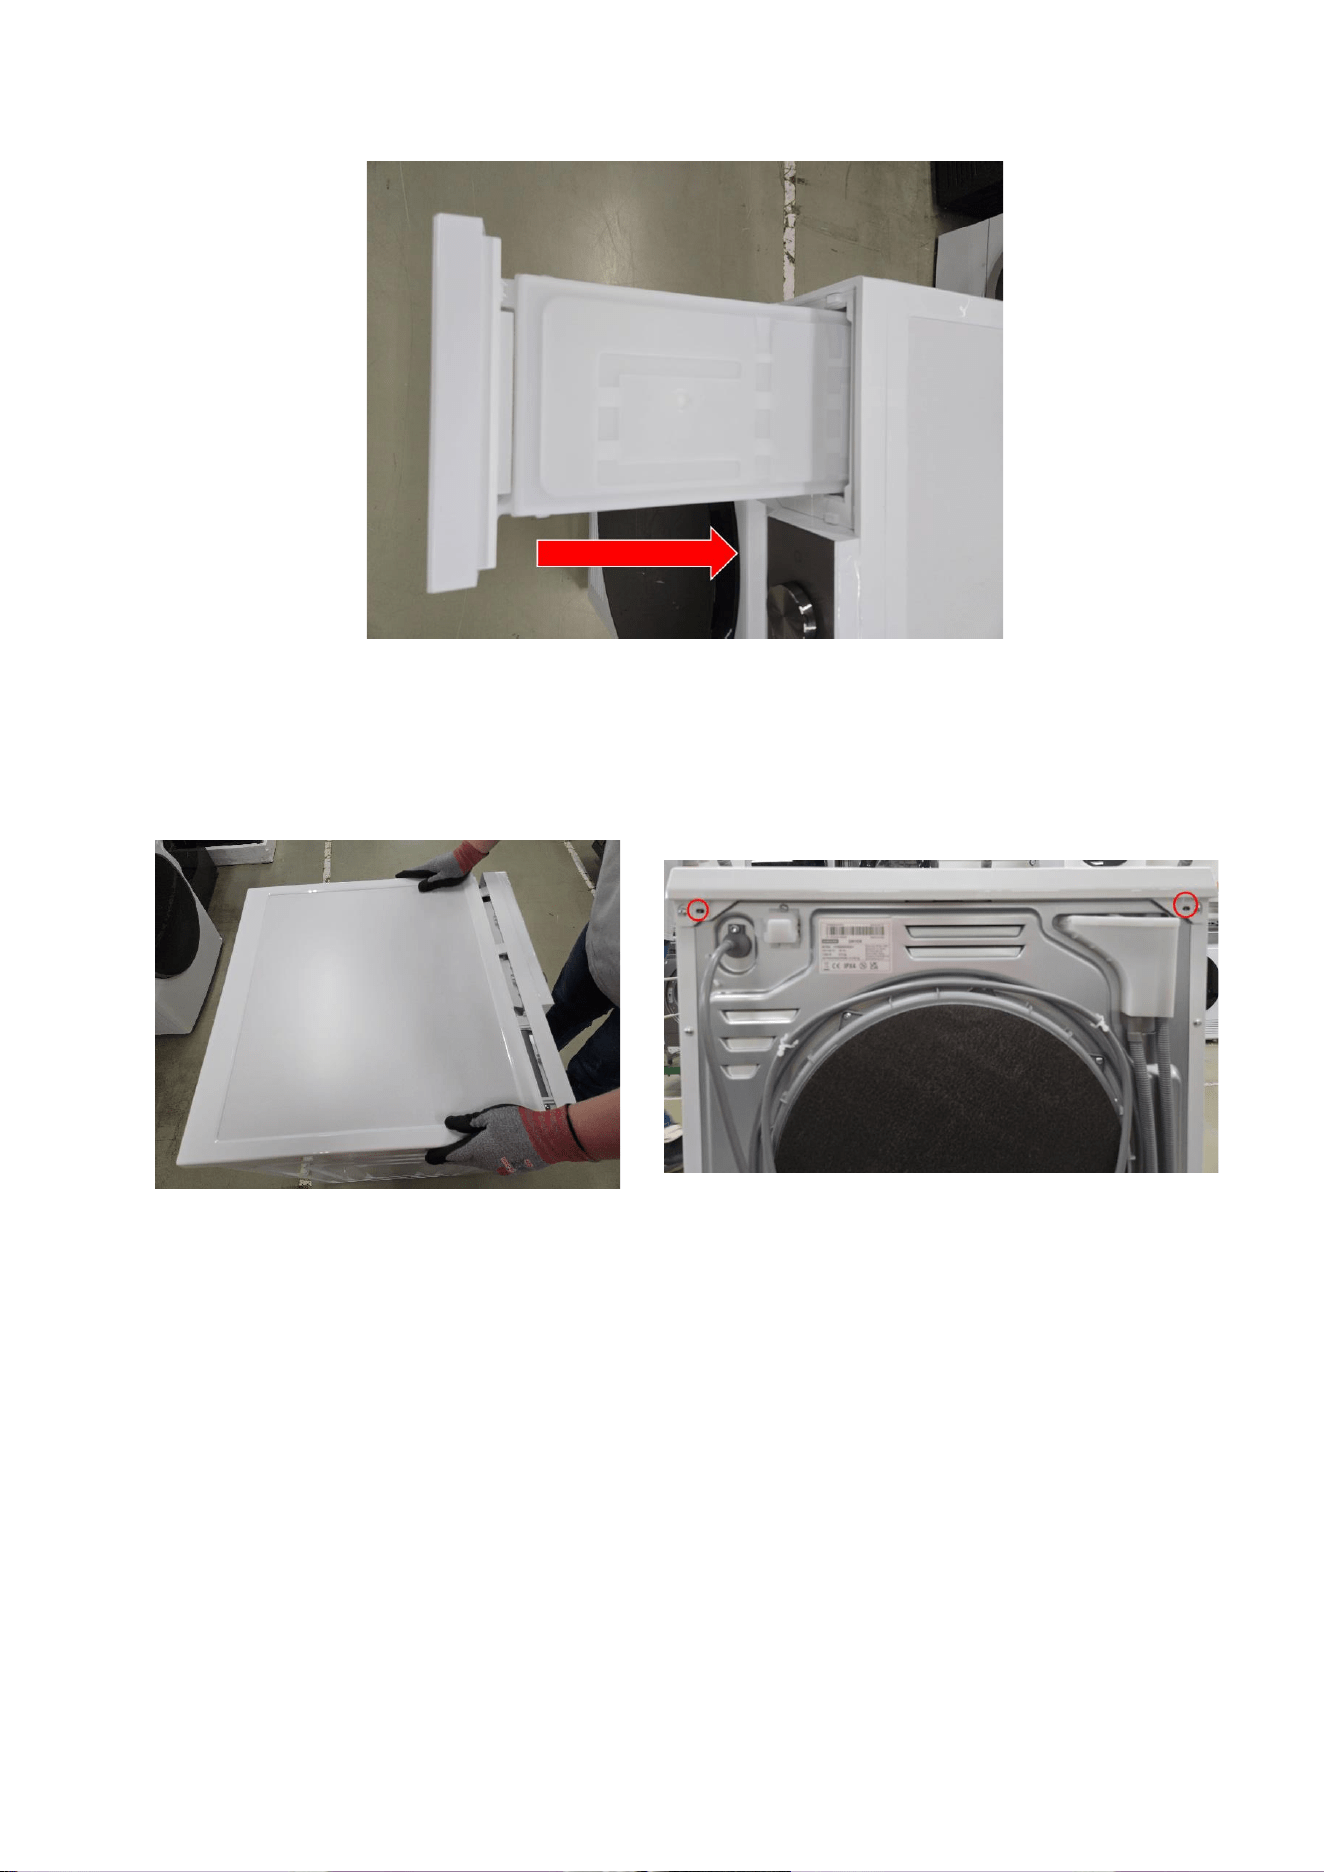
1 Remove 2 screws holding the Cover Top at the back of the unit using (+) screw
driver.
1-1. Remove the Cover Top by lifting it up after pulling it back about 15mm.
2 Open the Drawer by hand.
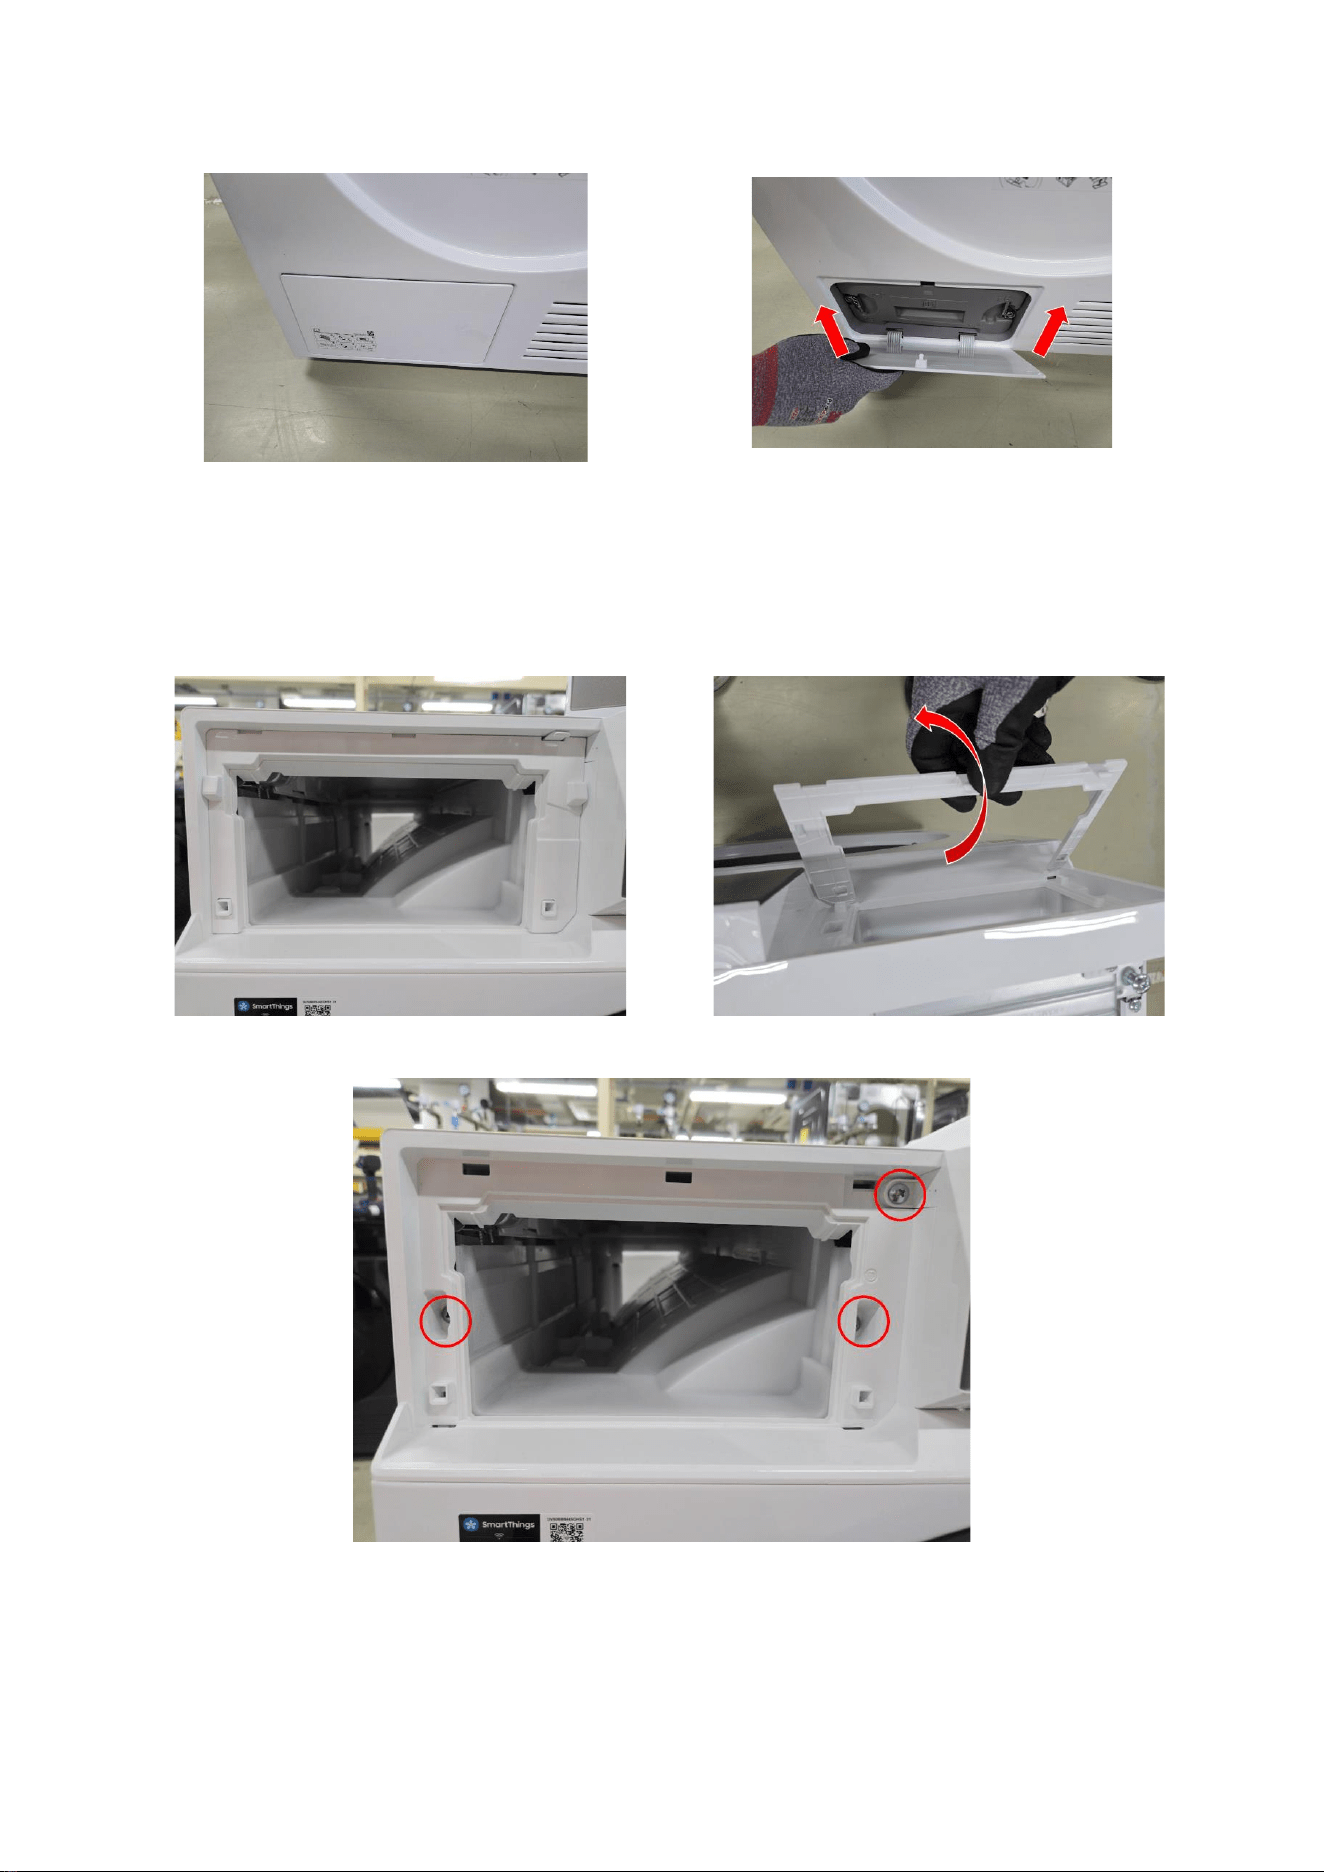
8
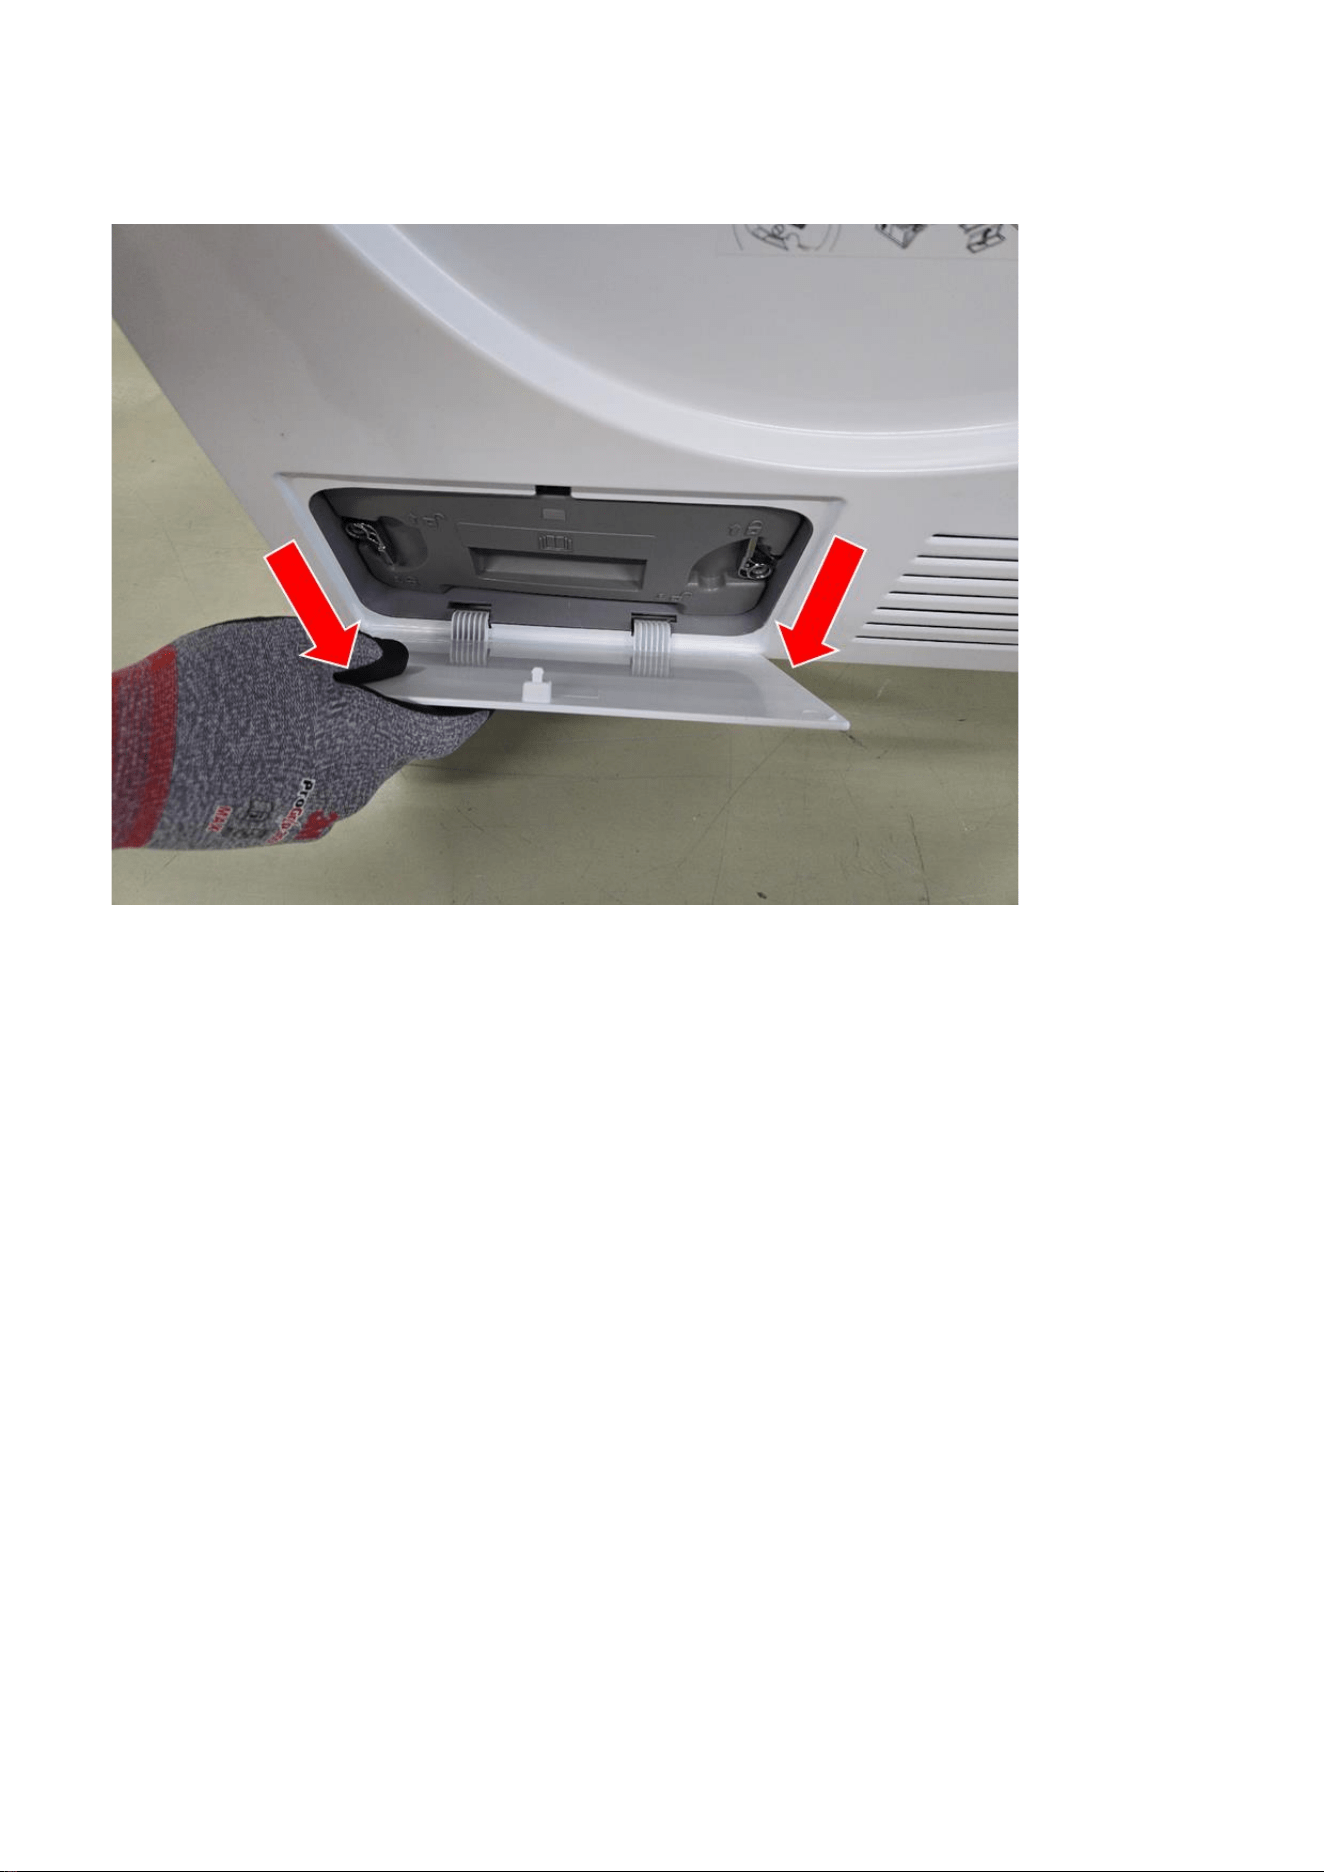
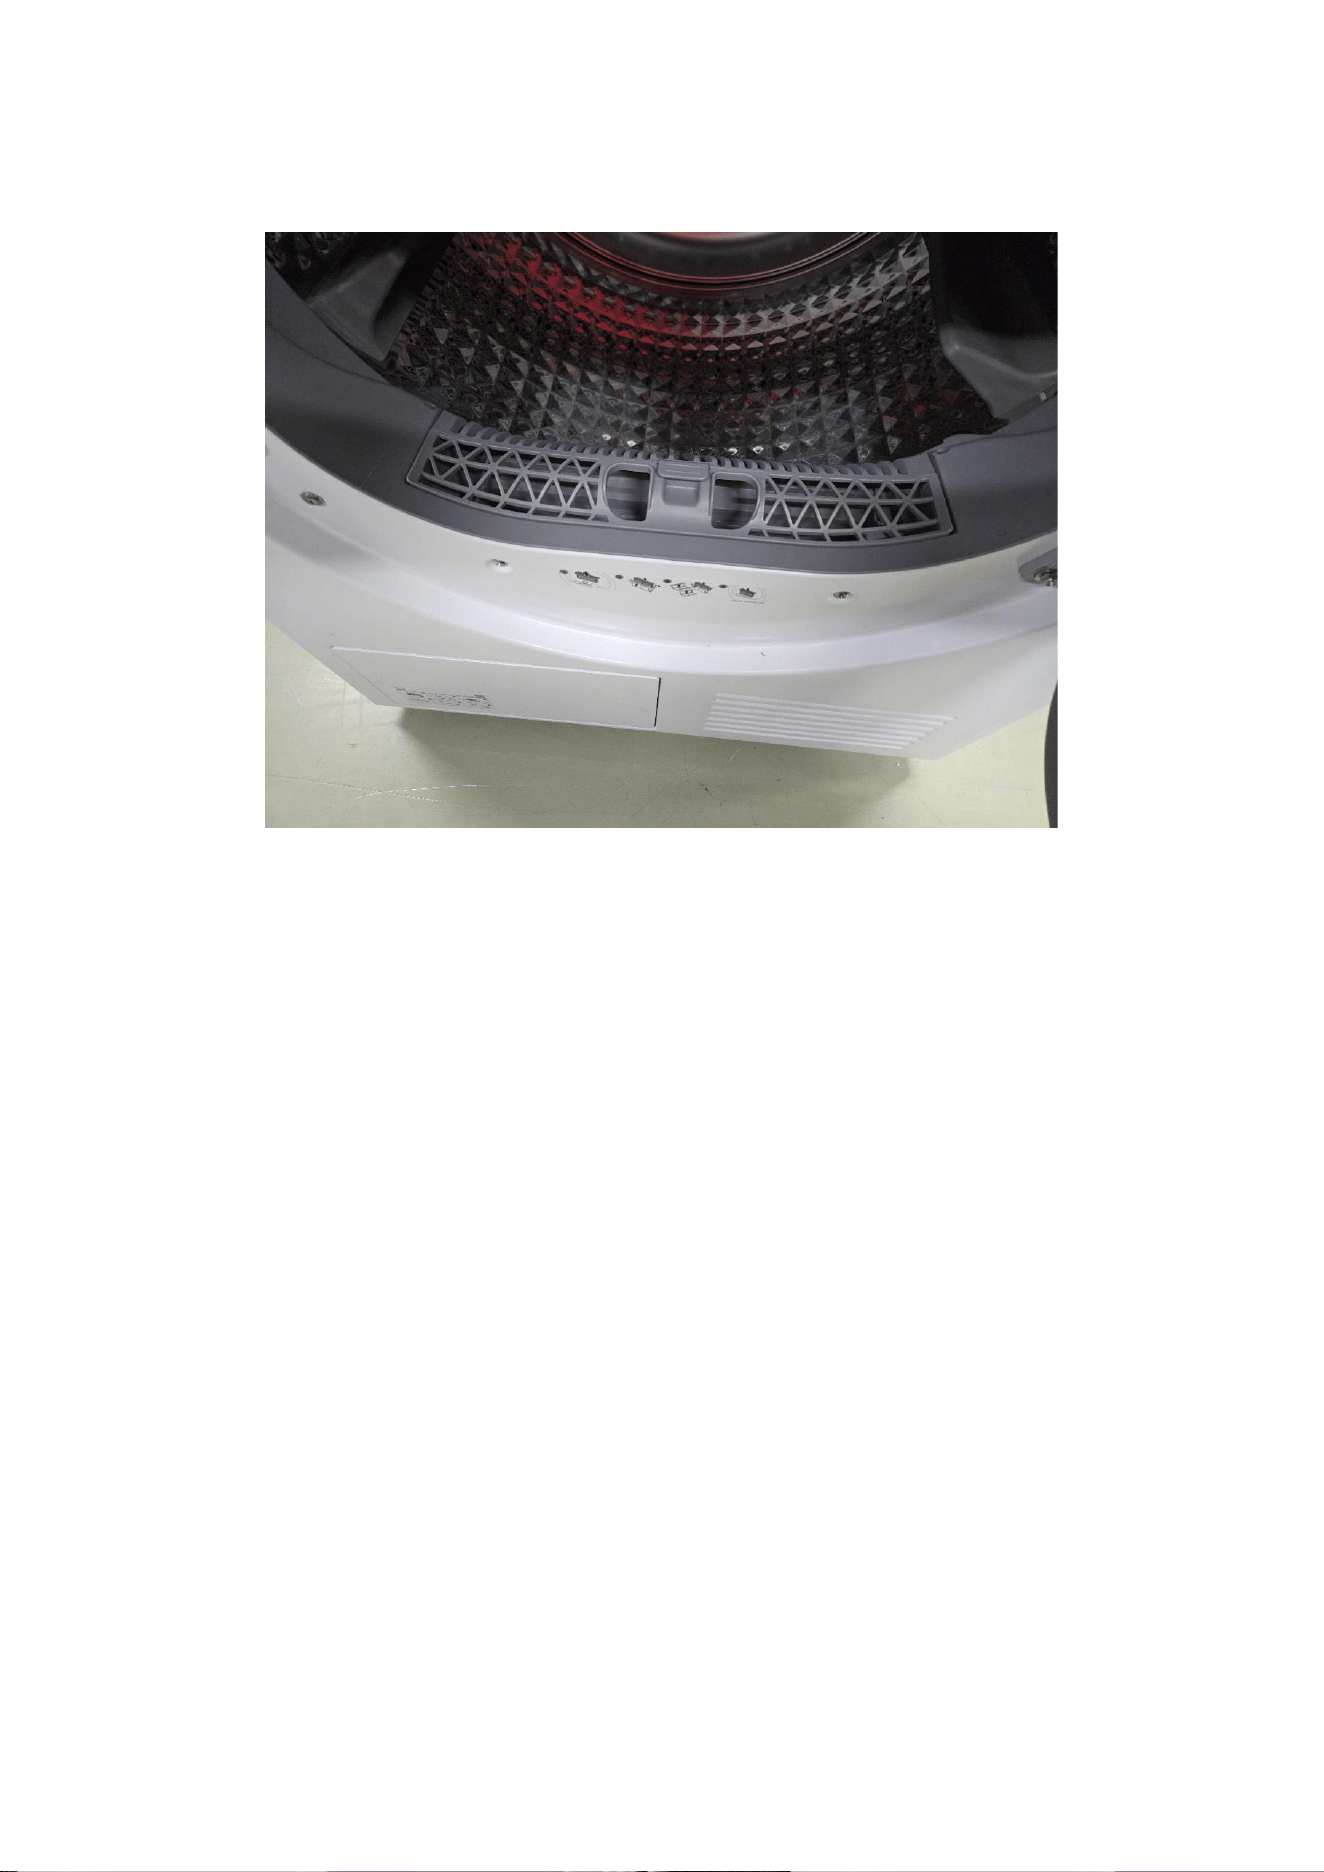
3 Remove filter cover at the bottom left.
4 Remove Panel
4.1 Remove the cover in the water tank.
4.2 Remove the screws holding the Drawer and Panel using (+) screw driver.
9
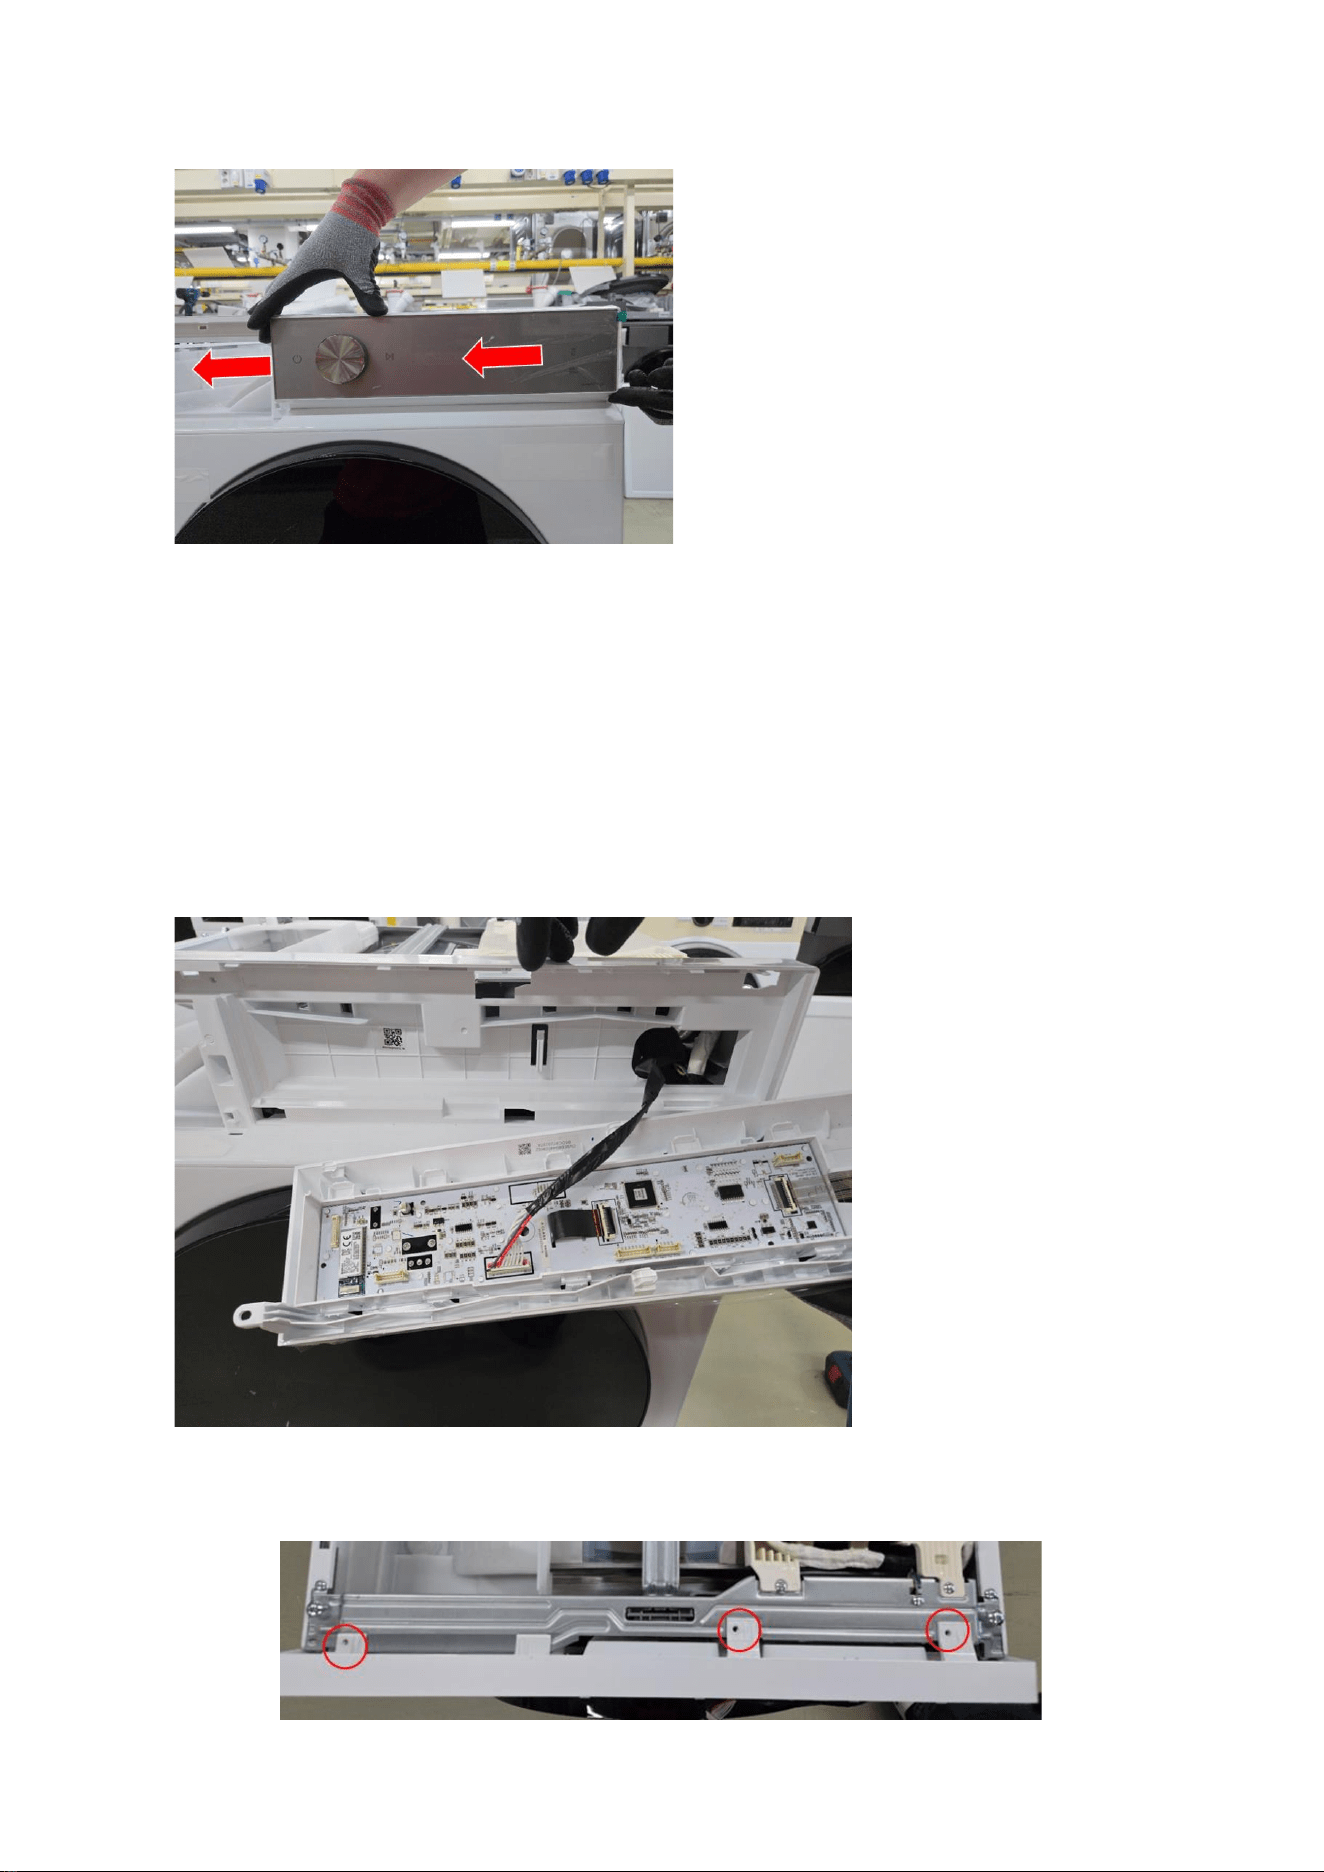
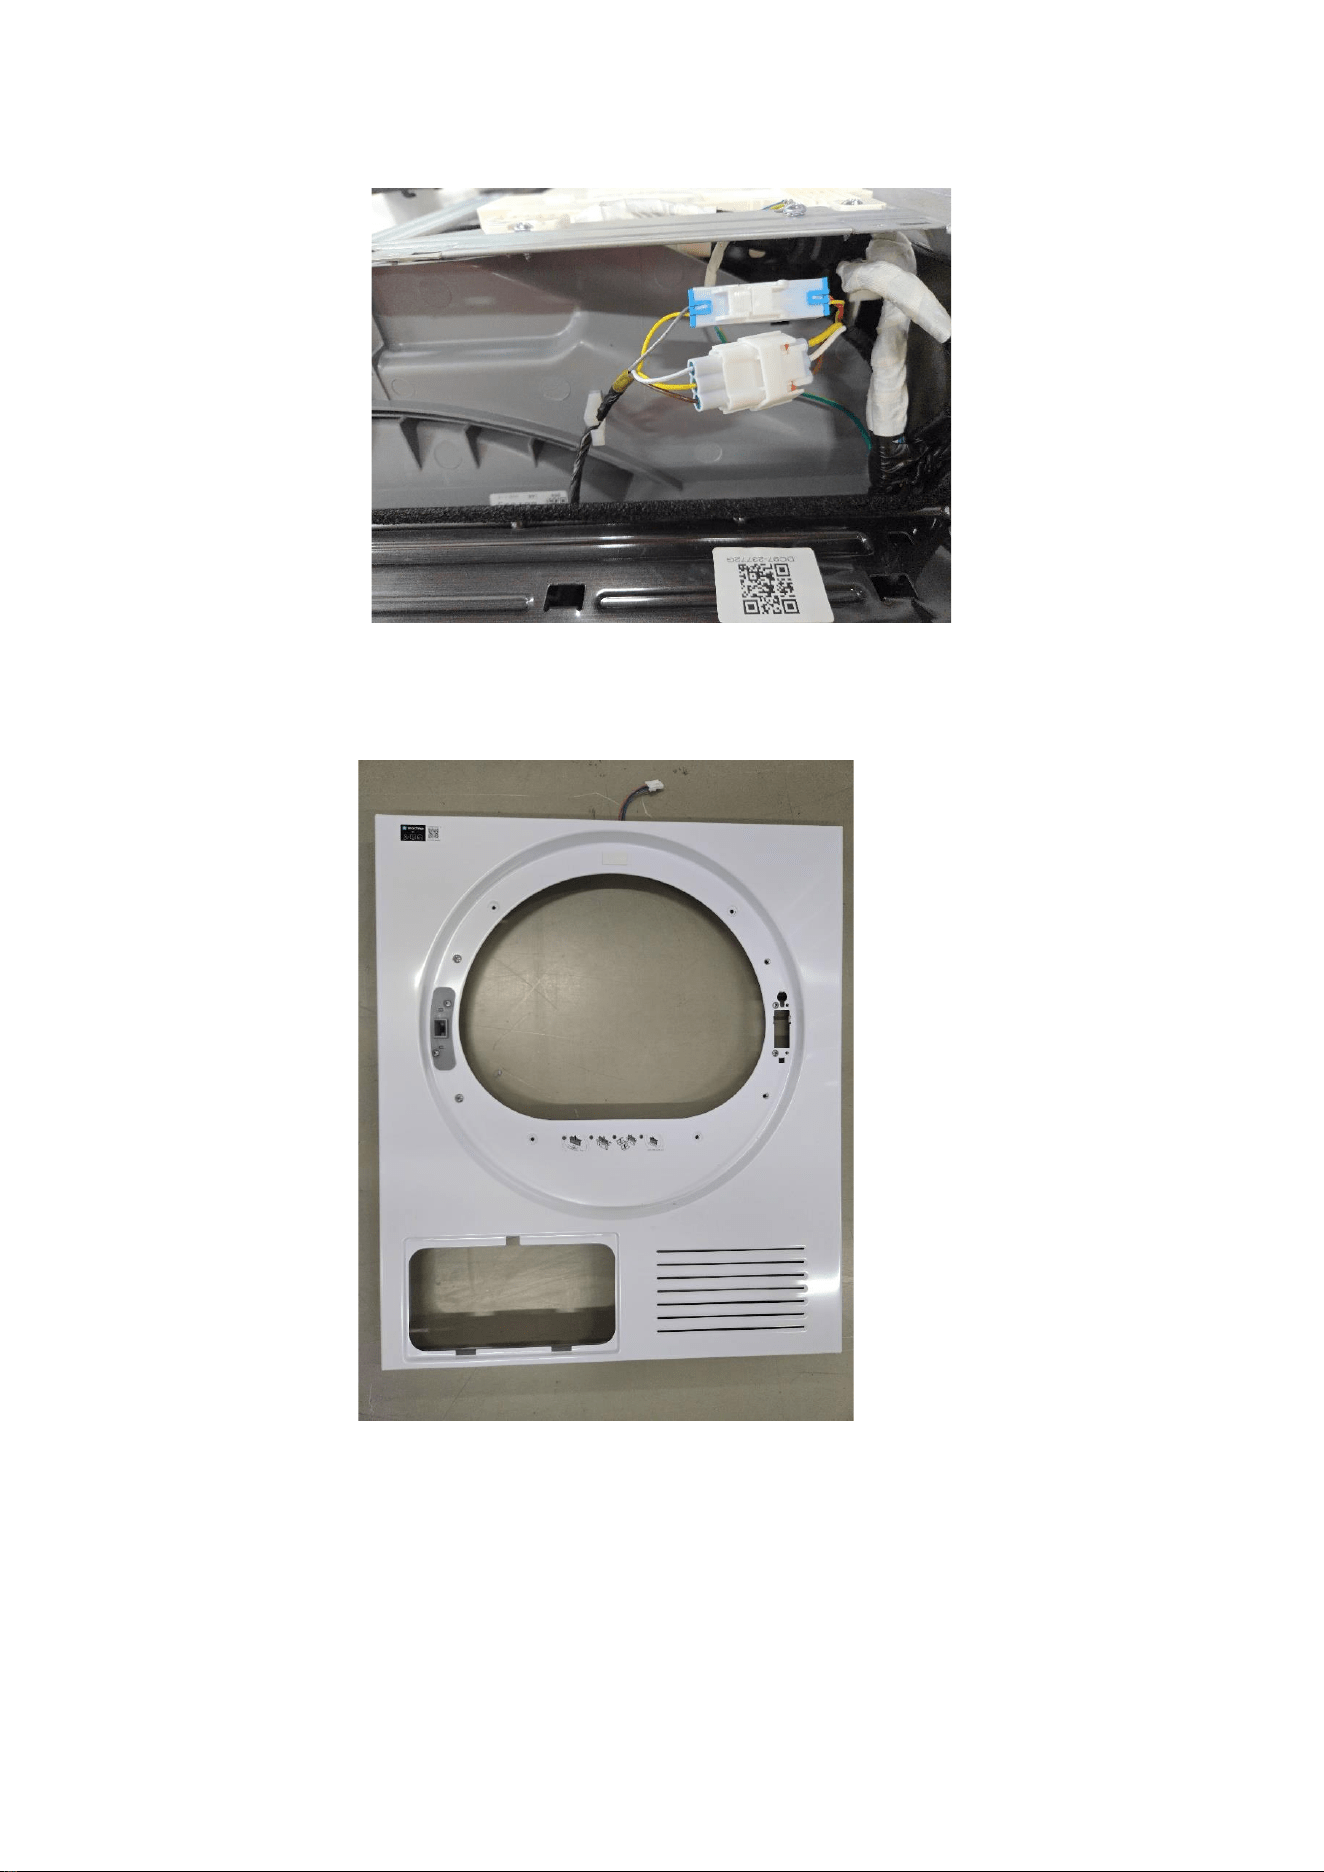
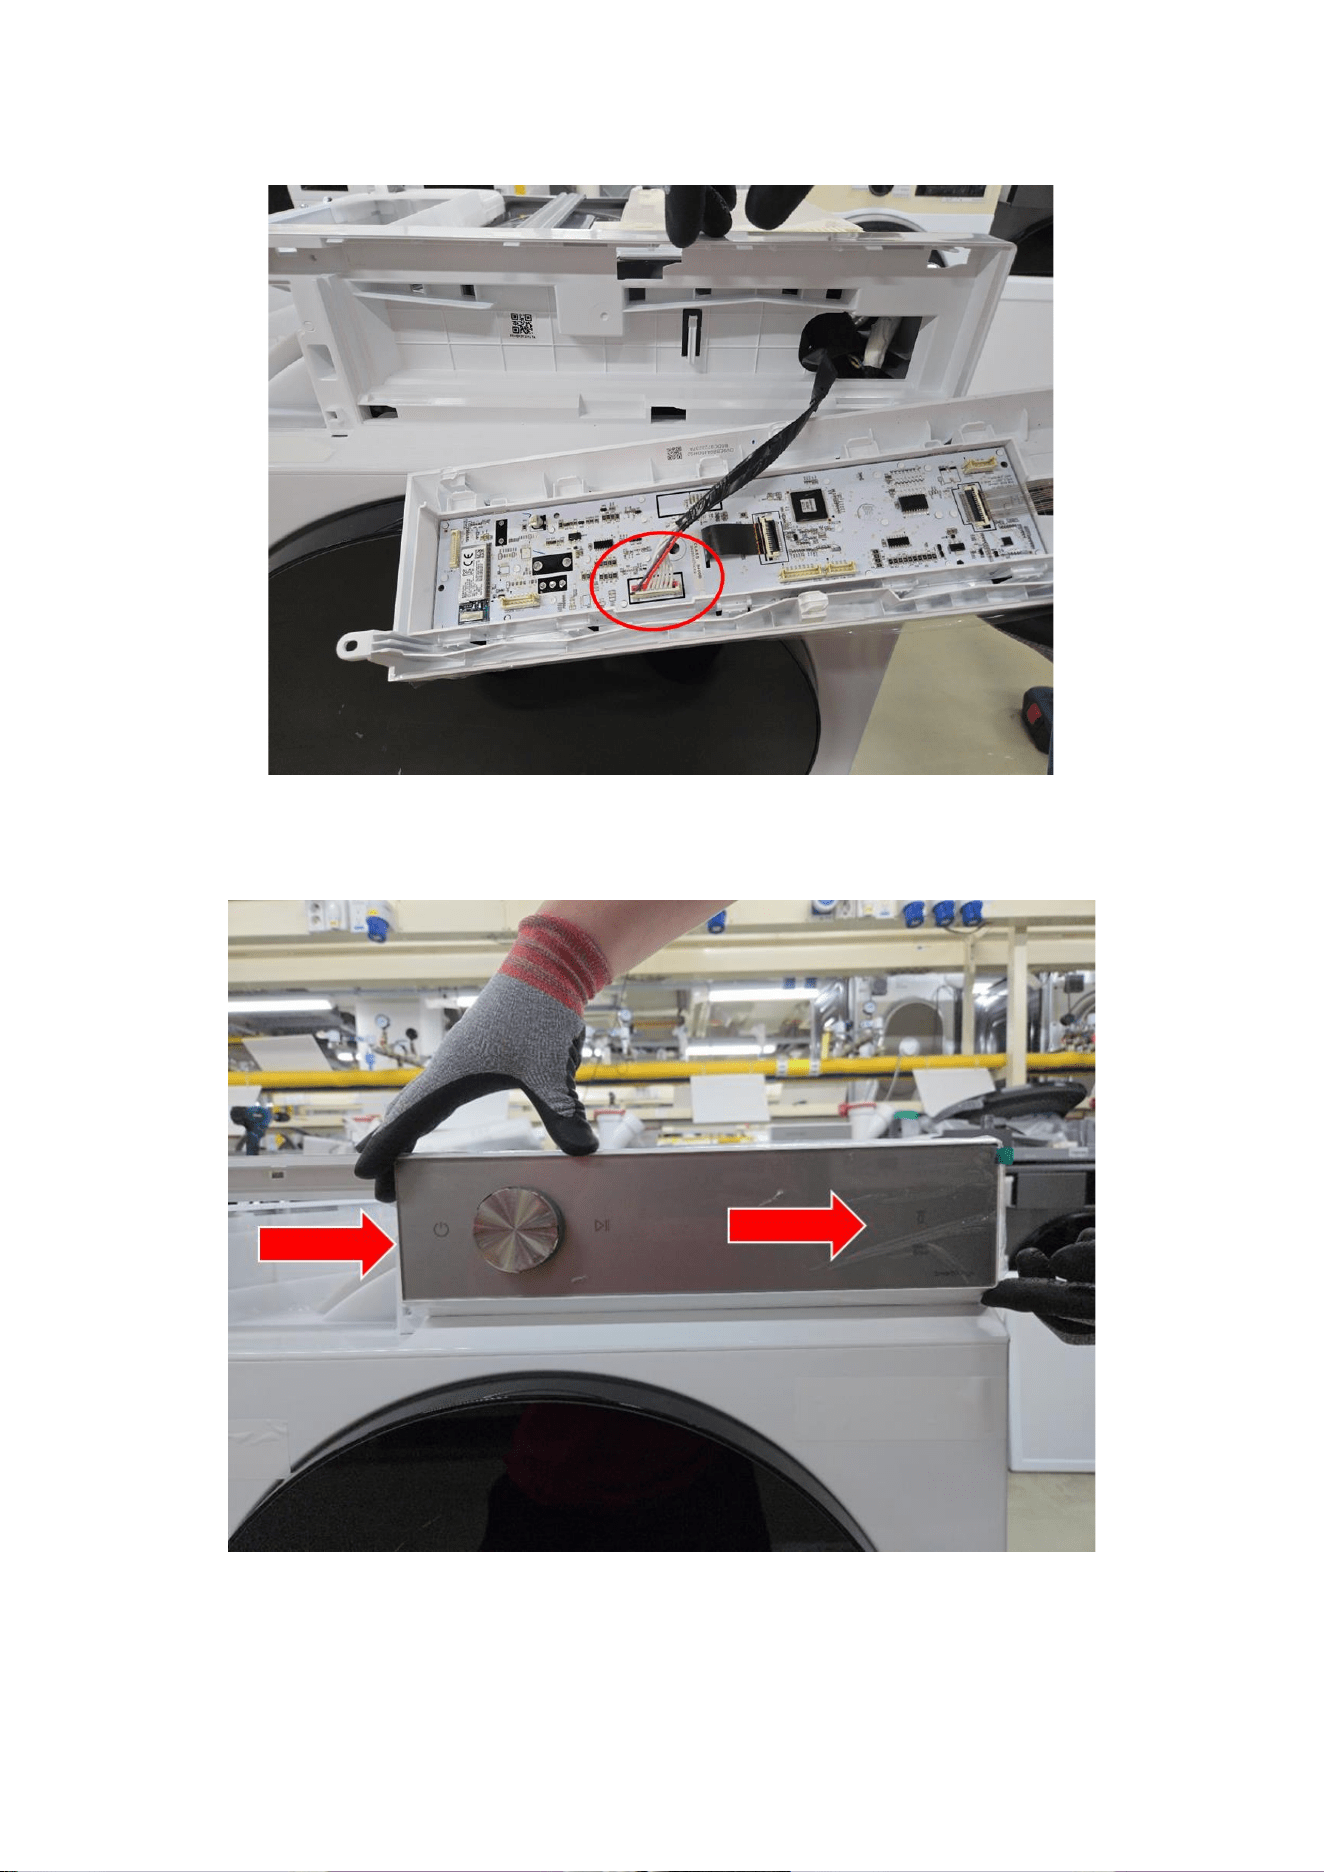
4.3 Push the Panel Control left to remove it.
4.4 Disconnect the wire.
4.5 Remove the screws at the top of the Assy Panel Control using (+) screw
driver. (3ea)
10
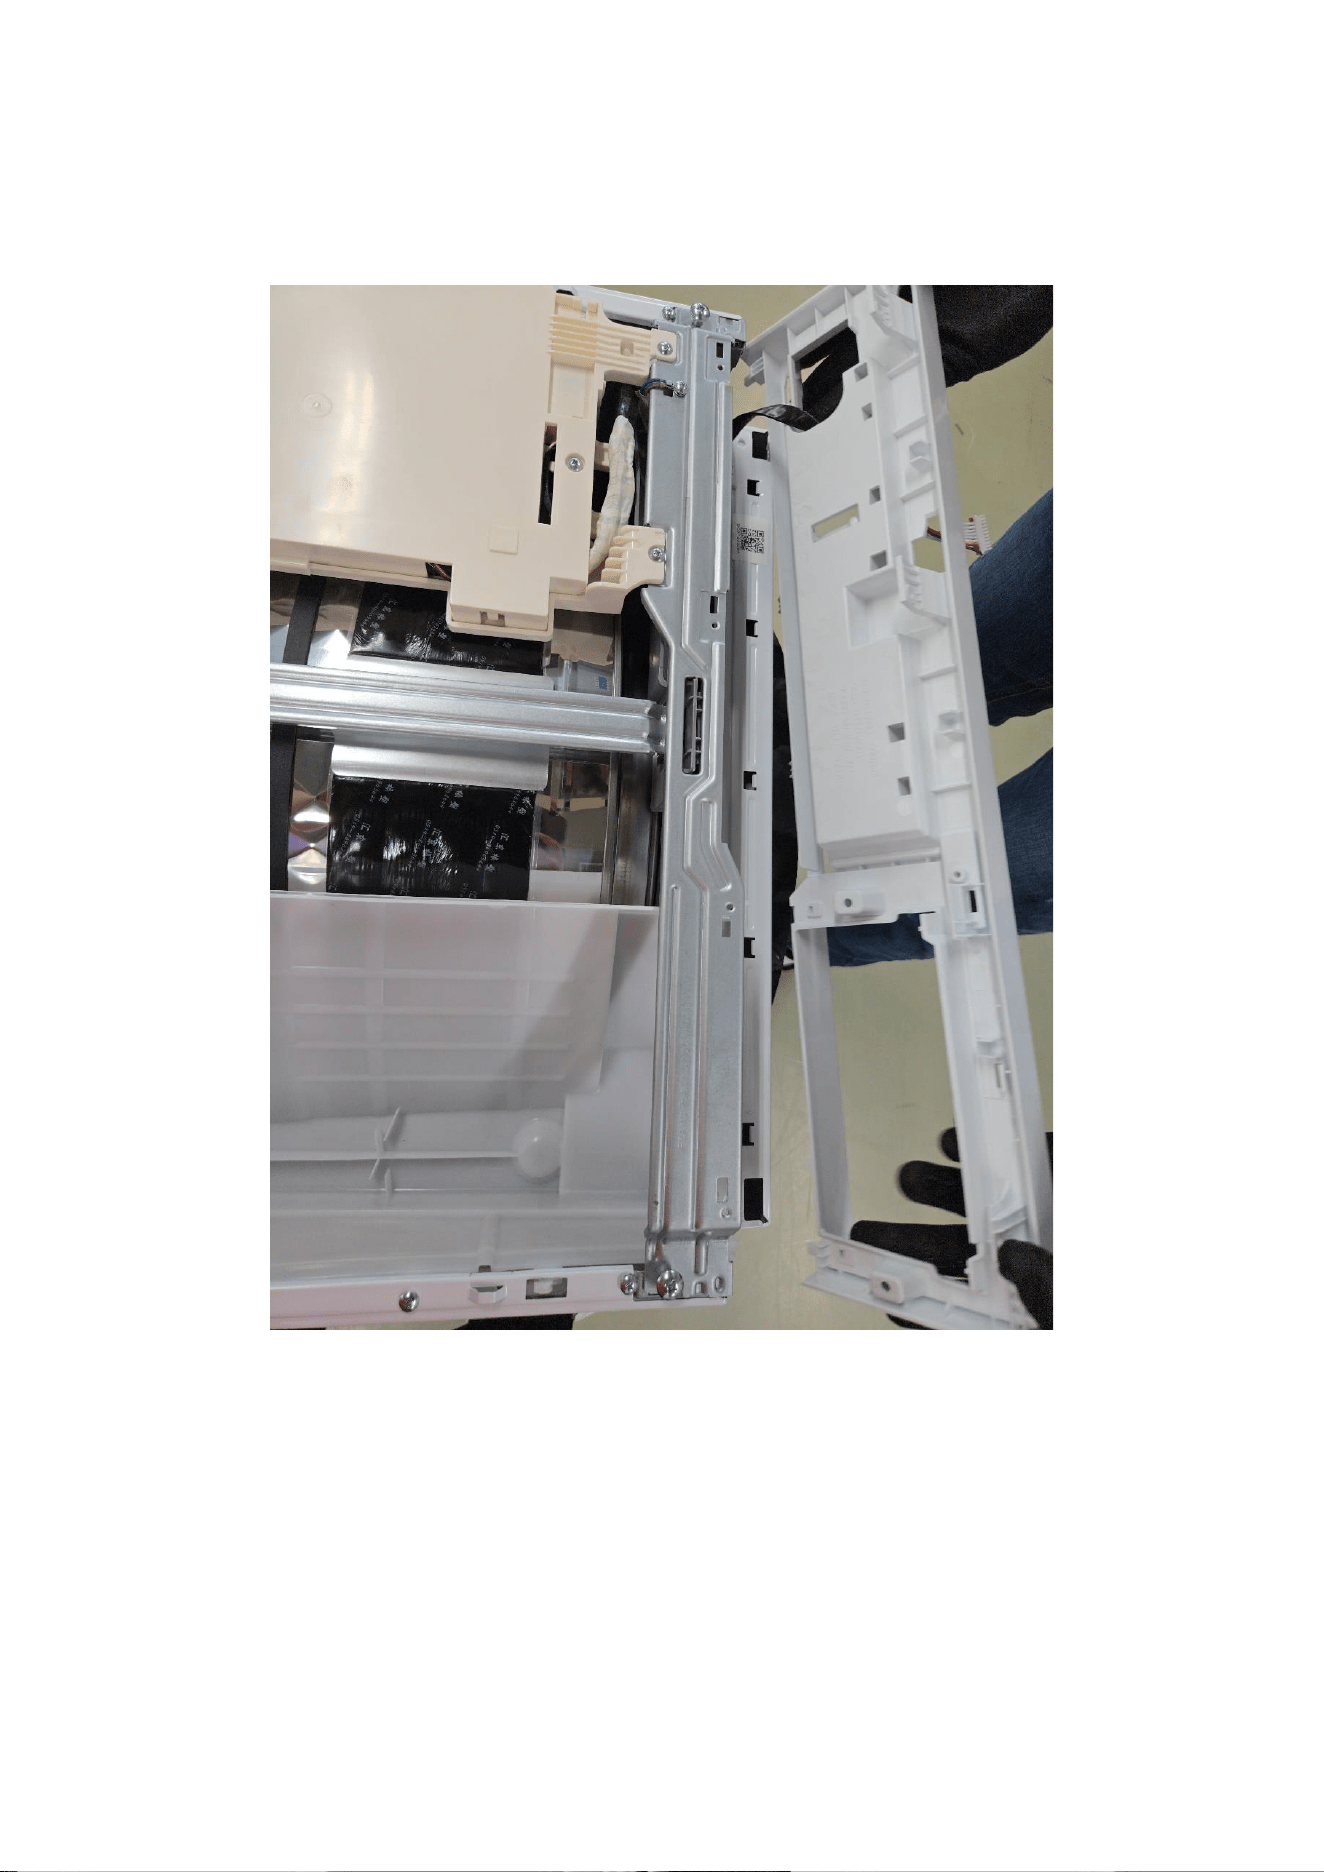
4.6 Grab the Panel and slightly push the Housing Drawer to remove the hook
and pull the Panel upwards to disassemble with body.
Be careful not to break the hook.
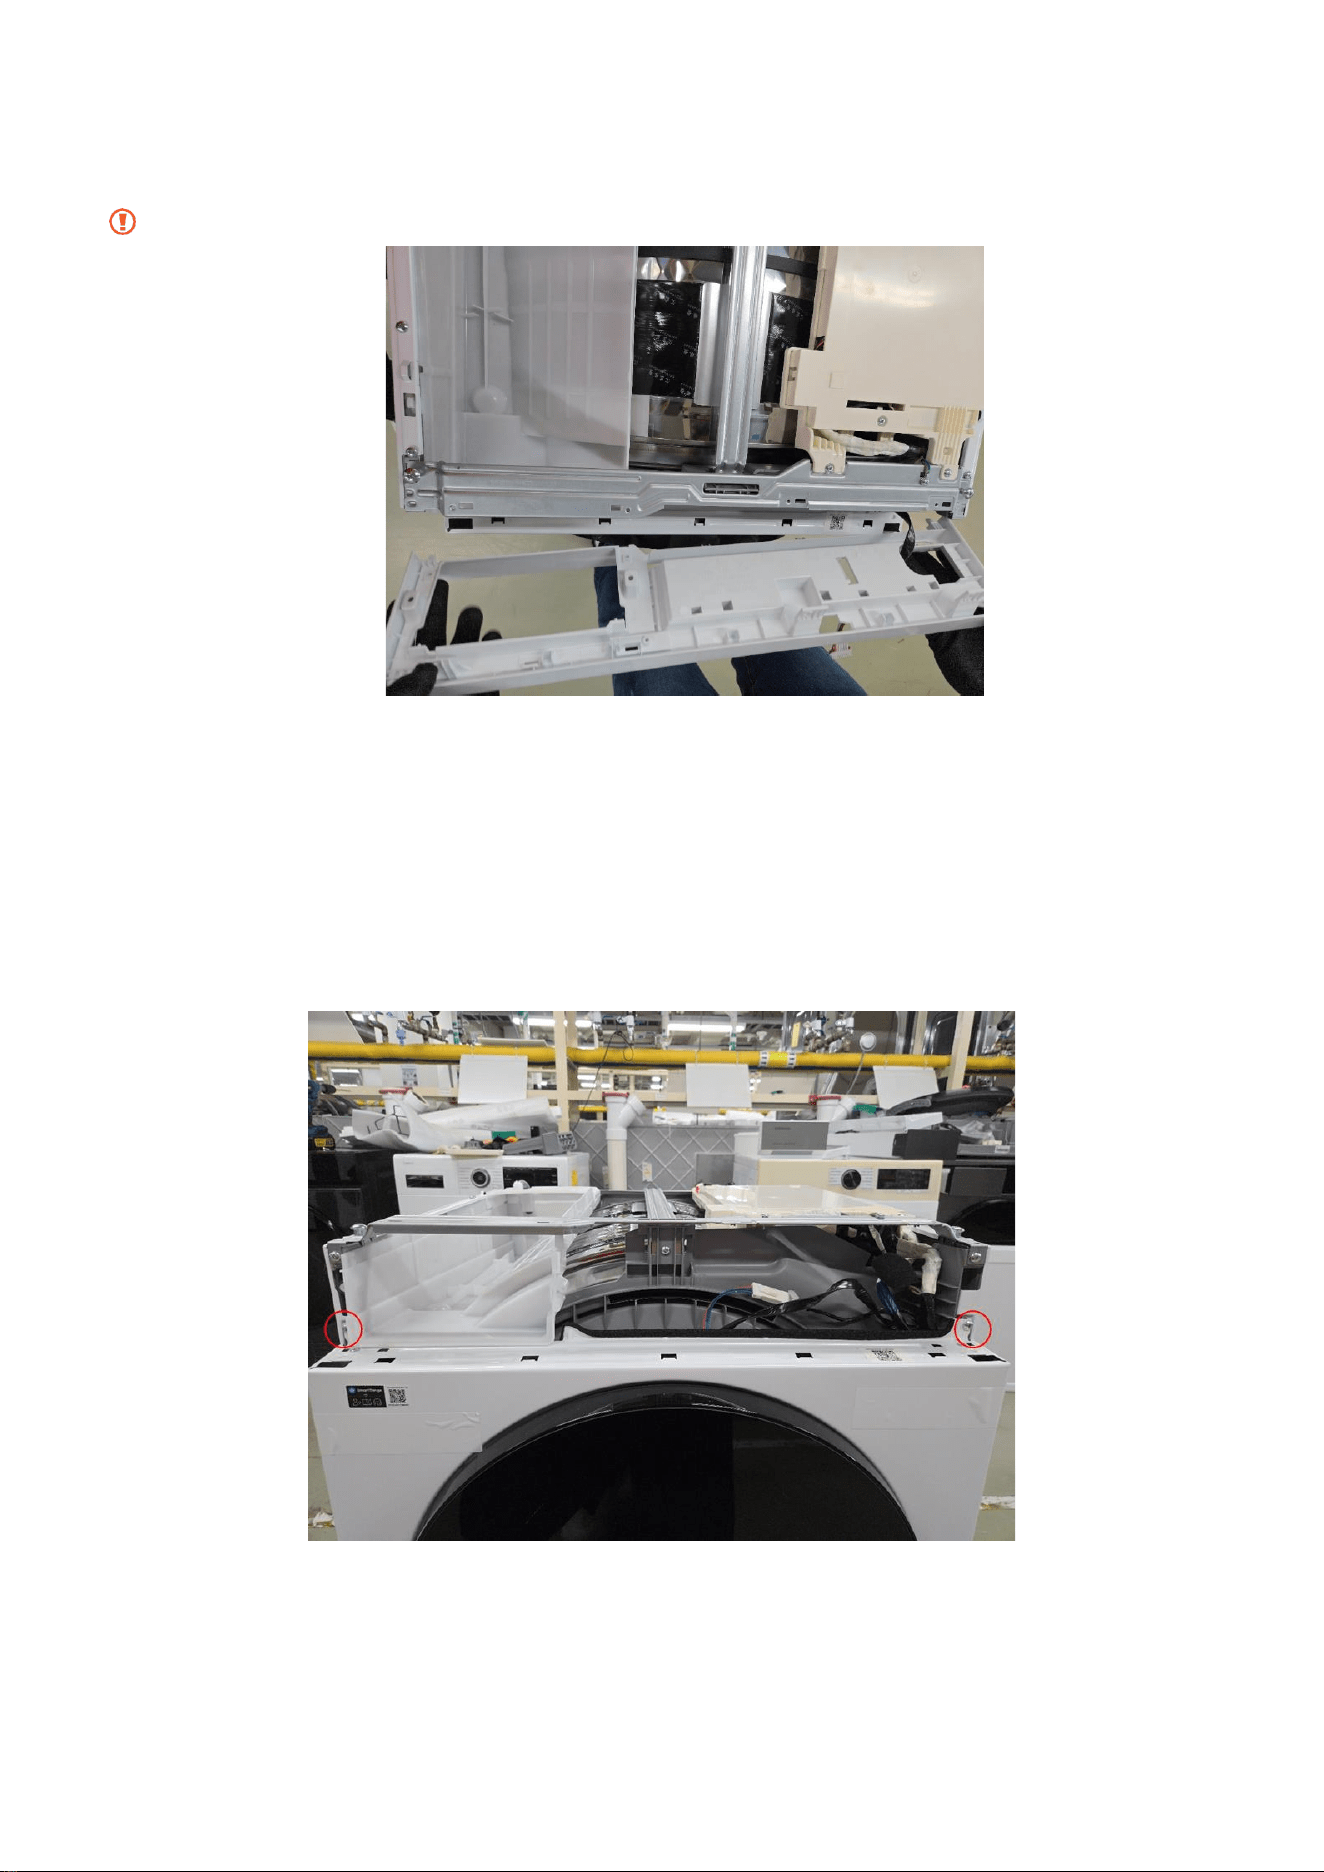
5 Remove Frame Front
5.1 Unscrew two points
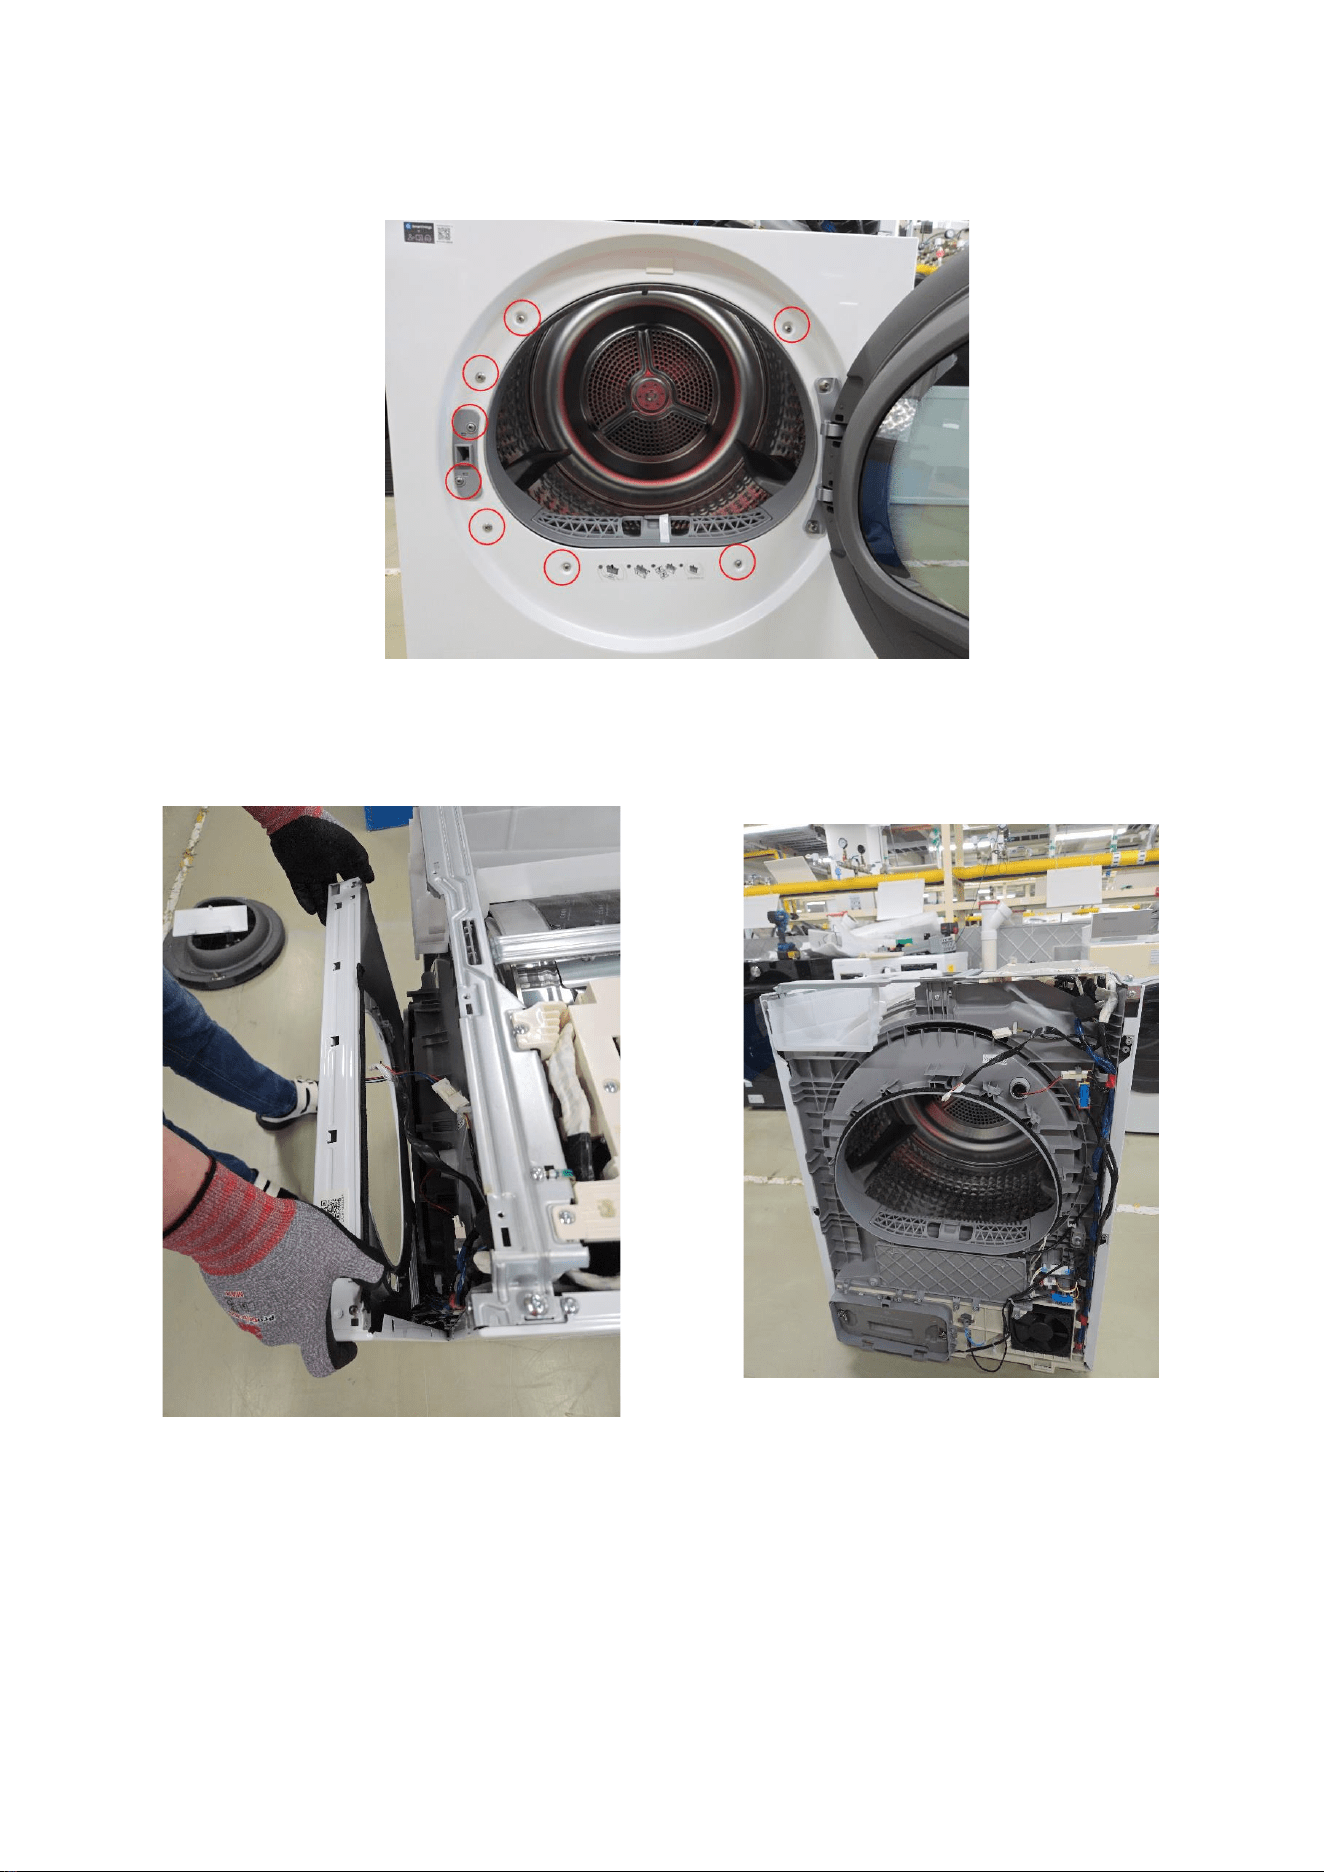
11
5.2 Unscrew 8 points
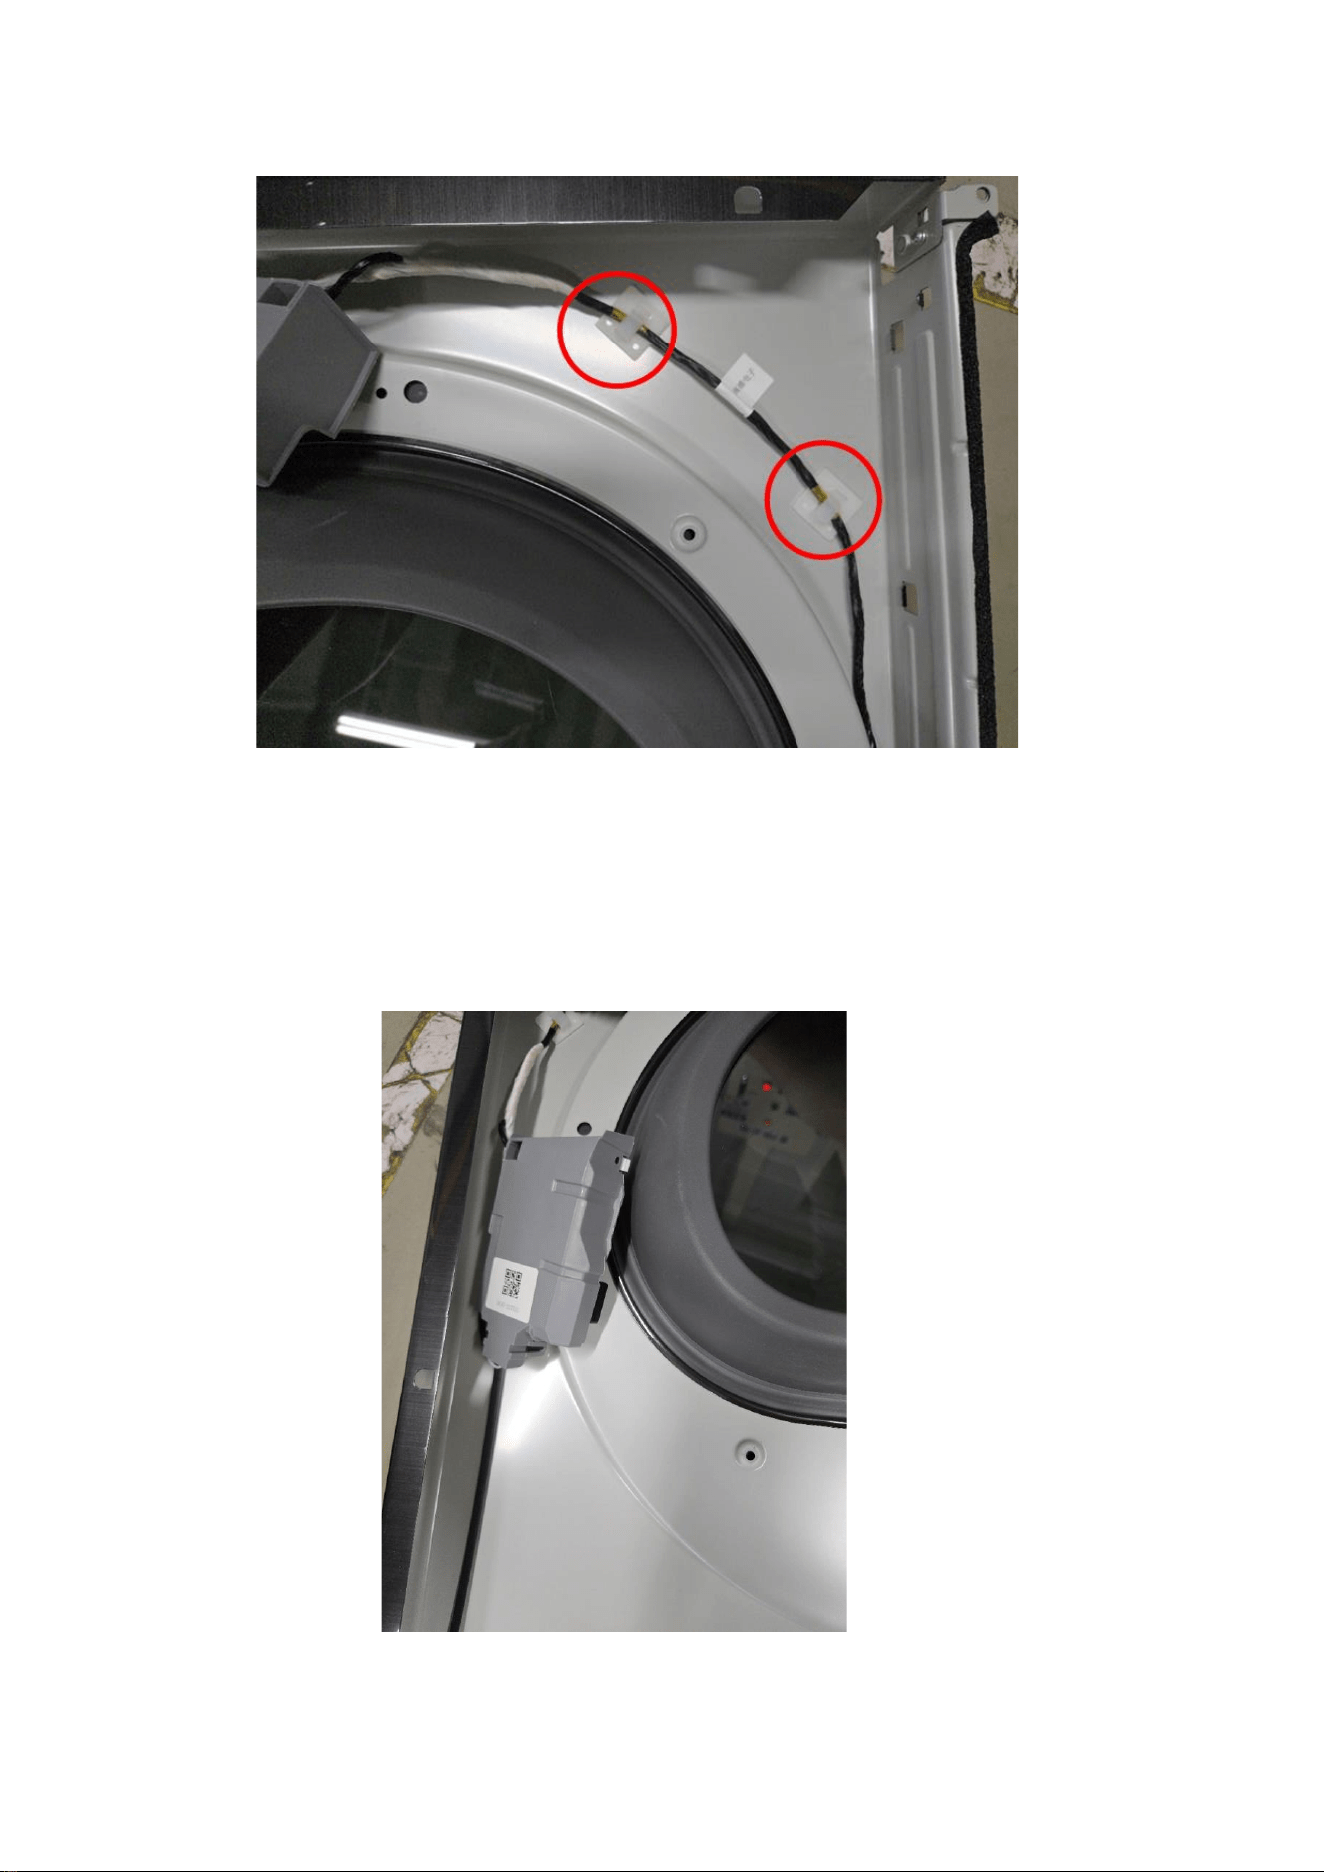
5.3 Remove Frame Front, make sure disconnect all two wires.
12
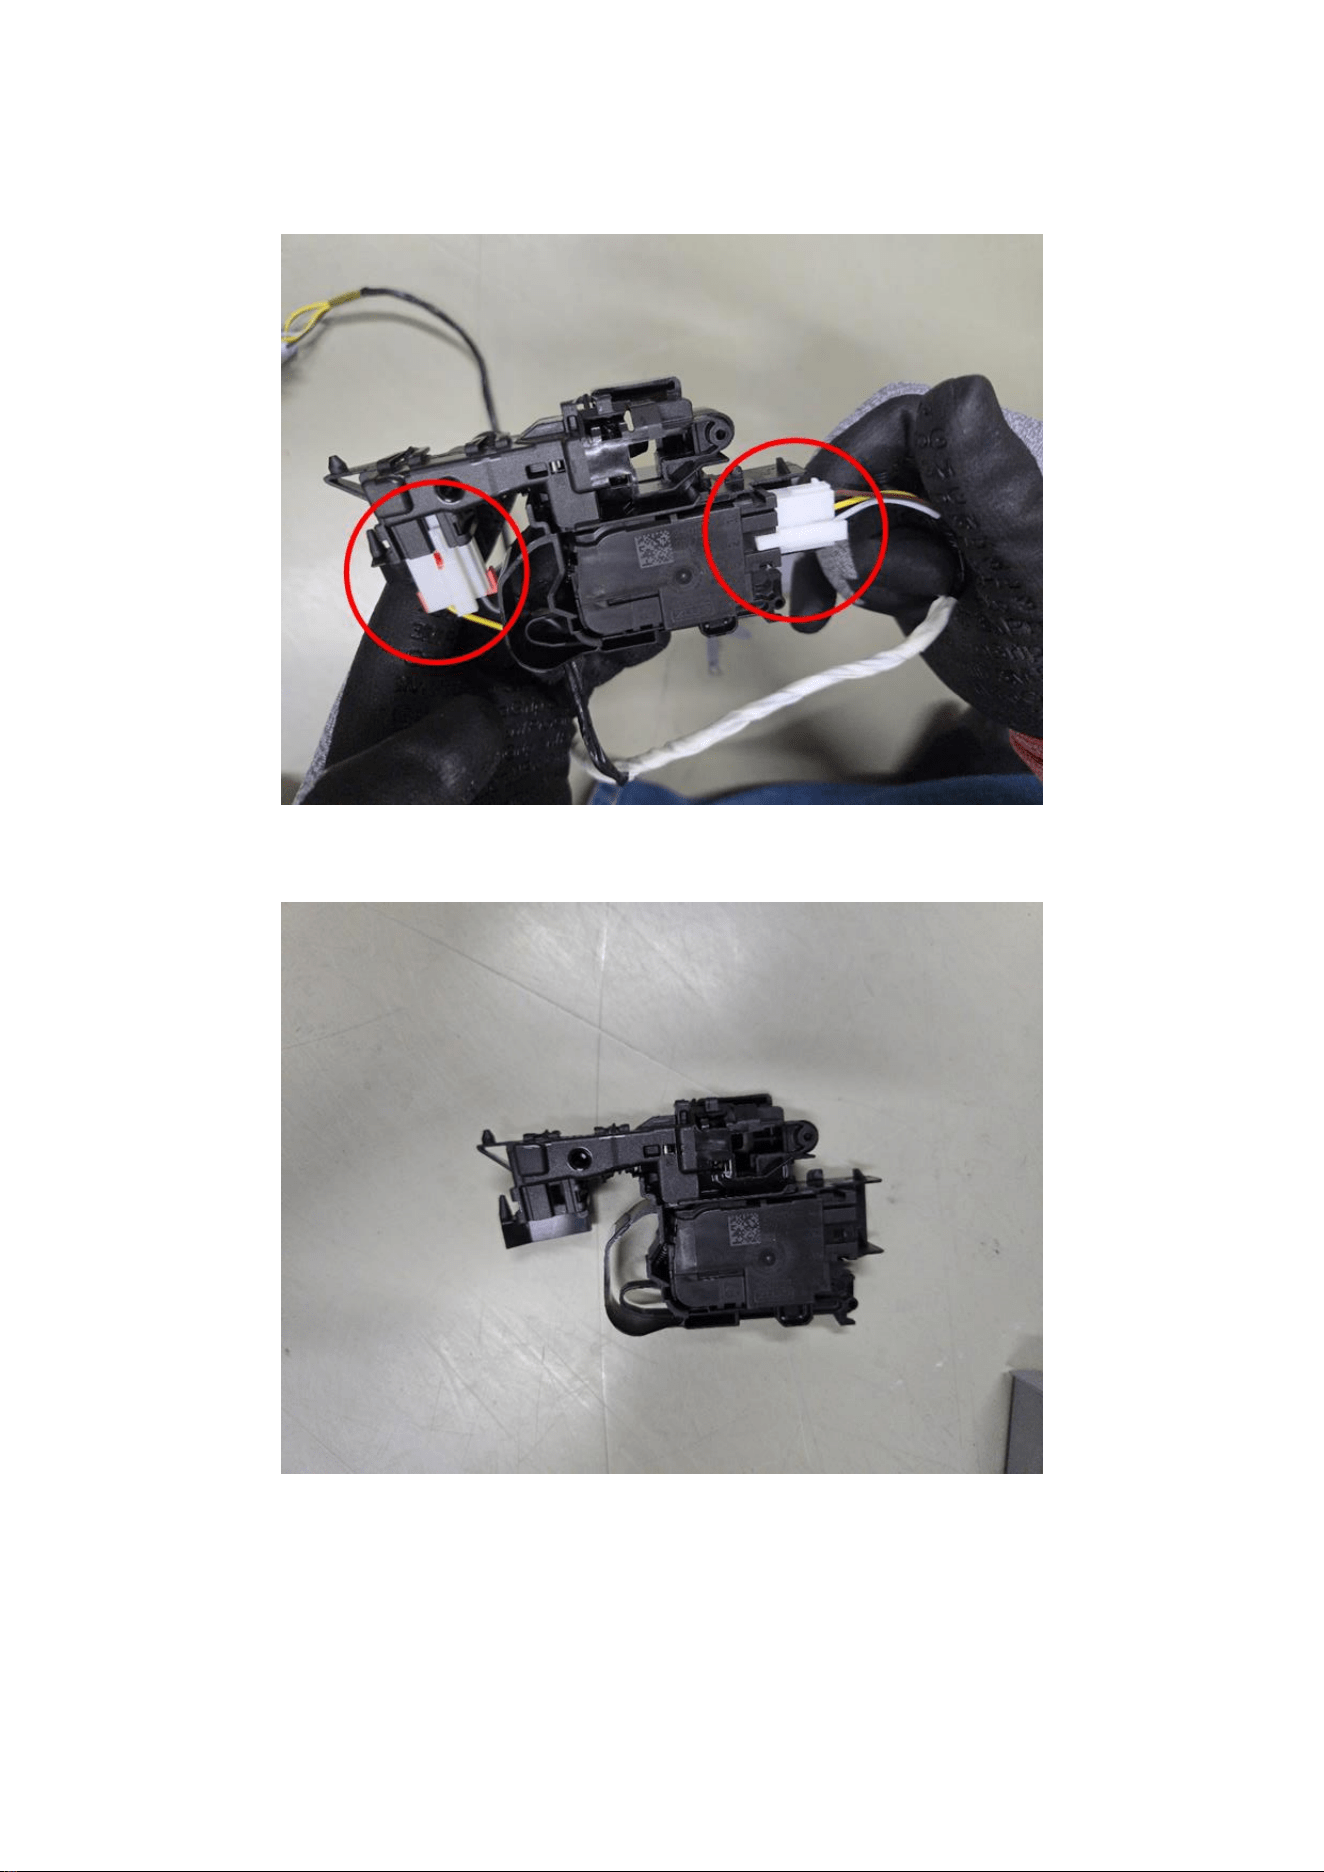
5.3.1 (Holder Lock case) There are two wires needed to be disconnected.
6 Disassemble Door Holder from Frame Front
13
6.1 At the back of Frame Front, detach wire from the holder
6.2 Remove the lock.
As already unscrew Door Holder’s screw in previous section, don’t need to
unscrew any more point.
14
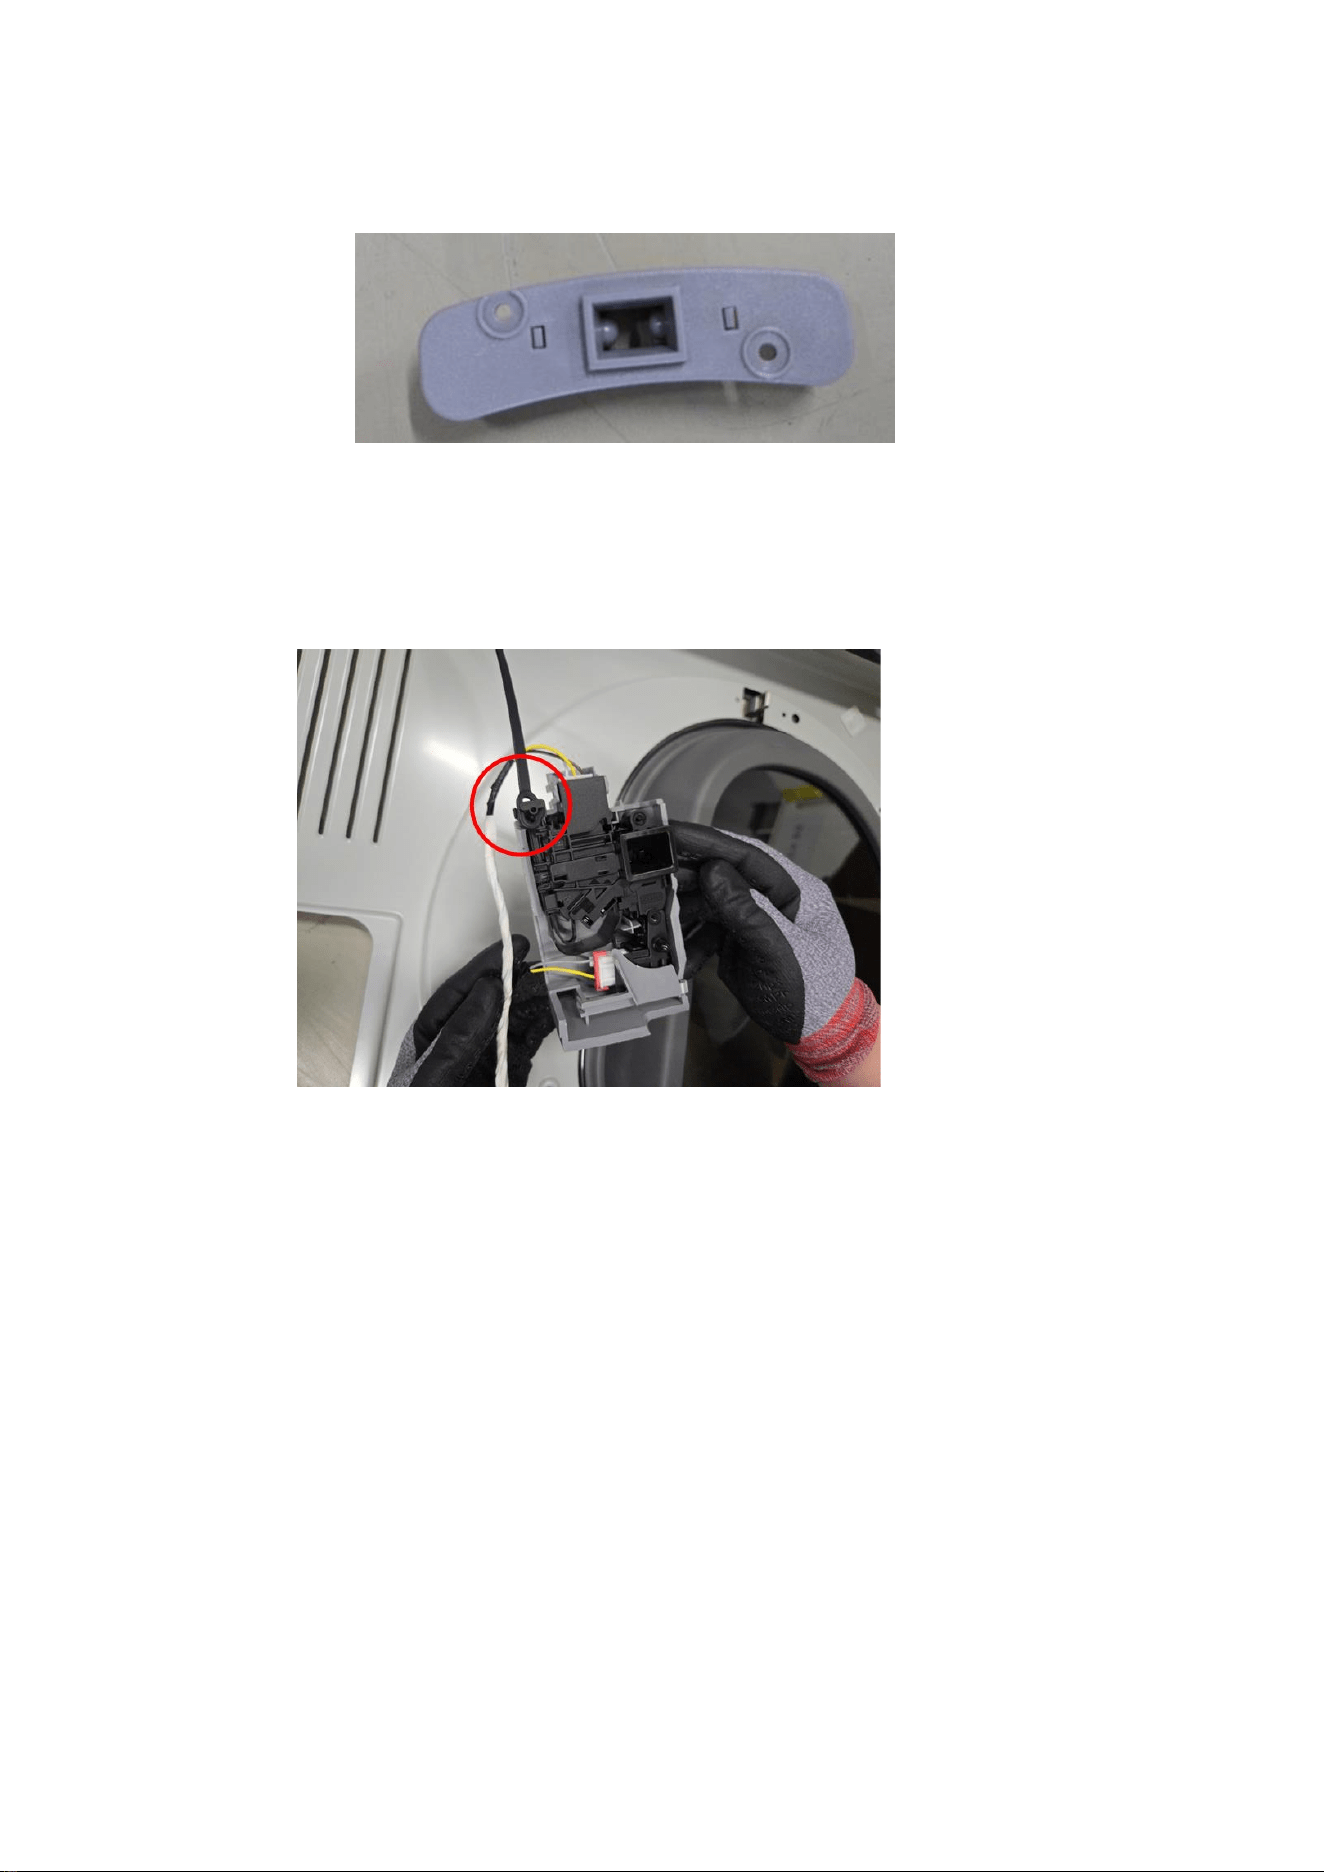
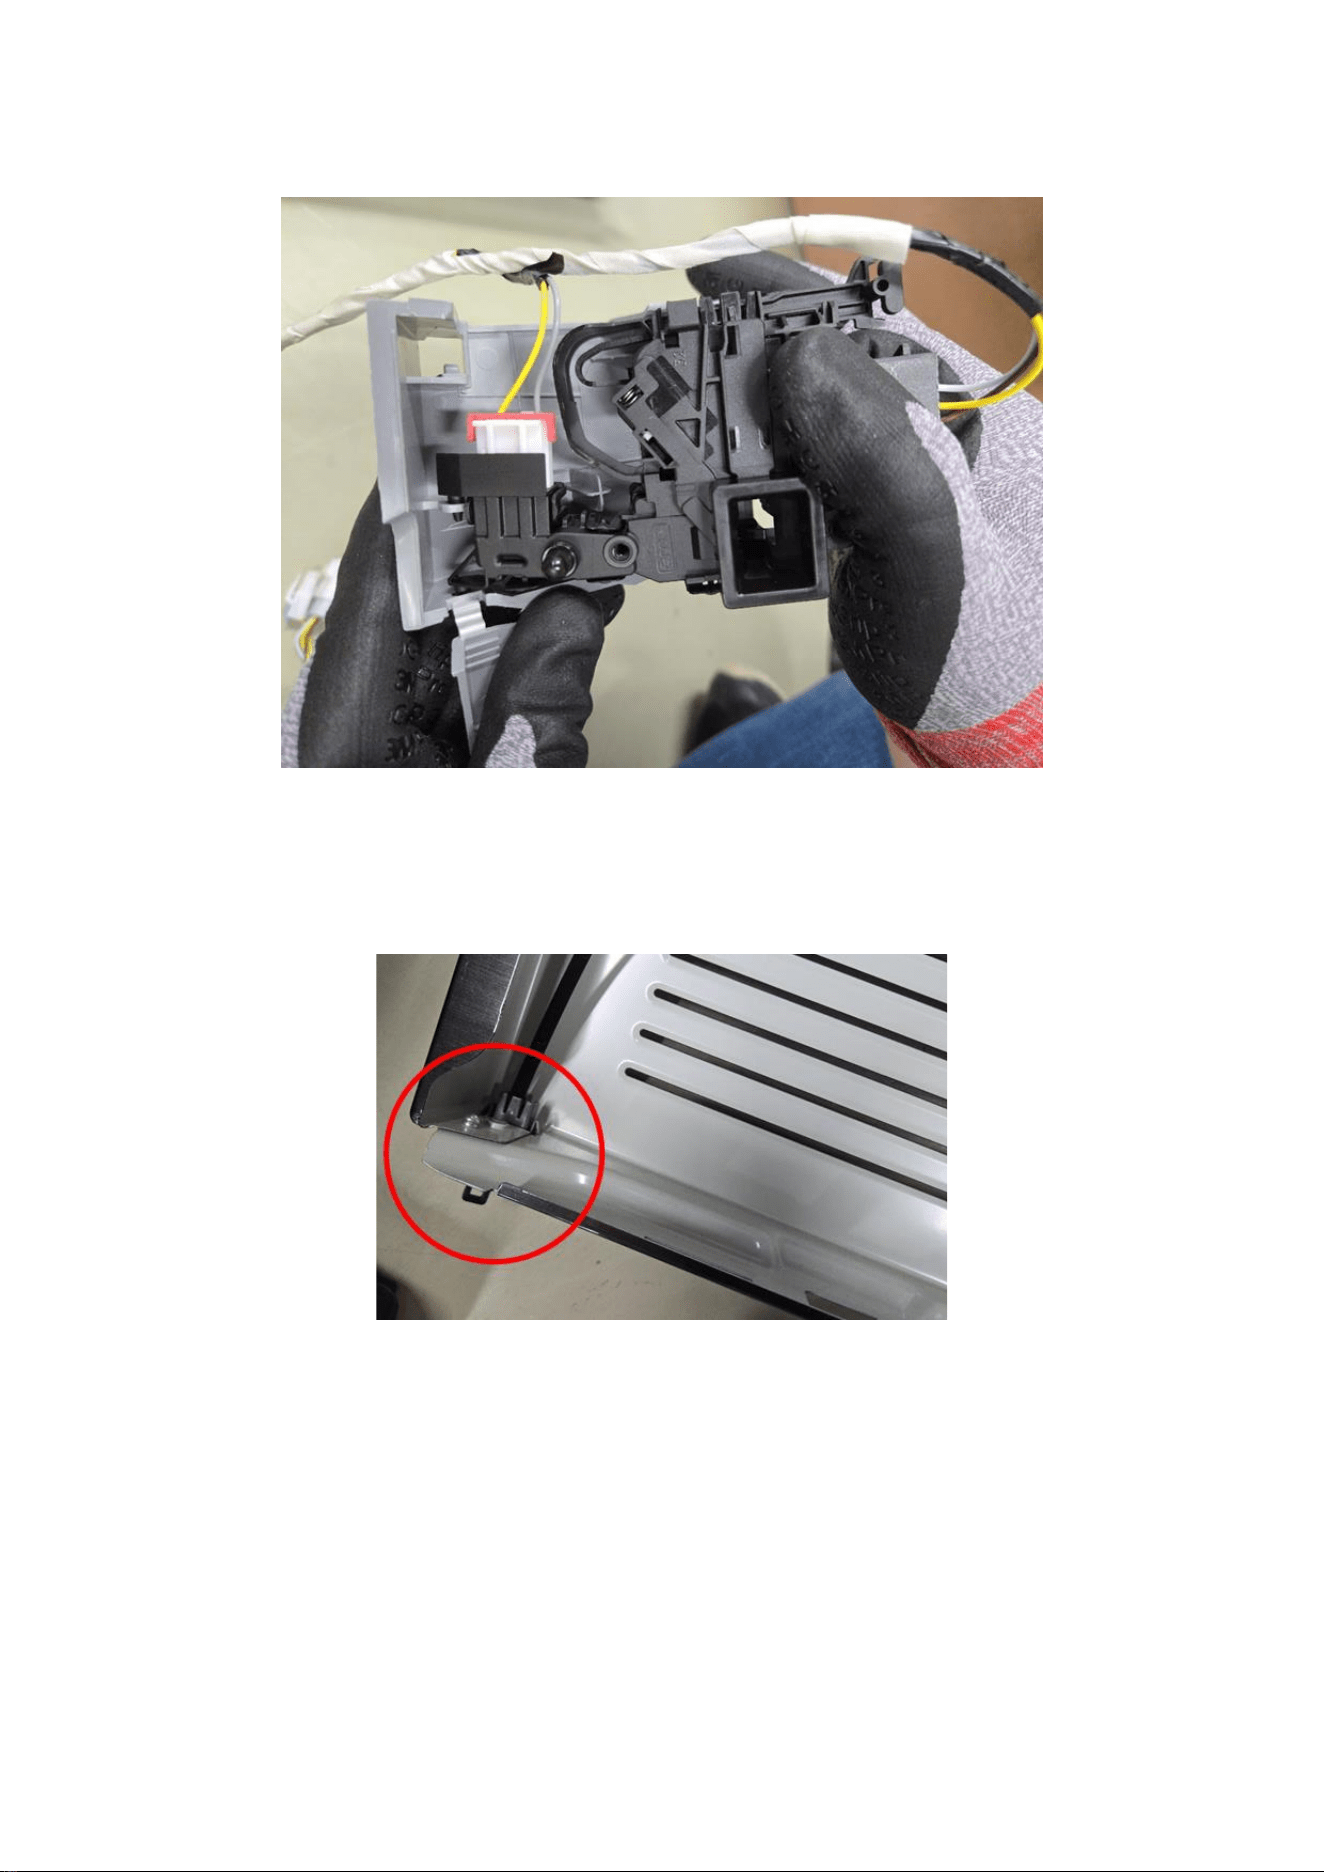
6.2.1 Pull the Holder Lever from the frame.
6.2.2 . Detach connected black wire from the Door Holder.
15
6.3 Remove Door Holder from it’s Cover.
6.3.1 Beware the holders.
6.4 Remove Door Holder from the Cover.
16
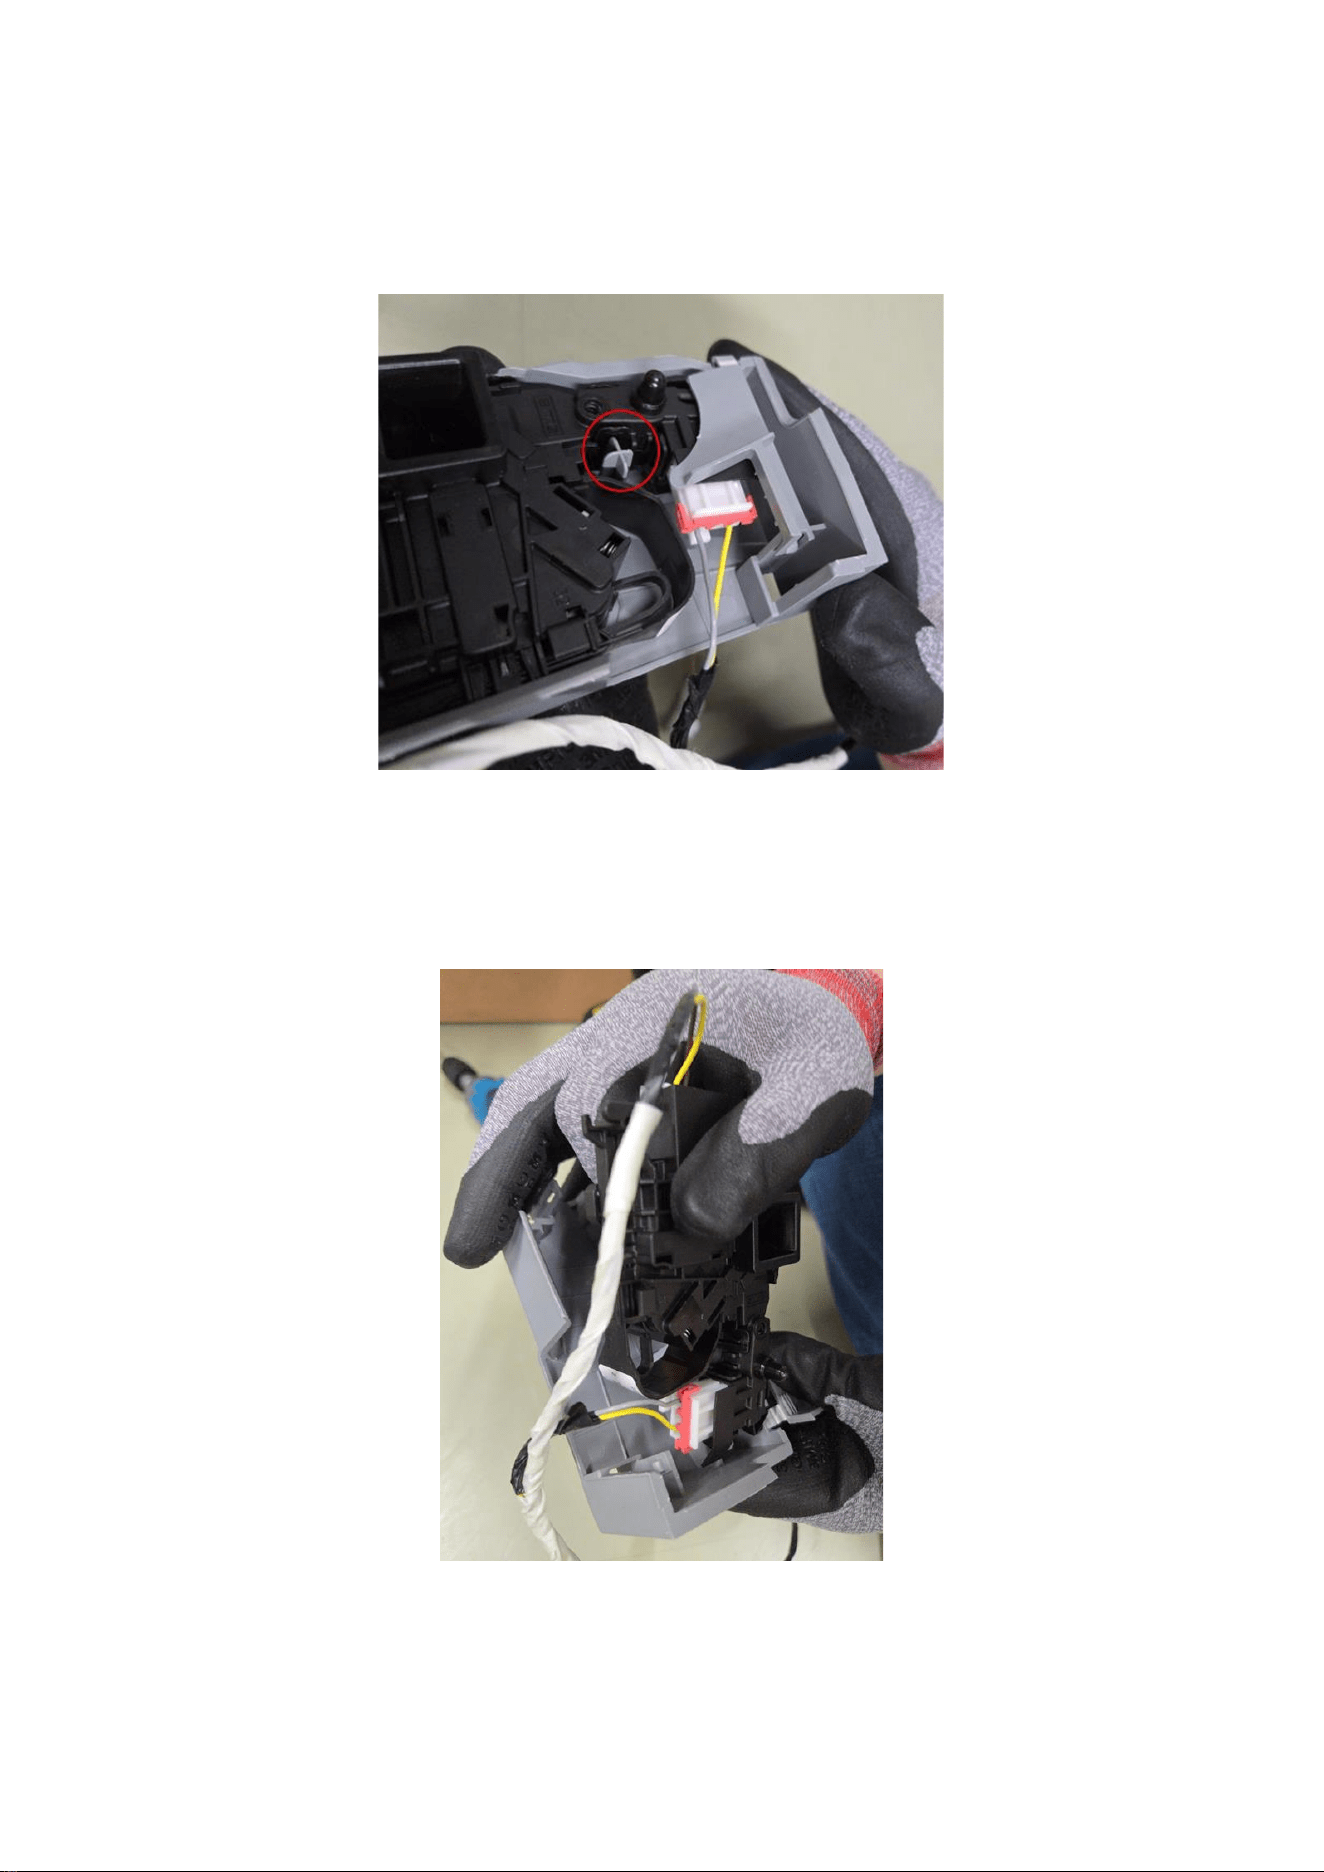
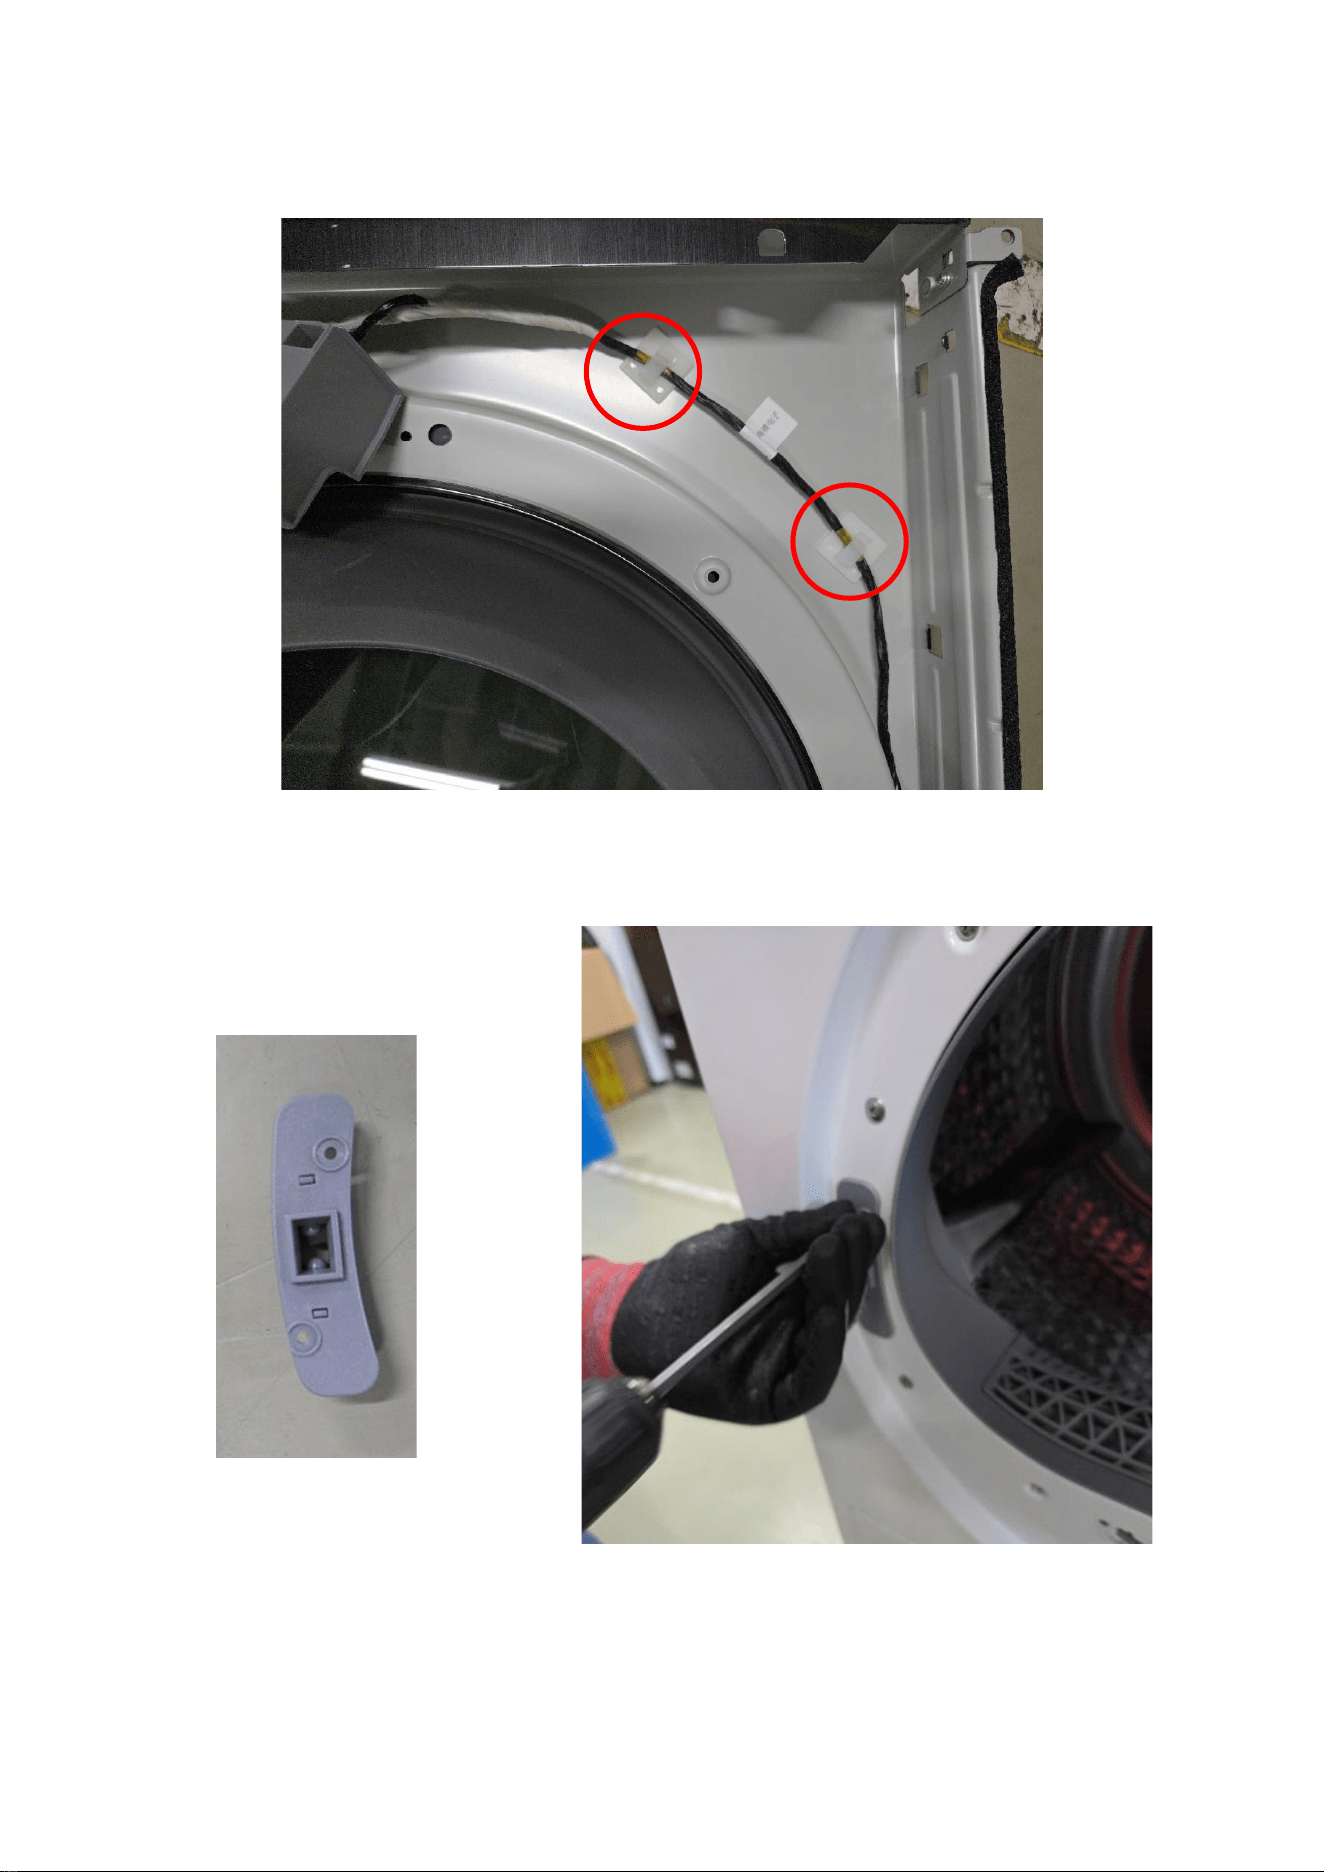
6.5 Unplug the wire.
17
Reassembly
1 Connect the wires and assembled to cover
1.1 Put edge of the black wire at the end of the Frame Front
18
2 Assemble to Frame Front
2.1 Make wire to attach to the Frame Front
2.2 Screw to the Frame Front.
19
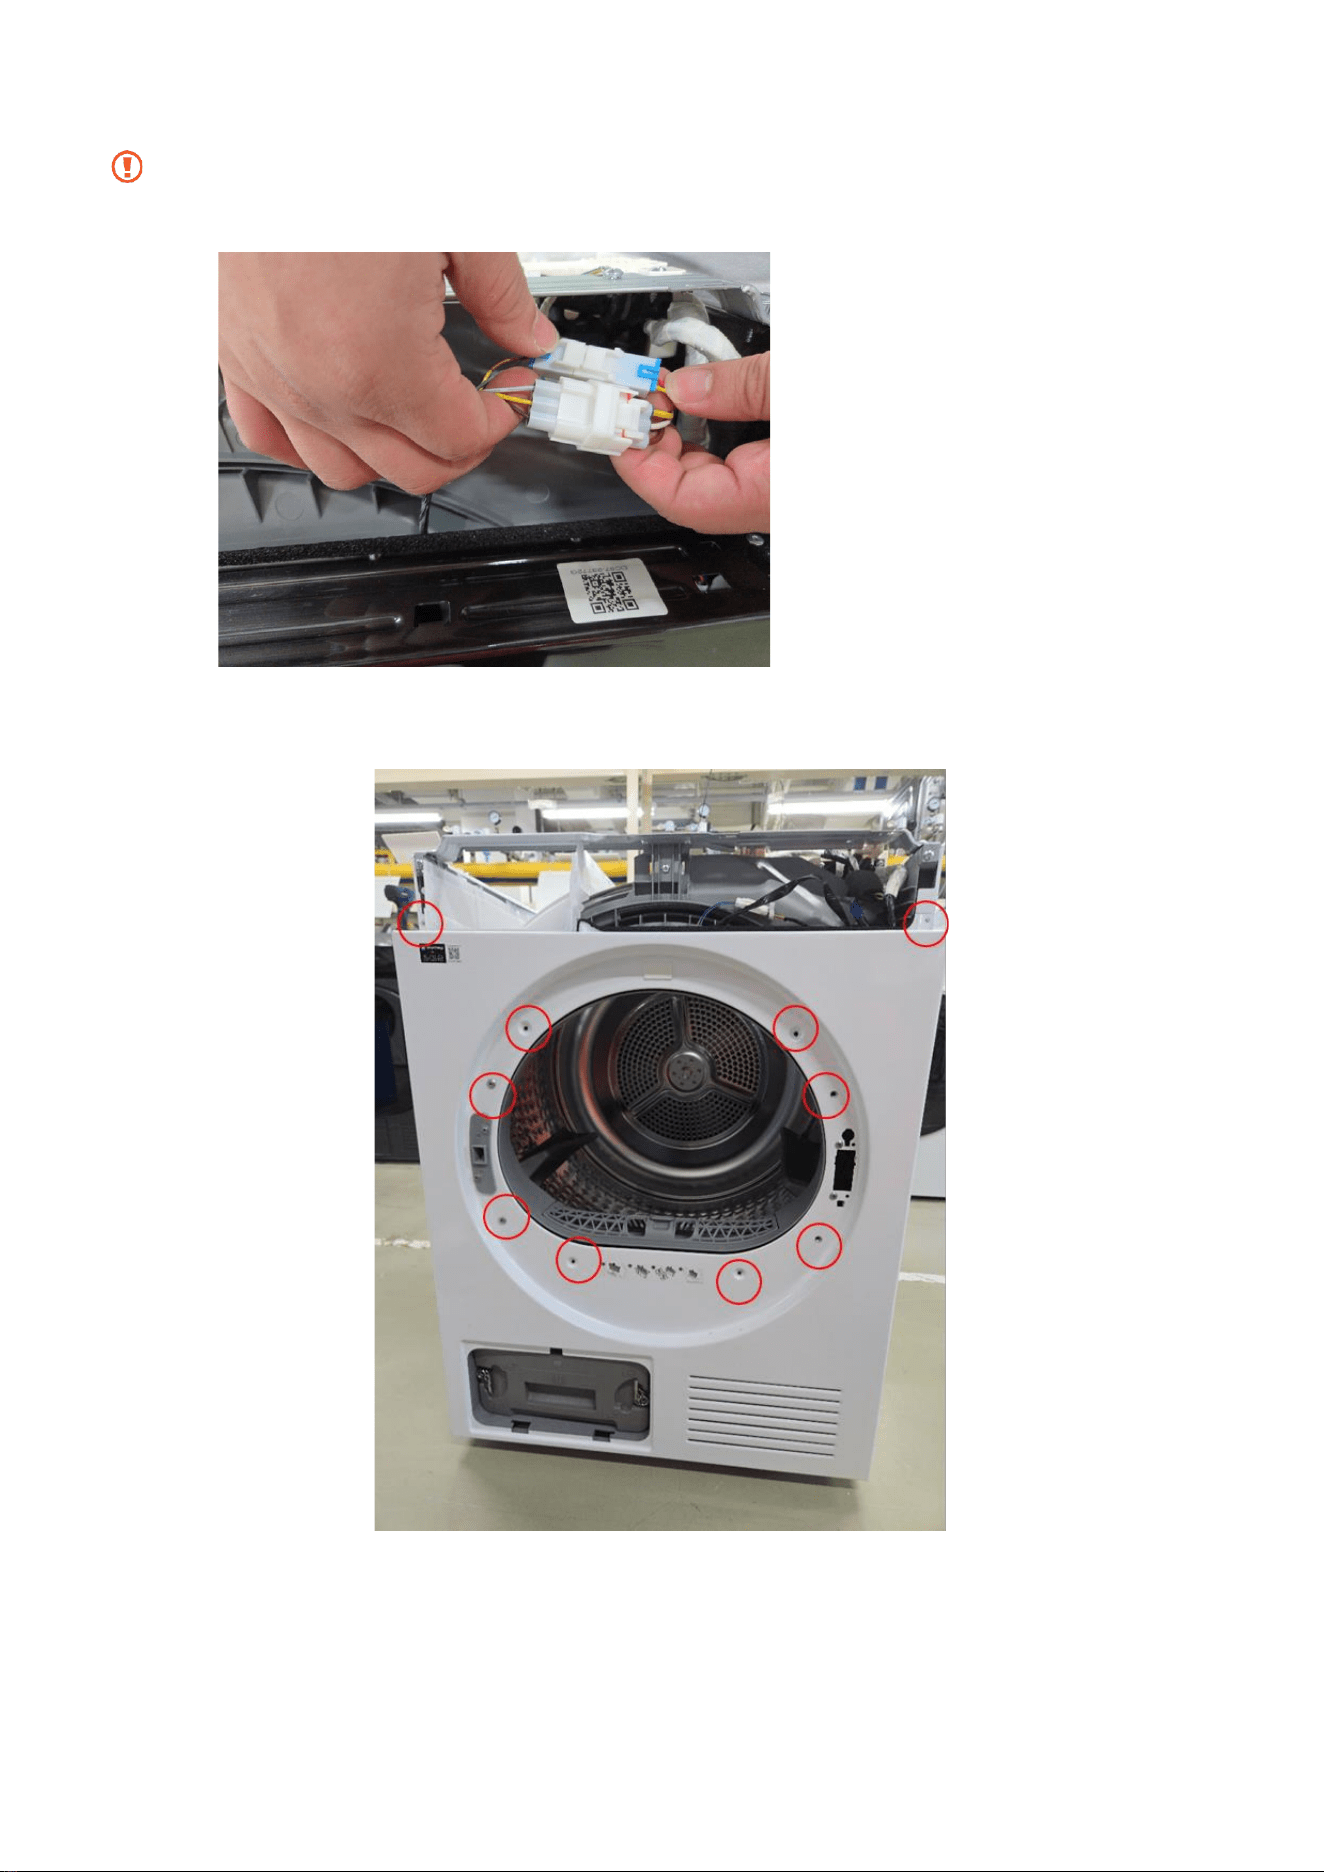
3 Plug the wires to the set.
Edge of the frame is very sharp. Beware cut injury.
4 Assemble 10 bolts each holding.
20
5 Assemble cover in the Filter.
21
6 Assemble Control Panel
6.1 Assemble the Panel to the Frame Front.
22
6.2 Plug the wire.
6.3 Push to the right.
23
7 Put the Drawer in the right direction.
8 Assemble Top Cover and screw two points
24
2.2.2. Door Seal
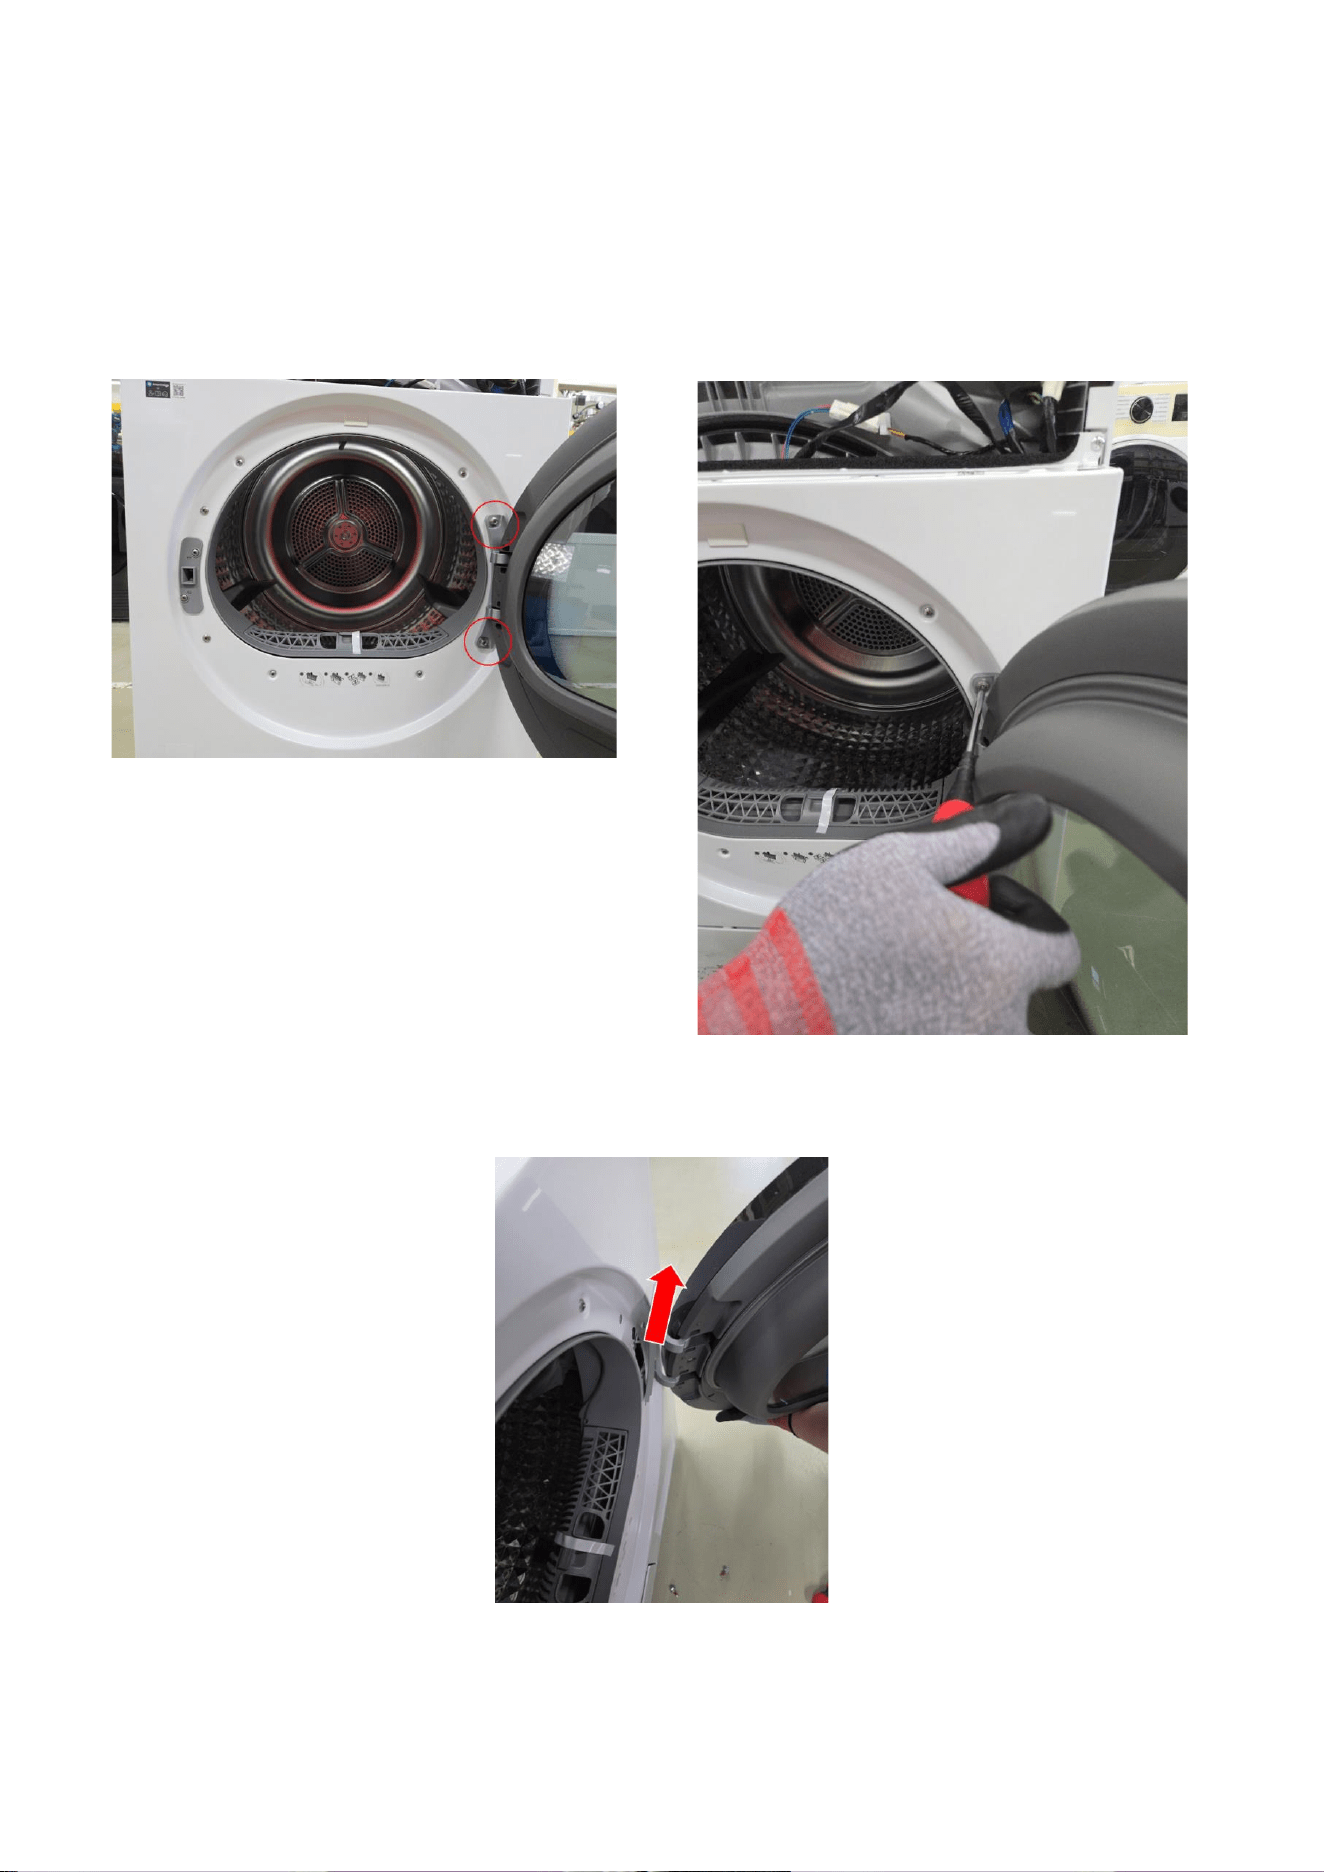
Disassembly
1 Unscrew two points in the Door
1.1 Pull up the door
25
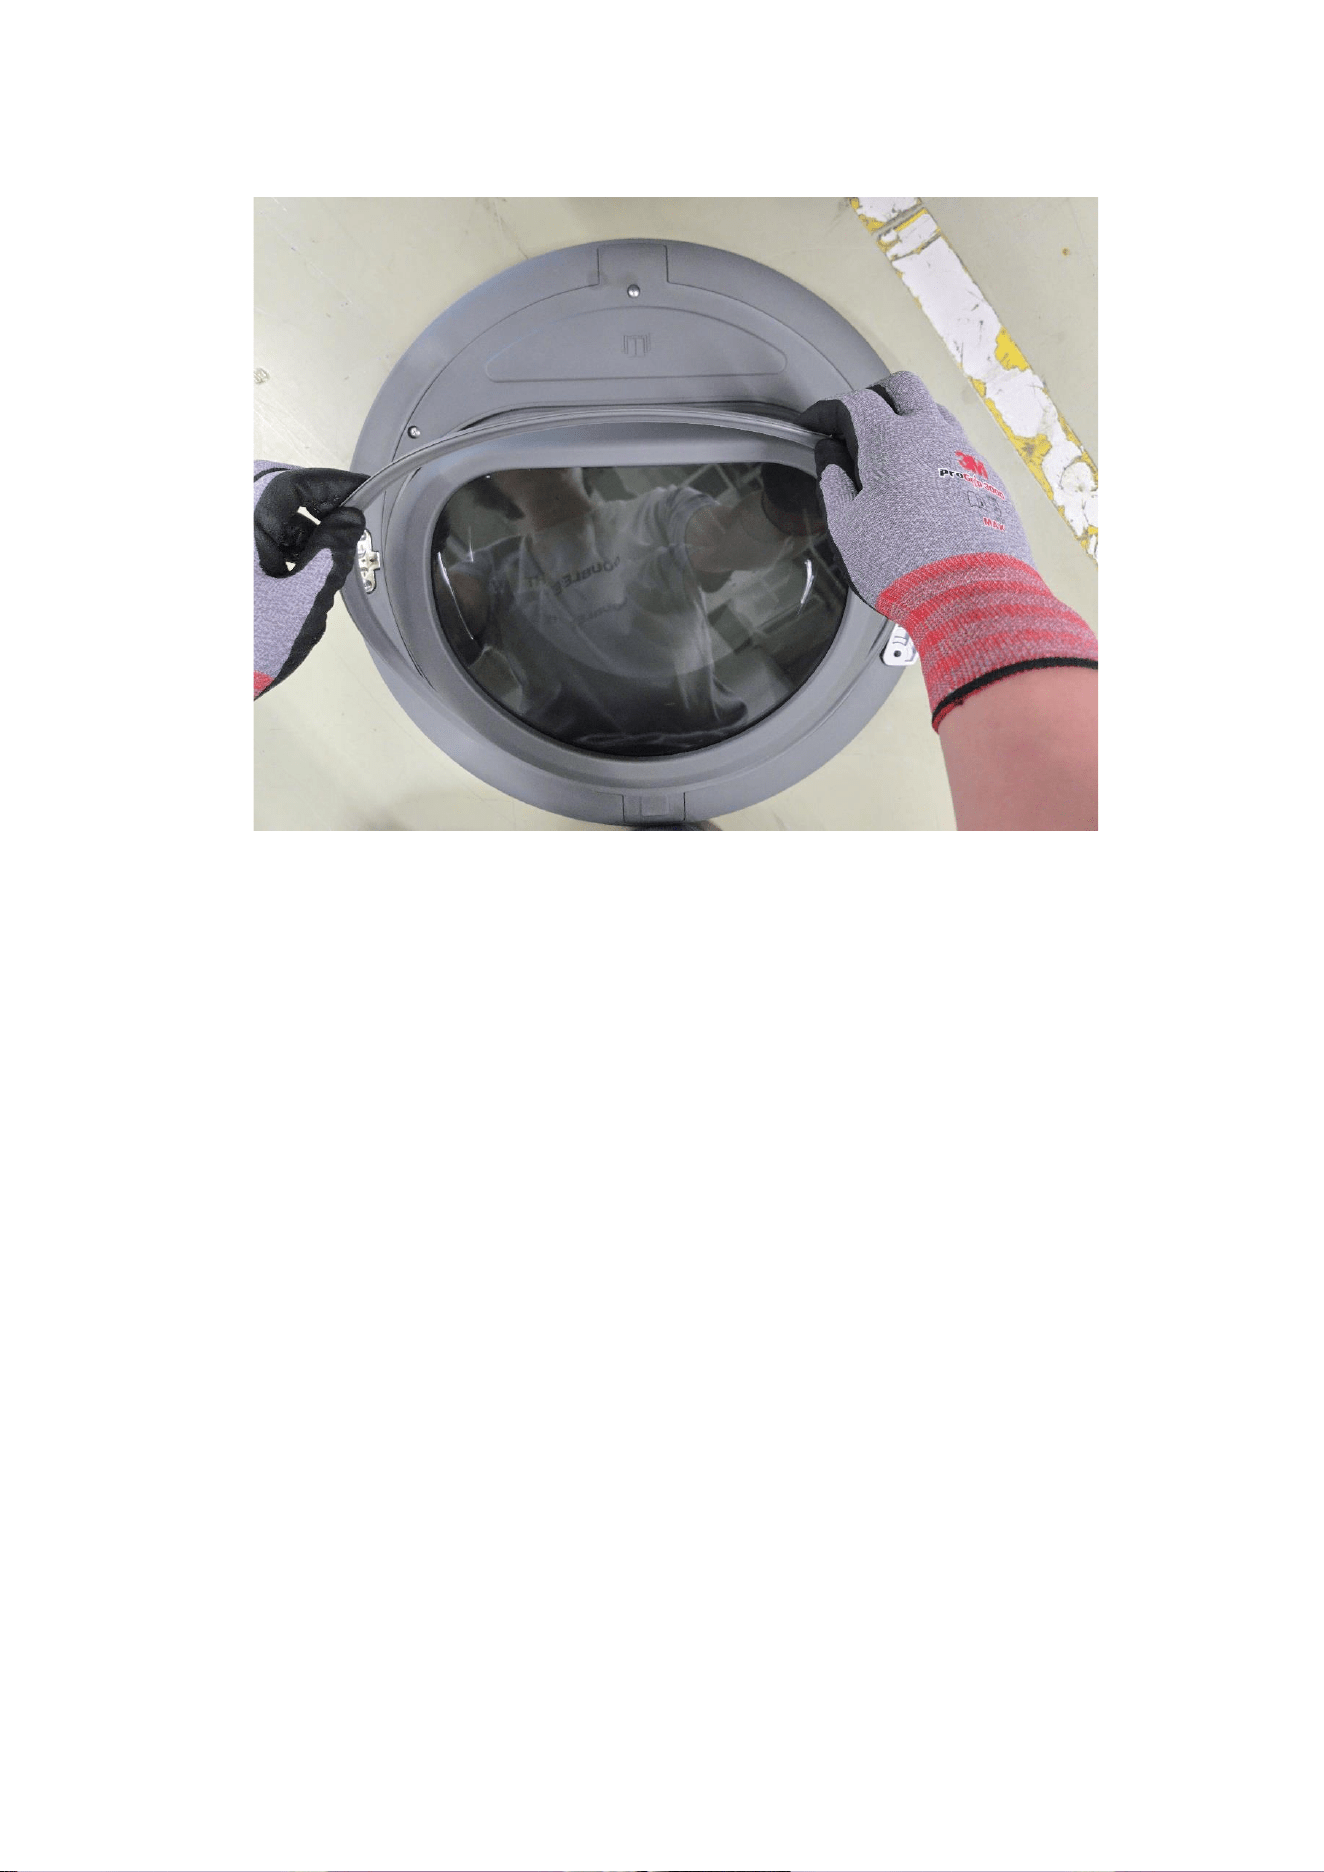
2 Detach Seal from the door.
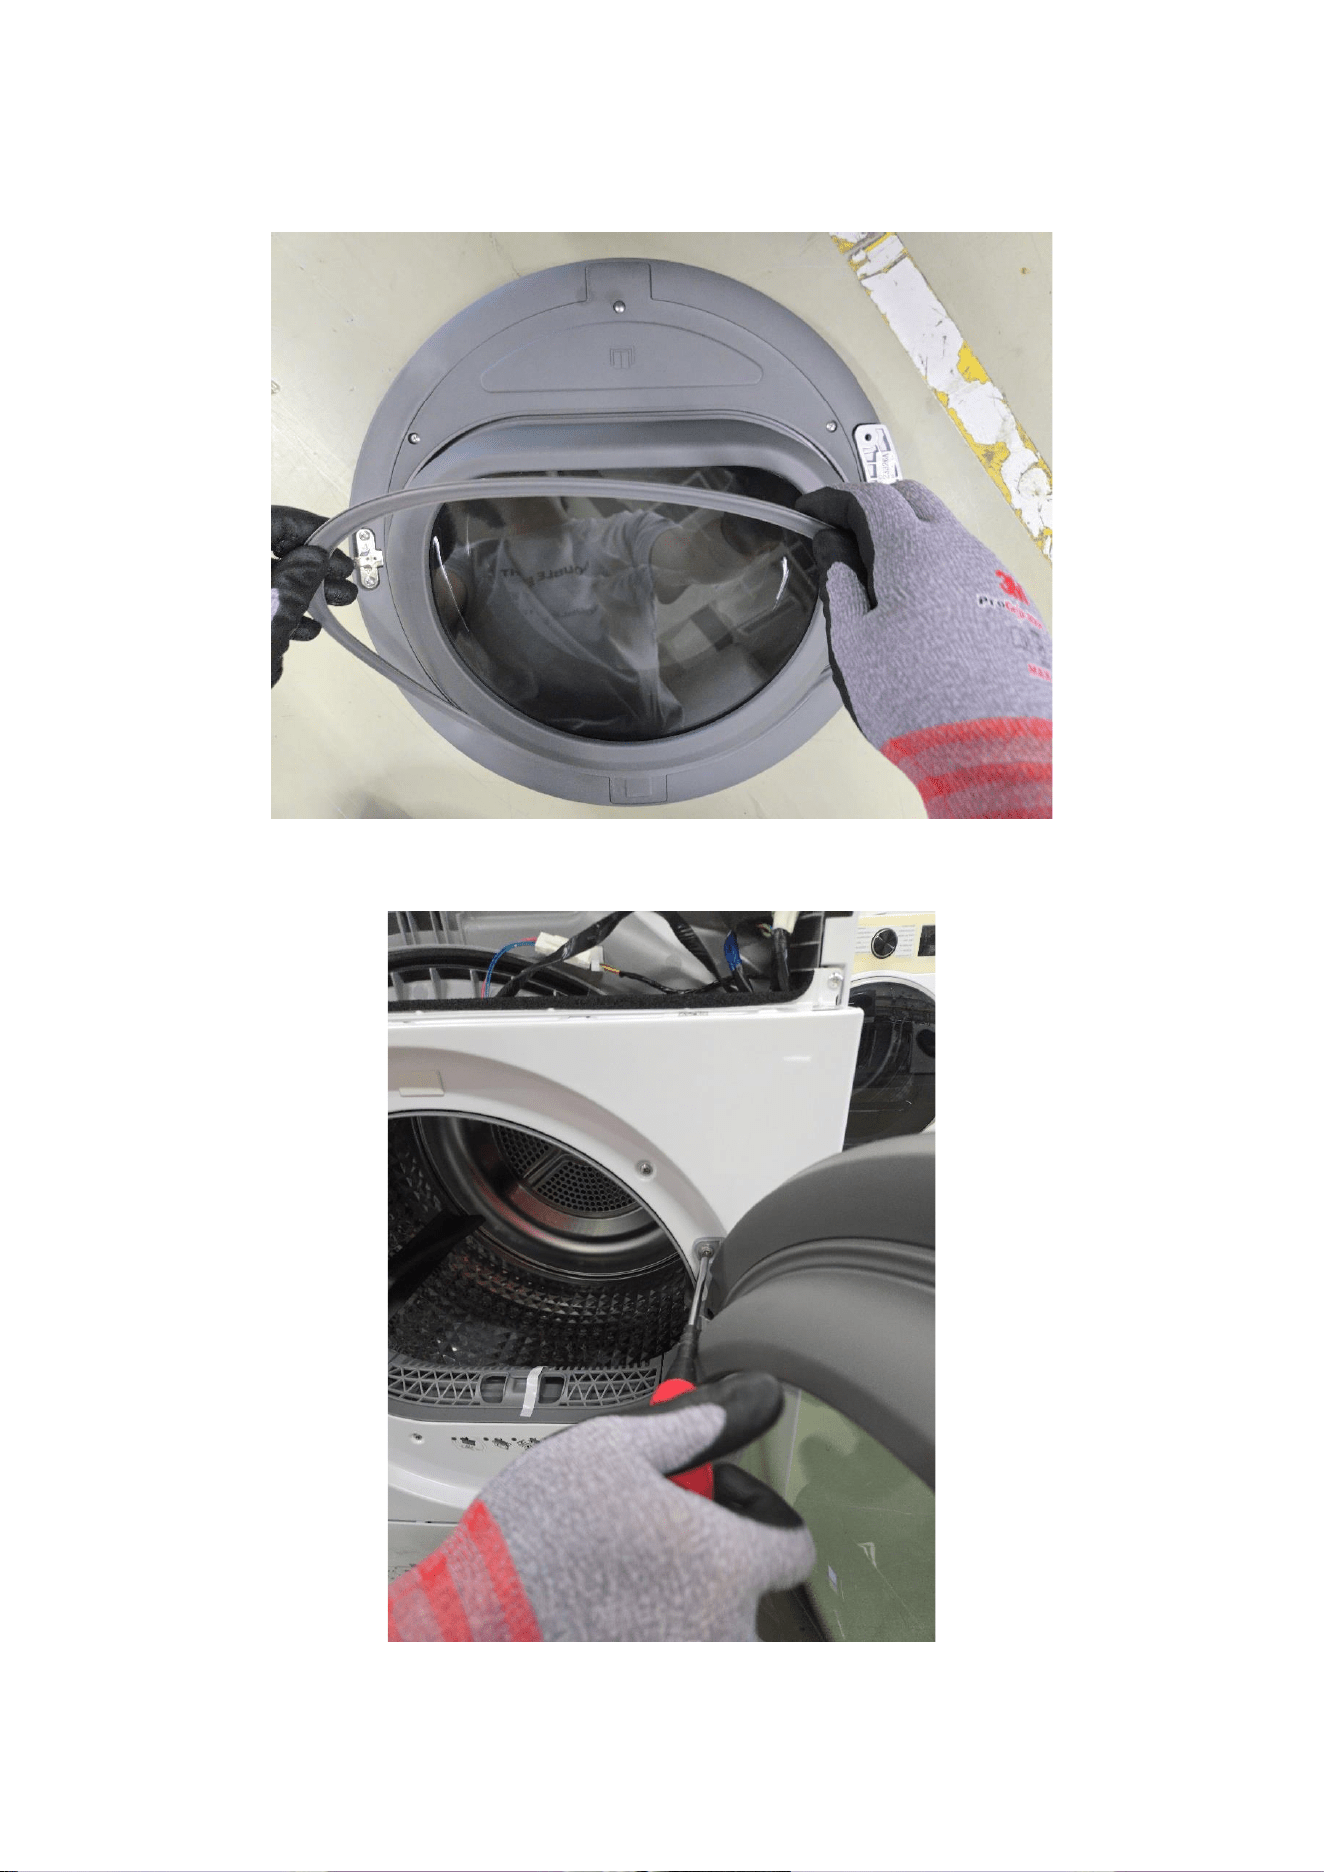
26
Assembly
1 Attach Seal to the door tight, beware that Seal and door assembled tightly.
2 Assemble the Door to the set.
27
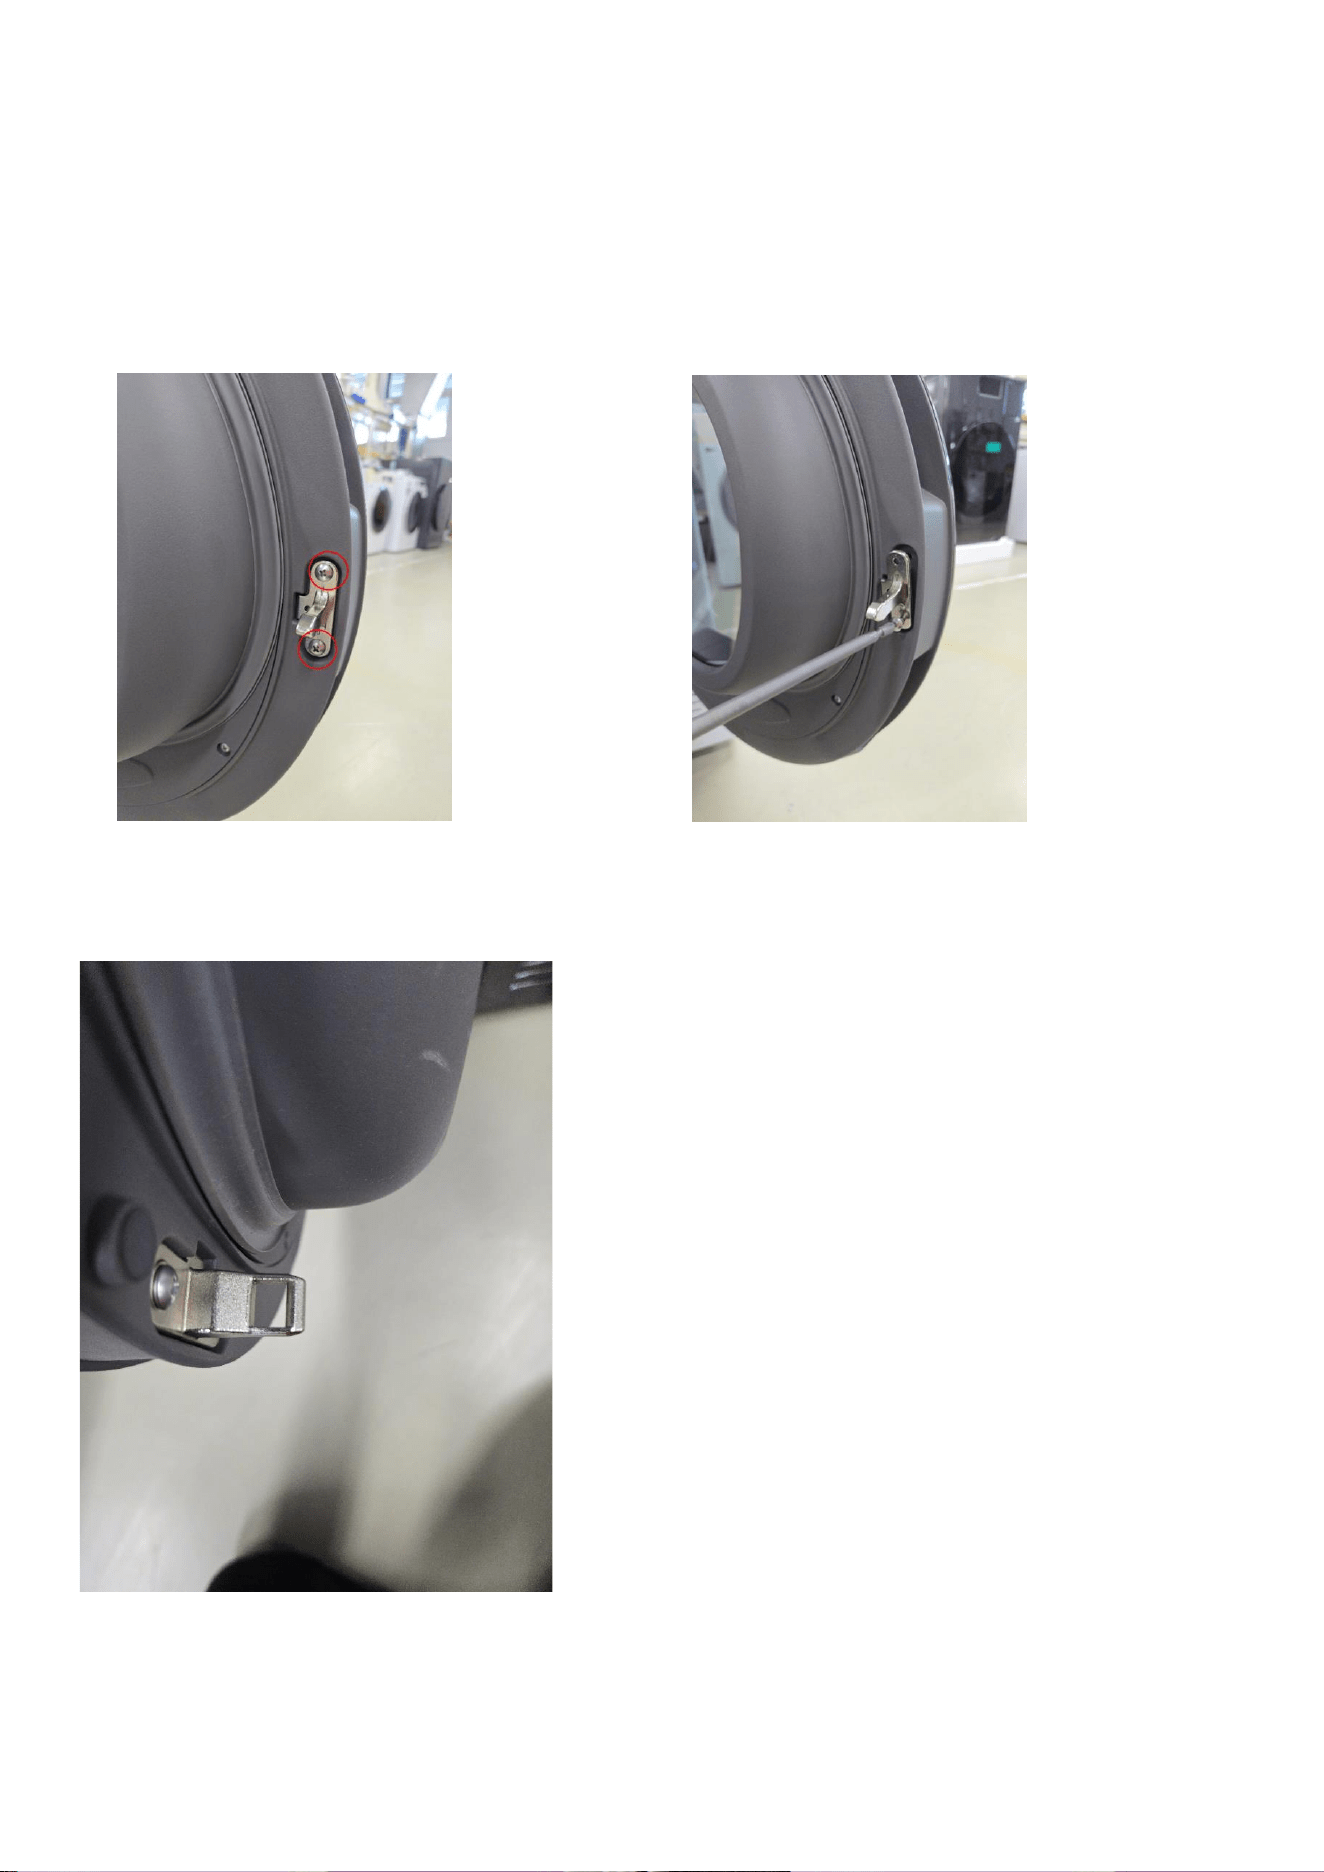
2.2.3. Lever Door
Disassembly
1 Unscrew the points in the door
2 Holder Lock has a different outlook in same process
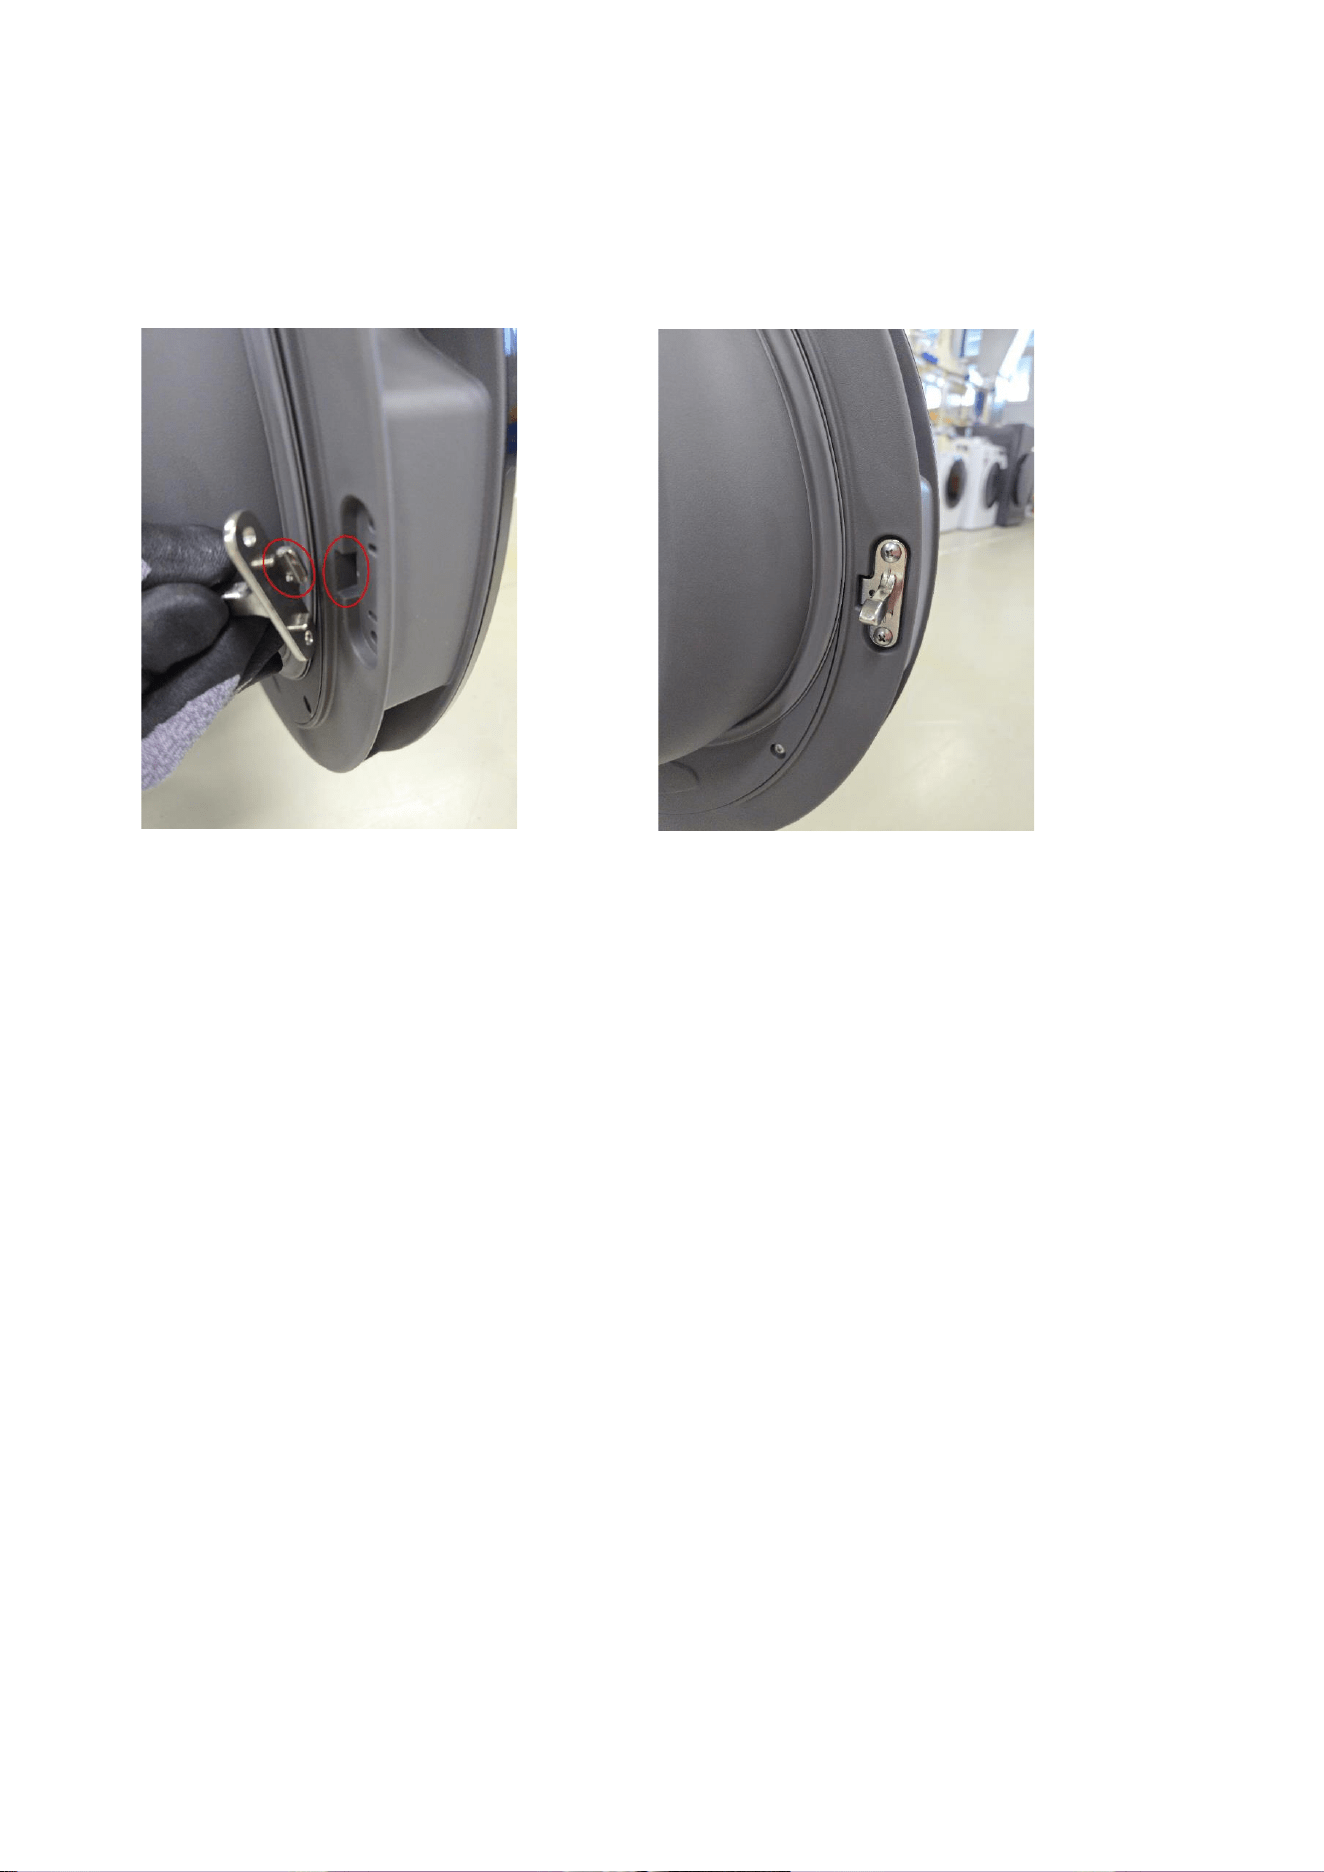
28
Assembly
1 Screw two points in the door
1.1 Beware the direction.
29
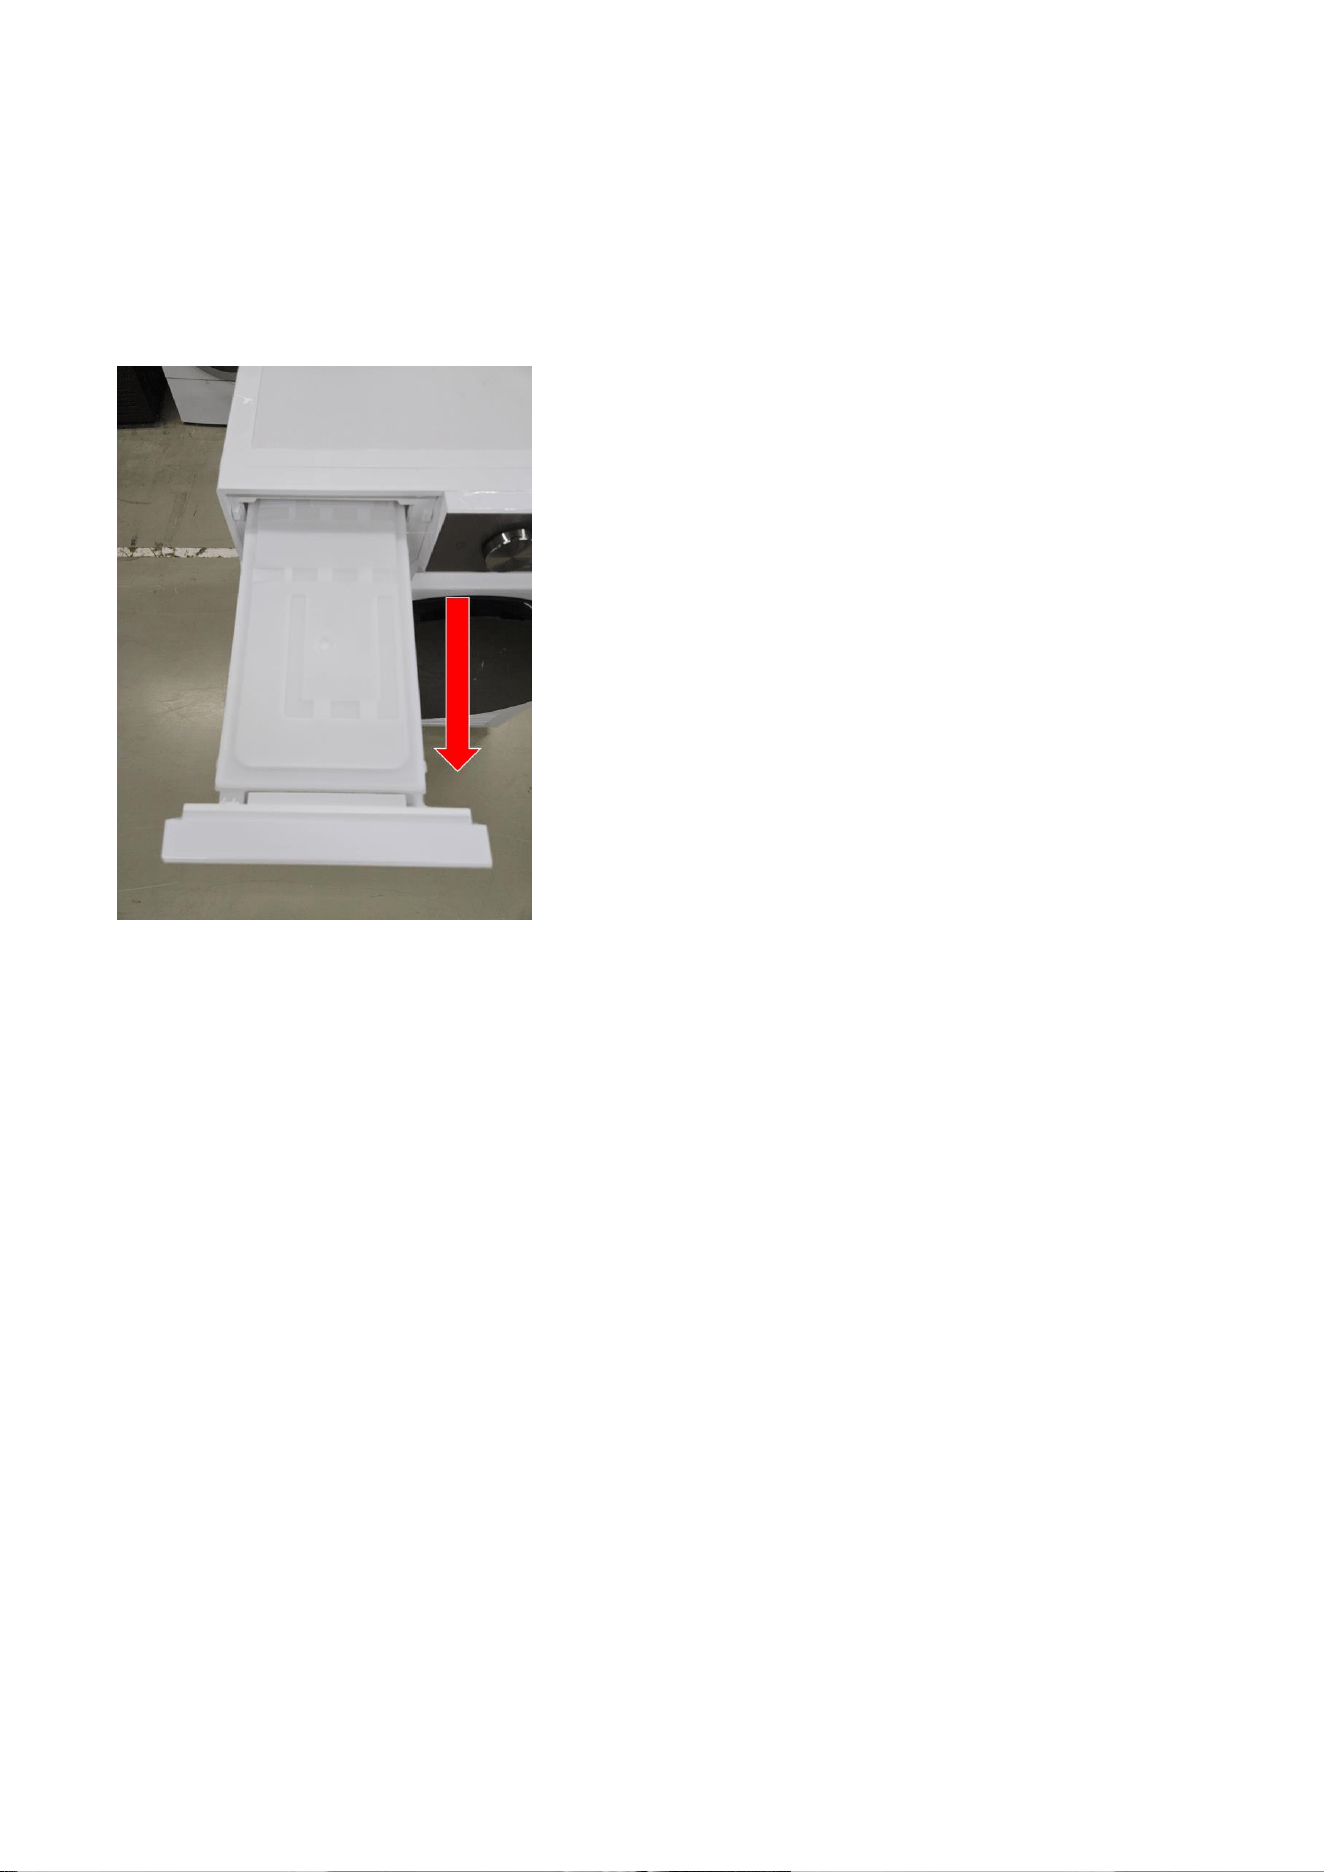
2.2.4. Water Tank
Disassembly
1. Pull the water tank
30
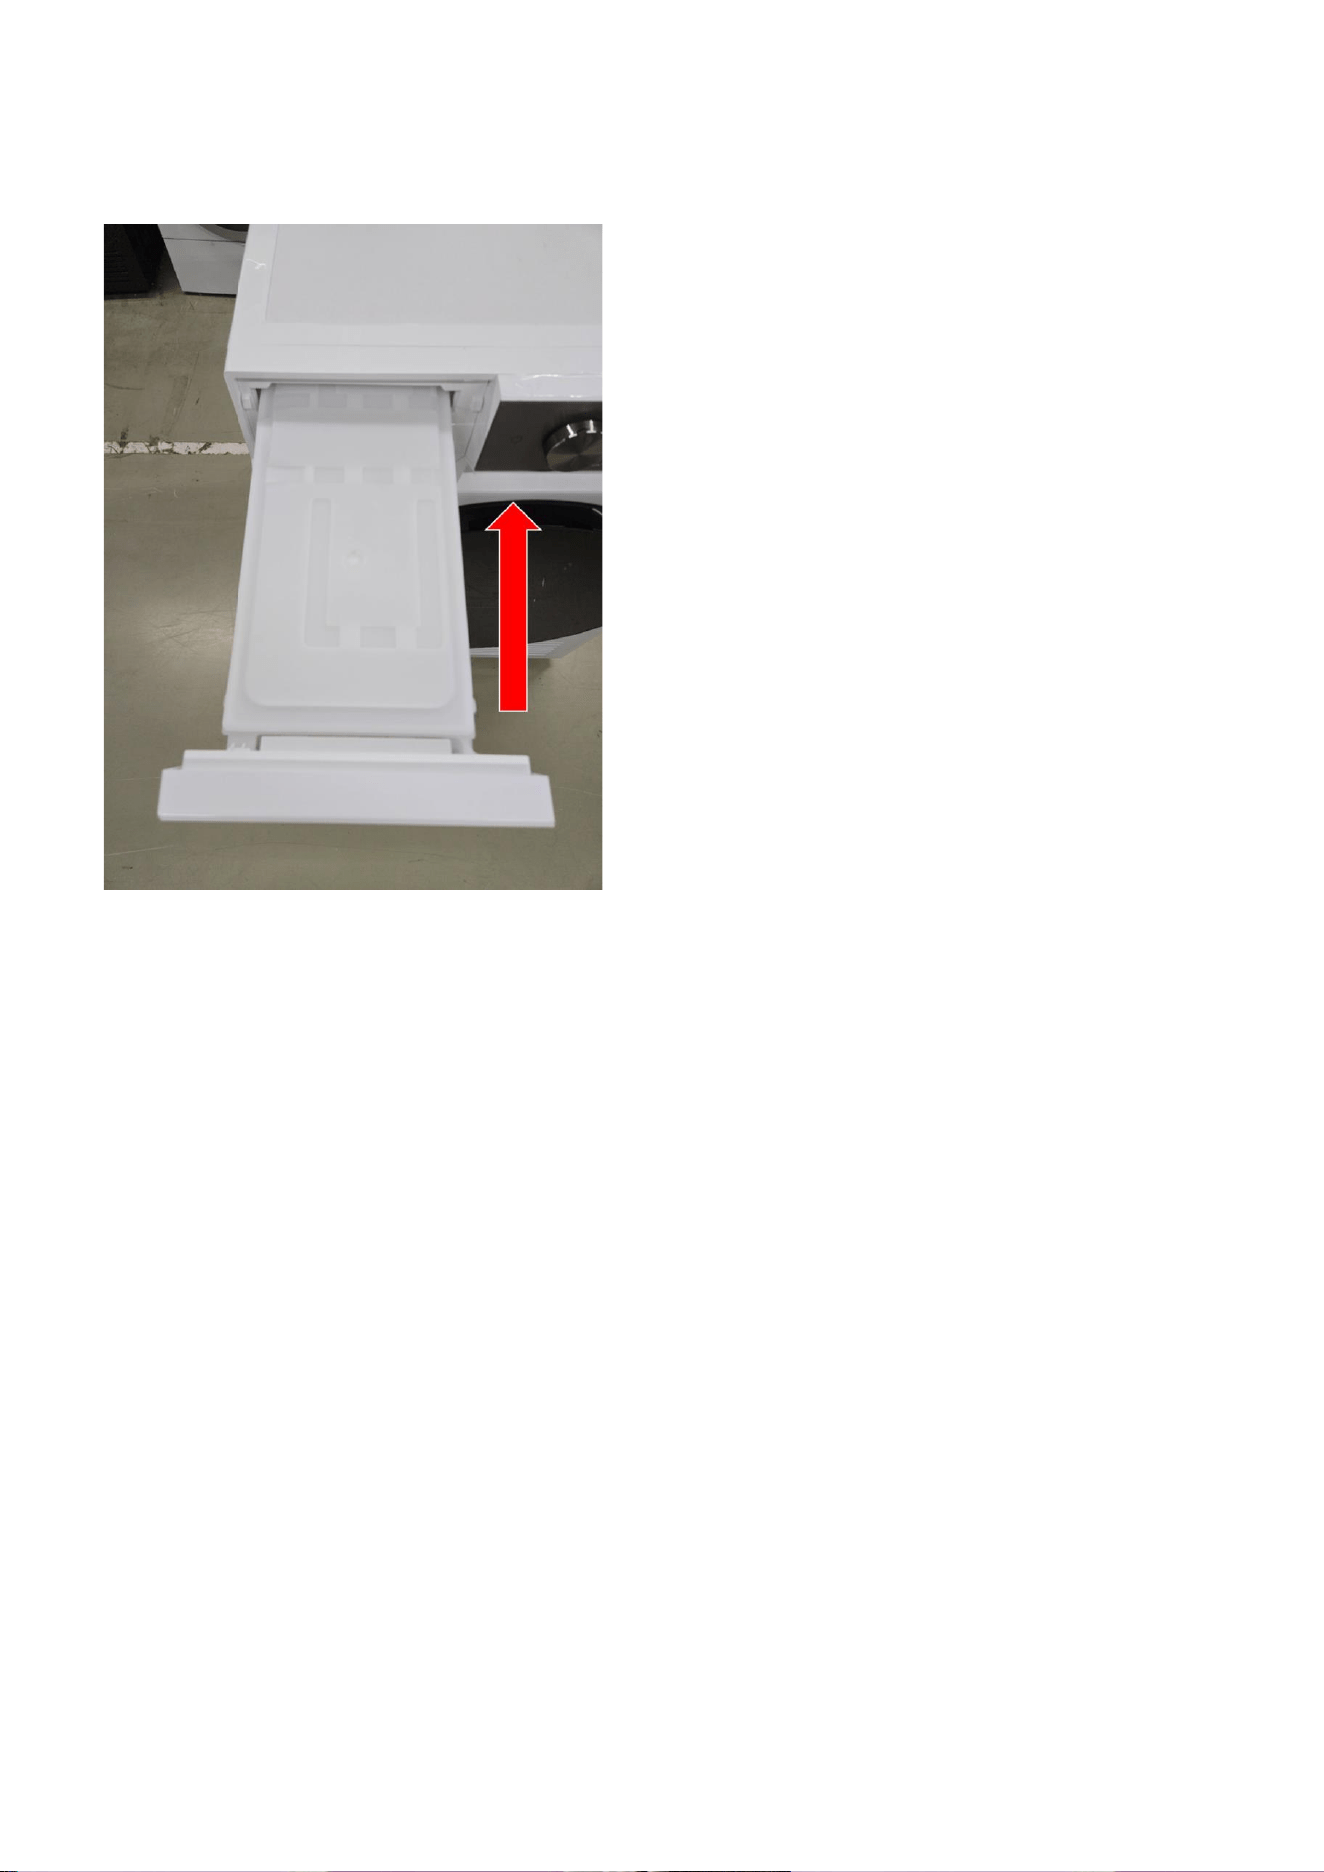
Assembly
1. Push the Water Tank
31
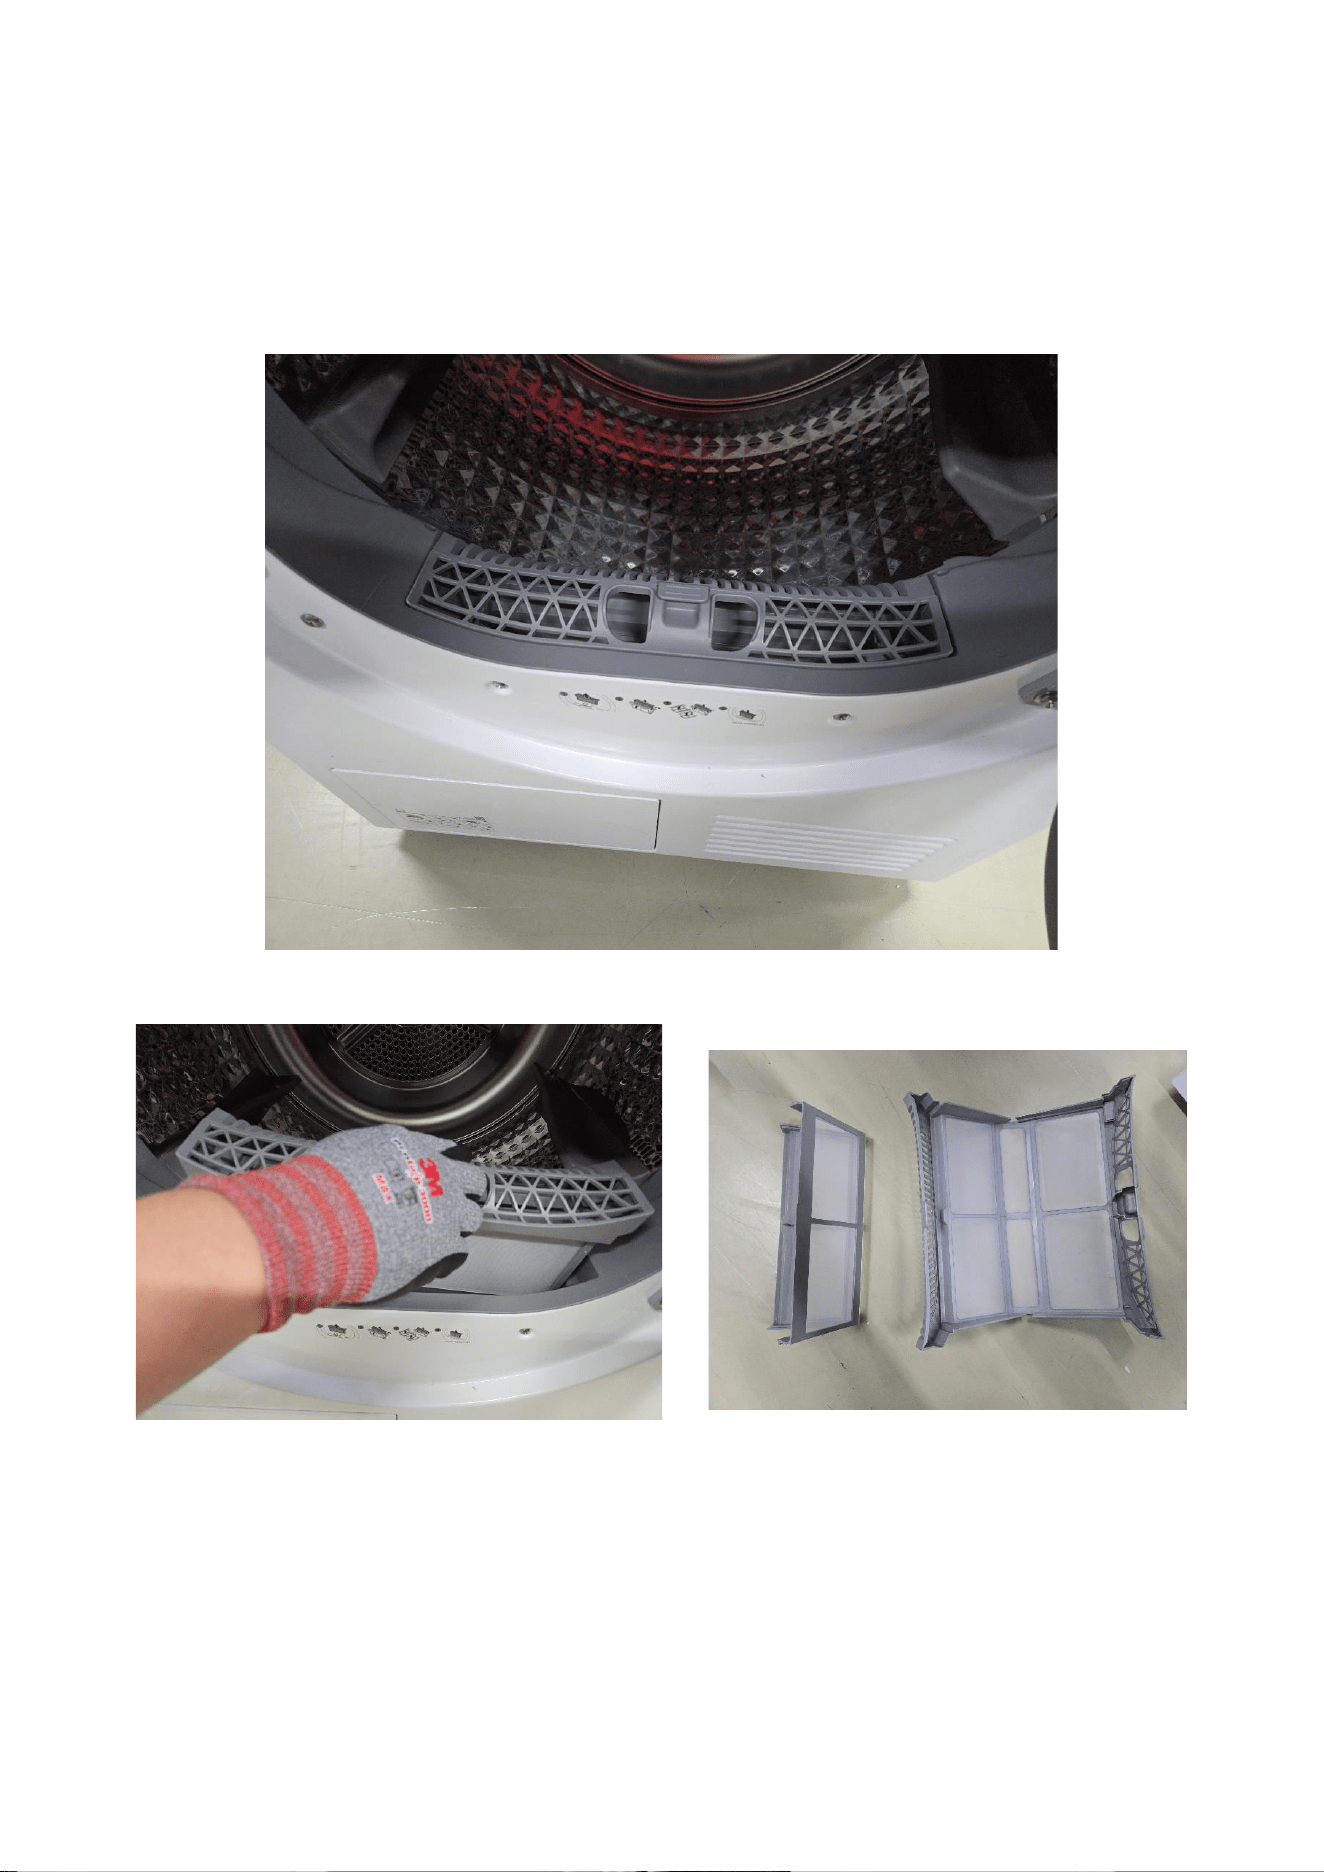
2.2.5. Filter
Disassembly
1. Open the door, find the filter at the bottom.
2. Pull the filter out off the set.
32
Assembly
1. Push Filter to the set. Beware the direction.

33
This guide is a property of Samsung Electronics Co.,Ltd.
Any unauthorized use of manual can be punished under applicable International
and/or domestic law.