Scan to register
bellakitchenware.com
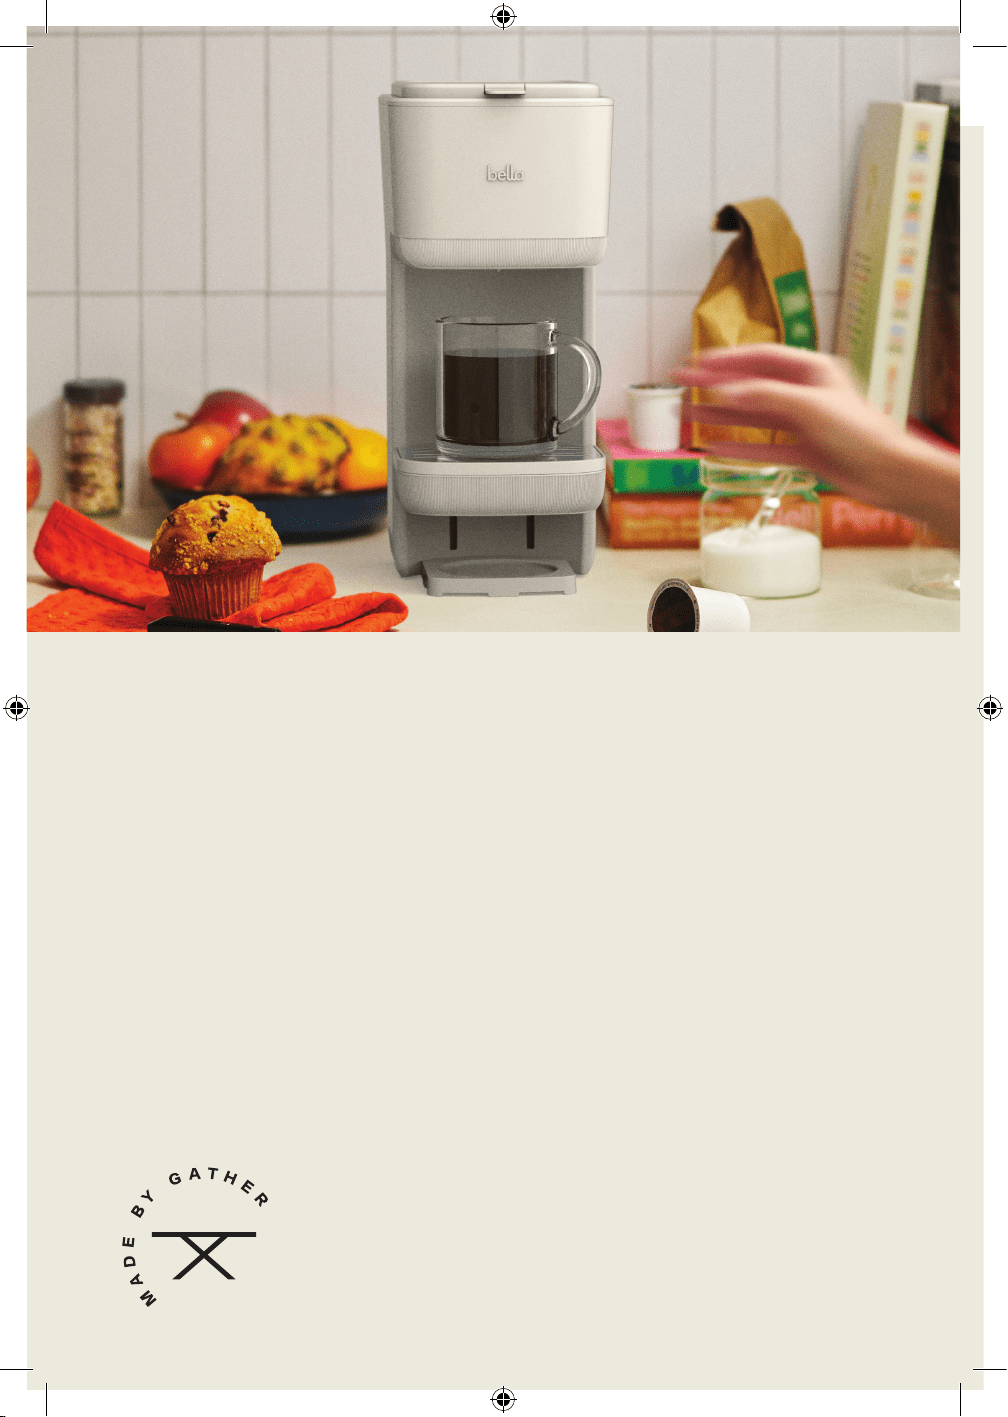
Single-Serve Coffee Maker
Instruction Manual
Cafetera Monodosis
Manual de instrucciones
35126_35183_35184_35185_BELLA_KCup Coffee Maker_IM_V4_R1.indd 135126_35183_35184_35185_BELLA_KCup Coffee Maker_IM_V4_R1.indd 1 2024-05-28 11:05 AM2024-05-28 11:05 AM

B
35126_35183_35184_35185_BELLA_KCup Coffee Maker_IM_V4_R1.indd 235126_35183_35184_35185_BELLA_KCup Coffee Maker_IM_V4_R1.indd 2 2024-05-28 11:05 AM2024-05-28 11:05 AM

1
TABLE OF CONTENTS
IMPORTANT SAFEGUARDS ................................................................................................................................................2-3
ADDITIONAL IMPORTANT SAFEGUARDS ........................................................................................................................3
NOTES ON THE PLUG ..............................................................................................................................................................3
NOTES ON THE CORD.............................................................................................................................................................4
PLASTICIZER WARNING .........................................................................................................................................................4
ELECTRIC POWER ......................................................................................................................................................................4
GETTING TO KNOW YOUR SINGLE-SERVE COFFEE MAKER ...................................................................................5
BEFORE USING FOR THE FIRST TIME ................................................................................................................................ 6
USING YOUR SINGLE-SERVE COFFEE MAKER .............................................................................................................. 6
POD BREWING – ANY STANDARD STYLE POD WILL WORK. .................................................................................. 6
GROUND COFFEE BREWING - USE STANDARD, MEDIUM GRIND COFFEE. ..................................................... 6
HOT WATER ONLY ................................................................................................................................................................... 6
CLEANING YOUR SINGLE-SERVE COFFEE MAKER ................................................................................................. 6-7
DESCALING YOUR SINGLE-SERVE COFFEE MAKER ................................................................................................... 7
LIMITED TWO-YEAR WARRANTY ........................................................................................................................................8
35126_35183_35184_35185_BELLA_KCup Coffee Maker_IM_V4_R1.indd 135126_35183_35184_35185_BELLA_KCup Coffee Maker_IM_V4_R1.indd 1 2024-05-28 11:05 AM2024-05-28 11:05 AM

2
IMPORTANT SAFEGUARDS
When using electrical appliances, basic safety precautions shouldalways
be followed, including the following:
1. READ ALL INSTRUCTIONS.
2. Do not touch hot surfaces. Use handles or knobs.
3. To protect against electrical shock, do not immerse cord, plugs, or appliance
in water or other liquids.
4. This appliance is not intended for use by persons (including children)
with reduced physical, sensory or mental capabilities, or lack of experience
and knowledge, unless they have been given supervision or instruction
concerning use of the appliance by a person responsible for their safety.
5. Children should be supervised to ensure that they do not play with
the appliance.
6. Unplug from outlet when not in use and before cleaning. Allow to cool before
putting on or taking o parts.
7. Do not operate any appliance with a damaged cord or plug or aer
the appliance malfunctions or has been damaged in any manner.
Bring it to a qualied technician for examination, repair or electrical
or mechanical adjustment.
8. Close supervision is necessary when any appliance is used by or near children.
NOTE: DO NOT ATTEMPT TO REPAIR THE UNIT YOURSELF. THIS WILL VOID
THE WARRANTY.
9. The use of accessories or attachments is not recommended by the manufacturer
and may result in re, electric shock or injury.
10. Do not use outdoors.
11. Do not let cord hang over edge of table or counter, or touch hot surface,
as it can cause a tripping hazard that could result in personal injury.
12. DO NOT place this appliance on or near hot surfaces, hot gas/electric burner
or in a heated oven as these actions could cause the appliance or cord to melt
13. Always ll the water tank rst, then plug the cord into
the wall outlet. This will reduce the risk of electrical shock or re.
14. To interrupt the brewing cycle at any time, press either the or button. Then
remove plug from wall outlet.
15. Unplug the power cord from the electrical outlet when the appliance is not
in use.
16. Do not use appliance for other than intended use.
17. Do not attempt to move the appliance when it contains hot liquids as
there is risk for personal injuries/burns. Allow liquids to cool before you move
the appliance.
18. Scalding may occur if the lid is removed during the brewing cycles.
CAUTION:
There are two sharp needles that puncture
the capsules. One is located inside the capsule adaptor and the other is
located on the top underside of the adaptor compartment. To avoid risk
of injury do not place ngers inside either parts. Also exercise caution when
cleaning the parts.
35126_35183_35184_35185_BELLA_KCup Coffee Maker_IM_V4_R1.indd 235126_35183_35184_35185_BELLA_KCup Coffee Maker_IM_V4_R1.indd 2 2024-05-28 11:05 AM2024-05-28 11:05 AM

3
CAUTION: There is boiling water in the front tab lid section during the brew
process. Do not open the lid at any time for risk of injury.
19. The coee maker should not be placed in a cabinet when in use.
20. Cleaning and user maintenance shall not be performed by children without
supervision.
ADDITIONAL IMPORTANT
SAFEGUARDS
WARNING: This appliance generates heat and escaping steam during use.
Proper precautions must be taken to prevent the risk of burns, res, or other
injury to persons or damage to property.
1. All users of this appliance must read and understand this Instruction Manual
before operating or cleaning this appliance.
2. The cord to this appliance should be plugged into a 120V AC electrical
outlet only.
3. Use water only in this appliance. Do not put any other liquids or food products
in this appliance. Do not mix or add anything to the water placed in this
appliance, except as instructed in the User Maintenance Instructions to clean
the appliance.
4. DO NOT attempt to move an appliance containing hot liquids. Allow
appliance to cool completely before moving.
5. Keep appliance at least 4 inches away from walls or other objects during
operation. Do not place any objects on top of appliance while it is operating.
Place the appliance on a surface that is resistant to heat.
6. If this appliance begins to malfunction during use, press either the power
button. Then remove plug from wall outlet. Do not use or attempt to repair
the malfunctioning appliance.
7. Do not use this appliance aer it has fallen into or has become immersed in
water. Doing so could result in personal injury or property damage.
8. It is recommended to let this appliance cool down for at least 5 minutes
between brewing cycles. Wait at least 5 minutes before relling the water
reservoir. Adding water before the appliance cools down could result in
personal injury due to steam exposure.
9. Always use fresh, cool water in your appliance. Warm water or other liquids,
except as listed in cleaning section, may cause damage to the appliance.
FOR HOUSEHOLD USE ONLY
NOTES ON THE PLUG
This appliance has a polarized plug (one blade is wider than the other). To reduce
the risk of electric shock, this plug will t in a polarized outlet only one way. If the
plug does not t fully into the outlet, reverse the plug. If it still does not t, contact a
qualied electrician. Do not modify the plug in any way.
35126_35183_35184_35185_BELLA_KCup Coffee Maker_IM_V4_R1.indd 335126_35183_35184_35185_BELLA_KCup Coffee Maker_IM_V4_R1.indd 3 2024-05-28 11:05 AM2024-05-28 11:05 AM

4
NOTES ON THE CORD
A. A short power-supply cord (or detachable power-supply cord) is provided to
reduce risks resulting from becoming entangled in or tripping over
a longer cord.
B. Longer detachable power-supply cords or extension cords are available
and may be used if care is exercised in their use.
C. If a long detachable power-supply cord or extension cord is used:
1. The marked electrical rating of the cord set, or extension cord should
be at least as great as the electrical rating of the appliance.
2. If the appliance is of the grounded type, the extension cord should
be a grounding-type3-wire cord.
3. The longer cord should be arranged so that it will not drape over
the countertop or tabletop where it can be pulled on by children
or tripped over.
SAVE THESE INSTRUCTIONS
PLASTICIZER WARNING
CAUTION: To prevent plasticizers from migrating to the nish of the countertop
or tabletop or other furniture, place NON-PLASTIC coasters or place mats between
the appliance and the nish of the countertop or tabletop. Failure to do so may
cause the nish to darken, permanent blemishes may occur, or stains can appear.
ELECTRIC POWER
If the electrical circuit is overloaded with other appliances, your appliance may not
operate properly. It should be operated on a separate electrical circuit from
other appliances.
35126_35183_35184_35185_BELLA_KCup Coffee Maker_IM_V4_R1.indd 435126_35183_35184_35185_BELLA_KCup Coffee Maker_IM_V4_R1.indd 4 2024-05-28 11:05 AM2024-05-28 11:05 AM
5
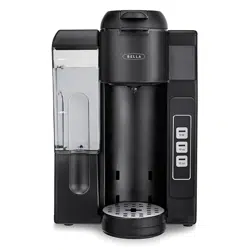
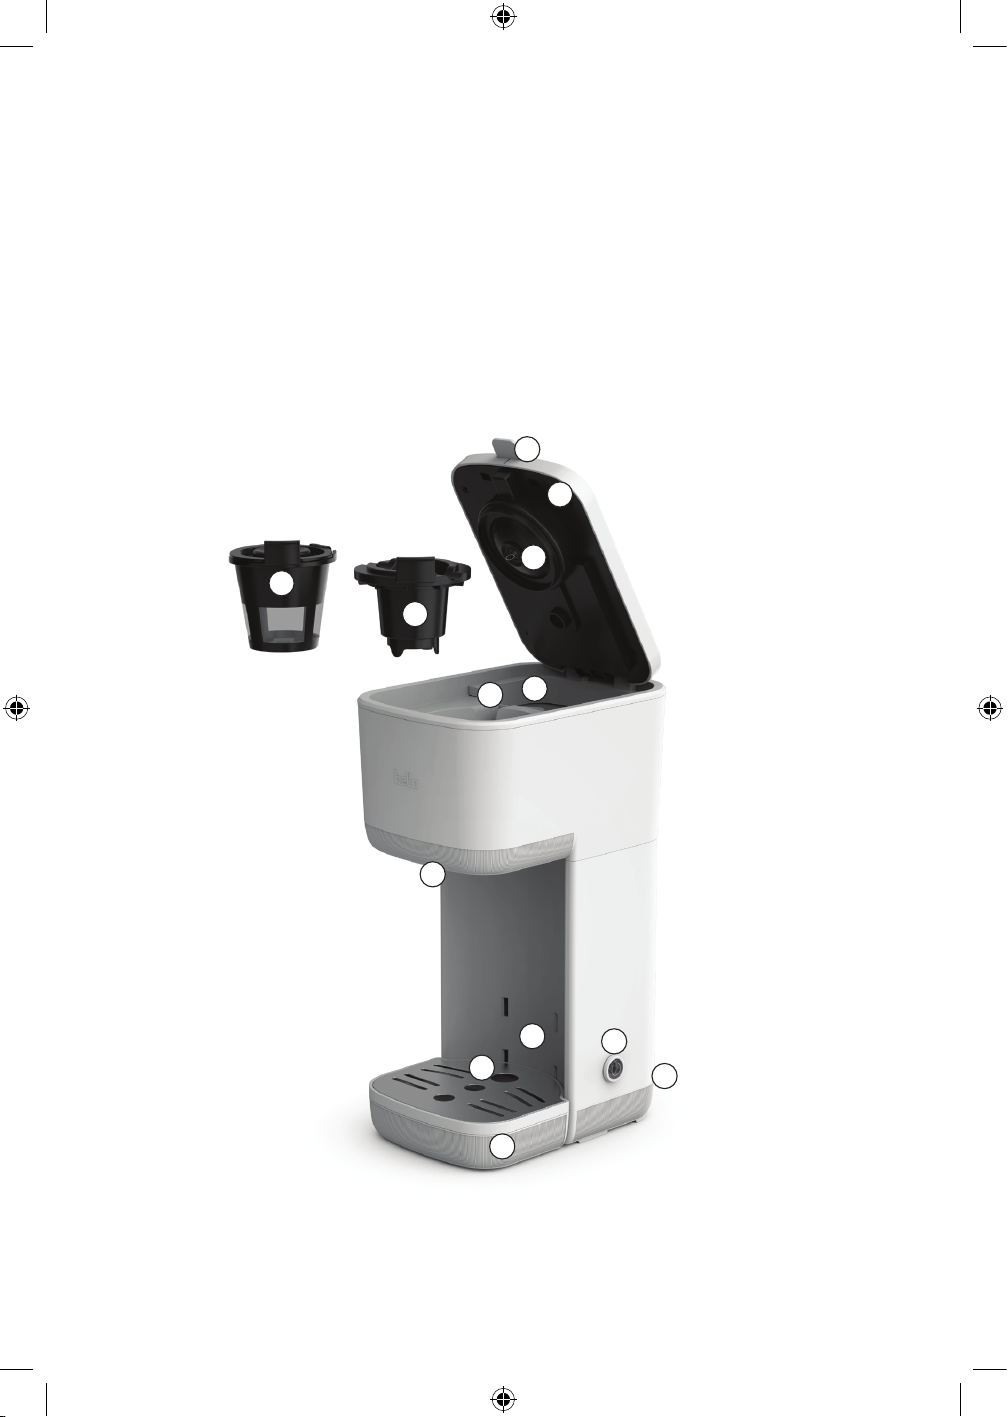
GETTING TO KNOW YOUR SINGLE-SERVE COFFE MAKER
Product may vary slightly from illustration.
1. Pod Adapter
2. Drip Tray Cover
3. Adjustable Height Drip Tray
4. Reusable Ground Coee Filter
5. Lid Tab
6. Lid
7. Piercer
8. Water Tank with Stepped Level Indicator
9. Adapter/Filter Compartment
10. Coee Nozzle (not shown)
11. Drip Tray Slots
12. Power Button with Indicator Light
13. Electric cord with Polarized Plug (not shown)
1
2
4
5
6
11
12
13
7
9
8
10
3
35126_35183_35184_35185_BELLA_KCup Coffee Maker_IM_V4_R1.indd 535126_35183_35184_35185_BELLA_KCup Coffee Maker_IM_V4_R1.indd 5 2024-05-28 11:05 AM2024-05-28 11:05 AM
6
BEFORE USING FOR THE FIRST TIME
Please check all packaging material carefully before discarding. Many accessory parts are contained within the
packaging material. Before using your Single-Serve Coee Maker, clean the entire appliance according to the
cleaning instructions. Wash the reusable brew cup and cup holder in warm, soapy water, rinse thoroughly and dry.
If desired, wipe the exterior of the coee maker with a so, damp cloth. NOTE: Do not wash any parts in
the dishwasher and do not immerse the coee maker in water or any other liquid. This may permanently damage
the product and void the warranty.
To remove any manufacturing residues that may reside in the appliance, we recommend running at least one full brew
cycle of water and discarding the water when complete.
USING YOUR SINGLE-SERVE COFFEE MAKER
1. Place the appliance on dry, level, heat-resistant surface, away from
any edge.
2. Plug cord into a 120-volt, AC electric outlet only.
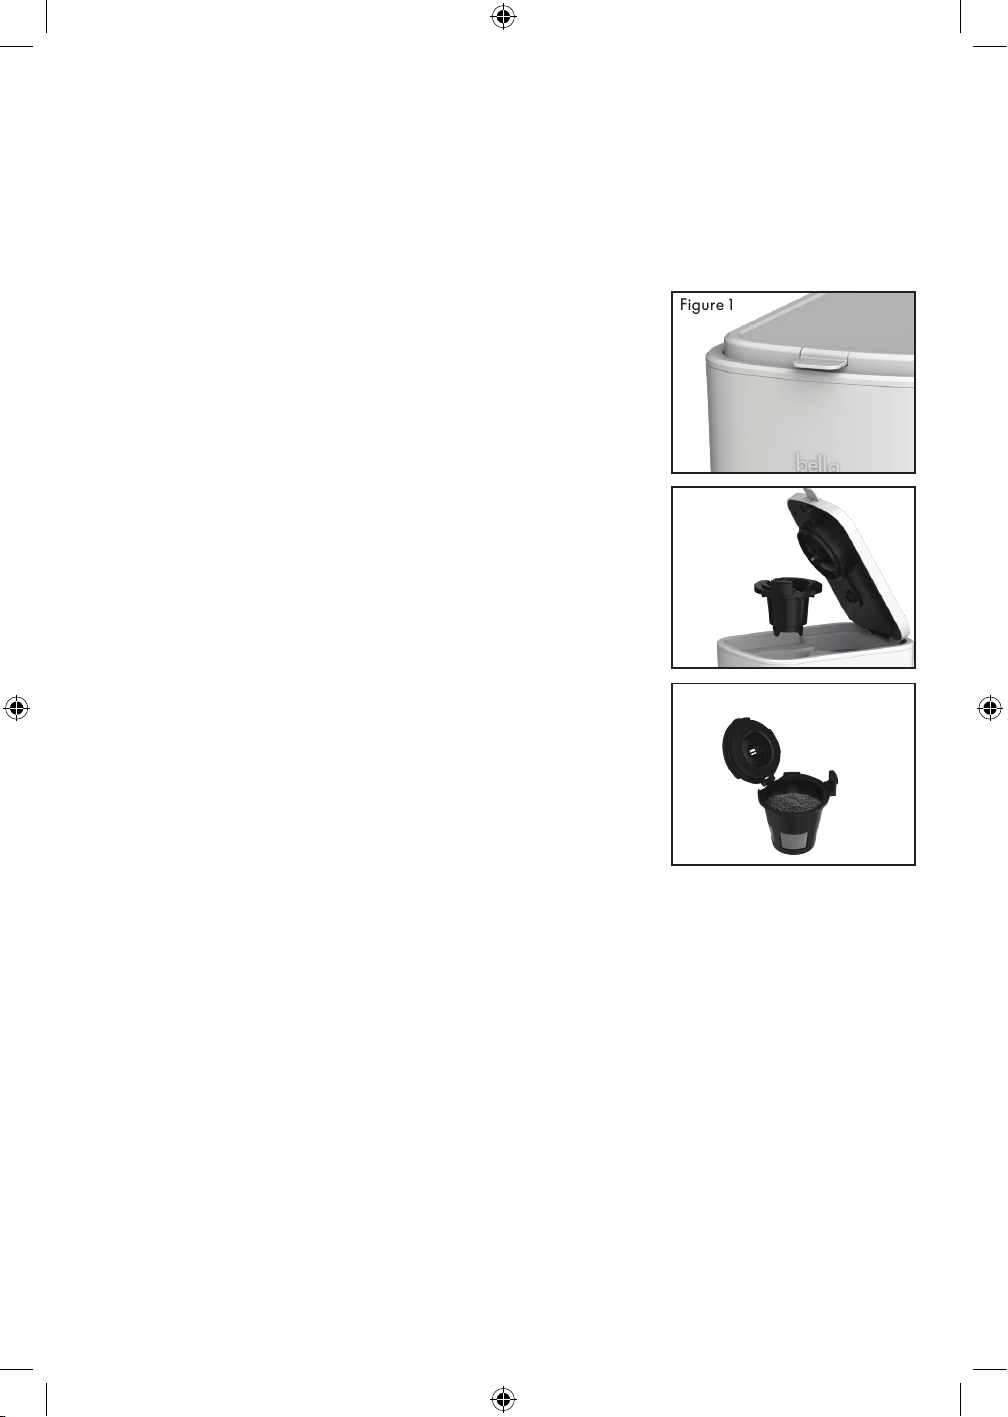
3. Push up the lid release button (Figure 1) in to open the cover.
4. Using the cup you’re brewing into, add cold water to the reservoir.
NOTE: The maximum capacity of the Single-Serve Coee Maker is 14 uid
oz. (1¾ cups). Never put more than this amount into the reservoir or the water
will overow.
5. Position the reusable ground coee lter (Figure 2) in place and add a pod
or position the reusable ground coee lter (Figure 3) with coee grounds.
Press down on the cover to lock in place. The cover will not lock if the pod
adapter or reusable lter is not inserted properly.
Caution: Piercer is sharp, do not touch.
6. Center a cup on the drip tray. Note: Make sure the cup is suitable
for hot liquids.
7. Press the power button. The light will illuminate. The coee maker
and light will turn o automatically at the end of the brew cycle.
Do not remove the cup before the coee maker has turned o.
POD BREWING – ANY STANDARD STYLE POD WILL WORK.
Place the coee pod adapter in the coee maker. Place a pod into the pod
adapter. Using the cup you’re brewing into (maximum 14 oz.), add cold water to the
reservoir. Close and lock the cover, then center a heat-safe cup on the drip tray
and press the power button. Brewing will be complete in under 5 minutes.
GROUND COFFEE BREWING - USE STANDARD, MEDIUM GRIND
COFFEE.
Add two heaping tablespoons of grounds into the reusable lter. Using the cup
you’re brewing into (maximum 14 oz.), add cold water to the reservoir. Close and
lock the cover, then center a heat-safe cup on the drip tray and press the power button. Brewing will be complete in
under 5 minutes. NOTE: Adjust the amount of grounds to taste.
HOT WATER ONLY
The Single-Serve Coee Maker can be used to heat water for tea or instant ciders, hot chocolates, oatmeals, soups, etc.
Using the cup you’re brewing into (maximum 14 oz.), add cold water to the reservoir. Close and lock the cover.
Place the instant mix, per package directions, in a heat-safe cup, then center on the drip tray and press the power
button. When the brewing is complete, approximately 5 minutes, stir the contents.
NOTE: Adjust the amounts to taste. A small amount of smoke and/or odor may occur upon heating due to the release
of manufacturing oils – this is normal. Some minor expansion/contraction sounds may occur during heating and
cooling – this is normal.
CLEANING YOUR SINGLE-SERVE COFFEE MAKER
1. Allow the Single-Serve Coee Maker to turn o automatically and unplug from the electrical outlet. Allow the
entire appliance to cool before cleaning.
2. Push up the lid release button to open the lid cover. Remove and discard the
use grounds, pod, etc. from the reusable lter or pod adapter.
3. Wash the reusable lter and pod adapter in hot, soapy water. Rinse and dry thoroughly. Periodically clean out
the nozzle in the pod adapter with a toothpick or bent paperclip. This will dislodge any stuck coee grounds.
CAUTION: Piercer inside pod adapter is sharp, do not touch.
Figure 2
Figure 1
Figure 3
35126_35183_35184_35185_BELLA_KCup Coffee Maker_IM_V4_R1.indd 635126_35183_35184_35185_BELLA_KCup Coffee Maker_IM_V4_R1.indd 6 2024-05-28 11:05 AM2024-05-28 11:05 AM
7
4. The exterior of the Single-Serve Coee Maker can be wiped clean with a damp cloth aer it has been
unplugged and the base is cool. Do not clean the inside of the water reservoir with a cloth or paper towel. This
may leave particles in the chambers that may clog small openings in your coee maker. Rinse with cold water
periodically. Descale the Single-Serve Coee Maker periodically.
See the “Descaling Your Single-Serve Coee Maker” section in this manual. This appliance has no user
serviceable parts.
DESCALING YOUR SINGLE-SERVE COFFEE MAKER
The Single-Serve Coee Maker must be decalcied periodically. Over time, mineral deposits build
up on internal parts and eect the operation of the appliance. The frequency of descaling depends
on the hardness of your water and how oen you use the coee maker. Indications that descaling is necessary are:
• Increased noise during use
• Excessive steaming
• Longer brewing times
• The pumping action stops before all of the water has been pumped from the water reservoir
• If usage is regular, descaling should be carried out as follows:
• With so water, decalcify once every month
• With medium water, descale every 2 weeks
• With hard water, descale every week
• We recommend the use of vinegar for descaling
1. Pour 14 ounces of fresh, cool, undiluted white household vinegar into the water reservoir.
NOTE: Do not use coee grounds and do not dilute vinegar with water.
2. Place an adequately sized cup suitable for hot liquids in place on the drip tray.
3. Press the power button.
4. When the brew cycle is complete and the Single-Serve Coee Maker has cooled, repeat the process above
except use clear, cool water in place of vinegar to rinse any remaining traces of the vinegar from the system.
Repeat twice using clean, cool water each time.
7
35126_35183_35184_35185_BELLA_KCup Coffee Maker_IM_V4_R1.indd 735126_35183_35184_35185_BELLA_KCup Coffee Maker_IM_V4_R1.indd 7 2024-05-28 11:05 AM2024-05-28 11:05 AM
8
SENSIO Inc. hereby warrants that for a period of TWO YEARS from the date of purchase,
this product will be free from mechanical defects in material and workmanship, and
for 90 days in respect to non-mechanical parts. At its sole discretion, SENSIO Inc. will
either repair or replace the product found to be defective, or issue a refund on the
product during the warranty period.
The warranty is only valid for the original retail purchaser from the date of initial retail
purchase and is not transferable. Keep the original sales receipt, as proof of purchase is
required to obtain warranty validation. Retail stores selling this product do not have the
right to alter, modify, or in any way revise the terms and conditions of the warranty.
EXCLUSIONS:
The warranty does not cover normal wear of parts or damage resulting from any of the
following: negligent use of the product, use of improper voltage or current, improper
routine maintenance, use contrary to the operating instructions, disassembly, repair, or
alteration by anyone other than qualied SENSIO Inc. personnel. Also, the warranty
does not cover Acts of God such as re, oods, hurricanes, or tornadoes.
SENSIO Inc. shall not be liable for any incidental or consequential damages caused
by the breach of any express or implied warranty. Apart from the extent prohibited
by applicable law, any implied warranty of merchantability or tness for a particular
purpose is limited in time to the duration of the warranty. Some states, provinces or
jurisdictions do not allow the exclusion or limitation of incidental or consequential
damages, or limitations on how long an implied warranty lasts, and therefore, the
above exclusions or limitations may not apply to you. The warranty covers specic legal
rights which may vary by state, province and/or jurisdiction.
HOW TO OBTAIN WARRANTY SERVICE:
You must contact Customer Service at our toll-free number: 1-866-832-4843.
A Customer Service Representative will attempt to resolve warranty issues over the
phone. If the Customer Service Representative is unable to resolve the problem, you will
be provided with a case number and asked to return the product to SENSIO Inc. Attach
a tag to the product that includes: your name, address, daytime contact telephone
number, case number, and description of the problem. Also, include a copy of the
original sales receipt. Carefully package the tagged product with the sales receipt,
and send it (with shipping and insurance prepaid) to SENSIO Inc.’s address. SENSIO
Inc. shall bear no responsibility or liability for the returned product while in transit to
SENSIOInc.’s Customer Service Center.
LIMITED TWO-YEAR WARRANTY
LIMITED TWO-YEAR WARRANTY
35126_35183_35184_35185_BELLA_KCup Coffee Maker_IM_V4_R1.indd 835126_35183_35184_35185_BELLA_KCup Coffee Maker_IM_V4_R1.indd 8 2024-05-28 11:05 AM2024-05-28 11:05 AM

35126_35183_35184_35185_BELLA_KCup Coffee Maker_IM_V4_R1.indd 935126_35183_35184_35185_BELLA_KCup Coffee Maker_IM_V4_R1.indd 9 2024-05-28 11:05 AM2024-05-28 11:05 AM
For customer service questions or comments
Dudas o comentarios contactar el departamento de servicio al cliente
1-866-832-4843 / help@bellahousewares.com
Sensio Inc.
dba Made by Gather
TM
New York, NY 10016/USA
35126_35183_35184_35185 R.1
35126_35183_35184_35185_BELLA_KCup Coffee Maker_IM_V4_R1.indd 1035126_35183_35184_35185_BELLA_KCup Coffee Maker_IM_V4_R1.indd 10 2024-05-28 11:05 AM2024-05-28 11:05 AM