FRONT CoverFRONT Cover
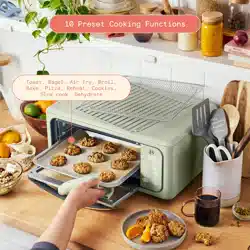
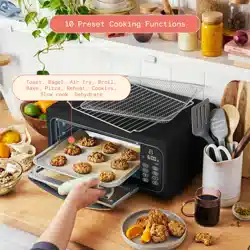
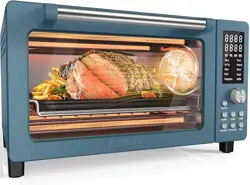
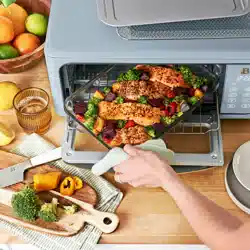
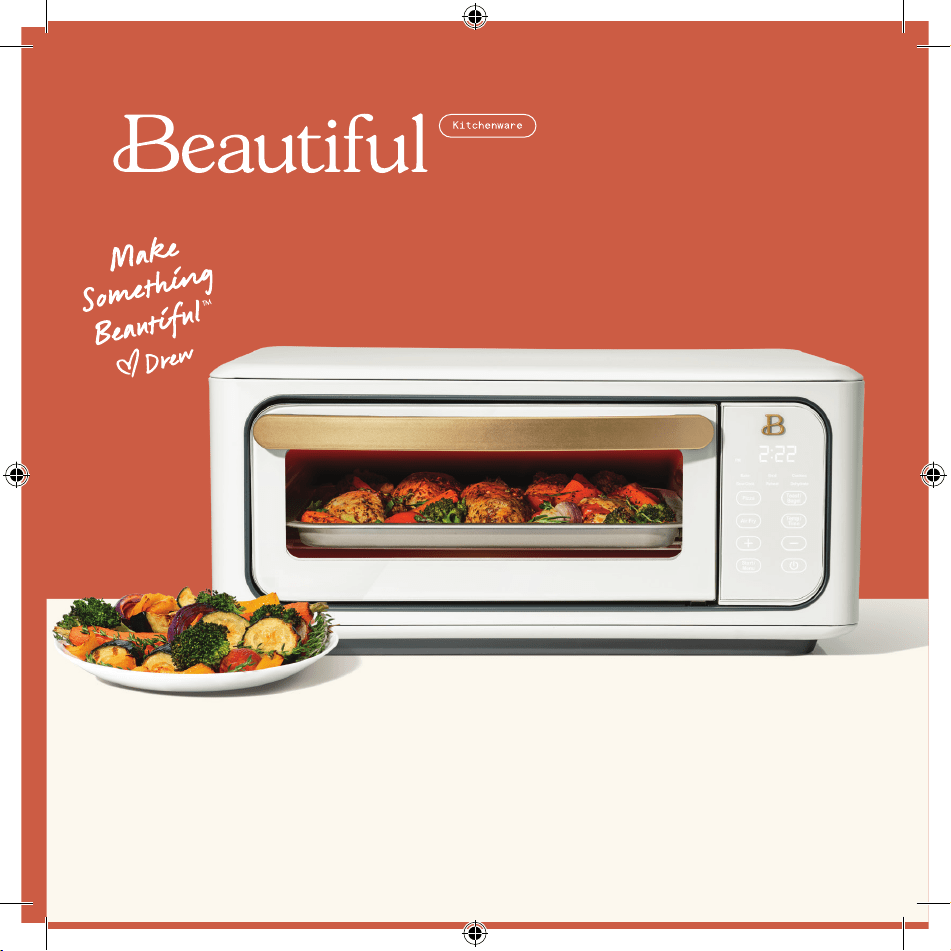
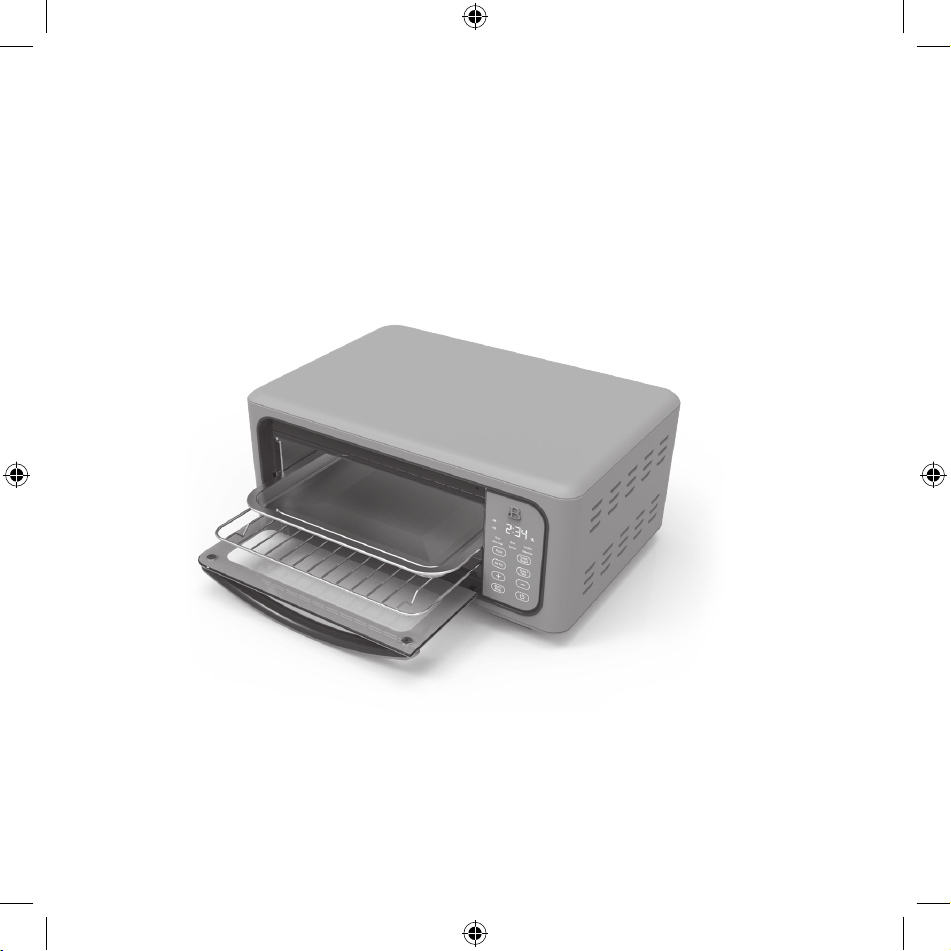
Digital Air Fry Toaster Oven
with Infrared Technology
Horno tostador con freidor
con tecnología infrarroja
Instruction Manual
Manual de instrucciones
®
19328_19329_19330_19331 BTFL_WMUS_TOV IM_R5.indd 119328_19329_19330_19331 BTFL_WMUS_TOV IM_R5.indd 1 2023-05-11 7:21 PM2023-05-11 7:21 PM
The kitchen is my family’s happy
place. It’s where we cook and eat
and bake and laugh and share our
most beautiful moments together.
That’s what inspired the creation
of Beautiful, my new collection
of easy-to-use kitchenware that
you’ll want to keep out on your
kitchen counter. So whether
your kitchen has flour all over
the place from a kid's baking
session or you’re throwing an adult
dinner party, I hope every step will
be simple, delicious and beautiful!
www.cookwithbeautiful.com
19328_19329_19330_19331 BTFL_WMUS_TOV IM_R5.indd 219328_19329_19330_19331 BTFL_WMUS_TOV IM_R5.indd 2 2023-05-11 7:21 PM2023-05-11 7:21 PM

Section 1: Safety
Important Safeguards ............................................ 4-6
Additional Important Safeguards ................................. 7-8
Notes on the Plug ................................................ 9
Notes on the Cord ................................................ 9
Plasticizer Warning .............................................. 10
Electric Power ................................................... 10
Section 2: Instructions
Getting to Know Your Digital Air Fryer Toaster Oven .............. 12
Infrared Heating ................................................. 13
Touch-Activated Display Control Panel ......................... 13-17
Shelf Positions .................................................. 17
Weight/Size Restrictions ......................................... 18
Cooking Containers ............................................... 18
Before Using for the First Time .................................. 19
Operation ..................................................... 20-21
Preset Times & Temps............................................. 22
Convection Fan Control ........................................... 23
Pizza, Toast/Bagel, Air Fry ...................................... 23
Convection Broil / Broil ......................................... 24
Air Fry / Convection Broil Cooking Chart ..................... 24-27
USDA Cooking Guidelines:
Pizza, Toast/Bagel .......................................... 28-29
Bake, Broil, Cookies, Slow Cook, Reheat, Dehydrate .......... 29-30
Figures .......................................................... 31
Beautiful Function Hints ...................................... 31-33
User Maintenance Instructions .................................... 33
Care & Cleaning Instructions .................................. 33-34
Storing Instructions ............................................. 34
Warranty ...................................................... 35-36
Table of Contents
19328_19329_19330_19331 BTFL_WMUS_TOV IM_R5.indd 119328_19329_19330_19331 BTFL_WMUS_TOV IM_R5.indd 1 2023-05-11 7:21 PM2023-05-11 7:21 PM

2
Sección 1: Seguridad
Precauciones importantes ...................................... 38-40
Precauciones adicionales importantes .......................... 41-43
Notas sobre el enchufe .......................................... 43
Notas sobre el cable ......................................... 43-44
Advertencia sobre plasticantes .................................. 44
Energía eléctrica ................................................ 44
Sección 2: Instructions
Conozca su horno tostador con freidora de aire digital .......... 46
Calentamiento infrarrojo ......................................... 47
Panel de control de pantalla táctil .......................... 47-52
Posiciones de estante ............................................ 52
Restricciones de peso/tamaño ..................................... 52
Recipientes de cocción ........................................ 52-53
Antes de usar por primera vez ................................ 53-54
Funcionamiento ................................................ 54-55
Tiempos y temperaturas preestablecidos ........................... 56
Control del ventilador de convección ............................ 57
Pizza, tostado/panecillo, freír ............................... 57-58
Asar por convección/Asar ......................................... 58
Tabla de cocción para Freír/Asar por convección ............... 58-62
Pautas de cocción del USDA:
Pizzas, tostado/panecillos ................................. 63-64
Hornear, asar, galletas, cocción lenta, recalentar, deshidratar
.. 64-66
Sugerencias sobre las funciones de Beautiful .................. 66-69
Figuras .......................................................... 67
Instrucciones de mantenimiento para el usuario ................... 69
Instrucciones de cuidado y limpieza ........................... 69-70
Instrucciones de almacenamiento .................................. 70
Garantía .......................................................71-72
Índice
19328_19329_19330_19331 BTFL_WMUS_TOV IM_R5.indd 219328_19329_19330_19331 BTFL_WMUS_TOV IM_R5.indd 2 2023-05-11 7:21 PM2023-05-11 7:21 PM

Section 1
Safety
1
19328_19329_19330_19331 BTFL_WMUS_TOV IM_R5.indd 319328_19329_19330_19331 BTFL_WMUS_TOV IM_R5.indd 3 2023-05-11 7:21 PM2023-05-11 7:21 PM

4
IMPORTANT SAFEGUARDS
When using electrical appliances, basic safety precautions
should always be followed including the following:
1. READ ALL INSTRUCTIONS.
2. Do not touch hot surfaces. Use handles or knobs.
3. To protect against electrical shock do not immerse
cord, plugs, or appliance in water or other liquid.
4. This appliance is not intended for use by persons
(including children) with reduced physical, sensory
or mental capabilities, or lack of experience and
knowledge, unless they have been given supervision or
instruction concerning use of the appliance by a person
responsible for their safety.
5. Children should be supervised to ensure that they do
not play with the appliance.
6. Unplug from outlet when not in use and before cleaning.
Allow Toaster Oven to cool before putting on or taking
off parts.
7. Do not operate any appliance with a damaged cord or
plug, or after the appliance malfunctions, or has been
damaged in any manner. Contact Consumer Service.
NOTE: DO NOT ATTEMPT TO REPAIR THE UNIT YOURSELF. THIS
WILL VOID THE WARRANTY.
8. The use of accessory attachments not recommended by the
appliance manufacturer may cause injuries.
19328_19329_19330_19331 BTFL_WMUS_TOV IM_R5.indd 419328_19329_19330_19331 BTFL_WMUS_TOV IM_R5.indd 4 2023-05-11 7:21 PM2023-05-11 7:21 PM

5
9. Do not use outdoors.
10. Do not let cord hang over edge of table or counter, or
touch hot surfaces.
11. Do not place on or near a hot gas or electric burner, or
in a heated oven.
12. Extreme caution must be used when moving an appliance
containing hot oil or other liquids.
13. To disconnect, press
or any illuminated FUNCTION
button to turn the Toaster Oven OFF.
14. Remove the plug from the wall outlet.
15. Do not use appliance for other than intended use.
16. Oversize foods or metal utensils must not be inserted
in the Toaster Oven as they may create a re or risk of
electric shock.
17. A re may occur if the Toaster Oven is covered or
touching ammable material, including curtains,
draperies, walls, and the like, when in operation.
Do not store any item on top of the appliance when in
operation.
18. Do not clean with metal scouring pads. Pieces can break
off the pad and touch electrical parts involving a risk
of electrical shock.
19. Extreme caution should be exercised when using
containers constructed of other than metal or glass.
20. Do not store any materials, other than manufacturer’s
recommended accessories, in this Toaster Oven when not
in use.
19328_19329_19330_19331 BTFL_WMUS_TOV IM_R5.indd 519328_19329_19330_19331 BTFL_WMUS_TOV IM_R5.indd 5 2023-05-11 7:21 PM2023-05-11 7:21 PM

6
21. Do not place any of the following materials in the
Toaster Oven: paper, cardboard, plastic, and the like.
22. Do not cover crumb tray or any part of the Toaster Oven
with metal foil. This will cause overheating of the
Toaster Oven.
23. Use extreme caution when removing the crumb tray or
disposing of hot grease.
24. Do not cover the Toaster Oven with anything that would
prevent steam from escaping. This may cause warping,
discoloration, malfunction or even re.
FOR HOUSEHOLD
USE ONLY
SAVE THESE
INSTRUCTIONS
19328_19329_19330_19331 BTFL_WMUS_TOV IM_R5.indd 619328_19329_19330_19331 BTFL_WMUS_TOV IM_R5.indd 6 2023-05-11 7:21 PM2023-05-11 7:21 PM

7
ADDITIONAL IMPORTANT
SAFEGUARDS
CAUTION HOT SURFACES: This appliance generates heat and
escaping steam during use. Proper precautions must be
taken to prevent the risk of burns, res, or other injury
to persons or damage to property.
1. A person who has not read and understood all operating
and safety instructions is not qualied to operate this
appliance. All users of this appliance must read and
understand this instruction manual before operating
orcleaning this appliance.
2. If this appliance falls or accidentally becomes
immersed in water, unplug it from the wall outlet
immediately. Do not reach into the water!
3. When using this appliance, provide adequate air space
above and on all sides for air circulation. Do not
operate this appliance while it is touching or near
curtains, wall coverings, clothing, dishtowels or other
ammable materials.
4. To reduce the risk of re, do not leave this appliance
unattended during use.
19328_19329_19330_19331 BTFL_WMUS_TOV IM_R5.indd 719328_19329_19330_19331 BTFL_WMUS_TOV IM_R5.indd 7 2023-05-11 7:21 PM2023-05-11 7:21 PM

8
5. If this appliance begins to malfunction during use,
press
or any illuminated FUNCTION button. Remove
the plug from the wall outlet. Do not use or attempt
torepair a malfunctioning appliance!
Contact Consumer Service
6. The cord to this appliance should only be plugged into
a 120V AC electrical wall outlet.
7. Do not use this appliance in an unstable position.
8. To reduce the risk of burns or other injuries, do not
touch hot surfaces. Use of protective oven mitts or
gloves as well as long-handled utensils is recommended.
9. To reduce the risk of injury to persons or property,
unplug this appliance before inserting food. Always
keep the appliance unplugged from the wall outlet when
not in use.
CAUTION: Never leave the Toaster Oven unattended while
inuse.
19328_19329_19330_19331 BTFL_WMUS_TOV IM_R5.indd 819328_19329_19330_19331 BTFL_WMUS_TOV IM_R5.indd 8 2023-05-11 7:21 PM2023-05-11 7:21 PM

9
NOTES ON THE PLUG
This appliance has a polarized plug (one blade is wider
than the other). To reduce the risk of electric shock,
thisplug will t in a polarized outlet only one way. If the
plug does not t fully into the outlet, reverse the plug.
If it still does not t, contact a qualied electrician.
Donot modify the plug in any way.
NOTES ON THE CORD
a) A short power-supply cord (or detachable power-supply
cord) is to be provided to reduce risks resulting from
becoming entangled in or tripping over a longer cord.
b) Longer detachable power-supply cords or extension cords
are available and may be used if care is exercised in
their use.
c) If a long detachable power-supply cord or extension
cord is used:
1) The marked electrical rating of the detachable
power-supply cord or extension cord should be
at least as great as the electrical rating of the
appliance;
2) If the appliance is of the grounded type, the extension
cord should be a grounding- type 3-wire cord; and
3) The longer cord should be arranged so that it will
not drape over the counter top or table top where it
can be pulled on by children or tripped over.
19328_19329_19330_19331 BTFL_WMUS_TOV IM_R5.indd 919328_19329_19330_19331 BTFL_WMUS_TOV IM_R5.indd 9 2023-05-11 7:21 PM2023-05-11 7:21 PM

10
PLASTICIZER WARNING
CAUTION: To prevent Plasticizers from migrating to the
nish of the counter top or table top or other furniture,
place NON-PLASTIC coasters or place mats between the
appliance and the nish of the counter top or table top.
Failure to do so may cause the nish to darken; permanent
blemishes may occur, or stains can appear.
ELECTRIC POWER
If the electrical circuit is overloaded with other
appliances, your appliance may not operate properly.
It should be operated on a separate electrical circuit
from other appliances.
19328_19329_19330_19331 BTFL_WMUS_TOV IM_R5.indd 1019328_19329_19330_19331 BTFL_WMUS_TOV IM_R5.indd 10 2023-05-11 7:21 PM2023-05-11 7:21 PM

Section 2
Instructions
2
19328_19329_19330_19331 BTFL_WMUS_TOV IM_R5.indd 1119328_19329_19330_19331 BTFL_WMUS_TOV IM_R5.indd 11 2023-05-11 7:21 PM2023-05-11 7:21 PM
12
1
4
2
3
6
5
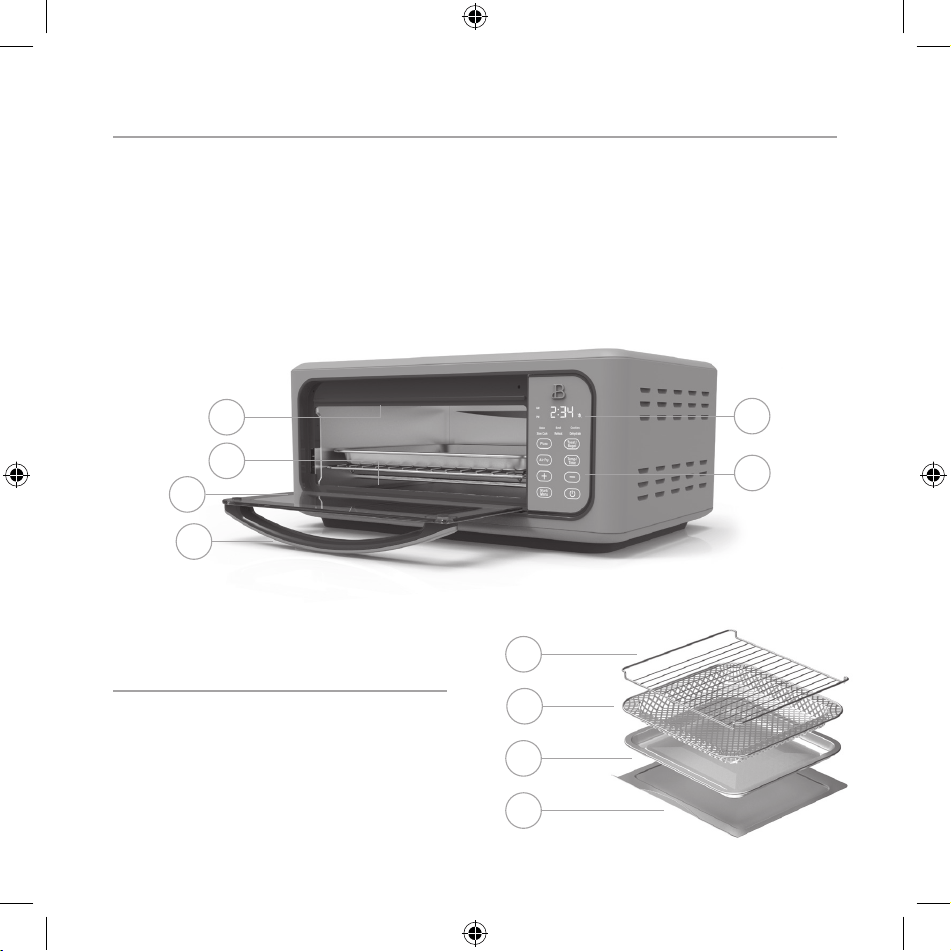
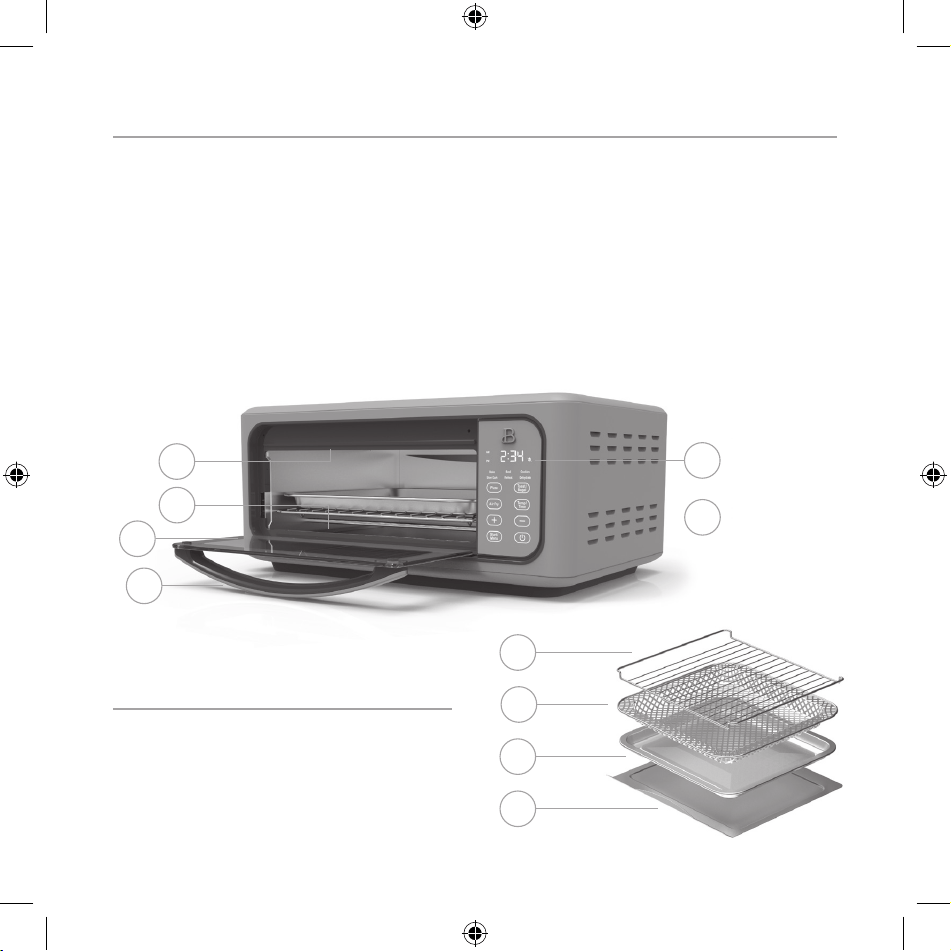
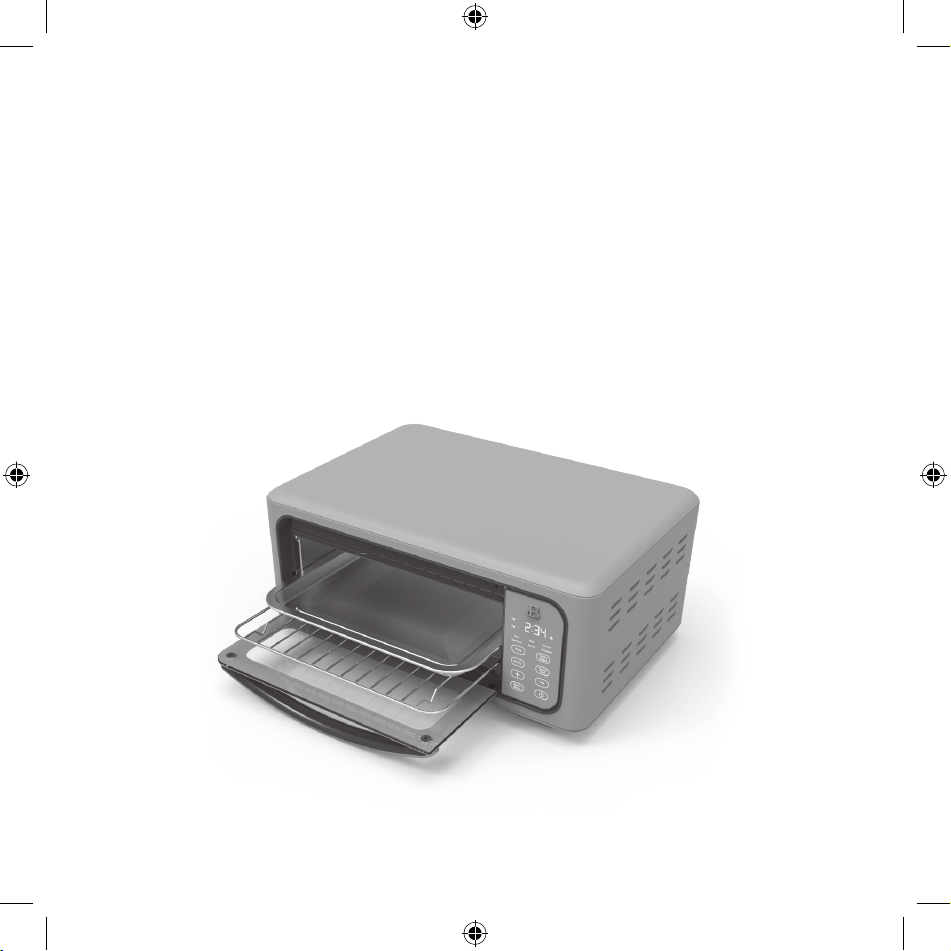
Getting To Know Your Digital Air Fryer Toaster Oven
Product may vary slightly from illustration
1. Door Handle
2. Glass Door
3. Lower Heating Elements
4. Upper Heating Elements
5. Touch-Activated Display Control Panel
6. Digital TIME/TEMP Display
7. Crumb Tray (not shown)
8. Convection Fan (not shown)
9. Polarized Plug (not shown)
Accessories
1. Wire Rack
2. Air Fryer/Dehydrator Basket
3. Bake/Broil Pan
4. Crumb Tray
2
1
3
4
19328_19329_19330_19331 BTFL_WMUS_TOV IM_R5.indd 1219328_19329_19330_19331 BTFL_WMUS_TOV IM_R5.indd 12 2023-05-11 7:21 PM2023-05-11 7:21 PM

13
Infrared Heating
6 heating elements with Infrared Quartz technology resulting in a 80% faster
preheat time compared to a traditional convectional oven
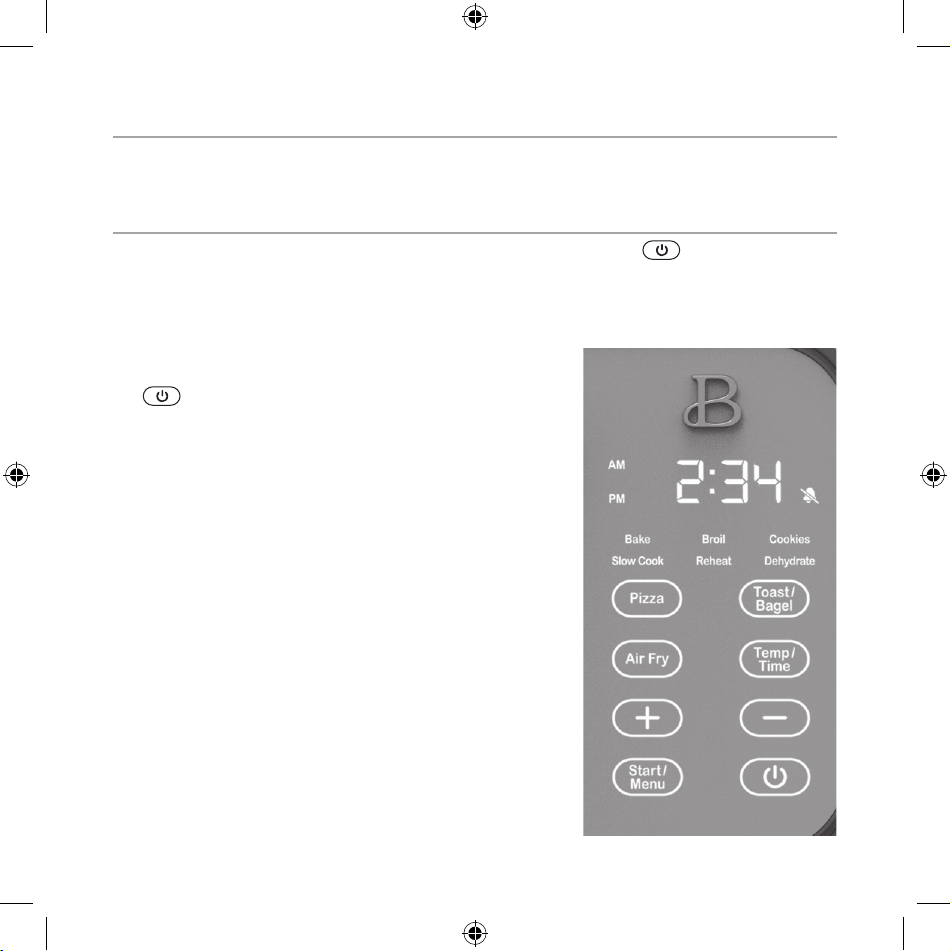
Touch-Activated Display Control Panel
A screen that only shows up when you need it.
The
button and any FUNCTION will illuminate when active and vanish when
not in use. Besides 10 preset functions with precision TIME / TEMP control, this
Beautiful Digital Air Fryer Toaster Oven offers an adjustable-speed convection
fan. No need to hover in the kitchen. When TIME expires, the Toaster Oven turns
OFF automatically.
1. Power Icon
2. Digital TIME/TEMP Display
3. PIZZA Button
4. TOAST/BAGEL Button
5. AIR FRY Button
6. TIME/TEMP Button
7. +/- Selector Buttons
8. START/MENU Button
9. BAKE
10. BROIL
11. COOKIES
12. SLOW COOK
13. REHEAT
14. DEHYDRATE
19328_19329_19330_19331 BTFL_WMUS_TOV IM_R5.indd 1319328_19329_19330_19331 BTFL_WMUS_TOV IM_R5.indd 13 2023-05-11 7:21 PM2023-05-11 7:21 PM
14
• When the Toaster Oven is plugged in, a tone will sound, the control
panel will illuminate for 1 second. The
button will illuminate
andthen pulse slowly on and off. 12:00 will be displayed. Press TEMP/
TIME button and “12” will begin to ash. Use the +, - to adjust hours.
Press TEMP/TIME button, “00” minutes will ash. Use the +, - to adjust
minutes.
• When
is pressed, a tone will sound, and the control panel will
illuminate and remain active for 3 minutes.
• Press the
to STOP any operation.
• When PIZZA is pressed, a tone will sound. 350 ºF and 20 minutes will
alternate every 5 seconds on display.
• Press TEMP/TIME, then press (+) to increase or (-) to decrease PIZZA
TIME in 1 minute increments.
• Press TEMP/TIME, then press (+) to increase or (-) to reduce PIZZA TEMP
in 5 degree increments.
• Press START/MENU to begin operation.
• Press
to stop PIZZA and return to standby mode.
• When TOAST/BAGEL is pressed, a tone will sound and TOAST L4 (MEDIUM)
toast shade will be displayed.
• Press and hold the TOAST/BAGEL button to change to BAGEL L4 (MEDIUM)
toast shade.
• In either TOAST or BAGEL mode, press (+) to increase or (-) to decrease toast
shade from L1 LIGHT to L7 DARK.
• Press START/MENU to begin operation.
• Press
to stop TOAST/BAGEL and return to standby mode.
19328_19329_19330_19331 BTFL_WMUS_TOV IM_R5.indd 1419328_19329_19330_19331 BTFL_WMUS_TOV IM_R5.indd 14 2023-05-11 7:21 PM2023-05-11 7:21 PM
15
• When AIR FRY is pressed, a tone will sound. 400 °F TEMP and 25 minutes
TIME will alternate every 5 seconds on the display.
• Press TEMP/TIME, then press (+) to increase or (-) to decrease AIR FRY
TIME in 1 minute increments.
• Press TEMP/TIME, then press (+) to increase or (-) to reduce AIR FRY
TEMP in 5 degree increments.
• Press and hold Temp/Time to adjust fan speed.
• Press START/MENU to begin operation.
• Press
to stop AIR FRY and return to standby mode.
• Press START/MENU button
• When BAKE is selected, 350 °F TEMP and 30 minutes TIME will alternate
every 5 seconds on the display.
• Press TEMP/TIME, then press (+) to increase or (-) to decrease BAKE TIME
in 1 minute increments.
• Press TEMP/TIME, then press (+) to increase or (-) to reduce BAKE TEMP
in 5 degree increments.
• Press and hold TEMP/TIME to adjust fan speed.
• Press START/MENU to begin operation.
• Press
to stop BAKE and return to standby mode.
19328_19329_19330_19331 BTFL_WMUS_TOV IM_R5.indd 1519328_19329_19330_19331 BTFL_WMUS_TOV IM_R5.indd 15 2023-05-11 7:21 PM2023-05-11 7:21 PM
16
• Press START/MENU button, use +/- to select BROIL setting.
• When BROIL is pressed, a tone will sound. 450 ºF and 30 minutes will
alternate every 5 seconds on display.
• Press TEMP/TIME, then press (+) to increase or (-) to decrease BROIL
TIME in 1 minute increments.
• Press and hold TEMP/TIME to adjust fan speed.
• Press START/MENU to begin operation.
• Press
to stop BROIL and return to standby mode.
• Press the START/MENU button a tone will sound. Press +, - until COOKIES
is illuminated. 350 ºF and 11 minutes will alternate every 5 seconds on
display.
• Press TEMP/TIME, then press (+) to increase or (-) to decrease COOKIES
TIME in 1 minute increments.
• Press TEMP/TIME, then press (+) to increase or (-) to reduce COOKIES
TEMP in 5 degree increments.
• Press START/MENU to begin operation.
• Press
to stop COOKIES and return to standby mode.
• Press the START/MENU button a tone will sound. Press +, - until SLOW
COOK is illuminated. HI and 4 hours will alternate every 5 seconds on
display.
• Press TEMP/TIME, then press (+) to increase or (-) to decrease SLOW COOK
TIME in 30 minute increments.
• Press TEMP/TIME, then press (-) to reduce to low setting.
• Press and hold TEMP/TIME buttons to adjust fan speed.
• Press START/MENU to begin operation.
• Press
to stop SLOW COOK and return to standby mode.
19328_19329_19330_19331 BTFL_WMUS_TOV IM_R5.indd 1619328_19329_19330_19331 BTFL_WMUS_TOV IM_R5.indd 16 2023-05-11 7:21 PM2023-05-11 7:21 PM

17
• Press the START/MENU button a tone will sound. Press +, - until REHEAT
is illuminated. 350 ºF and 15 minutes will alternate every 5 seconds on
display.
• Press TEMP/TIME, then press (+) to increase or (-) to decrease REHEAT
TIME in 1 minute increments.
• Press TEMP/TIME, then press (+) to increase or (-) to reduce REHEAT TEMP
in 5 degree increments.
• Press START/MENU to begin operation.
• Press
to stop REHEAT and return to standby mode.
• Press the START/MENU a tone will sound. Press +, - until DEHYDRATE
is illuminated. 120 ºF and 8 hours will alternate every 5 seconds on
display.
• Press TEMP/TIME, then press (+) to increase or (-) to decrease DEHYDRATE
TIME in 30 minute increments.
• Press TEMP/TIME, then press (+) to increase or (-) to reduce DEHYDRATE
TEMP in 5 degree increments.
• Press START/MENU to begin operation.
• Press
to stop DEHYDRATE and return to standby mode.
Shelf Positions
NOTE: Certain foods may require different shelf positions depending on the
recipe, size, amount of food to be cooked and personal taste. Use the following
information as a guide only.
1. There are 2 height positions that the air fryer/dehydrator basket, wire
rack or the bake/broil pan may be inserted.
2. Use the upper shelf position for BROIL, AIR FRY, TOAST, BAGEL, COOKIES,
DEHYDRATE.
3. Use the lower shelf position for BAKE, ROAST, REHEAT and PIZZA.
WARNING: Never set the bake/broil pan directly onto the lower heating elements.
19328_19329_19330_19331 BTFL_WMUS_TOV IM_R5.indd 1719328_19329_19330_19331 BTFL_WMUS_TOV IM_R5.indd 17 2023-05-11 7:21 PM2023-05-11 7:21 PM

18
Weight/Size Restrictions
1. This Toaster Oven can cook up to a 4 lbs. chicken or turkey
and up to a 5 lbs. roast.
2. We suggest that you periodically check cooking progress with a meat
thermometer.
Cooking Containers
• Both the air fryer/dehydrator basket and the bake/broil pan included
with the Toaster Oven are suitable for cooking items such as cookies,
rolls, biscuits, nachos and hot appetizers.
• A variety of standard baking dishes, such as an 8" x 12" casserole, any
8" or 9" round or square cake pan, a 12-cup mufn pan, 1 and 2 quart
round, square, or rectangular casserole dishes may be used for cooking
many different foods.
• Choose bakeware made of either metal or glass/ceramic without lids.
• Dark or dull pans absorb heat faster; foods will bake more rapidly, and
crust will brown more easily than in shiny bake pans.
• Check package directions on the container or contact the ovenware
manufacturer to determine the container’s suitability for use in a
Toaster Oven.
• Do not use oven roasting bags in this Toaster Oven, as they may come in
contact with the heating elements.
CAUTION: Do not use glass covers on baking pans. If using a glass or glass-
ceramic baking container, make sure it is at least 1 inch away from the upper
heating element.
19328_19329_19330_19331 BTFL_WMUS_TOV IM_R5.indd 1819328_19329_19330_19331 BTFL_WMUS_TOV IM_R5.indd 18 2023-05-11 7:21 PM2023-05-11 7:21 PM

19
Before Using for the First Time
CAUTION: To protect against electric shock, do not immerse the Toaster Oven or
allow cord to come into contact with water or other liquids.
1. Carefully unpack the Toaster Oven and accessories. Remove all packaging
materials from the inside of the Toaster Oven. Remove any labels from
the outer surfaces.
2. Place your Toaster Oven on a level surface such as a countertop or
table. Be sure the sides, back, and top of the Toaster Oven are at least
4 inches away from any walls, cabinets, or objects on the counter or
table.
3. To avoid scratching, marring, or discoloration, do not store anything on
top of the Toaster Oven during operation.
4. Wash the air fryer/dehydrator basket, bake/broil pan, wire rack,
and crumb tray in warm, soapy water. Rinse and dry thoroughly before
placing in
the Toaster Oven.
5. Do not use abrasive cleaners.
6. To ensure that the Toaster Oven is free from oils used in manufacturing,
it is necessary to operate the unit once, empty.
7. Make sure the crumb tray is in place in the bottom of the Toaster Oven.
8. Following the detailed OPERATION instructions, empty Toaster Oven and
BAKE for 30 minutes to prepare Toaster Oven for use.
19328_19329_19330_19331 BTFL_WMUS_TOV IM_R5.indd 1919328_19329_19330_19331 BTFL_WMUS_TOV IM_R5.indd 19 2023-05-11 7:21 PM2023-05-11 7:21 PM

20
Operation
NOTE: To turn the audible tones OFF, press and hold + & -. The SOUND OFF icon
is displayed next to the TIME on the control panel. Press both buttons again to
turn the sound on.
CAUTION: NEVER use plastic containers in the Toaster Oven.
CAUTION: Do not to place anything on top of the Toaster Oven.
1. When the Toaster Oven is plugged in, a tone will sound, the
button
will illuminate and then pulse slowly on and off.
2. Open the glass door.
3. Before use, always make sure the crumb tray is in place in the bottom
of the Toaster Oven. Always use the bake/broil pan assembly to decrease
spattering. (Figure 1.)
4. Slide the wire rack onto the desired shelf position. Add food. Close the
glass door.
5. Press the pulsing
. A tone will sound as the control panel
illuminates and remains active for 3 minutes.
6. Press any FUNCTION button: AIR FRY, PIZZA, or TOAST/BAGEL to activate .
7. To access COOKIES, SLOW COOK, REHEAT, DEHYDRATE, BAKE and BROIL
FUNCTIONS, Press the START/MENU button a tone will sound. Press +, -
until the desired FUNCTION is illuminated.
8. To change any default FUNCTION settings, press TEMP/TIME button; then
press +, - until the desired TIME and TEMP are displayed.
9. Press START/MENU to begin operation. The default TIME and TEMP will
alternate on the digital display. TIME will begin to count down.
10. When the remaining TIME reaches 0:00, 2 tones will sound and the Digital
Air Fryer Toaster Oven will automatically turn OFF.
CAUTION: Do not touch the hot Toaster Oven or any part of the hot Toaster Oven
without wearing oven mitts.
19328_19329_19330_19331 BTFL_WMUS_TOV IM_R5.indd 2019328_19329_19330_19331 BTFL_WMUS_TOV IM_R5.indd 20 2023-05-11 7:21 PM2023-05-11 7:21 PM
21
11. Open the glass door. Use a meat thermometer if necessary to check for
doneness. Extend cook TIME if needed.
WARNING: DO NOT LEAVE THE TOASTER OVEN UNATTENDED WHILE USING AIR FRY, BROIL,
orTOAST.
12. Unplug when not in use and allow the Toaster Oven to cool completely
before cleaning.
19328_19329_19330_19331 BTFL_WMUS_TOV IM_R5.indd 2119328_19329_19330_19331 BTFL_WMUS_TOV IM_R5.indd 21 2023-05-11 7:21 PM2023-05-11 7:21 PM

22
Preset Times and Temps
FAN
FUNCTION
TEMP TIME CONVECTION FAN
SPEED
Default Min Max Default
TIME
Min
TIME
Max
TIME
Default Min Max
* Air fry 400 °F 200 °F 450 °F 25 mins 1 min 1 hour 3 High 1 Low 3
High
* Broil 450 °F 30 mins 1 min 1 hour 3 High OFF 3
High
* Bake 350 °F 170 °F 450 °F 30 mins 1 min 2 hrs OFF OFF 3
High
Reheat 350 °F 170 °F 450 °F 15 mins 1 min 1 hour
Slow Cook HIGH Low High 4 hrs 2 hrs 12 hrs 3 High OFF 3
High
Slow Cook LOW 6 hrs 4 hrs 72 hrs 3 High OFF 3
High
Toast L4 L4
Medium
L1
Light
L7 Dark
Bagel L4 L4
Medium
L1
Light
L7 Dark
Cookies 350 °F 170 °F 450 °F 11 mins 1 min 1 hr
Pizza 350 °F 350 °F 450 °F 20 mins 1 min 1 hr
Dehydrate 120 °F 80 °F 180 °F 8 hrs 1 min 72 hrs 3 High
19328_19329_19330_19331 BTFL_WMUS_TOV IM_R5.indd 2219328_19329_19330_19331 BTFL_WMUS_TOV IM_R5.indd 22 2023-05-11 7:21 PM2023-05-11 7:21 PM

23
Convection Fan Control
1. AIR FRY, BROIL, SLOW COOK and BAKE FUNCTIONS feature a variable 3-speed
convection fan.
2. To select or change the convection fan speed, press and hold TEMP/TIME
for 3 seconds. A tone will sound and FAN SPEED 1, 2, or 3 will appear in
the display.
3. Press (+) to increase or (-) to decrease SPEED as needed. See Preset
TIMES & TEMPS for 3-fan speeds.
Pizza, Toast/Bagel, Air Fry
AIR FRY
NOTE: AIR FRY defaults to Convection Fan Speed 3 HIGH which may be lowered when
air frying delicate foods such as sh or some fruits/vegetables.
NOTE: The Convection Fan cannot be turned OFF during AIR FRY.
1. ALWAYS use the mesh Air Fryer/Dehydrator Basket when AIR FRYING.
2. Intense heat and maximum fan power ensure browned and crispy results
with a minimum or no oil.
IMPORTANT! When air frying fatty foods (such as chicken wings or pork ribs), use
the roasting pan instead of the air fry/dehydrator basket to prevent oil from
dripping onto the heating elements. Discard excess oil as necessary.
NOTE: Always turn food halfway through AIR FRY time. To speed up browning, brush
lean cuts of meat, chicken and sh with oil or melted butter.
3. When cooking is nished, always wear protective oven mitts to pull the
wire rack out from the Toaster Oven. Be careful when removing foods from
the back of the wire rack. The inside of the Toaster Oven is very hot.
Close glass door.
4. As a general rule, depending on the food and amount to be cooked, recipe
or packaged foods, suggested cook TIMES may have to be reduced slightly.
Always check food halfway through cook time to determine nal cook TIME
and TEMP.
5. Always check cooking progress after TIME has expired.
19328_19329_19330_19331 BTFL_WMUS_TOV IM_R5.indd 2319328_19329_19330_19331 BTFL_WMUS_TOV IM_R5.indd 23 2023-05-11 7:21 PM2023-05-11 7:21 PM

24
Convection Broil / Broil
NOTE: BROIL defaults to Convection Fan Speed 3 HIGH. When browning cheeses,
breadcrumbs, or sugary marshmallows, use the convection fan control to turn fan
OFF if convection BROIL is not needed. .
1. BROIL tender cuts of meats or marinated meats, chops, poultry or sh,
fruits and vegetables. Use the bake pan so that juices and/or fat will
drip into the pan to decrease spattering while broiling.
WARNING: NEVER place aluminum foil on top of the bake/broil pan. This traps
grease and can cause a re.
2. BROIL TIME is determined by the desired doneness and the distance
between the food and the element.
IMPORTANT: Turn and check food halfway through BROIL time.
Air Fry / Convection Broil Cooking Chart
Times are estimated and based on average sizes and weights.
ALWAYS USE A MEAT THERMOMETER TO ENSURE THAT MEAT, POULTRY AND FISH ARE COOKED
THOROUGHLY BEFORE SERVING.
NOTE: Frying smaller batches will result in shorter cooking times and higher
food quality. Adjust air frying TEMP and TIME as necessary to suit your taste.
NOTE: Unless food is pre-packaged and pre-oiled, for browned and crispy results,
all foods should be lightly oiled before air frying.
19328_19329_19330_19331 BTFL_WMUS_TOV IM_R5.indd 2419328_19329_19330_19331 BTFL_WMUS_TOV IM_R5.indd 24 2023-05-11 7:21 PM2023-05-11 7:21 PM

25
Vegetables
FOOD TEMP AIR FRY/BROIL Time
Asparagus 400 ºF 5 - 7 minutes
Broccoli Florets (roasted) 400 ºF 6 - 10 minutes
Brussels Sprouts 380 ºF 12 - 15 minutes
Cauliower Florets (roasted) 400 ºF 6 - 10 minutes
Corn on the Cob 390 ºF 6 - 8 minutes
Eggplant, 1-1/2-inch cubes (roasted) 400 ºF 15 minutes
Fennel, fresh, chopped 380 ºF 10 - 13 minutes
French Fries, (fresh, soaked, 1/4 to 1/3-
in. thick)
400 ºF 16 - 20 minutes
Mushrooms, sliced 400 ºF 5 minutes
Peppers, bell, 1-inch chunks 380 ºF 10 minutes
Peppers, jalapeno, poblano (roasted) 380 ºF 10 minutes
Potatoes, 1-inch cubes 400 ºF 12 - 14 minutes
Potatoes, whole 400 ºF 40 minutes
Root Vegetables, 1/2-in. chunks (roasted) 400 ºF 15 - 20 minutes
Sweet Potatoes, whole 380 ºF 30 - 35 minutes
Zucchini, 1/4-inch discs 400 ºF 12 - 17 minutes
19328_19329_19330_19331 BTFL_WMUS_TOV IM_R5.indd 2519328_19329_19330_19331 BTFL_WMUS_TOV IM_R5.indd 25 2023-05-11 7:21 PM2023-05-11 7:21 PM
26
Beef
FOOD TEMP AIR FRY/BROIL Time
Hamburgers, 1/4 lb. (up to 4) 360 ºF 12 – 16 minutes
Hot Dogs /Sausages 360 ºF 10 – 15 minutes
Meatloaf, 1 lb. 360 ºF 35 – 40 minutes
Steak 360 ºF 8 – 12 minutes
Beef Tenderloin, 1 lb., rare 360 ºF 16 minutes
Beef Tenderloin, 1 lb., medium 360 ºF 18 minutes
Chicken
FOOD TEMP AIR FRY/BROIL Time
Chicken Breast, boneless, skinless 360 ºF 10 – 15 minutes
Chicken Pieces 360 ºF 20 - 30 minutes
Chicken Tenders/Fingers, battered 360 ºF 13 - 15 minutes
Chicken Wings 360 ºF 20 minutes
Pork and Lamb
FOOD TEMP AIR FRY/BROIL Time
Bacon, thick cut 400 ºF 8 – 10 minutes
Ham, precooked, boneless, 3 lb. 300 ºF 1 hour
Lamb Loin Chops, 1-inch thick 400 ºF 8 – 12 minutes
Pork Chops, 1-inch thick 380 ºF 10 – 14 minutes
19328_19329_19330_19331 BTFL_WMUS_TOV IM_R5.indd 2619328_19329_19330_19331 BTFL_WMUS_TOV IM_R5.indd 26 2023-05-11 7:21 PM2023-05-11 7:21 PM
27
Fish and Seafood
FOOD TEMP AIR FRY/BROIL Time
Catsh Fingers (thawed, battered) 400 ºF 10 - 15 minutes
Shrimp (thawed, battered) 320 ºF 12 minutes
Shrimp (thawed, sauced) 320 ºF 5 - 8 minutes
Frozen Foods
FOOD TEMP AIR FRY/BROIL Time
Cheese Sticks (frozen) 350 ºF 6 – 9 minutes
Chicken Nuggets (frozen) 360 ºF 10 - 15 minutes
Fish Sticks (frozen) 400 ºF 12 – 18 minutes
French Fries, thick (frozen) 4 cups 400 ºF 17 – 21 minutes
French Fries, thin (frozen) 4 cups 400 ºF 15 – 17 minutes
Meatballs, 1-inch 380 ºF 7 - 9 minutes
Onion Rings (frozen) 360 ºF 12 – 16 minutes
Pizza, frozen, 7-in. x 8-in. 360 ºF 12 - 15 minutes
Desserts
FOOD TEMP AIR FRY/BROIL Time
Apple Turnovers 400 ºF 10 minutes
Cake 350 ºF 25 minutes
19328_19329_19330_19331 BTFL_WMUS_TOV IM_R5.indd 2719328_19329_19330_19331 BTFL_WMUS_TOV IM_R5.indd 27 2023-05-11 7:21 PM2023-05-11 7:21 PM

28
USDA Cooking Guidelines
The USDA recommends that meats such as beef and lamb, etc. should be cooked
toan internal temperature of 145 ºF/63 ºC. Pork should be cooked to an internal
temperature of 160 ºF/71 ºC and poultry products should be cooked to an internal
temperature of 170 ºF/77 ºC - 180 ºF/82 ºC to be sure any harmful bacteria has
been killed. When reheating meat/poultry products, they should also be cooked to
an internal temperature of 165 ºF/74 ºC.
Pizza
1. This Toaster Oven accommodates any 12-inch (or smaller) fresh
orfrozenpizza.
2. When cooking prepared pizza, fresh or frozen, remove all packaging,
including cardboard, plastic, paper, or other ammable materials before
placing the pizza in the Toaster Oven. When baking fresh pizza, lightly
oil bake/broil pan and sprinkle lightly with cornmeal to make removing
the baked pizza easier.
3. WARNING: Never cook pizzas directly on the wire rack as melted cheese
and other ingredients may fall onto the heating elements and create
apotential re risk.
4. Depending on the depth of the pizza, slide the wire rack and bake/broil
pan onto the center or lower shelf position. Carefully center pizza pan
directly on the wire rack.
CAUTION: Make sure the pizza is at least 1 inch away from the upper
heatingelement.
WARNING: NEVER place aluminum foil on top of the bake/broil pan. This traps
grease and can cause a re.
Toast/Bagel
1. Press and hold the TOAST/BAGEL button to change to from TOAST to BAGEL
and back to TOAST.
2. Slide the wire rack into the center shelf position and arrange bread,
mufns, frozen wafes, frozen toaster pastries, prepared toaster foods,
etc.
19328_19329_19330_19331 BTFL_WMUS_TOV IM_R5.indd 2819328_19329_19330_19331 BTFL_WMUS_TOV IM_R5.indd 28 2023-05-11 7:21 PM2023-05-11 7:21 PM

29
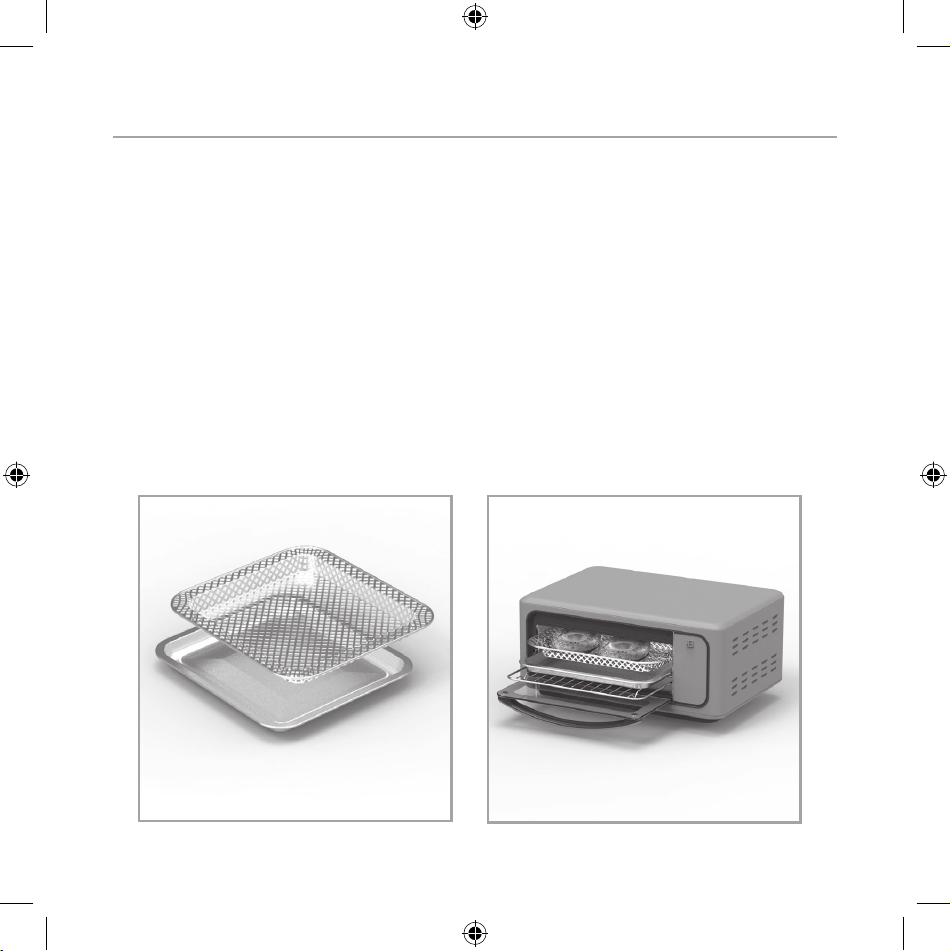
3. When toasting bagels, English mufns or toaster food, place cut-side-up
on the wire rack. (Figure 2.)
4. High heat sears the topsides of bagels, while warming the insides. Use
BAGEL to toast English mufns or thick sliced specialty breads which
require only the top side to be toasted.
NOTE: When toasting frozen breads, bagels, or toaster foods, increase shade
setting by 1 Level.
Bake, Broil, Cookies, Slow Cook, Reheat & Dehydrate
1. Press the START/MENU button, a tone will sound.
2. Press +, - until the desired FUNCTION is illuminated onthedisplay.
Bake
NOTE: BAKE defaults to Convection Fan Speed OFF. If CONVECTION BAKE is needed,
use the convection fan control to turn fan to Speed 3 HIGH, 2 MEDIUM, or 1 LOW.
NOTE: ROAST is a term often applied when using the BAKE or CONVECTION BAKE
tocook meats.
1. Use the convection fan control to turn the fan ON. Use BAKE or
CONVECTION BAKE to bake casseroles, cakes, cookies, pies, biscuits,
poultry, beef, pork, etc.
2. CONVECTION BAKE/ROAST seals in juices, promotes browning and may shorten
cook time without turning and basting.
3. To ROAST meats or sh, use the bake pan. Place meats or sh onto
the bake pan. Juices and/or fat will drip into the pan and decrease
spattering while roasting. (Figure 1.)
4. Use the bake/broil pan alone to bake foods such as biscuits, cookies,
or hot appetizers. When using your own baking dish, slide the wire rack
onto the center or lowest shelf position. Carefully center baking dish
directly on wire rack and close the glass door.
CAUTION: Make sure any baking dish is at least 1 inch away from the upper
heatingelement.
19328_19329_19330_19331 BTFL_WMUS_TOV IM_R5.indd 2919328_19329_19330_19331 BTFL_WMUS_TOV IM_R5.indd 29 2023-05-11 7:21 PM2023-05-11 7:21 PM

30
Cookies
1. The Toaster Oven’s exibility and pinpoint accuracy makes it perfect
for baking a wide variety of cookie types – scratch-made, fresh,
refrigerated or frozen cookie doughs, biscuits, cinnamon or crescent
rolls can all be used to produce fabulous results.
NOTE: The amount of dough per cookie or the thickness of the cookie many also
vary the cook time.
2. Place the bake/broil rack into the center shelf position.
WARNING: NEVER place aluminum foil on top of the bake/broil pan. This
traps grease and can cause a re.
Slow Cook
The Digital Air Fryer Toaster Oven can accommodate up to an 8 x 12-inch
casserole dish.
Reheat
The Digital Air Fry Toaster Oven is great for reheating your favorite dishes
andleftover meals.
Dehydrate
1. ALWAYS use the mesh Air Fryer/Dehydrator Basket when DEHYDRATING. Precise
low temperatures dry out foods evenly without cooking or overheating
2. DEHYDRATE combines low, steady heat with steady convection fan power.
3. Your Toaster Oven’s automated drying makes home dehydration both simple
and rewarding and ensures healthy, safe, preservative-free results.
NOTE: Turn food halfway or several times during DEHYDRATE time.
19328_19329_19330_19331 BTFL_WMUS_TOV IM_R5.indd 3019328_19329_19330_19331 BTFL_WMUS_TOV IM_R5.indd 30 2023-05-11 7:21 PM2023-05-11 7:21 PM
31
Figure 1 Figure 2
Beautiful Function Hints
PIZZA
NOTE: If package directions do not list convection cooking times, lower
the TEMP 50ºF and monitor cooking progress carefully.
• The versatility of this digital Toaster Oven allows you to cook a wide
variety of pizzas: fresh or frozen pizza; thin crust, stuffed or deep
dish perfectly every time.
• Use the TIME and TEMP controls for consistent and precision baking
results.
TOAST/BAGEL
• WARNING: Use extra caution when toasting pastry items with runny-type
frosting or open llings.
• When toasting more than one bagel, use halves of similar size, thickness
and freshness.
19328_19329_19330_19331 BTFL_WMUS_TOV IM_R5.indd 3119328_19329_19330_19331 BTFL_WMUS_TOV IM_R5.indd 31 2023-05-11 7:21 PM2023-05-11 7:21 PM

32
• Stale bagels, thin bagels or sweet bread products, such as tea cakes
and fruit loaf, brown much more quickly than ordinary bread, so reduce
toasting time.
AIR FRY
• Always check food halfway through cooking time to determine nal cook
time and temperature.
• Always pat food dry before cooking to encourage browning and avoid
excess smoke.
• For crispier results, air fry small batches of freshly breaded foods.
Create more surface area by cutting food into smaller pieces. Press
breading onto food to help it adhere. Refrigerate breaded foods for at
least 30 minutes. Spray with oil before air frying.
• Spray olive oil or vegetable oil works best as oil is distributed evenly
and less oil is needed.
• Arrange breaded food in the air fryer/dehydrator basket so that food is
not touching to allow air ow on all surfaces.
• Do not overll air fryer/dehydrator basket with food. NEVER ll air
fryer/dehydrator basket more than 2/3 full. When air frying fresh
vegetables, we do not recommend adding more than 3 cups of food to the
air fryer/dehydrator basket.
BAKE
• When using CONVECTION BAKE, lower the bake recipe temperature by 50°F to
a minimum of 300 °F when baking cakes, pies, cookies, and bread.
• Shelf position will depend on the size of the food being prepared. It is
important to place your food as close to the center of the Toaster Oven
as possible to ensure even cooking.
• Dark or dull pans absorb heat faster; foods will bake more rapidly, and
crust will brown more easily than in shiny bake pans.
• Choose bakeware made of metal, ovenproof glass, and ceramic.
• Check package directions to determine if the container is suitable for
use in a conventional or toaster oven.
19328_19329_19330_19331 BTFL_WMUS_TOV IM_R5.indd 3219328_19329_19330_19331 BTFL_WMUS_TOV IM_R5.indd 32 2023-05-11 7:21 PM2023-05-11 7:21 PM

33
BROIL/CONVECTION BROIL
• CONVECTION BROIL is used for thinner, tender cuts of meats.
• Dry marinated meats and sh before broiling. ALWAYS pat meat dry to
reduce smoke and promote brownness during broiling.
• To speed up browning and add lusciousness, brush lean cuts of meat,
chicken and sh with oil or melted butter.
• Trim excess fat from meat and score edges to prevent curling.
• Thaw frozen meats and sh before broiling.
• BROIL TIME is determined by the desired doneness and the distance
between the food and the upper heating elements. Always use a meat
thermometer.
DEHYDRATE
• Dehydrate fresh, ripe foods to preserve nutrients and enhance avor.
User Maintenance Instructions
This appliance requires little maintenance. It contains no user serviceable
parts. Do not try to repair it yourself. Any servicing that requires disassembly
other than cleaning must be performed by a qualied appliance repair technician.
Care & Cleaning Instructions
1. Unplug the Toaster Oven and allow the Toaster Oven and all accessories
to cool completely before cleaning.
2. Clean the outside of the Toaster Oven with a damp cloth and dry
thoroughly. A non-abrasive liquid cleaner may be used for stubborn
stains. Rinse and dry thoroughly. Do not use metal scouring pads or
abrasive cleaners that will scratch the surface.
3. Clean the interior with a mild or non-abrasive cleaner and plastic
scouring pad after each use to avoid build-up. Do not rub too hard as
surface can be scratched.
4. To remove baked-on food, pour a small amount of cooking oil onto the
food and allow to stand for 5 to 10 minutes. Remove the softened food
with a soft cloth. Do not use steel wool, scouring pads or abrasive
cleaners.
19328_19329_19330_19331 BTFL_WMUS_TOV IM_R5.indd 3319328_19329_19330_19331 BTFL_WMUS_TOV IM_R5.indd 33 2023-05-11 7:21 PM2023-05-11 7:21 PM

34
5. Rinse and dry thoroughly before closing the glass door. Clean the
glass door with a cloth or sponge dampened with warm, sudsy water. Dry
thoroughly.
6. Wash the air fryer/dehydrator basket, bake/broil pan, wire rack, and
crumb tray in soapy water and dry thoroughly. Toaster Oven accessories
may be washed in the dishwasher.
7. If crumbs and spills have accumulated on the crumb tray, wipe with a
damp cloth. Always dry the crumb tray thoroughly before replacing.
8. DO NOT use abrasive cleaners or metal scouring pads to clean bake/broil
pan, wire rack, wire rack, or crumb tray. For stubborn stains, clean
with a nylon or polyester mesh pad and a mild, non-abrasive cleaner.
Rinse and dry thoroughly.
CAUTION: DO NOT use spray-on or other oven cleaners. Using these types of
cleaners may cause cosmetic and/or electrical damage to the Toaster Oven.
Storing Instructions
1. Unplug unit, allow to cool, and clean before storing.
2. Slide the bake/broil assembly (wire rack and bake/broil pan) into the
lower shelf position.
3. Store Toaster Oven in its box in a clean, dry place.
4. Never store appliance while it is hot or still plugged in.
5. Never wrap cord tightly around the appliance.
19328_19329_19330_19331 BTFL_WMUS_TOV IM_R5.indd 3419328_19329_19330_19331 BTFL_WMUS_TOV IM_R5.indd 34 2023-05-11 7:21 PM2023-05-11 7:21 PM

35
Limited Two-Year Warranty
Sensio Inc. dba Made by Gather™
hereby warrants that for a period
of TWO YEARS from the date of
purchase, this product will be free
from mechanical defects in material
and workmanship, and for 90 days in
respect to non-mechanical parts. At
its sole discretion, Sensio Inc. dba
Made by Gather™ will either repair
or replace the product found to be
defective, or issue a refund on the
product during the warranty period.
The warranty is only valid for
the original retail purchaser from
the date of initial retail purchase
and is not transferable.
Keep the original sales receipt,
as proof of purchase isrequired
to obtain warranty validation.
Retail stores selling this product
do not have the right to alter,
modify, or in any way revise the
terms and conditions of the warranty.
Exclusions:
The warranty does not cover normal
wear of parts or damage resulting
from any of thefollowing: negligent
use of the product, use of improper
voltage or current, improper routine
maintenance, use contrary to the
operating instructions, disassembly,
repair, or alteration by anyone
other than qualied Sensio Inc.
dba Made by Gather™ personnel.
Also, the warranty does not cover
Acts of God such as re, oods,
hurricanes, or tornadoes.
Sensio Inc. dba Made by Gather™ shall
not be liable for any incidental or
consequential damages caused by the
breach of any express or implied
warranty. Apart from the extent
prohibited by applicable law, any
implied warranty of merchantability
or tness for a particular purpose
is limited in time to the duration
of the warranty. Some states,
provinces or jurisdictions do not
allow the exclusion or limitation
of incidental or consequential
damages, or limitations on how
long an implied warranty lasts,
and therefore, the above exclusions
or limitations may not apply to you.
The warranty covers specic legal
rights which may vary by state,
province and/or jurisdiction.
19328_19329_19330_19331 BTFL_WMUS_TOV IM_R5.indd 3519328_19329_19330_19331 BTFL_WMUS_TOV IM_R5.indd 35 2023-05-11 7:21 PM2023-05-11 7:21 PM

36
How To Obtain Warranty Service:
You must contact Customer Service at
our toll-free number: 1-877-775-3564.
A Customer Service Representative
will attempt to resolve warranty
issues over thephone. If the
Customer Service Representative
is unable to resolve the problem,
you will be provided with a case
number and asked to return the
product to Sensio Inc. dba Made
by Gather™ Attach a tag to the
product that includes: your name,
address, daytime contact telephone
number, case number, and description
of the problem.
Also, include a copy of the original
sales receipt. Carefully package
the tagged product with the sales
receipt, and send it (with shipping
and insurance prepaid) to SENSIO
Inc.’s address. Sensio Inc. dba
Made by Gather™ shall bear no
responsibility or liability for
the returned product while in
transit to Sensio Inc. DBA Made by
Gather™ Customer Service Center.
®
19328_19329_19330_19331 BTFL_WMUS_TOV IM_R5.indd 3619328_19329_19330_19331 BTFL_WMUS_TOV IM_R5.indd 36 2023-05-11 7:21 PM2023-05-11 7:21 PM
Sección 1
Seguridad
1
19328_19329_19330_19331 BTFL_WMUS_TOV IM_R5.indd 3719328_19329_19330_19331 BTFL_WMUS_TOV IM_R5.indd 37 2023-05-11 7:21 PM2023-05-11 7:21 PM

38
PRECAUCIONES
IMPORTANTES
Al utilizar electrodomésticos, deben seguirse siempre
las precauciones básicas de seguridad, entre las que se
incluyen las siguientes:
1. LEER TODAS LAS INSTRUCCIONES.
2. No tocar las supercies calientes. Utilizar asas o
pomos.
3. Para evitar descargas eléctricas, no sumergir el cable,
los enchufes ni el electrodoméstico en agua u otros
líquidos.
4. Este electrodoméstico no está diseñado para ser
utilizado por personas (incluidos niños) con
capacidades físicas, sensoriales o mentales reducidas,
o con falta de experiencia y conocimientos, a menos que
hayan sido supervisadas o instruidas acerca del uso
del electrodoméstico por una persona responsable de su
seguridad.
5. Se debe supervisar a los niños para procurar que no
jueguen con el electrodoméstico.
6. Desenchufarlo del tomacorriente cuando no se utilice
y antes de limpiarlo. Dejar enfriar el horno tostador
antes de colocar o quitar piezas.
19328_19329_19330_19331 BTFL_WMUS_TOV IM_R5.indd 3819328_19329_19330_19331 BTFL_WMUS_TOV IM_R5.indd 38 2023-05-11 7:21 PM2023-05-11 7:21 PM

39
7. No hacer funcionar ningún electrodoméstico con un cable
o enchufe dañado, o después de que el electrodoméstico
funcione mal o haya sido dañado de alguna manera.
Ponerse en contacto con el Servicio de Atención al
Cliente.
NOTA: NO INTENTAR REPARAR LA UNIDAD USTED MISMO. ESTO
ANULARÁ LA GARANTÍA.
8. El uso de accesorios no recomendados por el fabricante
del electrodoméstico puede causar lesiones.
9. No utilizar al aire libre.
10. No dejar que el cable cuelgue del borde de la mesa o
encimera, ni que toque supercies calientes.
11. No colocar sobre un quemador de gas o eléctrico
caliente ni cerca de este, ni en un horno caliente.
12. Extremar las precauciones al mover un electrodoméstico
que contenga aceite caliente u otros líquidos.
13. Para desconectar, presionar cualquier botón de FUNCIÓN
iluminado para apagar el horno tostador.
14. Desconectar el enchufe del tomacorriente.
15. No utilizar el electrodoméstico para un uso distinto al
previsto.
16. No introducir alimentos de gran tamaño ni utensilios
metálicos en el horno tostador, ya que podrían provocar
un incendio o riesgo de descarga eléctrica.
19328_19329_19330_19331 BTFL_WMUS_TOV IM_R5.indd 3919328_19329_19330_19331 BTFL_WMUS_TOV IM_R5.indd 39 2023-05-11 7:21 PM2023-05-11 7:21 PM

40
17. Puede producirse un incendio si el horno tostador está
cubierto o toca material inamable, como cortinas,
cortinajes, paredes y similares, cuando está en
funcionamiento. No colocar ningún objeto encima del
electrodoméstico cuando esté en funcionamiento.
18. No limpiar con estropajos metálicos. Pueden
desprenderse piezas del estropajo que pueden entrar
en contacto con piezas eléctricas, con el consiguiente
riesgo de descarga eléctrica.
19. Extremar las precauciones cuando se utilicen
recipientes que no sean de metal o vidrio.
20. No guardar ningún material, que no sean los accesorios
recomendados por el fabricante, en este horno tostador
cuando no esté en uso.
21. No introducir en el horno tostador ninguno de los
siguientes materiales: papel, cartón, plástico ni
similares.
22. No cubrir la bandeja para migas ni ninguna parte del
horno tostador con papel metálico. Esto provocará un
sobrecalentamiento del horno tostador.
23. Extremar las precauciones al retirar la bandeja para
migas o eliminar la grasa caliente.
24. No cubrir el horno tostador con ningún objeto que
impida la salida del vapor. Esto puede causar
deformación, decoloración, mal funcionamiento o
incluso un incendio.
19328_19329_19330_19331 BTFL_WMUS_TOV IM_R5.indd 4019328_19329_19330_19331 BTFL_WMUS_TOV IM_R5.indd 40 2023-05-11 7:21 PM2023-05-11 7:21 PM

41
SOLO PARA USO
DOMÉSTICO
GUARDAR ESTAS
INSTRUCCIONES
ADICIONALES
IMPORTANTES
PRECAUCIONES
PRECAUCIÓN - SUPERFICIES CALIENTES: Este electrodoméstico
genera calor y vapor durante su uso. Deben tomarse
las precauciones adecuadas para evitar el riesgo de
quemaduras, incendios u otras lesiones a las personas o
daños materiales.
1. Una persona que no haya leído ni comprendido todas
las instrucciones de funcionamiento y seguridad no
está calicada para utilizar este electrodoméstico.
Todos los usuarios de este electrodoméstico deben leer
y comprender este manual de instrucciones antes de
utilizar o limpiar este electrodoméstico.
2. Si este electrodoméstico se cae o se sumerge
19328_19329_19330_19331 BTFL_WMUS_TOV IM_R5.indd 4119328_19329_19330_19331 BTFL_WMUS_TOV IM_R5.indd 41 2023-05-11 7:21 PM2023-05-11 7:21 PM

42
accidentalmente en el agua, desenchufarlo
inmediatamente del tomacorriente. No meter la mano en el
agua.
3. Cuando se utilice este electrodoméstico, dejar un
espacio de aire adecuado por encima y por todos los
lados para que circule el aire. No utilizar este
electrodoméstico mientras esté en contacto o cerca de
cortinas, revestimientos murales, ropa, paños de cocina
u otros materiales inamables.
4. Para reducir el riesgo de incendio, no dejar este
electrodoméstico sin supervisión durante su uso.
5. Si este electrodoméstico empieza a funcionar mal durante
su uso, presione cualquier botón de FUNCIÓN iluminado.
Desconectar el enchufe del tomacorriente. No utilizar ni
intentar reparar un electrodoméstico averiado. Ponerse
en contacto con el Servicio de Atención al Cliente
6. El cable de este electrodoméstico solo debe enchufarse a
un tomacorriente eléctrico de 120 V CA.
7. No utilizar este electrodoméstico en una posición
inestable.
8. Para reducir el riesgo de quemaduras u otras lesiones,
no tocar las supercies calientes. Se recomienda
utilizar manoplas o guantes protectores para el horno,
así como utensilios de mango largo.
9. Para reducir el riesgo de lesiones a personas o
materiales, desenchufar este electrodoméstico
antes de introducir alimentos. Mantener siempre el
19328_19329_19330_19331 BTFL_WMUS_TOV IM_R5.indd 4219328_19329_19330_19331 BTFL_WMUS_TOV IM_R5.indd 42 2023-05-11 7:21 PM2023-05-11 7:21 PM

43
electrodoméstico desenchufado del tomacorriente cuando
no está en uso.
PRECAUCIÓN: Nunca dejar el horno tostador desatendido
mientras esté en uso.
NOTAS SOBRE EL ENCHUFE
Este electrodoméstico tiene un enchufe polarizado
(una clavija es más ancha que la otra). Para reducir el
riesgo de descarga eléctrica, este enchufe solo encaja
en un tomacorriente polarizado. Si el enchufe no entra
completamente en el tomacorriente, invertir el enchufe. Si
sigue sin encajar, ponerse en contacto con un electricista
calicado. No modicar el enchufe de ninguna manera.
NOTAS SOBRE EL CABLE
a) Debe suministrarse un cable de alimentación corto (o
desconectable) para reducir los riesgos de enredarse o
tropezar con un cable más largo.
b) Existen cables de alimentación desconectables más
largos o alargadores que pueden utilizarse si se usan
con cuidado.
c) Si se utiliza un cable de alimentación desconectable
largo o un alargador:
1) La capacidad eléctrica marcada del cable de
alimentación desconectable o del alargador debe
ser como mínimo igual a la capacidad eléctrica del
electrodoméstico.
19328_19329_19330_19331 BTFL_WMUS_TOV IM_R5.indd 4319328_19329_19330_19331 BTFL_WMUS_TOV IM_R5.indd 43 2023-05-11 7:21 PM2023-05-11 7:21 PM

44
2) Si el electrodoméstico es del tipo con toma de tierra,
el alargador debe ser de 3 cables con toma de tierra.
3) El cable más largo debe colocarse de modo que no caiga
sobre la encimera ni la mesa, donde los niños podrían
tirar o tropezar con este.
ADVERTENCIA SOBRE PLASTIFICANTES
PRECAUCIÓN: Para evitar que los plasticantes pasen al
acabado de la encimera, la mesa u otros muebles, colocar
posavasos o manteles individuales NO PLÁSTICOS entre el
electrodoméstico y el acabado de la encimera o la mesa.
Caso contrario, el acabado puede oscurecerse, pueden
producirse imperfecciones permanentes o pueden aparecer
manchas.
ENERGÍA ELÉCTRICA
Si el circuito eléctrico está sobrecargado con otros
electrodoméstico, es posible que su electrodoméstico no
funcione correctamente. Debe funcionar en un circuito
eléctrico separado del resto de electrodoméstico.
19328_19329_19330_19331 BTFL_WMUS_TOV IM_R5.indd 4419328_19329_19330_19331 BTFL_WMUS_TOV IM_R5.indd 44 2023-05-11 7:21 PM2023-05-11 7:21 PM

Sección 2
Instrucciones
2
19328_19329_19330_19331 BTFL_WMUS_TOV IM_R5.indd 4519328_19329_19330_19331 BTFL_WMUS_TOV IM_R5.indd 45 2023-05-11 7:21 PM2023-05-11 7:21 PM
46
Conozca su horno tostador con freidora de aire digital
El producto puede ser ligeramente diferente al ilustrado.
1. Asa de puerta
2. Puerta de vidrio
3. Elementos de calentamiento inferiores
4. Elementos de calentamiento superiores
5. Panel de control de pantalla táctil
6. Pantalla digital de TIME/TEMP (Tiempo/Temperatura)
7. Bandeja para migas (no se muestra)
8. Ventilador de convección (no se muestra)
9. Enchufe polarizado (no se muestra)
1
4
2
3
6
5
Accesorios
1. Rejilla de alambre
2. Canasta para freidora de aire/
deshidratador
3. Bandeja para hornear/asar
4. Bandeja para migas
2
1
3
4
19328_19329_19330_19331 BTFL_WMUS_TOV IM_R5.indd 4619328_19329_19330_19331 BTFL_WMUS_TOV IM_R5.indd 46 2023-05-11 7:21 PM2023-05-11 7:21 PM
47
Calentamiento infrarrojo
Seis elementos de calentamiento con tecnología de cuarzo infrarroja que
permiten precalentar un 80 % más rápido que un horno de convección tradicional
Panel de control de pantalla táctil
Una pantalla que solo aparece cuando la necesita. El botón y cualquier
FUNCIÓN se iluminarán cuando estén activos y desaparecerán cuando no se
utilicen. Además de 10 funciones preestablecidas con control preciso de TIEMPO/
TEMPERATURA, este horno tostador con freidora de aire digital Beautiful ofrece
un ventilador de convección de velocidad ajustable. No hay necesidad de quedarse
en la cocina. Cuando el TIEMPO expira, el horno
tostador se APAGA automáticamente.
1.
2. Pantalla digital de TIME/TEMP (Tiempo/
Temperatura)
3. Botón PIZZA
4. Botón TOAST/BAGEL (Tostado/Panecillo)
5. Botón AIR FRY (Freír)
6. Botón TIME/TEMP (Tiempo/Temperatura)
7. Botones selectores +/-
8. Botón START/MENU (Iniciar/Menú)
9. BAKE (Hornear)
10. BROIL (Asar)
11. COOKIES (Galletas)
12. SLOW COOK (Cocción lenta)
13. REHEAT (Recalentar)
14. DEHYDRATE (Deshidratar)
19328_19329_19330_19331 BTFL_WMUS_TOV IM_R5.indd 4719328_19329_19330_19331 BTFL_WMUS_TOV IM_R5.indd 47 2023-05-11 7:21 PM2023-05-11 7:21 PM
48
• Cuando el horno tostador esté enchufado, sonará un tono y el panel de
control se iluminará durante 1 segundo. El botón
se iluminará y se
encenderá y apagará lentamente. Se mostrará 12:00. Presionar el botón
TEMP/TIME (Temperatura/Tiempo) y “12” comenzará a parpadear. Utilizar
+, - para ajustar la hora. Presionar el botón TEMP/TIME (Temperatura/
Tiempo), y los minutos “00” parpadearán. Utilizar +, - para ajustar los
minutos.
• Cuando
se presiona, suena un tono, y el panel de control se
iluminará y permanecerá activo durante 3 minutos.
• Presionar
para DETENER cualquier operación.
• Cuando se presiona PIZZA, suena un tono. 177 ºC (350 ºF) y 20 minutos se
alternarán cada 5 segundos en la pantalla.
• Presionar TEMP/TIME (Temperatura/Tiempo), después presionar (+) para
aumentar o (-) para disminuir el TIEMPO DE PIZZA en incrementos de 1
minuto.
• Presionar TEMP/TIME (Temperatura/Tiempo), después presionar (+) para
aumentar o (-) para disminuir el TEMPERATURA DE PIZZA en incrementos de
5 grados.
• Presionar el botón START/MENU (Iniciar/Menú) para comenzar la operación.
• Presionar
para detener la función PIZZA y volver al modo de espera.
• Cuando se presiona TOAST/BAGEL (Tostado/Panecillo), suena un tono y se
muestra el tono de tostado TOAST L4 (MEDIUM) (Tostado L4 [Medio]).
• Mantener presionado el botón TOAST/BAGEL (Tostado/Panecillo) para cambiar
al tono de tostado BAGEL L4 (MEDIUM) (Panecillo L4 [Medio]).
19328_19329_19330_19331 BTFL_WMUS_TOV IM_R5.indd 4819328_19329_19330_19331 BTFL_WMUS_TOV IM_R5.indd 48 2023-05-11 7:21 PM2023-05-11 7:21 PM

49
• En el modo TOAST (Tostado) o BAGEL (Panecillo), presionar (+) para
aumentar el tono de tostado o (-) para disminuirlo de L1 LIGHT (L1
Claro) a L7 DARK (L7 Oscuro).
• Presionar el botón START/MENU (Iniciar/Menú) para comenzar la operación.
• Presionar
para detener la función TOAST/BAGEL (Tostado/Panecillo) y
volver al modo de espera.
• Cuando se presiona AIR FRY (Freír), suena un tono. TEMP (Temperatura)
204 ºC (400 °F) y TIME (Tiempo) 25 minutos se alternarán cada 5 segundos
en la pantalla.
• Presionar TEMP/TIME (Temperatura/Tiempo), después presionar (+) para
aumentar o (-) para disminuir el TIEMPO PARA FREÍR en incrementos de 1
minuto.
• Presionar TEMP/TIME (Temperatura/Tiempo), luego presionar (+) para
aumentar o (-) para disminuir la TEMPERATURA PARA FREÍR en incrementos
de 5 grados.
• Mantener presionado Temp/Time (Temperatura/Tiempo) para ajustar la
velocidad del ventilador.
• Presionar el botón START/MENU (Iniciar/Menú) para comenzar la operación.
• Presionar
para detener AIR FRY (Freír) y volver al modo de espera.
• Presionar el botón START/MENU (Iniciar/Menú).
• Cuando se selecciona BAKE (Hornear), TEMP (Temperatura) 177 °C (350 °F)
y TIME (Tiempo) 30 minutos se alternarán cada 5 segundos en la pantalla.
• Presionar TEMP/TIME (Temperatura/Tiempo), después presionar (+) para
aumentar o (-) para disminuir el TIEMPO DE HORNEADO en incrementos de 1
minuto.
• Presionar TEMP/TIME (Temperatura/Tiempo), después presionar (+) para
aumentar o (-) para disminuir la TEMPERATURA DE BAKE en incrementos de 5
grados.
• Mantener presionado TEMP/TIME (Temperatura/Tiempo) para ajustar la
velocidad del ventilador.
19328_19329_19330_19331 BTFL_WMUS_TOV IM_R5.indd 4919328_19329_19330_19331 BTFL_WMUS_TOV IM_R5.indd 49 2023-05-11 7:21 PM2023-05-11 7:21 PM
50
• Presionar el botón START/MENU (Iniciar/Menú) para comenzar la operación.
• Presionar
para detener la función BAKE (Hornear) y volver al modo
de espera.
• Presionar el botón START/MENU (Iniciar/Menú), utilizar +/- para
seleccionar el ajuste BROIL (Asar).
• Cuando se presiona BROIL (Asar), suena un tono. 232 ºC (450 ºF) y 30
minutos se alternarán cada 5 segundos en la pantalla.
• Presionar TEMP/TIME (Temperatura/Tiempo), después presionar (+) para
aumentar o (-) para disminuir el TIEMPO DE ASADO en incrementos de 1
minuto.
• Mantener presionado TEMP/TIME (Temperatura/Tiempo) para ajustar la
velocidad del ventilador.
• Presionar el botón START/MENU (Iniciar/Menú) para comenzar la operación.
• Presionar
para detener la función BROIL (Asar) y volver al modo de
espera.
• Presionar el botón START/MENU (Iniciar/Menú); sonará un tono. Presionar
+, - hasta que se ilumine COOKIES (Galletas). 177 ºC (350 ºF) y 11
minutos se alternarán cada 5 segundos en la pantalla.
• Presionar TEMP/TIME (Temperatura/Tiempo), luego presionar (+) para
aumentar o (-) para disminuir el TIEMPO PARA GALLETAS en incrementos de
1 minuto.
• Presionar TEMP/TIME (Temperatura/Tiempo), luego presionar (+) para
aumentar o (-) para disminuir la TEMPERATURA PARA GALLETAS en incrementos
de 5 grados.
• Presionar el botón START/MENU (Iniciar/Menú) para comenzar la operación.
• Presionar
para detener la función COOKIES (Galletas) y volver al
modo de espera.
• Presionar el botón START/MENU (Iniciar/Menú); sonará un tono. Presionar
+, - hasta que se ilumine SLOW COOK (Cocción lenta). HI y 4 horas se
alternarán cada 5 segundos en la pantalla.
19328_19329_19330_19331 BTFL_WMUS_TOV IM_R5.indd 5019328_19329_19330_19331 BTFL_WMUS_TOV IM_R5.indd 50 2023-05-11 7:21 PM2023-05-11 7:21 PM

51
• Presionar TEMP/TIME (Temperatura/Tiempo), luego presionar (+) para
aumentar o (-) para disminuir el TIEMPO DE COCCIÓN LENTA en incrementos
de 30 minutos.
• Presionar TEMP/TIME (Temperatura/Tiempo), luego presionar (-) para
disminuir a ajuste bajo.
• Mantener presionado los botones TEMP/TIME (Temperatura/Tiempo) para
ajustar la velocidad del ventilador.
• Presionar el botón START/MENU (Iniciar/Menú) para comenzar la operación.
• Presionar
para detener SLOW COOK (Cocción lenta) y volver al modo
de espera.
• Presionar el botón START/MENU (Iniciar/Menú); sonará un tono. Presionar
+, - hasta que se ilumine REHEAT (Recalentar). 177 ºC (350 ºF) y 15
minutos se alternarán cada 5 segundos en la pantalla.
• Presionar TEMP/TIME (Temperatura/Tiempo), después presionar (+)
para aumentar o (-) para disminuir el TIEMPO DE RECALENTAMIENTO en
incrementos de 1 minuto.
• Presionar TEMP/TIME (Temperatura/Tiempo), después presionar (+) para
aumentar o (-) para disminuir el TEMPERATURA DE RECALENTAMIENTO en
incrementos de 5 grados.
• Presionar el botón START/MENU (Iniciar/Menú) para comenzar la operación.
• Presionar
para detener la función REHEAT (Recalentar) y volver al
modo de espera.
• Presionar START/MENU (Iniciar/Menú); sonará un tono. Presionar +, - hasta
que se ilumine DEHYDRATE (Deshidratar). 49 ºC (120 ºF) y 8 horas se
alternarán cada 5 segundos en la pantalla.
• Presionar TEMP/TIME (Temperatura/Tiempo), luego presionar (+) para
aumentar o (-) para disminuir el TIEMPO DE DESHIDRATACIÓN en incrementos
de 30 minutos.
• Presionar TEMP/TIME (Temperatura/Tiempo), luego presionar (+) para
aumentar o (-) para disminuir la TEMPERATURA DE DESHIDRATACIÓN en
incrementos de 5 grados.
19328_19329_19330_19331 BTFL_WMUS_TOV IM_R5.indd 5119328_19329_19330_19331 BTFL_WMUS_TOV IM_R5.indd 51 2023-05-11 7:21 PM2023-05-11 7:21 PM

52
• Presionar el botón START/MENU (Iniciar/Menú) para comenzar la operación.
• Presionar
para detener DEHYDRATE (Deshidratar) y volver al modo de
espera.
Posiciones de estante
NOTA: Ciertos alimentos pueden requerir diferentes posiciones de estante
dependiendo de la receta, del tamaño, la cantidad de alimentos que se cocinarán
y del gusto personal. Utilizar la siguiente información solo como guía.
1. Hay 2 posiciones de altura para insertar la canasta para freidora de aire/
deshidratador, la rejilla de alambre o la bandeja para hornear/asar.
2. Utilizar la posición de estante superior para ASAR, FREÍR, TOSTADO,
PANECILLO, GALLETAS y DESHIDRATAR.
3. Utilizar la posición de estante inferior para HORNEAR, TOSTAR, RECALENTAR y
PIZZA.
ADVERTENCIA: No colocar nunca la bandeja para hornear/asar directamente sobre
los elementos de calentamiento inferiores.
Restricciones de peso/tamaño
1. Este horno tostador puede cocinar hasta 1,8 kg (4 lb) de pollo o pavo, y
hasta 2,3 kg (5 lb) de asado.
2. Le sugerimos que compruebe periódicamente el progreso de la cocción con
un termómetro para carne.
Recipientes de cocción
• Tanto la canasta para freidora de aire/deshidratador como la bandeja
para hornear/asar incluidas con el horno tostador son adecuadas para
cocinar alimentos como galletas, panecillos, bizcochos, nachos y
aperitivos calientes.
• Se puede utilizar una gran variedad de fuentes de horno estándar, como
una cazuela de 20,3 cm × 30,5 cm (8 in × 12 in), cualquier molde redondo
o cuadrado de 20,3 cm o 22,9 cm (8 in o 9 in), un molde para magdalenas
de 12 tazas, cazuelas redondas, cuadradas o rectangulares de 0,9 L y 1,9
L (1 y 2 cuartos) para cocinar muchos alimentos diferentes.
19328_19329_19330_19331 BTFL_WMUS_TOV IM_R5.indd 5219328_19329_19330_19331 BTFL_WMUS_TOV IM_R5.indd 52 2023-05-11 7:21 PM2023-05-11 7:21 PM

53
• Elegir recipientes para hornear de metal o de vidrio/cerámica sin tapa.
• Los moldes oscuros u opacos absorben el calor con mayor rapidez; los
alimentos se hornearán más rápido y la corteza se dorará más fácilmente
que en moldes brillantes.
• Revisar las instrucciones del paquete o ponerse en contacto con el
fabricante para determinar si el recipiente es adecuado para su uso en
un horno tostador.
• No utilizar bolsas para asar en este horno tostador, ya que pueden
entrar en contacto con los elementos de calentamiento.
PRECAUCIÓN: No utilizar tapas de vidrio en los moldes. Si se utiliza
un recipiente de vidrio o vitrocerámica para hornear, asegurarse de que
esté al menos a 2,5 cm (1 in) del elemento de calentamiento superior.
Antes de usar por primera vez
PRECAUCIÓN: Para protegerse contra descargas eléctricas, no sumergir el horno
tostador ni permitir que el cable entre en contacto con agua u otros líquidos.
1. Desembalar cuidadosamente el horno tostador y los accesorios. Retirar todos
los materiales de embalaje del interior del horno tostador. Retirar las
etiquetas de las supercies exteriores.
2. Colocar el horno tostador sobre una supercie plana, como una encimera o una
mesa. Asegurarse de que los lados, la parte posterior y la parte superior
del horno tostador estén al menos a 10,2 cm (4 in) de distancia de cualquier
pared, armario u objeto sobre la encimera o mesa.
3. Para evitar arañazos, marcas o decoloración, no guardar nada encima del
horno tostador durante su funcionamiento.
4. Lavar la canasta para freidora de aire/deshidratador, la bandeja para
hornear/asar, la rejilla de alambre y la bandeja para migas con agua tibia
jabonosa. Enjuagar y secar bien antes de colocarlas en el horno tostador.
5. No utilizar limpiadores abrasivos.
6. Para asegurarse de que el horno tostador esté libre de aceites utilizados
en la fabricación, es necesario poner en funcionamiento la unidad una vez
vacía.
19328_19329_19330_19331 BTFL_WMUS_TOV IM_R5.indd 5319328_19329_19330_19331 BTFL_WMUS_TOV IM_R5.indd 53 2023-05-11 7:21 PM2023-05-11 7:21 PM

54
7. Asegurarse de que la bandeja para migas esté colocada en la parte inferior
del horno tostador.
8. Siguiendo las instrucciones de FUNCIONAMIENTO detalladas, vaciar el horno
tostador y HORNEAR durante 30 minutos para preparar el horno tostador para
su uso.
Funcionamiento
NOTA: Para desactivar los tonos audibles, mantener presionados + y -. El ícono
de SONIDO APAGADO aparece junto a TIEMPO en el panel de control. Volver a
presionar ambos botones para encender el sonido.
PRECAUCIÓN: NUNCA utilizar recipientes de plástico en el horno tostador.
PRECAUCIÓN: No colocar nada encima del horno tostador.
1. Cuando el horno tostador esté enchufado, sonará un tono, el botón se
iluminará y se encenderá y apagará lentamente.
2. Abrir la puerta de vidrio.
3. Antes de utilizarlo, asegurarse siempre de que la bandeja para migas esté
colocada en la parte inferior del horno tostador. Utilizar siempre la
bandeja para hornear/asar con el n de reducir las salpicaduras. (Figura 1).
4. Deslizar la rejilla de alambre en la posición de estante deseada. Agregar
comida. Cerrar la puerta de vidrio.
5. Presionar el botón. Sonará un tono mientras el panel de control se ilumina y
permanece activo durante 3 minutos.
6. Presionar cualquier botón de FUNCIÓN: FREÍR, PIZZA o TOSTADO/PANECILLO para
activar.
7. Para acceder a las FUNCIONES COOKIES (Galletas), SLOW COOK (Cocción lenta),
REHEAT (Recalentar), DEHYDRATE (Deshidratar), BAKE (Hornear) y BROIL
(ASAR), presionar el botón START/MENU (Iniciar/Menú); sonará un tono.
Presionar +, -hasta que se ilumine la FUNCIÓN deseada.
8. Para cambiar cualquier ajuste de FUNCIÓN predeterminado, presionar el botón
TEMP/TIME (Temperatura/Tiempo); luego presionar +, - hasta que aparezcan el
TIEMPO y la TEMPERATURA deseados.
9. Presionar START/MENU (Iniciar/Menú) para comenzar la operación. El TIEMPO
y la TEMPERATURA predeterminados se alternarán en la pantalla digital. La
función de TIEMPO comenzará la cuenta regresiva.
19328_19329_19330_19331 BTFL_WMUS_TOV IM_R5.indd 5419328_19329_19330_19331 BTFL_WMUS_TOV IM_R5.indd 54 2023-05-11 7:21 PM2023-05-11 7:21 PM
55
10. Cuando el TIEMPO restante llegue a 0:00, sonarán 2 tonos y el horno tostador
con freidora de aire digital se APAGARÁ automáticamente.
PRECAUCIÓN: No tocar el horno tostador caliente ni ninguna parte del horno
tostador caliente sin usar guantes de cocina.
11. Abrir la puerta de vidrio. Utilizar un termómetro para carne, si es
necesario, para comprobar el punto de cocción. Prolongar el TIEMPO de
cocción si es necesario.
ADVERTENCIA: NO DEJAR EL HORNO TOSTADOR DESATENDIDO MIENTRAS USA LAS
FUNCIONES FREÍR, ASAR o TOSTADO.
12. Desenchufar cuando no se utilice y dejar que el horno tostador se enfríe por
completo antes de limpiarlo.
19328_19329_19330_19331 BTFL_WMUS_TOV IM_R5.indd 5519328_19329_19330_19331 BTFL_WMUS_TOV IM_R5.indd 55 2023-05-11 7:21 PM2023-05-11 7:21 PM

56
Tiempos y temperaturas preestablecidos
VENTILADOR
FUNCIÓN
TEMPERATURA TIEMPO VENTILADOR
DE
CONVECCIÓN
VELOCIDAD
Predet. Min. Máx. Predet. Min. Máx. Predet. Min. Máx.
Freír 204 °C
(400 °F)
204 °C
(400 °F)
232 °C
(450 °F)
25 min 1 min 1 hora 3 Alto 1 Bajo 3
Alto
Asar 232 °C
(450 °F)
30 min 1 min 1 hora 3 Alto APA-
GADO
3
Alto
Hornear 177 °C
(350 °F)
77 °C
(170 °F)
232 °C
(450 °F)
30 min 1 min 2 horas OFF APA-
GADO
3
Alto
Recalentar
177 °C
(350 °F)
77 °C
(170 °F)
232 °C
(450 °F)
15 min 1 min 1 hora
Cocción
lenta
ALTA Baja
ALTA 4 horas 2
horas
12 horas 3 Alto APA-
GADO
3
Alto
Cocción
lenta
Baja 6 horas 4
horas
72 horas 3 Alto APA-
GADO
3
Alto
Tostado L4 L4 Medio L1
Claro
L7
Oscuro
Panecillo L4 L4 Medio L1
Claro
L7
Oscuro
Galletas 177 °C
(350 °F)
77 °C
(170 °F)
232 °C
(450 °F)
11 min 1 min 1 hora
Pizza 177 °C
(350 °F)
177 °C
(
3
50
°F)
232 °C
(450 °F)
20 min 1 min 1 hora
D
eshidratar
49 °C
(120 °F)
27 °C
(80 °F)
82 °C
(180 °F)
8 horas 1 min 72 horas 3 Alto
19328_19329_19330_19331 BTFL_WMUS_TOV IM_R5.indd 5619328_19329_19330_19331 BTFL_WMUS_TOV IM_R5.indd 56 2023-05-11 7:21 PM2023-05-11 7:21 PM

57
Control del ventilador de convección
1. Las FUNCIONES AIR FRY (Freír), BROIL (Asar), SLOW COOK (Cocción lenta) y
BAKE (Hornear) disponen de un ventilador de convección de 3 velocidades.
2. Para seleccionar o cambiar la velocidad del ventilador de convección,
mantener presionado TEMP/TIME (Temperatura/Tiempo) durante 3 segundos.
Sonará un tono y aparecerá la VELOCIDAD DE VENTILADOR 1, 2 o 3 en la
pantalla.
3. Presionar (+) para aumentar o (-) para disminuir la VELOCIDAD según sea
necesario. Ver TIEMPOS Y TEMPERATURAS predeterminados para 3 velocidades
de ventilador.
Pizza, tostado/panecillo, freír
FREÍR
NOTA: La velocidad del ventilador de convección predeterminada para FREÍR es 3
ALTA, que puede reducirse al freír con aire alimentos delicados como pescado o
algunas frutas o verduras.
NOTA: El ventilador de convección no se puede apagar durante la función FREÍR.
1. SIEMPRE utilizar la canasta de malla para freidora de aire/deshidratador
cuando se fría al aire.
2. El calor intenso y la máxima potencia del ventilador garantizan alimentos
dorados y crujientes con un mínimo de aceite o sin este.
¡IMPORTANTE! Cuando fría al aire alimentos grasos (como alitas de pollo o
costillas de cerdo), utilizar la bandeja para asar en lugar de la canasta
para freidora de aire/deshidratador con el n de evitar que el aceite gotee
sobre los elementos de calentamiento. Desechar el exceso de aceite si es
necesario.
NOTA: Dar siempre vuelta los alimentos a mitad del tiempo para FREÍR. Para
acelerar el dorado, untar los cortes magros de carne, pollo y pescado con
aceite o mantequilla derretida.
3. Cuando termina de cocinar, usar siempre guantes protectores para horno al
momento de sacar la rejilla de alambre del horno tostador. Tener cuidado
al retirar los alimentos de la parte posterior de la rejilla de alambre. El
interior del horno tostador está muy caliente. Cerrar la puerta de vidrio.
19328_19329_19330_19331 BTFL_WMUS_TOV IM_R5.indd 5719328_19329_19330_19331 BTFL_WMUS_TOV IM_R5.indd 57 2023-05-11 7:21 PM2023-05-11 7:21 PM

58
4. Como norma general, dependiendo del alimento y de la cantidad a cocinar,
los alimentos de receta o envasados, es posible que los TIEMPOS de cocción
sugeridos deban reducirse ligeramente.
Comprobar siempre los alimentos a mitad del tiempo de cocción para
determinar el TIEMPO y la TEMPERATURA de cocción nales.
5. Comprobar siempre el progreso de la cocción una vez transcurrido el TIEMPO.
Asar por convección/Asar
NOTA: La velocidad del ventilador de convección predeterminada para ASAR es 3
ALTA. Al dorar quesos, pan rallado o malvaviscos azucarados, utilizar el control
del ventilador de convección para APAGAR el ventilador si no se necesita el
ASADO por convección.
1. ASAR cortes tiernos de carne o carnes marinadas, chuletas, aves o pescado,
frutas y verduras. Utilizar la bandeja para hornear de modo que los jugos
o la grasa goteen en la bandeja y se reduzcan las salpicaduras durante el
asado.
ADVERTENCIA: NUNCA colocar papel de aluminio encima de la bandeja para
hornear/asar. Esto atrapa la grasa y puede provocar un incendio.
2. El TIEMPO PARA ASAR se determina en función del punto de cocción deseado y la
distancia entre el alimento y el elemento.
IMPORTANTE: Voltear y comprobar los alimentos a mitad del tiempo de ASADO.
Tabla de cocción para Freír/Asar por convección
Los tiempos son estimados y se basan en porciones y pesos promedio.
UTILIZAR SIEMPRE UN TERMÓMETRO PARA CARNE PARA ASEGURARSE DE QUE LA CARNE, LAS
AVES Y EL PESCADO ESTÁN BIEN COCINADOS ANTES DE SERVIRLOS.
NOTA: Si se fríen porciones más pequeñas, los tiempos de cocción serán más
cortos y la calidad de los alimentos será mayor. Ajustar la TEMPERATURA y el
TIEMPO de fritura con aire según su gusto.
NOTA: A menos que los alimentos estén preenvasados y previamente aceitados, para
obtener resultados dorados y crujientes, todos los alimentos deben aceitarse
ligeramente antes de freírlos al aire.
19328_19329_19330_19331 BTFL_WMUS_TOV IM_R5.indd 5819328_19329_19330_19331 BTFL_WMUS_TOV IM_R5.indd 58 2023-05-11 7:21 PM2023-05-11 7:21 PM

59
Verduras
Alimento Temperatura TIEMPO PARA
FREÍR/ASAR
Espárragos 204 ºC (400 ºF) 5 - 7 minutos
Flores de brócoli (asadas) 204 ºC (400 ºF) 6 - 10 minutos
Coles de Bruselas 193 ºC (380 ºF) 12 - 15 minutos
Flores de colior (asadas) 204 ºC (400 ºF) 6 - 10 minutos
Mazorcas de maíz 199 ºC (390 ºF) 6 - 8 minutos
Berenjenas, cubos de 1 1/2 in (4 cm)
(asadas)
204 ºC (400 ºF) 15 minutos
Hinojos, frescos, cortados 193 ºC (380 ºF) 10 - 13 minutos
Papas fritas (frescas, en agua, de 1/4 a
1/3 in [6 a 8 mm] de espesor)
204 ºC (400 ºF) 16 - 20 minutos
Hongos, en rebanadas 204 ºC (400 ºF) 5 minutos
Pimientos, morrones, trozos de 1 in
(2.5 cm)
193 ºC (380 ºF) 10 minutos
Pimientos, jalapeños, poblanos (asados) 193 ºC (380 ºF) 10 minutos
Papas, cubos de 1 in (2.5 cm) 204 ºC (400 ºF) 12 - 14 minutos
Papas, enteras 204 ºC (400 ºF) 40 minutos
Tubérculos, 1/2 in (1.3 cm), trozos
(asados)
204 ºC (400 ºF) 15 - 20 minutos
Batatas, enteras 193 ºC (380 ºF) 30 - 35 minutos
Calabacín, rodajas de 1/4 in (6 mm) 204 ºC (400 ºF) 12 - 17 minutos
19328_19329_19330_19331 BTFL_WMUS_TOV IM_R5.indd 5919328_19329_19330_19331 BTFL_WMUS_TOV IM_R5.indd 59 2023-05-11 7:21 PM2023-05-11 7:21 PM
60
Carne
Alimento Temperatura TIEMPO PARA
FREÍR/ASAR
Hamburguesas, 1/4 lb (113 g) (hasta 4) 182 ºC (360 ºF) 12 – 16 minutos
Perros calientes/salchichas 182 ºC (360 ºF) 10 – 15 minutos
Pastel de carne, 1 lb (454 g) 182 ºC (360 ºF) 35 – 40 minutos
Filetes 182 ºC (360 ºF) 8 – 12 minutos
Solomillo de ternera, 1 lb (454 g),
poco cocido
182 ºC (360 ºF) 16 minutos
Solomillo de ternera, 1 lb (454 g),
cocción media
182 ºC (360 ºF) 18 minutos
Pollo
Alimento Temperatura TIEMPO PARA
FREÍR/ASAR
Pechuga de pollo deshuesada y sin piel 182 ºC (360 ºF) 10 – 15 minutos
Trozos de pollo 182 ºC (360 ºF) 20 - 30 minutos
Palitos/deditos de pollo, rebozados 182 ºC (360 ºF) 13 - 15 minutos
Alitas de pollo 182 ºC (360 ºF) 20 minutos
19328_19329_19330_19331 BTFL_WMUS_TOV IM_R5.indd 6019328_19329_19330_19331 BTFL_WMUS_TOV IM_R5.indd 60 2023-05-11 7:21 PM2023-05-11 7:21 PM
61
Cerdo y cordero
Alimento Temperatura TIEMPO PARA
FREÍR/ASAR
Tocino, cortado grueso 204 ºC (400 ºF) 8 – 10 minutos
Jamón, precocido, deshuesado, 1,4 kg
(3 lbs)
149 ºC (300 ºF) 1 hora
Chuletas de lomo de cordero, 2,5 cm
(1 in) de espesor
204 ºC (400 ºF) 8 – 12 minutos
Chuletas de cerdo, 2,5 cm (1 in) de
espesor
193 ºC (380 ºF) 10 – 14 minutos
Pescados y mariscos
Alimento Temperatura TIEMPO PARA
FREÍR/ASAR
Dedos de bagre (descongelados,
rebozados)
204 ºC (400 ºF) 10 - 15 minutos
Camarones (descongelados, rebozados) 160 ºC (320 ºF) 12 minutos
Camarones (descongelados, con salsa) 160 ºC (320 ºF) 5 - 8 minutos
19328_19329_19330_19331 BTFL_WMUS_TOV IM_R5.indd 6119328_19329_19330_19331 BTFL_WMUS_TOV IM_R5.indd 61 2023-05-11 7:21 PM2023-05-11 7:21 PM

62
Alimentos congelados
Alimento Temperatura TIEMPO PARA
FREÍR/ASAR
Bastones de queso (congelados) 177 ºC (350 ºF) 6 – 9 minutos
Bocaditos de pollo (congelados) 182 ºC (360 ºF) 10 - 15 minutos
Bastones de pescado (congelados) 204 ºC (400 ºF) 12 – 18 minutos
Papas fritas, gruesas (congeladas), 4
tazas
204 ºC (400 ºF) 17 – 21 minutos
Papas fritas, delgadas (congeladas), 4
tazas
204 ºC (400 ºF) 15 – 17 minutos
Albóndigas, 1 in (2.5 cm) 193 ºC (380 ºF) 7 - 9 minutos
Aros de cebolla (congelados) 182 ºC (360 ºF) 12 – 16 minutos
Pizza, congelada, 7 in x 8 in (18 cm x
20 cm)
182 ºC (360 ºF) 12 - 15 minutos
Postres
Alimento Temperatura TIEMPO PARA
FREÍR/ASAR
Hojaldre relleno de manzana 204 ºC (400 ºF) 10 minutos
Pastel 177 ºC (350 ºF) 25 minutos
19328_19329_19330_19331 BTFL_WMUS_TOV IM_R5.indd 6219328_19329_19330_19331 BTFL_WMUS_TOV IM_R5.indd 62 2023-05-11 7:21 PM2023-05-11 7:21 PM

63
Pautas de cocción del USDA
El USDA recomienda que las carnes como la ternera, el cordero, etc. se cocinen a
una temperatura interna de 63 ºC/145 ºF. La carne de cerdo debe cocinarse a una
temperatura interna de 71 ºC/160 ºF y los productos de ave deben cocinarse a una
temperatura interna de 77 ºC/170 ºF - 82 ºC/180 ºF para asegurarse de eliminar
cualquier bacteria dañina. Al recalentar productos cárnicos o de aves de corral,
también deben cocinarse a una temperatura interna de 74 ºC/165 ºF.
Pizza
1. Este horno tostador admite cualquier pizza fresca o congelada de 30,5 cm (12
in) (o más pequeña).
2. Cuando cocine pizza preparada, fresca o congelada, retirar todo el
envoltorio, incluido el cartón, el plástico, el papel u otros materiales
inamables antes de colocar la pizza en el horno tostador. Al hornear pizza
fresca, aceitar ligeramente la bandeja para hornear/asar y espolvorear con
harina de maíz para poder retirar la pizza al horno con mayor facilidad.
3. ADVERTENCIA: No cocinar nunca las pizzas directamente sobre la rejilla de
alambre, ya que el queso fundido y otros ingredientes pueden caer sobre los
elementos de calentamiento y crear un riesgo potencial de incendio.
4. Dependiendo de la profundidad de la pizza, deslizar la rejilla de alambre y
la bandeja para hornear/asar en la posición de estante central o inferior.
Centrar con cuidado la bandeja para pizza directamente sobre la rejilla de
alambre.
PRECAUCIÓN: Asegurarse de que la pizza esté al menos a 2,5 cm (1 in) del
elemento de calentamiento superior.
ADVERTENCIA: NUNCA colocar papel de aluminio encima de la bandeja para
hornear/asar. Esto atrapa la grasa y puede provocar un incendio.
19328_19329_19330_19331 BTFL_WMUS_TOV IM_R5.indd 6319328_19329_19330_19331 BTFL_WMUS_TOV IM_R5.indd 63 2023-05-11 7:21 PM2023-05-11 7:21 PM

64
Tostado/Panecillo
1. Mantener presionado el botón TOAST/BAGEL (Tostado/Panecillo) para cambiar
de TOAST (Tostado) a BAGEL (Panecillo) y de nuevo a TOAST (Tostado).
2. Deslizar la rejilla de alambre hasta la posición de estante central y
colocar el pan, las rosquillas, los waes congelados, las masas congeladas
para tostador, los alimentos preparados para tostador, etc.
3. Cuando tueste panecillos, rosquillas inglesas o alimentos para tostador,
colocarlos con el lado cortado hacia arriba en la rejilla de alambre.
(Figura 2).
4. El calor hornea la parte superior de los panecillos y calienta su interior.
Utilizar BAGEL (Panecillo) para tostar rosquillas inglesas o panes
especiales de rebanada gruesa que solo requieren que se tueste la parte
superior.
NOTA: Cuando tueste panes congelados, panecillos o alimentos para tostador,
aumente el ajuste de tono al Nivel 1.
Hornear, asar, galletas, cocción lenta, recalentar y deshidratar
1. Presionar el botón START/MENU (Iniciar/Menú); sonará un tono.
2. Presionar +, - hasta que la FUNCIÓN deseada se ilumine en la pantalla.
Hornear
NOTA: La velocidad del ventilador de convección predeterminada para HORNEAR
está DESACTIVADA. Si se necesita HORNEAR POR CONVECCIÓN, utilizar el control del
ventilador de convección para girar el ventilador a la velocidad 3 ALTA, 2 MEDIA
o 1 BAJA.
NOTA: TOSTAR es un término que se aplica a menudo cuando se utilizan los botones
BAKE (Hornear) o CONVECTION BAKE (Hornear por convección) para cocinar carnes.
1. Utilizar el control del ventilador de convección para encender el
ventilador. Utilizar BAKE (Hornear) o CONVECTION BAKE (Hornear por
convección) para hornear guisos, pasteles, galletas, tartas, bizcochos,
aves, ternera, cerdo, etc.
19328_19329_19330_19331 BTFL_WMUS_TOV IM_R5.indd 6419328_19329_19330_19331 BTFL_WMUS_TOV IM_R5.indd 64 2023-05-11 7:21 PM2023-05-11 7:21 PM

65
2. La función CONVECTION BAKE/ROAST (HORNEAR/TOSTAR POR CONVECCIÓN) retiene
los jugos, favorece el dorado y puede acortar el tiempo de cocción sin
necesidad de dar la vuelta ni untar.
3. Para ASAR carnes o pescados, utilizar la bandeja para hornear. Colocar la
carne o el pescado en la bandeja para hornear. Los jugos o la grasa gotearán
en la bandeja, y reducirán las salpicaduras durante el asado. (Figura 1).
4. Utilizar solo la bandeja para hornear/asar al momento de hornear alimentos
como bizcochos, galletas o aperitivos calientes. Si utiliza su propia
fuente de horno, deslizar la rejilla de alambre hasta la posición de estante
central o inferior. Colocar con cuidado la fuente de horno directamente
sobre la rejilla de alambre y cerrar la puerta de vidrio.
PRECAUCIÓN: Asegurarse de que la fuente de horno esté al menos a 2,5 cm (1
in) del elemento de calentamiento superior.
Galletas
1. La exibilidad y precisión milimétrica del horno tostador lo hacen
perfecto para hornear una amplia variedad de tipos de galletas: masas de
galletas caseras, frescas, refrigeradas o congeladas, galletas, rollos de
canela o de media luna; todos pueden utilizarse para obtener resultados
fabulosos.
NOTA: La cantidad de masa por galleta o el espesor de la galleta también
pueden variar el tiempo de cocción.
2. Colocar la rejilla para hornear/asar en la posición de estante central.
ADVERTENCIA: NUNCA colocar papel de aluminio encima de la bandeja para
hornear/asar. Esto atrapa la grasa y puede provocar un incendio.
Cocción lenta
El horno tostador con freidora de aire digital tiene capacidad para una cazuela
de 20,3 cm × 30,5 cm (8 in × 12 in).
Recalentar
El horno tostador con freidora de aire digital es ideal para recalentar sus
platos favoritos y las sobras de comida.
19328_19329_19330_19331 BTFL_WMUS_TOV IM_R5.indd 6519328_19329_19330_19331 BTFL_WMUS_TOV IM_R5.indd 65 2023-05-11 7:21 PM2023-05-11 7:21 PM

66
Deshidratar
1. Utilizar SIEMPRE la canasta de malla para freidora de aire/deshidratador
al DESHIDRATAR. Las bajas temperaturas precisas secan los alimentos
uniformemente sin cocinarlos ni sobrecalentarlos.
2. DESHIDRATAR combina el calor bajo y constante con la potencia estable del
ventilador de convección.
3. El secado automático de su horno tostador hace que la deshidratación
casera sea tan sencilla como graticante y garantiza unos resultados
saludables, seguros y sin conservantes.
NOTA: Dar vuelta los alimentos a la mitad, o varias veces, durante el
tiempo de DESHIDRATACIÓN.
Sugerencias sobre las funciones de Beautiful
PIZZA
NOTA: Si las instrucciones del paquete no indican los tiempos de
cocción por convección, bajar la TEMPERATURA 10 ºC (50 ºF) y vigilar
cuidadosamente el progreso de la cocción.
• La versatilidad de este horno tostador digital le permite cocinar una
gran variedad de pizzas, como pizza fresca o congelada, de masa na,
rellena o de plato hondo, a la perfección en todo momento.
• Utilizar los controles de TIEMPO y TEMPERATURA para obtener resultados
de horneado uniformes y precisos.
TOSTADO/PANECILLO
• ADVERTENCIA: Tener mucho cuidado al tostar productos de pastelería con
glaseado líquido o rellenos abiertos.
• Cuando tueste más de un panecillo, utilizar mitades de tamaño, grosor y
frescura similares.
• Los panecillos rancios, los panecillos nos o los productos de pan
dulce, como las pastas de té y el pan de frutas, se doran mucho más
rápido que el pan normal, por lo que hay que reducir el tiempo de
tostado.
19328_19329_19330_19331 BTFL_WMUS_TOV IM_R5.indd 6619328_19329_19330_19331 BTFL_WMUS_TOV IM_R5.indd 66 2023-05-11 7:21 PM2023-05-11 7:21 PM
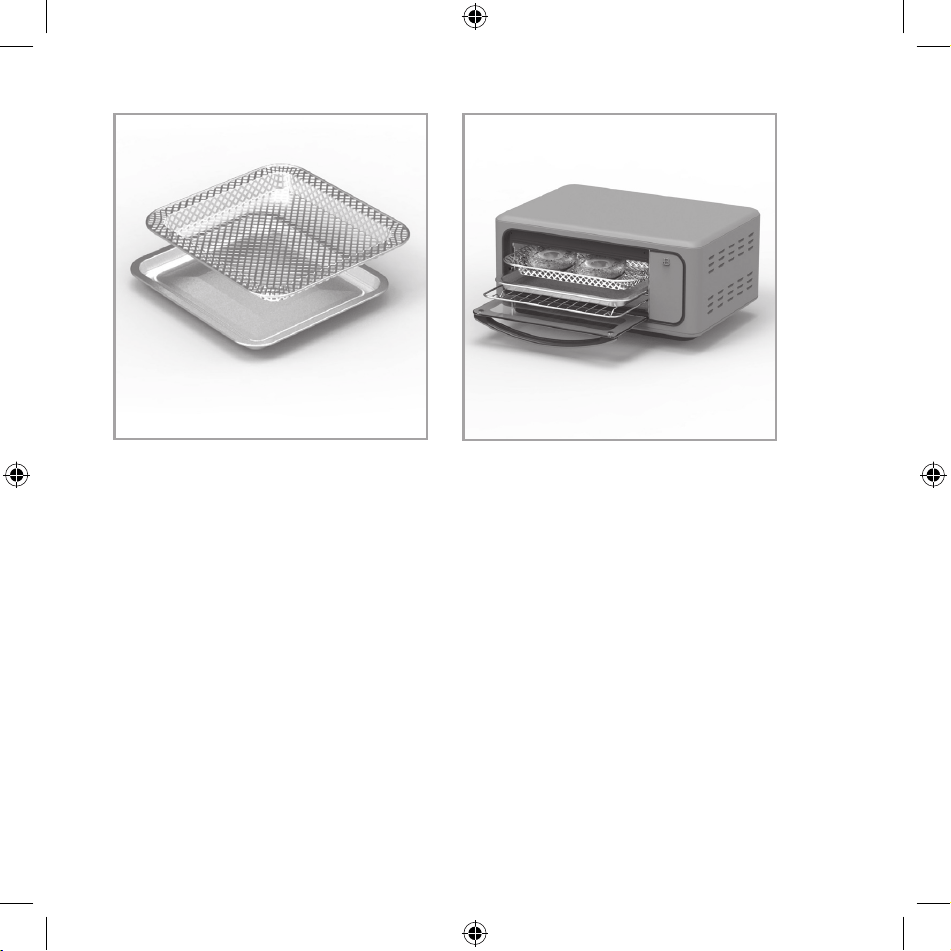
67
FREÍR
• Comprobar siempre los alimentos a mitad del tiempo de cocción para
determinar el tiempo de cocción y la temperatura nales.
• Secar siempre los alimentos antes de cocinarlos para favorecer el dorado
y evitar el exceso de humo.
• Para obtener resultados más crujientes, freír al aire pequeñas cantidades
de alimentos recién rebozados. Crear más supercie cortando los alimentos
en trozos más pequeños. Presionar el rebozado sobre los alimentos para
ayudar a que se adhiera. Refrigerar los alimentos rebozados durante al
menos 30 minutos. Rociar con aceite antes de freír al aire.
• El aceite vegetal o el aceite de oliva en aerosol son más efectivos, ya
que se distribuye de manera uniforme y se necesita menos cantidad.
• Colocar los alimentos rebozados en la canasta para freidora de aire/
deshidratador de forma que no se toquen para permitir el ujo de aire en
todas las supercies.
Figura 1 Figura 2
19328_19329_19330_19331 BTFL_WMUS_TOV IM_R5.indd 6719328_19329_19330_19331 BTFL_WMUS_TOV IM_R5.indd 67 2023-05-11 7:21 PM2023-05-11 7:21 PM

68
• No llenar demasiado la canasta para freidora de aire/deshidratador con
alimentos. NUNCA llenar la canasta para freidora de aire/deshidratador a
más de 2/3 de su capacidad. Al freír verduras frescas, no recomendamos
agregar más de 3 tazas de alimentos a la canasta para freidora de aire/
deshidratador.
HORNEAR
• Cuando use HORNEAR POR CONVECCIÓN, bajar la temperatura de la receta de
horneado en 10 °C (50 °F) a un mínimo de 149 °C (300 °F) al momento de
hornear pasteles, tartas, galletas y pan.
• La posición de estante dependerá del tamaño de los alimentos que se
preparen. Es importante colocar los alimentos lo más cerca posible del
centro del horno tostador para garantizar una cocción uniforme.
• Los moldes oscuros u opacos absorben el calor con mayor rapidez; los
alimentos se hornearán más rápido y la corteza se dorará más fácilmente
que en moldes brillantes.
• Elegir recipientes para hornear de metal, vidrio resistente al horno y
cerámica.
• Revisar las instrucciones del paquete para determinar si el recipiente
es adecuado para su uso en un horno convencional o tostador.
ASAR/ASAR POR CONVECCIÓN
• ASAR POR CONVECCIÓN se utiliza para cortes de carne más nos y tiernos.
• Secar carnes y pescados marinados antes de asarlos. Secar SIEMPRE la
carne con palmaditas para reducir el humo y favorecer el dorado durante
el asado.
• Para acelerar el dorado y agregar sabor, untar los cortes magros de
carne, pollo y pescado con aceite o mantequilla derretida.
• Quitar el exceso de grasa de la carne y marcar los bordes para evitar
que se ondulen.
• Descongelar las carnes y los pescados antes de asarlos.
• El TIEMPO DE ASADO se determina en función del punto de cocción deseado
y la distancia entre el alimento y los elementos de calentamiento
superiores. Utilizar siempre un termómetro para carne.
19328_19329_19330_19331 BTFL_WMUS_TOV IM_R5.indd 6819328_19329_19330_19331 BTFL_WMUS_TOV IM_R5.indd 68 2023-05-11 7:21 PM2023-05-11 7:21 PM

69
DESHIDRATAR
• Deshidratar alimentos frescos y maduros para conservar los nutrientes y
potenciar el sabor.
Instrucciones de mantenimiento para el usuario
Este electrodoméstico requiere poco mantenimiento. No contiene piezas que
pueda reparar el usuario. No tratar de repararlo. Toda reparación que requiera
desarmado y que no sea una operación de limpieza debe ser realizada por un
técnico calicado en reparación de electrodomésticos.
Instrucciones de cuidado y limpieza
1. Desenchufar el horno tostador y dejar que este y todos los accesorios se
enfríen completamente antes de limpiarlos.
2. Limpiar el exterior del horno tostador con un paño húmedo y secarlo
bien. Puede utilizarse un limpiador líquido no abrasivo para las manchas
difíciles. Enjuagar y secar bien. No utilizar estropajos metálicos ni
limpiadores abrasivos que rayen la supercie.
3. Limpiar el interior con un limpiador suave o no abrasivo, y un estropajo de
plástico después de cada uso para evitar acumulaciones. No frotar demasiado
fuerte, ya que la supercie puede rayarse.
4. Para eliminar los alimentos horneados, verter una pequeña cantidad de aceite
de cocina sobre los alimentos y dejar reposar de 5 a 10 minutos. Retirar la
comida reblandecida con un paño suave.
No utilizar lana de acero, estropajos ni limpiadores abrasivos.
5. Enjuagar y secar bien antes de cerrar la puerta de vidrio. Limpiar la puerta
de vidrio con un paño o una esponja humedecidos con agua tibia y jabonosa.
Secar bien.
6. Lavar la canasta para freidora de aire/deshidratador, la bandeja para
hornear/asar, la rejilla de alambre y la bandeja para migas con agua
jabonosa, y secarlas bien. Los accesorios del horno tostador pueden lavarse
en el lavavajillas.
19328_19329_19330_19331 BTFL_WMUS_TOV IM_R5.indd 6919328_19329_19330_19331 BTFL_WMUS_TOV IM_R5.indd 69 2023-05-11 7:21 PM2023-05-11 7:21 PM

70
7. Si se acumularon migas y derrames en la bandeja para migas, limpiarla con
un paño húmedo. Secar siempre bien la bandeja para migas antes de volver a
colocarla.
8. NO utilizar limpiadores abrasivos ni estropajos metálicos para limpiar la
bandeja para hornear/asar, la rejilla de alambre o la bandeja para migas.
Para las manchas difíciles, limpiar con un estropajo de malla de nailon o
poliéster, y un limpiador suave no abrasivo. Enjuagar y secar bien.
PRECAUCIÓN: NO utilizar limpiadores de horno en aerosol ni de otro tipo. El
uso de este tipo de limpiadores puede causar daños estéticos o eléctricos al
horno tostador.
Instrucciones de almacenamiento
1. Desenchufar la unidad, dejarla enfriar y limpiarla antes de guardar.
2. Deslizar el conjunto de horneado/asado (rejilla de alambre y bandeja para
hornear/asar) en la posición de estante inferior.
3. Guardar el horno tostador en su caja en un lugar limpio y seco.
4. No guardar nunca el electrodoméstico cuando esté caliente o enchufado.
5. No enrollar nunca el cable alrededor del electrodoméstico.
19328_19329_19330_19331 BTFL_WMUS_TOV IM_R5.indd 7019328_19329_19330_19331 BTFL_WMUS_TOV IM_R5.indd 70 2023-05-11 7:21 PM2023-05-11 7:21 PM

Garantía limitada de dos años
Mediante la presente, Sensio Inc.
dba Made by Gather™. garantiza que,
durante el plazo de DOS AÑOS a partir
de la fecha de compra, este producto
no presentará defectos mecánicos en
el material ni en la mano de obra, y
durante 90 días, no los presentará en
las piezas no mecánicas. A su entera
discreción, Sensio Inc. dba Made by
Gather™ que resulte defectuoso, o
emitirá un reembolso por el producto
durante el plazo de garantía.
Esta garantía es válida únicamente
para el comprador minorista
original a partir de la fecha de
compra minorista inicial y no es
transferible. Conserve el recibo
de compra original, ya que se exige
una prueba de compra para obtener
la validación de la garantía. Las
tiendas minoristas no tienen derecho
a alterar, modicar ni corregir
de ninguna manera los términos y
condiciones de la garantía.
Exclusiones:
La garantía no cubre el desgaste
normal de las piezas ni el daño
ocasionado por cualquiera de las
siguientes causas: uso negligente
del producto, uso de un voltaje o
corriente incorrectos, mantenimiento
de rutina inadecuado, uso
contrario al de las instrucciones
de funcionamiento, desarmado,
reparación o alteración a cargo
de personas que no sean miembros
del personal calicado de Sensio
Inc. dba Made by Gather™ Asimism o,
la garantía no cubre actos de
la naturaleza, como incendios,
inundaciones, huracanes o tornados.
Sensio Inc. dba Made by Gather™
no asumirá responsabilidad por
daños incidentales o resultantes
ocasionados por la violación
de cualquier garantía expresa
o implícita. Salvo en la medida
en que lo prohíban las leyes
aplicables, cualquier garantía
implícita de comerciabilidad o
aptitud para un propósito particular
se limita temporalmente a la
duración de la garantía. Algunos
estados, provincias o jurisdicciones
no permiten la exclusión ni la
limitación de daños incidentales
o resultantes, o limitaciones
sobre la duración de una garantía
implícita y, por lo tanto, es posible
que las exclusiones o limitaciones
mencionadas no le correspondan.
La garantía cubre derechos legales
especícos que pueden variar de
un estado, una provincia o una
jurisdicción a otros.
71
19328_19329_19330_19331 BTFL_WMUS_TOV IM_R5.indd 7119328_19329_19330_19331 BTFL_WMUS_TOV IM_R5.indd 71 2023-05-11 7:21 PM2023-05-11 7:21 PM

INSIDE back cover
72
Cómo obtener el servicio de garantía
Debe comunicarse con el Servicio
de atención al cliente a nuestro
número telefónico gratuito:
1-877-775-3564. Un representante
del Servicio de atención al cliente
intentará resolver los problemas
referidos a la garantía por
teléfono. Si este no puede resolver
el problema, le proporcionarán un
número de caso y le solicitarán que
devuelva el producto a Sensio Inc.
dba Made by Gather™ Adhiera una
etiqueta al producto que incluya:
su nombre, dirección, número
telefónico de contacto durante el
día, número de caso y descripción
del problema. Además, incluya una
copia del recibo de compra original.
Envuelva cuidadosamente el producto
etiquetado con el recibo de compra,
y envíelo (con el envío y el seguro
prepagados) a la dirección de Sensio
Inc. dba Made by Gather™. Sensio
Inc. dba Made by Gather™ no asumirá
obligación ni responsabilidad alguna
por el producto devuelto que esté
en el trayecto hacia el Centro de
servicio al cliente de Sensio Inc.
dba Made by Gather™
®
19328_19329_19330_19331 BTFL_WMUS_TOV IM_R5.indd 7219328_19329_19330_19331 BTFL_WMUS_TOV IM_R5.indd 72 2023-05-11 7:21 PM2023-05-11 7:21 PM

INSIDE back cover
19328_19329_19330_19331 BTFL_WMUS_TOV IM_R5.indd 7319328_19329_19330_19331 BTFL_WMUS_TOV IM_R5.indd 73 2023-05-11 7:21 PM2023-05-11 7:21 PM
BACK CoverBACK Cover
19328_19329_19330_19331 R5
19328_19329_19330_19331 BTFL_WMUS_TOV IM_R5.indd 7419328_19329_19330_19331 BTFL_WMUS_TOV IM_R5.indd 74 2023-05-11 7:21 PM2023-05-11 7:21 PM