
AUTOMATIC BATTERY CHARGER &
MAINTAINER 6/12V 1A
Thank you for purchasing a Sealey product. Manufactured to a high standard, this product will, if used according to these
instructions, and properly maintained, give you years of trouble free performance.
IMPORTANT: PLEASE READ THESE INSTRUCTIONS CAREFULLY. NOTE THE SAFE OPERATIONAL REQUIREMENTS, WARNINGS
& CAUTIONS. USE THE PRODUCT CORRECTLY AND WITH CARE FOR THE PURPOSE FOR WHICH IT IS INTENDED. FAILURE TO
DO SO MAY CAUSE DAMAGE AND/OR PERSONAL INJURY AND WILL INVALIDATE THE WARRANTY. KEEP THESE INSTRUCTIONS
SAFE FOR FUTURE USE.
1. SAFETY
1.1. ELECTRICAL SAFETY
WARNING! It is the user’s responsibility to check the following:
Check all electrical equipment and appliances to ensure that they are safe before using.
Inspect power supply leads, plugs and all electrical connections for wear and damage.
Ensure that the insulation on all cables and on the appliance is safe before connecting it to the power supply.
8 DO NOT use worn or damaged cables, plugs or connectors.
9 Ensure that any faulty item is repaired or is replaced immediately by a qualied electrician.
9 If the cable or plug is damaged during use, switch o the electricity supply and remove from use.
9 If the power supply cord is damaged, it must be replaced by the manufacturer, its service agent or qualied person in order to avoid a
hazard.
Ensure that repairs are carried out by a qualied electrician.
9 Sealey recommend that an RCD (Residual Current Device) is used with all electrical products.
IMPORTANT: Ensure that the voltage rating on the appliance suits the power supply to be used and that the plug is tted with the
correct fuse.
8 DO NOT pull or carry the appliance by the power cable.
8 DO NOT pull the plug from the socket by the cable.
▲ DANGER! BE AWARE, LEAD-ACID BATTERIES GENERATE EXPLOSIVE GASES DURING NORMAL BATTERY OPERATION.
FOR THIS REASON, IT VERY IMPORTANT TO READ AND FOLLOW THESE INSTRUCTIONS CAREFULLY, EACH TIME YOU USE
THE CHARGING EQUIPMENT.
Follow these instructions and those published by the battery and vehicle manufacturers, and the maker of any equipment you intend to
use in the vicinity of the battery. Remember to review warning marks on all products and on engines.
WARNING! Modern vehicles contain extensive electronic systems.
You are required to check with the vehicle Manufacturer, for any specic instructions regarding the use of this type of equipment on each
vehicle.
No liability will be accepted for damage / injury, where this product is not used in accordance with all instructions.
1.2. PERSONAL PRECAUTIONS
9 Ensure there is another person within hearing range of your voice and close enough to come to your aid, should a problem arise when
working near a lead-acid battery.
9 Wear safety eye protection and protective clothing. Avoid touching eyes while working near battery.
9 Have fresh water and soap nearby in case battery acid contacts skin, clothing or eyes.
9 Wash immediately with soap and water if battery acid contacts skin or clothing. If acid enters eye, flush eye immediately with cool, clean
running water for at least 15 minutes and seek immediate medical attention.
9 Remove personal metallic items such as rings, bracelets, necklaces and watches. A lead-acid battery can produce a short-circuit current
which is high enough to weld a ring or the like to metal, which would cause severe burns.
9 Ensure hands, clothing (especially belts) are clear of fan blades and other moving or hot parts of engine, remove ties and contain long hair.
8 DO NOT smoke or allow a spark or flame in the vicinity of battery or engine.
1.3. GENERAL SAFETY INSTRUCTIONS
9 Familiarise yourself with the application and limitations of the charger as well as the potential hazards. Also refer to the vehicle
manufacturer’s hand book. IF IN ANY DOUBT CONSULT A QUALIFIED ELECTRICIAN.
9 Ensure the charger is in good order and condition before use. If in any doubt do not use the unit, contact your Sealey Stockist.
9 Use the charger in the upright position only and ensure it is placed on a stable surface which will adequately support its weight.
9 Ensure the charger is disconnected from the mains supply before attaching/detaching the power clamps to/from the battery.
9 Keep tools and other items away from the engine and ensure you can see the battery and working parts of engine clearly.
9 Ensure the output of the charger is the same voltage as the battery.
9 Ensure that during charging, the charger is placed in a location where there is sufficient ventilation to prevent the build up of explosive
gases from a lead acid battery.
9 If battery has caps to access the battery fluid, remove the caps and check the fluid level before connecting the power clamps. If
necessary top-up the battery with distilled water by referring to the battery manufacturer’s instructions (Apply the personal safety
precautions described in part 1.2).
9 If the charger receives a sharp knock or blow the unit must be checked by a qualified service agent before using.
9 If the battery terminals are corroded or dirty clean them before attaching the power clamps.
SBC1 Issue 1 08/11/24
Original Language Version
© Jack Sealey Limited
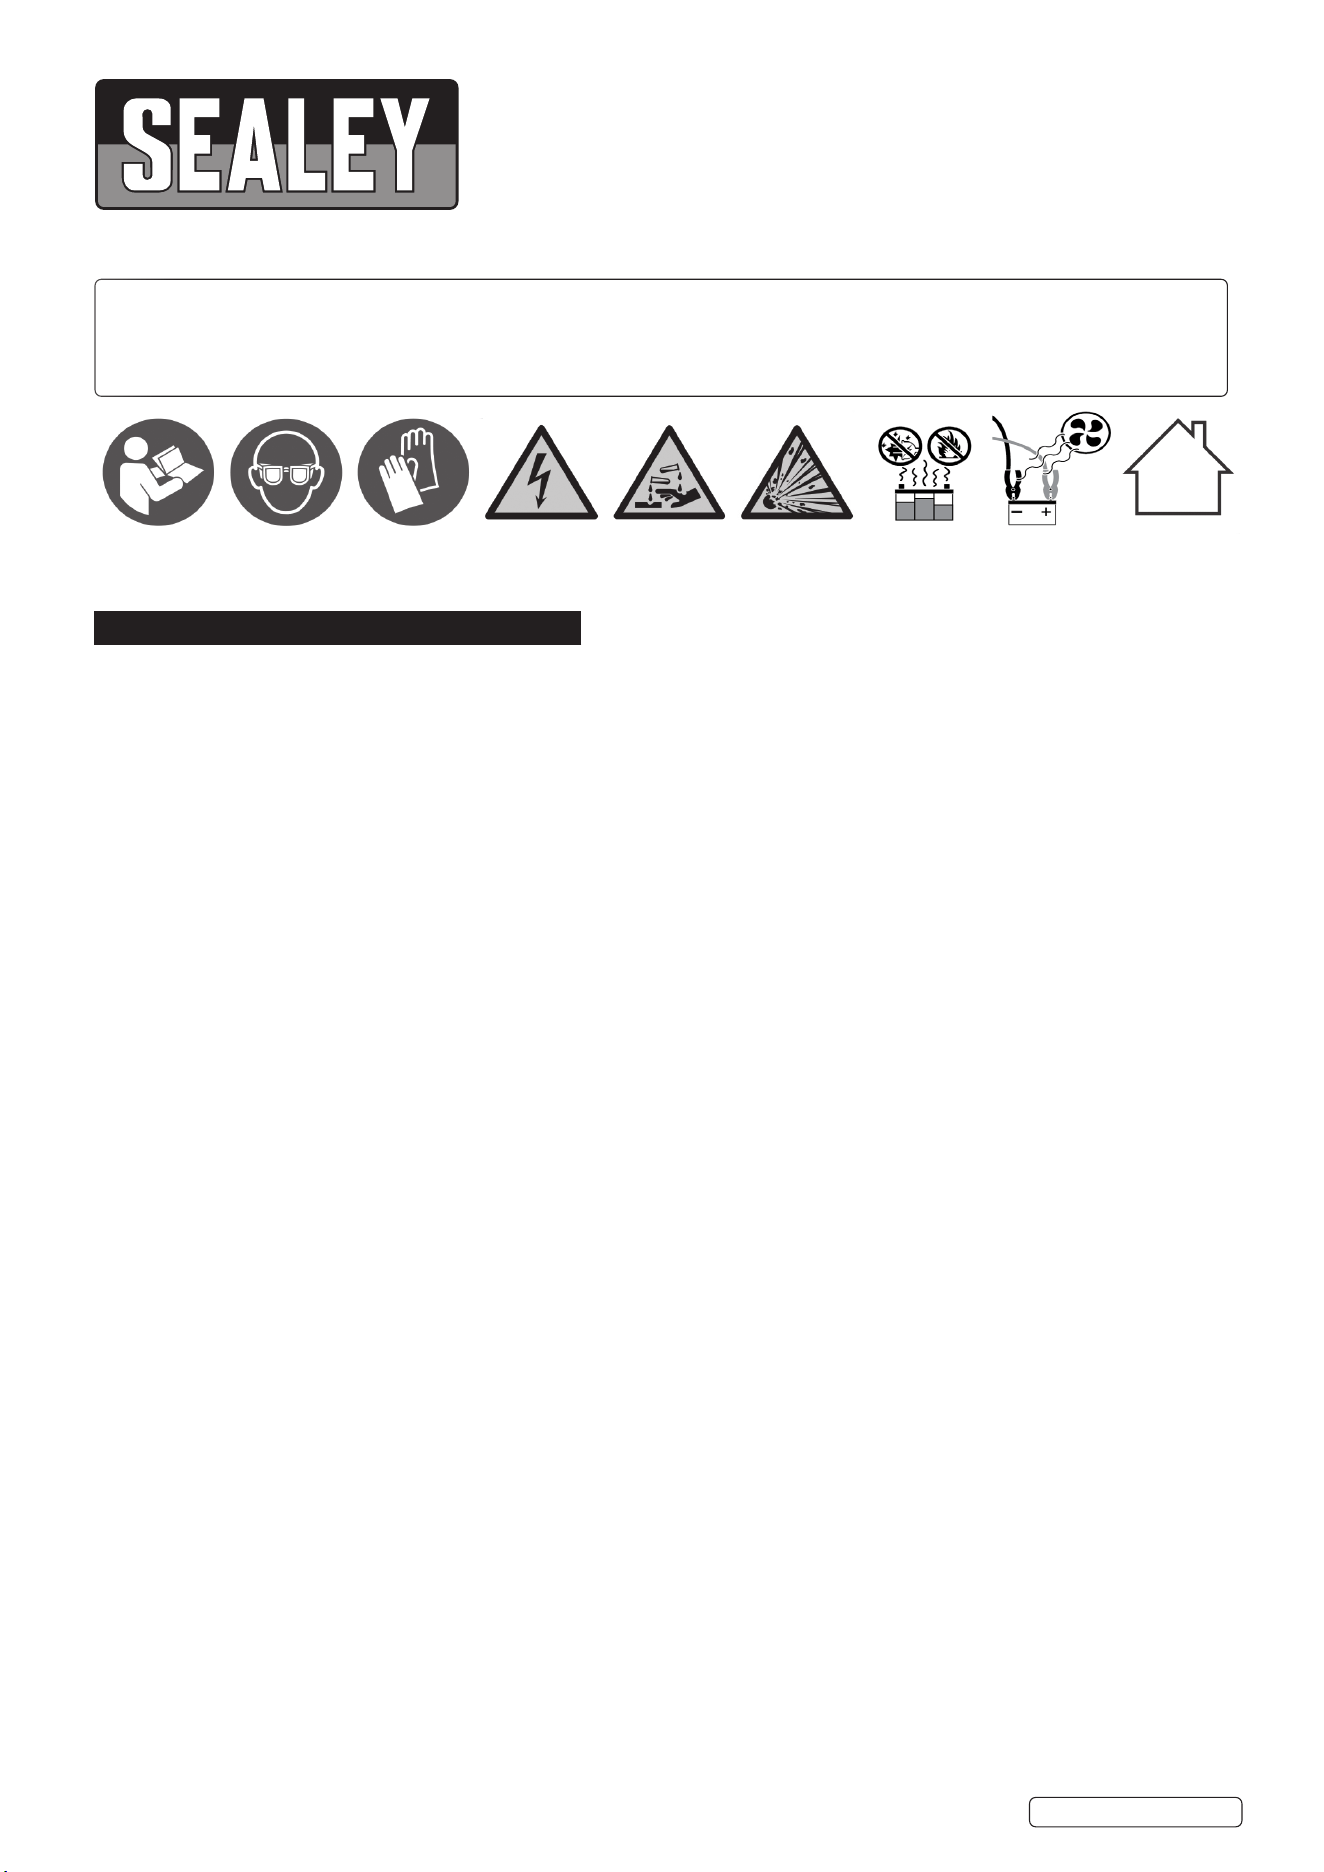
Refer to
instructions
Electrical shock
hazard
Wear eye
protection
Wear
protective
gloves
Warning
corrosive
substance
Warning:
explosive
material
Keep away
from sources
of ignition
Use in well
ventilated
areas
Indoor use
only
MODEL NO: SBC1
9 Keep children and unauthorised persons away from the working area.
9 Ambient Temperature 20°C - 40°C.
8 DO NOT dis-assemble the charger for any reason. The charger must only be checked by qualified service personnel.
8 DO NOT try to charge a non-rechargeable battery.
8 DO NOT try to start engine when charger is connected to battery.
WARNING! To prevent the risk of sparking, short circuit and possible explosion DO NOT drop metal tools in the battery area, or allow
them to touch the battery terminals.
8 DO NOT allow power clamps to touch each other or to make contact with any metallic part of the vehicle.
8 DO NOT cross connect power leads from charger to battery. Ensure positive (+/RED) is to positive and negative (-/BLACK) is to negative.
8 DO NOT pull the cables or clamps from the battery terminals.
8 DO NOT use the charger outdoors, or in damp, or wet locations and DO NOT operate within the vicinity of flammable liquids or gases.
8 DO NOT use charger inside vehicle or inside engine compartment.
9 Ensure there is effective ventilation to prevent a build-up of explosive gases.
8 DO NOT use the charger for a task for which it is not designed.
WARNING! DO NOT simultaneously charge batteries of different capacities or discharge levels.
WARNING! DO NOT charge a frozen battery.
WARNING! If a fuse blows, ensure it is replaced with an identical fuse type and rating. Use only Sealey genuine parts.
9 When not in use, store the charger carefully in a safe, dry, childproof location.
NOTE: Children from age 8 years and above, persons with reduced physical, sensory, or mental capabilities those with lack
of experience and knowledge can use the appliance, if they have been given supervision or instruction concerning use of the
appliance in a safe way to understand the hazards involved.
WARNING! Children shall NOT play with the appliance.
9 Cleaning and user maintenance on the appliance shall not be made by children without supervision.
9 The appliance shall be disconnected from its power source during service and when replacing parts.
9 During charging, the battery must be placed in a well-ventilated area.
9 The battery terminal not connected to the chassis has to be connected rst. The other connection is to be made to the chassis, remote
from the battery and fuel line. The battery charger is then to be connected to the supply mains.
9 After charging, disconnect the battery charger from the supply mains. Then remove the chassis connection and then the battery
connection.
9 The number of batteries that can be charged at any one time is 1.
9 Keep this manual in a safe place, so that the information is available at all times. If you give the equipment to any other person, hand
over these operating instructions and safety regulations as well. We cannot accept any liability for damage or accidents which arise due
to a failure to follow these instructions and the safety instructions.
2. INTRODUCTION
Fully automatic 1A 6/12V 5-stage intelligent battery charger, designed for charging and maintaining a variety of batteries including
VRLA (Lead Acid), GEL, AGM/EFB and Leisure on 6/12V systems. Suitable for trickle charging a variety of batteries, the charger reacts
continuously to battery condition and delivers whatever charge rate is required. Microprocessors constantly regulate the voltage pattern
allowing the battery to be recharged fully and safely without fear of overcharging. Once fully charged ‘oat’ mode is activated and the
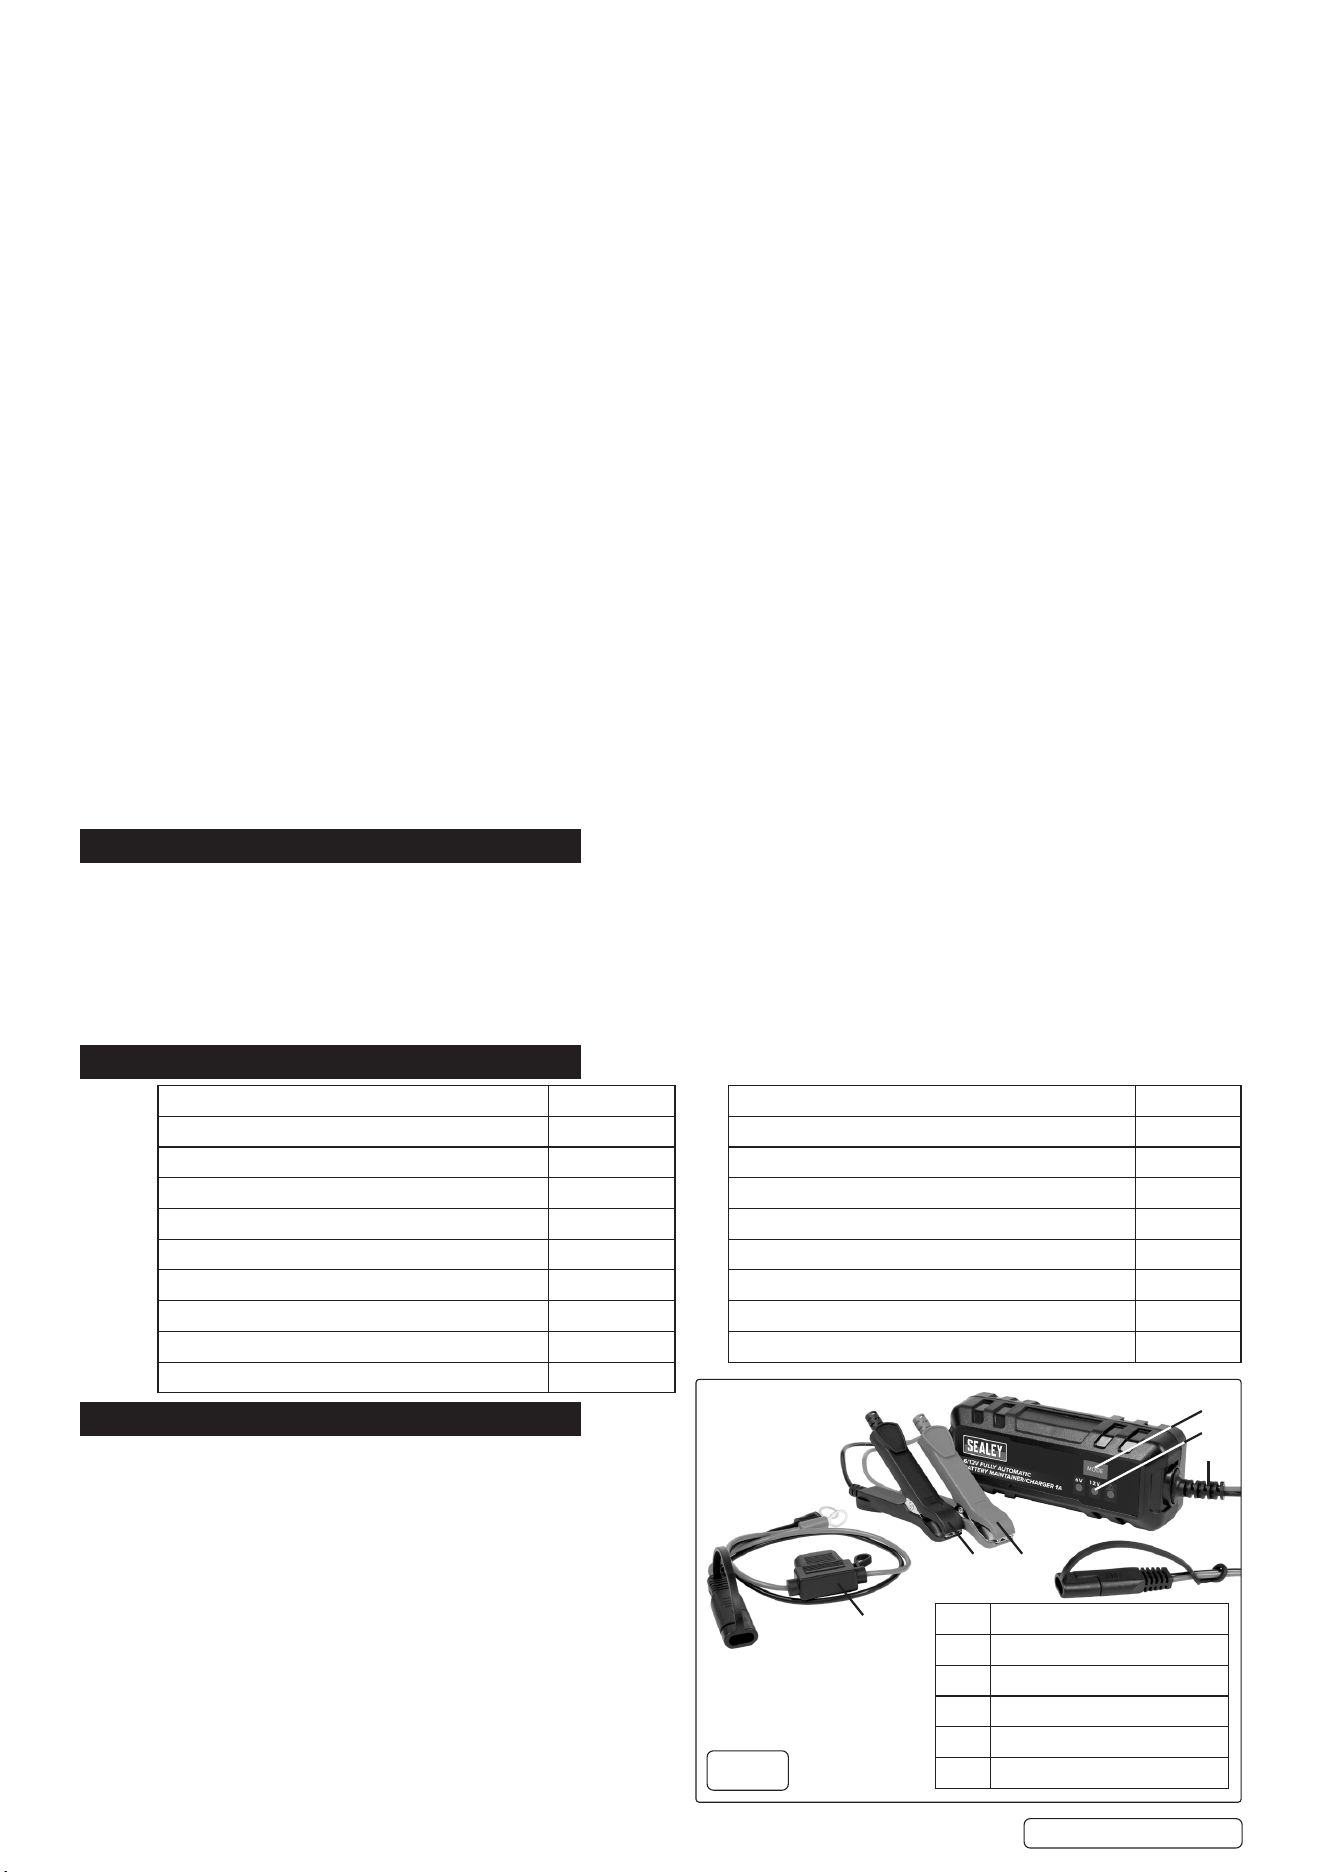
charger enters a monitoring status. Supplied with SAE “quick” connectors on leads and battery terminal eyelets. Safety features include
reverse polarity, short circuit, over temperature, over voltage and overcharging protection. Easy-to-read LED indicator will illuminate
during the charging process.
3. SPECIFICATION
4. ITEMS SUPPLIED
4.1. Open the packaging and take out the equipment with care.
4.1.1. Remove the packaging material and any packaging and/or
transportation braces (if available).
4.1.2. Check to see if all items are supplied. (See g.1).
4.1.3. Inspect the equipment and accessories for transport damage.
4.1.4. If possible, please keep the packaging until the end of the
guarantee period.
▲ DANGER! The equipment and packaging material are not toys.
8 DO NOT let children play with plastic bags, foils or small parts.
There is a danger of swallowing or suocating!
4.2. PROPER USE
4.2.1. The charger is designed for charging non-maintenance-free or
maintenance-free 6V/12V lead acid batteries (wet / Ca/Ca / EFB
batteries) and for lead gel and AGM batteries which are used in
motor vehicles.
Original Language Version
© Jack Sealey Limited
SBC1 Issue 1 08/11/24
MODEL NO. SBC1
Cable & Clamp Length: 1.5m
Nett Weight: 0.35kg
Plug Type: 3-Pin BS
Output: 6/12V
Zero Volt Charging: No
Battery Support/DC Supply Mode: No
Supply (Current): 13A
Supply (Voltage): 230V
Charger Type: Traditional (T) Intelligent (HF): HF
Battery Range: 4-30Ah
Max Size Battery in 12hrs from Discharged: 20Ah
Output Charge Peak: 1A
VRLA (Lead Acid): Yes
GEL: Yes
AGM/EFB: Yes
Lithium: No
Leisure (Deep Discharge): Yes
IP Rating: IP65
1
2
4
5
3
6
1 Mode
2 LED display
3 Mains power cable
4 Charging cable, red (+)
5 Charging cable, black (-)
6 O-ring with Fuse
g.1
4.2.2. The equipment must not be used for charging lithium iron phosphate rechargeable batteries (e.g. LiFePO4) or other lithium
rechargeable batteries. The equipment is designed for mobile use only and not for installation in caravans, mobile homes or similar
vehicles. The equipment cannot be used as a buer power supply, e.g. while changing a battery. DO NOT expose the charger to rain or
snow.
5. OPERATION
5.1. Before you connect the equipment to the power supply make sure that the data on the specications label on the battery are identical
to the supply voltage of the charger.
▲ DANGER! DO NOT charge any frozen batteries.
NOTE: Please also refer to the instructions in the owner’s manuals for the car, radio, navigation system, etc.
5.2. AUTOMATIC CHARGING
5.2.1. The charger is a microprocessor controlled automatic charger, i.e. it is suitable in particular for charging maintenance-free batteries
and for the long-term charging and maintenance-charging of batteries which are not in constant use, e.g. for classic cars, recreational
vehicles, lawn tractors and the like. The integrated microprocessor enables charging in several steps. The nal charging step,
maintenance charging, maintains the battery capacity at 95–100% and therefore keeps the battery fully charged at all times. The
charging operation does not need to be monitored. How ever, DO NOT leave the battery unattended if you charge it over an extended
period of time, so that you can disconnect it from the mains power supply in the event of a fault in the charger.
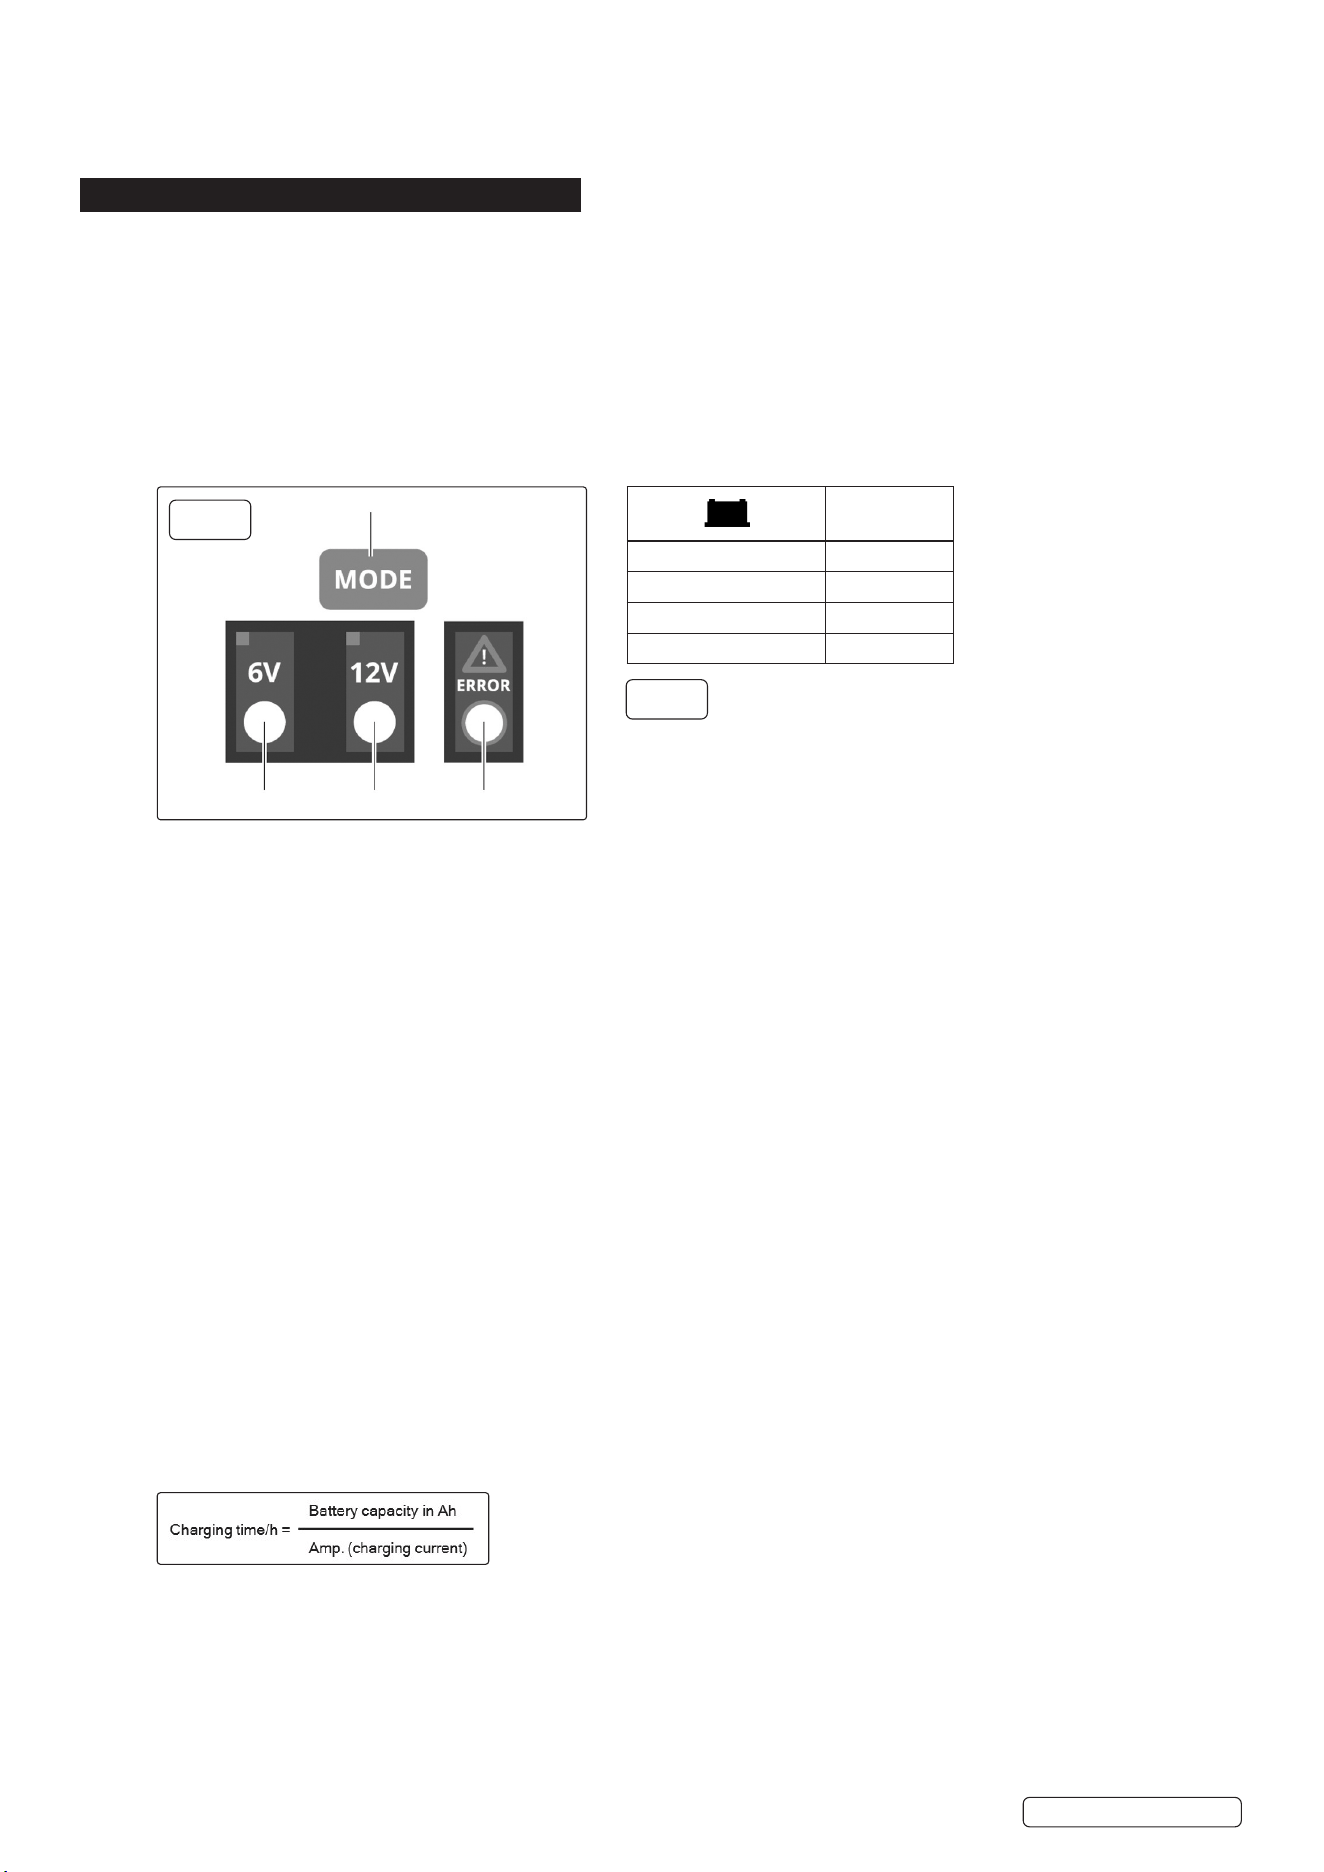
5.3. DISPLAY
5.3.1. A Charging of a 6V battery (lead acid battery, AGM battery and GEL battery). See g 2.
5.3.2. B Charging of a 12V battery (lead acid battery, AGM battery and GEL battery).
5.3.3. C Fault LED – the clamps are wrongly connected (reverse polarity), short-circuit, wrong charging voltage selected for 6V battery, faulty
battery.
5.4. CHARGING SETTINGS g.2
5.4.1. Connect the charger to the mains supply (check the technical data). All 3 LEDs will ash for a short time. Then the 12V LED will ash
rapidly. To set the charging voltage according to the battery voltage (6V or 12V), press the Mode button (g.2). Either the 6V or 12V
LED will ash rapidly depending on your selection. While charging is in progress, the applicable LED will ash slowly.
5.5. CHARGING THE BATTERY
• Release or remove the battery stoppers (if tted) from the battery.
• Check the acid level in the battery. If necessary, top up the battery with distilled water (if possible). IMPORTANT! Battery acid is
aggressive. Rinse o any acid splashes thoroughly with lots of water and seek medical advice if necessary.
• First connect the red charging cable to the positive pole of the battery.
• Then connect the black charging cable to the bodywork of the vehicle away from the battery and the petrol pipe. Either the 6V or 12V
LED will ash slowly depending on the battery voltage you have set.
WARNING! Under normal circumstances the negative battery pole is connected to the bodywork, proceed as described above. In
exceptional cases it is be possible that the positive battery pole is connected to the bodywork (positive earthing). In this case, connect
the black charger cable to the negative pole on the battery. Then connect the red charger cable to the bodywork at a point away from
the battery and the petrol pipe.
IMPORTANT! Charging may create dangerous explosive gases, and therefore you should avoid spark formation and naked ames
whilst the battery is charging. There is a risk of explosion! It is essential that you ventilate the rooms well.
• Once the battery is fully charged, the 6V or 12V LED will illuminate continuously.
• If the charger shows Battery fully charged after just a few minutes, this indicates that the battery capacity is low. The battery needs
replacing.
5.6. CALCULATING THE CHARGING TIME g.3
5.6.1. The charging time depends on the charge status of the battery. If the battery is fully discharged, the approximate charging time up to
approx. 80% charged can be calculated using the following formula:
The charging current should be 1/10 to 1/6 of the battery capacity.
5.7. ERROR LED (FIG. 3)
5.7.1. The error LED will ash (light up) in the following cases:
• If you have selected the wrong charging voltage (12V) for a 6V battery. The equipment fully charges the 6V battery and automatically
detects afterwards that the wrong charging voltage was selected.
• If the voltage of the battery is less than 3.5 V or more than 15 V. The battery is either unsuitable for charging or is defective. It is also
possible that other battery errors or faults can mean that the battery cannot be charged.
• If the terminal clamps are connected to the battery terminals with the wrong polarity. The protection against swapped poles ensures
that the battery and charger do not get damaged.
Original Language Version
© Jack Sealey Limited
SBC1 Issue 1 08/11/24
1
A B C
80%
3Ah 3h
10Ah 10h
20Ah 20h
30Ah 30h
g.2
g.3

Remove the charger from the battery and start the charging process from the beginning again.
• If there is a short circuit between the two terminal clamps (the metal parts of the clamps come into contact with each other). The pro-
tection against short circuits ensures that the battery and charger do not get damaged.
5.8. FINISHING CHARGING THE BATTERY
• Disconnect from mains supply.
• First disconnect the black charging cable from the bodywork.
• Then release the red charging cable from the positive pole on the battery.
IMPORTANT! In case of positive earthing, rst disconnect the red charging cable from the bodywork and then the black charging cable
from the battery.
• Screw or push the battery stoppers back into position (if there are any).
IMPORTANT! If the mains plug is pulled out but the charger cables are still connected to the battery, the charger will draw o a small
amount of electricity from the battery. We therefore recommend that you always completely remove the charger from the battery when
not in use.
5.9. OVERLOAD CUT-OUT
The charger is equipped with electronic protection against overload, short circuit and swapped poles. One or more ne fuses are also
tted. If the fuse suers a defect it must be replaced with a new fuse with the same amp value. If necessary, please contact Sealey
customer service centre.
5.10. MAINTENANCE AND CARE OF THE BATTERY
• Ensure that your battery is always tted securely.
• A perfect connection to the cable network of the electrical system must be ensured at all times.
• Keep the battery clean and dry. Apply a thin coating of grease to the connection terminals using an acid free, acid resistant grease.
• Check the level of the acid in batteries that are not maintenance free versions approximately every 4 weeks and top up with distilled
water if necessary.
6. MAINTENANCE
WARNING! ! Always pull out the mains power plug before starting any cleaning work.
9 There are no parts inside the equipment which require additional maintenance.
6.1. CLEANING
6.1.1. Keep all safety devices, air vents and the motor housing free of dirt and dust as far as possible. Wipe the equipment with a clean cloth
or blow it with compressed air at low pressure.
6.1.2. We recommend that you clean the device immediately each time you have nished using it.
6.1.3. Clean the equipment regularly with a moist cloth and some soft soap. DO NOT use cleaning agents or solvents; these could attack the
plastic parts of the equipment. Ensure that no water can seep into the device. The ingress of water into an electric tool increases the
risk of an electric shock.
6.2. STORAGE
6.2.1. Keep the charger cords loosely coiled during storage to prevent damage to the cords.
6.2.2. The charger should be placed in a dry room for storage. Any corrosion must be cleaned o the charging terminals.
6.3. WASTE DISPOSAL
6.3.1. BATTERIES: Only dispose of these items through motor vehicle workshops, special collection points or special waste collection points.
Ask your local council.
6.3.2. The equipment is supplied in packaging to prevent it from being damaged in transit. The raw materials in this packaging can be reused
or recycled. The equipment and its accessories are made of various types of material, such as metal and plastic. Never place defective
equipment in your household refuse. The equipment should be taken to a suitable collection center for proper disposal. If you do not
know the whereabouts of such a collection point, you should ask at your local council offices.
6.4. TROUBLESHOOTING
6.4.1. If the equipment is operated properly you shouldn’t experience any problems with malfunctions or faults. In the event of any
malfunctions or faults, please check the following before you contact your Sealey customer services.
Original Language Version
© Jack Sealey Limited
SBC1 Issue 1 08/11/24
FAULT POSSIBLE CAUSE REMEDY
Equipment does not charge up - Charger clamps connected incorrectly.
- Contact between the charger clamps.
- Battery defective.
- Wrong charging voltage selected.
- Connect the red clamp to the positive pole and the
back clamp to the bodywork
- Prevent contact.
- Have the battery checked by an expert and replace
it if necessary.
- Select the right charging voltage for the connected
battery.

Original Language Version
© Jack Sealey Limited
ENVIRONMENT PROTECTION
Recycle unwanted materials instead of disposing of them as waste. All tools, accessories and packaging should be sorted,
taken to a recycling centre and disposed of in a manner which is compatible with the environment. When the product
becomes completely unserviceable and requires disposal, drain any fluids (if applicable) into approved containers and
dispose of the product and fluids according to local regulations.
WEEE REGULATIONS
Dispose of this product at the end of its working life in compliance with the EU Directive on Waste Electrical and Electronic Equipment
(WEEE). When the product is no longer required, it must be disposed of in an environmentally protective way. Contact your local solid
waste authority for recycling information.
Sealey Group, Kempson Way, Suffolk Business Park, Bury St Edmunds, Suffolk. IP32 7AR
01284 757500 sales@sealey.co.uk www.sealey.co.uk
NOTE: It is our policy to continually improve products and as such we reserve the right to alter data, specications and component parts
without prior notice.
IMPORTANT: No Liability is accepted for incorrect use of this product.
WARRANTY: Guarantee is 12 months from purchase date, proof of which is required for any claim.
REGISTER YOUR
PURCHASE HERE
SBC1 Issue 1 08/11/24