Thank you for purchasing this Window Air Conditioner. Before operating this unit,
please read these instructions completely and keep the manual ready for further reference.
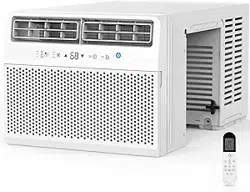
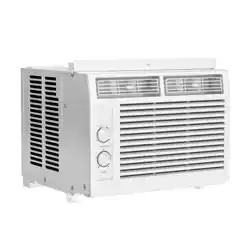
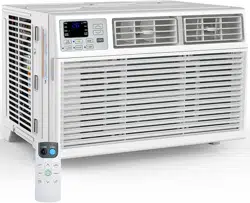
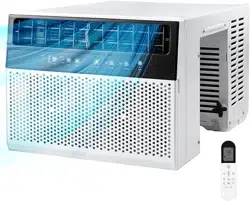
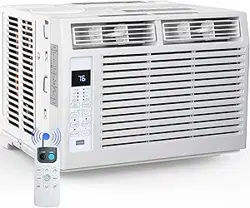
Window Air Conditioner
USER MANUAL
5000Btu, 6000Btu
ITEM NO. :A8505W-5K / A8506W-6K
MODEL NO. :
TWAC-05CRA1/L1U(DOE)
TWAC-06CRA1/L1U(DOE)
01
03
05
06
14
18
19
CONTENTS
Important Safety Instructions
Electrical Requirements
Packing List
Installation & Assembly Instructions
Using Your Air Conditioner
Care and Cleaning
Troubleshooting
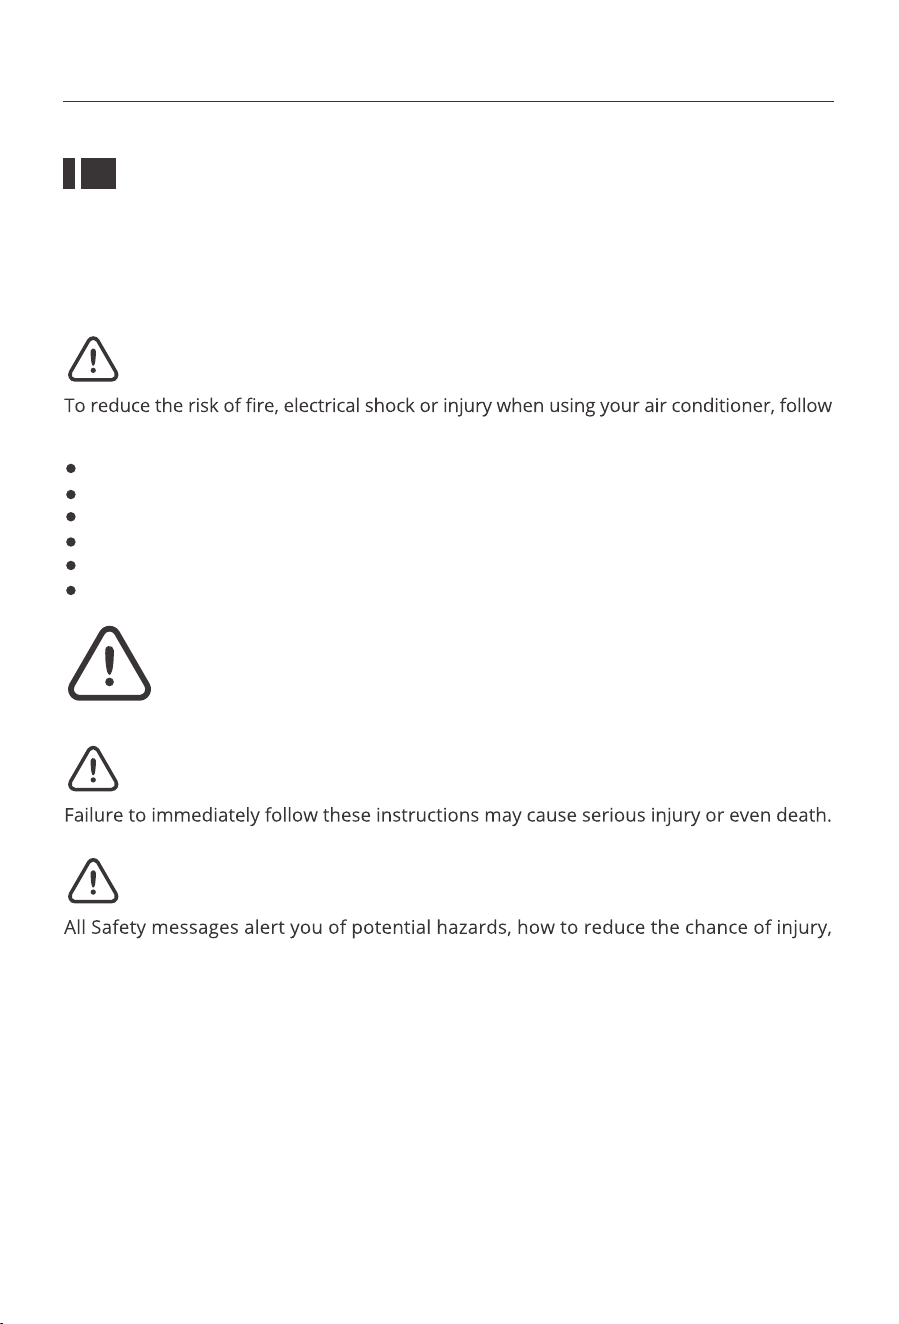
Important Safety Instructions
Before installing and using your air conditioner, please read this owner's manual carefully.
Store thismanual in a safe place for future reference. Your safety and the safety of others
is very important to us. Please pay attention to all safety messages outlined in this user
manual.
the basic precautions below:
This is a safety alert symbol. This symbol alerts you to potential hazards that
can harm you or others or even cause death. All safety messages will directly
follow the safety alert symbol and/or the words "DANGER" or "WARNING".
Warning
Danger
and what can happen if instructions are not followed correctly.
Warning
Plug into a grounded 3 prong outlet.
Do not remove the ground prong.
Do not use a plug adapter.
Do not use an extension cord.
Unplug the air conditioner before servicing.
Use two or more people to move and install the air conditioner.
01
Warning
Please read the manual before installation, using, maintenance.
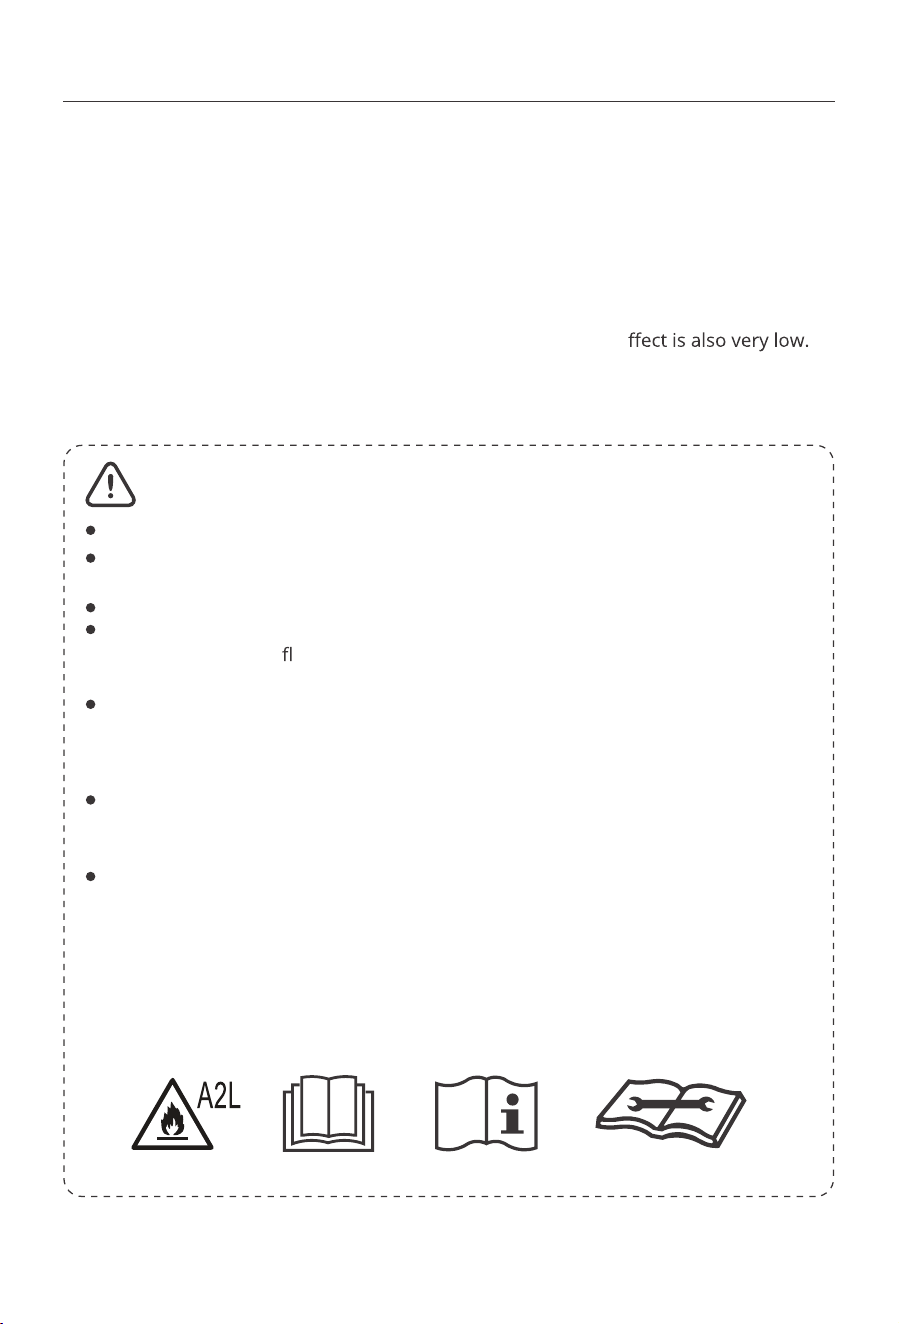
Do not use means to accelerate the defrosting process or to clean, other than
those recommended by the manufacturer.
Do not pierce or burn the appliance.
The appliance shall be stored in a room without continuously operating sources
(for example: open
ames, an operating ignition gas appliance or an operating
electric heater.)
Please contact the nearest after-sale service center when maintenance is necessary.
At the time of maintenance, the maintenance personnel must strictly comply with
the Operation Manual provided by the corresponding manufacturer and any non-
professional is prohibited to maintain the air conditioner.
The handling, installation, storage, servicing and disposal must comply with the
provisions of gas-related national laws and regulations, and also national wiring
regulation.
It is necessary to clear a
way the refrigerant in the system when maintaining or
scrapping an air conditioner. Be aware that refrigerants may not contain an odour.
This appliance is not intended for use by persons (including children) with reduced
physical, sensory or mental capabilities, or supervision or instruction concerning use
of the appliance by a person responsible for their safety.
Children should be supervised to ensure that they do not play with the appliance.
Unit operation limits: Outdoor side 61~110°F, 80%RH, indoor side 61~90°F, 80%RH.
02
The refrigerants used for air conditioners are environmentally friendly hydrocarbons R32.
This kind of erant is combustible and odorless. Moreover, it can burn and explode under
certain condition. However, there will be no risk of burning and explosion if you comply
with the following table to install your air conditioner in a room with an appropriate area
and use it correctly.
Compared with ordinary refrigerants, Refrigerant R32 is environmentally friendly and do
not destroy the ozone sphere and that its value of greenhouse e
Introduct ion to Refrigerants R32
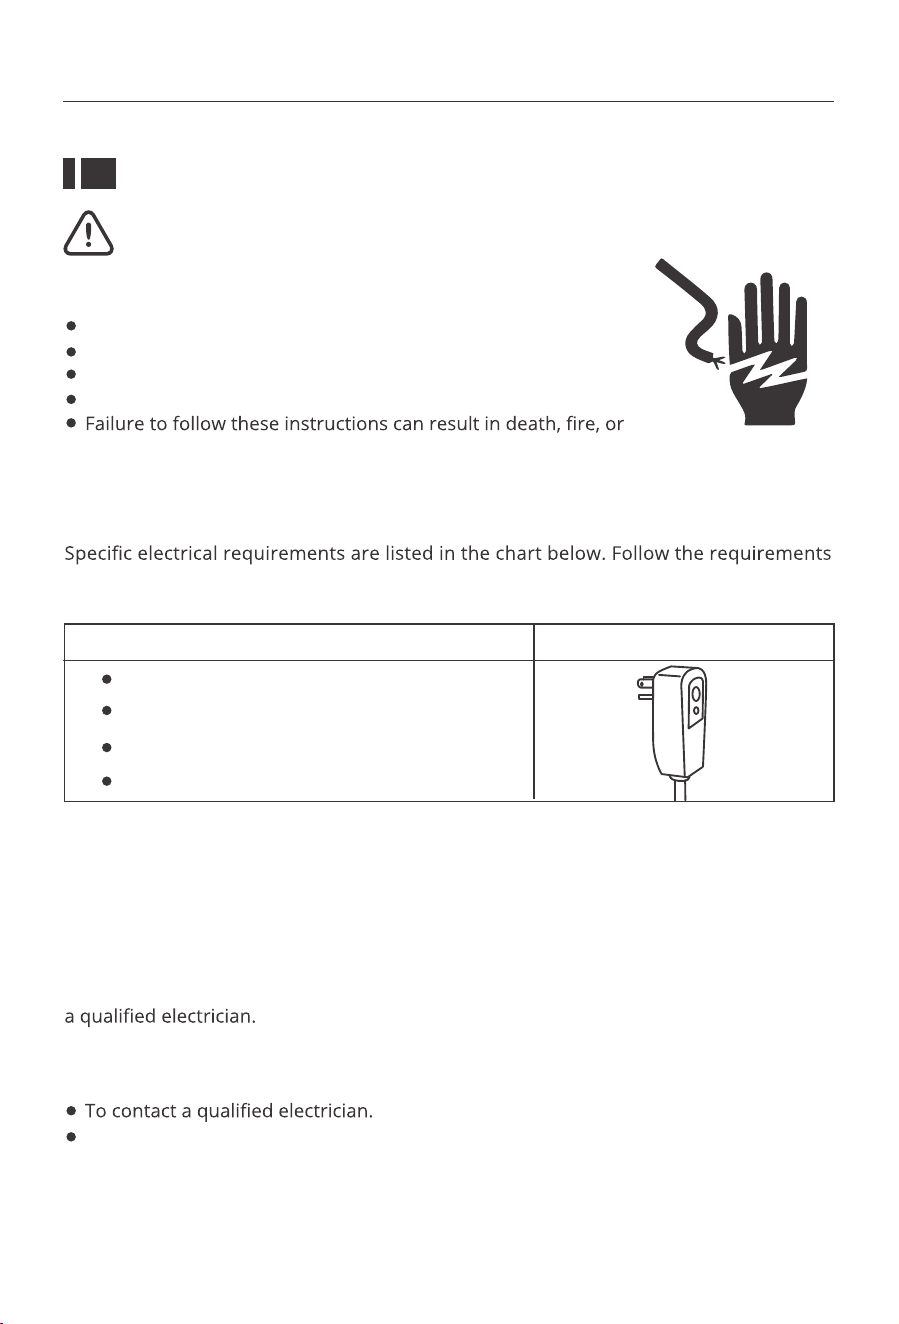
Electrical Requirements
Electrical Shock
Recommended Ground Method
It is the customer's responsibility:
Hazard Plug into a grounded 3 prong outlet.
Do not remove the ground prong.
Do not use an adapter.
Do not use an extension cord.
electrical shock.
To assure that the electrical installation is adequate and in conformance with the
National Electrical Code, ANSI/NFPA 70-latest edition, and all local codes and ordinances.
Warning
The electrical ratings for your air conditioner are listed on the model and serial number
label located on the front left side of the unit (when facing the front).
below for the type of plug on the power supply cord.
For your personal safety, this air conditioner must be grounded. This air conditioner is
equipped with a 3 prong power supply cord with a grounded plug. To minimize the poss-
ibility of electrical shock, the cord must be plugged into a 3 prong outlet and grounded
in accordance with all local codes and ordinances. If a 3 prong outlet is not available, it
is the customer's responsibility to have a properly grounded 3 prong outlet installed by
115 volt (103min. —127max)
0-8 amps
10-amp time-delay fuse or circuit breaker
Use on single outlet circuit only
Wiring Requirements Power Supply Cord
03
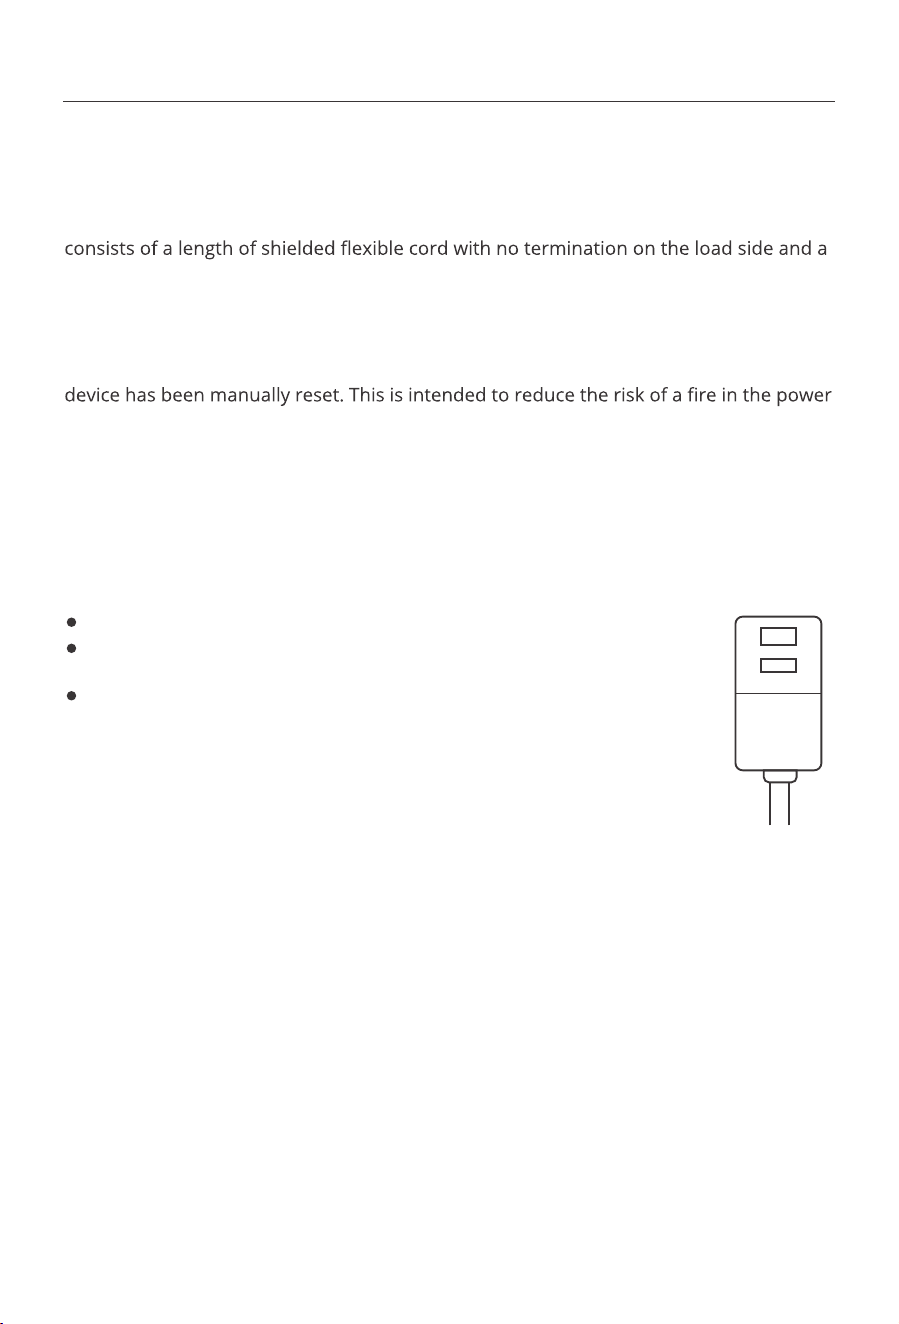
LCDI Power Cord and Plug
This air conditioner is equipped with an LCDI (Leakage Current Detection and Interrup-
tion) power cord and plug as required by US National Electric Code 440.65. This cord
LCDI attachment plug on the line side.
The LCDI power cord and plug will remove the supply source via electrical disconnect
(circuit trip) if the nominal current leakage between the cord shield and either load
conductor exceeds a predetermined value. The cord will remain deenergized until the
cord or combustible materials nearby. The cord shields are not grounded and they must
be considered a shock hazards if exposed. The cord shield must not be connected to
ground or to any exposed metal.
The test and reset buttons on the LCDI Plug are used to check if the plug is functioning
properly.
If a test is performed and the indicator light remains ON, the current
leakage has been detected. Do not use the air conditioner or attempt to
reset the LCDI Plug. Contact Customer Service for troubleshooting reco-
mmendations.
TEST
RESET
04
Plug power cord into a wall outlet.
Press the TEST Button, the circuit should trip and cut all power to the
air conditioner (on some units a green light may turn off).
Press the RESET button for use (on some units a green light will turn on).
To test the plug:
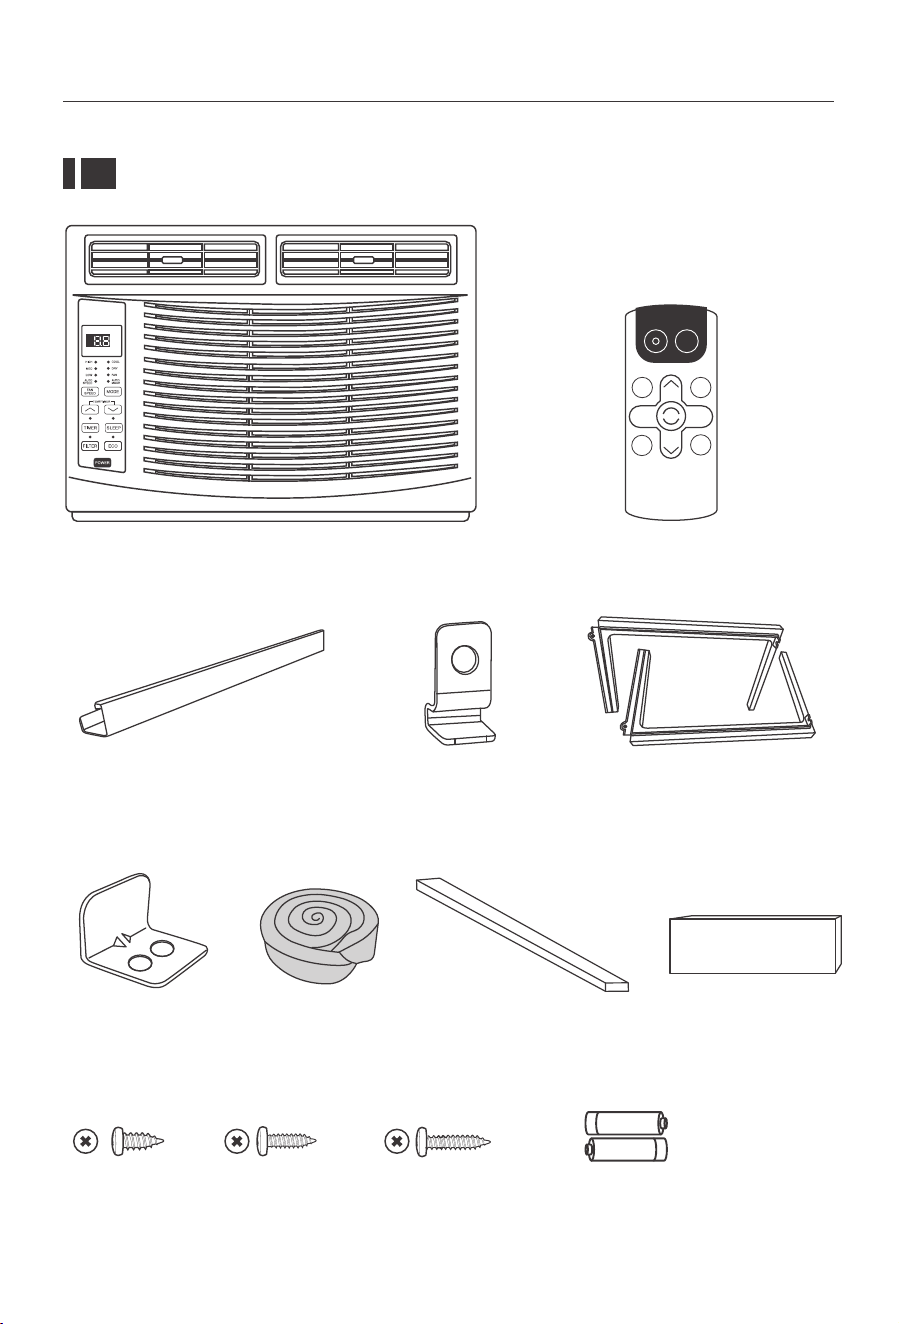
Packing List
Window Air Conditioner *1 Remote Control *1
Top Rail (With sponge) *1
Sash Lock
(Two holes) *1
3/8"Screws *4 3/4"Screws *4 Remote Control
Battery*2
1/2"Screws *3
Window Sash Seal
(Sponge) *1
Foam Top Window
Gasket *1
Insulation strip
(Sponge) *2
Lock Frame *2
Filler Panels *2
(With "Left"&"Right"remark on the
front face)
(Thin sponge for back-up using) (Only for E-star model)
POWER
SLEEP
FAN
SPEED
FAN
ONLY
AUTO
MODE
DISPLAY
TIMER
ECO
COOL
05

Installation & Assembly Instructions
Some assembly is required for your new air conditioner. Please read and follow these
instructions carefully.
This air conditioner is designed to be installed in a standard double-hung window with
a window width between 23" and 34" (584mm-863 mm).
The Lower Sash (the lower part of the window that moves up and down) must allow
for 14.5" of vertical dearance when open. (See Fig.1).
All s
The electrical outlet must be within reach of the power cord.
The air conditioner should be tilted about 3° for better drainage of condensate and
rainwater.
14.5inch
368mm
23-34inch
584-863mm
Interior Wall
Stool
Sill
Exterior
Wall
Fig.1
Save the product packaging and installation instructions for future reference.
Store the air conditioner in the product box when not in use for an extended period
of time.
NOTE:
06
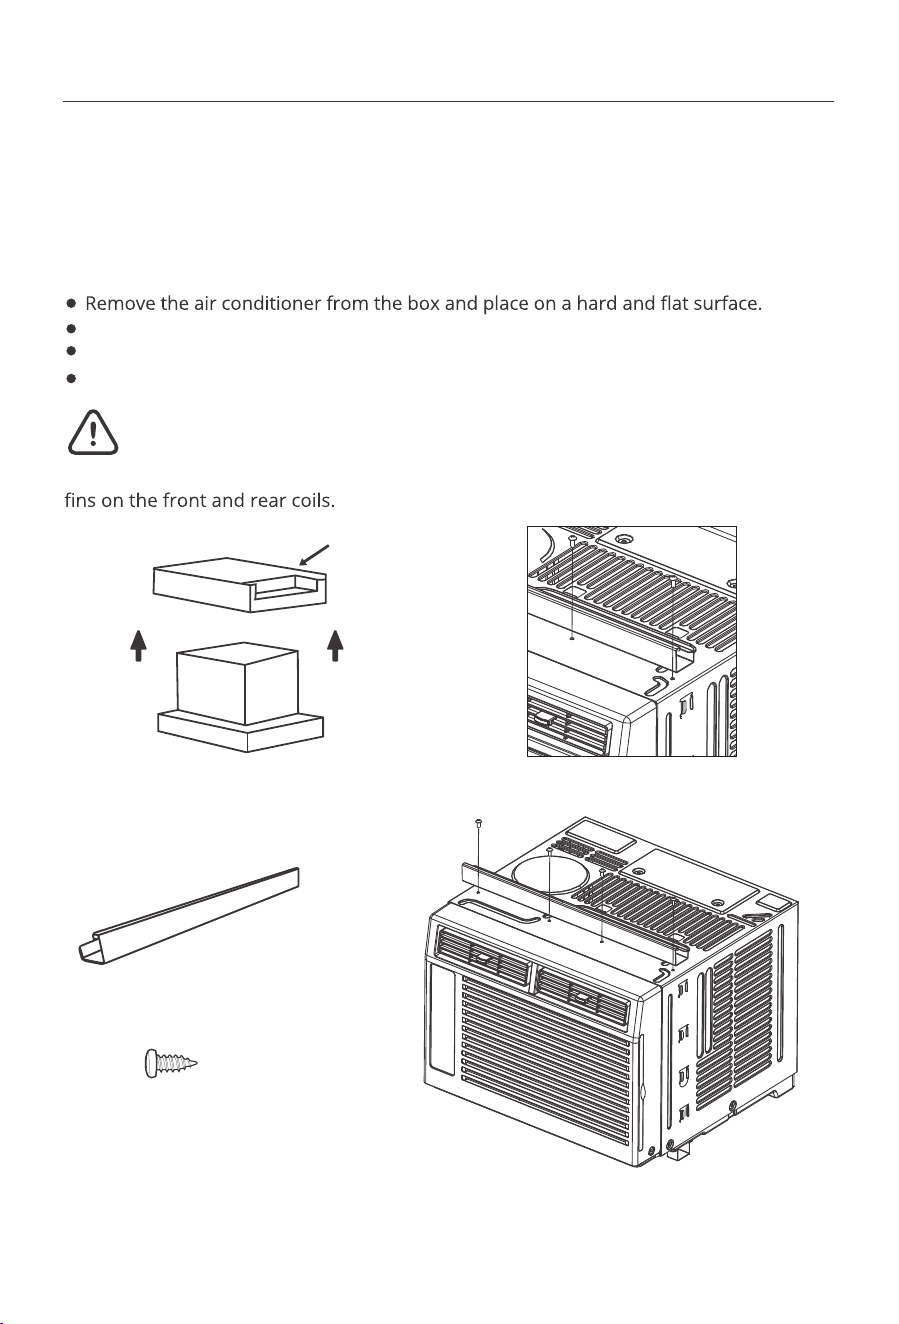
Fig.C
Fig.BFig.A
BOX
Top Rail
Top Rail Assembly
Attaching the Top Rail to the Air Conditioner
The top rail must be assembled prior to installing the air conditioner in the window.
Tools Needed: Phillips Head Screw Driver
When handling the unit, be careful to avoid cuts from the sharp metal edges and aluminum
3/8"Screws *4
NOTE: For safety reasons, all 4 screws
must be used to attach the top rail.
Remove top rail from the top of the packaging material as shown in Fig.A.
Align the hole in the top rail with those in the top of the unit as shown in Fig.B.
Secure the top rail to the unit with the 3/8" screws as shown in Fig.C.
Top Rail (With sponge) *1
Caution
07
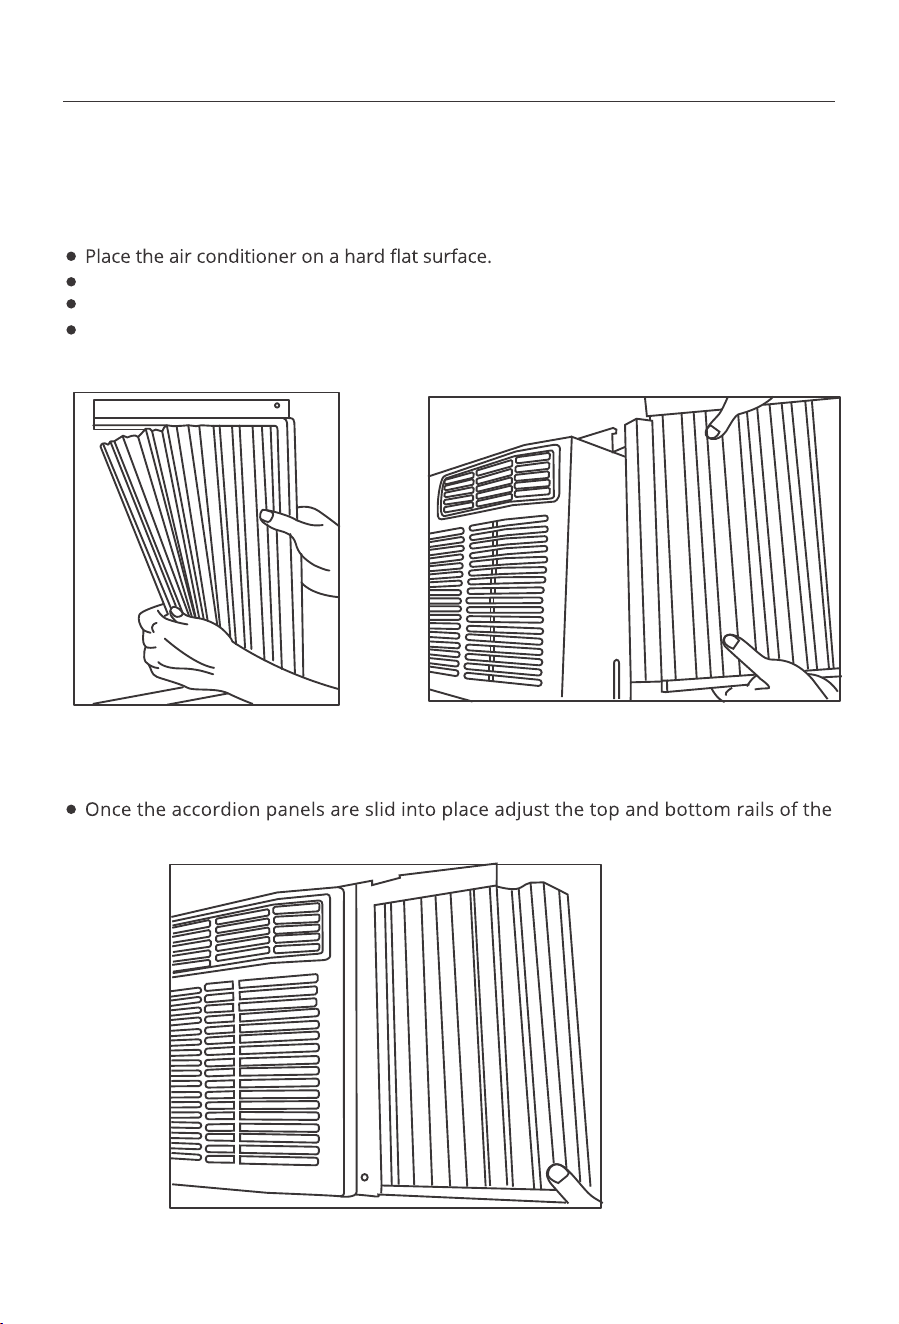
Fig.2 Fig.3
Fig.4
Accordion Panel Installation
Now that you have installed the top rail, you can now install the accordion panels on
each side.
Locate the accordion panels in the box.
Gently pull the free end of the accordion panel (See Fig.2). Do this for both panels.
Slide the free end of the accordion panel into the side panel of the air conditioner (See
Fig.3). Do this for each side.
accordion panels into the top and bottom rails of the air conditioner (See Fig.4).
08
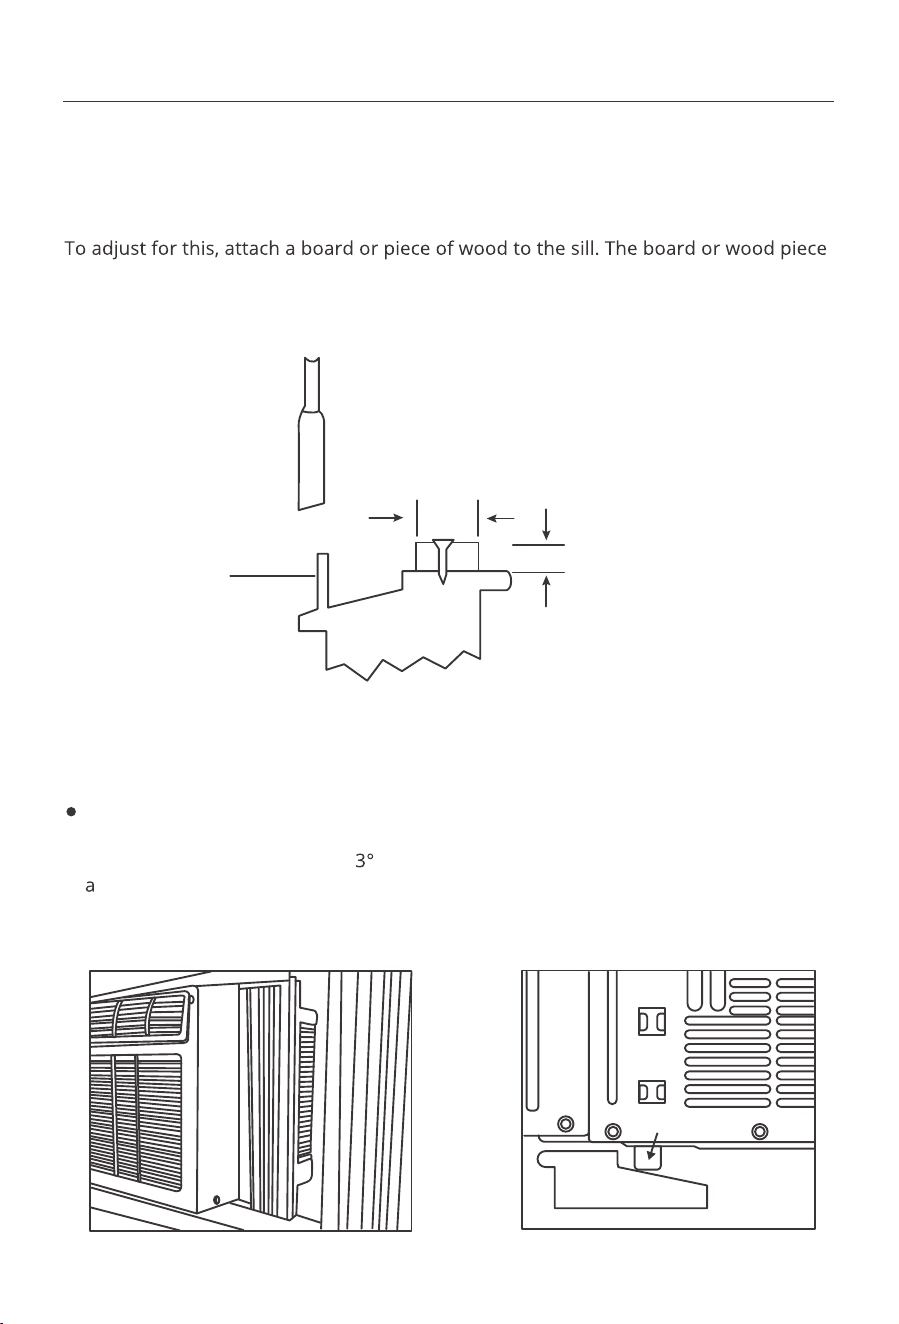
Storm Window Requirements
Placing the Unit Inside a Window
A storm window frame will not allow the air conditioner to tilt properly which in turn will
keep it from draining properly.
should have a depth of at least 1-1/2". Make sure the board or piece of wood is approxi-
mately 1/2" higher than the storm window frame. This will allow the air conditioner to
tilt enough for proper drainage. (See Fig.5).
Board or wood piece must be
approximately 1/2"higher than
the storm window frame for
proper drainage
Storm window
frame
OUTSIDE
1-1/2 min
(38 mm)
INSIDE
SASH
Fig.5
Fig.7Fig.6
Place the air conditioner on the sill with the bottommounting rail against its back edge.
Center the air conditioner and close the window securely behind the top mounting rail.
The air conditioner should be
slightly tilted to the outside area. Use a level, about
1/3 bubble will be the correct case slant to the outside. (See FIG.6 & FIG.7) (It is suggested
to keep a downward angle to let accumulated rain water drain out from the back side
of the unit bottom.)
Window Sill
Outside
Bottom Rail
09
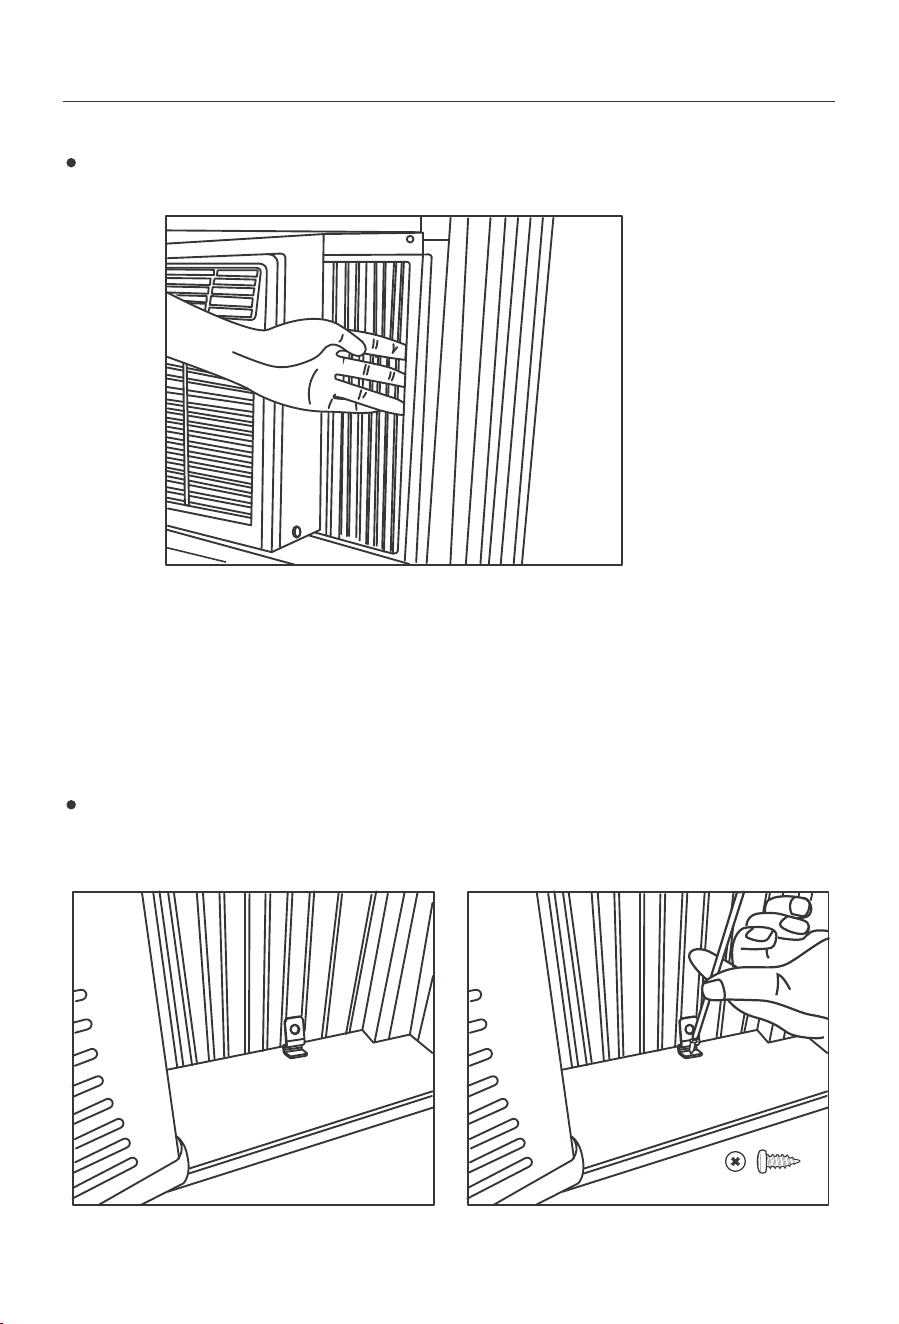
Fig.8
Fig.9 Fig.10
Once the air conditioner is placed, extend both the left and right accordion panels to
the width of the window.
Frame Lock, Sash Lock, and Foam Seal Installation
Mounting Hardware
Place the frame lock between the extended accordionpanels and the window sill as
show in Fig.9. Screw a 3/4" (19mm) locking screw through the frame lock anc into the
window sill. (Fig.10)
Tools Needed:
Phillips Head Screw Driver
Drill (if plot holes are needed)
3/8"Screws *4
10
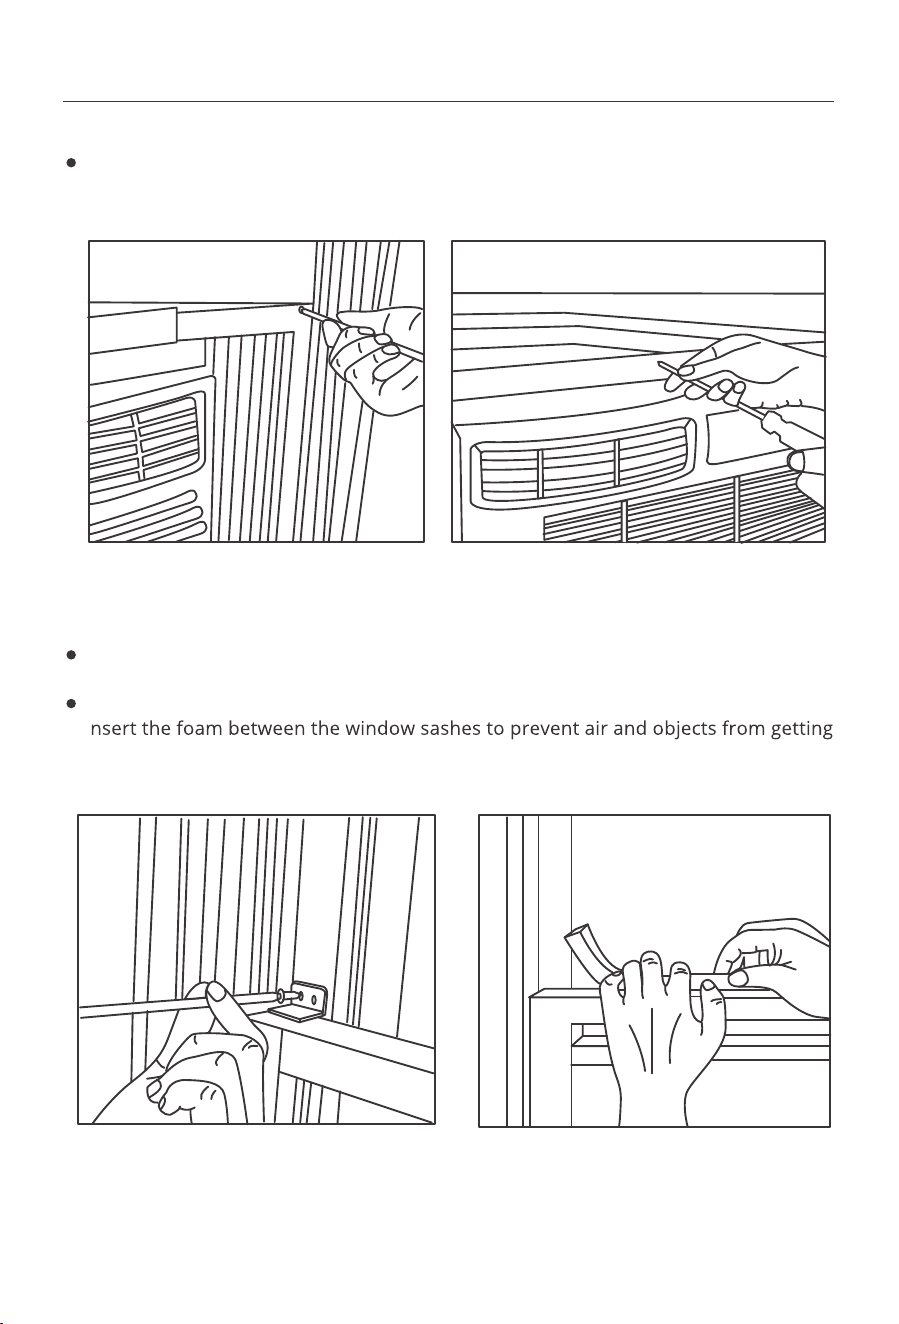
Fig.11 Fig.12
Fig.13 Fig.14
Drive 1/2" screws into the top of the accordion panel frame and the top rail to securely
attach the window air conditioner to the lower sash. (See Fig.11 Fig.12)
To secure the lower sash into place, use the sash lock and a 3/4" screw as shown
below. (See Fig.13)
For added insulation, cut the supplied insulation foam to the width of the window.
I
into the room. (See Fig.14)
11
Removing the Air Conditioner from the Window
Introduction to Refrigerants R32
1. Site Safety
2. Operation Safety
Remove the sash seal from between windows, and unscrew sash lock.
Remove the screws installed through the frame and frame lock.
Close (slide) the side panels into frame.
backward to drain any condensate water in base of unit. Be careful not to spill any
remaining water while lifting unit from window.
Store parts with the air conditioner in the box.
Before installing the appliance, you must read the manual carefully to get the safety
information and notes.
equipped with an air conditioner.
A leak test must be done after the installation is completed.
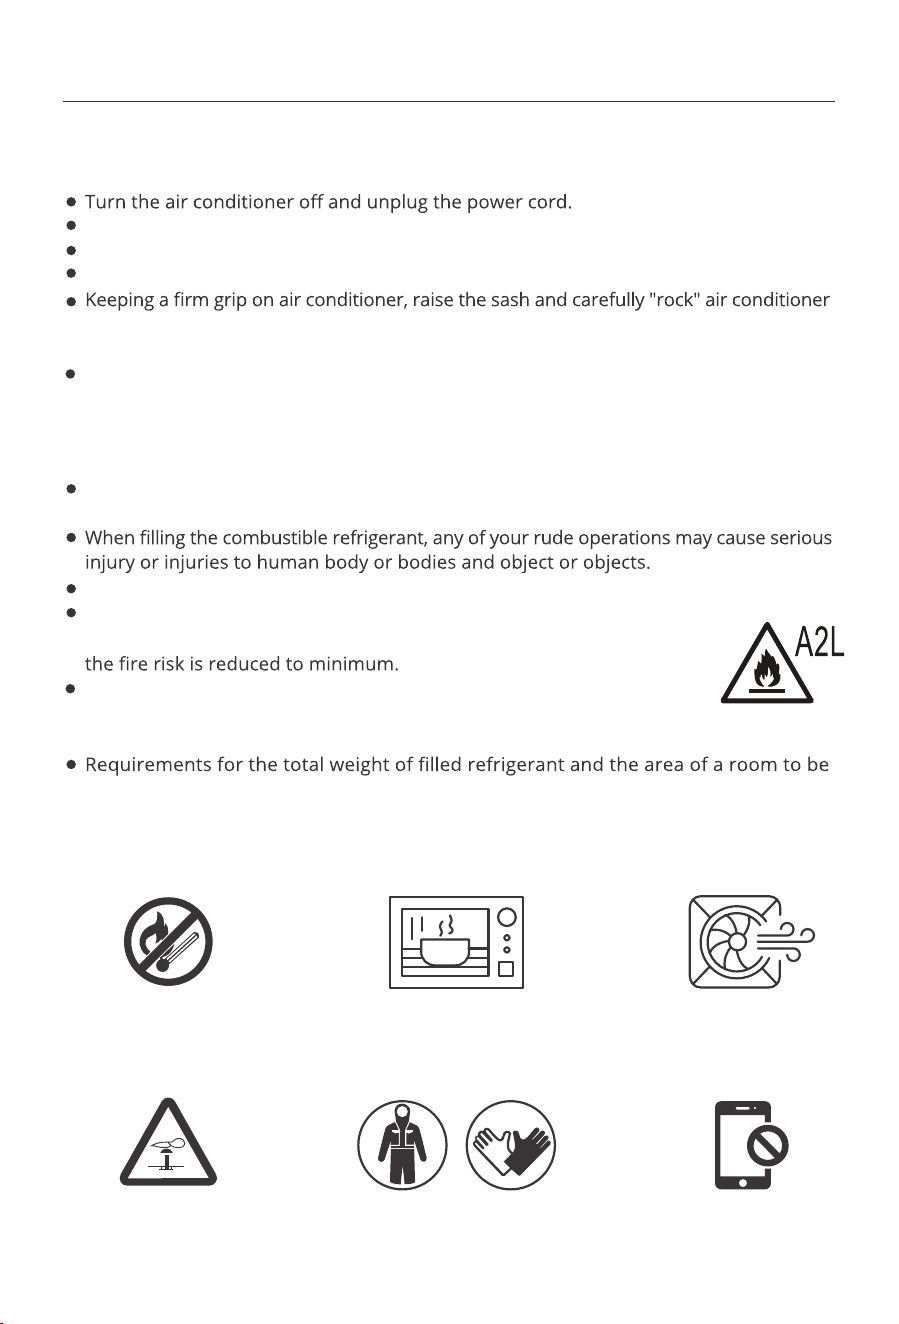
It is a must to do the safety inspection before maintaining or repairing
an air conditioner using combustible refrigerant in order to ensure that
It is necessary to operate the machine under a controlled procedure in
order to ensure that any risk arising from the combustible gas or vapor
during the operation is reduced to minimum.
Open Flames Prohibited
Open Flames Prohibited
Mind Static Electricity Don't use mobile phoneMust Wear Protective Clothing
and anti-static gloves
Ventilation Necessary
12
3. Installation Safety
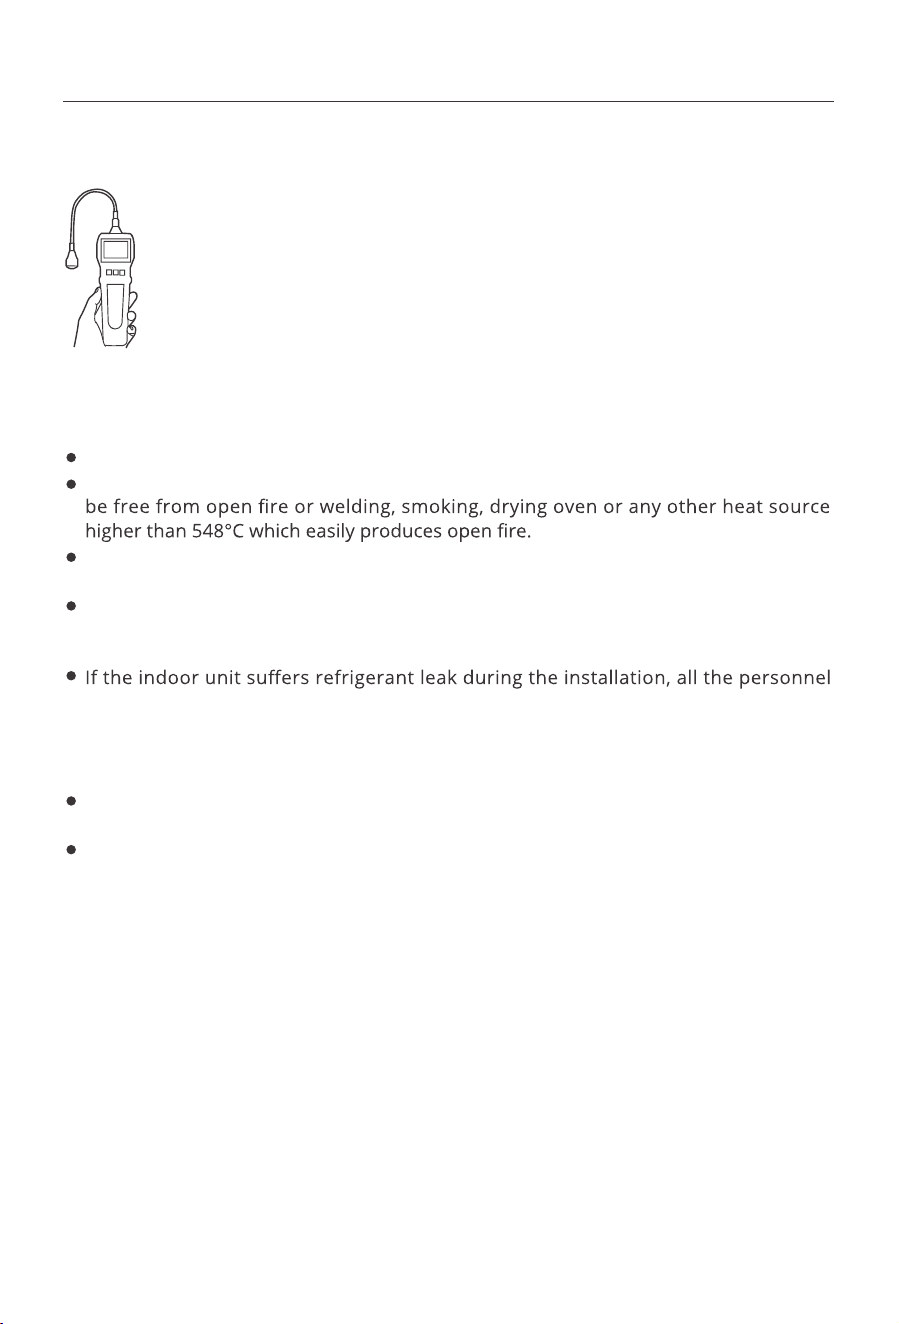
1) Refrigerant Leak Detector
2) Appropriate Installation Location
3) The left picture is the schematic diagram of arefrigerant leak detector
Please note that:
The installation site should be in a well-ventilated condition.
The sites for installing and maintaining an air conditioner using Refrigerant R32 should
When installing an air conditioner, it is necessary to take appropriate anti-static meas-
ures such as wear anti-static clothing and/or gloves.
It is necessary to choose the site convenient for installation or maintenance wherein
the air inlets and outlets of the indoor and outdoor units should be not surrounded
by obstacles or close to any heat source or combustible and/or explosive environment.
should go out till the refrigerant leaks completely for 15 minutes. If the product is
damaged, it is a must to carry such damaged product back to the maintenance station
and it is prohibited to weld the refrigerant pipe or conduct other operations on the
user's site.
It is necessary to choose the place where the inlet and outlet air of the indoor unit is
even.
It is necessary to avoid the places where there are other electrical products, power
switch plugs and sockets, kitchen cabinet, bed, sofa and other valuables right under
the lines on two sides of the indoor unit, and also prevent mechanical damage from
occurring.
13
You may hear a pinging noise caused by water hitting the condenser, on rainy days, or
when the humidity is high. This design feature helps remove moisture and improve
Water will collect in the base pan during rain or days of high humidity. The water may
The fan may run even when the compressor is not on.
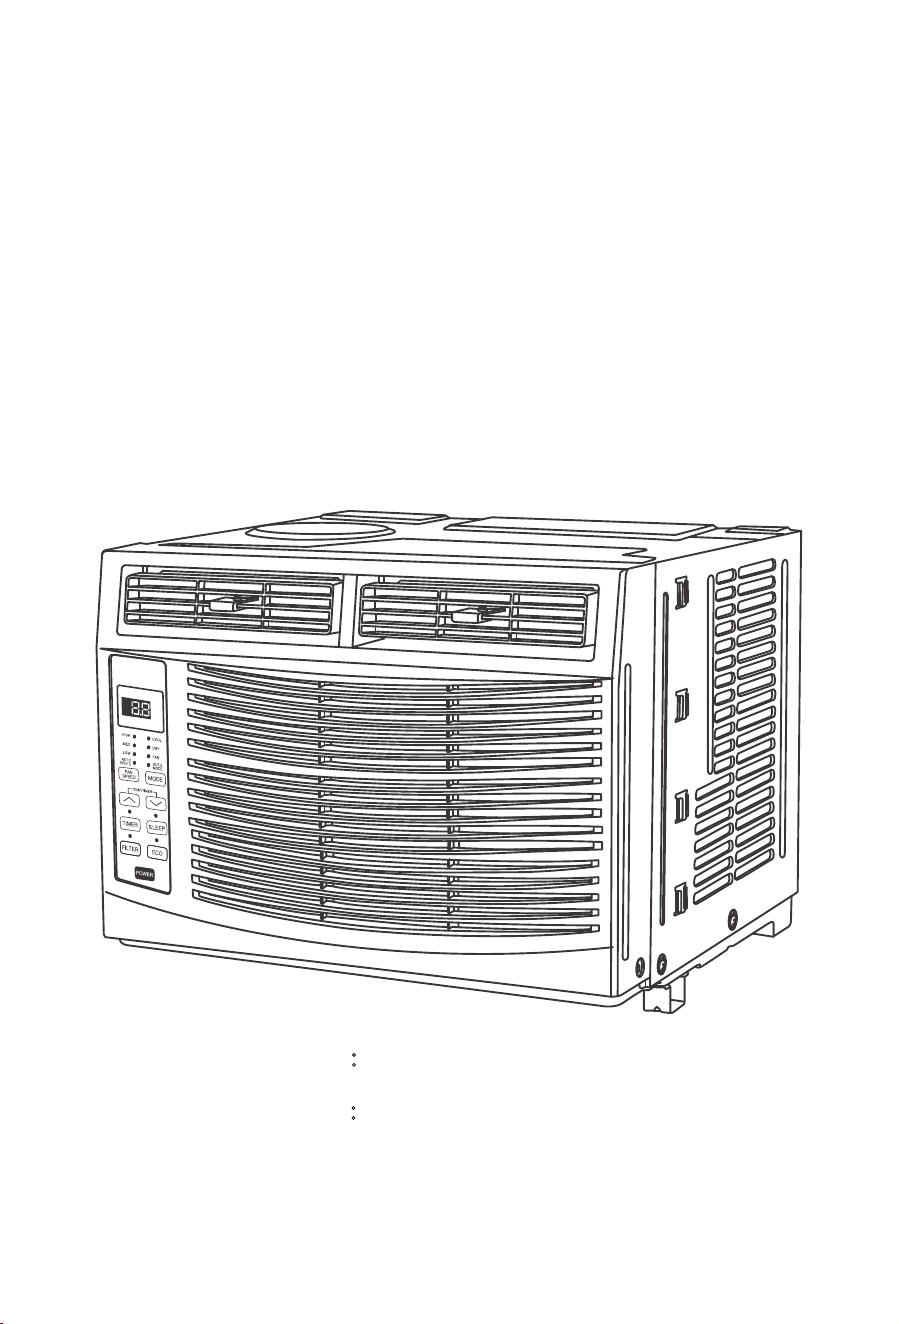
Using Your Air Conditioner
Normal Operating Sounds
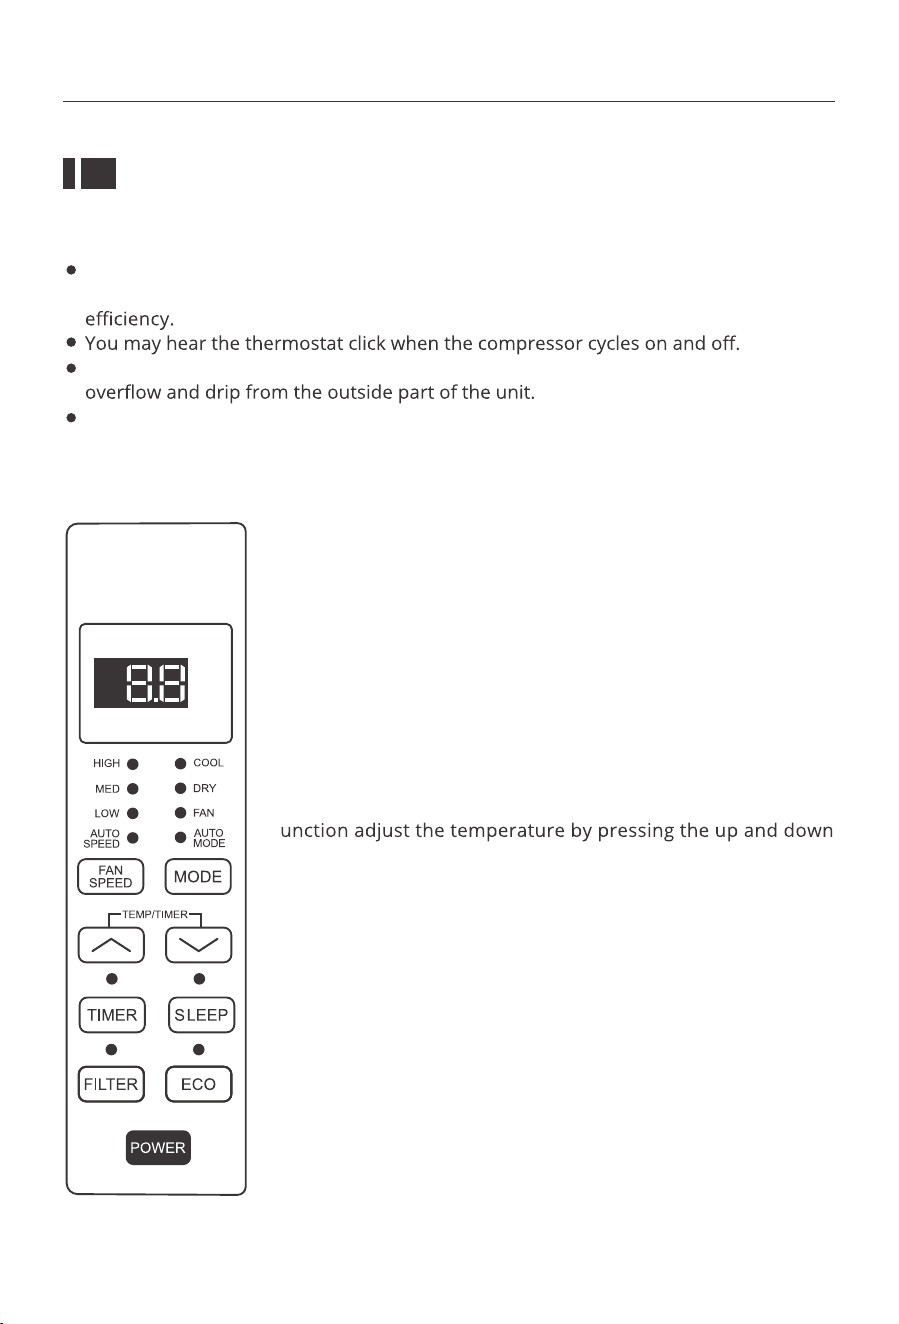
Manual Control Panel
1. Digital Display:
When the timer is not in use, the operation mode and the set
temperature willbe displayed. Time will be displayed under the
timer setting.
2. Mode Button:
Press the mode button to cycle through the various modes: Cool,
Dry, Fan and Auto.
Cool Mode: The cooling function allows the air conditioner to
cool the room and at the same time reduces humidity. Press the
MODE button to activate the cooling function. To optimize this
f
arrows and the speed by pressing the Fan Speed button.
Dry Mode: This function reduces the humidity of the air to make
the room more comfortable. Press the MODE button to set the
DRY mode. An automatic function of alternating cooling cycles
and air fan is activated.
Fan Mode: This function only works when the airconditioner is
vented. Press the MODE button to set the FAN mode. With press-
ing the FAN SPEED button, the speed changes in the following
sequence: HIGH, MED, LOW in FAN mode.
Auto Mode: In AUTO mode the unit automatically chooses the
mode of operation (COOL, FAN). In this mode the temperature
is set automatically according to the room temperature
(Room temperature is determined by the temperature sensor
located in the indoor unit).
14
3. and Button:
Use these buttons on the control panel and remote to increase or decrease the Set
Temperature or Timer.
Temperature range: 61°F~88°F or 16°C~31°C.
4. S
l
eep Button:
Press the SLEEP button, all of the display lights will turn after a while, but the Sleep
light is always on. In SLEEP mode, the air conditioner will automatically adjust the temp-
erature and fan speed to make the room more comfortable during the night. The set
temperature will automatically raise or decrease based on the room temperature and
5. Eco B
utton
:
When the unit is in ECO mode, thelight will turn on. In ECO mode, the unit will turn o
once the room is cooled to the user-set temperature.
The unit will turn back on when the room temperature rises above the user-set temper-
ature. Before the compressor starts, the fan motor will run for a while, then it will stop
for a while, and will repeat to provide a much more comfortable feeling and save energy.
6. P
o
we
r Button
:
7. Filte
r Button
:
When the Filter Check light is o it is not necessary to press the Filter Check button.
When the Filter Check light is on, you can turn the light by pressing the Filter Check
button. After the fan motor works for 500 total hours, the Filter Check light will turn on
ter.
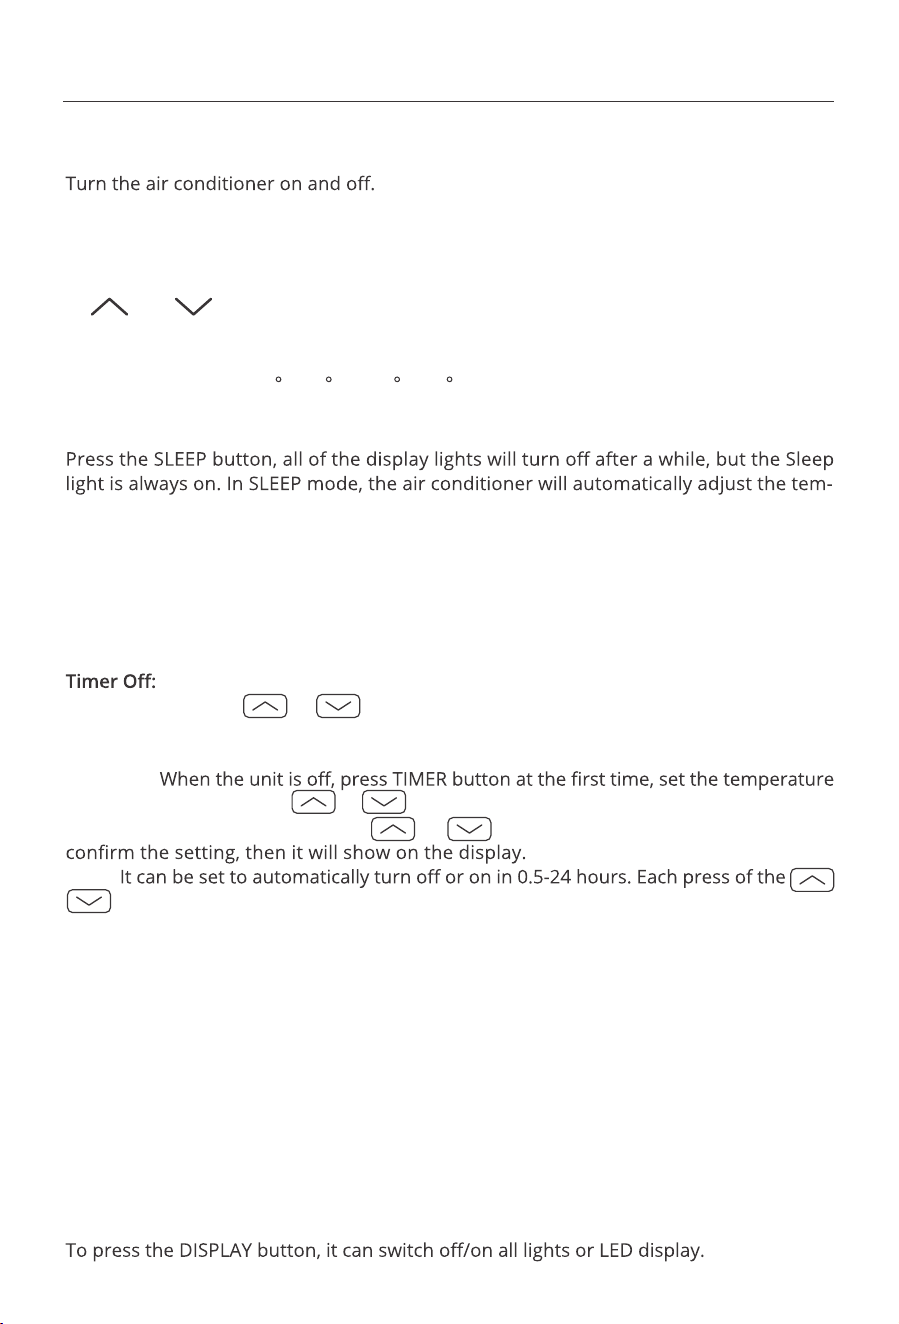
8. Timer Button :
Use these buttons on the control panel and remote to set the Timer.
Timer : The timed stop is programmed by pressing TIMER button. Set the rest time by
pressing the button or until the rest time displayed is to your demand then
press TIMER button again.
Timer On : When
the unit is o
press TIMER button at the rst time, set the temperature
with pressing the button or . Press TIMER button at the second time, set the
rest time with pressing the button or . Press TIMER button at the third time,
c
rm the setting, then it will show on the display.
Note : It can be set to automatically turn or on in 0.5-24 hours. Each press of the
buttons will increase or decrease the timer. The Timer can be set in 0.5 hours
increment below 10 hours and 1 hour increment for 10 hours or above. The SET light
will turn on while setting. To cancel the setted function, press the TIMER button again.
15
the duration of sleep.
9. Fan Speed Button:
Press the FAN SPEED button to select the fan speed. In COOL MODE you can choose the
following settings: HIGH, MED, LOW, or AUTO. In FAN MODE you can choose from HIGH,
MED, LOW.
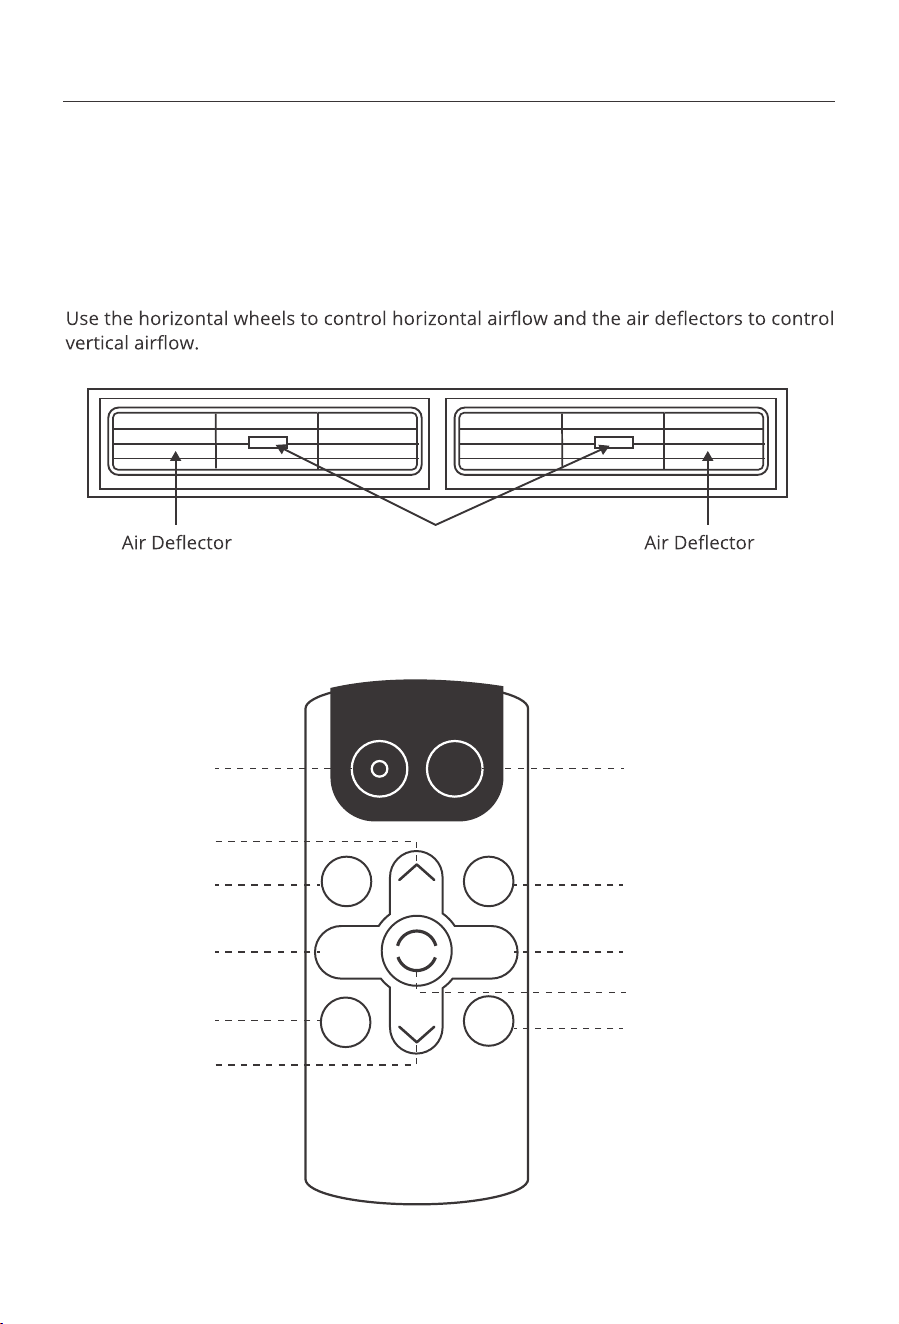
10. Directional Louvers:
Horizontal Wheel
REMOTE CONTROL
POWER
SLEEP
FAN
SPEED
FAN
ONLY
AUTO
MODE
DISPLAY
TIMER
ECO
COOL
1
3
3
4 7
8
10
9
2
5
6
16
1. POWER
2. Cool
Press the COOL button to COOL mode.
3. and
Use these buttons on the control panel and remote to increase or decrease the Set
Temperature or Timer.
Temperature range: 61 F~88 F or 16 C~31 C .
4. Sleep
perature and fan speed to make the room more comfortable during the night. The set
temperature will automatically raise or decrease based on the room temperature and
5. Timer
Use these buttons on the control panel and remote to set the Timer.
The timed stop is programmed by pressing TIMER button. Set the rest time by
pressing the button or until the rest time displayed is to your demand then
press TIMER button again.
Timer On:
with pressing the button or . Press TIMER button at the second time, set the
rest time with pressing the button or . Press TIMER button at the third time,
Note:
buttons will increase or decrease the timer. The Timer can be set in 0.5 hours
increment below 10 hours and 1 hour increment for 10 hours or above. The SET light
will turn on while setting. To cancel the set function, press the TIMER button again.
6. Auto Mode
In AUTO mode the unit automatically chooses the mode of operation (COOL, or FAN).
In this mode the temperature will be set automatically according to the room temperature
(tested by the temperature sensor which is incorporated in the indoor unit.).
7. Fan Speed
Press the FAN SPEED button to choose the fan speed options. You can choose HIGH,
MED, LOW or auto speed in COOL mode and choose HIGH, MED, LOW in FAN mode.
8. Display
17
the duration of sleep.
9. ECO
once the room is cooled to the user set temperature. The unit will turn back on when the
room temperature rises above the user set temperature. Before the compressor starts,
the fan motor will run for a while, then it will stop for a while, and will repeat to provide
a much more comfortable feeling and save energy.
10. Fan Only
Press the Fan Only button to FAN ONLY mode.
cause the cooling coils to accumulate frost.
Battery Size:
AAA-NOTE:
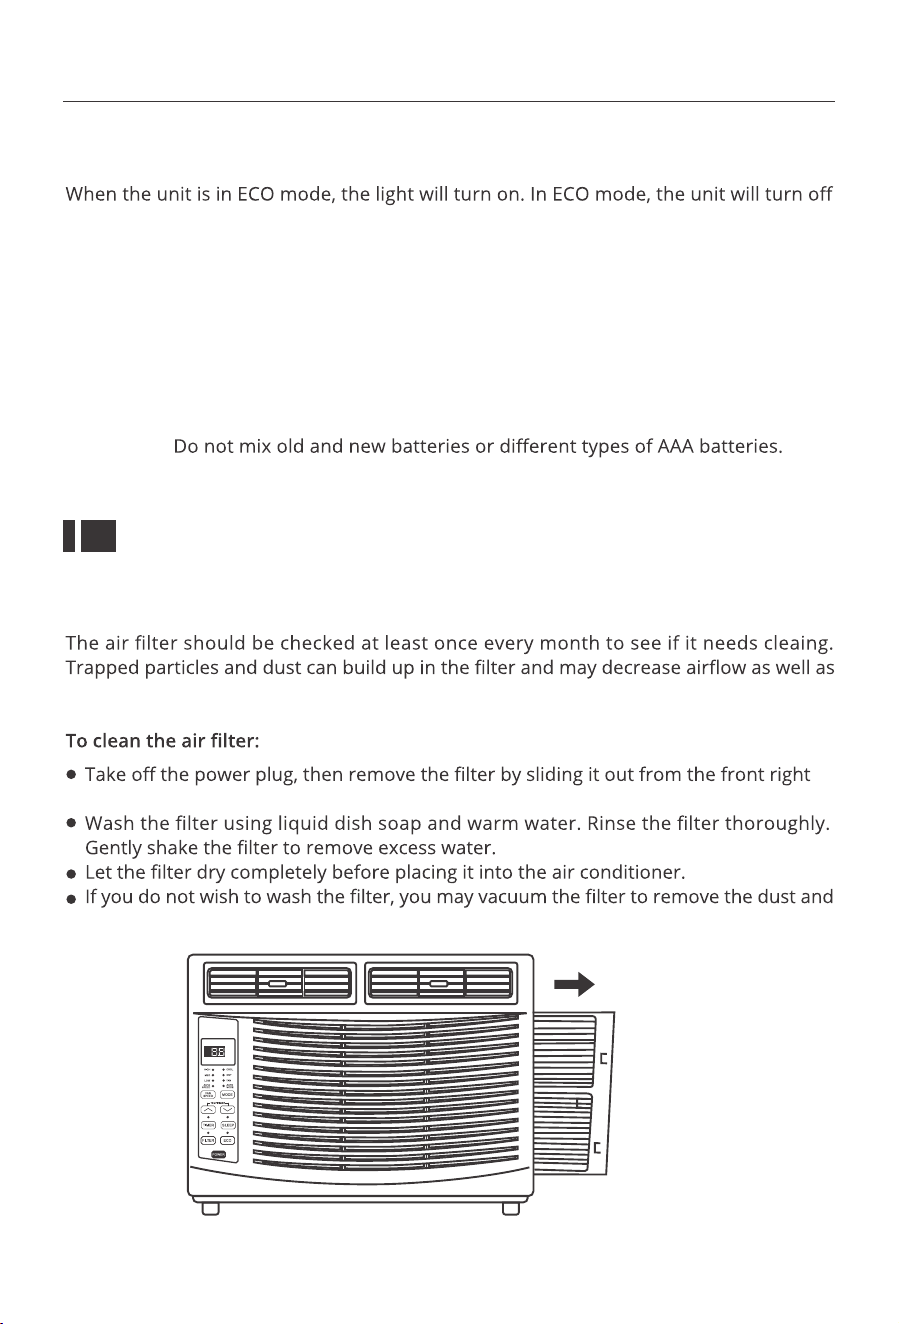
Care and Cleaning
Air Filter Cleaning
side of the air conditioner. (See Fig .15)
other particles.
Fig.15
18
To clean the air conditioner cabinet:
To store the air conditioner when it is not in use for an extended period of time, remove
it carefully from the window according to the installation instructions and cover it with
plastic or place it in the original box.
Cabinet Cleaning
Winter Storage
panel of the air conditioner may be dusted with an oilfree cloth or washed with a cloth
dampened in a solution of warm water and mild liquid soap. Rinse thoroughly with a
damp cloth and wipe dry.
Never use harsh cleaners, wax or polish on the cabinet front.
Be sure to wring excess water from the cloth before wiping around the controls.
Excess water in or around the controls may cause damage to the air conditioner.
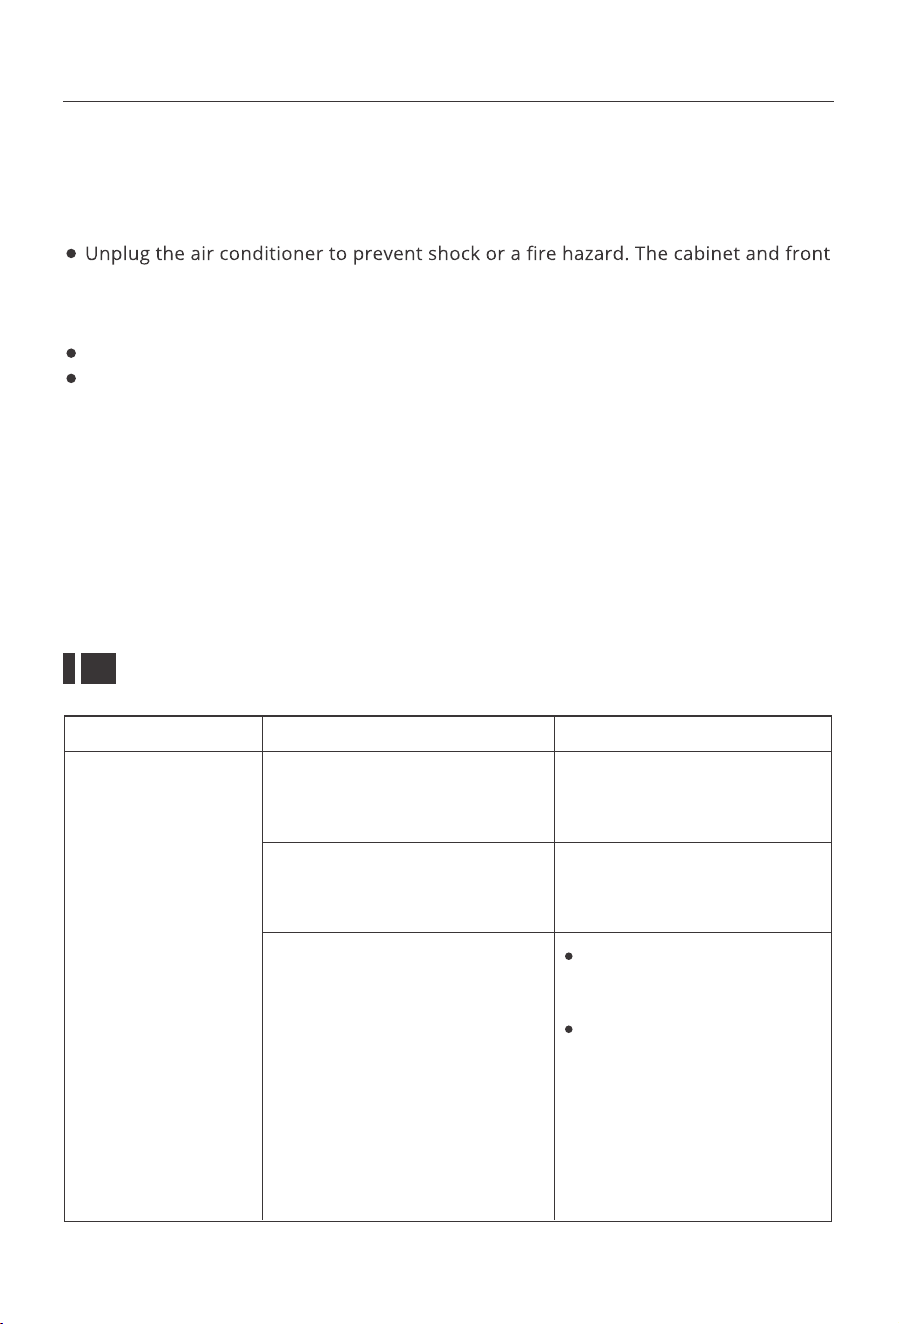
Troubleshooting
Problem Possible Causes Solutions
The air conditioner is unplugged
The fuse is blown/circuit breaker
is tripped
Power failure
Make sure the air condition-
er plug is pushed completely
into the outlet.
Check the house fuse/circuit
breaker box and replace the
fuse or reset the breaker.
The unit will automatically
re-start when power is
restored.
There is a protective time
delay (approx.3 minutes) to
prevent tripping of the
compressor overload. For
this reason, the unit may
not start normal cooling for
3 minutes after it is turned
back on.
The Air Conditioner
will not start
19
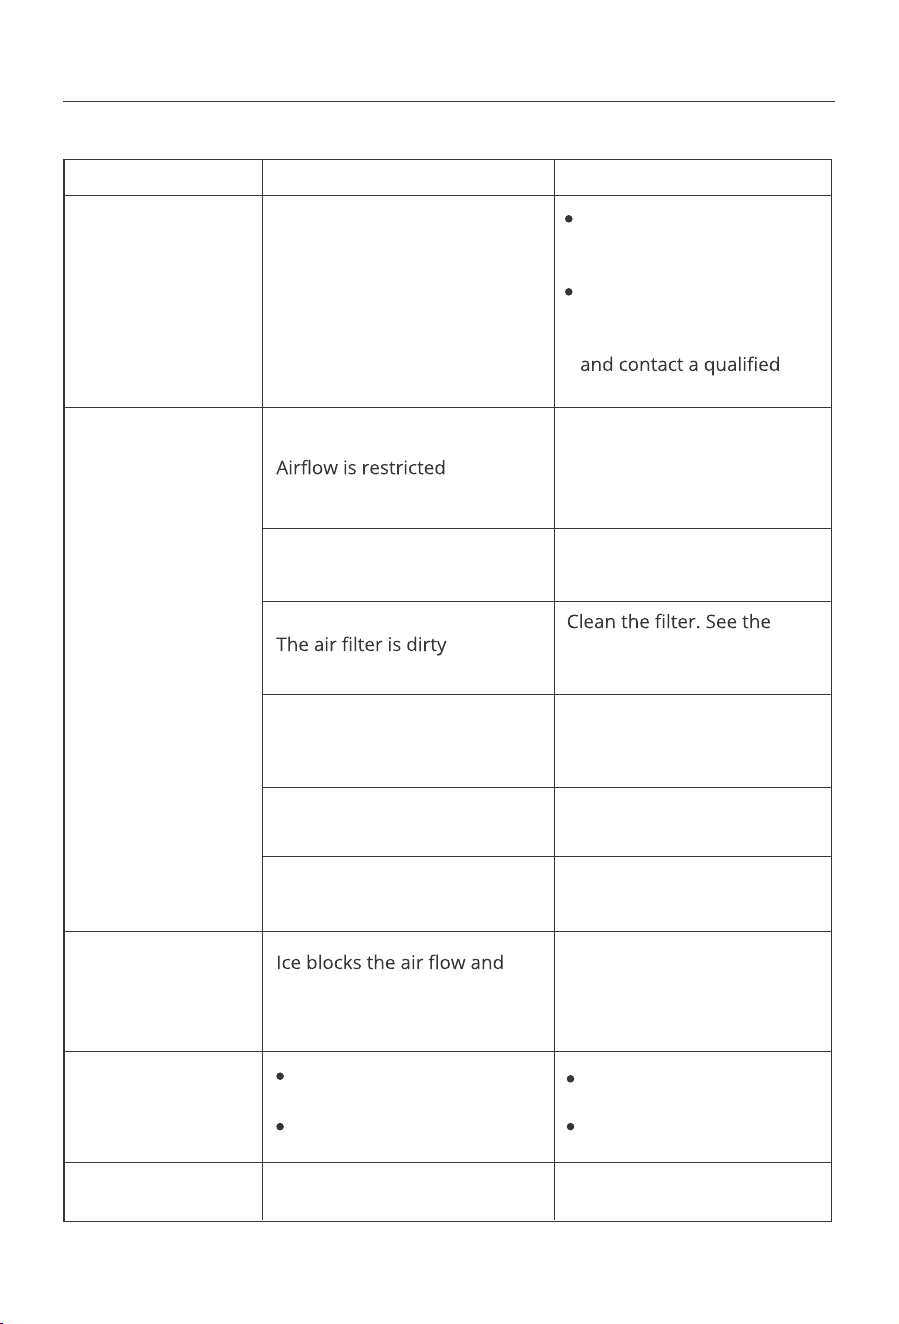
Problem Possible Causes Solutions
The Air Conditioner
will not start
The Air Conditioner
does not cool as it
should
The Air Conditioner
is freezing up
The Remote Control
is not working
Water is dripping
outside
The current interrupter device
is tripped
The room may be too warm
Cold air is escaping
The cooling coils are frozen
Hot and humid weather
The temperature control may
not be set correctly
stops the air conditioner from
cooling the room
The batteries are inserted
incorrectly
The batteries may be dead
Make sure there are no
curtains, blinds, or furniture
blocking the front of the air
conditioner.
Lower the set thermostat
temperature.
Cleaning and Care Section of
the manual.
Please allow time for the room
to cool down after turning on
the air conditioner.
Check for open furnace
registers and cold air returns.
See "Air Conditioner Freezing
Up" below.
This is normal.
Set the MODE dial to HIGH
FAN or HIGH COOL and set
the thermostat to a higher
temperature.
Check the position of the
batteries.
Replace the batteries.
Press the RESET button
located on the power cord
plug.
If the RESET button will not
stay engaged,discontinue
use of the air conditioner
service technician.
20
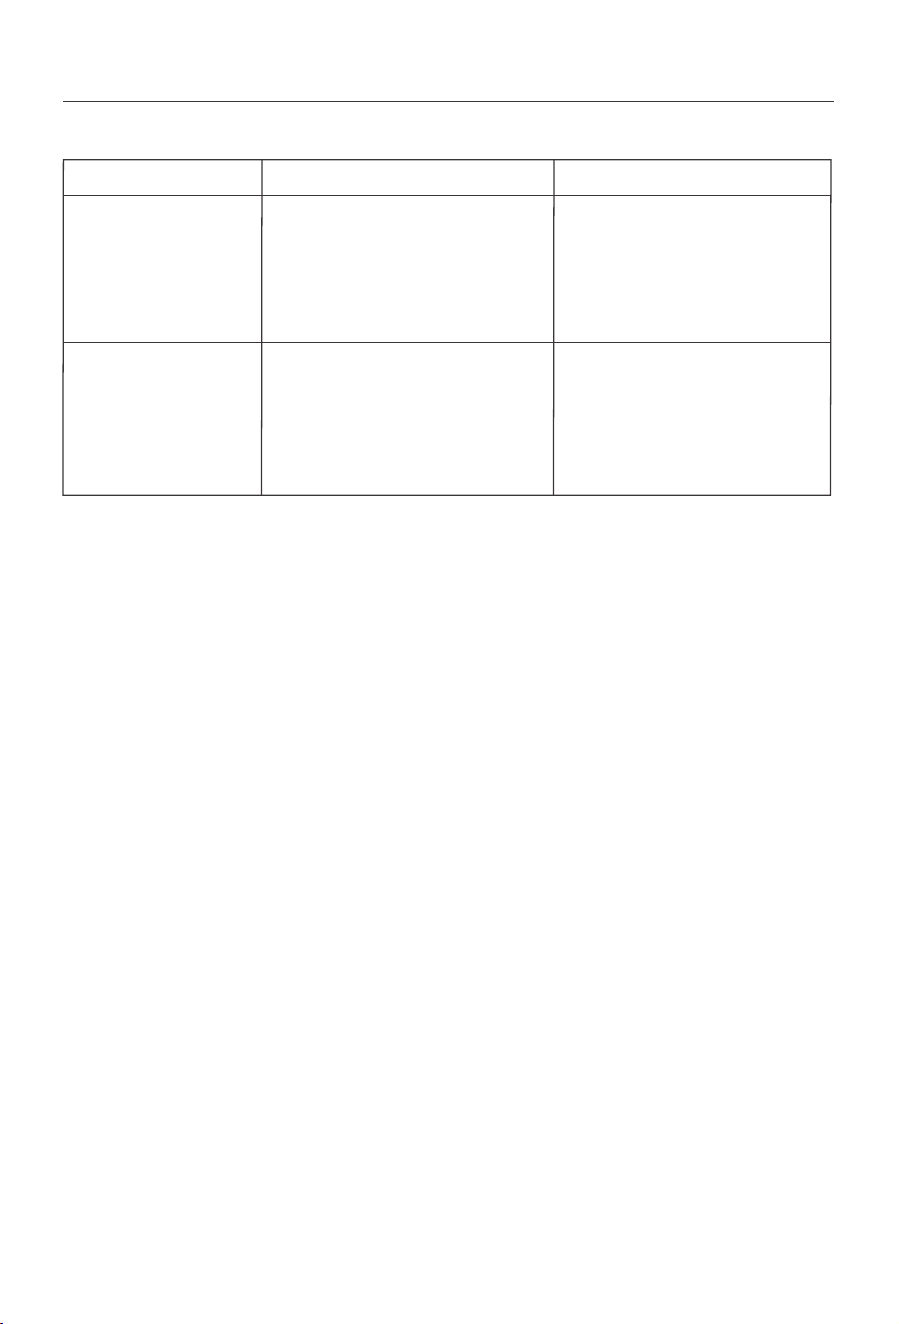
Problem Possible Causes Solutions
Water is dripping
inside the room
The air conditioner is not
correctly tilted outside
For proper water drainage,
make sure the air conditioner
is slightly tilted downward
from the front of the unit to
the rear.
Water collects in
the base pan
Moisture removed from the air
is draining into the base pan
This is normal for a short
period inareas with low
humidity and normal for a
longer period in areas with
high humidity.
21
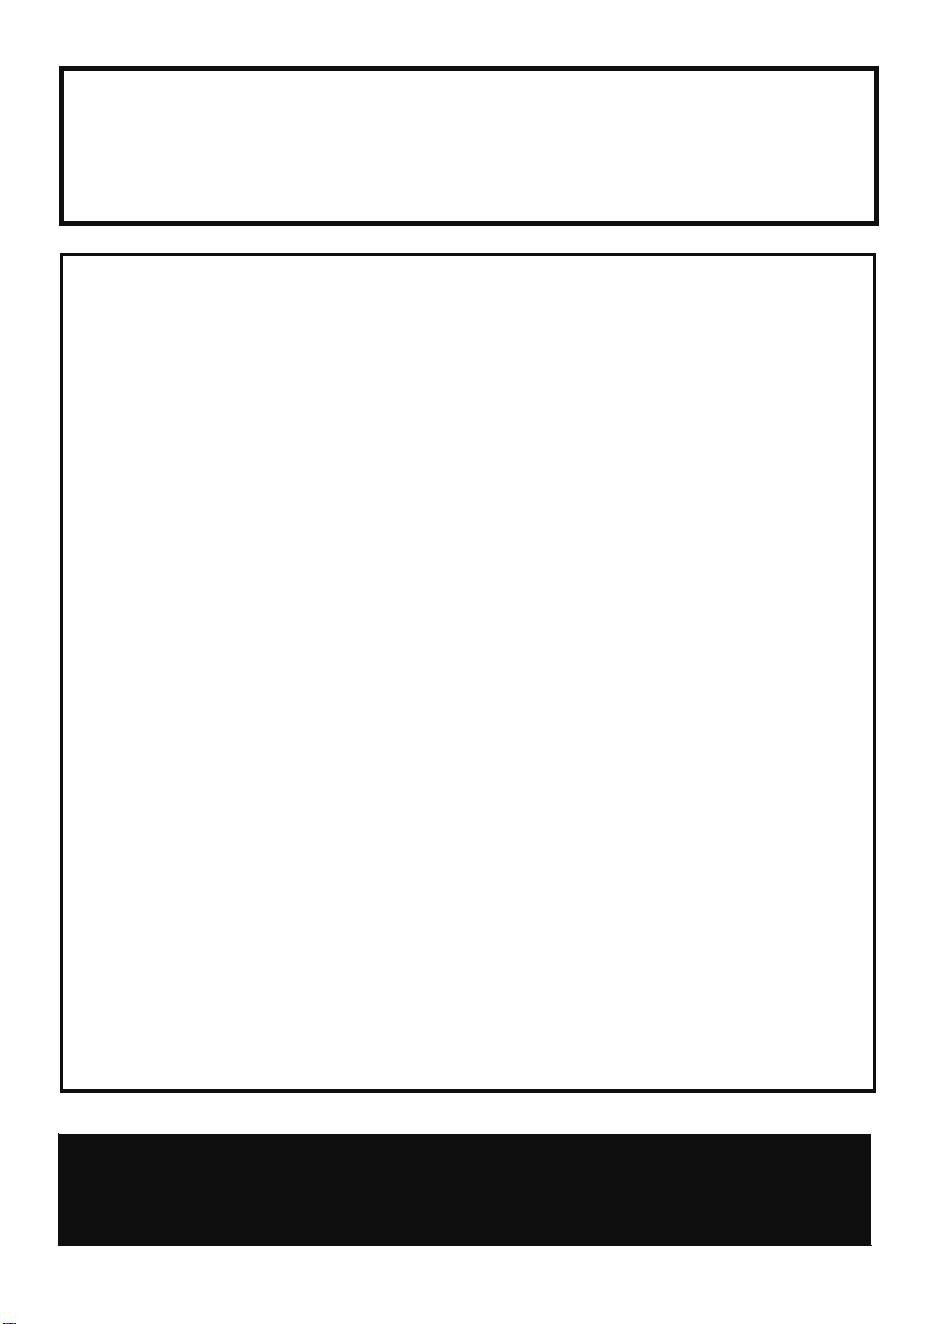
Thank you for purchasing this product! If you have any questions
about the product, such as missing parts, damaged products, product
assembling, and operation, please contact us via customer service
number: 818-468-3970.
IMPORTANT
Please call our customer service department for any consulting:
(8:30am - 5 :30pm P.S.T.)
DATED PROOF OF PURCHASE IS REQUIRED FOR WARRANTY
SERVICE.
AVIS
Veuillez appeler le service à la clientèle pour toutes questions a u:
(8:30am - 5 :30pm P.S.T.)
PREUVE D’ACHAT ORIGINALE REQUISE P OUR SERVICE DE
GARANTIE.
IMPORTANTE
Sólo hay que llamar nuestro departamento de servicio
al client e en caso de tener pre guntas o inquietu des:
(8:30am - 5 :30pm P.S.T.)
SE REQUIERE PR
UEBA DE COMPRA CON FECHA PARA
SERVICIO BAJO GARANTÍA.
818-468-3970
818-468-3970
818-468-3970
ROWAN ELECTRIC APPLIANCE LLC
818-468-3970