
Owner’s Manual & Safety Instructions
Save This Manual Keep this manual for the safety warnings and precautions, assembly,
operating, inspection, maintenance and cleaning procedures. Write the product’s serial number in the
back of the manual near the assembly diagram (or month and year of purchase if product has no number).
Keep this manual and the receipt in a safe and dry place for future reference. 20a
When unpacking, make sure that the product is intact
and undamaged. If any parts are missing or broken,
please call 1-888-866-5797 as soon as possible.
Copyright
©
2019 by Harbor Freight Tools
®
. All rights reserved.
No portion of this manual or any artwork contained herein may be reproduced in
any shape or form without the express written consent of Harbor Freight Tools.
Diagrams within this manual may not be drawn proportionally. Due to continuing
improvements, actual product may differ slightly from the product described herein.
To ols required for assembly and se rv ic e m ay n ot b e i nc lu de d .
Read this material before using this product.
Failure to do so can result in serious injury.
SAVE THIS MANUAL.
Visit our website at: http://www.harborfreight.com
Email our technical support at: [email protected]
Page 2 For technical questions, please call 1-888-866-5797. Item 57013
SaFEty OpEratiOn MaintEnancESEtup
table of contents
Safety ..........................................3
Specifications ..............................4
Setup ...........................................6
Operation .....................................7
Maintenance ...............................15
Warranty .....................................16
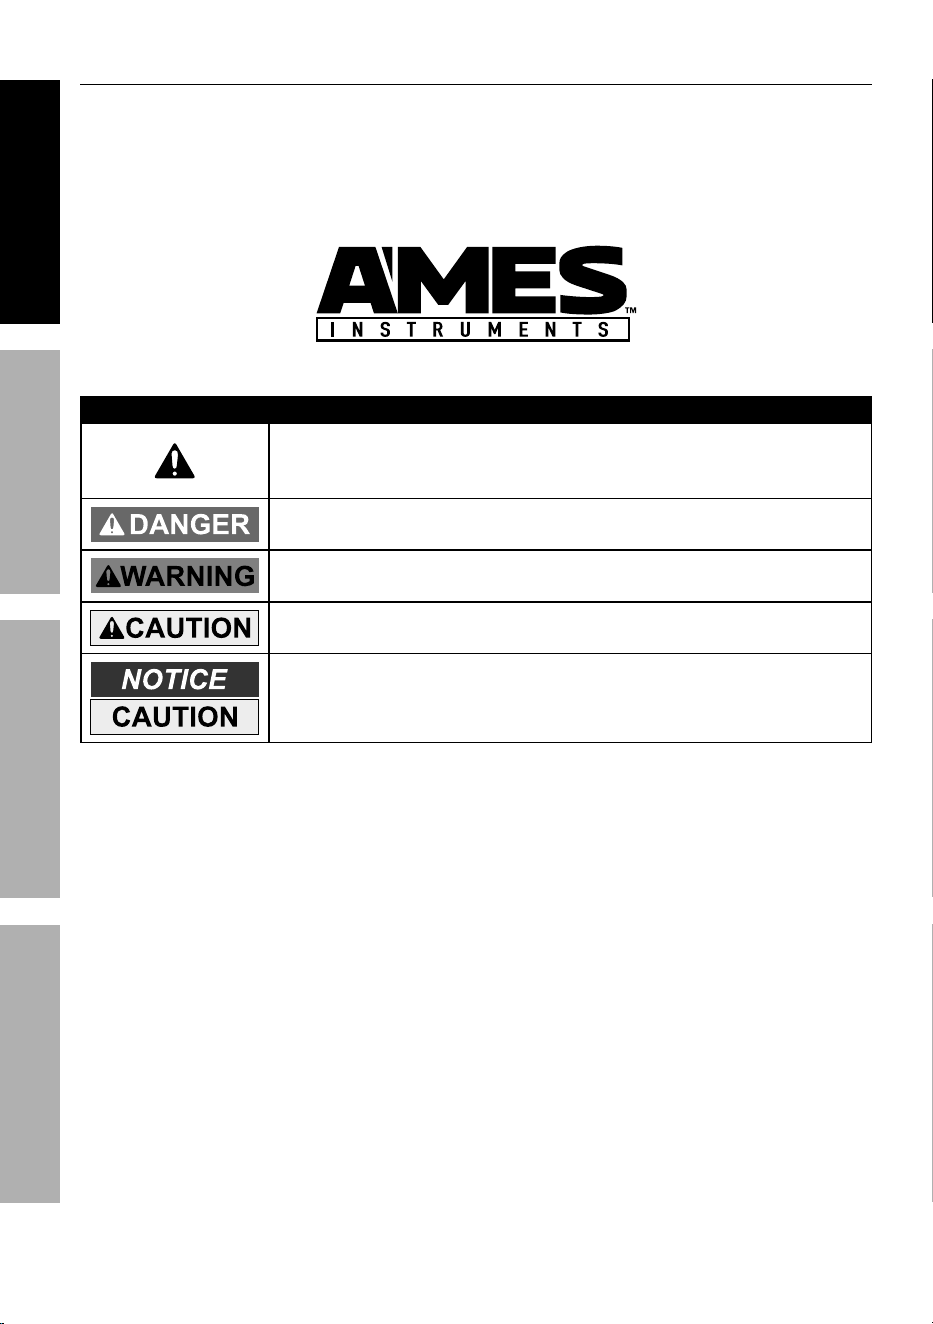
WarninG SyMBOLS anD DEFinitiOnS
This is the safety alert symbol. It is used to alert you to
potential personal injury hazards. Obey all safety messages
that follow this symbol to avoid possible injury or death.
Indicates a hazardous situation which, if not avoided,
will result in death or serious injury.
Indicates a hazardous situation which, if not avoided,
could result in death or serious injury.
Indicates a hazardous situation which, if not avoided,
could result in minor or moderate injury.
Addresses practices not related to personal injury.

Page 3For technical questions, please call 1-888-866-5797.Item 57013
SaFEtyOpEratiOnMaintEnancE SEtup
iMpOrtant SaFEty inFOrMatiOn
Safety Warnings and precautions
read all safety warnings and all instructions.
Failure to follow the warnings and instructions may result
in electric shock, fire and/or serious injury.
Save all warnings and instructions for future reference.
1. Never attach or use any other form
of optical device with this product.
Use as intended only.
2. Do not modify in any way as this may
result in hazardous radiation exposure.
3. This product is not a toy. Do not allow
children to play with or near this item.
4. Inspect before every use; do not
use if parts are loose or damaged.
5. Power this Meter using only
the batteries referenced in
the Specifications Chart.
6. Stay alert. Watch what you are doing,
use common sense. Do not operate
any Meter when you are tired.
7. Do not operate Meter if under
the influence of alcohol or drugs.
Read warning labels on prescriptions
to determine if your judgment
or reflexes are impaired while
taking drugs. If there is any doubt,
do not operate the Meter.
8. Do not look into laser. Do not point
laser at persons or animals directly or
indirectly off of reflective surfaces.
9. Avoid damaging Meter. Use only
as specified in this manual.
10. Performance of this Meter may vary
depending on battery condition.
11. Maintain product labels and
nameplates. These carry
important safety information.
If unreadable or missing, contact
Harbor Freight Tools for a replacement.
12. Do not attempt to charge battery.
13. Do not reverse the polarity of
the battery when installing.
14. Have the Meter calibrated by a
qualified technician every year
to maintain accurate results.
15. The warnings, cautions, and
instructions discussed in this
instruction manual cannot cover all
possible conditions and situations
that may occur. It must be understood
by the operator that common sense
and caution are factors which cannot
be built into this product, but must
be supplied by the operator.
SaVE tHESE inStructiOnS.
Page 4 For technical questions, please call 1-888-866-5797. Item 57013
SaFEty OpEratiOn MaintEnancESEtup
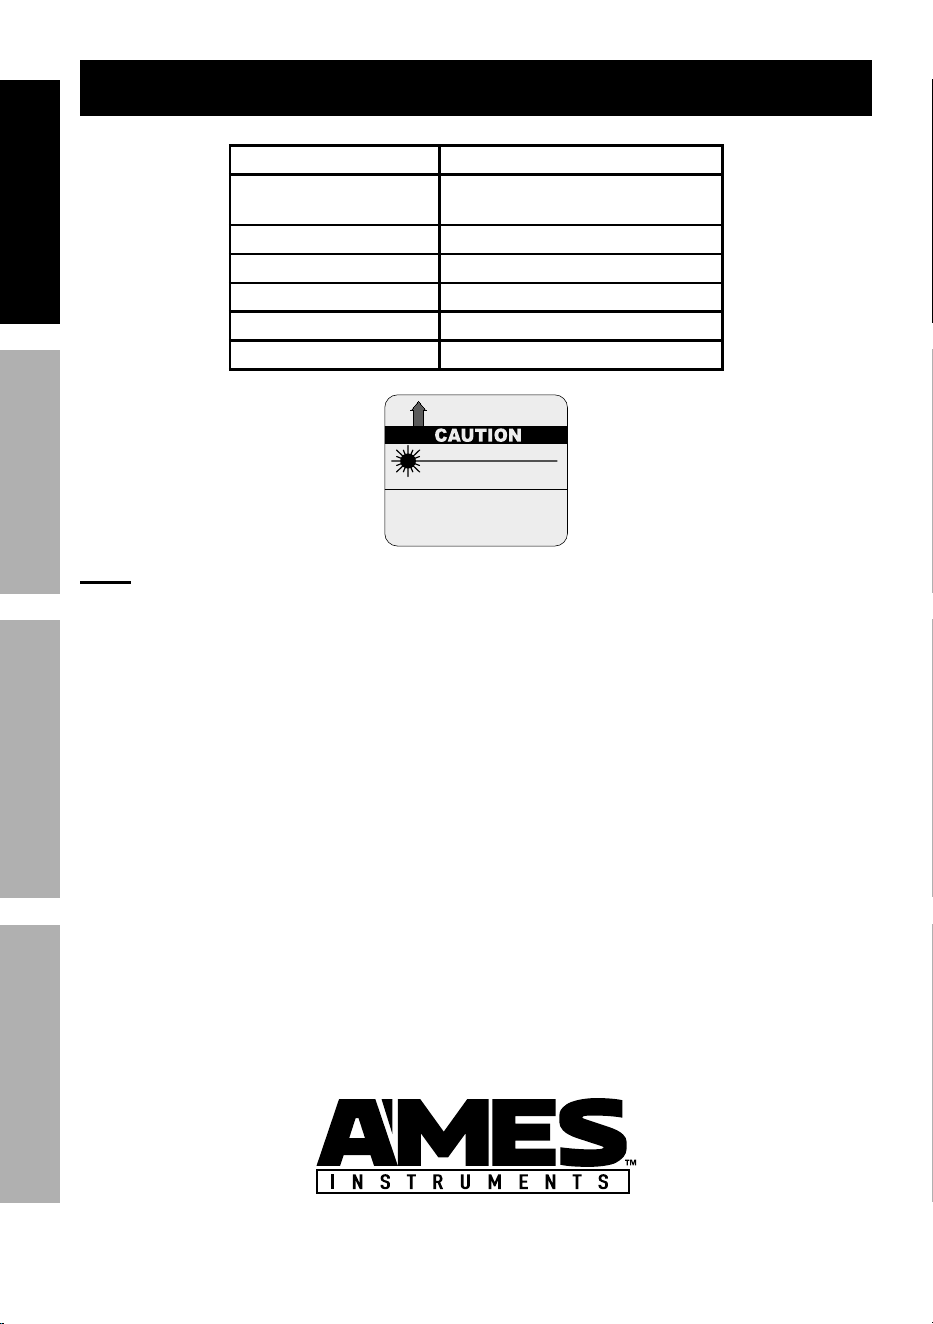
Specifications
Working Range 0.2" - 197' (0.05m - 60m)
Measurement Units
Meters (m), Inches (in), Feet
(ft), Feet + Inches (' ")
Accuracy ± 0.08" (2mm)
Battery 2x AAA (Included)
Working Temperature 14°F - 104°F (-10°C - 40°C)
Storage Temperature -4°F - 140°F (-20°C - 60°C)
Operating Environment Indoors, 0% - 80% RH
LASER LIGHT
DO NOT STARE INTO BEAM
Max. Output: 1mW Max
Wavelength: 620-670 nm
CLASS II LASER PRODUCT
This product complies with
21 CFR 1040.10 and 1040.11
Distributed by Harbor Freight Tools
26541 Agoura Road Calabasas, CA 91302
Manufacture Date:
______________, ________
AVOID EXPOSURE
Laser light is emitted from this aperture.
19l
Conforms to UL Std. 61010-1
note: When using Meter in or around bright solar light, or on rough
or poorly reflective measurement surfaces, use a target such as a
white surface or sheet of paper to avoid measurement error.

Page 5For technical questions, please call 1-888-866-5797.Item 57013
SaFEtyOpEratiOnMaintEnancE SEtup
Fcc Statement
This device complies with part 15 of the FCC Rules. Operation is subject
to the following two conditions: (1) This device may not cause harmful
interference, and (2) this device must accept any interference received,
including interference that may cause undesired operation.
Note: This equipment has been tested and found to comply with the limits for a
Class B digital device, pursuant to part 15 of the FCC Rules. These limits are
designed to provide reasonable protection against harmful interference in a
residential installation. This equipment generates, uses and can radiate radio
frequency energy and, if not installed and used in accordance with the instructions,
may cause harmful interference to radio communications. However, there is
no guarantee that interference will not occur in a particular installation. If this
equipment does cause harmful interference to radio or television reception, which
can be determined by turning the equipment off and on, the user is encouraged
to try to correct the interference by one or more of the following measures:
• Reorient or relocate the receiving antenna.
• Increase the separation between the equipment and receiver.
• Connect the equipment into an outlet on a circuit different
from that to which the receiver is connected.
• Consult the dealer or an experienced radio/TV technician for help.
Page 6 For technical questions, please call 1-888-866-5797. Item 57013
SaFEty OpEratiOn MaintEnancESEtup
Setup - Before use:
read the EntirE iMpOrtant SaFEty inFOrMatiOn section
at the beginning of this manual including all text under
subheadings therein before set up or use of this product.
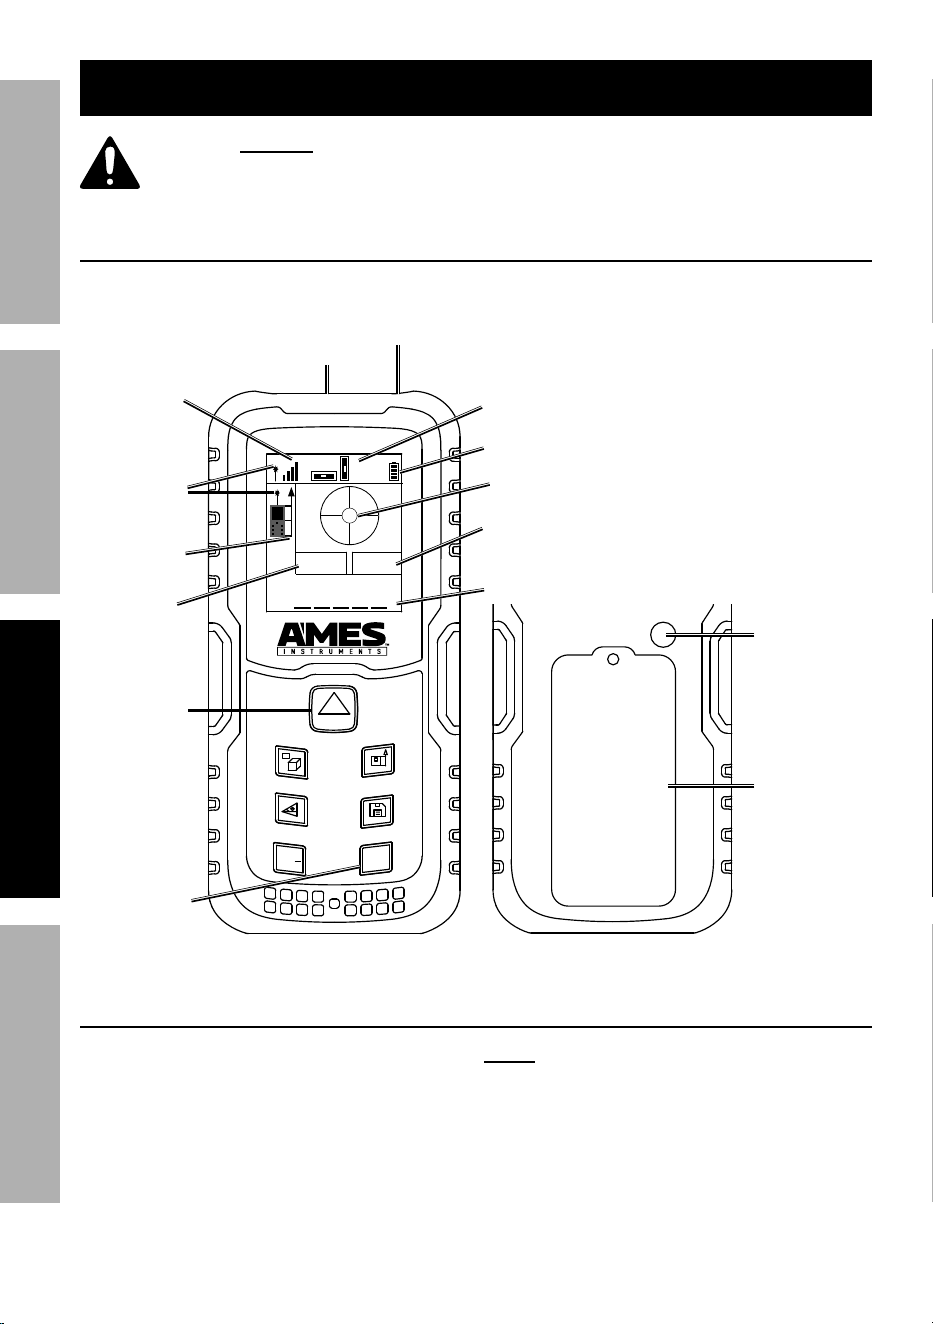
Functions
ON
DIST
UNITS
+
/
C
OFF
60M
X
01.0° 00.4°
Y
m
1.2°
2.4°
5/8"-11
tripod
connector
Battery
compartment
BackFront
power On/
Distance
Button
power Off/
clear
Button
reference
point
indicator
Laser On
Light
Sensor
Battery
Level
y axis
Value
X axis
Value
angle
Display
Measurement
units
Laser
aperture
Lens
install Batteries
1. Turn the Meter over.
2. Remove battery cover.
3. Remove batteries and
replace with same.
note: Do not install old and new batteries
together. Do not install alkaline, carbon-
zinc or rechargeable batteries together.
Position batteries in proper polarity. Do
not use swollen or leaking batteries.
4. Replace battery cover.
Page 7For technical questions, please call 1-888-866-5797.Item 57013
SaFEtyOpEratiOnMaintEnancE SEtup
Operating instructions
read the EntirE iMpOrtant SaFEty inFOrMatiOn section
at the beginning of this manual including all text under
subheadings therein before set up or use of this product.
General Operation
ON
DIST
On/DiSt Button
• Press to turn Meter on.
• Press to activate laser.
• Press to go back during
a measurement.
C
OFF
c/OFF Button
• Press to clear one data set. • Press and hold to turn Meter off.
UNITS
unitS Button
• Press to change laser
reference point between front,
center, and back of Meter.
• Press and hold until
measurement unit changes.
Cycle through until desired
measurement unit is shown.
Save Button
• Save up to 30 data sets.
• Press to save data set.
• Press to retrieve data set.
• Press and hold to delete data set.
+
/
add/Subtract Button
• Measured or calculated values can be added or
subracted. (May not work in all modes.)
using target card (included)
On a flat surface, where there is no reference point (e.g. the end of a table or
counter top), peel strip on bottom of card off and stick card to end of surface.
Surface
to be
measured.
target
card
Page 8 For technical questions, please call 1-888-866-5797. Item 57013
SaFEty OpEratiOn MaintEnancESEtup
Measurement Operations
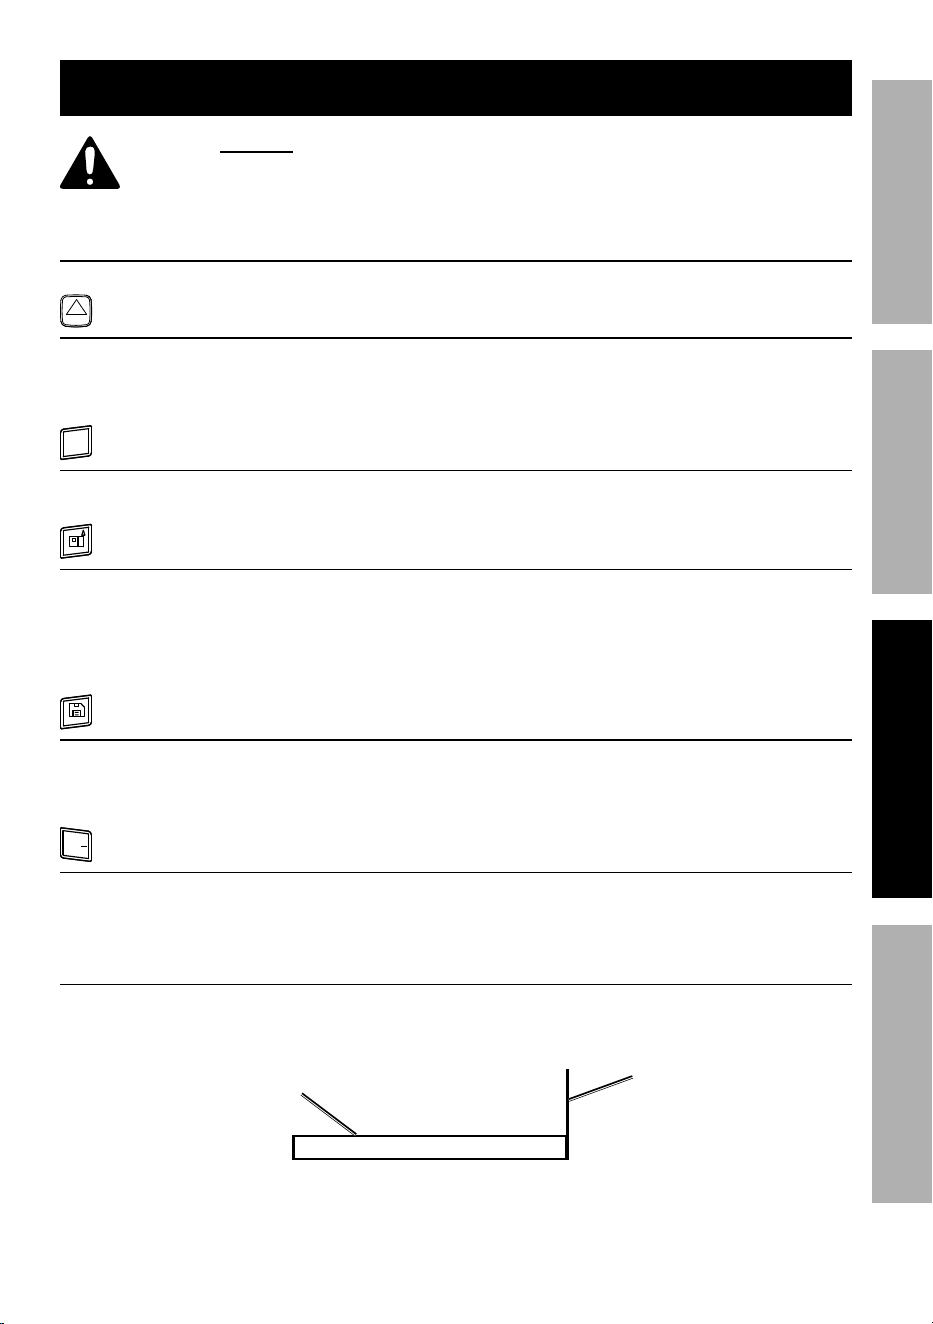
Level - Surface inclination
1. Press DiSt button to turn Meter on.
2. Press to activate level.
3. Use X and Y axis values to determine
angles.
Single Distance
1. Press DiSt button to turn Meter on.
2. Set Laser Reference Point.
3. Press DiSt button to activate laser.
4. Aim laser at target, using
level as necessary.
5. Press DiSt button.
6. Yellow measurement - Distance.
2.357
continuous - Find Desired Distance
1. Press DiSt button to turn Meter on.
2. Set Laser Reference Point.
3. Press and hold DiSt button.
4. Move Meter forward or backward
until desired distance is displayed.
5. Press DiSt button to stop measuring.
6. Pink measurement - Minimum.
7. Blue measurement - Maximum.
8. Yellow measurement - Distance.
Page 9For technical questions, please call 1-888-866-5797.Item 57013
SaFEtyOpEratiOnMaintEnancE SEtup
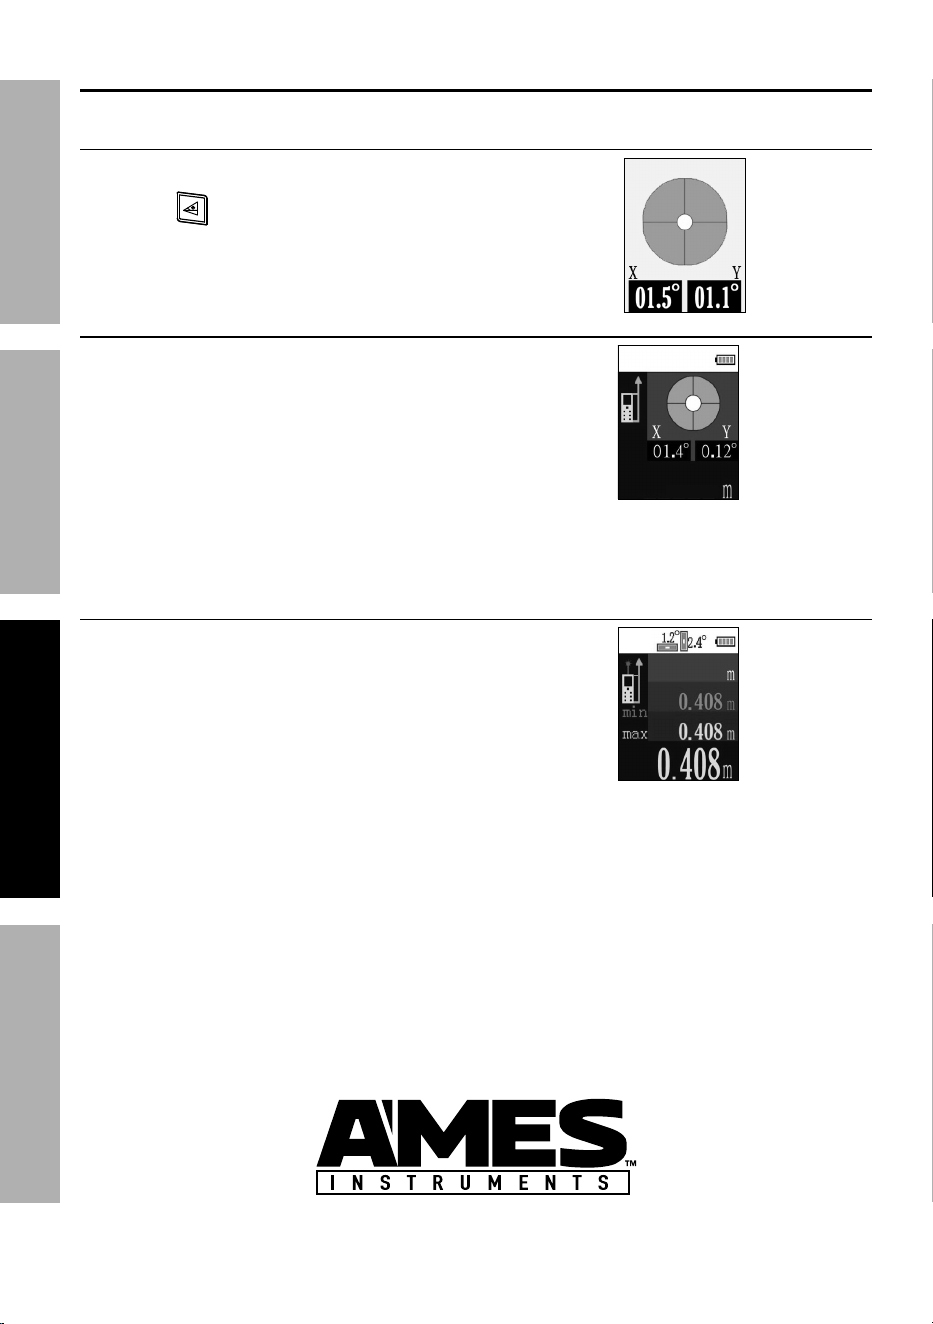
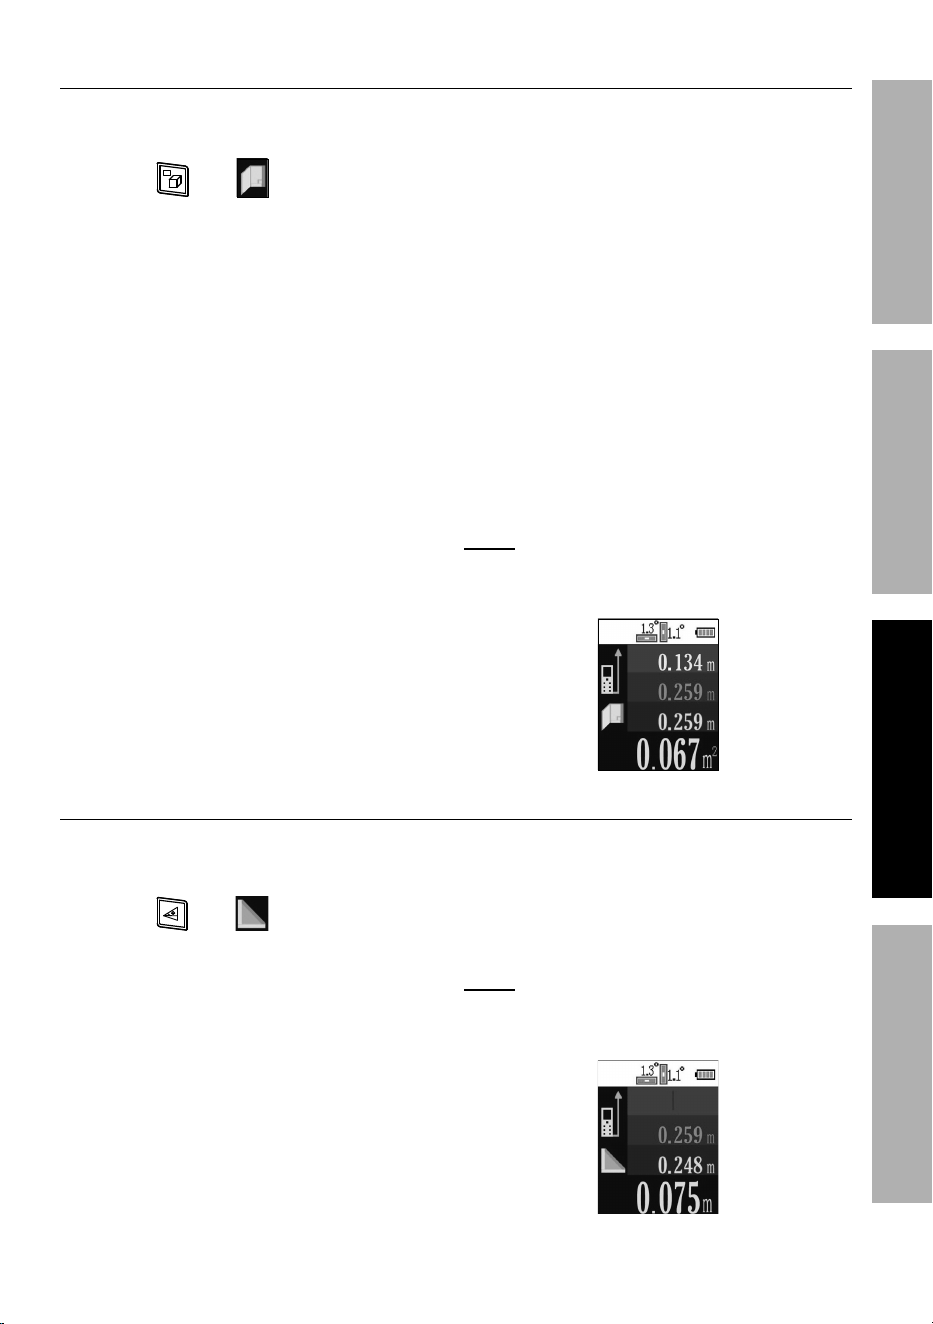
area - rectangle
1. Press DiSt button to turn Meter on.
2. Set Laser Reference Point.
3. Press until appears.
4. Press DiSt button to activate laser.
5. Pink measurement - Place Meter
against first surface, pointing at
opposite surface, then press DiSt
button to take first measurement.
6. Blue measurement - Place Meter
against second surface, pointing at
opposite surface, then press DiSt
button to take second measurement.
7. Yellow measurement - Area.
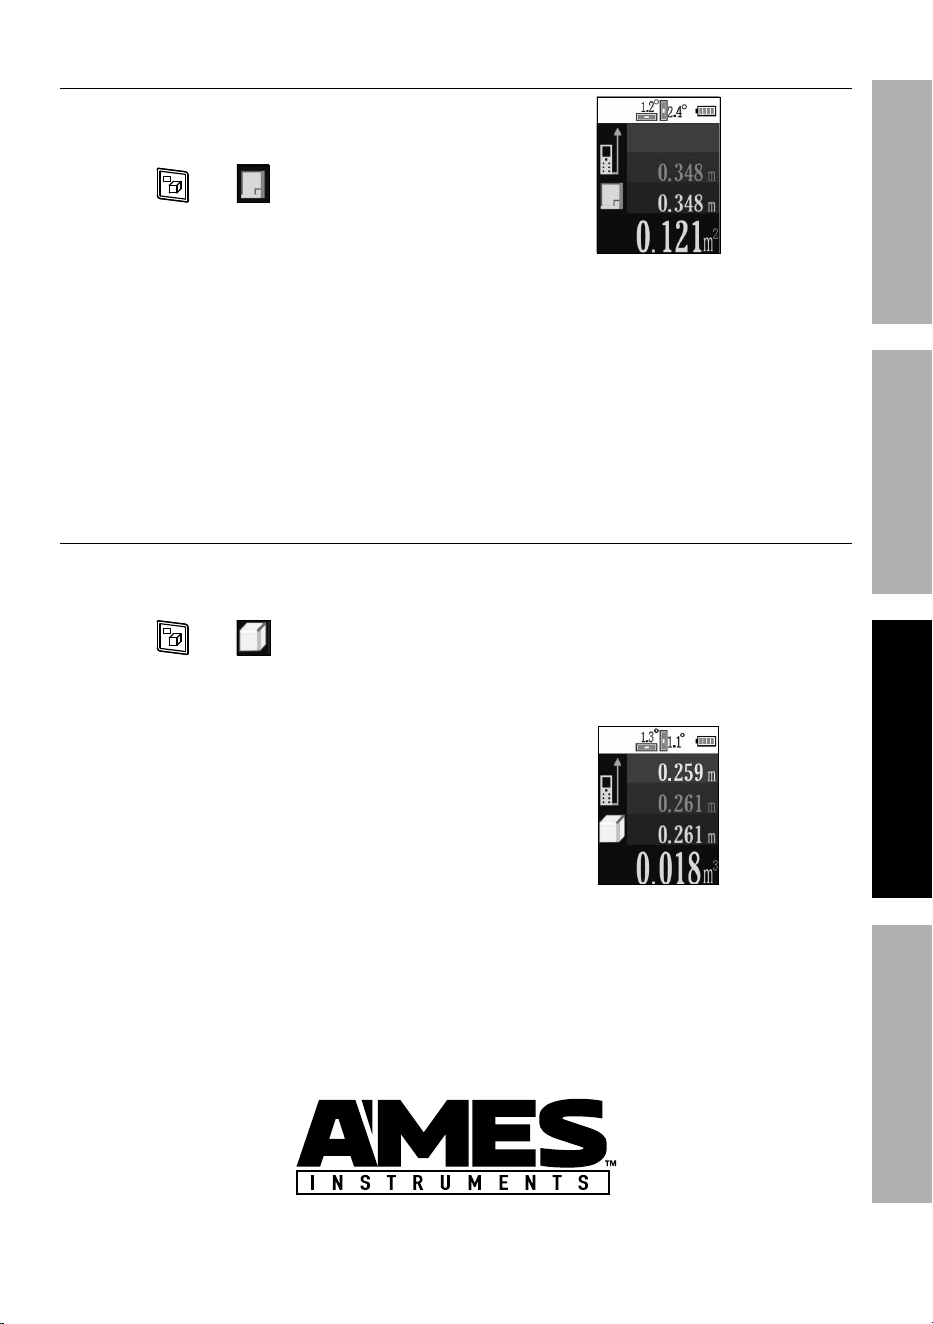
Volume - cubic Feet
1. Press DiSt button to turn Meter on.
2. Set Reference Point.
3. Press until appears.
4. Press DiSt button to activate laser.
5. White measurement - Place Meter
against first vertical surface,
pointing at opposite surface,
then press DiSt button to take
first horizontal measurement.
6. Pink measurement - Place Meter
against second vertical surface,
pointing at opposite surface, then
press DiSt button to take second
horizontal measurement.
7. Blue measurement - Place
Meter against horizontal surface,
pointing at opposite horizontal
surface, then press DiSt button
to take vertical measurement.
8. Yellow measurement - Volume.
Page 10 For technical questions, please call 1-888-866-5797. Item 57013
SaFEty OpEratiOn MaintEnancESEtup
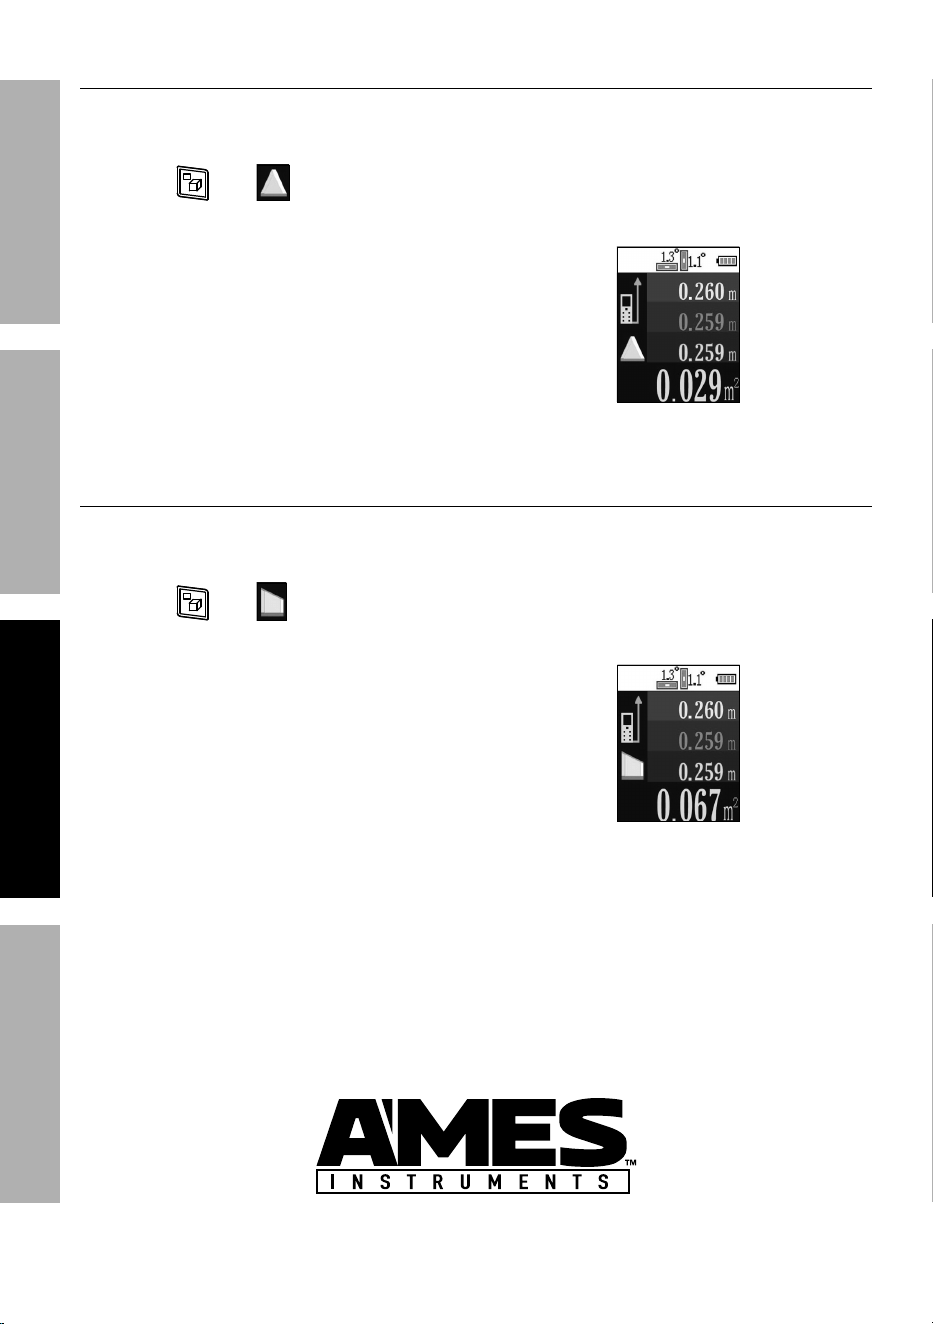
area - triangle
1. Press DiSt button to turn Meter on.
2. Set Laser Reference Point.
3. Press until appears.
4. Press DiSt button to activate laser.
5. White measurement - Place Meter in
corner of first angle, pointing to corner
of second angle, then press DiSt
button to take first measurement.
6. Place Meter in corner of second
angle, pointing to corner of third
angle, then press DiSt button to
take second measurement.
7. Place Meter in corner of third
angle, pointing to corner of first
angle, then press DiSt button
to take third measurement.
8. Yellow measurement - Area.
area - trapezoid
1. Press DiSt button to turn Meter on.
2. Set Laser Reference Point.
3. Press until appears.
4. Press DiSt button to activate laser.
5. White measurement - Place Meter
against first surface, pointing at
opposite surface, then press DiSt
button to take first measurement.
6. Pink measurement - Place Meter
against second surface, pointing at
opposite surface, then press DiSt
button to take second measurement.
7. Blue measurement - Place Meter
against third surface, pointing
opposite surface, then press DiSt
button to take third measurement.
8. Yellow measurement - Area.
Page 11For technical questions, please call 1-888-866-5797.Item 57013
SaFEtyOpEratiOnMaintEnancE SEtup
area - Multiple Surfaces
1. Press DiSt button to turn Meter on.
2. Set Laser Reference Point.
3. Press until appears.
4. First Surface:
a. Press DiSt button to activate laser.
b. Pink measurement - Place Meter
against first surface, pointing at
opposite surface, then press DiSt
button to take first measurement.
c. Blue measurement - Place
Meter against second surface,
pointing at opposite surface,
then press DiSt button to
take second measurement.
d. Yellow measurement -
Area of first surface.
e. White measurement -
Area of first surface.
5. Second Surface:
a. Press DiSt button to activate laser.
b. Pink measurement - Place Meter
against first surface, pointing at
opposite surface, then press DiSt
button to take first measurement.
c. Blue measurement - Place
Meter against second surface,
pointing at opposite surface,
then press DiSt button to
take second measurement.
d. Yellow measurement - Area
of second surface.
e. White measurement -
Combined area of first surface
and second surface.
note: Keep taking measurements
to add more surfaces. White
measurement will indicate total area.
2
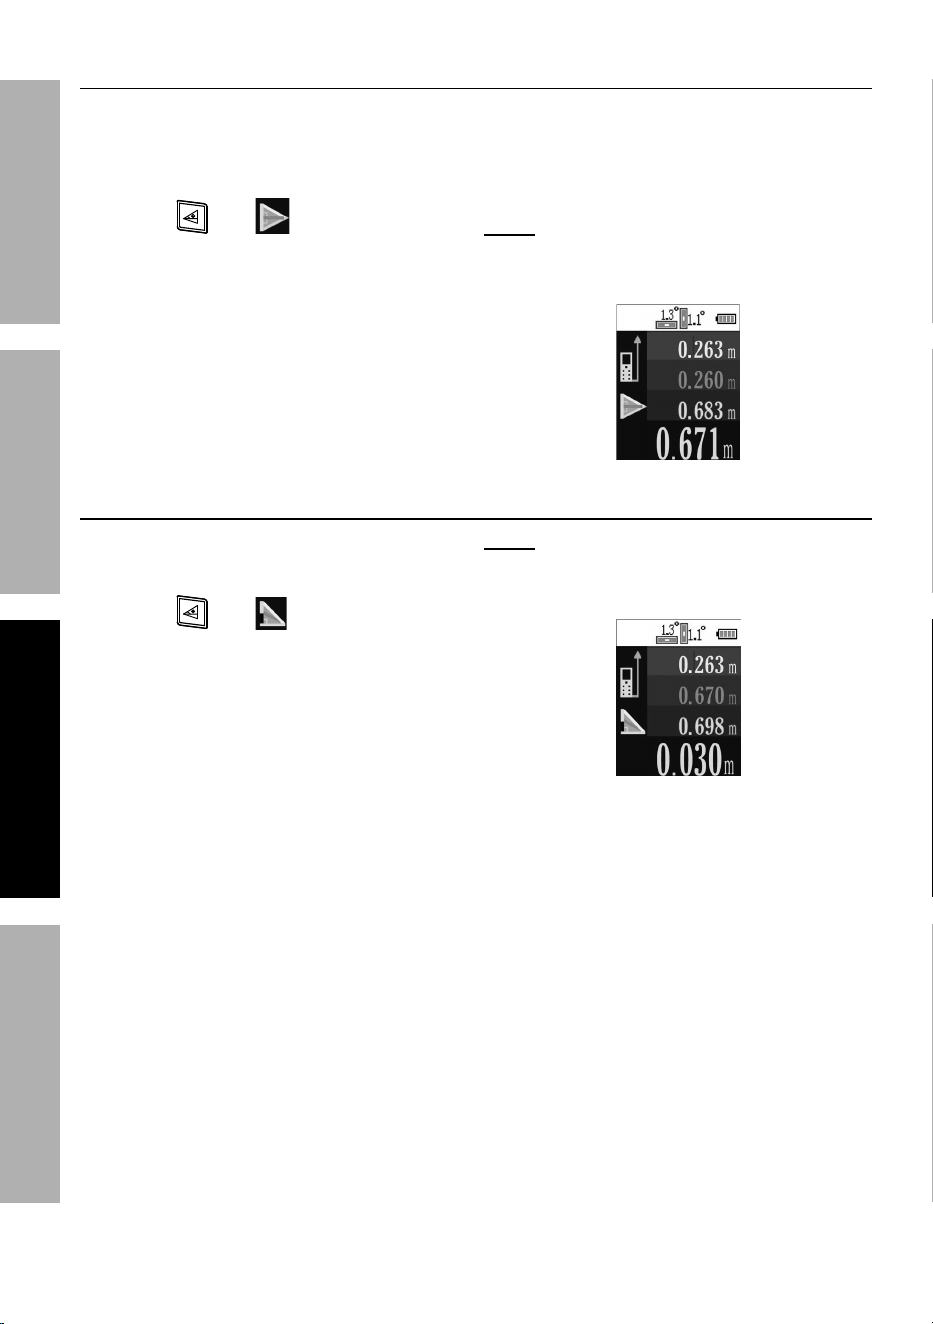
indirect Height/Length - Single pythagorean
1. Press DiSt button to turn Meter on.
2. Set Laser Reference Point.
3. Press until appears.
4. Press DiSt button to activate laser.
5. Pink measurement - Place Meter
on the ground. Tilt Meter up,
point at top reference point on
surface, then press DiSt button.
6. Blue measurement - Keep Meter
on the ground, point at bottom
reference point on surface,
then press DiSt button.
7. Yellow measurement - Height.
note: Measurement may also
be performed on horizontal
surface to measure length.
Page 12 For technical questions, please call 1-888-866-5797. Item 57013
SaFEty OpEratiOn MaintEnancESEtup
indirect Height/Length - Double pythagorean
1. Place Meter on tripod.
2. Press DiSt button to turn Meter on.
3. Set Laser Reference Point.
4. Press until appears.
5. Press DiSt button to activate laser.
6. White measurement - Tilt Meter
up, point at top reference point on
surface, then press DiSt button.
7. Pink measurement - Level Meter and
point at middle reference point on
surface, then press DiSt button.
8. Blue measurement - Tilt Meter down,
point at bottom reference point on
surface, then press DiSt button.
9. Yellow measurement - Height.
note: Measurement may also
be performed on horizontal
surface to measure length.
indirect Height/Length - Double pythagorean Minus
1. Press DiSt button to turn Meter on.
2. Set Laser Reference Point.
3. Press until appears.
4. Press DiSt button to activate laser.
5. White measurement - Place Meter
on the ground. Tilt Meter up,
point at top reference point on
surface, then press DiSt button.
6. Pink measurement - Keep Meter
on the ground, point at specific
reference point on surface,
then press DiSt button.
7. Blue measurement - Keep Meter
on the ground, point at bottom
reference point on surface,
then press DiSt button.
8. Yellow measurement -
Height of specific area.
note: Measurement may also
be performed on horizontal
surface to measure length.
Page 13For technical questions, please call 1-888-866-5797.Item 57013
SaFEtyOpEratiOnMaintEnancE SEtup
indirect Height/Length - angle calculation
1. Place Meter on tripod.
2. Press DiSt button to turn Meter on.
3. Set Laser Reference Point.
4. Press until appears.
5. Press DiSt button to activate laser.
6. White angle value - Used to
calculate measurement.
7. Pink measurement - Tilt Meter
up, point at top reference point on
surface, then press DiSt button.
8. Blue measurement - Tilt Meter down,
point at bottom reference point on
surface, then press DiSt button.
9. Yellow measurement - Height.
note: Measurement may also
be performed on horizontal
surface to measure length.
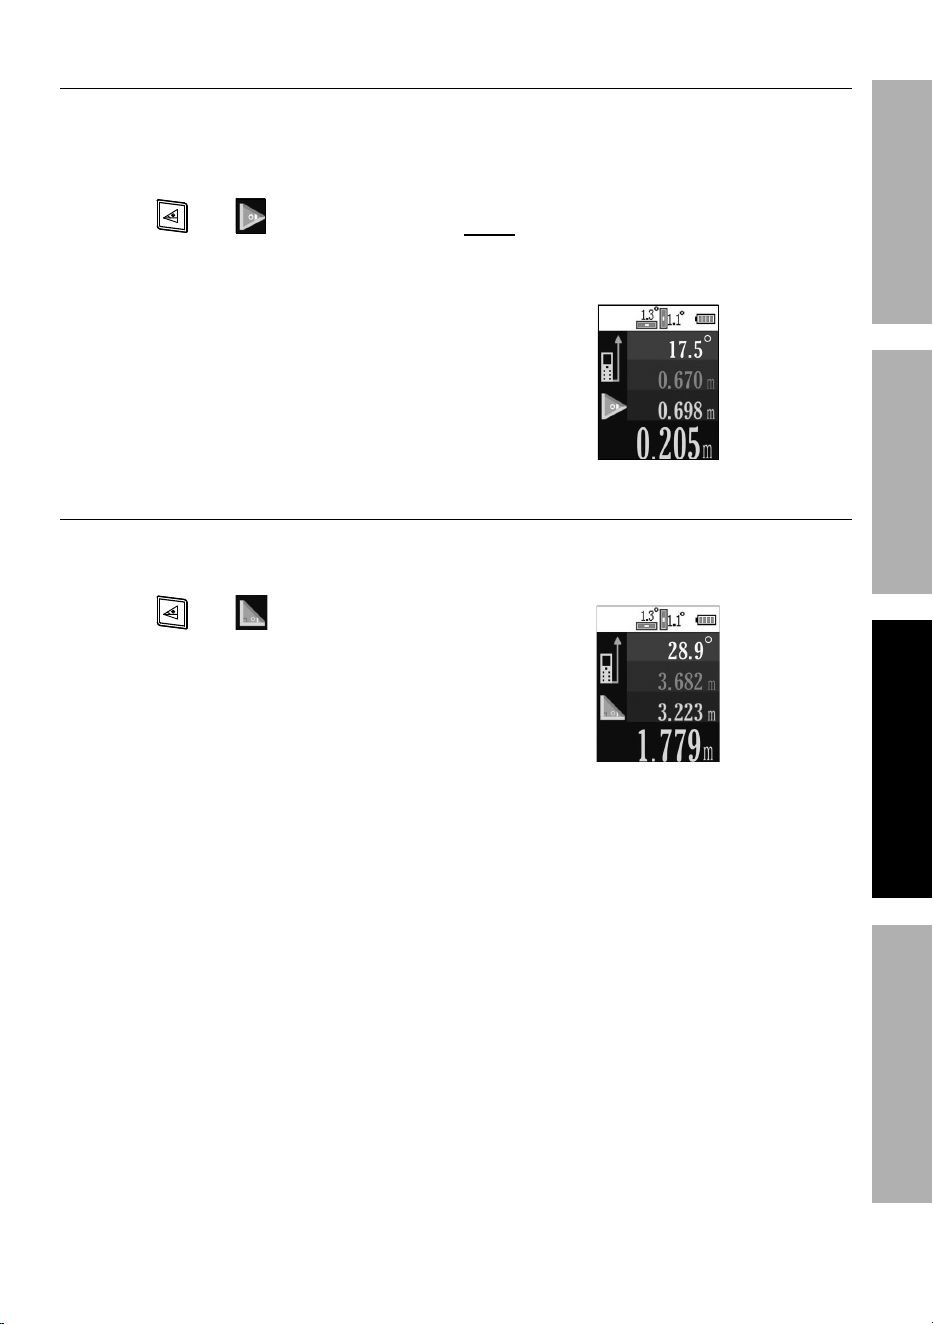
indirect Height/Length - angle calculation
1. Press DiSt button to turn Meter on.
2. Set Laser Reference Point.
3. Press until appears.
4. Press DiSt button to activate laser.
5. White angle value - Used to
calculate measurement.
6. Pink measurement - Place Meter
on the ground. Tilt Meter up,
point at top reference point on
surface, then press DiSt button.
7. Blue measurement - Length.
8. Yellow measurement - Height.

Page 14 For technical questions, please call 1-888-866-5797. Item 57013
SaFEty OpEratiOn MaintEnancESEtup
Error codes
Error code cause Solution
Err01 The reflected laser signal is too strong.
Change target or affix a white
sheet of paper to target.
Err02
The distance to be measured
falls outside working range.
Measure within the working range
0.2" - 197' (0.05m - 60m).
Err03 The reflected laser signal is too weak.
Change target or affix a white
sheet of paper to target.
Err06 Low battery.
Replace battery. See Battery
Replacement on page 15.

Page 15For technical questions, please call 1-888-866-5797.Item 57013
SaFEtyOpEratiOnMaintEnancE SEtup
Maintenance and Servicing
procedures not specifically explained in this manual
must be performed only by a qualified technician.
cleaning, Maintenance, and Lubrication
1. Wipe unit with a dry, lint-free cloth.
Do not use solvents or abrasives.
2. Remove batteries if not in
use for long periods.
3. Store unit in a dry location.
4. Other than the batteries, there
are no replaceable parts on this
unit. repairs should be done
by a qualified technician.
Battery replacement
1. When Err06 appears then the
Meter turns off, the batteries
need to be replaced.
2. Turn the Meter over.
3. Remove battery cover.
4. Remove batteries and
replace with same.
note: Do not install old and new batteries
together. Do not install alkaline, carbon-
zinc or rechargeable batteries together.
Position batteries in proper polarity. Do
not use swollen or leaking batteries.
5. Replace battery cover.
calibration
Have the Meter calibrated by a qualified technician every year.

26541 agoura road • calabasas, ca 91302 • 1-888-866-5797
Limited 90 Day Warranty
Harbor Freight Tools Co. makes every effort to assure that its products meet high
quality and durability standards, and warrants to the original purchaser that this
product is free from defects in materials and workmanship for the period of 90 days
from the date of purchase. This warranty does not apply to damage due directly or
indirectly, to misuse, abuse, negligence or accidents, repairs or alterations outside
our facilities, criminal activity, improper installation, normal wear and tear, or to lack of
maintenance. We shall in no event be liable for death, injuries to persons or property,
or for incidental, contingent, special or consequential damages arising from the use
of our product. Some states do not allow the exclusion or limitation of incidental or
consequential damages, so the above limitation of exclusion may not apply to you. THIS
WARRANTY IS EXPRESSLY IN LIEU OF ALL OTHER WARRANTIES, EXPRESS OR
IMPLIED, INCLUDING THE WARRANTIES OF MERCHANTABILITY AND FITNESS.
To take advantage of this warranty, the product or part must be returned to us
with transportation charges prepaid. Proof of purchase date and an explanation
of the complaint must accompany the merchandise. If our inspection verifies
the defect, we will either repair or replace the product at our election or we may
elect to refund the purchase price if we cannot readily and quickly provide you
with a replacement. We will return repaired products at our expense, but if we
determine there is no defect, or that the defect resulted from causes not within the
scope of our warranty, then you must bear the cost of returning the product.
This warranty gives you specific legal rights and you may also
have other rights which vary from state to state.
record Serial number Here:
note: If product has no serial number, record month and year of purchase instead.
note: Replacement parts are not available for this item.
