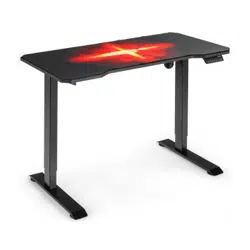
Computer Desk
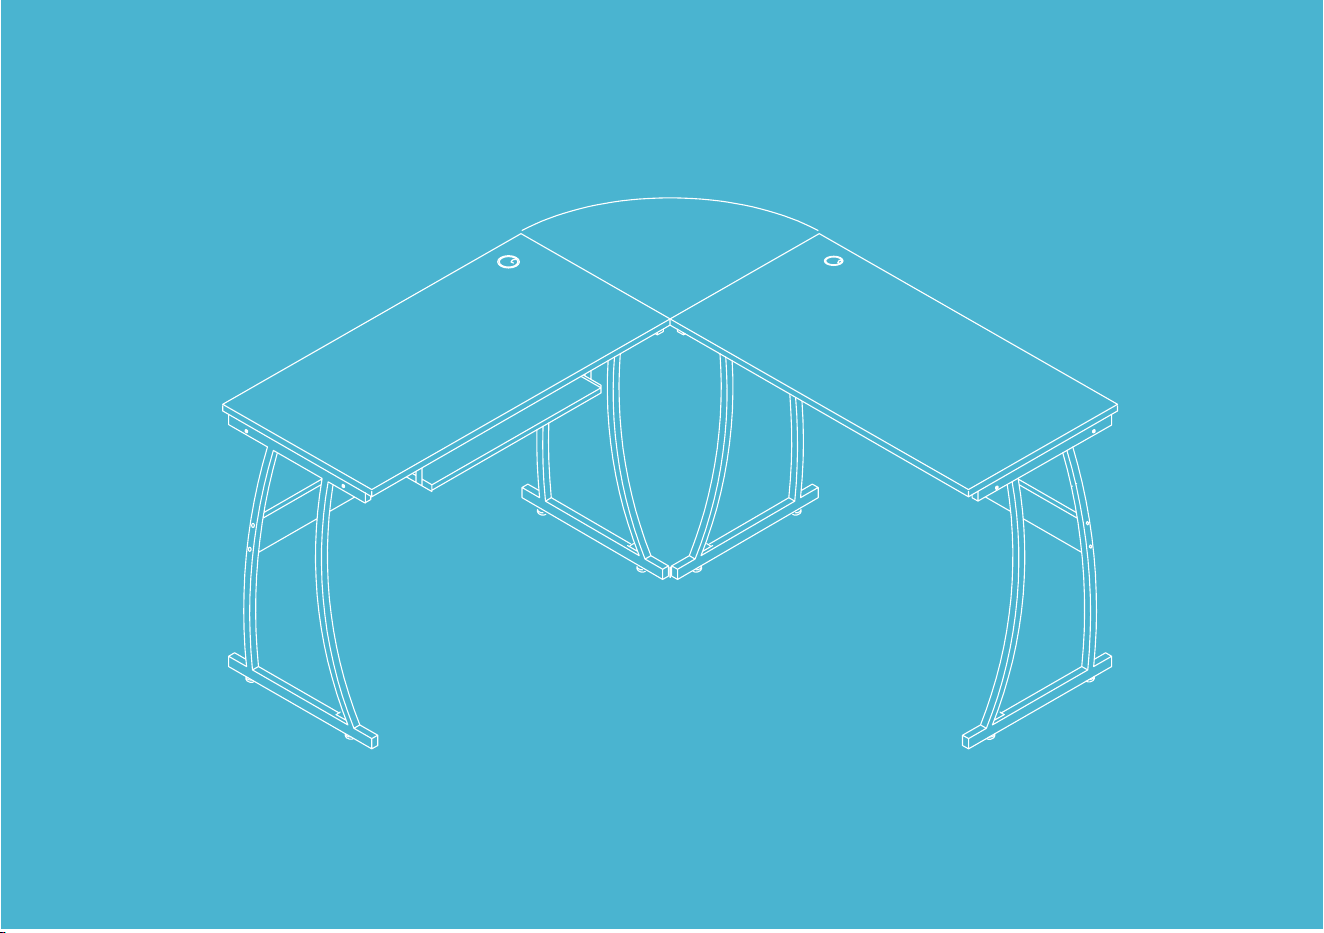

TABLE OF CONTENTS
Important Safety
Instructions
Tools Needed
Warranty Information
Parts Description
Installation
04
05
14
05
06

COMPUTER DESK | 4
IMPORTANT SAFETY INSTRUCTIONS
• Check if all the parts are complete before installation.
• Your computer desk is very heavy. Two people are recommended to assemble it.
• Read through the instructions before installing the computer desk.
• Do not tighten all the screws until the entire unit has been assembled and set up well.
• Keep the small parts away from children to avoid the risk of swallowing.
COMPUTER DESK | 5
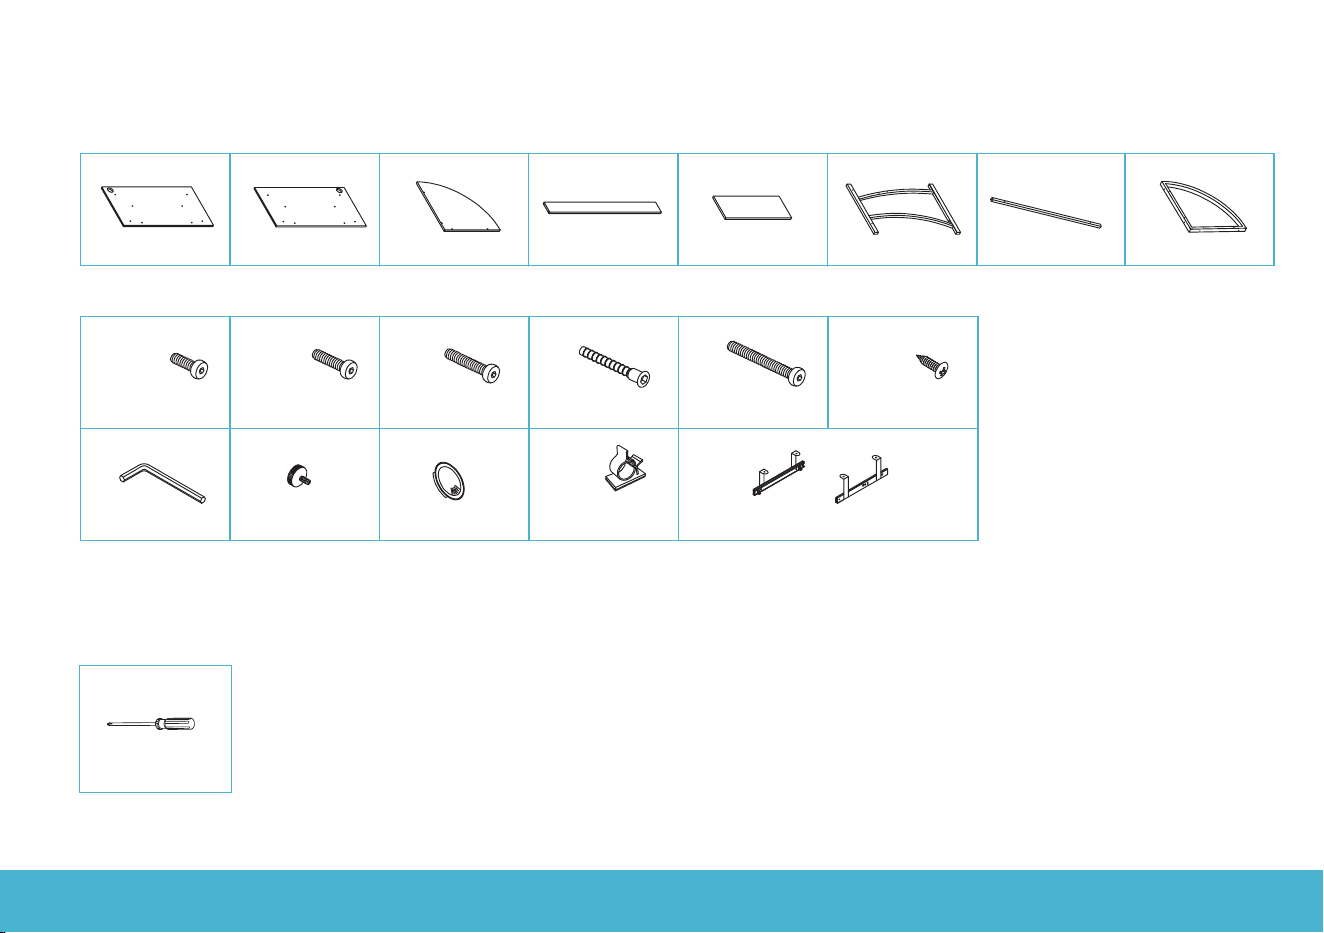
1
x1 PC
3
x1 PC
4
x4PCS
5 6
x4PCS
7
x1 PCS
8
x2PCS
x1 PC
2
x1 PC
K
x1 SET
x4PCS
x4PCS
C
x8PCS
D
x4PCS
E
x4PCS
F
M6x12
M6x35
M7x50
M6x55
G
A B
M4x12
x12PCS
M6x30
H
x1 PC
I
x4PCS
Cable clip
Grommet
Foot pad
Wrench
J
x2PCSx8PCS
Keyboard tray slider
TOOLS NEEDED
Screwdriver - 1 PC
(Not included)
PARTS DESCRIPTION

COMPUTER DESK | 6
Step 1:
Attach the foot pads to the desk legs.
IMPORTANT NOTE: Do not tighten all the screws until the entire unit has been assembled and set up well.
6
H
6
6
6
H
H
H
H
H
H
H
Hx8pcs
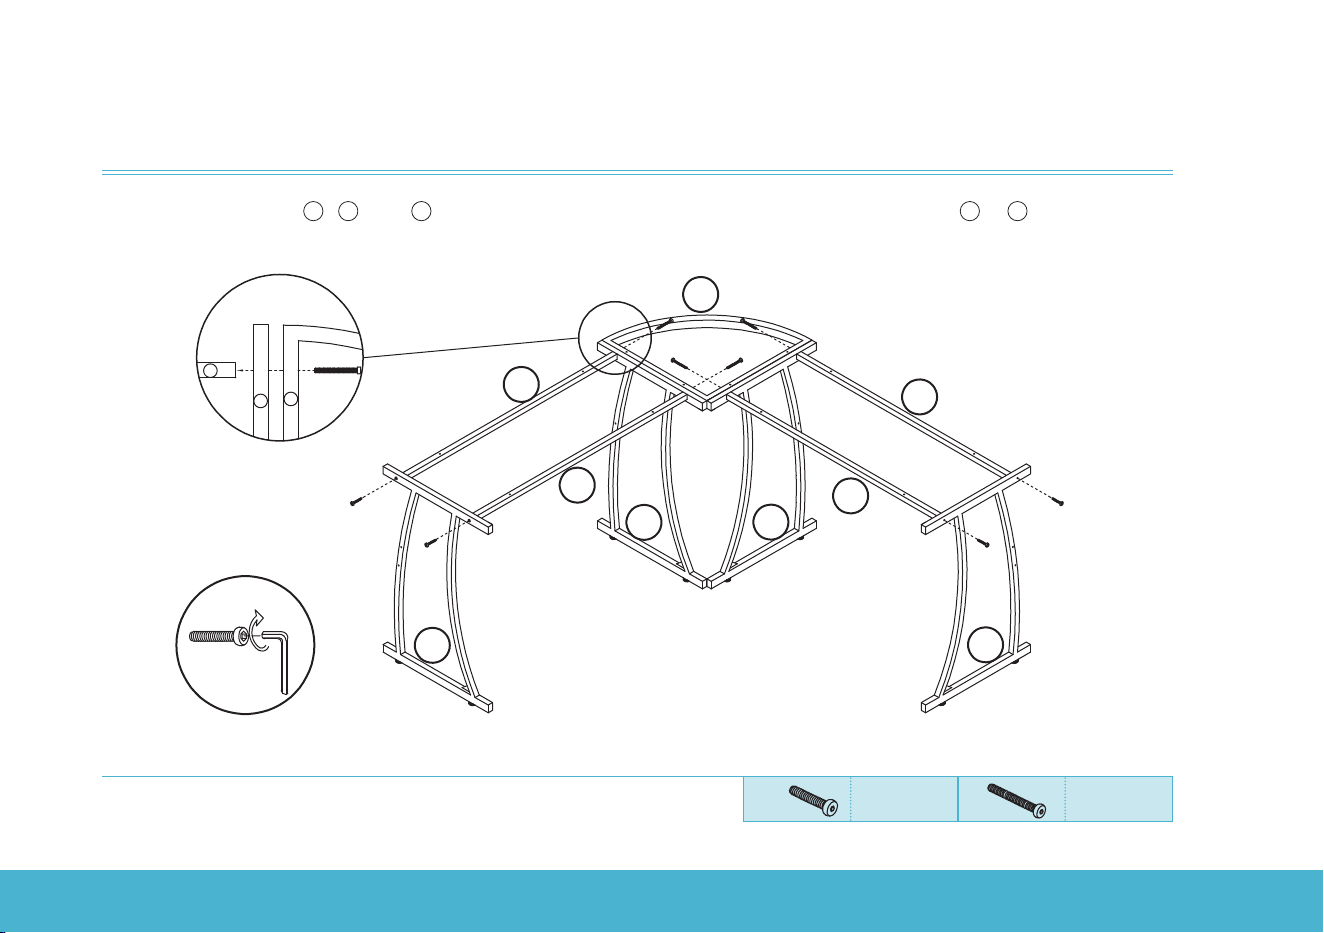
INSTALLATION
COMPUTER DESK | 7
INSTALLATION
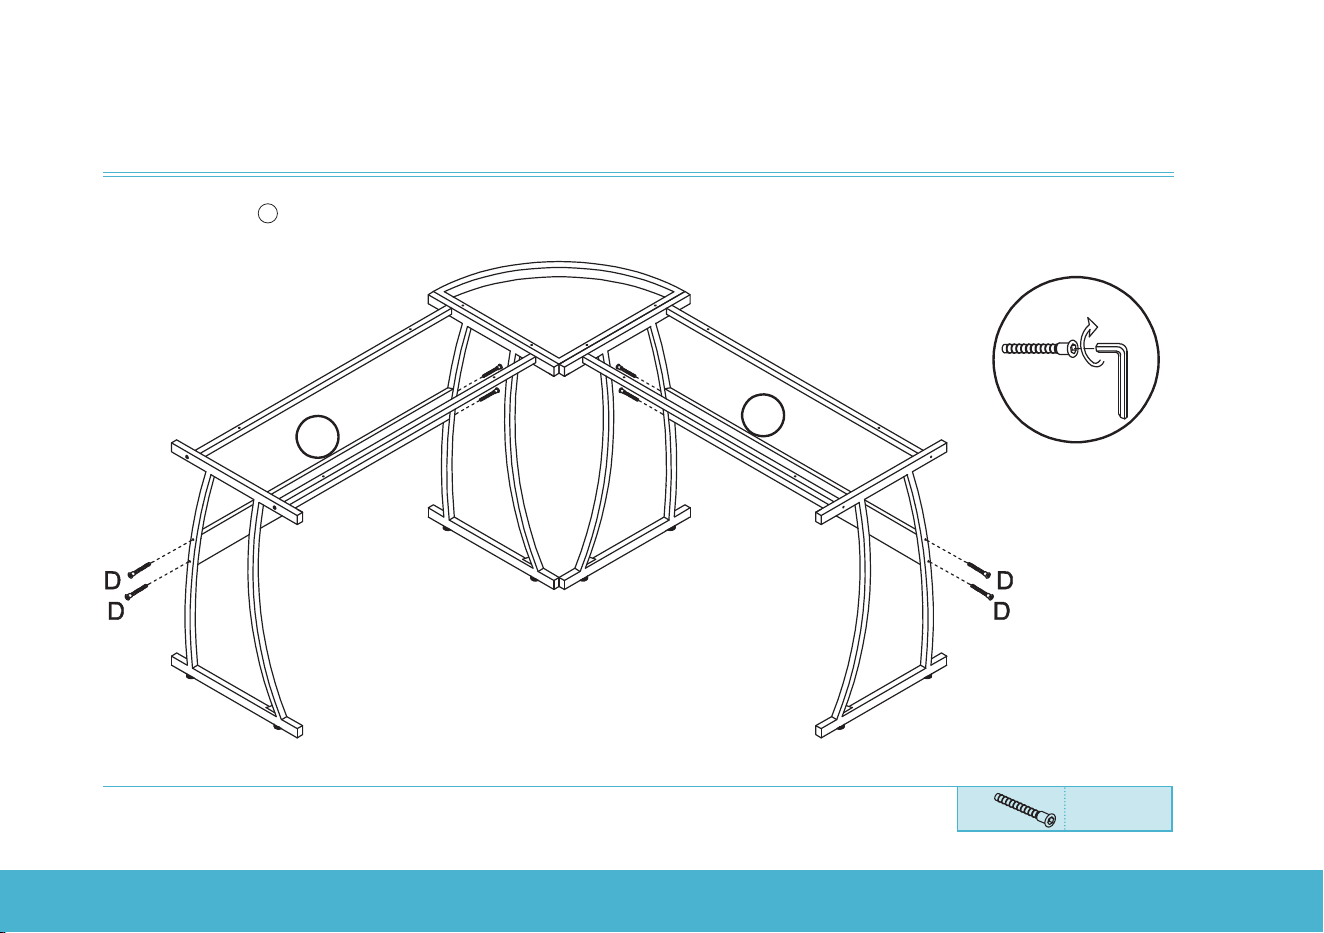
Step 2:
Insert screw E through
8
,
6
, and
7
in turn and tighten them securely. Use screw C to assemble
6
to
7
.
8
C
C
E
E
C
G
E
/
7
7
7
7
6
6
6
6
C
C
E
E
8
6
7
E
Top View
M6x35
Cx4pcs
M6x55
Ex4pcs
COMPUTER DESK | 8
INSTALLATION
Step 3:
Install the boards
4
.
D
D
D
G
D
D
4
4
M7x50
Dx8pcs
COMPUTER DESK | 9
INSTALLATION
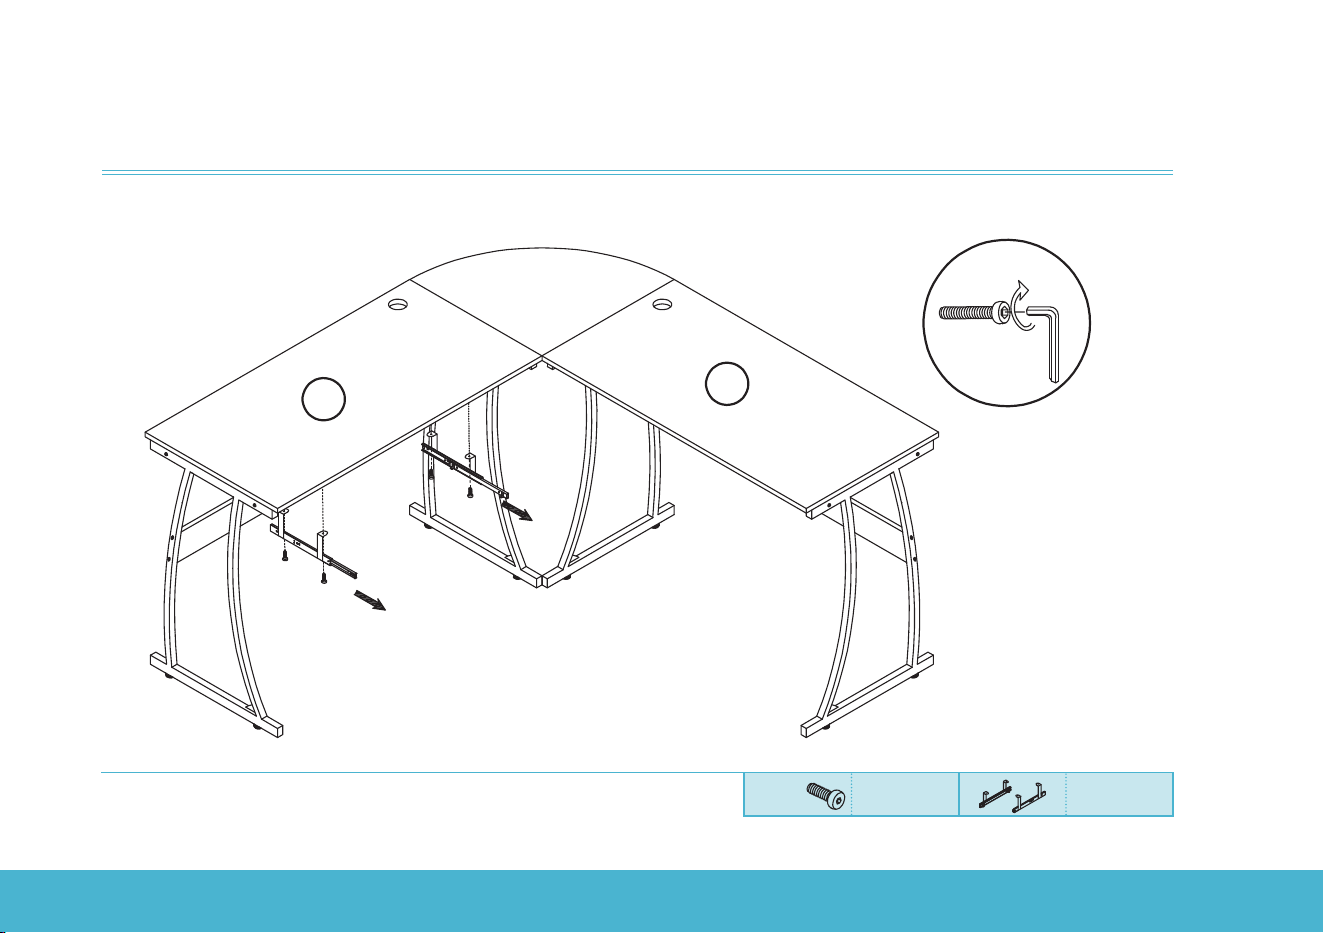
Step 4:
Install the desk boards onto the metal frame. The positions of
1
and
2
can be interchanged. You can select
an installation option according to the cable entry holes locations.
B
B
B
B
B
B
3
or the other option
G
B
B
B
B
B
B
B
3
1
2
2
1
M6x30
Bx12pcs
COMPUTER DESK | 10
INSTALLATION
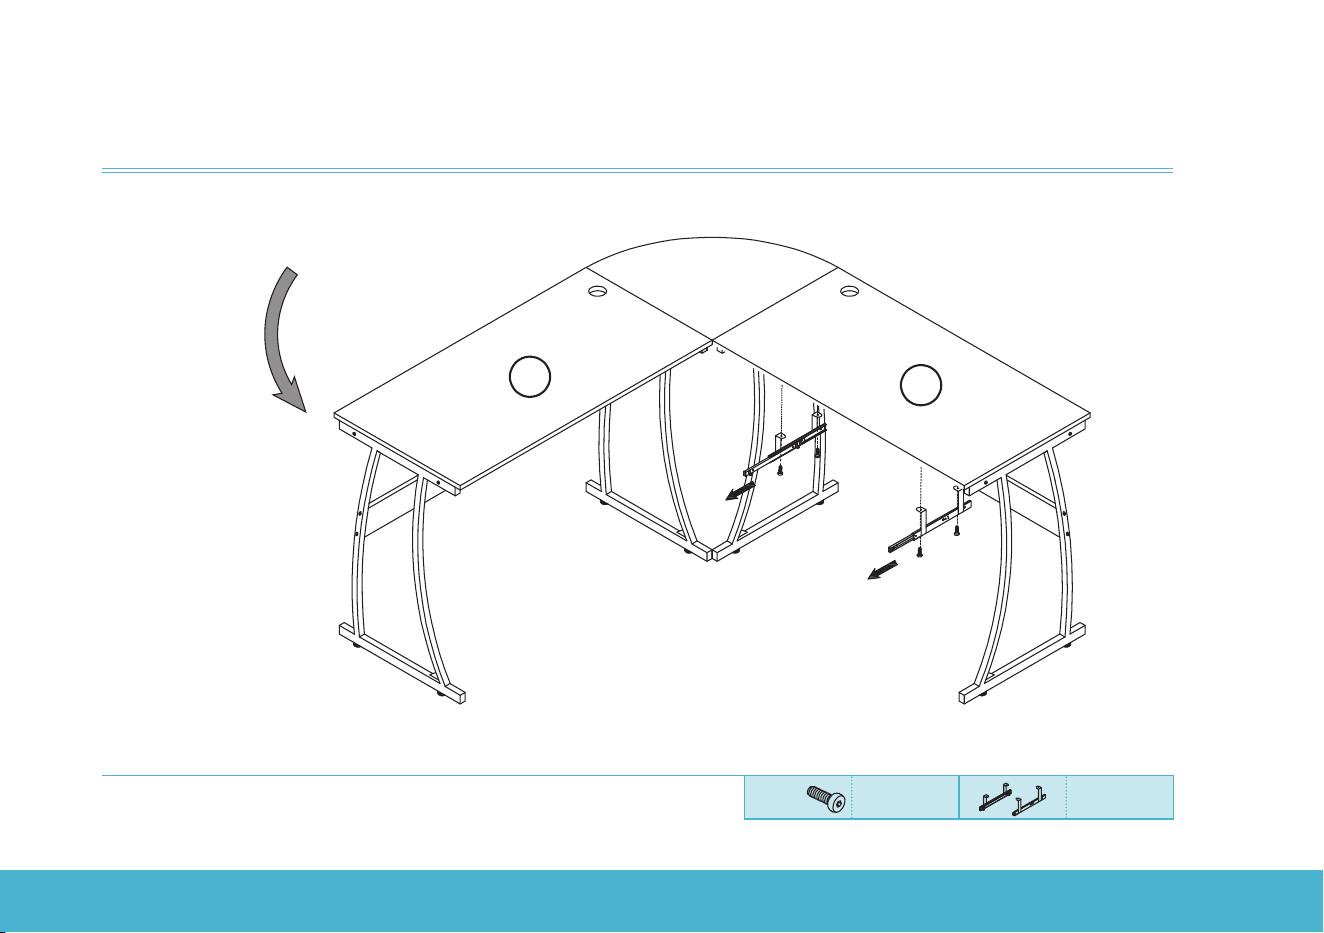
Step 5a:
Install the keyboard tray sliders. You can select to install the keyboard tray at left side or right side.
G
A
A
A
A
K(left)
2
1
A
Extend the sliders
towards the
front
K(right)
M6x12
Ax4pcs Kx1set
COMPUTER DESK | 11
INSTALLATION
Step 5b:
A
A
A
A
K(left)
2
1
Extend the sliders
towards the
front
K(right)
or the
other
option
M6x12
Ax4pcs Kx1set
COMPUTER DESK | 12
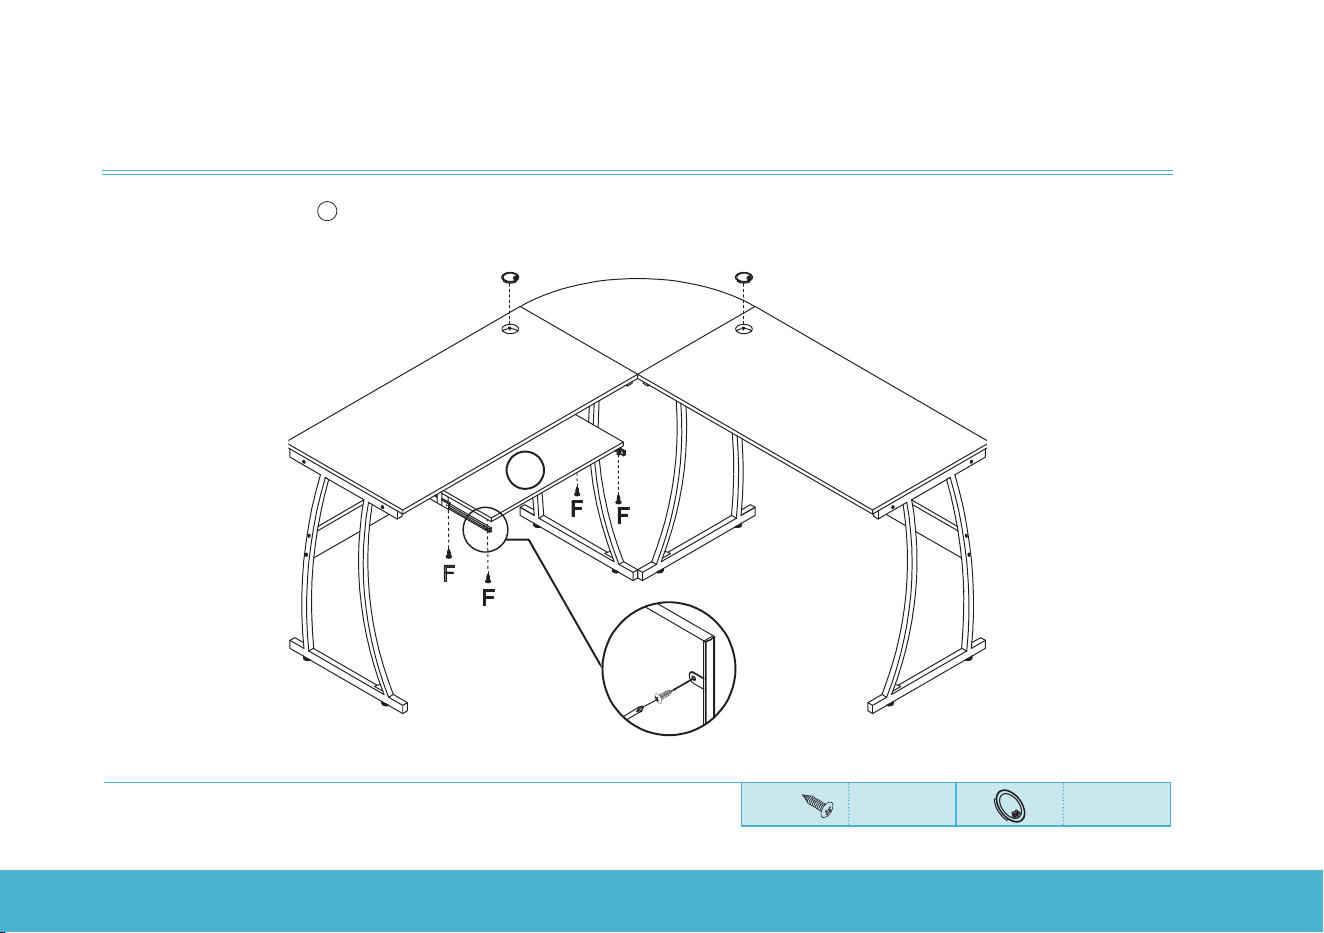
INSTALLATION
Step 6:
Install the keyboard tray
5
. Press the grommet (I) to the cable hole and cover it.
F
Backside
Screwdriver
5
I
I
M4x12
Fx4pcs Ix2pcs
COMPUTER DESK | 13
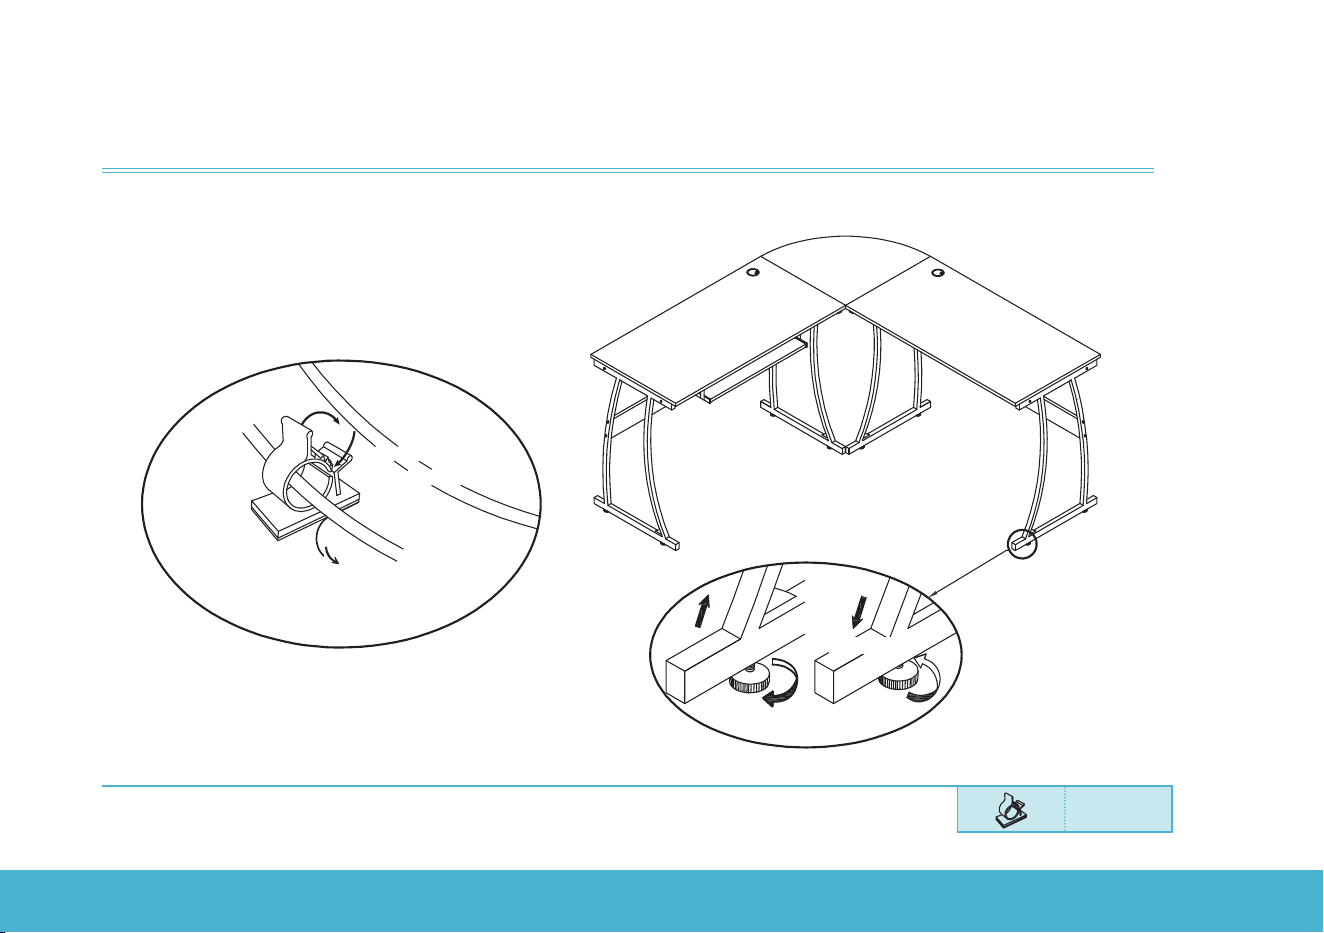
Step 7:
Check all the parts and tighten all the screws.
If needed, adjust the foot pads to make sure the desk is stable.
Stick the cable clip (J) in place to fix the wires if necessary.
Jx4pcs
Loose
Rise
Tighten
1. Peel o the protective film
and stick the cable clip.
2. Put the wire
into the clip
3. Fasten
Cable Clip Usage
J
Descend
INSTALLATION

COMPUTER DESK | 14
CONTACT US
RIF6 oers a 12-month warranty on all of our products purchased new and unused from RIF6 or an authorized
reseller, with an original proof of purchase and where a defect has arisen, wholly or substantially, as a result of faulty
manufacturing, parts or workmanship during the Warranty Period. The warranty does not apply where damage is
caused by other factors, including but without limitation: (a) normal wear and tear; (b) abuse, mishandling, accident
or failure to follow operating instructions; (c) exposure to liquid or infiltration of foreign particles; (d) servicing or
modification of the product other than by RIF6. These are our general terms for the warranty service, but we always
urge our customers to reach out to us with any issue, regardless of warranty terms. If you experience an issue with a
RIF6 product, please contact us at support@RIF6. com, and we will do our best to resolve it for you.
WARRANTY INFORMATION
WARNING
This manual is to be used with all items with the model numbers
RIF090408N
Keep all plastic bags away from children.


COMPUTER DESK | 16
learn more at rif6.com