
Technical Support and E-Warranty Certificate www.vevor.com/support
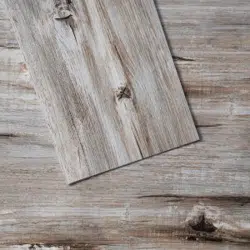
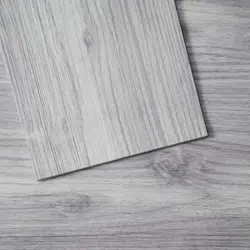
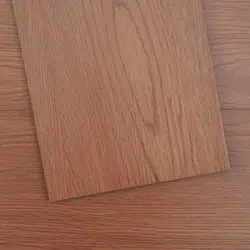
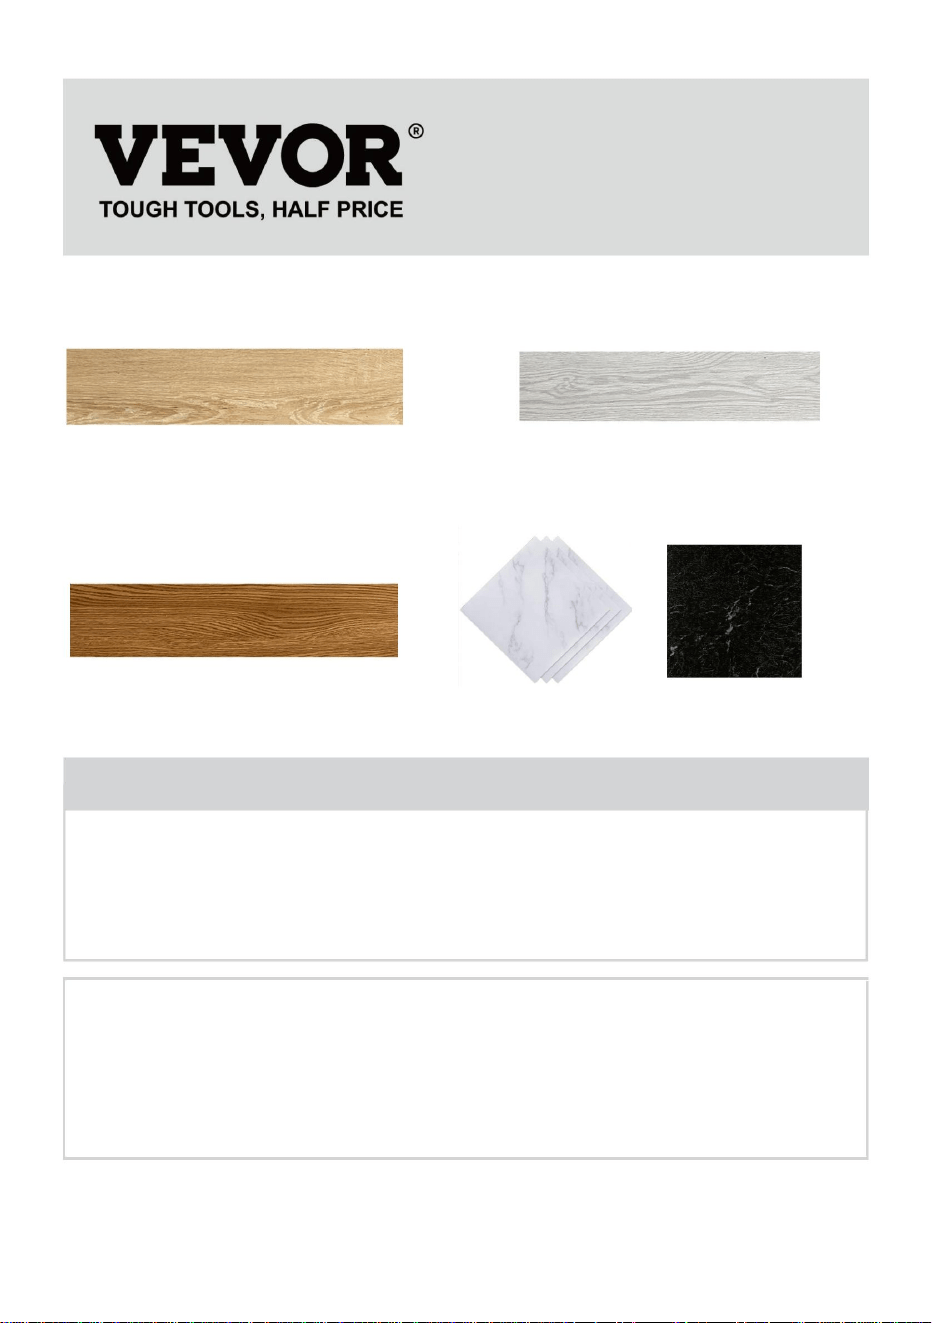
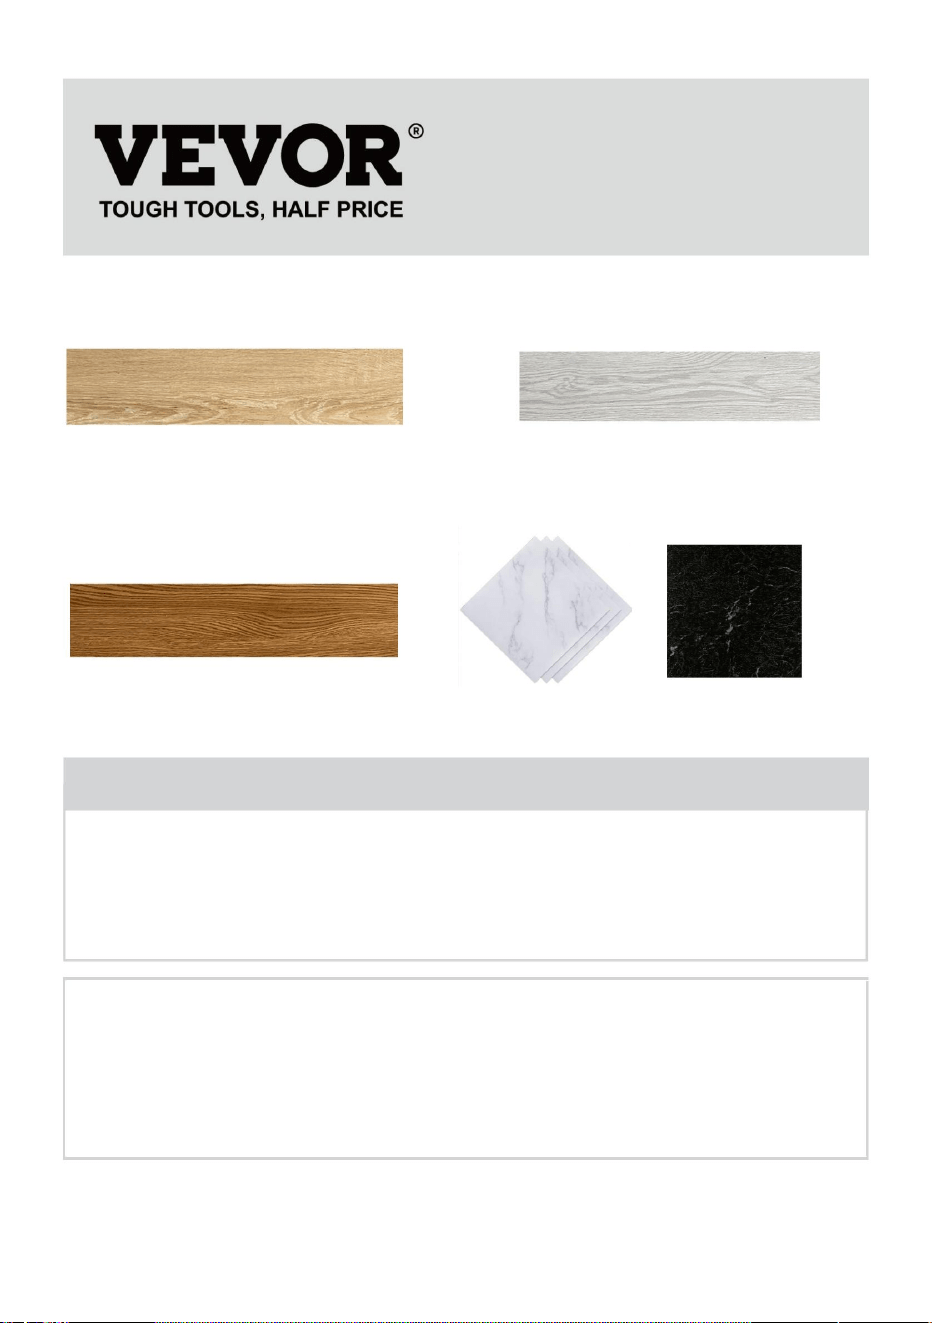
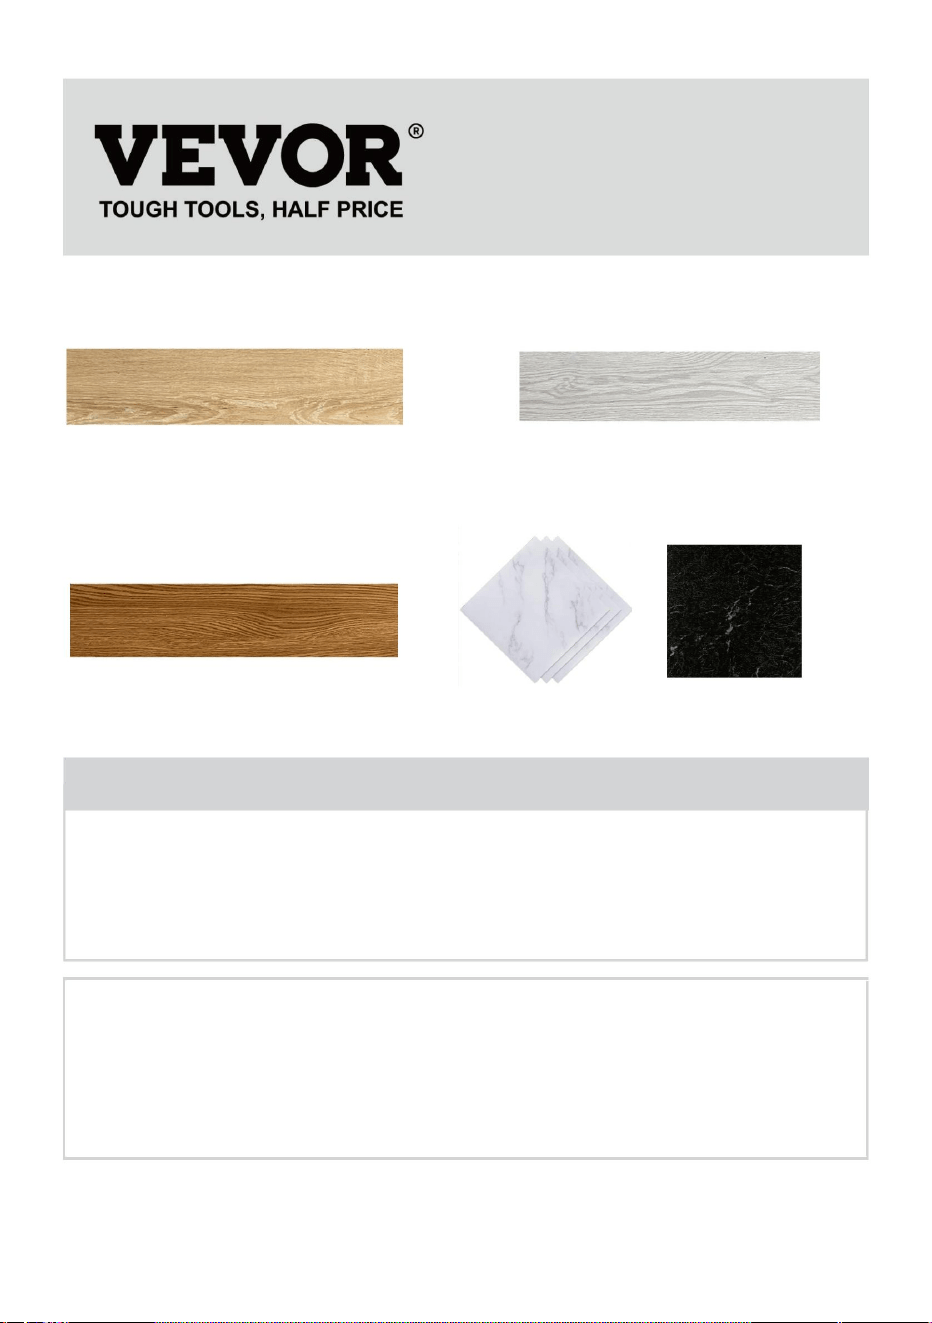
PEEL AND STICK FLOORING
MODEL:WB-1002-7/WB-801/WB-05-26/WB-4503/WB-XC613-1
We continue to be committed to provide you tools with competitive price.
"Save Half", "Half Price" or any other similar expressions used by us only represents an
estimate of savings you might benefit from buying certain tools with us compared to the major
top brands and does not necessarily mean to cover all categories of tools offered by us. You
are kindly reminded to verify carefully when you are placing an order with us if you are
actually saving half in comparison with the top major brands.


- 1 -
MODEL:WB-1002-7/WB-801/WB-05-26/WB-4503/WB-XC613-1
WB-1002-7 WB-801
WB-05-26 WB-4503 WB-XC613-1
Have product questions? Need technical support? Please feel free to
contact us:
Technical Support and E-Warranty Certificate
www.vevor.com/support
NEED HELP? CONTACT US!
This is the original instruction, please read all manual instructions
carefully before operating. VEVOR reserves a clear interpretation of our
user manual. The appearance of the product shall be subject to the
product you received. Please forgive us that we won't inform you again if
there are any technology or software updates on our product.
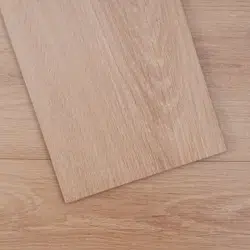
Peel and Stick Flooring
- 2 -
PARAMETER LIST
Model
WB-100
2-7
WB-801
WB-05-26
WB-4503
WB-XC61
3-1
Product
size
(mm/pcs)
914*152
*2.5
914*152
*2.5
914*152*
2.5
305*305*
1.5
305*305*1
.5
Quantity
(pcs)
36
36
36
50
50
net
weight(kg)
24
24
24
14.5
14.5
SECURITY & WARNINGS
General Safety Rules
WARNING: Please read carefully the following instructions in order to
reduce the risk of injuries, accidents or damage to the product by itself.
1. When you first open the box, you will have a pungent odor. Please don't
worry, this odor is non-toxic and will dissipate after a few days of use.
2. Never use corrosive detergents, wire brushes, abrasive scourers,metal
or sharp utensils to clean the product.
3. Please don't put the product beside a heating plant or fires, or pour hot
water on it in case of fires, burns and deformation dangers.
4. Please don't allow babies and children to put fragments of this product
into their mouths.
5. Please do not put the product into the washing machine, it is
recommended to wash by hand.
6. Please do not contact this product with corrosive chemicals and sharp
knives.
7. Children and minors are not allowed to install this product to avoid
causing personal injury
8. The safety precautions and instructions given in this manual are unable
- 3 -
to cover all the conditions and situations that may arise in detail.
9. The operator and/or user must use common sense and caution when
operating the product, especially for any matters that are not referred to
above.
SAVE THESE INSTRUCTIONS
OPERATION
Before Installation:
1.The flooring surface must be smooth and clean from all dust or debris.
2. Keep the product and installation surfaces dry.
Installation Caution:
1.Attach this product to the direction of the arrow.
2.Even though they have the same model number, there may be a color
difference depending on the production.
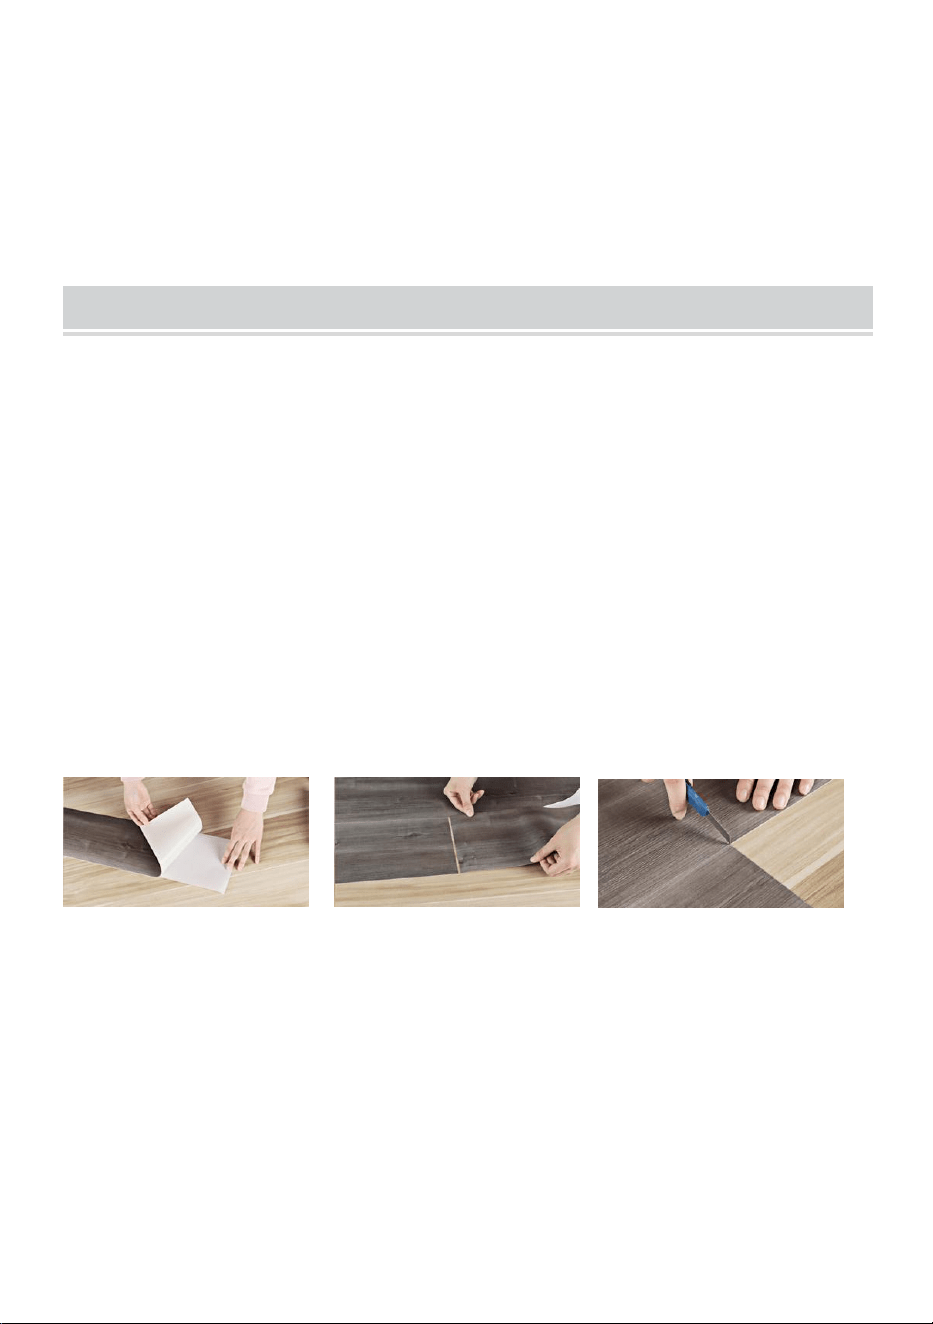
Installation Steps:
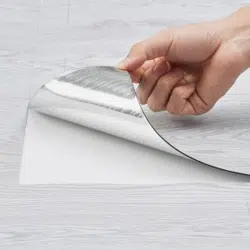
1. Start the installation through corner of the room. Stick one tip of the
adhesive floor onto the surface and keep pressing slowly, wiping with a
cloth or hand to ensure that the board is fixed to the floor.
2. Start installing the second row, aligned with the tip of the one you
installed previously. Continue installing the other rows until close to the
opposite side of wall.
3. To install the last row, turn it upside down and align it in the row on the
side, resting against the wall, mark the required length and use a metal
- 4 -
ruler and stylus to make the cut.
4. With the piece left over from the cut, start the next row, interspersing the
design pattern.
5. In the last row, parallel to the floor, mark the ruler cut by placing it upside
down to measure the excess that needs to be cut.
6.After the installation is complete, tap the joint with a rubber hammer to be
more fixed.
Manufacturer: Shanghaimuxinmuyeyouxiangongsi
Address: Baoshanqu Shuangchenglu 803long 11hao 1602A-1609shi
Shanghai
Imported to AUS:SIHAO PTY LTD.1 ROKEVA STREETEASTWOOD
NSW 2122 Australia
Imported to USA:Sanven Technology Ltd. Suite 250,9166 Anaheim
Place,Rancho Cucamonga,CA91730
REP
UK
Pooledas Group Ltd
Unit 5 Albert Edward House,
The Pavilions Preston, United Kingdom
pooledas12[email protected]
01772418127
REP
EC
SHUNSHUN GmbH
Römeräcker 9 Z2021,76351
Linkenheim-Hochstetten, Germany
euvertreter@gmail.com
+49 1727041930
Made In China


Parquetàdécolleretàcoller
Nouscontinuonsànousengageràvousfournirdesoutilsàdesprixcompétitifs.
"Économisezlamoitié","Moitiéprix"outouteautreexpressionsimilairequenousutilisonsnereprésente
qu'uneestimationdeséconomiesdontvouspourriezbénéficierenachetantcertainsoutilscheznouspar
rapportauxgrandesmarquesetnesignifiepasnécessairementcouvrirtouteslescatégoriesd'outilsproposés.
parnous.Nousvousrappelonsdevérifierattentivementlorsquevouspassezunecommandechez
noussivouséconomisezréellementlamoitiéparrapportauxgrandesmarques.
Assistancetechniqueetcertificatdegarantieélectroniquewww.vevor.com/support
MODÈLE:WB10027/WB801/WB0526/WB4503/WBXC6131
Machine Translated by Google

Machine Translated by Google
Vousavezdesquestionssurlesproduits?Besoind'uneassistancetechnique?
N'hésitezpas
ànouscontacter:Supporttechniqueetcertificatdegarantie
électroniquewww.vevor.com/support
Ils'agitdesinstructionsoriginales,veuillezlireattentivementtouteslesinstructions
dumanuelavantdel'utiliser.VEVORseréserveuneinterprétationclairedenotremanuel
d'utilisation.L'apparenceduproduitdépendduproduitquevousavezreçu.Veuillez
nouspardonnerquenousnevousinformeronspluss'ilyadesmisesàjourtechnologiques
oulogiciellessurnotreproduit.
MODÈLE:WB10027/WB801/WB0526/WB4503/WBXC6131
1
BESOIND'AIDE?CONTACTEZNOUS!
Revêtementdesolàdécolleretàcoller
WB801
WB4503WB0526
WB10027
WBXC6131
Machine Translated by Google
Modèle
SÉCURITÉETAVERTISSEMENTS
LISTEDESPARAMÈTRES
réduirelerisquedeblessures,d'accidentsoudedommagesauproduitparluimême.
5.Veuilleznepasmettreleproduitdanslamachineàlaver,ilest
*2,5
Quantité
24
WBXC61
rassurezvous,cetteodeurestnontoxiqueetsedissiperaaprèsquelquesjoursd'utilisation.
6.Veuilleznepascontacterceproduitavecdesproduitschimiquescorrosifsettranchants.
50
Règlesgénéralesdesécurité
4.Veuilleznepaspermettreauxbébésetauxenfantsdemettredesfragmentsdeceproduit
305*305*
taille
24
8.Lesprécautionsdesécuritéetlesinstructionsdonnéesdanscemanuelnesontpas
914*152
36
.5
del'eaudessusencasd'incendies,debrûluresetderisquesdedéformation.
14.5
oudesustensilespointuspournettoyerleproduit.
7.Lesenfantsetlesmineursnesontpasautorisésàinstallerceproduitpouréviter
27
2.5
(mm/pièces)
WB100
305*305*1
36
24
1.Lorsquevousouvrezlaboîtepourlapremièrefois,vousaurezuneodeurâcre.S'ilteplaît,nelefaispas
recommandédelaveràlamain.
914*152*
Produit
50
AVERTISSEMENT:Veuillezlireattentivementlesinstructionssuivantesafinde
3.Veuilleznepasplacerleproduitàcôtéd'uneinstallationdechauffageoud'unincendie,niverserdel'eauchaude.
dansleurbouche.
31
1,5
36
914*152
poids(kg)
causantdesblessurescorporelles
(pièces)
net
14.5
2.N'utilisezjamaisdedétergentscorrosifs,debrossesmétalliques,detamponsabrasifs,deproduitsmétalliques.
WB801WB0526WB4503
*2,5
descouteaux.
2
Machine Translated by Google

1.Commencezl'installationdansuncoindelapièce.Collezunboutdu
1.Lasurfacedurevêtementdesoldoitêtrelisseetpropredetoutepoussièreoudébris.
Avantl'installation:
soladhésifsurlasurfaceetcontinuezàappuyerlentement,enessuyantavecun
côté,enappuicontrelemur,marquezlalongueurrequiseetutilisezun
audessusde.
différenceselonlaproduction.
CONSERVEZCESINSTRUCTIONS
Étapesd'installation:
côtéopposédumur.
9.L'opérateuret/oul'utilisateurdoiventfairepreuvedebonsensetdeprudencelorsqu'ils
1.Fixezceproduitdanslesensdelaflèche.
2.Mêmes'ilsontlemêmenumérodemodèle,ilpeutyavoirunecouleur
l'utilisationduproduit,enparticulierpourtouteslesquestionsquinesontpasmentionnées
3.Pourinstallerladernièrerangée,retournezlaetalignezladanslarangéedu
2.Gardezleproduitetlessurfacesd'installationausec.
2.Commencezàinstallerladeuxièmerangée,alignéeaveclapointedecellequevous
unchiffonouunemainpours'assurerquelaplancheestbienfixéeausol.
Attentionàl'installation:
pourcouvrirendétailtouteslesconditionsetsituationsquipeuventsurvenir.
installéprécédemment.Continuezàinstallerlesautresrangéesjusqu'àcequevoussoyezprochedu
OPÉRATION
3
Machine Translated by Google

5.Dansladernièrerangée,parallèlementausol,marquezlarèglecoupéeenlaplaçantà
l'enverspourmesurerl'excédentàcouper.
SHUNSHUNGmbH
6.Unefoisl'installationterminée,tapotezlejointavecunmarteauencaoutchoucpourle
fixerdavantage.
règleetstyletpourfairelacoupe.
Römeräcker9Z2021,76351
LinkenheimHochstetten,Allemagne
[email protected]+49
1727041930
Fabricant:ShanghaimuxinmuyeyouxiangongsiAdresse:
BaoshanquShuangchenglu803long11hao1602A1609shiShanghaiImportéen
AUS:
SIHAOPTYLTD.1ROKEVASTREETEASTWOODNSW2122Australie
4.Aveclapiècerestantedelacoupe,commencezlarangéesuivanteenintercalantlemotif.
ImportéauxÉtatsUnis:SanvenTechnologyLtd.Suite250,9166AnaheimPlace,
RanchoCucamonga,CA91730
FabriquéenChine
PooledasGroupLtd
Unité5AlbertEdwardHouse,The
PavilionsPreston,RoyaumeUni
01772418127
REPRÉSENTANTDUROYAUMEUNI
REPRÉSENTANTCE
4
Machine Translated by Google

Machine Translated by Google


BODENBELÄGE SCHÄLEN UND STICKEN
Wir sind weiterhin bestrebt, Ihnen Werkzeuge zu wettbewerbsfähigen Preisen anzubieten.
„Sparen Sie die Hälfte“, „Halber Preis“ oder andere ähnliche von uns verwendete Ausdrücke stellen lediglich
eine Schätzung der Einsparungen dar, die Sie durch den Kauf bestimmter Werkzeuge bei uns im Vergleich zu den
großen Top-Marken erzielen könnten, und bedeuten nicht unbedingt, dass alle angebotenen Werkzeugkategorien
abgedeckt werden von uns. Bitte prüfen Sie bei Ihrer Bestellung sorgfältig, ob Sie im Vergleich zu den Top-
Marken tatsächlich die Hälfte sparen.
Technischer Support und E-Garantiezertifikat www.vevor.com/support
MODELL:WB-1002-7/WB-801/WB-05-26/WB-4503/WB-XC613-1
Machine Translated by Google

Machine Translated by Google

Haben Sie Fragen zum Produkt? Benötigen Sie technische Unterstützung? Bitte
kontaktieren
Sie uns: Technischer Support und E-Garantiezertifikat
www.vevor.com/support
MODELL:WB-1002-7/WB-801/WB-05-26/WB-4503/WB-XC613-1
Dies ist die Originalanleitung. Bitte lesen Sie alle Bedienungsanleitungen
sorgfältig durch, bevor Sie das Gerät in Betrieb nehmen. VEVOR behält sich eine klare
Auslegung unserer Bedienungsanleitung vor. Das Aussehen des Produkts hängt
von dem Produkt ab, das Sie erhalten haben. Bitte entschuldigen Sie, dass wir Sie nicht
erneut informieren, wenn es zu unserem Produkt technische oder Software-Updates gibt.
- 1 -
BRAUCHEN SIE HILFE? KONTAKTIERE UNS!
Bodenbelag abziehen und aufkleben
WB-801
WB-4503WB-05-26
WB-1002-7
WB-XC613-1
Machine Translated by Google
- 2 -
Modell
PARAMETERLISTE
SICHERHEIT & WARNHINWEISE
Reduzieren Sie das Risiko von Verletzungen, Unfällen oder Schäden am Produkt.
5. Bitte geben Sie das Produkt nicht in die Waschmaschine
*2.5
Menge
24
WB-XC61
Bedenken Sie, dieser Geruch ist ungiftig und verfliegt nach ein paar Tagen Gebrauch.
6. Bitte kontaktieren Sie dieses Produkt nicht mit ätzenden Chemikalien und scharfen Gegenständen
50
Allgemeine Sicherheitsregeln
4. Bitte erlauben Sie nicht, dass Babys und Kinder Fragmente dieses Produkts hineinlegen
305*305*
Größe
24
8. Die Sicherheitsvorkehrungen und Anweisungen in diesem Handbuch gelten nicht
914*152
36
.5
Wasser darauf, um Brände, Verbrennungen und Verformungsgefahr zu vermeiden.
14.5
oder scharfe Utensilien zum Reinigen des Produkts.
7. Kindern und Minderjährigen ist die Installation dieses Produkts nicht gestattet
2-7
2.5
(mm/Stück)
WB-100
305*305*1
36
24
1. Wenn Sie die Schachtel zum ersten Mal öffnen, nehmen Sie einen stechenden Geruch wahr. Bitte nicht
Handwäsche empfohlen.
914*152*
Produkt
50
WARNUNG: Bitte lesen Sie die folgenden Anweisungen sorgfältig durch
3. Bitte stellen Sie das Produkt nicht in die Nähe einer Heizungsanlage oder eines Feuers und schütten Sie es nicht heiß aus
in ihren Mund.
3-1
1.5
36
914*152
Gewicht (kg)
Personenschäden verursachen
(Stück)
netto
14.5
2. Verwenden Sie niemals ätzende Reinigungsmittel, Drahtbürsten, Scheuerschwämme oder Metall
WB-801 WB-05-26 WB-4503
*2.5
Messer.
Machine Translated by Google

- 3 -
1. Beginnen Sie die Installation durch die Ecke des Raumes. Kleben Sie eine Spitze davon
1. Die Bodenoberfläche muss glatt und frei von Staub und Schmutz sein.
Vor der Installation:
Kleben Sie den Bodenbelag auf die Oberfläche und drücken Sie langsam weiter, während Sie mit einem Tuch abwischen
Seite an der Wand anliegend, markieren Sie die erforderliche Länge und verwenden Sie ein Metall
über.
Unterschied je nach Produktion.
Installationsschritte:
ANLEITUNG AUFBEWAHREN
gegenüberliegende Seite der Wand.
9. Der Bediener und/oder Benutzer muss dabei seinen gesunden Menschenverstand und Vorsicht walten lassen
1. Befestigen Sie dieses Produkt in Pfeilrichtung.
2.Auch wenn sie die gleiche Modellnummer haben, kann es eine Farbe geben
Betrieb des Produkts, insbesondere für alle Angelegenheiten, auf die hier nicht Bezug genommen wird
3. Um die letzte Reihe zu installieren, drehen Sie sie um und richten Sie sie in der Reihe darauf aus
2. Halten Sie das Produkt und die Installationsflächen trocken.
2. Beginnen Sie mit der Installation der zweiten Reihe, ausgerichtet an der Spitze der von Ihnen verwendeten Reihe
Tuch oder Hand, um sicherzustellen, dass das Brett am Boden befestigt ist.
Installationshinweis:
um alle auftretenden Bedingungen und Situationen im Detail abzudecken.
zuvor installiert. Fahren Sie mit der Installation der anderen Reihen fort, bis Sie sich dem nähern
BETRIEB
Machine Translated by Google
- 4 -
Importiert in die USA: Sanven Technology Ltd. Suite 250,9166 Anaheim Place, Rancho
Cucamonga, CA91730
Römeräcker 9 Z2021,76351 Linkenheim-
Hochstetten, Germany [email protected]
+49 1727041930
4. Beginnen Sie mit dem vom Schnitt übriggebliebenen Stück mit der nächsten Reihe und verstreuen Sie
dabei das Designmuster.
Pooledas Group Ltd Unit 5
Albert Edward House, The Pavilions
Preston, Vereinigtes Königreich [email protected]
01772418127
5. Markieren Sie in der letzten Reihe parallel zum Boden den Linealschnitt, indem Sie ihn auf den Kopf
stellen, um den Überschuss zu messen, der abgeschnitten werden muss.
In China hergestellt
6. Nachdem die Installation abgeschlossen ist, klopfen Sie mit einem Gummihammer auf die Verbindung, um sie
fester zu machen.
SHUNSHUN GmbH
Hersteller: Shanghaimuxinmuyeyouxiangongsi Adresse: Baoshanqu
Shuangchenglu 803long 11hao 1602A-1609shi Shanghai Importiert nach AUS:SIHAO PTY LTD.1
ROKEVA
STREETEASTWOOD NSW 2122 Australien
Lineal und Stift zum Ausschneiden.
EG-REP
UK REP
Machine Translated by Google

Machine Translated by Google


Supporto tecnico e certificato di garanzia elettronica www.vevor.com/support
Continuiamo a impegnarci per fornirvi strumenti a prezzi competitivi.
"Risparmia la metà", "Metà prezzo" o qualsiasi altra espressione simile da noi utilizzata rappresenta
solo una stima del risparmio che potresti trarre dall'acquistare determinati strumenti con noi rispetto ai
principali marchi più importanti e non significa necessariamente coprire tutte le categorie di strumenti
offerti da noi. Ti ricordiamo gentilmente di verificare attentamente quando effettui un ordine con noi
se stai effettivamente risparmiando la metà rispetto ai migliori marchi principali.
MODELLO:WB-1002-7/WB-801/WB-05-26/WB-4503/WB-XC613-1
PAVIMENTAZIONE SBUCCIA E INCOLLA
Machine Translated by Google

Machine Translated by Google
Pavimentazione stacca e incolla
HO BISOGNO DI AIUTO? CONTATTACI!
- 1 -
WB-XC613-1
WB-1002-7
WB-05-26 WB-4503
WB-801
MODELLO:WB-1002-7/WB-801/WB-05-26/WB-4503/WB-XC613-1
Hai domande sul prodotto? Hai bisogno di supporto tecnico? Non esitate
a contattarci:
Supporto tecnico e certificato di garanzia
elettronica www.vevor.com/support
Queste sono le istruzioni originali, leggere attentamente tutte le
istruzioni del manuale prima dell'uso. VEVOR si riserva una chiara
interpretazione del nostro manuale d'uso. L'aspetto del prodotto sarà
soggetto al prodotto ricevuto. Ti preghiamo di perdonarci se non ti
informeremo più se sono presenti aggiornamenti tecnologici o software sul nostro prodotto.
Machine Translated by Google

ELENCO PARAMETRI
Modello
SICUREZZA E AVVERTENZE
8. Le precauzioni di sicurezza e le istruzioni fornite in questo manuale non sono valide
36
914*152
.5
bagnarlo in caso di incendi, ustioni e pericoli di deformazione.
7. Bambini e minorenni non sono autorizzati a installare questo prodotto per evitare
14.5
2-7
2.5
36
o utensili affilati per pulire il prodotto.
24
*2.5
WB-XC61
Quantità
preoccuparti, questo odore non è tossico e si dissiperà dopo alcuni giorni di utilizzo.
6. Si prega di non contattare questo prodotto con prodotti chimici corrosivi e taglienti
ridurre da solo il rischio di lesioni, incidenti o danni al prodotto.
305*305*
misurare
24
5. Si prega di non mettere il prodotto in lavatrice, lo è
Norme generali di sicurezza
50
914*152
4. Si prega di non permettere a neonati e bambini di inserire frammenti di questo prodotto
3. Si prega di non posizionare il prodotto accanto a impianti di riscaldamento o fuochi, né versarlo caldo
1.5
3-1
36
Peso (kg)
causando lesioni personali
2. Non utilizzare mai detergenti corrosivi, spazzole metalliche, pagliette abrasive, metalli
(pz)
netto
WB-801 WB-05-26 WB-4503
*2.5
14.5
coltelli.
consigliato lavare a mano.
(mm/pz)
WB-100
305*305*1
24
1. Quando apri la scatola per la prima volta, sentirai un odore pungente. Per favore, non farlo
nelle loro bocche.
50
914*152*
Prodotto
ATTENZIONE: leggere attentamente le seguenti istruzioni per poterlo fare
-2-
Machine Translated by Google

Sopra.
differenza a seconda della produzione.
2.Anche se hanno lo stesso numero di modello, potrebbe esserci un colore
utilizzare il prodotto, in particolare per qualsiasi questione non menzionata
9. L'operatore e/o l'utente devono usare buon senso e cautela quando
1.Attaccare questo prodotto nella direzione della freccia.
lato opposto del muro.
3. Per installare l'ultima fila, capovolgerla e allinearla nella fila su
per coprire nel dettaglio tutte le condizioni e le situazioni che possono presentarsi.
Attenzione all'installazione:
installato in precedenza. Continuare a installare le altre file finché non si avvicinano a
2. Mantenere il prodotto e le superfici di installazione asciutte.
panno o con la mano per garantire che la tavola sia fissata al pavimento.
2. Inizia a installare la seconda fila, allineata con la punta di quella che hai
1.La superficie del pavimento deve essere liscia e pulita da polvere o detriti.
Prima dell'installazione:
pavimento adesivo sulla superficie e continuare a premere lentamente, strofinando con a
1. Iniziare l'installazione dall'angolo della stanza. Attacca una punta del
CONSERVA QUESTE ISTRUZIONI
Passaggi di installazione:
lato, appoggiato al muro, segnare la lunghezza necessaria e utilizzare un metallo
OPERAZIONE
- 3 -
Machine Translated by Google

6. Al termine dell'installazione, toccare il giunto con un martello di gomma per fissarlo
ulteriormente.
Made in China
Pooledas Group Ltd
Unità 5 Albert Edward House,
The Pavilions Preston, Regno Unito
01772418127
5. Nell'ultima riga, parallela al pavimento, segnare il taglio del righello posizionandolo
capovolto per misurare l'eccesso da tagliare.
4. Con il pezzo rimasto dal taglio, inizia la riga successiva, intervallando il motivo del
disegno.
Importato negli Stati Uniti: Sanven Technology Ltd. Suite 250,9166 Anaheim
Place, Rancho Cucamonga, CA91730
righello e stilo per eseguire il taglio.
Römeräcker 9 Z2021,76351
Linkenheim-Hochstetten, Germania
1727041930
Produttore: Shanghaimuxinmuyeyouxiangongsi Indirizzo:
Baoshanqu Shuangchenglu 803long 11hao 1602A-1609shi Shanghai Importato
in
AUS:SIHAO PTY LTD.1 ROKEVA STREETEASTWOOD NSW 2122 Australia
SHUNSHUN GmbH
REP. DEL REGNO UNITO
REP.CE
-4-
Machine Translated by Google

Machine Translated by Google


PELARYPEGARPISOS
MODELO:WB10027/WB801/WB0526/WB4503/WBXC6131
"Ahorreamitaddeprecio","Amitaddeprecio"ocualquierotraexpresiónsimilarutilizadapornosotrossolo
representaunaestimacióndelosahorrosquepodríabeneficiarsealcomprarciertasherramientasconnosotrosen
comparaciónconlasprincipalesmarcasynosignificanecesariamentecubrirtodaslascategoríasdeherramientas
ofrecidas.pornosotros.Lerecordamosque,cuandorealiceunpedidoconnosotros,verifiquecuidadosamente
sirealmenteestáahorrandolamitadencomparaciónconlasprincipalesmarcas.
Seguimoscomprometidosaproporcionarleherramientasaprecioscompetitivos.
Soportetécnicoycertificadodegarantíaelectrónicawww.vevor.com/support
Machine Translated by Google

Machine Translated by Google

¿Tienepreguntassobreelproducto?¿Necesitasoportetécnico?Nodude
en
contactarnos:Soportetécnicoycertificadodegarantía
electrónicawww.vevor.com/support
Estassonlasinstruccionesoriginales;leaatentamentetodaslas
instruccionesdelmanualantesdeoperar.VEVORsereservauna
interpretaciónclaradenuestromanualdeusuario.Laaparienciadel
productoestarásujetaalproductoquerecibió.Perdonequenoleinformaremos
nuevamentesihayactualizacionesdetecnologíaosoftwareennuestroproducto.
MODELO:WB10027/WB801/WB0526/WB4503/WBXC6131
WB4503
WB801
WBXC6131
WB10027
WB0526
1
Pelarypegarpisos
¿NECESITASAYUDA?¡CONTÁCTENOS!
Machine Translated by Google

Modelo
SEGURIDADYADVERTENCIAS
LISTADEPARÁMETROS
2.5
WB100
305*305*1
(mm/piezas)
36
24
Serecomiendalavaramano.
1.Cuandoabraslacajaporprimeravez,tendrásunoloracre.Porfavorno
914*152*
Producto
ensusbocas.
50
ADVERTENCIA:Leaatentamentelassiguientesinstruccionespara
1.5
31
36
914*152
peso(kg)
3.Nocoloqueelproductojuntoaunaplantadecalefacciónofuegos,niloviertacaliente.
causandolesionespersonales
(piezas)
neto
WB801WB0526WB4503
*2.5
14.5
2.Nuncautilicedetergentescorrosivos,cepillosdealambre,estropajosabrasivos,
cuchillos.
Preocúpate,esteolornoestóxicoysedisiparádespuésdeunosdíasdeuso.
24
*2.5
Cantidad
WBXC61
reducirelriesgodelesiones,accidentesodañosalproductoporsímismo.
5.Nocoloqueelproductoenlalavadora,yaquees
Reglasgeneralesdeseguridad
50
24
305*305*
tamaño
4.Nopermitaquebebésyniñoscoloquenfragmentosdeesteproducto
6.Nopongaencontactoesteproductoconproductosquímicoscorrosivosniobjetosafilados.
aguasobreélencasodeincendio,quemadurasypeligrodedeformación.
8.Lasprecaucioneseinstruccionesdeseguridadproporcionadasenestemanualnosonválidas.
36
914*152
.5
outensiliospunzantesparalimpiarelproducto.
7.Nosepermitequeniñosymenoresinstalenesteproductoparaevitar
14.5
27
2
Machine Translated by Google

1.Inicielainstalaciónporlaesquinadelahabitación.Pegueunapuntadel
1.Lasuperficiedelpisodebeserlisaylimpiadepolvoosuciedad.
Antesdelainstalación:
pisoadhesivosobrelasuperficieysigapresionandolentamente,limpiandoconun
lado,apoyadocontralapared,marcarlalongitudrequeridayutilizarunmetal
diferenciadependiendodelaproducción.
arriba.
GUARDAESTASINSTRUCCIONES
9.Eloperadory/ousuariodebeutilizarelsentidocomúnylaprecauciónal
1.Coloqueesteproductoenladireccióndelaflecha.
Pasosdeinstalación:
ladoopuestodelapared.
2.Aunquetenganelmismonúmerodemodelo,puedehaberuncolor
3.Parainstalarlaúltimafila,délelavueltayalinéelaenlafiladela
operarelproducto,especialmenteparacualquierasuntoquenoestémencionado
2.Mantengasecoselproductoylassuperficiesdeinstalación.
pañoomanoparaasegurarquelatablaquedefijadaalsuelo.
2.Comienceainstalarlasegundafila,alineadaconlapuntadelaque
paracubrirdetalladamentetodaslascondicionesysituacionesquepuedansurgir.
Precaucióndeinstalación:
instaladopreviamente.Continúeinstalandolasotrasfilashastacercadel
OPERACIÓN
3
Machine Translated by Google
ImportadoaEE.UU.:SanvenTechnologyLtd.Suite250,9166Anaheim
Place,RanchoCucamonga,CA91730
reglaylápizparahacerelcorte.
Fabricante:Shanghaimuxinmuyeyouxiangongsi
Dirección:BaoshanquShuangchenglu803long11hao1602A1609shi
Shanghai
ImportadoaAUS:SIHAOPTYLTD.1ROKEVASTREETEASTWOODNSW
2122Australia
Römeräcker9Z2021,76351
LinkenheimHochstetten,Alemania
[email protected]+49
1727041930
SHUNSHUNGmbH
6.Unavezcompletadalainstalación,golpeelajuntaconunmartillodegoma
parafijarlamás.
Hechoenchina
5.Enlaúltimafila,paralelaalpiso,marcaelcortedelareglacolocándolaboca
abajoparamedirelsobrantequehayquecortar.
PooledasGroupLtd
Unidad5AlbertEdwardHouse,
ThePavilionsPreston,ReinoUnido
01772418127
4.Conlapiezasobrantedelcorte,comienzalasiguientefila,intercalandoel
patróndeldiseño.
REPRESENTANTEDELREINOUNIDO
REPRESENTANTEDELACE
4
Machine Translated by Google

Machine Translated by Google


Obierać i przyklejać PODŁOGĘ
MODEL: WB-1002-7/WB-801/WB-05-26/WB-4503/WB-XC613-1
Wsparcie techniczne i certyfikat e-gwarancji www.vevor.com/support
Nadal dokładamy wszelkich starań, aby zapewnić Państwu narzędzia w konkurencyjnej cenie.
„Zaoszczędź o połowę”, „o połowę ceny” lub inne podobne wyrażenia używane przez nas przedstawiają jedynie
szacunkową oszczędność, jaką możesz zyskać kupując u nas określone narzędzia w porównaniu z głównymi najlepszymi
markami i niekoniecznie oznaczają uwzględnienie wszystkich kategorii oferowanych narzędzi przez nas. Przypominamy,
aby podczas składania zamówienia u nas dokładnie sprawdzić, czy faktycznie oszczędzasz połowę w porównaniu
z czołowymi markami.
Machine Translated by Google

Machine Translated by Google
MODEL: WB-1002-7/WB-801/WB-05-26/WB-4503/WB-XC613-1
To jest oryginalna instrukcja. Przed przystąpieniem do obsługi prosimy o
dokładne zapoznanie się ze wszystkimi instrukcjami. VEVOR zastrzega sobie jasną
interpretację naszej instrukcji obsługi. Wygląd produktu zależy od produktu, który
otrzymałeś. Proszę wybaczyć nam, że nie będziemy ponownie informować Państwa,
jeśli pojawią się jakieś aktualizacje technologii lub oprogramowania naszego produktu.
Masz pytania dotyczące produktu? Potrzebujesz wsparcia technicznego? Prosimy o
kontakt:
Wsparcie techniczne i certyfikat e-gwarancji www.vevor.com/
support
WB-801
WB-4503WB-05-26
WB-1002-7
WB-XC613-1
POTRZEBUJĘ POMOCY? SKONTAKTUJ SIĘ Z NAMI!
Obierz i przyklej podłogę
- 1 -
Machine Translated by Google

LISTA PARAMETRÓW
Model
BEZPIECZEŃSTWO I OSTRZEŻENIA
Ilość
(szt)
netto
WB-801 WB-05-26 WB-4503
*2,5
14,5
martw się, ten zapach jest nietoksyczny i zniknie po kilku dniach użytkowania.
2. Nigdy nie używaj żrących detergentów, szczotek drucianych, szorstkich środków czyszczących, metalu
5. Proszę nie wkładać produktu do pralki
6. Proszę nie kontaktować tego produktu z żrącymi chemikaliami i ostrymi przedmiotami
3. Proszę nie stawiać produktu w pobliżu urządzeń grzewczych, ognisk i nie polewać go gorącym powietrzem
1,5
3-1
914*152
36
waga (kg)
noże.
Produkt
914*152*
powodując obrażenia ciała
do ich ust.
50
24
(mm/szt.)
WB-100
305*305*1
OSTRZEŻENIE: Aby to zrobić, przeczytaj uważnie poniższe instrukcje
1. Kiedy po raz pierwszy otworzysz pudełko, poczujesz ostry zapach. Proszę, nie
zaleca się prać ręcznie.
7. Dzieci i osoby niepełnoletnie nie mogą instalować tego produktu, aby tego uniknąć
14,5
2-7
2.5
36
lub ostre przybory do czyszczenia produktu.
8. Środki ostrożności i instrukcje podane w tej instrukcji nie mogą być stosowane
36
914*152
.5
wodą w przypadku pożaru, oparzeń i niebezpieczeństwa odkształcenia.
Ogólne zasady bezpieczeństwa
50
305*305*
rozmiar
24
4. Nie pozwalaj niemowlętom i dzieciom umieszczać fragmentów tego produktu
zmniejszyć ryzyko obrażeń, wypadków lub uszkodzenia samego produktu.
24
*2,5
WB-XC61
- 2 -
Machine Translated by Google

2. Rozpocznij instalację drugiego rzędu, wyrównanego z końcówką poprzedniego
Przed instalacją:
1. Powierzchnia podłogi musi być gładka i czysta od kurzu i zanieczyszczeń.
przyklej podłogę do powierzchni i powoli dociskaj, przecierając szmatką
1. Rozpocznij instalację od rogu pomieszczenia. Przyklej jedną końcówkę
ZACHOWAJ TE INSTRUKCJE
Kroki instalacji:
powyżej.
różnica w zależności od produkcji.
boku, opierając się o ścianę, zaznacz wymaganą długość i użyj metalu
obsługi produktu, zwłaszcza w kwestiach, które nie zostały tu omówione
2. Nawet jeśli mają ten sam numer modelu, może występować kolor
3. Aby zamontować ostatni rząd, odwróć go do góry nogami i zrównaj z rzędem na
przeciwległa strona ściany.
1. Przymocuj ten produkt w kierunku wskazanym strzałką.
9. Operator i/lub użytkownik musi kierować się zdrowym rozsądkiem i ostrożnością
Instalacja Uwaga:
aby szczegółowo uwzględnić wszystkie warunki i sytuacje, które mogą wystąpić.
zainstalowany wcześniej. Kontynuuj instalowanie pozostałych rzędów, aż zbliżysz się do
szmatką lub ręką, aby upewnić się, że deska jest przymocowana do podłogi.
2. Utrzymuj produkt i powierzchnie montażowe w suchości.
OPERACJA
- 3 -
Machine Translated by Google

6. Po zakończeniu montażu uderz złącze gumowym młotkiem, aby je lepiej zamocować.
Wyprodukowano w Chinach
Pooledas Group Ltd
Unit 5 Albert Edward House, The
Pavilions Preston, Wielka Brytania
01772418127
5. W ostatnim rzędzie, równolegle do podłogi, zaznacz wycięcie linijki, odwracając ją
do góry nogami, aby zmierzyć nadmiar, który należy odciąć.
4. Po odcięciu kawałka rozpocznij kolejny rząd, przeplatając wzór.
Importowane do USA: Sanven Technology Ltd. Suite 250,9166 Anaheim Place,
Rancho Cucamonga, CA91730
linijka i rysik do wykonania cięcia.
Römeräcker 9 Z2021,76351
Linkenheim-Hochstetten, Niemcy
1727041930
Producent: Shanghaimuxinmuyeyouxiangongsi Adres:
Baoshanqu Shuangchenglu 803long 11hao 1602A-1609shi Szanghaj Import do
AUS:SIHAO
PTY LTD.1 ROKEVA STREETEASTWOOD NSW 2122 Australia
SHUNSHUN GmbH
REPUBLIKA Wielkiej Brytanii
REPREZENT KE
- 4 -
Machine Translated by Google

Machine Translated by Google


SCHIL EN STIK VLOEREN
MODEL:WB-1002-7/WB-801/WB-05-26/WB-4503/WB-XC613-1
We blijven ons inzetten om u gereedschap tegen een concurrerende prijs te bieden.
"Bespaar de helft", "Halve prijs" of andere soortgelijke uitdrukkingen die door ons worden gebruikt vertegenwoordigt
slechts een schatting van de besparingen die u zou kunnen profiteren als u bepaalde gereedschappen bij ons koopt in
vergelijking met de grote topmerken en betekent niet noodzakelijkerwijs dat deze alle categorieën van aangeboden
gereedschappen omvatten door ons. Wij verzoeken u vriendelijk om bij het plaatsen van een bestelling bij ons
goed na te gaan of u daadwerkelijk de helft bespaart in vergelijking met de grote topmerken.
Technische ondersteuning en e-garantiecertificaat www.vevor.com/support
Machine Translated by Google

Machine Translated by Google

MODEL:WB-1002-7/WB-801/WB-05-26/WB-4503/WB-XC613-1
Dit is de originele instructie. Lees alle instructies in de handleiding zorgvuldig
door voordat u ermee aan de slag gaat. VEVOR behoudt zich een duidelijke interpretatie
van onze gebruikershandleiding voor. Het uiterlijk van het product is afhankelijk
van het product dat u heeft ontvangen. Vergeef ons alstublieft dat we u niet opnieuw
zullen informeren als er technologie- of software-updates zijn voor ons product.
Heeft u productvragen? Technische ondersteuning nodig? Neem gerust contact met
ons op:
Technische ondersteuning en e-garantiecertificaat
www.vevor.com/support
WB-4503
WB-801
WB-XC613-1WB-05-26
WB-1002-7
- 1 -
HULP NODIG? NEEM CONTACT MET ONS OP!
Schil en plak vloeren
Machine Translated by Google

2.5
WB-100
305*305*1
(mm/st.)
36
24
aanbevolen om met de hand te wassen.
1. Wanneer u de doos voor het eerst opent, ruikt u een scherpe geur. Alsjeblieft niet
914*152*
Product
in hun mond.
50
WAARSCHUWING: Lees de volgende instructies zorgvuldig door om dit te doen
1.5
3-1
36
914*152
Gewicht (kg)
3. Plaats het product niet naast een verwarmingsinstallatie of vuur, en giet het ook niet heet
persoonlijk letsel veroorzaken
(stuks)
netto
WB-801 WB-05-26 WB-4503
*2,5
14.5
2. Gebruik nooit bijtende schoonmaakmiddelen, draadborstels, schuursponsjes, metaal
messen.
Maak je geen zorgen, deze geur is niet giftig en zal na een paar dagen gebruik verdwijnen.
24
*2,5
Hoeveelheid
WB-XC61
vermindert het risico op letsel, ongevallen of schade aan het product zelf.
5. Plaats het product niet in de wasmachine, dat is het wel
Algemene veiligheidsregels
50
24
305*305*
maat
4. Laat baby's en kinderen geen fragmenten van dit product erin doen
6. Neem dit product niet in contact met bijtende chemicaliën en scherp
water erop in geval van brand, brandwonden en gevaar voor vervorming.
8. De veiligheidsmaatregelen en instructies in deze handleiding zijn niet van toepassing
36
914*152
.5
of scherp keukengerei om het product schoon te maken.
7. Kinderen en minderjarigen mogen dit product niet installeren om dit te voorkomen
14.5
2-7
- 2 -
PARAMETERLIJST
Model
VEILIGHEID & WAARSCHUWINGEN
Machine Translated by Google

1. Start de installatie via de hoek van de kamer. Plak een puntje van de
1. Het vloeroppervlak moet glad zijn en vrij van stof en vuil.
Vóór installatie:
lijmvloer op het oppervlak en blijf langzaam aandrukken, veeg met een
kant, tegen de muur rustend, markeer de gewenste lengte en gebruik een metaal
boven.
verschil afhankelijk van de productie.
BEWAAR DEZE INSTRUCTIES
9. De bediener en/of gebruiker moet bij het gebruik van gezond verstand en voorzichtigheid handelen
1. Bevestig dit product in de richting van de pijl.
Installatiestappen:
tegenoverliggende kant van de muur.
2. Hoewel ze hetzelfde modelnummer hebben, kan er een kleur zijn
3. Om de laatste rij te installeren, draait u deze ondersteboven en lijnt u deze uit in de rij op de
het bedienen van het product, vooral voor zaken die niet worden genoemd
2. Houd het product en de installatieoppervlakken droog.
doek of hand om ervoor te zorgen dat de plank aan de vloer wordt bevestigd.
2. Begin met het installeren van de tweede rij, uitgelijnd met de punt van degene die u gebruikt
om alle omstandigheden en situaties die zich kunnen voordoen in detail te behandelen.
Installatie Let op:
eerder geïnstalleerd. Ga door met het installeren van de andere rijen tot dichtbij de
OPERATIE
- 3 -
Machine Translated by Google

5. Markeer in de laatste rij, evenwijdig aan de vloer, de uitgesneden liniaal door deze ondersteboven te
plaatsen om het overtollige materiaal te meten dat moet worden afgesneden.
SHUNSHUN GmbH
6. Nadat de installatie is voltooid, tikt u met een rubberen hamer op de verbinding om deze
steviger te maken.
liniaal en stylus om de snede te maken.
Römeräcker 9 Z2021,76351
Linkenheim-Hochstetten, Duitsland
1727041930
Fabrikant: Shanghaimuxinmuyeyouxiangongsi Adres: Baoshanqu
Shuangchenglu 803long 11hao 1602A-1609shi Shanghai Geïmporteerd in AUS: SIHAO
PTY LTD.1
ROKEVA STREETEASTWOOD NSW 2122 Australië
4. Begin met het stuk dat overblijft na het knippen aan de volgende rij, met het ontwerppatroon
ertussen.
Geïmporteerd naar de VS: Sanven Technology Ltd. Suite 250,9166 Anaheim Place,
Rancho Cucamonga, CA91730
Gemaakt in China
Pooledas Group Ltd Unit
5 Albert Edward House, The
Pavilions Preston, Verenigd Koninkrijk
01772418127
Britse REP
EG REP
- 4 -
Machine Translated by Google

Machine Translated by Google


SKAL OCH PINN GOLV
Vi fortsätter att vara engagerade i att ge dig verktyg till konkurrenskraftiga priser.
"Spara hälften", "halva priset" eller andra liknande uttryck som används av oss representerar
bara en uppskattning av besparingar du kan dra nytta av att köpa vissa verktyg hos oss jämfört med
de stora toppmärkena och betyder inte nödvändigtvis att täcka alla kategorier av verktyg som erbjuds
av oss. Du påminns vänligen om att noggrant kontrollera när du gör en beställning hos oss om
du faktiskt sparar hälften i jämförelse med de främsta stora varumärkena.
Teknisk support och e-garanticertifikat www.vevor.com/support
MODELL:WB-1002-7/WB-801/WB-05-26/WB-4503/WB-XC613-1
Machine Translated by Google

Machine Translated by Google

MODELL:WB-1002-7/WB-801/WB-05-26/WB-4503/WB-XC613-1
Detta är den ursprungliga instruktionen, läs alla instruktioner
noggrant innan du använder den. VEVOR reserverar sig för en tydlig
tolkning av vår användarmanual. Utseendet på produkten är beroende
av den produkt du fått. Ursäkta oss att vi inte kommer att informera dig
igen om det finns någon teknik eller mjukvaruuppdateringar på vår produkt.
Har du produktfrågor? Behöver du teknisk support? Kontakta oss gärna:
Teknisk
support och e-garanticertifikat www.vevor.com/
support
- 1 -
Skala och sticka golv
BEHÖVS HJÄLP? KONTAKTA OSS!
WB-801
WB-4503
WB-1002-7
WB-05-26 WB-XC613-1
Machine Translated by Google

minska risken för skador, olyckor eller skador på produkten i sig.
5. Vänligen stoppa inte produkten i tvättmaskinen, det är det
*2.5
Kvantitet
24
WB-XC61
oroa dig, denna lukt är giftfri och kommer att försvinna efter några dagars användning.
6. Vänligen kontakta inte denna produkt med frätande kemikalier och vassa
50
Allmänna säkerhetsregler
4. Tillåt inte spädbarn och barn att lägga fragment av denna produkt
305*305*
storlek
24
8. Säkerhetsföreskrifterna och instruktionerna i den här bruksanvisningen är oförmögna
914*152
36
.5
vatten på den i händelse av bränder, brännskador och deformationsrisker.
14.5
eller vassa redskap för att rengöra produkten.
7. Barn och minderåriga får inte installera denna produkt för att undvika
2-7
2.5
(mm/st)
WB-100
305*305*1
36
24
1. När du först öppnar lådan kommer du att ha en stickande lukt. Snälla gör inte det
rekommenderas att tvätta för hand.
914*152*
Produkt
50
VARNING: Läs noga igenom följande instruktioner för att
3. Ställ inte produkten bredvid en värmeanläggning eller eld, och häll inte upp den varm
in i deras mun.
3-1
1.5
36
914*152
vikt (kg)
orsakar personskada
(st)
nät
14.5
2. Använd aldrig frätande rengöringsmedel, stålborstar, slipande skurmedel, metall
WB-801 WB-05-26 WB-4503
*2.5
knivar.
- 2 -
Modell
SÄKERHET OCH VARNINGAR
PARAMETERLISTA
Machine Translated by Google

DRIFT
- 3 -
1. Starta installationen genom hörnet av rummet. Stick en spets av
1. Golvytan måste vara slät och ren från allt damm eller skräp.
Före installation:
självhäftande golv på ytan och fortsätt att trycka långsamt, torka med en
sida, vilande mot väggen, markera önskad längd och använd en metall
ovan.
skillnad beroende på produktion.
SPARA DESSA INSTRUKTIONER
Installationssteg:
motsatt sida av väggen.
9. Operatören och/eller användaren måste använda sunt förnuft och vara försiktig när
1. Fäst produkten i pilens riktning.
2. Även om de har samma modellnummer kan det finnas en färg
använda produkten, särskilt för alla frågor som inte nämns
3. För att installera den sista raden, vänd den upp och ner och rikta in den i raden på
2. Håll produkten och installationsytorna torra.
2. Börja installera den andra raden, i linje med spetsen på den du
trasa eller hand för att säkerställa att brädan är fäst i golvet.
Installation Varning:
för att i detalj täcka alla förhållanden och situationer som kan uppstå.
installerat tidigare. Fortsätt att installera de andra raderna tills du är nära
Machine Translated by Google
UK REP
EC REP
- 4 -
4. Med biten som är över från snittet, börja nästa rad, varva designmönstret.
Importerad till USA:Sanven Technology Ltd. Suite 250,9166 Anaheim
Place, Rancho Cucamonga, CA91730
Tillverkad i Kina
5. I sista raden, parallellt med golvet, markera linjalsnittet genom att placera det
upp och ner för att mäta överskottet som behöver skäras.
Pooledas Group Ltd
Enhet 5 Albert Edward House,
The Pavilions Preston, Storbritannien
01772418127
SHUNSHUN GmbH
6. När installationen är klar, knacka på fogen med en gummihammare för att bli
mer fixerad.
Römeräcker 9 Z2021,76351
Linkenheim-Hochstetten, Tyskland
1727041930
linjal och penna för att göra snittet.
Tillverkare: Shanghaimuxinmuyeyouxiangongsi Adress:
Baoshanqu Shuangchenglu 803long 11hao 1602A-1609shi Shanghai
Importerad
till AUS:SIHAO PTY LTD.1 ROKEVA STREETEASTWOOD NSW 2122
Australien
Machine Translated by Google

Machine Translated by Google