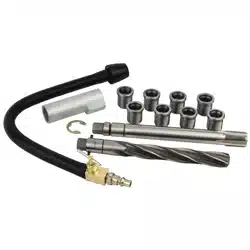
It is recommended to have the following other tools when performing this job: Bore Scope, Quality Air Gun
with extended end or hose, Starter Button to turn engine over, Cutting Oil, and Shop Rag.
1) Make sure the valves are closed and piston is down. You do not want shavings spread throughout
the engine or to damage the piston with the drill. Use the cylinder leak detector to make sure these valves
are closed. Plug the rubber stopper on the leak detector into the cylinder and connect to shop air. Use
T-valve to let about 60 cu. ft. of air an hour, or enough that you can hear and feel a volume of air into the
cylinder. The rubber cone “popping” out of the cylinder indicates the valves are closed.
2) Use a bore scope to make sure that the piston is down at least 2” to 4”.
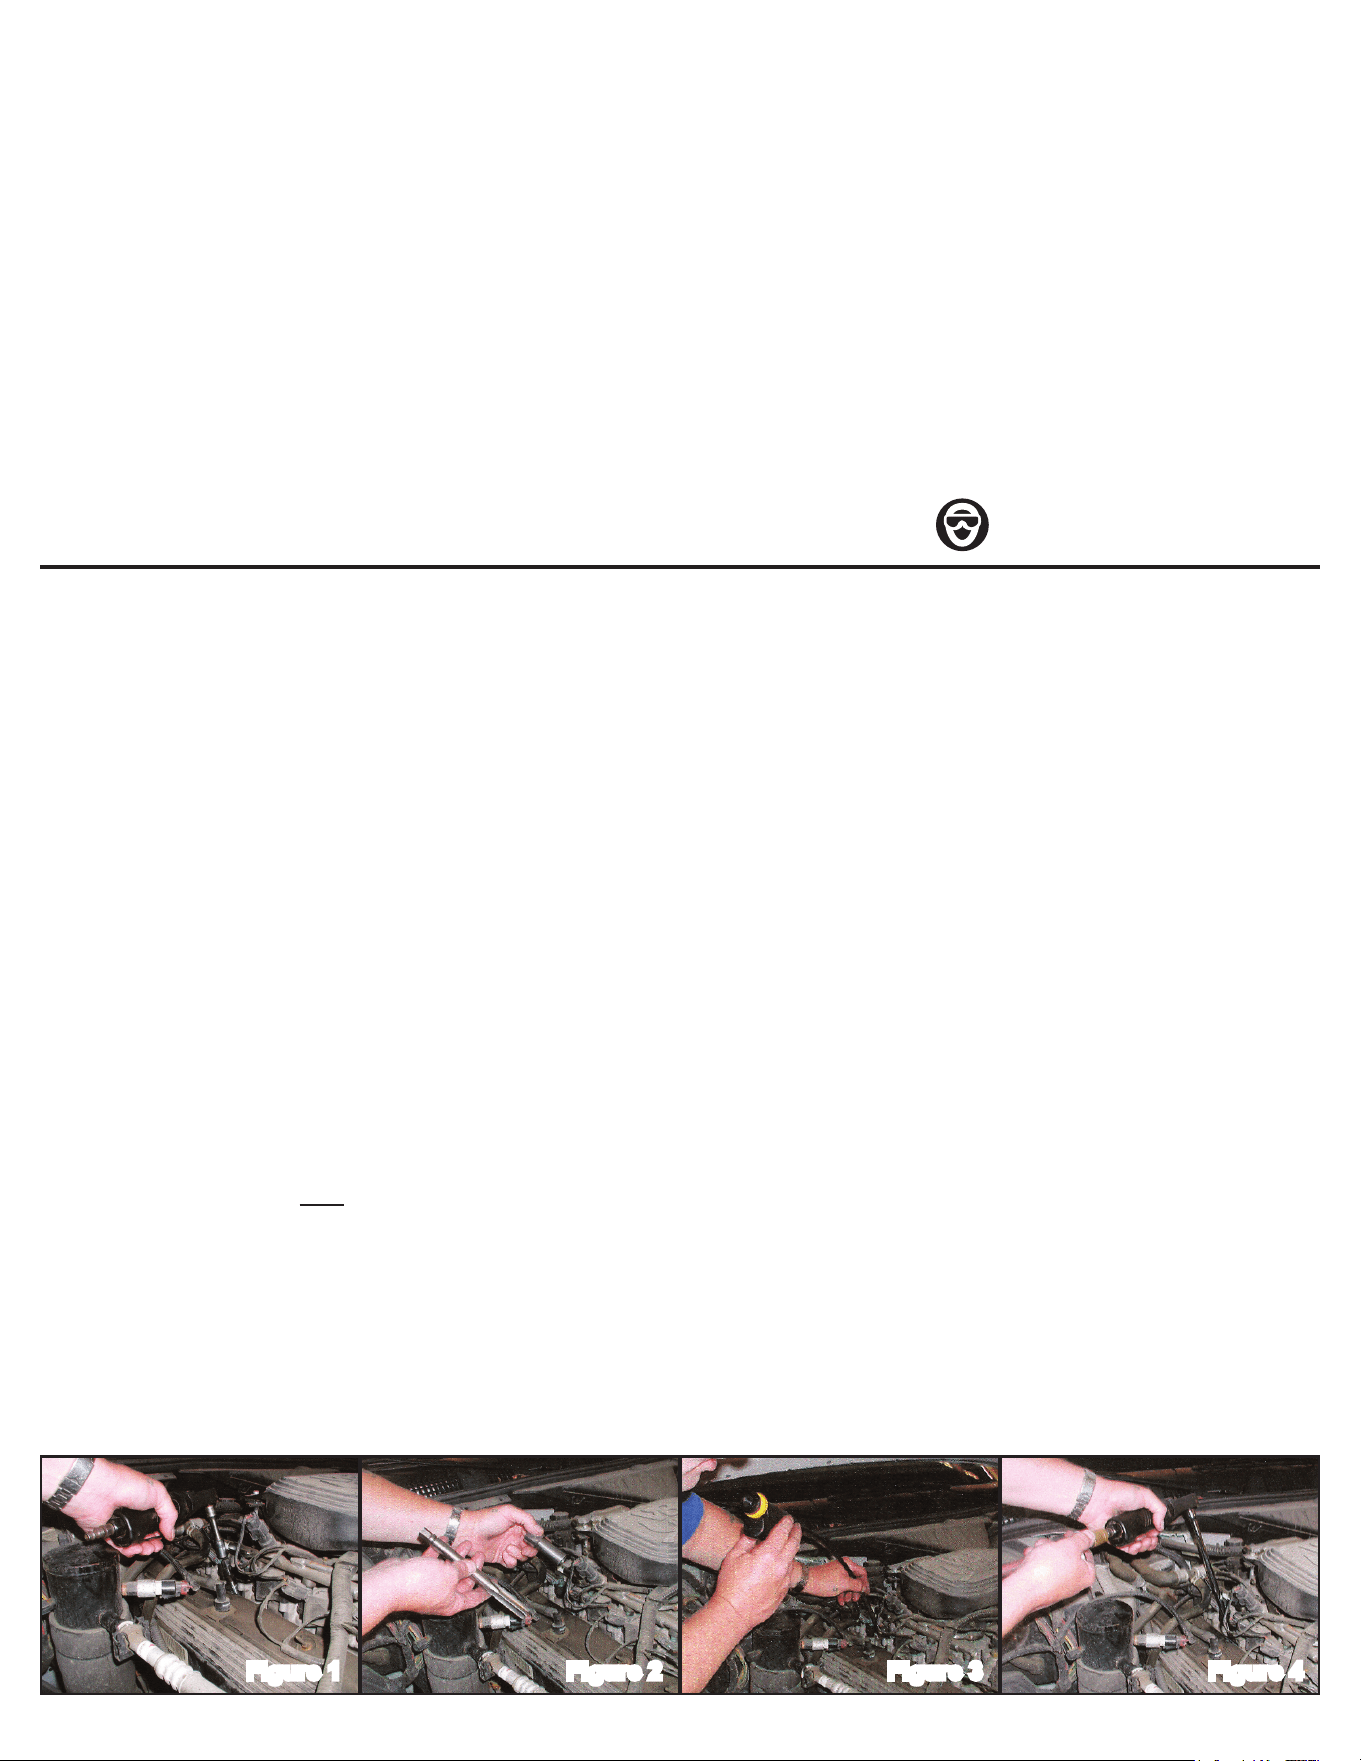
3) Insert the guide into the cylinder. Insert Core Drill through the guide. It is important to use a quality air
ratchet. Bore out old threads. Remove the core drill and guide. (See Figure 1)
4) Use the air gun to blowout all of the shavings in the cylinder.
5) Insert the tap into the guide. Insert the guide into the cylinder. Use the air ratchet to tap the hole that
was previously drilled. You can put cutting oil onto the threads of the tap. (See Figure 2) Completely tap
hole to the center of the “V” groove that is closest to the hex end of the shaft. Failure to do so will cause an
incomplete tapped hole and will not allow the spark plug to seat properly.
6) IMPORTANT!! Use an air gun to blow the shavings out of the cylinder. Use the bore scope to make
sure that there is not any material left in the cylinder. Material left can cause engine damage. (See Figure
3)
7) Screw the spark plug into the patented insert. Spread JB Weld or another heat resisting metal bonding
material on the outer threads of the insert. DO NOT USE A QUICK SET VARIETY.
8) Use your air ratchet to run the spark plug and insert into the head. This insert will become part of the
engine. (See Figure 4)
9) You can now reconnect the coil and the boot. The job is now complete.
Figure 1 Figure 2 Figure 3 Figure 4
Ford Cylinder Repair Kit Instructions
It is recommended that you have the right length extensions and socket picked out before starting. In
some cases there is barely enough room to get your hands in, so make sure you have a Quality Air
Wrench before you even drill out the old threads.
Other tools to have at hand are a bore scope, a modied air gun with exible 1/4” clear tubing
attached to the end of the air gun and a starter button to turn over the engine. Use spark plug
to test inner threads of insert. Should be a smooth secure t. All good techs pre-check all of the parts
to every job before starting. If you ever nd a defective insert, we will replace it, but we will NOT be
responsible for mechanic error. You can also use a 3/4” die to clean up the threads. This system has
been tested for over 4 years without failure.
This system is for use on 4.6L, 5.4L, and 6.8 V-10 Ford Triton Engines. Please watch the video for
comprehensive instructions on the proper use of this product.
ALWAYS WEAR SAFETY GLASSES.
