UL 2021. FIXED AND LOCATION –DEDICATED ELECTRIC ROOM HEATERS
DO NOT DISCARD THIS MANUAL
CUSTOMER: PLEASE RETAIN THIS MANUAL FOR FUTURE USE
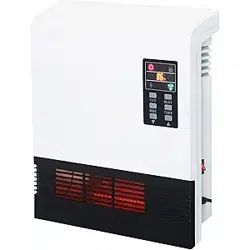
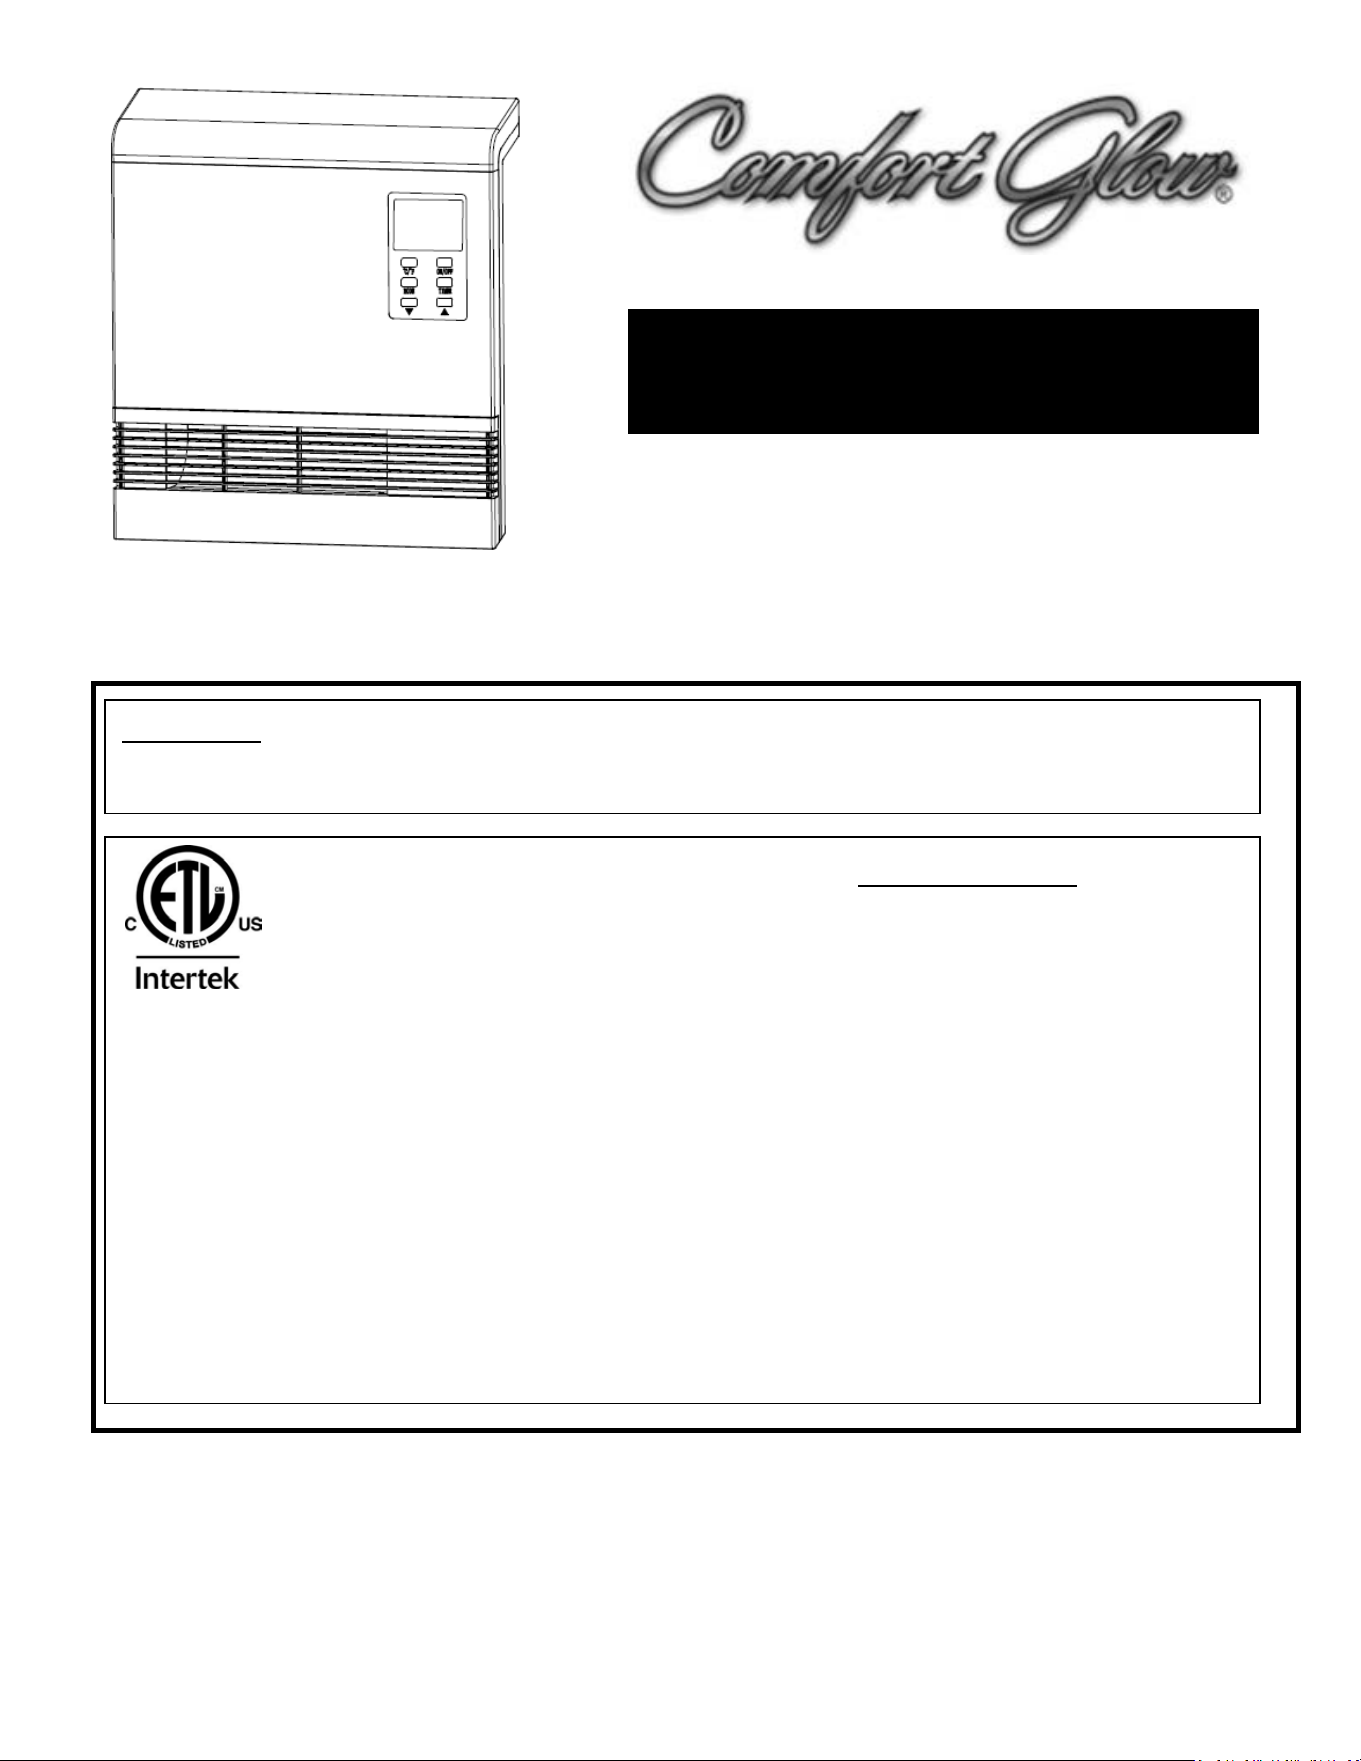
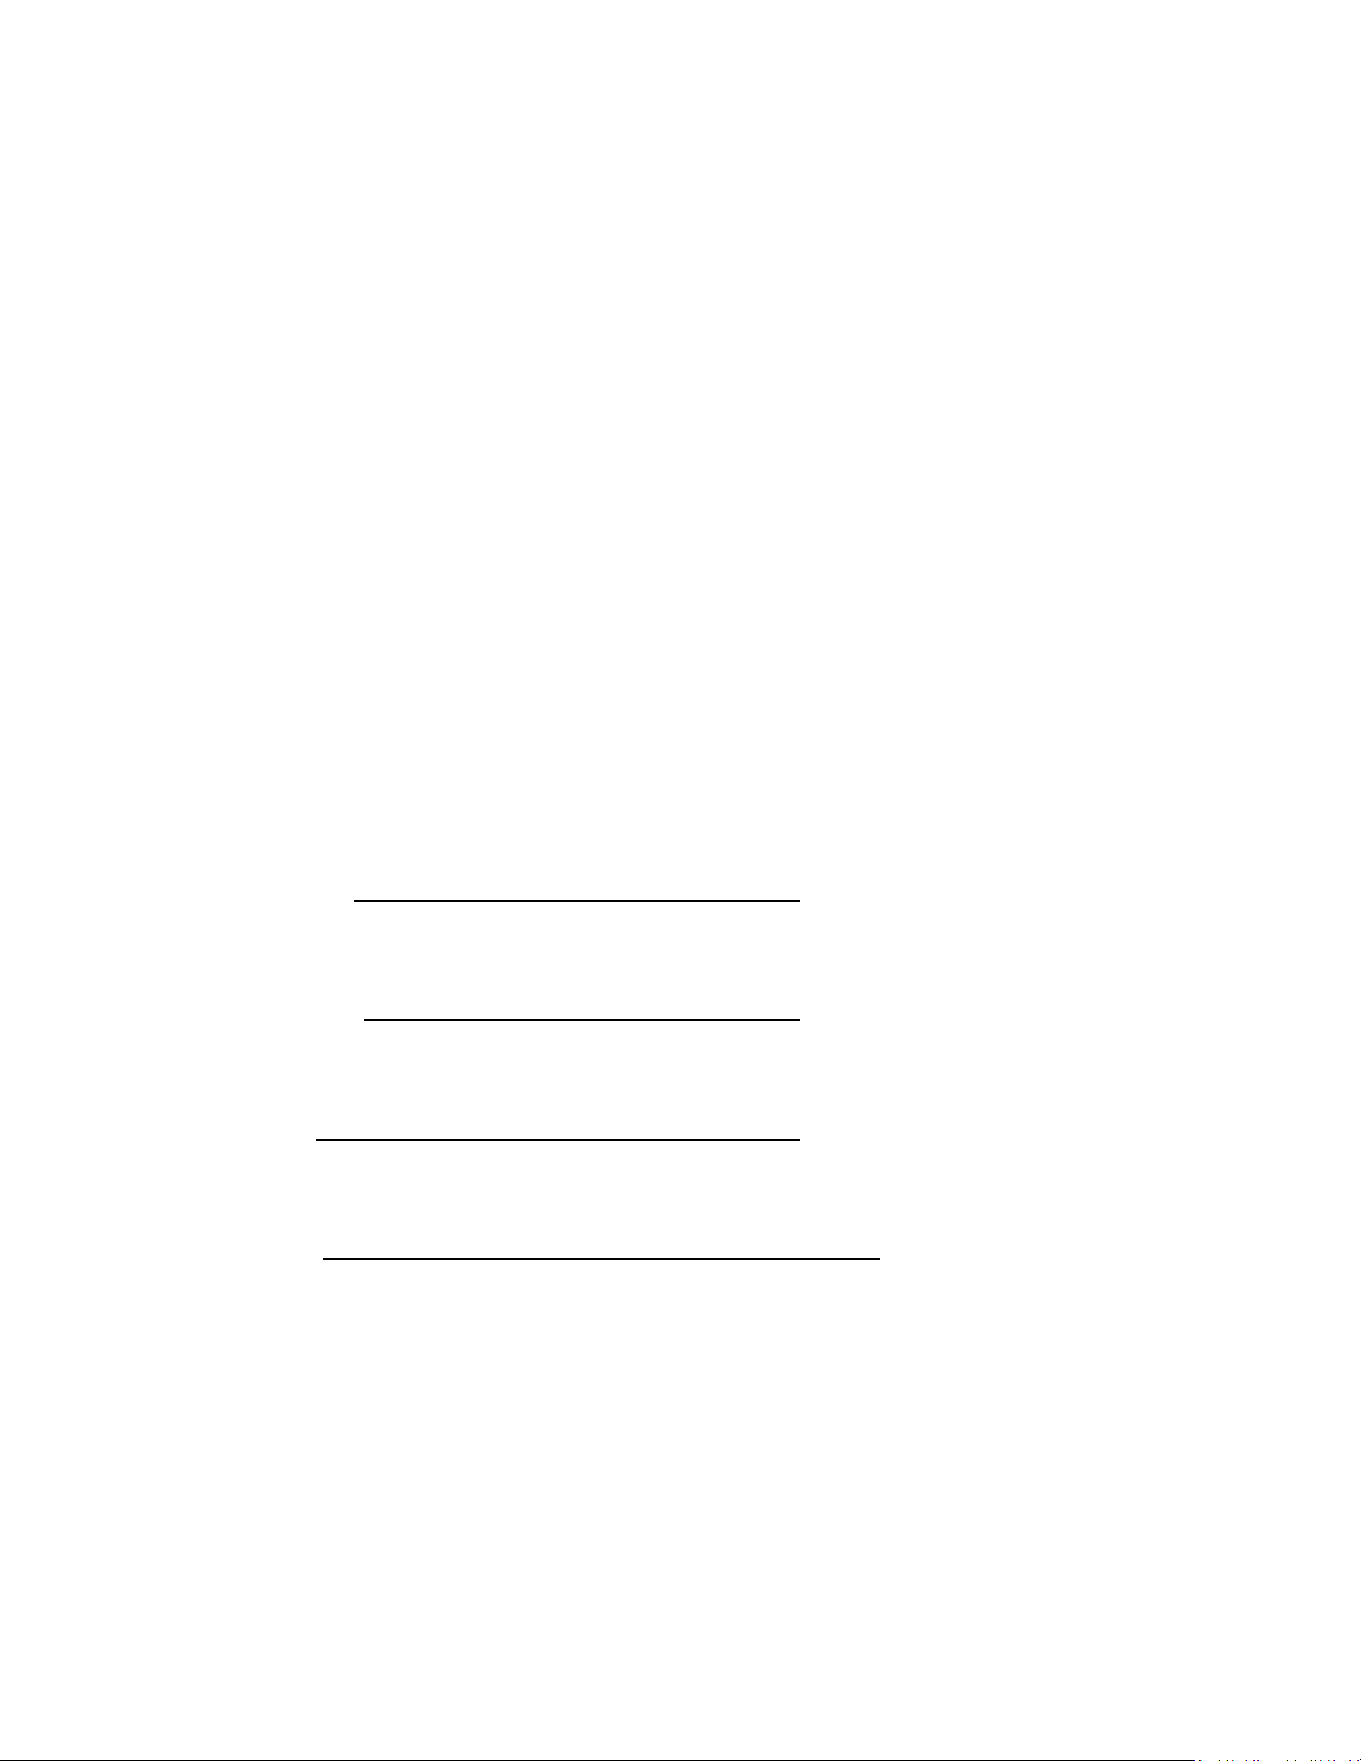
WALL MOUNT QUARTZ INFRARED
ELECTRIC HEATER
QWH2100
Operator's Manual
WARNING! IF THE INFORMATION IN THIS MANUAL IS NOT FOLLOWED EXACTLY, A FIRE
MAY RESULT CAUSING PROPERTY DAMAGE, PERSONAL INJURY OR LOSS OF LIFE.
Comfort Home Products, Inc.
12256 William Penn Hwy, Ste A
Huntingdon, PA 16652
FOR YOUR SAFETY
DO NOT STORE
OR USE GASOLINE OR
OTHER FLAMMABLE VAPORS
OR LIQUIDS
IN THE VICINITY OF THIS OR
ANY OTHER ELECTRIC APPLIANCE
Made in China
DURA HEAT PHONE NUMBER: (814) 643-1775
http://www.worldmkting.com.com

~ 2 ~
Read all instructions in this guide before using your Heater. This product is intended for indoor residential, office
and personal shop use only, not for industrial or other commercial applications. Use only with electrical wiring
that is in good working order and that meets applicable codes and ordinances. If you have any questions
whether your wiring is adequate, consult a qualified electrician.:
1. Read all instructions before using this heater.
2. This heater is hot when in use. To avoid burns, do not let bare skin touch hot surfaces. If provided, use handles
when moving this heater. Keep combustible materials, such as furniture, pillows, bedding, papers, clothes and
curtains at least 3 feet (0.9m) from the heater.
3. Extreme caution is necessary when any heater is used by or near children, pets or invalids and whenever the
heater is left operating unattended.
4. Always unplug heater when not in use.
5. Do not operate any heater with a damaged cord or plug or after the heater malfunctions, has been dropped or
damaged in any manner.
6. Any repairs to this appliance should be carried out by a qualified service person.
7. Under no circumstances should this appliance be modified. Parts having to be removed for servicing must be
replaced prior to operating this appliance again.
8. Do not use outdoors.
9. Do not run cord under carpeting. Do not cover cord with throw rugs, runners, or similar coverings. Arrange cord
away from traffic area and where it will not be tripped over.
10. To disconnect heater, first turn controls to off, then remove plug from outlet. Always unplug the heater when
not in use.
11. Connect to a properly grounded outlets only.
12. Do not insert or allow foreign objects to enter any ventilation or exhaust opening as this may cause an
electrical shock or fire, or damage the heater.
13. To prevent a possible fire, do not block air intakes or exhaust in any manner. Do not use on soft surfaces, like a
bed, where openings may become blocked.
14. This appliance has hot and arcing or sparking parts inside. Do not use it in areas where gasoline, paint or
flammable liquids are used or stored.
15. Use this heater only as described in this manual. Any other use not recommended by the manufacturer may
cause fire, electric shock, or injury to persons.
16. Avoid the use of an extension cord because the extension cord may overheat and cause a risk of fire.
17. This heater may include an audible (a visual) alarm to warn that parts of the heater are getting excessively hot.
If the alarm sounds (flashes), immediately turn the heater off and inspect for any objects on or adjacent to the
heater that may cause high temperatures. DO NOT OPERATE THE HEATER WITH THE ALARM (FLASHING).
18. “SAVE THESE INSTRUCTIONS”
THIS HEATER MUST BE PROPERLY INSTALLED PRIOR TO OPERATION. This heater will not operate on the floor or
ground.
IMPORTANT INSTRUCTIONS

~ 3 ~
ALWAYS OBSERVE THESE SAFETY PRECAUTIONS WHEN OPERATING YOUR ELECTRIC HEATER
ALWAYS Read all instructions before operating.
ALWAYS Locate your electric heater away from furniture or loose hanging drapes.
ALWAYS Keep the grill away from walls or drapes so as not to block the air intake. (If applicable)
ALWAYS Unplug electric heater when not in use.
ALWAYS Use this heater in a correctly installed position.
ALWAYS Route the cord so it will not be walked on tripped over or pinched by furniture.
ALWAYS Keep electrical cords, drapes and other furnishings away from your electric heater.
ALWAYS Keep your electric heater clean and free of dust.
ALWAYS Use indoors only.
NEVER Place drapes, clothing or towels over electric heater to dry.
NEVER Use in the presence of explosive or flammable vapors such as gas or paint.
NEVER Plug another electrical appliance into the same circuit. Blown fuses, tripped circuits and fire hazards
may result.
NEVER Use water or liquids to clean your electric heater.
NEVER Let bare skin touch hot surfaces as this may cause burns.
NEVER Leave heater unattended.
NEVER Leave children or pets near heater without supervision.
NEVER Locate electric heater where it may fall into a bath tub or other water containers.
NEVER Operate electric heater with a damaged cord, plug or after the heater malfunctions, or has been
dropped or damaged in any manner.
NEVER Run cord under carpeting or cover with throw rugs or runners.
NEVER Insert or allow foreign objects to enter any ventilation or exhaust openings, as this may cause an
electrical shock, fire or damage.
NEVER Use this heater without proper installation.
~ 4 ~
IMPORTANT
SPECIFICATIONS
Voltage
120V AC 60HZ;
Heating Power
1500 Watts/12.5 Amps
Dimensions
17.32” Wide x 4.49” Deep x 19.21” High
Weight
10.6 Lbs
Grounded Outlet
Over-Heat safety feature
This heater is equipped with a Ground Fault Circuit Interrupter (GFCI), a safety feature that renders it inoperable under
some abnormal conditions, such as immersion in water.
To make sure the GFCI is functioning properly, perform the following test at 120VAC 60Hz frequency.
1. Plug in heater and turn on. Press test button on plug.
2. There will be an audible click. Heater should stop working. Unplug the heater and push the reset button in. Reinsert
plug into outlet.
3. If GFCI is NOT operating properly, immediately unplug heater. DO NOT USE HEATER WITH FAULTY OUTLET OR PLUG.
WALL MOUNTING REQUIRED
LOCATING HEATER:
This heater is designed to be mounted on a wall only. It will not operate as a freestanding heater and should not be
modified to do so. For convenience and efficiency, install heater:
1. Where all clearances can be maintained. (see Page 5)
2. Where there is easy access for operation, inspection and service.
3. Within 5 feet of proper electrical outlet.
4. Away from any doorway or water source such as tub, sink, etc.
5. Insure there is no existing electrical wiring, plumbing or other obstructions in the area chosen.
6. Wall must be flat and must be a solid surface.
7. In the coldest part of the room.
8. Mounting screws are included for Dry Wall mounting only, for other installations the installer or home owner is
responsible to insure that the heater is securely mounted to wall.
Failure to position the heater in accordance with the guidance provided or failure
to secure heater securely to the wall could result in property damage and personal
injury.
~ 5 ~
INSTALLATION
WARNING:
If the heater is being installed in a residential garage, it must be secured firmly to the wall, a minimum of 39 inches
(457mm) above the floor. The heater must be located so that it is protected against any possibility of damage by a
moving vehicle, etc.
Raising the heater will reduce BUT NOT eliminate the possibility of lighting the vapor of any flammable liquids which
may be improperly stored or accidentally spilled. If the smell of gasoline is present, do not operate this heater until the
area has been properly ventilated.
WARNING:
DO NOT PLUG HEATER INTO ELECTRICAL OUTLET UNTIL INSTALLATION HAS BEEN COMPLETE
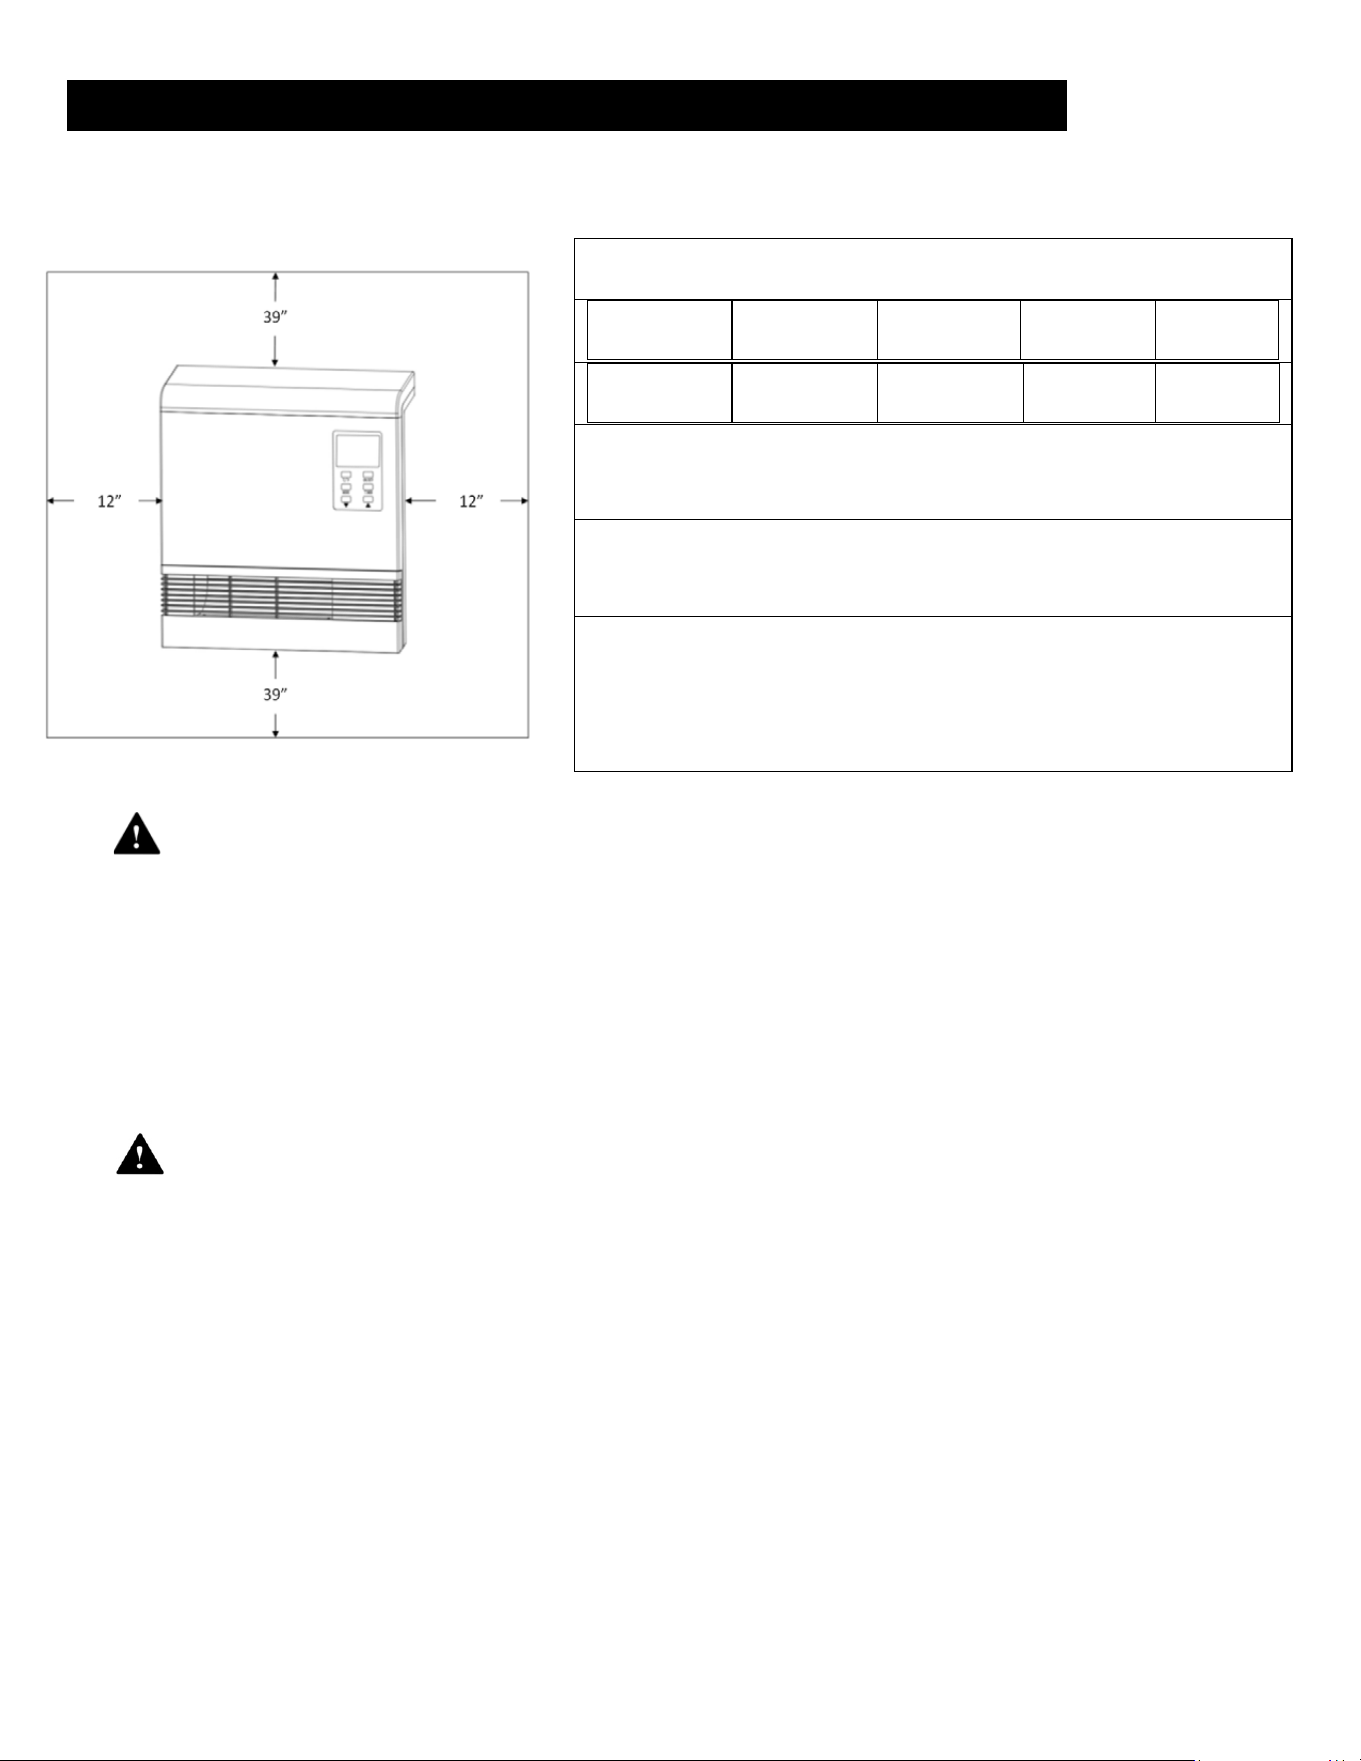
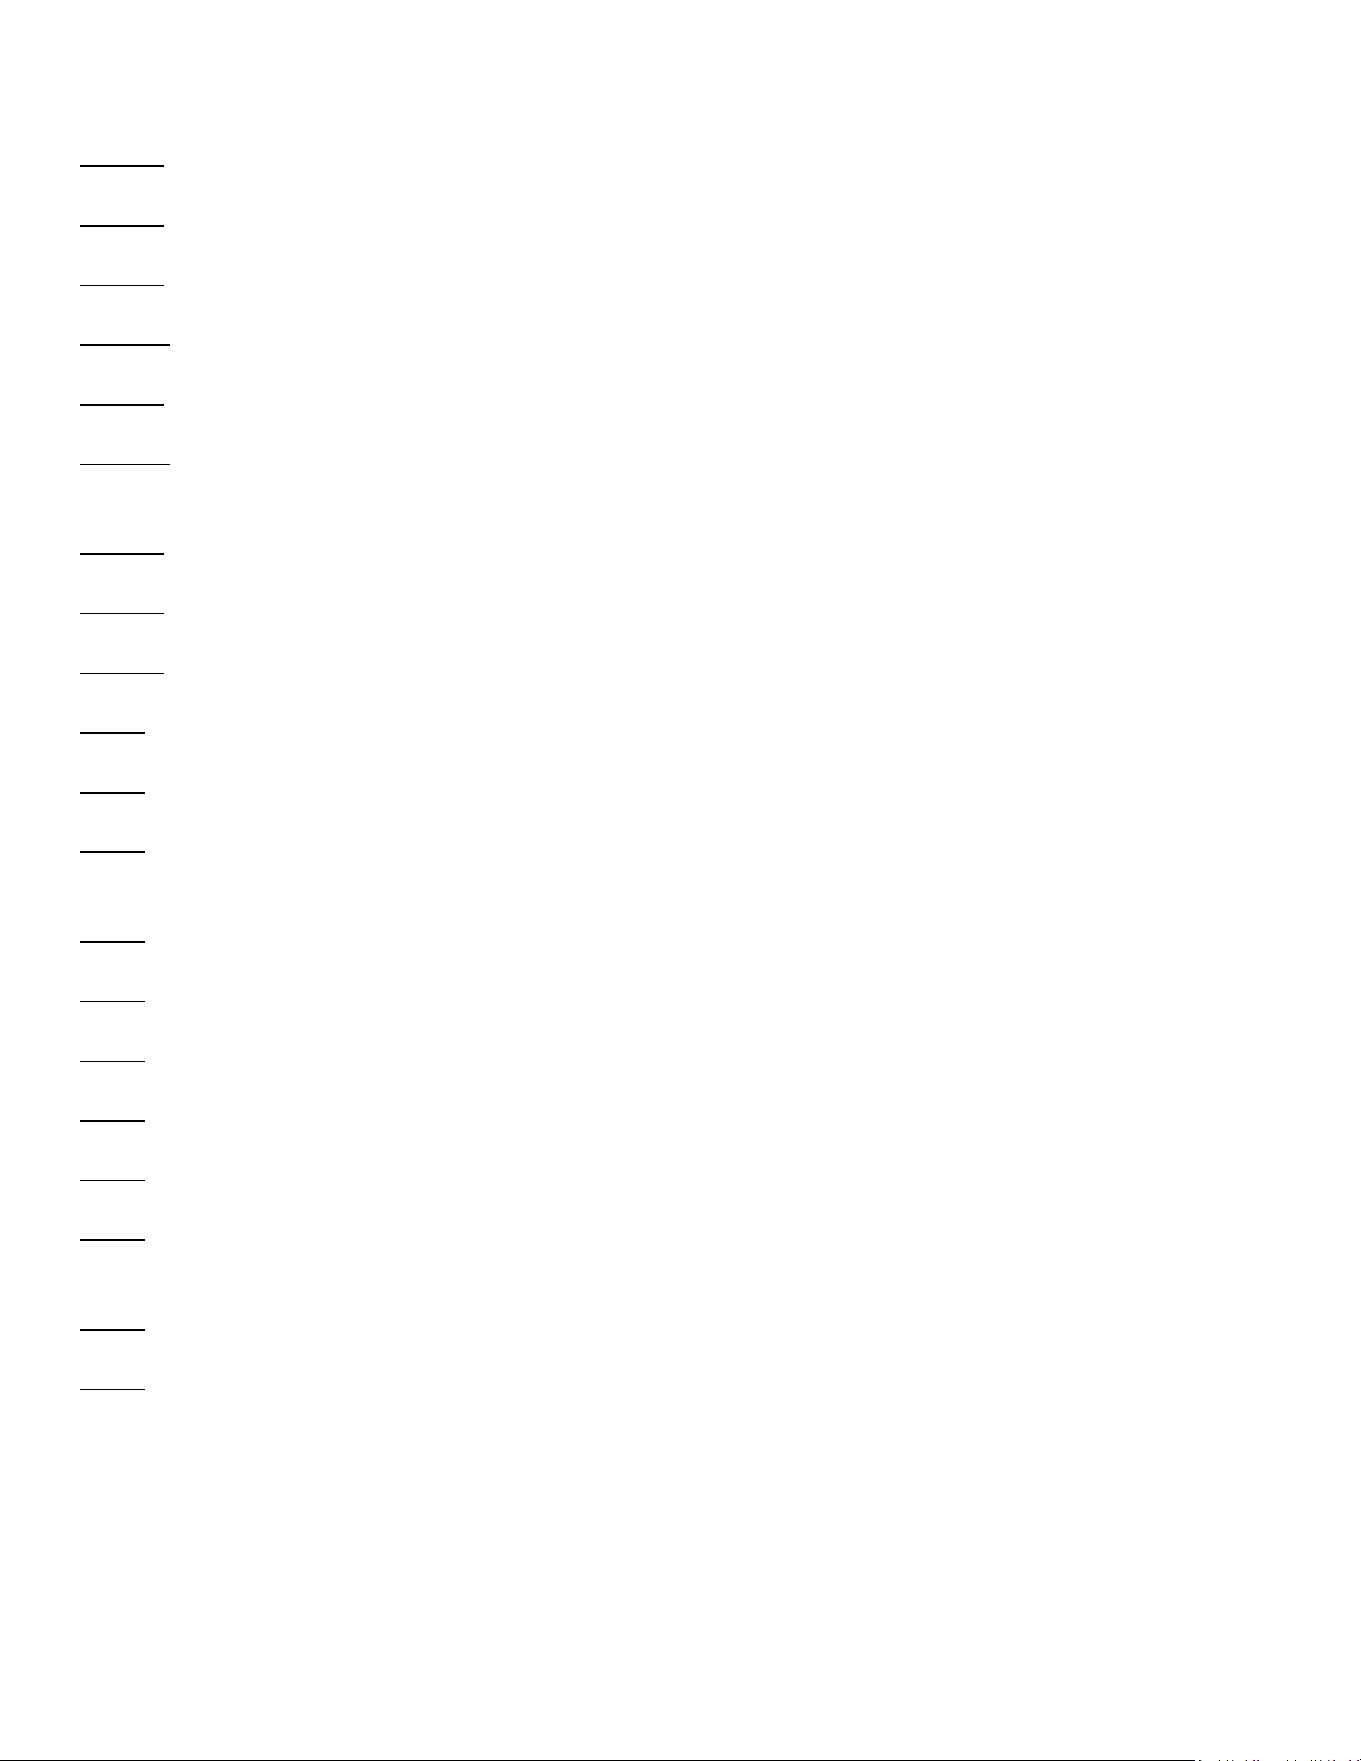
MINIMUM CLEARANCES TO COMBUSTABLES
LEFT/RIGHT
TOP
BOTTOM
FRONT
REAR
*12 Inches
39 Inches
39 Inches
39 Inches
0 Inches
Top clearance is from top of the heater to ceiling or other
combustible material
Bottom clearance is from the bottom of heater to surface of carpet,
tile or other combustible material.
* A sidewall must be at least 18 Inches away from the side of heater.
-Always maintain a 36 Inch clearance from any furniture, draperies or
other combustible material.
~ 6 ~
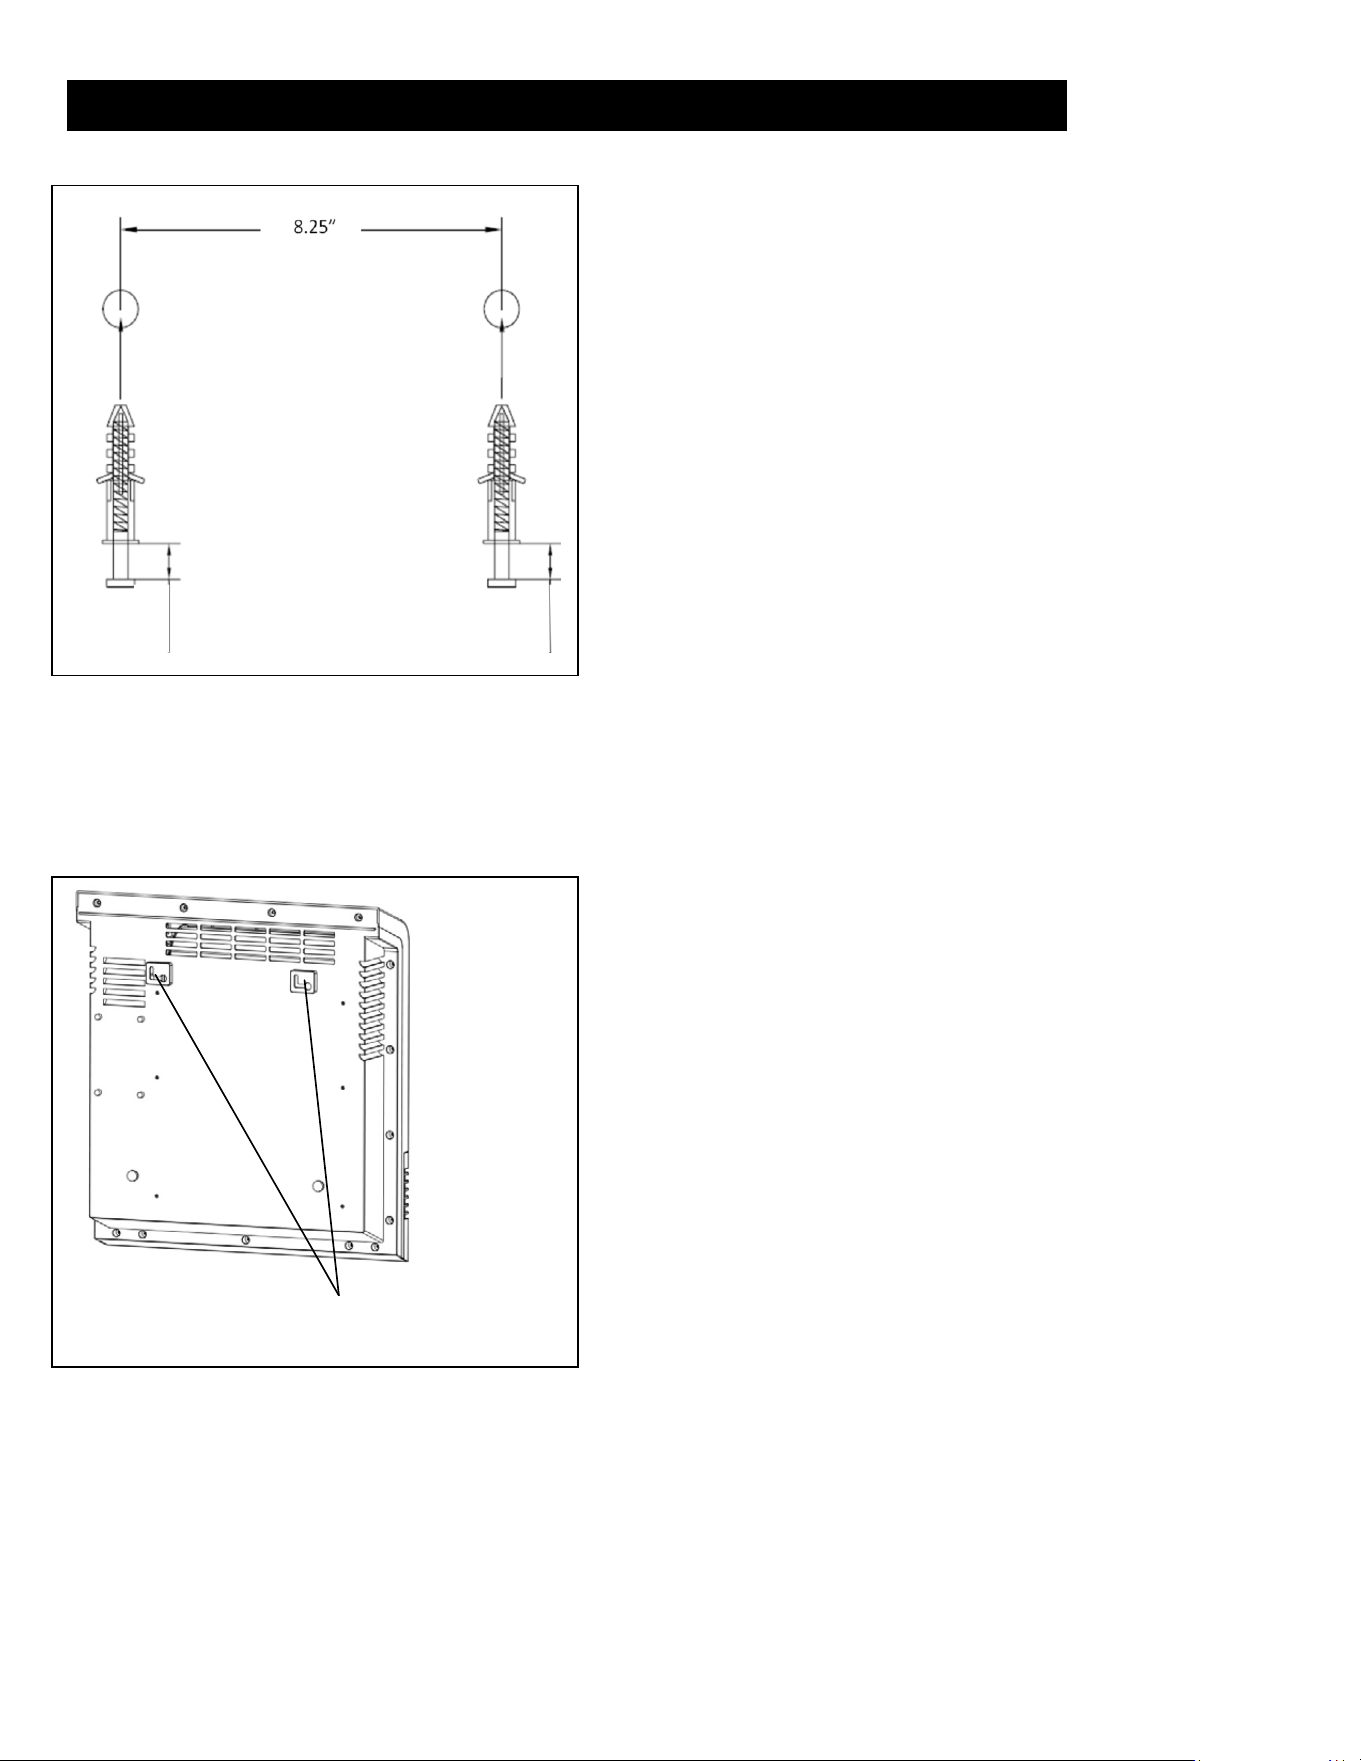
INSTALLATION
Heater Hook Position
Step 1 (Figure 1)
DRY WALL: Using the screws and wall anchors
provided install into drywall as shown. Check to
insure screws are secure.
STUD WALL: Using the screws provided install into
drywall as shown. Check to insure screws are secure.
CONCRETE WALL: Drill ¼ inch holes, insert # 12 wall
anchors (not included) and secure to wall with #12 x 3
inch screws (not included). Check to insure screws are
secure.
Step 2 (Figure 2)
Hook the heater into position. Check to insure
that the mounting hook holes have securely
attached to the screws installed in step 1.
Figure 1
Figure 2
~ 7 ~
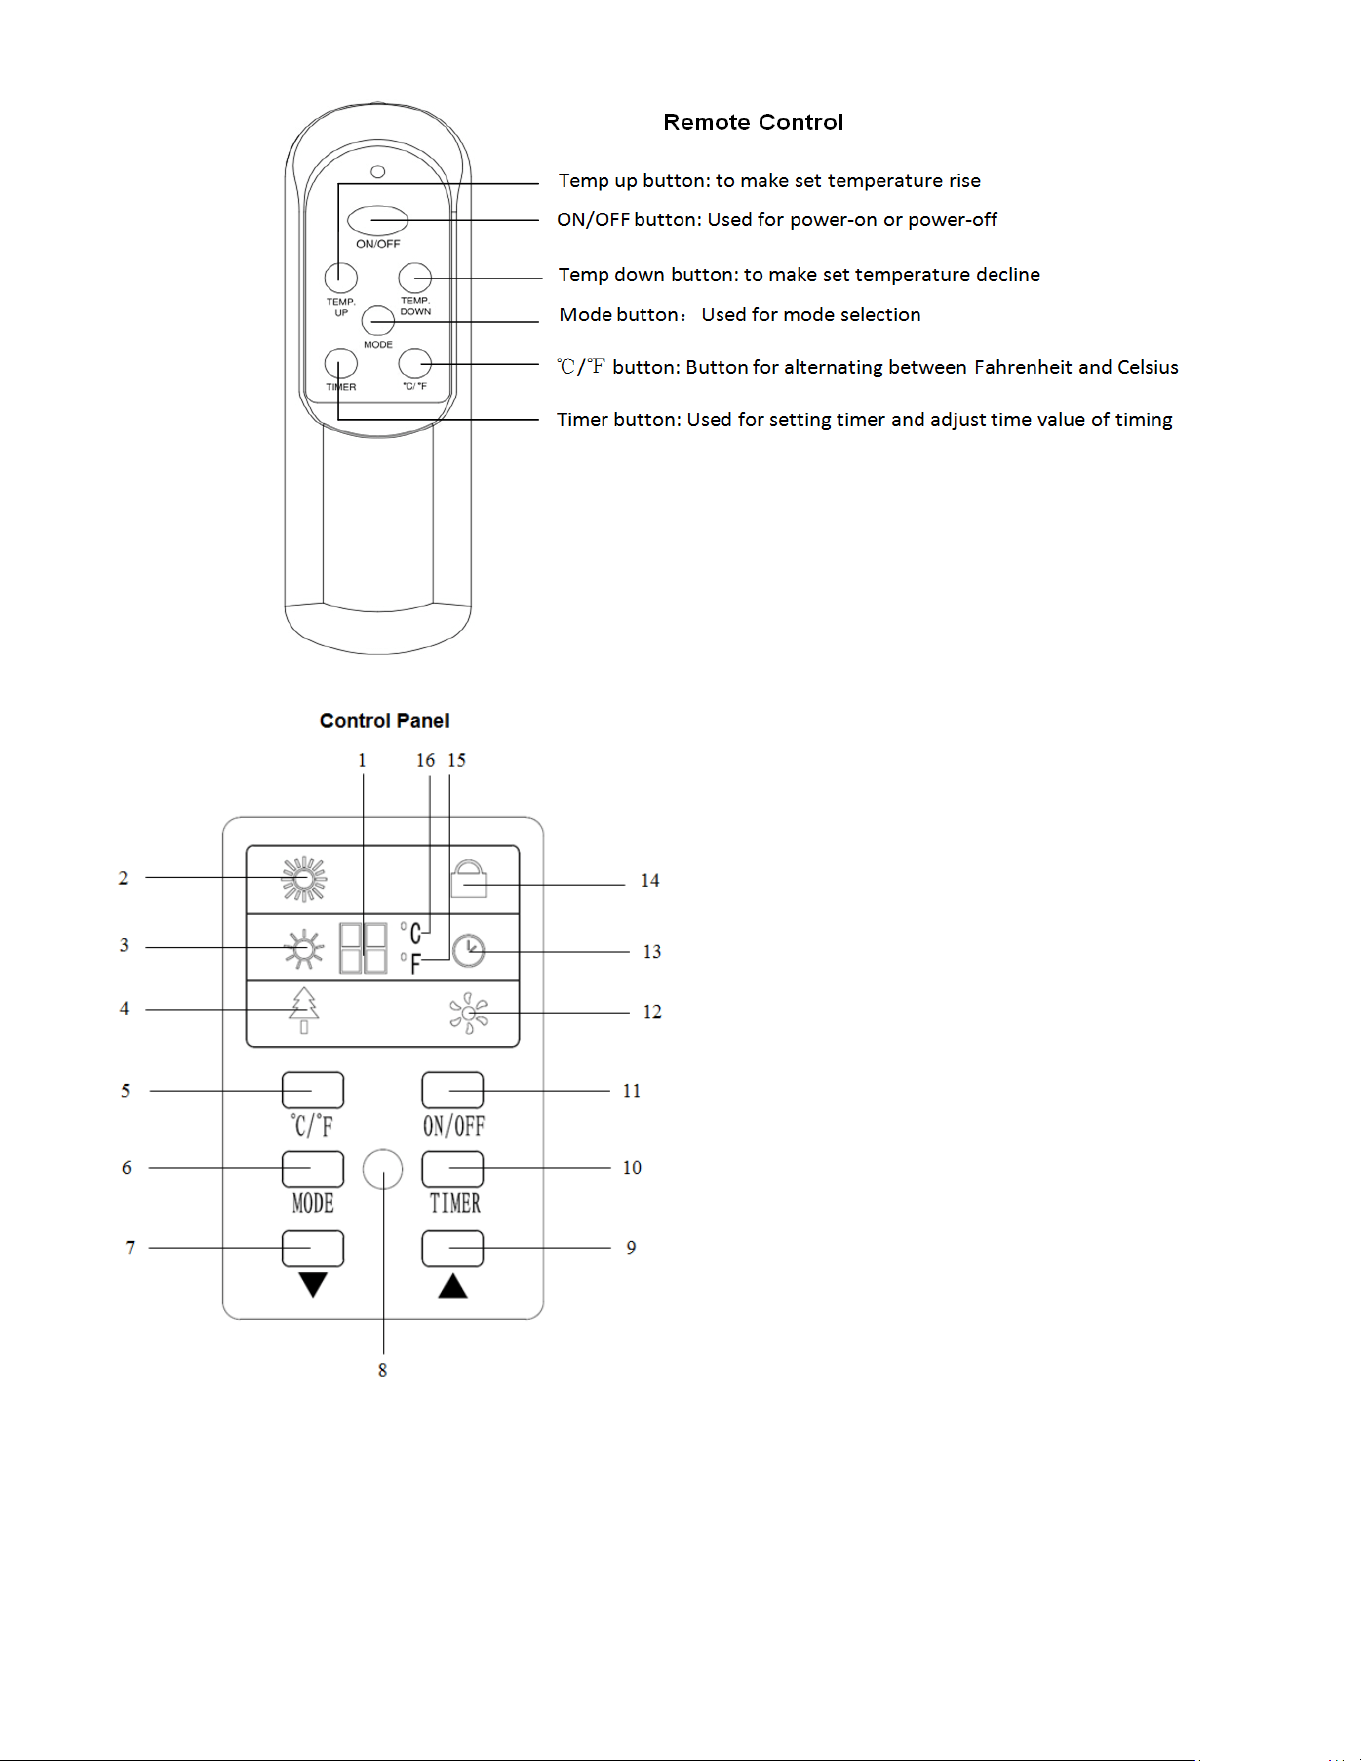
1. Digital display: Indicates temperature or time.
2. High Mode indicator light: Will be lit when High Heat
mode is engaged.
3. Low Mode indicator light: Will be lit when Low Heat
mode is engaged.
4. Energy-saving mode indicator: Will be lit when energy-
saving mode is engaged.
5. °C/°F Button: Alternates between Fahrenheit and Celsius.
6. Mode button to select between High, Low and Eco
modes.
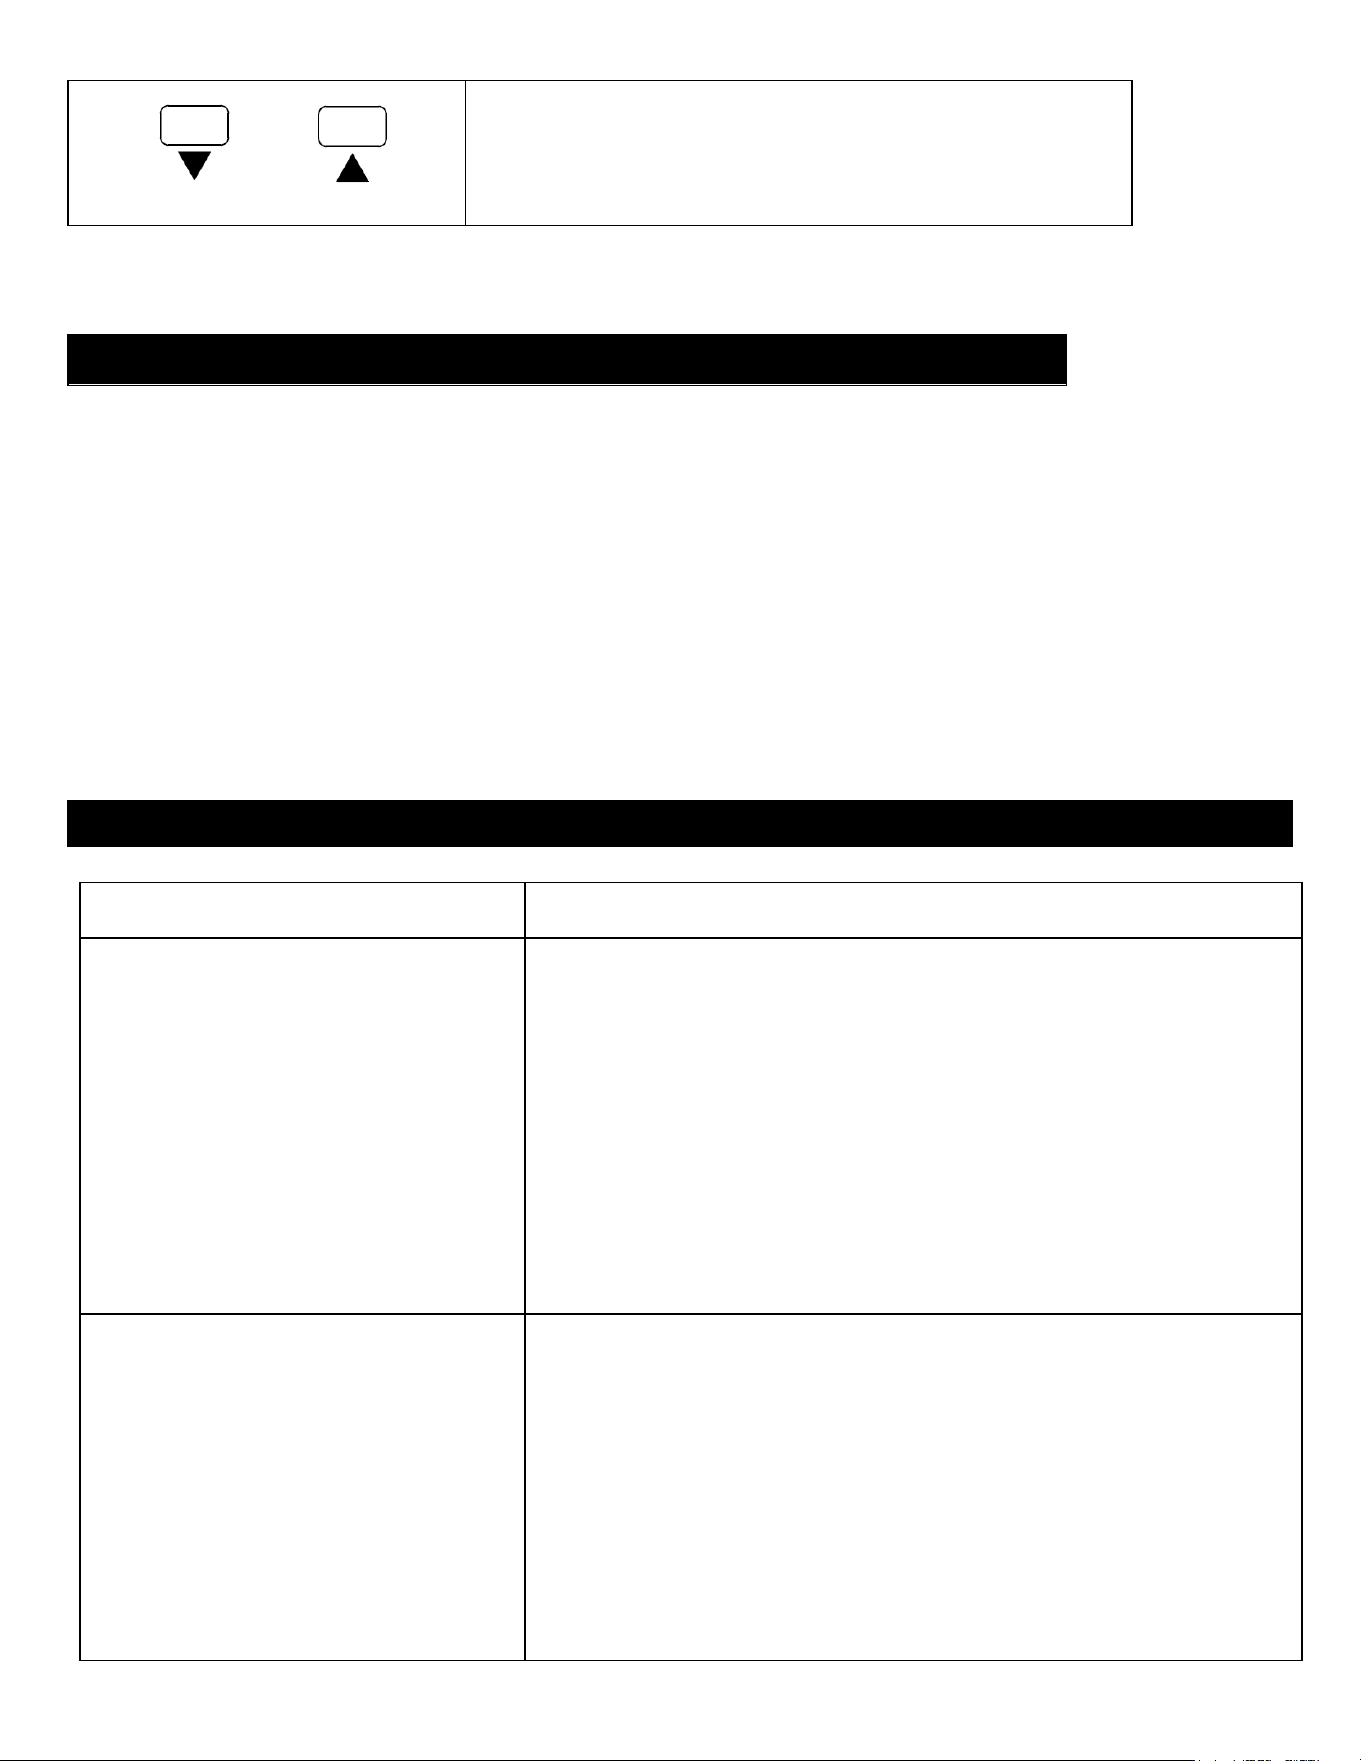
7. Temp down button: To decrease desired temperature.
8. Signal receiving window: For receiving remote control
signal.
9. Temp up button: To increase desired temperature.
10. Timer button: Used to engage timer mode and to set
hour value for the timer.
11. ON/OFF button: Powers the display on and off.
12. Fan light will be lit when Fan is engaged.
13. Timer indication light will be lit when the Timer mode is
engaged.
14. Key lock indicator light will be lit when the key lock is
open.
15. Fahrenheit indicator light: Will be lit when temperature
displayed is in Fahrenheit.
16. Celsius indicator light: Will be lit when temperature
displayed is in Celsius.
Requires 2 AAA batteries not included
~ 8 ~
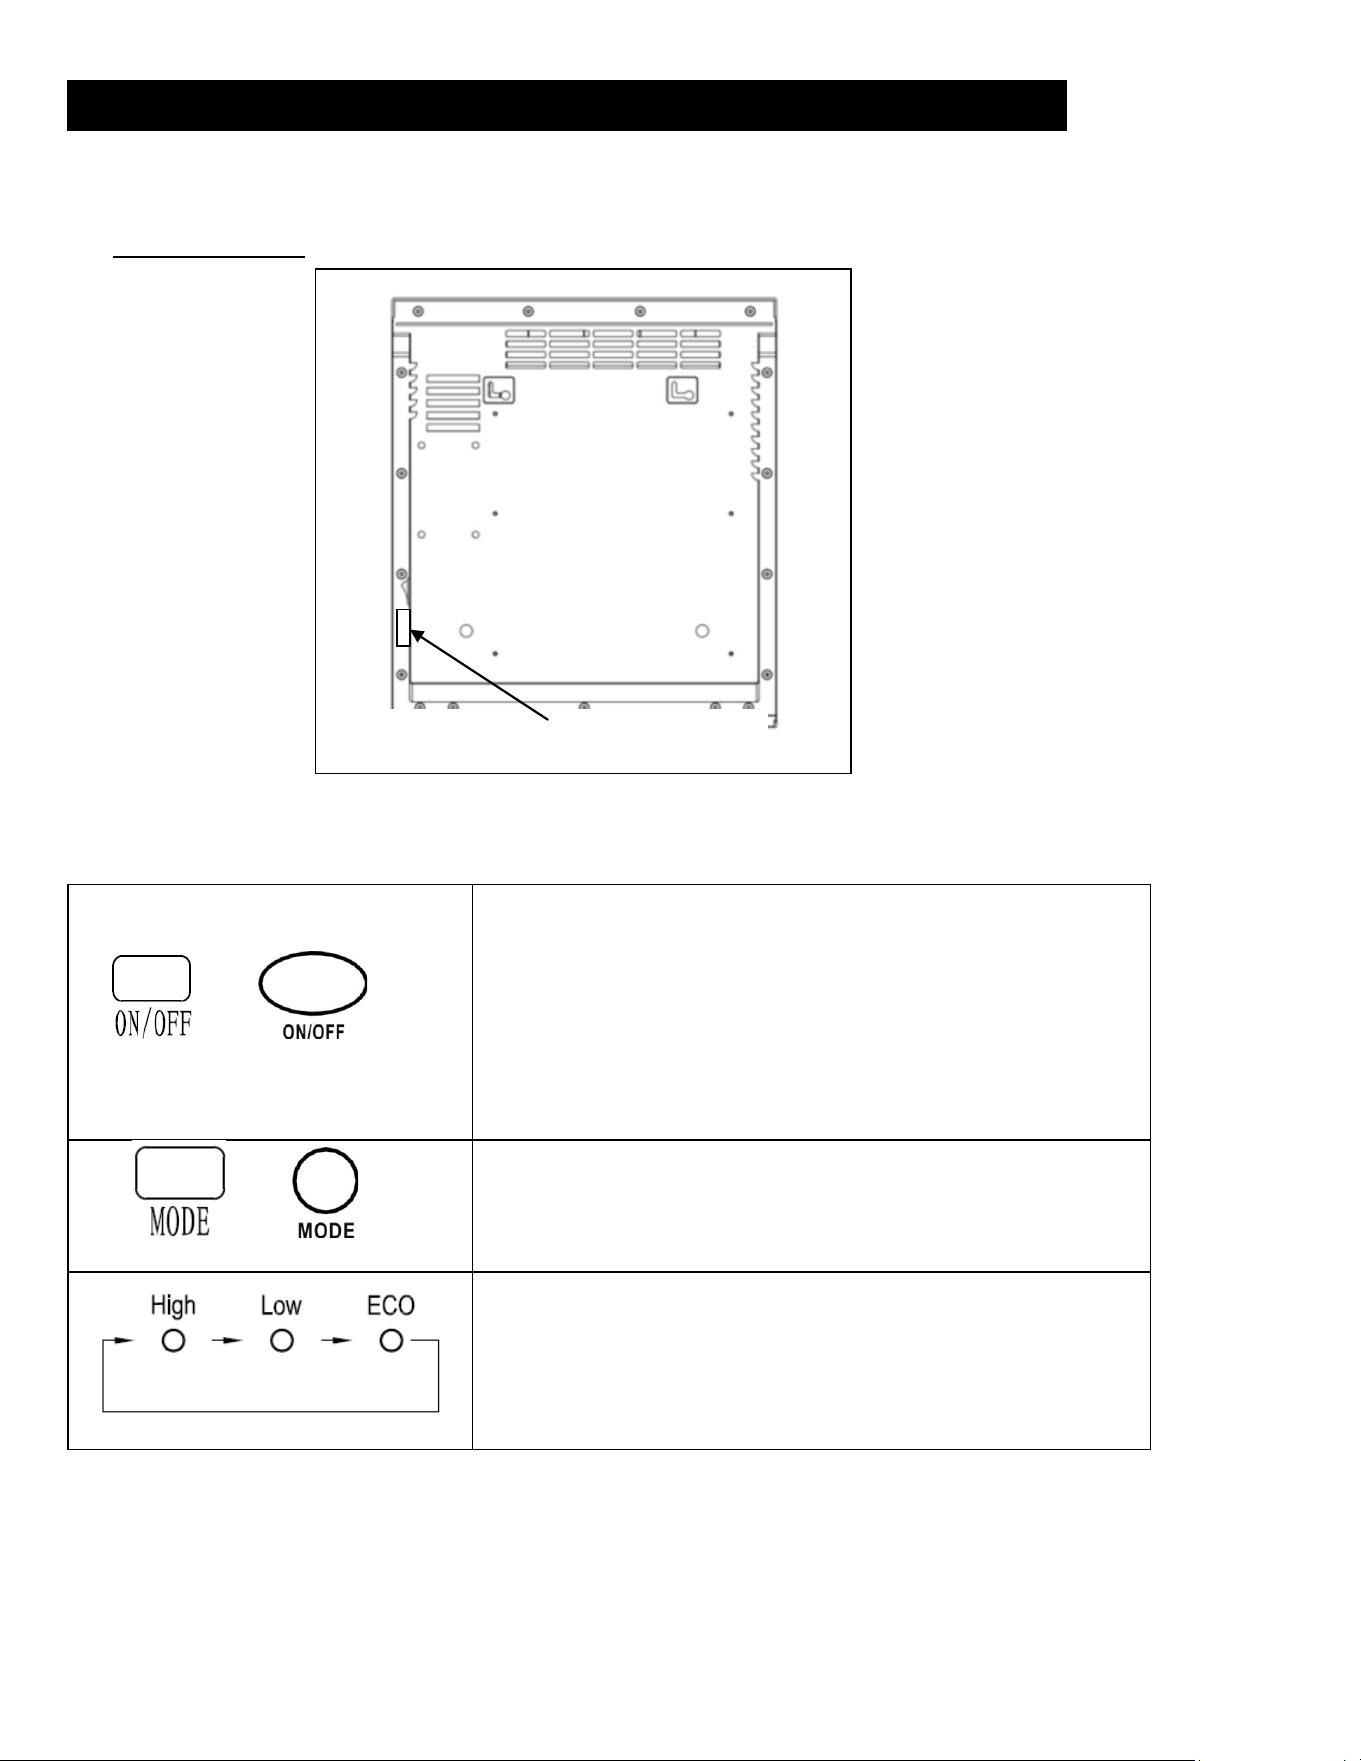
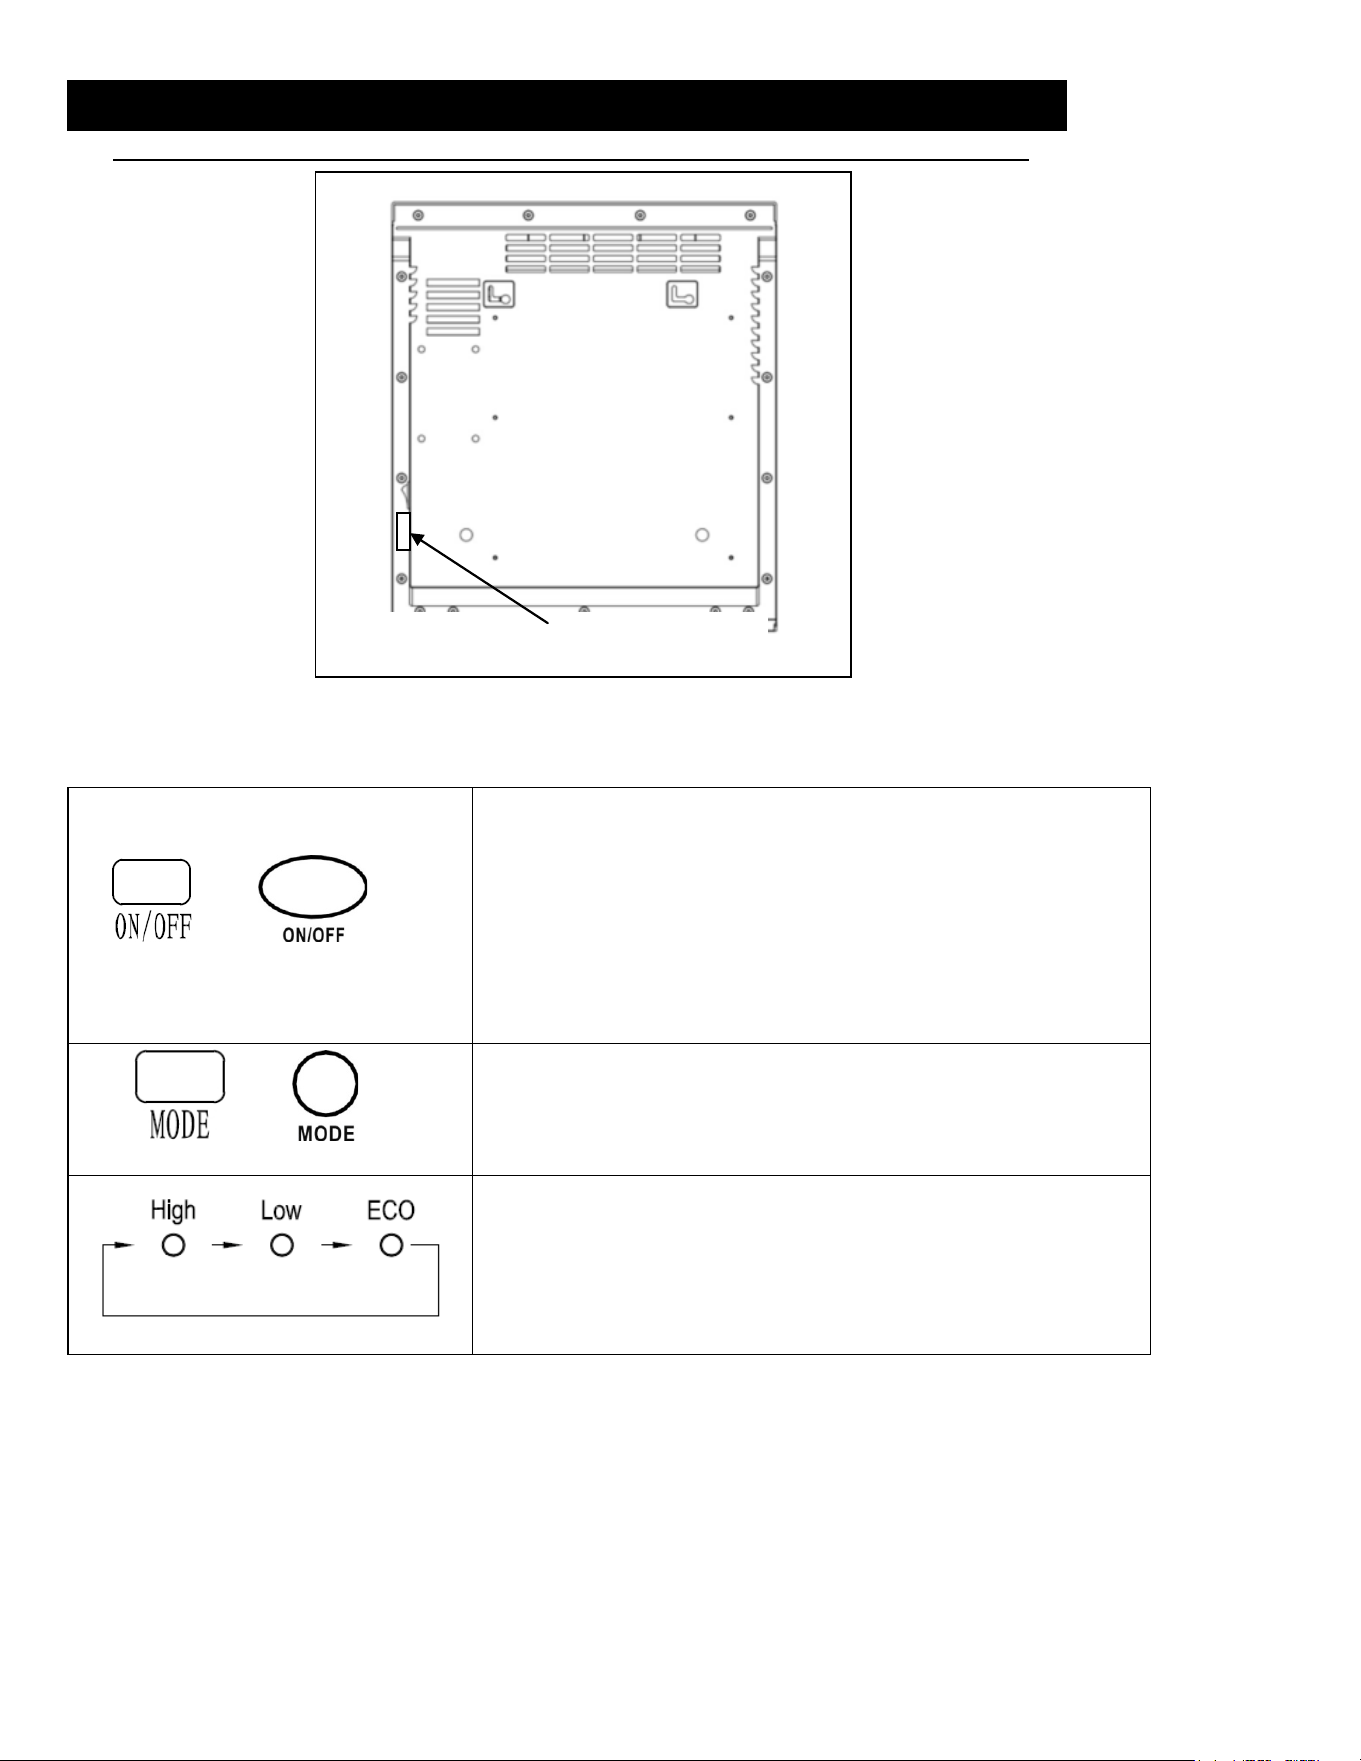
OPERATION
1. Turn Main Power switch on rear of appliance to On.
2. Start and select working mode
Or
Turn the heater on by pressing the ON/OFF button on the
control panel or by pressing the Power button on the
supplied remote control.
Once power is off, heating element will stop working at
first. Fan will prolong working for 3 min to emit plenty of
heat inside. This mark will indicate running during the 3
min.
Or
Select a heat Mode
Press the MODE button to toggle between the three heat
modes.
High Mode uses 1500W; Low Mode uses 750W. ECO mode
is an Economic Energy Saving Function. When ECO mode is
chosen, the heater will manage itself from less to more
heating power (watts) in an attempt to maintain a constant
warm 68° F(20°C).
Main Power Switch
~ 9 ~
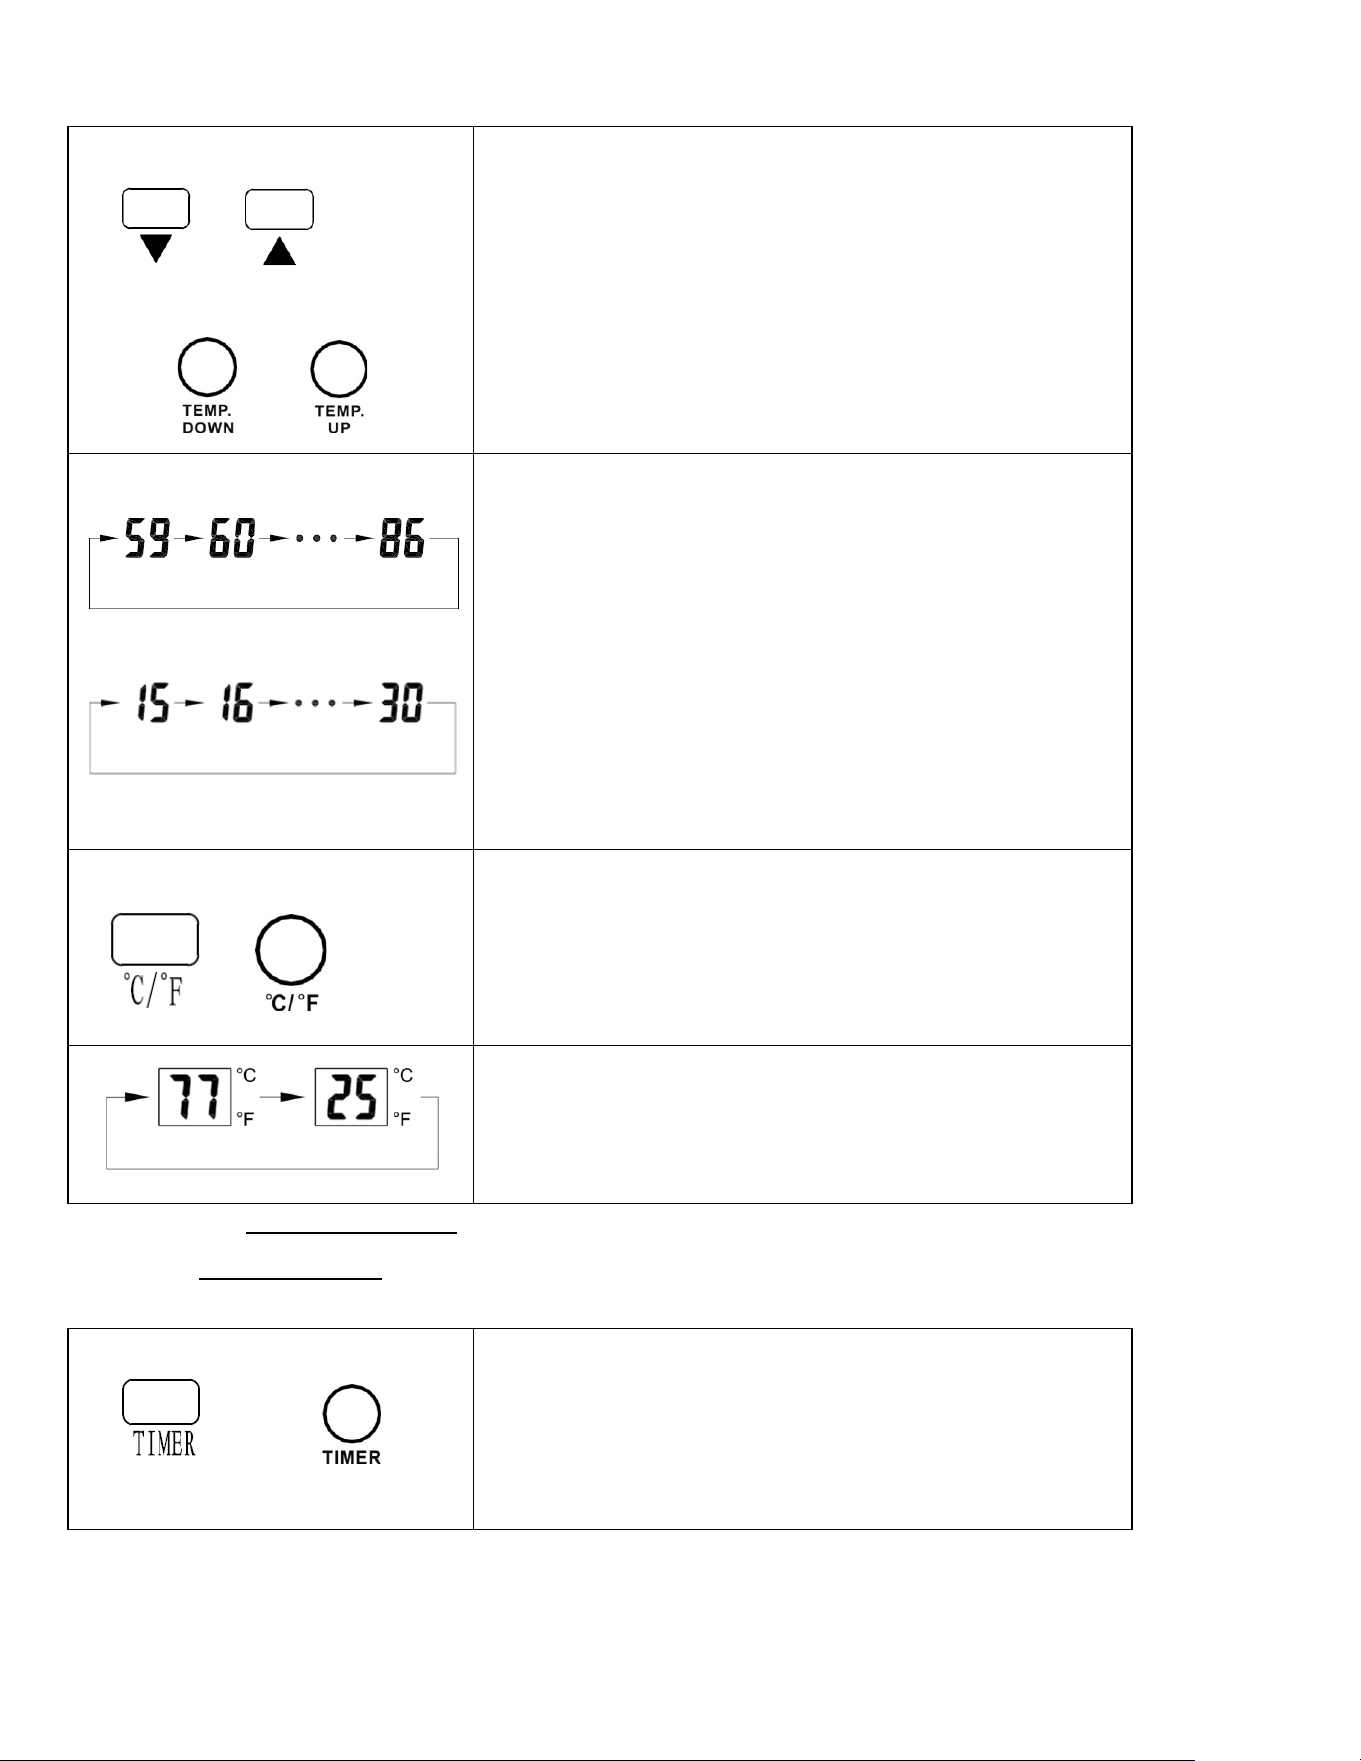
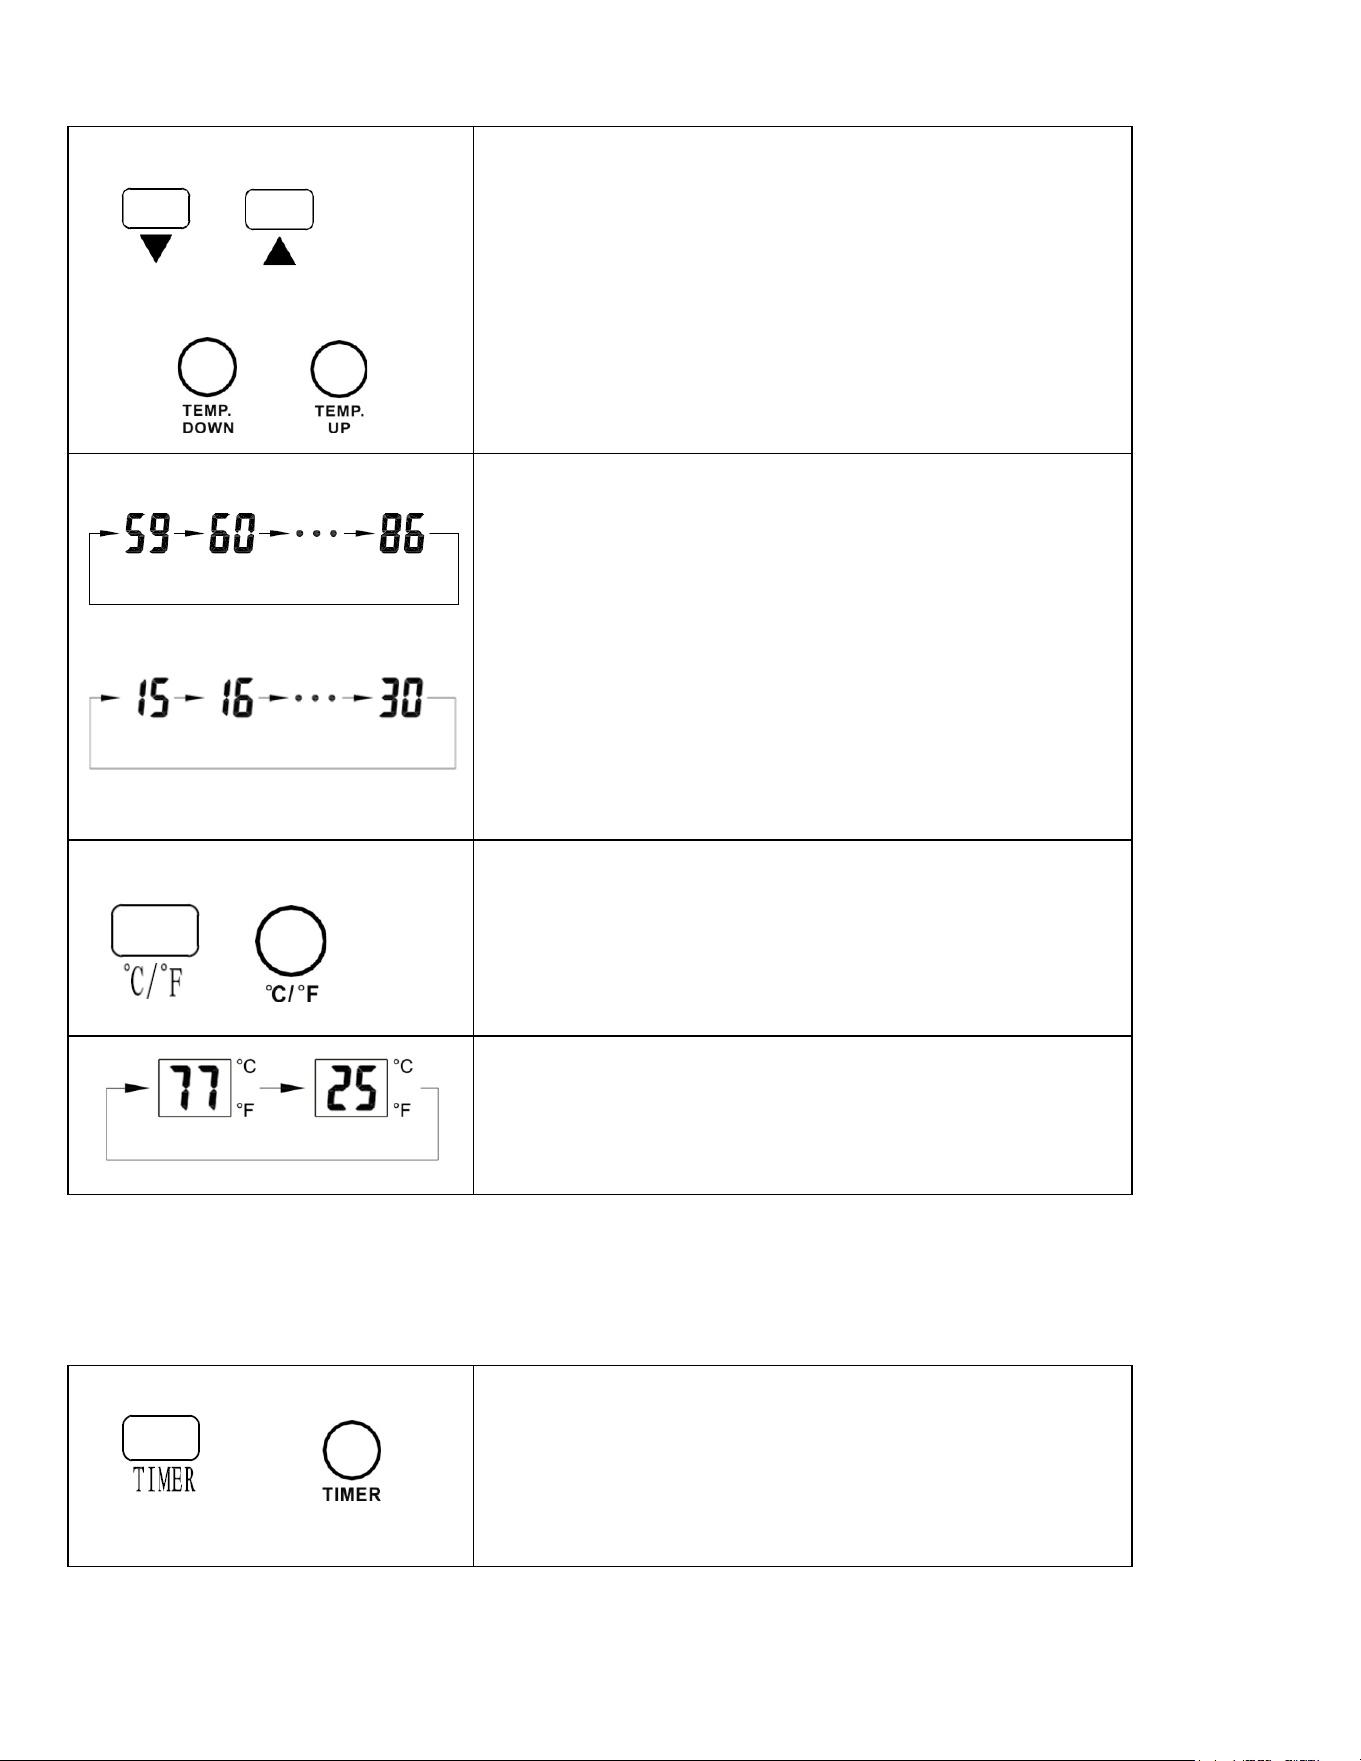
3. Setting Desired Temperature
Or
Or
Or
Adjust the desired temperature by pressing the Up/Down
arrows on the control panel or remote control.
Or
Desired temperature options vary from 59°F to 86°F
,
or
from 15°C to 30°C Once you have chosen the desired
temperature, the heater will remain on until the room
temperature increases to the temperature on the digital
display. The heater will cycle on and off to maintain the
desired room temperature.
Or
Press C/F button to change the display temperature
between Fahrenheit and Celsius.
The Fahrenheit indicator LED will light , when the
temperature is displayed in Fahrenheit.
The Celsius LED will light, when the temperature is
displayed in Celsius.
4. Setting the POWER OFF TIMER Function
Note: The Power-Off-Timer Function will allow for the heater to power OFF after a certain set time, and can
only be set while the heater’s display is in the “On” position.
Or
Turn the heater to the “On” position .Press the Timer
button on the heater’s control panel or the remote.
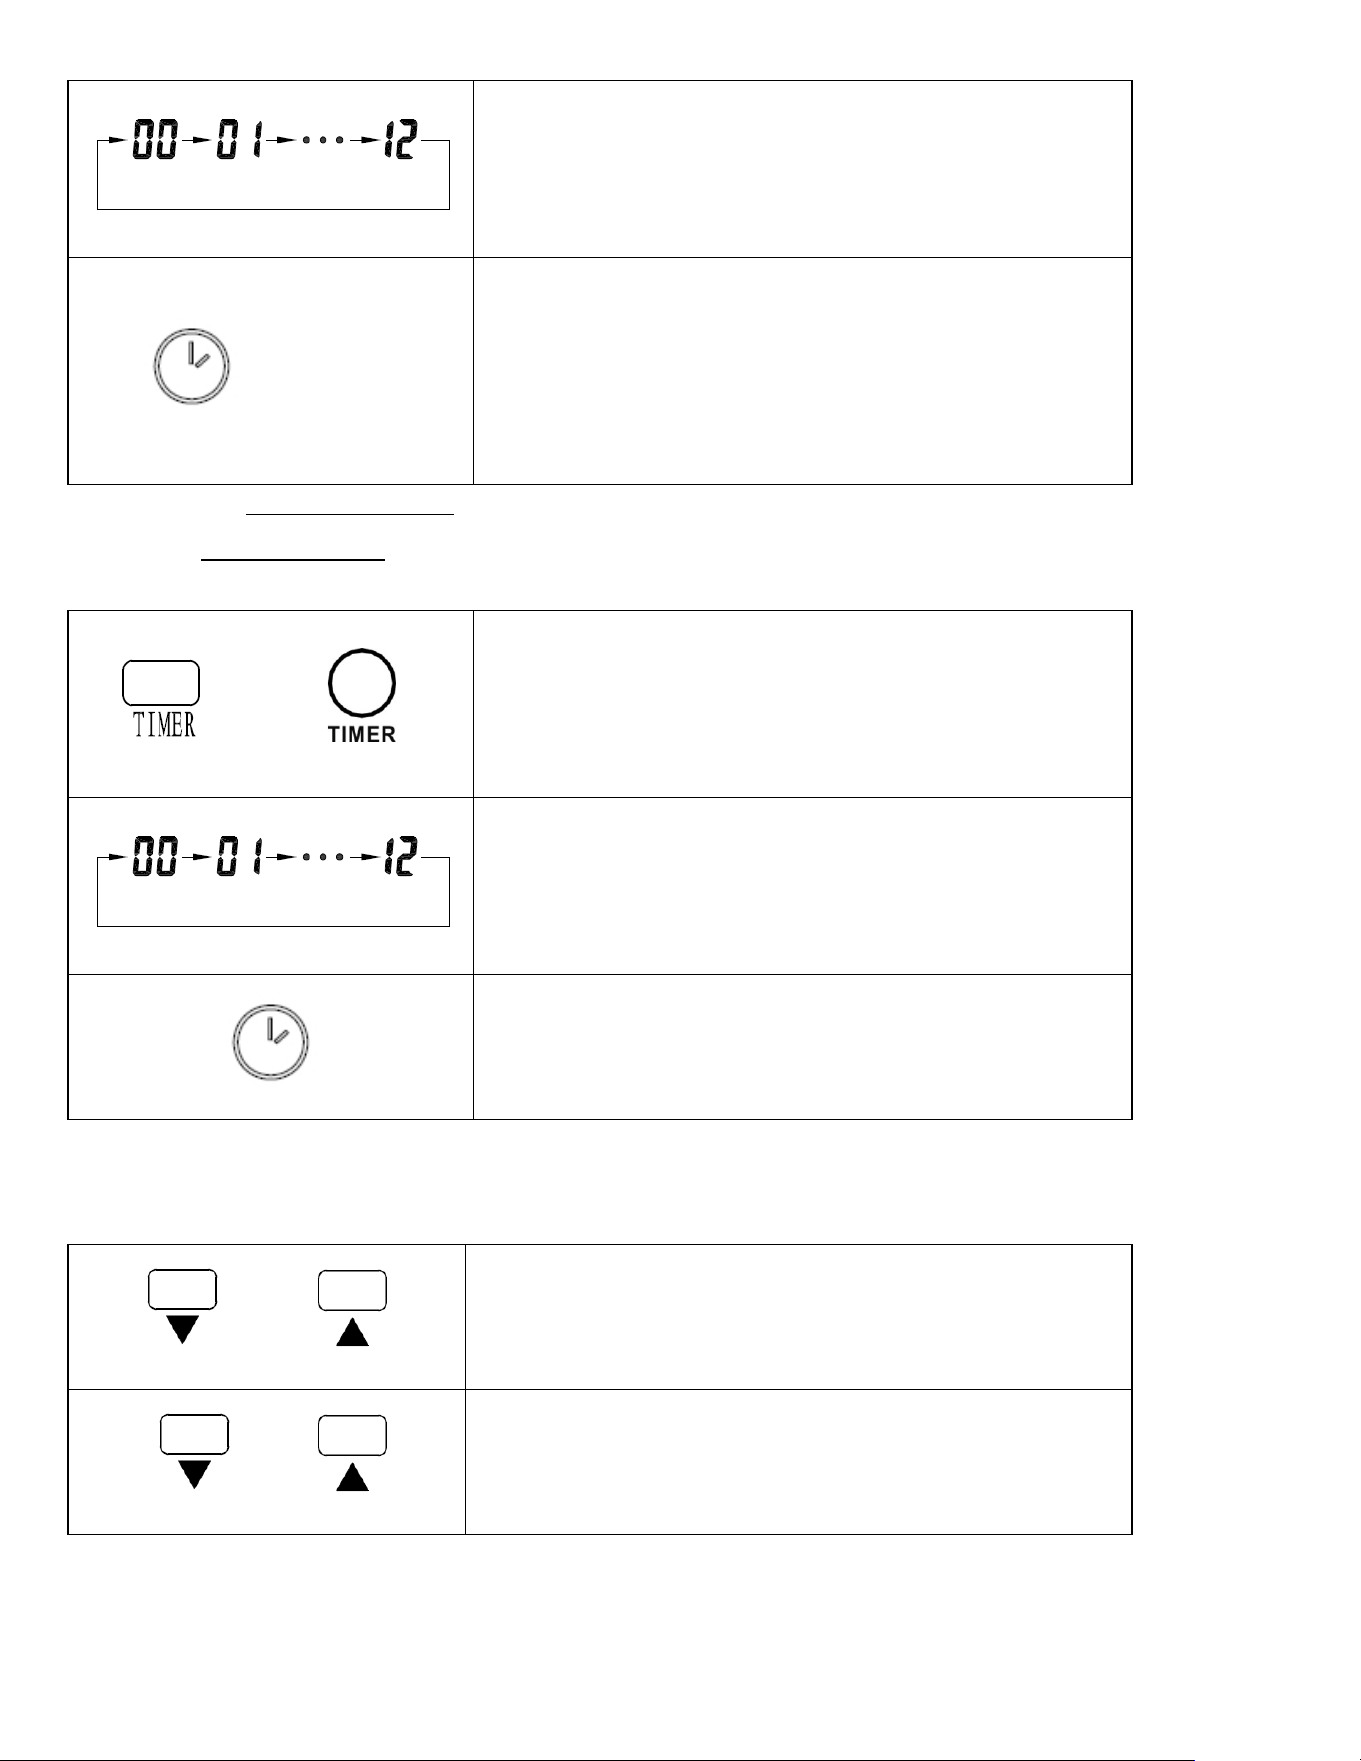
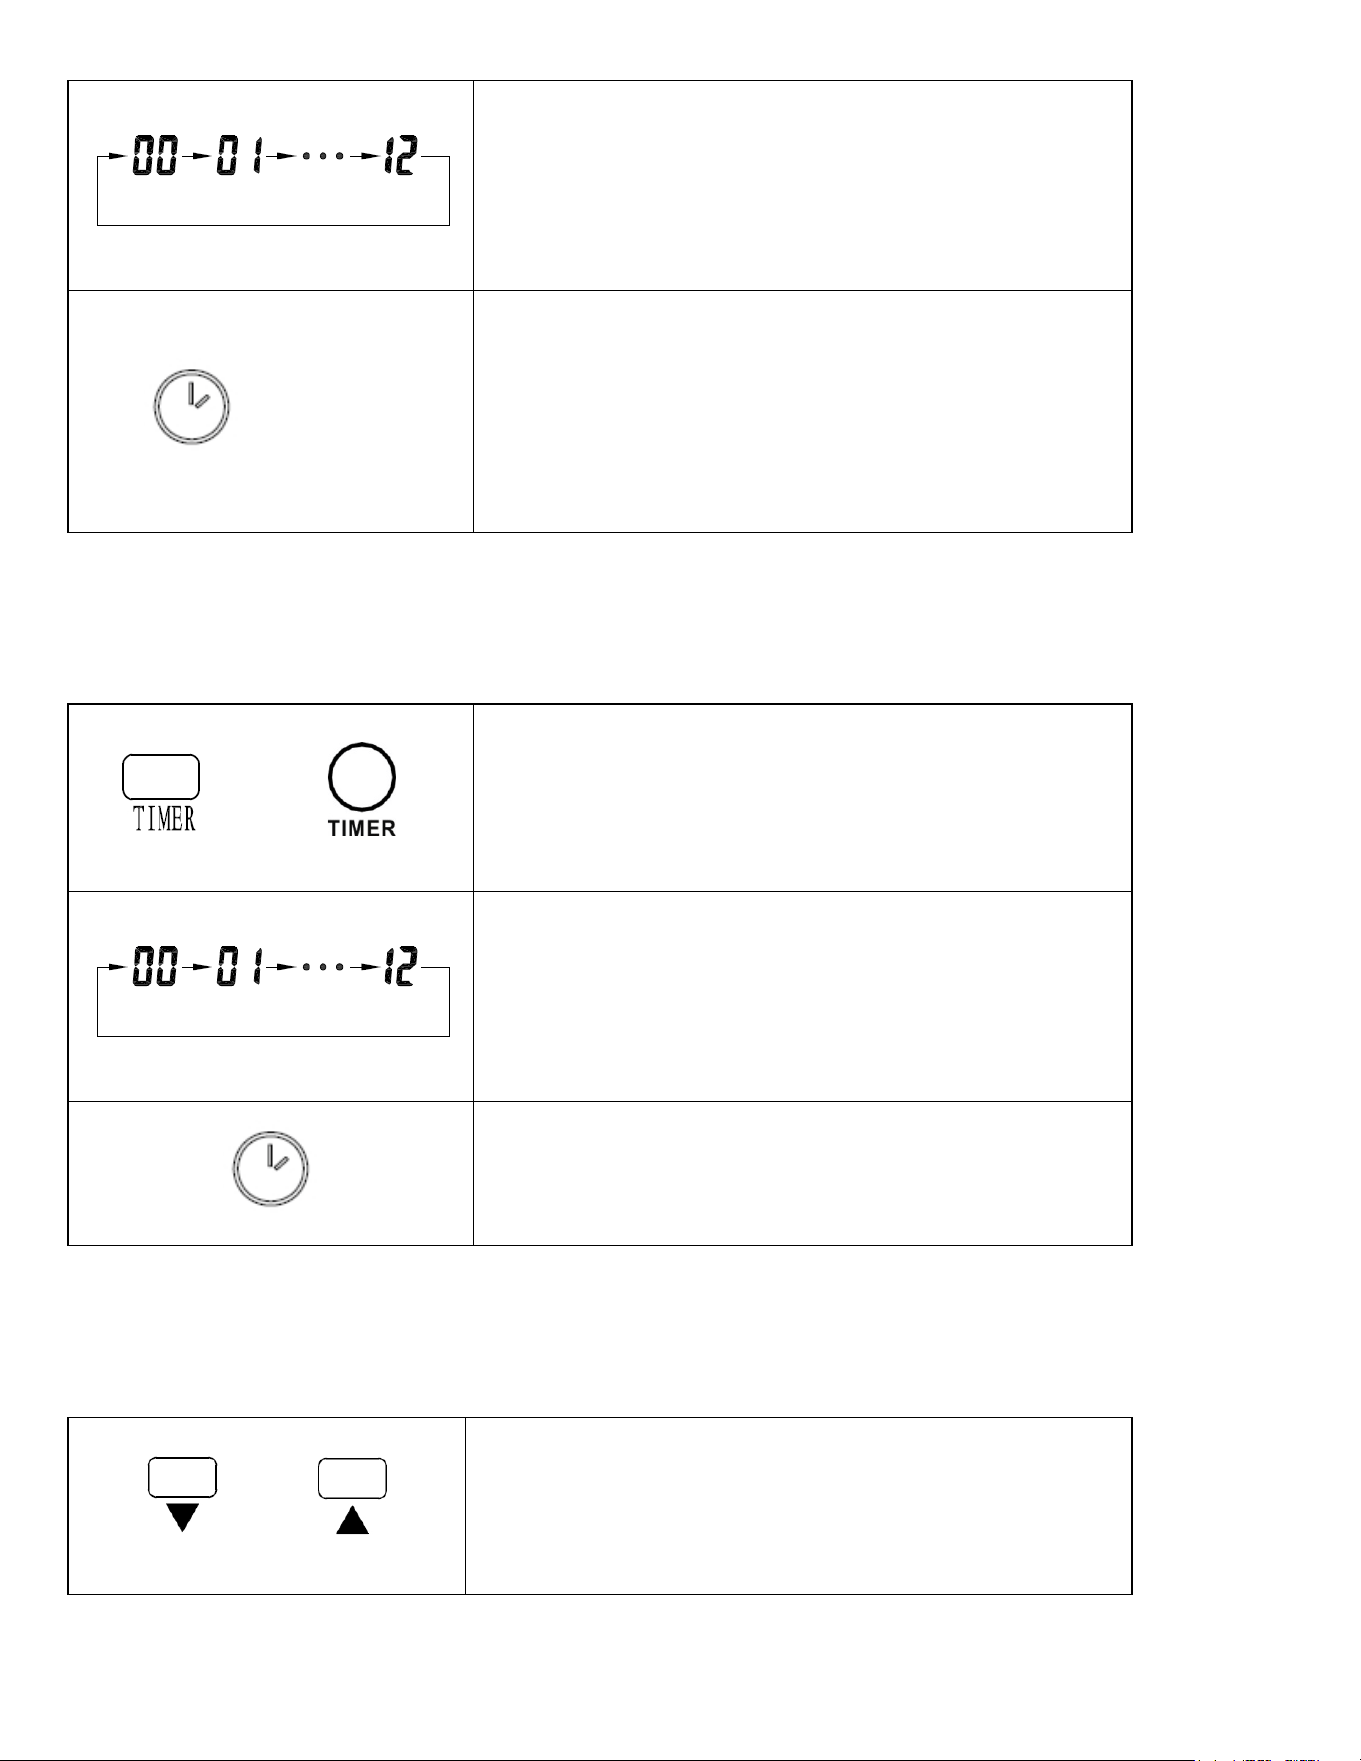
~ 10 ~
The digital display changes from the “temperature” to the
“hours” option for the timer. Continue to press the timer
button to change the number of hours you would like the
heater to run before powering itself off .The hour options
for the timer are from 0 to 12 hrs. (in 1 hr increments).
The selected hour increments will flash for a few seconds,
then revert back to the set desired temperature .The
Timer indicator light will remain lit as long as the Timer is
set. The heater will power OFF when the internal heater
clock counts down the hour increments you set.
5. Setting the POWER-ON-TIMER Function
(Note: The Power-ON-Timer Function will allow for the heater to power ON after a certain set time, and can
only be set while the heater’s display is in the “Off” position.
Or
Turn the heater to the “OFF” position .Press the Timer
button on the heater’s control panel or the remote.
The digital display shows the “hours” option for the timer.
Continue to press the timer button to change the number
of hours you would like the heater’s internal clock to
count down before powering itself on .The hour options
for the timer are from 0 to 12 hrs. (in 1 hr increments).
The Timer indicator light will remain lit as long as the
Timer is set. The heater will power itself ON when the
internal heater clock counts down the hour increments
you set.
6. Setting electro lock
The Electro Lock can help avoid the heater from being accidentally engaged by children. The locking
mechanism can be set in both the ON and OFF modes.
And
Press Temp Up and Temp Down buttons at the same time
for 3 seconds. Locking is complete when you hear a beep.
When locked, the functions of the control panel and
remote will be locked for use.
And
When you need to unlock it, press Temp Up and Temp
Down buttons at the same time for 3 seconds. You will
hear a beep .The control panel and remote control will
become functional again.
~ 11 ~
CARE AND MAINTENANCE
• Turn off the power switch in the rear of the unit.
• Unplug the unit and let it cool completely.
• To keep the heater clean, the outer shell may be cleaned with a soft, damp cloth. You may use a mild detergent
if necessary. After cleaning, dry the unit with a soft cloth. CAUTION: DO NOT let liquid enter the heater.
• DO NOT use alcohol, gasoline, abrasive powders, furniture polish, or rough brushes to clean the heater. This
may cause damage or deterioration to the surface of the heater.
• DO NOT immerse the heater in water.
• Wait until the unit is completely dry before use.
• If you do not use the heater for a long time, please take out the remote batteries (to prevent corrosion ) as
shown below. Store the remote in a safe place.
TROUBLE SHOOTING
\
PORTABLE ELECTRIC HEATER WARRANTY
PROBLEM
CORRECTIVE ACTION
1. Heater does not blow warm air
a. The room temperature is higher than the thermostat setting.
b. Check to be sure unit is on high setting.
c. If the power button on the front of the heater is red but the heater is
not operating the safety overheat function may have been triggered. Try
pressing the power button. If the heater does not turn on, clear any
obstructions from front and rear of unit that may have caused internal
overheating. Allow the heater to cool for approximately 10 minutes and
then press the power button again.
2. No Power to heater
a. Make sure main switch on rear of unit is switched to on position.
b. Over heat safety control activated. Remove blockage from filter and
around heater. Unplug heater for 10 to 20 minutes. Unit should then
operate normally.
c. Check circuit breaker, reset as needed or plug into different outlet.
d. Call customer service at 1-814-643-1775 or visit us at
www.worldmkting.com
~ 12 ~
ELECTRIC HEATER WARRANTY
LIMITED WARRANTY:
A limited warranty is extended to the original purchaser of this heater and warrants against malfunction due
to manufacturing defects for a period of (1) one year from the date of retail purchase. Please read and follow
all details noted below.
CLAIMS HANDLED AS FOLLOWS:
1. WITHIN 30 DAYS OF PURCHASE:
Return to the place of purchase.
2. AFTER 30 DAYS AND WITHIN THE 1 YEAR WARRANTY PERIOD:
Contact our Customer Service Team at 1-800-776-9425.
You must have the model number, serial number and date of purchase. Our customer service team will provide
you with further instructions, which will include repair or replacement at our option.
CALL 1-800-776-9425 FOR SERVICE (9AM-6PM MON.-FRI.)
Or EMAIL US AT techsupport@worldmkting.com
DUTIES OF THE OWNER:
This heating appliance must be operated in accordance with the written instructions furnished with this
heater. This warranty shall not excuse the owner from properly maintaining this heater in accordance with the
written instructions furnished with this heater. A bill of sale, cancelled check or payment record must be kept
to verify purchase date and establish warranty period. Original carton should be kept in case of warranty
return of unit.
WHAT IS NOT COVERED:
1. Damage caused by misuse or use contrary to the owner’s manual and safety guidelines.
2. Damage caused by a lack of normal maintenance.
3. Repair by an unauthorized person.
4. Damage caused by connection to an improper voltage.
5. Damaged caused by use outdoors.
~ 13 ~
LIMITATIONS:
This warranty does not imply or assume any responsibility for consequential damages that may result from the
use, misuse, or the lack of routine maintenance of this heating appliance. A cleaning fee and the cost of parts
may be charged for appliance failures resulting from lack of maintenance. This warranty does not cover claims,
which do not involve defective workmanship or materials. FAILURE TO PERFORM GENERAL MAINTENANCE
(INCLUDING CLEANING) WILL VOID THIS WARRANTY.
THIS LIMITED WARRANTY IS GIVEN TO THE PURCHASER IN LIEU OF ALL OTHER WARRANTIES, EXPRESSED OR
IMPLIED, INCLUDING BUT NOT LIMITED TO THE WARRANTIES OF MERCHANTABILITY OF FITNESS FOR A
PARTICULAR PURPOSE. THE REMEDY PROVIDED IN THIS WARRANTY IS EXCLUSIVE AND IS GRANTED IN LIEU OF
ALL OTHER REMEDIES. IN NO EVENT WILL WORLD MARKETING OF AMERICA BE LIABLE FOR INCIDENTAL OR
CONSEQUENTIAL DAMAGES.
Some states do not allow limitations on how long an implied warranty lasts, so the above limitation may not
apply to you. Some states do not allow the exclusion or limitation of incidental or consequential damages so
the above limitation or exclusion may not apply to you.
For your record, staple your sales receipt to this manual and record the following
DATE OF PURCHASE:
PLACE OF PURCHASE:
SERIAL NUMBER:
MODEL NUMBER:
Printed in China
~ 14 ~
QWH2100
MURAL CUARZO calentador
eléctrico infrarrojo
Instrucciones de instalación y el Manual de Propietario
UL 2021. FIXED AND LOCATION –DEDICATED ELECTRIC ROOM HEATERS
No DESECHE ESTE MANUAL - HOJA PARA el PROPIETARIO
CLIENTE: RETENGA POR FAVOR ESTE MANUAL PARA FUTURO USO
¡ADVERTENCIA! SI LA INFORMACION EN ESTE MANUAL no ES SEGUIDA EXACTAMENTE, UN RESULTADO
del FUEGO mayo que CAUSA DAÑO de PROPIEDAD, HERIDA O PERDIDA PERSONALES DE la VIDA.
Comfort Home Products, Inc.
12256 William Penn Hwy, Ste A
Huntingdon, PA 16652
Hencho in China
PARA SU SEGURIDAD
No ALMACENE ni UTILICE GASOLINA ni OTROS
VAPORES de FLAMABLE ni los LIQUIDOS EN LA
VECINDAD DE ESTE niCUALQUIER OTRO
APARATO
DURA HEAT PHONE NUMBER: (814) 643-1775
http://www.worlddmkting.com

~ 15 ~
POR FAVOR LEA Y GUARDE ESTAS INSTRUCCIONES DE SEGURIDAD Cuando se usan aparatos eléctricos, siempre las
precauciones básicas deben ser seguidas para reducir el riesgo de incendio, descarga eléctrica y lesiones a personas,
incluyendo las siguientes:
1. Lea todas las instrucciones antes de usar el calentador.
2. Este calentador está caliente cuando está en uso. Para evitar quemaduras, no permita que la piel desnuda toque las
superficies calientes. Si tiene mangos, utilice al mover este calentador. Mantenga los materiales combustibles, tales
como muebles, almohadas, ropa de cama, papeles, ropa y cortinas por lo menos 3 pies (0.9 m) del calentador.
3. que extremar la precaución cuando se use cualquier calentador por o cerca de niños, mascotas o inválidos y los niños
cada vez que se deja el calentador funcionando sin vigilancia.
4. Siempre desconecte el calentador cuando no esté en uso.
5. No haga funcionar ningún calentador con un cable o enchufe dañado o después de que haya funcionado mal, se haya
caído o dañado de alguna manera.
6. Cualquier reparación a este aparato deben ser realizadas por un técnico de servicio calificado.
7. Bajo ninguna circunstancia debe modificarse este aparato. Piezas que tienen que ser retirado por el servicio deben ser
reemplazados antes de operar este aparato nuevo.
8. No use al aire libre.
9. No coloque el cable debajo de alfombras. No cubra el cable con tapetes, alfombras o cubiertas similares. Coloque el
cable lejos de zonas transitadas y donde no pueda provocar tropezones.
10. desconecte el calentador, primero apague los controles, luego retire el enchufe del tomacorriente. Siempre
desenchufe el calentador cuando no esté en uso.
11. Conectar a sólo unos puntos de conexión a tierra.
12. No inserte o permita que objetos extraños penetren en la ventilación o salida de aire, ya que esto puede causar una
descarga eléctrica o un incendio o dañar el calentador.
13. Para evitar un posible incendio, no bloquee las entradas o salidas de aire de ninguna manera. No utilizar sobre
superficies blandas, como una cama, donde las aberturas se pueden bloquear.
14. Este aparato tiene partes calientes y pueden echar chispas. No lo use en áreas donde la gasolina, pintura o líquidos
inflamables se almacenen o utilicen.
15. Use este calentador sólo como se describe en este manual. Cualquier otro uso no recomendado por el fabricante
puede causar incendio, choque eléctrico o lesiones a las personas.
16. Evite el uso de un cable de extensión porque la extensión se puede sobrecalentar y provocar un riesgo de incendio.
17. Este calentador puede incluir un (a visual) la alarma audible para avisar de que partes de la estufa se están
excesivamente caliente. Si los sonidos de alarma (flashes), se convierten inmediatamente el calentador y verifique que
no existan objetos sobre o al lado del calentador que puede causar altas temperaturas. NO HAGA FUNCIONAR LA
ESTUFA CON EL SONIDO DE ALARMA (INTERMITENTE).
18. "GUARDE ESTAS INSTRUCCIONES"
ESTE CALENTADOR DEBE INSTALARSE ADECUADAMENTE ANTES DE SER OPERADO Este calentador no
funciona en el piso o en el suelo.
INSTRUCCIONES IMPORTANTES
~ 16 ~
SIEMPRE OBSERVE que ESTAS MEDIDAS DE SEGURIDAD AL OPERAR SU CALENTADORA ELECTRICA
Siempre Lea todas las instrucciones antes de operarlo.
Siempre Coloque su calentador eléctrico lejos de los muebles o cortinas colgantes.
Siempre Mantenga la parrilla lejos de las paredes o lascortinas para no bloquear la entrada de aire. (Si procede)
Siempre Desenchufe el calentador eléctrico cuando no esté en uso.
Siempre Use este calentador instalado en una posición correcta.
Siempre Pase el cable de una forma tal que no se camine sobre él o sea posible tropezarse, o sea pellizcado por
los muebles.
Siempre Mantenga los cables eléctricos, cortinas y otros muebles lejos de su calentador eléctrico.
Siempre Mantenga su calentador eléctrico limpio y libre de polvo.
Siempre Utilícelo solamente en espacios cerrados.
Nunca Las cortinas del lugar, la ropa o las toallas sobre calentadora eléctrica secar.
Nunca Uso en la presencia de explosivo ni vapores flamables como gas ni pinta
Nunca Tape otro electrodoméstico en el mismo circuito. Los fusibles soplados, peligros tropezados de circuitos
y fuego pueden resultar.
Nunca El agua del uso o líquidos para limpiar su calentadora eléctrica.
Nunca Permita toque descubierto de piel superficies calientes como esto puede causar quemaduras
Nunca Deje calentadora eléctrica desatendida.
Nunca Deje calentadora eléctrica cuando niños o animales favoritos sean presentes.
Nunca Sitúe calentadora eléctrica donde puede caerse en una tina de baño u otros contenedores de agua.
Nunca Opere calentadora eléctrica con una cuerda dañada, el tapón o después de que la calentadora falle, o
haya sido dejada caer o Ha Sido Dañada en cualquier.
Nunca Corra cuerda bajo alfombrar ni cobertura con tapetes de tiro ni corredores.
Nunca Inserte ni permita objetos extranjeros entrar cualquier ventilación ni agotar aperturas, como esto puede
causar un golpe eléctrico, el fuego o el daño.

~ 17 ~
IMPORTANTE
PRESUPUESTO
Voltaje
120V AC 60HZ;
Energía de la calefacción
1500 Watts/12.5 Amps
Dimensiones
17.32” Wide x 4.49” Deep x 19.21” High
Peso
10.6 Lbs
Enchufe de conexión a tierra
Característica de seguridad del sobrecalentamiento
Este calentador está equipado con un circuito de falla a tierra (GFCI), una característica de seguridad que hace que
ocurran situaciones anormales, tales como la inmersión en agua.
Para asegurarse de que el GFCI está funcionando correctamente, realice la siguiente prueba en la frecuencia de 120VAC
60Hz.
1. Enchufe el calentador y encienda. Presione el botón de prueba en el enchufe.
2. El calentador debería dejar de funcionar. Habrá un clic audible. Desenchufe el calentador y presionar el botón de
reinicio en. Vuelva a enchufar el aparato.
3. Si el GFCI no está funcionando correctamente, desconecte inmediatamente el calentador. No use el calentador con
una salida defectuosa o se ha TAPÓN.
REQUIERE MONTAJE EN LA PARED
UBICACIÓN DEL CALENTADOR:
Este calentador solo está diseñado para ser montado en una pared. No funciona como calentador independiente y no
debe ser modificado para hacerlo. Para comodidad y eficiencia, instale el calentador:
1. Donde todas las salidas puedan ser mantenidas (ver página 5).
2. Donde haya fácil acceso para la operación, inspección y servicio.
3. A una distancia de 5 pies de una toma eléctrica apropiada.
4. Lejos de cualquier puerta o fuente de agua tal como una bañera, una pileta, etc.
5. Asegúrese de que haya ningún cableado existente, plomería u otras obstrucciones en la zona elegida.
6. La pared debe ser plana y debe ser una superficie sólida.
7. En la parte más fría de la habitación.
8. Los tornillos de montaje que están incluidos son para el montaje en una panel de yeso solamente. Para otras
instalaciones el instalador o dueño de la casa es responsable de asegurarse que el calentador sea instalado en la pared
en forma segura.
Si no se posiciona el calentador en forma acorde a las instrucciones proporcionadas o
no se asegura en forma apropiada a la pared esto podría resultar en daños a la
propiedad y lesiones personales.
~ 18 ~
INSTALACIÓN
Si el calentador se instala en un garaje residencial, debe fijarse firmemente a la pared, a un mínimo de 39 pulgadas
(457mm) por encima del piso. El calentador debe colocarse de tal forma que esté protegido contra cualquier
posibilidad de daños causados por un vehículo en movimiento, etc..
Ubicar más arriba el calentador reducirá PERO NO eliminará la posibilidad de encender el vapor de cualquier líquido
inflamable que pueda estar almacenado en forma incorrecta o haya sido derramado por accidente. Si hay olor de
gasolina, no utilice este calentador hasta que el área ha sido ventilada adecuadamente.
NO enchufe de la resistencia en el contacto eléctrico hasta que la instalación se ha completado
DISTANCIAS MÍNIMAS CON RESPECTO A COMBUSTIBLES
IZQUIERDA
DERECHA
PARTE
SUPERIOR
PARTE
INFERIOR
FRENTE
PARTE
TRASERA
*12 Pulgadas
39 Pulgadas
39 Pulgadas
39 Pulgadas
0 Pulgadas
El espacio libre superior es desde la parte superior del calentador hasta
el techo u otro material combustible
El espacio libre inferior es desde la parte inferior del calentador hasta la
superficie de la moqueta, los azulejos u otro material combustible.
* Los flancos deben estar por lo menos a una distancia de 18 pulgadas
del calentador.
-Siempre mantenga un espacio libre de 36 pulgadas de los muebles,
cortinas u otros materiales combustibles.

~ 19 ~
INSTALACIÓN
Calentador de gancho Posición
Paso 1 (Figura 1)
PANEL DE YESO: Instale en un panel de yeso tal como
se muestra, utilizando los tornillos y los anclajes que
se proporcionan. Controle para verificar que los
tornillos estén asegurados.
PARED DE ENTRAMADO: Usando los tornillos
provistos instalar en paneles de yeso como se
muestra. Compruebe para asegurar tornillos son
seguras.
PARED DE HORMIGÓN: Perfore agujeros de 1/4
pulgada, inserte los anclajes de pared # 12 (no
incluidos) y fíjelo a la pared con tornillos de #12 x 3
pulgadas (no incluidos). Controle para verificar que los
tornillos estén asegurados.
Paso 2 (Figura 2)
Enganche el calentador en posición.
Compruebe para asegurarse de que los
agujeros de los ganchos estén fijados en forma
segura con los tornillos instalados en el paso 1.
Figura 1
Figura 2
~ 20 ~
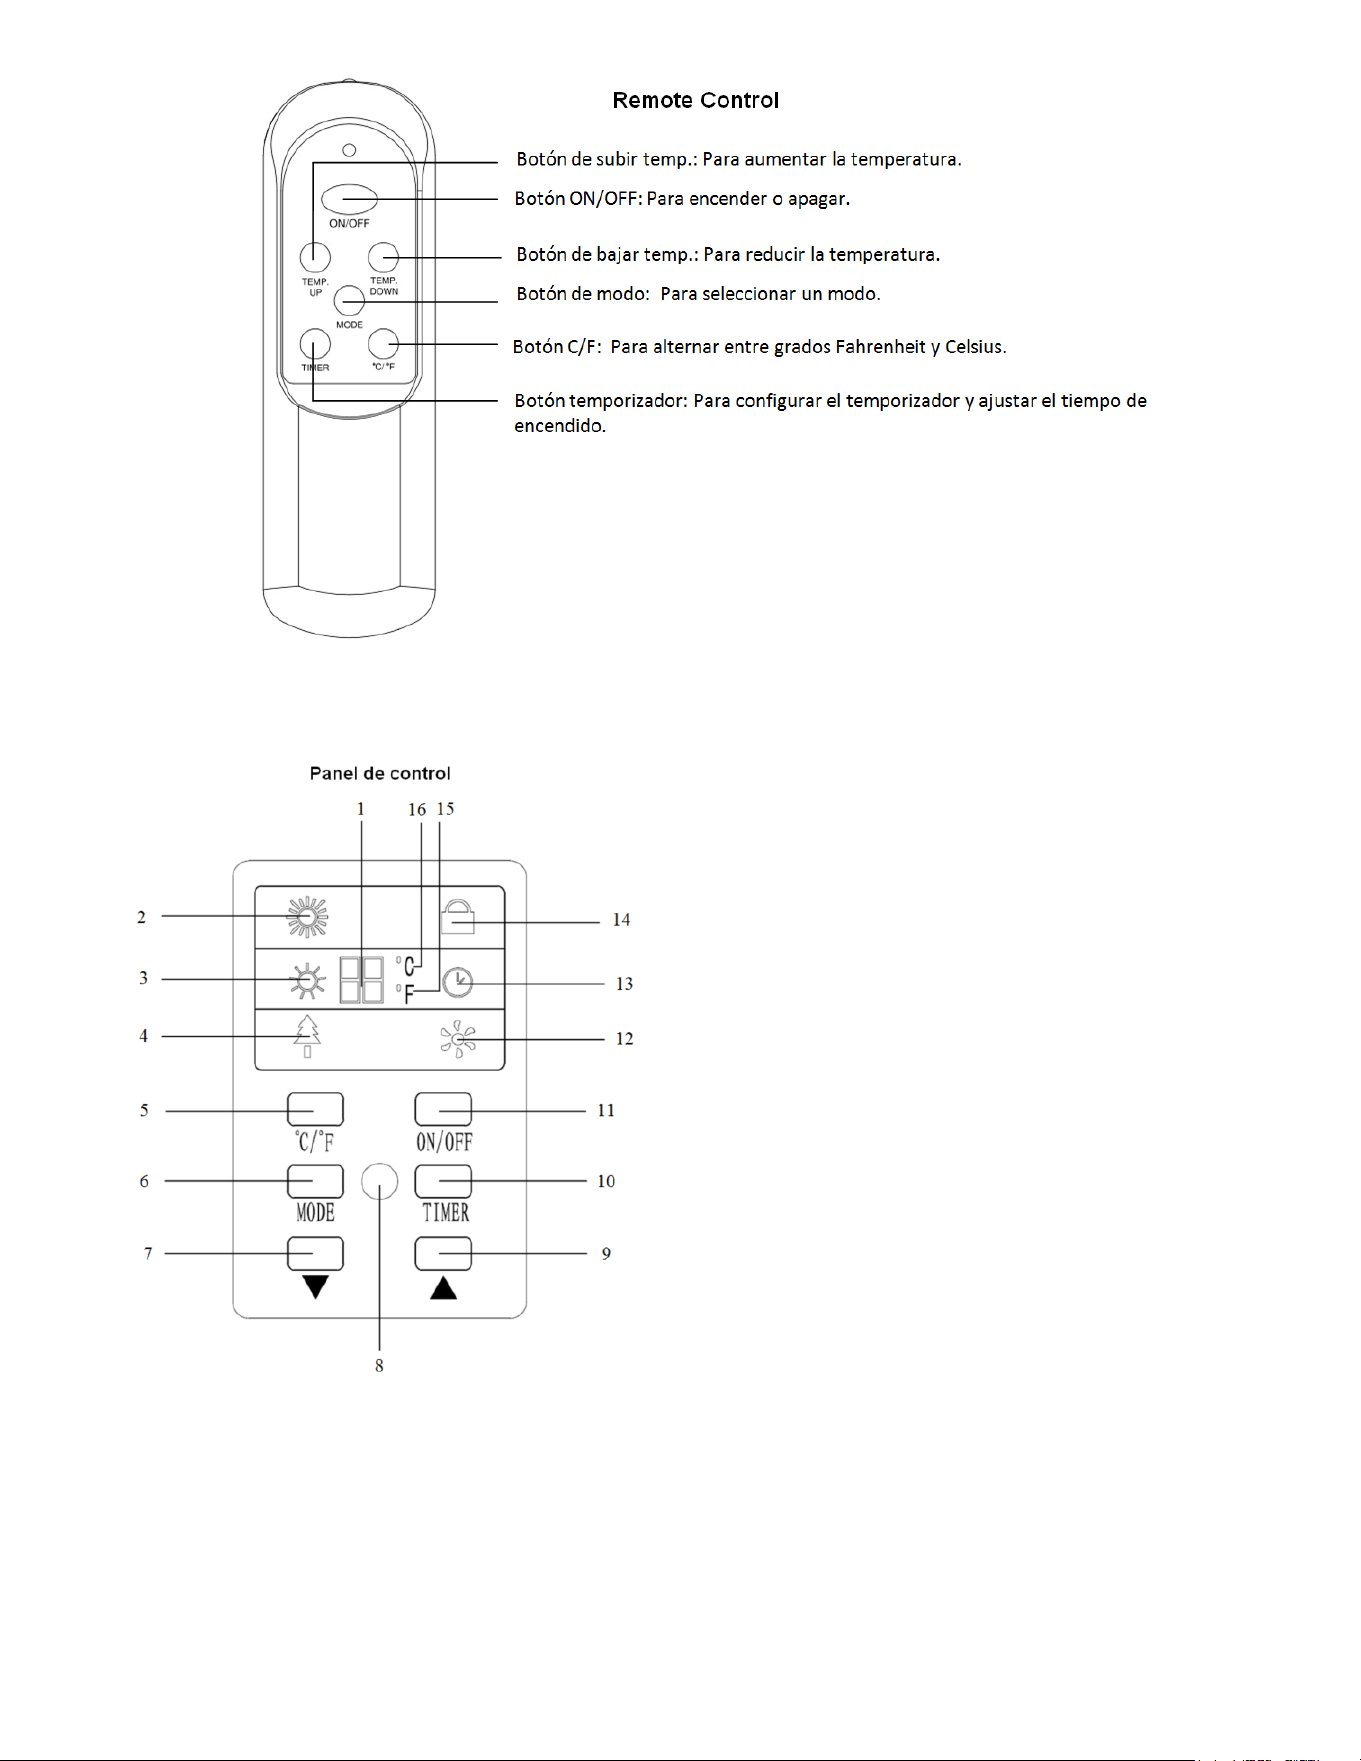
1. Pantalla digital
:
Indica temperatura o la hora.
2. Luz indicadora de modo Alto: Se iluminará cuando el
modo Alto de calefacción esté activado.
3. Luz indicadora de modo Bajo: Se iluminará cuando el
modo Bajo de calefacción esté activado.
4. Indicador de modo Ahorro de energía: Se iluminará
cuando el modo Ahorro de energía esté activado.
5. Botón °C/°F: Alterna entre grados Fahrenheit y Celsius.
6. Botón de modo: Para seleccionar modo Alto, Bajo y Eco.
7. Botón de bajar temp.: Para bajar la temperatura
deseada.
8. Ventana de recepción de señal: Para recibir la señal del
control remoto.
9. Botón de subir temp.: Para aumentar la temperatura
deseada.
10. Botón temporizador:para activar el temporizador y
fijar el tiempo para el temporizador.
11. Botón ON/OFF: Enciende o apaga pantalla.
12. Luz indicadora del ventilador: Se iluminará cuando el
ventilador esté activado.
13. Luz indicadora del temporizador: Se iluminará cuando el
temporizador esté activado.
14. Luz indicadora de bloqueo de teclado: Se iluminará
cuando esté desbloqueado el teclado.
15. Luz indicadora de grados Fahrenheit: Se iluminará
cuando la temperatura se muestre en grados Fahrenheit.
16. Luz indicador de grados Celsius: Se iluminará cuando la
temperatura se muestre en grados Celsius.
Requiere 2 pilas AAA no incluidas
~ 21 ~
OPERACIÓN
1. Encienda el interruptor de alimentación principal en la parte posterior del aparato.
2. Inicio y selección del modo de funcionamiento
Or
Presione el botón de encendido ON/OFF en el panel de
control o en el control remoto suministrado para encender
el calefactor.
Una vez apagado, primeramente dejará de funcionar la
resistencia. El ventilador seguirá funcionando durante 3
minutos para suministrar suficiente calor en el interior. Esta
marca indicará que seguirá funcionando por 3 minutos.
Or
Selección de modo de calefacción
Presione el botón MODE para alternar entre los tres modos
de calefacción.
El modo Alto consume 1500 W; el modo Bajo consume 750
W. El modo ECO es una función de ahorro de energía. Al
seleccionar el modo ECO, el calefactor administrará
automáticamente la potencia (vatios) de menor a mayor
para intentar mantener un calor constante de 68℉(20℃).
Interruptor de Alimentación
~ 22 ~
3. Ajuste de la temperatura deseada
Or
Or
Or
Presione las flechas hacia arriba o abajo en el panel de
control o en el control remoto para establecer la
temperatura deseada.
Or
Las opciones temperaturas var
í
an desde 59
℉
a 86
℉
, o
desde 15°C a 30°C. Una vez seleccionada la
temperatura deseada, el calefactor permanecerá
encendido hasta que la temperatura ambiente alcance la
temperatura establecida en el panel digital. El calefactor
continuará con un ciclo de actividad e inactividad para
mantener la temperatura deseada en el ambiente.
Or
Presione el botón C/F para que el panel de temperatura
se muestre en Fahrenheit o Celsius.
Se iluminará el indicador LED de Fahrenheit, cuando la
temperatura se muestre en Fahrenheit.
Se iluminará el indicador LED de Celsius, cuando la
temperatura se muestre en Celsius.
4. Ajuste de la función TEMPORIZADOR DE APAGADO
Nota: La función Temporizador de apagado (OFF) permite apagar el calefactor después de determinado
tiempo y solamente se puede establecer cuando la pantalla del calefactor está en "On" (encendida).
Or
Encienda el calefactor en "On". Presione el botón
Temporizador en el panel de control o en el control
remoto.
~ 23 ~
La pantalla digital cambiará de la opción de "temperatura"
a "horas" para establecer el temporizador. Siga
presionando el botón del temporizador para cambiar la
cantidad de horas que desea mantener en
funcionamiento el calefactor. Las opciones de horas van
de 0 a 12 horas (en incrementos de 1 hora).
Los incrementos de horas seleccionadas parpadearán
unos segundos, luego volverá a la temperatura deseada
establecida. La luz indicadora del temporizador
permanecerá encendida mientras que el temporizador
esté activo. El calefactor se apagará cuando el reloj
interno complete la cuenta regresiva de las horas que
usted estableció.
5. Ajuste de la función TEMPORIZADOR DE ENCENDIDO
Nota: La función Temporizador de encendido (ON) permite encender el calefactor después de determinado
tiempo y solamente se puede establecer cuando la pantalla del calefactor está en "Off" apagada.
Or
Deje el calefactor en "OFF". Presione el botón
Temporizador en el panel de control o en el control
remoto.
La pantalla digital mostrará la opción de "horas" para
establecer el temporizador. Siga presionando el botón del
temporizador para cambiar la cantidad de horas del reloj
interno que faltan para que se encienda calefactor. Las
opciones de horas van de 0 a 12 horas (en incrementos de
1 hora).
La luz indicadora del temporizador permanecerá
encendida mientras el temporizador esté activo. El
calefactor se encenderá cuando el reloj interno complete
la cuenta regresiva de las horas que usted estableció.
6. Ajustes del bloqueo eléctrico
El bloqueo eléctrico ayuda a evitar que los niños tengan accidentes con el calefactor. El mecanismo de
bloqueo se puede establecer tanto en modo apagado como encendido.
And
Presione los botones de Subir Temp. y Bajar Temp.
simultáneamente durante 3 segundos. El artefacto
quedará bloqueado cuando escuche un pitido. Una vez
bloqueado, se bloquearán las funciones del panel de
control y del control remoto.
~ 24 ~
And
Para desbloquear, presione los botones de Subir Temp. y
Bajar Temp. simultáneamente durante 3 segundos.
Escuchará un pitido. El panel de control y el control remoto
se podrán volver a utilizar.
CUIDADO Y MANTENIMIENTO
• Apague el interruptor de alimentación en la parte posterior de la unidad.
• Desenchufe la unidad y deje que se enfríe completamente.
• Para mantener el calefactor limpio, limpie la cubierta exterior con un paño suave y húmedo. Puede usar una
solución ligera con detergente, de ser necesario. Después de limpiar, seque la unidad con un paño suave.
PRECAUCIÓN: NO derrame líquidos dentro del calefactor.
• NO use alcohol, combustible, polvos abrasivos, lustre para muebles ni cepillos duros para limpiar el calefactor.
Puede causar daños o deterioro en la superficie del calefactor.
• NO sumerja el calefactor en agua.
• Espere que la unidad se seque completamente antes de utilizar.
• Si no utilizará el calefactor por un periodo prolongado, extraiga las pilas del control remoto (para evitar
corrosión). Guarde el control remoto en un lugar seguro.
MOLESTE DISPARAR
PROBLEMA
ACCION CORRECTIVA
1. . La calentadora no sopla aire tibio
a. La temperatura ambiente es más alta que la colocación de termostato.
b. El cheque para estar que unidad seguro está en alto poniendo.
c. Si el botón de encendido en la parte frontal del calentador es de color
rojo, pero el calentador no está funcionando el sobrecalentamiento
función de seguridad puede haber sido provocado. Pruebe a pulsar el
botón de encendido. Si el calentador no se enciende, quite cualquier
obstrucción de la parte delantera y trasera de la unidad que puede haber
causado el recalentamiento interno. Permita que el calentador se enfríe
durante aproximadamente 10 minutos y luego presione el botón de
encendido.
2. Ningún Poder a la calentadora
a. asegúrese de que principal interruptor en el trasero de la unidad es
cambiado a en la posición.
b. Sobre control de seguridad de calor activó. Quite obstrucción del filtro y
alrededor de calentadora. Desenchufe calentadora para 10 a 20 minutos.
La unidad entonces debe operar normalmente.
c. Verifique cortacircuitos, o utiliza salida diferente.
d. Llame servicio de atención al cliente en1-814-643-1775 o nos visita en
www.worldmkting.com

~ 25 ~
GARANTIA ELECTRICA PORTATIL de CALENTADORA
La GARANTIA LIMITADA:
Una garantía limitada es extendida al comprador original de esta calentadora y autorizaciones contra falla debido a
defectos industriales por un período de
(1) un año de la fecha de la compra de la venta al por menor. Lea por favor y siga todos los detalles notados abajo.
Los RECLAMOS MANEJARON DE LA SIGUIENTE MANERA:
- No REGRESA a COLOCAR DE la COMPRA
- Contacta nuestro Departamento de Servicio de Costomer en 1-800-776-9425. Debe tener el número modelo, el
número de serie y la fecha de la compra.
-Le proporcionarán con instuctions adicional, que puede repuestos de incluse, la reparación o el reemplazo en
nuestra opción.
LLAME 1-800-776-9425 PARA el SERVICIO (9AM-6PM Lunes-Viernes)
PEMAIL EEUU EN info@worldmkting.com
Los DEBERES DEL PROPIETARIO:
Este aparato de la calefacción debe ser operado de acuerdo con las instrucciones escritos amuebladas con esta
calentadora. Esta garantía no dispensará al propietario de mantener apropiadamente esta calentadora de acuerdo con
las instrucciones escritos amueblados con esta calentadora. Una escritura de venta, registro de cheque pagado o pago
debe ser mantenido para verificar la compra la fecha y establecer el período de garantía. El cartón original debe ser
mantenido en caso del regreso de garantía de la unidad.
LO QUE no ES CUBIERTO:
1. El daño causado por maltrato o utiliza al contrario del manual de propietarios y pautas de seguridad.
2. El daño causado por una falta de mantenimiento normal.
3. Repare por una persona no autorizada.
4. El daño causado por conexión a un voltaje impropio.
5. Dañado causado por el uso fuera.
MONTAJE EN PARED DE APLICACIÓN
TECHO DE APLICACIÓN

~ 26 ~
Las LIMITACIONES:
Esta garantía no implica ni asume responsabilidad para daños consecuentes que pueden resultar del uso, del
maltrato, o de la falta de mantenimiento rutinario de este aparato de la calefacción. Un honorario de limpieza
y el costo de partes pueden ser cargados para fracasos de aparato que resultan de la falta de mantenimiento.
Esta garantía no cubre reclamos, que no implican habilidad ni materiales defectuosos. El INCUMPLIMIENTO
MANTENIMIENTO GENERAL (INCLUSIVE LIMPIEZA) VACIARA ESTA GARANTIA.
ESTA GARANTIA LIMITADA ES DADA AL COMPRADOR EN VEZ DE TODAS LAS OTRAS GARANTIAS, EXPRESADO O
IMPLICITO, INCLUSIVE PERO no LIMITADO A LAS GARANTIAS DE COMERCIALIZACION DE la SALUD PARA UN
PROPOSITO PARTICULAR. EL REMEDIO PROPORCIONADO EN ESTA GARANTIA ES EXCLUSIVO Y GRANT EN VEZ
DE TODOS LOS OTROS REMEDIOS. EN ningún ACONTECIMIENTO HACE MARKETING de MUNDO DE AMERICA
ES RESPONSABLE DE el CASUAL O DAÑOS CONSECUENTES.
Algunos estados no permiten limitaciones en cuánto tiempo una garantía implícita dura, así que la
limitación antes mencionada no le puede aplicar. Algunos estados no permiten la exclusión ni la
limitación de daños casuales ni consecuentes tan que la limitación ni exclusión antes mencionadas no
le pueden aplicar.
Para su registro, cosa con una grapa su recibo de ventas a este manual y registra lo
Siguiente:
La FECHA DE la COMPRA:
El LUGAR DE la COMPRA:
El NUMERO DE SERIE:
Impreso en China