
BlazeGrills.com
Blaze Appliance Cart
PREMIUM LTE SERIES PRODUCT MANUAL
SCAN TO REGISTER
BLZ-4LTE2(NG/LP)
BLZ-GRIDDLE-LTE30-LP/NG
BLZ-5LTE3(NG/LP)
BLZ-4LTE3-(NG/LP)
BLZ-4LBM-(NG/LP)
BLZ-5LTE2-(NG/LP)
2
Blaze LTE Cart
BlazeGrills.com
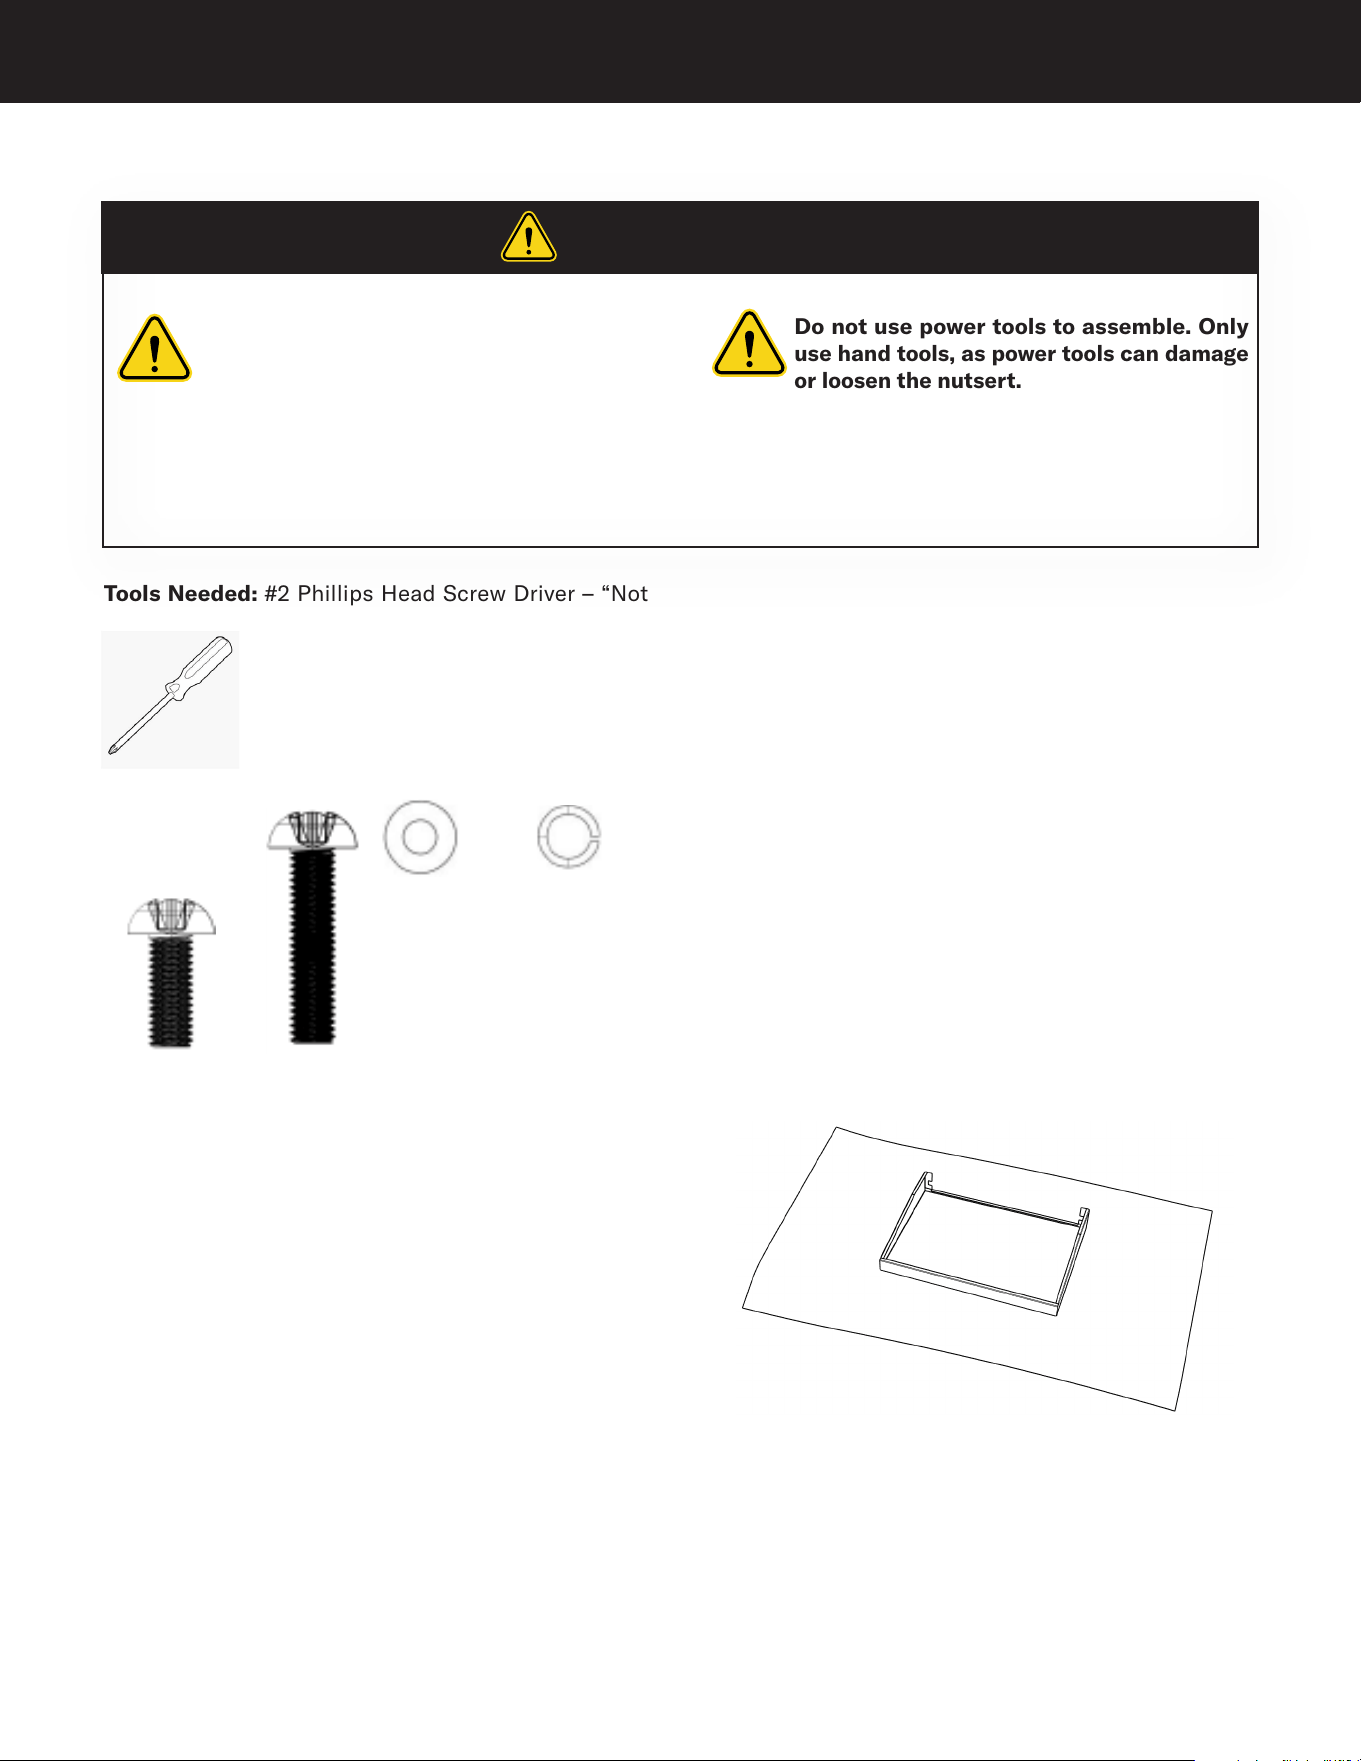
Do not use power tools to assemble. Only
use hand tools, as power tools can damage
or loosen the nutsert.
M5 x 12 mm M5 x 24 mm
Before getting started:
Unpack and lay out all of the included parts.
Most of the stainless steel pieces come with
a protective film. Remove all of the plastic
film and pay no attention to the print on the
film as it has nothing to do with the assembly
instructions.
Take caution with the stainless steel
components as to not scratch them during
the assembly process. Use a non-aressive
surface and protect the stainless steel as best
as possible. The foam and box can be used to
place the stainless steal parts on to prevent
scratching. - (77) M5 x 12 mm screw will be
paired with a M5 lock washer.
Use M5 flat washer and lock washer for
Be sure to place your parts on a protected
surface such as a towel or blanket to prevent
scratching.
M5 washer M5 lock washer
Tools Needed: #2 Phillips Head Screw Driver – “Not
Included”
hardware needed "included"
WARNING
CALIFORNIA PROPOSITION 65 WARNING:
This product can expose you to chemicals
including Chromium (hexavalent
compounds), which are known to the State
of California to cause cancer and birth
defects or other reproductive harm. For
more information go to: www.P65Warnings.
ca.gov
installing the casters to the base. All other
connections will be made with a screw only.
NOTE - screws for the door handles are smaller
and those are packaged with the handles them
self.
(2) M5 x 24 mm - are to be used last and are for
securing BBQ to cart.
The appliance is to be placed into the cart
after all instructions have been followed and
all screws have been tightened.
3
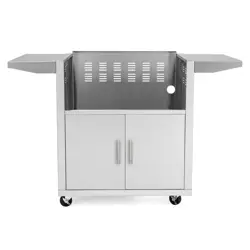
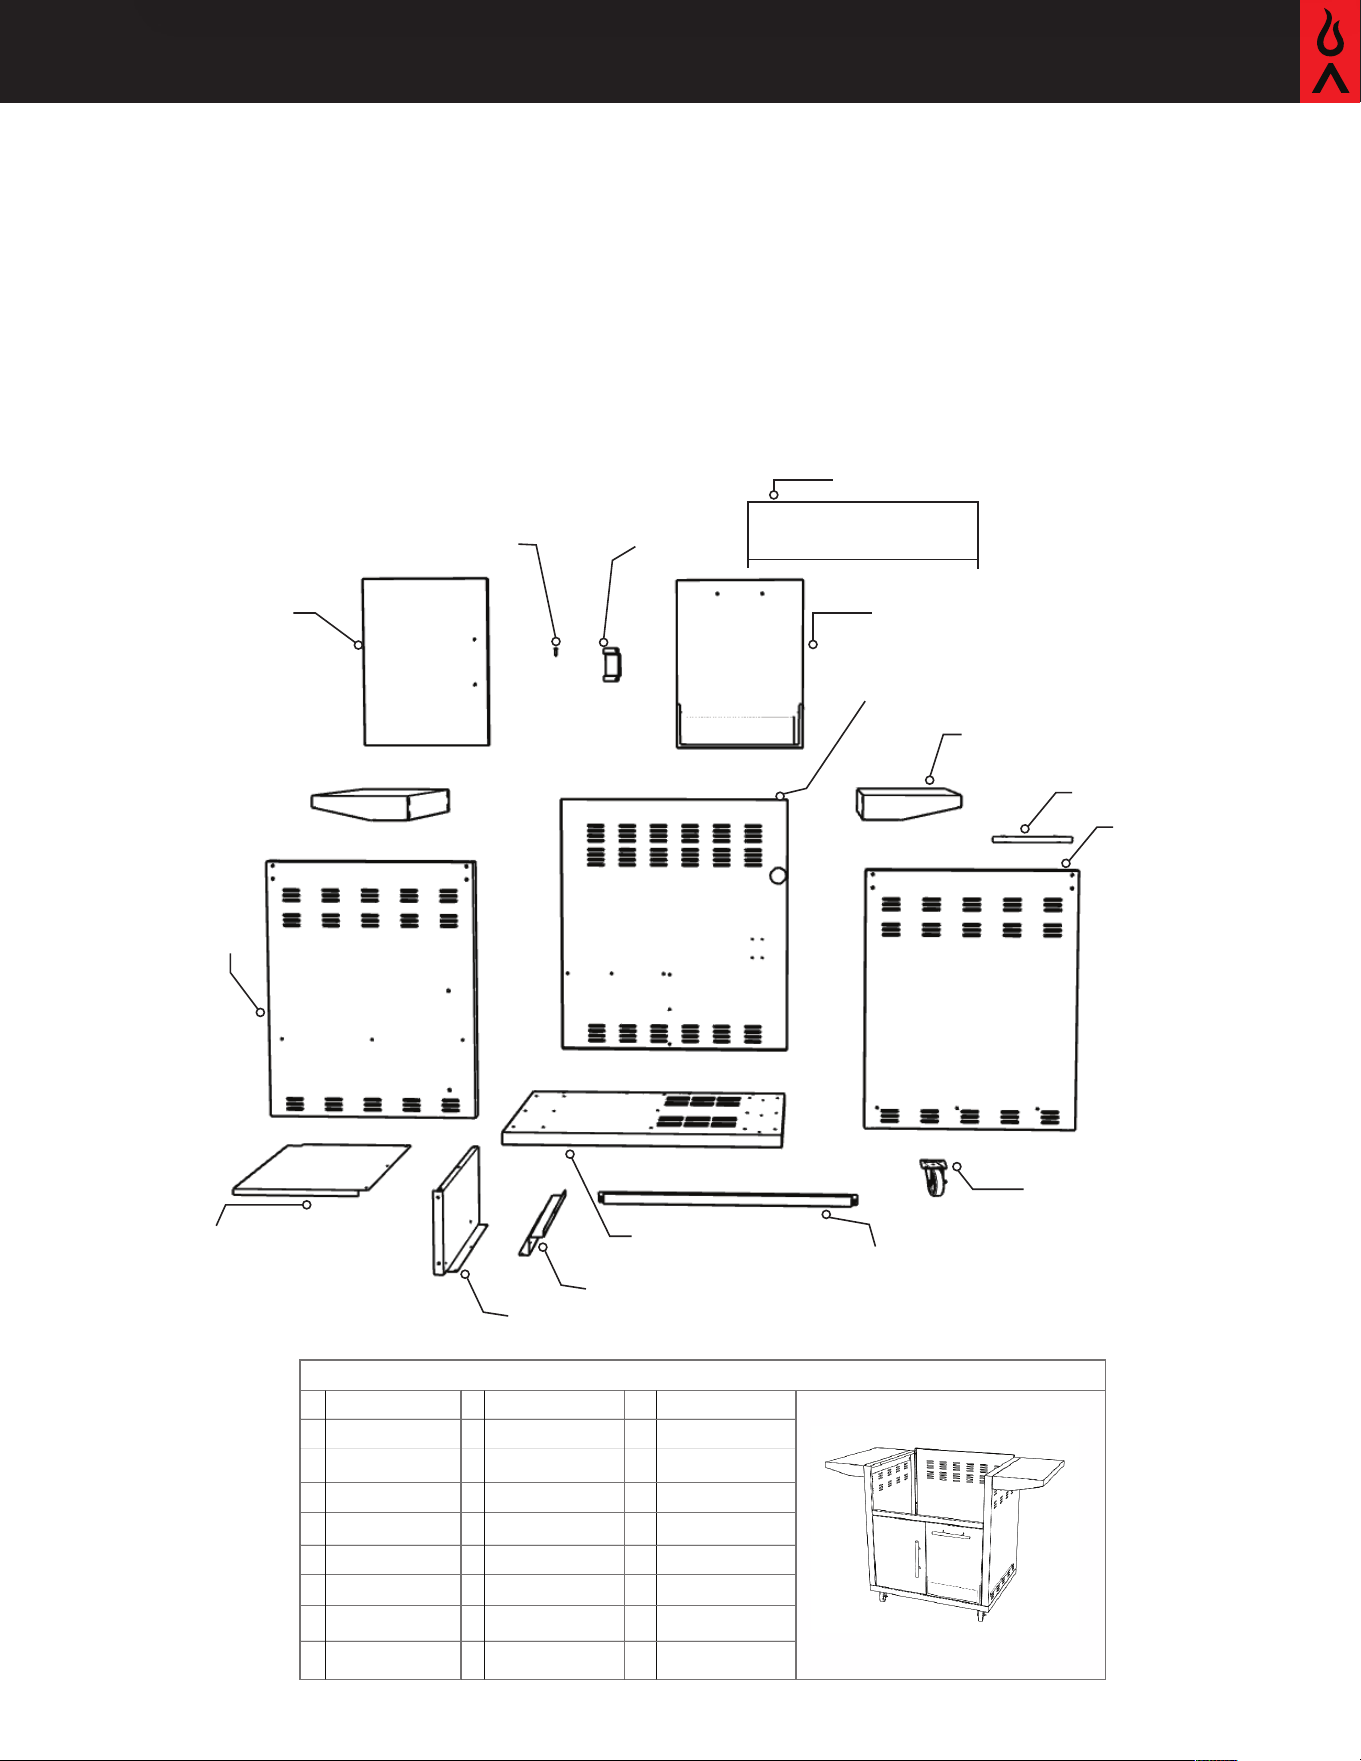
Blaze 32'' LTE Grill cart
Blaze 32" LTE+ Grill cart
Blaze 32" LBM Grill cart
2. Back panel
3. Side Shelf
5. Right side panel
6. Casters
8. Bottom panel
9. Right side drawer slide
10. Right side shelf panel
11. Top side shelf
pannel
7. Front strut
4. Handles
13. Left door
15. Hinges
12. Left side panel
14. Hardware pack
17.
16.
15.
14.
13.
12.
11.
10.
9.
8.
7.
6.
5.
4.
3.
2.
1.
Blaze Part Number: Reference Guide
1. Propane drawer
BLZ-AD32-007
BLZ-32C-031SC
BLZ-32C-025SC
BLZ-32C-024SC
BLZ-32C-016
BLZ-D/DR-2
BLZ-32C-023RS SC
BLZ-32C-022
BLZ-32C-004
BLZ-32C-026SC
BLZ-32C-027SC
BLZ-32C-028SC
BLZ-32C-029SC
BLZ-32C-023LS SC
BLZ-32C-030SC
BLZ-CART-HARDWARE
16. Upper back panel

4 Blaze LTE Cart
BlazeGrills.com
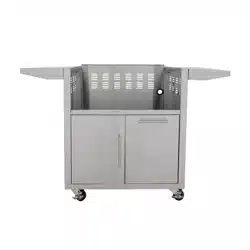
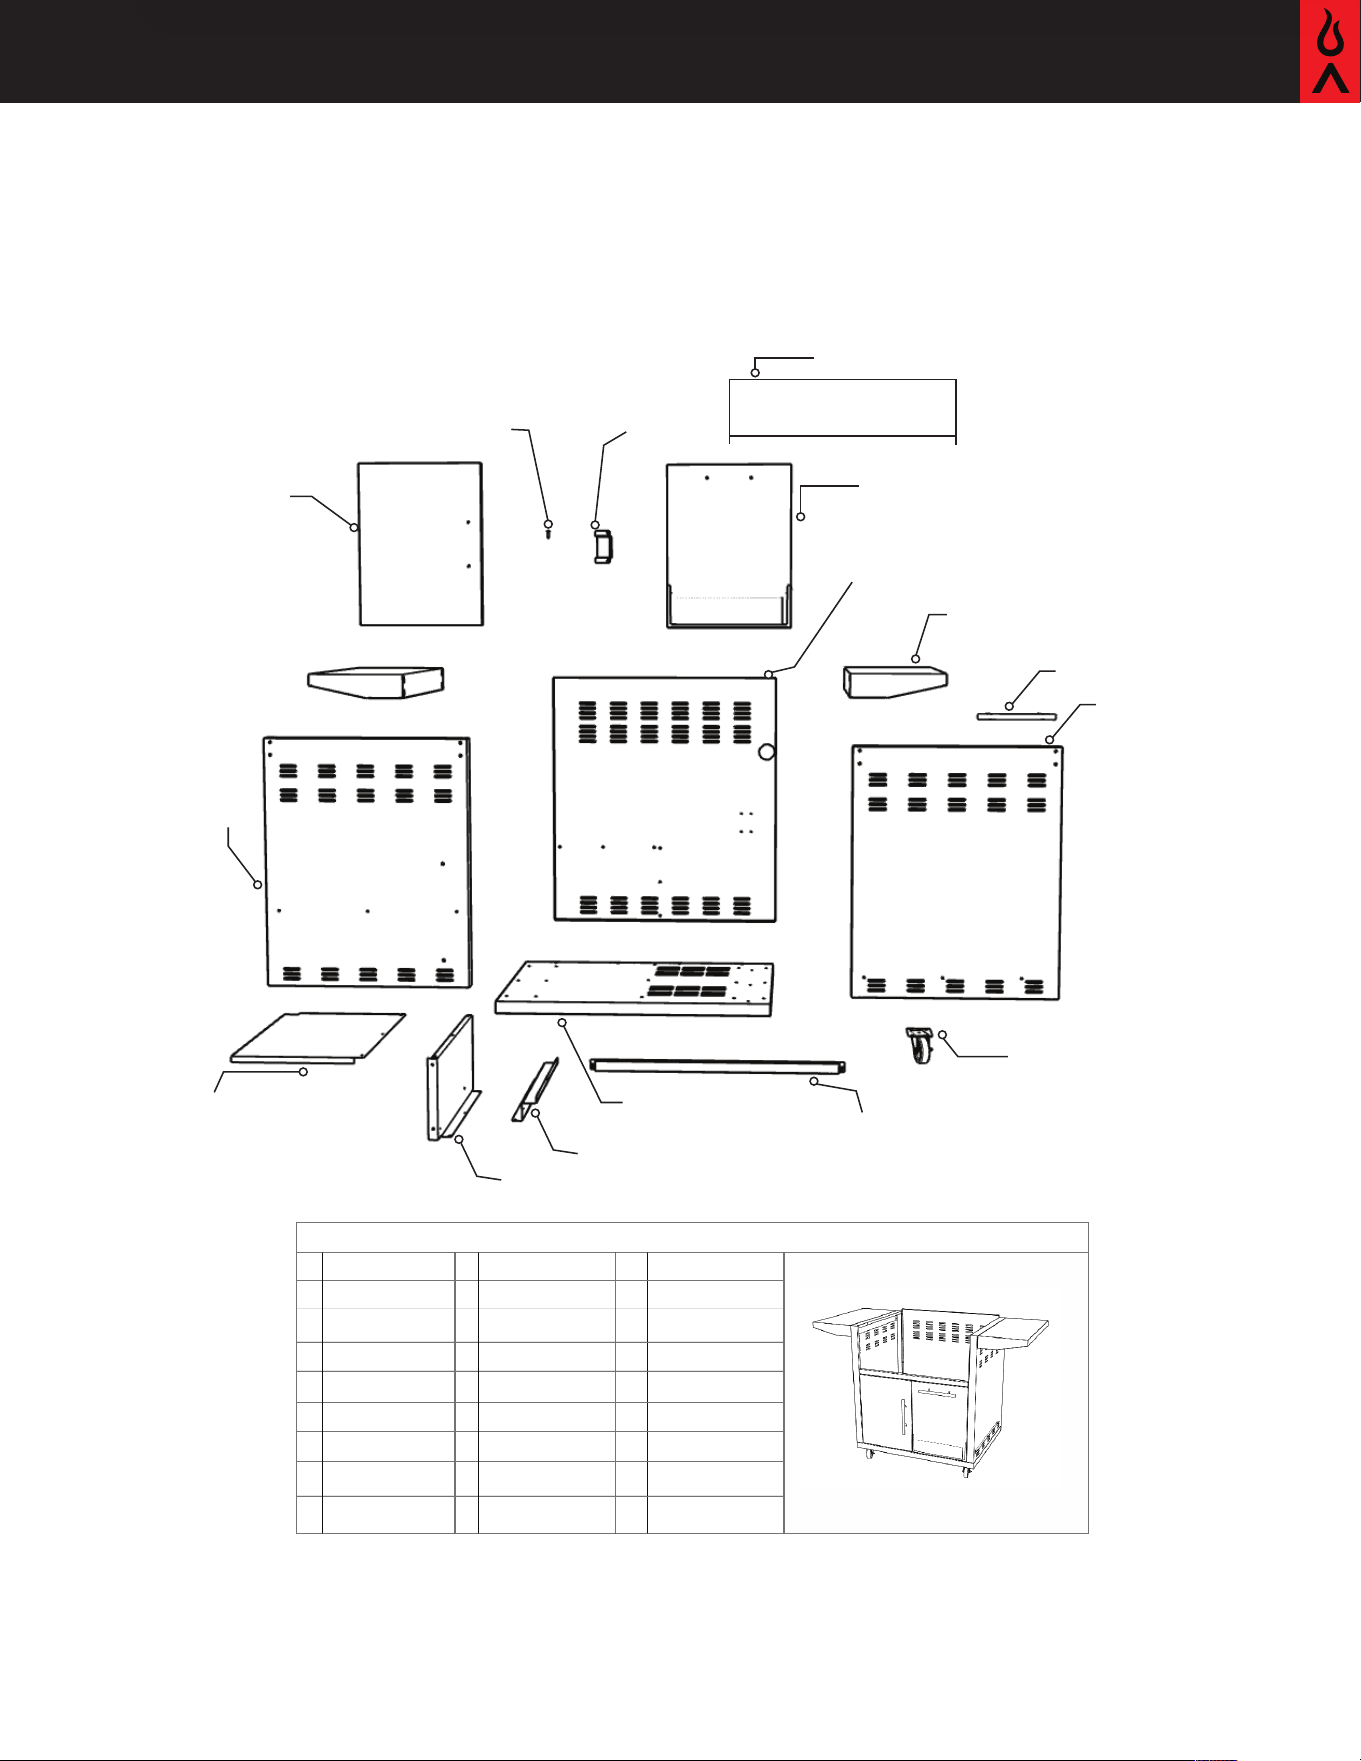
Blaze 30'' Griddle cart
2. Back panel
3. Side Shelf
5. Right side panel
1. Propane drawer
6. Casters
8. Bottom panel
9. Right side drawer slide
10. Right side shelf panel
11. Top side shelf
pannel
7. Front strut
4. Handles
13. Left door
15. Hinges
16. Upper back panel
12. Left side panel
14. Hardware pack
17.
16.
15.
14.
13.
12.
11.
10.
9.
8.
7.
6.
5.
4.
3.
2.
1.
Blaze Part Number: Reference Guide
BLZ-AD32-007
BLZ-GRIDDLECART-012
BLZ-GRIDDLECART-005
BLZ-GRIDDLECART-011
BLZ-D/DR-2
BLZ-GRIDDLECART-008
BLZ-32C-022
BLZ-GRIDDLECART-004
BLZ-GRIDDLECART-006
BLZ-GRIDDLECART-013
BLZ-GRIDDLECART-015
BLZ-GRIDDLECART-014
BLZ-GRIDDLECART-007
BLZ-GRIDDLECART-009
BLZ-CART-HARDWARE
BLZ-GRIDDLECART-016
5
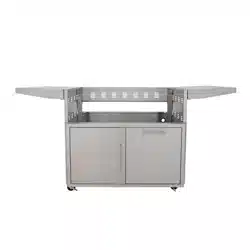
Blaze 40'' LTE Grill cart
Blaze 40" LTE+ Grill cart
2. Back panel
3. Side Shelf
5. Right side panel
1. Propane drawer
6. Casters
8. Bottom panel
9. Right side drawer slide
10. Right side shelf panel
11. Top side shelf
pannel
7. Front strut
4. Handles
13. Left door
15. Hinges
12. Left side panel
14. Hardware pack
17.
16.
15.
14.
13.
12.
11.
10.
9.
8.
7.
6.
5.
4.
3.
2.
1.
Blaze Part Number: Reference Guide
BLZ-AD32-007
BLZ-40C-019SC
BLZ-40C-016SC
BLZ-32C-016
BLZ-D/DR-2
BLZ-32C-023RS SC
BLZ-32C-022
BLZ-40C-017SC
BLZ-40C-018SC
BLZ-40C-021SC
BLZ-40C-022SC
BLZ-40C-023SC
BLZ-32C-023LS SC
BLZ-40C-020SC
BLZ-CART-HARDWARE
16. Upper back panel
BLZ-40C-024SC
6 Blaze LTE Cart
BlazeGrills.com
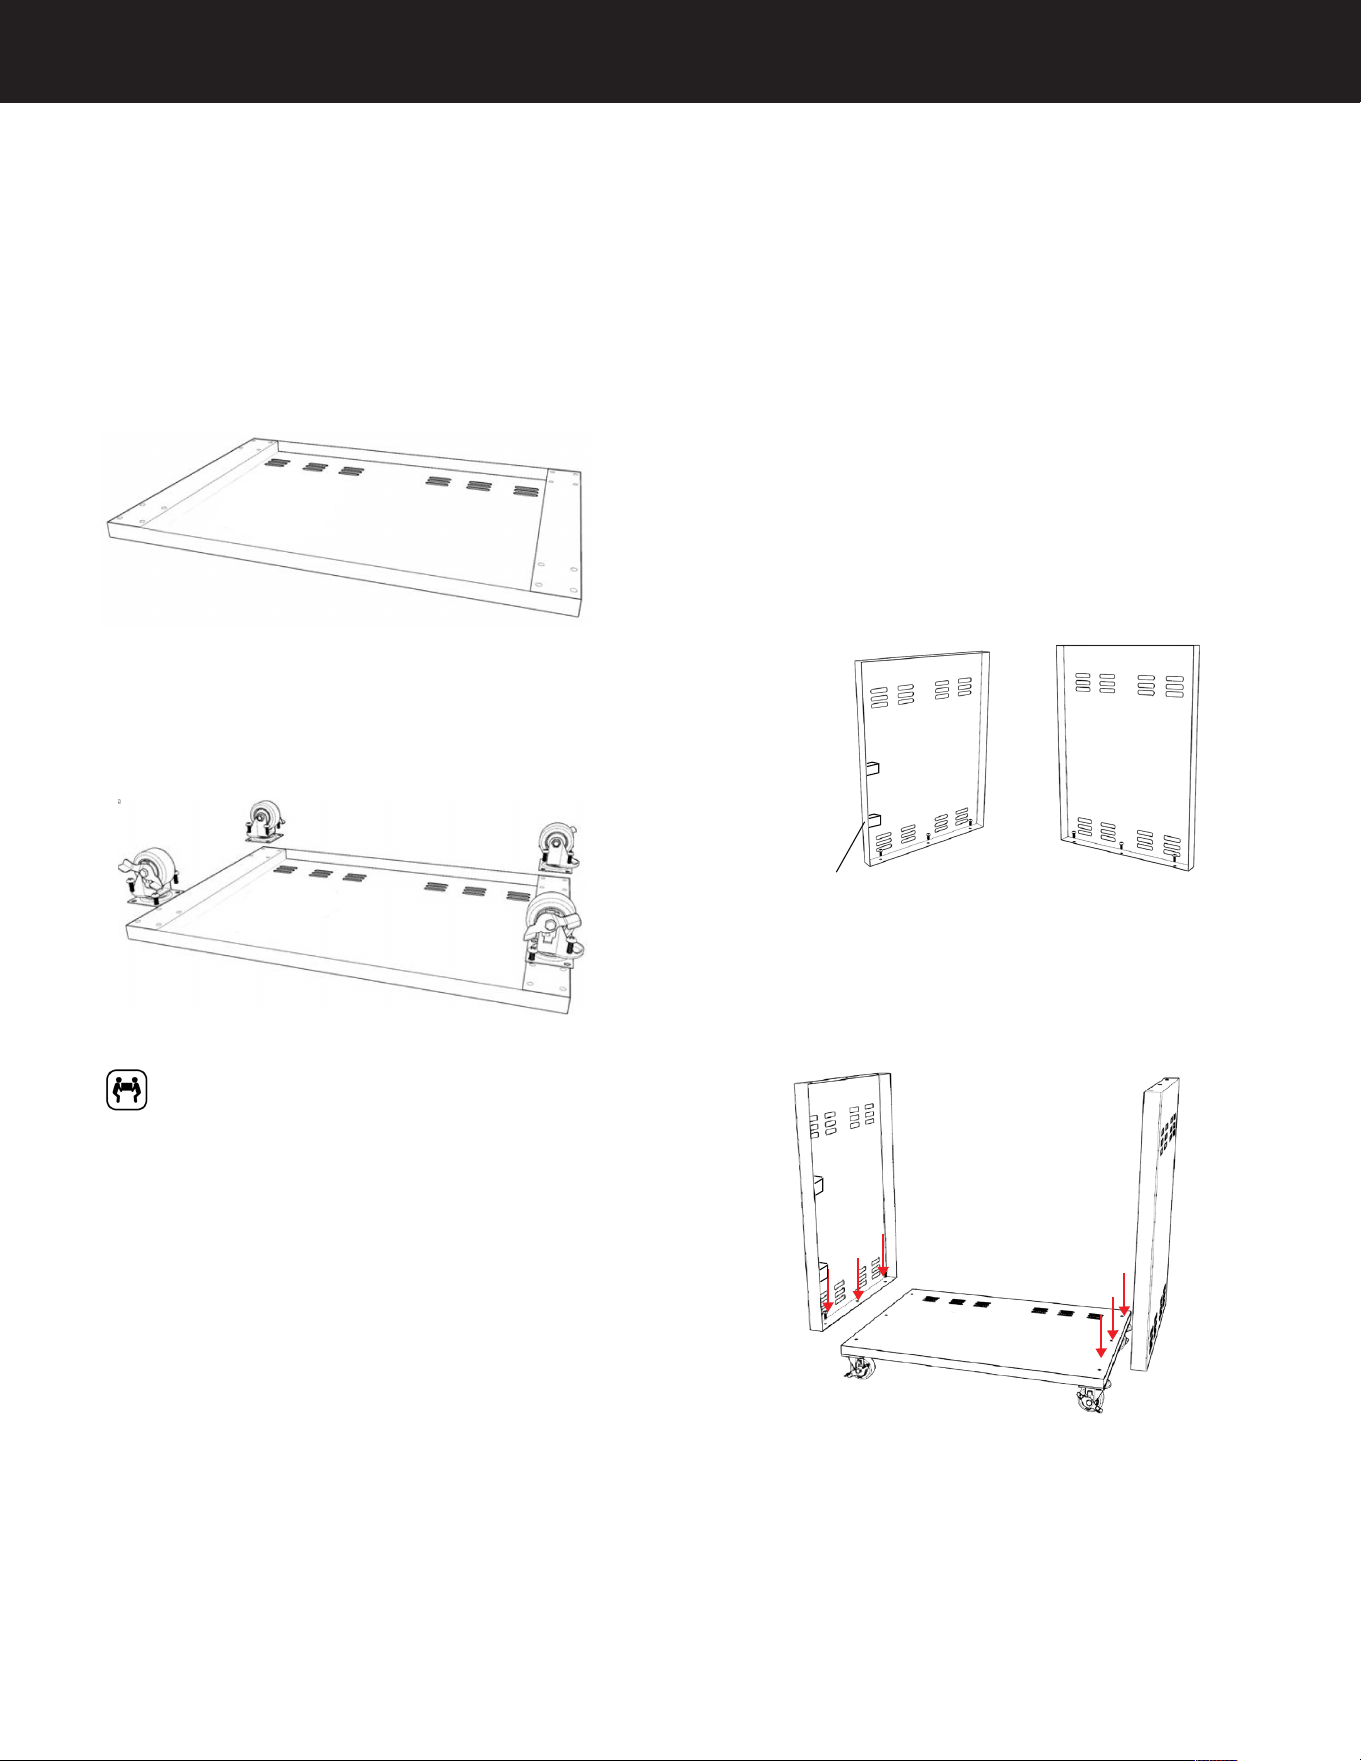
STEP 3: Attach the right and left side cart panels. The
right and left side panels can be identified as follows. The
top rail of each side cart panel is a solid surface with no
openings for anything to screw down into. The bottom
sides have three openings per panel for screws, which
are used to attach to the bottom cart panel. The front
side of each cart panel has a cluster of three nutserts
within 1.5 inches of each other, which will attach to the
front strut assembly. Attach both the left and right side
panels to the bottom cart panel using three screws per
side. Do not completely tighten.
STEP 4: Attach Bottom Back Panel - The bottom back
panel is first secured to the bottom cart panel with
screws. (The bottom of the panel has openings for
screws to go through; see the diagram.) The number of
screws used varies by the size of the grill cart you are
assembling. Attach but do not tighten. Next, secure the
back panel. Attach to side walls before adding top bar.
L R
STEP 1: Flip the panel upside down on a protected
surface, exposing the four locations where the casters
attach. There are two runners on the bottom cart panel
with four nutserts (female threaded inserts that a screw
goes into) at each end of each runner. This is where the
casters will be installed.
STEP 2: Attach the four casters. Use the locations
described above and tighten them completely. Once
complete, lock the locking casters, then turn the bottom
panel right side up.
For the remainder of the grill cart
assembly, the use of a second person is
recommended to make the process easier.
Hinges on
the left
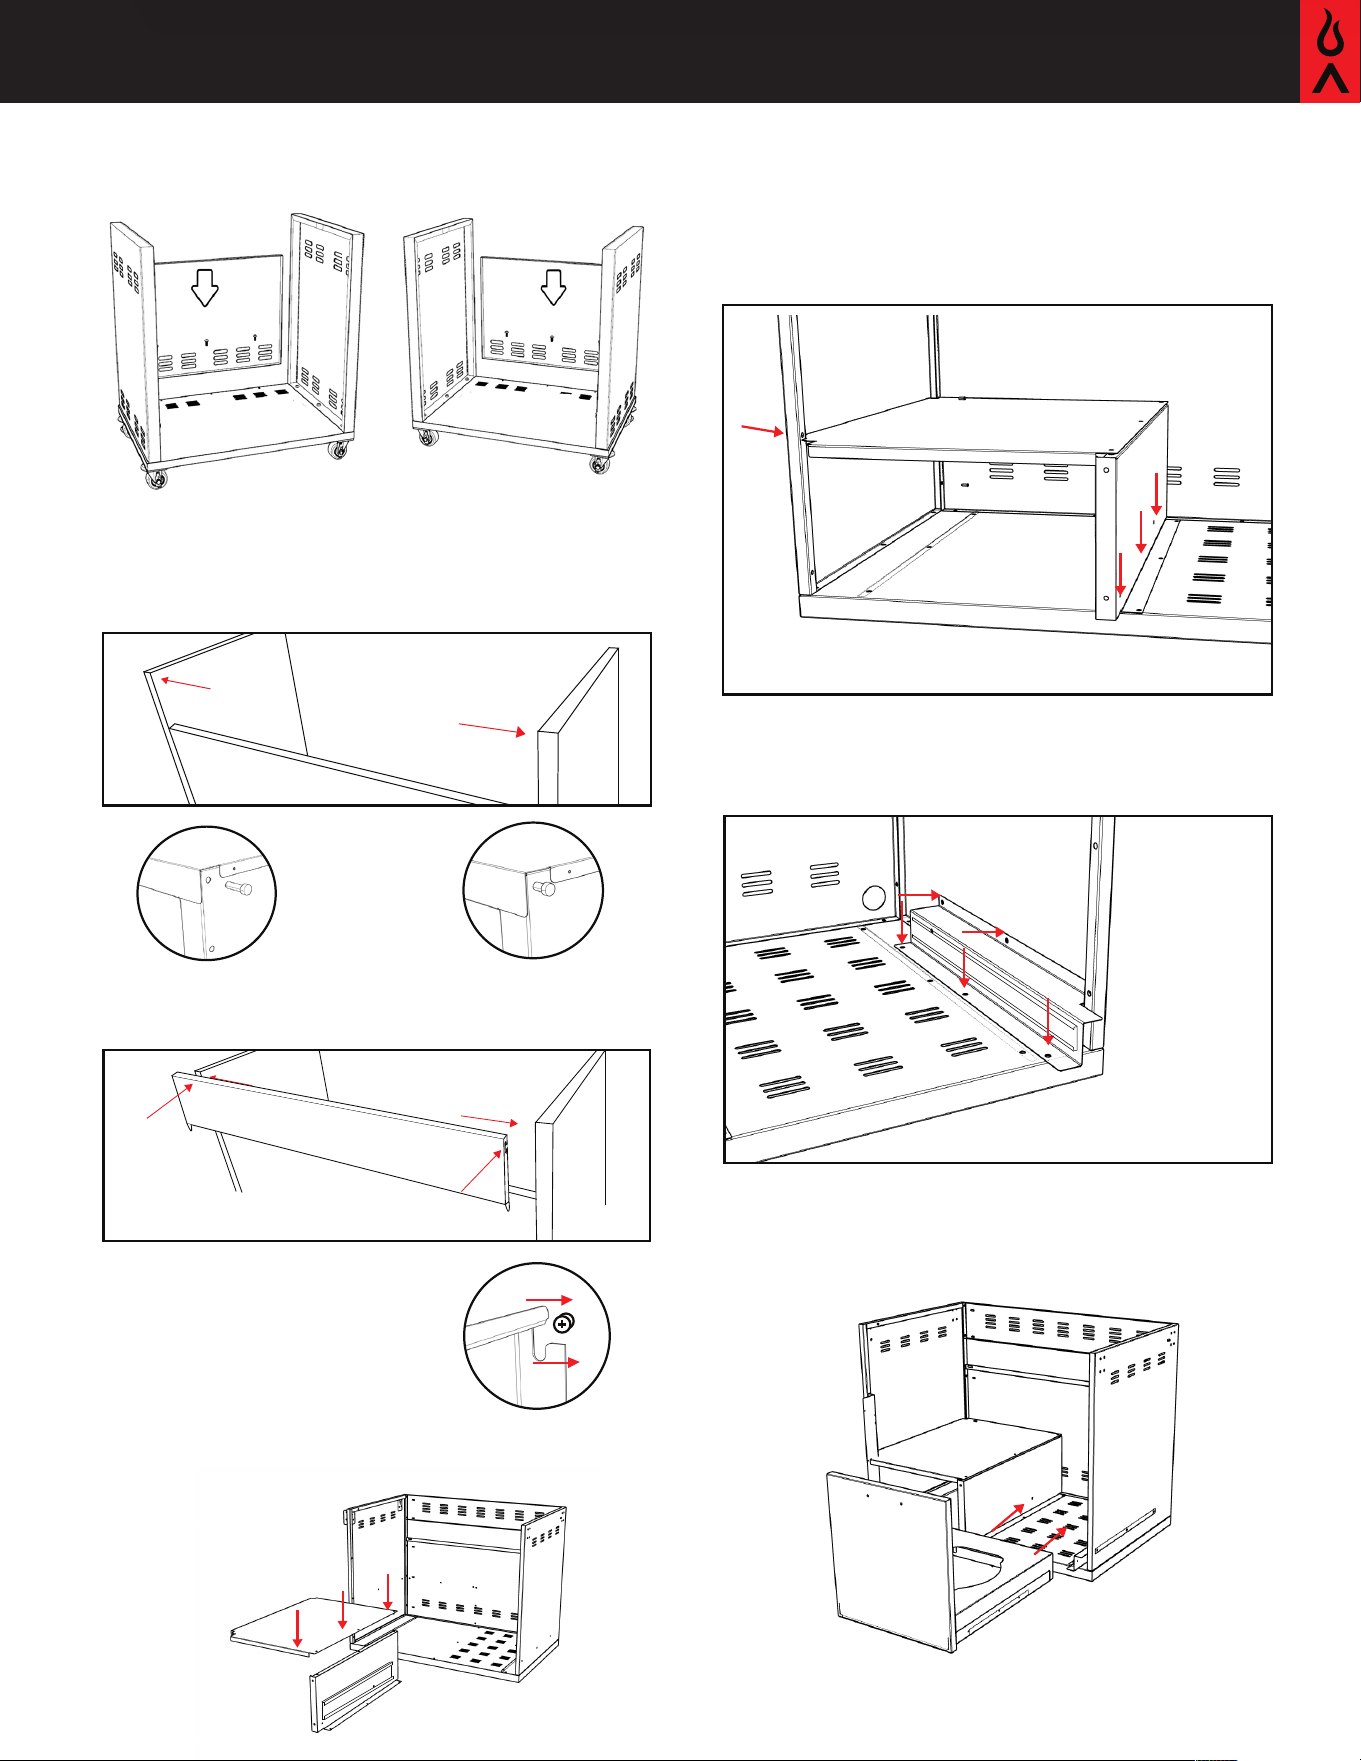
7
STEP 5: Attach the upper two screws on the back side
panel, but do not fully tighten them until the cart is
fully assembled. Then attach the side panels to the
lower back panel.
STEP 6: Slide the back panel on left and right screws
but located on the side panels do not tighten them let
this panel hang on these screws for now.
STEP 7: Attach the upper shelf panel to the right shelf
STEP 8: Attach the shelf to the interior of the
appliance cart using six screws: three on the interior
of the cart and three on the exterior.
STEP 9: Attach the right-side drawer slide to the lower
right side of the cart.
STEP 10: Slide in the propane pull out.
8 Blaze LTE Cart
BlazeGrills.com
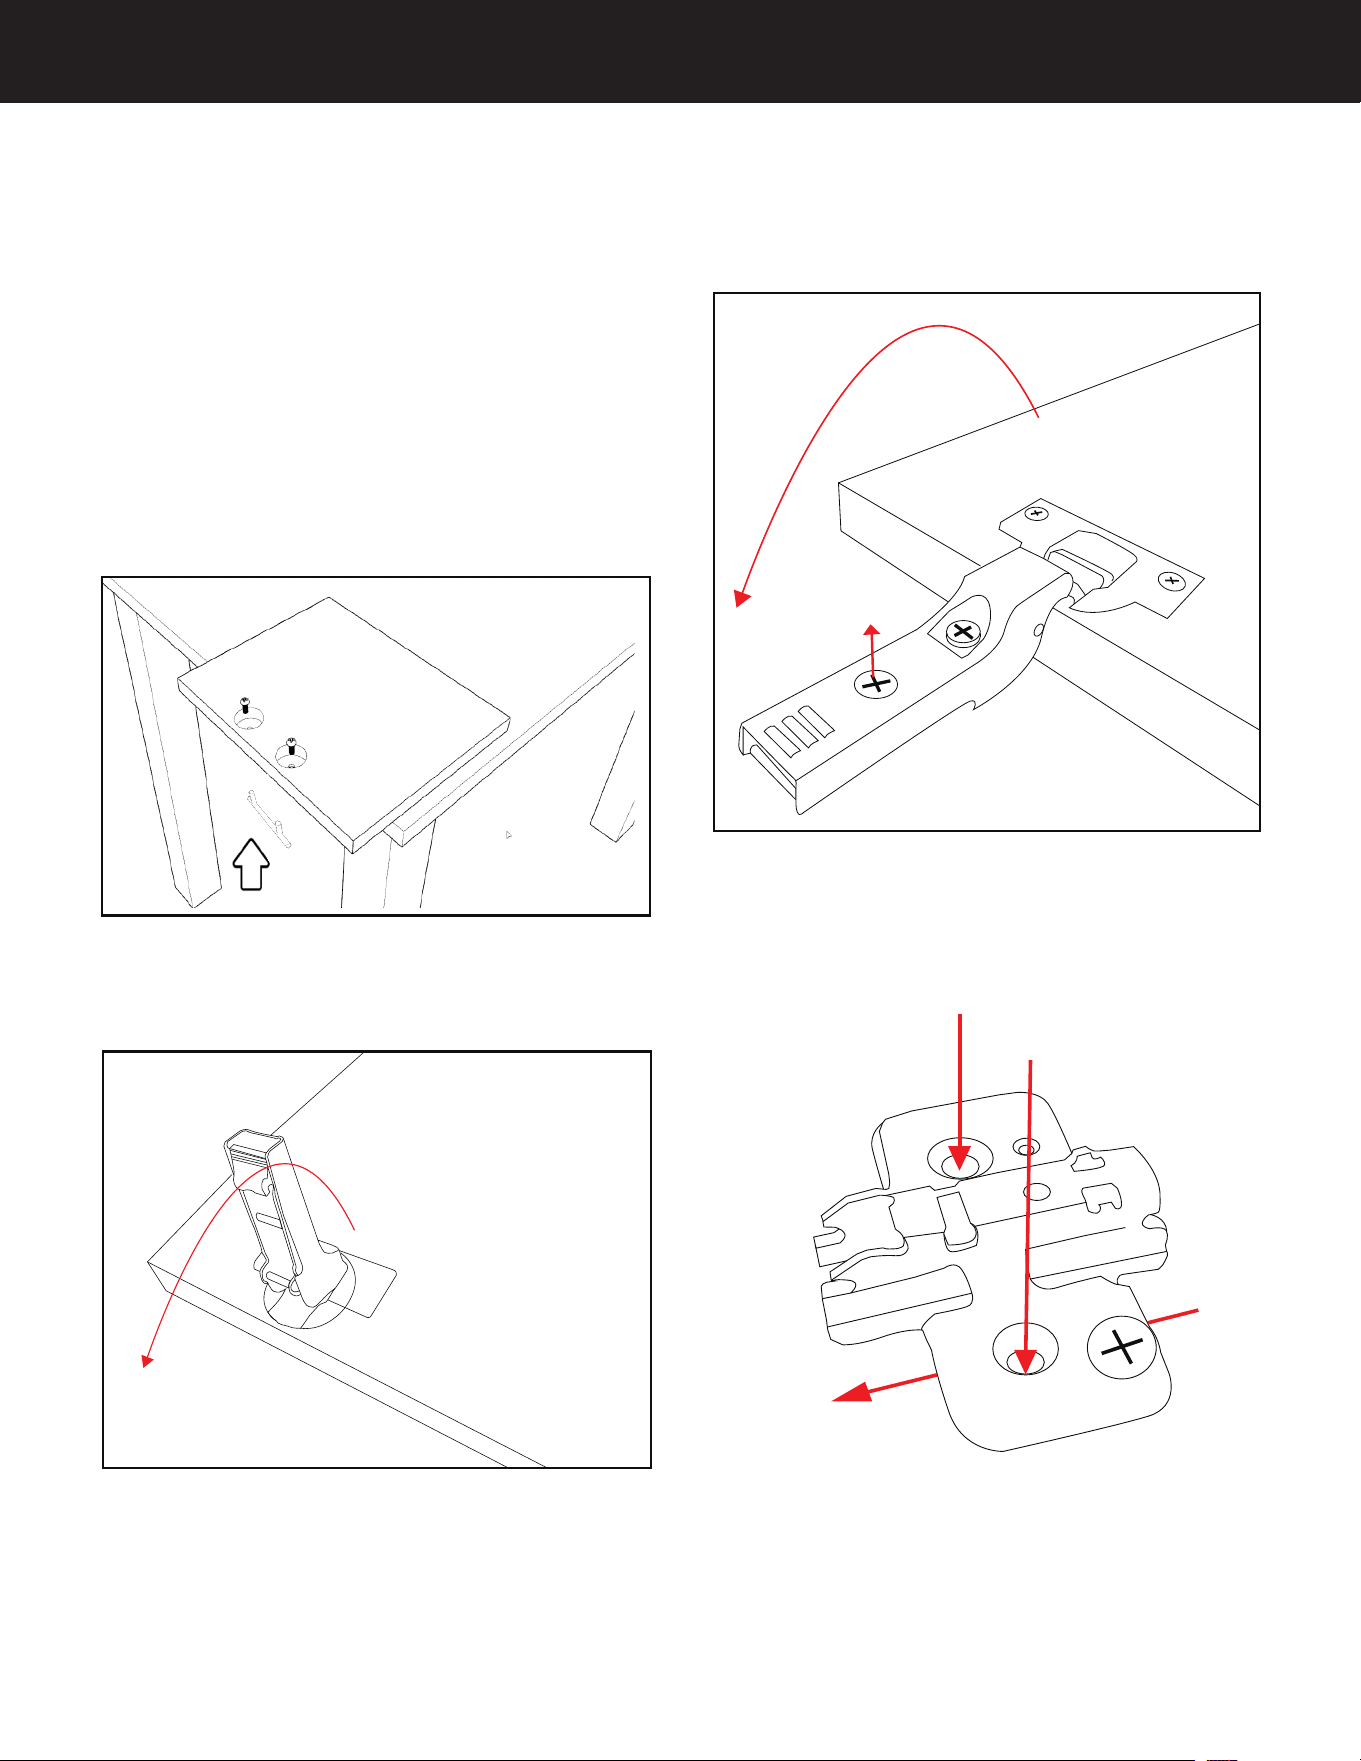
STEP 11: Attach door handles to the doors - The door
handles and hardware are packaged separately from the
rest of the hardware. Each handle is attached to the door
with two M6x8 screws. To avoid scratching the doors,
lay them on a soft surface. Hint: While the door is on a
soft surface on a work area, such as a table, position the
door off the edge just enough to expose the handle screw
holes. Place the screw in your screwdriver and guide it
into the hole on the door. Once positioned, move the
handle to the screw and begin threading it slightly. This
allows flexibility for attaching the second screw. Once
both screws are in place, tighten completely.
STEP 12: To attach the soft-close hinges to the cart, start
by flattening the hinges and loosening the adjustment
screw.
push the hinge
so it lays flat
STEP 13: Then loosen the adjustment screw.
STEP 14: To attach the soft-close hinge mounts to the
cart as shown.
After the hing is layed
flat you can loosen this
screw to allow the
snaps to reach their
snap-on point.
Insert two hinge screws
with the rounded hooks
facing toward the back
of the cart.
Back of appliance
cart
9
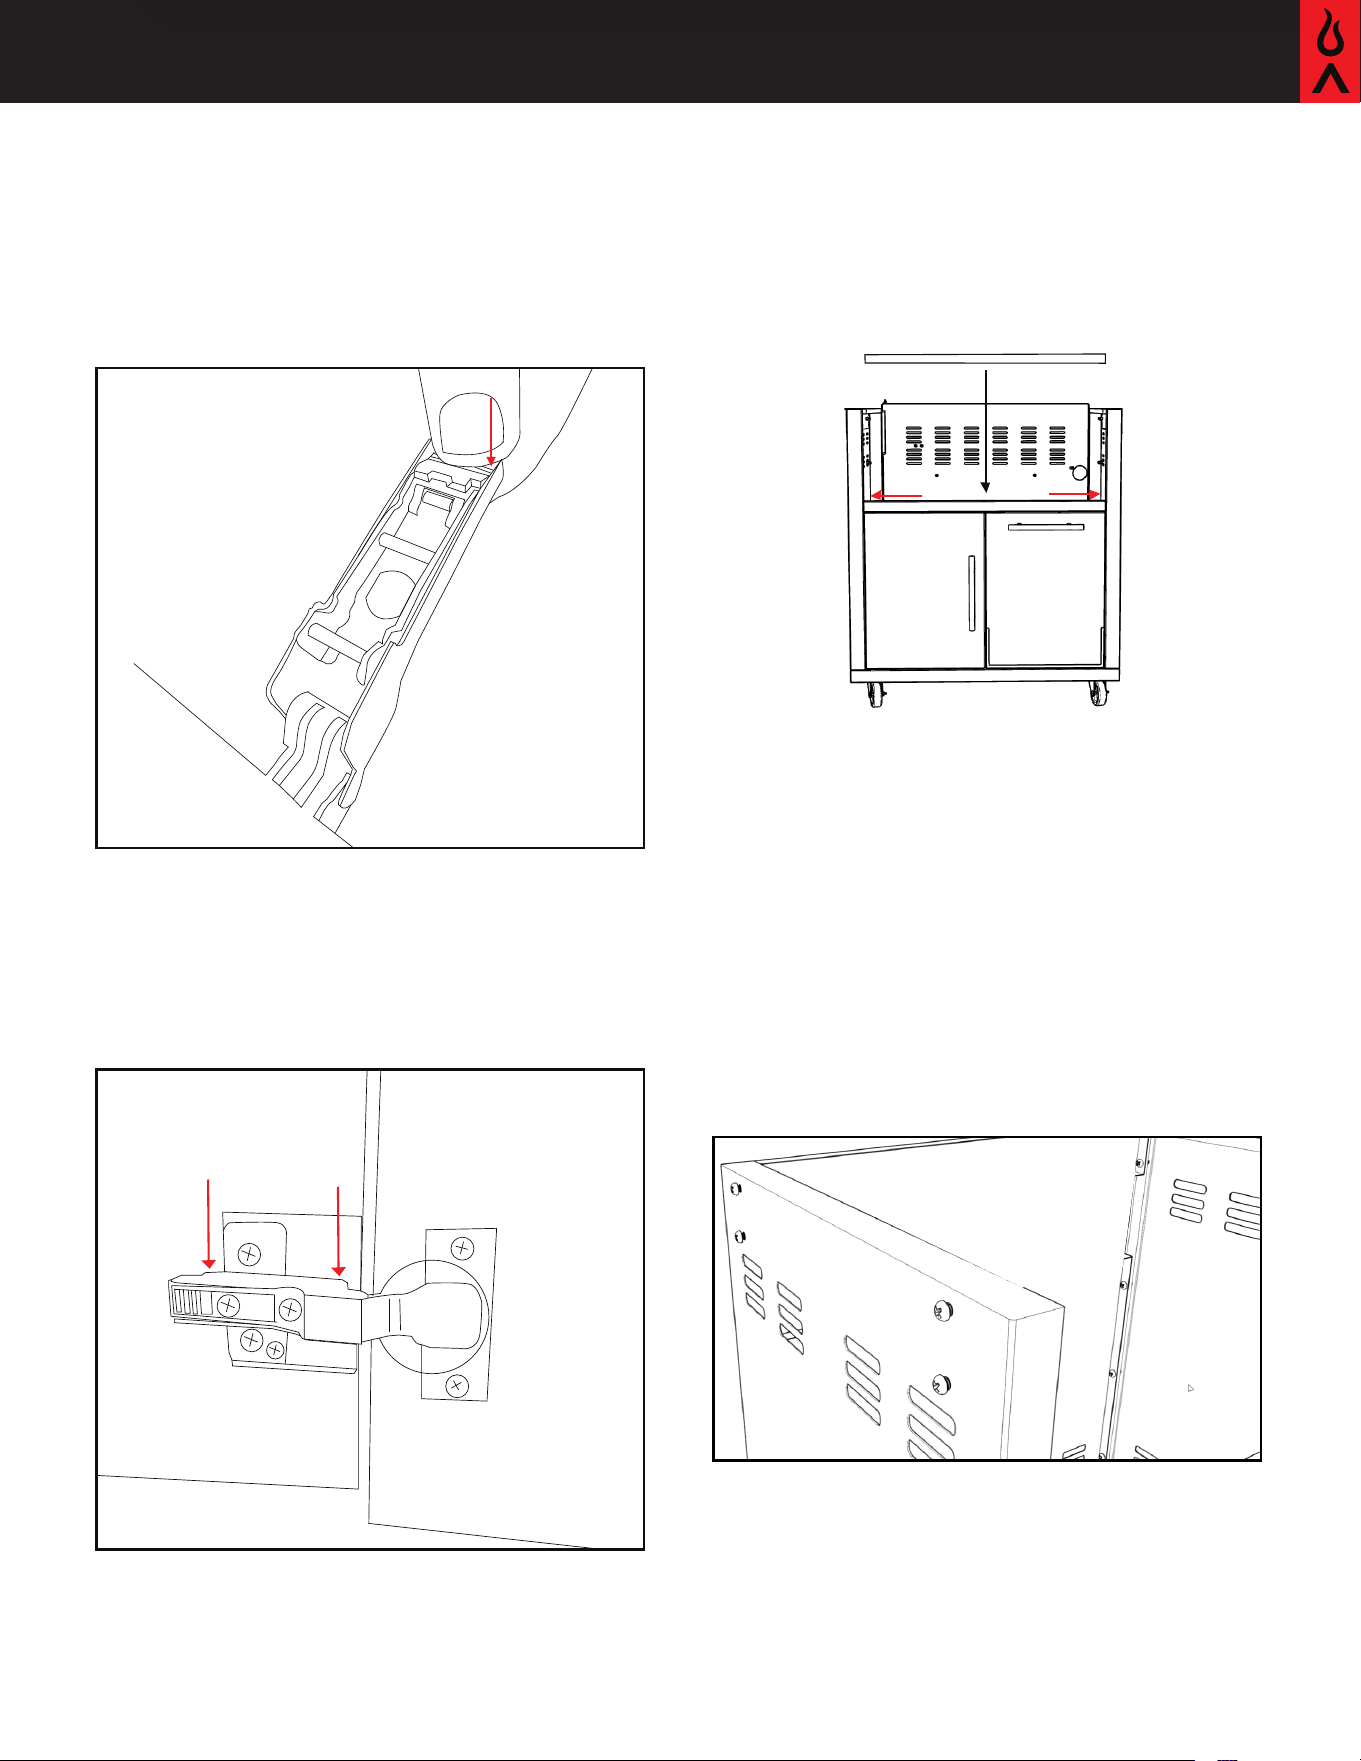
STEP 15: To attach the soft-close hinge, snap one hinge
at a time onto the hinge mounts, hooking the front
hook first, then pushing down the back until you hear
a click. This may take multiple tries, and you may need
to loosen the adjustment screw.
Pushing this tab while trying to snap the hinge on will
help the hinge have enough clearance to snap into place.
Push this tab down to
allow the hooks on the
hinge to open, making it
easier to hook the hinges
onto their mounts.
snap this
hook first
snap this
hook second
STEP 16: The front strut will be attached next with four
screws, two on each side.
STEP 17: Attach side shelves - four screws per shelf are
used to attach them to the right and left side panels.
Both shelves are exactly the same and can be used on
either side. Start all four screws into the side panel, as
the shelf can then simply be placed over the screws and
pushed downward into place. Once in position, tighten
completely.
10 Blaze LTE Cart
BlazeGrills.com
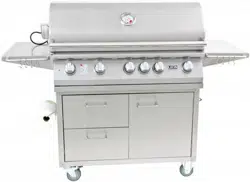
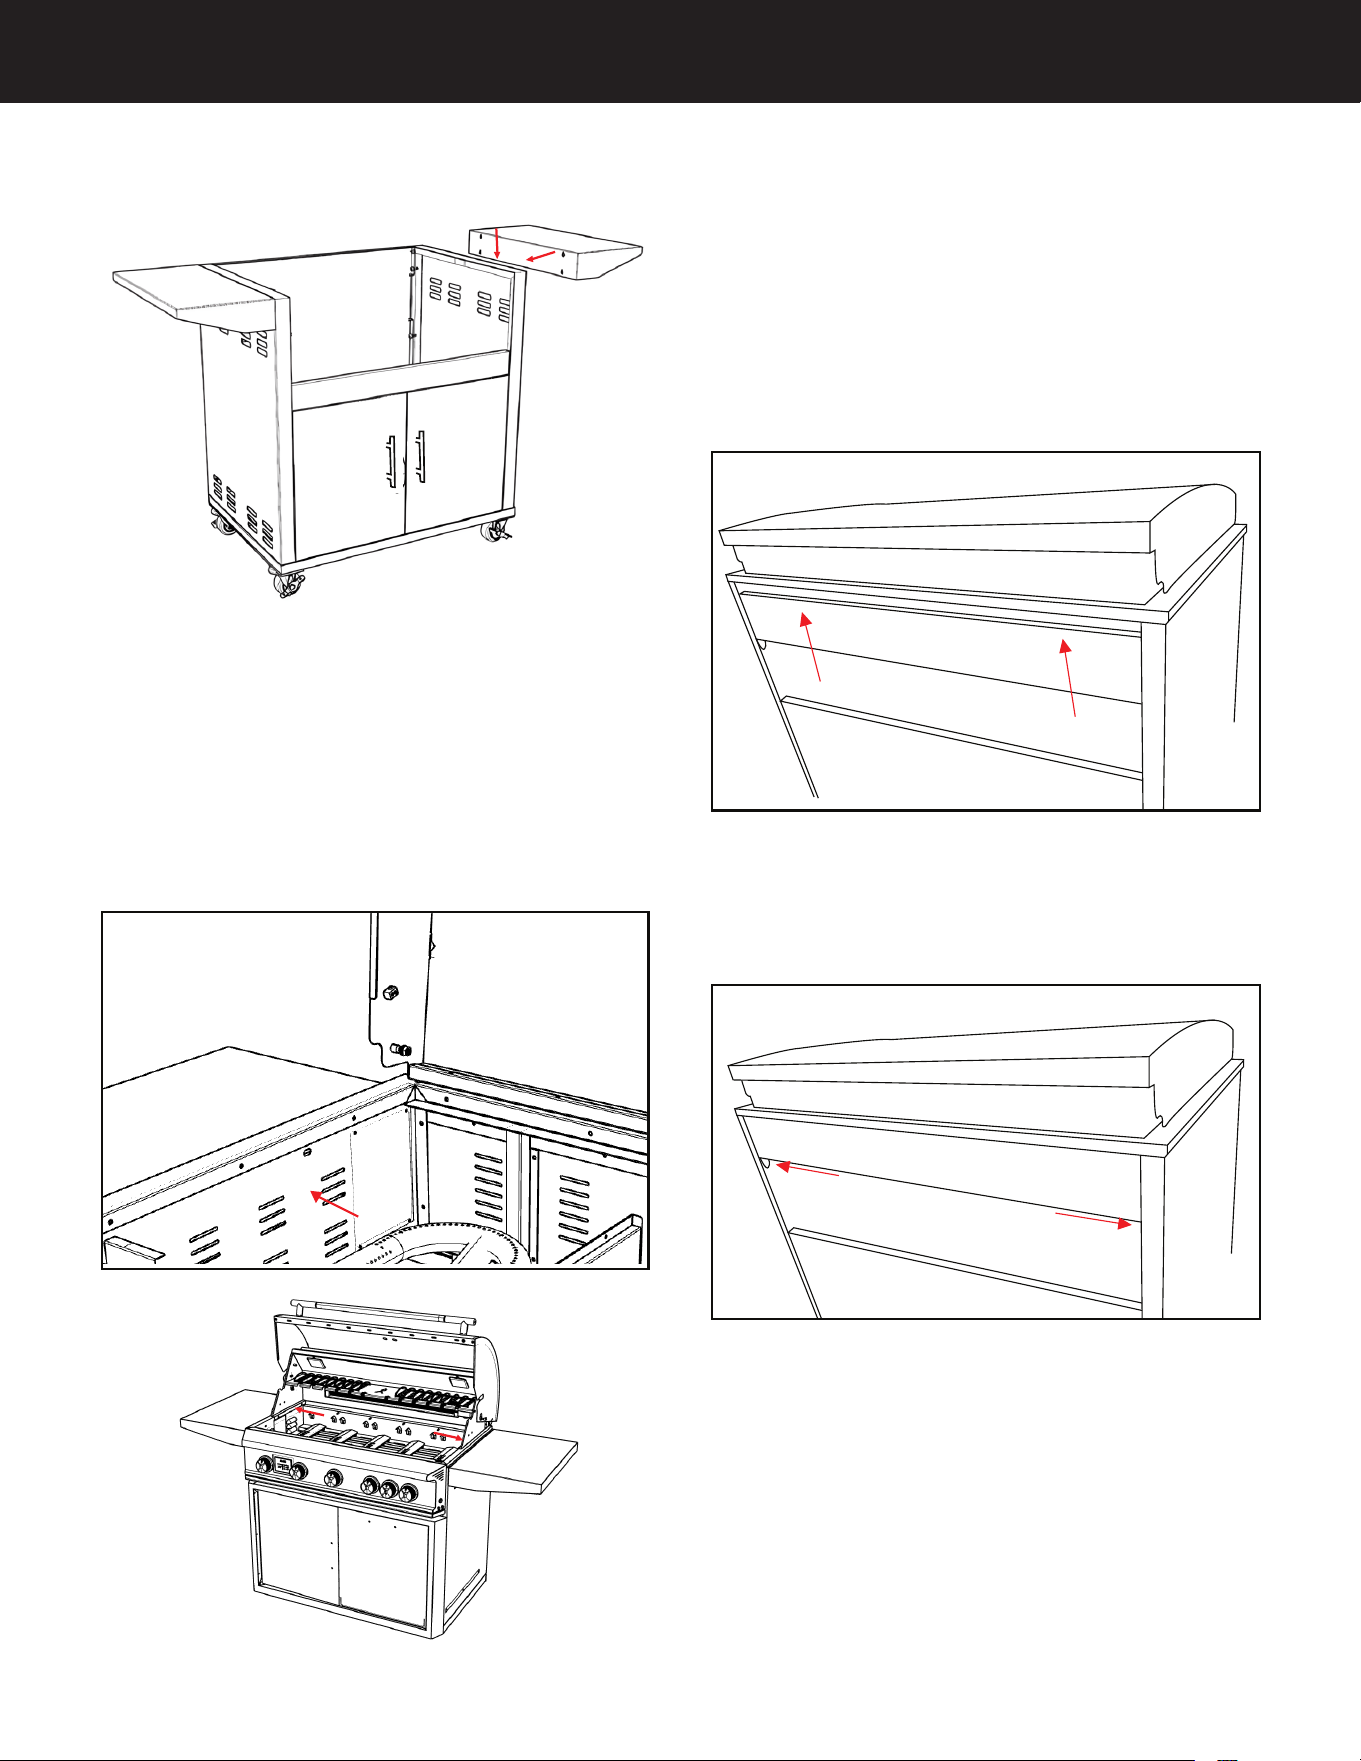
STEP 18 (Grill): The appliance is placed into the cart and
attached with two screws. Always use a partner when
lifting the appliance, and removing the internal parts
above the burners can help reduce the weight, making
it easier to lift. With the cooking grids still removed, you
will notice an opening toward the front left and right
sides on the inside of the grill body. One screw per side
goes through the inside of the grill and attaches to the
grill cart. Tighten these screws, but do not over-tighten.
If you are installing a griddle into your cart the
griddle will not have attachment screws.
STEP 19: (For both griddle and grill) once your
appliance is in place push upper back panel
into the slot on the back of the grill to lock it
in place.
STEP 20: Put locking screws in each side of the
back panel.
STEP 21: Tighten all screws.

11
Please leave these
instructions with the
consumer.
Please read and retain
these instructions for
future reference and
before installation or
operation.
Contact Us:
Blaze
6620 Greenwell Springs Rd
Baton Rouge, LA 70805
Phone: 866-976-9510
customerservice@blazegrills.com
Contact Us:
@Blazegrills
@Blaze_Grills
@BlazeOutdoorProducts