FREMONT
6000

3
FCC Warning
This device complies with part 15 of the FCC Rules. Operation is subject to the following two
conditions: (1) This device may not cause harmful interference, and (2) this device must
accept any interference received, including interference that may cause undesired operation.
Note: This equipment has been tested and found to comply with the limits for a Class B digital
device, pursuant to part 15 of the FCC Rules. These limits are designed to provide reasonable
protection against harmful interference in a residential installation. This equipment generates,
uses and can radiate radio frequency energy and, if not installed and used in accordance with
the instructions, may cause harmful interference to radio communications. However, there is
no guarantee that interference will not occur in a particular
installation. If this equipment does cause harmful interference to radio or television reception,
which can be determined by turning the equipment off and on, the user is encouraged to try to
correct the interference by one or more of the following measures:
—Reorient or relocate the receiving antenna.
—Increase the separation between the equipment and receiver.
—Connect the equipment into an outlet on a circuit different from that to which the receiver
is connected.
—Consult the dealer or an experienced radio/TV technician for help.
4
Note: The Grantee is not responsible for any changes or modifications not expressly approved
by the party responsible for compliance. such modifications could void the user's authority to
operate the equipment.
The device has been evaluated to meet general RF exposure requirement.
To maintain compliance with FCC's RF exposure guidelines, the distance must be at least 20
cm between the radiator and your body, and fully supported by the operating and installation.

TABLE OF CONTENTS
5
FEATURES...............................................................................................................................................6
SPECIFICATIONS....................................................................................................................................6
PRODUCT OVERVIEW.......................................................................................................................................7
TURNTABLE PLATTER AND BELT SETUP........................................................................................................9
CARTRIDGE TRACKING FORCE ADJUSTMENT...........................................................................................10
SETUP & BASIC OPERATION..........................................................................................................................12
RADIO OPERATION.........................................................................................................................................13
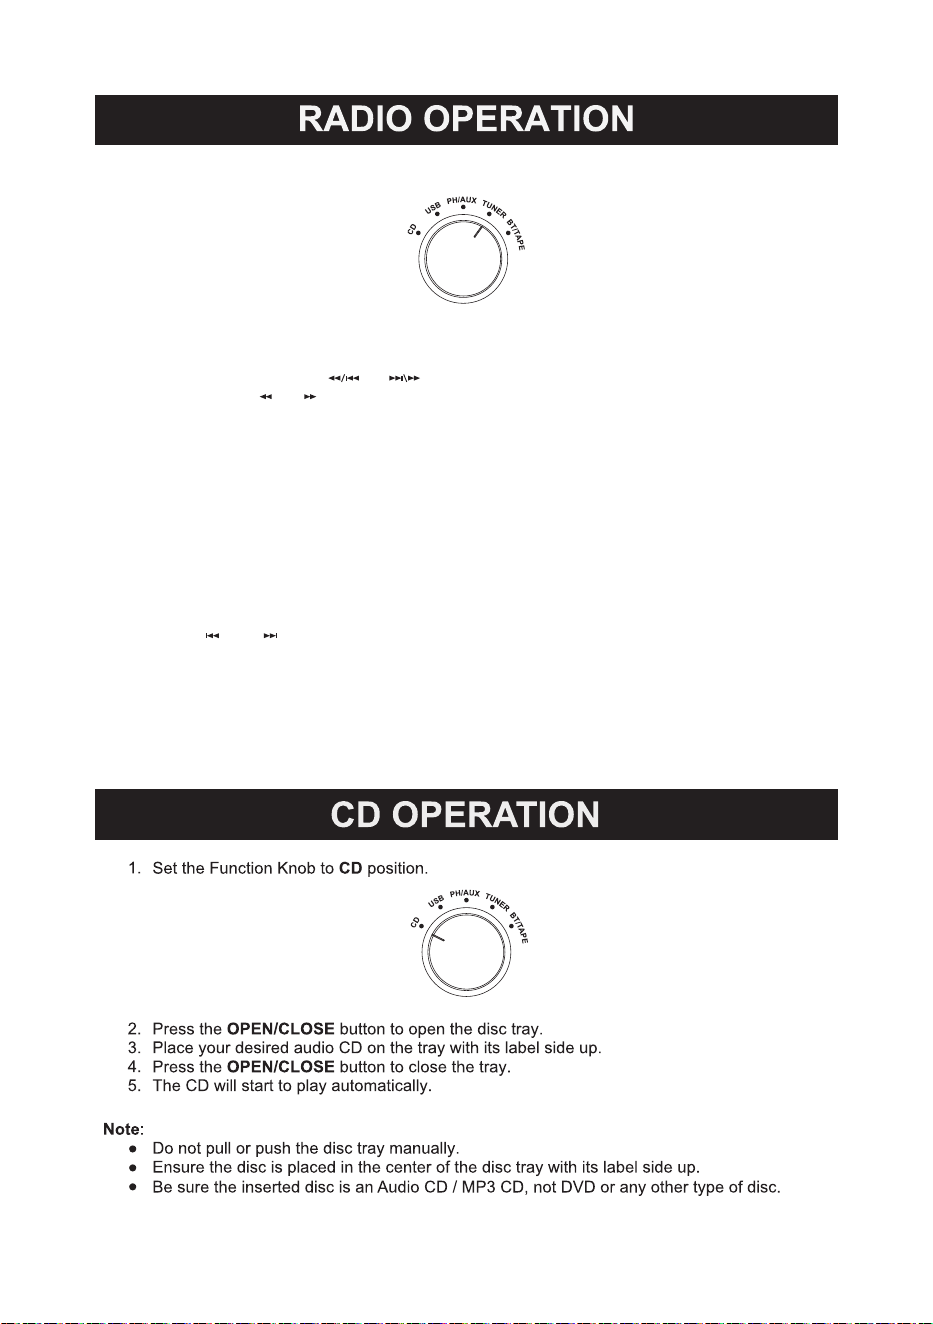
CD OPERATION................................................................................................................................................13
AUX IN OPERATION.........................................................................................................................................14
USB OPERATION..............................................................................................................................................14
CASSETTE TAPE OPERATION........................................................................................................................15
VINYL RECORD OPERATION..........................................................................................................................16
BLUETOOTH
®
OPERATION.............................................................................................................................17
CARE & MAINTENANCE..................................................................................................................................18
HOW TO REPLACE THE STYLUS...................................................................................................................20
TROUBLESHOOTING GUIDE..........................................................................................................................21
SUPPORT........................................................................................................................................................22
FEATURES
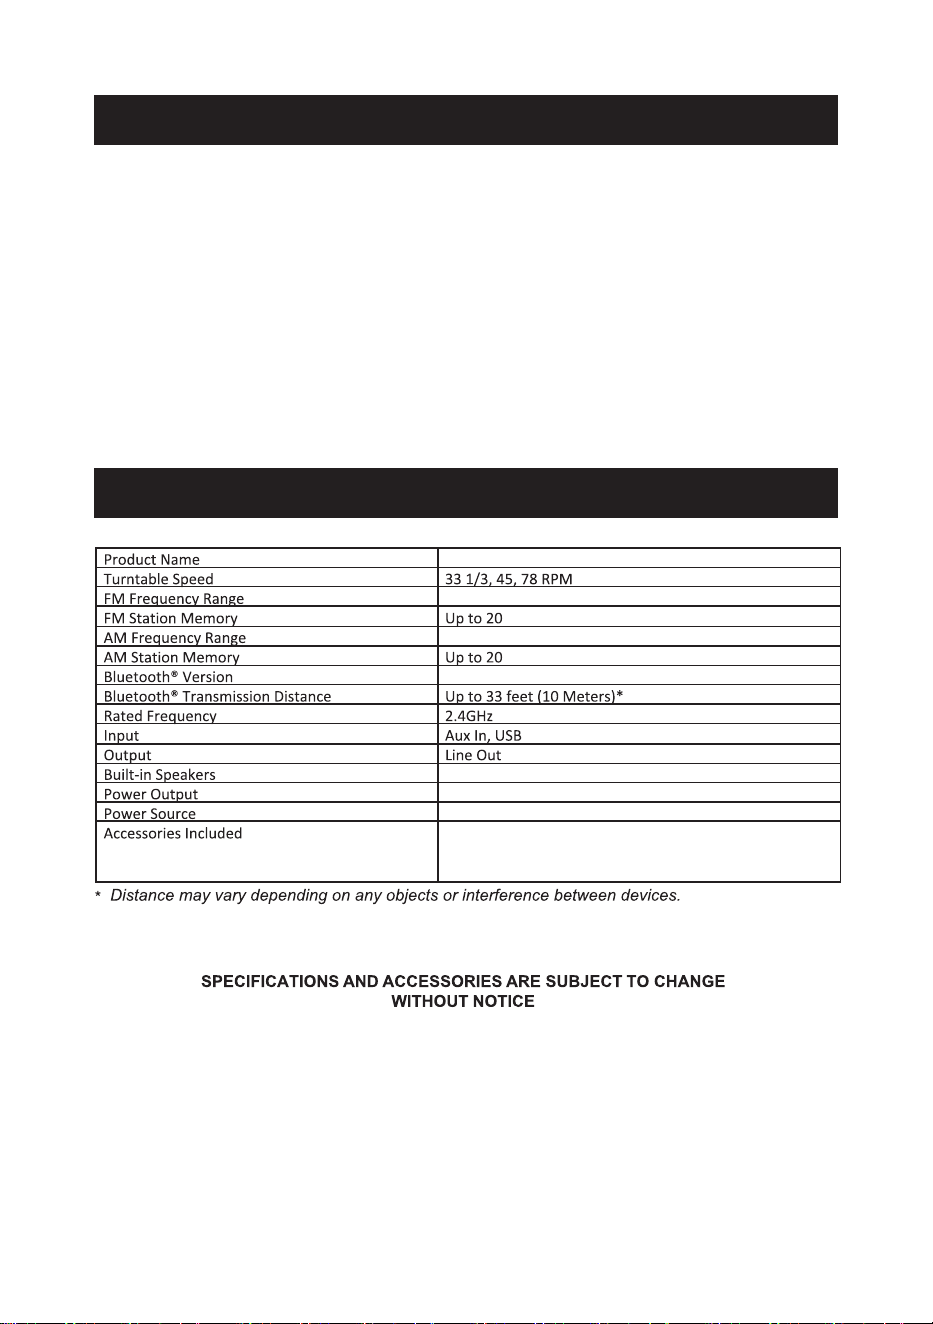
SPECIFICATIONS
6
87.5 - 108 MHz
45 RPM Adaptor, Platter, Counterweight, Power
Adaptor, Aux In Cable, Remote Control, User Manual,
Quick Set Up Guide, Felt Slipmat, Warranty Card
3” x 2 + 4’’ x1
V5.3
15W x 2 + 30W
AC/DC 100-240V~ 50/60Hz 15V 2.4A
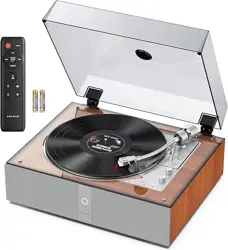
The Fremont Wood Music Center features a great retro design and solid wood construction. With a 3
Speed turntable, CD & Cassette Player the Monument is ready to play all your music! The Dual
Bluetooth feature allows streaming of your music to an external speaker. Record and playback all
your favorite songs with the built in USB player & recorder. Also features built in Speakers & AM/FM
Radio.
● 3-Speed record player with Auto Return will play 33 1/3, 45, 78 rpm records
● Bluetooth In connectivity allows you to stream music from another source up to 33 feet away
● Bluetooth Out Connectivity allows you to stream vinyl playback through any external Bluetooth
Speaker
● CD & Cassette Player and AM/FM Radio
● USB Input for Playback & One Touch Recording of your favorite Music
● Built in Stereo Speakers for playback convenience
● Includes a 3.5mm Aux input for additional connectivity options
FREMONT ( Wood Music Center )
520 - 1710KHz
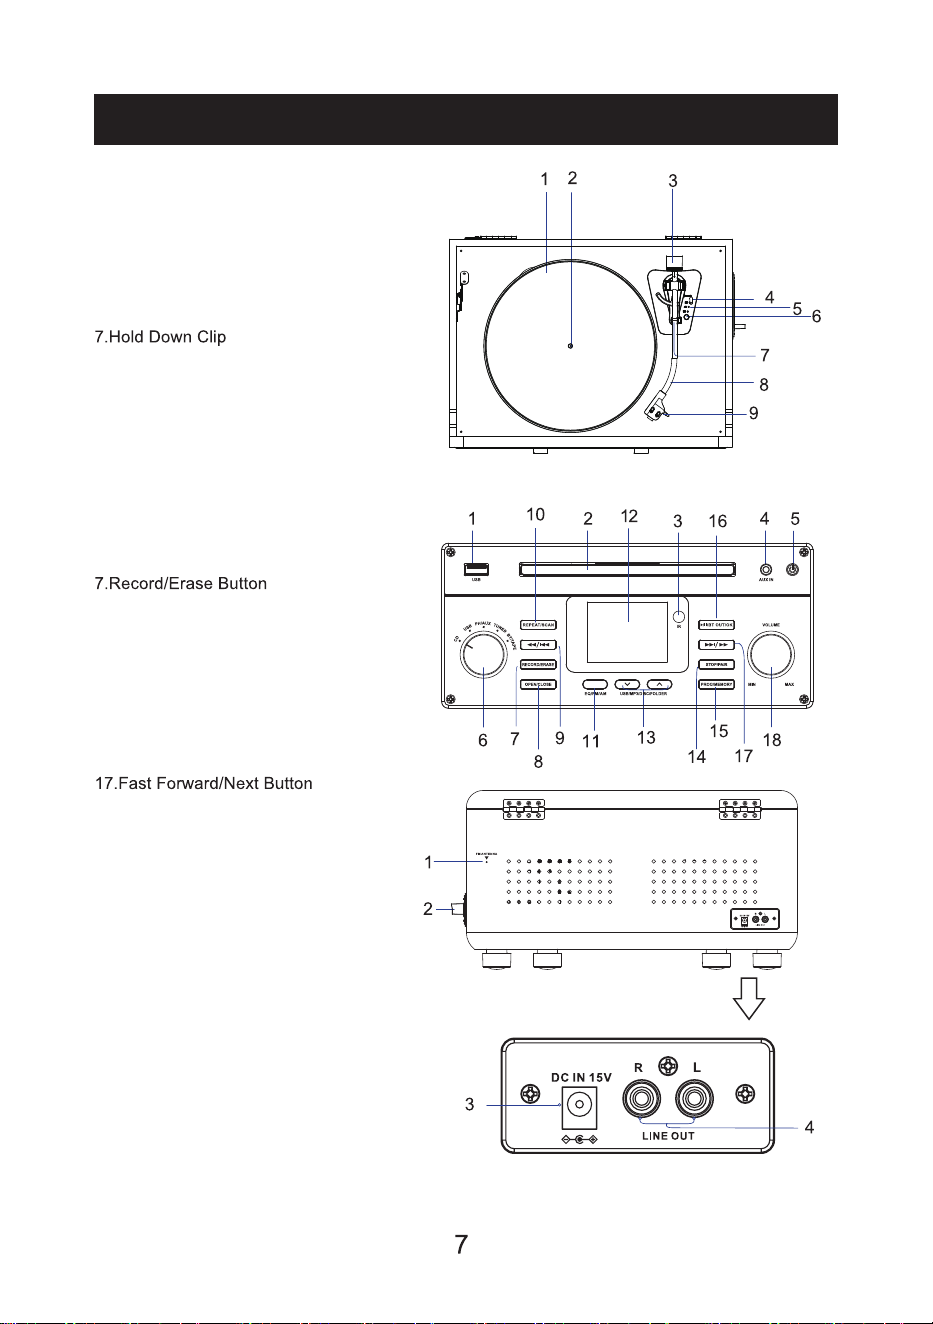
PRODUCT OVERVIEW
Turntable
1.Turntable Platter
2.Turntable Spindle
3.Counterweight
4.Cue Lever
5.Speed Indicator
6.Speed Selector
8.Tone Arm
9.Cartridge
Front Panel
1.USB Port
2.Disc tray
3.Remote sensor
4.AUX IN Jack
5.Power Button
6.Function Knob
8.Open/Close Button
9.Rewind/Previous Button
10.Repeat/Scan Button
11.EQ/FM/AM Button
12.Display
13.USB/MP3/DISC/FOLDER Buttons
14.Stop/Pair Button
15.Program/Memory Button
16.Play/Pause/Bluetooth OUT/OK Button
18.Volume Knob
Back Panel
1.FM Antenna
2.Cassette Eject/Fast Forward Button
3.DC IN Jack
4.Line Out Jack
8
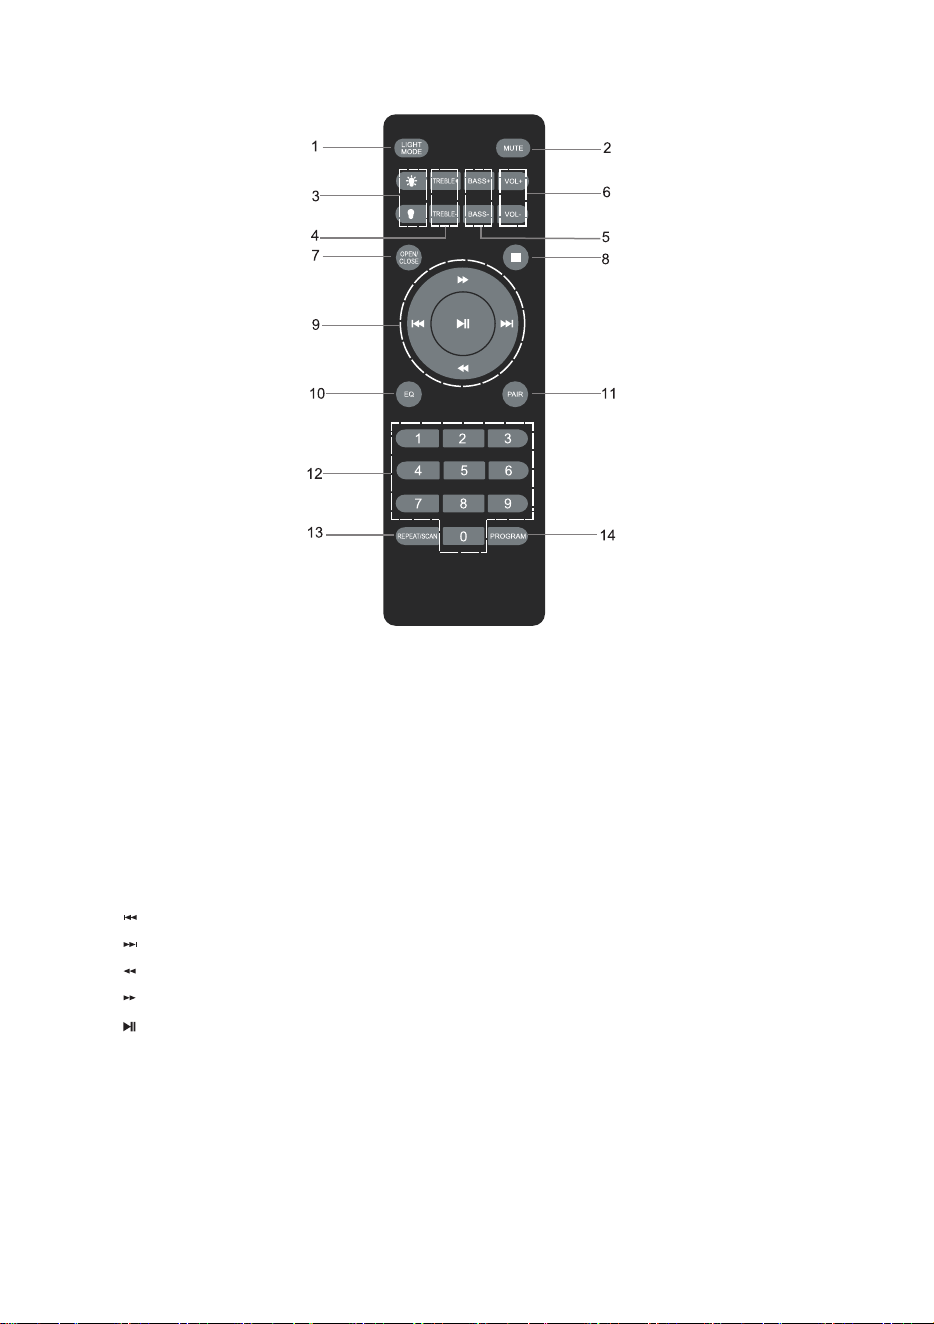
Remote Control
1. LIGHT MODE button: Press to change the color of the RGB light ring; press and hold to
turn off the RGB light ring.
2
.
MUTE button: Press to mute the unit, press again to resume the audio.
3
. LIG
HT buttons: Press to change the brightness of the RGB light ring.
4
. T
REBLE+/- buttons: Adjust the treble effect.
5
.
BASS+/- buttons: Adjust the bass effect.
6
. VOL+/
- buttons: Adjust the volume of the unit.
7. OPEN/CLOSE button: Open or close the Disc tray.
8
. STOP bu
tton: Stop the tracks.
9
. P
REVIOUS button: Skip to previous track.
NEXT button: Skip to next track.
REWIND button: Press and hold to rewind to the part you want to listen.
FAST FO
RWARD button: Press and hold to fast forward to the part you want to listen.
PL
AY/PAUSE button: Play or pause the track.
10.EQ button: Change the EQ effects(POP/JAZZ/NOR/ROCK/CLASS/GAME/MOVIE/NEWS).
11.PAIR button: Press to disconnect the Bluetooth device.
12.NUMERIC buttons:
13.REPEAT/SCAN button: Repeat the tracks; search and store stations in Radio mode.
14.PROGRAM button:
Note: The remote control does not always function in all modes.
To program playback sequences.
Choose the desired track.
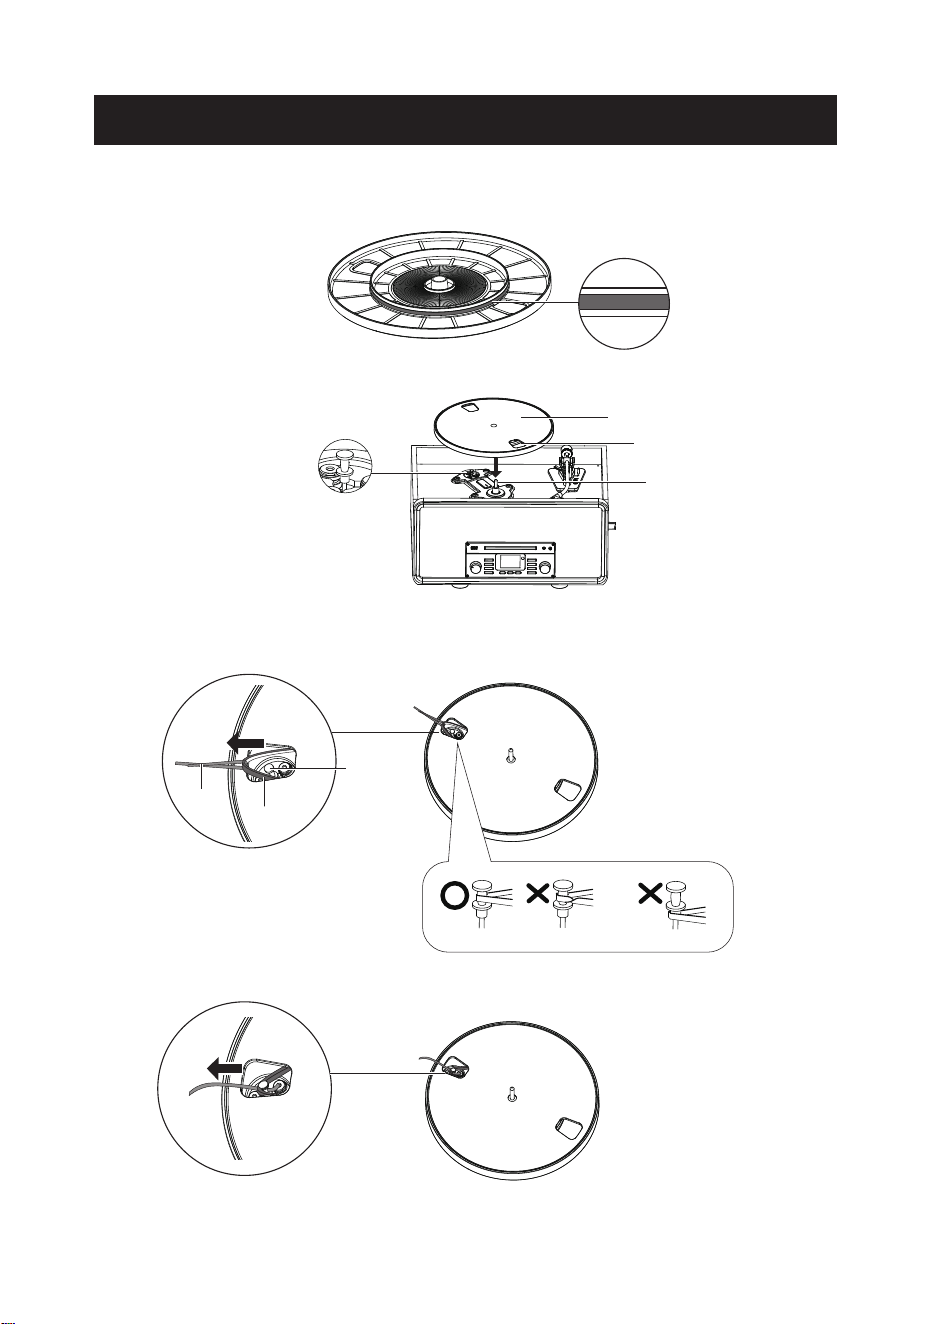
TURNTABLE PLATTER AND BELT SETUP
1. Turn the platter over and check the belt position.
Make sure that the drive belt is looped in the middle of the circle. The drive belt located too
high or too low in this circle may cause the drive belt to fall off or speed to be unstable.
2. Set the platter on the spindle.
Make sure the platter is fully seated on the spindle.
3. Place the belt on the motor pulley.
Align one of the platter openings with the motor pulley, and while pulling both ends of the red
ribbon that comes attached to the belt, place the belt on the motor pulley, as per the diagram.
When doing this, be careful not to twist the belt.
4. Remove the red ribbon from the belt.
Motor Pulley
Platter
Opening
Spindle
Straight Twisted Wrong location
Hook
Motor
Pulley
Belt
9
10
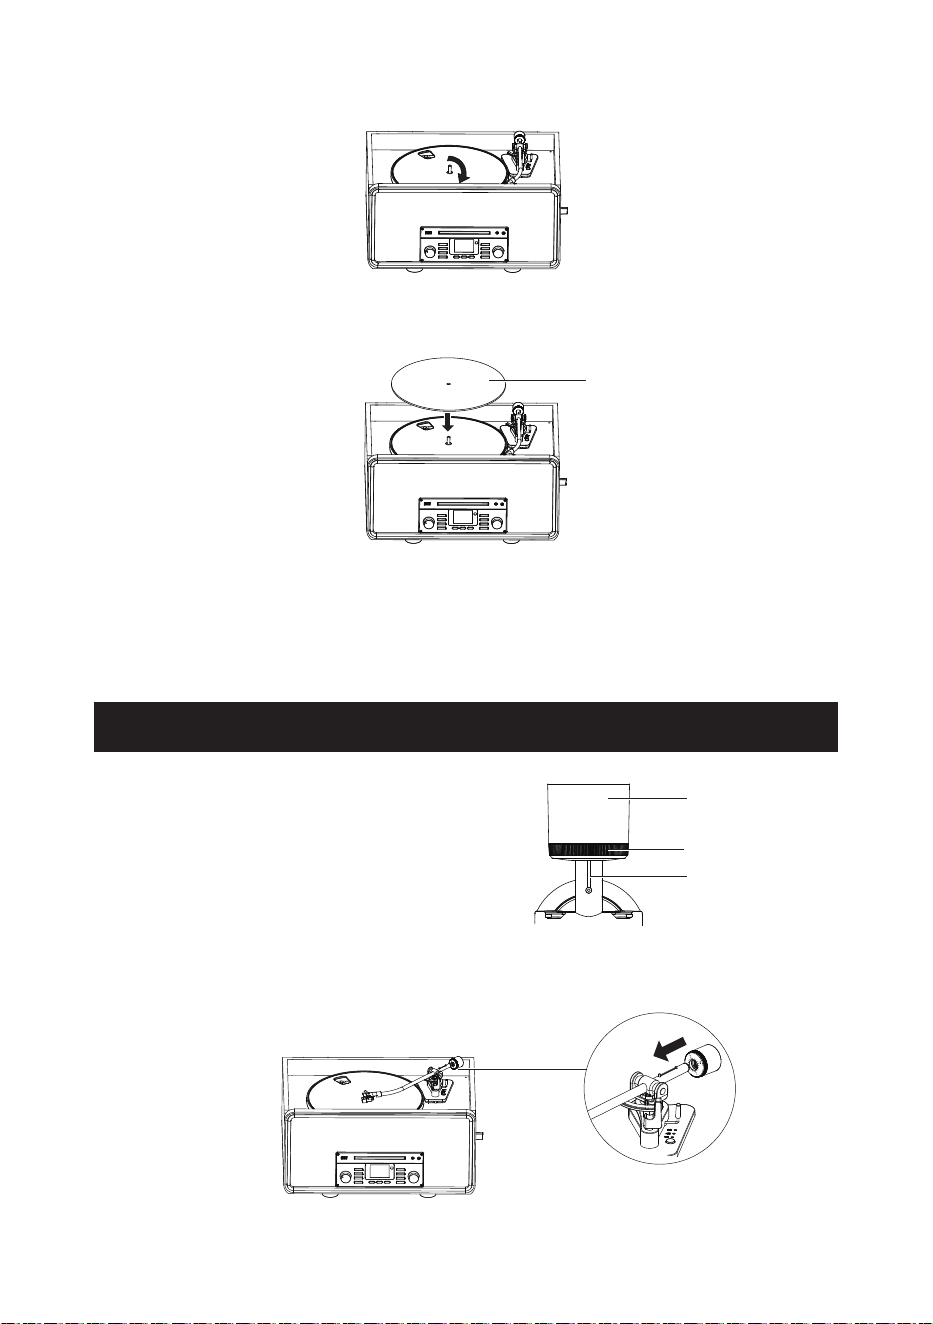
5. Using your hands, slowly rotate the platter ten circles in a clockwise direction.
This step is for resetting the auto mechanism, getting rid of any twists in the belt and making
sure the belt rides smoothly along the drive rim on the underside oft he platter.
6. Place the slip mat on top of the platter. Make sure the logo on the mat is facing up.
Note:
● The belt is a consumable part. Replace the belt if the speed of playback slows down or
irregular rotation occurs. As a rule of thumb, we suggest replacing the belt once a year.
● Before replacing the belt, be sure to disconnect the unit’s AC adapter from the outlet.
The supplied Counterweight is suitable for cartridges
weighing between 2.0 - 4.5g.
1. Unlock the Hold Down Clip, raise the Cue Lever and gently move the tone arm to the space
above the platter.
2. Gently push and turn the counterweight onto the rear of the tone arm (with the dial facing
toward the front of the turntable).
CARTRIDGE TRACKING FORCE ADJUSTMENT
Counterweight
Tracking Force Dial
Center Line
Slip mat
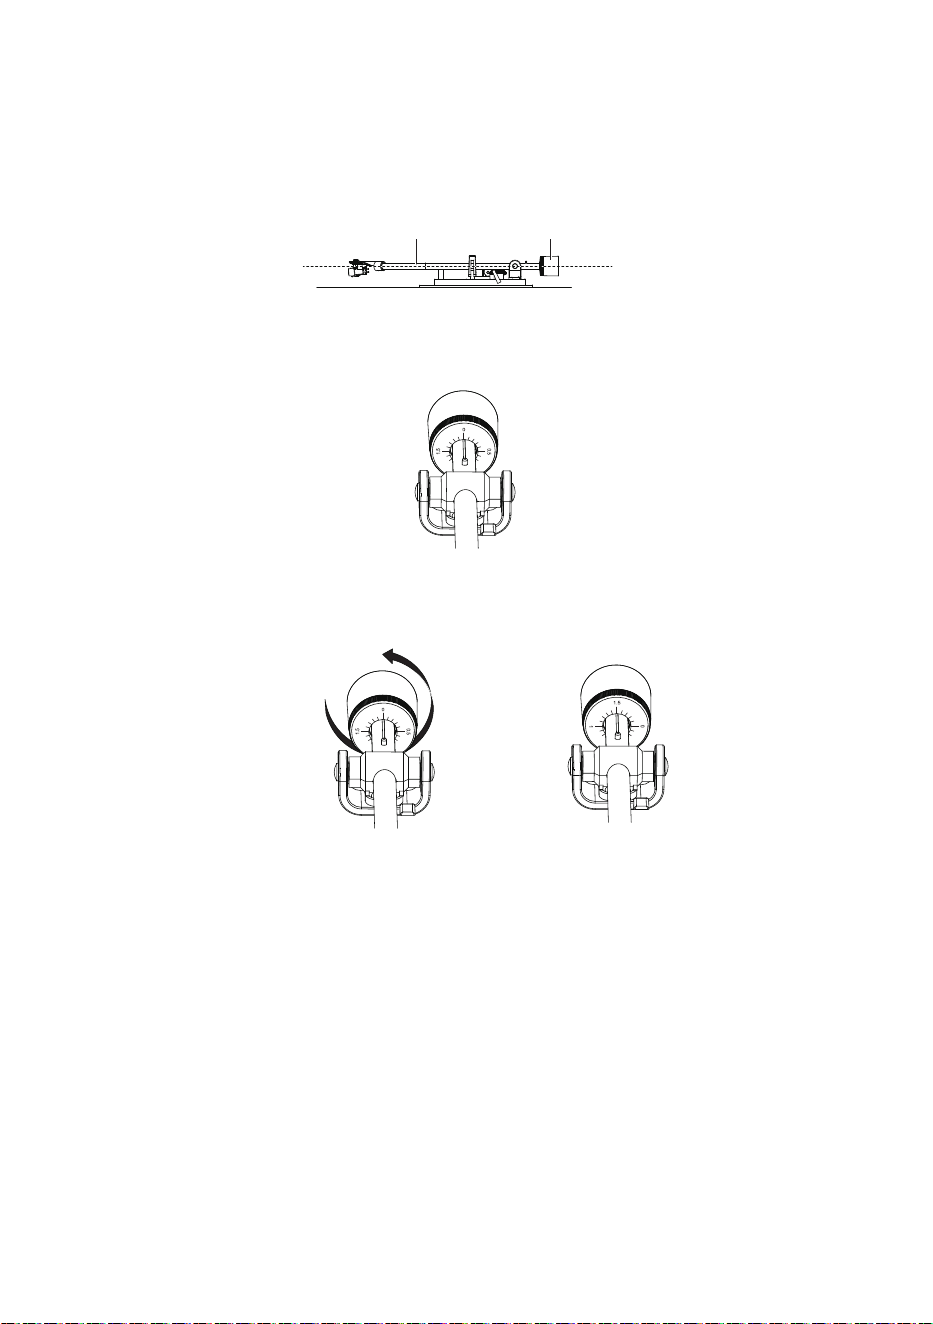
3. Slowly move the tone arm to the position above the tone arm support. Pull out the stylus
protector.
4. Carefully rotate the Counterweight until the tone arm achieves a neutral balance.
The tone arm should return to this balanced position if it is moved up or down. This
adjustment must be done carefully.
5. Once the tone arm is correctly balanced, return the tone arm to the support. Without moving
the position of the counterweight, gently rotate the tracking force dial until the zero is in line
with the center line as the follow diagram. Check to make sure the tone arm is still neutrally
balanced.
6. Rotate the counterweight counterclockwise to adjust the tracking force according to the
cartridge manufacturer's recommendations.
Note: Each mark on the scale represents 0.1g. The recommended tracking force for the
factory-installed cartridge is 3.5 ± 0.5g. Carefully rotate the tracking force dial 1.75 circles.
When “1.5” is centered over the center line please stop.
Balanced
Counterweight
Tone arm
11
Essential Setup
1. Unpack the unit and remove all packaging materials.
2. Place the unit on a flat and level surface. The selected location should be stable and free from
vibration.
3. Plug the power adaptor into the electrical outlet and connect other end to the back of the unit.
4. Press the Button on the upper right corner of the front panel. The display and RGB light ring
will light up, and the playback mode will appear on the display.
5. When the unit is playing music, the playback message will appear on the display.
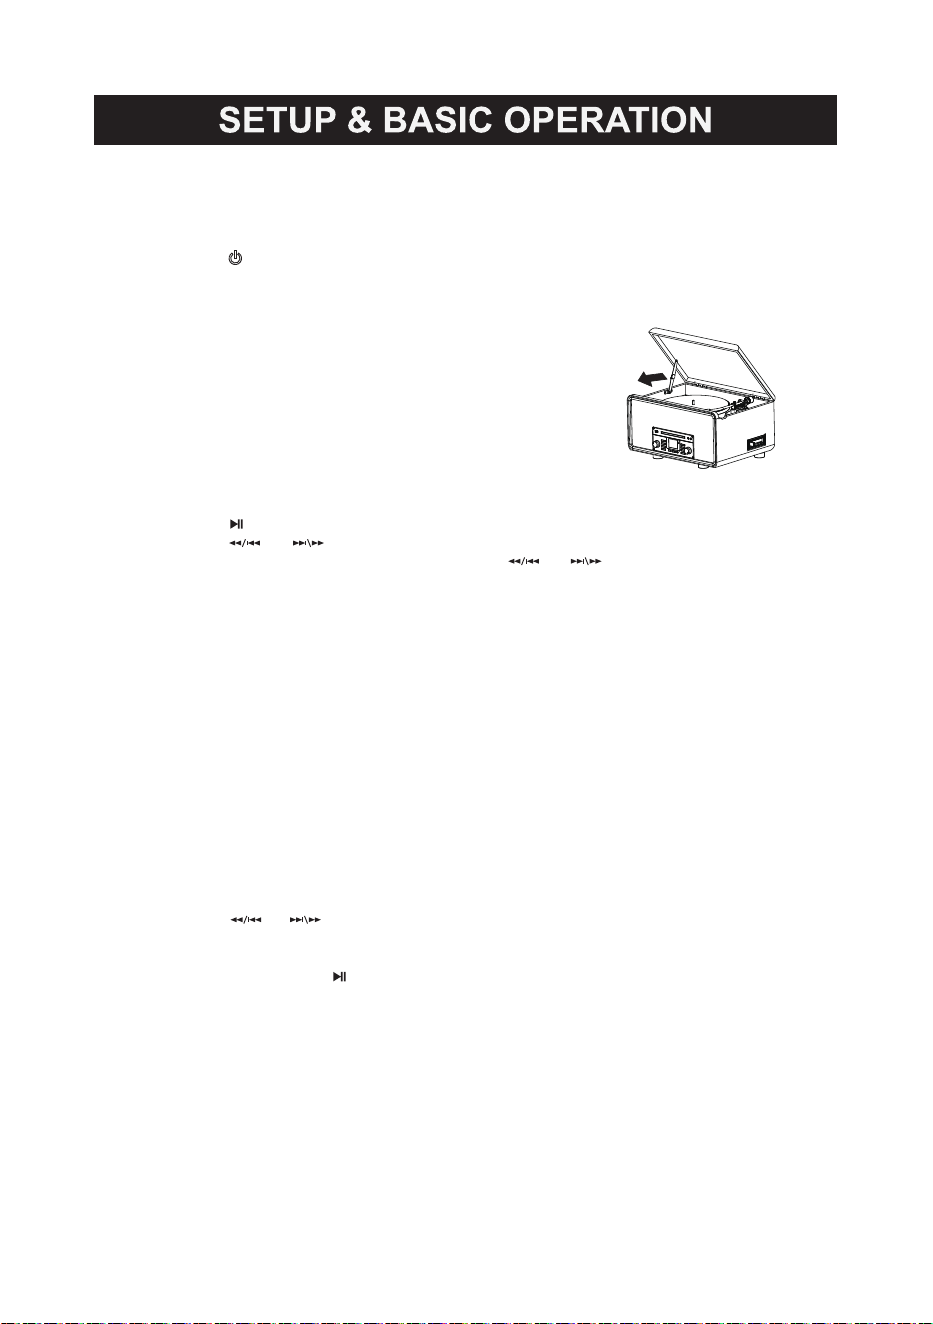
Open and Close Turntable Cover:
1. Lift the turntable cover all the way up until it stops.
2. To close lid, pull the center of the hinge toward the front
of the unit to release the lock.
3. Make sure you hold the cover to avoid pinching your
fingers as it closes.
Common Playback Control
● Press the /BT OUT/OK button to pause / play the playback.
● Press the or button to skip to previous or next track.
● To search for a part of track: press and hold the or button and release it when the
part you want is found.
● Search for a folder, press the USB/MP3/DISC/FOLDER Buttons to choose the folder.
● Press the STOP/PAlR button to stop playing.
● Press the EQ/FM/AM button on unit to change the EQ effects.
Note: These controls do NOT always function in specified playback mode.
Repeat Function
Press REPEAT/SCAN button: ● one time, to repeat the current track.
● two times, to repeat the current folder.
● three times, to repeat all tracks of the disc.
● four times,to cancel the repeat function.
Note: This feature functions in CD and USB mode.
Program Function
This function enables you to set the playback of tracks into an ordered playlist.
1. Press the STOP/PAlR button; then press the PROG/MEMORY button to activate the
program feature. The display will show “PROG”, “P01” and blinking “000".
2. Press the or button to select your track.
3. Press the PROG/MEMORY button again to confirm.
4. Repeat the step 2 and 3 to program other tracks.
5. After finished, press the /BT OUT/OK button to start playback.
6. Press the STOP/PAlR button once to stop.
7. Press the STOP/PAlR button twice to erase the programmed track, and “PROG" will
disappear from the display.
Note:
● This feature functions in CD and USB mode.
● This unit can program up to 20 tracks in CD mode and up to 99 tracks in USB mode.
● Turning the power off or switching to other playback modes by turning the Function Knob will
automatically erase the programmed playlist.
12
13
1. Set the Function Knob to TUNER position.
2. Press and hold the EQ/AM/FM button to receive AM or FM signals. Note to extend the FM
antennae when you want to listen to FM stations.
3. To search for available stations, you can:
a. Press and hold the or button on unit.
b. Press the or button on remote control.
c. Press REPEAT/SCAN button on unit or remote control to search and store the available
stations automatically, and it can store 20 stations.
4. Adjust the volume by switching the VOLUME +/- Knob.
5. You can store your favorite station to the unit and listen to it conveniently by following steps:
a. When you are listening to a radio channel, press PROG/MEMORY button on unit or
PROGRAM button on remote control, “P01” will appear and blink on the display.
b. Press USB/MP3/DISC/FOLDER buttons to select a number as the serial number of
the current channel.
c. Press PROG/MEMORY button again to confirm.
d. Repeat the b-c steps to store other your favorite radio channels.
e. To listen to the stored radio channels, just press USB/MP3/DISC/FOLDER buttons on unit
or and button on remote control to select the serial number of your favorite radio
channel, then the selected channel starts to play.
You can improve the signal receiving strength by:
●Extending the FM Antenna to a higher position.
●Turn the unit to face different directions.
●Move the unit to a different place.
●Connect the FM Antenna to your outdoor antenna.
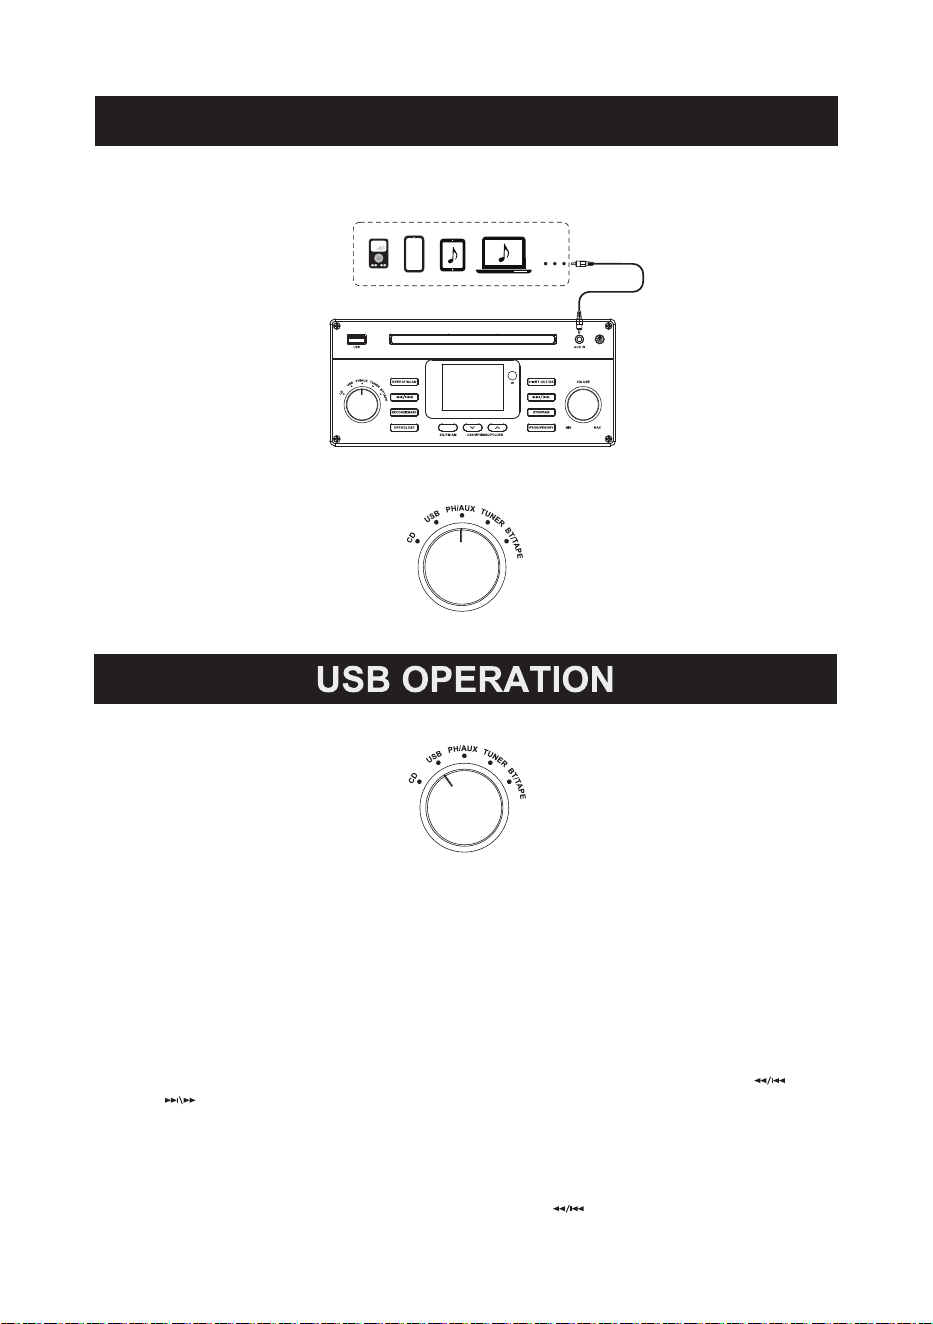
AUX IN OPERATION
1. Insert one end of the 3.5mm AUX in cable into the AUX IN Jack on the upper right of
the front control panel, the other end to your playing device.
2. Set the Function Knob to PH/AUX position.
3. Start to play your favourite music on your playing device.
1. Set the Function Knob to USB position.
2. Insert a USB device (only with .mp3 audio files) to the USB Port.
3. The unit will start playback automatically.
4. Use the volume and control buttons to control playback.
Note: Control buttons may not work with all USB devices due to manufacturing differences.
Recording with USB
With this function you can record music from your player onto a USB device in .mp3 format.
1. Insert a USB device into the USB port.
2. Play music in the CD, Phono, AUX, BT or Tape mode.
3. The operations are different in specific modes:
a. When playback in CD mode, press the RECORD/ERASE button and then press or
button to select recording one track, a fold of tracks or all tracks. Finally press the
RECORD/ERASE button to confirm and “REC” will appear on the display. Recording starts.
b. When playback in other modes, press the RECORD/ERASE button and “REC” will appear
on the display which indicating recording starts.
4. Press the STOP/PAlR button on unit to stop recording, and “REC-END” will appear on display.
Now the recording process ends.
Note: If you want to listen to the latest record track, just press button when play in USB mode.
14
15
Erasing Files on the USB Device
1. Insert a USB device into the USB port and play the song you want to delete.
2. Press and hold the RECORD/ERASE button for about two seconds, “DEL ONE” will appear
on the display.
3. Press the or button to select:
a. DEL ONE - erase the current track
b. DEL FOLD - erase all the audio tracks in the entire folder
c. DEL ALL - erase all the audio tracks of the USB device
4. Press the RECORD/ERASE button again to confirm. “DEL WAIT” will appear, and erasing
process starts.
5. When all tracks and folders erased, “NO SONG" will be shown on display.
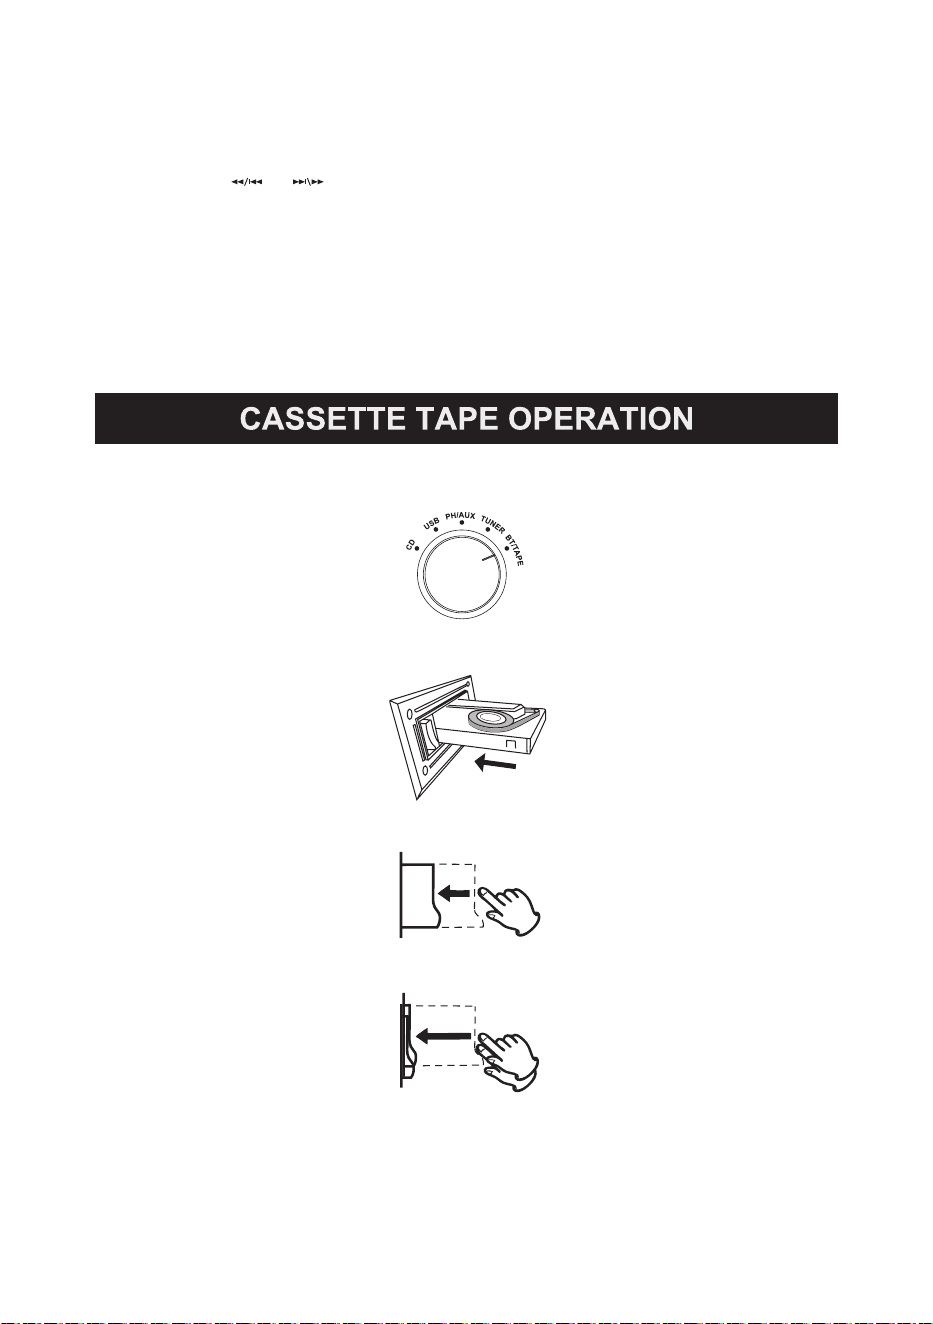
1. Set the Function Knob to BT/TAPE position.
2. Insert a recorded cassette with its exposed side facing outwards. Push inwards until a
CLICK sound is heard. Playback will start automatically.
3. During playback, you can lightly press and hold the Eject/Fast Forward button to accelerate
the playing speed and release your finger when the part you want to listen to is found.
4. To stop playback and eject the tape, push the Eject/Fast Forward button all the way in until
the tape is ejected.
16
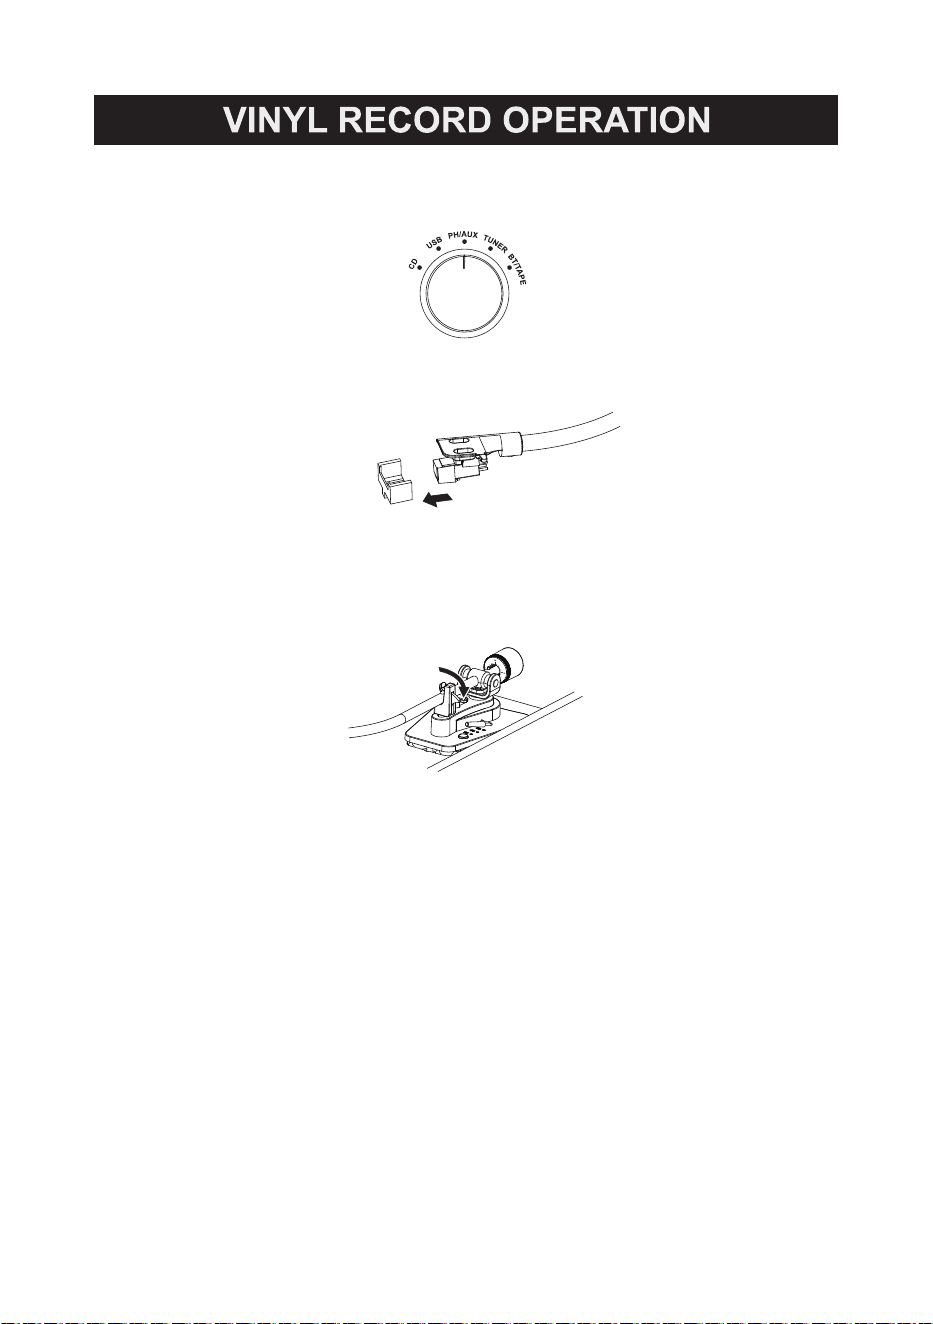
1. Press the Power Button to turn on the unit and open the cover.
2. Set the Function Knob to PH/AUX position.
3. Detach the stylus protector by pulling straight in the direction shown.
4. Place a vinyl record on the Turntable by aligning the Turntable Spindle to the record hole.
5. Press the Speed Selector to select 33, 45 or 78 to match the play speed of the record.
6. Unlock the Hold Down Clip.
7. Raise the Cue Lever to lift the tone arm off the tone arm support.
8. Gently move the tone arm to the edge of the record (or the starting point of a track).
9. Release the Cue Lever to put the tone arm onto the record. Turntable will begin playback.
10. Turn the VOLUME +/- Knob to adjust the volume. To pause/stop during playback, raise
the Cue Lever to lift the tone arm off the record.
11. When finished listening:
a. Raise the Cue Lever to lift the tone arm off the record.
b. Move the tone arm to its support.
c. Lower the Cue Lever to release the tone arm.
d. Lock the Hold Down Clip.
Note:
● Make sure there is no AUX IN cable inserted in the unit, or it will be in AUX IN mode.
● Put the 45 RPM Adapter across the Turntable Spindle firstly if playing a 45 RPM record.
● After you play 78 RPM vinyl record, it will stop in about 120 seconds.
17
With the Bluetooth
®
in function, you can play music from an external Bluetooth
®
device on
the speakers of this unit.
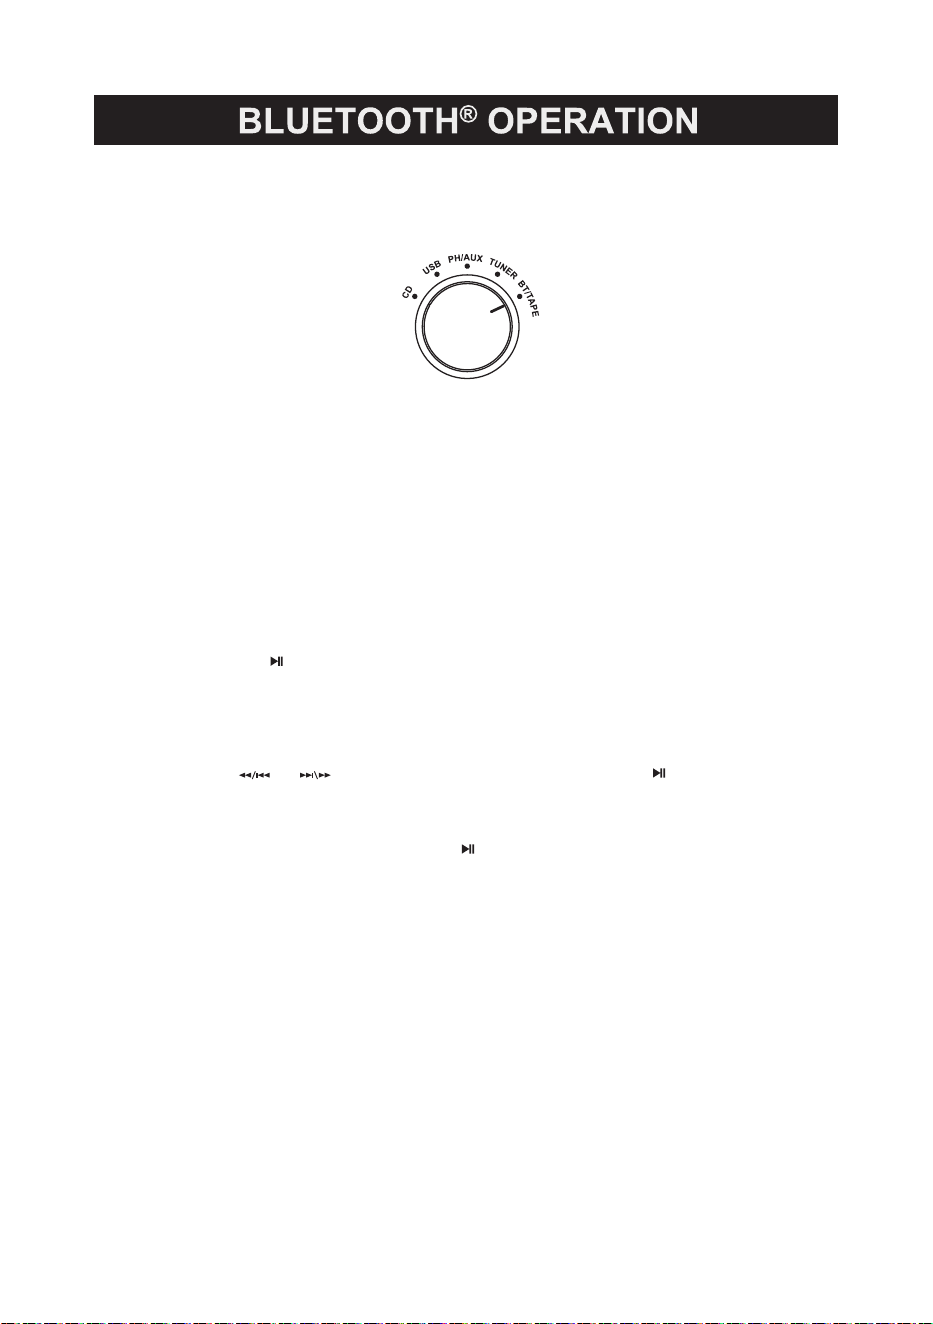
1. Set the Function Knob to BT/TAPE position. “Disconnect” will blink on display.
2. Turn on your external Bluetooth
®
device and pair with the “VICTOR VWRP-6000” device.
3. When the Bluetooth
®
connection is established, you will hear a short confirmation sound
from the unit, and “Connected” will appear on display.
4. Start to play your favorite music on the connected device.
5. To disconnect the current Bluetooth
®
device, press and hold STOP/PAlR button on unit or
press PAIR button on remote control.
Note: Make sure the cassette tape is not inserted in the unit, or it will be TAPE mode.
Bluetooth
®
Transmitter
You can play music from this unit on external Bluetooth
®
speakers, soundbar, earbuds, or
headphones.
1. Set the unit to CD/ Phono/ AUX/ USB/ Tuner/ Tape mode.
2. Press and hold /BT OUT/OK button to activate Bluetooth
®
Transmitter function.
“BT” will blink on display.
3. Power on your Bluetooth
®
device and activate its Bluetooth
®
pairing mode.
4. Press and hold REPEAT/SCAN button on the unit or remote control to search for the
external device.
5. After a few seconds, the panel will appear the Bluetooth
®
names of external devices,
then press or button to select the desired one and press /BT OUT/OK
button to confirm.
6. After a few seconds, the external device will connect to this unit successfully.
“BT” will stop blinking.
7. To turn off BT OUT mode, press and hold /BT OUT/OK button.
18
19
20
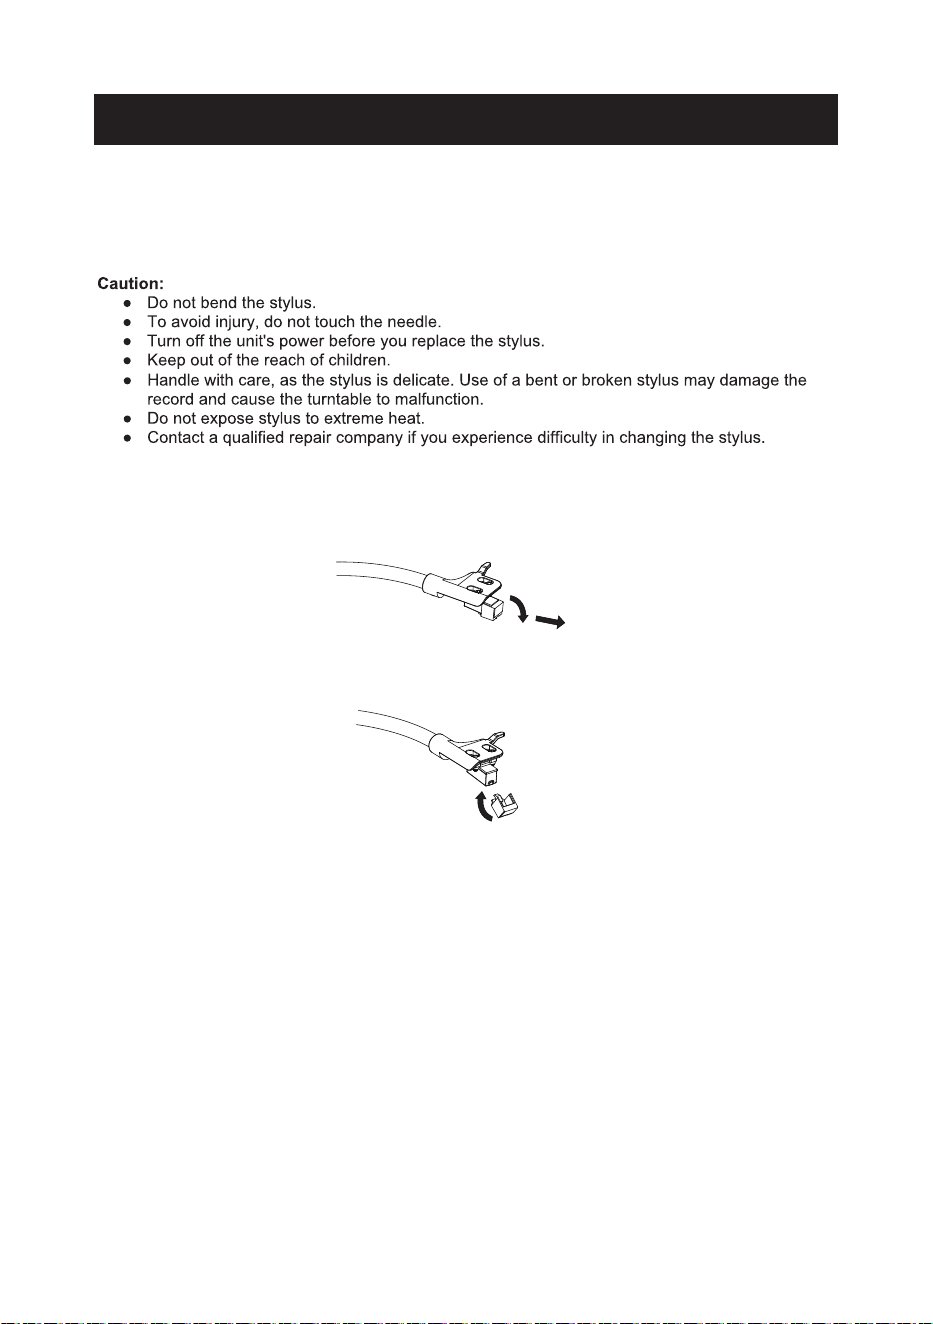
Remove and install the stylus
1. Pull down the front of the stylus and then pull out in straight direction.
2. Engage the stylus in the cartridge as the follow diagram. Lift the stylus up until you hear a
click.
Note: Make sure there is no gap between the stylus and the cartridge.
HOW TO REPLACE THE STYLUS
The stylus should last about 200 hours under normal use. However, it is recommended that the stylus
be replaced as soon as you notice a change in sound quality. Prolonged use of a worn-out stylus
may damage the record. Wear and tear on the stylus will be accelerated when playing 78 RPM
records. The higher speed of 78 RPM records can wear the stylus more quickly .
21
22
* This product has been manufactured and sold under the responsibility of NAXA ELECTRONICS INC.
VICTOR and the DOG & GRAMOPHONE logo are trademarks used under license by NAXA ELECTRONICS INC.
Further information at www.victor-brand.com.
All other products, services, companies, trademarks, trade or product names and logos referenced herein are the property of
their respective owners
Made in China