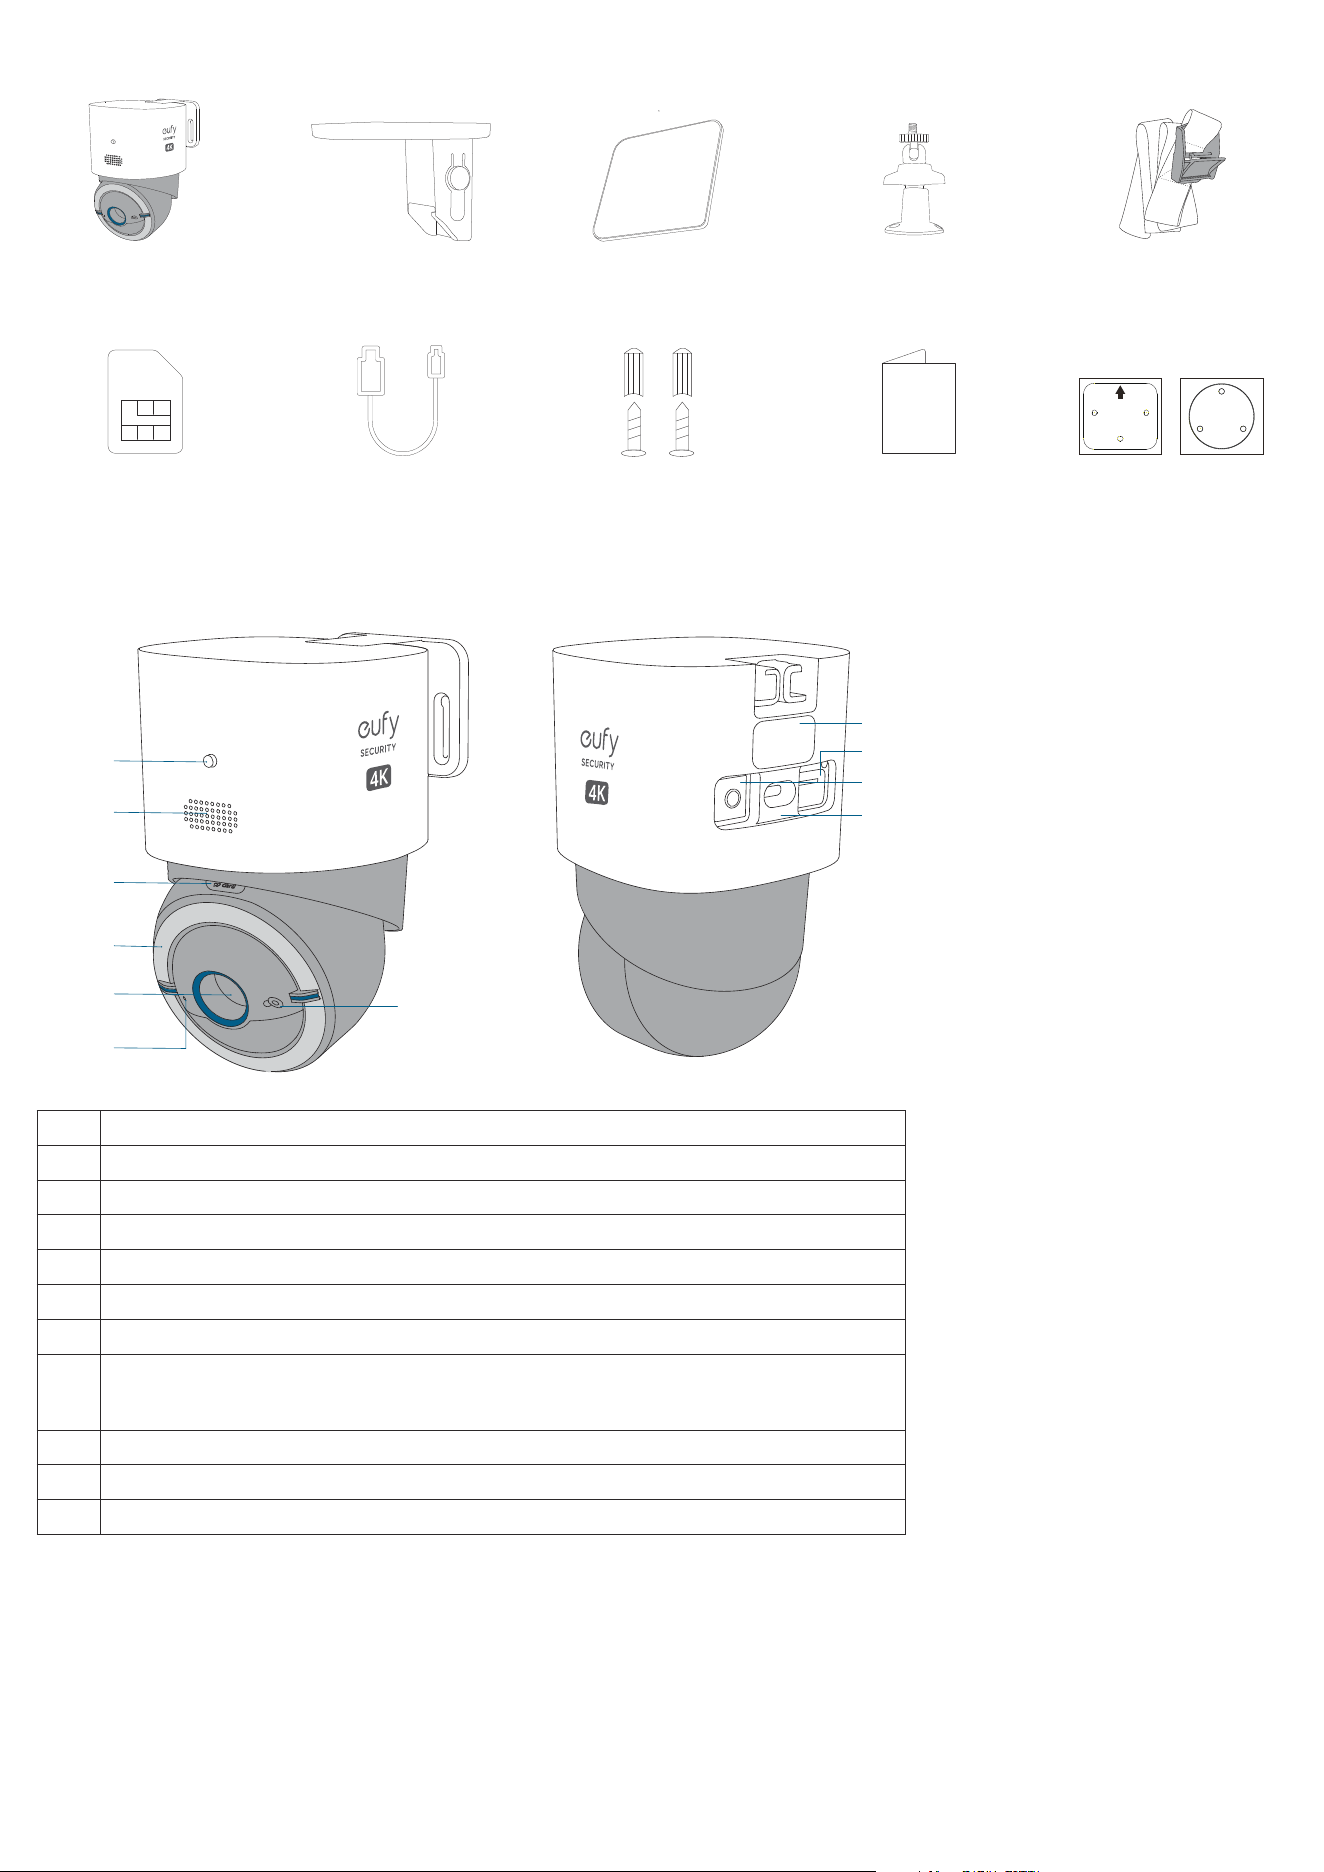
What's in the Box
4G LTE Camera S330 Pole Mounting Strap
Nano SIM Card
Camera Mounting
Bracket
USB-C Charging Cable
Solar Panel
Screw Set
Solar Panel Bracket
Quick Start Guide
THIS SIDE UP
Positioning Stickers x2
At a Glance
①
⑤
④
⑥
③
②
⑦
⑧
⑪
⑨
⑩
❶
LED Indicator
❷
Speaker
❸
microSD Card Slot
❹
Light
❺
Lens
❻
Microphone
❼
Light Sensor
❽
Antenna Port
(Optional) You can install an antenna (not provided) to boost the signal strength as necessary.
❾
SIM Card Slot
❿
SYNC Button
⓫
USB-C Charging Port
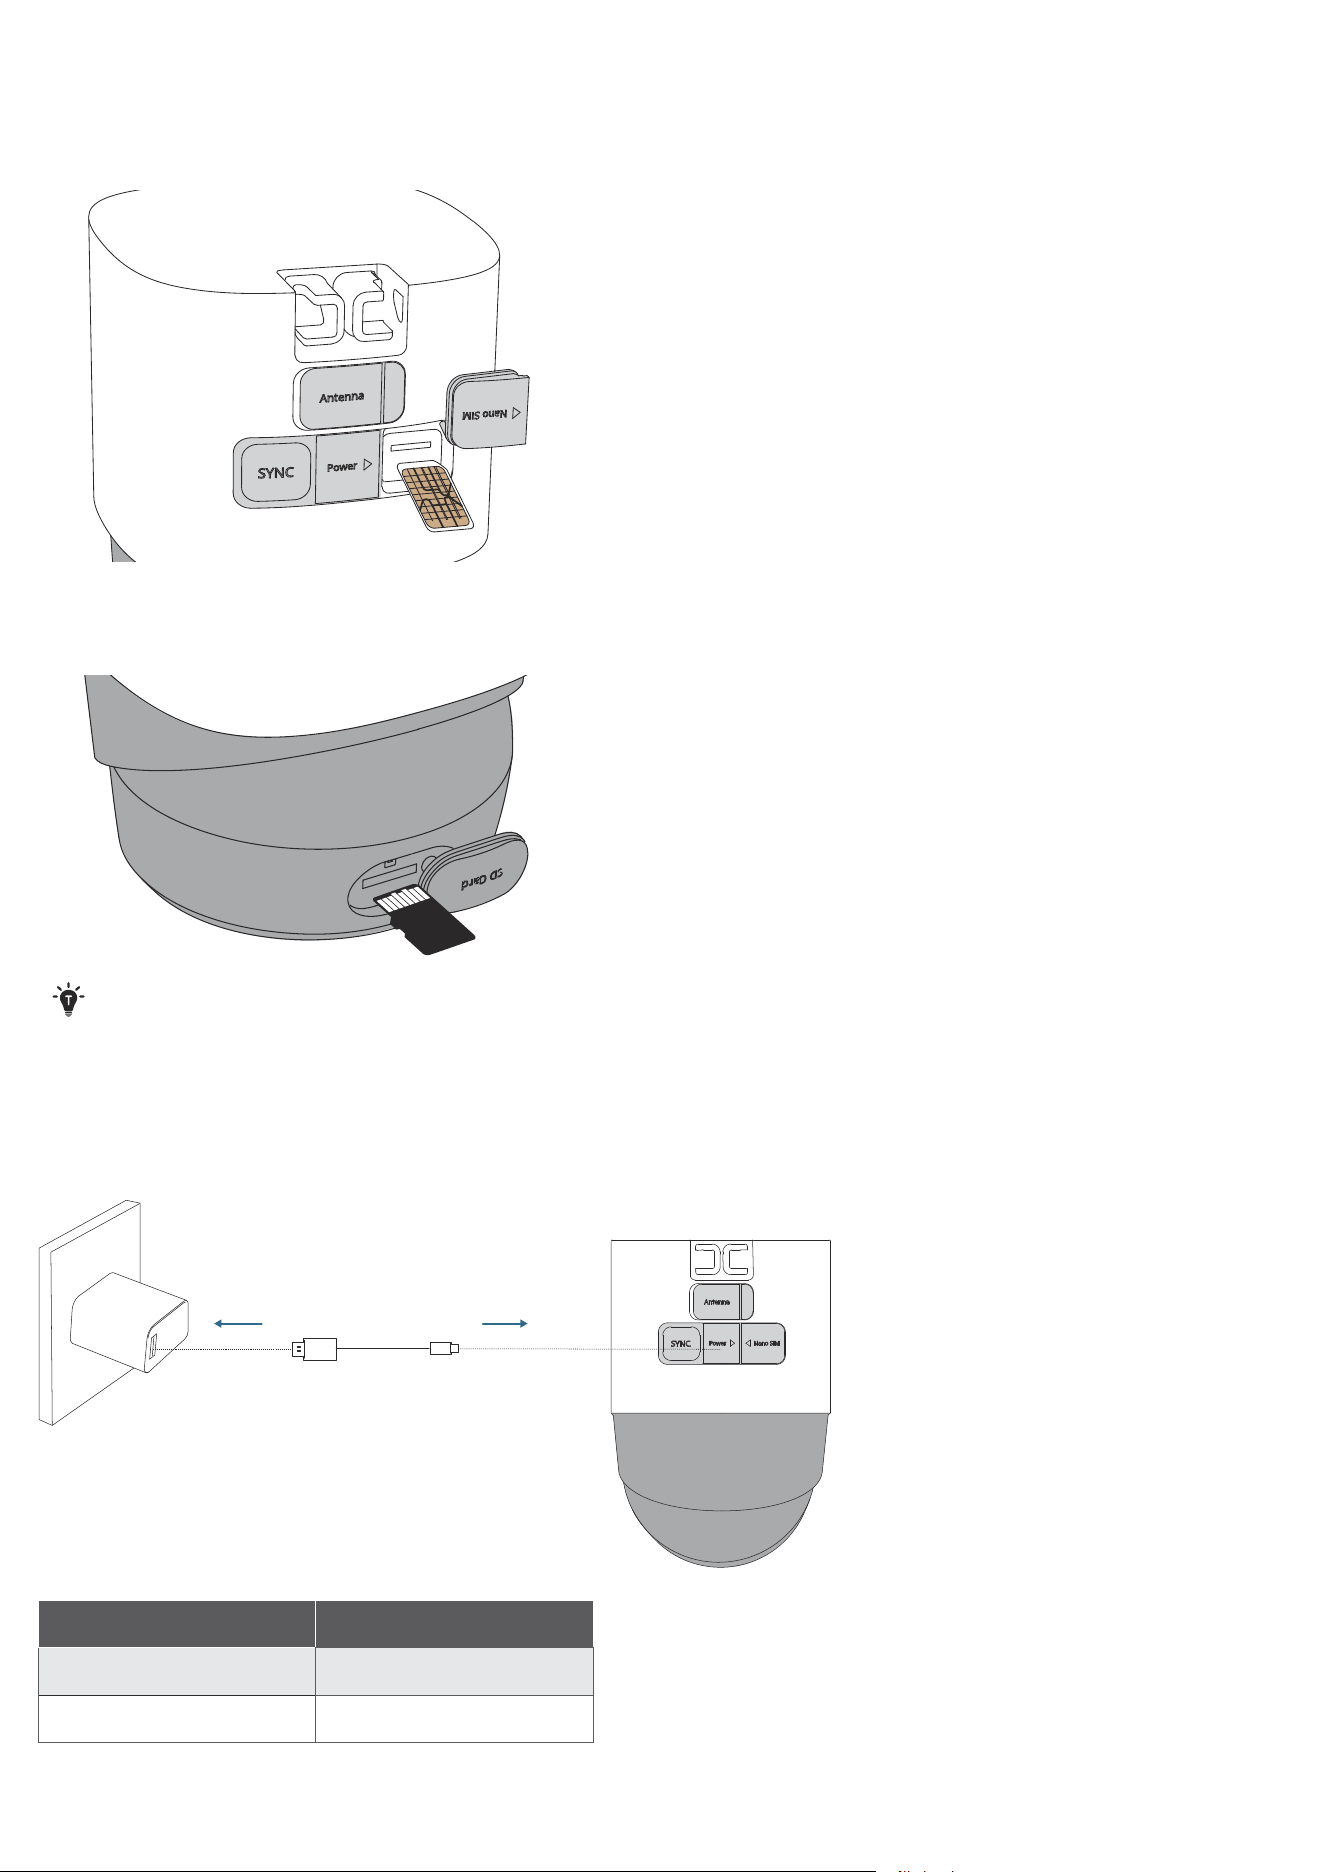
Inserting SIM Card and microSD Card
1. Open the waterproof cover of the nano SIM slot on the back of the camera, then insert the provided nano SIM card.
• Make sure the gold contacts side of the nano SIM card is facing up.
2. Rotate the camera and open the waterproof cover of the SD card slot, then insert a microSD card (not provided).
• Make sure the chip side of the microSD card is facing up.
Close tightly the waterproof cover after inserting the card.
Charging the Camera
Fully charge the camera prior to its initial use. Charging takes 3 to 5 hours to complete.
5V/2.5A
LED Indicator Status Charging Status
Solid Blue Charging
Light Off Fully charged
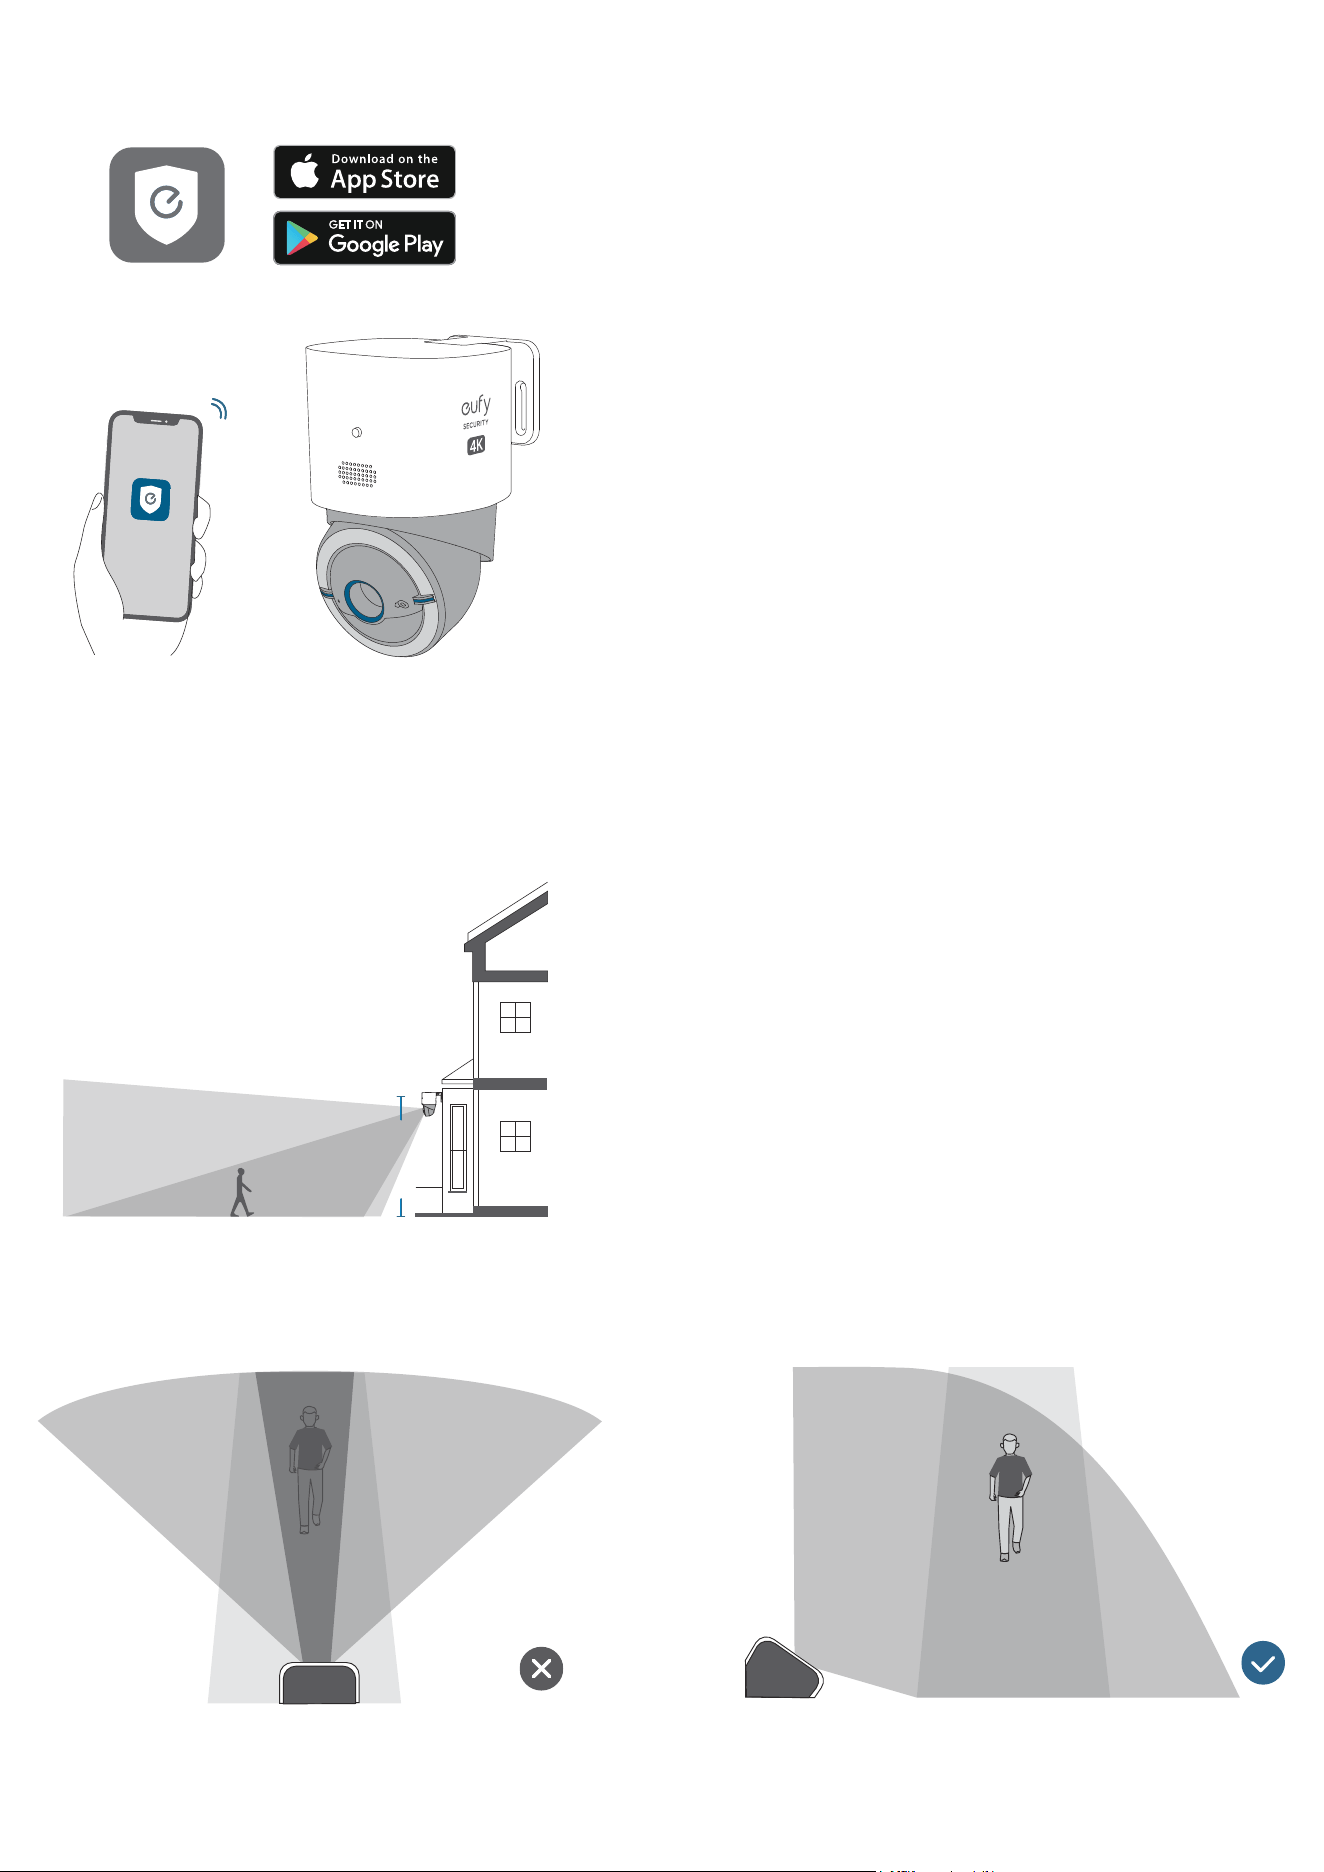
Setting up the Camera
1. Download and install the eufy Security app, then sign in or create an account.
2. Follow the in-app instructions to add the camera to the device list.
Mounting your Camera
Select a Location and a Height
Select a location where you can get the desired view. We recommend hanging the camera 8-10 ft (2.5-3 m) above the ground.
8-10 ft
(2.5 - 3 m)
Up to 30 ft (9m)
To ensure that no detection is missed, do not install the camera directly facing the monitoring area. Instead, maintain an
angle to avoid any potential blind spots.
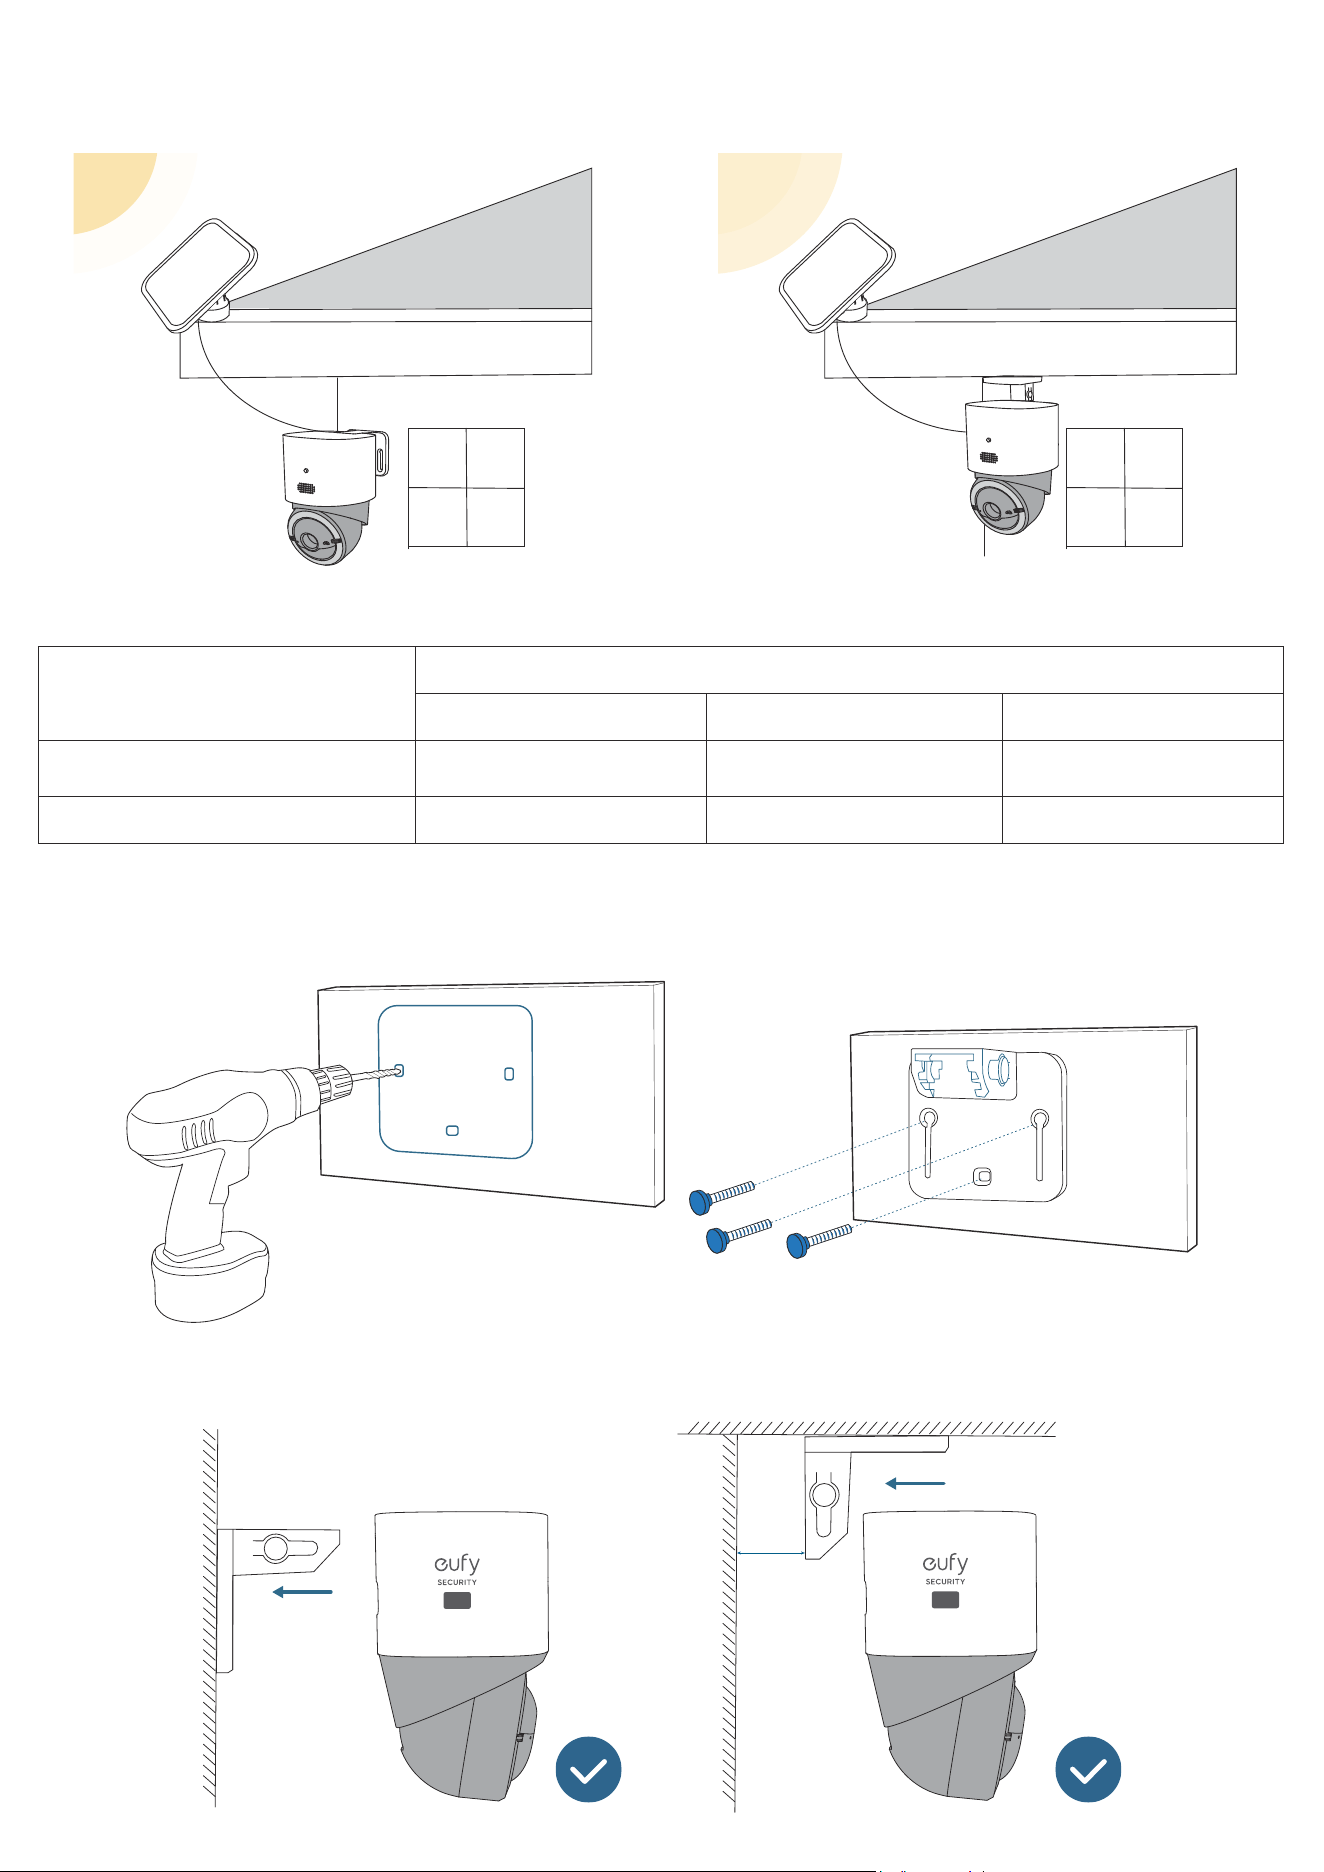
Select a Location for the Solar Panel
Select an optimal location for the solar panel that receives sufficient sunlight and is within a 10 ft (3 m) radius of the camera.
Make sure the location has facilities or structures suitable for mounting the solar panel.
To absorb the most solar energy, choose the highly recommended orientation for installation based on your location.
Your Location
Orientation
Highly Recommended Recommended Not Recommended
Northern Hemisphere (US, UK, EU) True South Southwest or Southeast North
Southern Hemisphere (Australia) True North Northwest or Northeast South
Mount the Camera
1. Drill holes with a 15/64 inch (5.95 mm) drill bit with the provided positioning card, then insert the anchors into the holes.
PUSH
2. Firmly secure the camera onto the mounting bracket.
PUSH
PUSH
4K
4K
20 cm
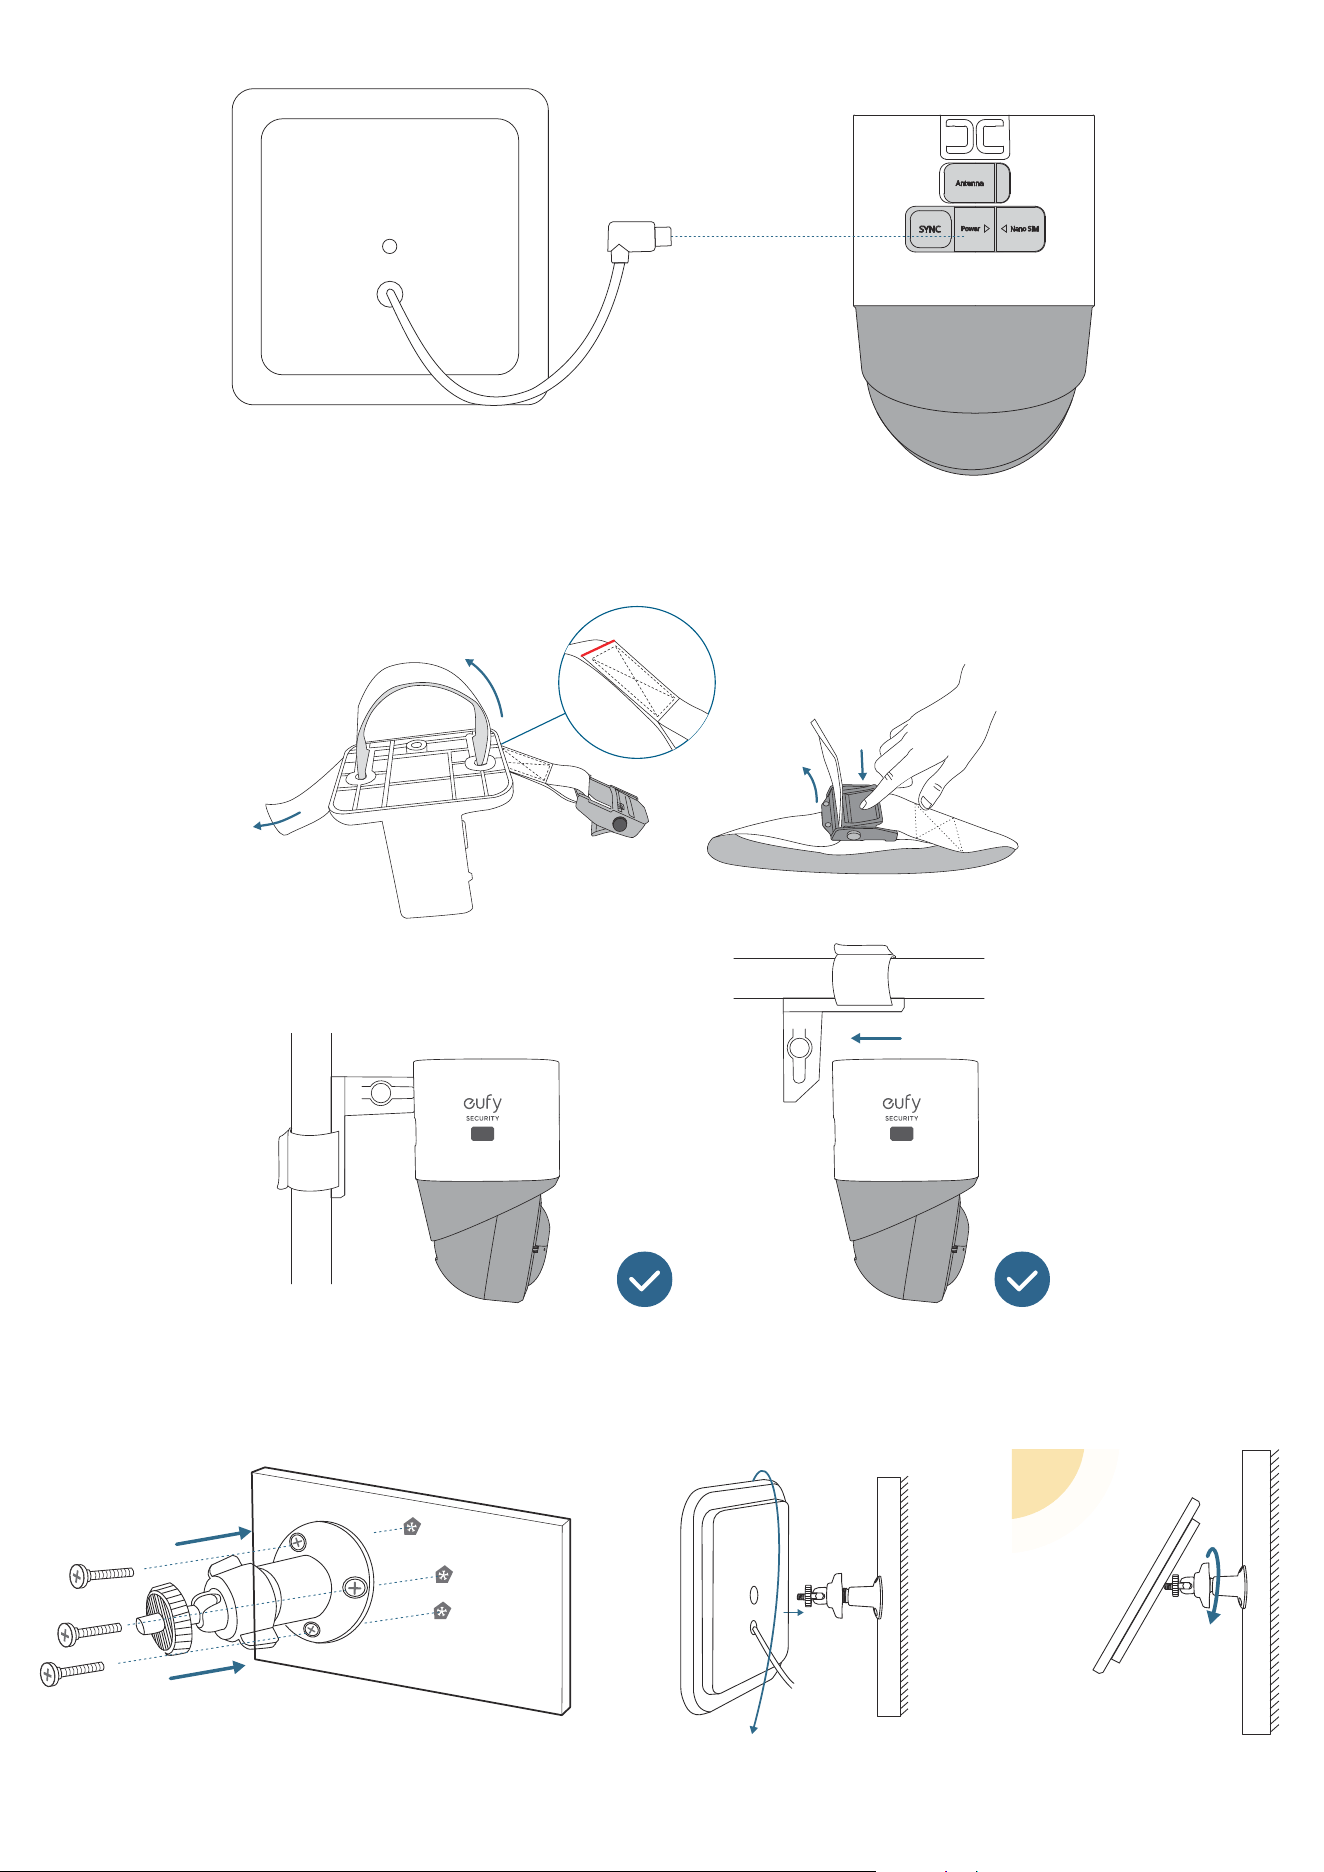
3. Connect the solar panel to the camera using the USB-C cable.
5V/0.9A
Bundling the Camera on a Post
You can also bundle the camera on a post using the pole mounting strap.
PUSH
PUSH
4K
4K
Install the Solar Panel
1. Secure the mounting bracket in the selected optimal location, then install the solar panel onto the mounting bracket by
turning it.
2. Remove the film before use.