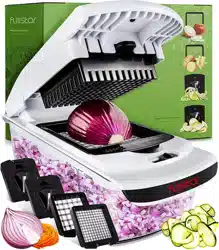
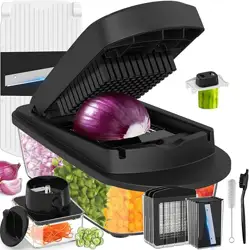
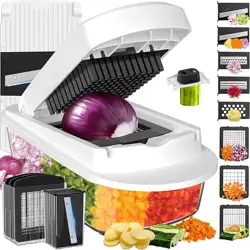
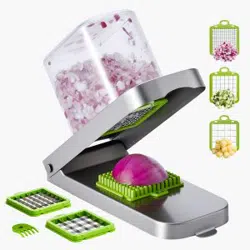
4-IN-1 ONION CHOPPER USER MANUAL
Full Instruction Video Here: 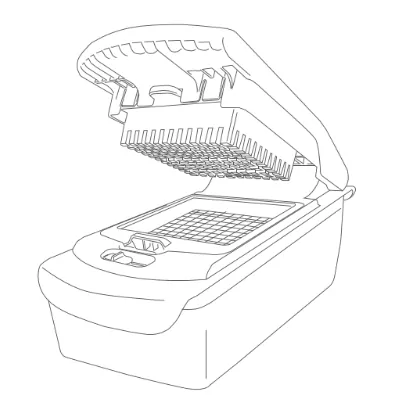
Parts Overview
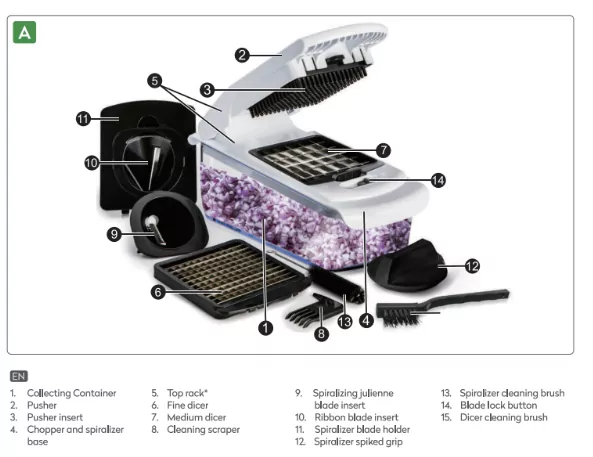
- 1. Collecting Container
- 2. Pusher
- 3. Pusher insert
- 4. Chopper and spiralizer base
- 5. Top rack
- 6. Fine dicer
- 7. Medium dicer
- 8. Cleaning scraper
- 9. Spiralizing julienne blade insert
- 10. Ribbon blade insert
- 11. Spiralizer blade holder
- 12. Spiralizer spiked grip
- 13. Spiralizer cleaning brush
- 14. Blade lock button
- 15. Dicer cleaning brush
USING THE CHOPPER/DICER
WARNING! RISK OF INJURY!
Use extreme care when handling the cutting blades. The blades are very sharp. Keep fingers clear of the blades at all times. Before using the chopper, cut large fruit or vegetable into smaller pieces (must be smaller than the cutting blade & the height of the food is not greater than 4cm before cutting).
POSSIBLE USES OF THE INSERTS
MEDIUM CHOPPING BLADE
Magic cube gourmet (0.53x0.53 in / 1.35x1.35 cm)

- Potatoes, e.g. raw for chips or cooked for potato salad.
- Carrots, zucchini, cucumbers, peppers, courgettes, leeks, celery for salads, vegetable dishes or as ingredients for soups.
- Boiled eggs, cooked ham, sausage or Mozzarella for salads.
- Cheese, such as sheep's cheese or Mozzarella for Mediterranean dishes.
Warning: Do not use this for hard fruits and vegetables like raw beetroot and sweet potatoes. Blade not suitable for full tomato, but half a tomato is fine.
FINE CHOPPING BLADE
Magic cube gourmet (0.53x0.53 in / 1.35x1.35 cm)

- Onions, shallots for sauces.
- Garlic, chills for dips.
- Zucchini, mushrooms, soft cheese, peppers and more.
Warning: Do not use this for hard fruits and vegetables like raw beetroot and sweet potatoes. Blade not suitable for tomatoes.
TWO CHOPPING BLADES INCLUDED
- Place the top rack (5) onto the collecting container (1)
- Flip the pusher (2) open.
- Select a cutting blade (6) or (7) and insert it into the lower slot (see Fig. B).
- Lock the cutting blade (see Fig.C)
- To replace the cutting blade, unlock the cutting blade then remove the installed cutting blade before placing the desired one onto the chopper base (4).
- Close the pusher. The chopper is now assembled and ready for use. It is recommended to always close the pusher when the chopper is not in use.
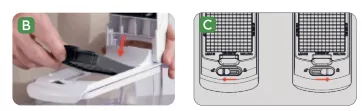
Ensure correct installation with the text "THIS SIDE UP" facing upward on the cutting blade.
HOW TO CHOP/DICE
- Flip the pusher (2) open.
- Place the fruit or vegetable you want to cut onto the cutting blade (6) or (7) with the flat or larger side facing down.
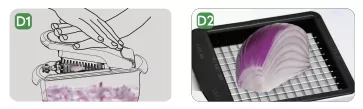
- Close the pusher and press it downward onto the fruit or vegetable (see Fig. D1).
ATTENTION!
- Make sure that vegetable to be chopped stays entirely within the blade area, otherwise it might be difficult to chop it (see Fig. D2).
- Cut an onion or large vegetable into a quarter or much smaller pieces when using the fine chopping blade.
- Press the pusher down swiftly and firmly with both hands like a hammer. Fruits or vegetables to be cut are pressed downward through the cutting blade.
- Remove the top rack (5) to empty the cut fruit or vegetable from the collecting container (1).
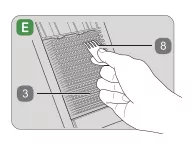
- If necessary, flip the pusher open and use the cleaning scraper to remove any food residuals on the pusher insert before using the food chopper again (see Fig. E).
ATTENTION!
- In case you are unable to cut the food at the first attempt. Lift the cover and press the cover down swiftly and firmly again.
- Some hard vegetables may cause damage to the blades. e.g. sweet potatoes. This does not constitute grounds for a warranty claim.
- Clean all blades under running water immediately after use in order to prolong the life of blade and keep them sharp for longer time.
USING THE SPIRALIZER
- Flip the pusher (2) open.
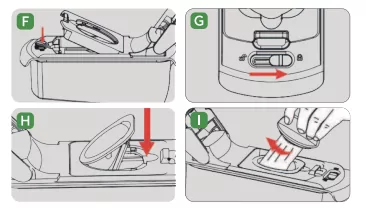
- Insert Spiralizer blade holder (1) into chopper base (4). See Fig.F.
- Switch to lock. See Fig.G
- Select desired Spiralizer blade (9) or 10 insert into Spiralizer blade holder (1) See Fig.H.
- Wash, and if necessary peel the food you are about to cut.
- Remove stems and trim ends.
- Place food into the insert. ATTENTION: Skewer short pieces of food or end pieces on the Spiralizer spiked grip. (12)
- Twist the food with slight pressure to slice it. See Fig.I.
- Clean all blades under running water immediately after use in order to prolong the life of blade and keep them sharp for longer time.
CLEANING
Extremely sharp blades! Keep fingers clear of the blade at all times when cleaning the dicing blades.
- Clean all used parts under running water with a mild detergent or in the top- rack of a dishwasher. Thoroughly dry all parts after washing.
- If necessary, use the cleaning scraper to remove any food residuals on the pusher insert (3) (see Fig. E).
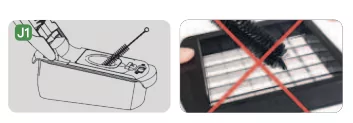
- Use spiralizer cleaning brush to remove any stuck food. (see Fig. J1).
ATTENTION!
- Do not use Spiralizer cleaning brush(13) to clean chopping blades, otherwise the brush bristles will be torn off easily.
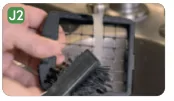
- Clean the chopping blades with provided Dicer cleaning brush(15) and always keep fingers clear of blades at all times (see Fig. J2).
CLEANING THE TOP RACK
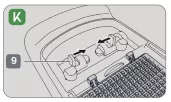
The pusher(3) and chopper base(4) can be separated for cleaning. To do so, push the pusher locks on the underside of the chopper base towards each other to release the pusher from the chopper base (see Fig. K).
To install the pusher(3), push the two buttons inward to draw back the pivots and slide the Pusher(3) in from underneath. Release two buttons to lock-in the pusher(3).
DISPOSAL
The packaging material is recyclable. Please dispose of it in an environmentally friendly manner and take it to a recycling centre. Dispose of the product in an environmentally friendly manner. You can obtain more information from your local authorities.