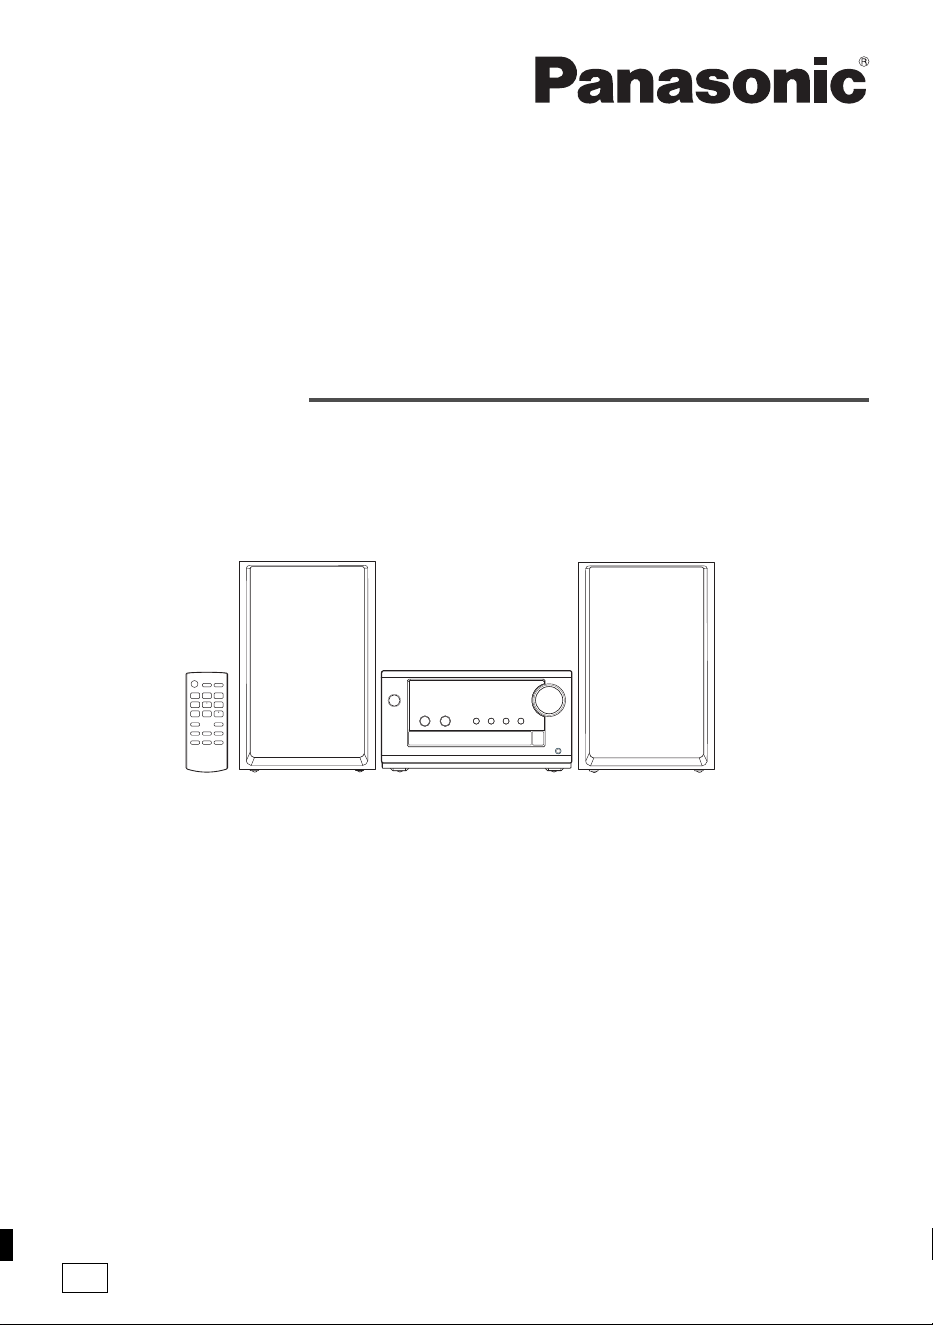
Owner’s Manual
Manual del propietario
CD Stereo System
Sistema estéreo con reproductor
de discos compactos
Model No. SC-PM700
TQBM0873
Thank you for purchasing this product.
For optimum performance and safety, please read these instructions carefully.
Please keep this manual for future reference.
PP
If you have any questions, visit:
U.S.A.: https://shop.panasonic.com/support
Canada: www.panasonic.ca/english/support
Register online at https://shop.panasonic.com/support (U.S. customers only)
Muchísimas gracias por haber adquirido este aparato.
Para un desempeño y seguridad óptimos, por favor lea estas instrucciones cuidadosamente.
Guarde este manual para su consulta en el futuro.
PM700PP_TQBM0873_en.fm Page 1 Friday, March 17, 2023 4:34 PM
2
TQBM0873
Your system and the illustrations can look differently.
These operating instructions are applicable to the
following system:
User memo:
The symbols on this product (including the accessories)
represent the following:
Table of contents
IMPORTANT SAFETY INSTRUCTIONS . . . . . . . . . . . . 2
Safety precautions . . . . . . . . . . . . . . . . . . . . . . . . . . . . . 3
Maintenance . . . . . . . . . . . . . . . . . . . . . . . . . . . . . . . . . . 4
References . . . . . . . . . . . . . . . . . . . . . . . . . . . . . . . . . . . 4
Supplied accessories . . . . . . . . . . . . . . . . . . . . . . . . . . . 5
Placement of speakers . . . . . . . . . . . . . . . . . . . . . . . . . . 5
Making the connections . . . . . . . . . . . . . . . . . . . . . . . . . 5
Overview of controls . . . . . . . . . . . . . . . . . . . . . . . . . . . . 6
Preparing the remote control . . . . . . . . . . . . . . . . . . . . . 6
Preparing the media . . . . . . . . . . . . . . . . . . . . . . . . . . . . 7
Media playback. . . . . . . . . . . . . . . . . . . . . . . . . . . . . . . . 8
FM Radio . . . . . . . . . . . . . . . . . . . . . . . . . . . . . . . . . . . . 9
Sound effects . . . . . . . . . . . . . . . . . . . . . . . . . . . . . . . . 10
Clock and timers . . . . . . . . . . . . . . . . . . . . . . . . . . . . . . 11
Others . . . . . . . . . . . . . . . . . . . . . . . . . . . . . . . . . . . . . . 12
Troubleshooting . . . . . . . . . . . . . . . . . . . . . . . . . . . . . . 12
Specifications . . . . . . . . . . . . . . . . . . . . . . . . . . . . . . . . 15
Limited Warranty (ONLY FOR U.S.A.) . . . . . . . . . . . . . 16
Limited Warranty (ONLY FOR CANADA) . . . . . . . . . . . 17
IMPORTANT SAFETY
INSTRUCTIONS
Read these operating instructions carefully before using
the unit. Follow the safety instructions on the unit and the
applicable safety instructions listed below. Keep these
operating instructions handy for future reference.
1. Read these instructions.
2. Keep these instructions.
3. Heed all warnings.
4. Follow all instructions.
5. Do not use this apparatus near water.
6. Clean only with dry cloth.
7. Do not block any ventilation openings. Install in
accordance with the manufacturer’s instructions.
8. Do not install near any heat sources such as radiators,
heat registers, stoves, or other apparatus (including
amplifiers) that produce heat.
9. Do not defeat the safety purpose of the polarized or
grounding-type plug. A polarized plug has two blades
with one wider than the other. A grounding-type plug
has two blades and a third grounding prong. The wide
blade or the third prong are provided for your safety. If
the provided plug does not fit into your outlet, consult
an electrician for replacement of the obsolete outlet.
10. Protect the power cord from being walked on or
pinched particularly at plugs, convenience
receptacles, and the point where they exit from the
apparatus.
11. Only use attachments/accessories specified by the
manufacturer.
12. Use only with the cart, stand, tripod,
bracket, or table specified by the
manufacturer, or sold with the
apparatus. When a cart is used, use
caution when moving the
cart/apparatus combination to avoid
injury from tip-over.
13. Unplug this apparatus during lightning storms or when
unused for long periods of time.
14. Refer all servicing to qualified service personnel.
Servicing is required when the apparatus has been
damaged in any way, such as power-supply cord or
plug is damaged, liquid has been spilled or objects
have fallen into the apparatus, the apparatus has
been exposed to rain or moisture, does not operate
normally, or has been dropped.
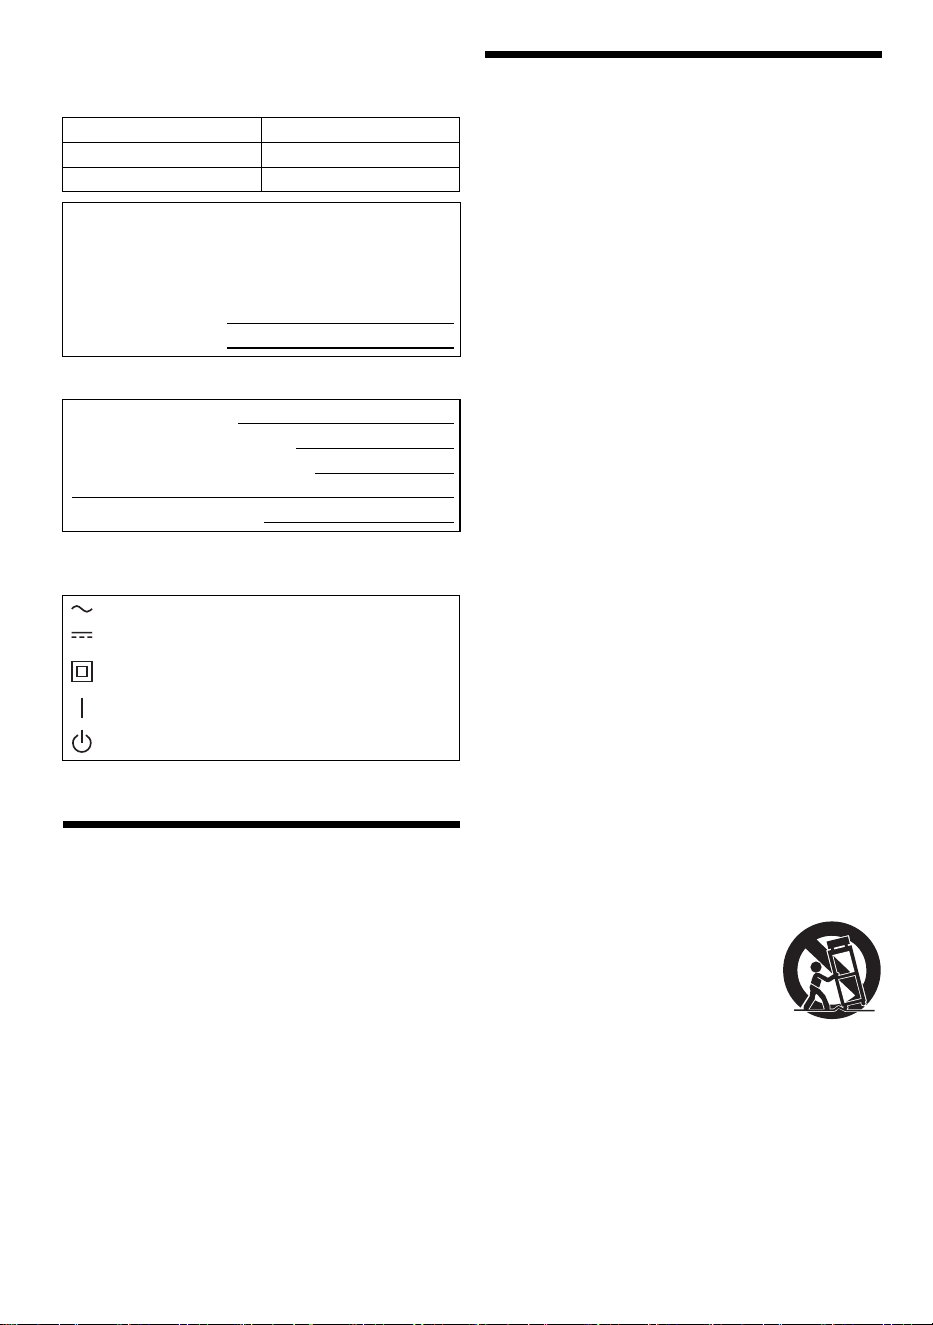
System SC-PM700
Main unit SA-PM700
Speakers SB-PM700
The model number and serial number of this product
can be found on either the back or the bottom of the unit.
Please note them in the space provided below and keep
for future reference.
MODEL NUMBER SC-PM700
SERIAL NUMBER
DATE OF PURCHASE
DEALER NAME
DEALER ADDRESS
TELEPHONE NUMBER
AC
DC
Class II equipment (The construction of the
product is double-insulated.)
ON
Standby
PM700PP_TQBM0873_en.fm Page 2 Friday, March 17, 2023 4:34 PM
3
TQBM0873
Safety precautions
WARNING
Unit
• To reduce the risk of fire, electric shock or product
damage,
– Do not expose this unit to rain, moisture, dripping or
splashing.
– Do not place objects filled with liquids, such as vases,
on this unit.
– Use the recommended accessories.
– Do not remove covers.
– Do not repair this unit by yourself. Refer servicing to
qualified service personnel.
– Do not let metal objects fall inside this unit.
CAUTION
Unit
• To reduce the risk of fire, electric shock or product
damage,
– Do not install or place this unit in a bookcase, built-in
cabinet or in another confined space. Ensure this unit
is well ventilated.
– Do not obstruct this unit’s ventilation openings with
newspapers, tablecloths, curtains, and similar items.
– Do not place sources of naked flames, such as
lighted candles, on this unit.
• Set the unit up on an even surface away from direct
sunlight, high temperatures, high humidity, and
excessive vibration.
• This unit utilizes a laser. Use of controls or adjustments
or performance of procedures other than those
specified herein may result in hazardous radiation
exposure.
AC power supply cord
• The power plug is the disconnecting device. Install this
unit so that the power plug can be unplugged from the
socket outlet immediately.
Battery
• Danger of explosion if battery is incorrectly replaced.
Replace only with the type recommended by the
manufacturer.
• When disposing of the batteries, please contact your
local authorities or dealer and ask for the correct
method of disposal.
• Do not heat or expose to flame.
• Do not leave the battery(ies) in a car exposed to direct
sunlight for a long period of time with doors and
windows closed.
• Do not break open or short-circuit the battery.
• Do not charge the alkaline or manganese battery.
• Do not use the battery if the cover has peeled off.
• Remove the battery if you do not use the remote control
for a long period of time. Keep in a cool, dark area.
• Avoid the use in the following conditions
– High or low extreme temperatures during use,
storage or transportation.
– Replacement of a battery with an incorrect type.
– Disposal of a battery into fire or a hot oven, or
mechanically crushing or cutting of a battery, that can
result in an explosion.
– Extremely high temperature and/or extremely low air
pressure that can result in an explosion or the
leakage of flammable liquid or gas.
THE FOLLOWING APPLIES ONLY IN THE U.S.A. AND
CANADA
CAUTION: TO REDUCE THE RISK OF ELECTRIC
SHOCK, DO NOT REMOVE SCREWS.
NO USER-SERVICEABLE PARTS INSIDE.
REFER SERVICING TO QUALIFIED
SERVICE PERSONNEL.
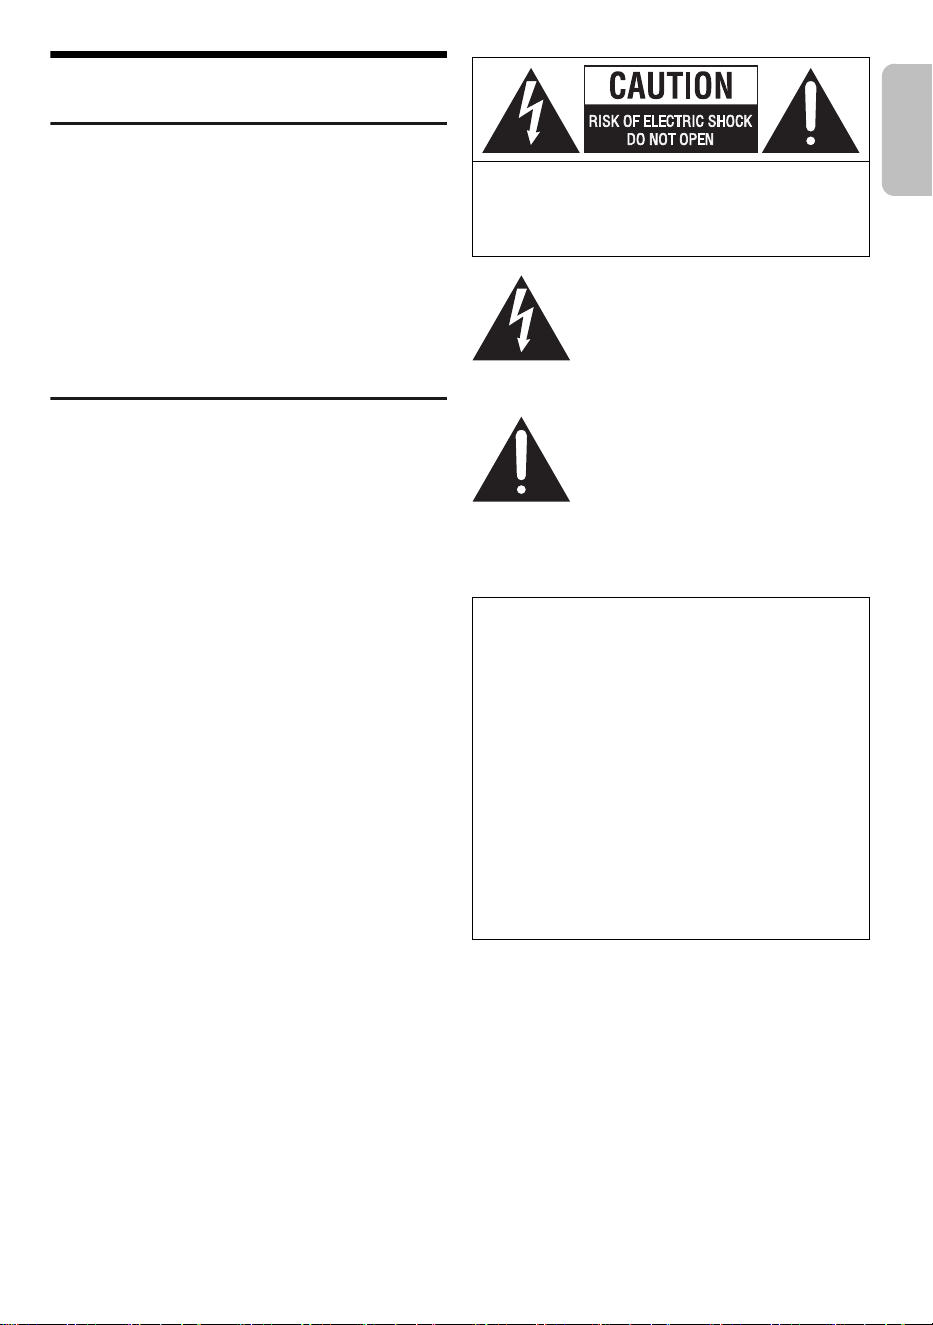
The lightning flash with arrowhead
symbol, within an equilateral triangle, is
intended to alert the user to the presence
of uninsulated “dangerous voltage” within
the product’s enclosure that may be of
sufficient magnitude to constitute a risk of
electric shock to persons.
The exclamation point within an
equilateral triangle is intended to alert the
user to the presence of important
operating and maintenance (servicing)
instructions in the literature
accompanying the appliance.
This device complies with Part 15 of FCC Rules and
Innovation, Science and Economic Development
Canada’s licence-exempt RSS(s).
Operation is subject to the following two conditions:
(1) this device may not cause interference, and
(2) this device must accept any interference, including
interference that may cause undesired operation.
Contains FCC ID: ACJ-B42R1801
Contains IC: 216A-B42R1801
This transmitter must not be co-located or operated in
conjunction with any other antenna or transmitter.
This equipment complies with FCC/ISED radiation
exposure limits set forth for an uncontrolled environment
and meets the FCC radio frequency (RF) Exposure
Guidelines and RSS-102 of the ISED radio frequency
(RF) Exposure rules. This equipment should be installed
and operated keeping the radiator at least 20 cm (7⅞")
or more away from person's body.
ENGLISH
PM700PP_TQBM0873_en.fm Page 3 Friday, March 17, 2023 4:34 PM
4
TQBM0873
THE FOLLOWING APPLIES ONLY IN THE U.S.A.
THE FOLLOWING APPLIES ONLY IN CANADA
Maintenance
Disconnect the AC power supply cord before
maintenance. To clean this system, wipe with a soft,
dry cloth.
• Never use alcohol, paint thinner or benzine to clean this
system.
• Before using chemically treated cloth, read the
instructions that came with the cloth carefully.
References
About Bluetooth
®
Frequency band
• This system uses the 2.4 GHz frequency band.
Certification
• This system conforms to the frequency restrictions and
has received certification based on frequency laws.
Thus, a wireless permit is not necessary.
• The actions below are punishable by law:
– Taking apart or modifying the main unit.
– Removing specification indications.
Restrictions of use
• Wireless transmission and/or usage with all Bluetooth
®
equipped devices is not guaranteed.
• All devices must conform to standards set by Bluetooth
SIG, Inc.
• Depending on the specifications and settings of a
device, it can fail to connect or some operations can be
different.
• This system supports Bluetooth
®
security features. But
depending on the operating environment and/or
settings, this security is possibly not sufficient. Transmit
data wirelessly to this system with caution.
• This system cannot transmit data to a Bluetooth
®
device.
Range of use
• Use this device at a maximum range of 10 m (33 ft).
• The range can decrease depending on the
environment, obstacles or interference.
Interference from other devices
• This system may not function properly and troubles
such as noise and sound jumps may arise due to radio
wave interference if this unit is located too close to
other Bluetooth
®
devices or the devices that use the
2.4 GHz band.
• This system may not function properly if radio waves
from a nearby broadcasting station, etc. is too strong.
Intended usage
• This system is for normal, general use only.
• Do not use this system near an equipment or in an
environment that is sensitive to radio frequency
interference (example: airports, hospitals, laboratories,
etc.).
Licenses
FCC Note:
This equipment has been tested and found to comply
with the limits for a Class B digital device, pursuant to
Part 15 of the FCC Rules.
These limits are designed to provide reasonable protec-
tion against harmful interference in a residential installa-
tion. This equipment generates, uses, and can radiate
radio frequency energy and, if not installed and used in
accordance with the instructions, may cause harmful
interference to radio communications. However, there is
no guarantee that interference will not occur in a partic-
ular installation. If this equipment does cause harmful
interference to radio or television reception, which can
be determined by turning the equipment off and on, the
user is encouraged to try to correct the interference by
one or more of the following measures:
• Reorient or relocate the receiving antenna.
• Increase the separation between the equipment and
receiver.
• Connect the equipment into an outlet on a circuit
different from that to which the receiver is connected.
• Consult the dealer or an experienced radio/TV
technician for help.
FCC Caution:
Any unauthorized changes or modifications to this
equipment would void the user’s authority to operate this
device.
Supplier's Declaration of Conformity
Trade Name: Panasonic
Model No.: SC-PM700
Responsible Party: Panasonic Corporation of North
America
Two Riverfront Plaza, Newark,
NJ 07102-5490
Support Contact: http://shop.panasonic.com/support
CAN ICES-003(B)/NMB-003(B)
Panasonic cannot be held responsible for data and/or
information that can possibly be compromised during a
wireless transmission.
The Bluetooth
®
word mark and logos are registered
trademarks owned by Bluetooth SIG, Inc. and any use of
such marks by Panasonic Holdings Corporation is under
license. Other trademarks and trade names are those of
their respective owners.
PM700PP_TQBM0873_en.fm Page 4 Friday, March 17, 2023 4:34 PM
5
TQBM0873
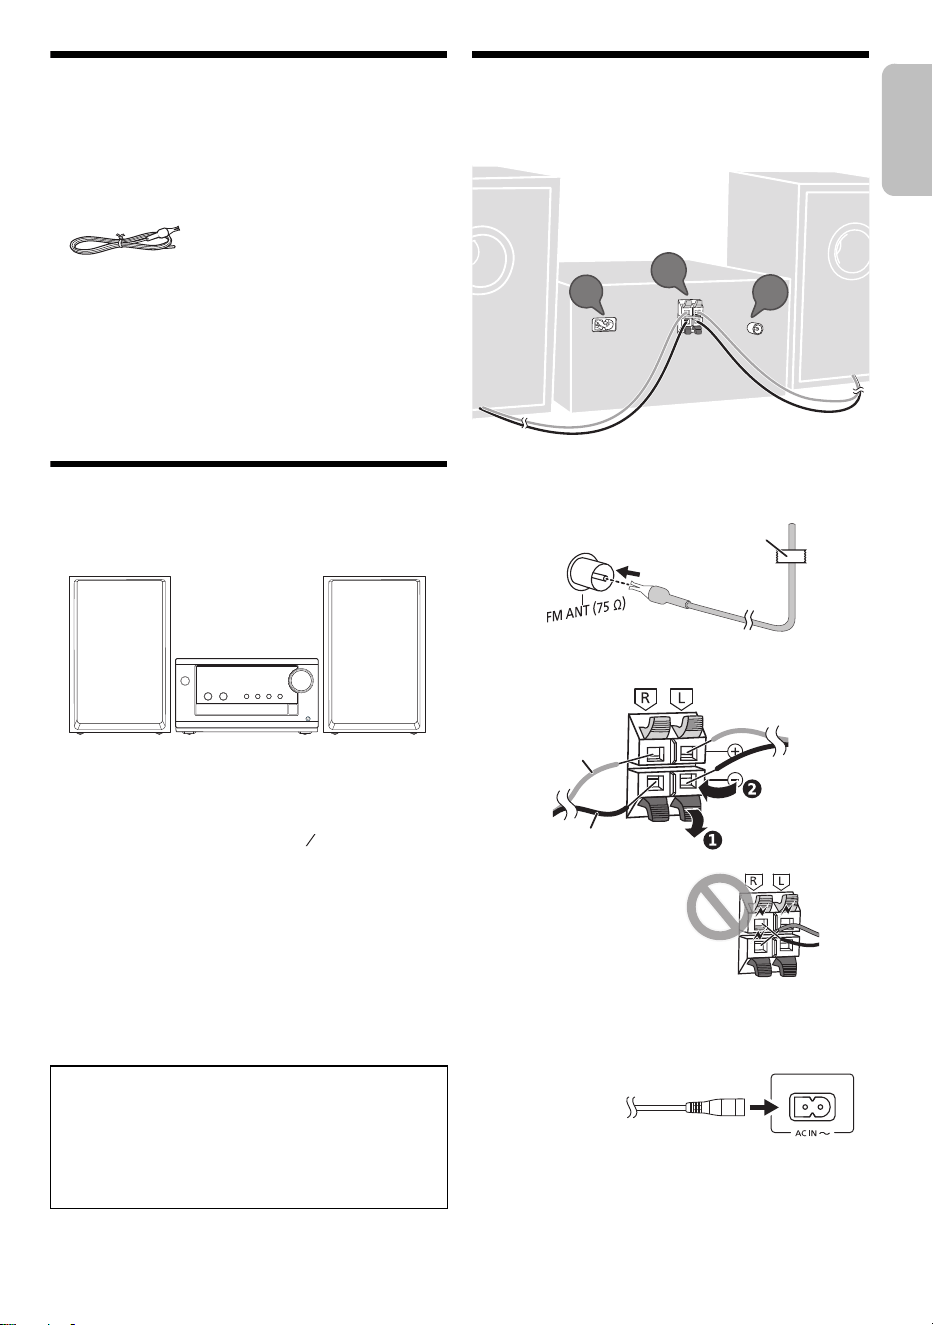
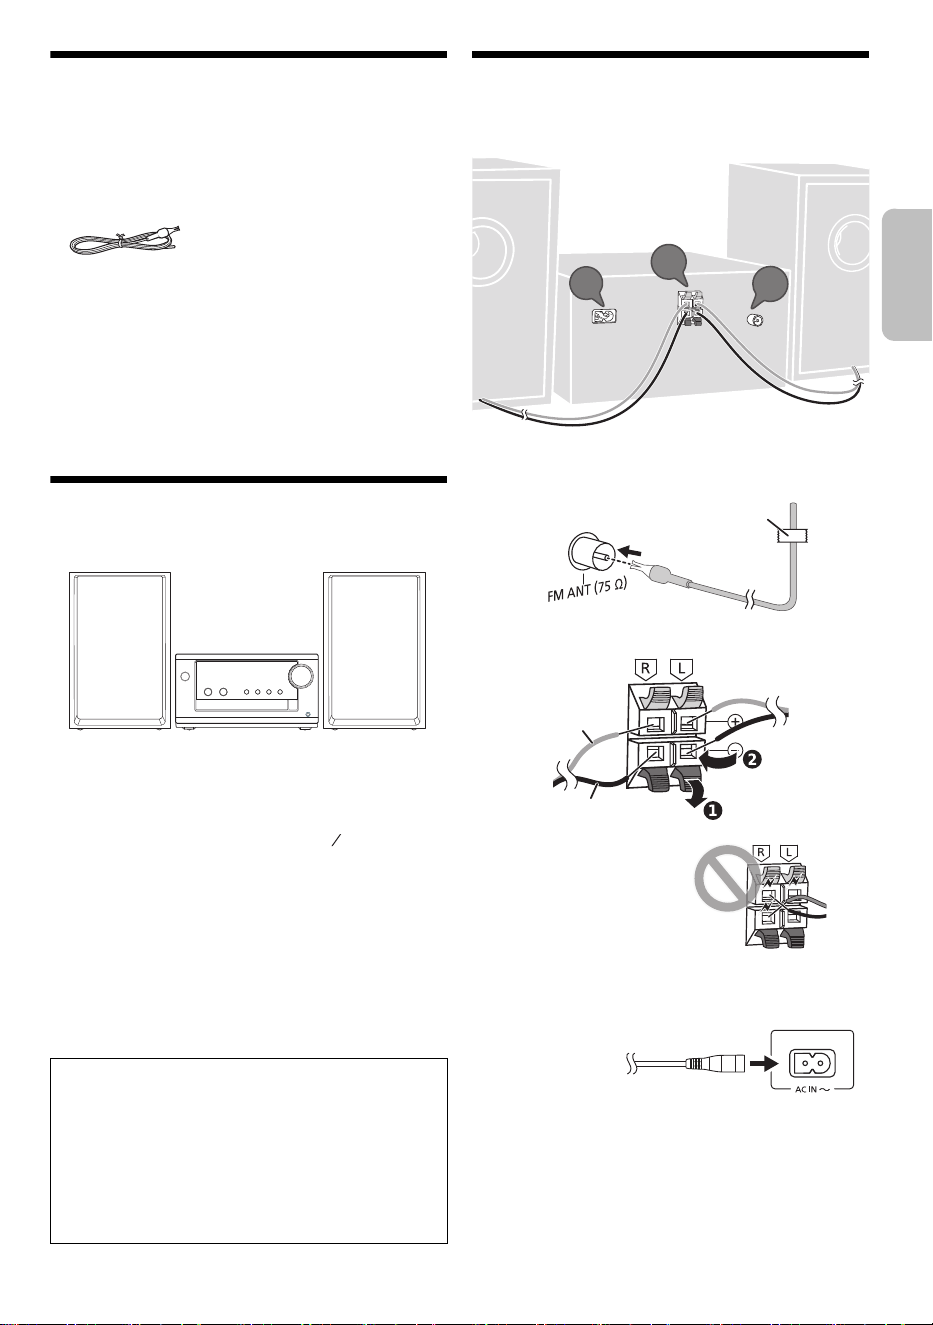
Supplied accessories
Check and identify the supplied accessories.
1 AC power supply cord
(K2CB2YY00065)
1 FM indoor antenna
(RSAX0002)
1 Remote control
(N2QAYB000984)
Note:
• Product numbers correct as of March 2023. These may be
subject to change.
• The included Canadian French label sheet corresponds to
the English printing on the main unit and remote control.
Placement of speakers
The left and right speakers are the same.
Use only the supplied speakers.
You can cause damage to the system and decrease the
sound quality if you use other speakers.
Note:
• Keep your speakers at least 10 mm ( ") away from the
system for proper ventilation.
• Put the speakers on a flat safe surface.
• These speakers do not have magnetic shielding. Do not put
them near TVs, PCs or other equipment easily influenced by
magnetism.
• When you play at high levels for a long period, it can cause
damage to the speakers and decrease the life of the
speakers.
• Decrease the volume in these conditions to prevent
damage:
– When the sound is distorted.
– When you adjust the sound quality.
Making the connections
Connect the AC power supply cord only after all the
other connections have been made.
1 Connect the FM indoor antenna.
Put the antenna where reception is best.
2 Connect the speakers.
3 Connect the AC power supply cord.
Do not use an AC power supply cord from other
equipment.
Conserving power
The system consumes a small amount of power
(~“Specifications”) when it is in standby mode.
Disconnect the power supply if you do not use the
system.
Some settings will be lost after you disconnect the
system. You have to set them again.
CAUTION!
• Use the speakers only with the recommended system.
If not, you can cause damage to the amplifier and
speakers and can cause a fire. Consult an approved
service personnel if damage occurs or if there is a
sudden apparent change in performance.
• Do not modify the speaker or speaker wires as this
can cause damage to the system.
32
13
Be careful not to cross
(short-circuit) or reverse
the polarity of the speaker
wires as doing so may
damage the speakers.
1
2
3
Adhesive tape
(not supplied)
Red
Black
To household
AC outlet
ENGLISH
PM700PP_TQBM0873_en.fm Page 5 Friday, March 17, 2023 4:34 PM
6
TQBM0873
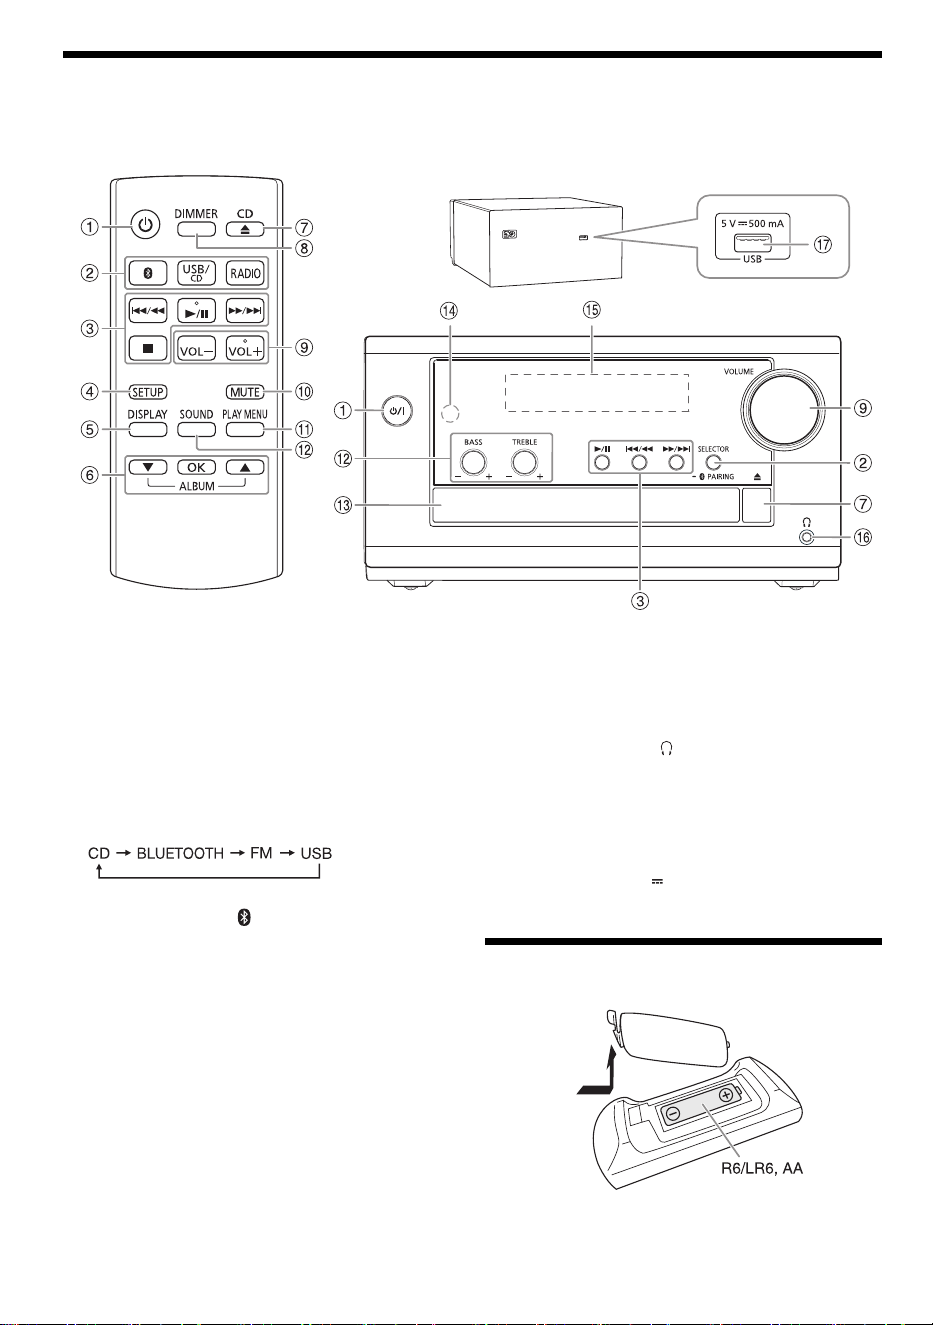
Overview of controls
Do the procedures with the remote control. You can also use the buttons on the main unit if they are the same.
A Standby/on switch [`], [1]
Press to turn the unit from on to standby mode or vice
versa. In standby mode, the unit is still consuming a
small amount of power.
B Select the audio source
On the main unit:
Press [SELECTOR] repeatedly to select the source:
To start Bluetooth
®
pairing, press and hold
[– PAIRING].
C Basic playback control
D View the setup menu
E View the content information
F Select or confirm the option
G Open or close the disc tray
H Decrease the brightness of the display panel
To cancel, press the button again.
I Adjust the volume level
J Mute the sound
To cancel, press the button again.
“MUTE” is also canceled when you adjust the volume
or when you turn off the system.
K View the play menu
L Select the sound effects
M Disc tray
N Remote control sensor
Distance: Within approximately 7 m (23 ft)
Angle: Approximately 10° up and 30° down,
30° left and right
O Display panel
P Headphones jack ( )
Plug type: Ø 3.5 mm (⅛
") stereo (not supplied)
– Excessive sound pressure from earphones and
headphones can cause hearing loss.
– Listening at full volume for long periods may
damage the user’s ears.
Q USB port (DC 5 V 500 mA)
Preparing the remote control
Use alkaline or manganese battery.
Install the battery so that the poles (+ and –) align with
those in the remote control.
Rear
(not supplied)
PM700PP_TQBM0873_en.fm Page 6 Friday, March 17, 2023 4:34 PM

7
TQBM0873
Preparing the media
Disc
1 Press [CD x] (main unit: [x]) to open the disc
tray.
Put in a disc with the label facing up.
Press again to close the disc tray.
2 Press [USB/CD] (main unit: [SELECTOR])
repeatedly to select “CD”.
USB
Preparation
Before you connect a USB device to the system, make
sure you do a backup of the data.
1 Decrease the volume and connect the USB device
to the USB port.
Hold the main unit when connecting or disconnecting
the USB device.
2 Press [USB/CD] (main unit: [SELECTOR])
repeatedly to select “USB”.
Note:
Do not use a USB extension cable. The system cannot
recognize USB device connected through a cable.
Bluetooth
®
You can connect and play an audio device wirelessly
through Bluetooth
®
.
Preparation
• Turn on the Bluetooth
®
feature of the device and put the
device near the system.
• Read the operating instructions of the device for details.
█
Pairing a device
Preparation
If this system is connected to a Bluetooth
®
device,
disconnect it (~“Disconnecting a device”).
1 Press [ ].
If “PAIRING” is shown, continue with step 3.
2 Press [PLAY MENU] to select “PAIRING” and then
press [OK].
3 Select “SC-PM700” from the Bluetooth
®
menu of
the device.
If prompted for a passkey, input “0000”.
The device connects with this system automatically
after pairing is complete.
The name of the connected device is shown for a few
seconds.
Using the main unit
1 Press and hold [– PAIRING] until “PAIRING” is
shown.
2 Select “SC-PM700” from the Bluetooth
®
menu of
the device.
Note:
You can pair up to 8 devices with this system. If a 9th device is
paired, the device that has not been used for the longest time
will be replaced.
█
Connecting a device
Preparation
If this system is connected to a Bluetooth
®
device,
disconnect it (~“Disconnecting a device”).
1 Press [ ].
“BLUETOOTH READY” is shown.
2 Select “SC-PM700” from the Bluetooth
®
menu of
the device.
The name of the connected device is shown for a few
seconds.
3 Start playback on the device.
Note:
• A device must be paired to connect.
• This system can only connect to one device at a time.
• When “BLUETOOTH” is selected as the source, this system
will automatically try to connect to the last connected
device. (“LINKING” is shown during this process.)
█
Disconnecting a device
While a Bluetooth
®
device is connected
1 Press [PLAY MENU] repeatedly to select
“DISCONNECT?”.
2 Press [R, T] to select “OK? YES” and then press
[OK].
“BLUETOOTH READY” is shown.
To cancel, select “OK? NO”.
Using the main unit
Press and hold [– PAIRING] until “PAIRING” is
shown.
Note:
A device is disconnected when you:
– Select a different source.
– Move the device out of the maximum range.
– Disable the Bluetooth
®
transmission of the device.
– Turn off the system or the device.
ENGLISH
PM700PP_TQBM0873_en.fm Page 7 Friday, March 17, 2023 4:34 PM
8
TQBM0873
Media playback
The following marks indicate the availability of the feature.
Basic playback
CD USB BLUETOOTH
Note:
Depending on the Bluetooth
®
device, some operations may
not work.
Viewing available information
CD USB BLUETOOTH
You can view the available information on the display
panel.
Press [DISPLAY] repeatedly.
Example: MP3 album and track number display.
Note:
• Maximum characters that can be shown: approximately 32
• This system supports ver. 1.0, 1.1 and 2.3 ID3 tags.
• Text data that the system does not support can show
differently.
Play menu
CD USB
1 Press [PLAY MENU] repeatedly to select
“PLAYMODE” or “REPEAT”.
2 Press [R, T] to select the setting and then press
[OK].
Note:
• During random playback, you cannot skip to tracks which
have been played.
• The setting is canceled when you open the disc tray or
disconnect the USB device.
Link mode
BLUETOOTH
You can change the link mode to suit the connection type.
Preparation
If this system is connected to a Bluetooth
®
device,
disconnect it (~“Disconnecting a device”).
1 Press [PLAY MENU] repeatedly to select
“LINK MODE”.
2 Press [R, T] to select the mode and then press
[OK].
Note:
• Depending on the device, the playback image and sound
may not be synchronized. In this case, select “MODE 1”
.
•
Select “MODE 1” if the sound is interrupted.
CD :
CD-R/RW in CD-DA format or with MP3 files.
USB :
USB device with MP3 files.
BLUETOOTH :
Bluetooth
®
device.
Play Press [4/9].
Stop Press [8].
USB
The position is memorized.
“RESUME” is shown.
Press again to stop fully.
Pause Press [4/9].
Press again to continue playback.
Skip Press [2/3] or [5/6] to skip track.
CD USB
Press [R, T] to skip MP3 album.
Search Press and hold [2/3] or [5/6].
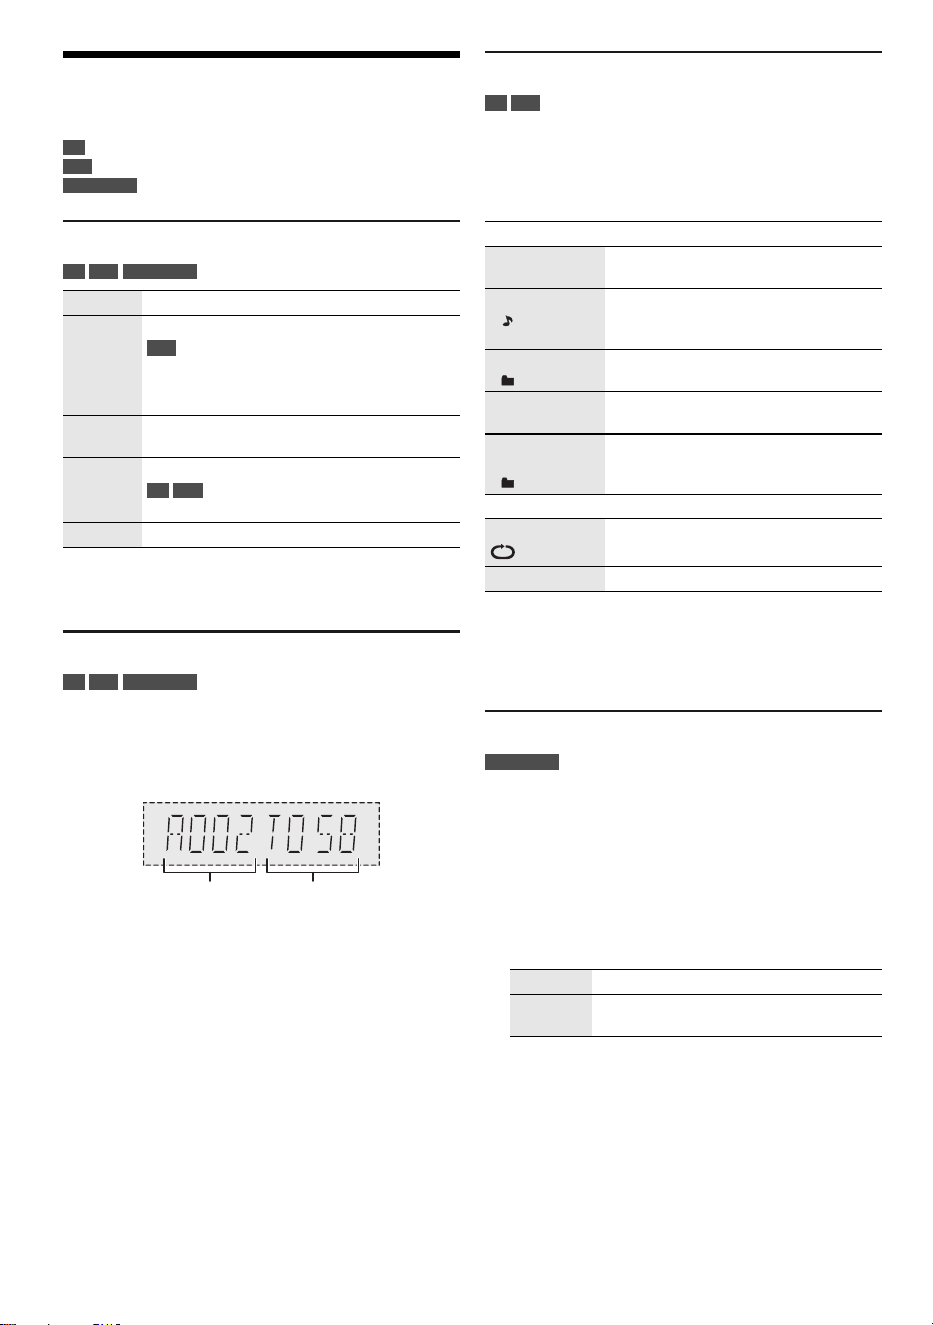
Album
number
Track
number
PLAYMODE
OFF
PLAYMODE
Cancel the setting.
1-TRACK
1
Play one selected track.
Press [2/3] or [5/6] to
select the track.
1-ALBUM
1
Play one selected MP3 album.
Press [R, T] to select the MP3 album.
RANDOM
RND
Play all tracks randomly.
1-ALBUM
RANDOM
1 RND
Play all tracks in one selected MP3
album randomly.
Press [R, T] to select the MP3 album.
REPEAT
ON REPEAT Repeat playback.
OFF REPEAT Cancel the setting.
MODE 1 Emphasis on connectivity.
MODE 2
(default)
Emphasis on sound quality.
PM700PP_TQBM0873_en.fm Page 8 Friday, March 17, 2023 4:34 PM
9
TQBM0873
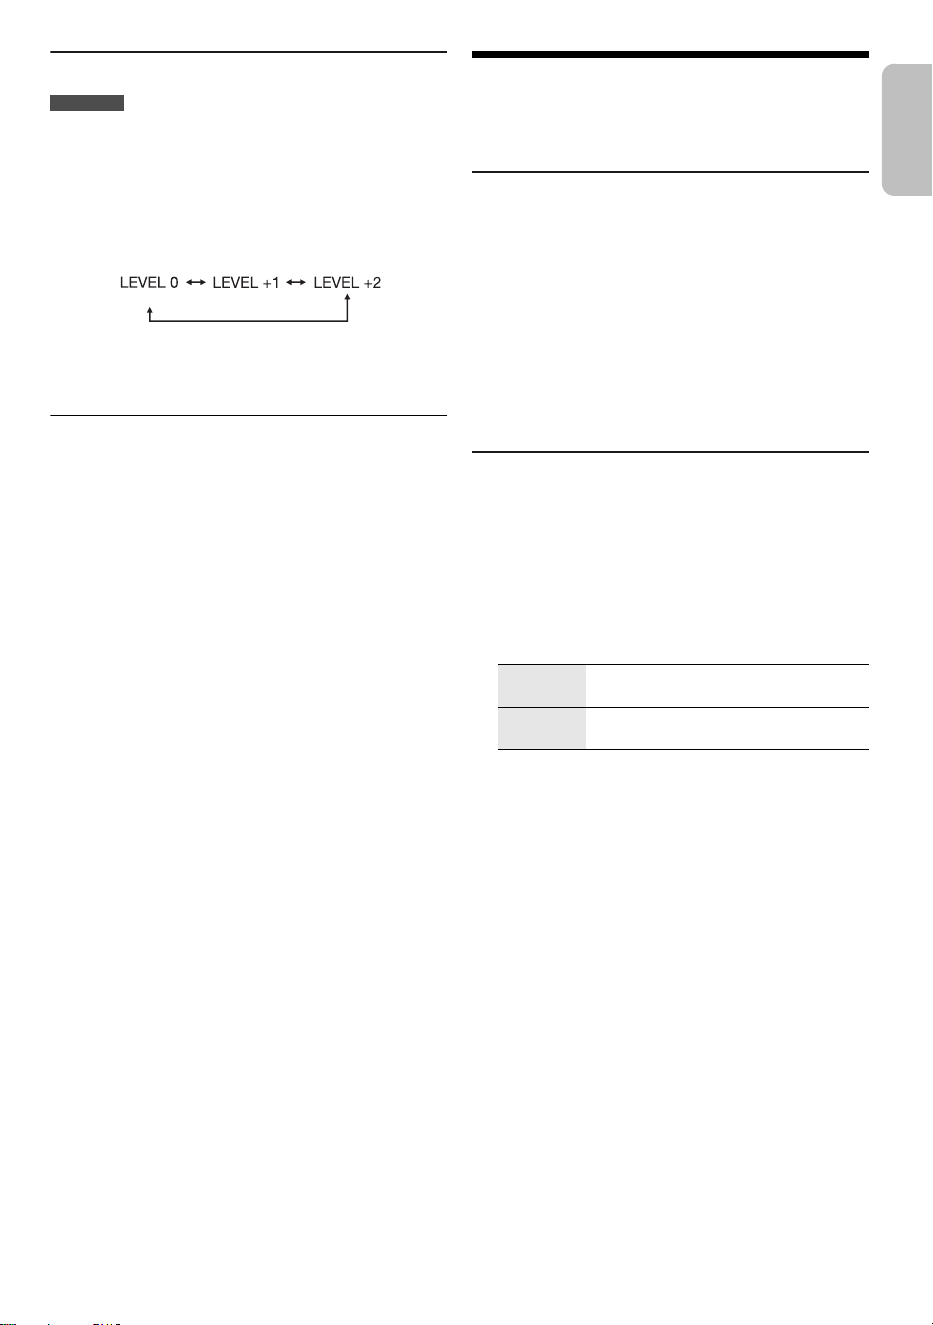
Input level
BLUETOOTH
You can change the input level setting if the sound input
level of the Bluetooth
®
transmission is too low.
1 Press [PLAY MENU] repeatedly to select
“INPUT LEVEL”.
2 Press [R, T] to select the level and then press
[OK].
Note:
Select “LEVEL 0” if the sound is interrupted.
█
Note on disc
• This system can play CD-R/RW with CD-DA or MP3
format content.
• Before playback, finalize the disc on the device it was
recorded on.
• Some CD-R/RW cannot be played because of the
condition of the recording.
• This system does not guarantee play of all types of
discs.
█
Note on USB device
• This system does not guarantee connection with all
USB devices.
• This system supports USB 2.0 full-speed.
• This system can support USB devices of up to 32 GB.
• Only FAT 12/16/32 file system is supported.
█
Note on MP3 file
• Files are defined as tracks and folders are defined as
albums.
• Tracks must have the extension “.mp3” or “.MP3”.
• Tracks will not necessarily be played in the order you
recorded them.
• Some files can fail to work because of the sector size.
• This system does not guarantee play of all MP3s.
MP3 file on disc
• This system can access up to:
– 255 albums (including root folder)
– 999 tracks
– 20 sessions
• Disc must conform to ISO9660 level 1 or 2 (except for
extended formats).
MP3 file on USB device
• This system can access up to:
– 800 albums (including root folder)
– 8000 tracks
– 999 tracks in one album
FM Radio
Preparation
Press [RADIO].
Manual tuning
1 Press [PLAY MENU] repeatedly to select
“TUNE MODE”.
2 Press [R, T] to select “MANUAL” and then press
[OK].
3 Press [2/3] or [5/6] to tune in to the
station.
To tune automatically, press and hold the button until
the frequency starts changing quickly.
“STEREO” is shown when a stereo broadcast is being
received.
Memory presetting
You can preset up to 30 FM stations.
█
Automatic presetting
1 Press [PLAY MENU] repeatedly to select
“A.PRESET”.
2 Press [R, T] to select “LOWEST” or “CURRENT”
and then press [OK].
The tuner presets all the stations it can receive into the
channels in ascending order.
To cancel, press [8].
█
Manual presetting
1 Press [PLAY MENU] repeatedly to select
“TUNE MODE”.
2 Press [R, T] to select “MANUAL” and then press
[OK].
3 Press [2/3] or [5/6] to tune in to the
station.
4 Press [OK].
5 Press [R, T] to select a preset number and then
press [OK].
Do steps 3 through 5 again to preset more stations.
The new station replaces any station that occupies the
same preset number.
(default)
LOWEST Tuning begins from the lowest
frequency.
CURRENT Tuning begins from the current
frequency.
ENGLISH
PM700PP_TQBM0873_en.fm Page 9 Friday, March 17, 2023 4:34 PM
10
TQBM0873
█
Selecting a preset station
1 Press [PLAY MENU] repeatedly to select
“TUNE MODE”.
2 Press [R, T] to select “PRESET” and then press
[OK].
3 Press [2/3] or [5/6] to select the preset
station.
Improving the sound quality
1 Press [PLAY MENU] repeatedly to select
“FM MODE”.
2 Press [R, T] to select “MONO” and then press
[OK].
To cancel, select “STEREO”.
“MONO” is also canceled when you change the
frequency.
To memorize the setting
Continue with step 4 of “Manual presetting”.
Checking the signal status
Press [DISPLAY].
FM allocation setting
This system can also receive FM broadcasts allocated in
0.1 MHz steps.
1 Press [RADIO].
2 Press [PLAY MENU] repeatedly to select
“FREQ.STEP”.
3 Press [R, T] to select “100kHz” and then press
[OK].
After a few seconds, the display panel shows the current
minimum radio frequency.
• To go back to the initial setting, do the above steps
again and select “200kHz” in step 3.
• Preset frequencies are erased after you change the
setting.
Sound effects
1 Press [SOUND] repeatedly to select the sound
effect.
2 Press [R, T] to select the setting and then press
[OK].
Note:
Changed settings will be kept until it is changed again, unless
otherwise indicated.
Saving the sound settings
You can save the current sound effects (up to
3 combinations).
Preparation
Select the sound effects.
1 Press [SETUP] to select “SAVE MY SOUND”.
2 Press [R, T] to select a sound setting number and
then press [OK].
“SAVED” is shown.
The new setting replaces the one existing in the same
sound setting number.
To recall the setting
1 Press [SOUND] to select “MY SOUND”.
2 Press [R, T] to select the sound setting number
and then press [OK].
FM – – – – The FM signal is weak.
The system is not tuned in to a station.
FM ST The FM signal is in stereo.
FM MONO “MONO” is selected as the “FM MODE”.
The FM signal is in monaural.
MY SOUND “SOUND 1”, “SOUND 2” or “SOUND 3”
PRESET EQ “HEAVY” (default), “SOFT”, “CLEAR”,
“VOCAL” or “FLAT”
BASS –4 to +4 (default: 0)
Using the main unit
Turn [BASS].
TREBLE –4 to +4 (default: 0)
Using the main unit
Turn [TREBLE].
D.BASS “ON D.BASS” (default) or
“OFF D.BASS”
SURROUND “ON SURROUND” or
“OFF SURROUND” (default)
PM700PP_TQBM0873_en.fm Page 10 Friday, March 17, 2023 4:34 PM
11
TQBM0873
Clock and timers
Setting the clock
This is a 12-hour clock.
1 Press [SETUP] repeatedly to select “CLOCK”.
2 Press [R, T] to set the time and then press [OK].
To check the time
Press [SETUP] repeatedly to select “CLOCK” and
then press [OK].
In standby mode, press [DISPLAY].
Note:
Reset the clock regularly to maintain accuracy.
Play timer
(Except for Bluetooth
®
source)
You can set the timer to come on at a certain time to wake
you up.
Preparation
Set the clock.
1 Press [SETUP] repeatedly to select “TIMER ADJ”.
2 Press [R, T] to set the start time and then press
[OK].
3 Do step 2 again to set the end time.
4 Press [R, T] to select the source you want to play
and then press [OK].
To start the timer
1 Prepare the source you want to listen to (disc,
USB or radio) and set the volume.
2 Press [SETUP] repeatedly to select “TIMER SET”.
3 Press [R, T] to select “SET” and then press [OK].
“#” is shown.
To cancel, select “OFF”.
The system must be turned off for the timer to operate.
To check the setting
Press [SETUP] repeatedly to select “TIMER ADJ” and
then press [OK].
In standby mode, press [DISPLAY] two times.
Note:
• The timer starts at a low volume and increases gradually to
the preset level.
• The timer comes on at the set time every day if the timer is
on.
• If you turn off the system and then turn on again while a
timer is in operation, the timer will not stop at the end time.
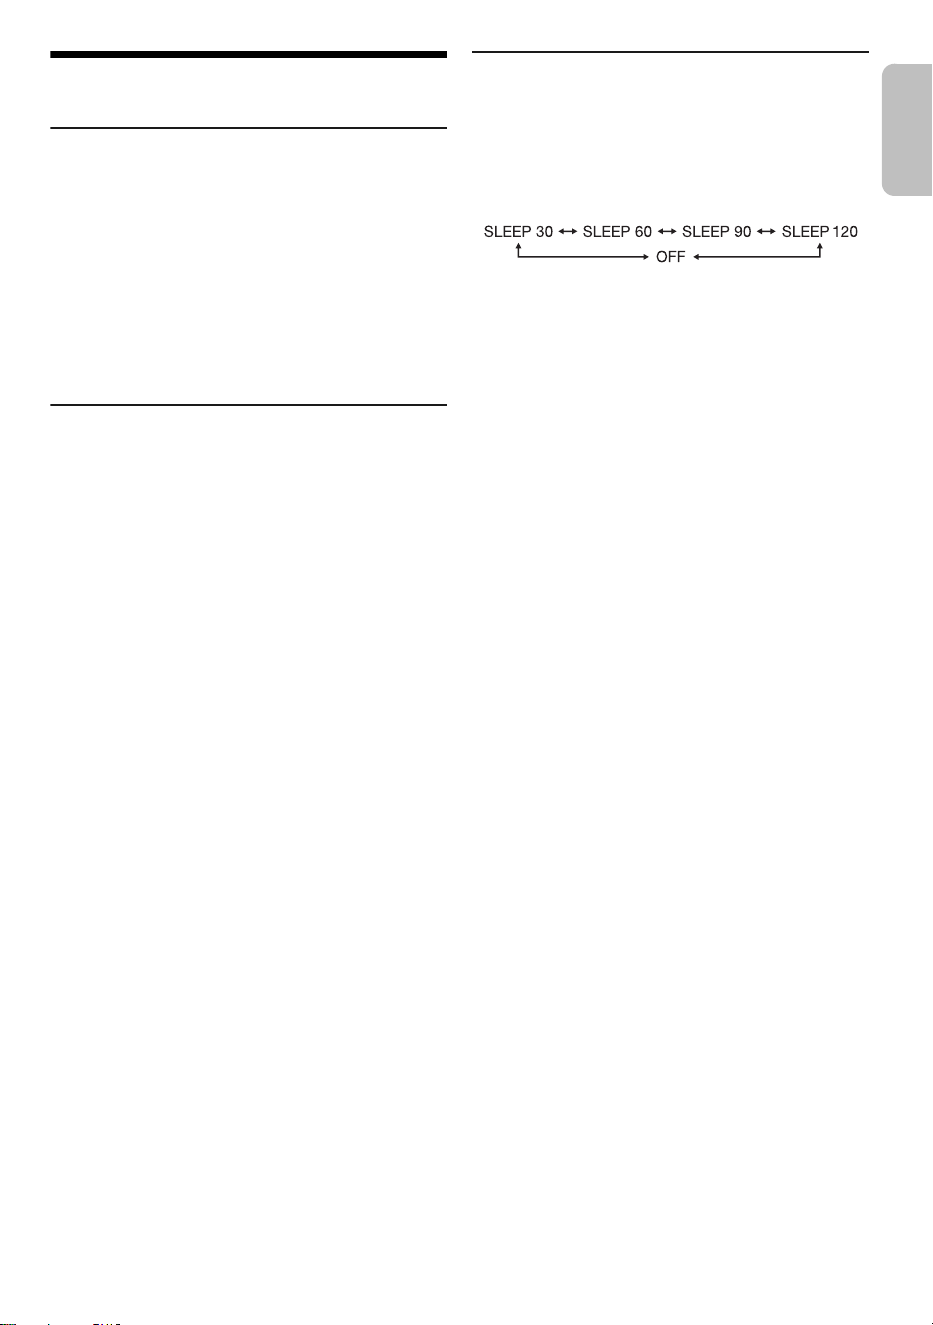
Sleep timer
The sleep timer turns off the system after the set time.
1 Press [SETUP] repeatedly to select “SLEEP”.
2 Press [R, T] to select the setting (in minutes) and
then press [OK].
To cancel, select “OFF”.
Note:
• The remaining time is shown for a few seconds every
minute. “SLEEP 1” is always shown when only 1 minute
remains.
• The sleep timer always comes first. Be sure not to set an
overlap of timers.
ENGLISH
PM700PP_TQBM0873_en.fm Page 11 Friday, March 17, 2023 4:34 PM

12
TQBM0873
Others
Auto off
This system automatically turns off when you do not use it
for approximately 20 minutes.
1 Press [SETUP] repeatedly to select “AUTO OFF”.
2 Press [R, T] to select “ON” and then press [OK].
To cancel, select “OFF”.
Note:
This function does not work when you are in radio source or
when a Bluetooth
®
device is connected.
Bluetooth
®
standby
This function automatically turns on the system when you
establish a Bluetooth
®
connection from a paired device.
1 Press [SETUP] repeatedly to select
“BLUETOOTH STANDBY”.
2 Press [R, T] to select “ON” and then press [OK].
To cancel, select “OFF”.
Note:
Some devices may take longer to respond. If you are
connected to a Bluetooth
®
device before turning off the
system, wait for a minimum of 5 seconds before connecting to
this system from your Bluetooth
®
device again.
Software updates
Occasionally, Panasonic may release updated software
for this system that may add or improve the way a feature
operates. These updates are available free of charge.
For more details, refer to the following website.
https://panasonic.jp/support/global/cs/
(This site is in English only.)
█
Checking the software version
1 Press [SETUP] repeatedly to select “SW VER.”
and then press [OK].
The software version is shown.
2 Press [OK] again to exit.
Troubleshooting
Before requesting service, make the following checks. If
you are in doubt about some of the check points, or if the
solutions indicated do not solve the problem, consult your
dealer for instructions.
When requesting service, make sure to send both the
main unit and the remote control to the service center.
█
Common problems
The unit does not work.
• The safety device has been activated. Do the following:
1. Press [1] on the main unit to turn the unit to standby
mode. If the unit does not turn to standby mode,
disconnect the AC power supply cord and connect it
again.
2. Press [1] again to turn on the unit. If the problem
persists, consult your dealer.
No operations can be done with the remote control.
• Examine that the battery is installed correctly.
Sound is distorted or no sound.
• Adjust the volume of the system.
• Turn off the system, determine and correct the cause, and
then turn on again. It can be caused by straining of the
speakers through excessive volume or power, and when
using the system in a hot environment.
A humming sound can be heard during playback.
• An AC power supply cord or fluorescent light is near the
cables. Keep other appliances and cords away from the
cables of this system.
█
Disc
Display not shown correctly.
Playback does not start.
• You have not put in the disc correctly. Put it in correctly.
• Disc is dirty. Clean the disc.
• Replace the disc if it is scratched, warped, or non-standard.
• There is condensation. Let the system dry for 1 to 2 hours.
The total number of tracks shown is incorrect.
The disc cannot be read.
Distorted sound is heard.
• You put in a disc that the system cannot play. Change to a
playable disc.
• You put in a disc that has not been finalized.
█
USB
The USB device or the contents in it cannot be read.
• The format of the USB device or the contents in it are not
compatible with the system.
• USB devices with storage capacity of more than 32 GB
cannot work.
• USB devices may not be recognized when connected to this
system with a USB extension cable or USB hub.
Slow operation of the USB device.
• Large content size or large memory USB device takes
longer time to read.
The elapsed time shown is different from the actual play
time.
• Transfer the data to another USB device or backup the data
and reformat the USB device.
PM700PP_TQBM0873_en.fm Page 12 Friday, March 17, 2023 4:34 PM

13
TQBM0873
█
Radio
Sound is distorted.
• Use an optional outdoor antenna. The antenna should be
installed by a competent technician.
A beat sound is heard.
• Turn off the TV or move it away from the system.
• Move mobile telephones away from the system if the
interference is apparent.
█
Bluetooth
®
Pairing cannot be done.
• Check the Bluetooth
®
device condition.
• The device is out of the 10 m (33 ft) communication range.
Move the device nearer to the system.
The device cannot be connected.
• The pairing of the device was unsuccessful. Do pairing
again.
• The pairing of the device has been replaced. Do pairing
again.
• This system might be connected to a different device.
Disconnect the other device and try pairing the device
again.
• The system may have a problem. Turn off the system and
then turn on again.
• If “MODE 2” is selected in “LINK MODE”, select “MODE 1”.
The device is connected but audio cannot be heard
through the system.
• For some built-in Bluetooth
®
devices, you have to set the
audio output to “SC-PM700” manually. Read the operating
instructions of the device for details.
Sound from the device is interrupted.
• The device is out of the 10 m (33 ft) communication range.
Move the device nearer to the system.
• Remove any obstacle between the system and the device.
• Other devices that use the 2.4 GHz frequency band
(wireless router, microwaves, cordless phones, etc.) are
interfering. Move the device nearer to the system and
distance it from the other devices.
• Select “MODE 1” for stable communication.
Playback image and sound are not synchronized.
• Restart the playback app of the device.
█
Main unit displays
“--:--”
• You connected the AC power supply cord for the first time or
there was a power failure recently. Set the clock.
• Track play time is more than 99 minutes.
“ADJUST CLOCK”
• The clock is not set. Adjust the clock.
“ADJUST TIMER”
• The play timer is not set. Adjust the play timer.
“AUTO OFF”
• The system has not been used for 20 minutes and will turn
off within a minute. To cancel, press any button.
“ERROR”
• An incorrect operation was done. Read the instructions and
try again.
“F61”
“F77”
• Disconnect the AC power supply cord and consult your
dealer.
“F703”
• Examine the Bluetooth
®
connection.
• Disconnect the Bluetooth
®
device. Turn off the system and
then turn on again.
“F76”
• There is a problem with the power supply.
• Disconnect the AC power supply cord and consult your
dealer.
“NO DEVICE”
• The USB device is not connected. Examine the connection.
“NO DISC”
• You have not put in a disc.
“NO PLAY”
• There is no album or track in the USB device.
• Examine the content. You can only play supported format.
• The system may have a problem. Turn off the system and
then turn on again.
“PLAYERROR”
• You played an unsupported MP3 file. The system will skip
that track and play the next one.
“REMOTE 1”
“REMOTE 2”
• The remote control and the main unit are using different
codes. Change the code of the remote control.
– When “REMOTE 1” is shown, press and hold [OK] and
[ ] on the remote control for a minimum of 4 seconds.
– When “REMOTE 2” is shown, press and hold [OK] and
[USB/CD] for a minimum of 4 seconds.
“SOUND 1 NOT SET”
“SOUND 2 NOT SET”
“SOUND 3 NOT SET”
• You have not saved the sound effects into the sound setting
number.
“USB OVER CURRENT”
• The USB device is using too much power. Disconnect the
USB device, turn off the system and then turn on again.
• Check the connection, it may be caused by a faulty USB
cable.
“VBR”
• The system cannot show the remaining play time for
variable bit rate (VBR) tracks.
ENGLISH
PM700PP_TQBM0873_en.fm Page 13 Friday, March 17, 2023 4:34 PM
14
TQBM0873
Remote control code
When other Panasonic equipment responds to the remote
control of this system, change the remote control code for
this system.
Preparation
1. Press [CD x] to open the disc tray and remove the
disc.
2. Press [USB/CD] to select “CD”.
“NO DISC” is shown.
█
To set the code to “REMOTE 2”
1 Press and hold [2/3] on the main unit and
[USB/CD] on the remote control until “REMOTE 2”
is shown.
2 Press and hold [OK] and [USB/CD] for a minimum
of 4 seconds.
█
To set the code to “REMOTE 1”
1 Press and hold [2/3] on the main unit and
[ ] on the remote control until “REMOTE 1” is
shown.
2 Press and hold [OK] and [ ] on the remote
control for a minimum of 4 seconds.
System memory reset
Reset the memory when the following situations occur:
• There is no response when buttons are pressed.
• You want to clear and reset the memory contents.
1 Disconnect the AC power supply cord.
2 While you press and hold [1] on the main unit,
connect the AC power supply cord again.
Continue to press and hold the button until
“–––––––––” is shown.
3 Release [1].
All the settings are set back to the factory preset.
It is necessary to set the memory items again.
Customer Service
(Only for Latin American countries)
Obtain products information and operative assistant; localize the closer distributor or Service
Center; buy spare parts and accessories by our Web Site to Latin American or calling out
Contact Center:
For Caribbean countries that speak English please enter this web site in order to find
information of our products and operative assistant:
www.panasonic.com/caribbean
Customer Service Directory
COUNTRY WEB SITE CONTACT CENTER
Panama www.panasonic.com/pa/soporte/ 800-7262
Colombia www.panasonic.com/co/soporte/ 01-8000-947262
Ecuador www.panasonic.com/pa/soporte/ 1-800-726276
Costa Rica www.panasonic.com/pa/soporte/ 800-7262737
El Salvador www.panasonic.com/pa/soporte/ 800-7262
Guatemala www.panasonic.com/pa/soporte/ 1-801-811-7262
Uruguay www.panasonic.com/pa/soporte/ 0-800-7262
Paraguay www.panasonic.com/pa/soporte/ Web Site
Peru www.panasonic.com/pe/soporte/ 0800-00726
Venezuela www.panasonic.com/pa/soporte/ Web Site
Mexico www.panasonic.com/mx/soporte/ 800-847-7262
55-5000-1200
Argentina 0800-333-7262
0810-321-7262
Dominican Rep. www.panasonic.com/pa/soporte/ 809-607-2152
PM700PP_TQBM0873_en.fm Page 14 Friday, March 17, 2023 4:34 PM

15
TQBM0873
Specifications
█
General
Dimensions (W x H x D)
SA-PM700 210 mm × 114 mm × 261 mm
(8 " × 4½" × 10 ")
SB-PM700 145 mm × 226 mm × 195 mm
(5¾" × 8 " × 7 ")
Mass
SA-PM700 2.2 kg (4.9 lbs)
SB-PM700 1.8 kg (4.0 lbs)
Operating temperature range 0 °C to +40 °C
(+32 °F to +104 °F)
Operating humidity range 35% to 80% RH
(no condensation)
█
Amplifier section
RMS output power
Front Ch (both ch driven)
40 W per channel (6 Ω), 1 kHz, 10% THD
Total RMS power 80 W
█
Disc section
Disc played [8 cm (3") or 12 cm (5")]
CD, CD-R/RW
Pick up
Wavelength 790 nm (CD)
Format CD-DA, MP3*
1
Maximum number of folders (albums) 255
Maximum number of files (songs) 999
*
1
MPEG-1 Layer 3, MPEG-2 Layer 3
█
Tuner section
Frequency modulation (FM)
Preset memory FM 30 stations
Frequency range
87.9 MHz to 107.9 MHz (200 kHz step)
87.5 MHz to 108.0 MHz (100 kHz step)
Antenna terminals 75 Ω (unbalanced)
█
Speaker section
Speaker unit(s)
Woofer 10 cm (4") cone type x 1
Tweeter 6 cm (2⅜") cone type x 1
Impedance 6 Ω
█
Bluetooth
®
section
Bluetooth
®
System Specification Bluetooth
®
Ver. 4.2
Wireless Equipment Classification Class 2 (2.5 mW)
Supported profiles A2DP, AVRCP
Supported codec SBC
Frequency band 2.4 GHz band FH-SS
Operating distance Approx. 10 m (33 ft) Line of sight*
2
*
2
Prospective communication distance
Measurement environment:
Temperature 25 °C (77 °F)/Height 1.0 m (3.3 ft)
Measure in “MODE 1”
█
Terminals section
Headphones jack Stereo, 3.5 mm (⅛") jack
USB Rear, USB Type-A connector
Maximum number of folders (albums) 800
Maximum number of files (songs) 8000
File system FAT12, FAT16, FAT32
USB port power DC OUT 5 V, 500 mA (MAX)
█
Format Section
USB
USB standard USB 2.0 full-speed
USB mass storage class
Format support MP3 (32 kHz, 44.1 kHz, 48 kHz /
16 kbps - 320 kbps)
Note:
• Specifications are subject to change without notice.
Mass and dimensions are approximate.
• Total harmonic distortion is measured by the digital
spectrum analyzer.
Power supply AC 120 V, 60 Hz
Power consumption 27 W
Power consumption in standby mode (approximate)
With “BLUETOOTH STANDBY” set to “OFF” 0.2 W
With “BLUETOOTH STANDBY” set to “ON” 0.3 W
ENGLISH
PM700PP_TQBM0873_en.fm Page 15 Friday, March 17, 2023 4:34 PM

16
TQBM0873
Limited Warranty
(ONLY FOR U.S.A.)
Panasonic Products Limited Warranty
Limited Warranty Coverage (For USA Only)
If your product does not work properly because of a defect in
materials or workmanship, Panasonic Corporation of North
America (referred to as “the warrantor”) will, for the length of
the period indicated on the chart below, which starts with the
date of original purchase (“warranty period”), at its option
either (a) repair your product with new or refurbished parts,
(b) replace it with a new or a refurbished equivalent value
product, or (c) refund your purchase price. The decision to
repair, replace or refund will be made by the warrantor.
During the “Labor” warranty period there will be no charge for
labor. During the “Parts” warranty period, there will be no
charge for parts. This Limited Warranty excludes both parts
and labor for non-rechargeable batteries, antennas, and
cosmetic parts (cabinet). This warranty only applies to
products purchased and serviced in the United States. This
warranty is extended only to the original purchaser of a new
product which was not sold “as is”.
Mail-In Service -- Online Repair Request
Online Repair Request
To submit a new repair request and for quick repair status visit
our Web Site at http://shop.panasonic.com/support
When shipping the unit, carefully pack, include all supplied
accessories listed in the Owner’s Manual, and send it prepaid,
adequately insured and packed well in a carton box. When
shipping Lithium Ion batteries please visit our Web Site at
http://shop.panasonic.com/support
as Panasonic is committed
to providing the most up to date information. Include a letter
detailing the complaint, a return address and provide a
daytime phone number where you can be reached. A valid
registered receipt is required under the Limited Warranty.
IF REPAIR IS NEEDED DURING THE WARRANTY PERIOD,
THE PURCHASER WILL BE REQUIRED TO FURNISH A
SALES RECEIPT/PROOF OF PURCHASE INDICATING
DATE OF PURCHASE, AMOUNT PAID AND PLACE OF
PURCHASE. CUSTOMER WILL BE CHARGED FOR THE
REPAIR OF ANY UNIT RECEIVED WITHOUT SUCH PROOF
OF PURCHASE.
Limited Warranty Limits and Exclusions
This warranty ONLY COVERS failures due to defects in
materials or workmanship, and DOES NOT COVER normal
wear and tear or cosmetic damage. The warranty ALSO
DOES NOT COVER damages which occurred in shipment, or
failures which are caused by products not supplied by the
warrantor, or failures which result from accidents, misuse,
abuse, neglect, mishandling, misapplication, alteration, faulty
installation, set-up adjustments, misadjustment of consumer
controls, improper maintenance, power line surge, lightning
damage, modification, introduction of sand, humidity or liquids,
commercial use such as hotel, office, restaurant, or other
business or rental use of the product, or service by anyone
other than a Factory Service Center or other Authorized
Servicer, or damage that is attributable to acts of God.
THERE ARE NO EXPRESS WARRANTIES EXCEPT AS
LISTED UNDER “LIMITED WARRANTY COVERAGE”.
THE WARRANTOR IS NOT LIABLE FOR INCIDENTAL OR
CONSEQUENTIAL DAMAGES RESULTING FROM THE USE
OF THIS PRODUCT, OR ARISING OUT OF ANY BREACH
OF THIS WARRANTY.
(As examples, this excludes damages for lost time, travel to
and from the servicer, loss of or damage to media or images,
data or other memory or recorded content. The items listed are
not exclusive, but for illustration only.)
ALL EXPRESS AND IMPLIED WARRANTIES, INCLUDING
THE WARRANTY OF MERCHANTABILITY, ARE LIMITED TO
THE PERIOD OF THE LIMITED WARRANTY.
Some states do not allow the exclusion or limitation of
incidental or consequential damages, or limitations on how
long an implied warranty lasts, so the exclusions may not
apply to you.
This warranty gives you specific legal rights and you may also
have other rights which vary from state to state. If a problem
with this product develops during or after the warranty period,
you may contact your dealer or Service Center. If the problem
is not handled to your satisfaction, then write to:
Panasonic Corporation of North America
Consumer Affairs Department
Two Riverfront Plaza
Newark NJ 07102-5490
PARTS AND SERVICE, WHICH ARE NOT COVERED BY
THIS LIMITED WARRANTY, ARE YOUR RESPONSIBILITY.
Product registration is not mandatory. Failure to complete the
form does not affect the consumer's warranty rights.
As of October 2022
Product or Part Name Parts Labor
CD Stereo System 1 Year 1 Year
All included Accessories (Except
Non-Rechargeable Batteries)
90 Days Not
Applicable
Only Non-Rechargeable Batteries 10 Days Not
Applicable
Get everything you need to get the most out of
your Panasonic products
Accessories & Parts for your Camera, Phone,
A/V products, TV, Computers & Networking,
Personal Care, Home Appliances, Headphones,
Batteries, Backup Chargers & more…
Customer Services Directory
For the hearing or speech impaired TTY: 1-877-833-8855
for all your Panasonic gear
Go to
http://shop.panasonic.com/support
For Product Information, Operating Assistance,
Parts, Owner’s Manuals, Dealer and Service info
go to http://shop.panasonic.com/support
PM700PP_TQBM0873_en.fm Page 16 Friday, March 17, 2023 4:34 PM

Limited Warranty
(ONLY FOR CANADA)
Panasonic Canada Inc.
5770 Ambler Drive, Mississauga, Ontario L4W 2T3
PANASONIC PRODUCT – LIMITED WARRANTY
Panasonic Canada Inc. warrants this product to be free from defects in material and workmanship under normal use and
for a period as stated below from the date of original purchase agrees to, at its option either (a) repair your product with
new or refurbished parts, (b) replace it with a new or a refurbished equivalent value product, or (c) refund your purchase
price. The decision to repair, replace or refund will be made by Panasonic Canada Inc.
This warranty is given only to the original purchaser, or the person for whom it was purchased as a gift, of a Panasonic
brand product mentioned above sold by an authorized Panasonic dealer in Canada and purchased and used in Canada,
which product was not sold “as is”, and which product was delivered to you in new condition in the original packaging.
IN ORDER TO BE ELIGIBLE TO RECEIVE WARRANTY SERVICE HEREUNDER, A PURCHASE RECEIPT OR
OTHER PROOF OF DATE OF ORIGINAL PURCHASE, SHOWING AMOUNT PAID AND PLACE OF PURCHASE
IS
REQUIRED
LIMITATIONS AND EXCLUSIONS
This warranty ONLY COVERS failures due to defects in materials or workmanship, and DOES NOT COVER normal
wear and tear or cosmetic damage. The warranty ALSO DOES NOT COVER damages which occurred in shipment, or
failures which are caused by products not supplied by Panasonic Canada Inc., or failures which result from accidents,
misuse, abuse, neglect, mishandling, misapplication, alteration, faulty installation, set-up adjustments, misadjustment of
consumer controls, improper maintenance, power line surge, lightning damage, modification, introduction of sand,
humidity or liquids, commercial use such as hotel, office, restaurant, or other business or rental use of the product, or
service by anyone other than an Authorized Servicer, or damage that is attributable to acts of God.
Dry cell batteries are also excluded from coverage under this warranty.
THIS EXPRESS, LIMITED WARRANTY IS IN LIEU OF ALL OTHER WARRANTIES, EXPRESS OR IMPLIED,
INCLUDING ANY IMPLIED WARRANTIES OF MERCHANTABILITY AND FITNESS FOR A PARTICULAR PURPOSE.
IN NO EVENT WILL PANASONIC CANADA INC. BE LIABLE FOR ANY SPECIAL, INDIRECT OR CONSEQUENTIAL
DAMAGES RESULTING FROM THE USE OF THIS PRODUCT OR ARISING OUT OF ANY BREACH OF ANY
EXPRESS OR IMPLIED WARRANTY. (As examples, this warranty excludes damages for lost time, travel to and from
the Authorized Servicer, loss of or damage to media or images, data or other memory or recorded content. This list of
items is not exhaustive, but for illustration only.)
In certain instances, some jurisdictions do not allow the exclusion or limitation of incidental or consequential damages,
or the exclusion of implied warranties, so the above limitations and exclusions may not be applicable. This warranty
gives you specific legal rights and you may have other rights which vary depending on your province or territory.
WARRANTY SERVICE
For product operation, repairs and information assistance, please visit our Support page:
www.panasonic.ca/english/support
IF YOU SHIP THE PRODUCT TO A SERVICENTRE
Carefully pack and send prepaid, adequately insured and preferably in the original carton.
Include details of the defect claimed, and proof of date of original purchase.
Panasonic BD/DVD Product One (1) year, parts and labour
Panasonic Audio Receivers One (1) year, parts and labour
Home Theater Systems Product One (1) year, parts and labour
Panasonic Corporation
of North America
Two Riverfront Plaza, Newark, NJ 07102-5490
https://shop.panasonic.com
Panasonic Entertainment & Communication Co., Ltd.
https://www.panasonic.com
© Panasonic Entertainment & Communication Co., Ltd. 2023
Printed in Malaysia
TQBM0873
L0323CH0
Panasonic Canada Inc.
5770 Ambler Drive, Mississauga,
Ontario, L4W 2T3
www.panasonic.com
En
ENGLISH
PM700PP_TQBM0873_en.fm Page 17 Friday, March 17, 2023 4:34 PM
2
TQBM0873
D:\New folder\PM700\FOI\PM700PP_TQBM0873_le.fm
Su sistema y las ilustraciones pueden diferir.
Estas instrucciones de funcionamiento son para el
sistema siguiente.
Recordatorio del usuario:
Los símbolos de este producto (incluidos los accesorios)
representan lo siguiente:
Índice
INSTRUCCIONES IMPORTANTES DE SEGURIDAD . . 2
Medidas de seguridad. . . . . . . . . . . . . . . . . . . . . . . . . . . 3
Mantenimiento . . . . . . . . . . . . . . . . . . . . . . . . . . . . . . . . 4
Referencias. . . . . . . . . . . . . . . . . . . . . . . . . . . . . . . . . . . 4
Accesorios suministrados . . . . . . . . . . . . . . . . . . . . . . . . 5
Colocación de las bocinas . . . . . . . . . . . . . . . . . . . . . . . 5
Cómo realizar las conexiones. . . . . . . . . . . . . . . . . . . . . 5
Visión general de los controles. . . . . . . . . . . . . . . . . . . . 6
Cómo preparar el control remoto . . . . . . . . . . . . . . . . . . 6
Cómo preparar los medios . . . . . . . . . . . . . . . . . . . . . . . 7
Reproducción de medios . . . . . . . . . . . . . . . . . . . . . . . . 8
Radio FM . . . . . . . . . . . . . . . . . . . . . . . . . . . . . . . . . . . . 9
Efectos de sonido . . . . . . . . . . . . . . . . . . . . . . . . . . . . . 10
Reloj y temporizadores . . . . . . . . . . . . . . . . . . . . . . . . . 11
Otros . . . . . . . . . . . . . . . . . . . . . . . . . . . . . . . . . . . . . . . 12
Solución de problemas . . . . . . . . . . . . . . . . . . . . . . . . . 12
Especificaciones . . . . . . . . . . . . . . . . . . . . . . . . . . . . . . 15
INSTRUCCIONES
IMPORTANTES DE
SEGURIDAD
Lea estas instrucciones de funcionamiento
minuciosamente antes de usar la unidad. Siga las
instrucciones de seguridad en la unidad y las
instrucciones de seguridad aplicables enumeradas abajo.
Mantenga estas instrucciones de funcionamiento a mano
para consultas futuras.
1. Lea estas instrucciones.
2. Guarde estas instrucciones.
3. Ponga atención a todas las advertencias.
4. Siga todas las instrucciones.
5. No use este aparato cerca del agua.
6. Límpielo solamente con un paño seco.
7. No bloquee las aberturas de ventilación. Instale en
conformidad con las instrucciones del fabricante.
8. No instale cerca de fuentes de calor, como es el caso
de radiadores, calefacciones, estufas u otros aparatos
(incluyendo amplificadores) que producen calor.
9. No viole el dispositivo de seguridad del enchufe
polarizado o del tipo de conexión a tierra. Un enchufe
polarizado tiene dos cuchillas, una es más ancha que
la otra. Un enchufe del tipo de conexión a tierra tiene
dos cuchillas y una tercera clavija para conexión a
tierra. La cuchilla ancha o la tercera cuchilla se
suministran para su seguridad. Si el enchufe
suministrado no encaja en su tomacorriente, consulte
a un electricista para el reemplazo del tomacorriente
obsoleto.
10. Proteja el cable de alimentación para evitar que lo
pisen o pinchen, especialmente en el área del
enchufe, tomacorriente, o en el punto en el que sale
del aparato.
11. Use sólo los aditamentos/accesorios especificados
por el fabricante.
12. Use solo con el carrito, base, trípode,
soporte o mesa especificados por el
fabricante, o vendido con el aparato.
Cuando se usa un carrito, tenga
cuidado al mover la combinación
carrito/aparto para evitar daños
físicos al voltearse la misma.
13. Desconecte este aparato durante tormentas eléctricas
o cuando no se vaya a usar durante períodos
prolongados.
14. Refiera todo el servicio a un personal de servicio
calificado. Se necesita suministrar servicio cuando el
aparato se ha dañado de cualquier forma, como por
ejemplo, si se daña el cable de alimentación o el
enchufe; si se derrama líquido o caen objetos en el
interior del aparato; si el aparato se ha expuesto a la
lluvia o a la humedad; si no opera normalmente; o, si
se ha dejado caer.
Sistema SC-PM700
Unidad principal SA-PM700
Bocinas SB-PM700
El número de modelo y número de serie de este
producto se puede encontrar en la parte posterior o
inferior del mismo. Por favor, anótelo en el espacio
suministrado a continuación y guárdelo para consultas
futuras.
MODELO NÚMERO SC-PM700
NÚMERO DE SERIE
FECHA DE COMPRA
NOMBRE DEL DISTRIBUIDOR
DIRECCIÓN DEL DISTRIBUIDOR
NÚMERO DE TELÉFONO
CA
CC
Equipo Clase II (La construcción del producto
posee doble aislante.)
ENCENDIDO
En espera
PM700PP_TQBM0873_le.fm Page 2 Friday, March 17, 2023 5:53 PM
3
TQBM0873
D:\New folder\PM700\FOI\PM700PP_TQBM0873_le.fm
Medidas de seguridad
ADVERTENCIA
Unidad
• Para reducir el riesgo de incendios, descargas
eléctricas o daños en el producto,
– No exponga esta unidad a la lluvia, humedad, goteo o
salpicaduras.
– No coloque objetos con líquidos, como por ejemplo
floreros, encima de esta unidad.
– Utilice los accesorios recomendados.
– No retire las tapas.
– No repare esta unidad usted mismo. Refiera el
servicio al personal calificado.
– No permita que objetos de metal caigan dentro esta
unidad.
PRECAUCIÓN
Unidad
• Para reducir el riesgo de incendios, descargas
eléctricas o daños en el producto,
– Para mantener bien ventilada esta unidad, no la
instale ni ponga en un estante de libros, mueble
empotrado u otro espacio de dimensiones reducidas.
– No obstruya las aberturas de ventilación de la unidad
con periódicos, manteles, cortinas u objetos similares.
– No coloque objetos con llama descubierta, una vela
por ejemplo, encima de esta unidad.
• Coloque la unidad en una superficie plana lejos de la luz
directa del sol, altas temperaturas, mucha humedad, y
vibración excesiva.
• Esta unidad utiliza un láser. El usar los controles, hacer
los ajustes o los pasos requeridos en forma diversa de
la aquí expuesta puede redundar en exposición
peligrosa a la radiación.
Cable de alimentación de CA
• El enchufe del equipo es el acceso principal a la
corriente eléctrica o al corte de energía. Instale esta
unidad de manera que el cable de alimentación se
pueda desenchufar desde el tomacorriente
inmediatamente si ocurre un problema.
Pila
• Hay peligro de explosión si se sustituye
incorrectamente la pila. Sólo sustituya con el tipo
recomendado por el fabricante.
• Al desechar las pilas, comuníquese con sus
autoridades locales o con su distribuidor y pregunte
sobre el método correcto de eliminación.
• No caliente o exponga a las llamas.
• No deje la(s) pila(s) en un automóvil expuesto a luz
solar directa durante un largo período de tiempo con las
puertas y ventanas cerradas.
• No desarme o provoque un cortocircuito con la pila.
• No intente recargar una pila alcalina o de manganeso.
• No use una pila cuya cubierta haya sido arrancada.
• Saque la pila si no va a usar el control remoto durante
un período prolongado. Guárdelas en un lugar fresco y
oscuro.
• Evite el uso en las siguientes condiciones
– Temperaturas extremadamente altas o bajas durante
el uso, almacenamiento o transporte.
– Sustitución de una batería por un tipo incorrecto.
– Eliminación de una batería en el fuego o en un horno
caliente, o aplastándola o cortándola mecánicamente,
lo que podría provocar una explosión.
– Temperatura extremadamente alta o presión del aire
extremadamente baja que pueda provocar una
explosión o la fuga de líquido o gas inflamable.
LO QUE SIGUE SE APLICA SOLAMENTE EN LOS
ESTADOS UNIDOS Y EL CANADÁ
PRECAUCIÓN: PARA REDUCIR EL RIESGO DE
SACUDIDA ELÉCTRICA, NO QUITE
LOS TORNILLOS.
NO EXISTEN EN EL INTERIOR
PIEZAS REPARABLES POR EL
USUARIO.
REFIERA EL SERVICIO AL
PERSONAL CALIFICADO.
El símbolo del rayo con punta de flecha
dentro de un triángulo equilátero pretende
alertar al usuario de la presencia de
“voltaje peligroso” no aislado dentro del
mueble del producto, que puede ser de
magnitud suficiente como para constituir
riesgo de sacudida eléctrica a las personas.
El signo de admiración dentro de un
triángulo equilátero pretende alertar al
usuario de la existencia de importantes
instrucciones de operación y
mantenimiento (servicio) en el material
impreso adjunto al aparato.
Este dispositivo cumple con la sección 15 de las normas
de la FCC y con los estándares de RSS de exención de
licencia del Departamento de Innovación, Ciencia y
Desarrollo Económico de Canadá.
Su funcionamiento está sujeto a las dos condiciones
siguientes:
(1) este dispositivo no puede producir interferencias y
(2) este dispositivo debe aceptar cualquier interferencia,
incluidas las interferencias que puedan dar lugar a un
funcionamiento no deseado.
Contiene ID FCC: ACJ-B42R1801
Contiene IC: 216A-B42R1801
Este transmisor no debe colocarse o hacerse funcionar
junto con otra antena o transmisor.
Este equipo cumple con los límites de exposición a la
radiación FCC/ISED establecidos para un entorno no
controlado y cumple con las Pautas de exposición (RF)
de radiofrecuencia FCC y RSS-102 de las reglas de
exposición de radiofrecuencia (RF) IC. El equipo se
debe instalar y operar manteniendo el radiador al menos
20 cm (7⅞") o más alejado del cuerpo de la persona.
ESPAÑOL
PM700PP_TQBM0873_le.fm Page 3 Friday, March 17, 2023 5:53 PM

4
TQBM0873
D:\New folder\PM700\FOI\PM700PP_TQBM0873_le.fm
LO QUE SIGUE SE APLICA SOLAMENTE EN LOS
ESTADOS UNIDOS
Mantenimiento
Desconecte el cable de alimentación de CA antes de
realizar el mantenimiento. Limpie este sistema con un
paño suave y seco.
• Nunca utilice alcohol, diluyente de pintura ni gasolina
para limpiar este sistema.
• Antes de utilizar un paño impregnado químicamente,
lea con atención las instrucciones suministradas con el
mismo.
Referencias
Acerca de Bluetooth
®
Banda de frecuencia
• Este sistema utiliza la banda de frecuencia de 2.4 GHz.
Certificación
• Este sistema cumple con las restricciones de frecuencia
y tiene una certificación recibida basada en las leyes de
frecuencia. Por lo tanto, no se necesita un permiso de
conexión inalámbrica.
• Las siguientes acciones son castigadas por la ley en
algunos países:
– Separar o modificar la unidad principal.
– Retirar las indicaciones de la especificación.
Restricciones de uso
• No se garantiza la transmisión inalámbrica o el uso con
todos los dispositivos equipados con Bluetooth
®
.
• Todos los dispositivos deben cumplir con las normas
establecidas por Bluetooth SIG, Inc.
• Según las especificaciones y los ajustes de un
dispositivo, es posible que no se pueda conectar o
algunas operaciones pueden ser diferentes.
• Este sistema admite las funciones de seguridad de
Bluetooth
®
. Según los ajustes o el ambiente de
operación, es posible que esta seguridad no sea
suficiente. Transmita, con cuidado, los datos de forma
inalámbrica a este sistema.
• Este sistema no puede transmitir los datos a un
dispositivo Bluetooth
®
.
Rango de uso
• Use este dispositivo en un rango máximo de 10 m
(33 pies).
• El rango se puede disminuir según el ambiente, los
obstáculos o la interferencia.
Interferencia de otros dispositivos
• Este sistema puede no funcionar correctamente y los
problemas como ruido y saltos de sonido pueden surgir
debido a la interferencia de ondas de radio, si esta
unidad está ubicada demasiado cerca de otros
dispositivos Bluetooth
®
o de dispositivos que usan la
banda 2.4 GHz.
• Este sistema puede no funcionar correctamente si las
ondas de radio de una estación de emisión cercana,
etc. son demasiado fuertes.
Uso previsto
• Este sistema es para el uso general normal solamente.
• No use este sistema cerca de un equipo o en un
ambiente sensible a la interferencia de la frecuencia de
radio (ejemplo: aeropuertos, hospitales, laboratorios,
etc.).
Licencias
Nota de la FCC:
Este equipo ha sido probado y se ha observado que
cumple con los límites para un dispositivo digital de
Clase B, de conformidad con la Parte 15 de las Reglas
de la FCC.
Estos límites se diseñaron para brindar protección
razonable contra la interferencia dañina en una
instalación residencial. Este equipo genera, usa y puede
irradiar energía de radiofrecuencias y, si no se instala y
usa de conformidad con las instrucciones,
podría causar
interferencia dañina en las comunicaciones
por radio. Sin
embargo, no existe garantía de que la interferencia no
ocurrirá en una instalación específica. Si este equipo
llega a causar interferencia dañina en la recepción de
emisiones de radio o televisión, lo cual se puede
determinar al apagar y encender el equipo, se
recomienda al usuario que trate de corregir la
interferencia con una o más de las medidas siguientes:
• Reorientar o reubicar la antena receptora.
• Aumentar la separación entre el equipo y el receptor.
• Conectar el equipo a un tomacorriente de un circuito
distinto al circuito en el que está conectado el
receptor.
• Consultar al distribuidor o a un técnico de radio/TV
experimentado para que le brinden ayuda.
Advertencia de FCC:
Todo cambio o modificación no autorizados de este
equipo anularía la autoridad del usuario para operar
este dispositivo.
Declaración de conformidad del proveedor
Nombre comercial: Panasonic
Número de modelo: SC-PM700
Parte responsable: Panasonic Corporation of North
America
Two Riverfront Plaza, Newark,
NJ 07102-5490
Contacto de Soporte:
http://shop.panasonic.com/support
Panasonic no se responsabiliza por datos y/o
información que se vean comprometidos durante la
transmisión inalámbrica.
La marca denominativa Bluetooth
®
y sus logos son
marcas comerciales registradas propiedad de Bluetooth
SIG, Inc. y cualquier uso de dichas marcas por parte de
Panasonic Holdings Corporation se realiza bajo licencia.
Otros nombres de marcas y marcas comerciales son
propiedad de sus respectivos propietarios.
PM700PP_TQBM0873_le.fm Page 4 Friday, March 17, 2023 5:53 PM
5
TQBM0873
D:\New folder\PM700\FOI\PM700PP_TQBM0873_le.fm
Accesorios suministrados
Verifique e identifique los accesorios suministrados.
1 Cable de alimentación de CA
(K2CB2YY00065)
1 Antena interior de FM
(RSAX0002)
1 Control remoto
(N2QAYB000984)
Nota:
• Números de productos correctos para marzo de 2023. Estos
podrían cambiar.
• La hoja de etiquetas en francés canadiense corresponde a
la impresión en inglés en la unidad principal y el control
remoto.
Colocación de las bocinas
Las bocinas izquierda y derecha son iguales.
Utilice solamente las bocinas suministradas.
Puede dañar el sistema y disminuir la calidad del sonido
si usa otras bocinas.
Nota:
• Mantenga sus bocinas a más de 10 mm ( ") de la unidad
principal para que haya ventilación.
• Coloque las bocinas sobre una superficie plana segura.
• Estas bocinas no disponen de blindaje magnético. No las
ponga cerca de televisores, computadoras personales y
otros equipos a los que afecte fácilmente el magnetismo.
• Realizar la reproducción a altos niveles durante un período
prolongado puede provocar daños en las bocinas y reducir
la vida útil de ellas.
• Baje el volumen en las siguientes condiciones para evitar
daños:
– Cuando se distorsiona el sonido.
– Cuando ajuste la calidad del sonido.
Cómo realizar las conexiones
Conecte el cable de alimentación de CA sólo después
de haber hecho todas las demás conexiones.
1 Conecte la antena interior de FM.
Coloque la antena donde la recepción sea la mejor.
2 Conecte las bocinas.
3 Conecte el cable de alimentación de CA.
No utilice otro cable de alimentación de CA que no
sea el suministrado.
Cómo ahorrar energía
El sistema consume una pequeña cantidad de
corriente alterna, incluso cuando está en modo de
espera (~“Especificaciones”). Desconecte la fuente
de alimentación cuando no use el sistema.
Se perderán algunas configuraciones cuando
desconecte el sistema. Tendrá que configurarlas
nuevamente.
¡PRECAUCIÓN!
• Use las bocinas sólo con el sistema recomendado.
De lo contrario, puede provocar daños al
amplificador y las bocinas y provocar un incendio.
Consulte a un técnico de servicio especializado si
se ha producido algún daño o si se ha producido
un cambio repentino en su funcionamiento.
• No modifique las bocinas ni los cables de las
bocinas ya que esto puede causar daños en el
sistema.
32
13
Tenga cuidado de no
cortocircuitar ni invertir la
polaridad de los cables de
las bocinas, ya que pueden
dañarse.
1
2
3
Cinta adhesiva
(no suministrada)
Rojo
Negro
Al enchufe de
conexión a la red
de CA
ESPAÑOL
PM700PP_TQBM0873_le.fm Page 5 Friday, March 17, 2023 5:53 PM
6
TQBM0873
D:\New folder\PM700\FOI\PM700PP_TQBM0873_le.fm
Visión general de los controles
Lleve a cabo los procedimientos con el control remoto. Usted también puede usar los botones de la unidad
principal si son iguales.
A Interruptor de alimentación en espera/conectada
[`], [1]
Pulse este interruptor para cambiar del modo de
alimentación conectada al modo de alimentación en
espera o viceversa. En el modo de alimentación en
espera, la unidad consume una pequeña cantidad de
corriente.
B Selecciona la fuente de audio
En la unidad principal:
Pulse [SELECTOR] repetidas veces para seleccionar
la fuente:
Para iniciar a emparejar el Bluetooth
®
, pulse y
mantenga pulsado [– PAIRING].
C Control de reproducción básica
D Muestra el menú de configuración
E Ve la información del contenido
F Selecciona o confirma la opción
G Abre o cierra la bandeja del disco
H Disminuye el brillo del panel de visualización
Para cancelar, pulse el botón nuevamente.
I Ajusta el nivel de volumen
J Silencia el sonido
Para cancelar, pulse el botón nuevamente.
“MUTE” también se cancela cuando usted ajusta el
volumen o cuando apaga el sistema.
K Muestra el menú de reproducción
L Selecciona los efectos de sonido
M Bandeja de disco
N Sensor del control remoto
Distancia: A aproximadamente 7 m (23 pies)
Ángulo: Aproximadamente 10° hacia arriba y 30°
hacia abajo, 30° a la izquierda y derecha
O Panel de visualización
P Toma de audífonos ( )
Tipo de clavija: Estéreo de Ø 3.5 mm (⅛
")
(no suministrado)
– La presión excesiva de los auriculares puede
causar pérdida de audición.
– Escuchar a todo volumen durante períodos
prolongados podría dañar los oídos del usuario.
Q Puerto USB (CC 5V 500 mA)
Cómo preparar el control remoto
Use una pila alcalina o de manganeso.
Instale la pila de modo que los polos (+ y –) queden
alineados con los del control remoto.
Posterior
(no suministrada)
PM700PP_TQBM0873_le.fm Page 6 Friday, March 17, 2023 5:53 PM

7
TQBM0873
D:\New folder\PM700\FOI\PM700PP_TQBM0873_le.fm
Cómo preparar los medios
Disco
1 Pulse [CD x] (unidad principal: [x]) para abrir la
bandeja del disco.
Coloque un disco con la etiqueta hacia arriba.
Pulse nuevamente para cerrar la bandeja del disco.
2 Pulse [USB/CD] (unidad principal: [SELECTOR])
repetidas veces para seleccionar “CD”.
USB
Preparación
Antes de conectar su dispositivo USB al sistema,
asegúrese de realizar una copia de respaldo de los datos.
1 Reduzca el volumen y conecte el dispositivo USB
al puerto USB.
Sujete la unidad principal al conectar o desconectar el
dispositivo USB.
2 Pulse [USB/CD] (unidad principal: [SELECTOR])
repetidas veces para seleccionar “USB”.
Nota:
No use un cable de extensión USB. El sistema no puede
reconocer el dispositivo USB conectado a través de un cable.
Bluetooth
®
Puede conectar y reproducir un dispositivo de audio de
manera inalámbrica a través de Bluetooth
®
.
Preparación
• Encienda la opción de Bluetooth
®
en el dispositivo y
ponga el dispositivo cerca del sistema.
• Lea las instrucciones de operación del dispositivo para
obtener más detalles.
█
Emparejar un dispositivo
Preparación
Si este sistema está conectado a un dispositivo
Bluetooth
®
, desconéctelo (~“Desconexión del
dispositivo”).
1 Pulse [ ].
Si visualiza “PAIRING”, continúe con el paso 3.
2 Pulse [PLAY MENU] para seleccionar “PAIRING” y
después pulse [OK].
3 Seleccionar “SC-PM700” desde el menú
Bluetooth
®
del dispositivo.
Si le pide clave de acceso, ingrese “0000”.
El dispositivo se conecta con el sistema
automáticamente, después que se hubiera
completado el emparejamiento.
Se visualiza el nombre del dispositivo conectado
durante unos segundos.
Uso de la unidad principal
1 Pulse y mantenga pulsado [– PAIRING] hasta
que se visualice “PAIRING”.
2 Seleccionar “SC-PM700” desde el menú
Bluetooth
®
del dispositivo.
Nota:
Se pueden parear hasta 8 dispositivos con este sistema. Si se
esta pareando un 9° dispositivo, se reemplazará el dispositivo
que no se usó por un período de tiempo más largo.
█
Cómo conectar un dispositivo
Preparación
Si este sistema está conectado a un dispositivo
Bluetooth
®
, desconéctelo (~“Desconexión del
dispositivo”).
1 Pulse [ ].
Se visualiza “BLUETOOTH READY”.
2 Seleccionar “SC-PM700” desde el menú
Bluetooth
®
del dispositivo.
Se visualiza el nombre del dispositivo conectado
durante unos segundos.
3 Inicie la reproducción en el dispositivo.
Nota:
• Para conectarse, un dispositivo debe estar pareado.
• El sistema sólo puede conectarse a un dispositivo a la vez.
• Cuando seleccione “BLUETOOTH” como la fuente, este
sistema tratara de conectarse automáticamente al último
dispositivo conectado. (“LINKING” se visualizará durante
este proceso.)
█
Desconexión del dispositivo
Mientras un dispositivo Bluetooth
®
está conectado
1 Pulse [PLAY MENU] repetidas veces para
seleccionar “DISCONNECT?”.
2 Pulse [R, T] para seleccionar “OK? YES” y
después pulse [OK].
Se visualiza “BLUETOOTH READY”.
Para cancelar, seleccione “OK? NO”.
Uso de la unidad principal
Pulse y mantenga pulsado [– PAIRING] hasta que
se visualice “PAIRING”.
Nota:
Un dispositivo se desconecta cuando:
– Selecciona una fuente diferente.
– Mueva el dispositivo fuera del alcance máximo.
– Desactiva la transmisión Bluetooth
®
del dispositivo.
– Apaga el sistema o el dispositivo.
ESPAÑOL
PM700PP_TQBM0873_le.fm Page 7 Friday, March 17, 2023 5:53 PM
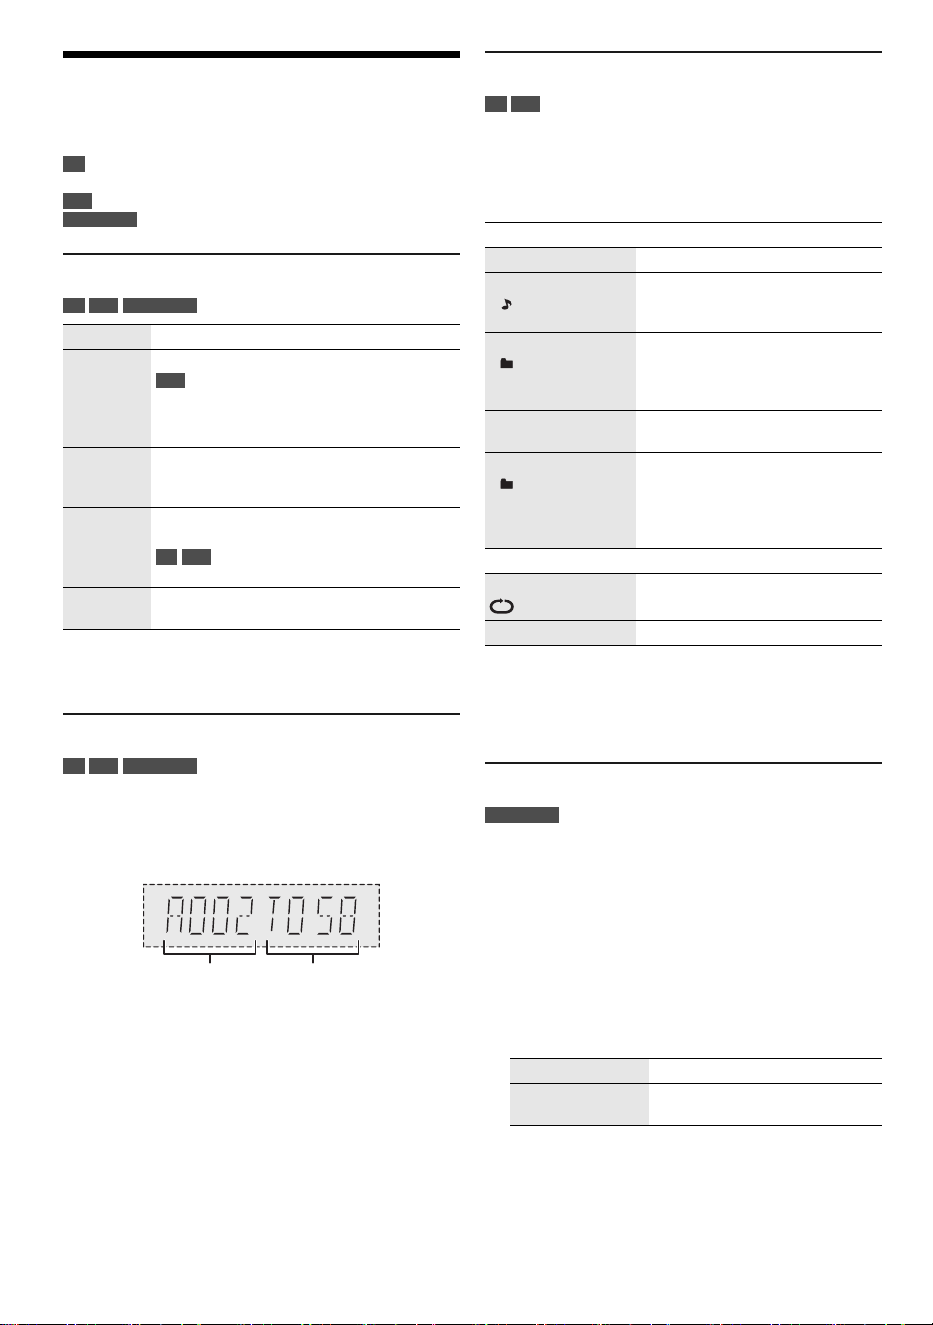
8
TQBM0873
D:\New folder\PM700\FOI\PM700PP_TQBM0873_le.fm
Reproducción de medios
Las siguientes marcas indican la disponibilidad de la
función.
Reproducción básica
CD USB BLUETOOTH
Nota:
Según el dispositivo Bluetooth
®
, algunas operaciones pueden
no funcionar.
Ver información disponible
CD USB BLUETOOTH
Puede ver la información disponible en el panel de la
pantalla.
Pulse [DISPLAY] repetidas veces.
Ejemplo: Visualización del número de pista y álbum MP3.
Nota:
• Caracteres máximos que se pueden mostrar:
Aproximadamente 32
• Este sistema es compatible con las etiquetas ID3 (versión
1.0, 1.1 y 2.3).
• La información de texto que el sistema no soporta puede
mostrarse de modo distinto.
Menú de reproducción
CD USB
1 Pulse [PLAY MENU] repetidas veces para
seleccionar “PLAYMODE” o “REPEAT”.
2 Pulse [R, T] para seleccionar la configuración y
después pulse [OK].
Nota:
• Durante la reproducción aleatoria, no se puede saltar a
pistas que ya han sido reproducidas.
• La configuración se cancela cuando se abre la bandeja de
disco ó desconecta el dispositivo USB.
Modo de vínculo
BLUETOOTH
Puede cambiar el modo de vínculo para adecuarse al tipo
de conexión.
Preparación
Si este sistema está conectado a un dispositivo
Bluetooth
®
, desconéctelo (~“Desconexión del
dispositivo”).
1 Pulse [PLAY MENU] repetidas veces para
seleccionar “LINK MODE”.
2 Pulse [R, T] para seleccionar el modo y después
pulse [OK].
Nota:
• Dependiendo del dispositivo, si la reproducción de la
imagen y el sonido no se sincronizan. En este caso,
seleccione “MODE 1”.
• Seleccionar “MODE 1” si el sonido se interrumpe.
CD :
USB :
BLUETOOTH :
CD-R/RW en formato CD-DA o con
archivos MP3.
Dispositivo USB con archivos MP3.
Dispositivo Bluetooth
®
.
Reproducir Pulse [4/9].
Detener Pulse [8].
USB
Se memorizará la posición.
Se visualiza “RESUME”.
Pulse nuevamente para detener totalmente.
Pausar Pulse [4/9].
Pulse nuevamente para reanudar la
reproducción.
Saltar Pulse [2/3] o [5/6] para saltar la
pista.
CD USB
Pulse [R, T] para saltar el álbum MP3.
Buscar Pulse y mantenga pulsado [2/3] o
[5/6].
Número
de álbum
Número
de pista
PLAYMODE
OFF PLAYMODE Cancela la configuración.
1-TRACK
1
Reproducir una pista seleccionada.
Pulse [2/3] o [5/6] para
seleccionar la pista.
1-ALBUM
1
Reproducir un álbum MP3
seleccionado.
Pulse [R, T] para seleccionar el
álbum MP3.
RANDOM
RND
Reproducir todas las pistas
aleatoriamente.
1-ALBUM RANDOM
1 RND
Reproducir todas las pistas de un
álbum MP3 seleccionado
aleatoriamente.
Pulse [R, T] para seleccionar el
álbum MP3.
REPEAT
ON REPEAT Repetir la reproducción.
OFF REPEAT Cancela la configuración.
MODE 1 Énfasis en la conectividad.
MODE 2
(predeterminado)
Énfasis en la calidad del sonido.
PM700PP_TQBM0873_le.fm Page 8 Friday, March 17, 2023 5:53 PM
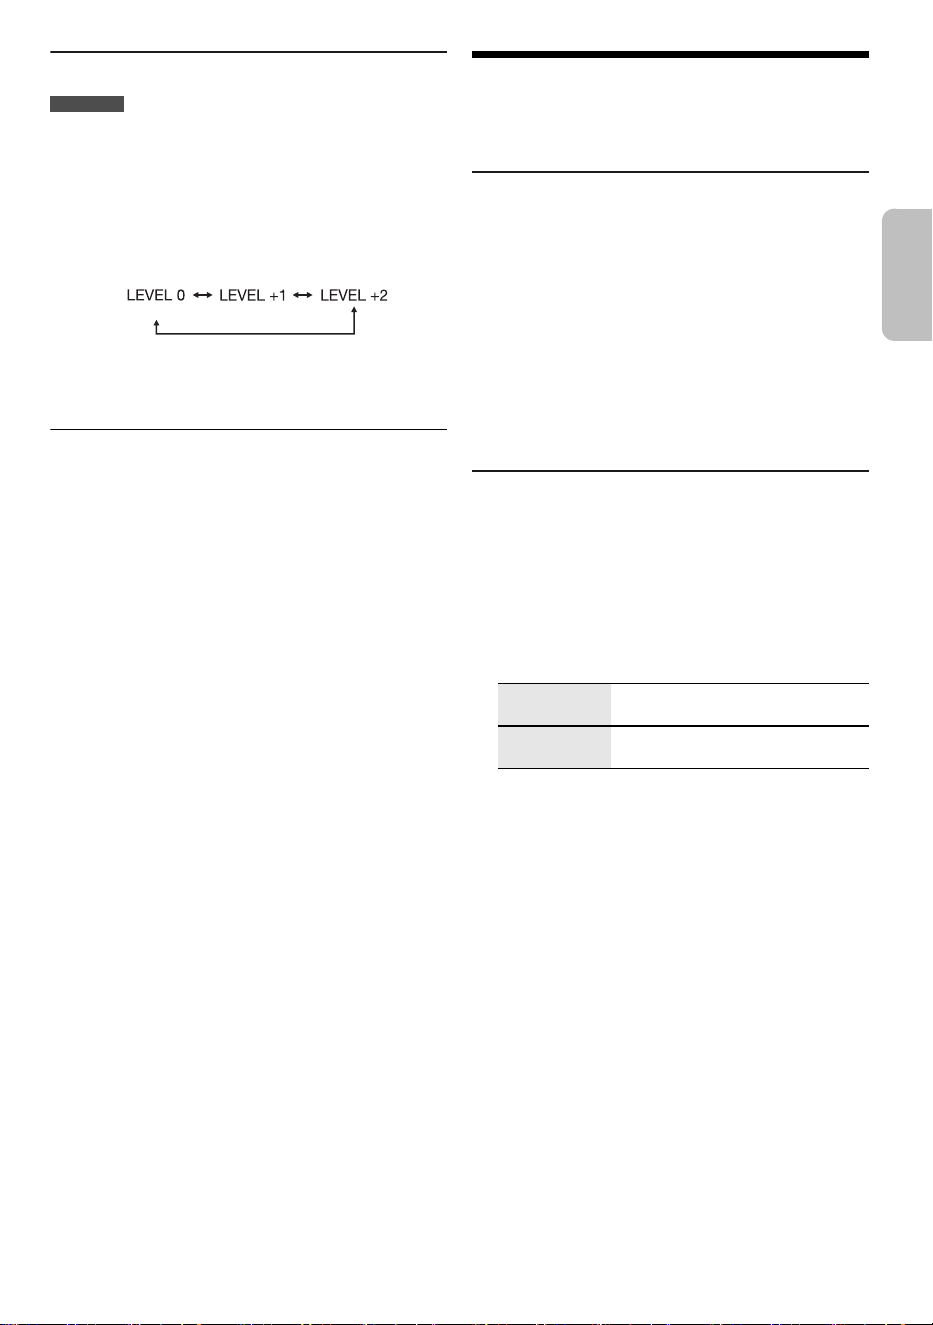
9
TQBM0873
D:\New folder\PM700\FOI\PM700PP_TQBM0873_le.fm
Nivel de entrada
BLUETOOTH
Puede cambiar el ajuste del nivel de entrada si el nivel de
entrada de sonido de la transmisión de Bluetooth
®
es
demasiado bajo.
1 Pulse [PLAY MENU] repetidas veces para
seleccionar “INPUT LEVEL”.
2 Pulse [R, T] para seleccionar el nivel y después
pulse [OK].
Nota:
Seleccionar “LEVEL 0” si el sonido se interrumpe.
█
Nota sobre el disco
• Este sistema puede reproducir CD-R/RW con contenido
formato CD-DA o MP3.
• Antes de realizar la reproducción finalice el disco en el
equipo en el que se grabó.
• Algunos CD-R/RW no se pueden reproducir debido a la
condición de la grabación.
• Este sistema no garantiza que se puedan reproducir
todos los tipos de discos.
█
Nota sobre dispositivo USB
• Este sistema no garantiza la conexión con todos los
dispositivos USB.
• Este sistema admite USB 2.0 velocidad total.
• Este sistema puede admitir los dispositivos USB de
hasta 32 GB.
• Solo se admite el sistema de archivo FAT 12/16/32.
█
Nota sobre el archivo MP3
• Los archivos se definen como pistas y las carpetas
como álbumes.
• Las pistas debe tener la extensión “.mp3” o “.MP3”.
• Las pistas no se reproducirán necesariamente en el
orden de grabación.
• Algunos archivos pueden fallar debido al tamaño del
sector.
• Este sistema no garantiza que se puedan reproducir
todos los MP3.
Archivo MP3 en el disco
• Este sistema puede acceder hasta:
– 255 álbumes (incluye la carpeta raíz)
– 999 pistas
– 20 sesiones
• Los discos deben cumplir con la norma ISO9660 nivel 1
ó 2 (excepto para los formatos extendidos).
Archivo MP3 en el dispositivo USB
• Este sistema puede acceder hasta:
– 800 álbumes (incluye la carpeta raíz)
– 8000 pistas
– 999 pistas en un álbum
Radio FM
Preparación
Pulse [RADIO].
Sintonización manual
1 Pulse [PLAY MENU] repetidas veces para
seleccionar “TUNE MODE”.
2 Pulse [R, T] para seleccionar “MANUAL” y
después pulse [OK].
3 Pulse [2/3] o [5/6] para sintonizar la
estación.
Para sintonizar automáticamente, pulse y mantenga
pulsado el botón hasta que la frecuencia comience a
cambiar rápidamente.
Se visualiza “STEREO” cuando se esté recibiendo
una emisora estéreo.
Presintonización de la memoria
Puede preconfigurar hasta 30 emisoras de FM.
█
Preconfiguración automática
1 Pulse [PLAY MENU] repetidas veces para
seleccionar “A.PRESET”.
2 Pulse [R, T] para seleccionar “LOWEST” o
“CURRENT” y después pulse [OK].
El sintonizador presintonizará en los canales, en
orden ascendente, todas las emisoras que pueda
recibir.
Para cancelar, pulse [8].
█
Preconfiguración manual
1 Pulse [PLAY MENU] repetidas veces para
seleccionar “TUNE MODE”.
2 Pulse [R, T] para seleccionar “MANUAL” y
después pulse [OK].
3 Pulse [2/3] o [5/6] para sintonizar la
estación.
4 Pulse [OK].
5 Pulse [R, T] para seleccionar un número
preconfigurado y después pulse [OK].
Realice los pasos 3 al 5 nuevamente para
preconfigurar más estaciones.
La estación más reciente reemplazará cualquier
estación que ocupe el mismo número preconfigurado.
(predeterminado)
LOWEST La sintonización comienza desde la
frecuencia más baja.
CURRENT La sintonización comienza desde la
frecuencia actual.
ESPAÑOL
PM700PP_TQBM0873_le.fm Page 9 Friday, March 17, 2023 5:53 PM
10
TQBM0873
D:\New folder\PM700\FOI\PM700PP_TQBM0873_le.fm
█
Selección de una emisora preconfigurada
1 Pulse [PLAY MENU] repetidas veces para
seleccionar “TUNE MODE”.
2 Pulse [R, T] para seleccionar “PRESET” y
después pulse [OK].
3 Pulse [2/3] o [5/6] para seleccionar la
estación preconfigurada.
Cómo mejorar la calidad del sonido
1 Pulse [PLAY MENU] repetidas veces para
seleccionar “FM MODE”.
2 Pulse [R, T] para seleccionar “MONO” y después
pulse [OK].
Para cancelar, seleccione “STEREO”.
“MONO” también se cancela cuando cambia la
frecuencia.
Para memorizar la configuración
Continúe con el paso 4 de “Preconfiguración manual”.
Cómo comprobar el estado de señal
Pulse [DISPLAY].
Configuración de asignación de FM
Este sistema también puede recibir emisiones de FM
asignadas en pasos de 0.1 MHz.
1 Pulse [RADIO].
2 Pulse [PLAY MENU] repetidas veces para
seleccionar “FREQ.STEP”.
3 Pulse [R, T] para seleccionar “100kHz” y después
pulse [OK].
Al cabo de unos cuantos segundos, el panel de
visualización mostrará la frecuencia de radio mínima
actual.
• Para regresar a la configuración inicial, realice los
pasos anteriores nuevamente y seleccione “200kHz” en
el paso 3.
• Las frecuencias preconfiguradas se borrarán después
de que cambie la configuración.
Efectos de sonido
1 Pulse [SOUND] repetida veces para seleccionar el
efecto.
2 Pulse [R, T] para seleccionar la configuración y
después pulse [OK].
Nota:
Las configuraciones modificadas se guardarán hasta que se
vuelvan a cambiar, a menos que se indique lo contrario.
Cómo guardar la configuración de
sonido
Puede guardar los efectos de sonido actuales (hasta 3
combinaciones)
Preparación
Selecciona los efectos de sonido.
1 Pulse [SETUP] para seleccionar “SAVE MY
SOUND”.
2 Pulse [R, T] para seleccionar una configuración
de sonido y después pulse [OK].
Se visualiza “SAVED”.
La nueva configuración reemplaza a la existente en
ese número de configuración de sonido.
Para recuperar la configuración
1 Pulse [SOUND] para seleccionar “MY SOUND”.
2 Pulse [R, T] para seleccionar el número de
configuración de sonido y después pulse [OK].
FM – – – – La señal FM es débil.
El sistema no se sintoniza en una estación.
FM ST La señal FM está en estéreo.
FM MONO “MONO” se selecciona como el
“FM MODE”. La señal FM es monoaural.
MY SOUND “SOUND 1”, “SOUND 2” o “SOUND 3”
PRESET EQ “HEAVY” (predeterminado), “SOFT”,
“CLEAR”, “VOCAL” o “FLAT”
BASS –4 a +4 (predeterminado: 0)
Uso de la unidad principal
Gire [BASS].
TREBLE –4 a +4 (predeterminado: 0)
Uso de la unidad principal
Gire [TREBLE].
D.BASS “ON D.BASS” (predeterminado) o
“OFF D.BASS”
SURROUND “ON SURROUND” o
“OFF SURROUND” (predeterminado)
PM700PP_TQBM0873_le.fm Page 10 Friday, March 17, 2023 5:53 PM

11
TQBM0873
D:\New folder\PM700\FOI\PM700PP_TQBM0873_le.fm
Reloj y temporizadores
Configuración de la hora
Este es un reloj con un sistema de 12 horas.
1 Pulse [SETUP] repetidas veces para seleccionar
“CLOCK”.
2 Pulse [R, T] para configurar la hora y después
pulse [OK].
Para revisar la hora
Pulse [SETUP] repetidas veces para seleccionar
“CLOCK” y después pulse [OK].
En el modo en espera, pulse [DISPLAY].
Nota:
Vuelva a poner en hora el reloj frecuentemente para mantener
su exactitud.
Temporizador de reproducción
(Excepto para la fuente de Bluetooth
®
)
Puede configurar el temporizador para activarse a una
hora determinada y despertarle.
Preparación
Configure el reloj.
1 Pulse [SETUP] repetidas veces para seleccionar
“TIMER ADJ”.
2 Pulse [R, T] para configurar la hora de inicio y
después pulse [OK].
3 Realice el paso 2 nuevamente para configurar la
hora de finalización.
4 Pulse [R, T] para seleccionar la fuente que quiera
reproducir y después pulse [OK].
Para iniciar el temporizador
1 Prepare la fuente que desea escuchar (disco, USB
o radio) y configure el volumen.
2 Pulse [SETUP] repetidas veces para seleccionar
“TIMER SET”.
3 Pulse [R, T] para seleccionar “SET” y después
pulse [OK].
Se visualiza “#”.
Para cancelar, seleccione “OFF”.
El sistema debe estar apagado para que el
temporizador funcione.
Para revisar la configuración
Pulse [SETUP] repetidas veces para seleccionar
“TIMER ADJ” y después pulse [OK].
En el modo en espera, pulse [DISPLAY] dos veces.
Nota:
• El temporizador iniciará con un volumen bajo y aumentará
gradualmente hasta el nivel predeterminado.
• Si el temporizador está activo, se encenderá todos los días
a la hora configurada.
• Si apaga el sistema y después vuelve a encender mientras
está funcionando el temporizador, el temporizador no
terminará a la hora final.
Temporizador de apagado automático
El temporizador de apagado automático apagará el
sistema después de la hora configurada.
1 Pulse [SETUP] repetidas veces para seleccionar
“SLEEP”.
2 Pulse [R, T] para seleccionar la configuración (en
minutos) y después pulse [OK].
Para cancelar, seleccione “OFF”.
Nota:
• El tiempo restante se muestra durante algunos segundos
cada minuto. “SLEEP 1” siempre se muestra cuando solo
queda 1 minuto.
• El temporizador de apagado automático siempre tiene
prioridad. Asegúrese de no configurar horas superpuestas.
ESPAÑOL
PM700PP_TQBM0873_le.fm Page 11 Friday, March 17, 2023 5:53 PM

12
TQBM0873
D:\New folder\PM700\FOI\PM700PP_TQBM0873_le.fm
Otros
Apagado automático
Este sistema se apaga automáticamente cuando no lo
usa durante aproximadamente 20 minutos.
1 Pulse [SETUP] repetidas veces para seleccionar
“AUTO OFF”.
2 Pulse [R, T] para seleccionar “ON” y después
pulse [OK].
Para cancelar, seleccione “OFF”.
Nota:
Esta función no funciona cuando se encuentra en la fuente de
radio o cuando está conectado un dispositivo Bluetooth
®
.
Modo de espera de Bluetooth
®
Esta función enciende automáticamente el sistema
cuando establece una conexión Bluetooth
®
desde un
dispositivo emparejado.
1 Pulse [SETUP] repetidas veces para seleccionar
“BLUETOOTH STANDBY”.
2 Pulse [R, T] para seleccionar “ON” y después
pulse [OK].
Para cancelar, seleccione “OFF”.
Nota:
Algunos dispositivos podrían tardar más tiempo en responder.
Si está conectado a un dispositivo Bluetooth
®
antes de apagar
el sistema, espere un mínimo de 5 segundos antes de
conectar este sistema de nuevo a su dispositivo Bluetooth
®
.
Actualización de software
En ocasiones, Panasonic puede lanzar actualizaciones
del software para esta sistema que pueden optimizar el
desempeño de ciertas funciones. Estas actualizaciones
se encuentran disponibles en forma gratuita.
Para obtener más detalles, consulte el siguiente sitio web.
https://panasonic.jp/support/global/cs/
(Este sitio está en inglés solamente.)
█
Cómo comprobar la versión del software
1 Pulse [SETUP] repetidas veces para seleccionar
“SW VER.” y después pulse [OK].
Se visualiza la versión del software.
2 Pulse [OK] nuevamente para salir.
Solución de problemas
Antes de solicitar el servicio de reparaciones haga las
comprobaciones indicadas a continuación. Si tiene
alguna duda acerca de algunos de los puntos de
comprobación, o si los indicados no resuelven el
problema, consulte a su distribuidor para obtener
instrucciones.
Al solicitar el servicio, asegúrese de que enviar tanto
la unidad principal como el control remoto al centro
de servicio.
█
Problemas comunes
La unidad no funciona.
• El dispositivo de seguridad se ha activado. Realice lo
siguiente:
1. Pulse [1] en la unidad principal para activar el modo de
espera. Si la unidad no cambia al modo en espera,
desconecte el cable de alimentación de CA y luego
vuelva a conectarlo.
2. Pulse [1] nuevamente para encender la unidad. Si el
problema persiste, consulte a su distribuidor.
No se pueden realizar operaciones con el control remoto.
• Verifique si la pila está instalada correctamente.
El sonido está distorsionado o no hay sonido.
• Ajustar el volumen del sistema.
• Apague el sistema, determine y corrija la causa, y a
continuación encienda el sistema nuevamente. La causa
puede ser el esfuerzo de las bocinas debido a una potencia
o a un volumen excesivo, y la utilización del sistema en un
ambiente donde hace calor.
Se oye ruido de zumbido durante la reproducción.
• Un cable de alimentación de CA o luz fluorescente está
cerca de los cables. Mantenga otros aparatos y cables
alejados de este sistema.
█
Disco
Pantalla no visualizada correctamente.
No se inicia la reproducción.
• No introdujo el disco correctamente. Introdúzcalo
correctamente.
• El disco está sucio. Limpie el disco.
• Reemplace el disco si está rayado, deformado o no es un
disco convencional.
• Hay condensación. Deje que el sistema se seque durante 1
a 2 horas.
El número total de pistas mostrado es incorrecto.
No se puede leer el disco.
Se oye un sonido distorsionado.
• Introdujo un disco que el sistema no puede reproducir.
Cambiélo por un disco que sí se pueda reproducir.
• Introdujo un disco que no se finalizó.
█
USB
No es posible leer el dispositivo USB o el contenido del
mismo.
• El formato del dispositivo USB o el contenido del mismo no
es compatible con el sistema.
• Los dispositivos USB con una capacidad superior a los
32 GB no funcionan.
• Los dispositivos USB posiblemente no se reconozcan
cuando están conectados a este sistema con un cable de
extensión USB o hub USB.
PM700PP_TQBM0873_le.fm Page 12 Friday, March 17, 2023 5:53 PM

13
TQBM0873
D:\New folder\PM700\FOI\PM700PP_TQBM0873_le.fm
Funcionamiento lento del dispositivo USB.
• El tamaño del contenido es muy grande o el dispositivo USB
tarda más en leer.
El tiempo transcurrido que se muestra es diferente del
tiempo de reproducción real.
• Transfiera los datos a otro dispositivo USB o haga una copia
de respaldo de los datos y vuelva a formatear el dispositivo
USB.
█
Radio
El sonido está distorsionado.
• Utilice una antena exterior opcional. Esta antena debe ser
instalada por un técnico competente.
Se oye un sonido rítmico.
• Apague el televisor o sepárelo del sistema.
• Separe los teléfonos celulares del sistema si las
interferencias resultan evidentes.
█
Bluetooth
®
No se puede emparejar.
• Revise la condición del dispositivo Bluetooth
®
.
• El dispositivo está fuera del rango de comunicación de 10 m
(33 pies). Mueva el dispositivo más cerca del sistema.
No se puede conectar el dispositivo.
• El emparejado del dispositivo no fue exitoso. Realice el
emparejamiento nuevamente.
• El emparejamiento del dispositivo a sido reemplazado.
Realice el emparejamiento nuevamente.
• Este sistema puede estar conectado a un dispositivo
diferente. Desconecte el otro dispositivo e intente volver a
conectar el dispositivo.
• El sistema puede tener un problema. Apague el sistema y
después vuelva a encenderlo.
• Si está seleccionado “MODE 2” en “LINK MODE”,
seleccione “MODE 1”.
El dispositivo está conectado pero el audio no se puede
escuchar en el sistema.
• Para algunos dispositivos con Bluetooth
®
incorporado, tiene
que fijar manualmente la salida de audio a “SC-PM700”. Lea
las instrucciones de operación del dispositivo para obtener
más detalles.
Se interrumpe el sonido del dispositivo.
• El dispositivo está fuera del rango de comunicación de 10 m
(33 pies). Mueva el dispositivo más cerca del sistema.
• Retire cualquier obstáculo entre el sistema y el dispositivo.
• Otros dispositivos que usan la banda de frecuencia de
2.4 GHz (router inalámbrico, microondas, teléfonos
inalámbricos, etc.) están haciendo interferencia. Mueva el
dispositivo más cerca del sistema y aléjelo de otros
dispositivos.
• Seleccionar “MODE 1” para comunicación estable.
Se sincronizan la imagen y el sonido de reproducción.
• Reinicie la reproducción de la aplicación del dispositivo.
█
Pantalla de la unidad principal
“--:--”
• Conectó el cable de alimentación de CA por primera vez o
se quedó sin energía eléctrica recientemente. Configure el
reloj.
• El tiempo máximo de reproducción mostrado de una pista es
de 99 minutos.
“ADJUST CLOCK”
• El reloj no está configurado. Ajuste el reloj.
“ADJUST TIMER”
• El temporizador de reproducción no está configurado. Ajuste
el temporizador de reproducción.
“AUTO OFF”
• El sistema no se usó durante 20 minutos y se apagará en un
minuto. Para cancelar, pulse cualquier botón.
“ERROR”
• Se realizó una operación incorrecta. Lea las instrucciones e
intentar nuevamente.
“F61”
“F71”
• Desconecte el cable de alimentación de CA y consulte a su
distribuidor.
“F703”
• Compruebe la conexión Bluetooth
®
.
• Desconecte el dispositivo Bluetooth
®
. Apague el sistema y
después vuelva a encenderlo.
“F76”
• Hay un problema con el suministro de corriente.
• Desconecte el cable de alimentación de CA y consulte a su
distribuidor.
“NO DEVICE”
• El dispositivo USB no está conectado. Compruebe la
conexión.
“NO DISC”
• No introdujo un disco.
“NO PLAY”
• No existe un álbum o pista en el dispositivo USB.
• Compruebe el contenido. Sólo puede reproducir el formato
soportado.
• El sistema puede tener un problema. Apague el sistema y
después vuelva a encenderlo.
“PLAYERROR”
• Está reproduciendo un archivo MP3 no compatible. El
sistema saltará esa pista y reproducirá la siguiente.
“REMOTE 1”
“REMOTE 2”
• El control remoto y la unidad principal están usando
diferentes códigos. Cambie el código en el control remoto.
– Cuando se visualice “REMOTE 1”, pulse y mantenga
pulsado [OK] y [ ] en el control remoto durante al menos
4 segundos.
– Cuando se visualice “REMOTE 2”, pulse y mantenga
pulsado [OK] y [USB/CD] durante al menos 4 segundos.
“SOUND 1 NOT SET”
“SOUND 2 NOT SET”
“SOUND 3 NOT SET”
• No ha guardado los efectos de sonido en el número de
configuración de sonido.
“USB OVER CURRENT”
• El dispositivo USB absorbe demasiada potencia.
Desconecte el dispositivo USB, apague el sistema y
después vuelva a encenderlo.
• Verifique la conexión, la falla podría ser causada por un
cable USB dañado.
“VBR”
• El sistema no puede visualizar el tiempo de reproducción
restante para las pistas con velocidad de bits variable
(VBR).
ESPAÑOL
PM700PP_TQBM0873_le.fm Page 13 Friday, March 17, 2023 5:53 PM
14
TQBM0873
D:\New folder\PM700\FOI\PM700PP_TQBM0873_le.fm
Código del control remoto
Cuando otro equipo Panasonic responda al control
remoto de este sistema, cambie el código del control
remoto de este sistema.
Preparación
1. Pulse [CD x] para abrir la bandeja de discos y retirar
el disco.
2. Pulse [USB/CD] para seleccionar “CD”.
Se visualiza “NO DISC”.
█
Para configurar el código en “REMOTE 2”
1 Pulse y mantenga pulsado [2/3] en la unidad
principal y [USB/CD] en el control remoto hasta
que se visualice “REMOTE 2”.
2 Pulse y mantenga pulsado [OK] y [USB/CD]
durante al menos 4 segundos.
█
Para configurar el código en “REMOTE 1”
1 Pulse y mantenga pulsado [2/3] en la unidad
principal y [ ] en el control remoto hasta que se
visualice “REMOTE 1”.
2 Pulse y mantenga pulsado [OK] y [ ] en el
control remoto durante al menos 4 segundos.
Restablecer memoria del sistema
Restablezca la memoria cuando ocurren las siguientes
situaciones:
• Los botones no funcionan.
• Usted desea borrar y restablecer el contenido de la
memoria.
1 Desconecte el cable de alimentación de CA.
2 Mientras pulsa y mantiene pulsado [1] en la
unidad principal, conecte el cable de la fuente de
alimentación nuevamente.
Continúe pulsando y mantenga pulsado el botón
hasta que se visualice “– – – ––––––”.
3 Suelte [1].
Todas las configuraciones se reponen a los valores
predeterminados.
Es necesario configurar los elementos de la memoria
nuevamente.
Atención al Cliente
(Solo para los países de América Latina)
Obtenga información de productos y asistencia operativa, localice el Centro de Servicio más
cercano y compre repuestos y accesorios a través de nuestro Sitio Web o llamando a nuestro
Contact Center:
Para países del CARIBE anglosajón, por favor dirigirse a nuestro sitio web para información
de productos y asistencia operativa:
www.panasonic.com/caribbean
Directorio de Atención al cliente
PAIS SITIO WEB CONTACT CENTER
Panamá www.panasonic.com/pa/soporte/ 800-7262
Colombia www.panasonic.com/co/soporte/ 01-8000-947262
Ecuador www.panasonic.com/pa/soporte/ 1-800-726276
Costa Rica www.panasonic.com/pa/soporte/ 800-7262737
El Salvador www.panasonic.com/pa/soporte/ 800-7262
Guatemala www.panasonic.com/pa/soporte/ 1-801-811-7262
Uruguay www.panasonic.com/pa/soporte/ 0-800-7262
Paraguay www.panasonic.com/pa/soporte/ Sitio Web
Perú www.panasonic.com/pe/soporte/ 0800-00726
Venezuela www.panasonic.com/pa/soporte/ Sitio Web
México www.panasonic.com/mx/soporte/ 800-847-7262
55-5000-1200
Argentina 0800-333-7262
0810-321-7262
R. Dominicana www.panasonic.com/pa/soporte/ 809-607-2152
PM700PP_TQBM0873_le.fm Page 14 Friday, March 17, 2023 5:53 PM
Especificaciones
█
Generalidades
Dimensiones (An x Al x Prf)
SA-PM700 210 mm × 114 mm × 261 mm
(8 " × 4½" × 10 ")
SB-PM700 145 mm × 226 mm × 195 mm
(5¾" × 8 " × 7 ")
Peso
SA-PM700 2.2 kg (4.9 lbs)
SB-PM700 1.8 kg (4.0 lbs)
Gama de temperaturas de funcionamiento
0°C a +40°C
(+32°F a +104°F)
Gama de humedades de funcionamiento
35% a 80% humedad relativa (sin condensación)
█
Sección del amplificador
Potencia de salida RMS
Canal frontal (ambos canales controlados)
40 W por canal (6 Ω), 1 kHz, 10% THD
Potencia RMS total 80 W
█
Sección de discos compactos
Discos reproducidos [8 cm (3") o 12 cm (5")]
CD, CD-R/RW
Lector
Longitud de onda 790 nm (CD)
USB CD-DA, MP3*
1
Cantidad máxima de carpetas (álbumes) 255
Cantidad máxima de archivos (canciones) 999
*
1
MPEG-1 Layer 3, MPEG-2 Layer 3
█
Sección del sintonizador
Frecuencia modulada (FM)
Memoria preconfigurada 30 emisoras
Gama de frecuencias
87.9 MHz a 107.9 MHz (en pasos de 200 kHz)
87.5 MHz a 108.0 MHz (en pasos de 100 kHz)
Terminales de la antena 75 Ω (desequilibrado)
█
Sección de bocinas
Bocina(s)
Bocina para graves Tipo cónico de 10 cm (4") x 1
Bocina para agudos Tipo cónico de 6 cm (2⅜") x 1
Impedancia 6 Ω
█
Sección de Bluetooth
®
Especificación del sistema de Bluetooth
®
Bluetooth
®
Versión 4.2
Clasificación del equipo inalámbrico Clase 2 (2.5 mW)
Perfiles admitidos A2DP, AVRCP
Códec compatible SBC
Banda de frecuencia Banda de 2.4 GHz FH-SS
Distancia de funcionamiento
Aprox. 10 m (33 pies) de la línea de visión*
2
*
2
Posible distancia de comunicación
Entorno de medición:
Temperatura 25°C (77°F)/Altura 1.0 m (3.3 pies)
Medición en “MODE 1”
█
Sección de terminales
Toma de audífonos Estéreo, toma de 3.5 mm (⅛")
USB Conector A tipo USB, trasero
Cantidad máxima de carpetas (álbumes) 800
Cantidad máxima de archivos (canciones) 8000
Sistema de archivos FAT12, FAT16, FAT32
Energía puerto USB CC OUT 5 V, 500 mA (máx.)
█
Sección de formato
USB
USB estándar USB 2.0 velocidad total
Clase de almacenamiento masivo USB
Compatibilidad del formato
MP3 (32kHz, 44.1kHz, 48kHz /
16 kbps - 320 kbps)
Nota:
• Las especificaciones están sujetas a cambios sin previo
aviso.
El peso y las dimensiones son aproximados.
• La distorsión armónica total se mide con el analizador de
espectro digital.
Fuente de alimentación CA 120 V, 60 Hz
Consumo de energía 27 W
Consumo en el modo de espera (aproximado)
Con “BLUETOOTH STANDBY” configurado como
“OFF” 0.2 W
Con “BLUETOOTH STANDBY” configurado como
“ON” 0.3 W
ESPAÑOL
Panasonic Corporation of North America
Two Riverfront Plaza, Newark, NJ 07102-5490
https://shop.panasonic.com
Panasonic Entertainment & Communication Co., Ltd.
https://www.panasonic.com
© Panasonic Entertainment & Communication Co., Ltd. 2023
Printed in Malaysia
TQBM0873
L0323CH0
Sp
PM700PP_TQBM0873_le.fm Page 15 Friday, March 17, 2023 5:53 PM