Email:support@euhomy.com
Facebook:@Euhomy.Official
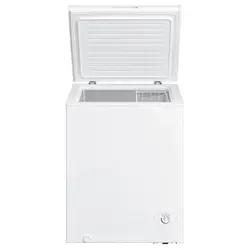
CHEST FREEZER
SKU:MCF-35H-HM
Instruction Manual


Congratulations
Dear Customer:
Welcome to the Euhomy family. Thank you for purchasing one of our products.
Our goal is to provide you with superior service. If there is anything missing from or wrong with
your order, or if you have any questions about using our ice maker, PLEASE contact us.
Email: [email protected]
Facebook: @Euhomy.Official
The Euhomy team is available 24/7 to address your questions, comments, and concerns. Your
satisfaction is our ultimate goal. We want to make everything right so you'll share your positive
experience with other shoppers on Amazon.
If you experience any problems, please send an email to [email protected].
Our mission:
* To be the most trusted appliance brand.
* To create practical, compact appliances that better your life.
Be sure to register at
www.euhomy.com/register
for updates, warranty, and other relevant information.


Contents
01
Parts 02
Important safety instructions
03-04
Installation Instructions
05
Troubleshooting Guide
Operating Your Freezer
06-08
09
Care and Maintenance
12
Technical Information
10-11


WARNING:
Never touch the interior of the freezer chamber or any frozen foods in the compartment
with wet hands as this could result in frostbite.
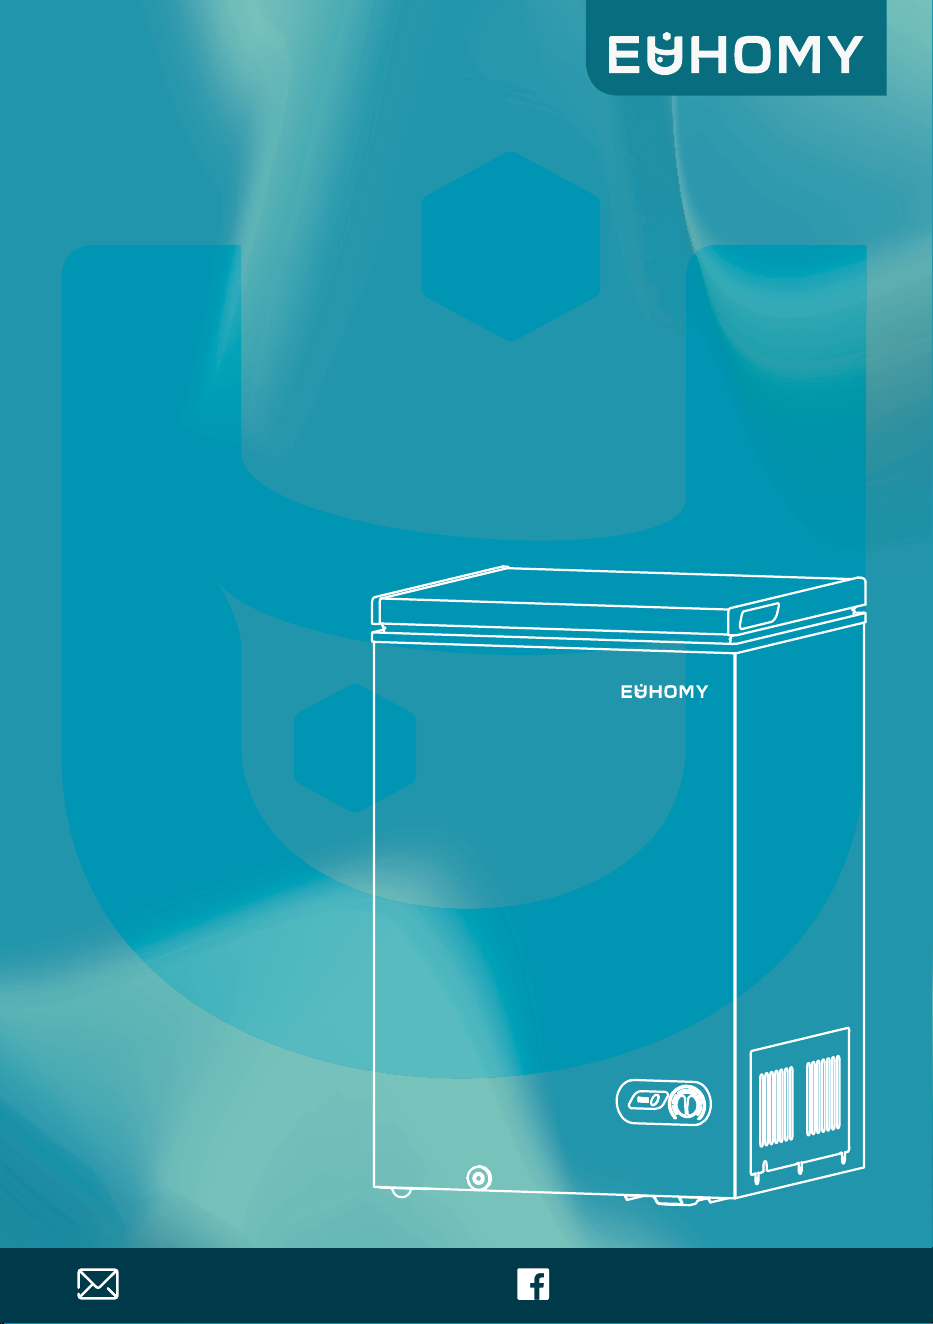
PARTS
02
1. Temperature control dial 2. Removable plastic basket×2
3. Exterior drain 4. Compressor On indicator (green)

WARNING
To reduce the risk of fire, electrical shock, or injury when
using your freezer, follow these basic precautions.
-SAVE THESE INSTRUCTIONS-
Read all instructions before using the freezer.
DANGER WARNING: Risk of child entrapment. To avoid the possibility of child
entrapment when the freezer is not in use, remove the freezer top and DO NOT remove
the basket.
Before you throw away your old freezer: Take off the top. Leave the basket in place so
that children may not easily climb inside.
Never allow children to operate, play with, or crawl inside the freezer.
Refrigerants: All refrigeration products contain refrigerants, which, under the guidelines
of federal law, must be removed before disposing of the product. It is the consumer’s
responsibility to comply with federal and local regulations when disposing of this
product.
Never clean freezer parts with flammable fluids. The fumes can create a fire hazard or
explosion.
Do not store or use gasoline or any other flammable vapors and liquids in the vicinity of
this or any other freezer. The fumes can create a fire hazard or an explosion.
Important Safety Instructions
03

04
Important Safety Instructions
Before Using Your Freezer
Installing Your Freezer
Remove the exterior and interior packing.
Check to be sure you have all of the following accessories:
This appliance is designed to be freestanding only and should not be recessed or built in.
Place your freezer on a floor that is strong enough to support the freezer when it is fully
loaded.
Allow 5 inches of space around the back and sides of the freezer for proper air ventilation.
Adjust the feet to keep the freezer level.
Your freezer should be conveniently located in a dry, well-ventilated room away, from direct
sunlight and sources of heat (stove, heater, radiator, etc.). Direct sunlight may affect the
acrylic coating, and heat sources may increase electrical consumption. Do not install the
freezer where the temperature could drop below 32 °F or rise above 100 °F. Temperatures
outside of this range may affect the performance and longevity of the unit.
Avoid running the freezer in damp areas.
Plug the freezer into a dedicated, properly installed, grounded wall outlet. Do not, under any
circumstances, cut or remove the third (ground) prong from the power cord. Any questions
concerning power and/or grounding should be directed to a certified electrician or an
authorized service center. This unit is not designed to be installed in an RV or used with an
adapter.
After plugging the appliance into a wall outlet, turn the unit on and allow the unit to cool for
2–3 hours before placing food in the freezer compartment.
Before connecting the freezer to a power source, let the freezer stand upright for approxi-
mately 4 hours. This will reduce the possibility of a malfunction in the cooling system from
improper handling during transportation.
Clean the interior surface with lukewarm water and a soft cloth (see “Cleaning Your Freezer”
on page 7).
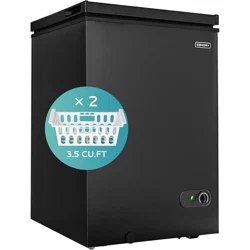
■Storage basket (1)
■Ice shovel (1)
■Instruction manual (1)

Installation Instructions
DANGER: Risk of Fire or Explosion. Flammable Refrigerant Used. To Be Repaired Only by
Trained Service Personnel. Do Not Puncture Refrigerant Tubing.
CAUTION: Risk of Fire or Explosion. Flammable Refrigerant Used. Consult Repair Manu-
al/Owner’s Guide Before Attempting to Service This Product. All Safety Precautions Must Be
Followed.
CAUTION: Risk of Fire or Explosion. Dispose of Properly in Accordance With Federal or Local
Regulations. Flammable Refrigerant Used.
CAUTION: Risk of Fire or Explosion Due to Puncture of Refrigerant Tubing. Follow Handling
Instructions Carefully. Flammable Refrigerant Used.
Improper use of the grounded plug can result in electrical shock. If the power cord is damaged,
have it replaced by an authorized service center.
This freezer should be properly grounded for your safety. The power cord for this freezer is
equipped with a three-prong plug, which mates with standard three-prong wall outlets to
minimize the risk of electrical shock.
Do not, under any circumstances, cut or remove the third ground prong from the supplied
power cord.
This freezer requires a standard AC 115–120V/60Hz electrical outlet with three-prong
ground.
This freezer is not designed to be used with an adapter.
To prevent accidental injury, the cord should be secured behind the freezer and not left
exposed or dangling.
Never unplug the freezer by pulling the power cord. Always grip the plug firmly and pull it
straight out from the receptacle.
Do not use an extension cord with this appliance. If the power cord is too short, have a
qualified electrician or service technician install an outlet near the appliance. Use of an
extension cord can negatively affect the performance of the unit.
The Power light (red) indicates that the freezer is properly connected to an electrical source.
Do not attempt to repair or replace any part of your refrigerator unless it is specifically
recommended in this manual. All other servicing should be referred to a qualified technician so
as to minimize the risk of ignition due to incorrect parts or improper service.
Electrical Connection
WARNING
05
DANGER: Risk of Fire or Explosion. Flammable Refrigerant Used. To Be Repaired Only by
Trained Service Personnel. Do Not Puncture Refrigerant Tubing.
CAUTION: Risk of Fire or Explosion. Flammable Refrigerant Used. Consult Repair Manu-
al/Owner’s Guide Before Attempting to Service This Product. All Safety Precautions Must Be
Followed.
CAUTION: Risk of Fire or Explosion. Dispose of Properly in Accordance With Federal or Local
Regulations. Flammable Refrigerant Used.
CAUTION: Risk of Fire or Explosion Due to Puncture of Refrigerant Tubing. Follow Handling
Instructions Carefully. Flammable Refrigerant Used.
Risk of Fire or Explosion. Flammable Refrigerant Used. To Be Repaired Only by
06
Operating Your Freezer
Risk of Fire or Explosion. Flammable Refrigerant Used. To Be Repaired Only by
Temperature Control
Once your freezer is in its proper place, plug the power cord into an electrical socket to turn on
the unit. The light (green) will be lit if the freezer compressor is in operation (i.e., the tempera-
ture control dial is set anywhere from 1 to 7).
* Given a room temperature of 66℉.
0
6
1
2
4
3
5
temperature control dial
7
Temperature Control Chart
Temperature dial setting
0
1
2
3
4
5
6
7
3.87℉
1.83℉
0.82℉
–1.41℉
–3.26℉
–6.25℉
–7.42℉
Average freezer temperature*
N/A (freezer off)

07
Operating Your Freezer
Note:
If the unit is unplugged or loses power, you must wait 3 to 5 minutes before restarting the unit.
If you attempt to restart before this time delay, the freezer will not start.
Large volumes of food will lower the cooling efficiency of the appliance.
If you choose to change the thermostat setting, adjust the thermostat control by one numerical
increment at a time. Allow several hours for the temperature to stabilize between adjustments.
For maximum operating efficiency and minimum energy consumption, defrost the freezer when
the frost on the freezer walls is excessive, or 1/4 to 1/2 inch thick (approximately every 3
months).
Choose a time when the stock of frozen food is low.
Do not use boiling water to defrost your freezer because hot water may damage the
plastic parts. In addition, never use a sharp or metallic instrument to remove frost as it
may damage the cooling coils and will void the warranty.
Remove frozen food from the freezer and place it in a cooler or ice chest to protect the food.
Unplug the freezer. The Run light (green) should be off.
During defrosting, the ice melts into the compartment.
When the defrosting process is complete, place a shallow pan beneath the drain outlet on the
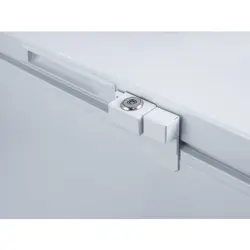
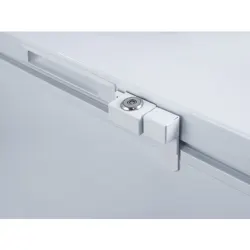
exterior front of the freezer (lower left).•
Unscrew and remove the drain cap.
Let all the water (melted ice) drain out.
Check the pan occasionally so the water does not overflow.
Defrosting Your Freezer
Your freezer will automatically maintain the temperature level you select.
Turning the dial to 0 (off) stops the freezer’s cooling cycle but doesn't shut off power to the
freezer. The Run indicator (green) will turn off.
When turning the freezer on for the first time, set the temperature dial to 4 and allow 24 hours to
pass before adjusting the temperature to your needs. This will ensure the freezer compartment is
thoroughly chilled before food is put in.
CAUTION:

WARNING
08
Operating Your Freezer
Clean the interior of the freezer.
Replace the drain cap.
Plug in the unit and wait for the Power light (red) to come on.
Adjust the temperature control dial to 7. The Run indicator (green) should come on.
Allow the cabinet to cool for 1 hour.
Return food to the freezer.
Adjust the temperature control dial to set the freezer to your preferred temperature.
Defrosting usually takes a few hours. Leaving the door open will speed up the melting process.
Pouring warm (NOT boiling!) water onto the ice will also speed up the melting process.
This compartment is designed for the long-term storage of frozen food, up to 3 months.
The storage life of frozen foods varies, and the recommended storage time for a food should not
be exceeded. The instructions regarding the care of frozen foods should be followed when
defrosting the freezer.
Pre-packed, commercially frozen foods should be stored in accordance with the frozen foods
manufacturers’ instructions.
Place frozen food into the freezer as quickly as possible after purchase. If there are instructions
about storage times on the packet, carefully follow these instructions.
The freezer lid is susceptible to breakage due to excessive ice buildup. Be sure to defrost when the
ice reaches 1/4 to 1/2 inch thick.
A storage basket is provided for the organization of odd-shaped items. To reach other packages in
the freezer, simply slide the basket to one side or lift it out.
Scraping ice from the freezer compartment can damage the unit.
HELPFUL HINT
The Freezer Compartment

Care and Maintenance
Unplug the freezer.
Remove all food and the storage basket.
Wash the inside with a soft cloth soaked in a solution of 1 quart of lukewarm water and 2 table-
spoons of baking soda.
Wash the storage basket with a solution of mild detergent and warm water.
Be sure to keep the door gasket clean to keep the unit running efficiently.
The outside of the freezer should be cleaned with mild detergent and warm water.
Dry the interior and exterior with a soft cloth.
Short vacations: Leave the freezer operating during vacations of less than 3 weeks.
Long vacations: If the appliance will not be used for several months, remove all food and unplug
the power cord. Clean and dry the interior thoroughly. To prevent odors and mold growth, leave
the door open slightly. Prop the door open if necessary or remove the door.
Cleaning Your Freezer
We recommend that you clean your new appliance thoroughly before installing it
and each time it is defrosted to help keep the unit odor-free and running efficiently.
09
Vacation Time
Unplug the freezer.
Remove all the food.
Securely tape down all loose items inside your freezer.
Tape the doors shut.
Be sure the freezer stays upright during transportation.
Moving Your Freezer
The freezer should be located in the coolest part of the room, away from heat-producing applianc-
es or heating ducts, and out of direct sunlight.
Let hot foods cool to room temperature before placing them in the freezer. Overloading the
freezer forces the compressor to run longer. Foods that freeze too slowly may spoil.
Be sure to wrap foods properly. Wipe containers dry before placing them in the freezer. This cuts
down on frost build-up inside the freezer.
The storage basket should not be lined with aluminum foil, wax paper, or paper towels. Liners
interfere with air circulation, making the freezer less efficient.
Organize and label food to reduce door openings and extended searches. Remove as many items as
needed at one time, and close the door as soon as possible.
Energy-Saving Tips
External freezer surface is warm.
External freezer surface is warm.
Temperature control is set too cold.
SOLUTION: Turn control to a warmer setting and allow
several hours for temperature to stabilize.
Exterior freezer walls can be as much as 30 °F warmer than
room temperature. This is normal as the compressor works to
transfer heat from inside the freezer cabinet.
10
Troubleshooting Guide
You can solve many common freezer problems easily, thus saving the cost of a service call. Try the
suggestions below to see if you can solve the problem before calling for service.
Problem Possible Cause
Freezer does not operate.
Compressor turns on and off
frequently.
Temperature inside the freezer is too
high.
Temperature inside the freezer is too
low.
Temperature control is set too cold.
SOLUTION: Turn control to a warmer setting and allow
several hours for temperature to stabilize.
Power cord is unplugged.The circuit breaker tripped
SOLUTION: Plug in the freezer.
Circuit breaker has been tripped or fuse has blown.
SOLUTION: Please check the circuit or replace the fuse
under the guidance of professional staff.
Freezer does not have enough space around the sides and
back.
SOLUTION: Increase clearance around freezer to improve
air circulation.
Freezer has recently been disconnected for a period of time.
SOLUTION: Give freezer 4 hours to cool down completely.
Room temperature is higher than normal.
A large volume of food has been added to freezer.
Door is opened too often.
Door is not closed completely.
Temperature control is not set correctly.
Door gasket does not seal properly.
Temperature control is set too warm.
SOLUTION: Turn control to a cooler setting and allow
several hours for the temperature to stabilize.
A large volume of warm or hot food has been stored recently.
Freezer has recently been disconnected for a period of time.
SOLUTION: Give freezer time to reach its selected
temperature. It takes 4 hours for freezer to cool down
completely.
Door is kept open too long or is opened too frequently.
Door is not closed completely.
SOLUTION: Keep door fully shut and open only when
needed.
Door gasket does not seal properly.
SOLUTION: Check whether the door seal is aging
deformation.

Troubleshooting Guide
Problem Possible Cause
Popping or cracking sound when
compressor comes on.
Bubbling or gurgling sound, like water
boiling.
Refrigerant is circulating throughout system. This is normal.
Vibrations.
Freezer is on uneven surface.
Freezer rocks on the floor when it is moved slightly.
Floor is uneven or weak.
SOLUTIONS: Be sure floor can adequately support freezer.
Level freezer by putting wood or metal shims under freezer.
Freezer is touching wall.
SOLUTION: Move freezer away from wall. Be sure freezer is
level after it is moved. See “INSTALLATION INSTRUC-
TIONS” on page 3.
Moisture forms inside freezer.
Moisture forms on outside of freezer.
Door does not close properly.
Freezer is not on a level surface.
SOLUTION: Level freezer by putting wood or metal shims
under freezer.
Gasket is old and deformed or has lost suction.
SOLUTION: Replace the door seal with a new one.
Storage basket is out of position.
SOLUTION: Adjust storage basket to let door fully close.
Door is slightly open, causing cold air from inside the freezer
to meet warm moist air from outside.
SOLUTION: Keep door fully closed.
Weather is hot and humid, which increases rate of frost
build-up. This is normal.
SOLUTION: Defrost freezer regularly. See “Defrosting
Your Freezer” on page 6.
Door is slightly open.
SOLUTION: Keep door fully closed.
Door is kept open too long or is opened too frequently.
SOLUTION: Open door less often.
The door is not sealed properly.
SOLUTION: Check whether the suction force of the door
seal is normal.
Metal parts, such as hot water pipes, make sounds when they
expand and contract. This is normal. Sound will level off or
disappear as freezer continues to run.
11

Technical Information
SKU
Rated Voltage
Rated Freouency
Power Input
Capacity
60Hz
65W
3.5 Cu.Ft
Refrigerant
Dimensionsk
Net Weigh
R600a
21.5*21.8*31 inch
50.7 lbs
MCF-35H-HM
115V AC
12


Email:support@euhomy.com
Facebook:@Euhomy.Official