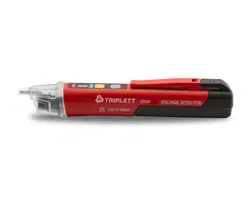
Product:
Dual Range Non-Contact
AC Voltage Detector
WPMDNC1000V10
DO NOT RETURN THIS PRODUCT TO THE STORE
If you have questions
or need assistance, please call
customer service at 888-230-4260.
User
Manual

WARNINGS
International Safety Symbols
Potential danger. Indicates the user must refer to the manual
for important safety information.
Indicates hazardous voltages may be present.
Equipment is protected by double or reinforced insulation.
SAFETY NOTES
• Read, understand, and follow safety rules and operating instructions in the manual
before using this tester.
• The tester’s safety features may not protect the user if not used in accordance with
the manufacturer’s instructions.
• Check on a known live source within the rated AC voltage range of the tester before
use to ensure it is in working order.
• Insulation type and thickness, distance from the voltage source, shielded wires, and
other factors may eect reliable operation. Use other methods to verify live voltage,
if there is any uncertainty.
• Do not use if the tester appears damaged or if it is not operating properly. If in doubt,
replace the tester.
• Do not use on voltages that are higher than as marked on the tester.
• Use caution with voltages above 30 volts AC as a shock hazard may exist.
• Comply with all applicable safety codes. Use approved personal protective equipment
when working near live electrical circuits-particularly with regard to arc-flash potential.
• Do not operate tester if Low Battery warning occurs. Replace batteries immediately.
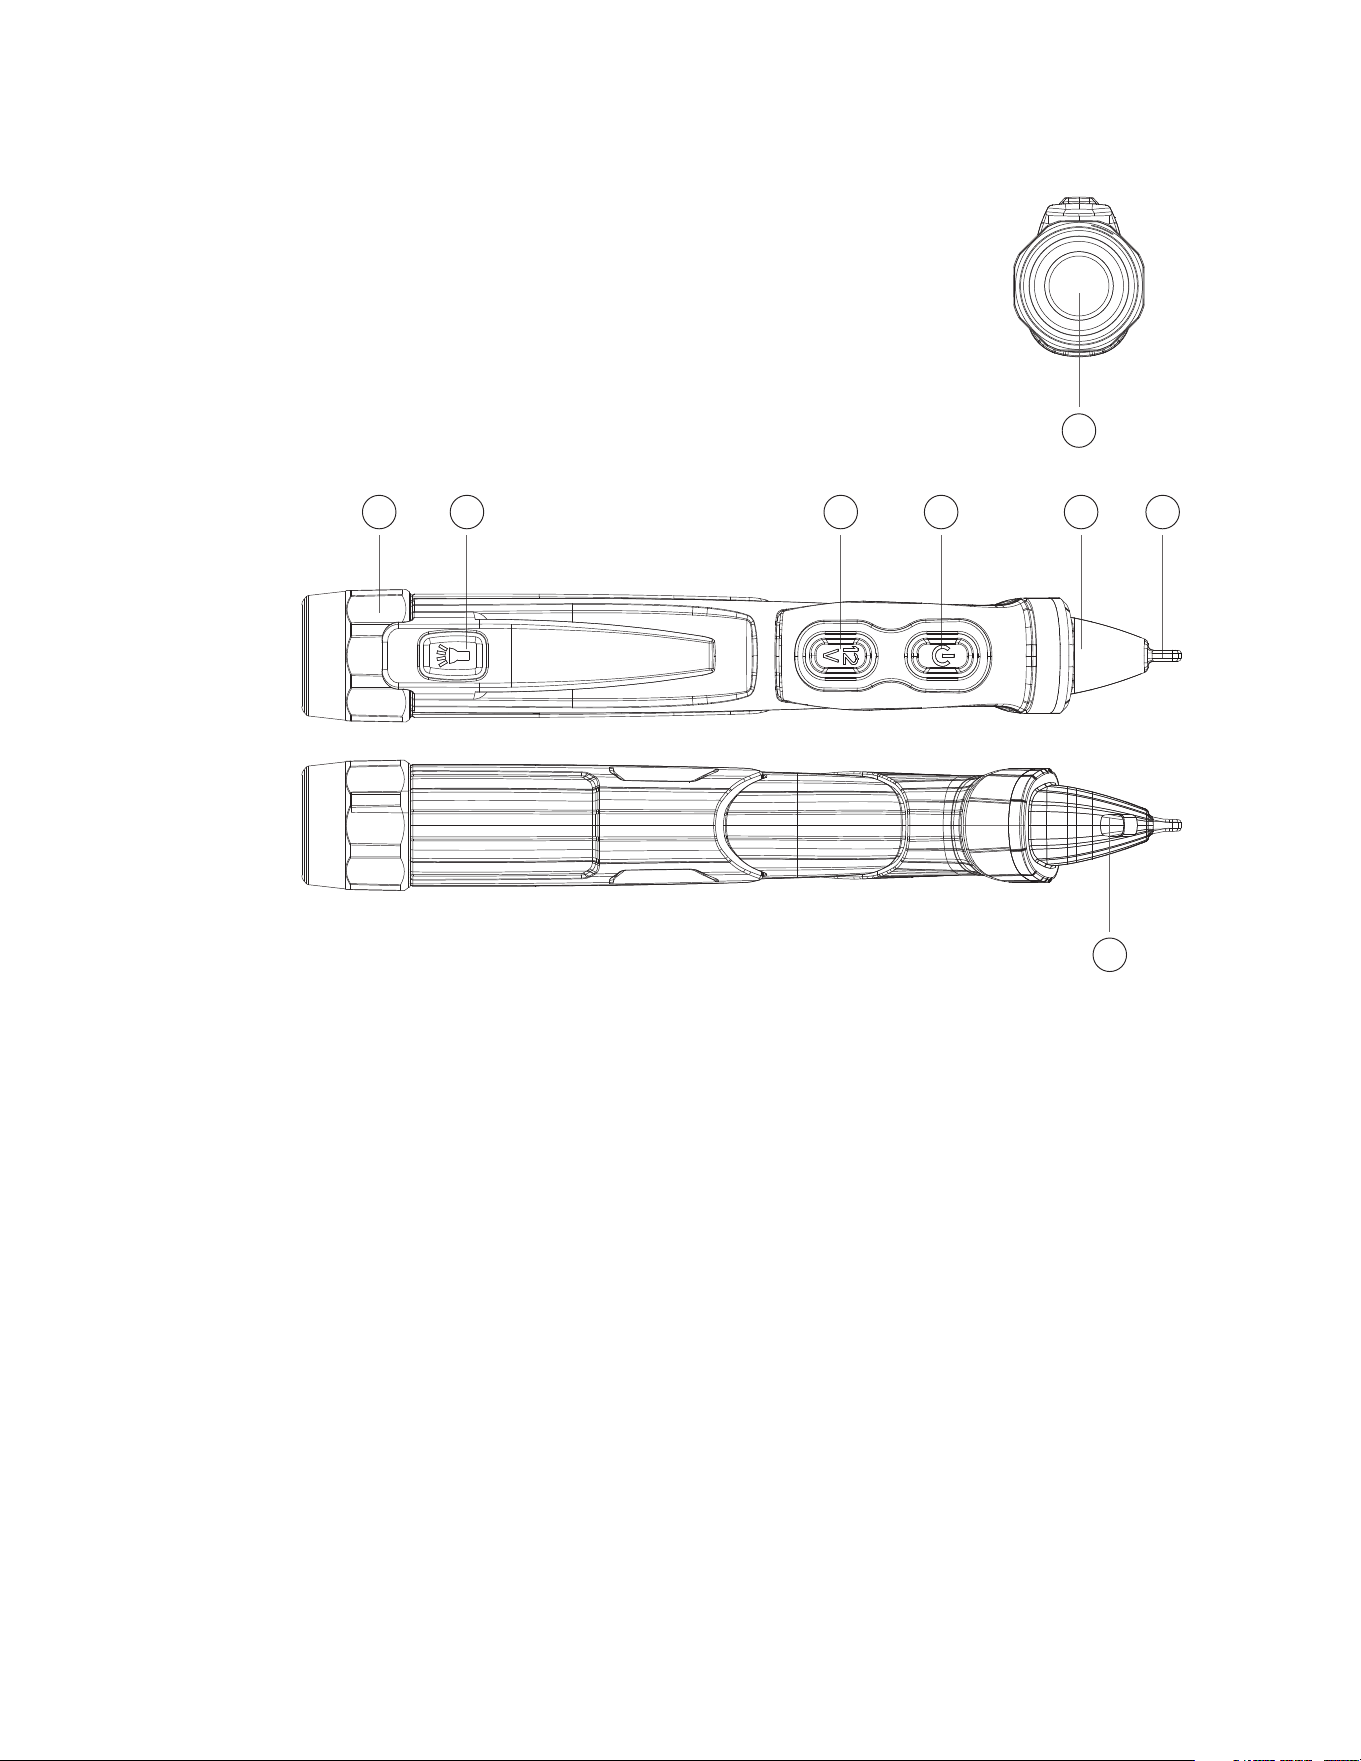
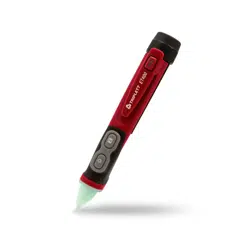
Description
1. Screw on Battery Cover
2. Flashlight Button
3. Range Select Button
4. Tester ON/OFF Button
5. LED Indicators
6. Detector Tip
7. Flashlight
8. Worklight
Operation
1. Turning the Tester On and Self-test
• Momentarily press the On/O button, to turn on the device and activate the tester
self-test.
Self-test pass:
• The beeper will beep once and the range LED will flash twice rapidly to indicate that
the device is on and ready for use.
• The device will self-test every five seconds with AC voltage out o range, the range
LED will flash twice rapidly every self-test pass.
Self-test fail:
• The beeper will beep and all indicator LED will flash five times, and then turn o to
indicate that the device is not ready to use.
2. Turning the Tester O
• Momentarily press the ON/OFF Button, The tester will beep twice and all indicator LED
will turn o to indicate that NCV function is o.
3. Turning the Beeper O
• With the tester o, press and hold the ON/OFF Button until the range LED (green or
yellow) is illuminated, the tester will now operate without the beeper.
• It can not turn the beeper o when the tester is on.
4. Verify Operation
• Before using tester, (1) Make sure the range LED is glowing, (2) Check tester on a
known live AC voltage that is within the defined detection range of the tester.
5. High Voltage Mode (100V to 1000VAC)
• The green range LED is bright to indicate that the tester is working on High Voltage
Mode when the tester is on, place the tip of the tester near an AC voltage.
• If the tester detects voltage within the defined detection range, the tester will light as
red LED and the beeper will beep rapidly.
6. Low Voltage Mode (12V to 1000VAC)
• The yellow range LED illuminate to indicate that the tester work on Low Voltage Mode
when the tester is on, place the tip of the tester near an AC voltage.
• If the tester detects voltage within the defined detection range, the yellow LED will
turn o, the red LED will flash and the beeper will beep.
• The flash rate and beeping rate will increase as the tester gets closer to the voltage
source.
• If the tester detects high voltage, the red LED will change to a steady glow and the
beeper will beep rapidly.
7. Change Voltage Range Mode
• Press the “R” (Range) Button when the tester is on with NCV function, the tester will
change voltage range mode once between low voltage mode and high voltage mode.
• The yellow range LED illuminate to indicate that the tester is working on Low Voltage
Mode, otherwise the green range LED is bright to indicate that the tester is working
on High Voltage Mode.
8. Low Battery Indication
• Replace the batteries if the range LED does not turn on.
• When the tester is on and the batteries are too low for reliable operation, the beeper
will beep three times and the range LED will turn o indicating the tester is not
operational.
• Replace the batteries to restore operation.
9. Auto Power O
• To conserve battery life, the tester will automatically turn o after approximately 5
minutes of inactivity.
• When powering down, the beeper will beep twice and all LED will turn o.
10. Flashlight
• Momentarily press the Flashlight button to turn the flashlight on or o.
• To conserve battery life, the flashlight will automatically turn o after approximately
5 minutes.
• The beeper will beep twice as the flashlight turns o.
11. Worklight
• Press and hold the ON/OFF Button about two seconds when the tester is on with NCV
function, the tester will turn o or turn on the worklight.
• The status of the worklight can only be changed by long press of the ON/OFF Button.
NOTE:
The tester cannot determine the actual voltage. The voltage level where the tester
switches from the low to high voltage mode is eected by insulation type and thickness,
distance from the voltage source, and other factors.
1 2 3 4 5 6
7
8

Operation
1. Turning the Tester On and Self-test
• Momentarily press the On/O button, to turn on the device and activate the tester
self-test.
Self-test pass:
• The beeper will beep once and the range LED will flash twice rapidly to indicate that
the device is on and ready for use.
• The device will self-test every five seconds with AC voltage out o range, the range
LED will flash twice rapidly every self-test pass.
Self-test fail:
• The beeper will beep and all indicator LED will flash five times, and then turn o to
indicate that the device is not ready to use.
2. Turning the Tester O
• Momentarily press the ON/OFF Button, The tester will beep twice and all indicator LED
will turn o to indicate that NCV function is o.
3. Turning the Beeper O
• With the tester o, press and hold the ON/OFF Button until the range LED (green or
yellow) is illuminated, the tester will now operate without the beeper.
• It can not turn the beeper o when the tester is on.
4. Verify Operation
• Before using tester, (1) Make sure the range LED is glowing, (2) Check tester on a
known live AC voltage that is within the defined detection range of the tester.
5. High Voltage Mode (100V to 1000VAC)
• The green range LED is bright to indicate that the tester is working on High Voltage
Mode when the tester is on, place the tip of the tester near an AC voltage.
• If the tester detects voltage within the defined detection range, the tester will light as
red LED and the beeper will beep rapidly.
6. Low Voltage Mode (12V to 1000VAC)
• The yellow range LED illuminate to indicate that the tester work on Low Voltage Mode
when the tester is on, place the tip of the tester near an AC voltage.
• If the tester detects voltage within the defined detection range, the yellow LED will
turn o, the red LED will flash and the beeper will beep.
• The flash rate and beeping rate will increase as the tester gets closer to the voltage
source.
• If the tester detects high voltage, the red LED will change to a steady glow and the
beeper will beep rapidly.
7. Change Voltage Range Mode
• Press the “R” (Range) Button when the tester is on with NCV function, the tester will
change voltage range mode once between low voltage mode and high voltage mode.
• The yellow range LED illuminate to indicate that the tester is working on Low Voltage
Mode, otherwise the green range LED is bright to indicate that the tester is working
on High Voltage Mode.
8. Low Battery Indication
• Replace the batteries if the range LED does not turn on.
• When the tester is on and the batteries are too low for reliable operation, the beeper
will beep three times and the range LED will turn o indicating the tester is not
operational.
• Replace the batteries to restore operation.
9. Auto Power O
• To conserve battery life, the tester will automatically turn o after approximately 5
minutes of inactivity.
• When powering down, the beeper will beep twice and all LED will turn o.
10. Flashlight
• Momentarily press the Flashlight button to turn the flashlight on or o.
• To conserve battery life, the flashlight will automatically turn o after approximately
5 minutes.
• The beeper will beep twice as the flashlight turns o.
11. Worklight
• Press and hold the ON/OFF Button about two seconds when the tester is on with NCV
function, the tester will turn o or turn on the worklight.
• The status of the worklight can only be changed by long press of the ON/OFF Button.
NOTE:
The tester cannot determine the actual voltage. The voltage level where the tester
switches from the low to high voltage mode is eected by insulation type and thickness,
distance from the voltage source, and other factors.
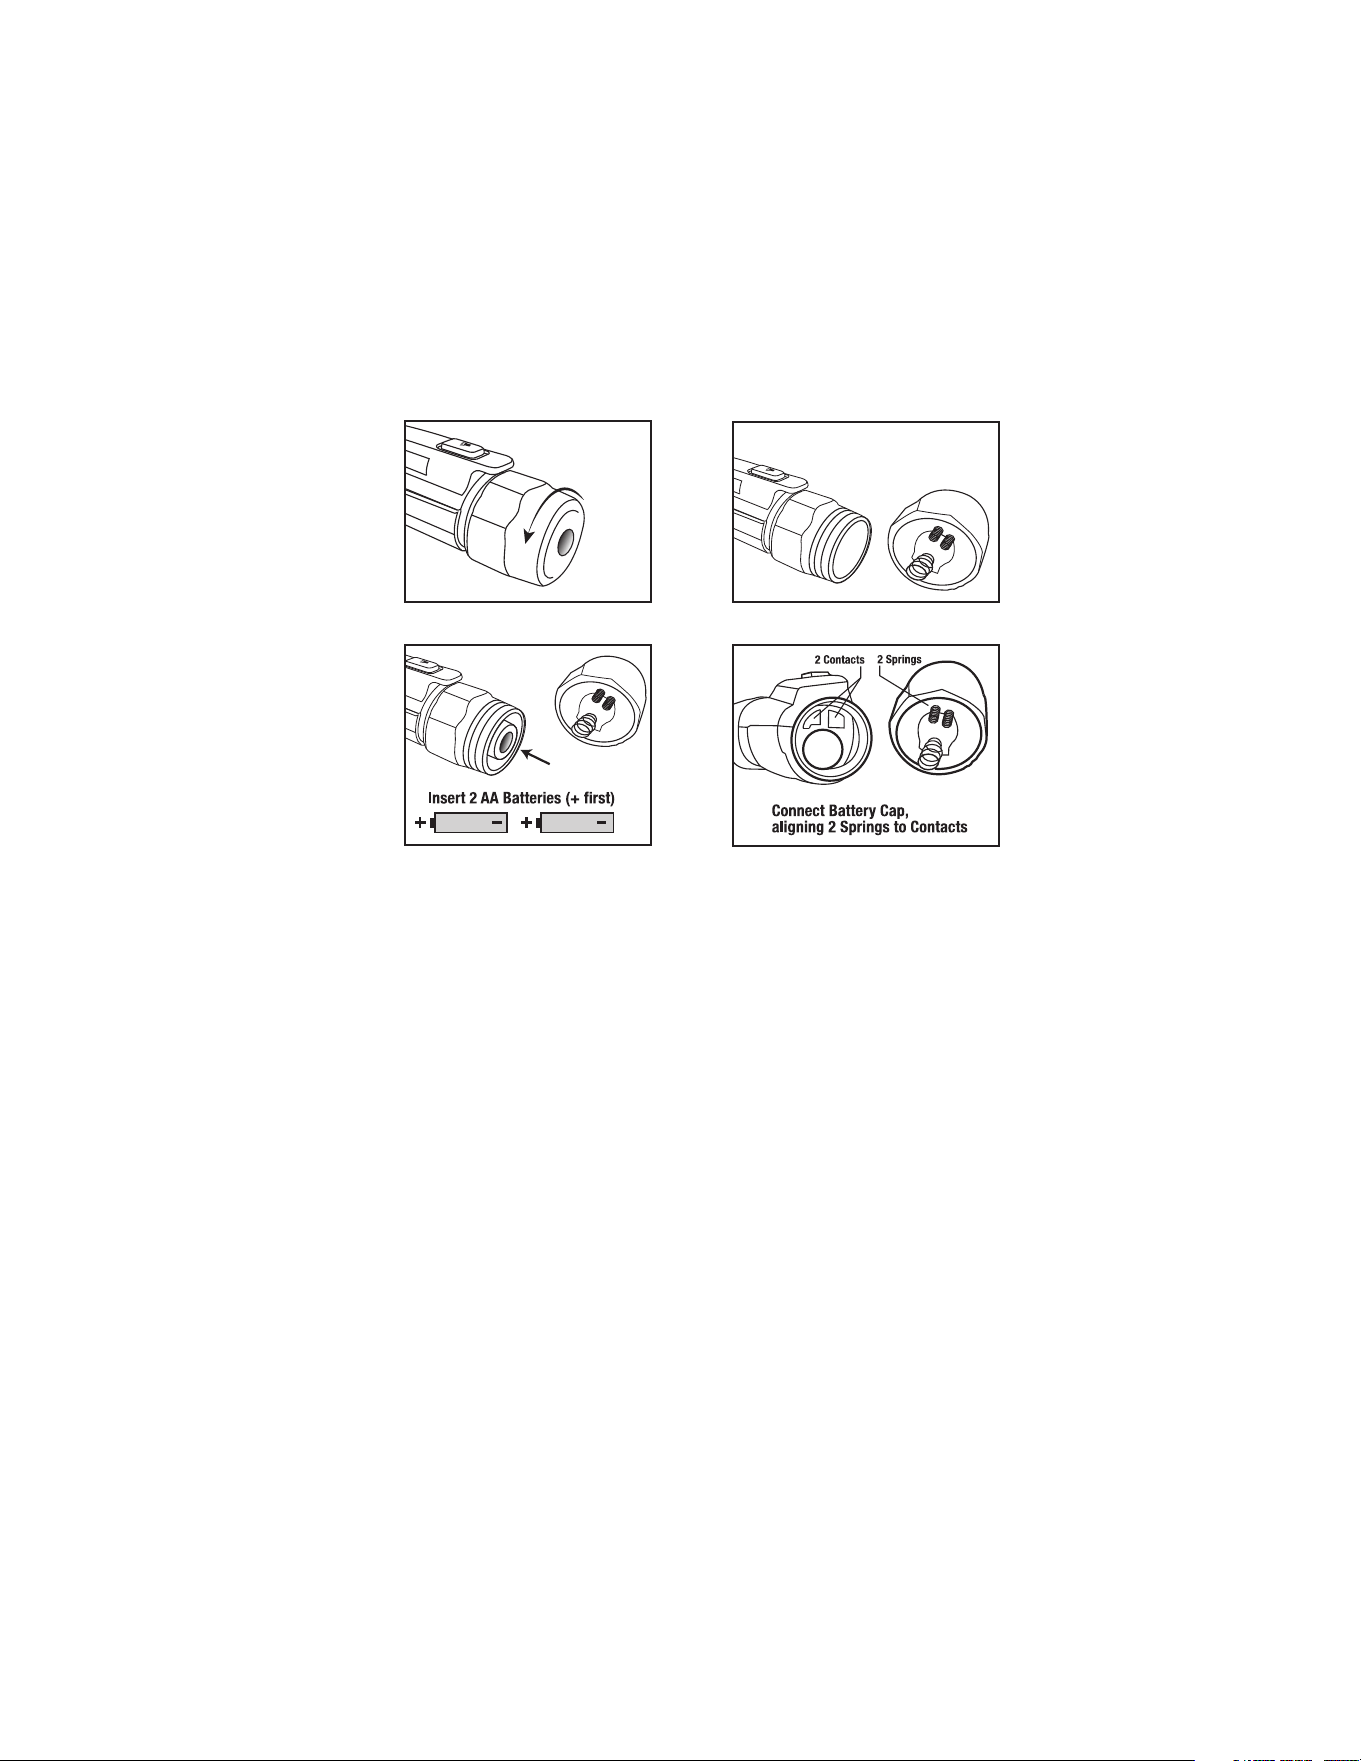
Changing Batteries
1. Carefully unscrew battery cap at the rear (flashlight end) of the tester.
2. Replace batteries with two AAA 1.5V batteries. Observe polarity.
3. Carefully align cover with tester as shown below.
4. Tighten the battery cap securely but avoid overtightening, as this may damage the
tester or compromise its IP67 protection.
5. Verify proper operation.
NOTE:
When batteries are loaded for the first time, remove the white rectangular security strip
before installing batteries.
NOTE:
When replacing the batteries, be sure to secure the cap firmly to maintain IP67 water and dust
protection. A loose or overtightened battery cap may compromise water and dust protection.
Care and Maintenance
• Do not immerse the instrument in water.
• Ensure the instrument is powered o, then wipe the dirt with a soft cloth dampened
with pure water.
• Do not use aggressive cleaning agents or solutions.
• Do not mix dierent types of batteries such as alkaline, carbon-zinc, or rechargeable
batteries.
• Handle the instrument with care.
• Please take out the battery when the instrument is not used for a long time.
• Remove the batteries if the tester will not be used for an extended period to prevent
battery leakage and damage.
• Keep it away from high temperatures and humidity.
• If the non contact AC voltage detector has been stored in extreme conditions beyond
the limits specified in the General Specifications section, allow it to stabilize under
normal operating conditions before use.
End of the Tester Cap with springs to align
Observe correct polarity
when installing batteries.
Push IN and Rotate Cap
back onto Tester Body

100V to 1000VAC, 12V to 1000VAC
50/60Hz
Two AAA 1.5V batteries
0 to 50°C (32 to 122°F)
-10 to 60°C (14 to 140°F)
80% max.
2000 meters
2
CAT IV 1000V
IP67
160 x 25 x 23mm (6.29 x 0.98 x 0.90in)
66g (2.32oz)
For Indoor Use. Have been investigated by UL in accordance
with the Standard(s) for Safety: UL61010-1, 3rd Edition,
Mai 11, 2012, Revised November 21 2018, CAN/CSA-C22.2
No. 61010-1-12, 3rd Edition and Additional Standards:
IEC 61010-2-030:2017 (Second Edition)
UL 61010-2-030 Ed.2 Published December 21, 2018;
CAN/CSA C22.2 No 61010-2-030:18 Published December 2018
Detection Voltage Range
Frequency Range
Batteries
Operating Temperature
Storage Temperature
Humidity
Altitude
Pollution Degree
Safety Compliance
IP Rating
Dimensions
Weight
Safety
General Specifications

2-Year Warranty
If your product fails due to defects in materials or workmanship, we will replace it.
This warranty is valid only for the original end-user purchaser of the product.
Exclusions:
• The warranty is non-transferable.
• For details, contact Customer Care at (888) 230-4260 or send us a mail at
• This warranty applies exclusively to products purchased directly from us or our
authorized sellers. Products bought from unauthorized sellers, including
unapproved online platforms, may not be covered unless prohibited by law.
• We reserve the right to deny warranty claims for items purchased from
unauthorized sellers.
Legal Rights:
This warranty provides you with specific legal rights, and you may have additional
rights that vary by state or country. Proof of purchase indicating the date and place of
purchase may be required.
Limitations:
This limited warranty replaces all other express warranties. Any implied warranties,
including merchantability or fitness for a particular purpose, are limited to the
duration of this warranty. We are not liable for incidental or consequential damages.
Note: Some states or countries do not allow limitations on the duration of implied
warranties or exclusions of certain damages, so these limitations may not apply to you.
This guarantee applies only to products purchased from us or authorized sellers unless
prohibited by law. We may reject claims for items bought from unauthorized sellers,
including unapproved online platforms.
For more details or to confirm if a seller is authorized, contact Customer Care at
(888) 230-4260 or email us at [email protected]
Disposal / Recycle
Do not dispose of the equipment and its accessories in the trash. Ensure proper disposal in
compliance with local regulations. For more information, visit www.epa.gov/recycle.

www.westinghouse.com
Service Number 888-230-4260
and Westinghouse are trademarks of Westinghouse Electric Corporation.
Used under license by Bramli USA Inc.