
Installation Guide
Tapo Solar Panel
*Images may dier from your actual products. © 2023 TP-Link 1910013456

1
Position the Solar Panel
Note: The position and tilt angle of the solar panel greatly aects solar eciency.
1. Choose a location where the solar panel gets the most sunlight throughout the
year.
2. Position the panel south-facing in the Northern Hemisphere or north-facing in
the Southern Hemisphere.
3. Regularly wipe the panel to remove dust and debris.
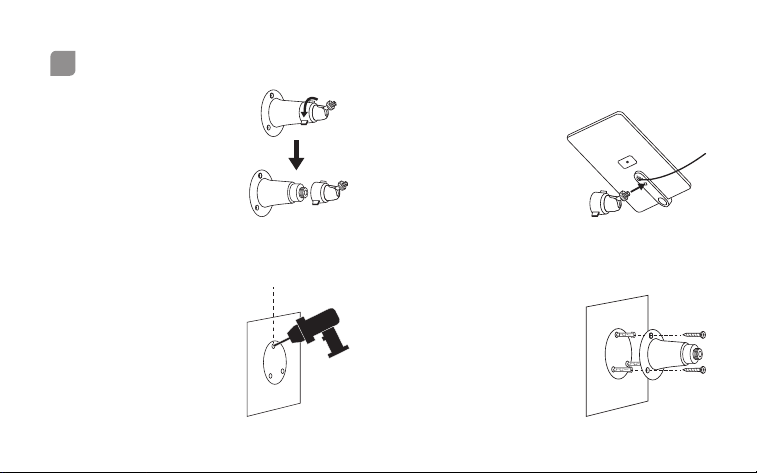
2. Install Adjustable Bracket
Install the adjustable
bracket on the back of
the solar panel and
tighten the xing screw.
1. Detach Bracket
Loosen the adjustable
screw to detach the
mounting bracket and
adjustable bracket.
3. Drill Holes
Stick the mounting
template to the
desired location. Drill
three screw holes
according to the
template.
4. Install Mounting Bracket
Insert three mounting
anchors into the holes
and use the mounting
screws to ax the
bracket over the
anchors.
Φ=6 mm (15/64 in.)
2
Mount the Solar Panel
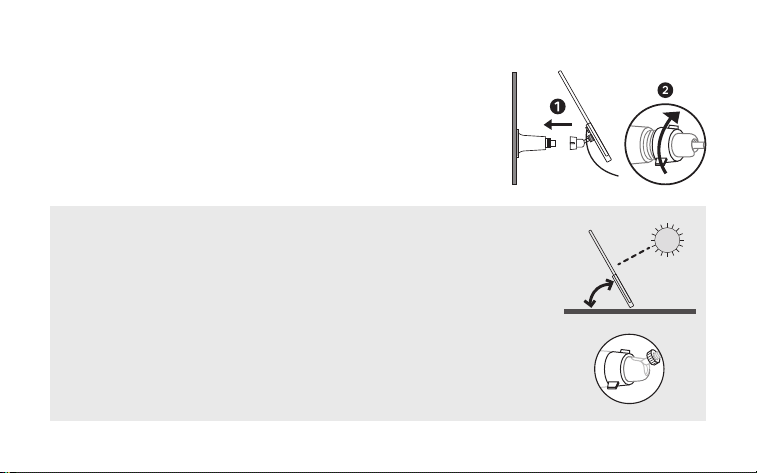
5. Install Solar Panel
Install the solar panel on the mounting bracket, rotate
the adjustable screw but keep it loose, tilt the solar panel
to adjust the angle, then tighten the adjustable screw.
To optimize your solar panel eciency:
1. Mount the solar panel south-facing in the Northern Hemisphere
or north-facing in the Southern Hemisphere.
2. Adjust the tilt angle between the panel and the horizontal ground.
The recommended tilt angle is 35° ~ 45°.
Note: To adjust the angle, loosen the adjustable screw, tilt the solar
panel to the desired angle, then tighten the adjustable screw and
xing screw.

Note: Images may dier from your actual products. If the USB port of your Tapo device
is against the wall, please move the device for easier access, then return it.
1. Slide the waterproof gasket onto the USB connector of the solar panel cable.
2. Plug the USB connector into the USB port of your Tapo device for charging.
3
Connect the Solar Panel to Your Tapo Device
