
2

3
CONTENTS
Technical data…...…………………………………………………….... 3
Introduction……………………………………………………………... 4
Safety information……………………………………………………… 4
General safety rules…….………………………………………………... 5
Symbols………………………………………………………………… 6
Knowing your flashlight.………….….……………………………...… 7
Assembly instruction…………………………………………….………. 8
Operating instruction…………………………………………………....... 9
Maintenance……………………………………………………...………... 10
Trouble shooting…………………………………………………………. 10
Exploded view…………………………………………………………… 11
Parts list…………………………………………………………………... 12
Warranty…………………………………………………………………. 13
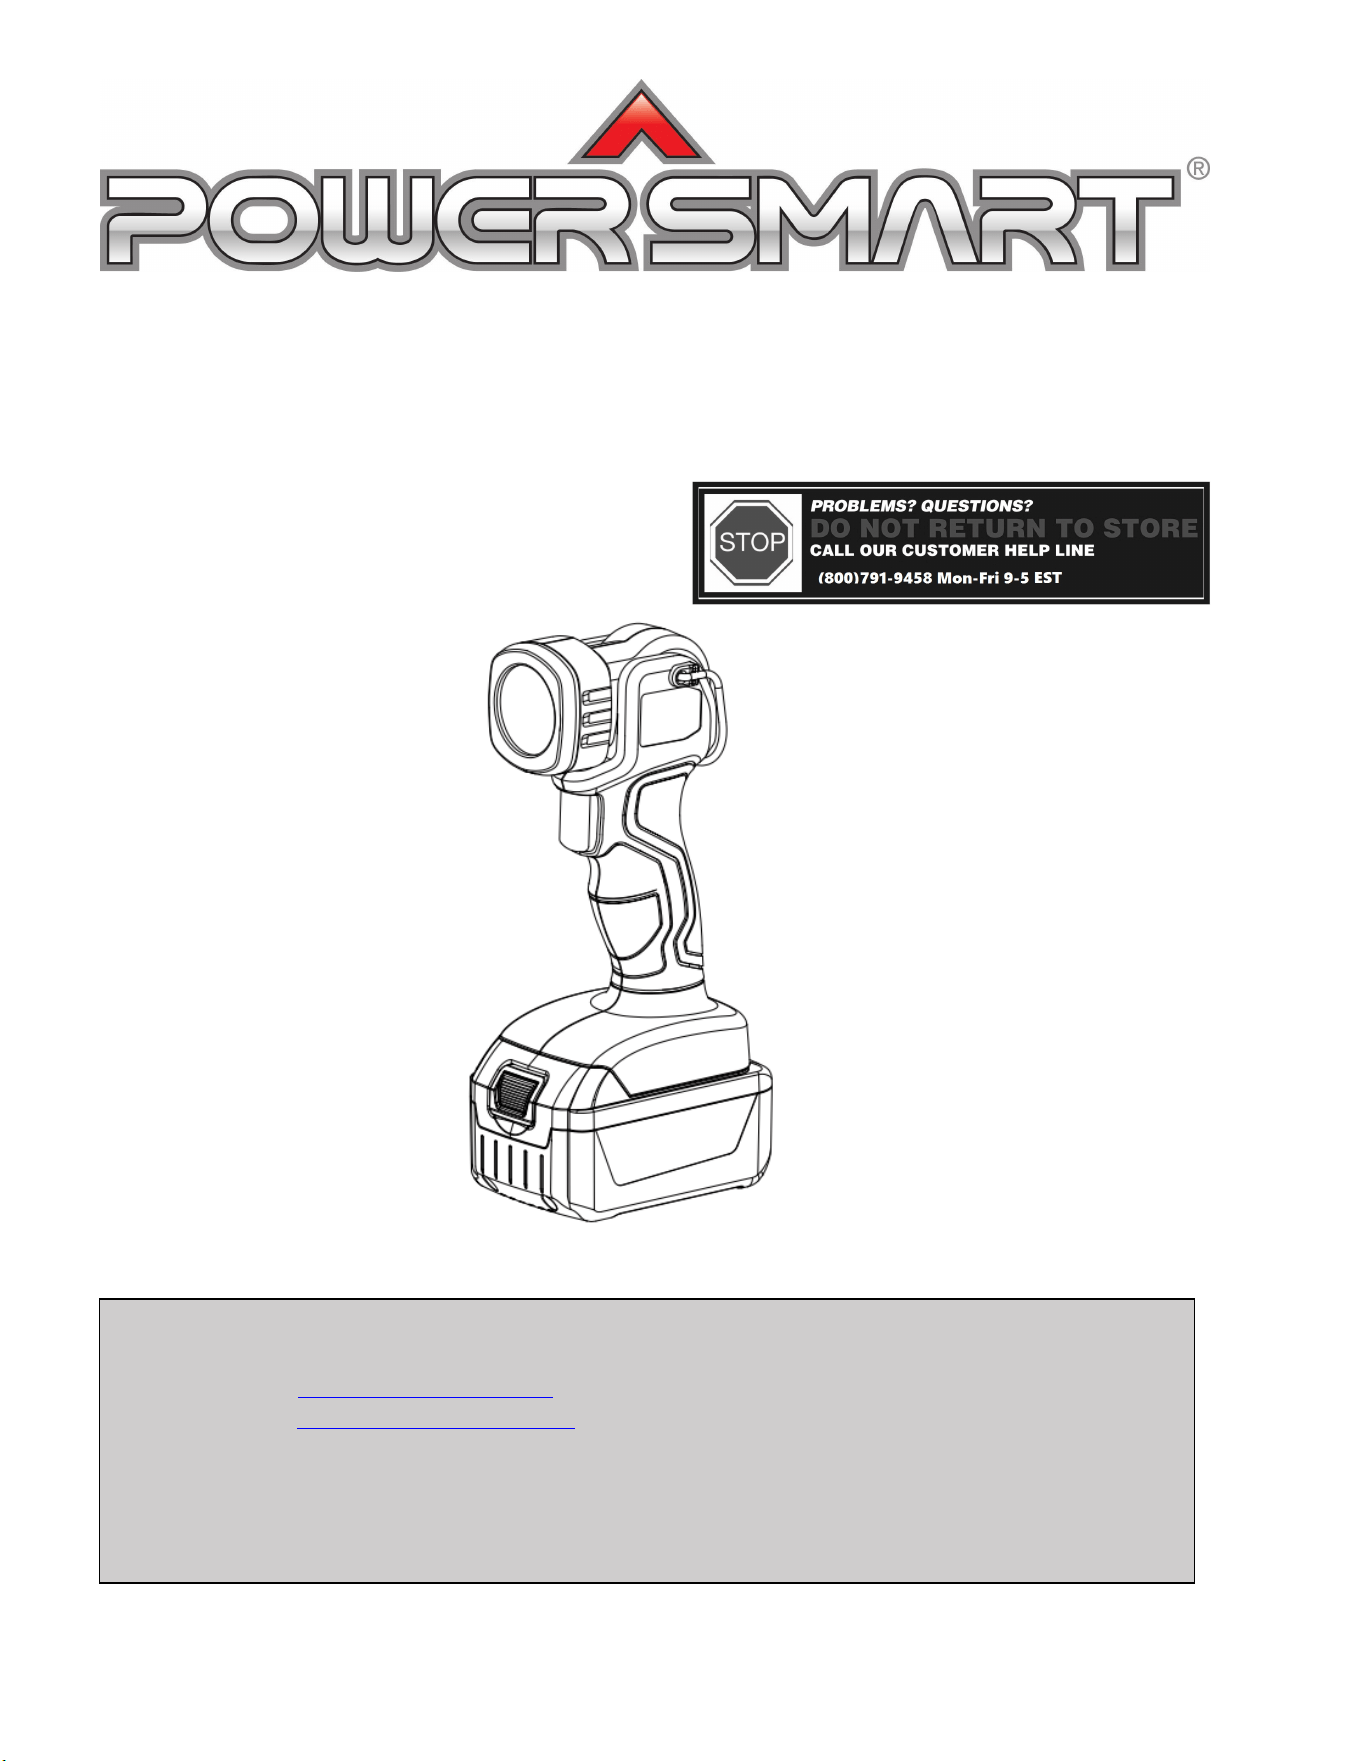
TECHNICAL DATA
20 V Cordless Flashlight Model # PS76420
Rated Voltage: 20 V
Watt: 3 W
Lumens: 110 lm
Running time: 5 hours
Battery type: 20 V Lithium-ion, 1.5 Ah
Battery model: PS76018B
Charge time: 1 hour
Charger model: PS76018C
Weight: 1.3 lb.

4
INTRODUCTION
Thank You for Purchasing a PowerSmart
®
Product. This manual provides information regarding the safe
operation and maintenance of this product. Every effort has been made to ensure the accuracy of the
information in this manual. PowerSmart
®
reserves the right to change this product and specifications at
any time without prior notice.
Please keep this manual available to all users during the entire life of the flashlight.
This manual contains special messages to bring attention to potential safety concerns,
flashlight damage as well as helpful operating and servicing information. Please read all the
information carefully to avoid injury and flashlight damage.
QUESTIONS? PROBLEMS?
Please contact our Customer Service Dept. with any questions and/or comments, either by Email:
help solve any issues that you might encounter.
SAFETY INFORMATION
Before operating this flashlight, read and observe all warnings, cautions, and instructions on the
flashlight and in this Owner’s Manual.
NOTE: The following safety information is not meant to cover all possible conditions and situations that
may occur. Read the entire Owner’s Manual for safety and operating instructions. Failure to follow
instructions and safety information could result in serious injury or death.
This safety alert symbol is used to identify safety information about hazards that can result in personal
injury.
A signal word (DANGER, WARNING, or CAUTION) is used with the alert symbol to
indicate the likelihood and the potential severity of injury. In addition, a hazard symbol may
be used to represent the type of hazard.
DANGER Indicates a hazard, which, if not avoided, will result in death or serious injury.
WARNING Indicates a hazard, which, if not avoided, could result in death or serious injury.
CAUTION Indicates a hazard, which, if not avoided, might result in minor or moderate injury.
CAUTION Without the alert symbol, indicates a situation that could result in damage.

5
GENERAL SAFETY RULES
Safety is a combination of common sense, staying alert, and knowing how your flashlight works.
SAVE THESE SAFETY INSTRUCTIONS.
WARNING: Do not operate this unit until you read this instruction manual for safety,
operation and maintenance instructions. Failure to follow all instructions listed below may
result in electric shock, fire, and/or serious personal injury.
ELECTRICAL SATETY
Power tool plugs must match the outlet. Never modify the plug in any way. Do not use any adapter
plugs with earthed (grounded) power tools. Unmodified plugs and matching outlets will reduce risk
of electric shock.
Avoid body contact with earthed or grounded surfaces such as pipes, radiators, ranges and
refrigerators. There is an increased risk of electric shock if your body is earthed or grounded.
Do not expose power tools to rain or wet conditions. Water entering a power tool will increase the
risk of electric shock.
Do not abuse the cord. Never use the cord for carrying, pulling or unplugging the power tool. Keep
cord away from heat, oil, sharp edges or moving parts. Damaged or entangled cords increase the risk
of electric shock.
When operating a power tool outdoors, use an extension cord suitable for outdoor use. Use of a cord
suitable for outdoor use reduces the risk of electric shock.
If operating a power tool in a damp location is unavoidable, use a ground fault circuit.
POWER TOOL USE AND CARE
• Do not force power tool. Use the correct power tool for your application. The correct power tool will
do the job better and safer at the rate for which it is designed.
• Do not use the power tool if switch does not turn it on or off. Any power tool that cannot be
controlled with the switch is dangerous and must be repaired.
• Disconnect the plug from the power source before making any adjustments, changing accessories, or
storing the power tool. Such preventive safety measures reduce the risk of starting the power tool
accidentally.
• Store idle power tools out of reach of children and other untrained persons. Power tools are
dangerous in the hands of untrained users.
• Maintain power tools with care. Keep cutting tools sharp and clean. Properly maintained power tools,
with sharp cutting edges are less likely to bind and are easier to control.
• Check for misalignment or binding of moving parts, breakage of parts, and any other condition that
may affect the power tools operation. If damaged, have the power tool serviced before using.
• Use the power tool, accessories and tool bits etc. in accordance with these instructions, taking into
account the working conditions and the work to be performed. Use of the power tool for operations
different from those intended could result in a hazardous situation.
6
BATTERY TOOL USE AND CARE
Recharge only with the charger specified by the manufacturer. A charger that is suitable for one type
of battery pack may create a risk of fire when used with another battery pack.
Use power tools only with specifically designated battery packs. Use of any another battery packs
my create a risk of injury and fire. Use only POWERSMART battery (Model#PS76018B)
When battery pack is not in use, keep it away from other metal objects, like paper clips, coins, keys,
nails, screws or other small metal objects, that can make a connection from one terminal to another.
Shorting the battery terminals together may cause burns or a fire.
Under extreme usage or temperature conditions, battery leakage may occur. If liquid comes in
contact with your skin, wash immediately with soap and water, then neutralize with lemon juice or
vinegar. If liquid gets into your eyes, flush them with clean water for at least 10 minutes, then seek
immediate medical attention. Following this rule will reduce the risk of serious personal injury.
SERVICE
• Tool service must be performed only by qualified repair personnel. Service or maintenance
performed by unqualified personnel could result in a risk of injury.
• When servicing a tool, use only identical replacement parts. Follow instructions in the Maintenance
section of this manual. Use of unauthorized parts or failure to follow Maintenance Instructions may
create a risk of electric shock or injury.
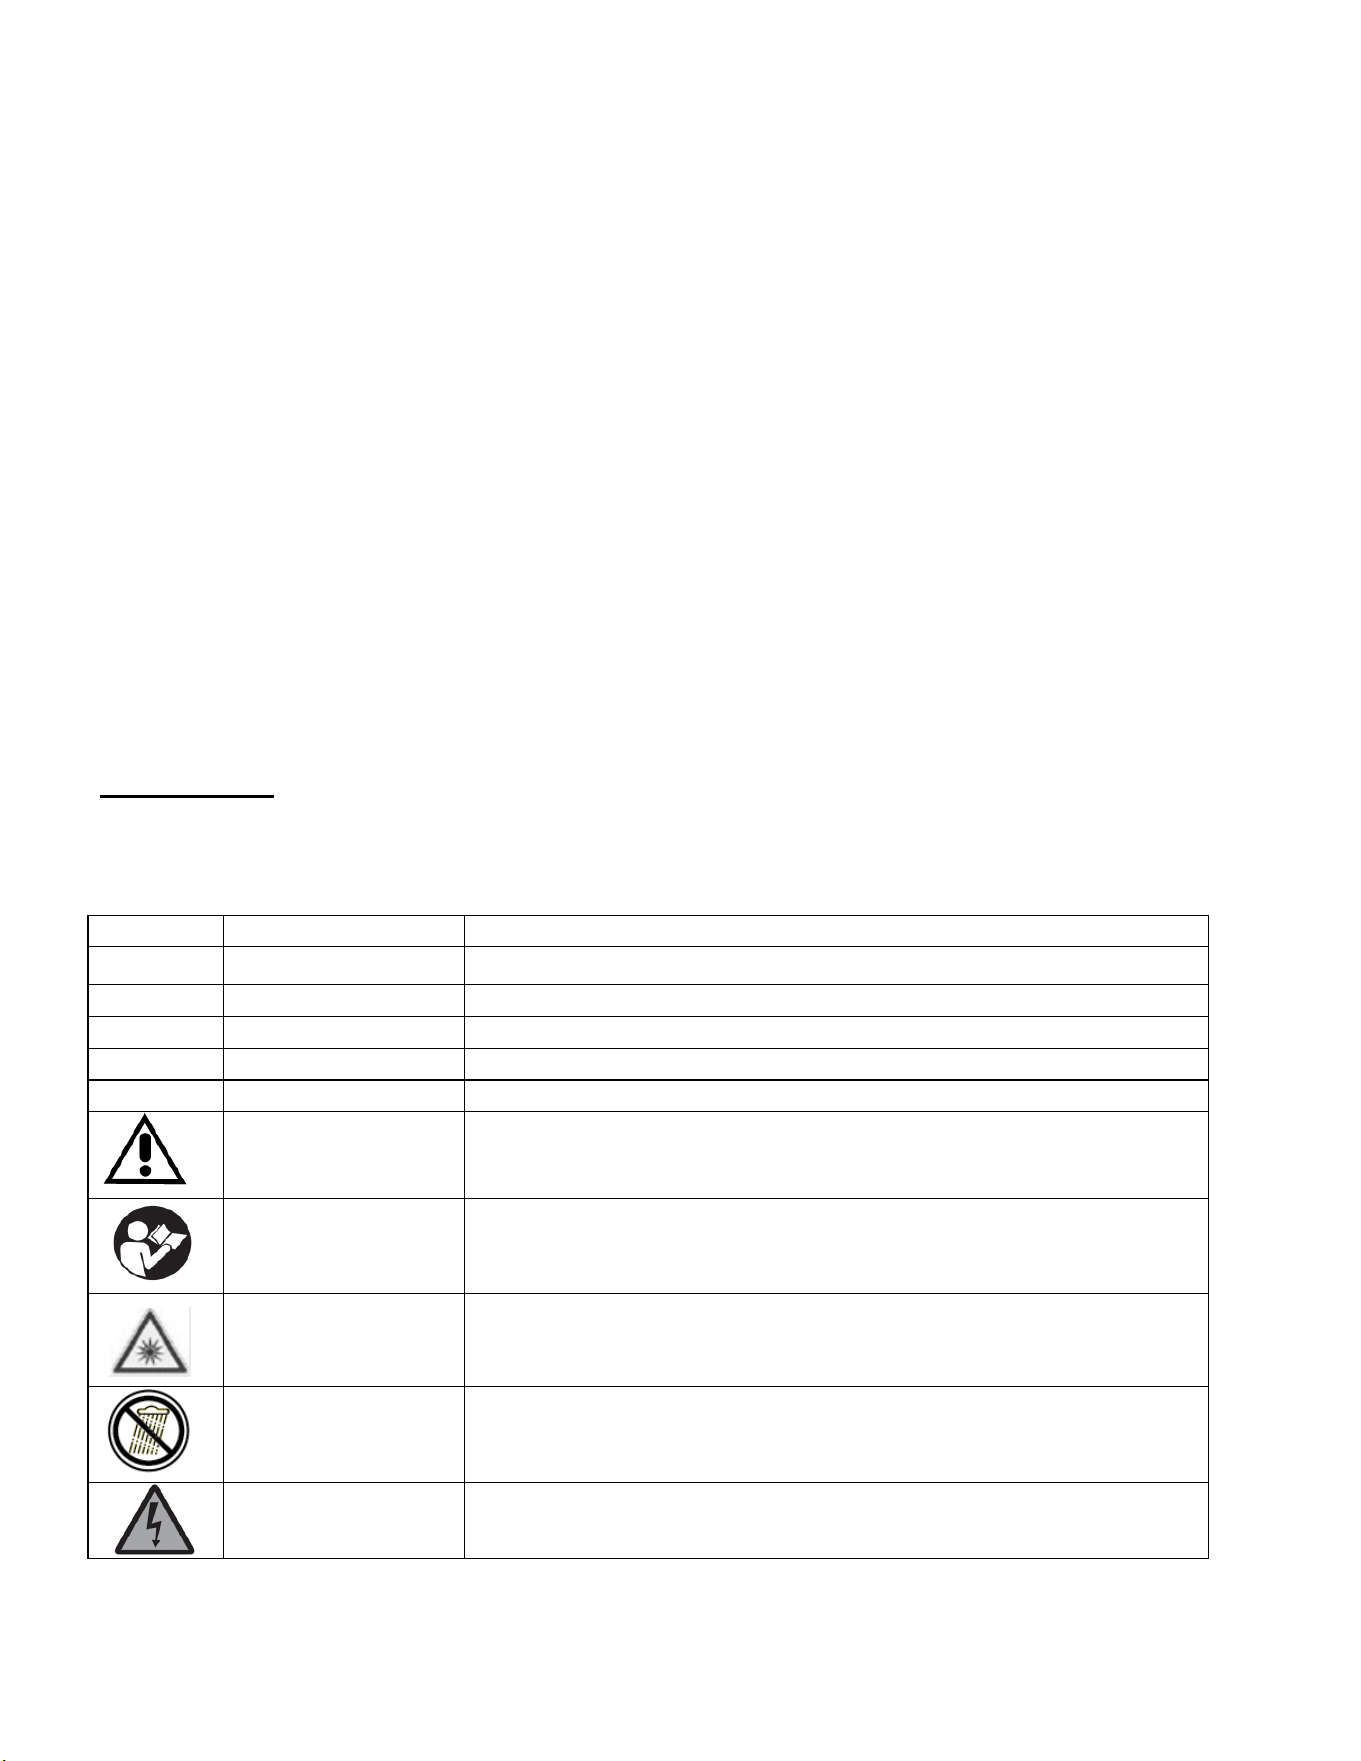
SYMBOLS
Some of the following symbols may be used on this product. Please study them and learn their
meaning. Proper interpretation of these symbols will allow you to operate the product better and safer.
SYMBOL
NAME
DESIGNATION/EXPLANATION
V
Volts
Voltage
A
Amperes
Current
Hz
Hertz
Frequency (cycles per second)
W
Watts
Power
MIN
Minutes
Time
Safety Alert
Precautions that involve your safety.
Read the user’s
manual
To reduce the risk of injury, user must read and understand user’s
manual before using this product.
Laser radiation alert
Do not look into the light beam.
Wet conditions alert
Do not expose to rain or use in damp locations.
Electric shock alert
Beware of electric shock hazard.
7
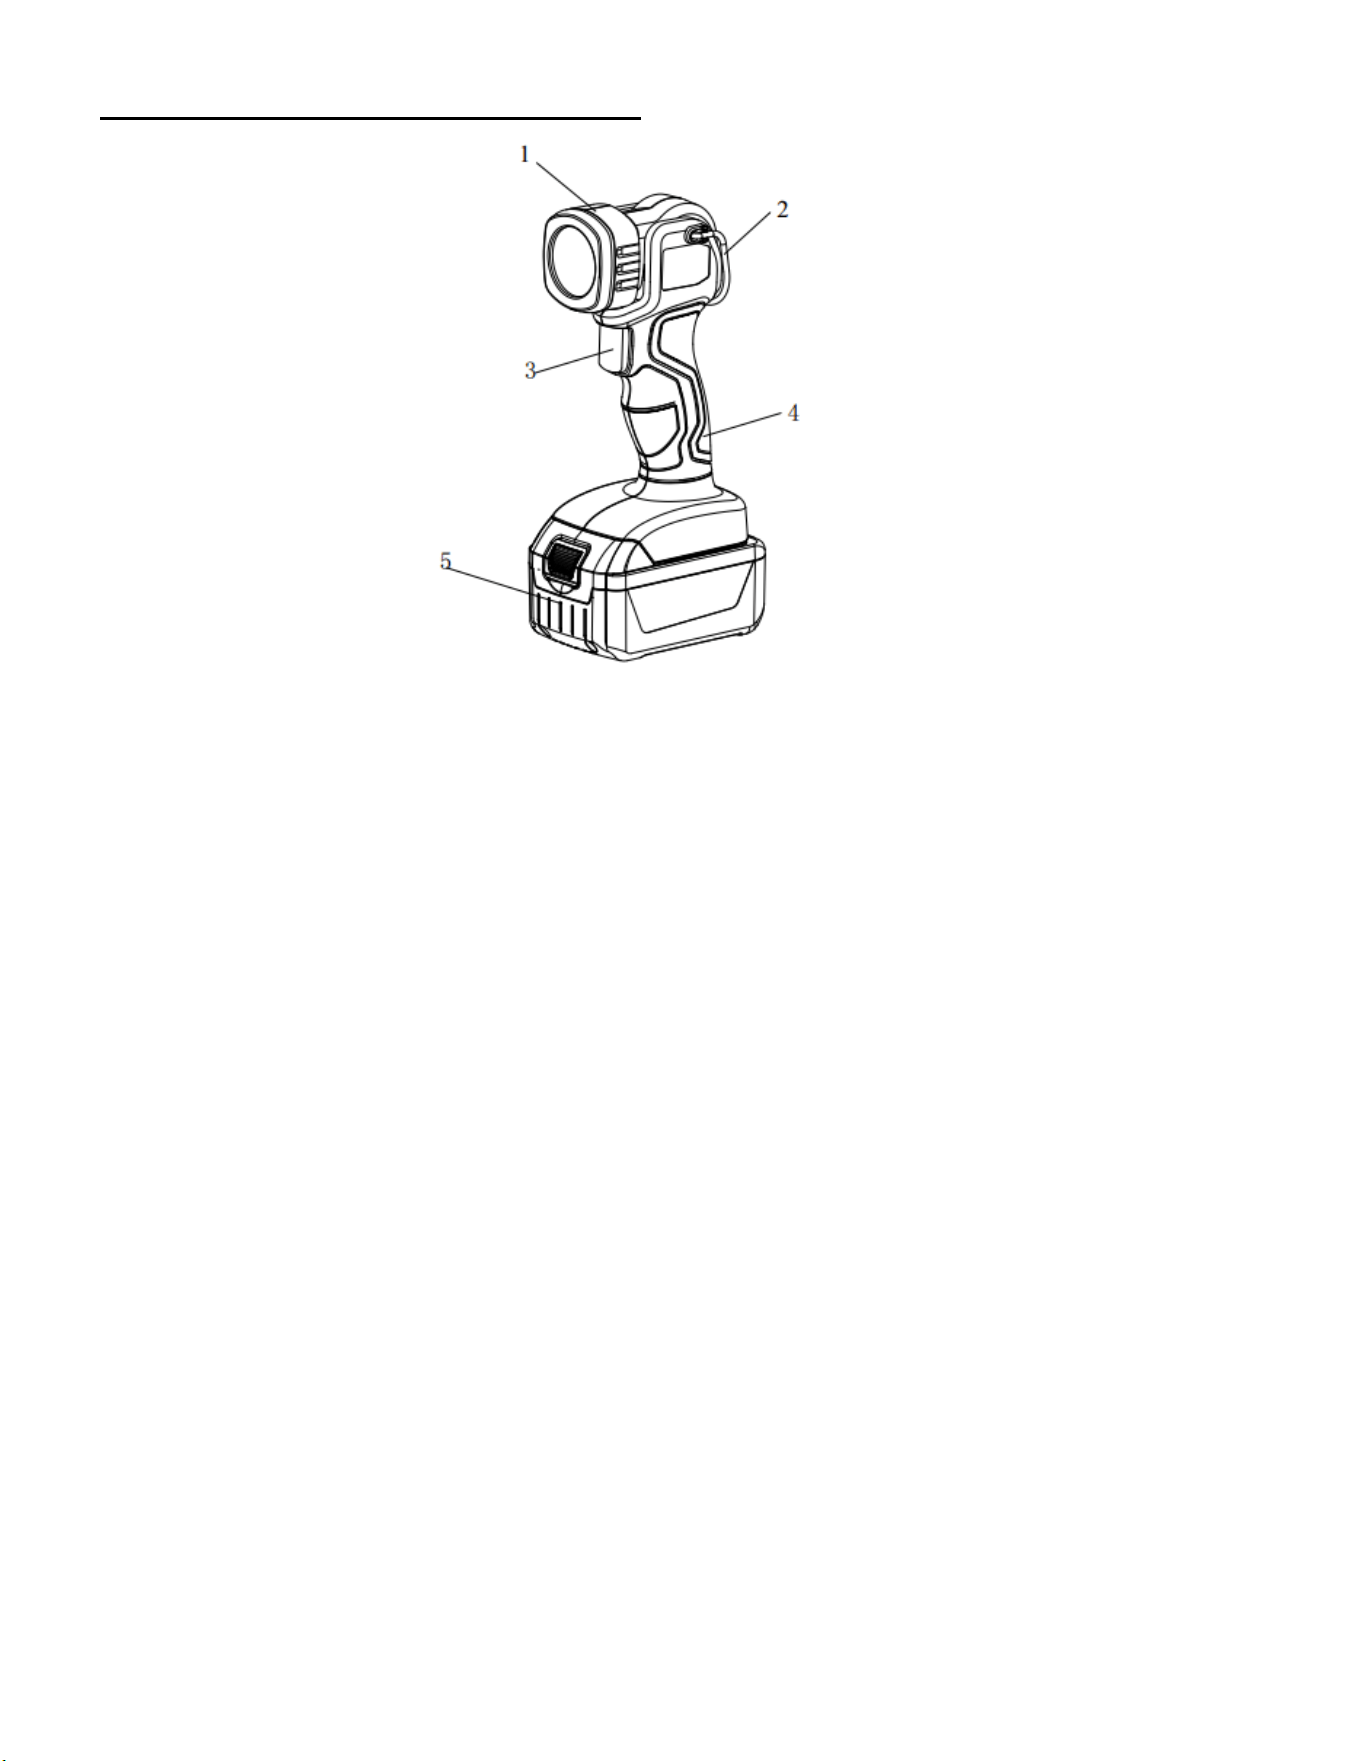
KNOWING YOUR FLASHLIGHT
1. Lamp head 4. Handle
2. Pothook 5. Battery pack
3. On/Off switch
Unpacking
Unpack the power tool and all its parts, and compare against the list below. Do not discard the carton or
any packaging materials. Please call 1-800-791-9458 or E-mail us at support@amerisuninc.com if any
parts are damaged or missing.
Including: Flashlight
Fig.1

8
ASSEMBLY INSTRUCTION
WARNING:
Do not use this product if any parts on the packing list are already assembled to your product
when you unpack it. Parts on this list are not assembled to the product by the manufacturer
and require customer installation. Use of a product that may have been improperly assembled
could result in serious personal injury.
WARNING:
If any parts are damaged or missing do not operate this product until the parts are replaced.
Use of this product with damaged or missing parts could result in serious personal injury.
WARNING:
Do not attempt to modify this product or create accessories not recommended for use with
this product. Any such alteration or modification is misuse and could result in a hazardous
condition leading to possible serious personal injury.
WARNING:
Do not connect to power supply until assembly is complete. Failure to comply could result in
accidental starting and possible serious personal injury.
CONNECTING AND REMOVING BATTERY
IMPORTANT!
The battery pack is not charged when it is purchased. Before using the flashlight for the first time, place
the battery pack in the battery charger and charge. Make sure to read all safety precautions, and follow the
instructions in the battery charger section.
To install the battery pack
To install the battery pack into the bottom of the handle, align the rails of the battery pack with the rails in
the handle and push the battery into the handle. To connect the battery, slide the battery pack fully
forward. Until the latch locks into place.
To remove the battery pack
Press the battery release button ,Slide the battery pack backward, and then pull or lift the battery out of
the flashlight .
WARNING:
Follow these instructions in order to avoid injury and to reduce the risk of electric shock or
fire:
• Replace the battery pack or the charger immediately if the battery case or charger cord is damaged.
• Verify that the battery pack is removed before inspecting, adjusting, or performing maintenance on
any part of the flashlight.
• Read, understand, and follow the instructions.
9
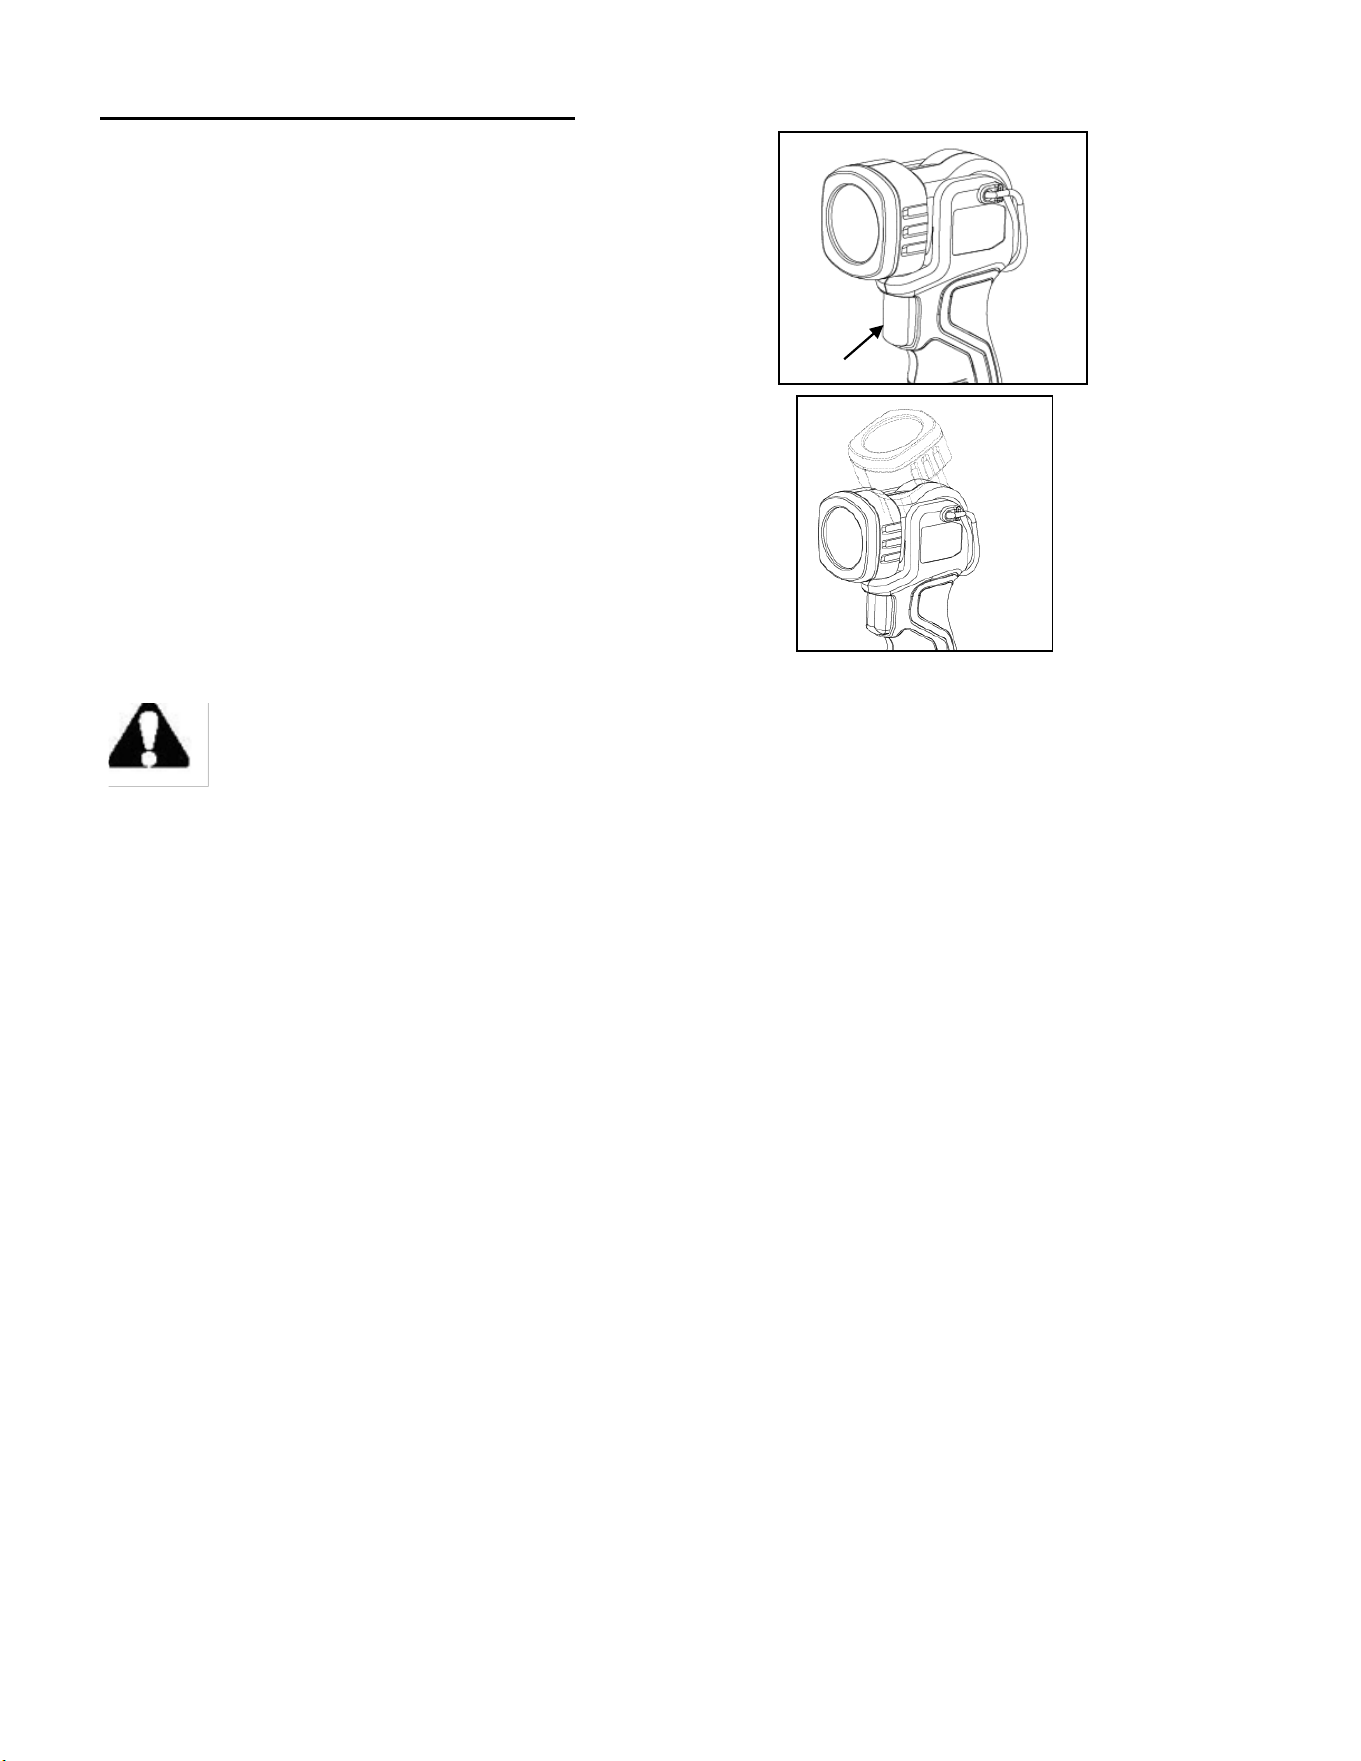
OPERATING INSTRUCTION
SWITCH ON AND OFF
To switch on:
Press the On / Off switch (see fig.2).
To switch off:
Press the On / Off switch again.
SETTING THE LIGHTING POSITION
You can set the lighting position 0°/ 30°/ 60°/90° by
moving the lamp head (see fig.3).
IMPORTANT CHARGING NOTES
WARNING: Battery packs are shipped in a low charge condition to prevent possible
problems. Therefore, you should charge them before first use.
• Use only POWERSMART battery charger (Model#PS76018C)
• Charge time is approximately 1hour, and is dependent upon the type of battery pack.
• Make sure the power supply is normal household voltage, 120V, AC only, 60HZ.
• Attach the battery pack to the charger by aligning the raised ribs on the battery pack with the grooves
in the charger, then slide the battery pack onto the charger.
• Press down on the battery pack to be sure contacts on the battery pack engage properly with contacts
in the charger. Latches should snap into ensure charger is correctly connected.
• Do not place the charger in an area of extreme heat or cold. It will work best at normal room
temperature.
• The battery pack may become slightly warm to the touch while charging. This is normal and does not
indicate a problem.
• The red LEDs will remain on while charging.
• When the green LEDs is light, this indicates the battery is fully charged.
• To remove the battery pack from the charger, depress latches and pull up on the battery pack.
• When the battery pack is fully charged, remove it from the charger.
Fig.2
On/Off switch
Fig.3
10
MAINTENANCE
WARNING: In order to avoid personal injury and the risk of fire and electric shock,
remove the battery pack before adjusting, inspecting, or cleaning the flashlight.
• Keep all safety devices, air vents and the motor housing free of dirt and dust as far as possible. Wipe
the equipment with a clean cloth or blow it with compressed air at low pressure.
• We recommend that you clean the device immediately each time you have finished using it.
• Clean the equipment regularly with a moist cloth and some soft soap. Do not use cleaning agents or
solvents; these could attack the plastic parts of the equipment. Ensure that no water can seep into the
device. The ingress of water into an electric tool increases the risk of an electric shock.
• There are no parts inside the equipment which require additional maintenance.
TROUBLE SHOOTING
WARNING: Read instruction manual first! Remove battery pack from the tool before
making adjustments or assembling accessories.
TROUBLE: TOOL WILL NOT START
PROBLEM
1. Battery pack not charged.
2. Battery pack not installed properly.
3. Battery pack temperature is too hot or cold for operation.
4. Burned out switch.
REMEDY
1. If equipped, check battery charge condition lights for charge status. Charge
battery if needed.
2. Confirm battery is locked and secured to the tool.
3. Let battery sit a few minutes or until it reaches normal operating temperature.
4. Replace the switch provided by POWERSMART.
TROUBLE: BATTERY PACK WILL NOT CHARGE
PROBLEM
1. Charger not plugged into outlet.
2. Battery pack not completely inserted into charger.
REMEDY
1. Confirm charger is plugged into outlet.
2. Confirm battery pack is inserted into charger completely.
11
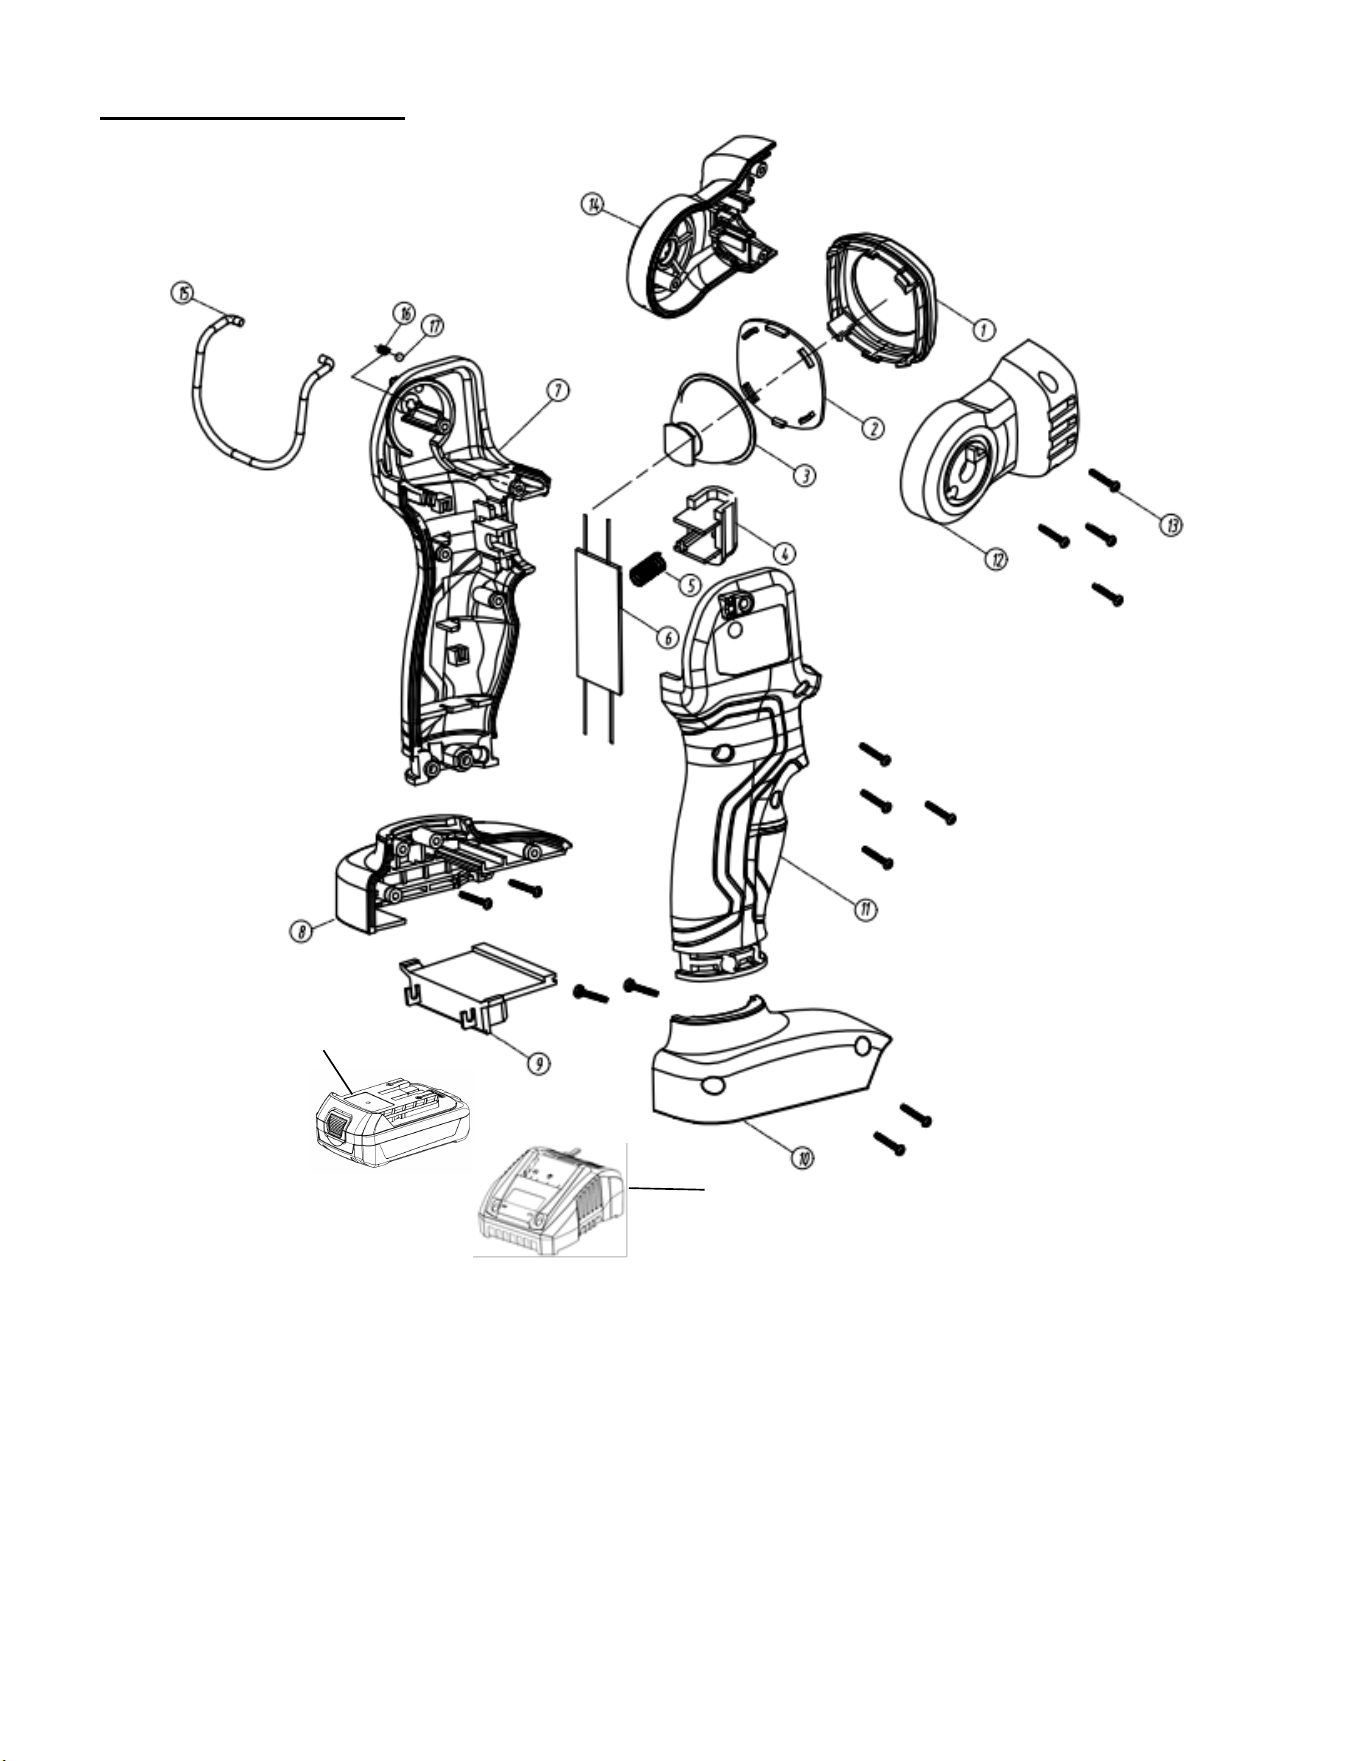
EXPLODED VIEW
○
18
○
19

12
PARTS LIST
Item
Stock#
Description
Qty.
1 PS76420-001 Lamp cover 1
2 PS76420-002 Lens 1
3 PS76420-003 Light cup component 1
4 PS76420-004 Switch 1
5 PS76420-005 Reset spring 1
6 PS76420-006 Guard plate 1
7 PS76420-007 Left casing 1
8 PS76420-008 Left base 1
9 PS76420-009 Pin 1
10 PS76420-010 Right casing 1
11 PS76420-011 Right base 1
12 PS76420-012 Lamp right cover 1
13 PS76420-013 Screw 14
14 PS76420-014 Lamp left cover 1
15 PS76420-015 Hook 1
16 PS76420-016 Spring 1
17 PS76420-017 Steel ball 1
18 PS76018B Battery pack 1
19 PS76018C Charger 1

13
TWO (2) YEARS LIMITED WARRANTY
PowerSmart
®
is committed to building tools that are dependable for years. Our warranties are consistent with our
commitment and dedication to quality.
TWO (2) YEARS LIMITED WARRANTY OF POWERSMART PRODUCTS FOR HOME USE.
PowerSmart (“Seller") warrants to the original purchaser only, that all PowerSmart consumer power tools will be
free from defects in material or workmanship for a period of two (2) years from date of purchase. Ninety (90) days
for all Power Smart Products, if the tool is used for professional or commercial use.
SELLER’S SOLE OBLIGATION AND YOUR EXCLUSIVE REMEDY under this Two (2) Years Limited
Warranty and, to the extent permitted by law, any warranty or condition implied by law, shall be the repair or
replacement of parts, without charge, which are defective in material or workmanship and which have not been
misused, carelessly handled, or misrepaired by persons other than Seller or Authorized Service Center. To make a
claim under this Limited Warranty, you must return the entire power tool product; transportation prepaid, to
PowerSmart Include a legible copy of the original receipt, which lists the date of purchase (month and year) and the
name of the company purchased from.
THIS LIMITED WARRANTY DOES NOT APPLY TO ANY ACCESSORY ITEMS INCLUDED WITH THE
TOOL SUCH AS CIRCULAR SAW BLADES OTHER RELATED ITEMS OR TO ANY REPLACEMENT
PARTS LISTED UNDER MAINTENANCE.
ANY IMPLIED WARRANTIES SHALL BE LIMITED IN DURATION TO TWO (2) YEARS FROM DATE OF
PURCHASE. SOME STATES IN THE U.S. AND SOME CANADIAN PROVINCES DO NOT ALLOW
LIMITATIONS ON HOW LONG AN IMPLIED WARRANTY LASTS, SO THE ABOVE LIMITATION MAY
NOT APPLY TO YOU.
IN NO EVENT SHALL SELLER BE LIABLE FOR ANY INCIDENTAL OR CONSEQUENTIAL DAMAGES
(INCLUDING BUT NOT LIMITED TO LIABILITY FOR LOSS OF PROFITS) ARISING FROM THE SALE
OR USE OF THIS PRODUCT. SOME STATES IN THE U.S. AND SOME CANADIAN PROVINCES DO NOT
ALLOW THE EXCLUSION OR LIMITATION OF INCIDENTAL OR CONSEQUENTIAL DAMAGES, SO
THE ABOVE LIMITATION OR EXCLUSION MAY NOT APPLY TO YOU.
THIS LIMITED WARRANTY GIVES YOU SPECIFIC LEGAL RIGHTS, AND YOU MAY ALSO HAVE
OTHER RIGHTS WHICH VARY FROM STATE TO STATE IN THE U.S., PROVINCE TO PROVINCE IN
CANADA AND FROM COUNTRY TO COUNTRY.
For questions / comments, technical assistance or repair parts –
Please call toll free at: 1-800-791-9458 (M-F 9am – 5pm EST)
Email: support@amerisuninc.com
SAVE YOUR RECEIPTS. THIS WARRANTY IS VOID WITHOUT THEM.