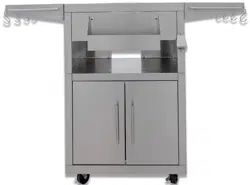
Do not use power tools to assemble. Only use hand tools, as power tools can
damage or loosen the nutsert.
Before getting started:
• Unpack and lay out all of the included parts. Most of the stainless steel pieces come with a protective film. Remome
all of the plastic film and pay no attention to the print on the film as it has nothing to do with the assembly
instructions.
• Take caution with the stainless steel components as to not scratch them during the assembly process. Use a non-
aggressive surface and protect the stainless steel as best as possible.
• 5 mm screw will be paired with a 5mm lock washer. Use a flat washer and lock washer for installing the casters to
the base. All other connections will be made with a screws only.
• NOTE: screws for the door handles are smaller and those are packaged with the handles them self.
• 5 mm are to used last and are for securing panels to cart.
Tools Needed: #2 Phillips Head Screw
Driver – “Not Included”
M5 x 12 mm
M5 x 24 mm
M5 washer
M5 lock
washer
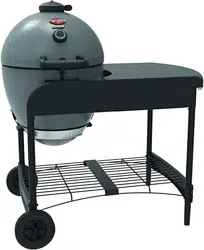
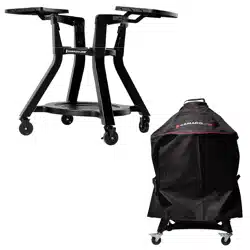
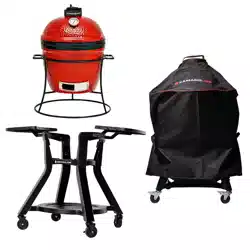
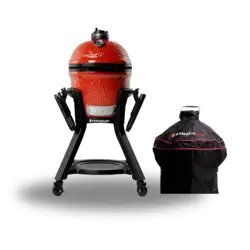
BLAZE KAMADO CART ASSEMBLY
WARNING: This product can expose you to chemicals including Chromium (hexavalaent compounds), which are
known to the State of California to cause cancer and birth defects or other reproductive harm. For more
information go to: www.p65Warnings.ca.gov
Page 1
CALIFORNIA PROPOSITION 65
W
ARNIN
G
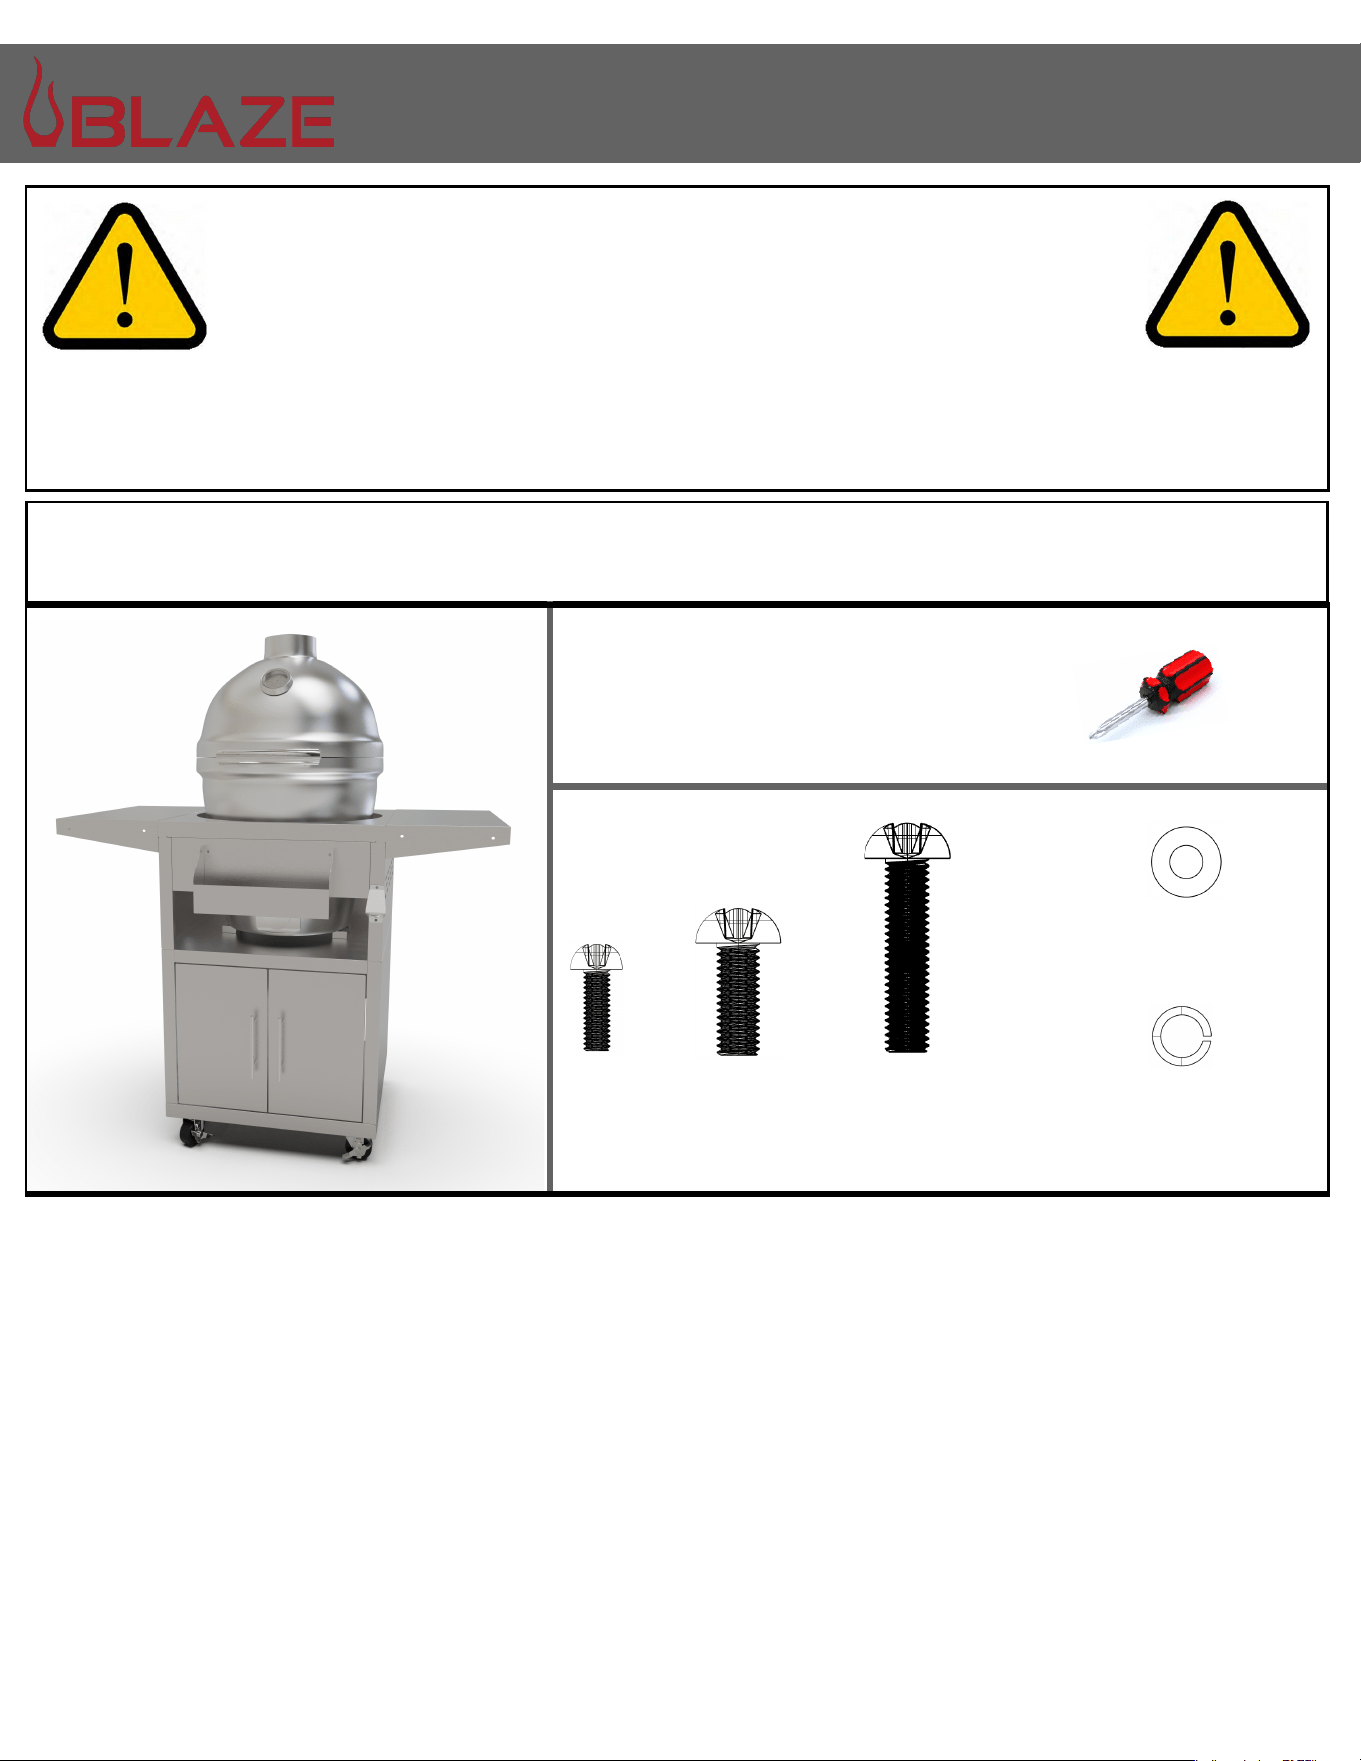
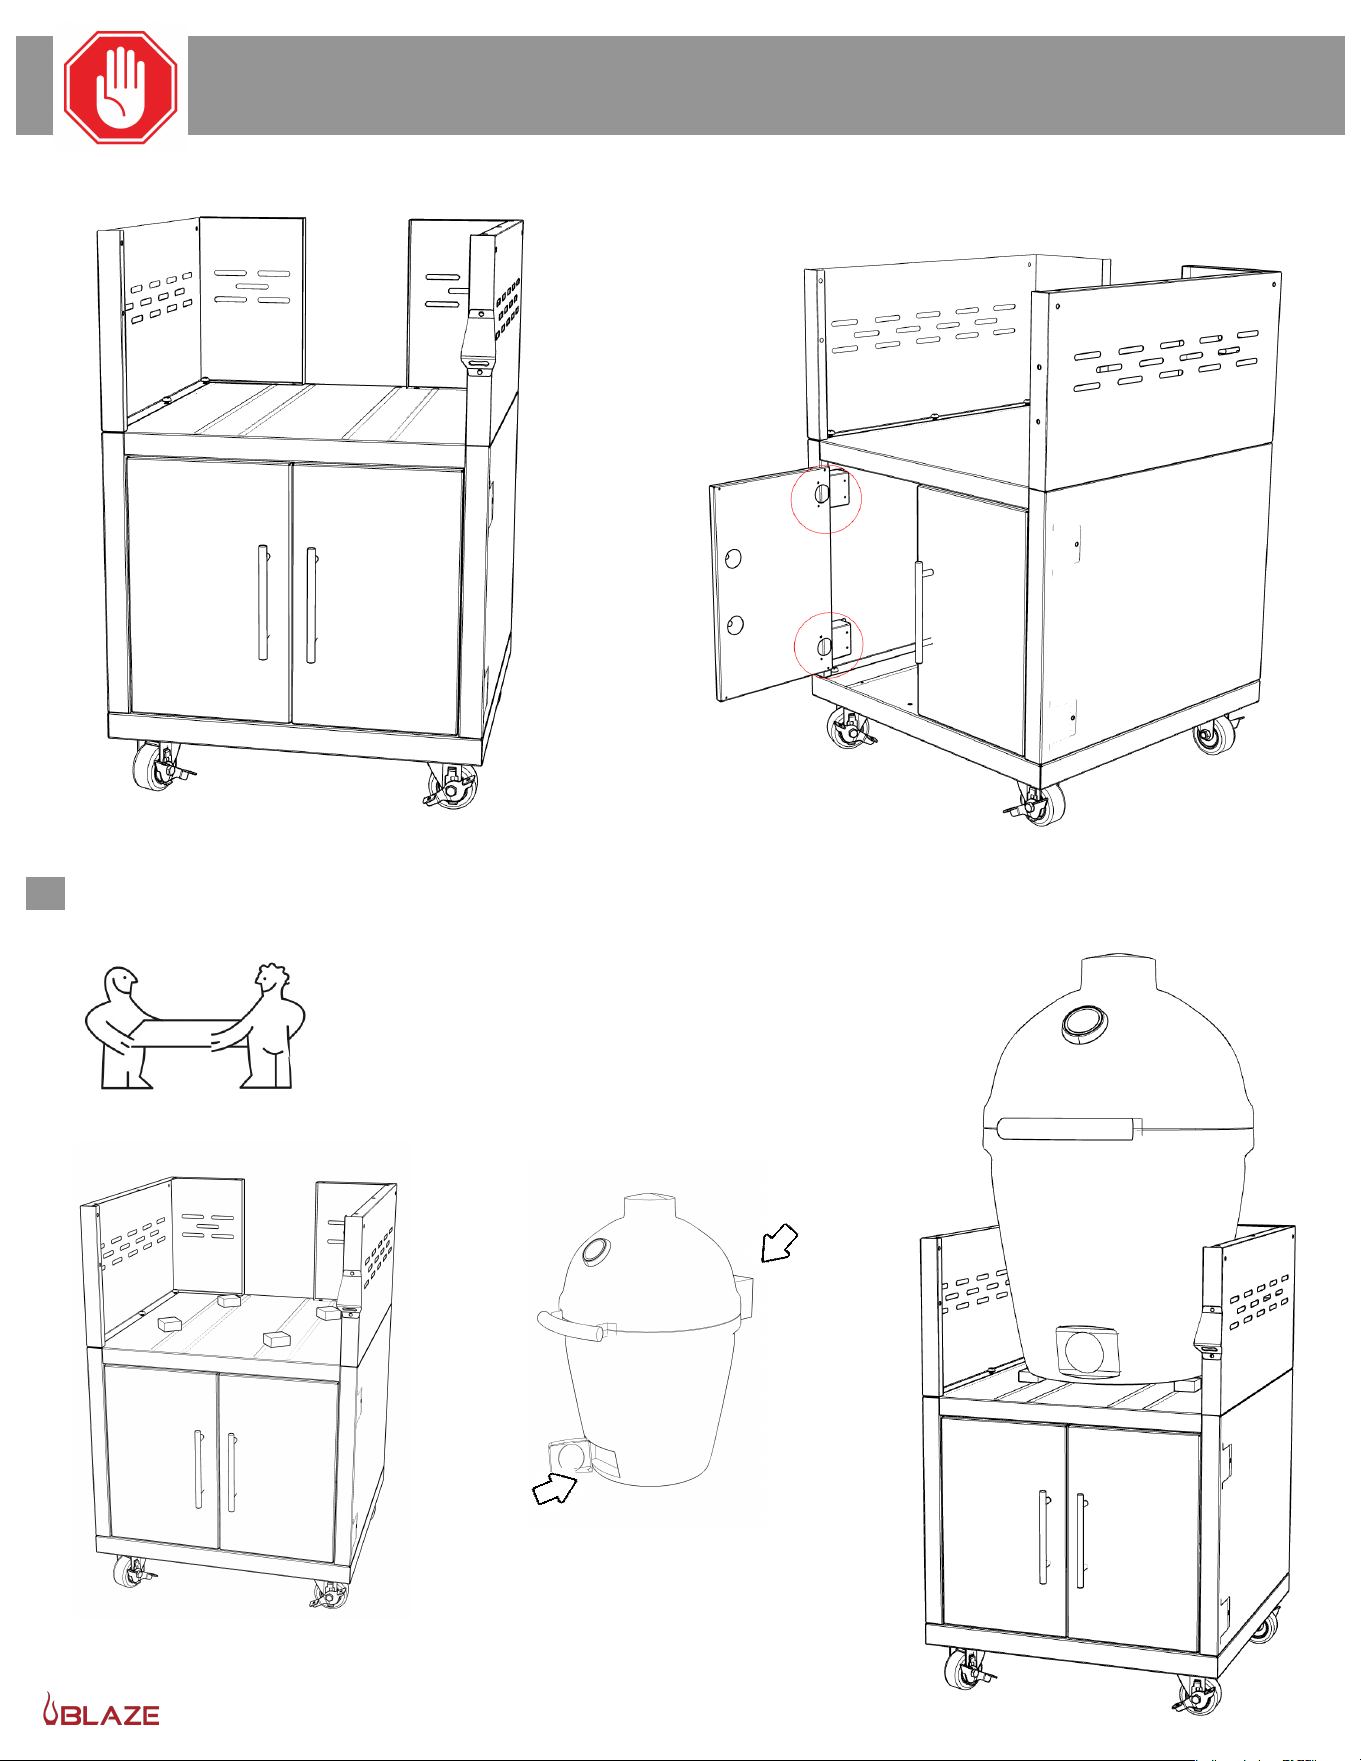
1. Bottom Cart Panel- flip the panel upside down on a protected surface exposing the four locations where the casters
attach. There are two runners on the bottom cart panel bottom with 4 nutserts (female threaded inserts which a screw
goes into) on each end of each runner. This is the location where the casters install. See figure A.
2. Attach the four casters. Use the locations described above and tighten completely. Once complete, lock the locking
casters and then turn the bottom panel right side up. See figure B.
3. Attach the right and left side cart panels - the right and left side panel can be identified as large square panels with
rectangular mounting blocks located on the inside of each panel, these blocks will go towards the front of the unit and
are used for mounting the door hinges. The front side of the bottom cart panel cart panel has two nutserts and they
should face forward. Attach both the left and right side panels to the bottom cart panel using three screws per side. Do
not completely tighten. NEED TO CONFIRM SCREW SIZE and Number
A.
B.
F
or the remainder of the grill cart assembly, the use of a second
person is recommend and will make for an easier time
assembling
L
R
Page 2
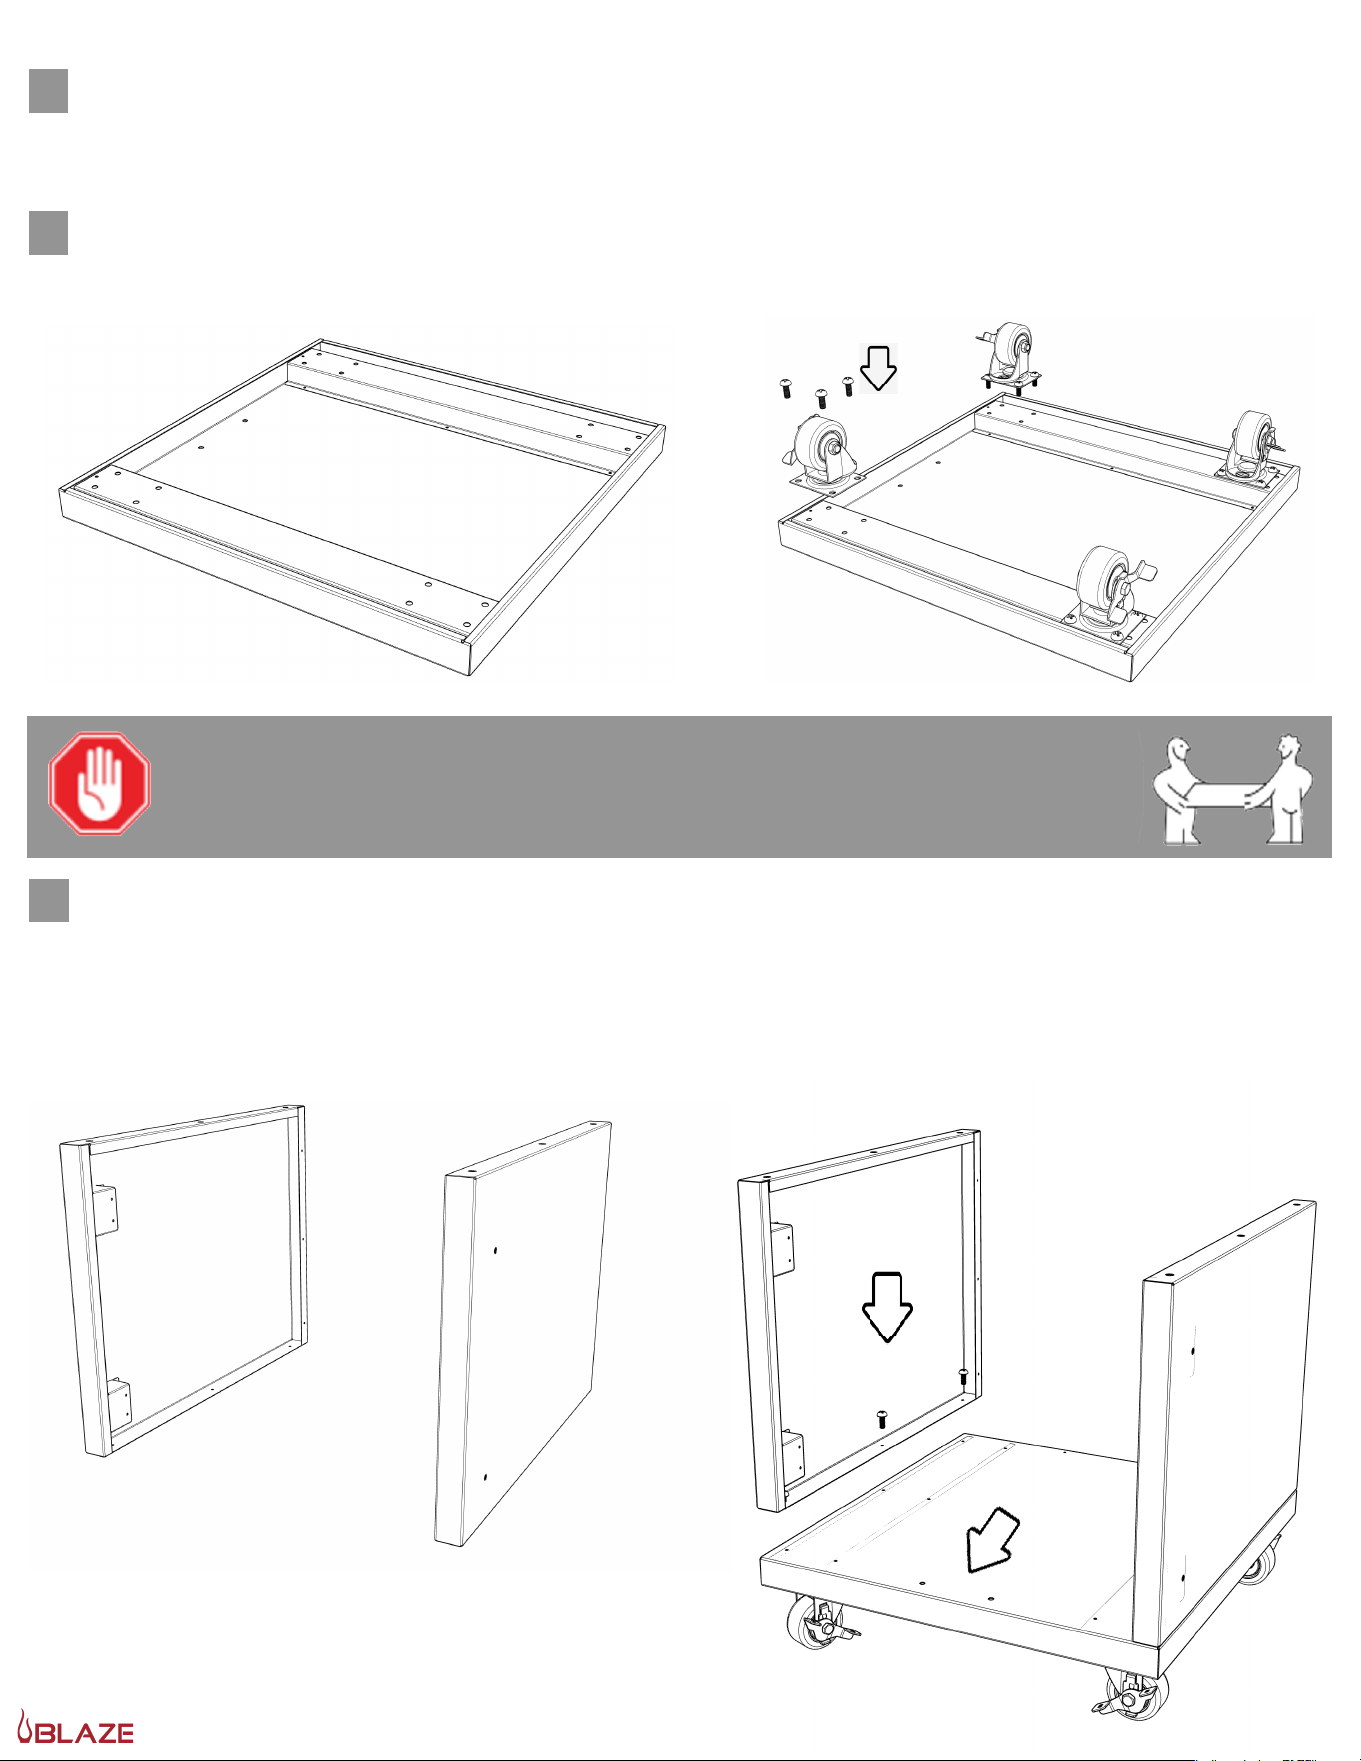
5. Attach Upper Storage Cart Panel - You can identify this panel by locating the large rectangular panel with two
rectangle support bars mounted to the bottom side of the panel. Place this panel onto the top edge of the left and right
panel. Once in place align but donot attach. (see figure D). Align left and right upper kamado support walls and
fasten with 4 screws per side. Tighten completely.
4. Attach Bottom Back Panel - The bottom back panel first gets secured to the Bottom Cart Panel with 2 screws.
(The bottom of the panel has openings for screws to go through, see diagram). Attach but to not tighten. Next secure
the Bottom Back Panel to the right and left side panels. Three screws get used per side. Attach but do not tighten.
Page 3
6. Attach door handles to doors - The door handles and hardware come packaged separately from the rest of the
hardware. Two screws (M6) hold each handle to the door. Take care as to not scratch the doors by laying them on a soft
surface. Hint: while on a soft surface on a work area like a table, hang the door off the edge to the point where the holes
are exposed for door handle. Place the screw in your screw driver then guide the screw into the hole on the door. Once in
place, move the handle to the screw and get it started a small amount. This gives flexibility when attaching the second
screw. Once both screws are in place, tighten completely.
Finish product will look like this.
figure D

Page 4
Depth adjustment
Rotate rear spiral tech cam screw to adjust
door gap (+3 mm, -2 mm).
Side adjustment
Rotate front screw to increase or decrease
door overlay (±2 mm).
Height adjustment
Rotate cam screw on mounting plate to
adjust door position (±2 mm).
On non-cam mounting plates, loosen
screws, adjust door and retighten screws.
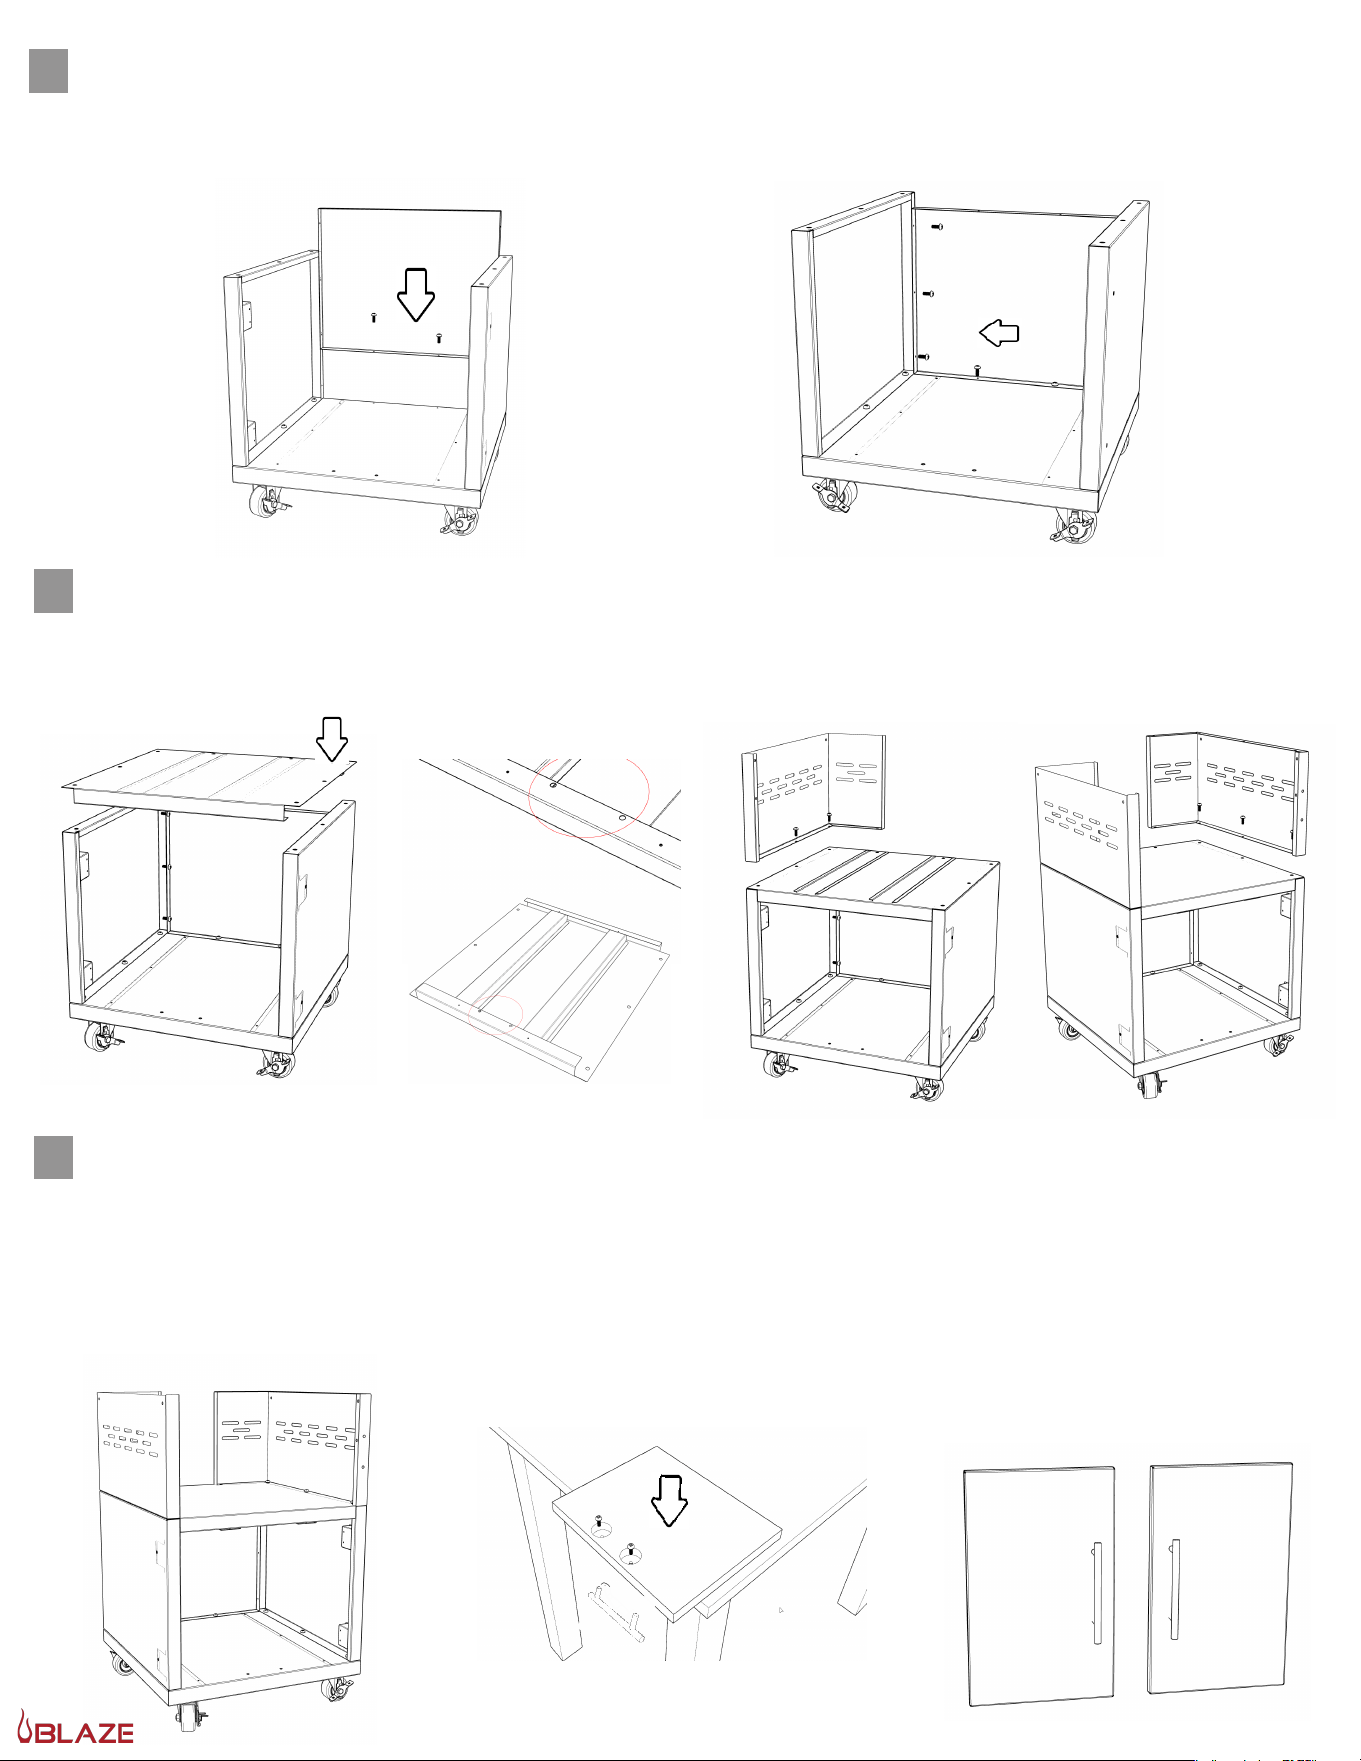
7. Attach soft close hinge - please follow below instructions
For small or light doors, the BLUMOTION can be deactivated on one of the hinges. Door must be closed once for the deactivation to be complete. To
reactivate, move switch back to original position.
1
2
8. Adjusting door close tension.
9. Using two people carefully grab kamado by the front lower ash hole and rear hinge bracket and lift onto the cart.
First add kamado feet onto cart surface, then with two people lift and center kamado on cart.
At this point cart should be fully tightened and doors should be attached
and aligned. See below images.
Page 5
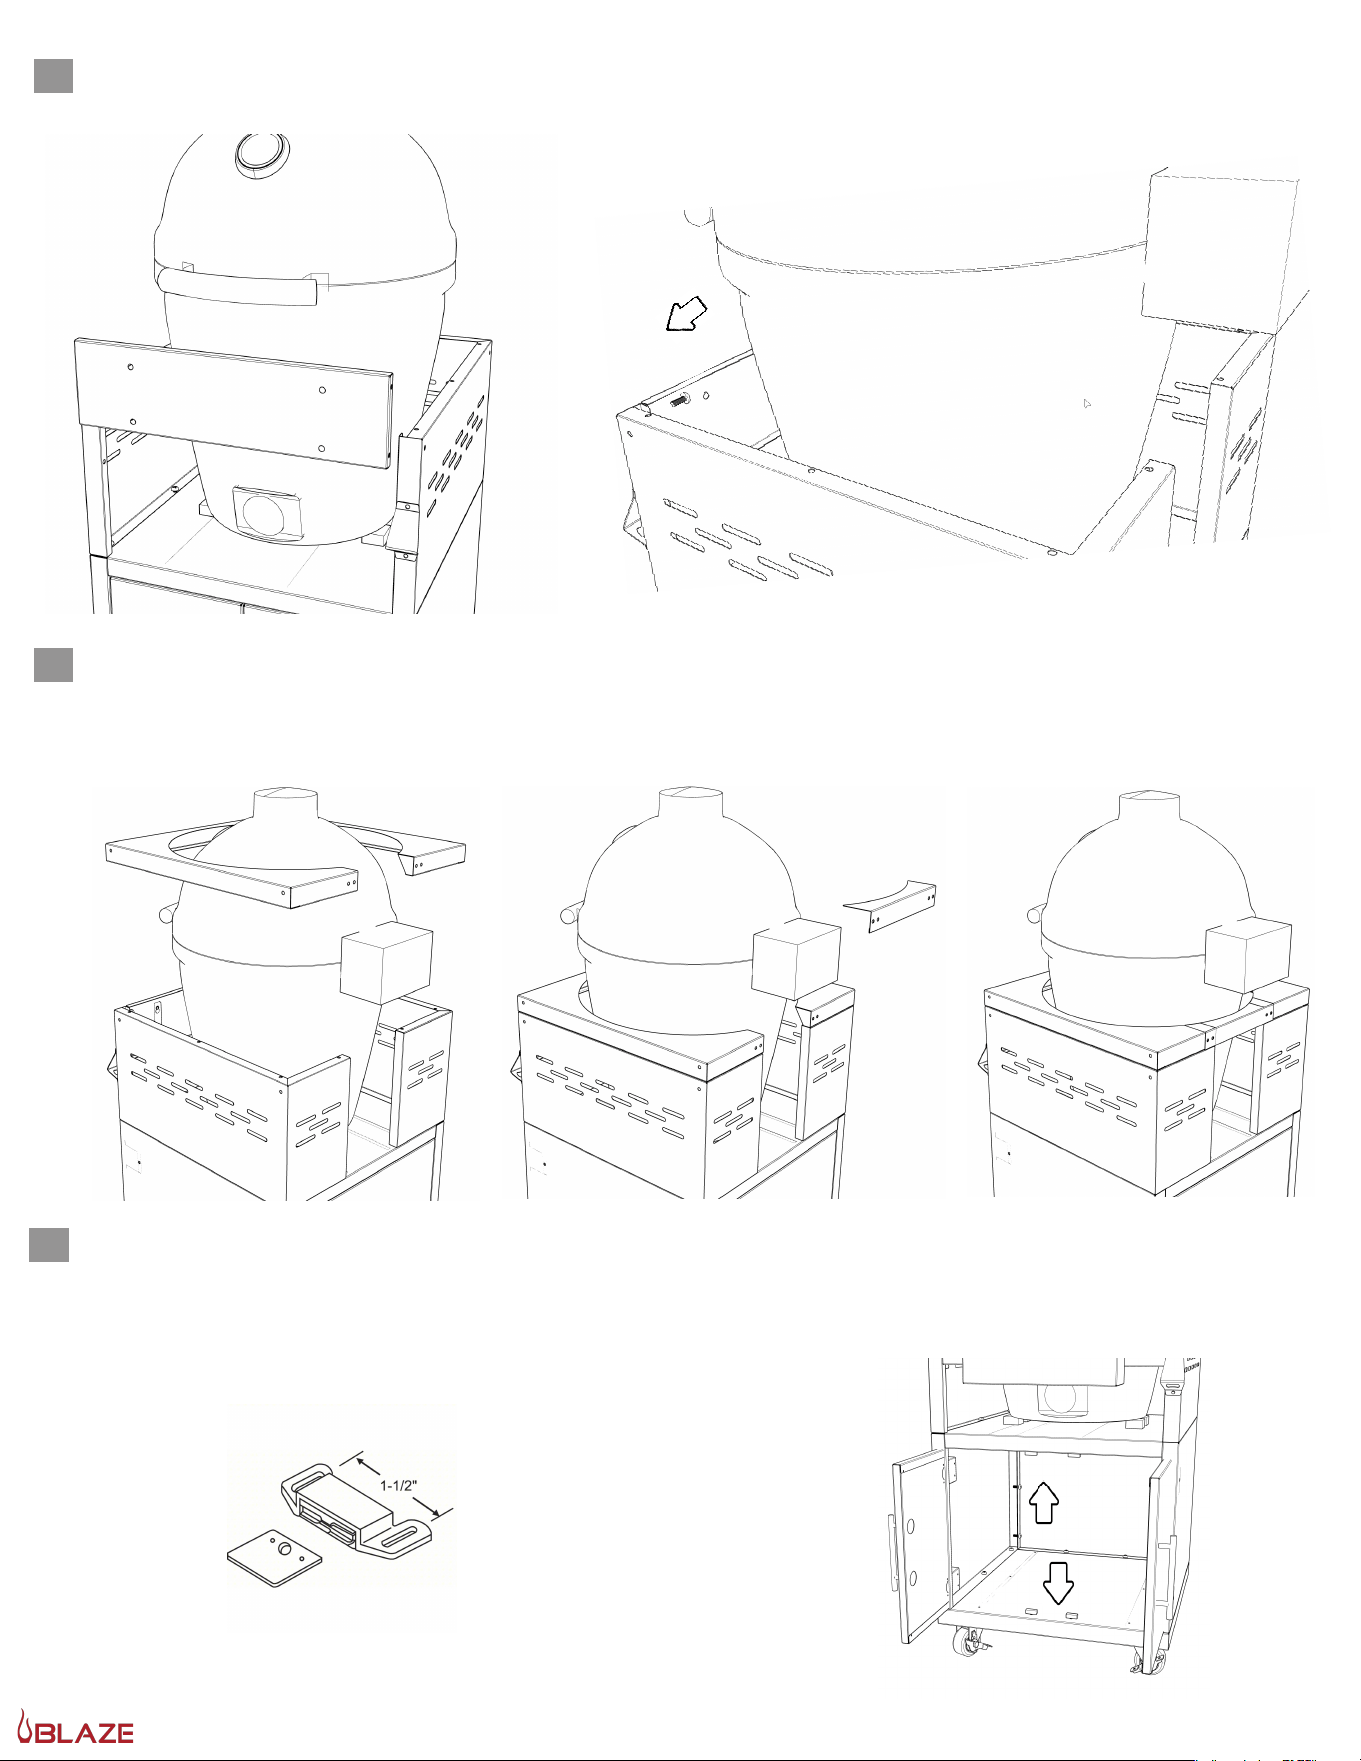
10. Attach lower magnetic catch - Two screws hold the catch to the bottom cart panel. Place the lower magnetic catch
in place and attach with the two screws. Both the top and bottom magnetic catches can be moved forwards and backwards
in order to allow the doors to stop at a flush position with the cart frame. Adjust if necessary.
8. Attach the front kamado support - slide panel into place and align with nut-cert holes. . At this point, all 4
screws from the this step can be completely tightened.
Page 6
9. Attach the upper kamado support ring - slide panel into place by lifting it up and over the top of the kamado,
align with nut-cert holes and tighten. Now, locate the kamado rig locking bracket. Align bracket to the back of the
cart and four netcerts. At this point, all 4 screws from the this step can be completely tightened.
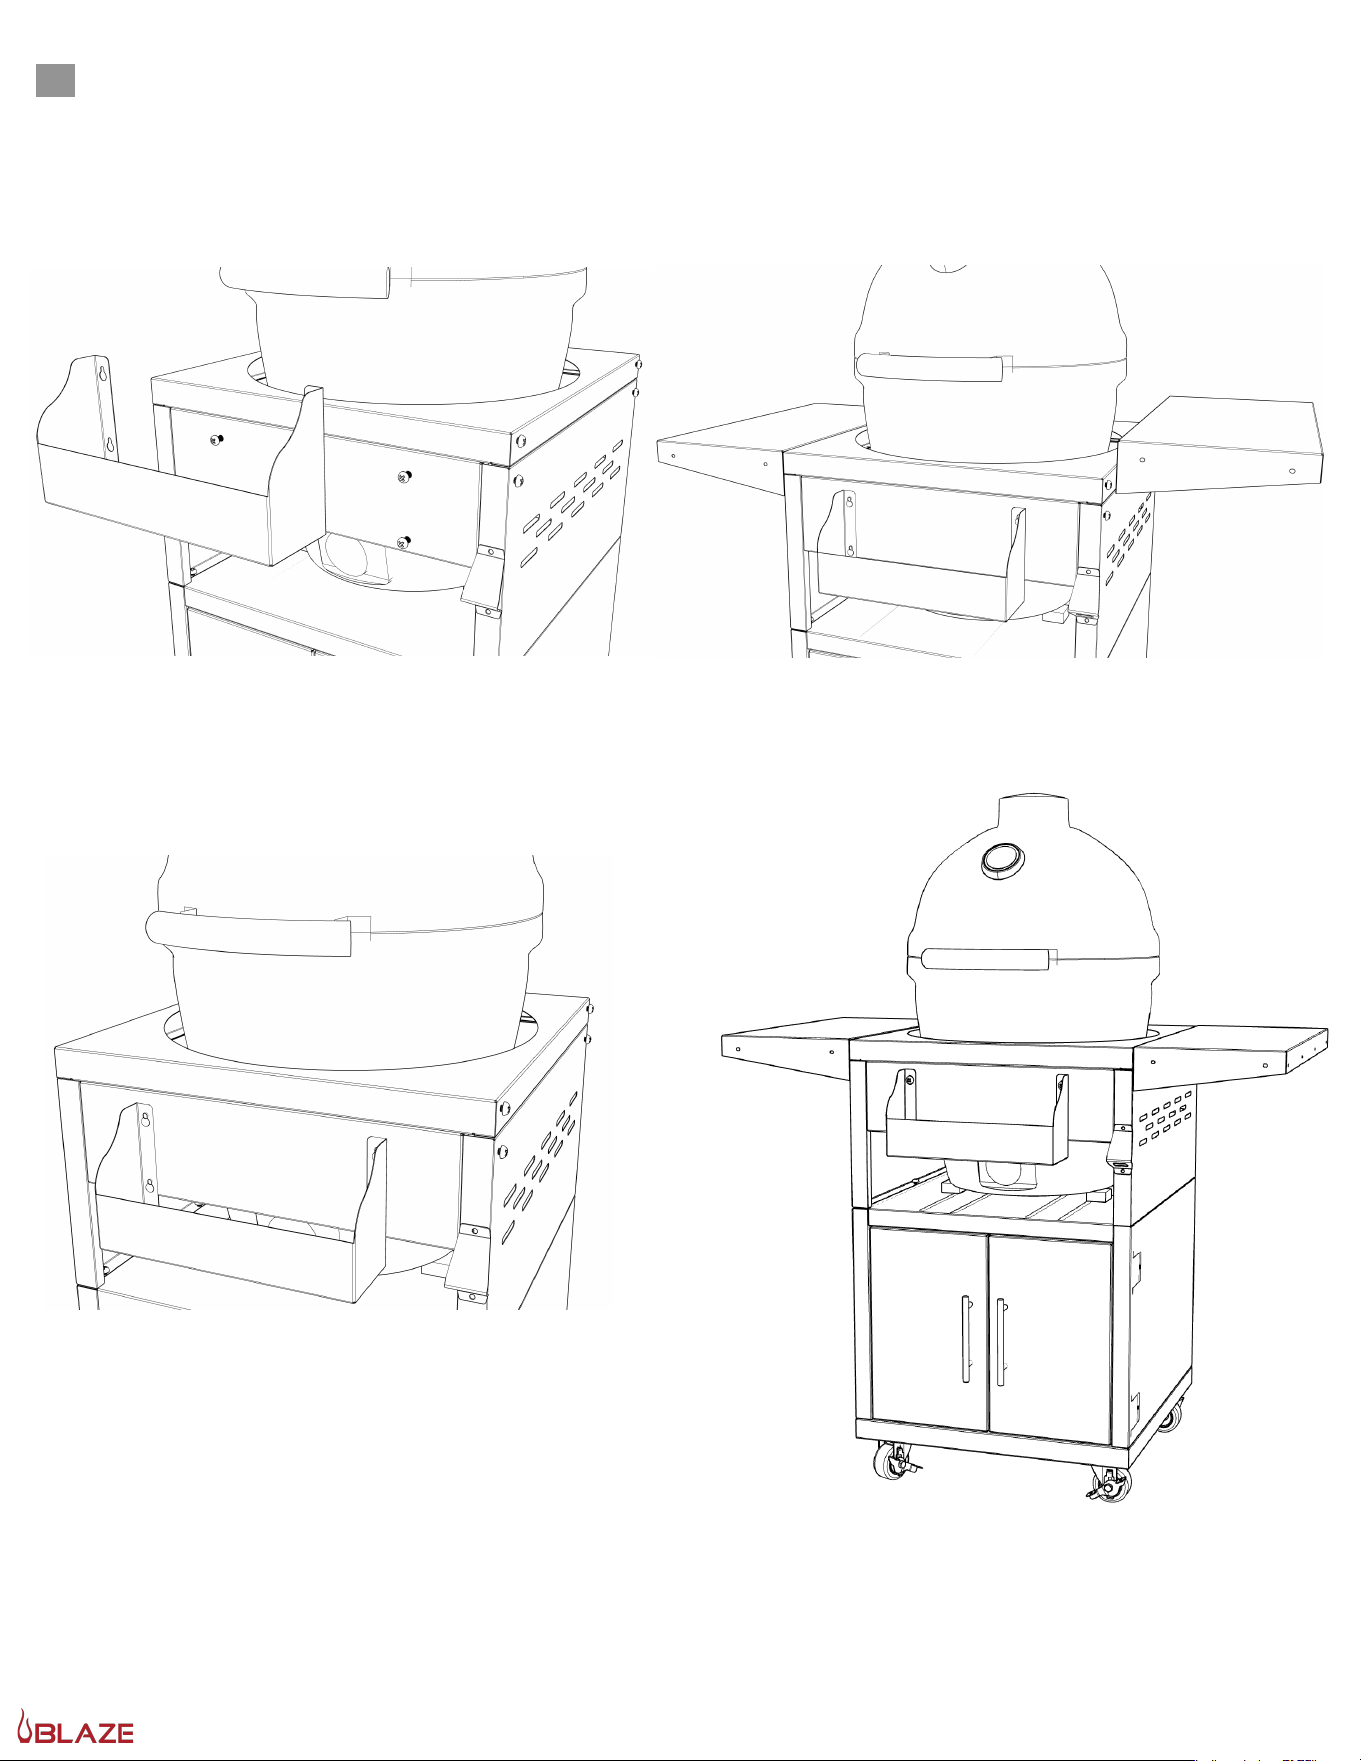
12. Attach Side Shelves and front storage shelf - Four screws per shelf are used to attach to the right and left side
panels. Both shelves are exactly the same and can be used on either side. Start all 4 screws into the side panel as the
shelf can then simply be placed over the screws and pushed downward in place. Once in place, tighten completely.
Page 7