Loading ...
Loading ...
Loading ...

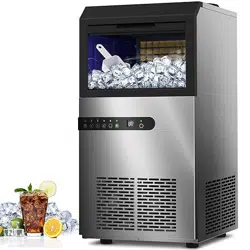
ICE-HARVEST:
During the ice-harvest process, the reversing valve is opened, the ice tray will be heated,
and the connection between the ice cube and the ice tray will be melted. When the ice
cube cannot be attached to the ice tray due to its own weight, it will fall down and one
ice-harvest is finished.
When each batch of ice fall off to the ice bin, please use an ice spoon to shovel them into
45 small ice cubes to hold more ice.
When the ice falls, the flap is flipped, and then the flap is reset due to its own weight, then
the machine starts to make the next ice. However, due to too many ice cubes are in the
ice bin, and they press against the flaps to make the flaps cannot be reset, the control
chip will judge that the ice is full and temporarily stop and will restart until the flaps are
reset.
OPERATING INSTRUCTIONS
ICE-MAKING:
1. After all the water pipes are connected, plug on the main power supply plug.
2. Press On/off button to start the motor, then compressor will start to run
about 3 minutes to pre-cooling. Then press or button to choose the time of ice
making to choose the sise of ice. The adjusted ice making time will be reflected in the
next round of ice making.
3. After 3 minutes, the circulating water pump start to work, ice making begins. During
the ice making process, the water pump will last running, and the water will flow down
from the top of the ice.
4. When the ice cube reaches the reservation time position, the program will switch to the
ice-harvest process.
FORCED ICE-HARVEST:
During the ice making process, press the ice-harvest button , the unit will enter the
ice-harvest program in advance, and will continue to run the next ice-making cycle after
the ice-harvest is finished.
˜
NOTE:
1. When each batch of ice falls off to the ice bin, we suggest you use an ice shovel to
shovel them into 45 small ice cubes to let the ice bin hold more ice.
2. We suggest you keep the produced ice cubes in ice bags and put them in the freezer
to prevent melting.
3. When the ambient temperature is high, we suggest you increase the ice making time to
prevent the ice from being too thin.
When the ambient temperature is low, we suggest you reduce the ice making time to
prevent the ice from being too thick.
There is no accurate data, please adjust it in the actual production process. The quality of
ice cubes made in the first 3 rounds after startup may not be very good. Please let it
make several more rounds of ice cubes.
ATTENTION: The adjusted ice making time will be reflected in the next round.
BLUE LIGHT:
Click the blue light button, it will light up inside the ice maker.
HOW TO SET 24H TIMING?
Auto startup timing: Do not turn on the ice maker after plugging in the power supply, click the
timer button. The number on the LED screen will change from temperature to time and
flash. At this time, you can click the and buttons to set the automatic start-up time.
Auto shutdown timing: When the ice maker is working, click the timer button. The number on the
LED screen will change from ice making time to timer time and flash. At this time, you can click
the and buttons to set the automatic start-up time.
TIMING EXPLANATION: For example, the current time is 1:00 p.m. When you set
the timing of 10 hours, Then the auto startup / shutdown time of the ice machine is
11:00 p.m.
CLEANING FUNCTION:
After turn on the ice maker, hook up the clean water. Click the button. The ice machine will
automatically start cleaning the internal pipes, ice tray, etc. It will stop after 10 minutes. After the
cleaning program is finished, please pull out the sewage plug and drain the sewage. Please place
a container to collect sewage at the sewage outlet to prevent water from splashing on the ground.
- 24 -
Loading ...
Loading ...
Loading ...