285x210mm
PRODUCT ASSEMBLY
USER'S MANUAL
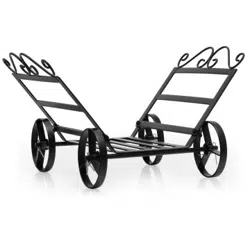
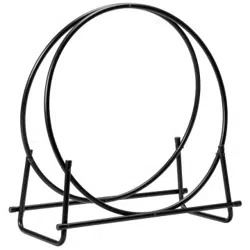
Tubular Log Hoop
TIPS:
Your suggestions and comments for Costway are really important to us!
We sincerely solicit you to go back to our shop and leave a good rating in just a
simple click. It would be quite encouraging if you could kindly do so like below:
February 24, 2018
Great product so far. Fast delivery, easy setup, and working without any issues.
Great products so far
With your inspiring rating, Costway will be more consistent to offer you
EASY SHOPPING EXPERIENCE, GOOD PRODUCTS and EFFICIENT SERVICE!
UNITED STATES
CANADA
UNITED KINGDOM
GERMANY
FRANCE
ITALY
SPAIN
JAPAN
RUSSIA
AUSTRALIA
US office:Fontana
UK office:Ipswich
Caution:
Before starting assembly read the instructions carefully as incorrect
assembly can cause misalignment.Study Fig 2.
,
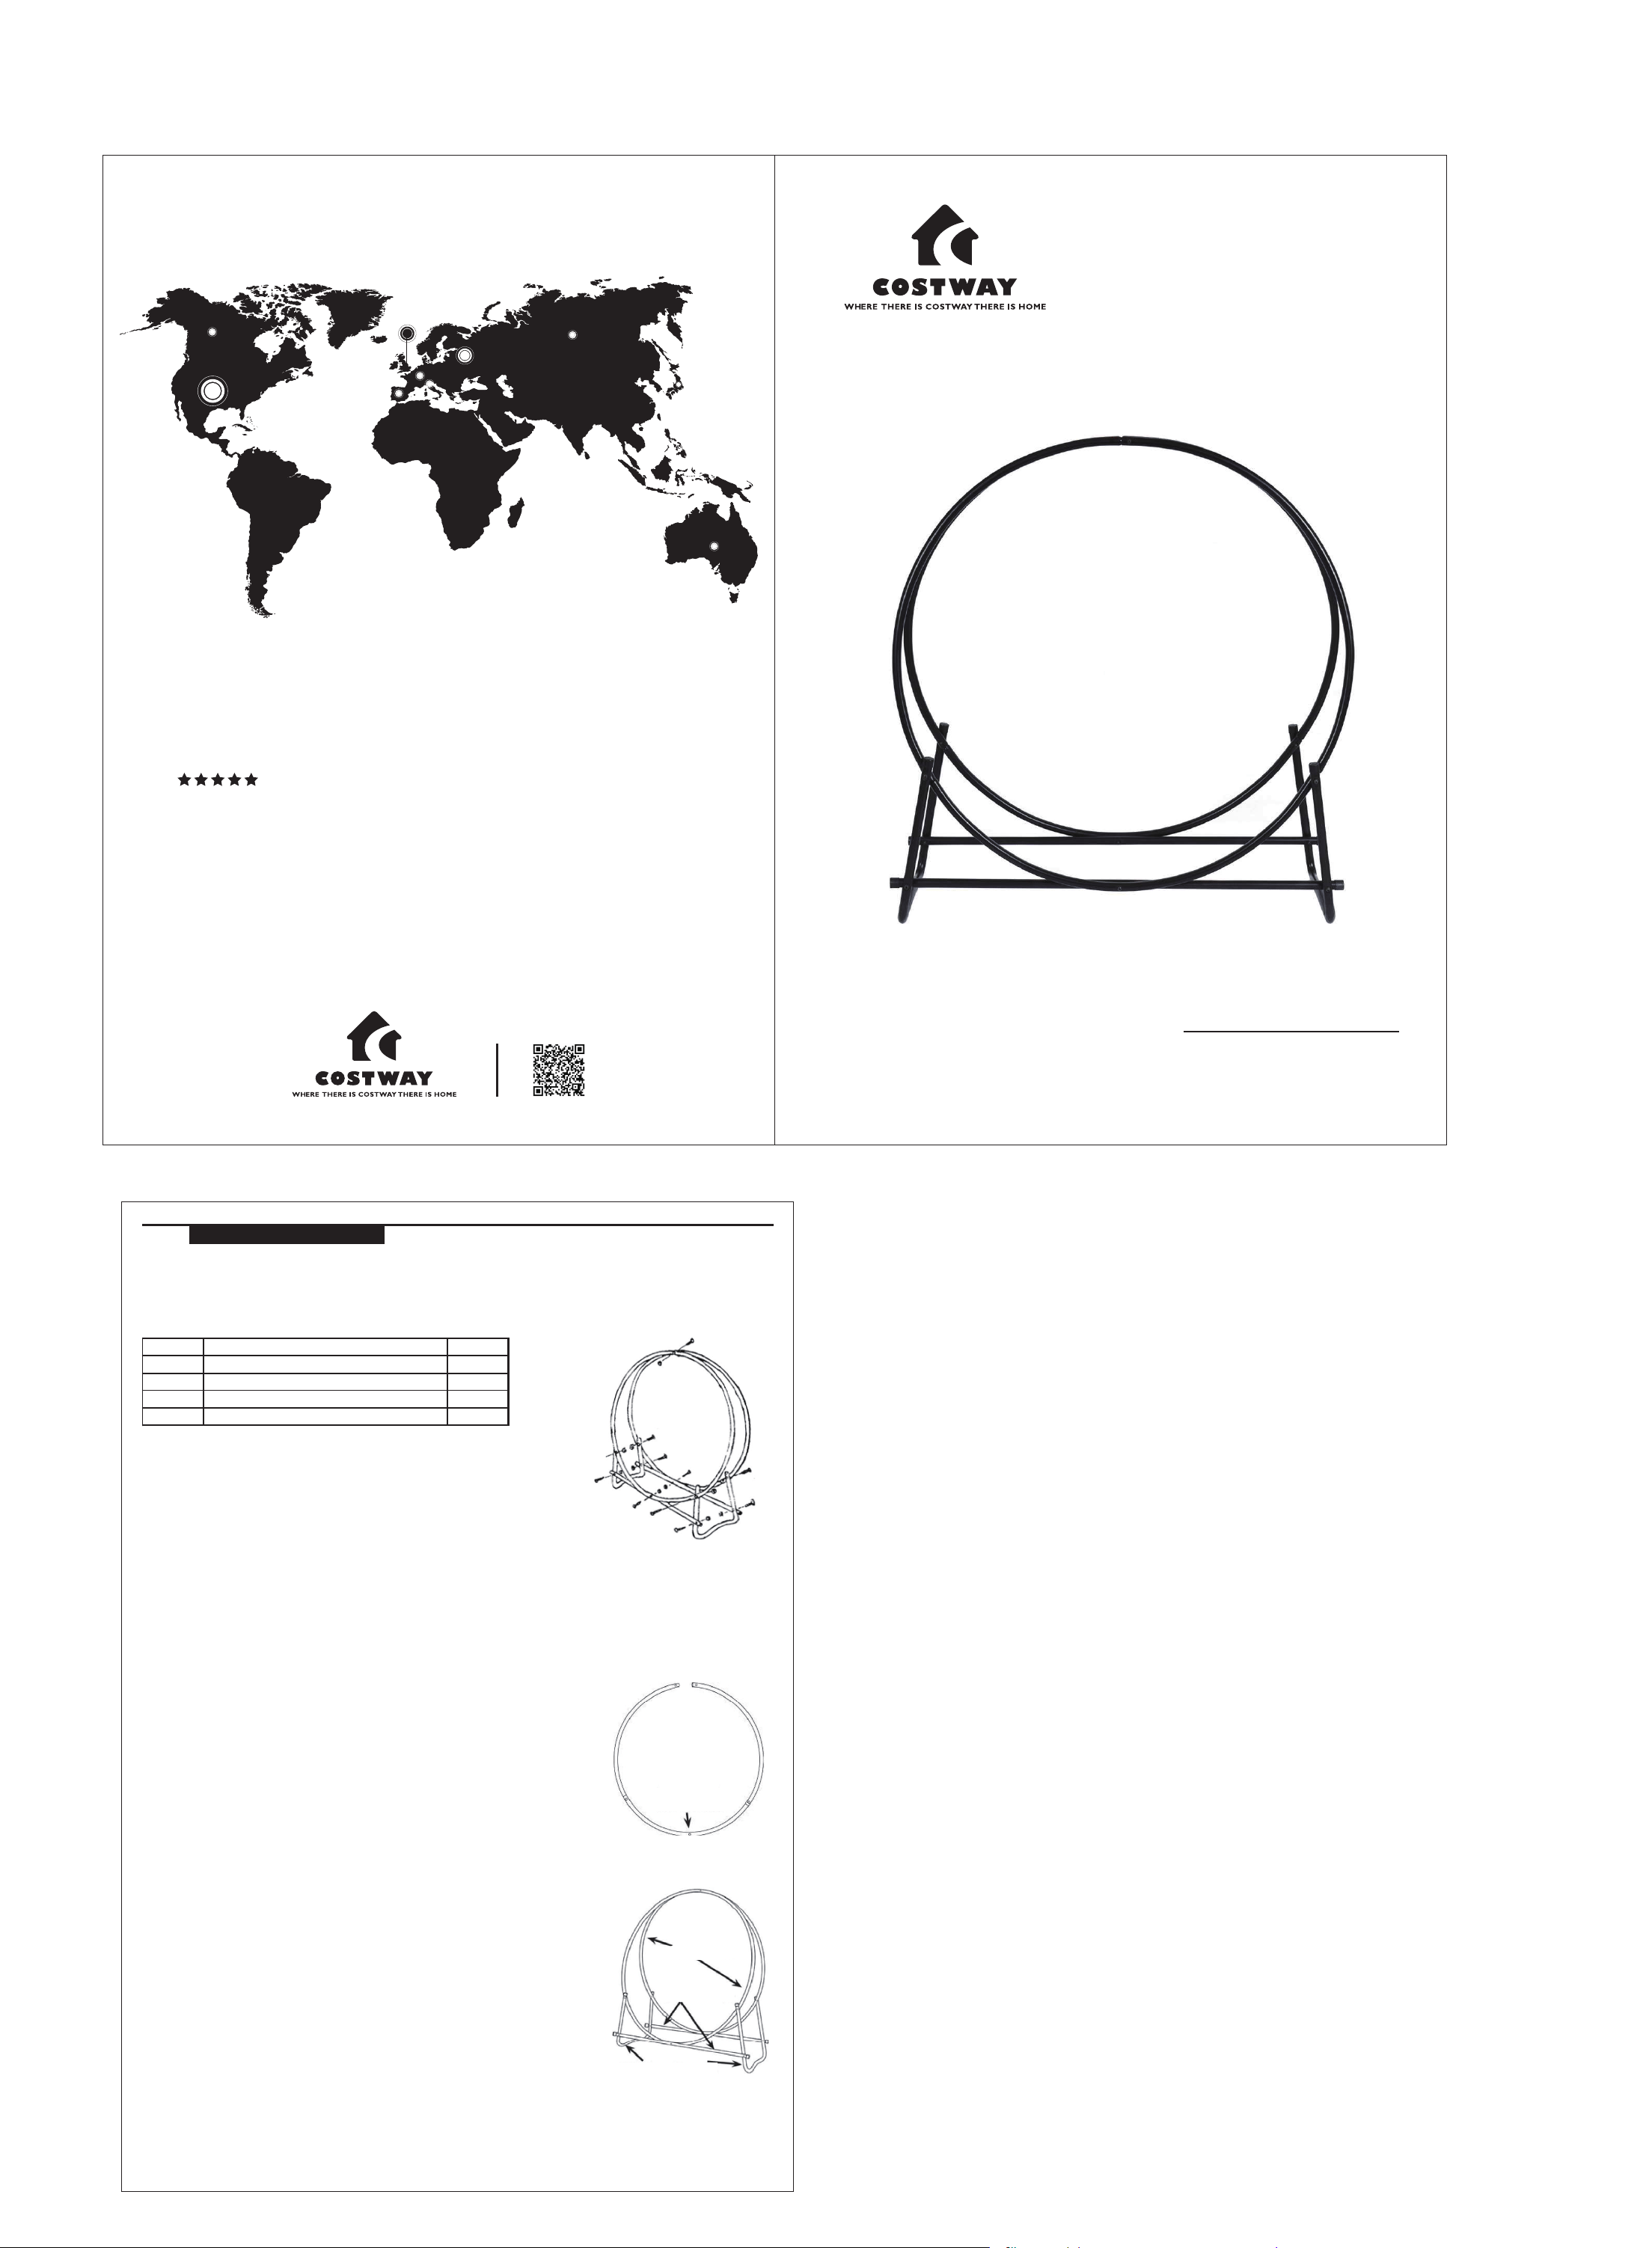
No.
Part
1 6
2 2
3
2
4 11
Curved Ring Section
Qty
“W” Shaped Legs with Plastic Caps
Spreader Bar with Plastic Caps
Nut & Bolt and washer sets
Note on unpacking:
The Curved Ring Sections (1) are wrapped in 2 packs of 3 sections-Keep each
pack separately as a set.
The difference being one section has an extra hole in the centre. This is the
base section (Fig 1 ).
Assembly:
Note:During assembly - DO NOT tighten Nut & Bolt Sets
1.Assemble one ring by placing each section of 3 on a flat surface. Each
section should have a male fitting one end and a female the other.
These should easily slot together for 2 joins leaving a gap for the 3rd join.
To fit the 3rd join together stand the ring up with the open end to the top.
Press down on the 2 open end so they meet and slot together (Fig 1 ).The ring
should then hold together without any further fixing.Repeat for the second ring.
2.Place the 2 rings together making sure that the 4 holes align.
For aesthetics make sure that the joints on each ring are together:
To determine which is the base of the rings, select the hole that is in the centre of
the section (Fig 1) (not at the ends)
Fit the centre of a Spreader Bar (3) to the outside of the base section of each ring.
Fit the 2 rings together at the top using a Nut and Bolt Set.
IMPORTANT:Do not tighten the bolt set.Fit the nut level with the end of the
bolt
3.Fit the “W” Shaped Legs (2) by gently spreading the base of the rings and
fit-ting to the outside of the rings
4.Fit the Spreader Bars to the outside of the “W” Shaped Legs (2)
5.Now Tighten the 10 Nut & Bolt Sets at the base of the unit
(DO NOT tighten Nut & Bolt Set at the top)
↓↓
put enough pressure
downwards so that
the 2 end join
(Fig 1)
Note base
sectionwith
hole in centre
(Fig 2)
Curved
Ring Section(1)
Spreader Bar(3)
“W”Shaped Legs(2)